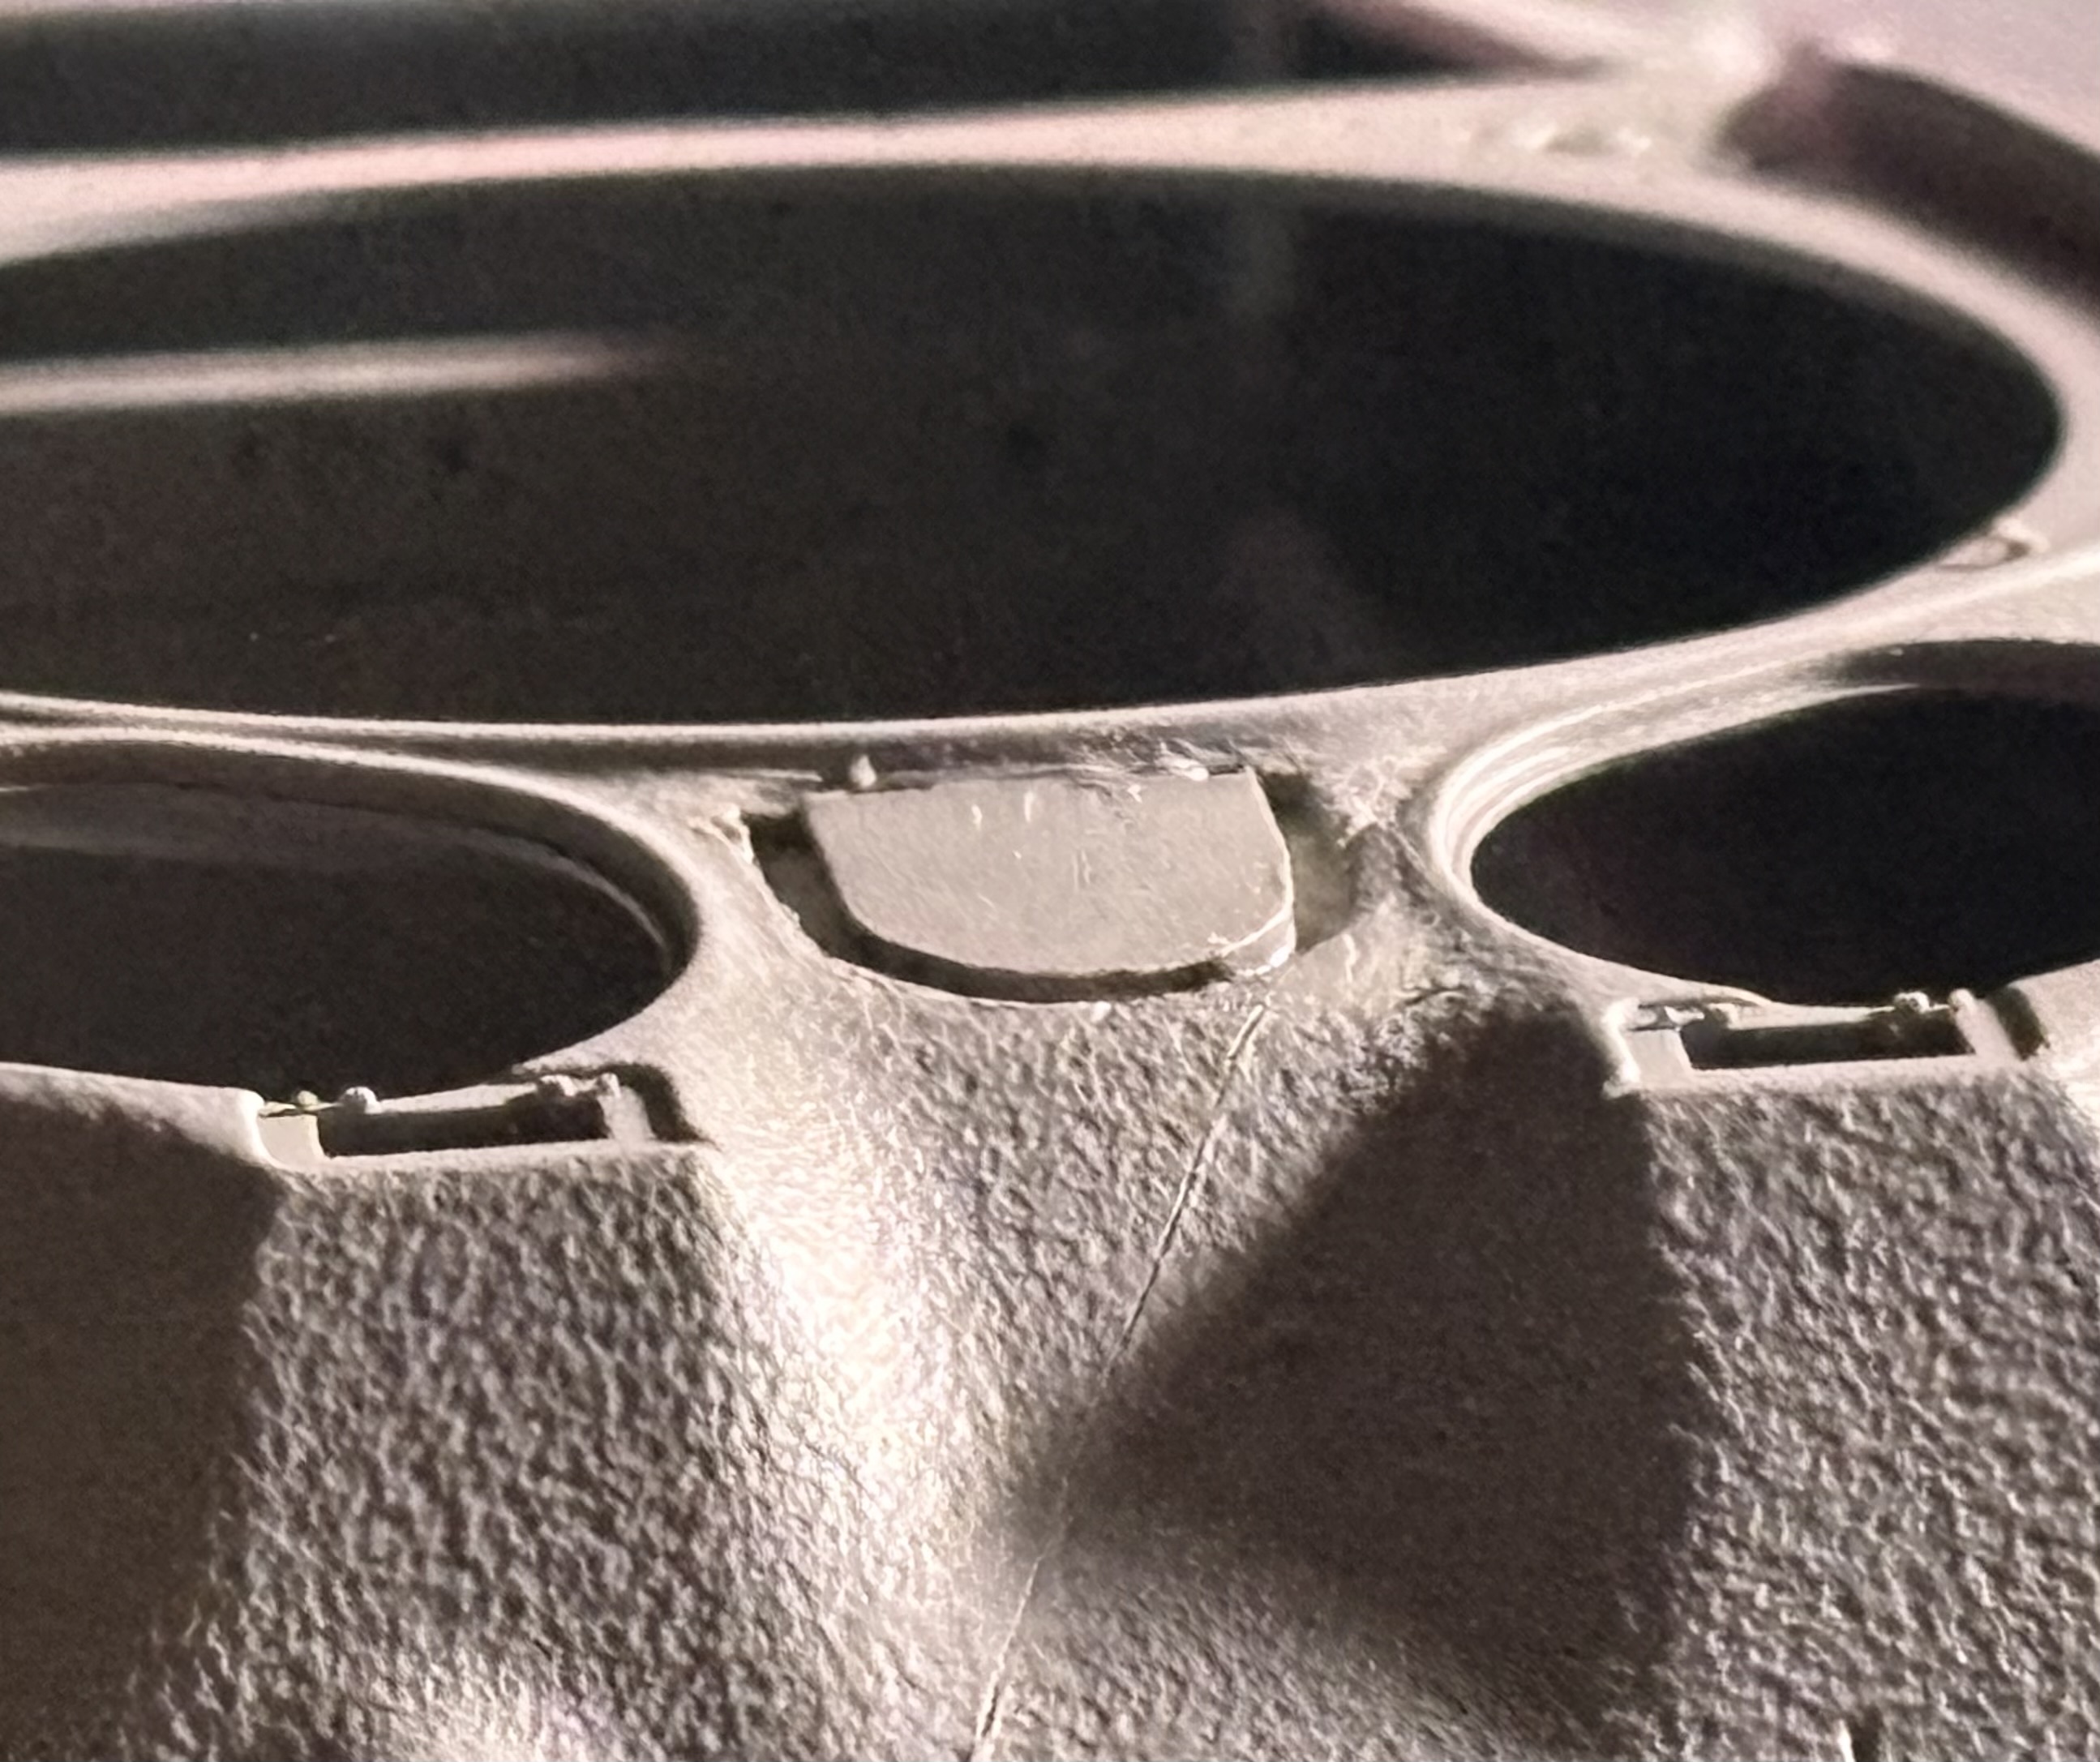
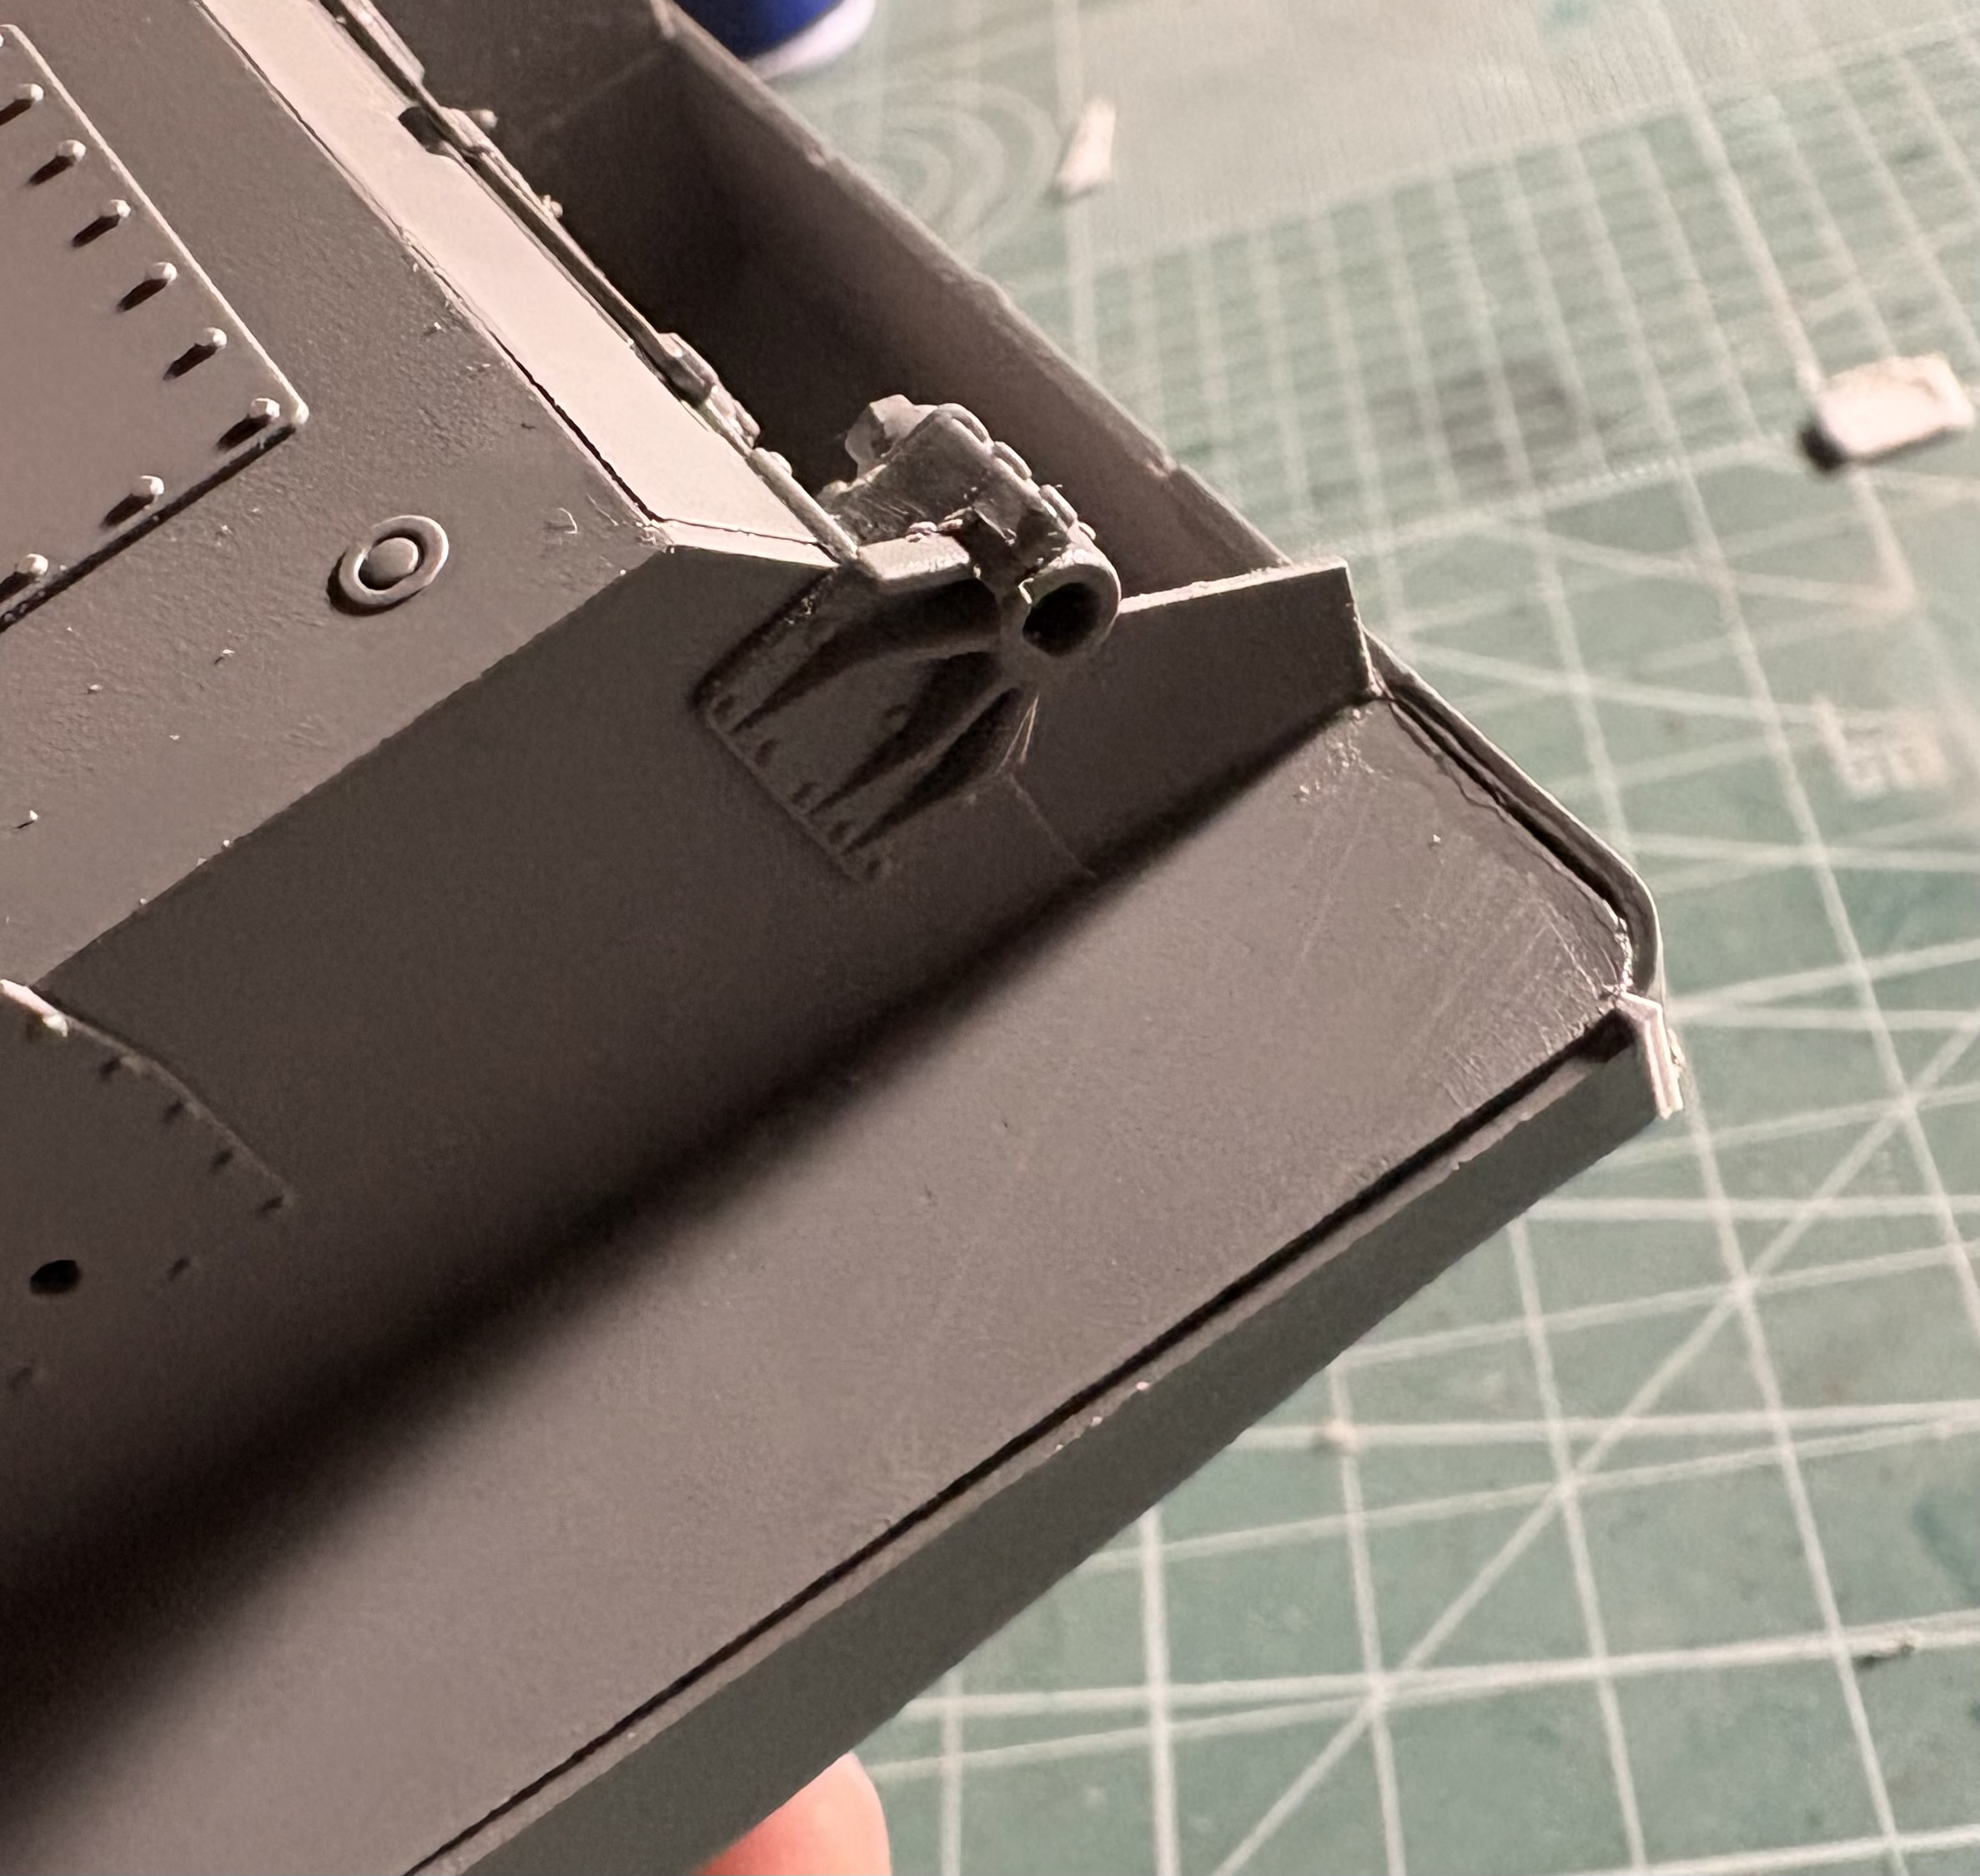
I only had like 45 minutes to toy with this tonight so I didn’t have time to fill and sand the stuff I did last night. But here are a couple pictures so you guys can see how quickly this surgery is going. It’s not ideal and a better modeler can make this much cleaner but once I fill and sand it’s going to be good enough for my standards;)
3 Likes
So with the angle that Border Models added to this 76mm A1, there was a gap between the end of the lower tub sponson floor and the upper rear hull. by making the relief cut and basically just folding the top in, it automatically straightened itself to where it should’ve been from the beginning.
I have a theory as to the weird angle and other strange things in this kit. I learned that the instructions call for one of two rear engine plates for this tank. the confusing part is that the instructions start with them asking you to use the one from the 75mm kit first and then in the very next panel they show you adding pieces to the new part. Thing is, that new part? it has idler mount base brackets for an E8 suspension and is totally wrong for the VVSS 76mmW. This tells me that Border Models is probably going to release an M4A3E8 next. They must’ve assumed that because the 76mm was a later tank than the 75mm that it shared certain features with the E8, like a slopped upper rear hull and E8 mounting brackets for the idler. Strangely tho that one particular rear engine setup would only work on a late big hatch M4 with E8 suspension because the engine access doors are still the M4/M4A1 type for the radial engine.
So long story short if you get one of these use the rear plate that was from the 75mm kit and then I hope the new filters and other bits fit the old 75mm part, I’ll find out tomorrow.
Early conclusion regarding these two kits is that the 75mm kit is superior to the 76mm, it’ll build into what it’s supposed to build into and without surgery. Yeah the decals are wrong and you’ll have to find photos of that exact setup from tracks to combination of bogies to narrow gun mantlet etc…but tanks with those features can be found in photos of MTO Shermans. This 76mm kit is a mess because of Border’s desire to re-use sprues and not just from the previous kit but from an upcoming kit. I bought it thinking that it was worth the price just to cannibalize the tracks and the stowage for other builds and thinking that I can try to make something out of the rest of the kit. And I think, I hope, I’ll be able to work with the tank and turn it into a passable Operation Cobra M4A1 76W…in the future tho I would only buy another one of these if it was on some kind of discount sale and then only for the tracks and stowage. At the rate these guys are going I’m wondering if the pending E8 version is going to continue to use the same lower hull tub, LOL! I was wondering why they included a dust cover in a kit for a M4A1 76mm but now it looks like that turret sprue is one that will be included in the up coming E8 release. That’s going to be a problem for the E8 version as this turret is strictly for early versions, comes with a wrong split loaders hatch already for the T-23 turret and has a couple of early T-23 turret features that would only be found in the earliest tanks issued with that turret.
7 Likes
I’m okay recommending the 75mm version as good because it doesn’t share anything with any other kit, it can be built to represent tanks used in the MTO with that exact setup, unfortunately no decals. Plus the 75mm introduces a type of track that I’ve never seen in a kit before. I believe Bronco released a set of these years ago as a separate kit, but I’m not 100% sure on that. Any subsequent versions will be in trouble if BM continues to want to include old sprues on new releases. Next thing you know we’ll have a DML type situation all over again where the sprues will barely fit in the box because they need to add a whole sprue for a couple of pieces, LOL. Even at these early stages of working on this 76mm A1, I cannot recommend this kit. Another thing that’s really odd about this kit is the plastic. it’s almost bendy and soft in some parts and super brittle and hard in others. People that know more about the model making process might have some theories as to why that is happening. On the positive side it doesn’t take very much Tamiya extra thin to just melt this stuff into mush. so you’ll save glue by using it very sparingly ![]()
5 Likes
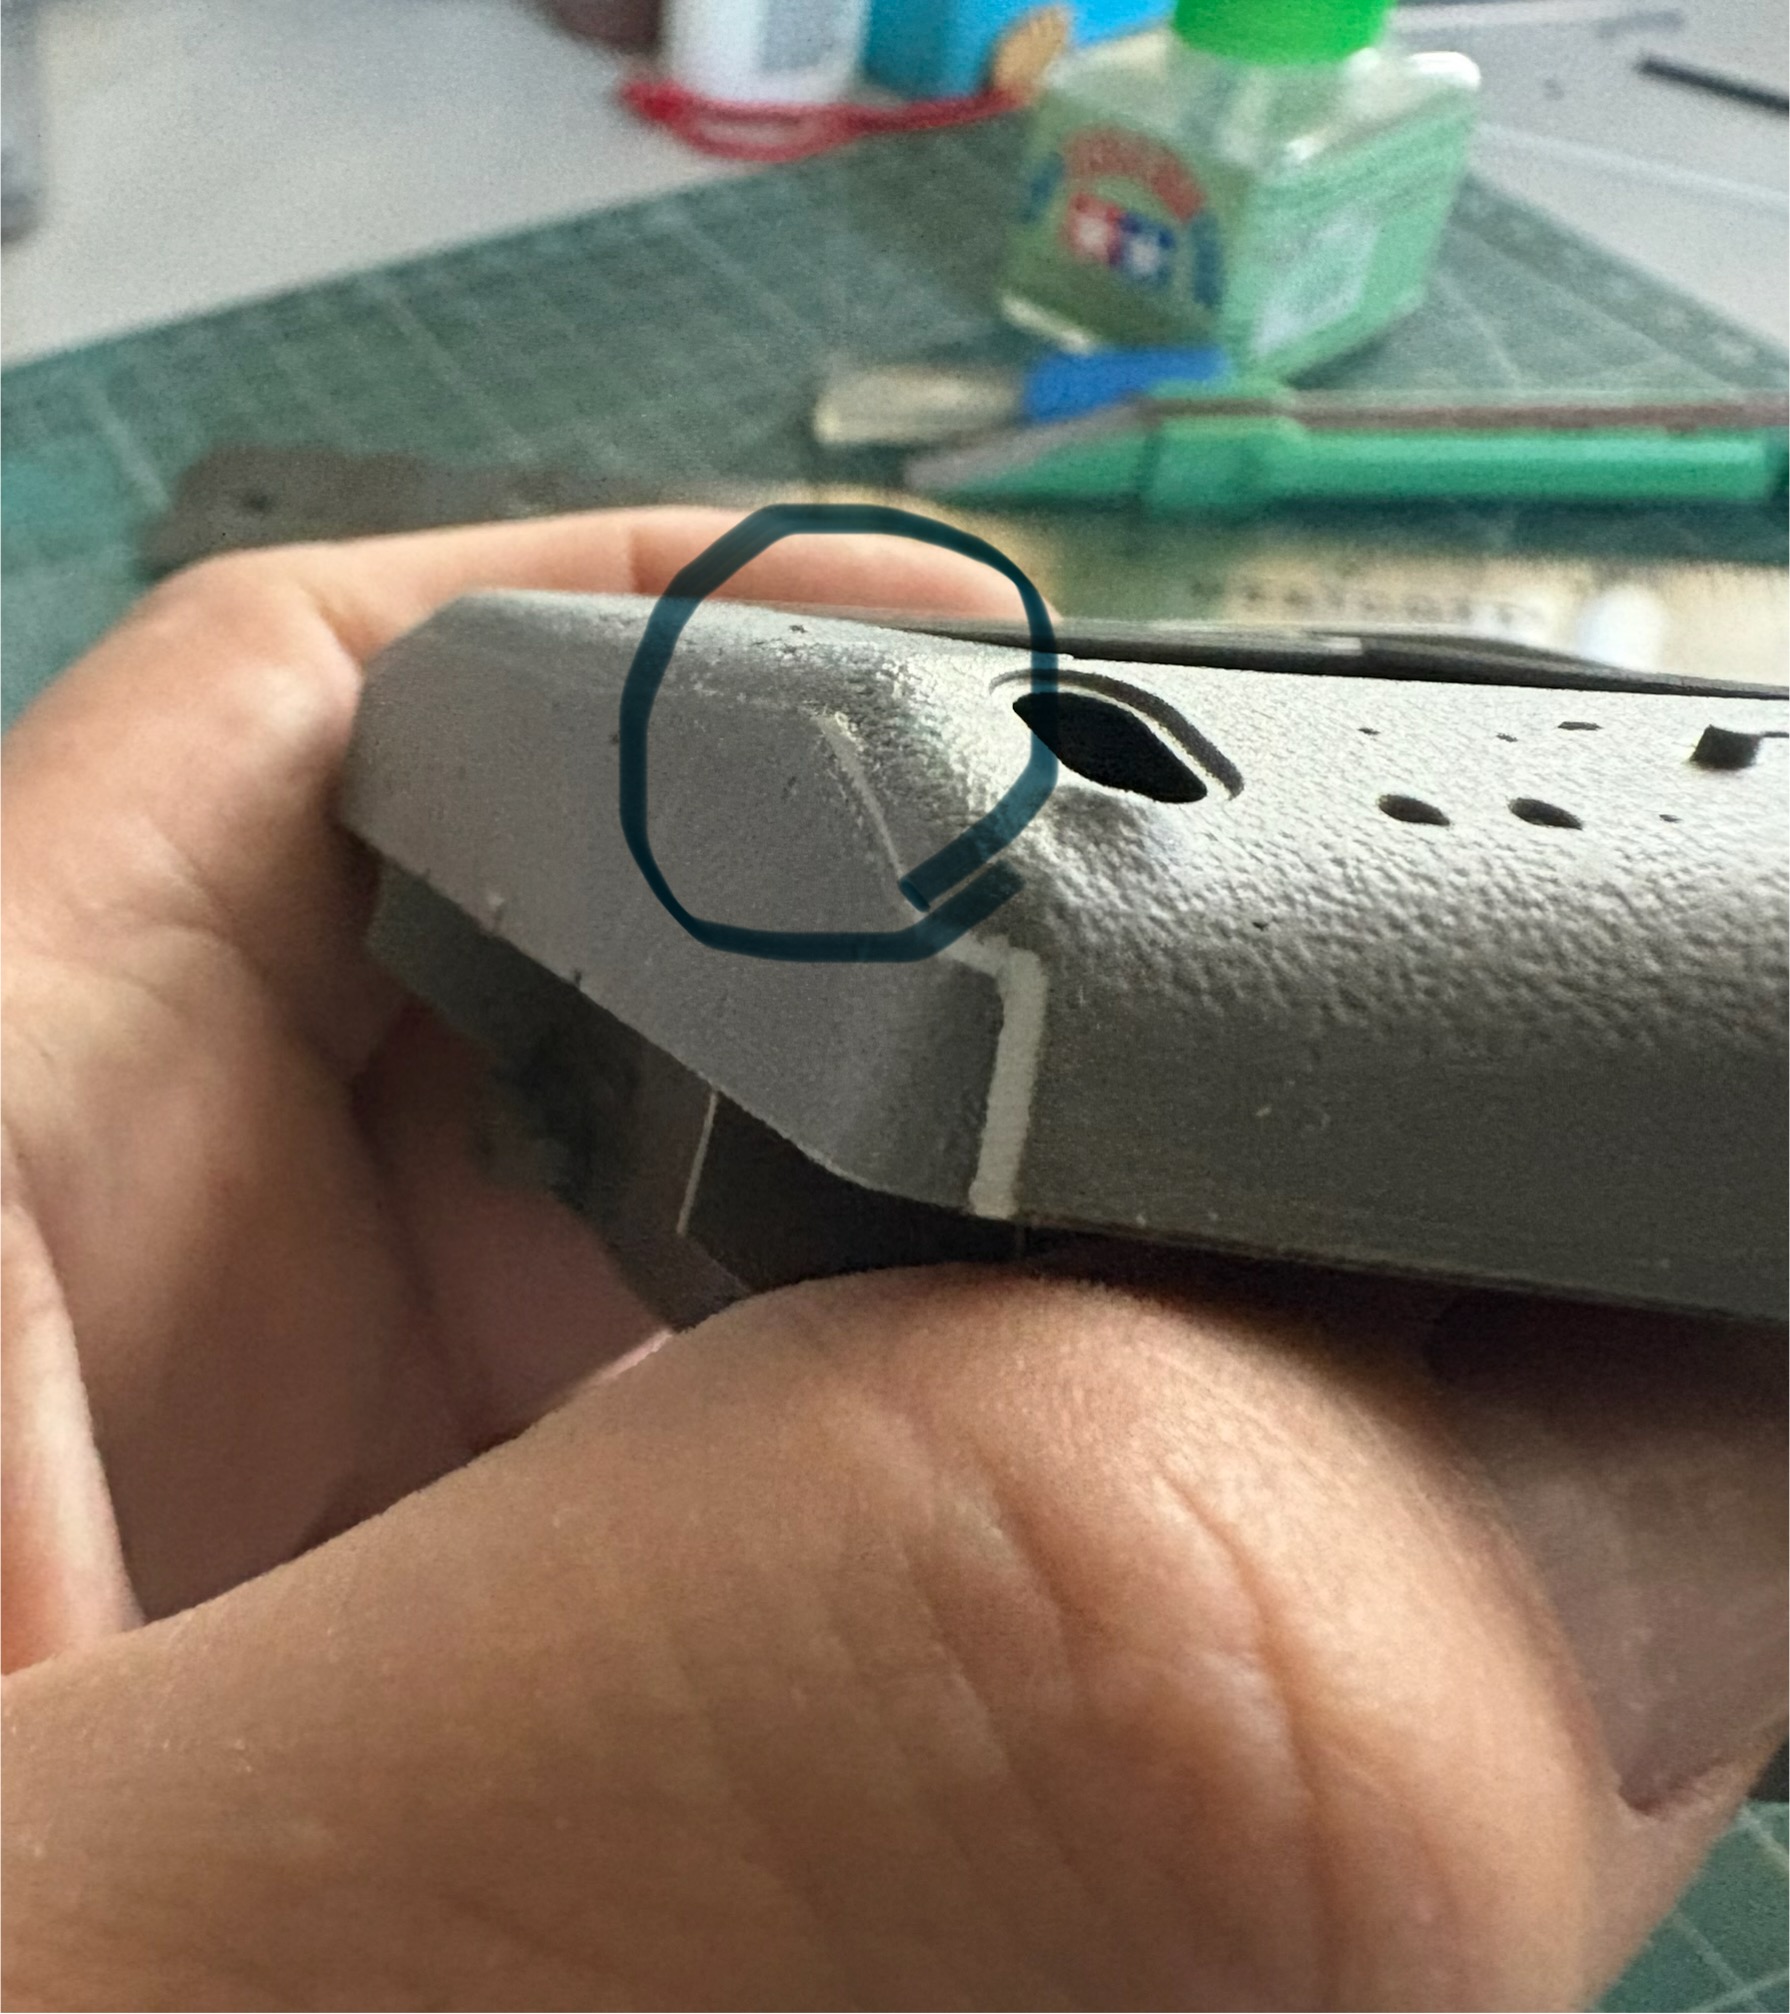
Some progress tonight, with care and by gluing the nose first and then progress towards the back as you continue gluing you can get a really nice snug fit on the area where the FDA meets the hull. Of course only after extensive dry fitting.
4 Likes
WOW!
For an aged neophyte, please share how that stipling is done. It’s again rather stunning.
1 Like
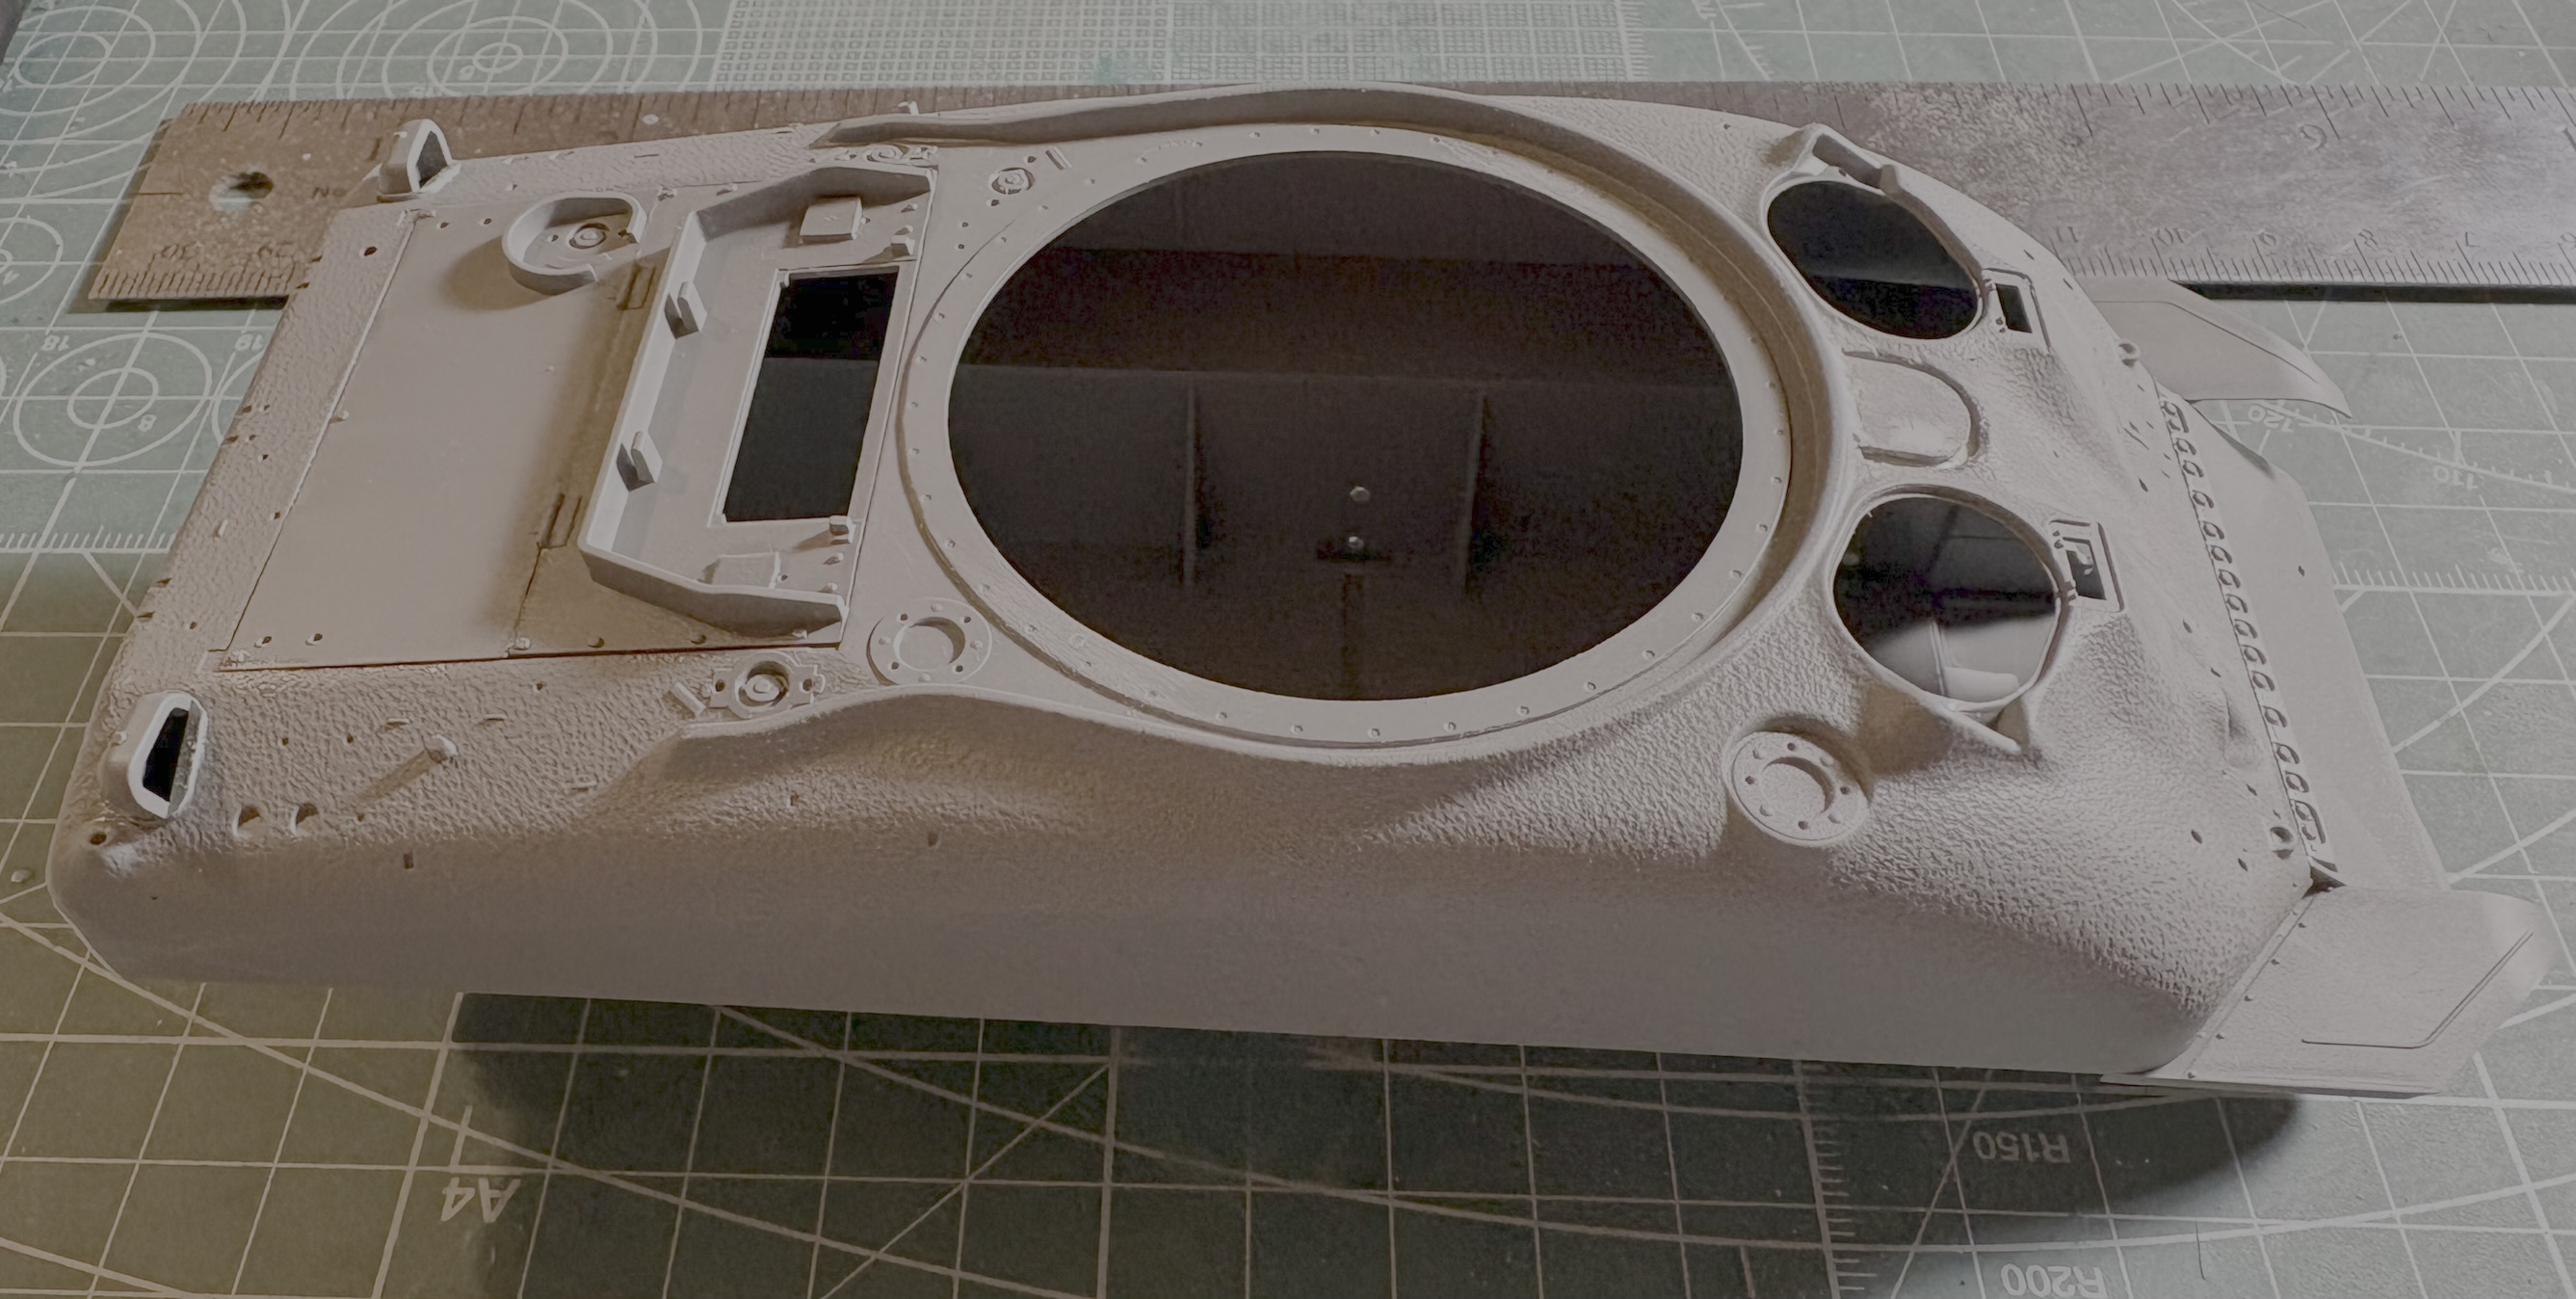
![]()
That’s the over the top orange peel courtesy of BM. Once every thing is fitted it’s going to get some surfacer.
4 Likes
That’s wild ![]() !!!
!!!
2 Likes
It reminds me of the Dragon M-51 Sherman hull, except that had a more random texture (due to it being based on the flaking paint that the M-51 at Latrun had at the time the kit was developed). I replaced it with an Italeri M4A1 upper hull when I built it about 20–25 years ago, as that seemed a lot easier than trying to tone down the texture. Not sure what the easiest fix for the Border hull is, though. Sand it down before adding any other parts maybe?
3 Likes
I’ve been sanding it a bit and will sand it some more tonight but the plastic is very thin. I’ll sand it a bit more once I put surfacer on it too. The surfacer should fill a lot of that texture up.
4 Likes
I read a short thread on missing lynx where someone chimed in that the 75mm version by BM turned out to be a decent kit. One thing that person failed to mention is what a pain in the rear it is to put these bogies together. I can build a complete set of Asuka bogies in a 2 hour sitting and yes some of that might be the familiarity with them since before Asuka existed and since even before Tasca released full tank kits, back when they were making suspensions as add ons for Tamiya and DML kits.
Here’s the reason that these are taking so long to assemble even though they have a LOT in common with the Asuka. Minus the molded on skids, these build almost exactly like the Asuka and like the Asuka they can legitimately be posed like the real thing, not the swing ones that DML used to make. But unlike RFM, Asuka, and Meng, these bogies don’t have a spring, a spacer, or anything really to hold them either in a fixed position or to push back and hold a normal position. If you build these without putting your own spacer the bogie depresses all the way down and you’ll end up with a low rider Sherman tank.
I had to go back and measure the height on the Asuka ones when using the normal A spacers and then come up with a spacer for the inside of these to make it match the normal height. I think BM should include some kind of notch, setting, or spacer for people that just want to model the supension in a neutral pose.
I’ve made three complete bogies in two nights and single biggest reason is that the parts are loaded with flash and push marks so these are taking a long to assemble. Maybe I should’ve taken a set of Asuka from the stash but I want to see how much I can do with this OOTB. I basically bought this to be a donor kit for the tracks and the stowage to go on something else. So I’m going to work with what’s in the box but it has been a frustrating couple of nights with the suspension. it has made the surgery stuff on the hull feel like a breeze by comparison ![]()
5 Likes
Those are actually modified Italeri bogies ![]()
3 Likes
So true, DML did copy the entire setup from Italeri. Not sure why I forgot to write that. Aside from the flash and the molded on skids these BM bogies are very similar to the Asuka but they have so much more cleanup and they also feature the two hole hull mount setup that goes all the way back to those Italeri bogies too.
On the positive side these have the realistic range of motion that the Tasca suspension first introduced. Also fit is decent once everything is cleanup up, not Tamiya, RFM or Asuka type of precision, but still acceptable.
2 Likes
The more I read of your experiences with these Shermans, the less likely I become to buy one for myself ![]() I was debating whether to get one when they just came out, despite the poor impression the preview images made, but I think I’ll pass. There are enough other, good M4A1s out there.
I was debating whether to get one when they just came out, despite the poor impression the preview images made, but I think I’ll pass. There are enough other, good M4A1s out there.
2 Likes
This looks over textured in the photo. Is it just the way the photo was taken?
1 Like
I think you are smart to stay away. Me I was overcome with curiosity because it’s two new Shermans from a company that hadn’t put out one previously. It’s demented I know but I just had to see them in hand. The other motive was getting my hands on the tracks. I can’t wait to build the tracks on these two kits. Hopefully they will be kinder than the bogies have been so far. I’ve had a couple of hours to work on them today and will again later tonight. Hopefully I can get everything to line up correctly. I’ll post an update once the suspension is on the tank, hopefully tonight.
This is definitely not the RFM or Asuka experience. That said I’m enjoying building it despite the set backs. You’ve built the Zvezda M4A2 75mm, this kit is actually about a half a notch above those kits, granted the price is 40% more. Also bears mentioning that I’m working strictly OOTB with some scratch work, I don’t want to throw good money after bad. Most likely these tracks are going to end up on one of my old Tasca kits, first I have to see how they go together. These kinds of Tracks normally go for 18-22 dollars so the way I look at it, I bought some AM link to link tracks and then I got a flawed kit for about $32 bucks plus some stowage thrown in too.
It’s terrible I know, but all I build nowadays is Shermans, 1/32, 1/35, 1/16, 1/56, 1/48, 1/72/, 1/100, 28mm, you name it, I have a Sherman kit in the stash. So when a new Sherman comes out I have to jump on it. I won’t buy re-released kits mostly because I already have one in the stash. Last time I counted I have 95 total Shermans in all scales in the stash and about 35 of them are either partially assembled or 100% completed but without paint, about another 20 finished on my shelves or boxes.
I also have a small collection of about 6-7 RC Shermans too ![]()
7 Likes
You’re once more not selling it to me ![]()
3 Likes
The photo is just a regular cell phone picture, the texture molded on the kit is just bad. With some light sanding it’s been significantly reduced. I don’t think it’s going to be an issue after surfacer.
1 Like
Never, I would never try to sell this kit to anyone. It does have some redeeming qualities but it’s surprising that a modern kit like this would have so many egregious errors. I’m still hopeful that someone will give us a dedicated “Operation Cobra” M4A1. So far Dragon is the only one that put one out although that kit also requires a lot of work to make it accurate, the gun and the turret are a bit small for 1/35 scale. Granted the Dragon kit is going on what, like 3 decades since it was put out? I think this kit will build into a better representation once I’m done I’ll take side by side photos of them together. I believe that the BM will look much better.
I’m having a lot of fun with this kit but I can understand completely how other folks would be very turned off by this kit. BUT, If you want to build a Cobra M4A1 76mm OOTB and enjoy having things to fix, then this is the kit for you ![]()
5 Likes
I think the Dragon kit was from 2005 or 2006 so yeah it’s a good kit but showing its age. I have it in my stash, might be time to unload it.
2 Likes