Hi, just thought I would restart this WIP with you. My previous effort was a while ago, and if truth were told, a little bit rubbish. Sorry, the pictures are not very good. I am returning to AFV after a long hiatus, so I would welcome any praise/constructive feedback as I go.
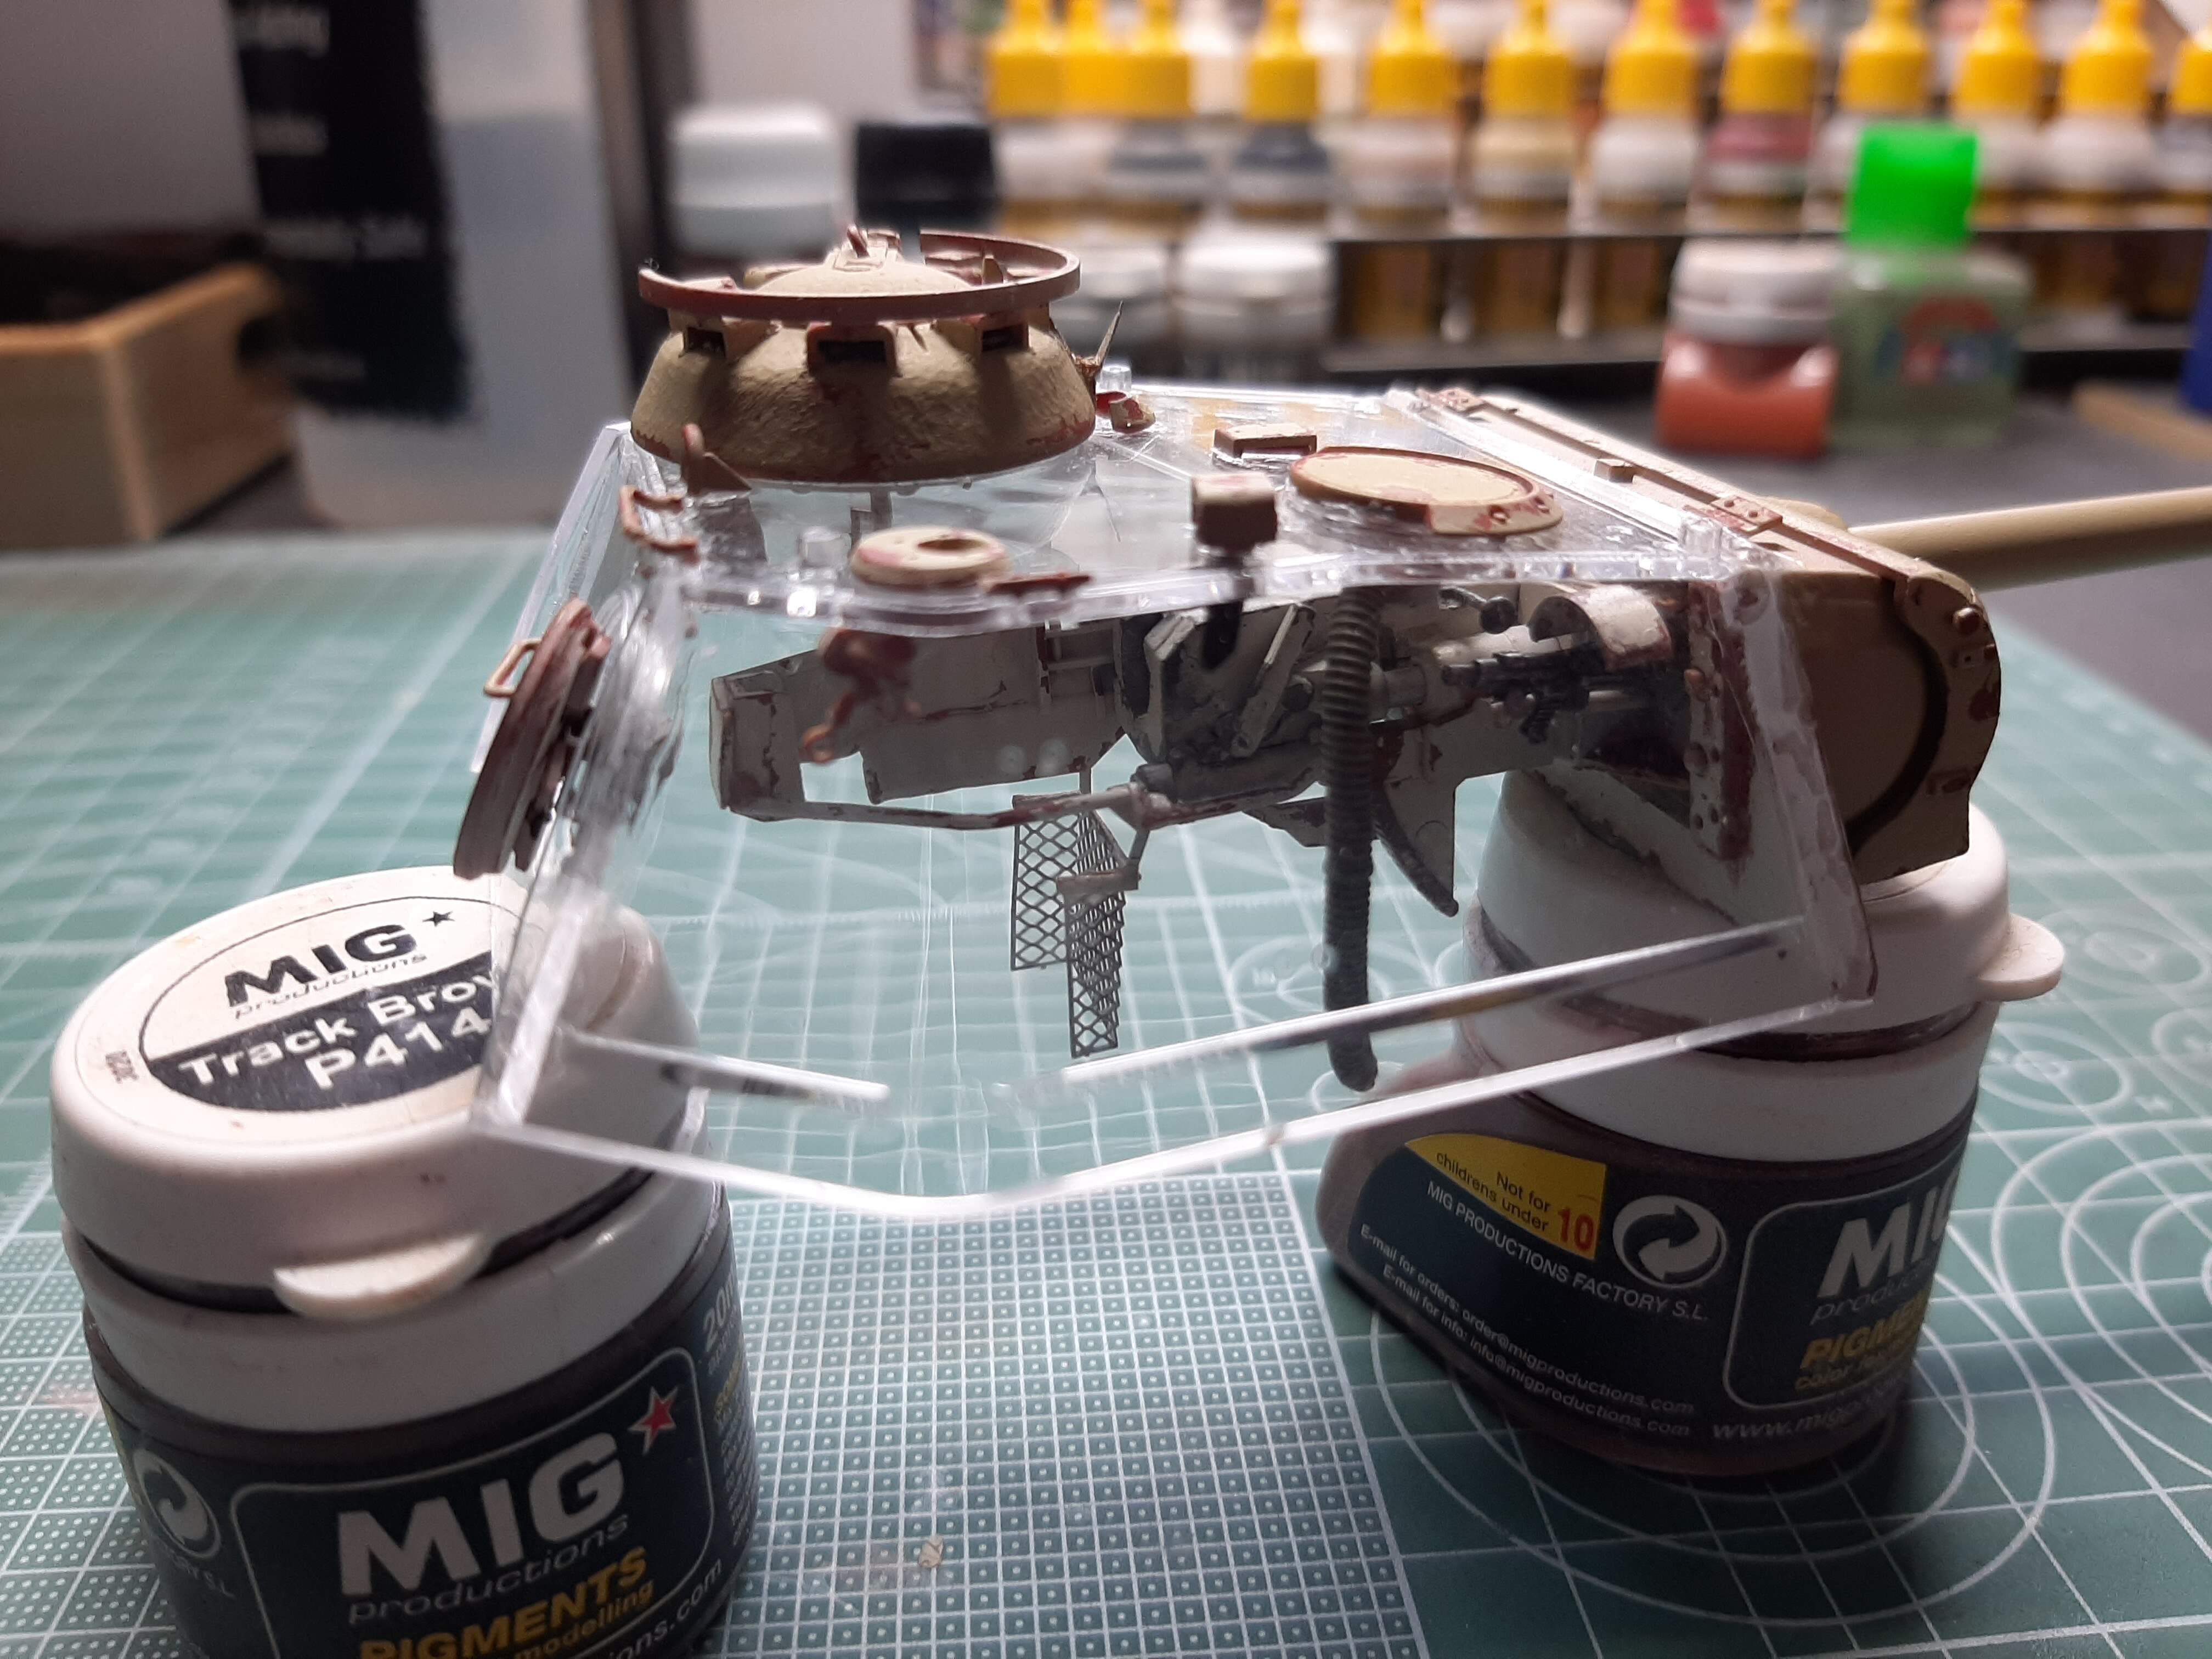
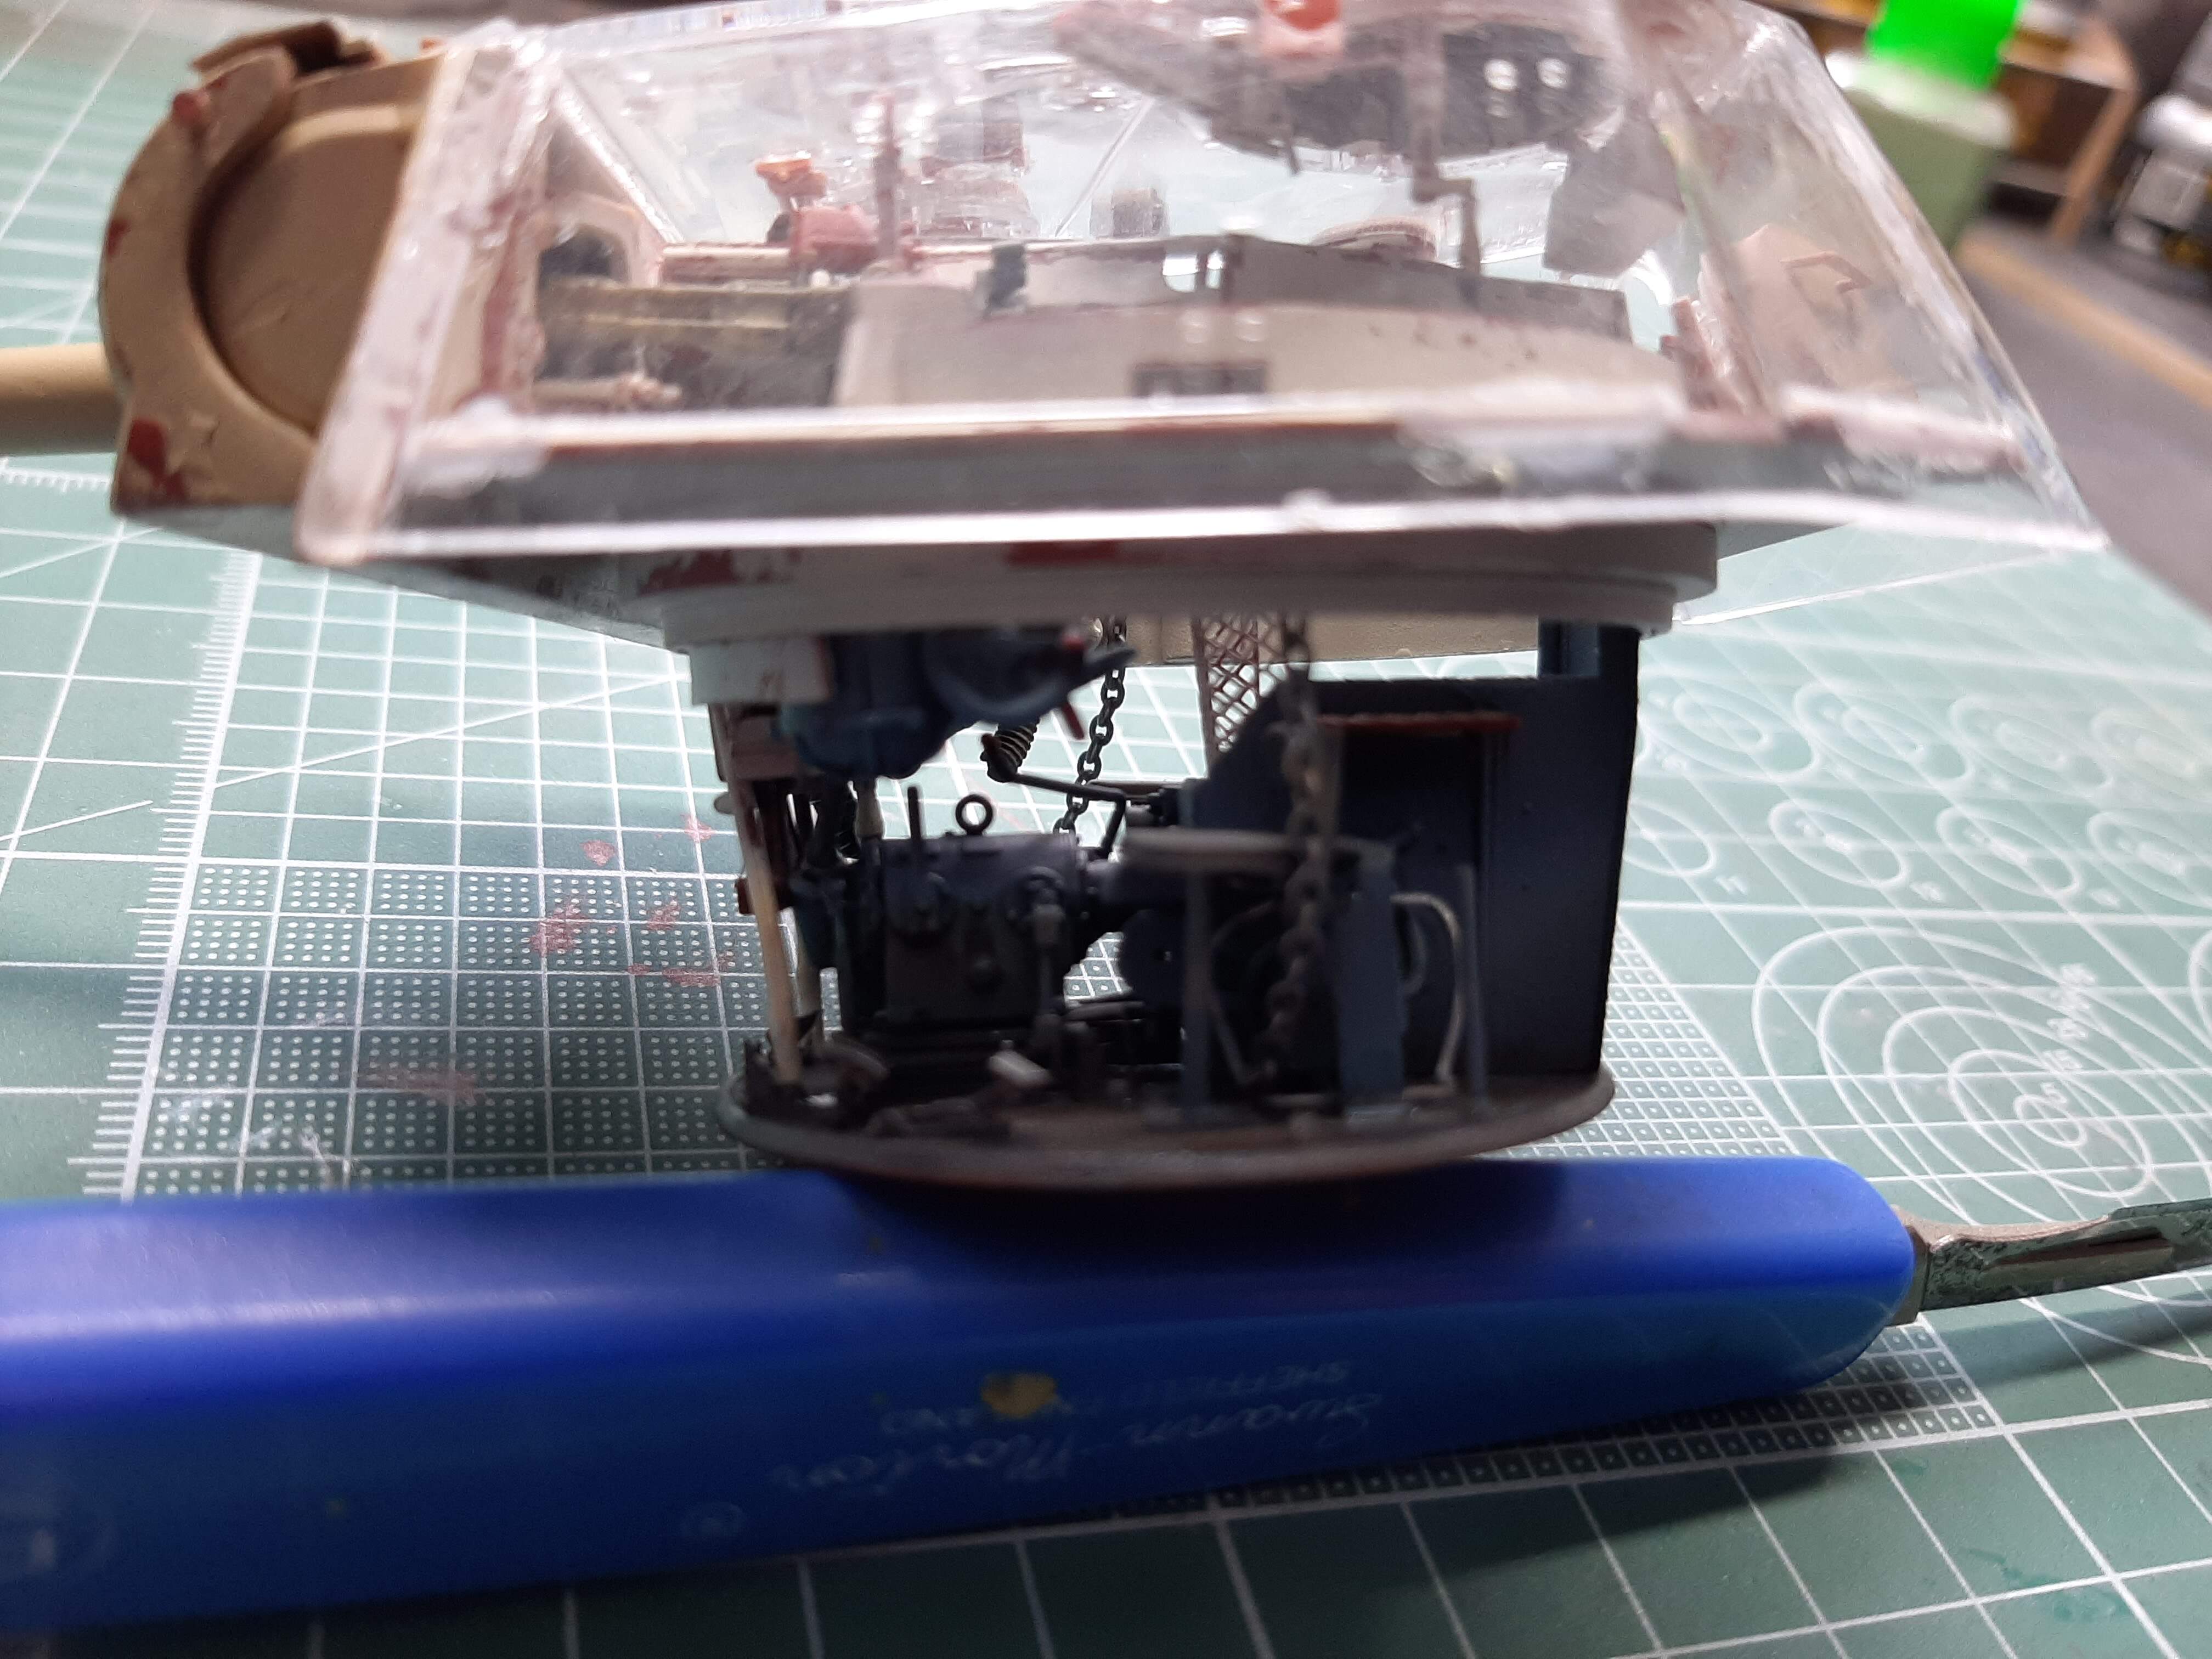
Huge amount of detail in this kit, i’ve been at it for weeks and so far have only just managed to get the turret done. It is almost impossible to assemble the stages and then paint them. You have to paint each sub-assembly then bring it all together. The parts are mainly ‘interference’ fit, which means that once painted, the sub-assemblies are really hard to get together without some kind of ‘doctoring’.
The kit instructions begin with the turret assembly (unusually) so I went with it.
It helps to read several steps in advance and plan the assembly sequence accordingly. Its not always the best policy to follow the instructions verbatim!
Kit painting guide is not the best, a lot is left to the builder to use artistic licence I suppose. I’m using AMMO MIG Acrylics (MIG actually do a box set of paints for this kit). Chipping effects are achieved using MIG ‘Scratches Effect’ laquer.
One criticism is that the kit uses quite a lot of PE for added detail. Some of it is mind-bogglingly tiny, and the PE itself is very thin and fragile. I can’t help think that RFM would have been better off using moulded plastic parts for some of them, I can’t understand why they didn’t.
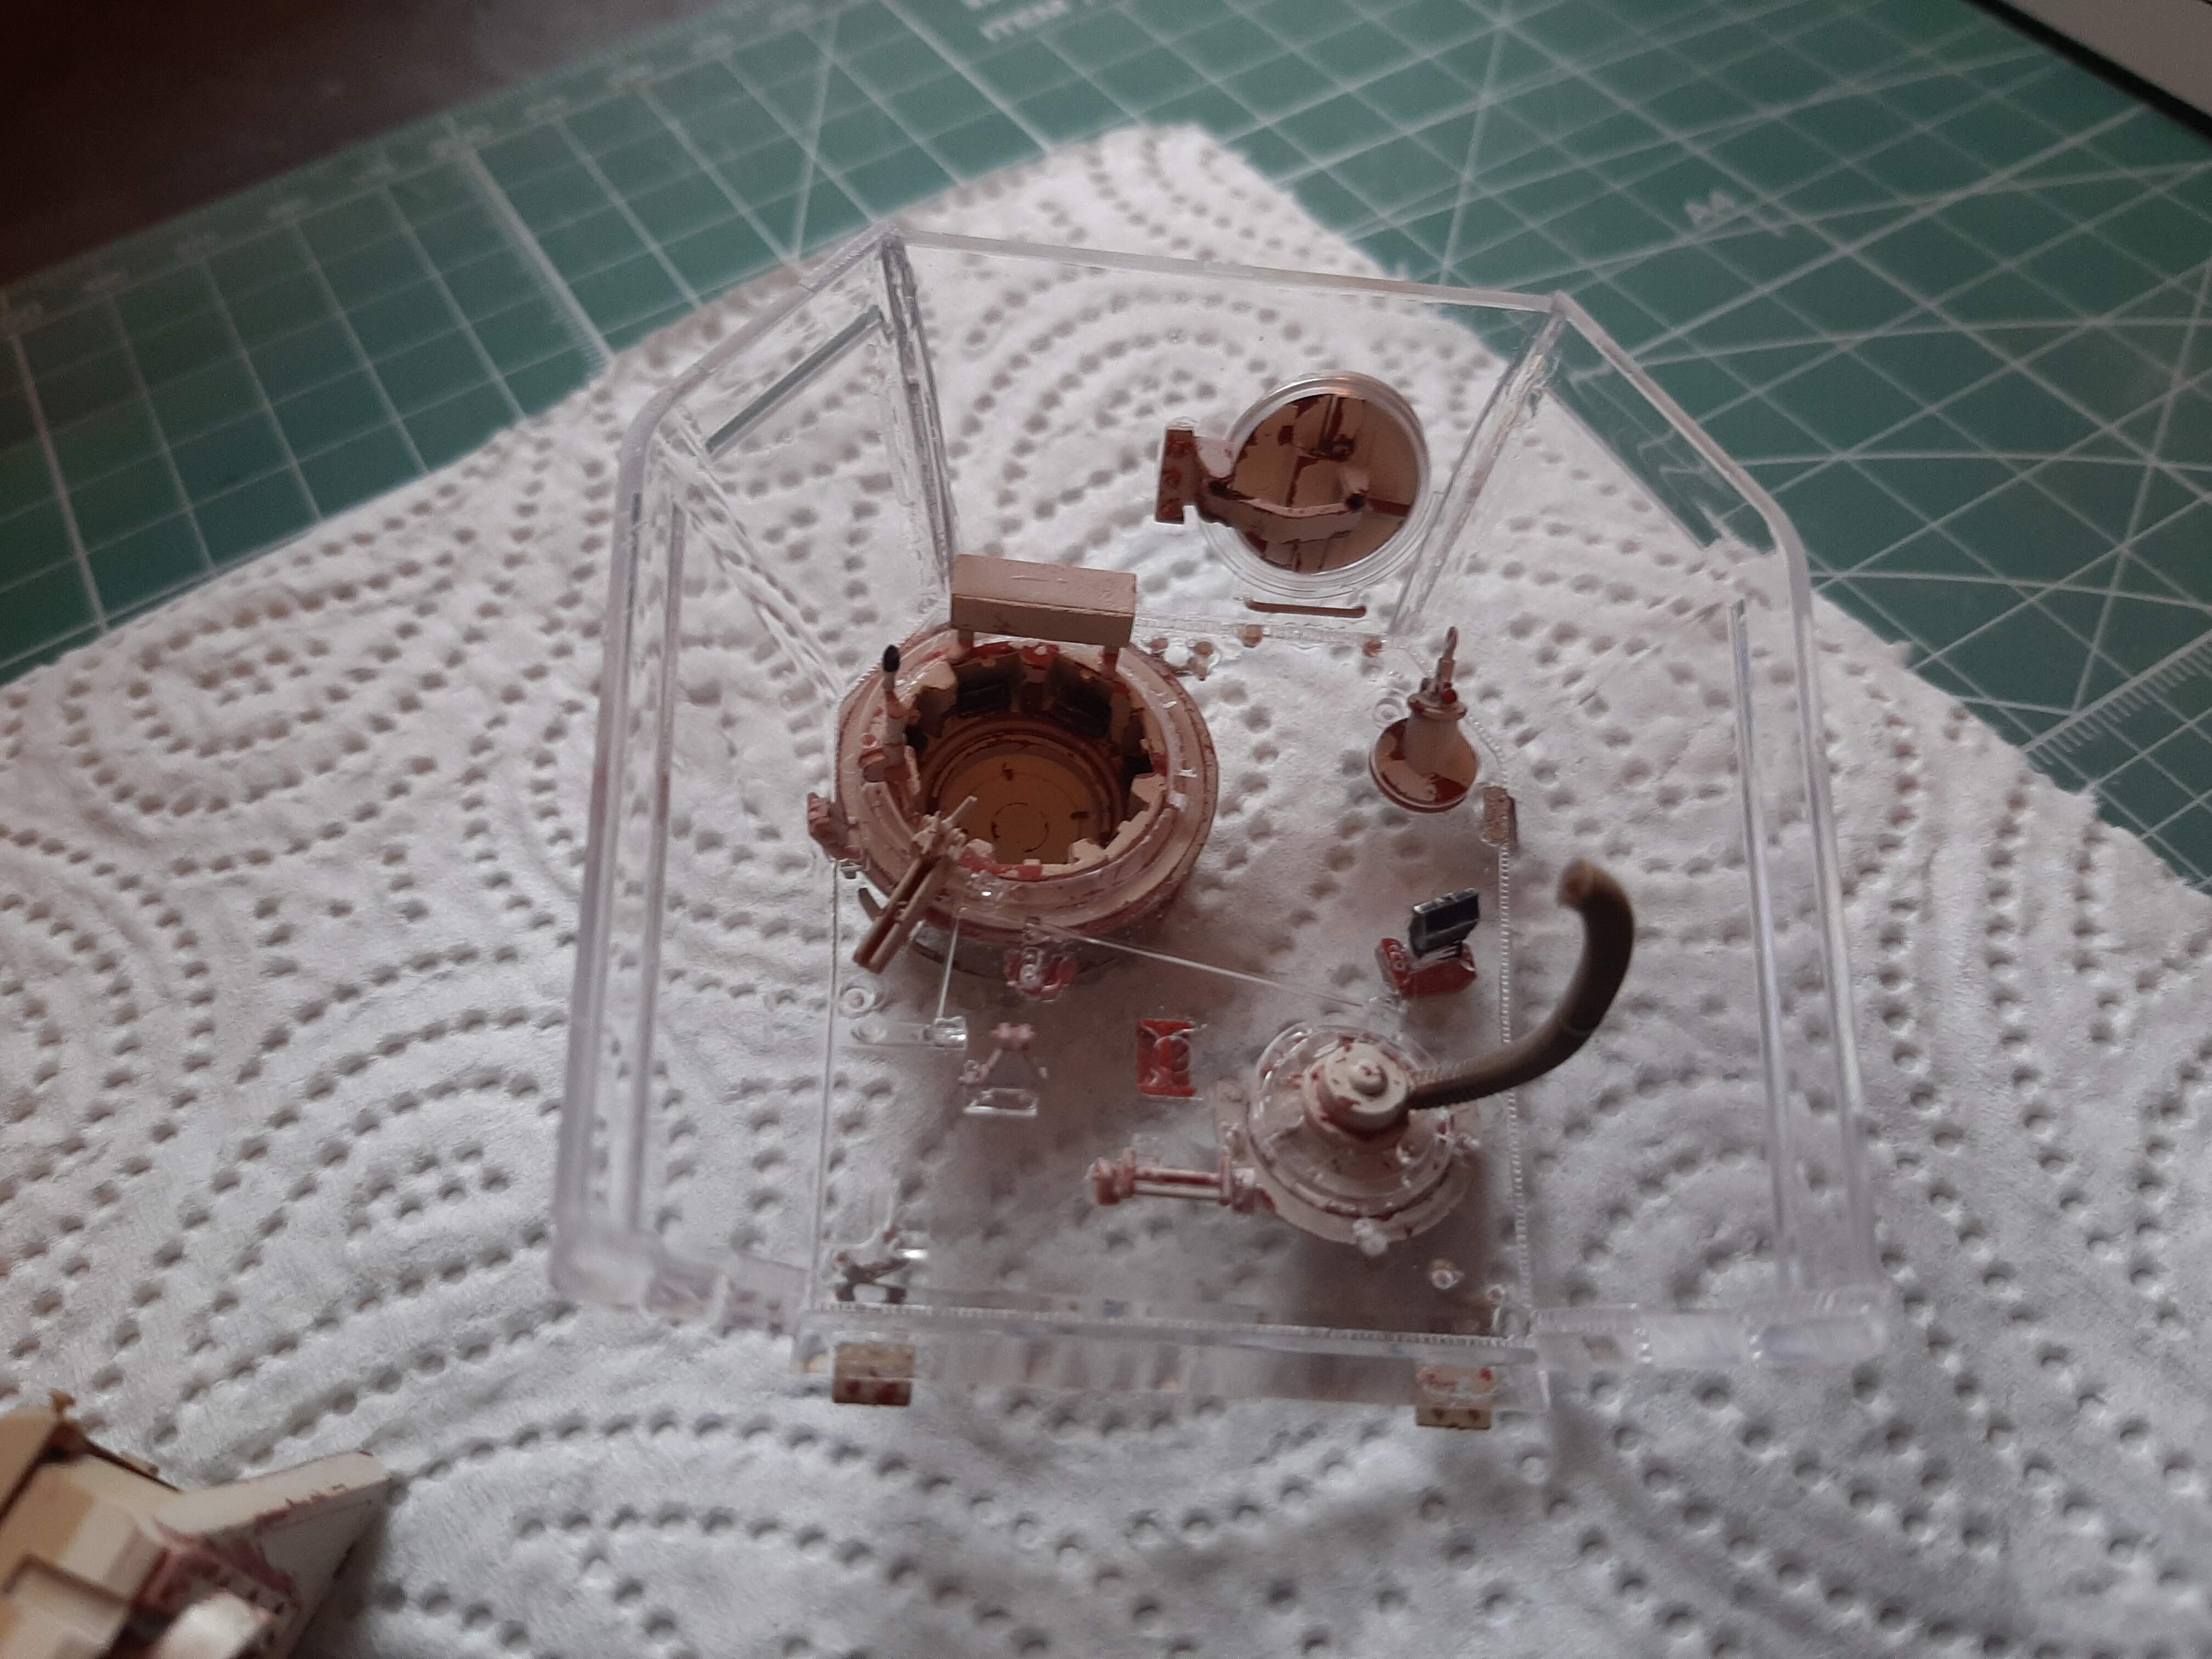
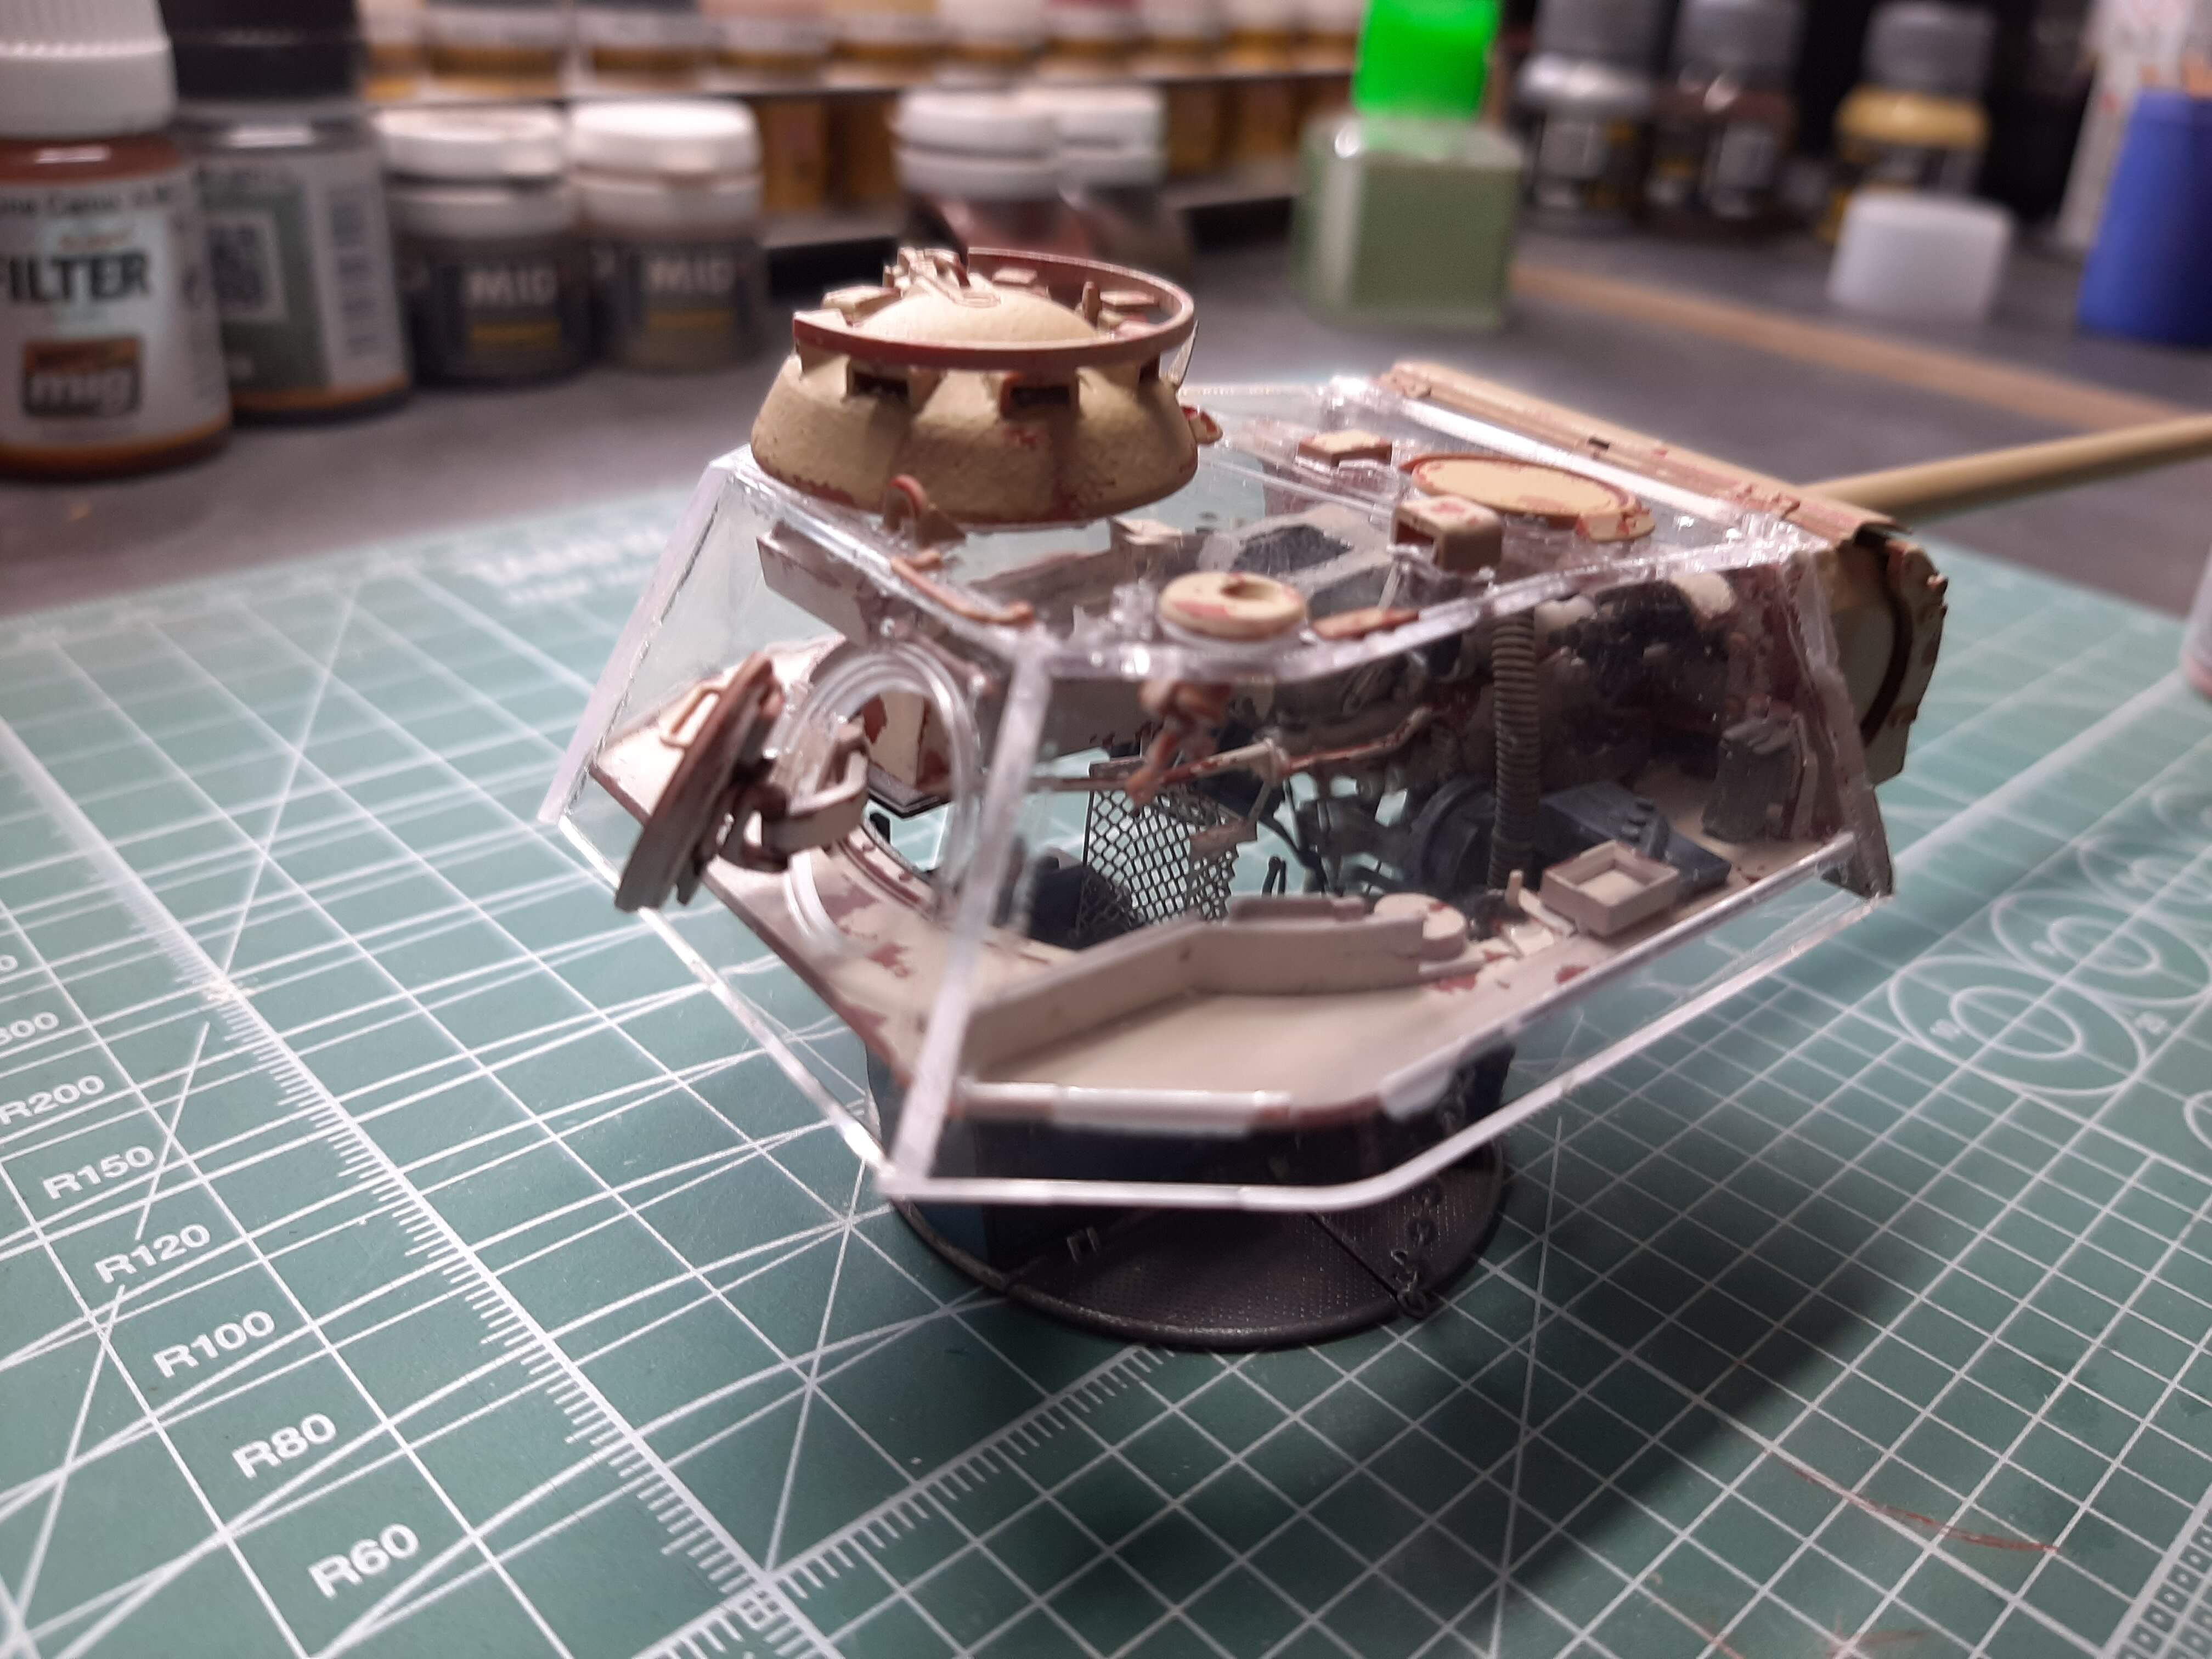
I decided to retain the clear plastic parts, after all, I didn’t see the point of buying a kit with a full interior and not have the ability to see in afterwards.
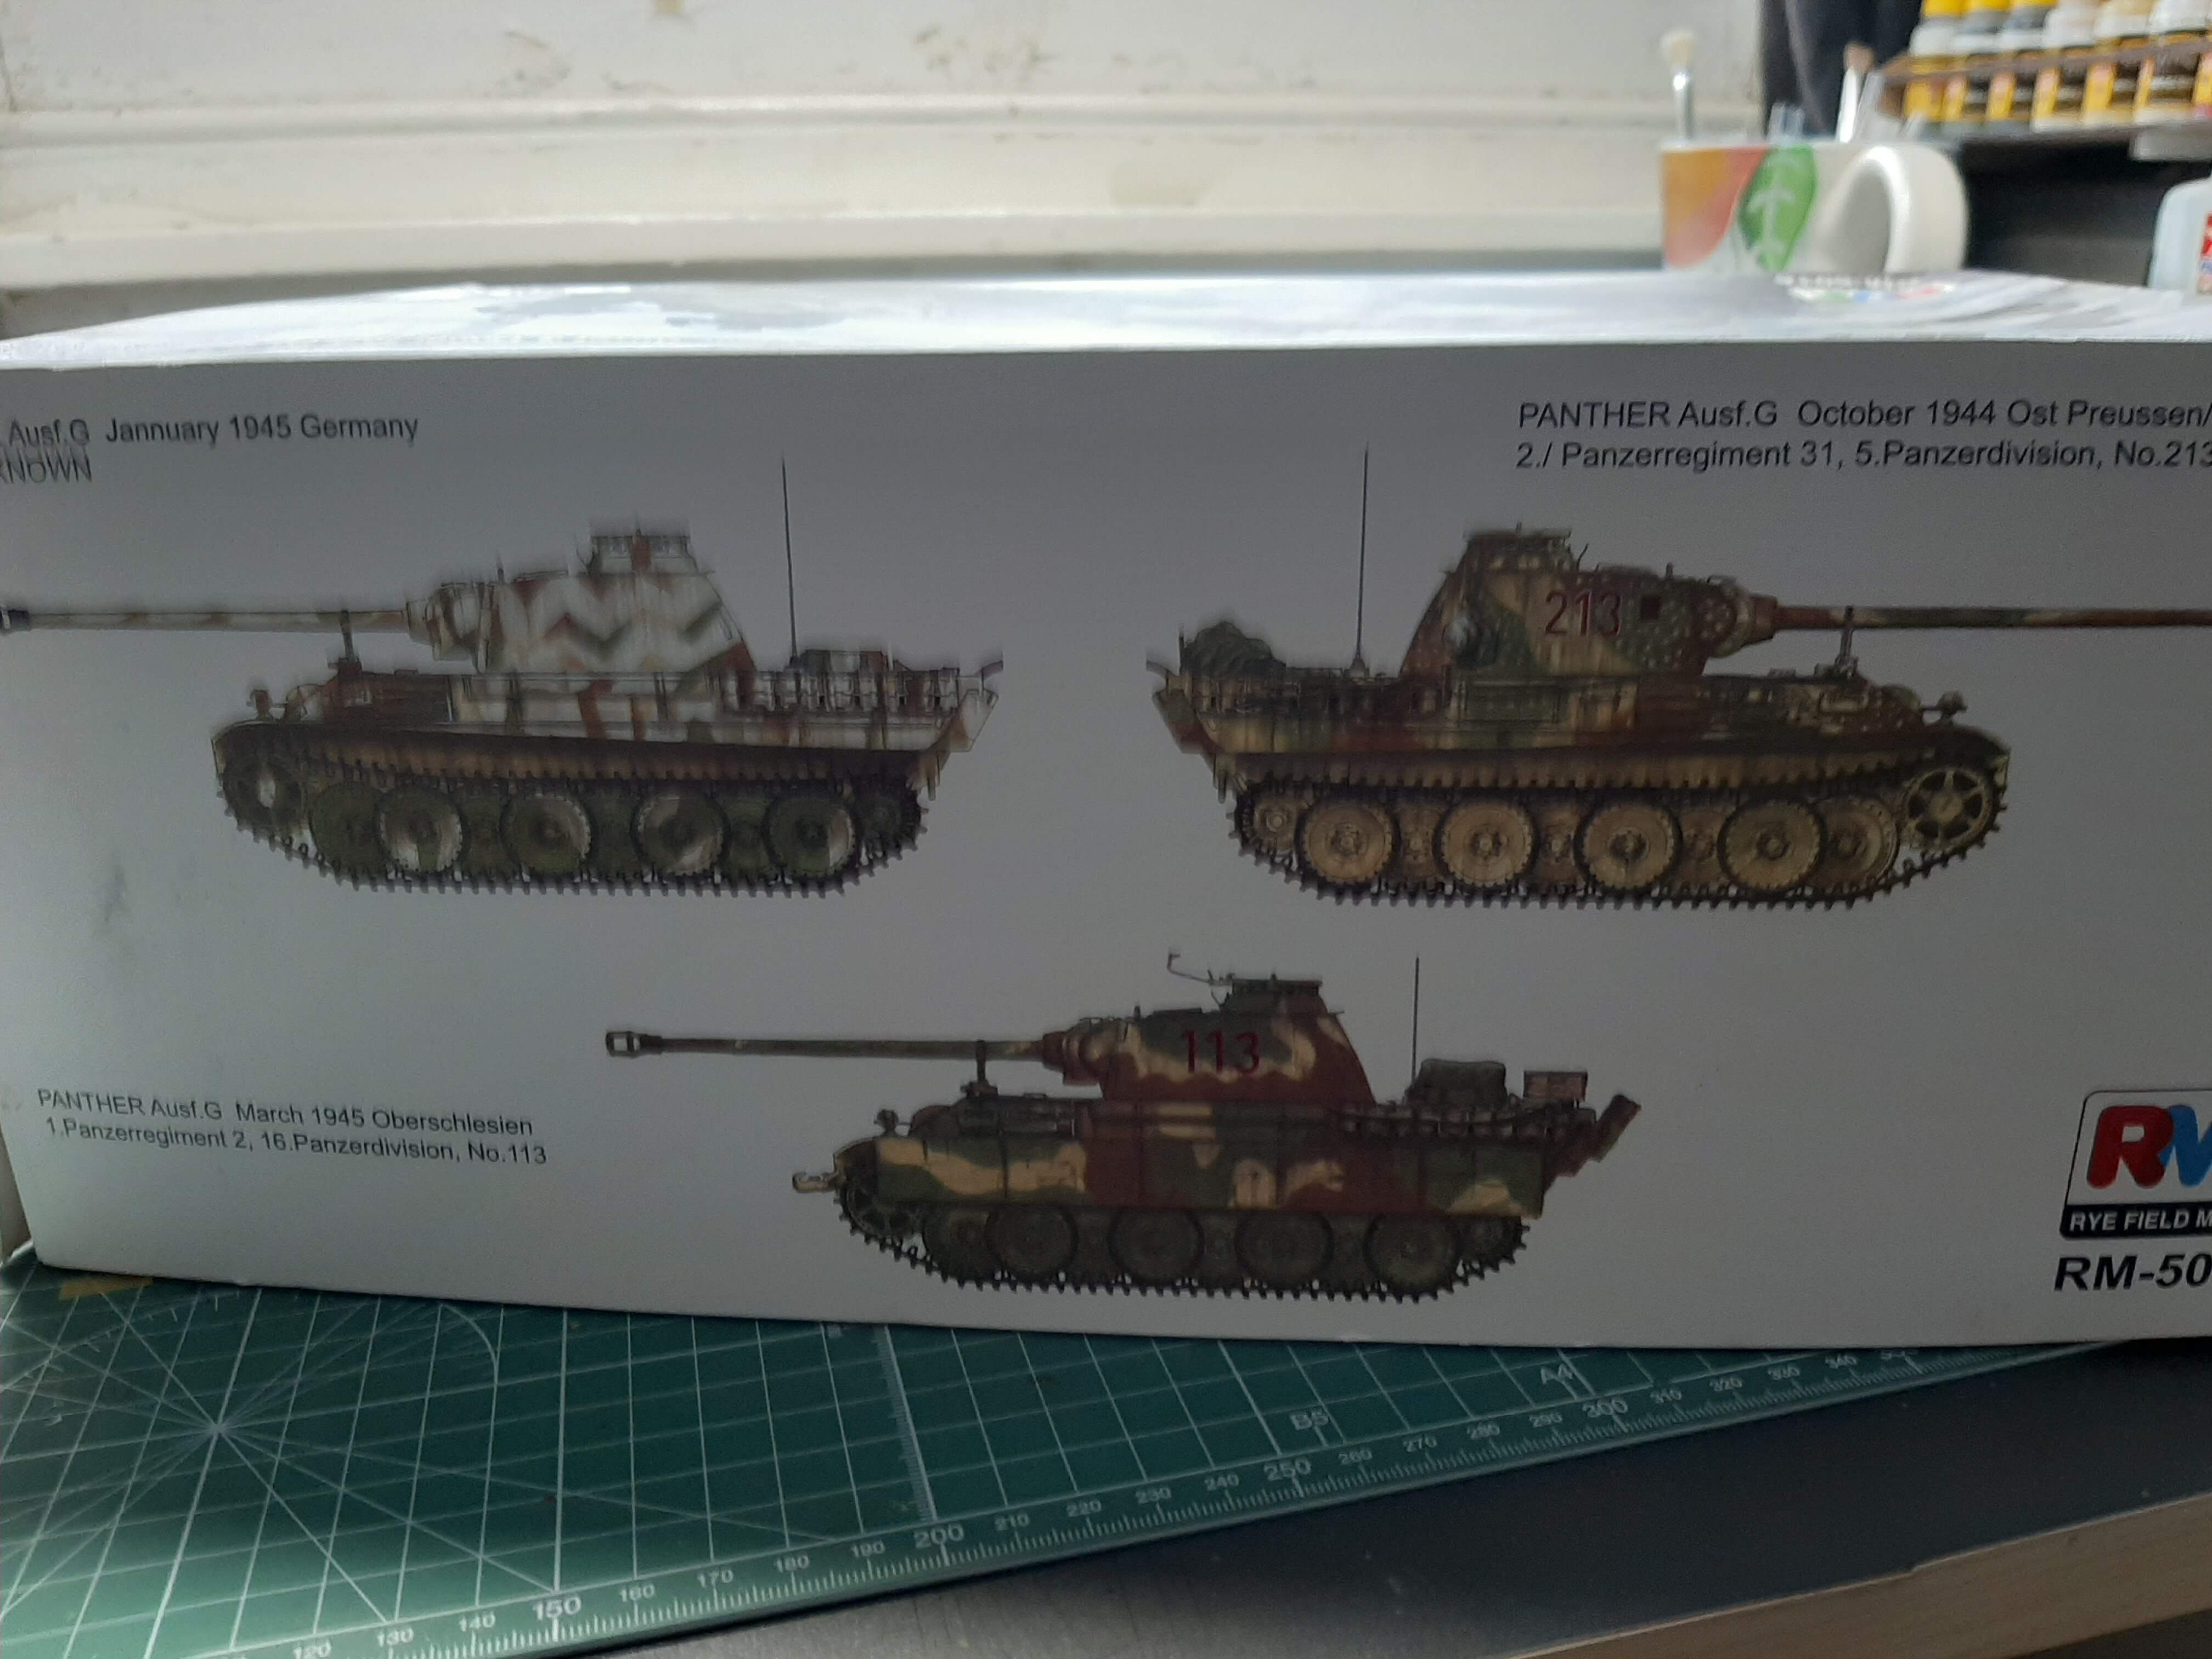
Anyway, this is the box. Note the artwork on the side depicts a vehicle with schurzen. There is no schurzen included in the kit! Fortunately, Aber do an aftermarket set for this kit, so i did buy it.
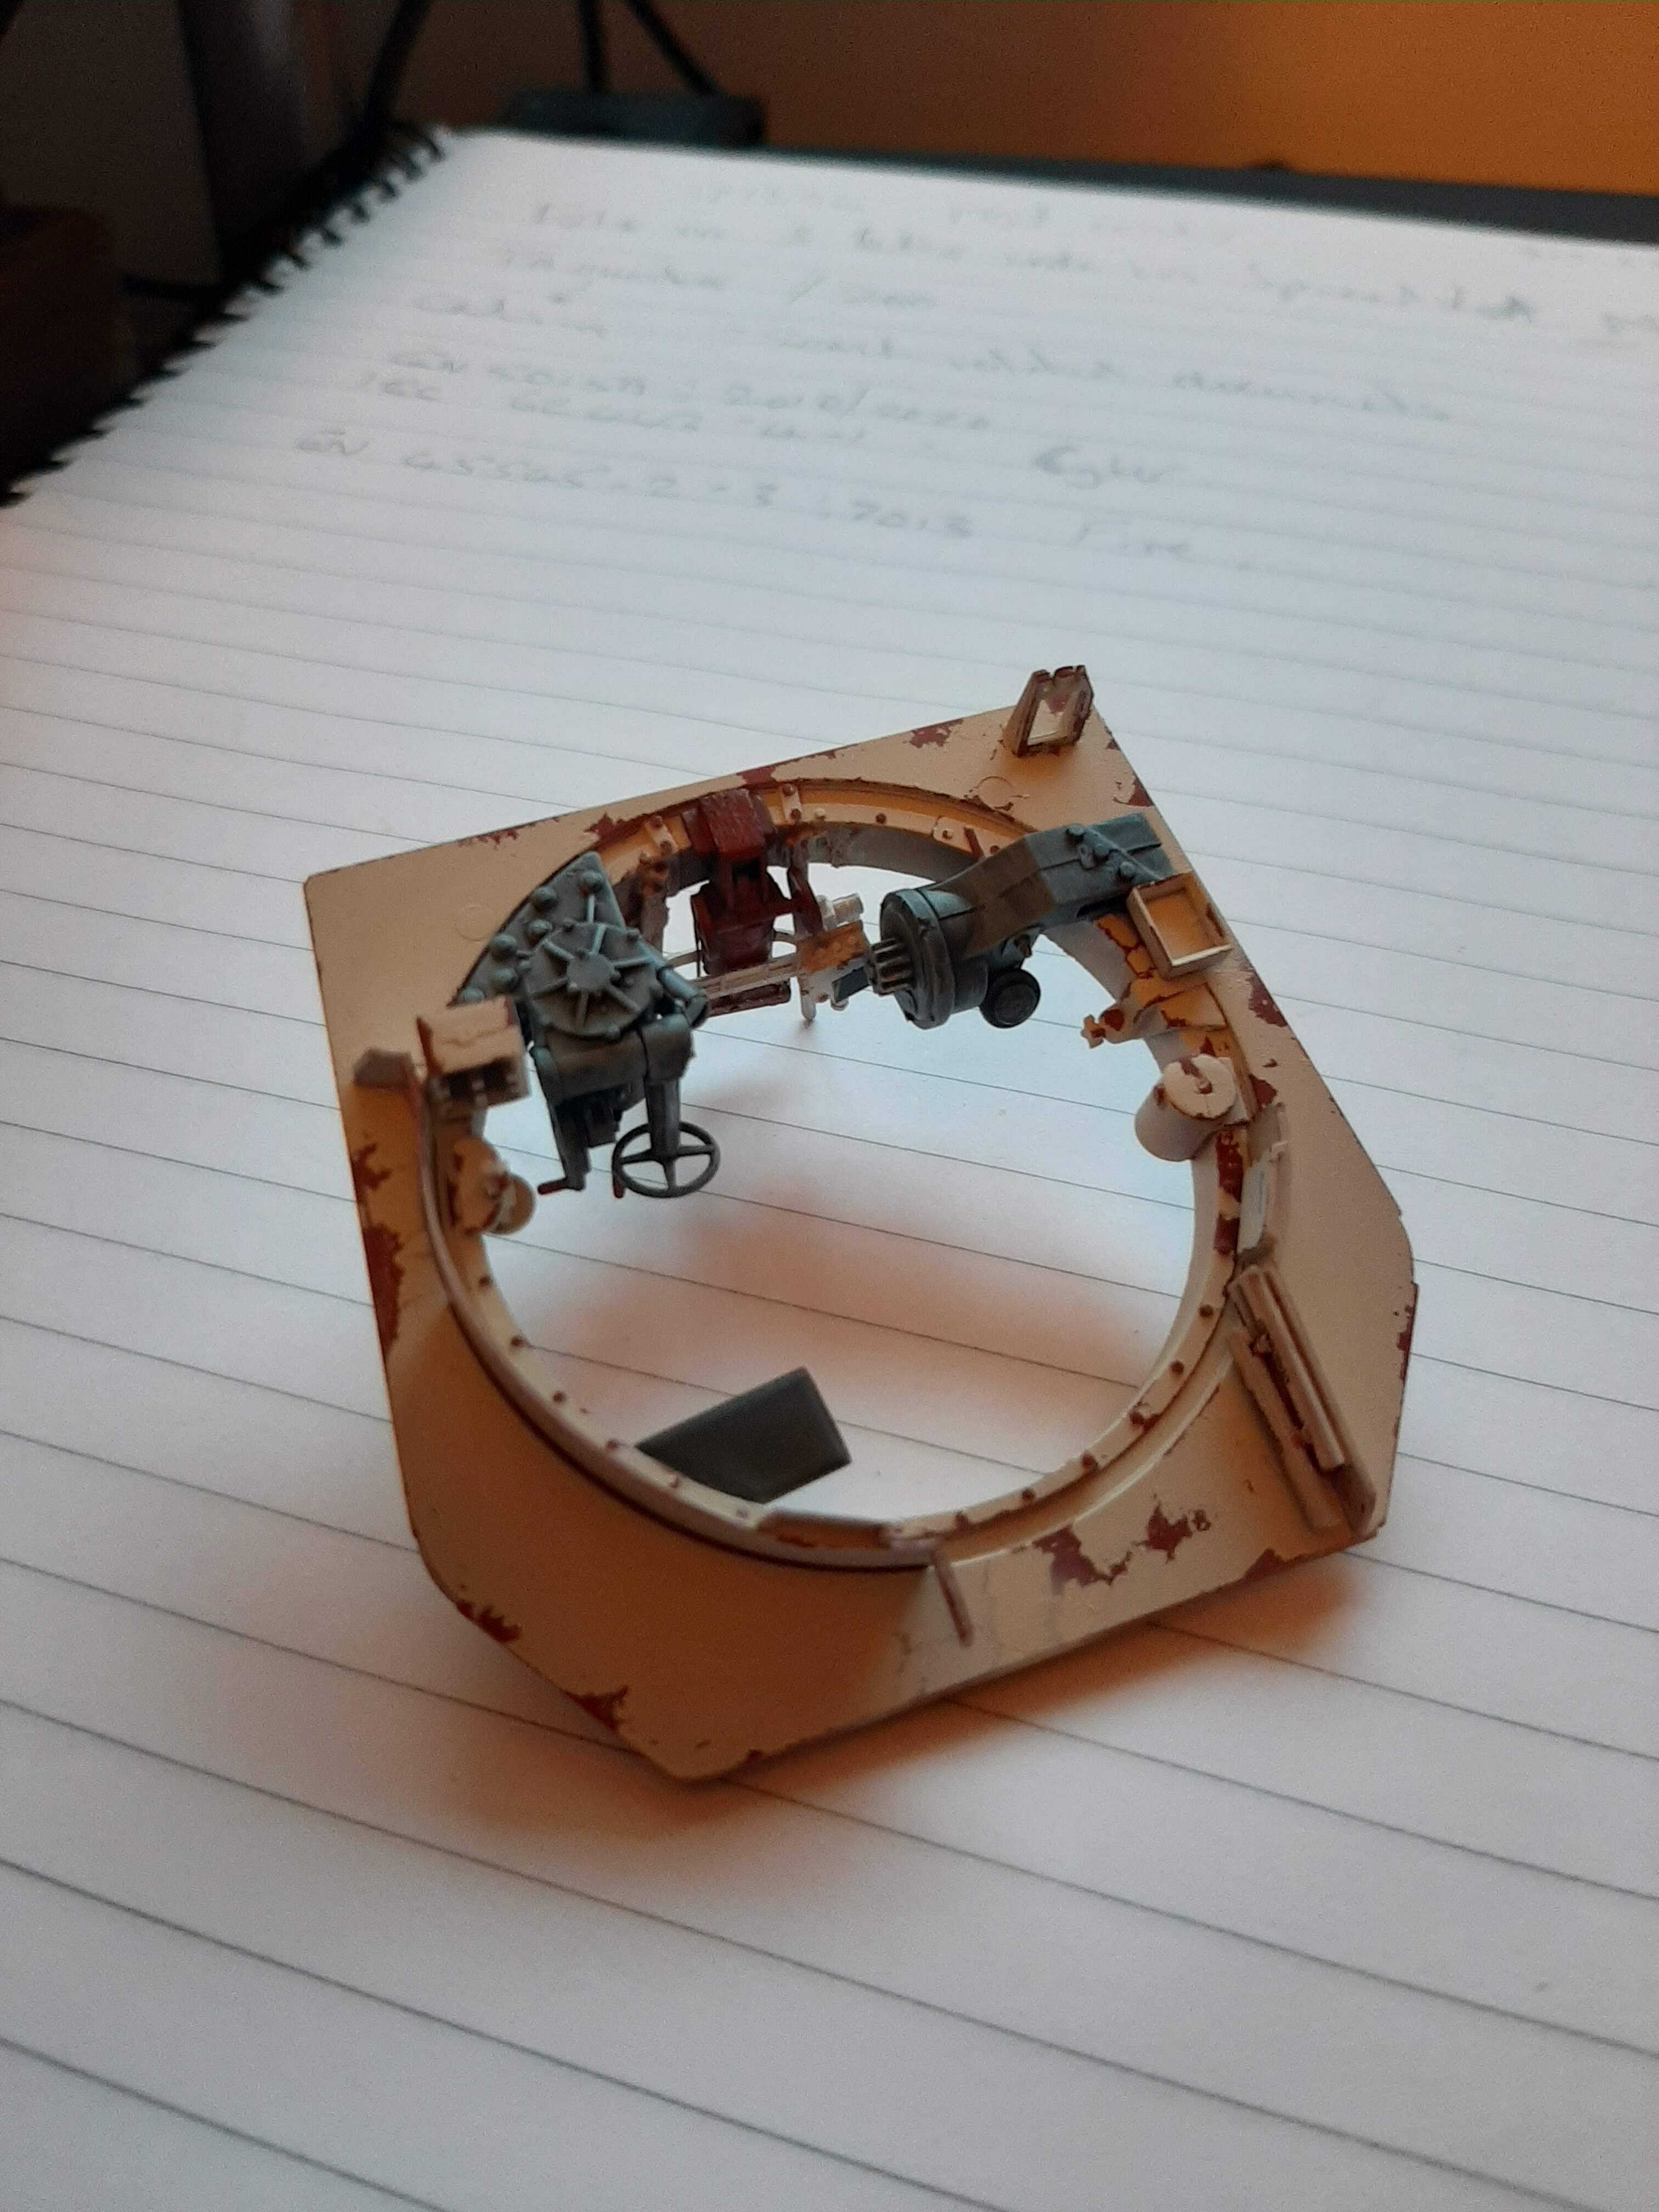
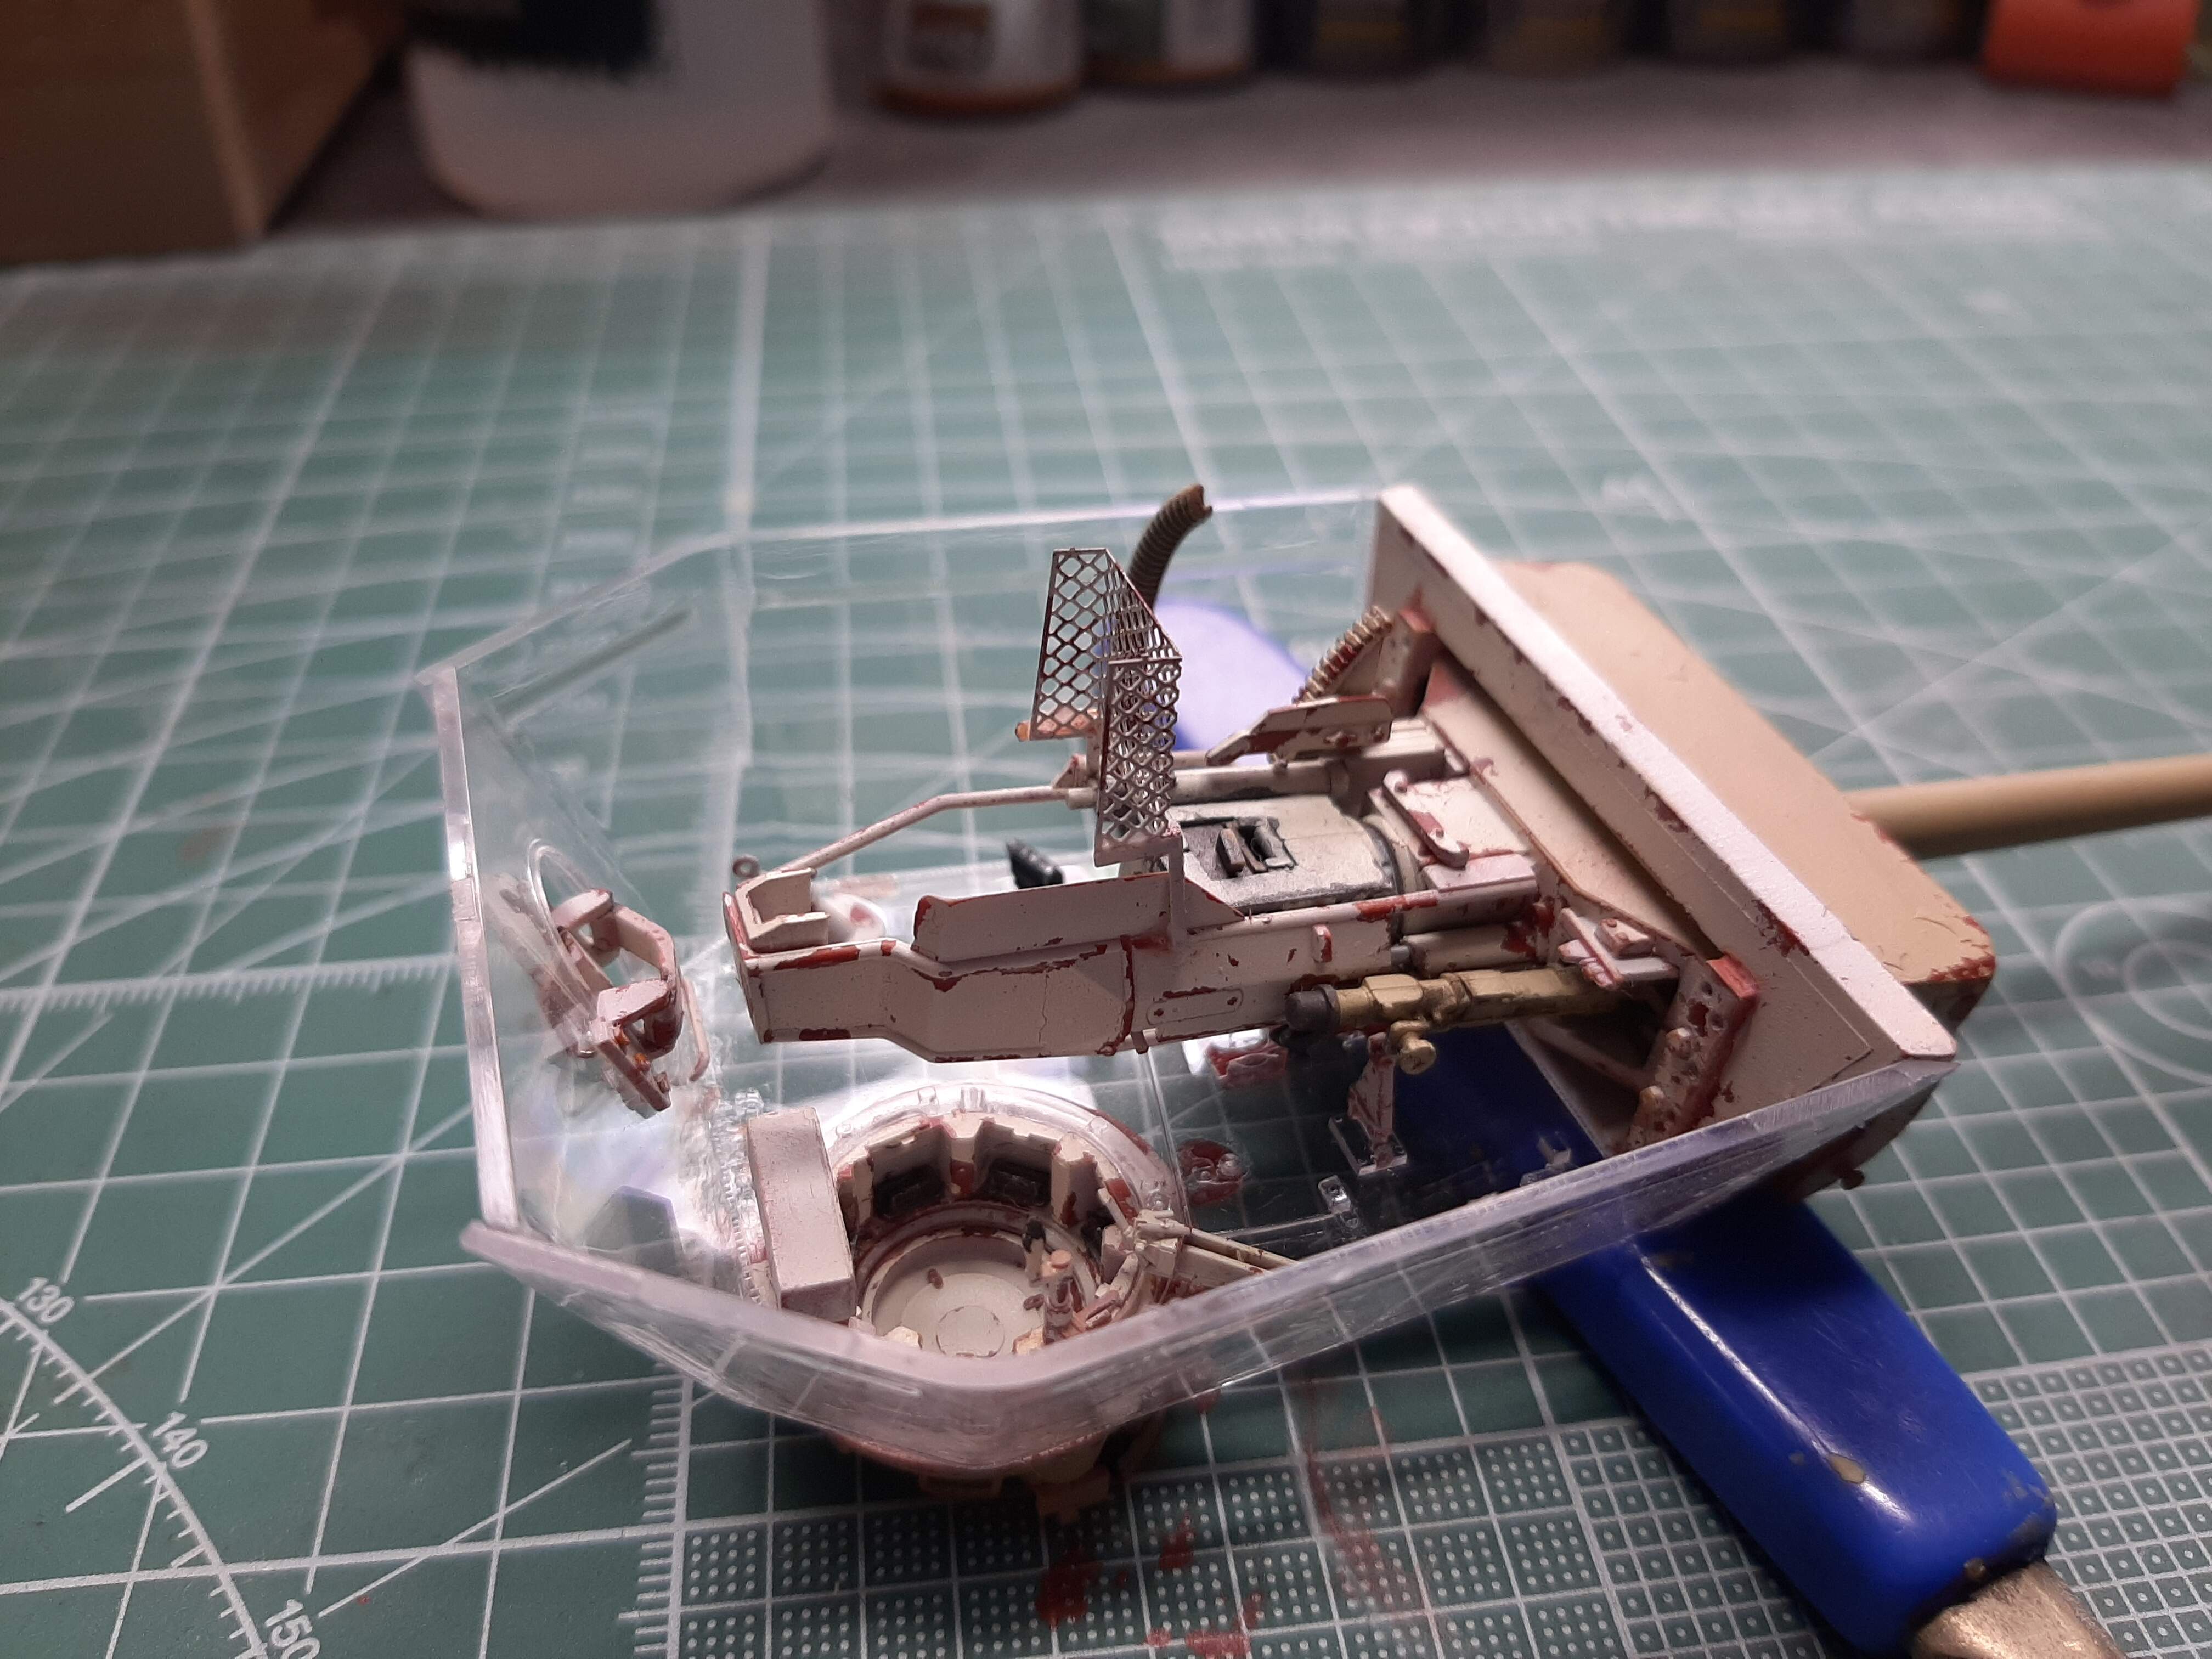
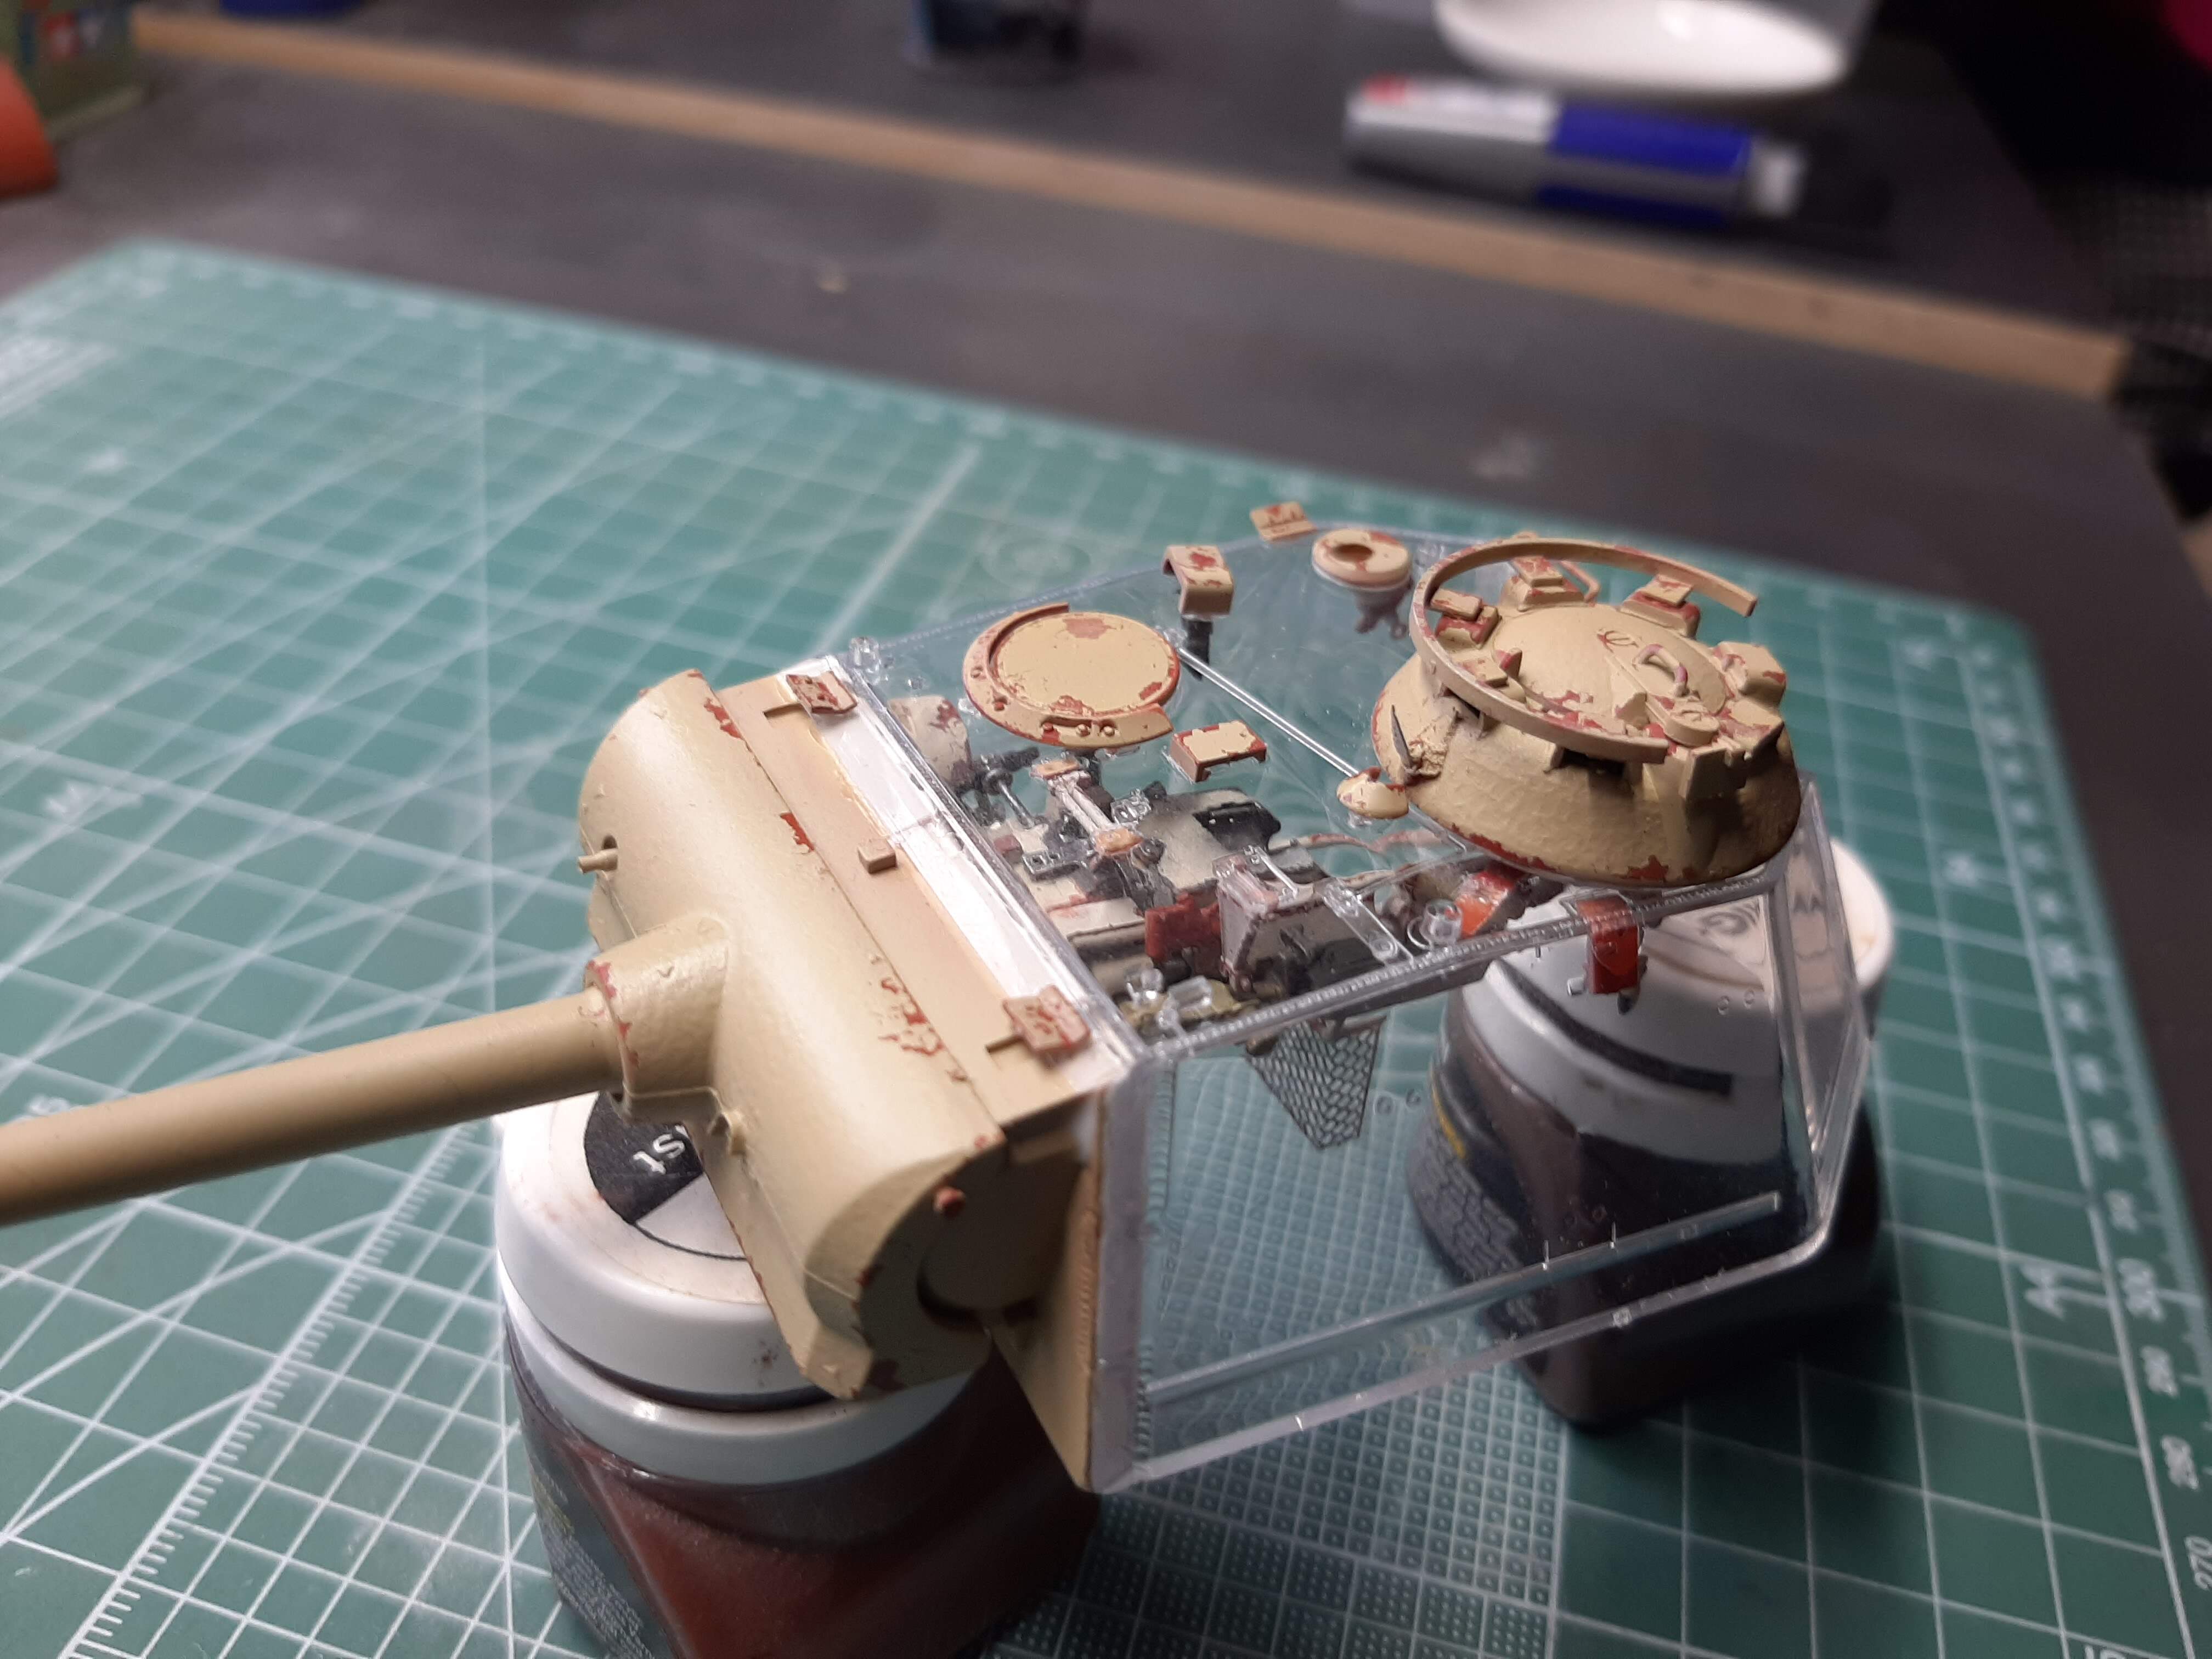
Nicely detailed. The kit gives you the option to have a gun that actually recoils (a spring is included) or to have it fixed. I opted to leave it fixed. The other thing is, although there’s nothing bad about the kit barrel, the muzzle brake is a seperate part and i just could not get the damn thing to glue on to the barrel straight. So, again, i used an Aber metal barrel which is of superb quality.
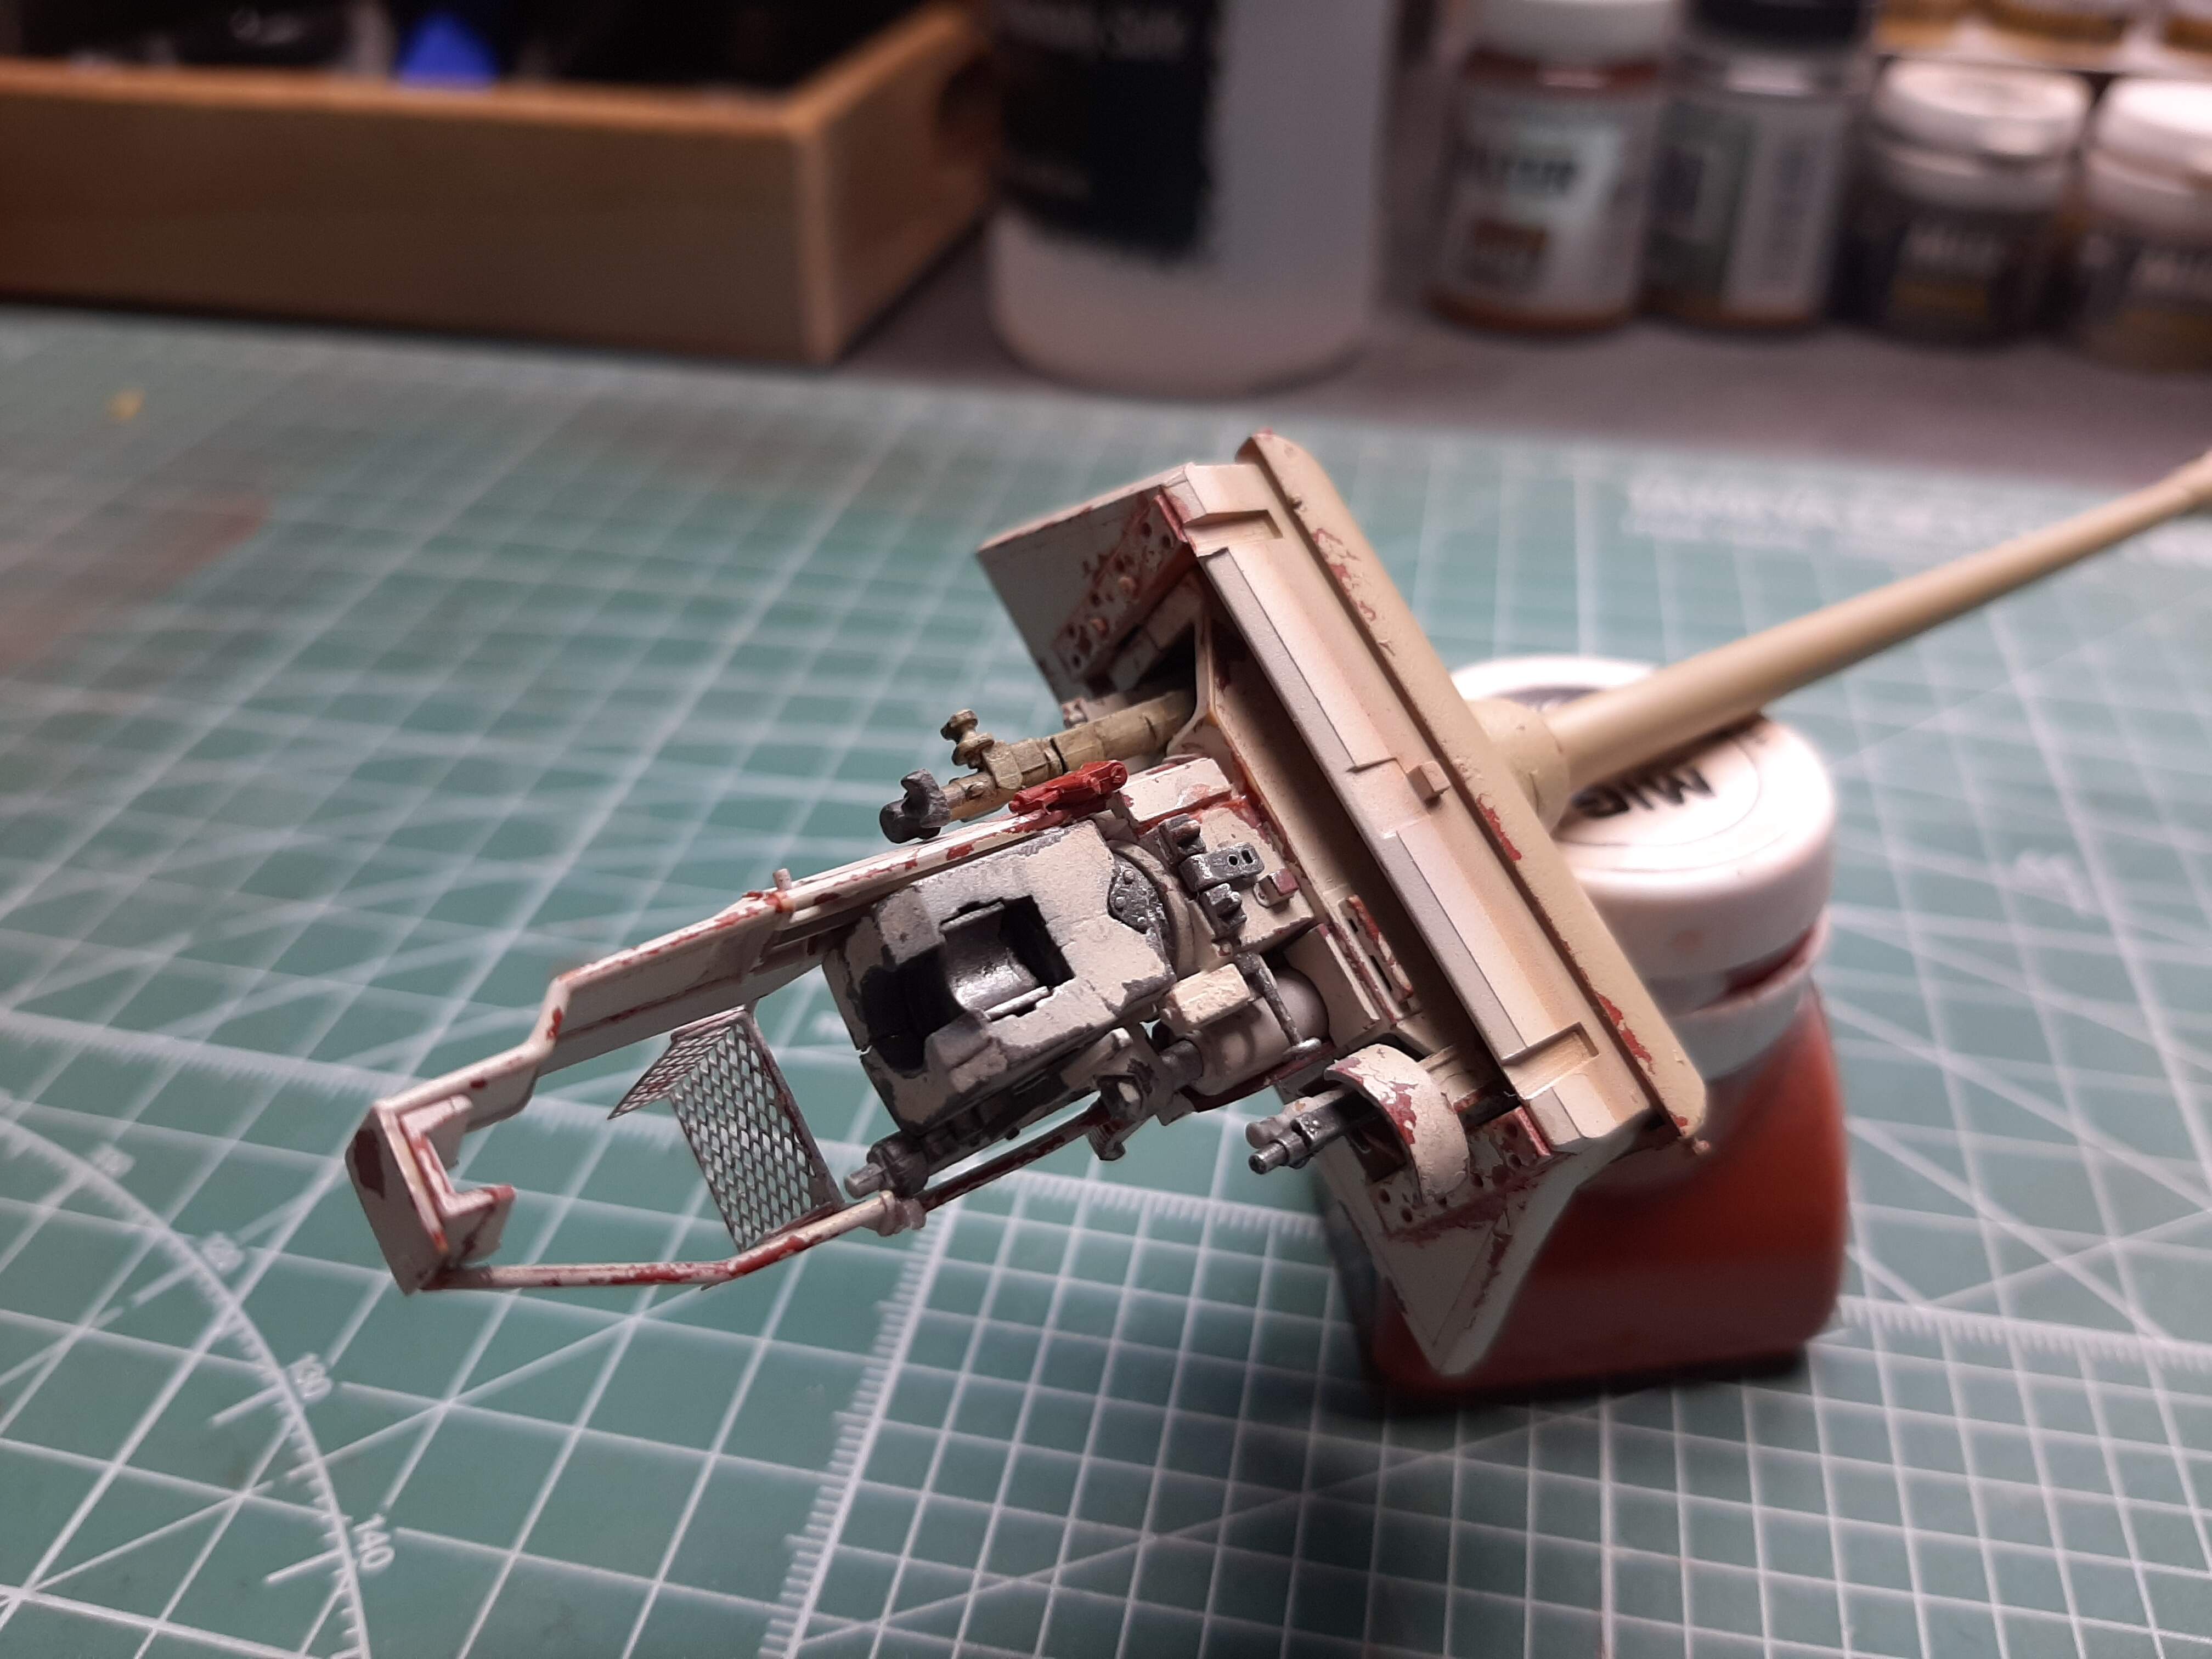
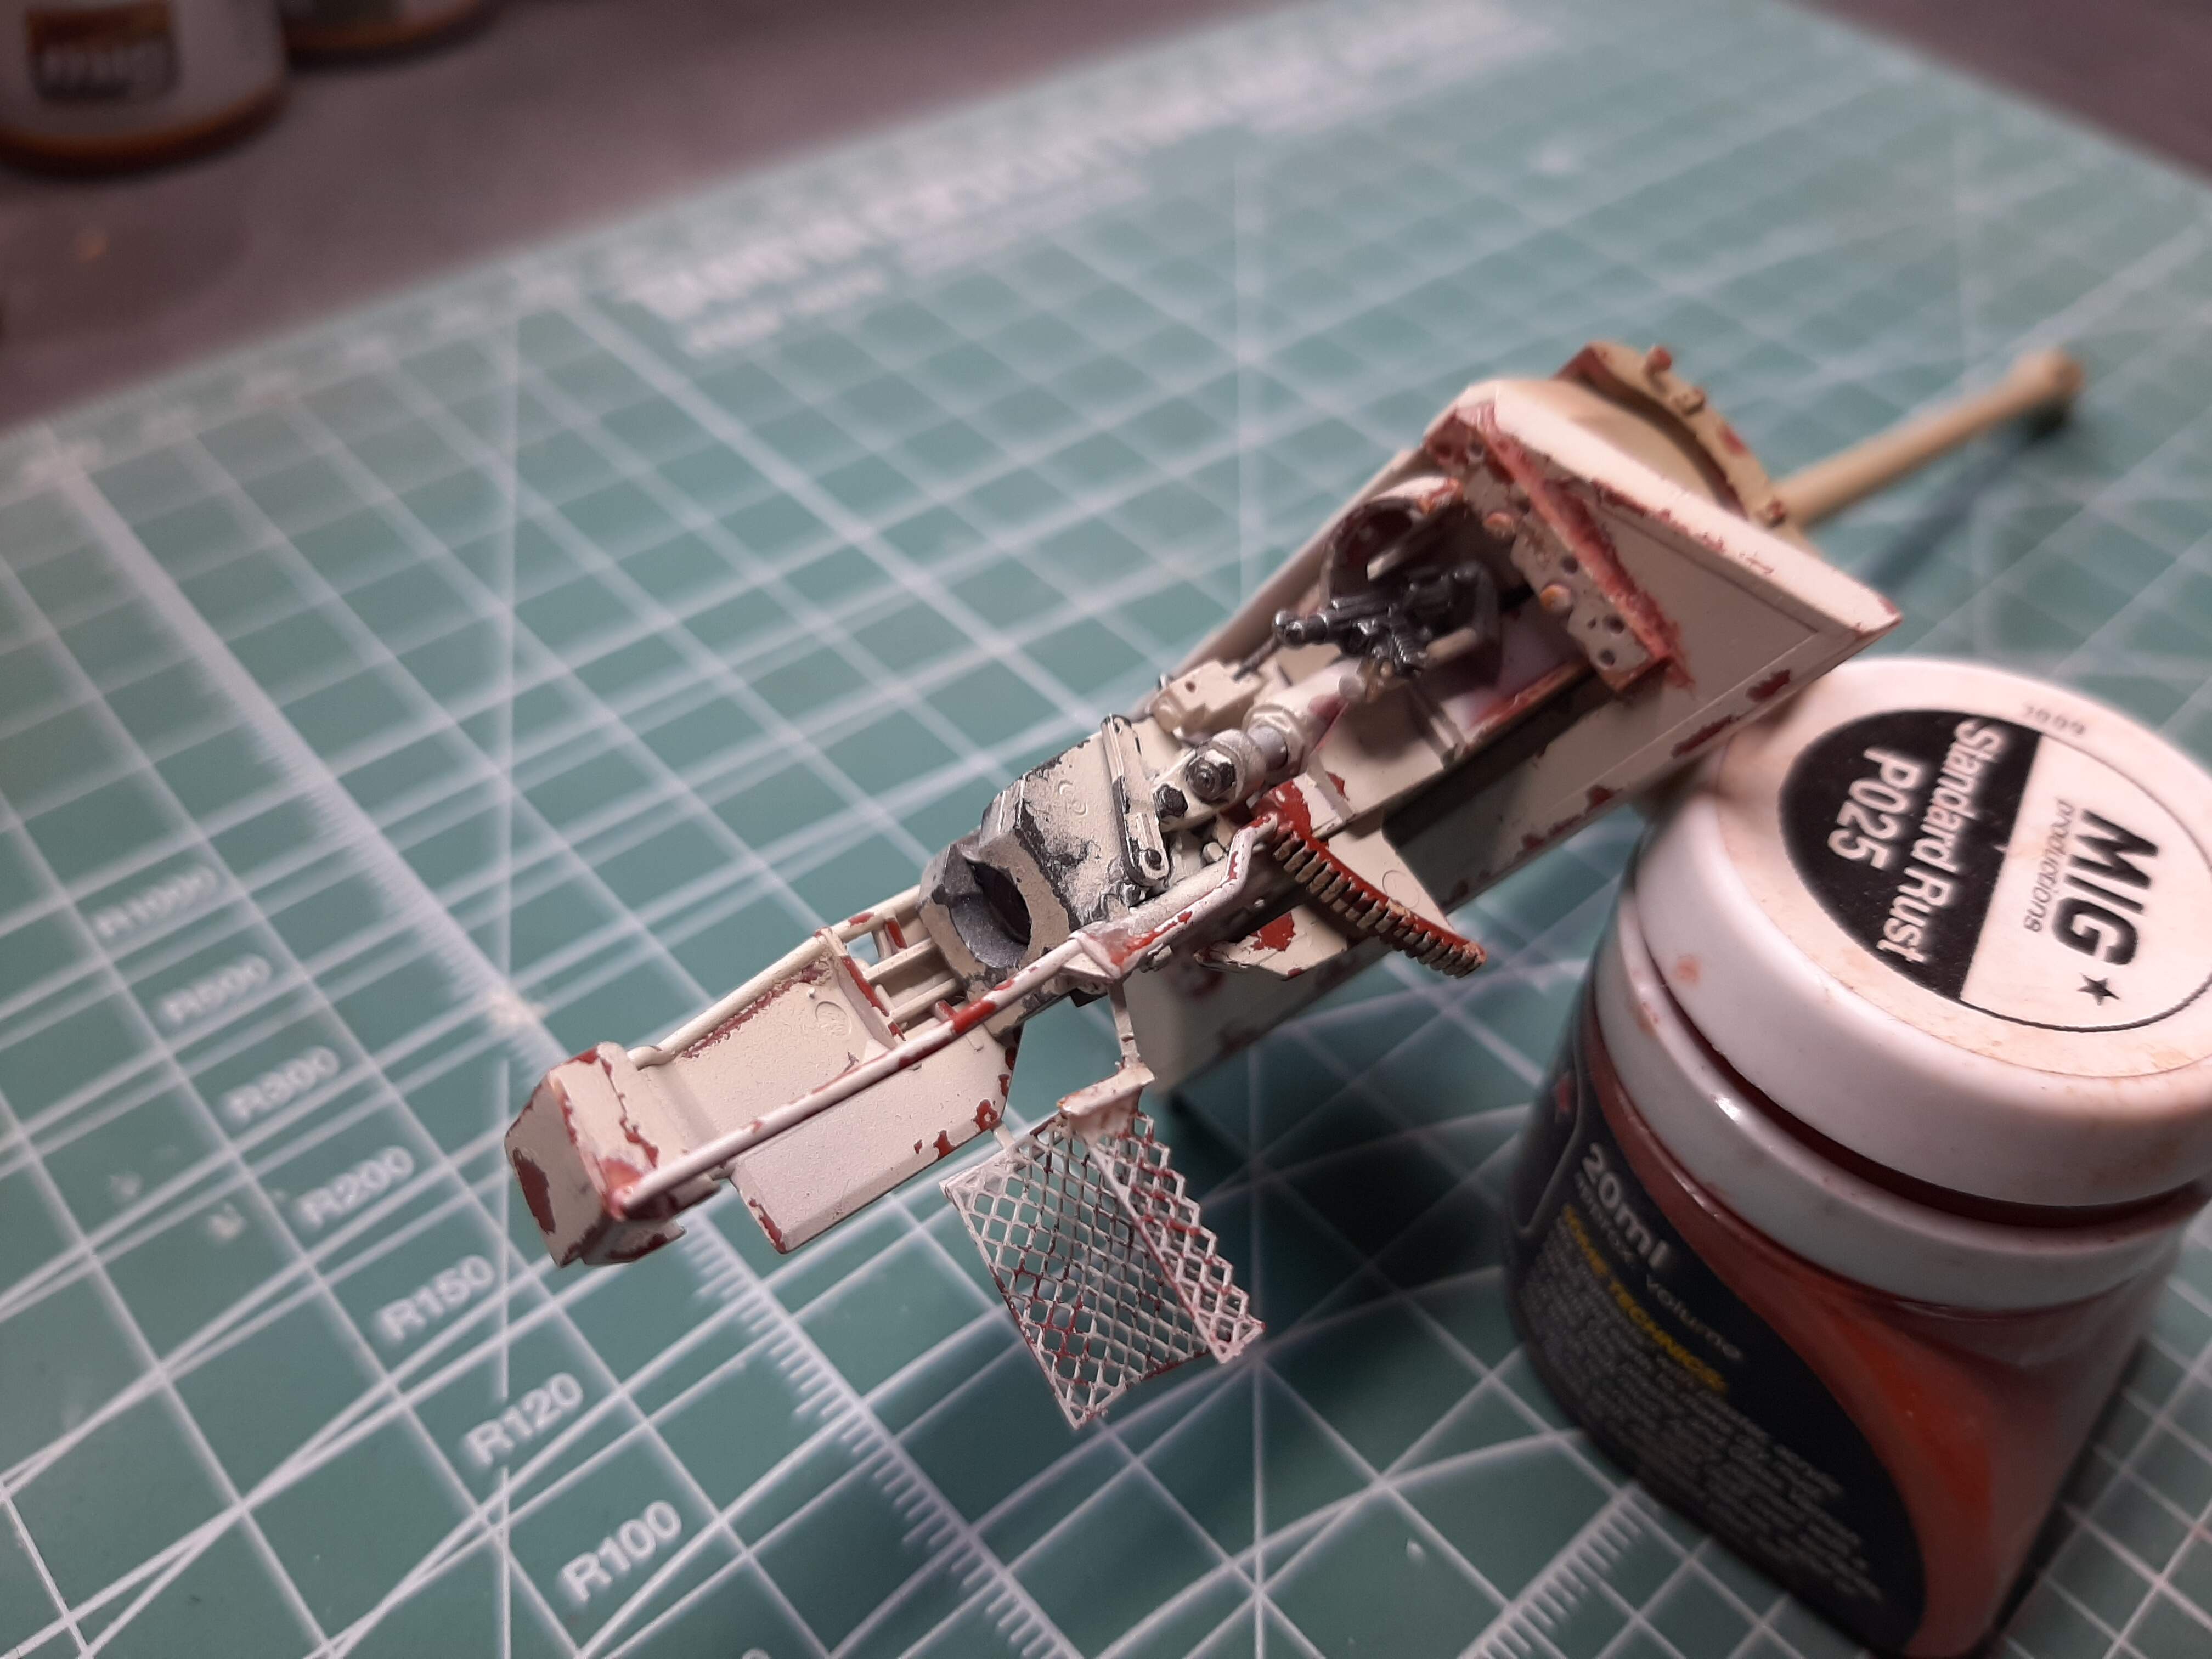
Note the shell casing catcher hanging below the breech. This was all PE parts and it was a real (and I mean, A REAL) pain to do. In the end, i had to use a lot of superglue to get it to stick together with sufficient strength that it could be attached to the gun itself.
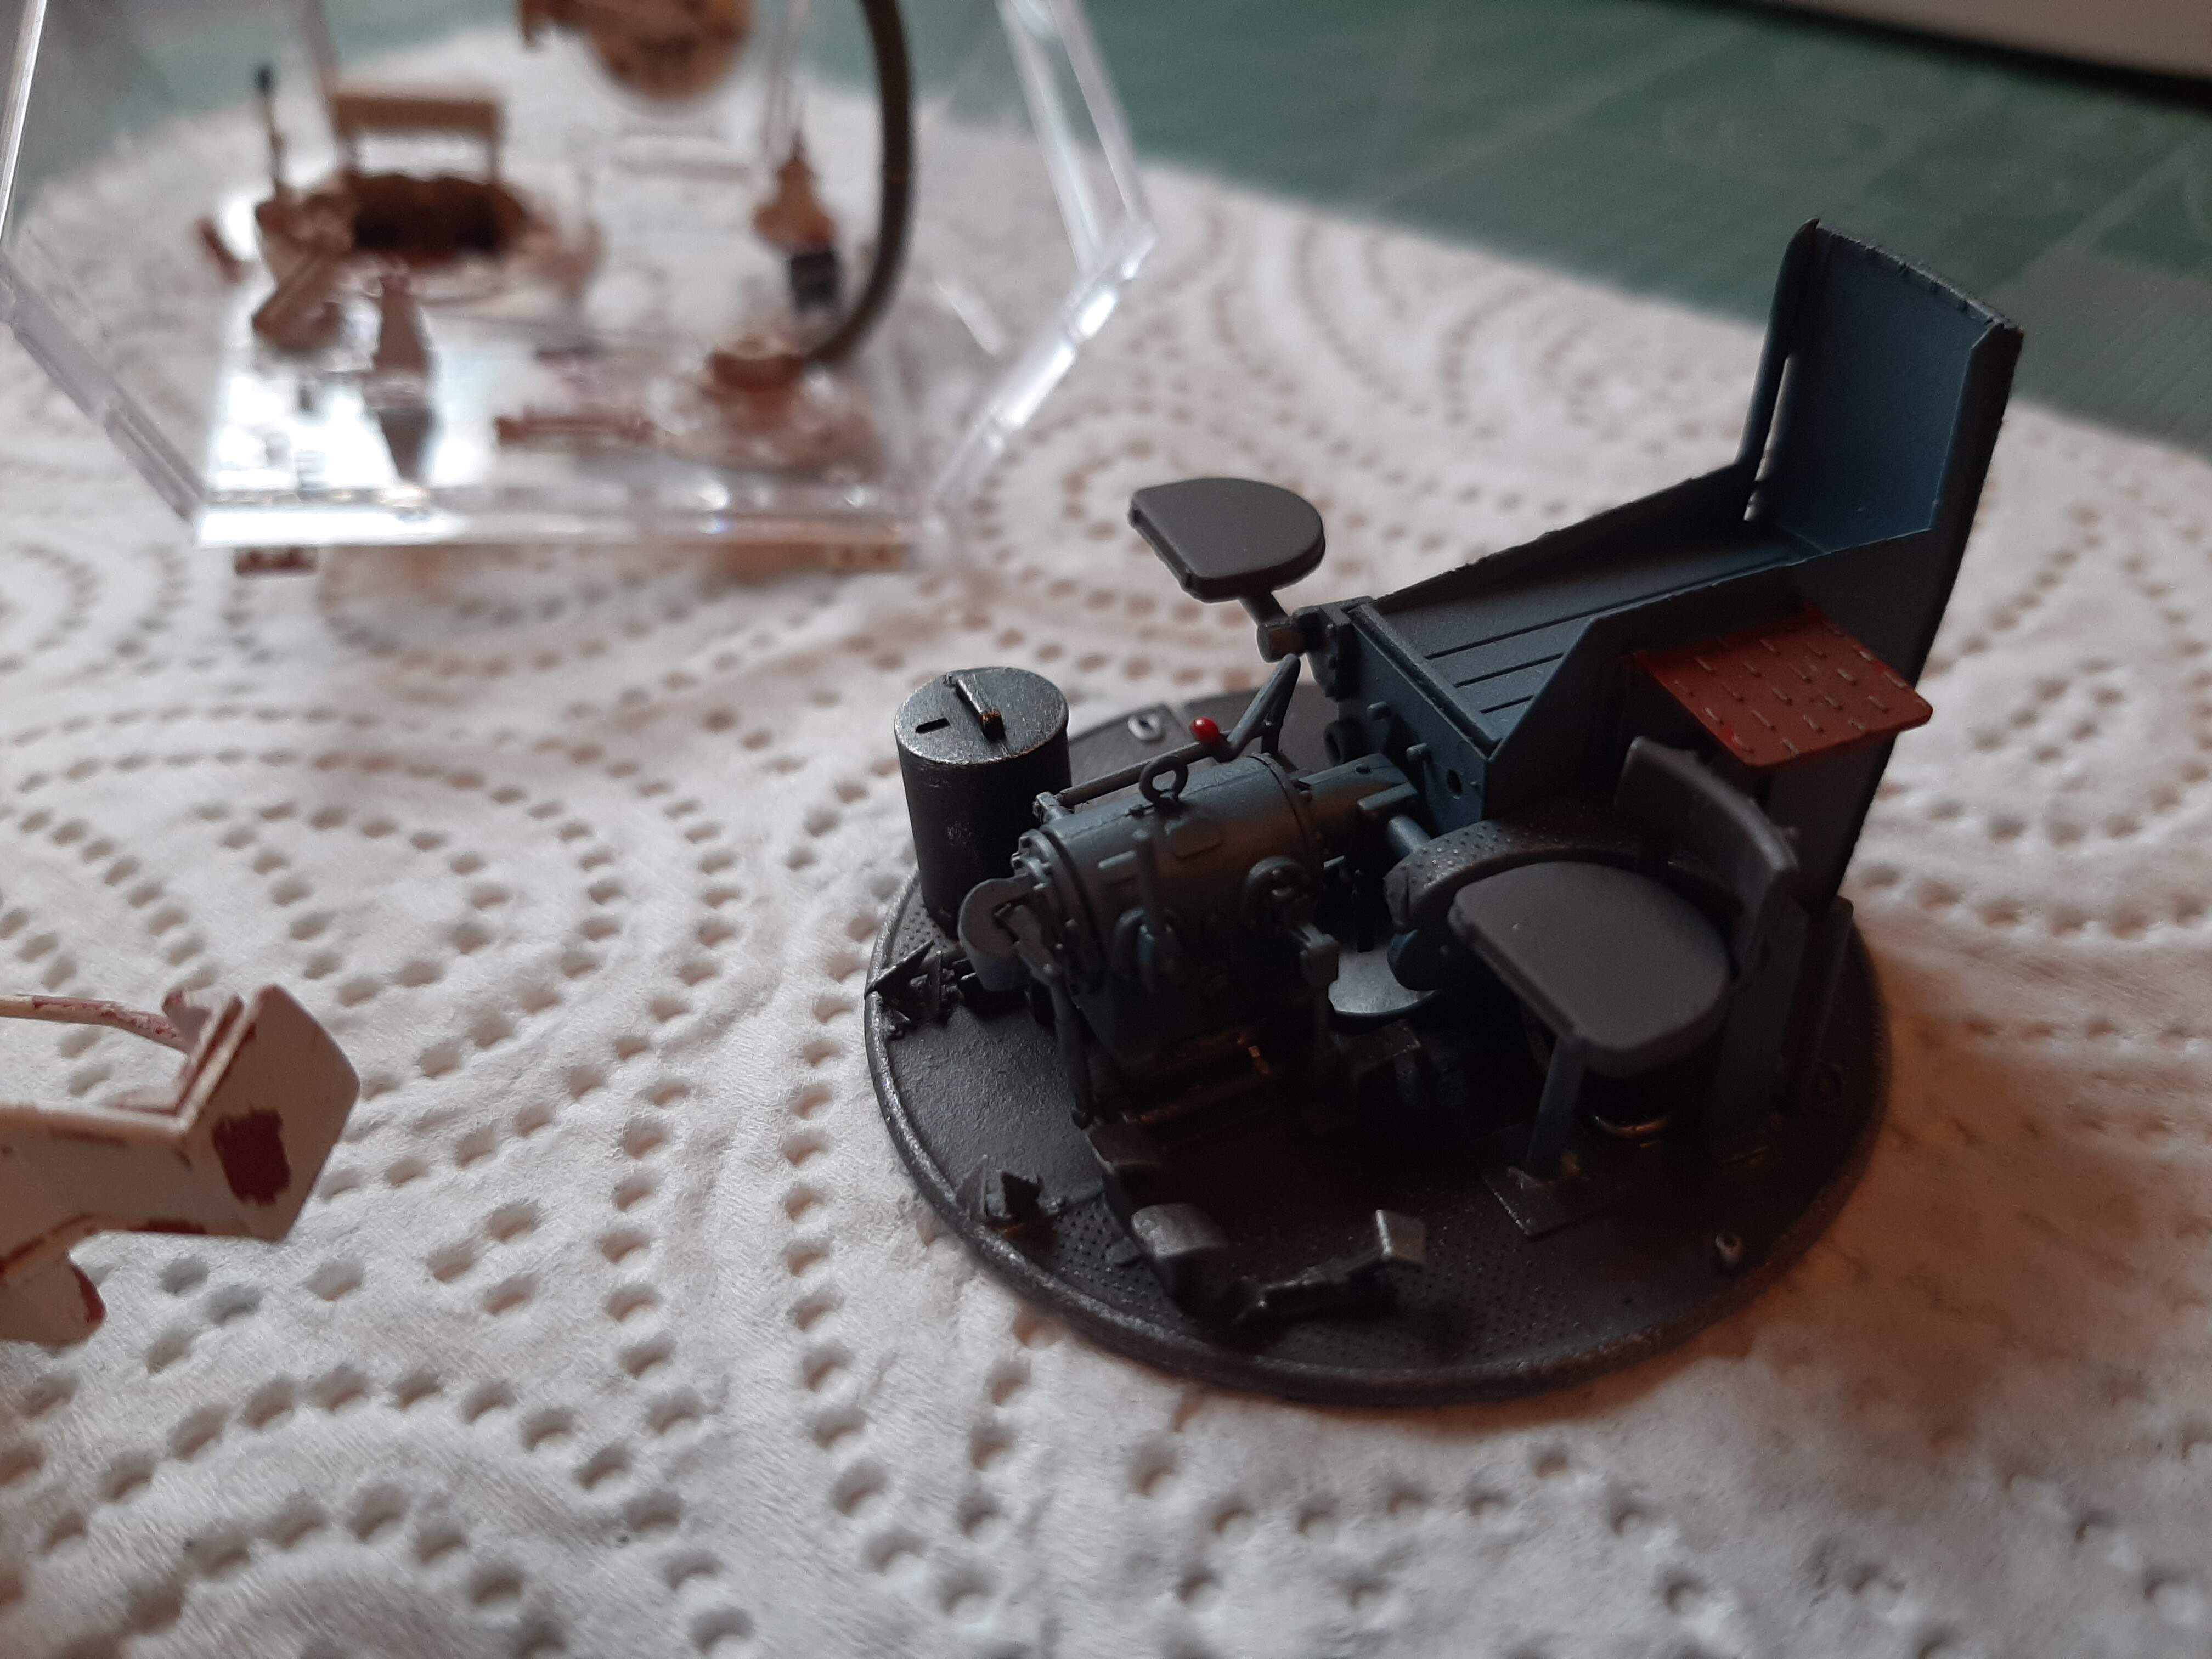
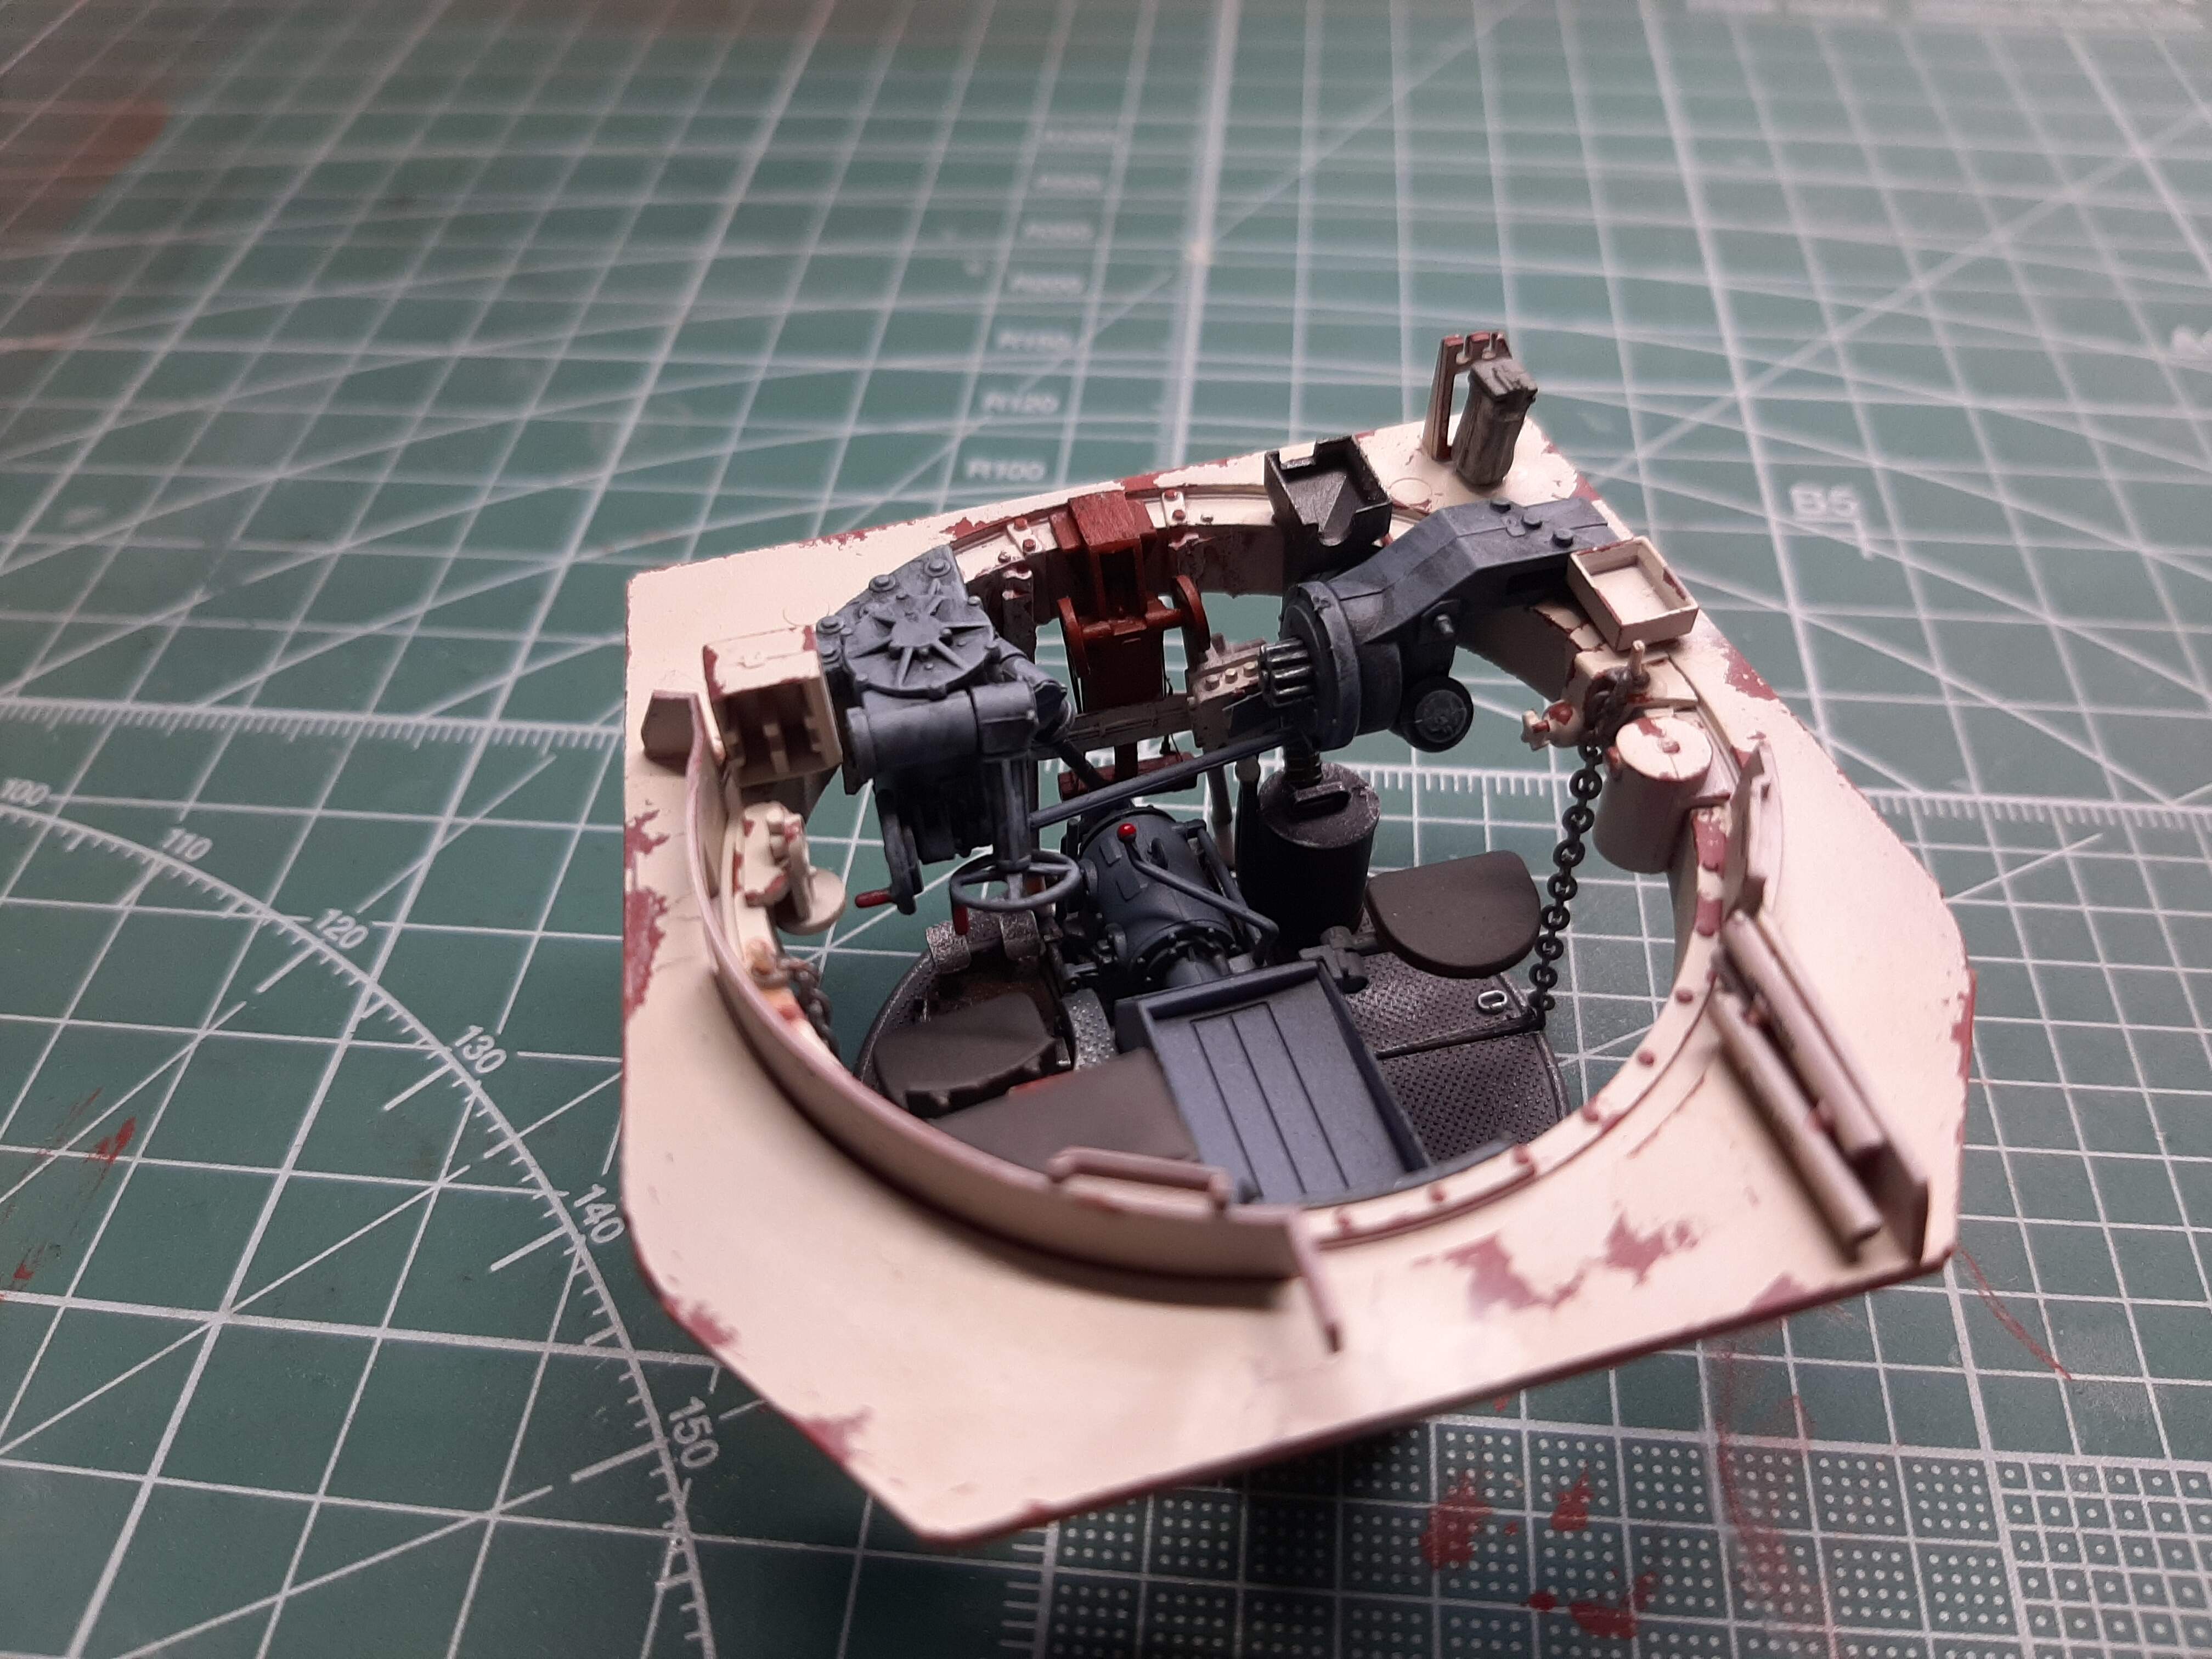
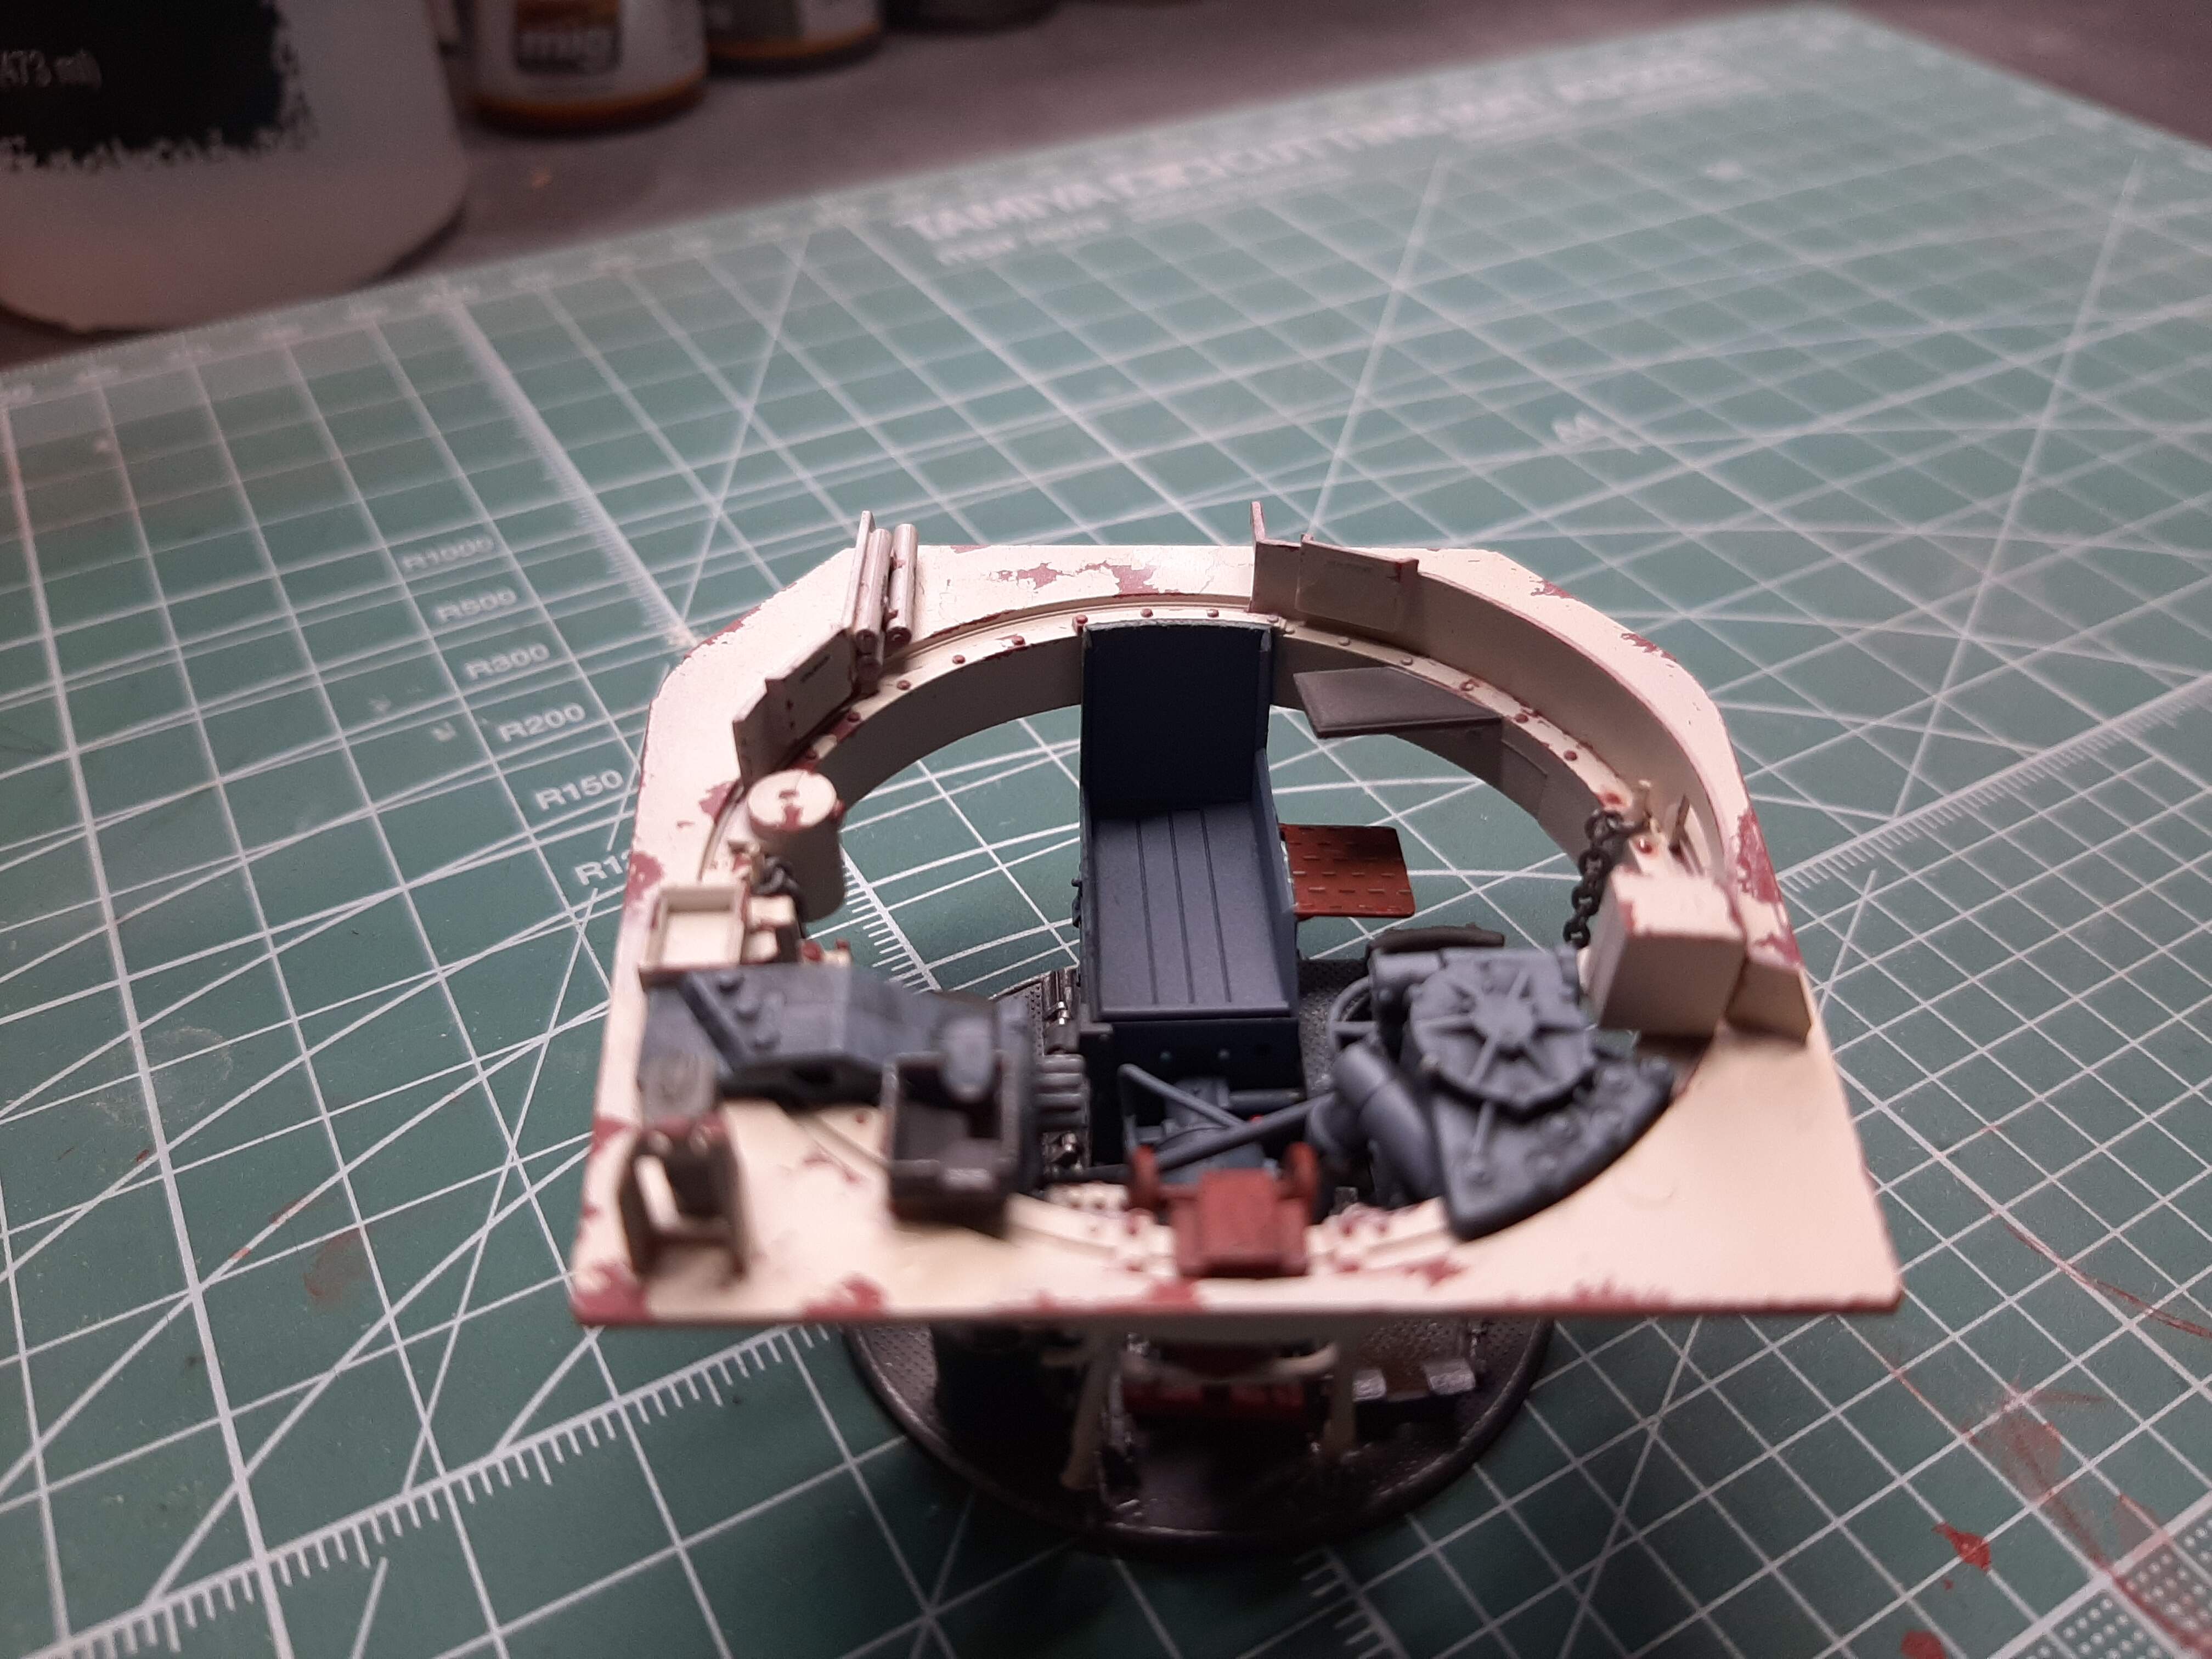
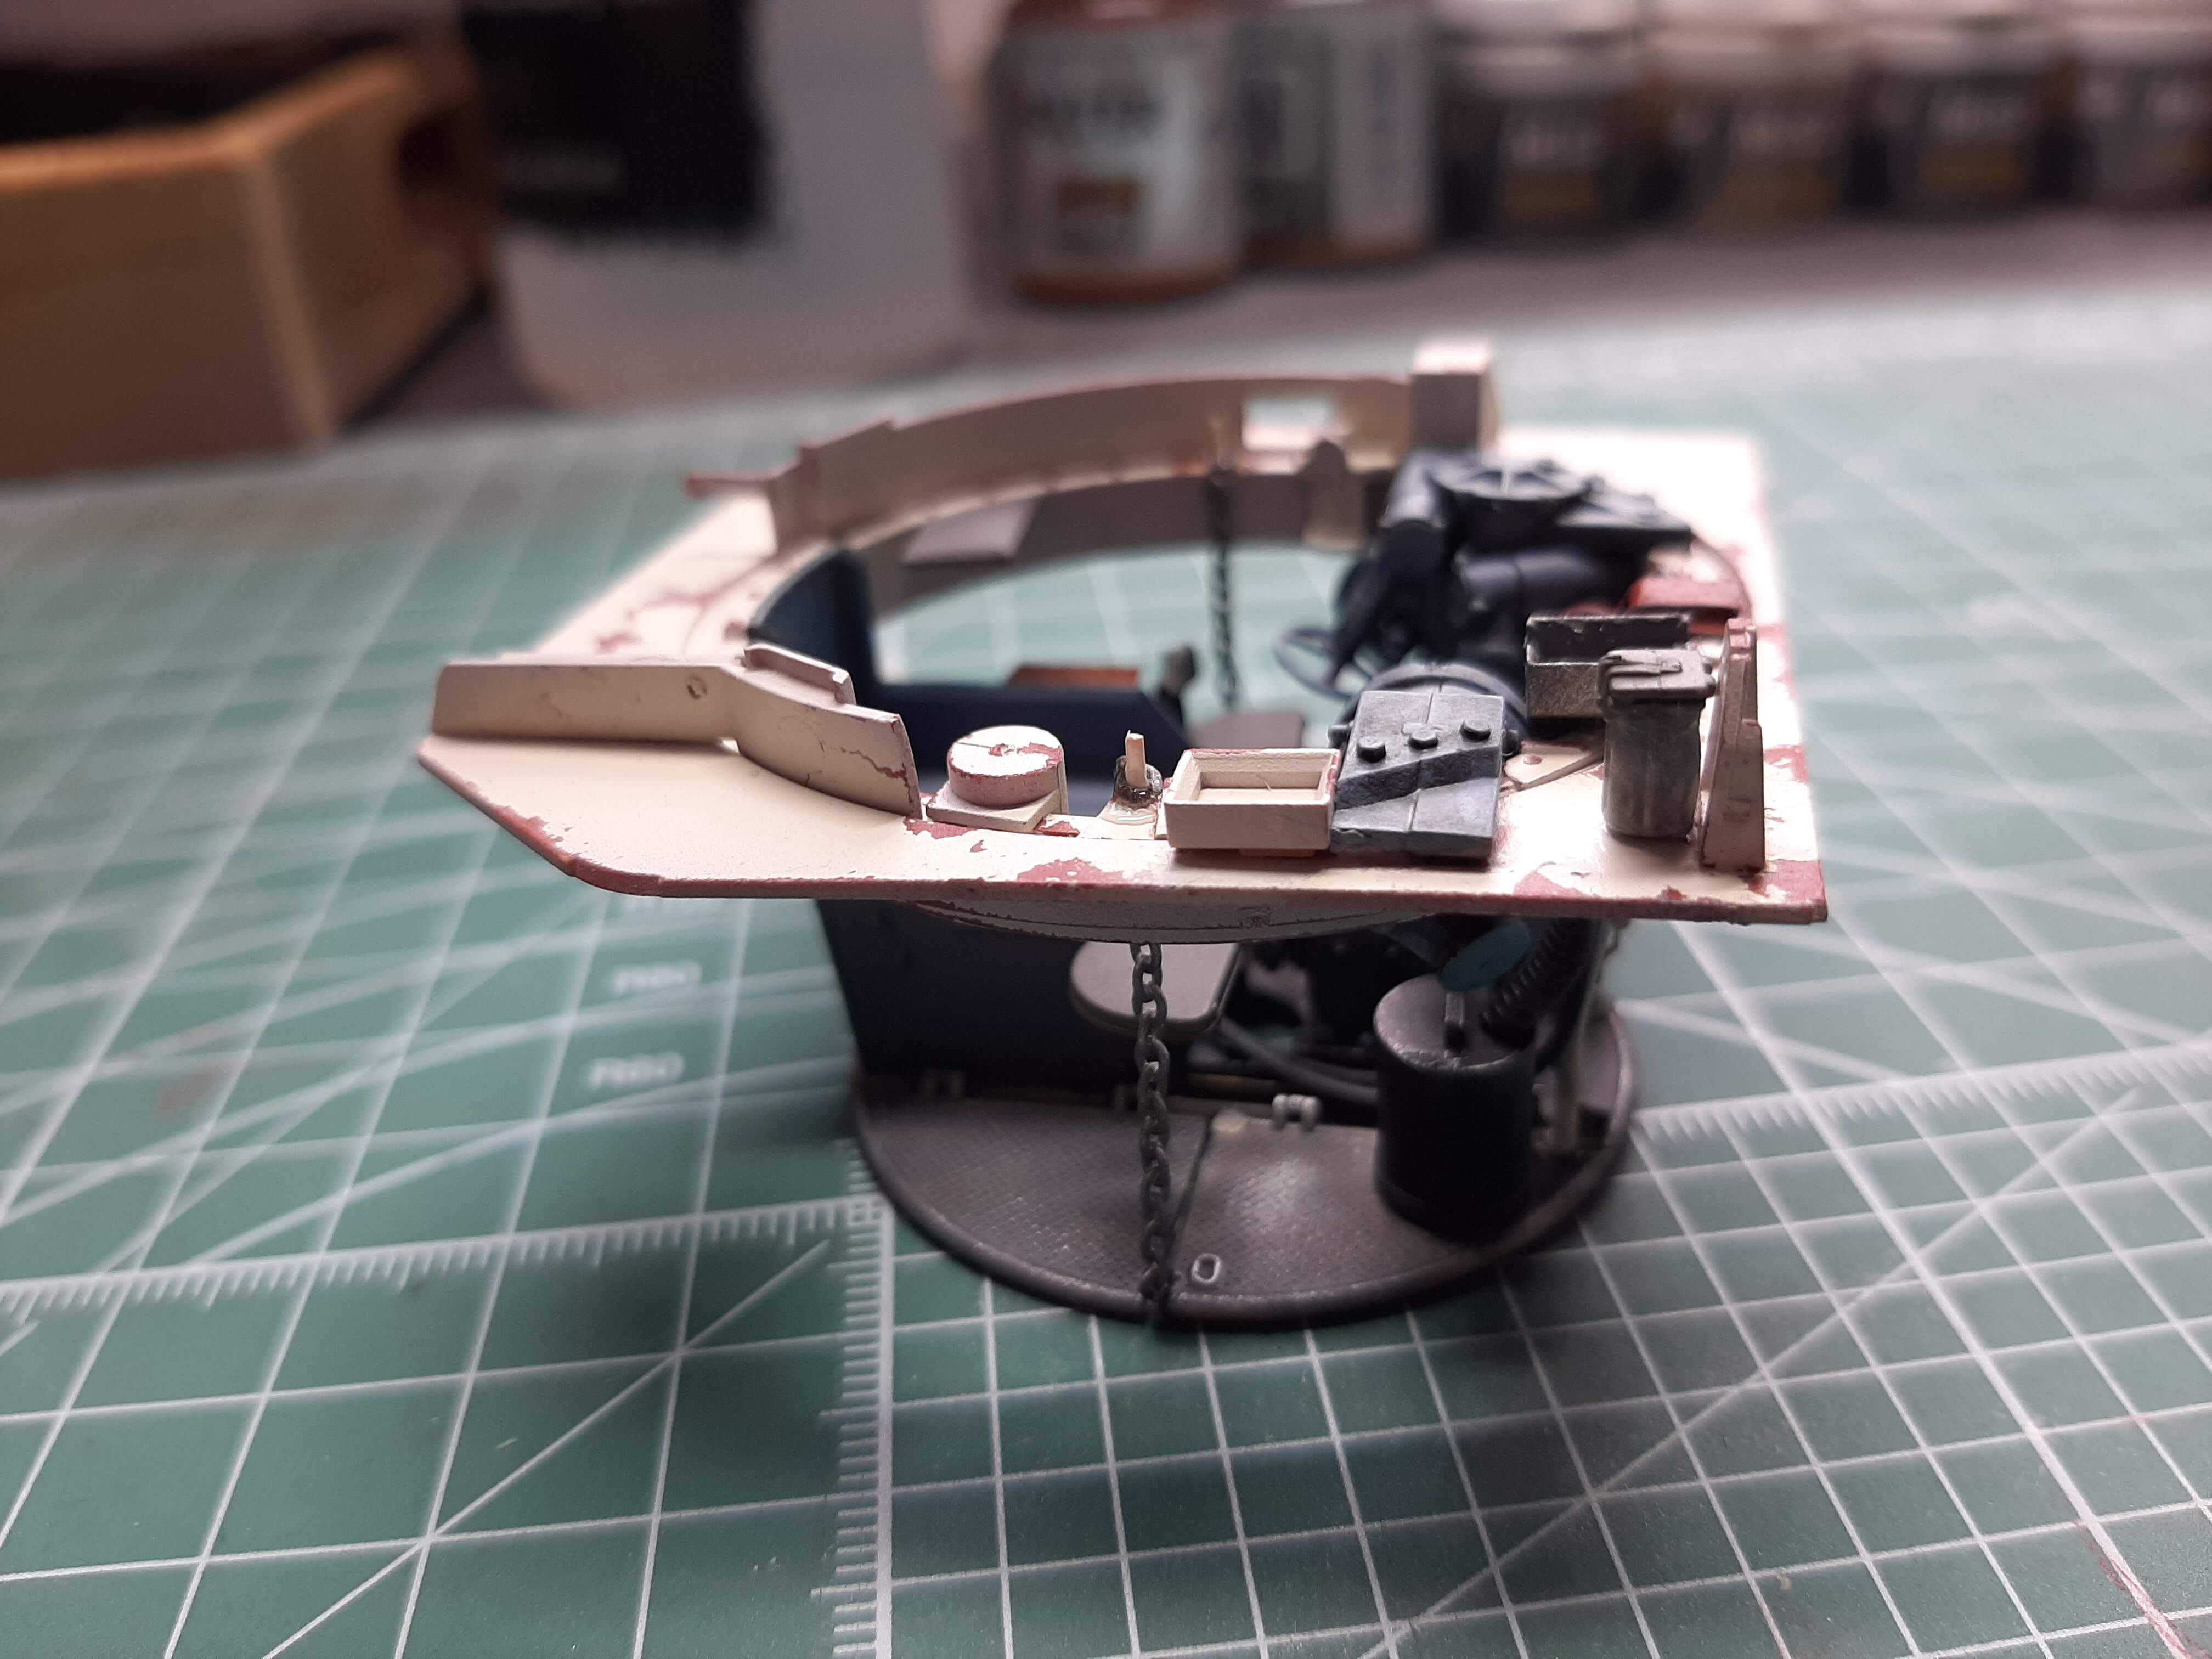
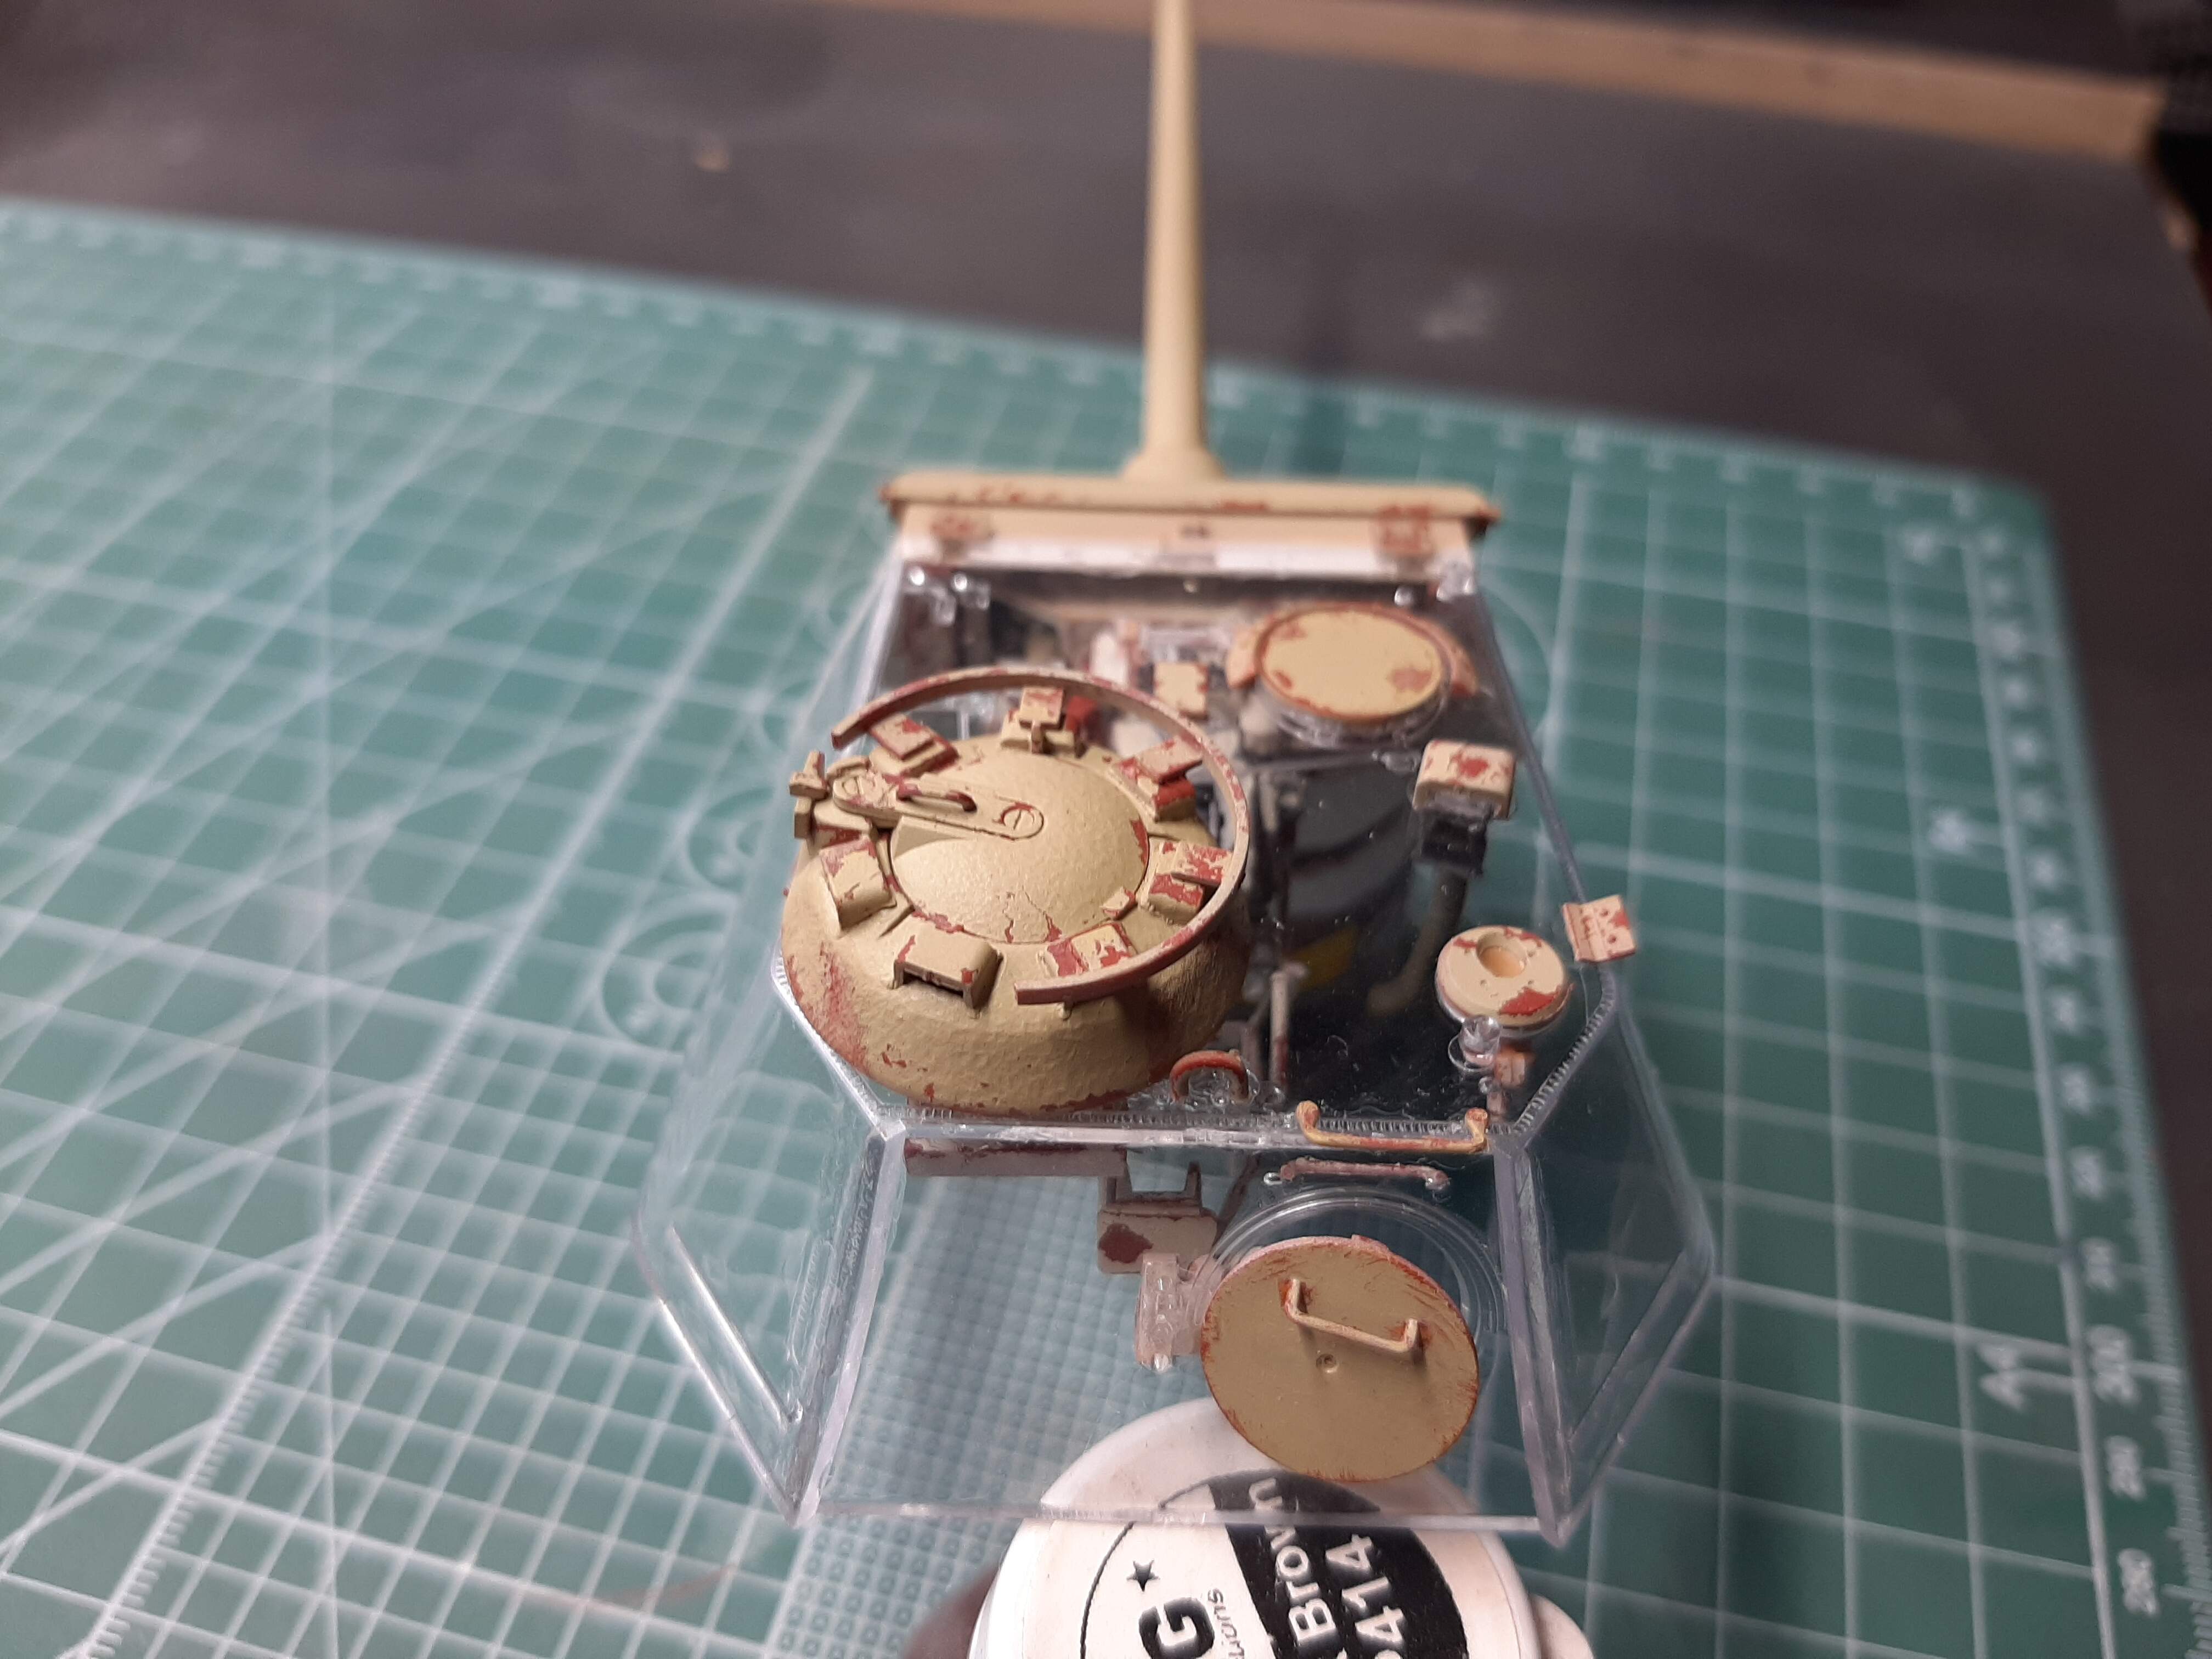
Several sub-assemblies, but nicely done. The box in the centre which looks like a seat, isn’t a seat. It is the box to catch the empty shell casings. In reality, this was hinged at the rear and opened when in action. Shells were guided into the box by the catcher on the gun.
Strange though - RFM do not give you the option to have this lid open. There is an option to have a side access panel opened, and some interior detail is provided for the inside of the box - but, when the the lower turret is complete, there’s no way you can see into the box. Why bother? Anyway, its a minor gripe really.
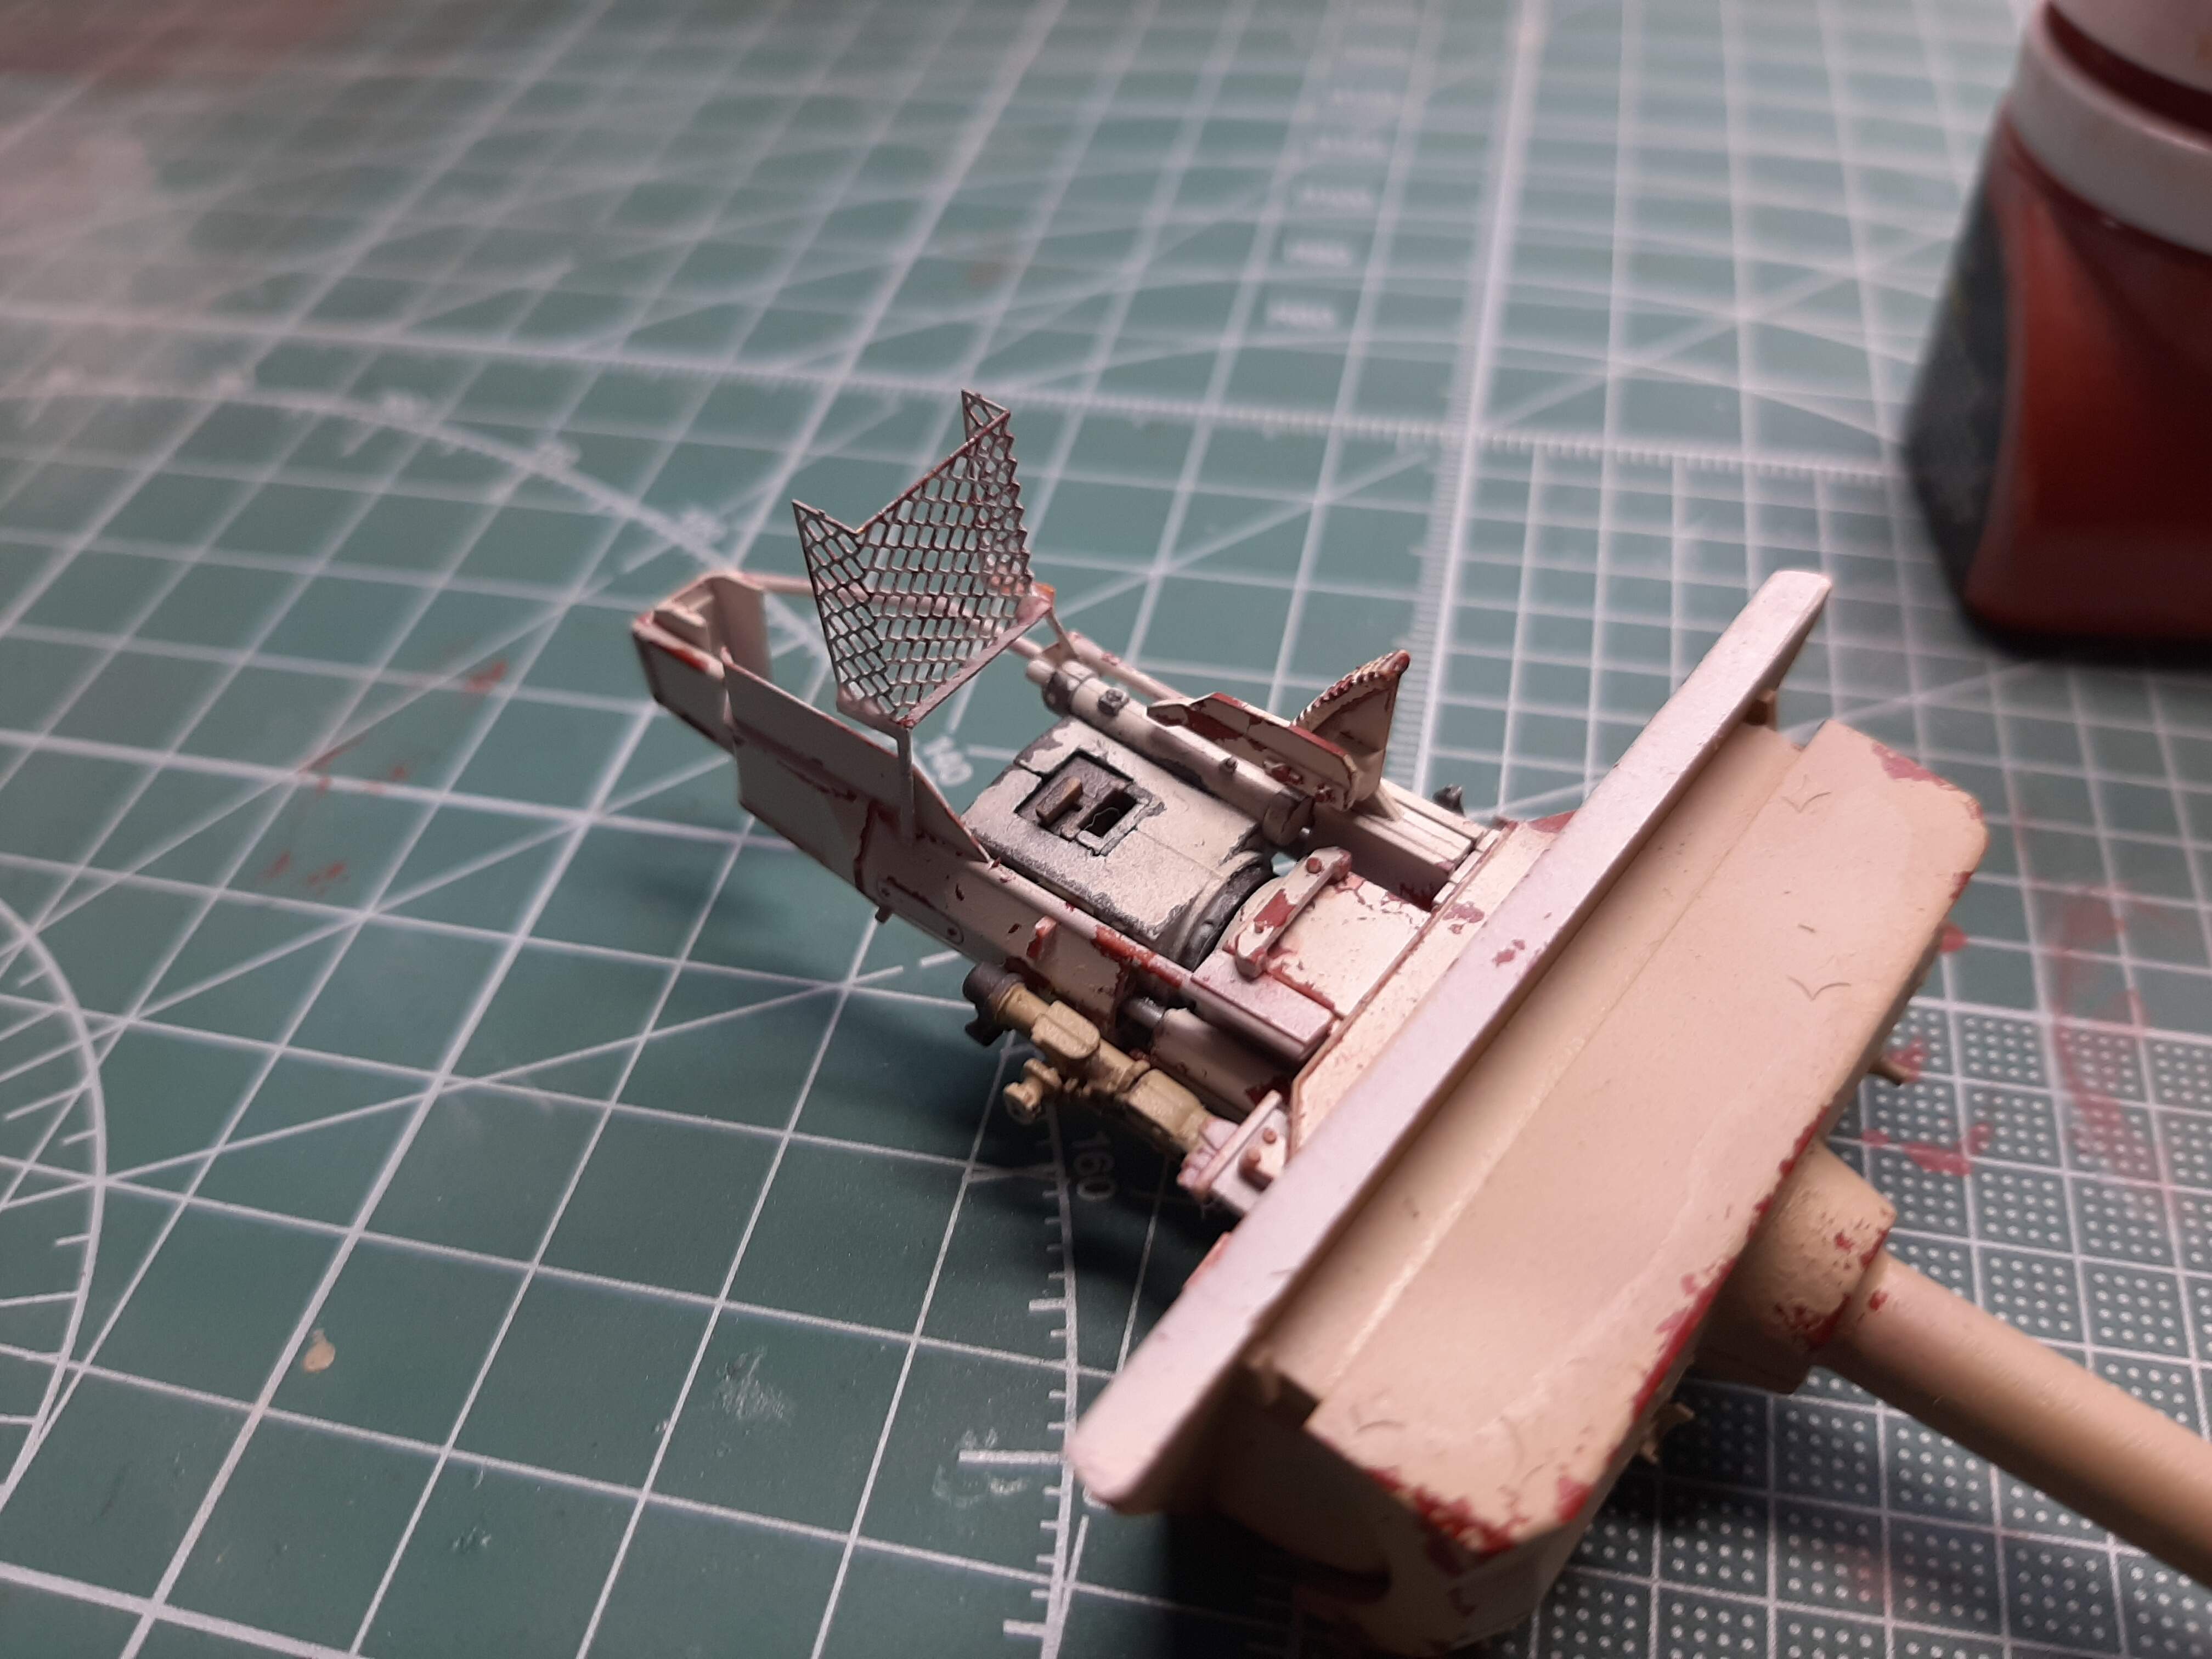
And here it is mated with the lower turret assembly. Note the chains hanging down each side that reach to the floor. These were so that the turret floor could be lifted to access ammunition stored in the hull. The kit provides really rubbish PE parts for these ‘chains’ and in fact, it doesn’t look like chain at all. So, i swapped it for actual chain that is normally used for model railway enthusiasts. The chain may be a bit coarse, but it looks better anyway, and finer chain is available if you want it.
You can see that the gun is set a bit wonky. Not sure why, but it isn’t wonky enough for me to worry too much, and looks fine when viewing from a few feet away. Seriously, it is exhagerated by the picture, the reality is that its hardly noticeable.
Khouli, I have this very kit sitting in my stash, so I am watching your build with interest. When I do eventually start it, you have laid down quite a standard to live up to! I won’t be doing ot for a while, as I have just completed the Takom King Tiger which took about two years, so I am having a rest doing a few less daunting kits first before I tackle that. I’m slightly concerned at the amount of PE you are coming across, however in the Takom kit there was quite a lot that I was able to leave out! Hopefully this will be the same…
Based on my progress so far, this will take me a year at least to complete, I have around four hours per week available for my hobby.
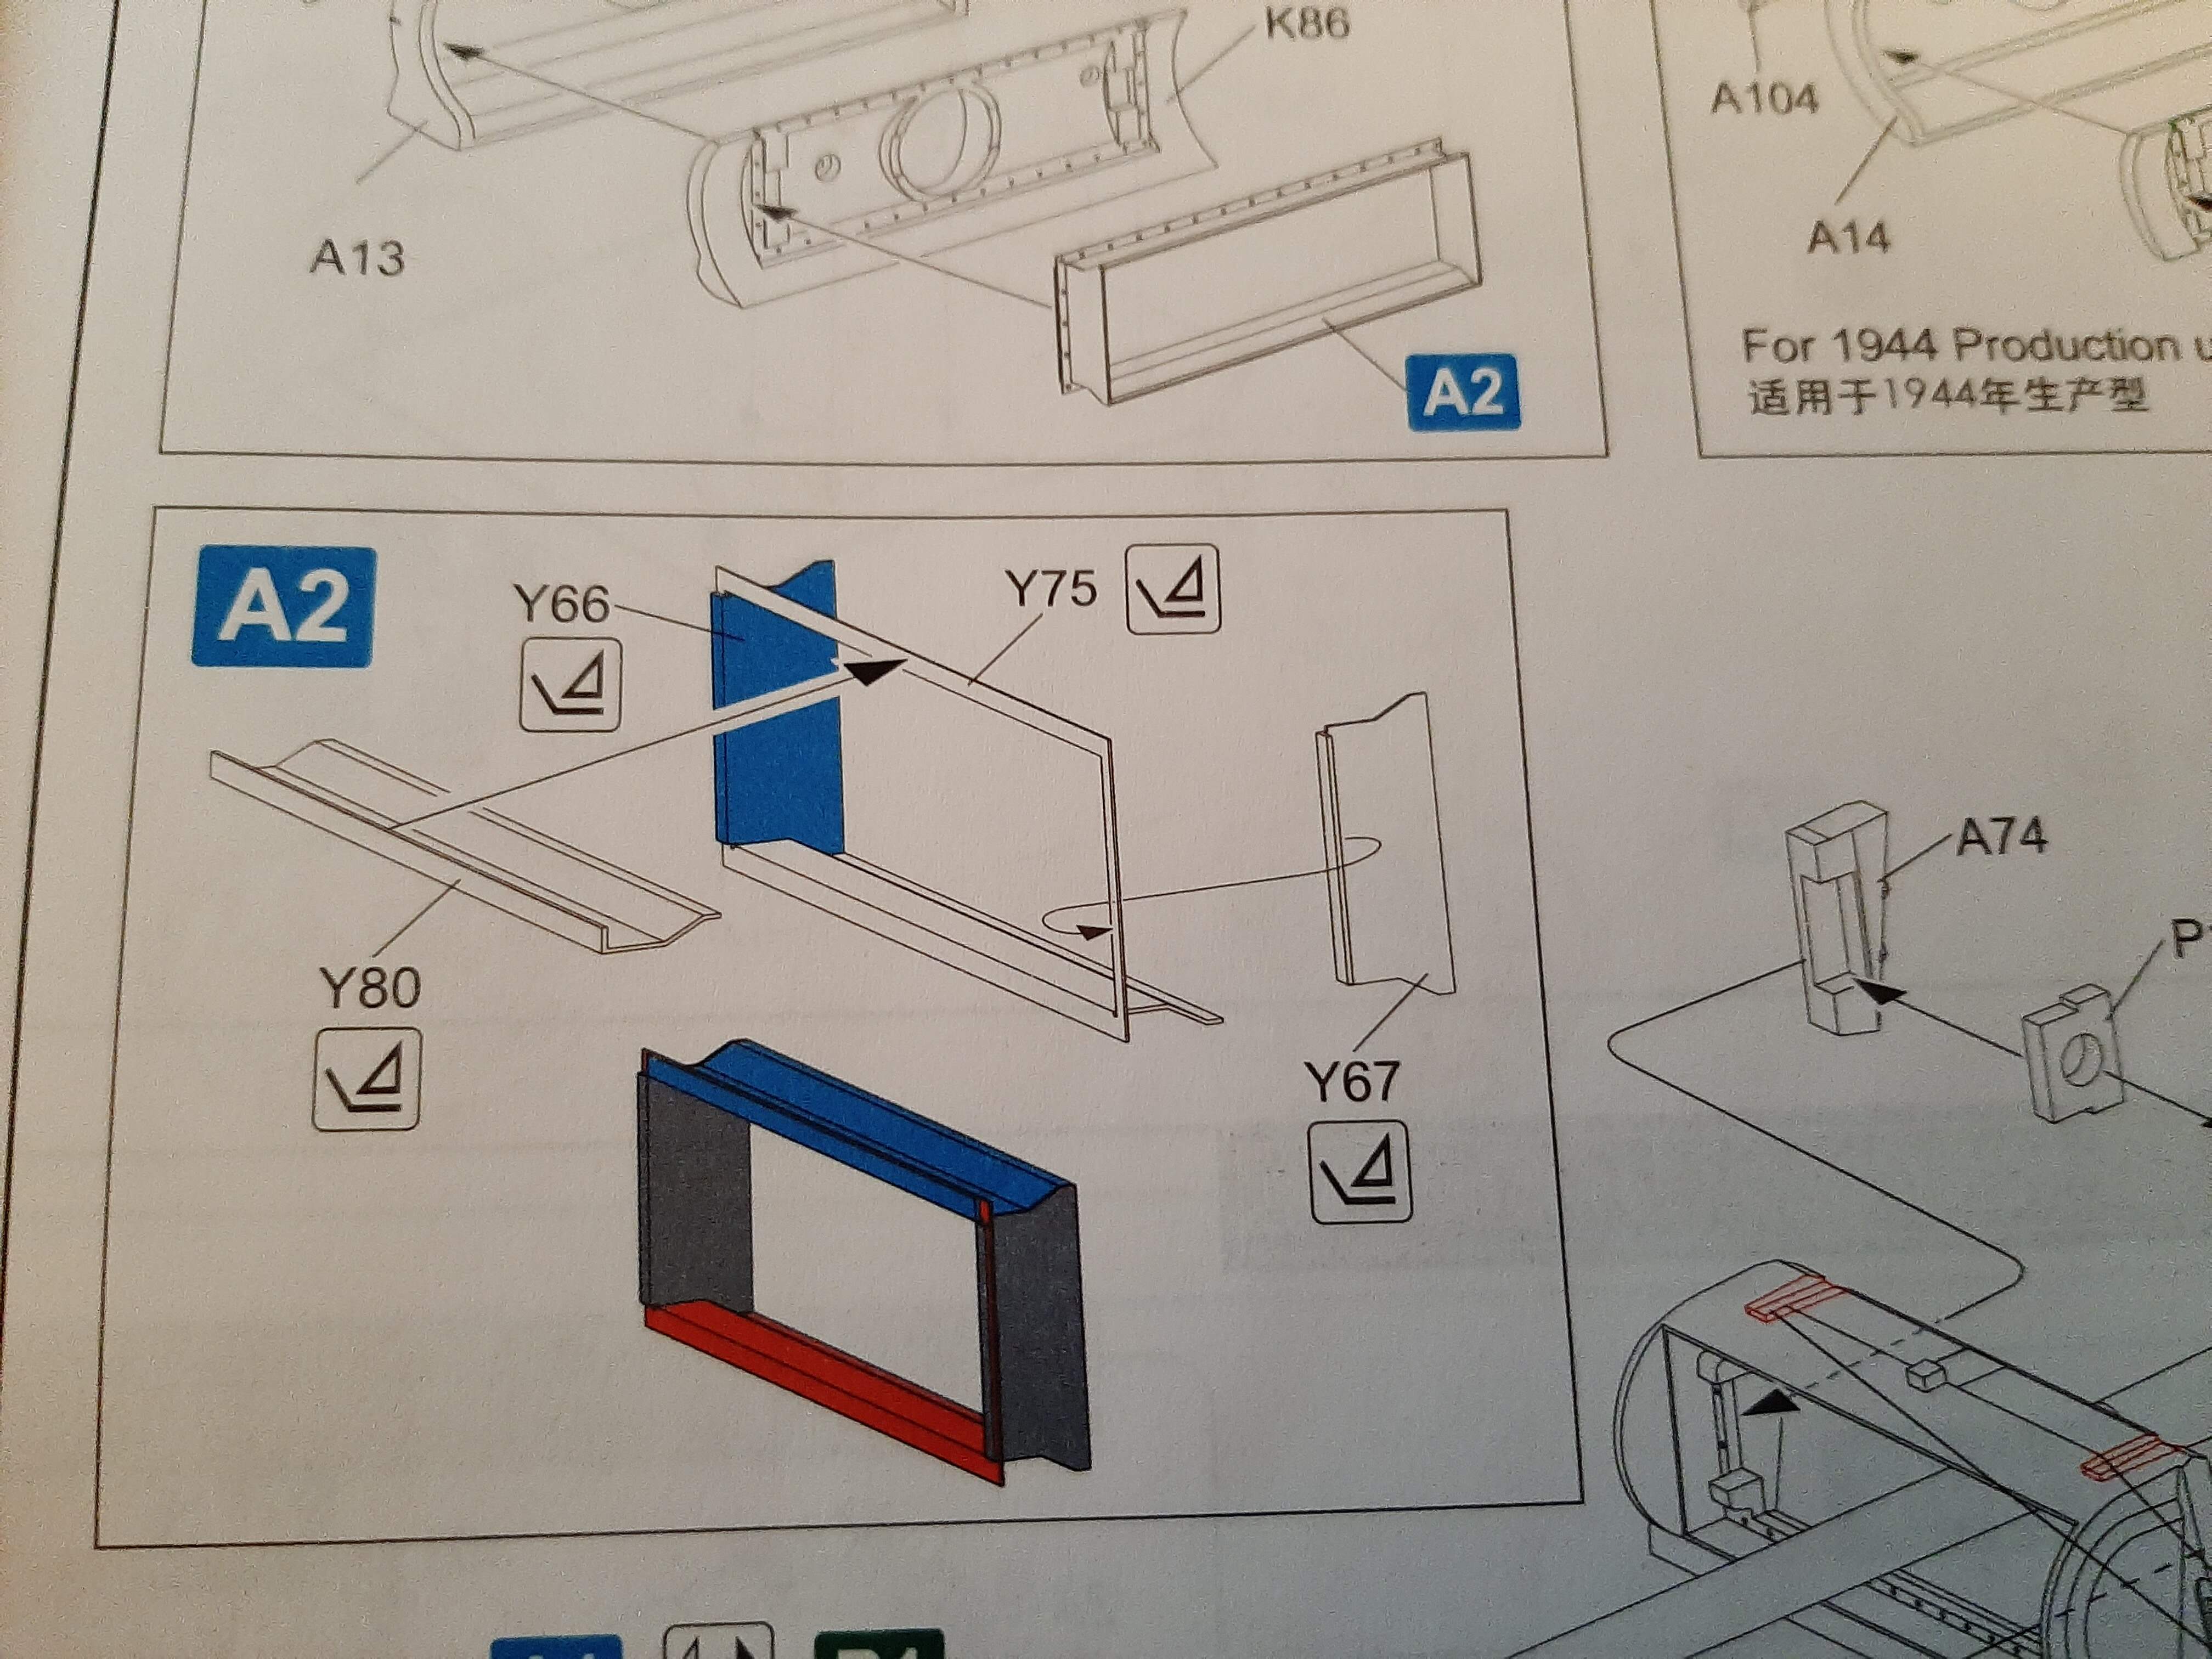
The amount of PE is not a problem, compared to some kits, it doesn’t have a huge amount. But, I just wish it had been made of stronger stuff. Any modeller will be able to decide what they want to use and what they want to discard. I understand that Takom do a similar kit (although it might be an Ausf A) and they used sprue parts where RFM have used PE. So far, I have used the PE where I thought it absolutely necessary. A very good example of where PE is used, where some might say it isn’t needed, is the inner mantlet waterproofing guard in Sub-Build A2. I spent hours trying to bend and attach these ridiculously flimsy pieces of PE into shape, only to realise that after assembly, its invisible. The only time you’d use something like this is if you were using the kit in a diorama that depicted a removed gun for example.
I’ve got this kit also and will be following you closely. One comment: Next time try using model ship chain. It comes in much smaller sizes. You are doing an amazing job on it so far!
Can’t supply a picture I’m afraid, but the description of the spent shell case box came from M & G Green “Panther: Germany’s Quest for Combat Dominance”. The box had two sprung flaps which opened when impacted by the spent case. The case itself, on ejection from the breech hit a sprung clip on the rear of the breech guard which delayed its fall sufficiently to ensure it went into the box open mouth first. This and the extraction tube from the box, which was linked to the turret extractor fan, reduced the amount of spent gases which escaped into the turret with each firing. Unfortunately, the box only took six shell cases, so presumably if you got caught up in an extended fight (not unknown on the Eastern Front!) you ended up with cases all over the floor.
Appreciate that information. It did occur to me that the box wouldn’t hold many casings, presumably they simply threw them out of the loader’s hatch if things got too busy.
In any case, it seems the kit is fairly accurate in this respect, so i’m quite pleased about that.
Thanks, I appreciate your feedback. I did look at model ship chain, but could I find anywhere in the UK selling the stuff where it wasn’t out of stock? Not a chance!
No doubt if I looked now, there would be piles of the stuff about.
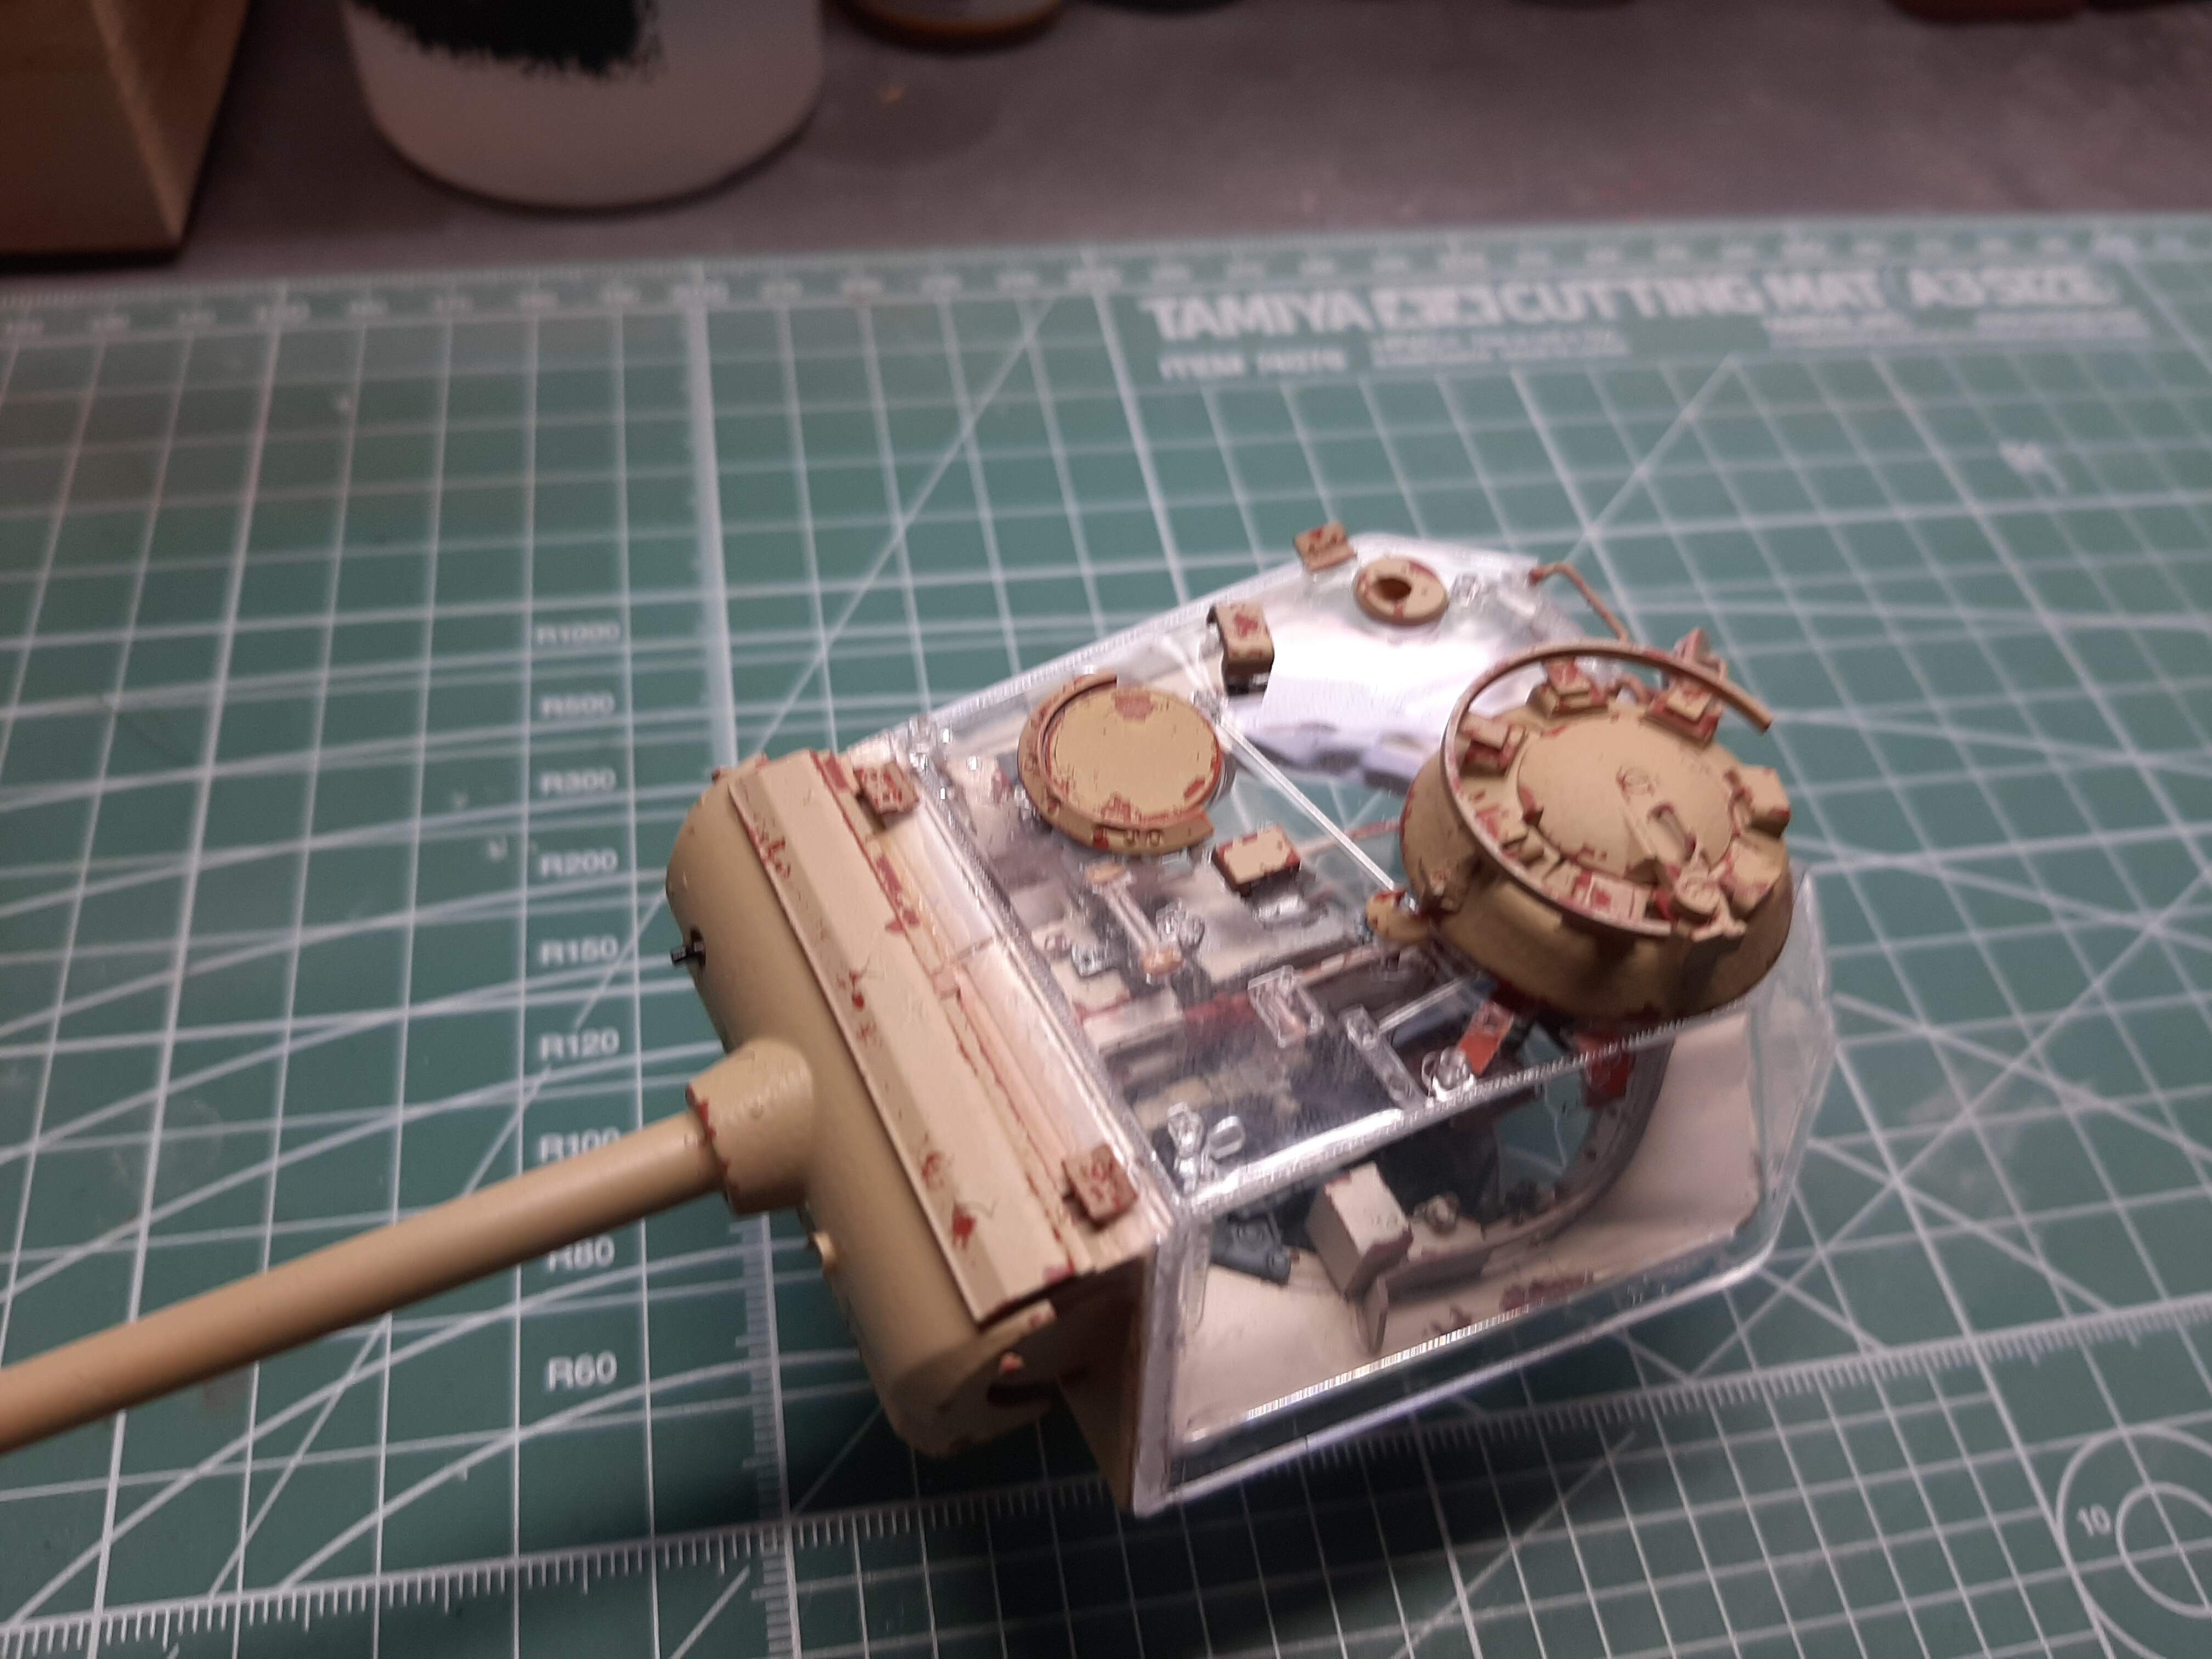
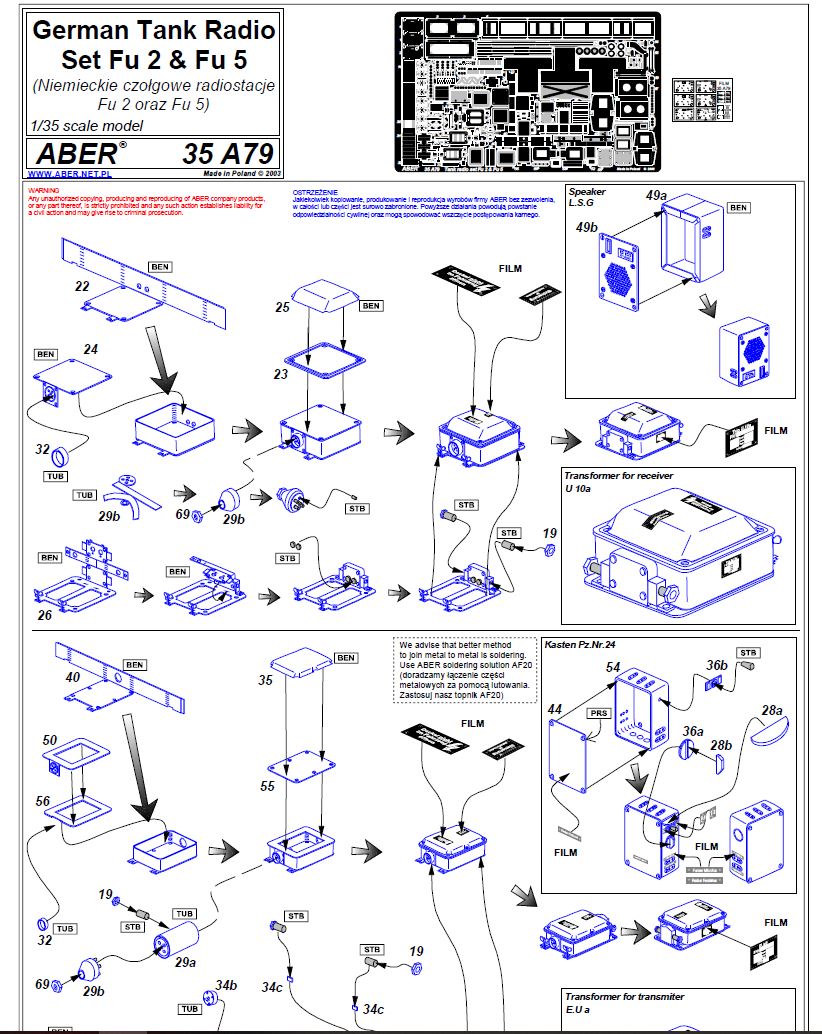
I have taken delivery of this rather spiffing German Tank Radio Set Fu 2 & Fu 5 for my build. The kit one is…okay, but lacks detail which is a bit annoying as the radio sets are highly visible through the clear upper hull, so i thought i’d invest in this.
Questions…
I need some clarification on the nomenclature used in the instructions:
BEN = ‘Bend’ (I get that)
TUB = ‘Tube’ (I think i get that too);
STB = ? I think it must be styrene rod or something like that?
Also, i’m considering soldering for the first time on a kit. Is it really worth it?
Anyway, this is just the first page, but you get the idea?
And, if you’re interested in some additional detail, the plate, J11, should have a short tube on its back side that slips into the hole for the MG on the ball mount. (Could be molded on, though, and not visible in the instruction drawing?)