The tube is there on the Panther A kit.
1 Like
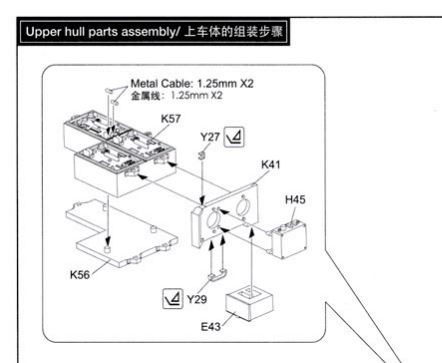
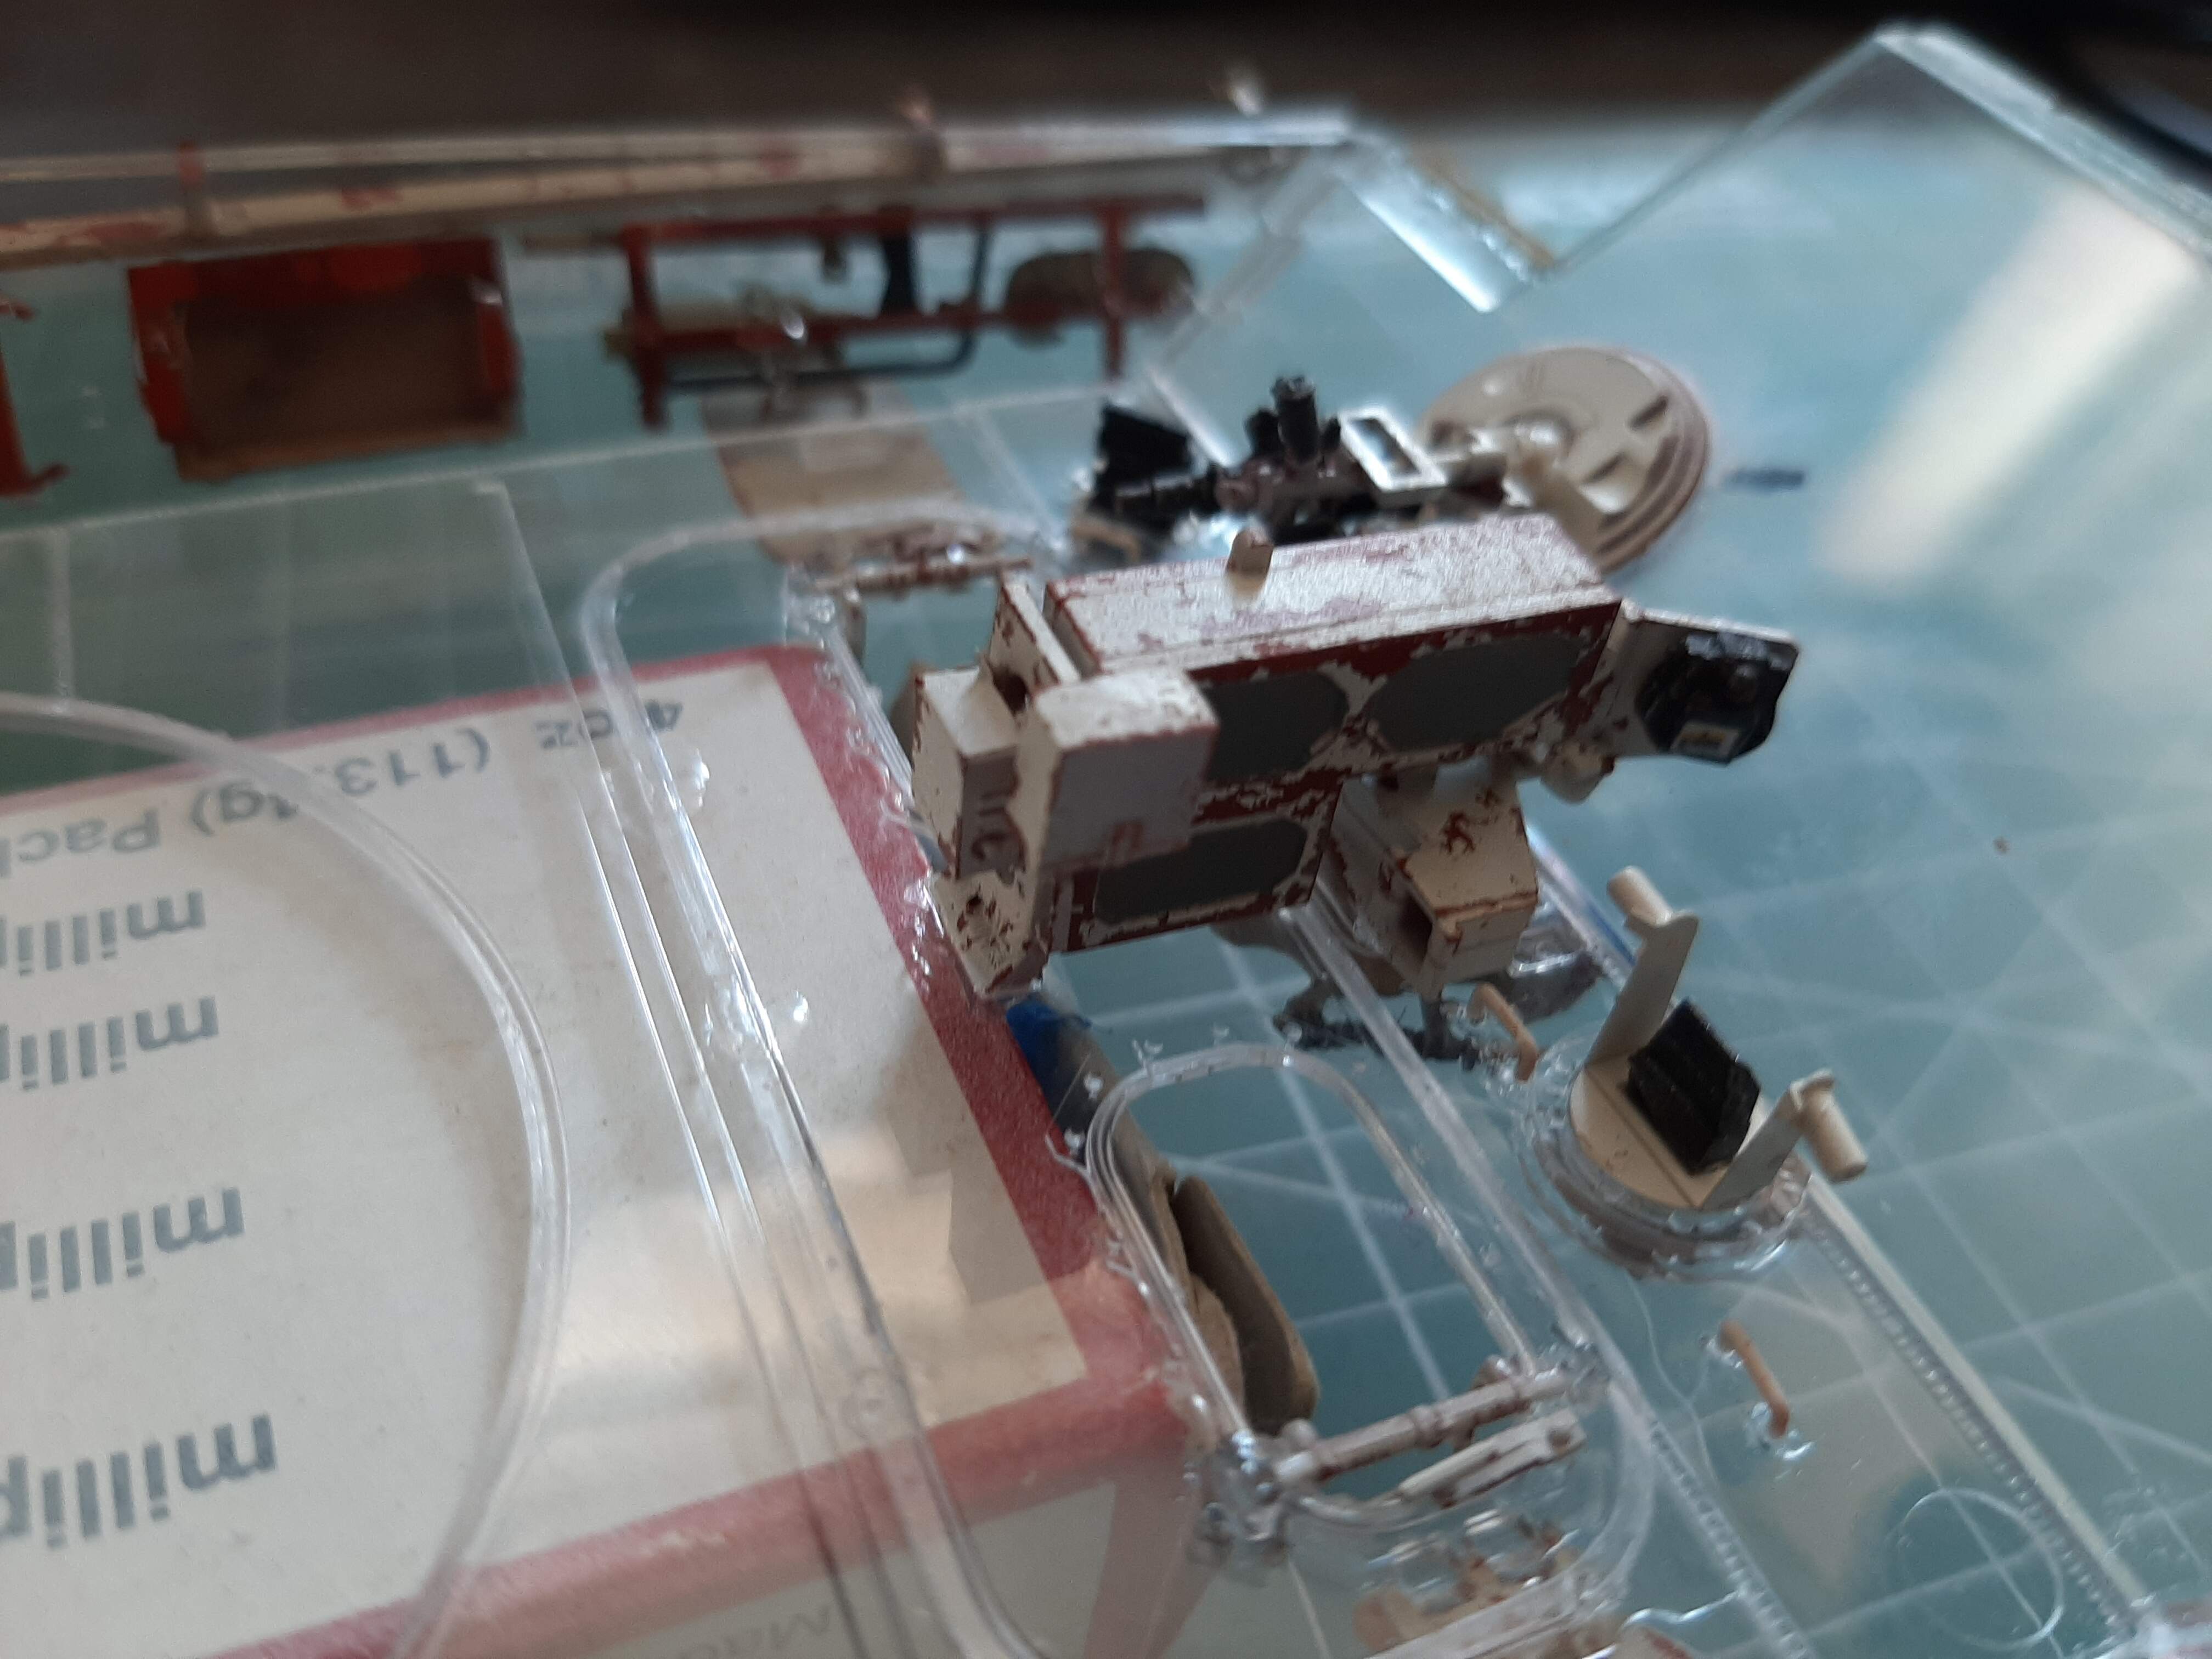
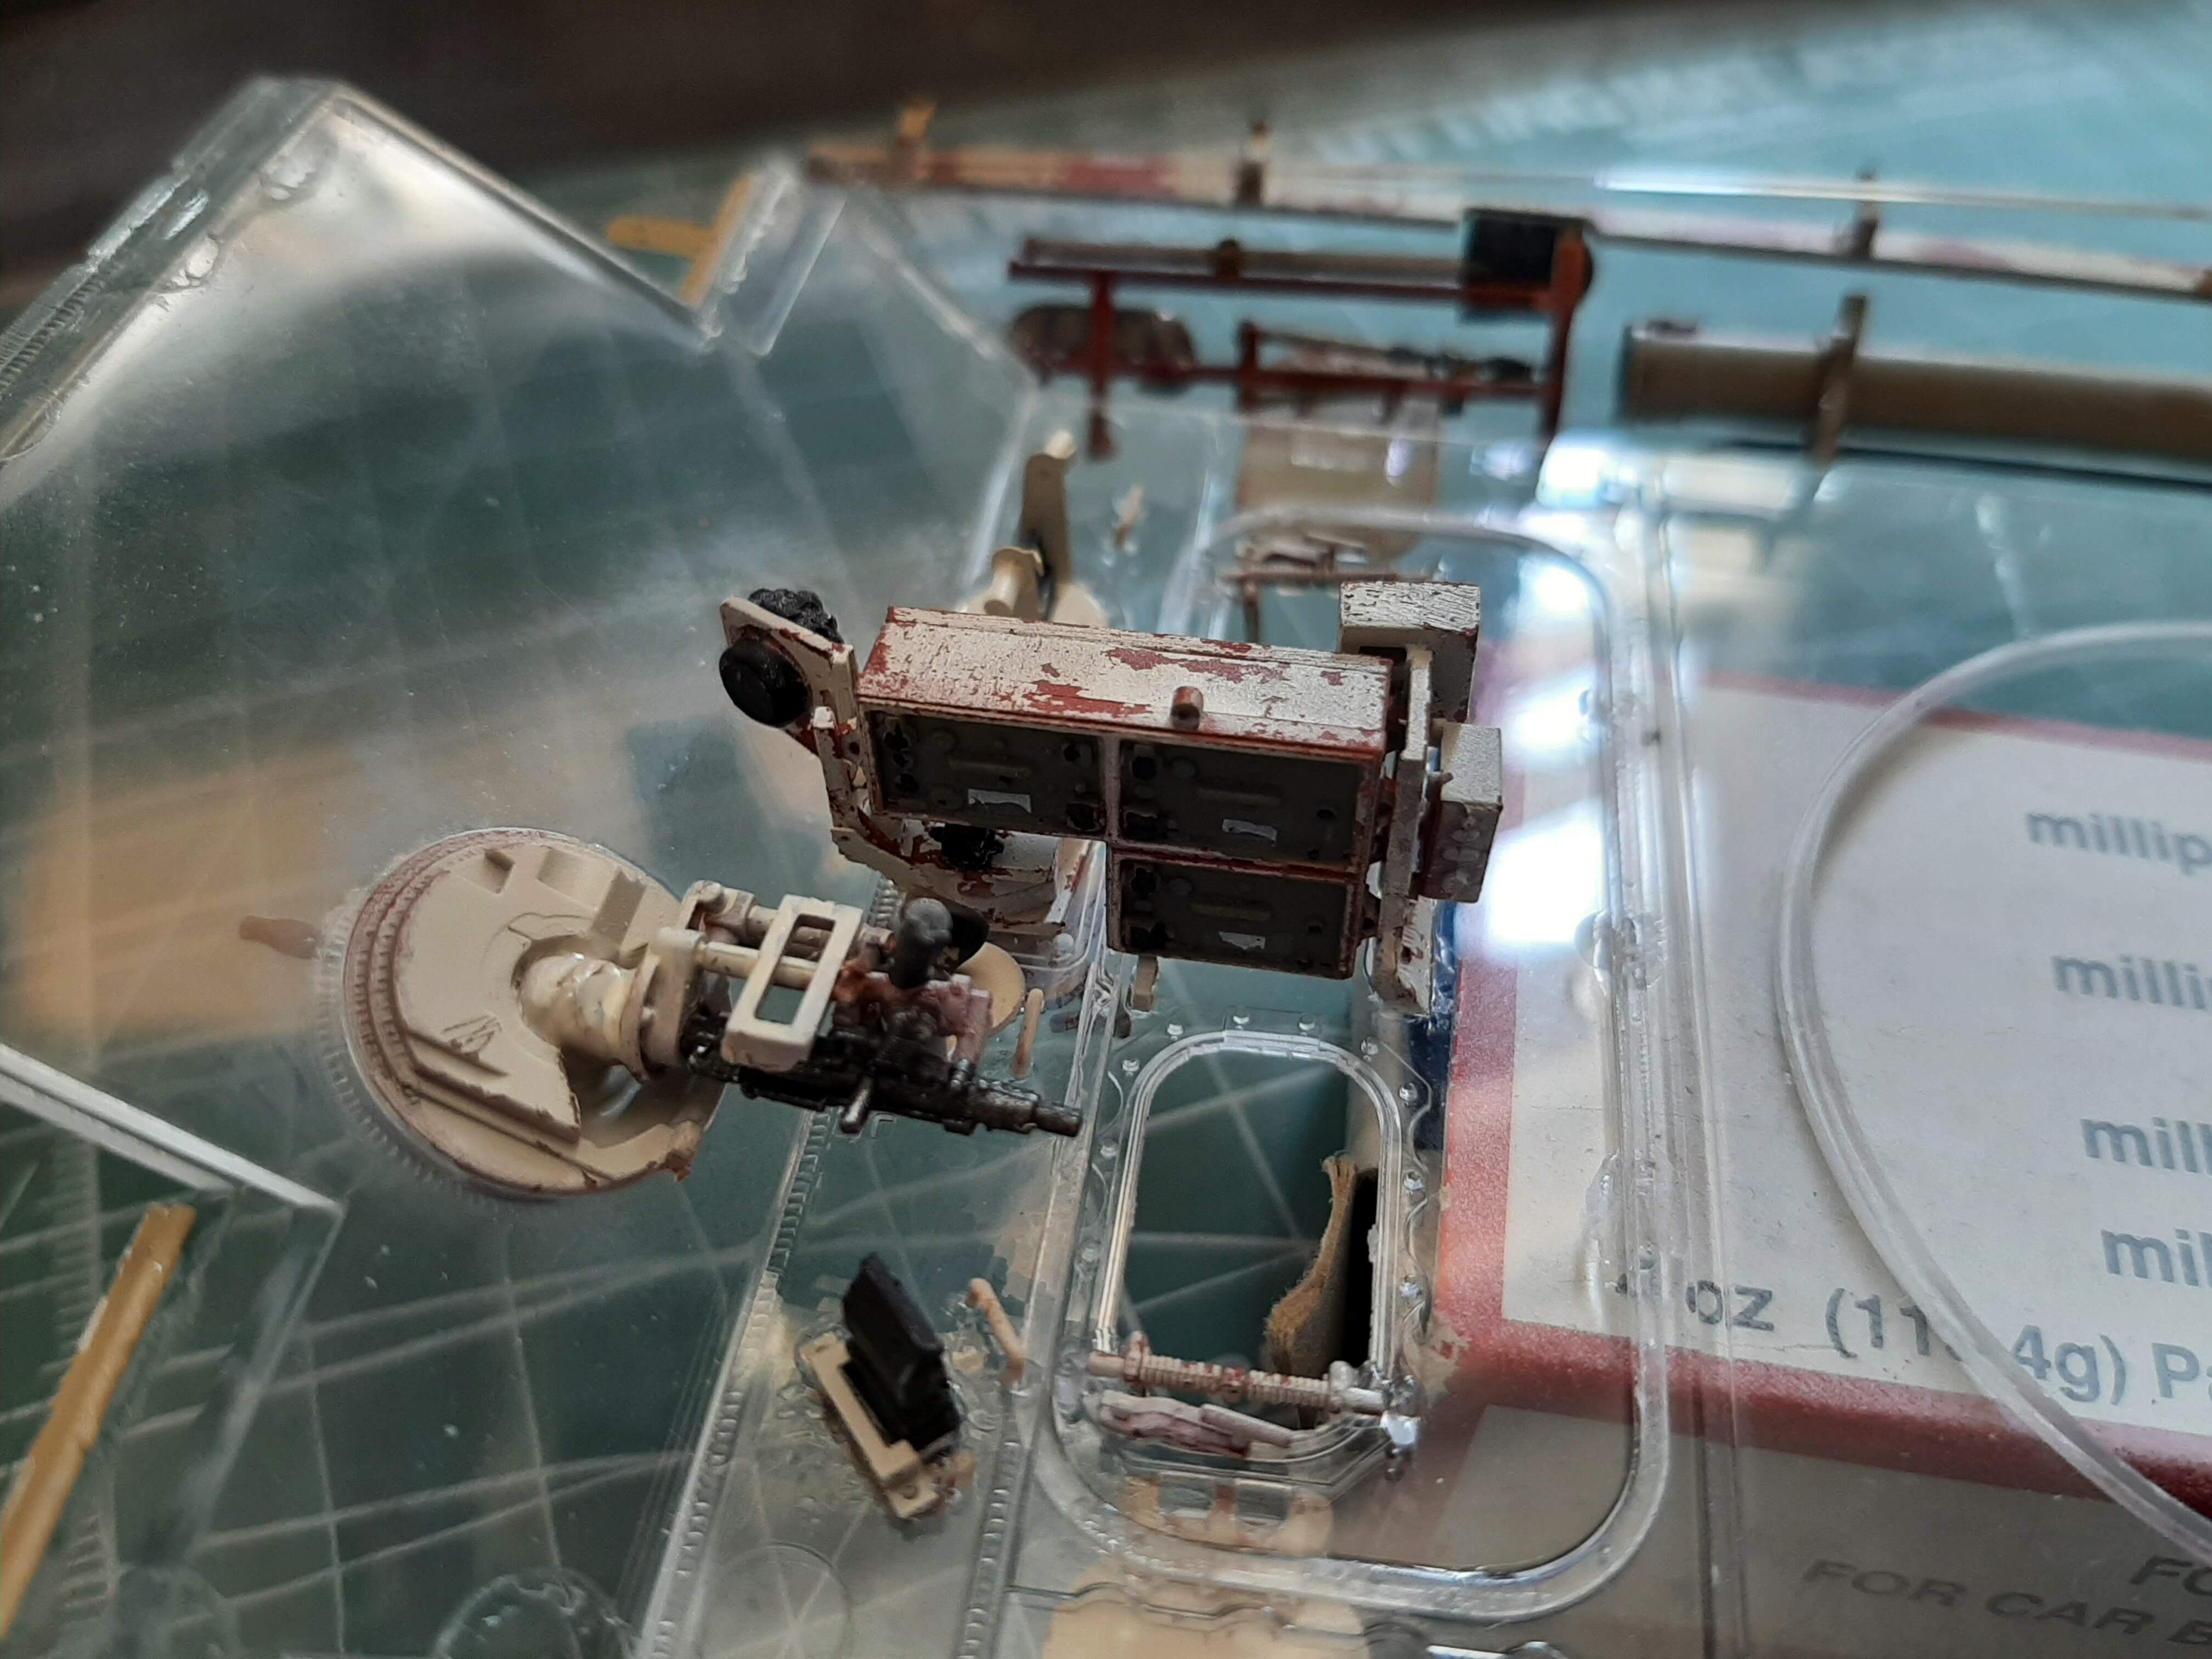
Not much progress, but not for lack of effort. Work begins on the interior of the upper hull now. Namely the gyro-compass mount and hull machine gun assembly.
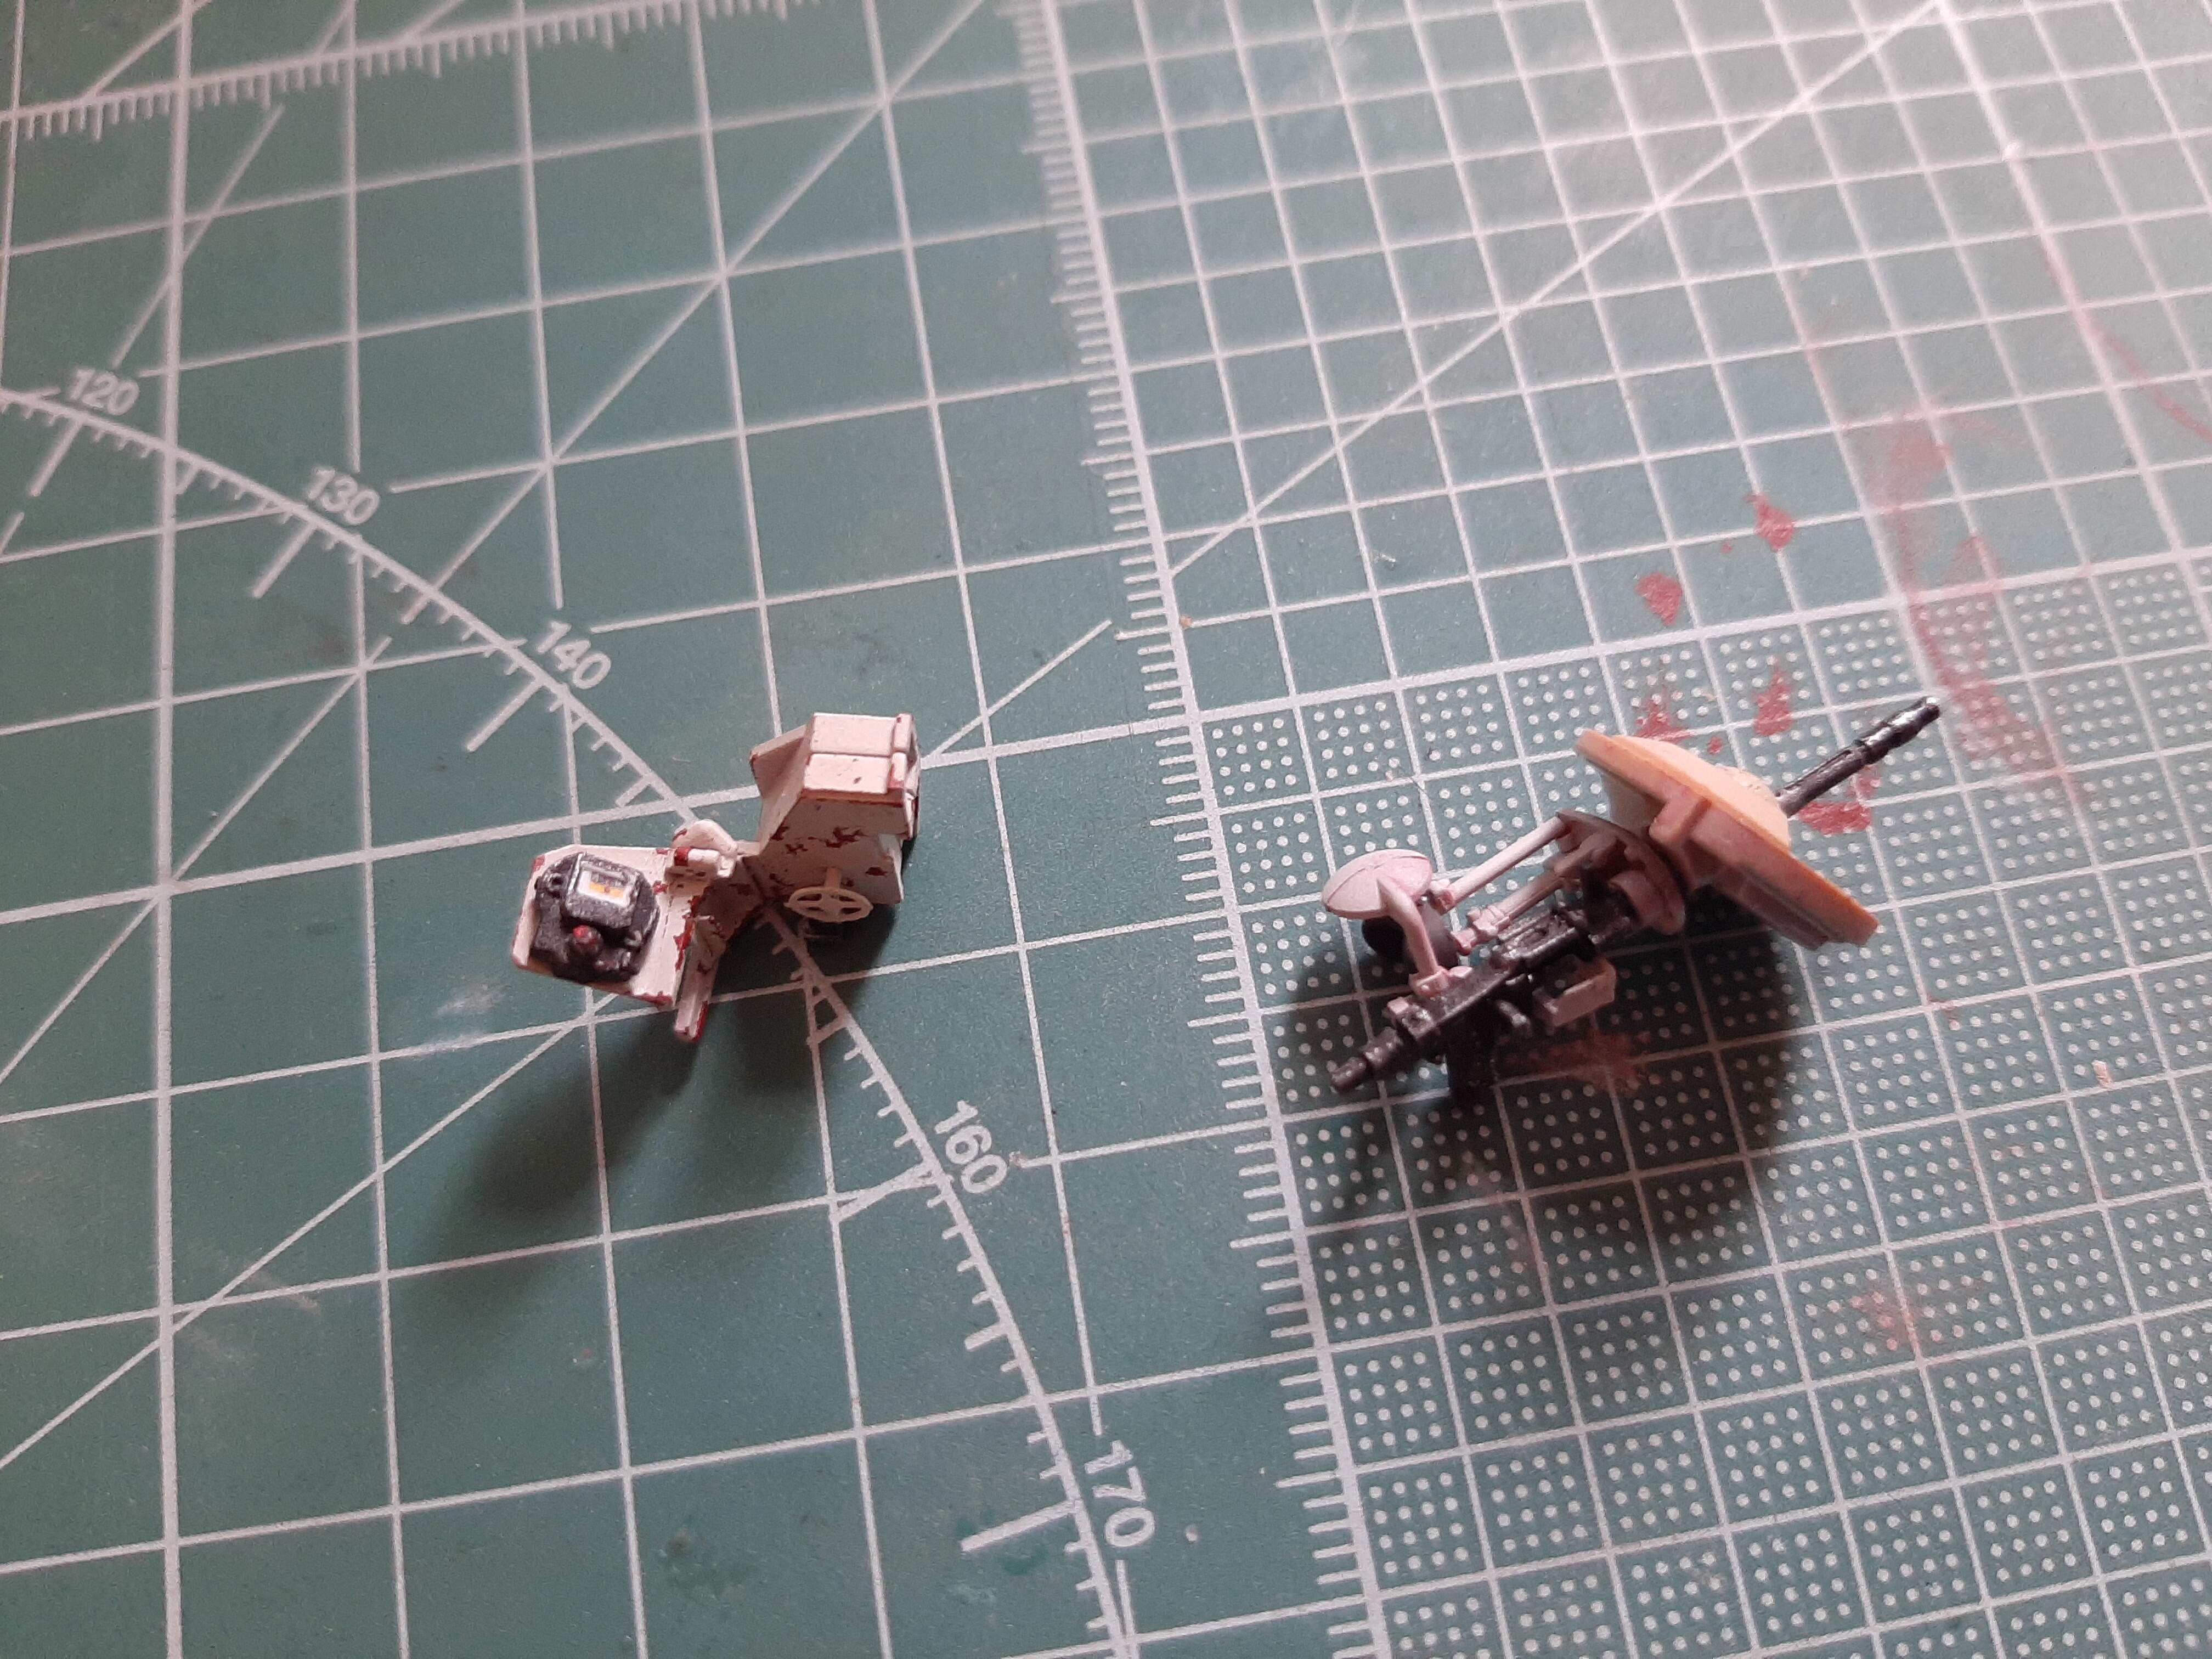
The Fu2 & 5 Radio mount are surprisingly superficial for a kit showing interior detail, particularly as the radio sets are highly visible through the hull roof. So, I invested in this bad boy…
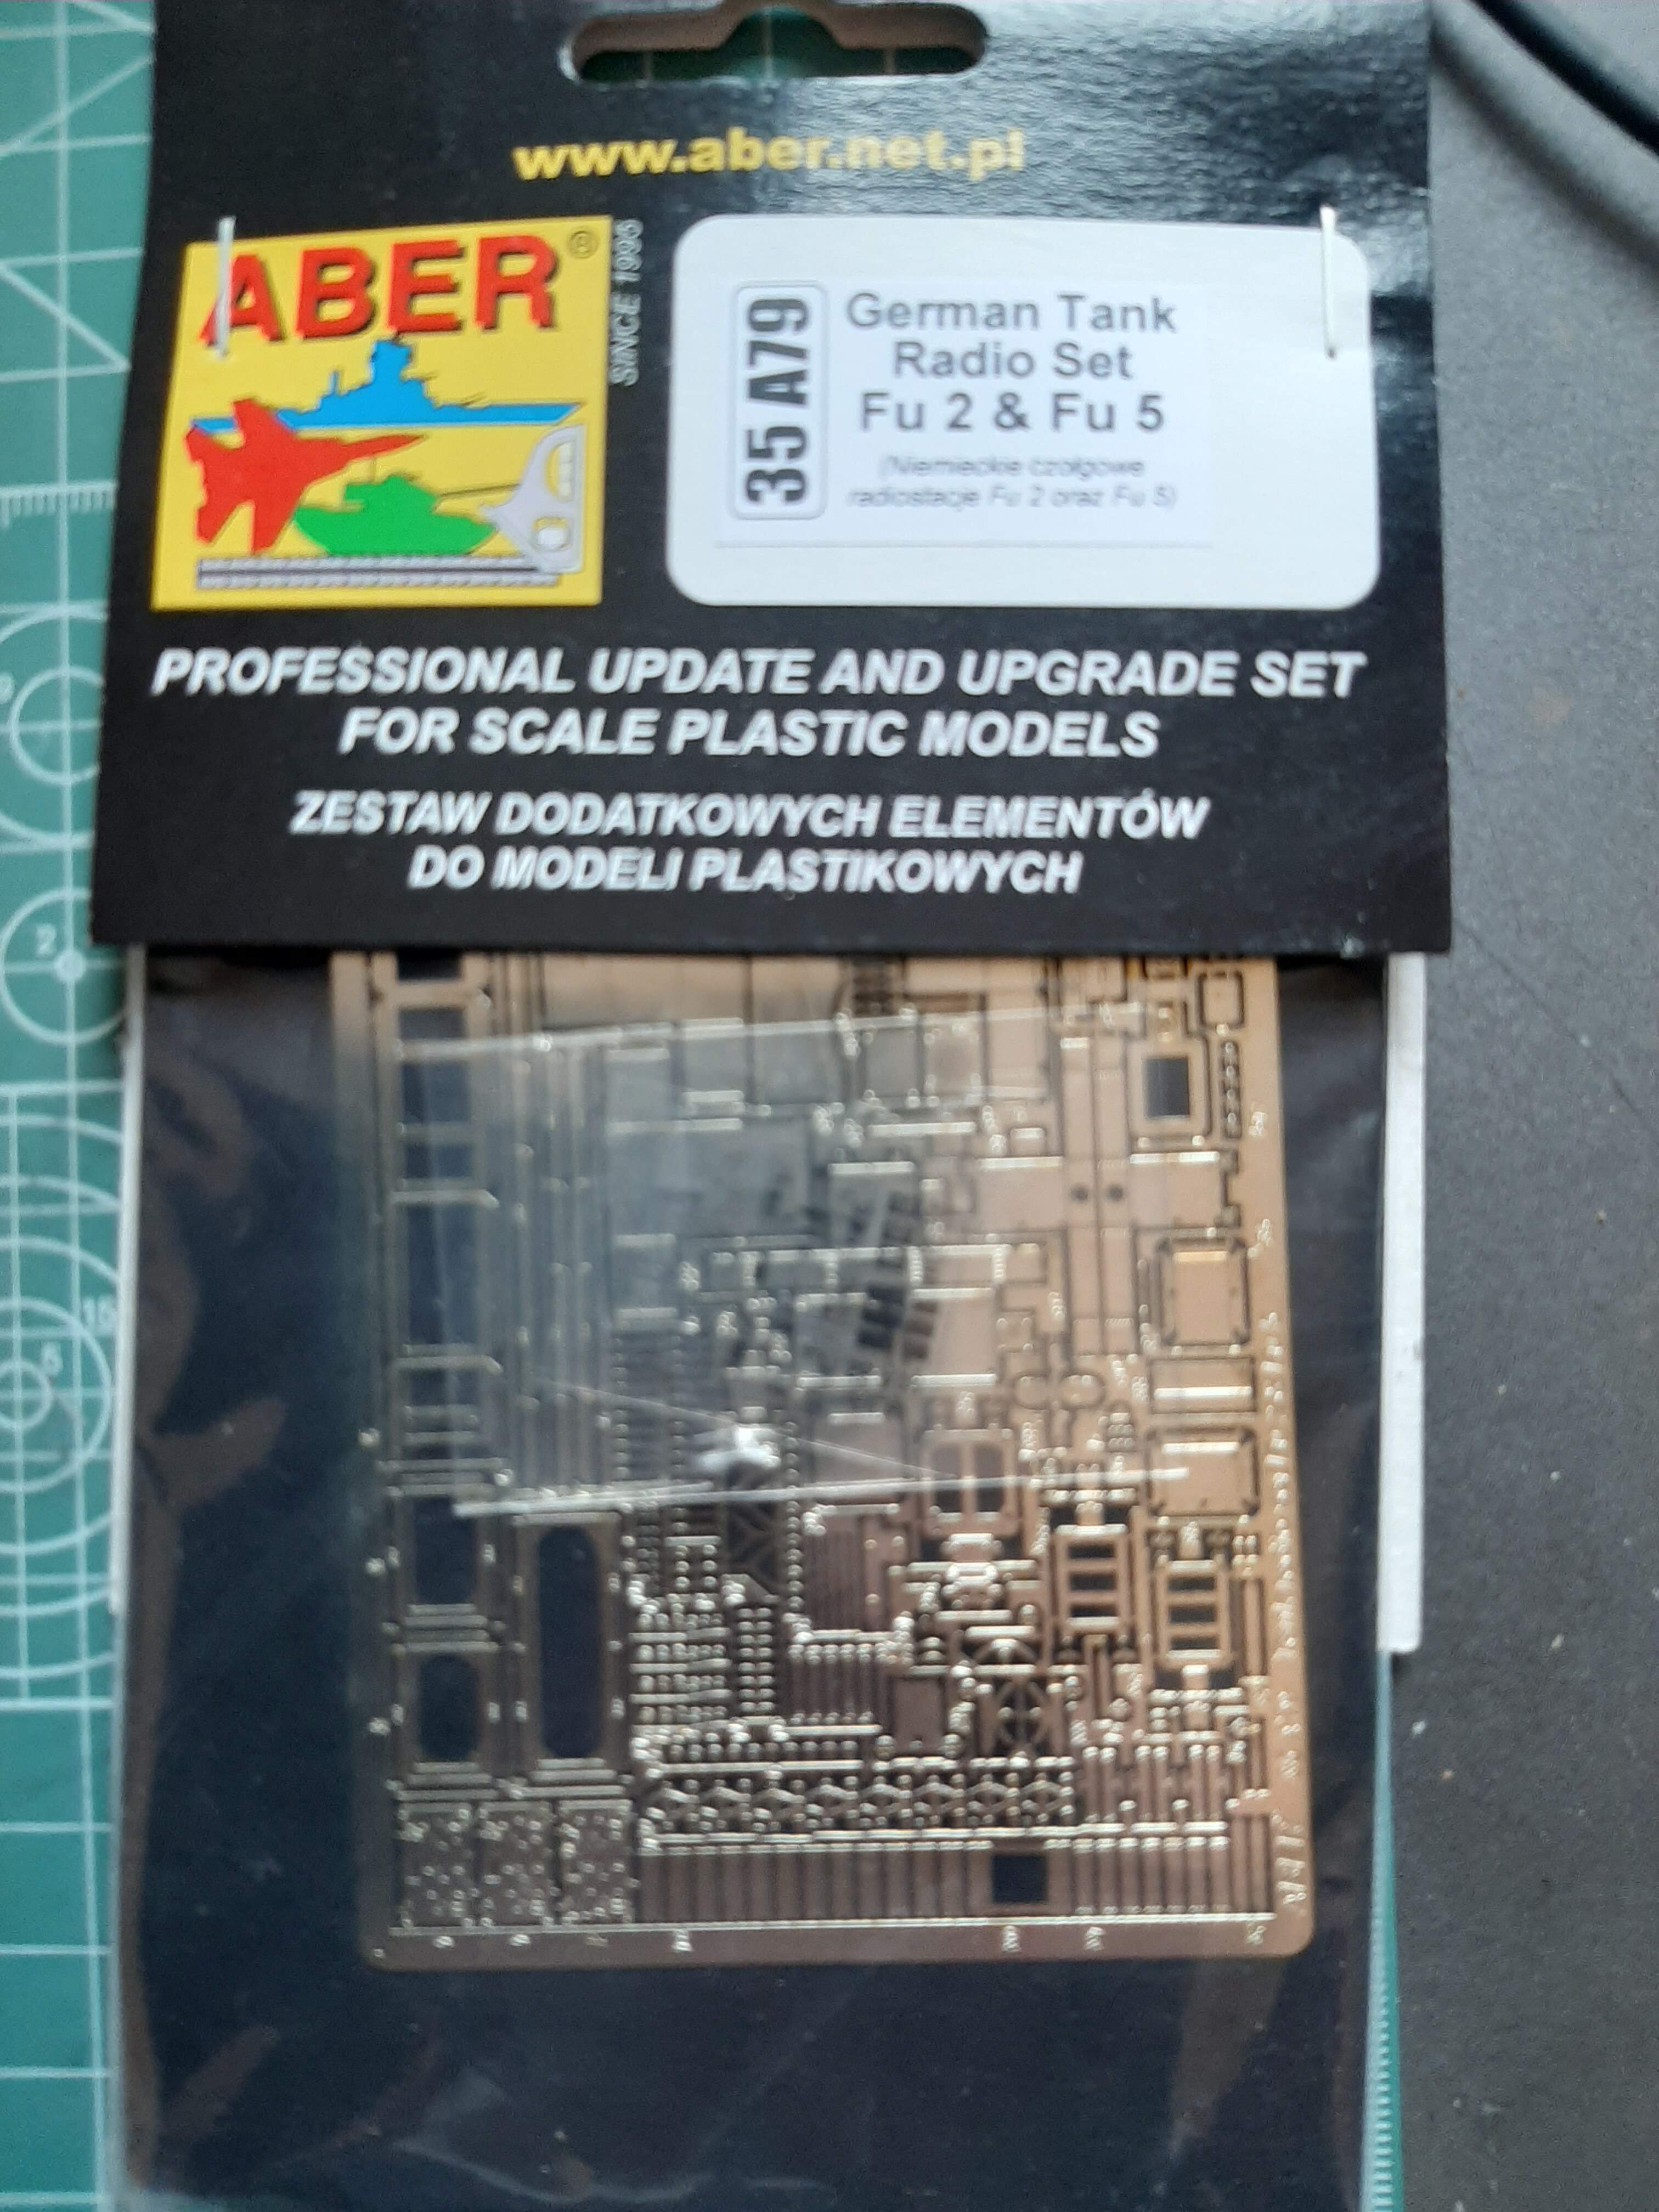
The radios are going to be alot of work in their own right, but worth it I think.
2 Likes
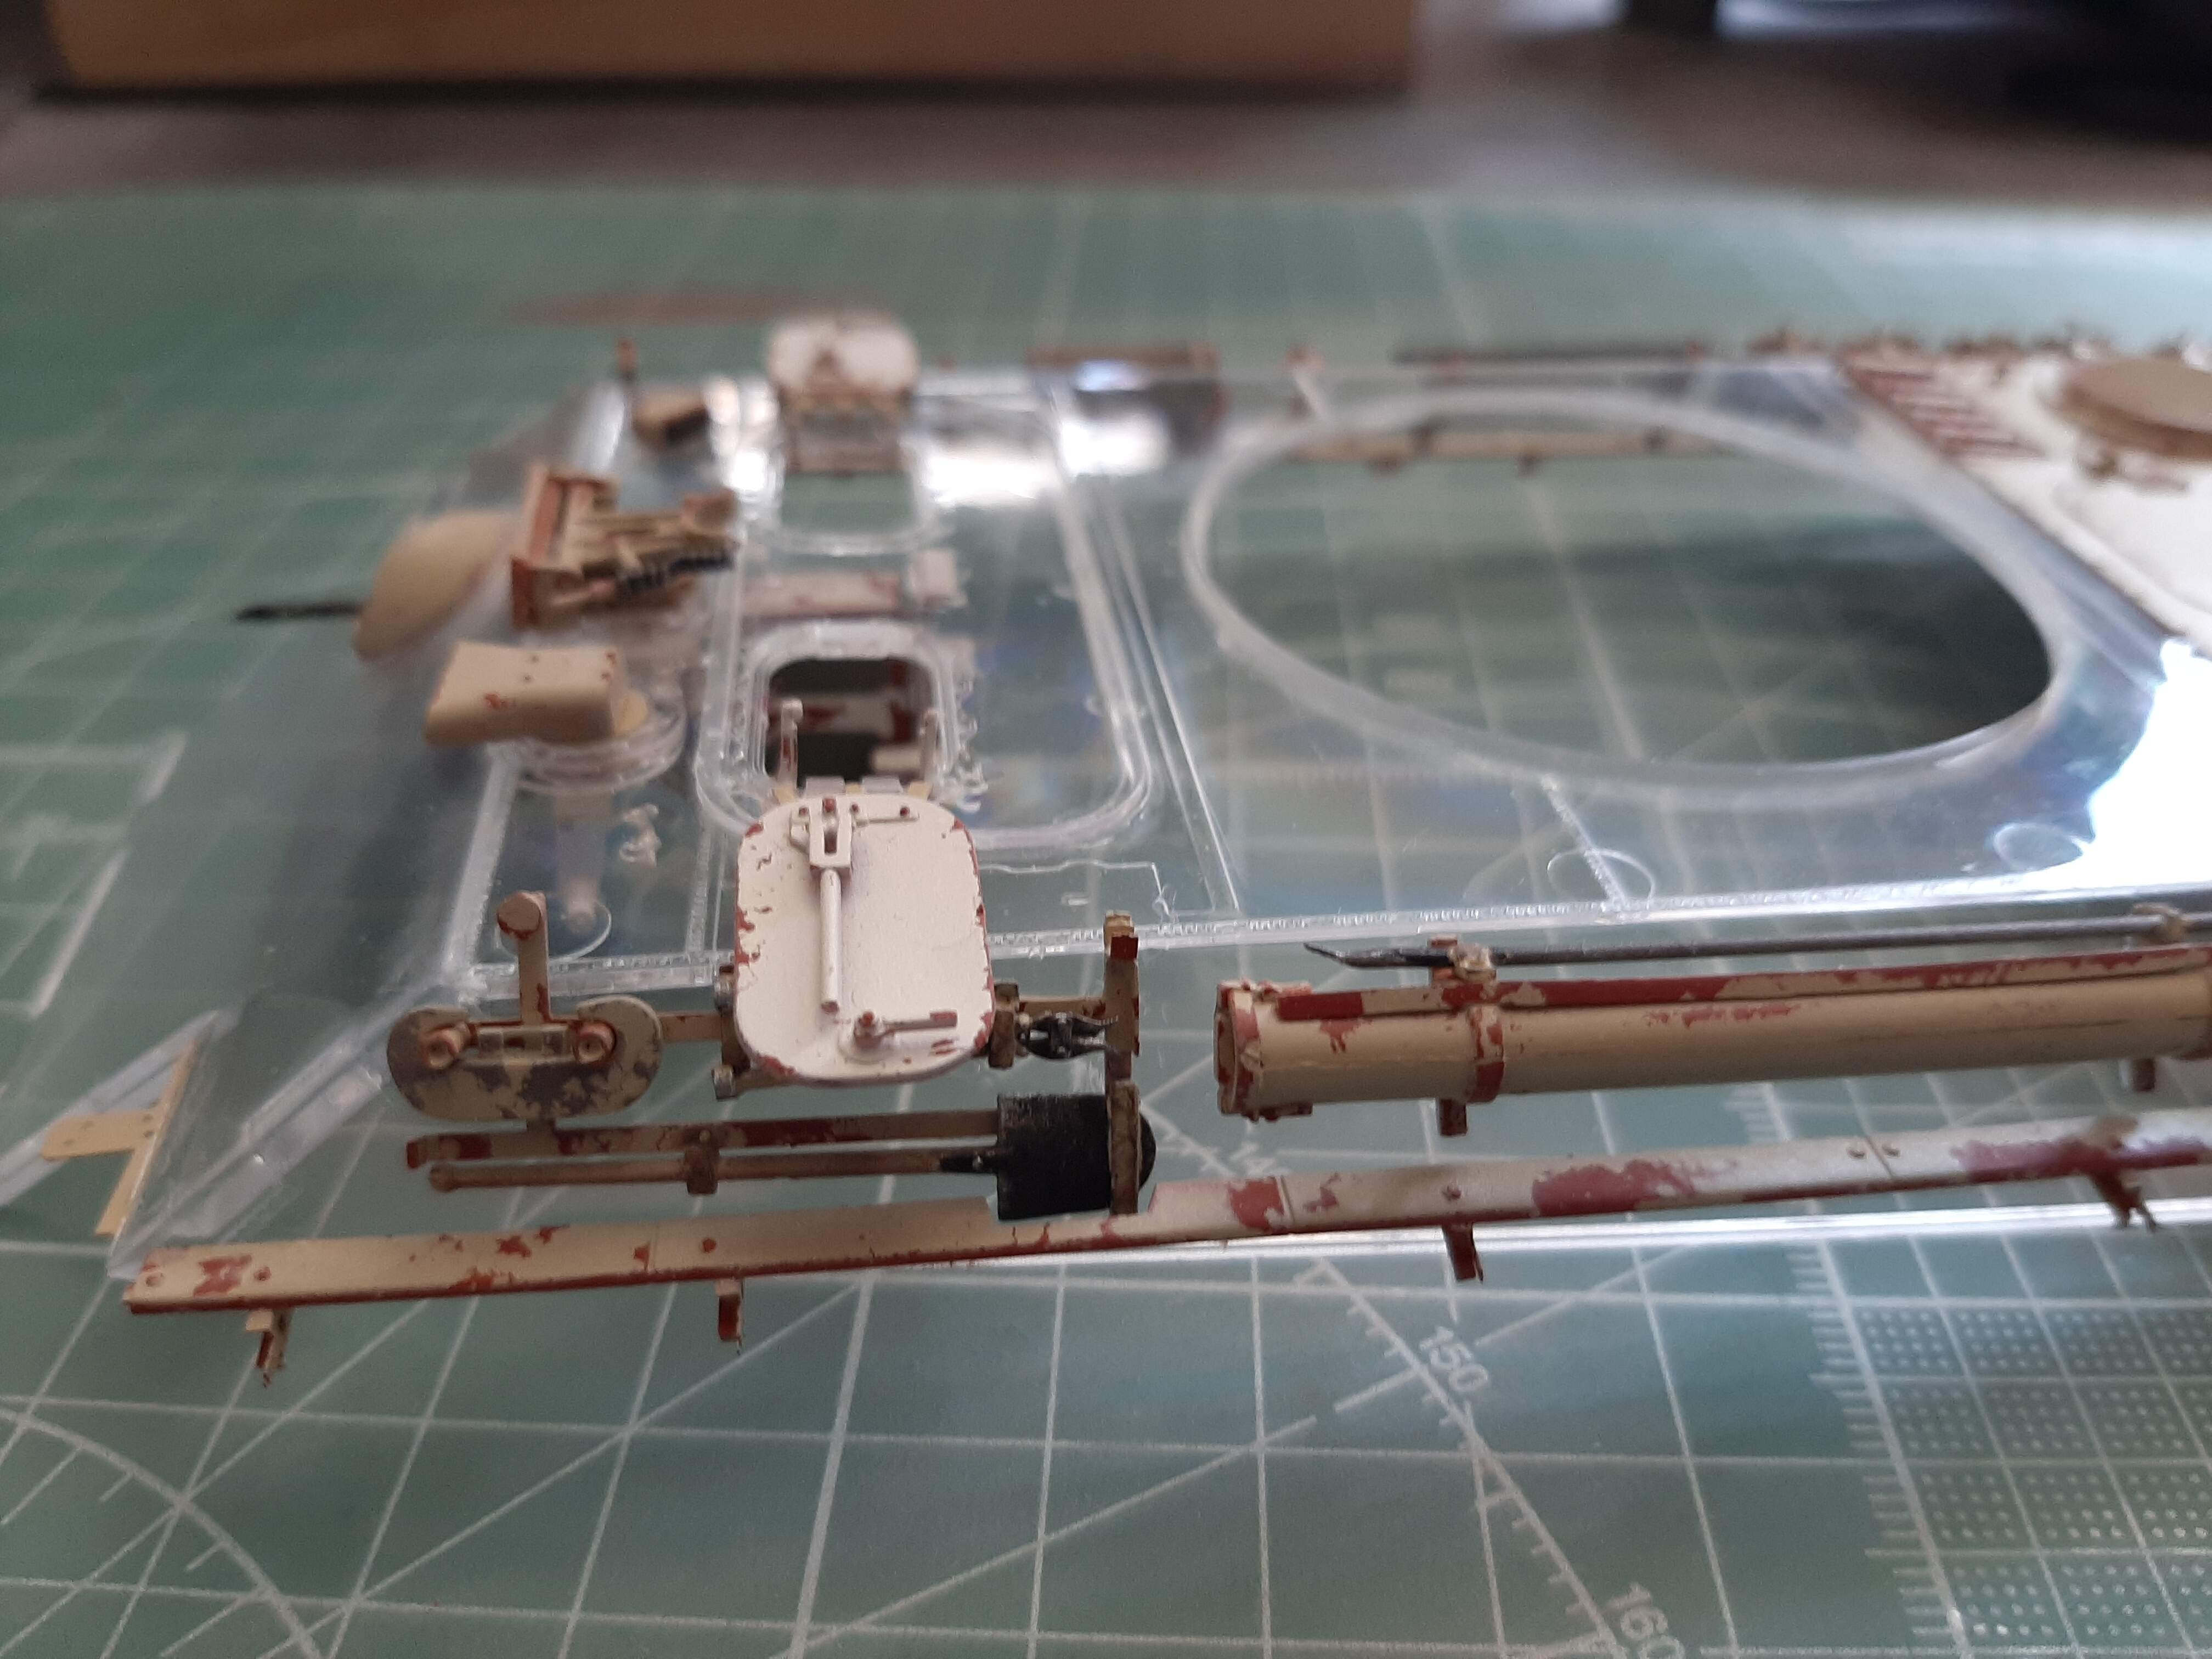
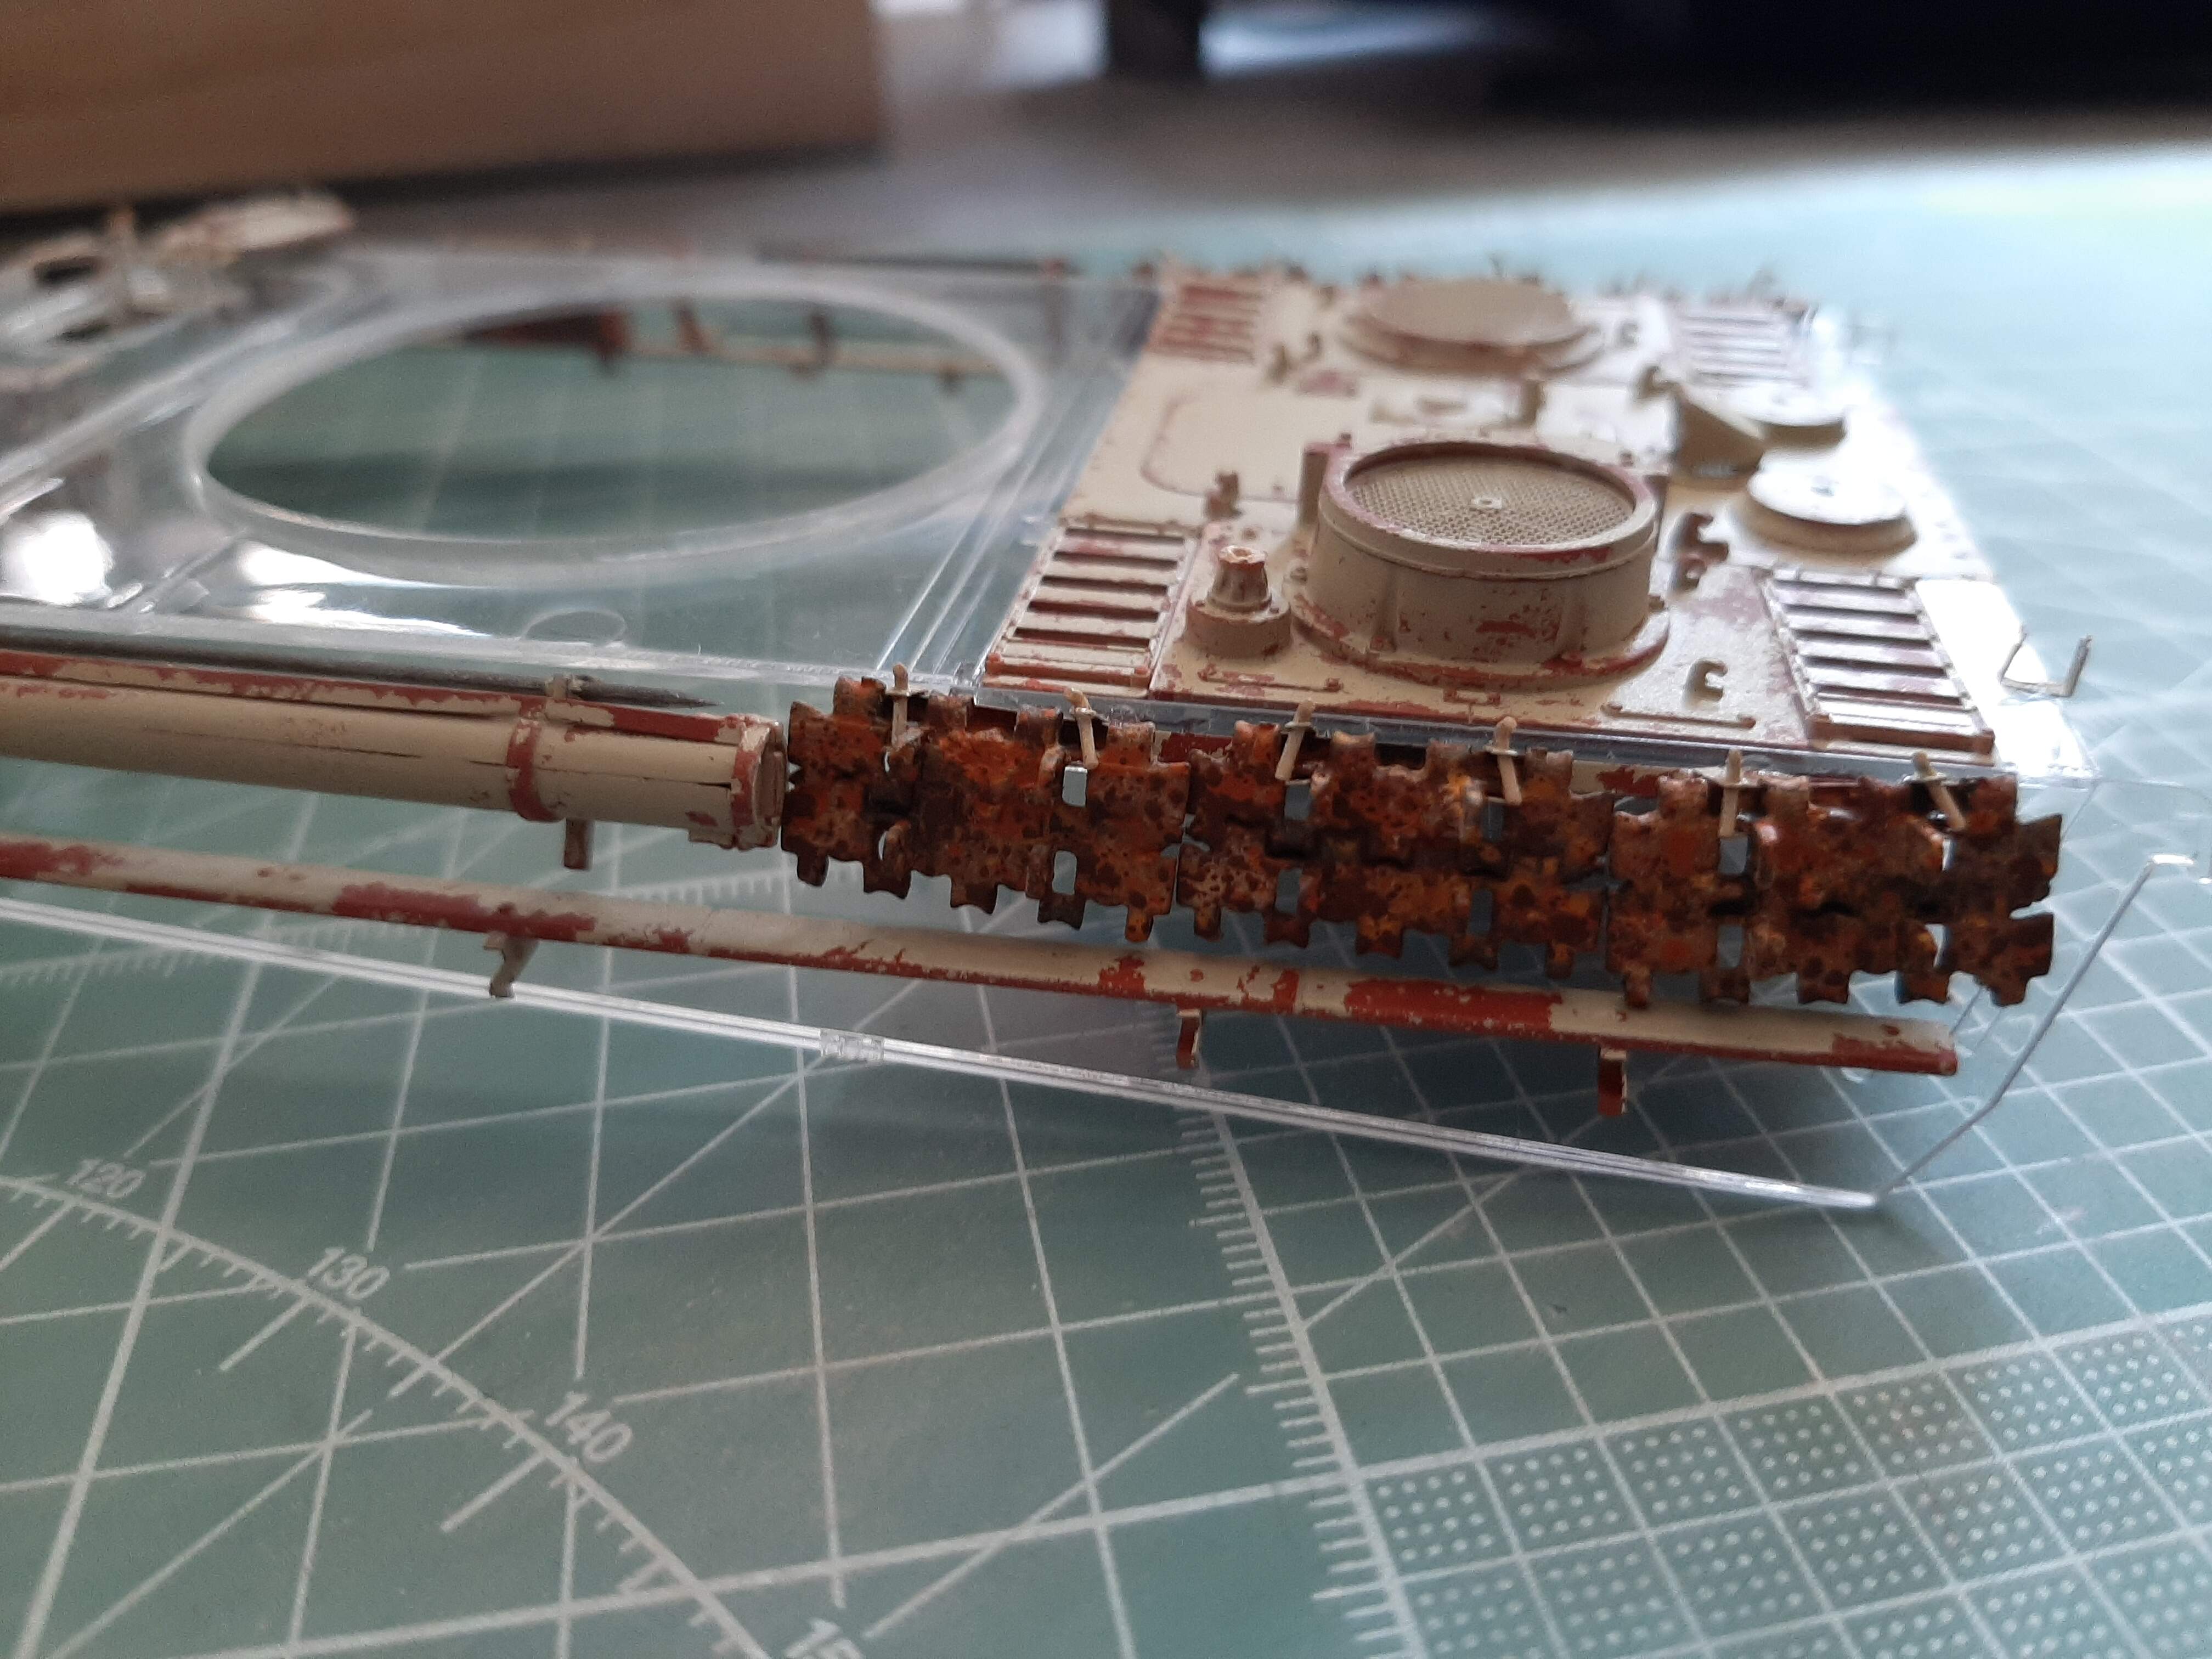
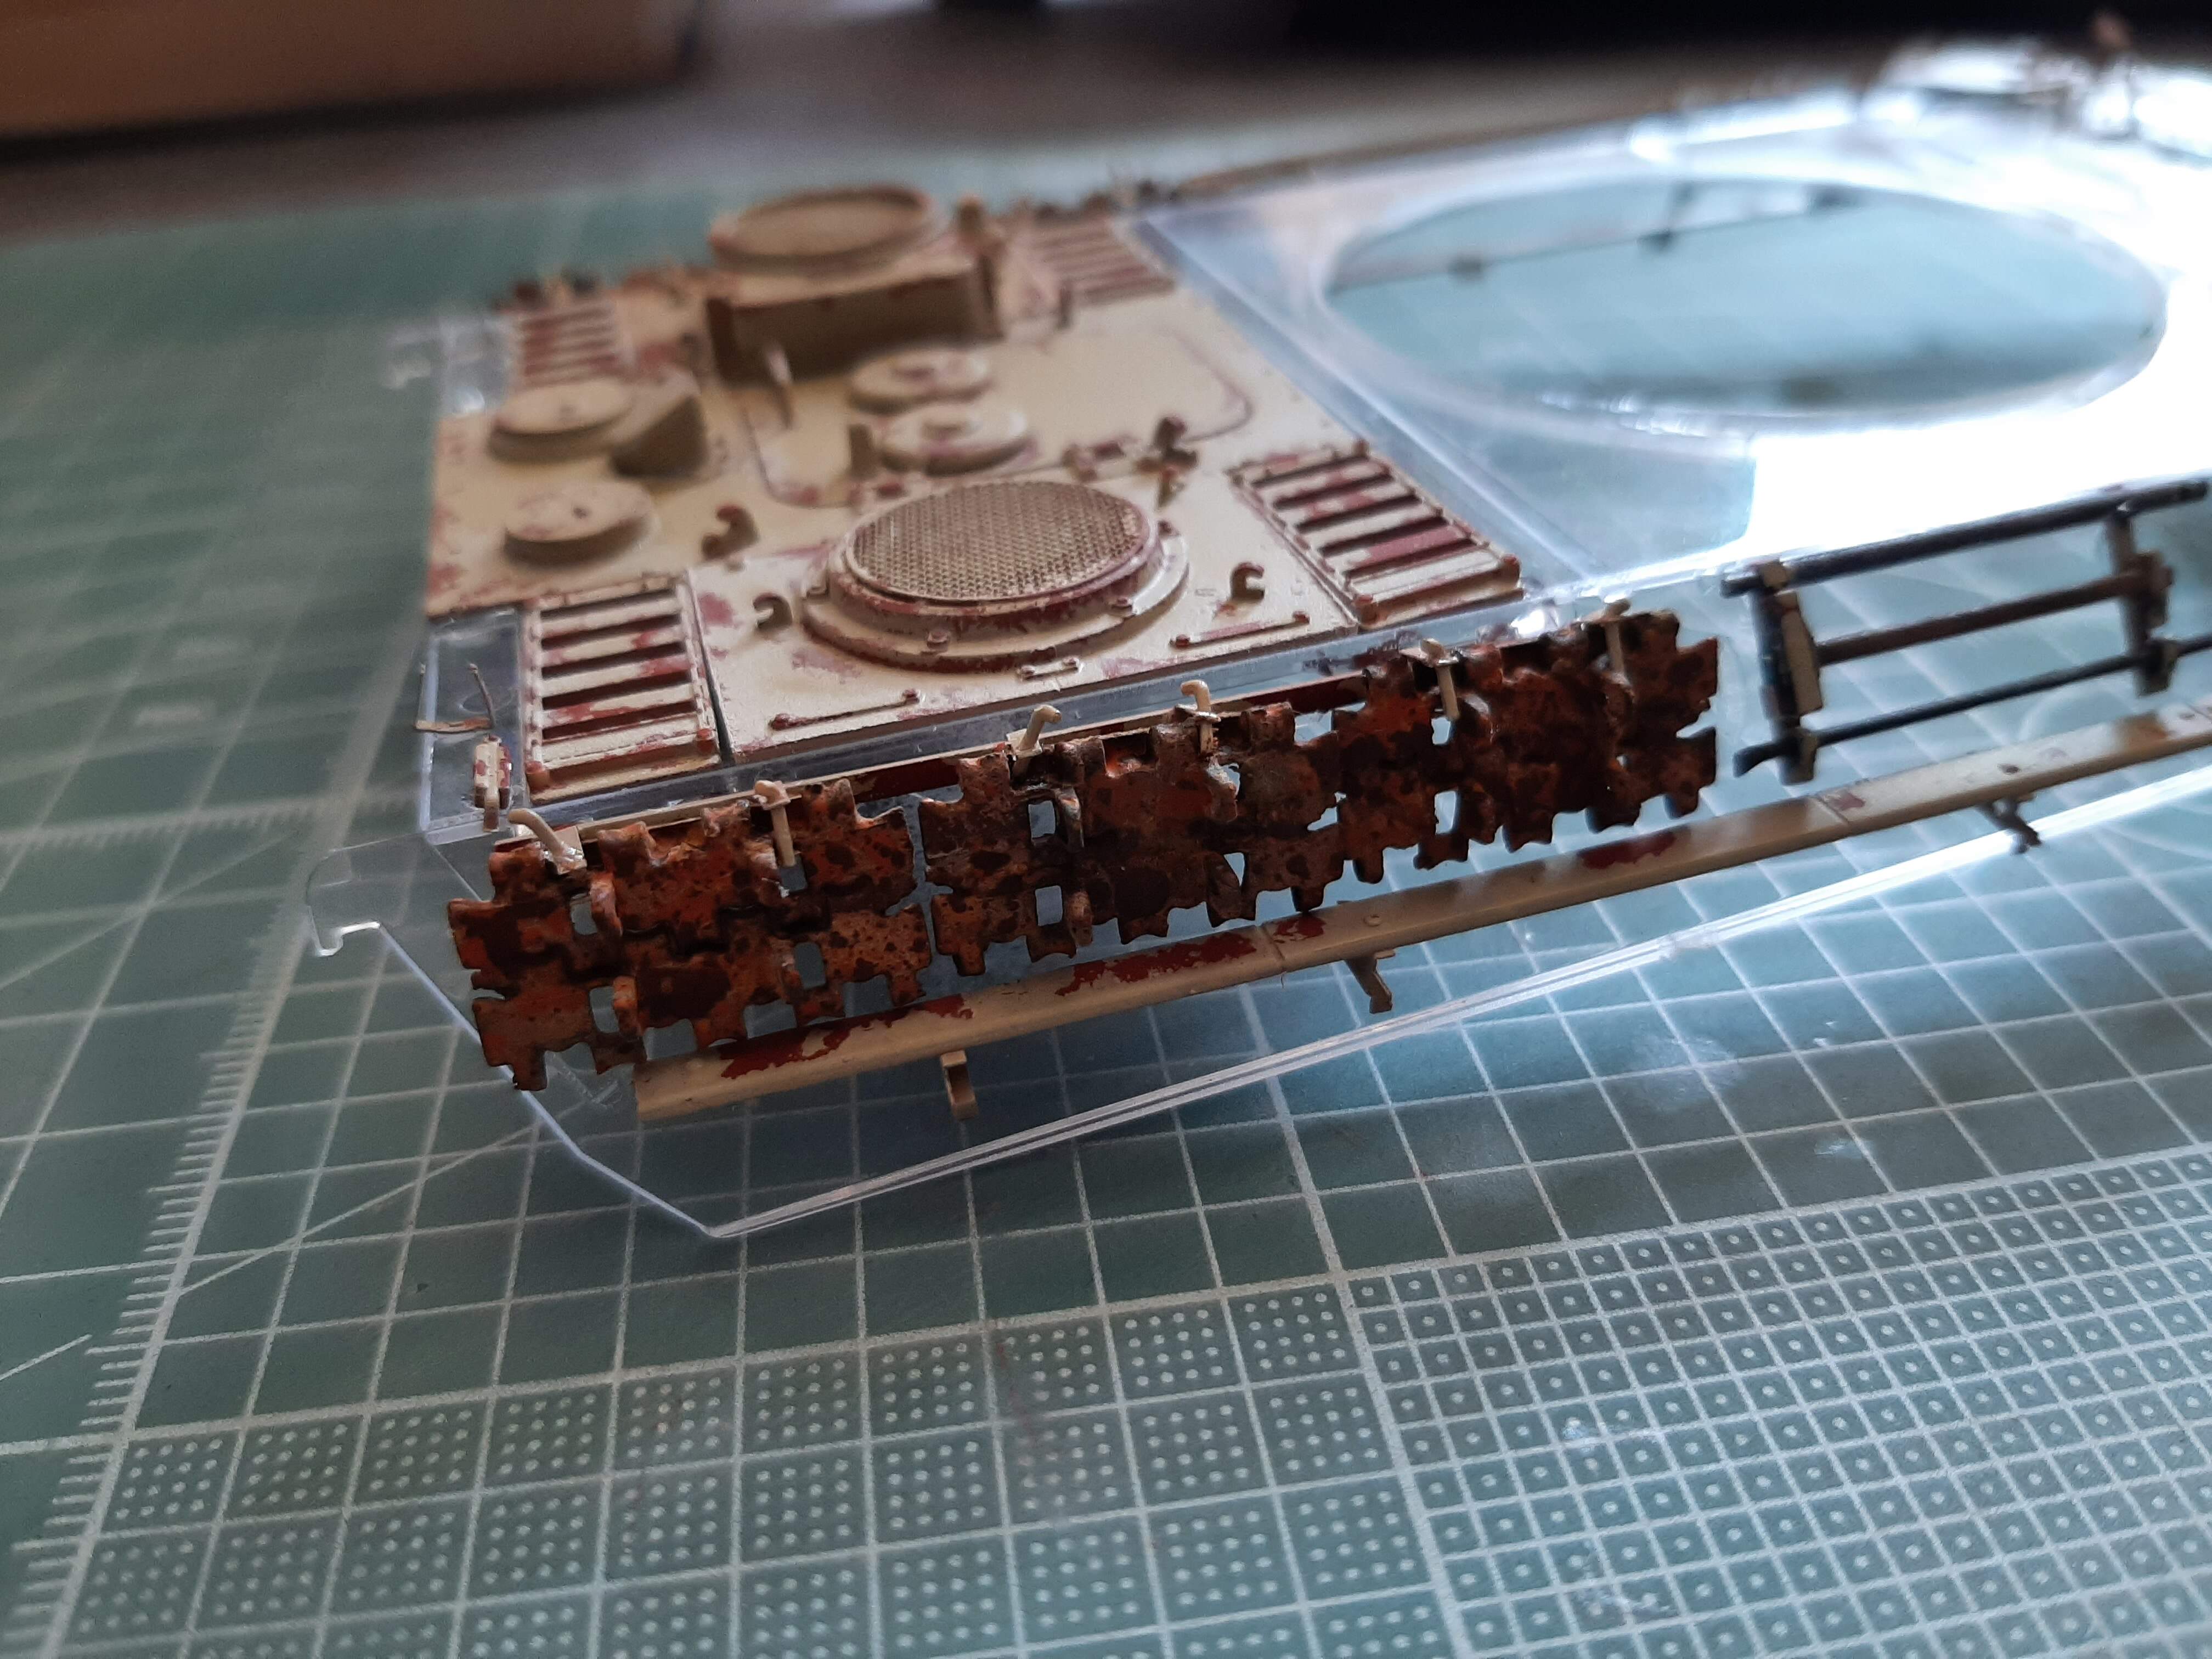
So, its been a long time since there was an update but i’ve finally finished the upper hull.
It was really fiddly at times due to the need to finish individual sub-assemblies before attaching to the hull so that the clear plastic wasn’t damaged. Its been a real pain trying to keep the clear plastic smudge free, and I didn’t fully achieve that. But, its still pretty clear and any screw-ups are covered yp by other parts.
I decided to use the kit radio mount after all, I will save the Aber radio set for my Mk IV J which is in the stash.
I used the kit side fenders, but used the brakets from the Aber Schurzen kit. The schurzen will be added at the end of the build.
The rear decking is removeable (and will be removed) to allow view of the engine compartment when that is done.
It might be a bit ‘over-weathered’ but i’m not too worried, it adds texture and some context to the overall effect.
Let me know what you think.


Now on to the lower hull, and the ‘meat’ of the build.
8 Likes
Looking Good Khouli! I have this kit in my stash and was wondering how to assemble it. I was thinking of sort of misting colour on one side so it was like a “ghosted” vehicle, but your progress is making me reconsider this.
Tried to give 2 hearts but that was a no go.
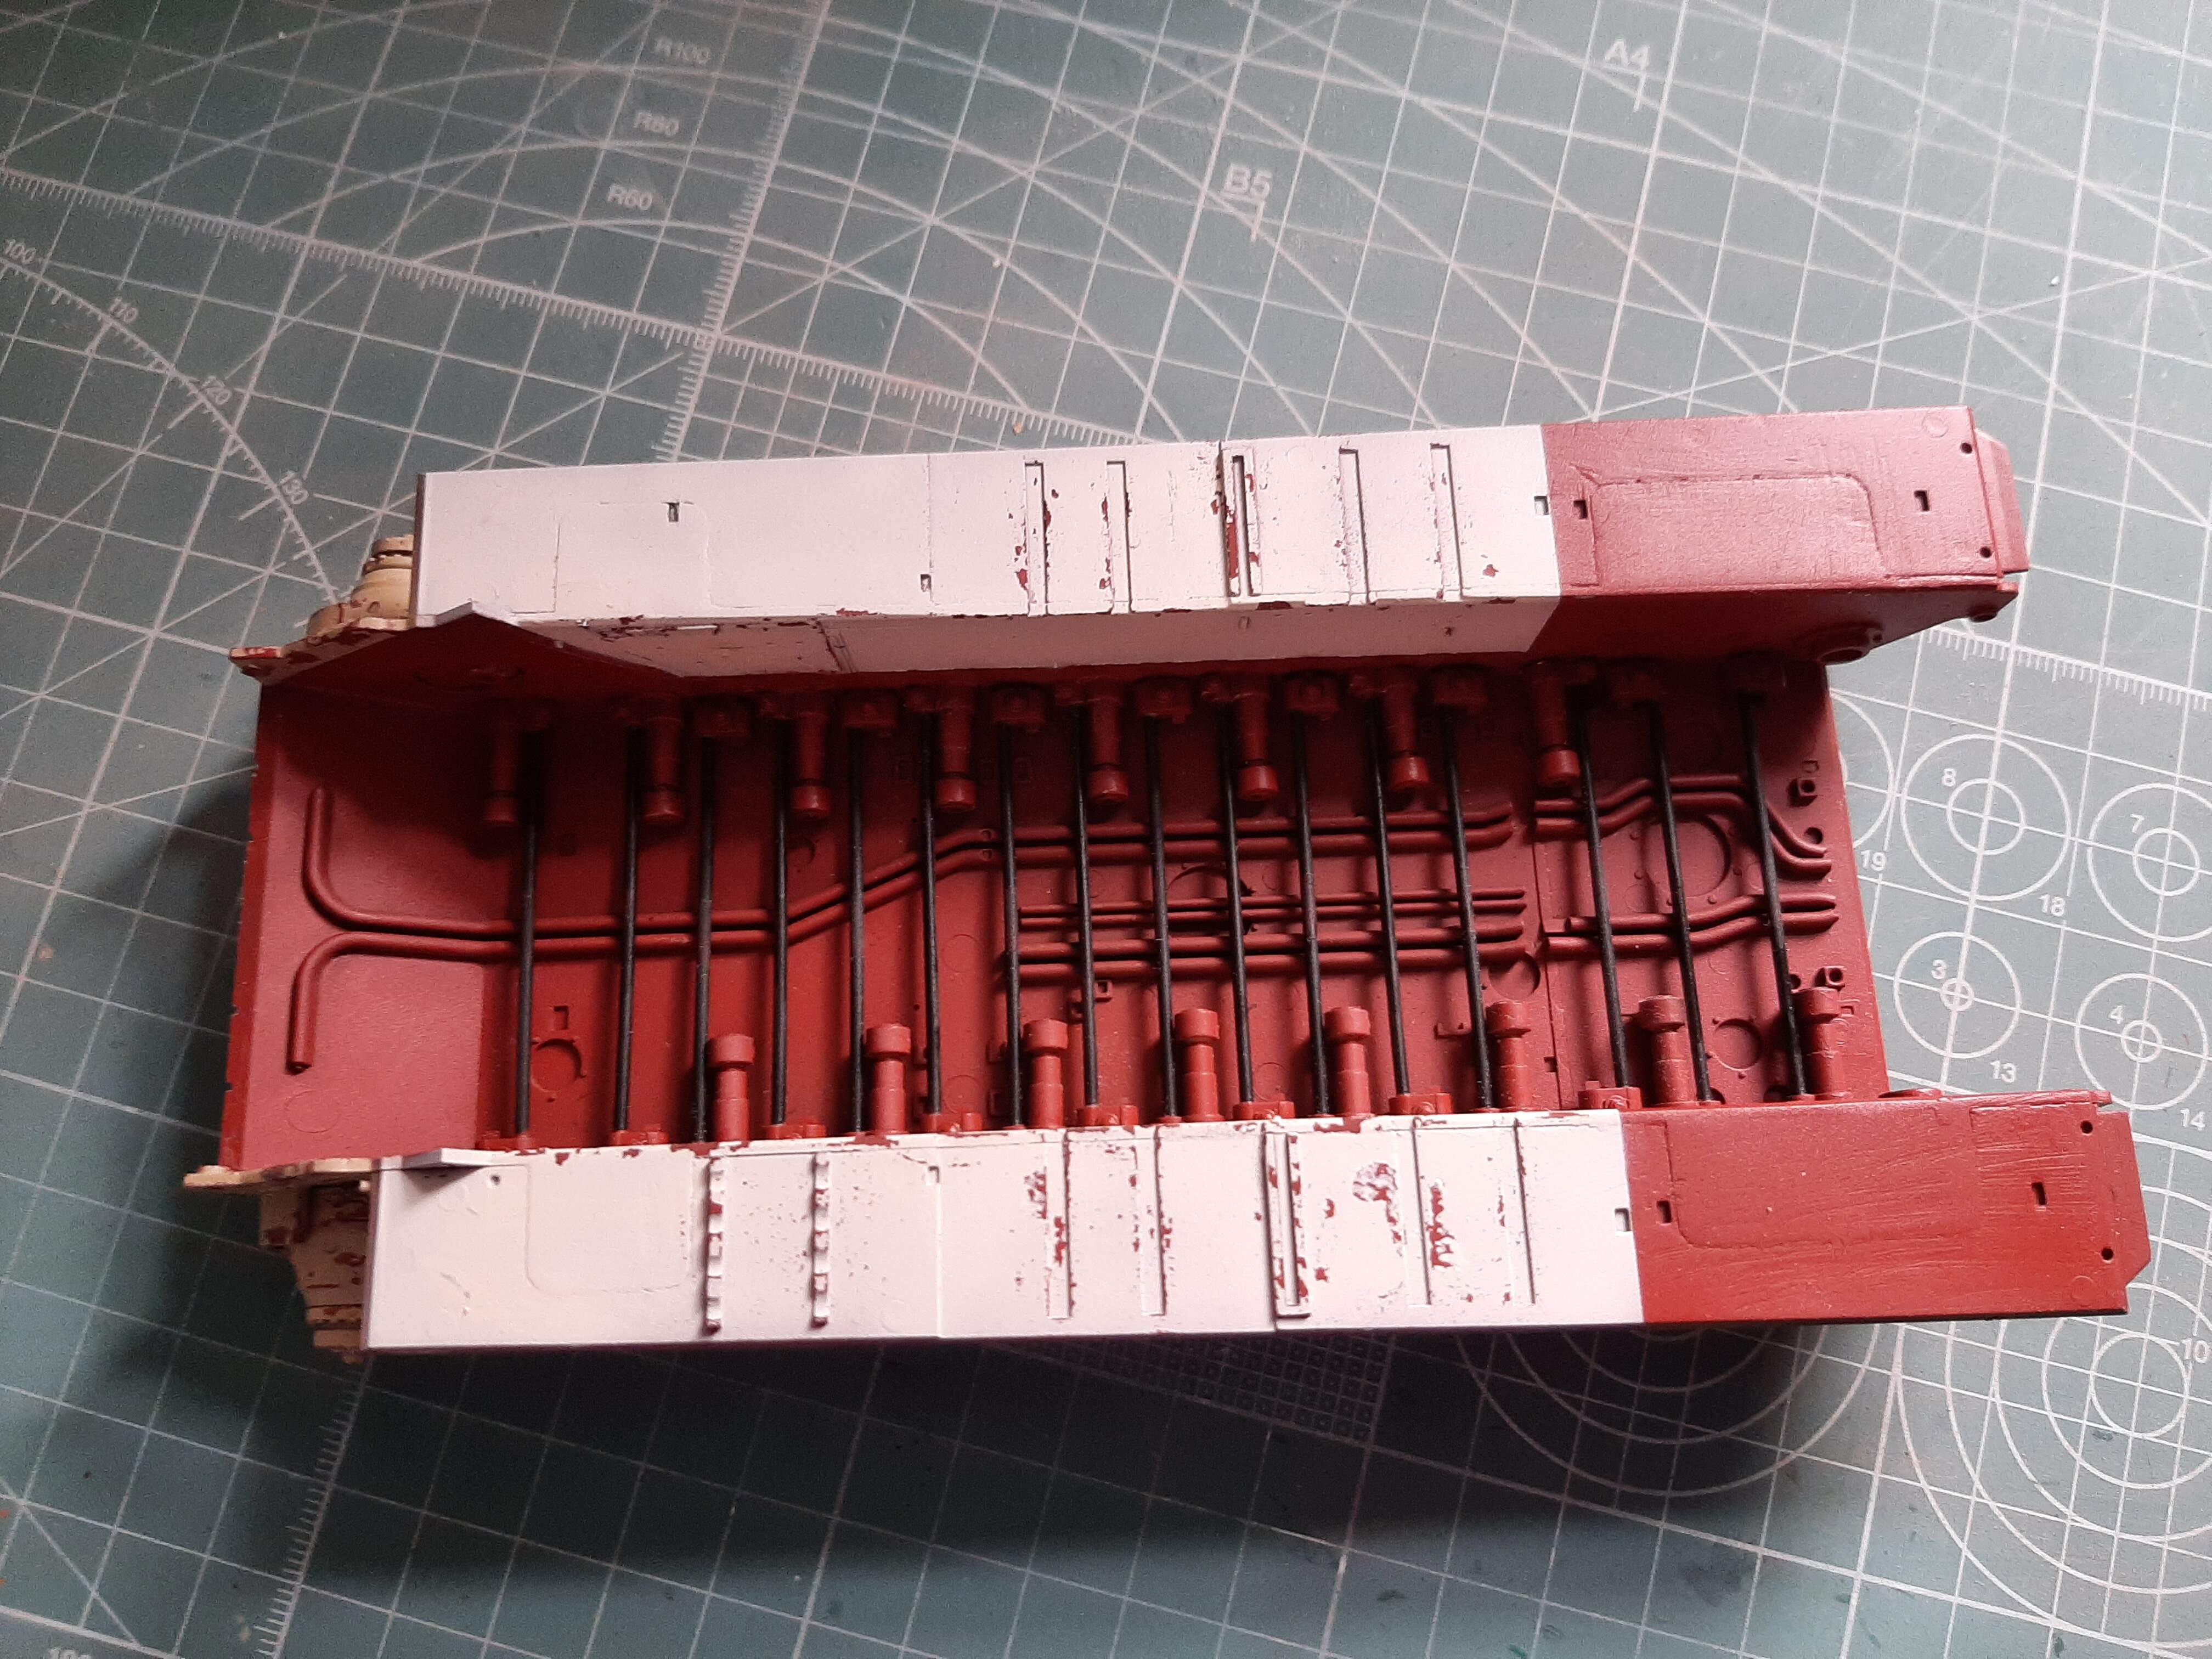
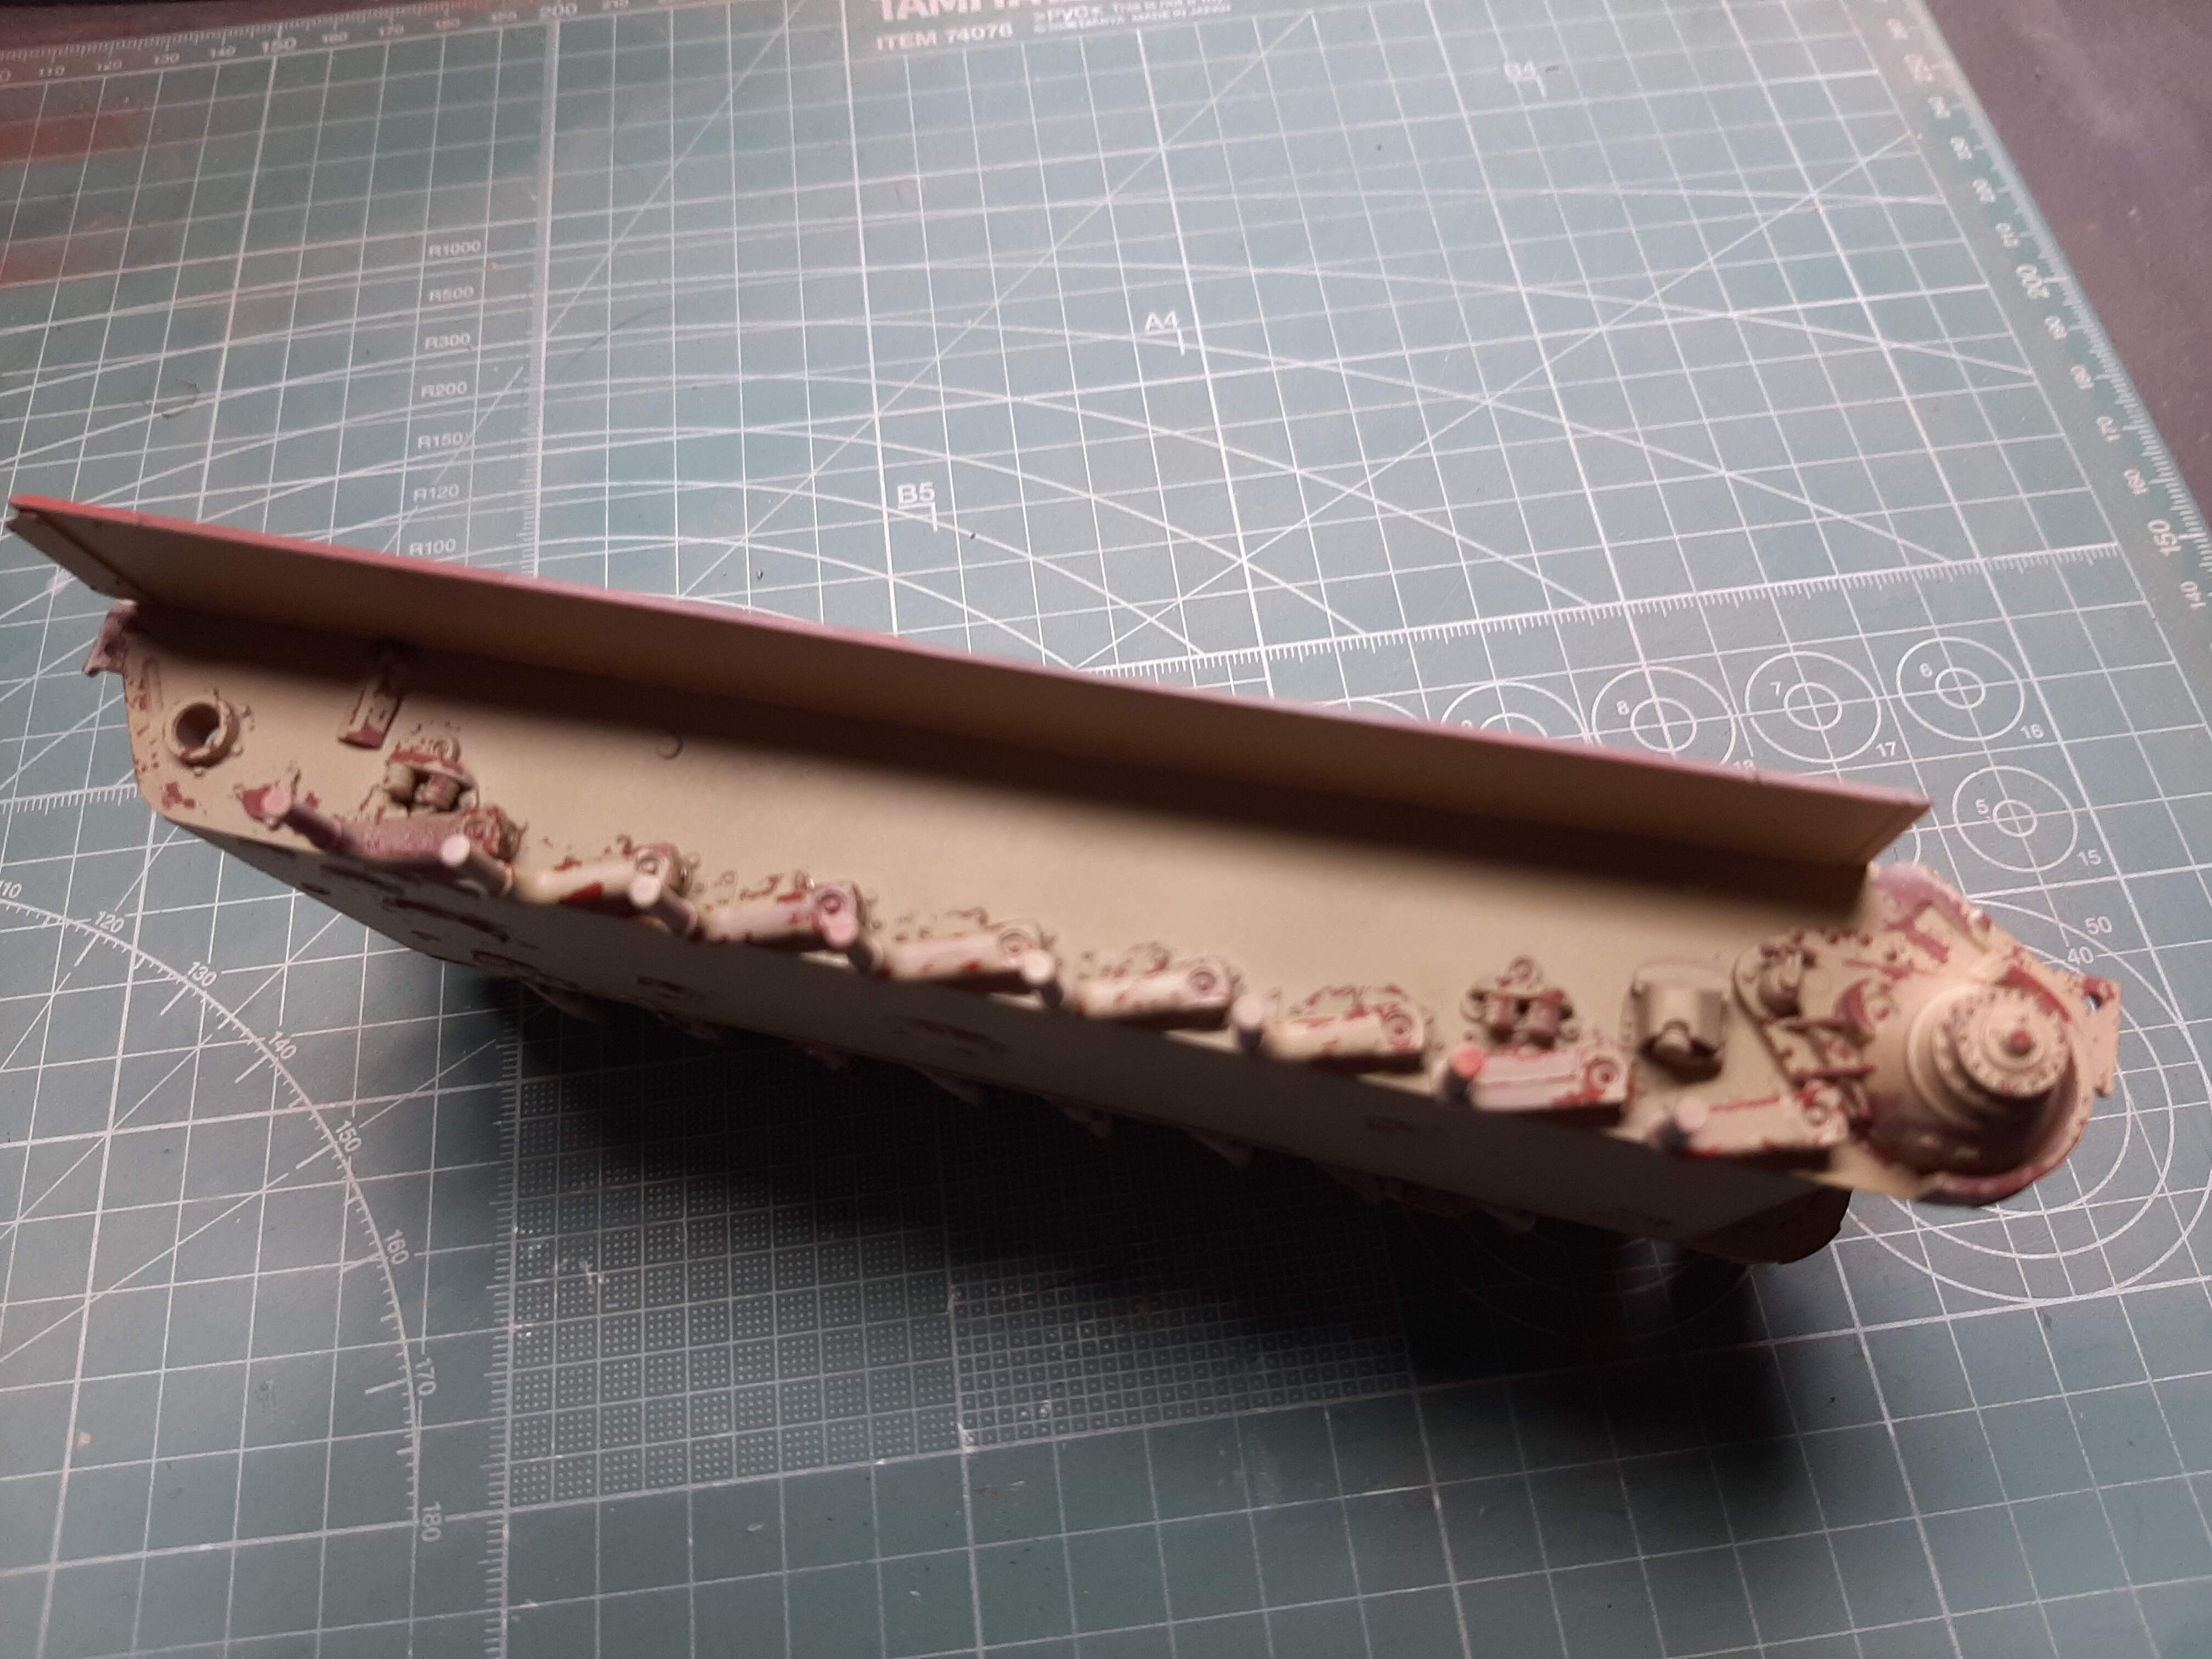
Work has begun on the lower hull.
The hull joins together as seperate bottom and side pieces and then the torsion bar anchor units are attached.
The torsion bar units were a pain. Even without primer, paint etc. i.e. just a dry fit, the units are too long. This means that when you slide the bars into place, they ‘bow’ considerably. This meant that the big ends had to be filed down (almost 1mm) in order that they fit correctly (you cant file down the small end, as these have horozontal locating pins for alignment inside the hull wall).
Still, it looks alright. Next step, the swing arms and torsion bars.


3 Likes
how does it compare to the takom or dragon kit? Nice interior by the way, wouldn’t be patient enough to do that (still waiting my RFM panther F, going to comapre it with the dragon one)
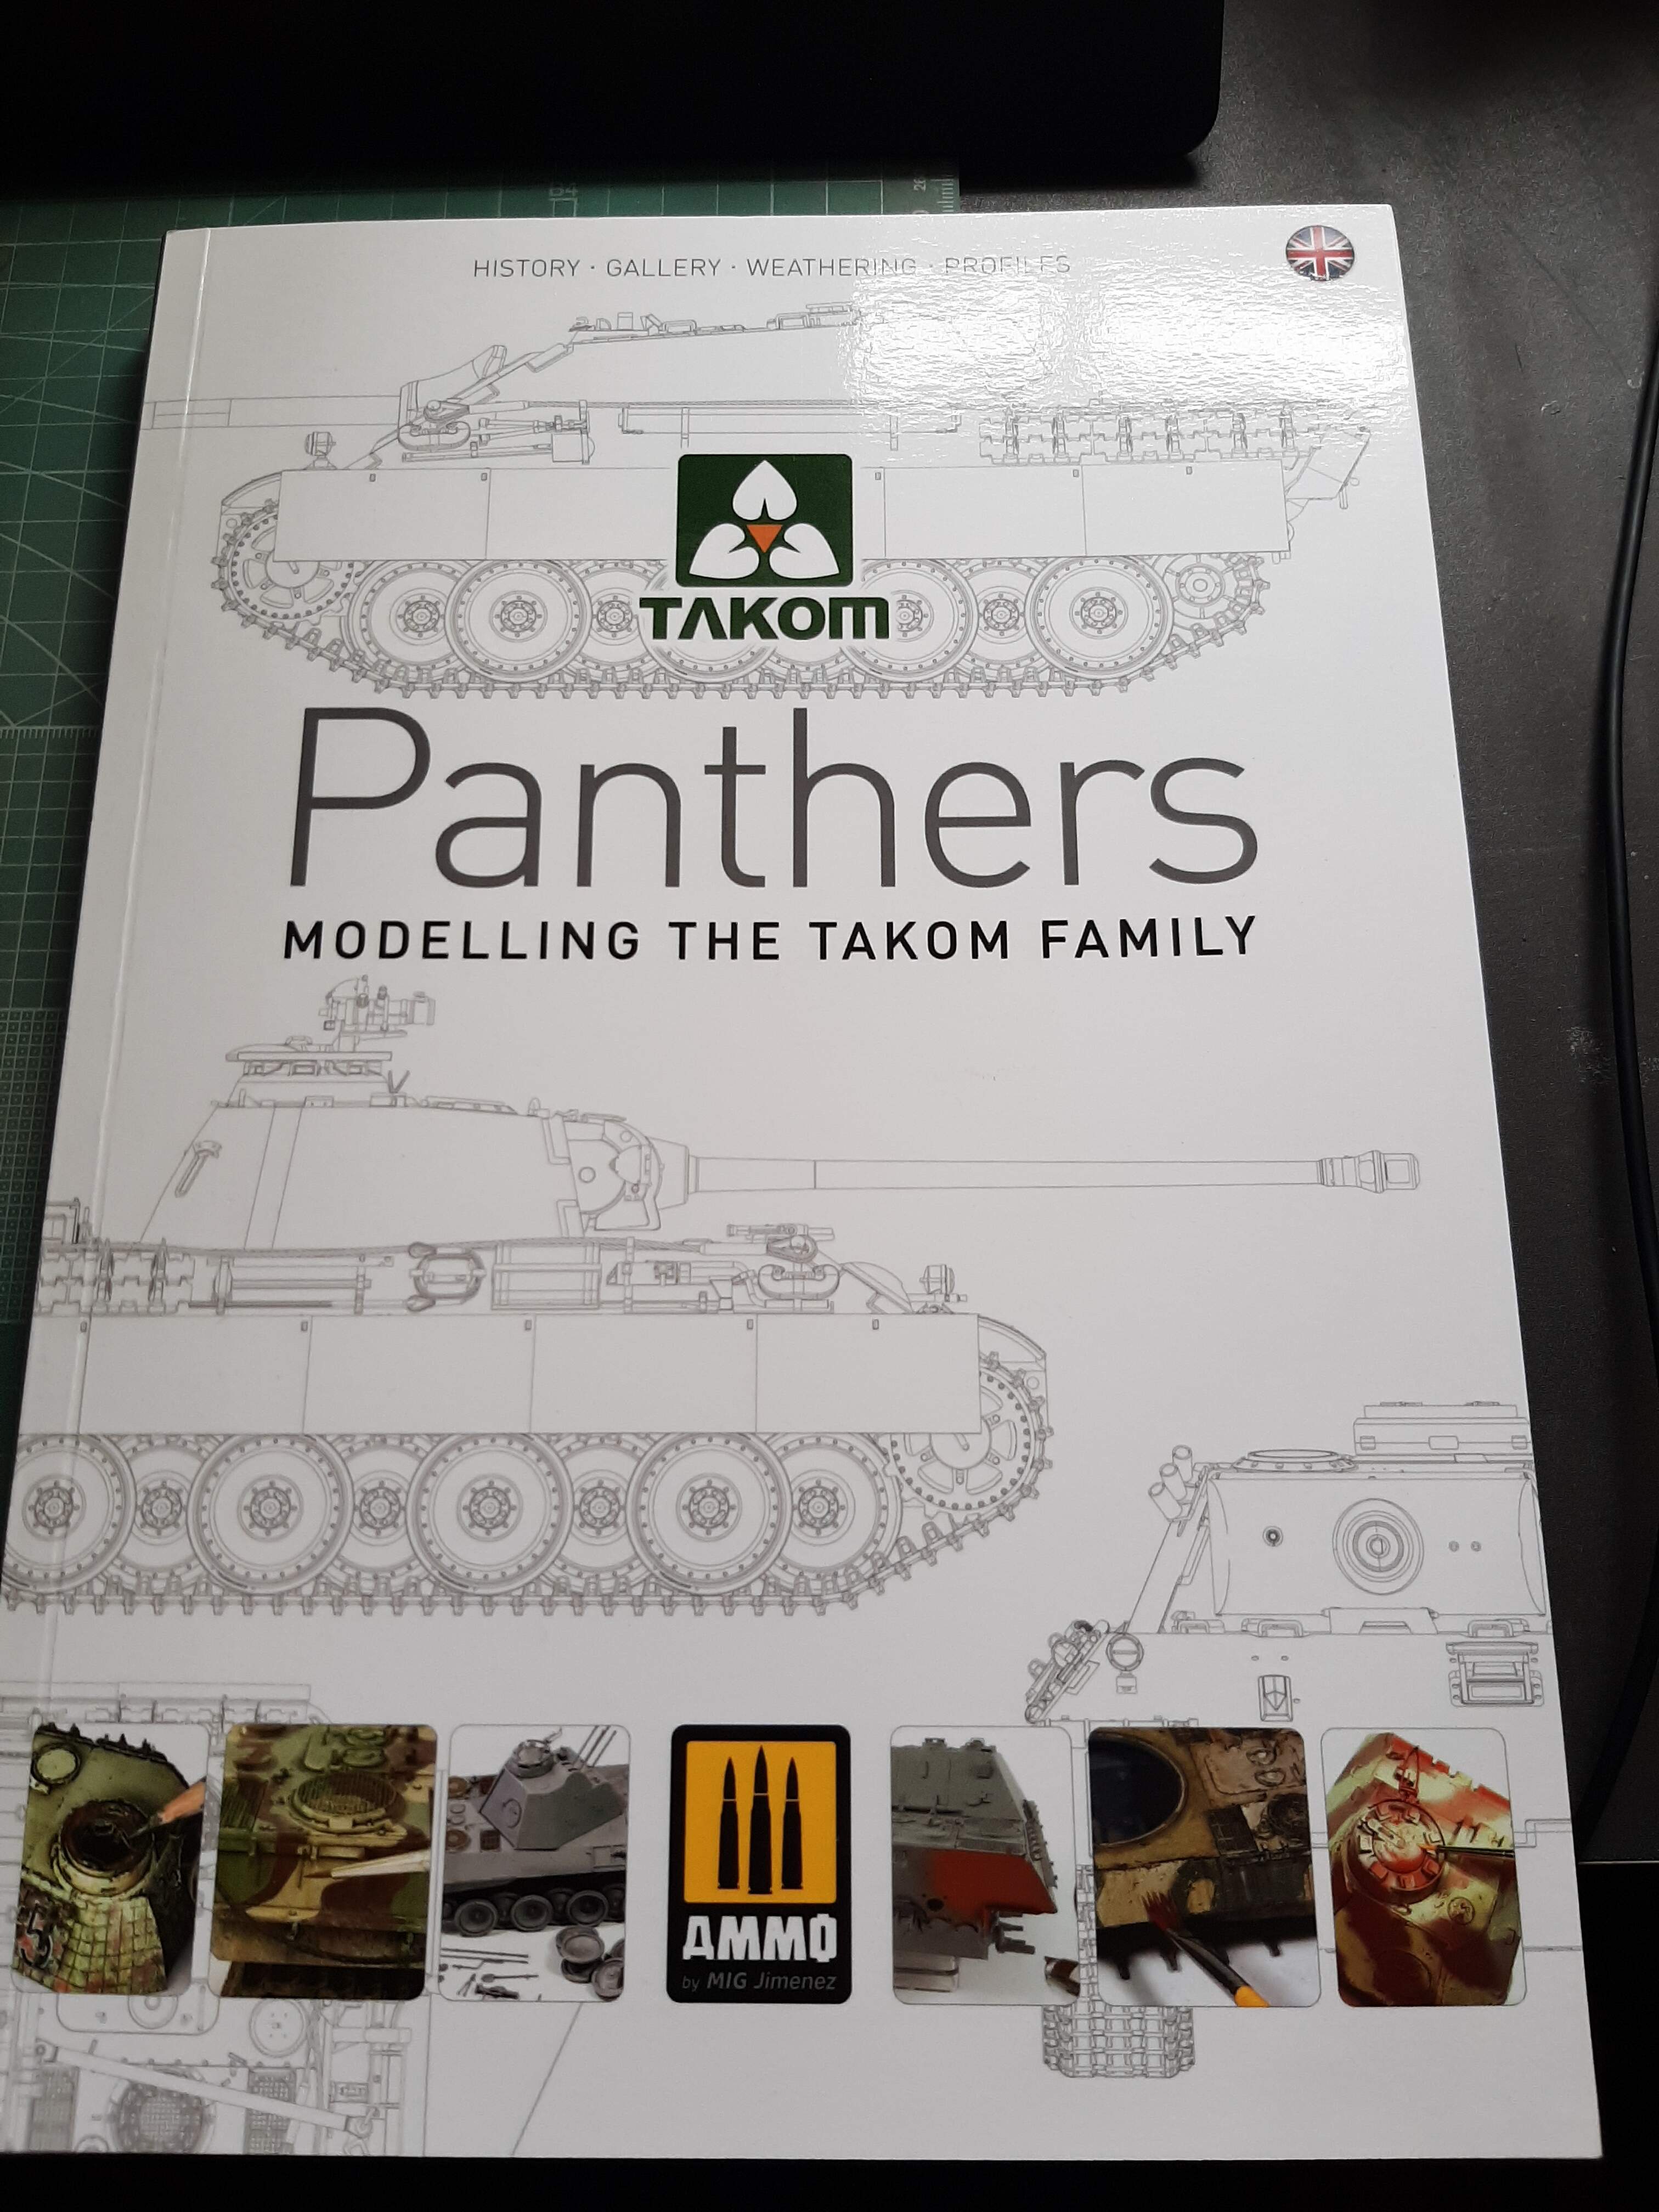
Hi, I actually don’t know because i’ve not built a Takom or Dragon Panther. What I do know is that the Takom kit is very similar (although it does not use clear plastic upper hull and turret - I really don’t see the point of installing a full interior if you’re not going to see it). I found a comparison between the RFM & Takom kits here:
Also, I have this book. It is a very useful reference guide for both manufacturers even though it deals exclusively with the Takom kit. I have found it useful as a painting guide.
You’ve got to really want to build the RFM kit, its hugely complex, there are some fit issues and it uses PE where it would have been more manageable to use moulded plastic parts. Having said that, it is extremely satisfying and i hevent lost interest in it yet, so it can’t be all bad.
for the interior, just cut through the hull and that’s it and the RFM panther F doesn’t have interior (alhough for some reason manufacturer love to put steelwheel in their panther F kit). I do have the takom flakpanther in stock (one turret will finnish on a AH panther II for a pantherturm technical in a what if battle of berlin)
So, the torsion bar assemblies are complete and installed.
This has been challenging to say the least. The assemblies are too long and lots of filing was required to get them to fit. Also, the holes in the torsion bar assemblies are literally, an interference fit for the swing arm/torsion bar components. So having decided to paint them before installing them, I discovered that they now wouldn’t push through.
Therefore, I also had to drill out the torsion bar housings to make things go a bit smoother. This didn’t bother me too much, as i’d elected to install the suspension in the non-working mode. So the swing arms were glued into place when fitted.
It is also nearly impossible to get the swing arms level, although i think i’ve done a pretty good job (close enough for Government work, as we say in the UK). This is because although there are supposed to be locating lugs on each swing arm which engage with the hull, these are tiny and have no material effect on aligning the arms.
I’m now working on the hull cross members, which are in PE form. There are serious fit issues, which I will describe in my next update.

3 Likes
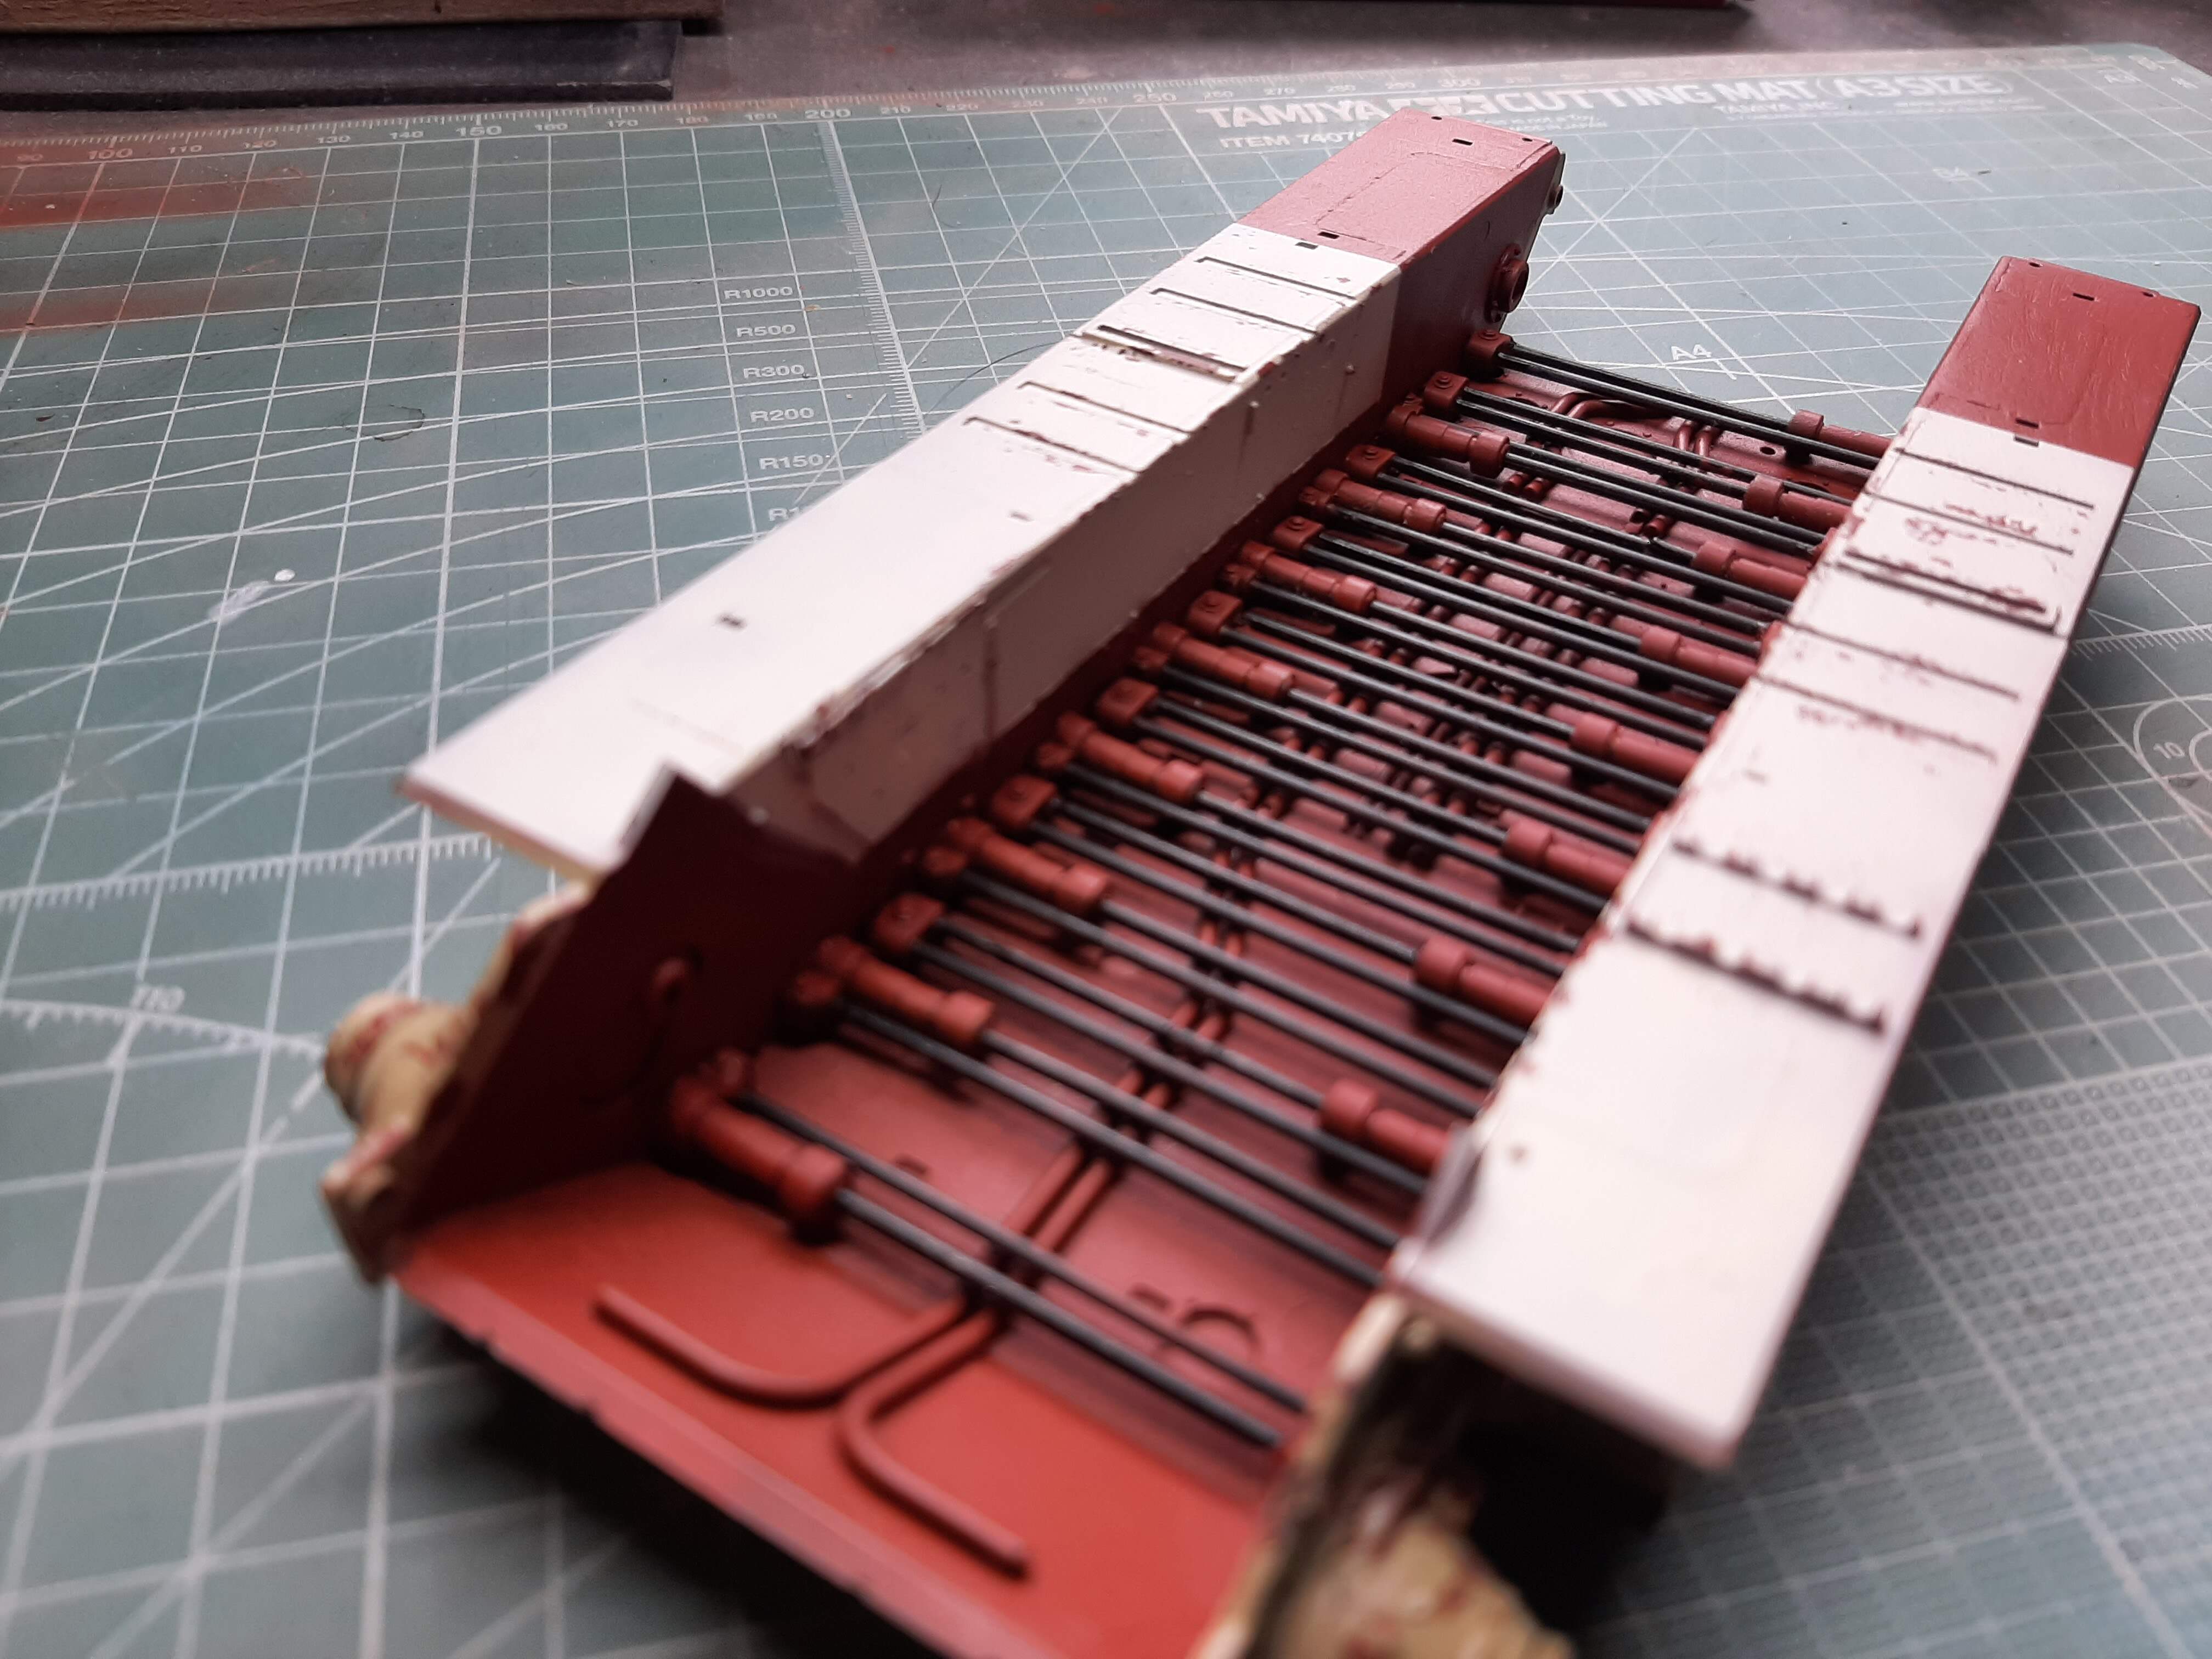
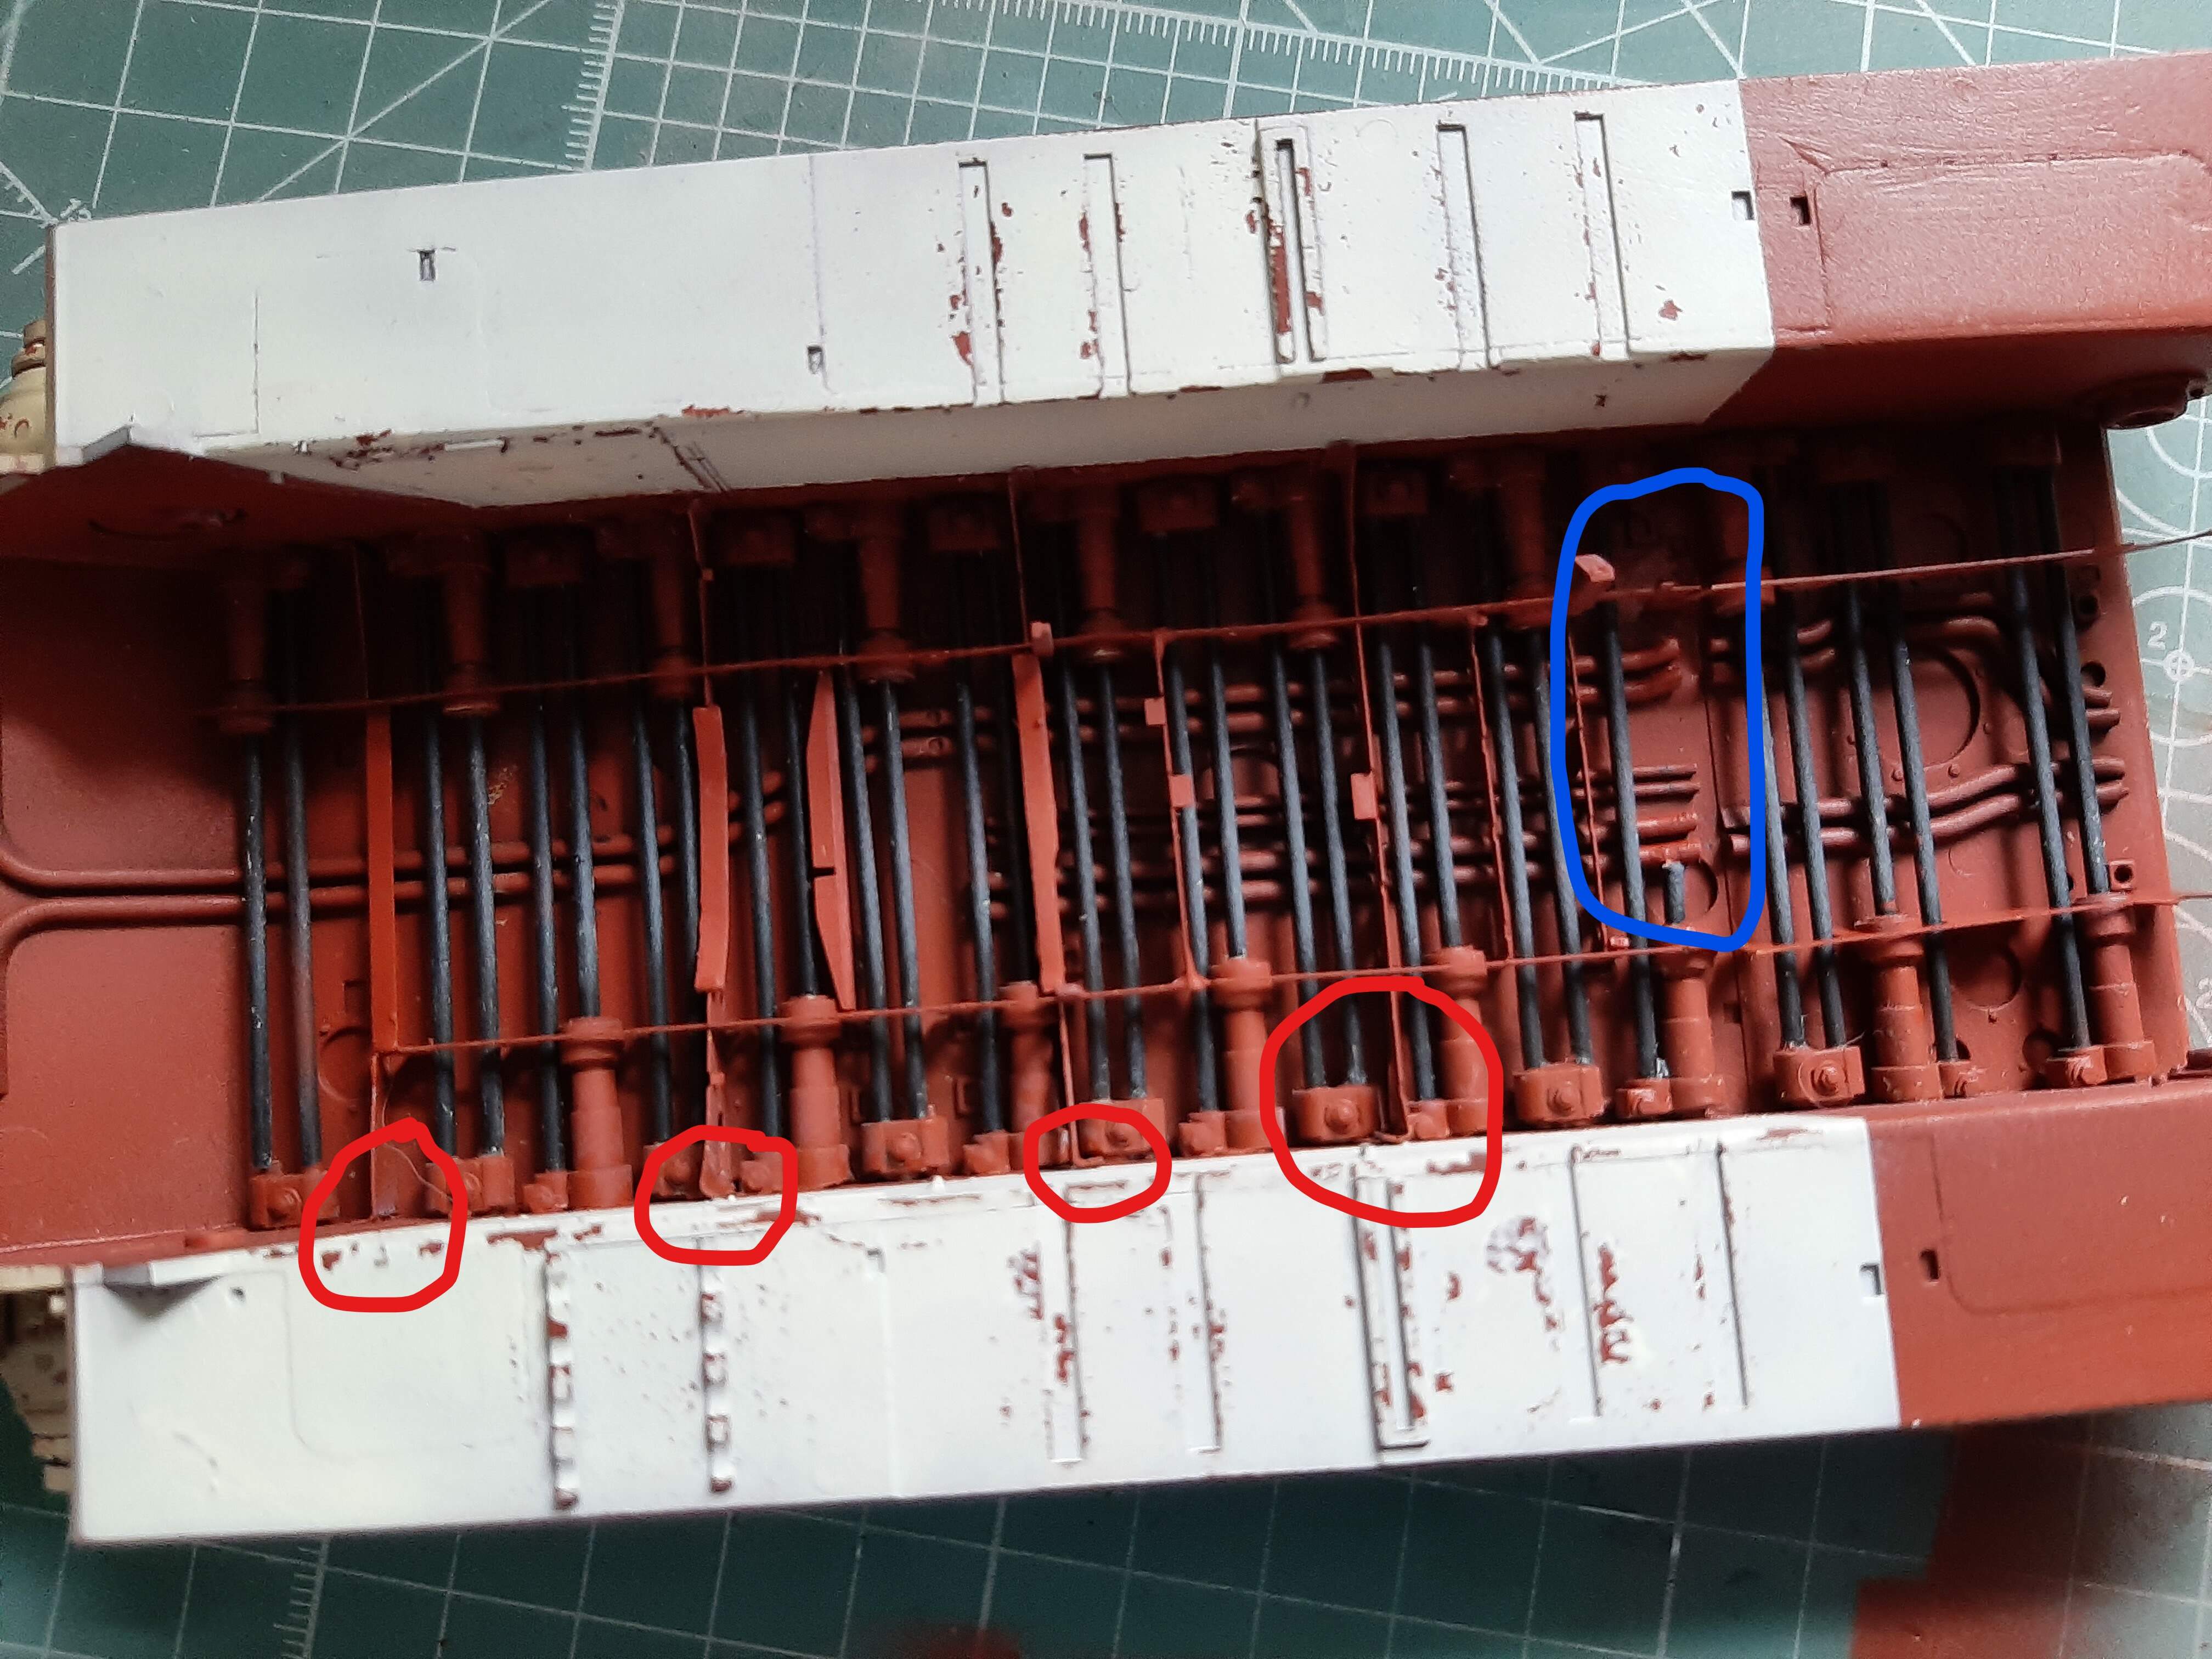
Latest progress was to construct and fit the cross and longitudinal members to the hull floor.
This was hard work. The cross members and frame are made from PE. Although it is sturdier PE than the PE used for other kit detail (the hull framework comes as a seperate fret of PE), it is still far too flimsy and its all too easy to introduce bends/kinks.
Also, the cross members were too long to fit! It meant that I had to bend bigger tabs than the pieces were designed for and this was problematic (circled in red). Getting the longitudinal frame to fit required a lot, and I mean a lot of patience. I have had to remove a section of torsion bar (circled in blue) to get it to fit. I will replace it later.
I suspect that the issue was with my original fitment of the torsion bar housings, which were also too long to fit the hull and needed a lot of filing, thus ensuring that the original locator marks/pins maybe were not as lined up as they could have been. All in all, it went together. Close up shots show it to be quite untidy - but, most of this detail will be hidden by floor plates and other detail, so it won’t matter too much.
I can’t help thinking that RFM would have been better off adding this framework to the plastic sprues. I have no idea why they didn’t. It certainly would have made filing/fitment a lot easier.


Next step - some less fiddly (I hope) lower hull detail.
2 Likes
This build is likely sādhanā(tight physical and mind training on budism)!
really awesome.
I have experience only tamiya’s panther, Even these wheel gave me educational ordeal(around 10 old ).
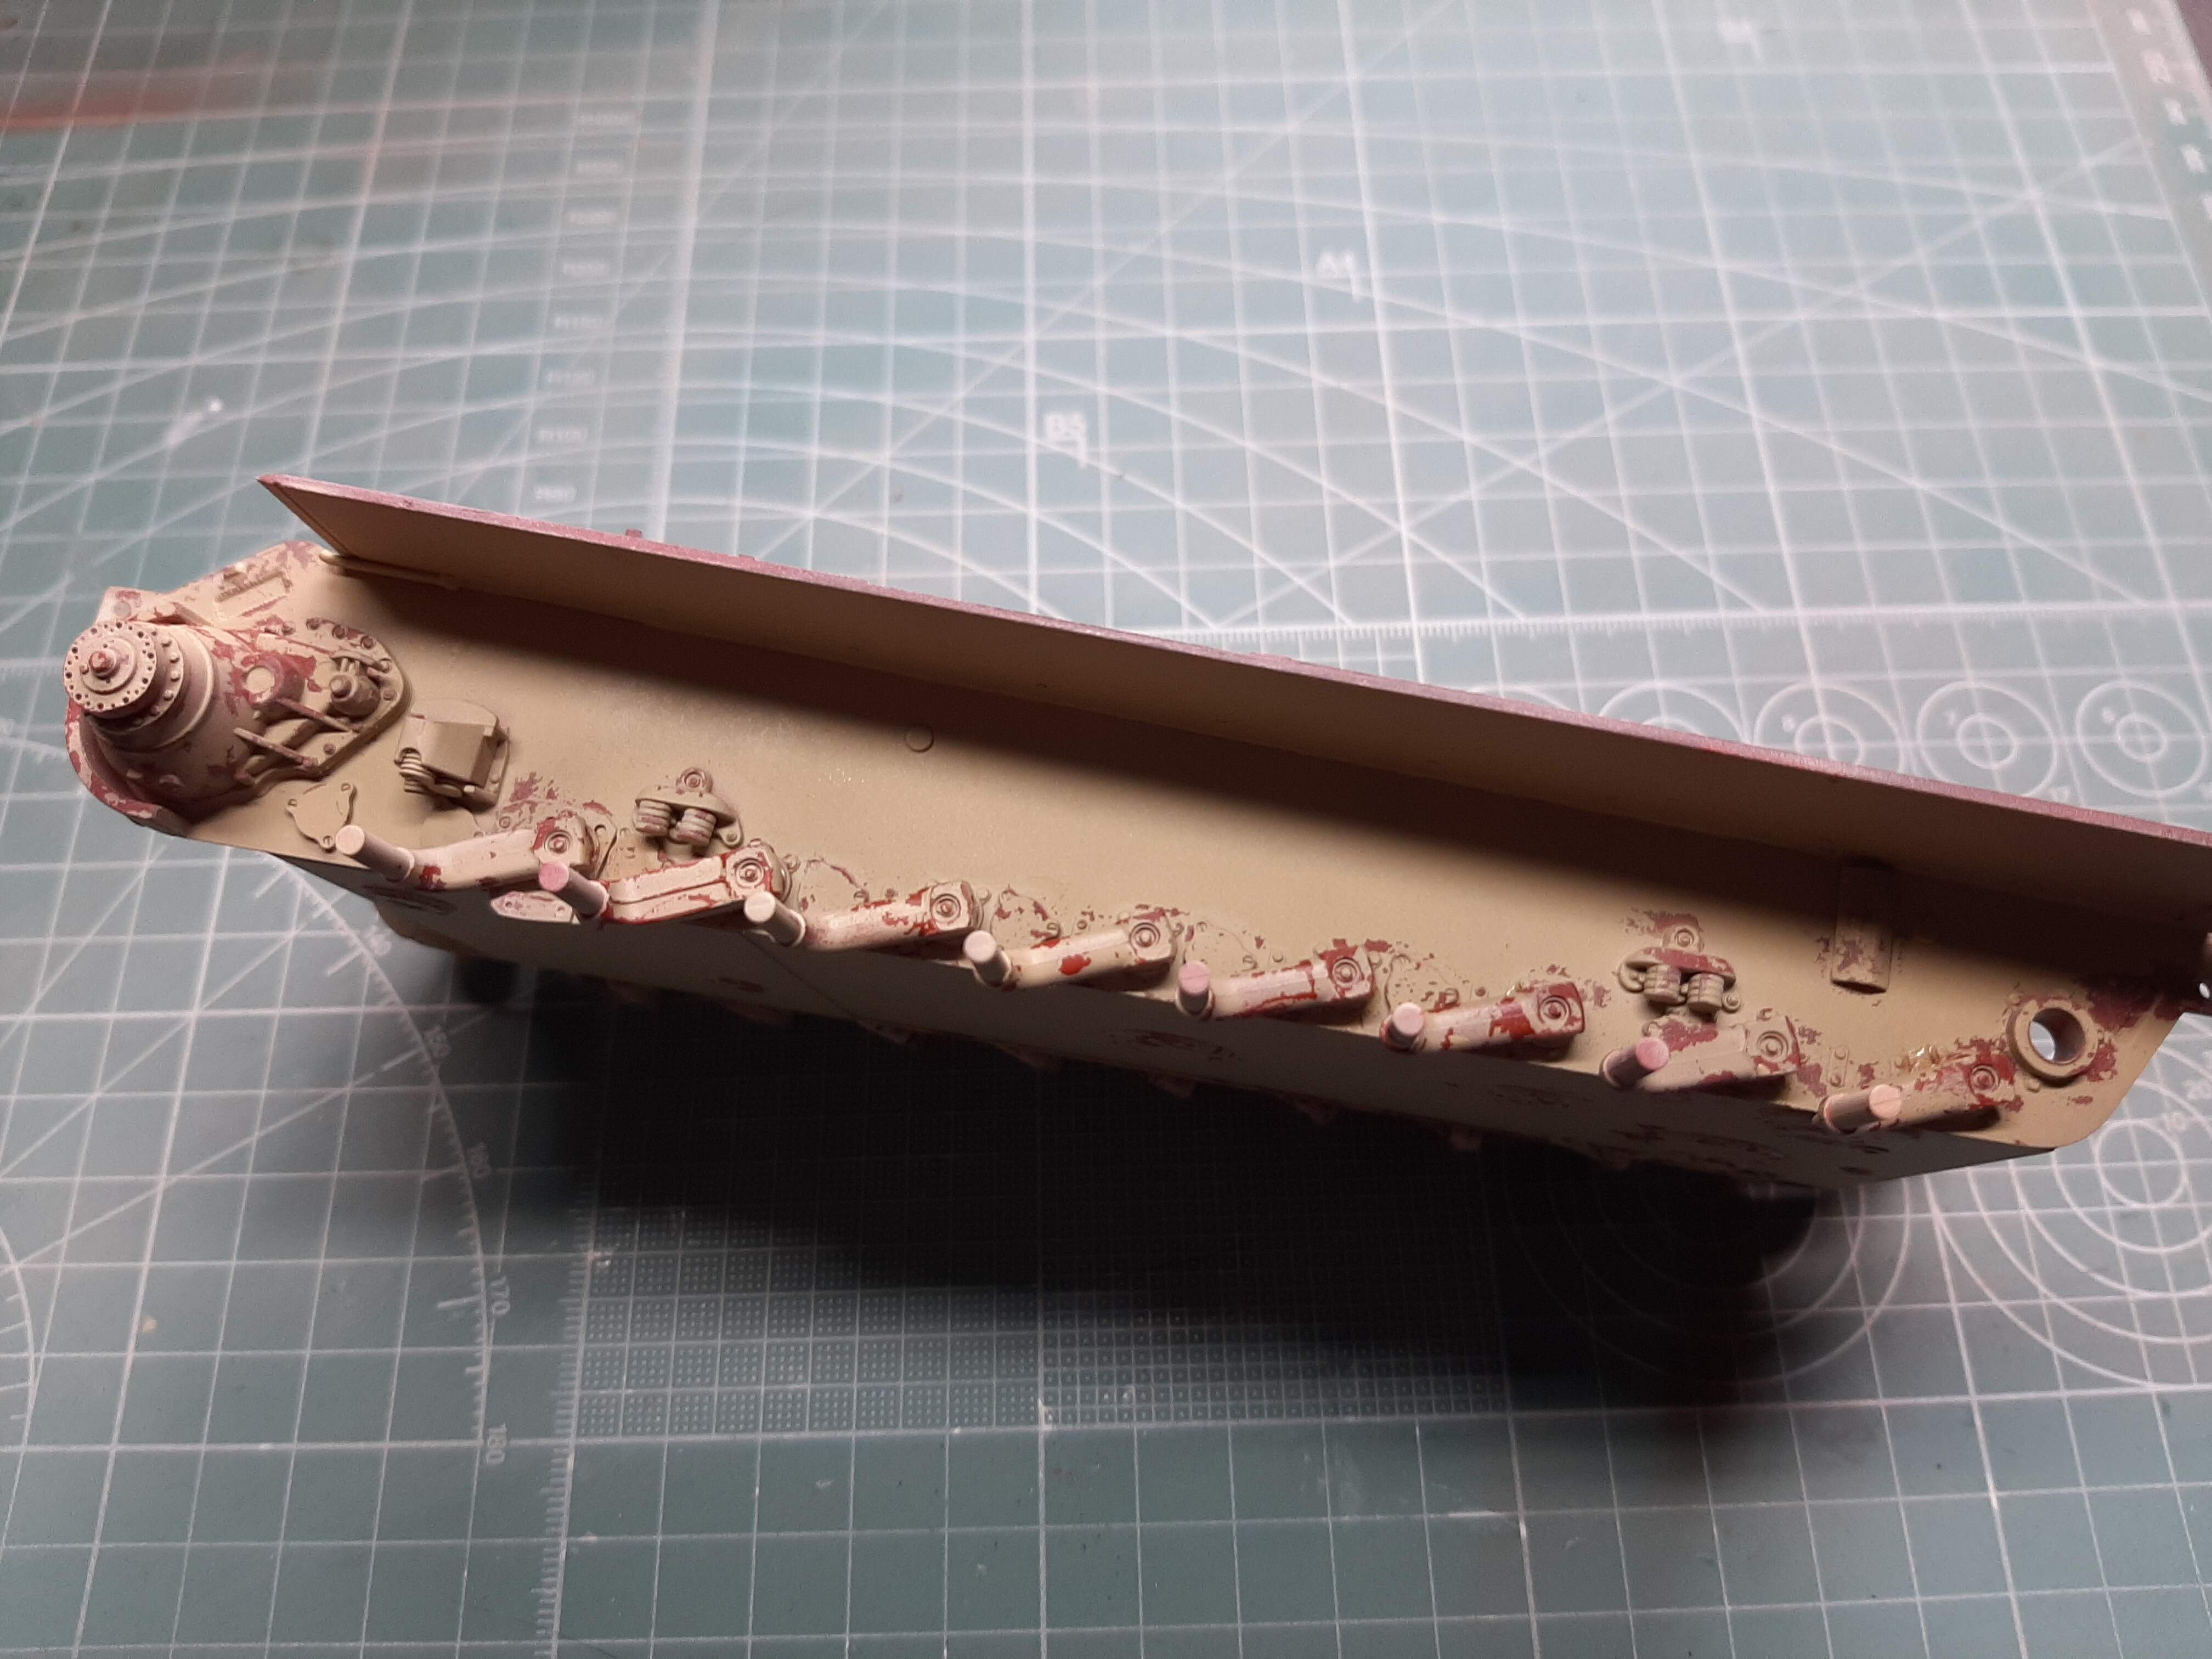
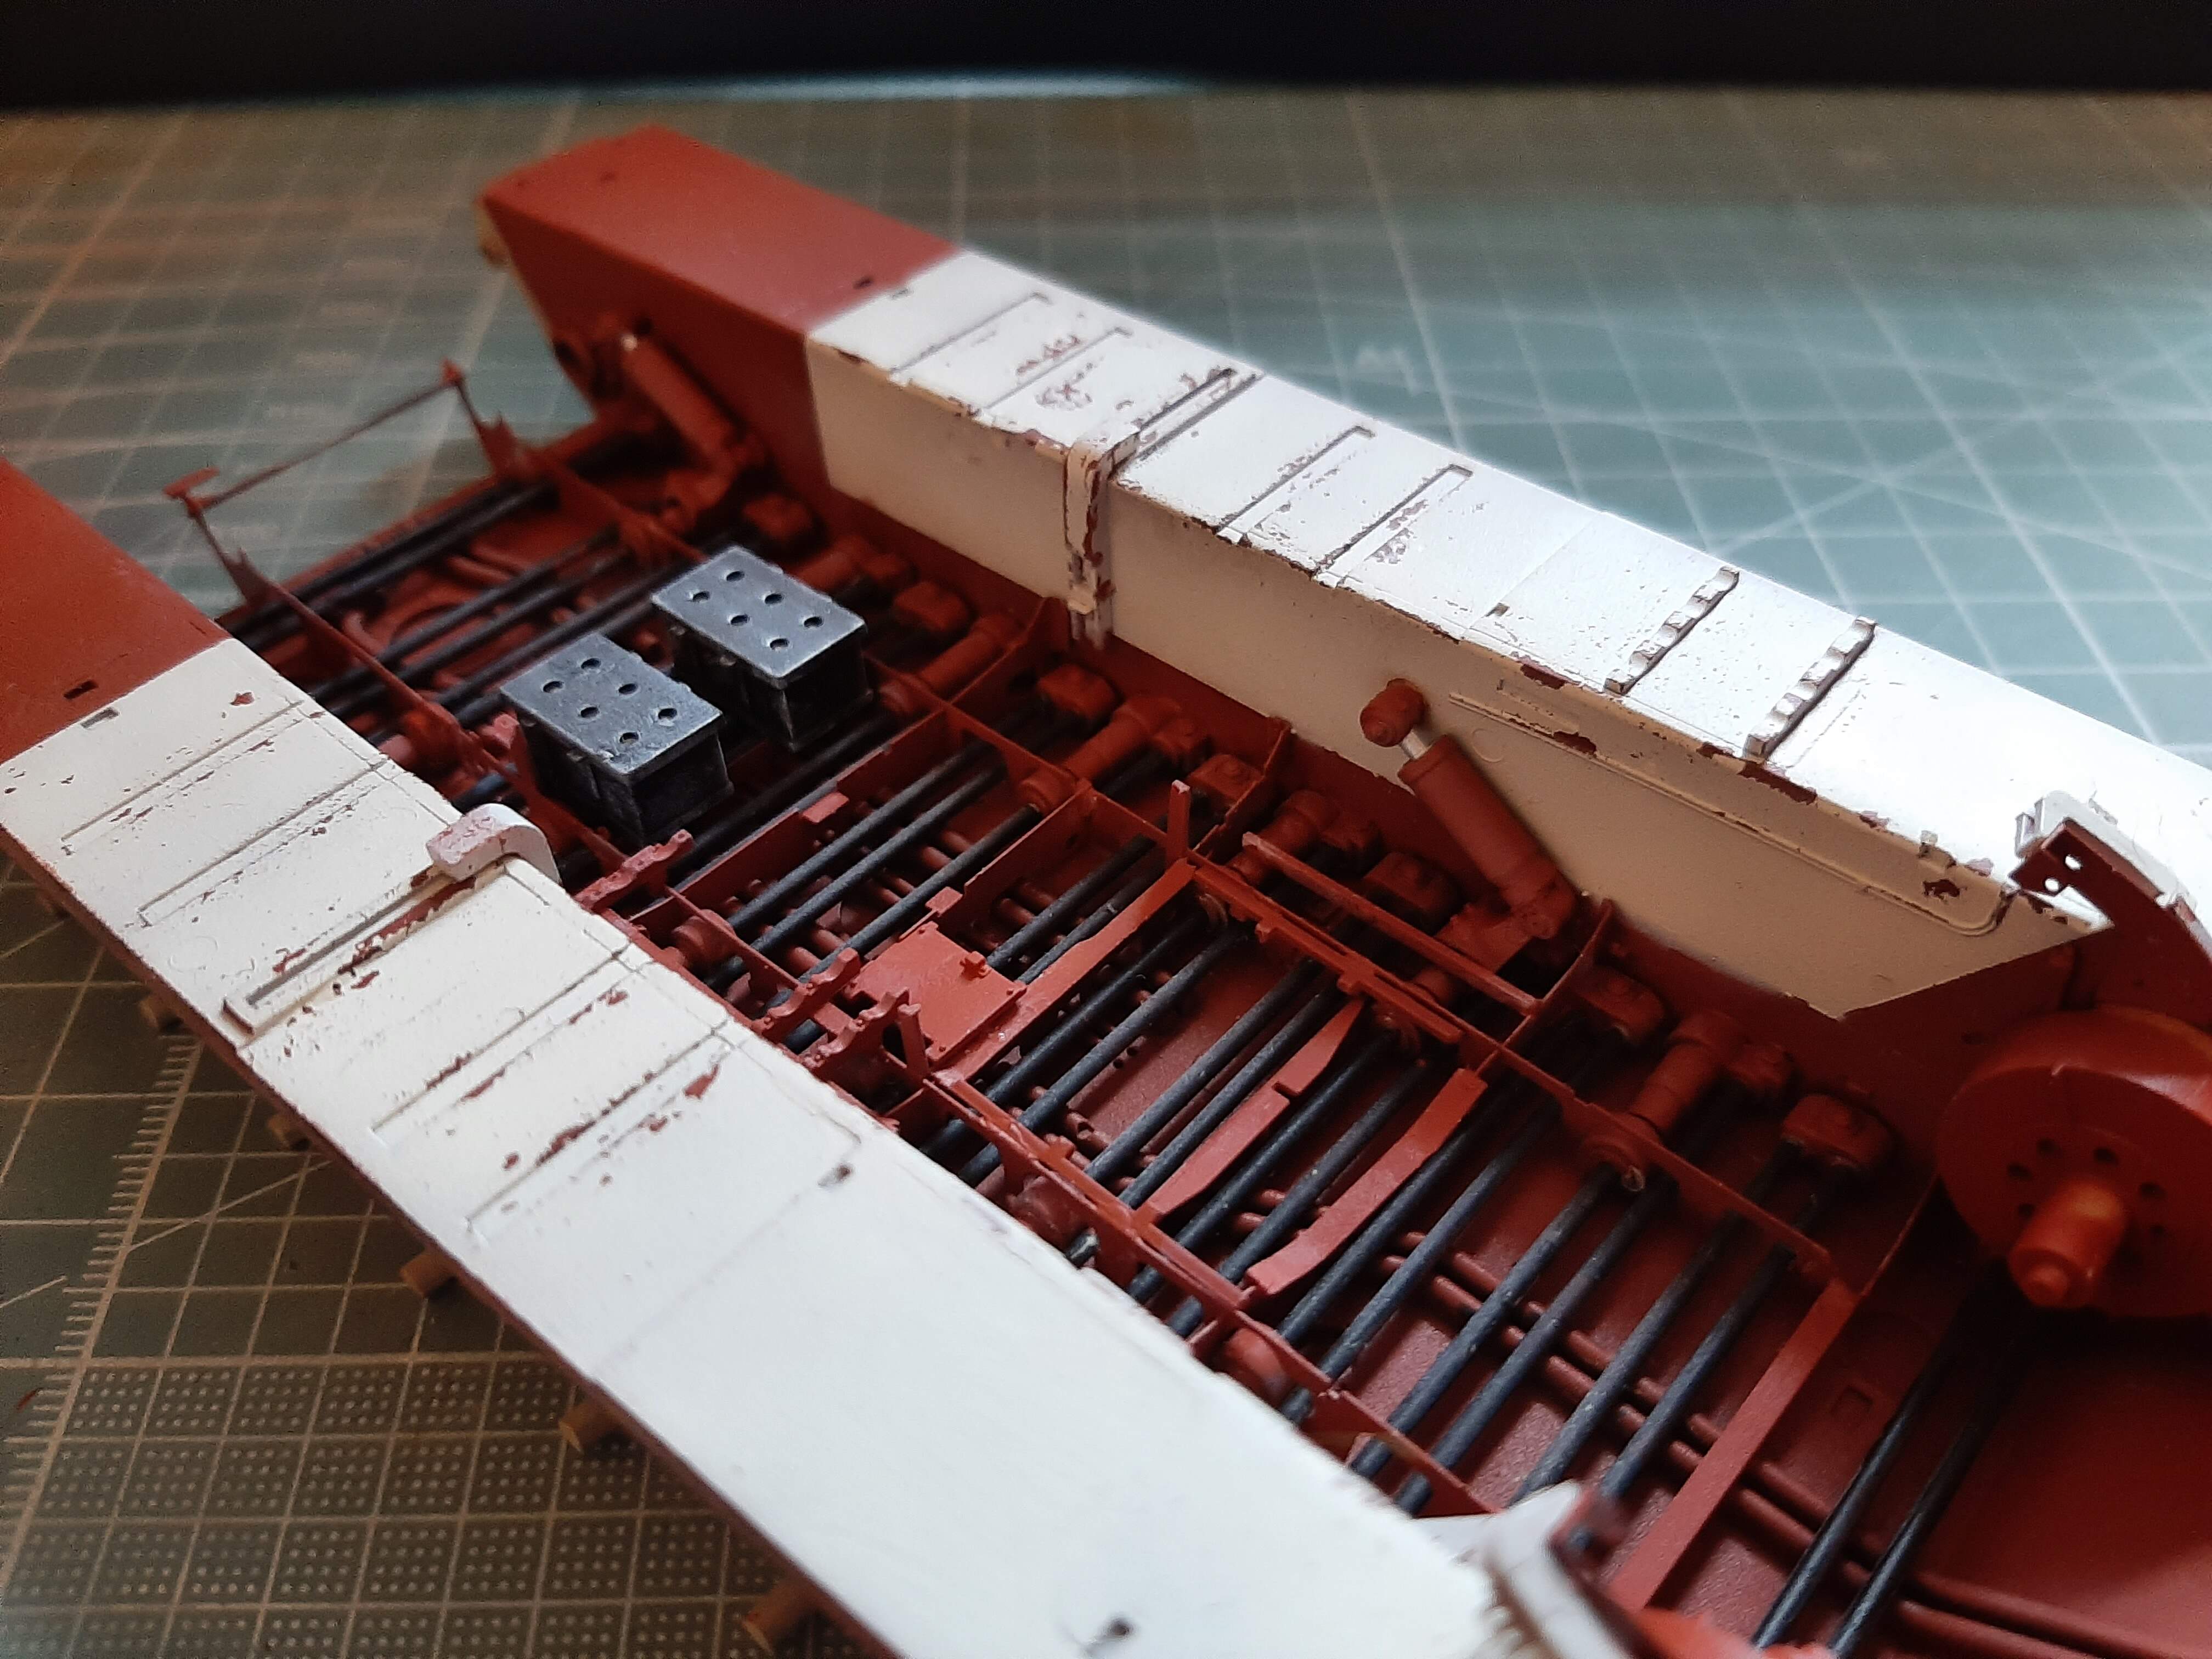
Further progress on the lower hull. It seems to be taking shape now.
Its not perfect and i’m the first to admit it, but, it isn’t too bad at all. Despite the wonky longitudinal and cross members, the lower hull parts went in quite well. I just have some paintwork to touch up and then its on to painting the 84 rounds of ammunition supplied with the kit…

2 Likes
I like your red oxide very much. It looks very accurate. What paint did you use for it?
Hi there, and thank you.
Its Ammo MIG 0014 (Rotbraun). I’ve used MIG acrylics almost exclusively.
I agree the red oxide looks like a very true colour and the chipping is spot on.
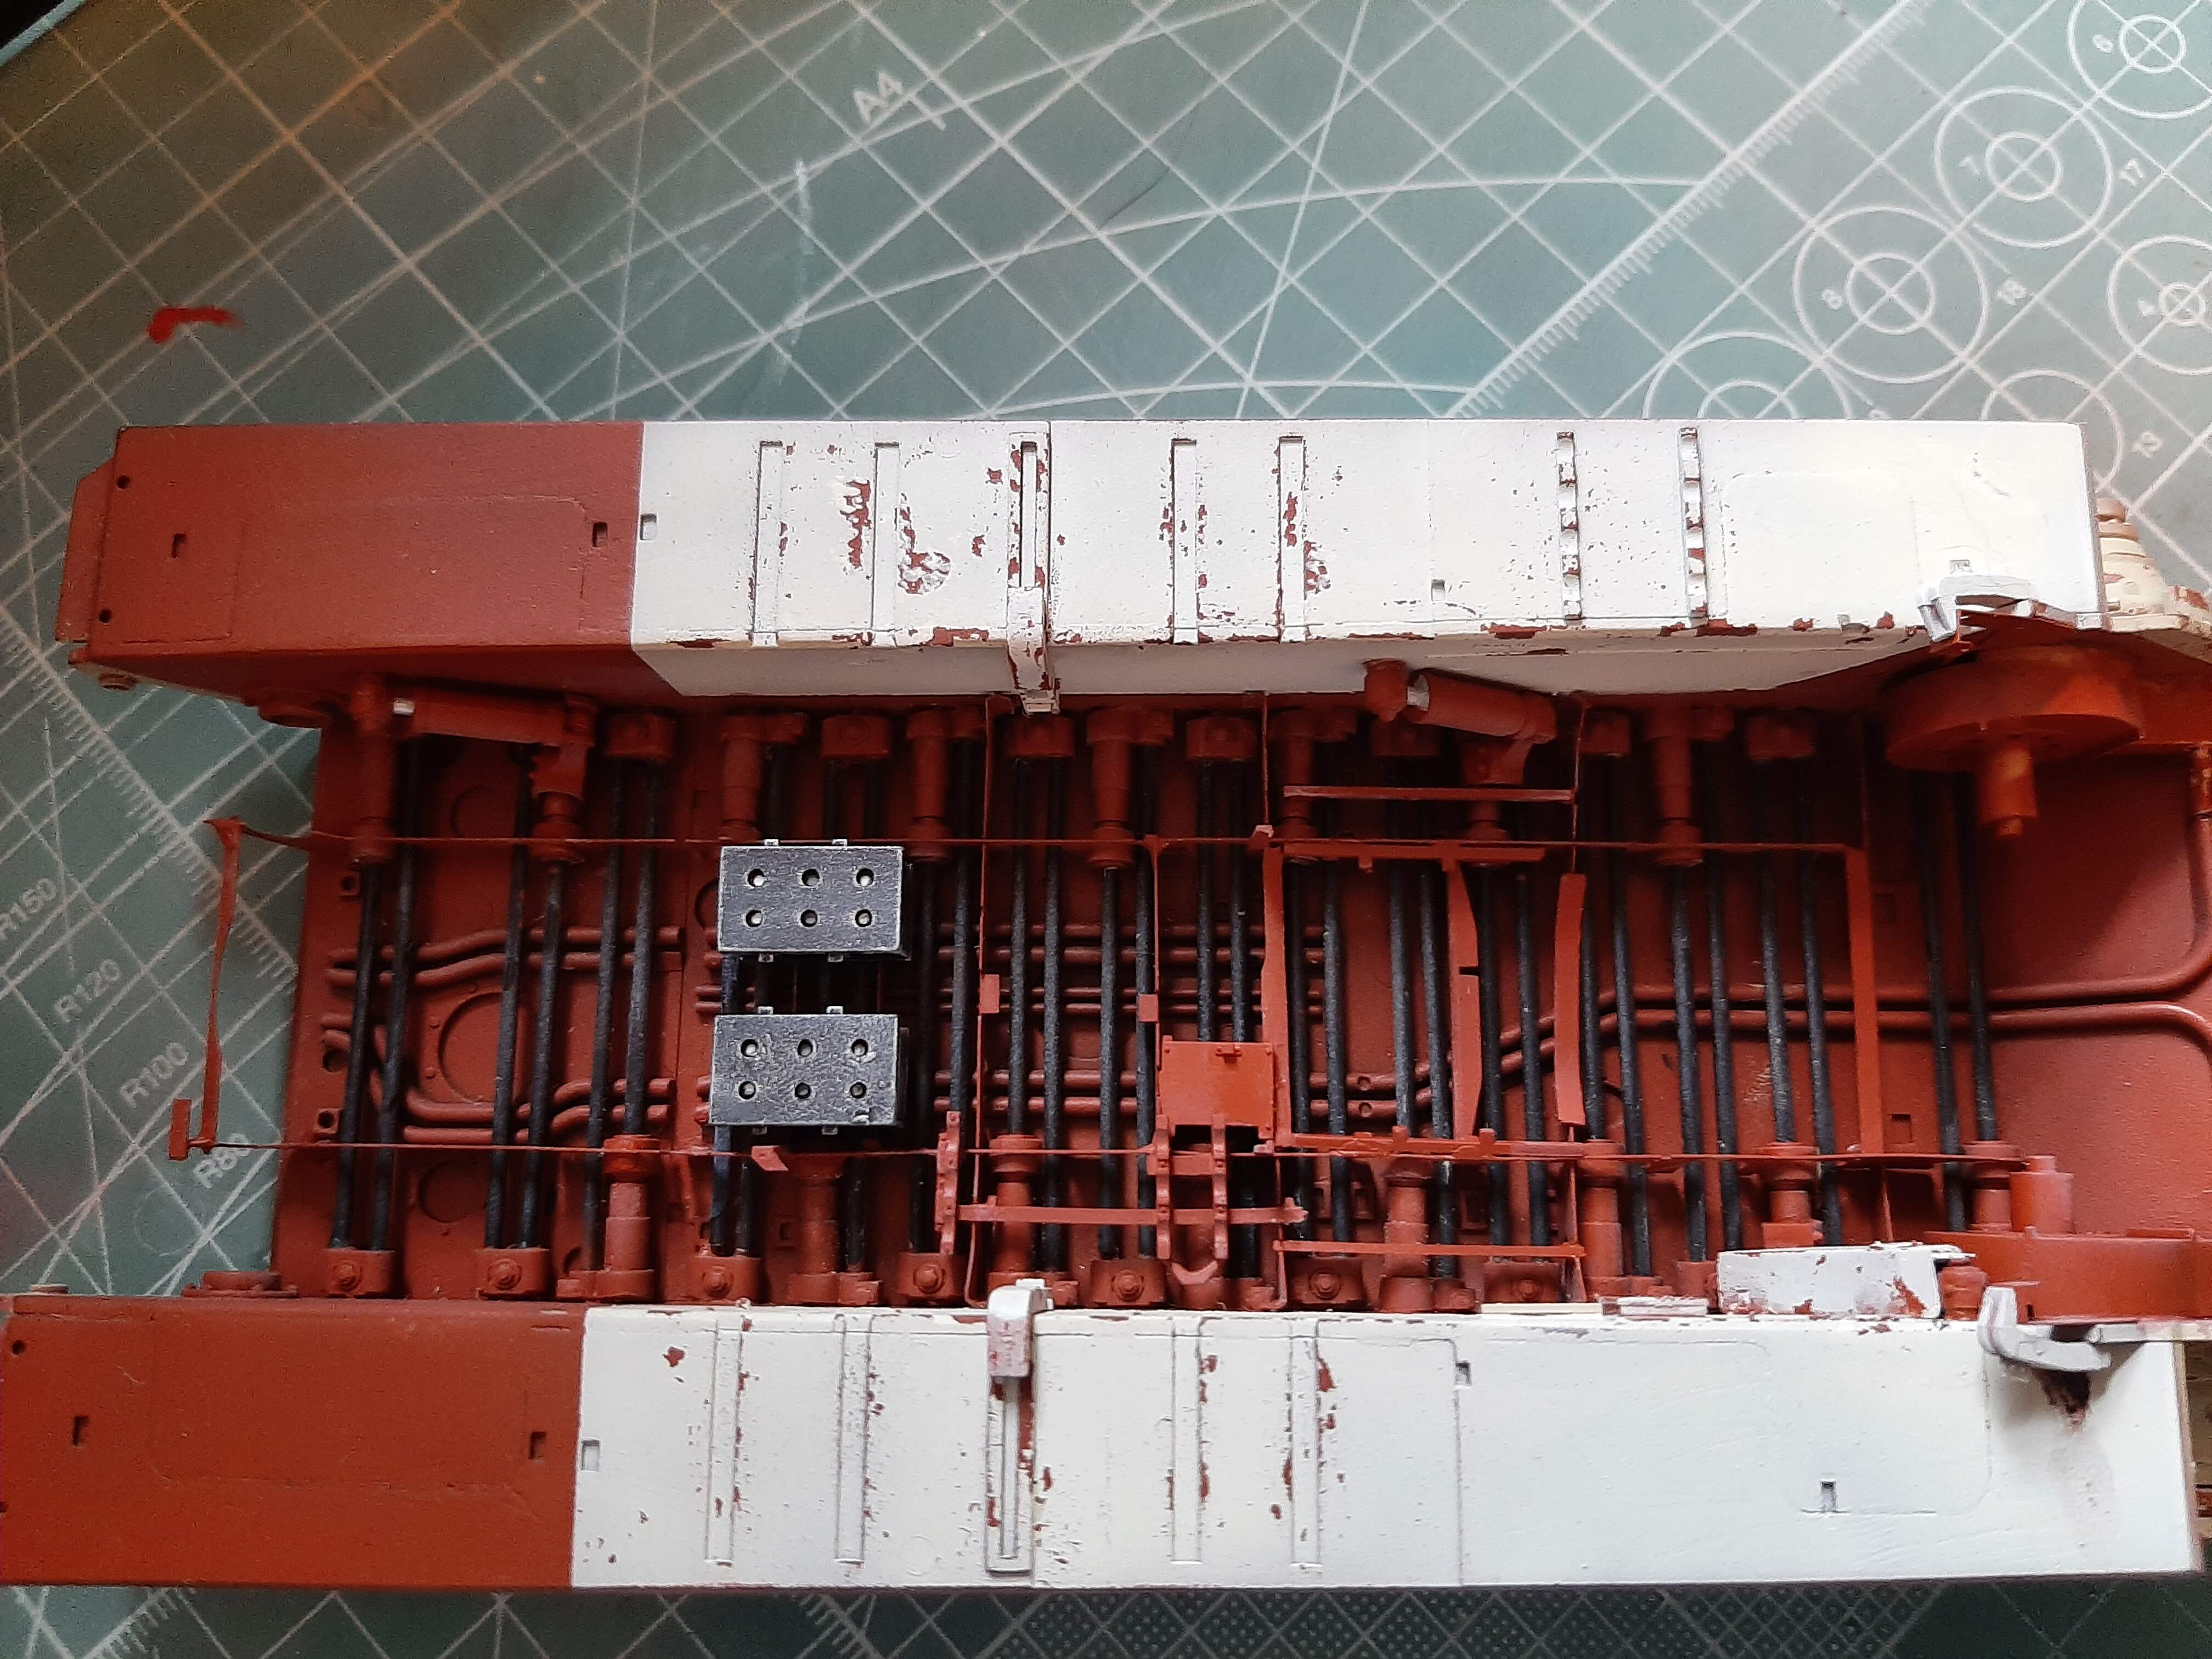
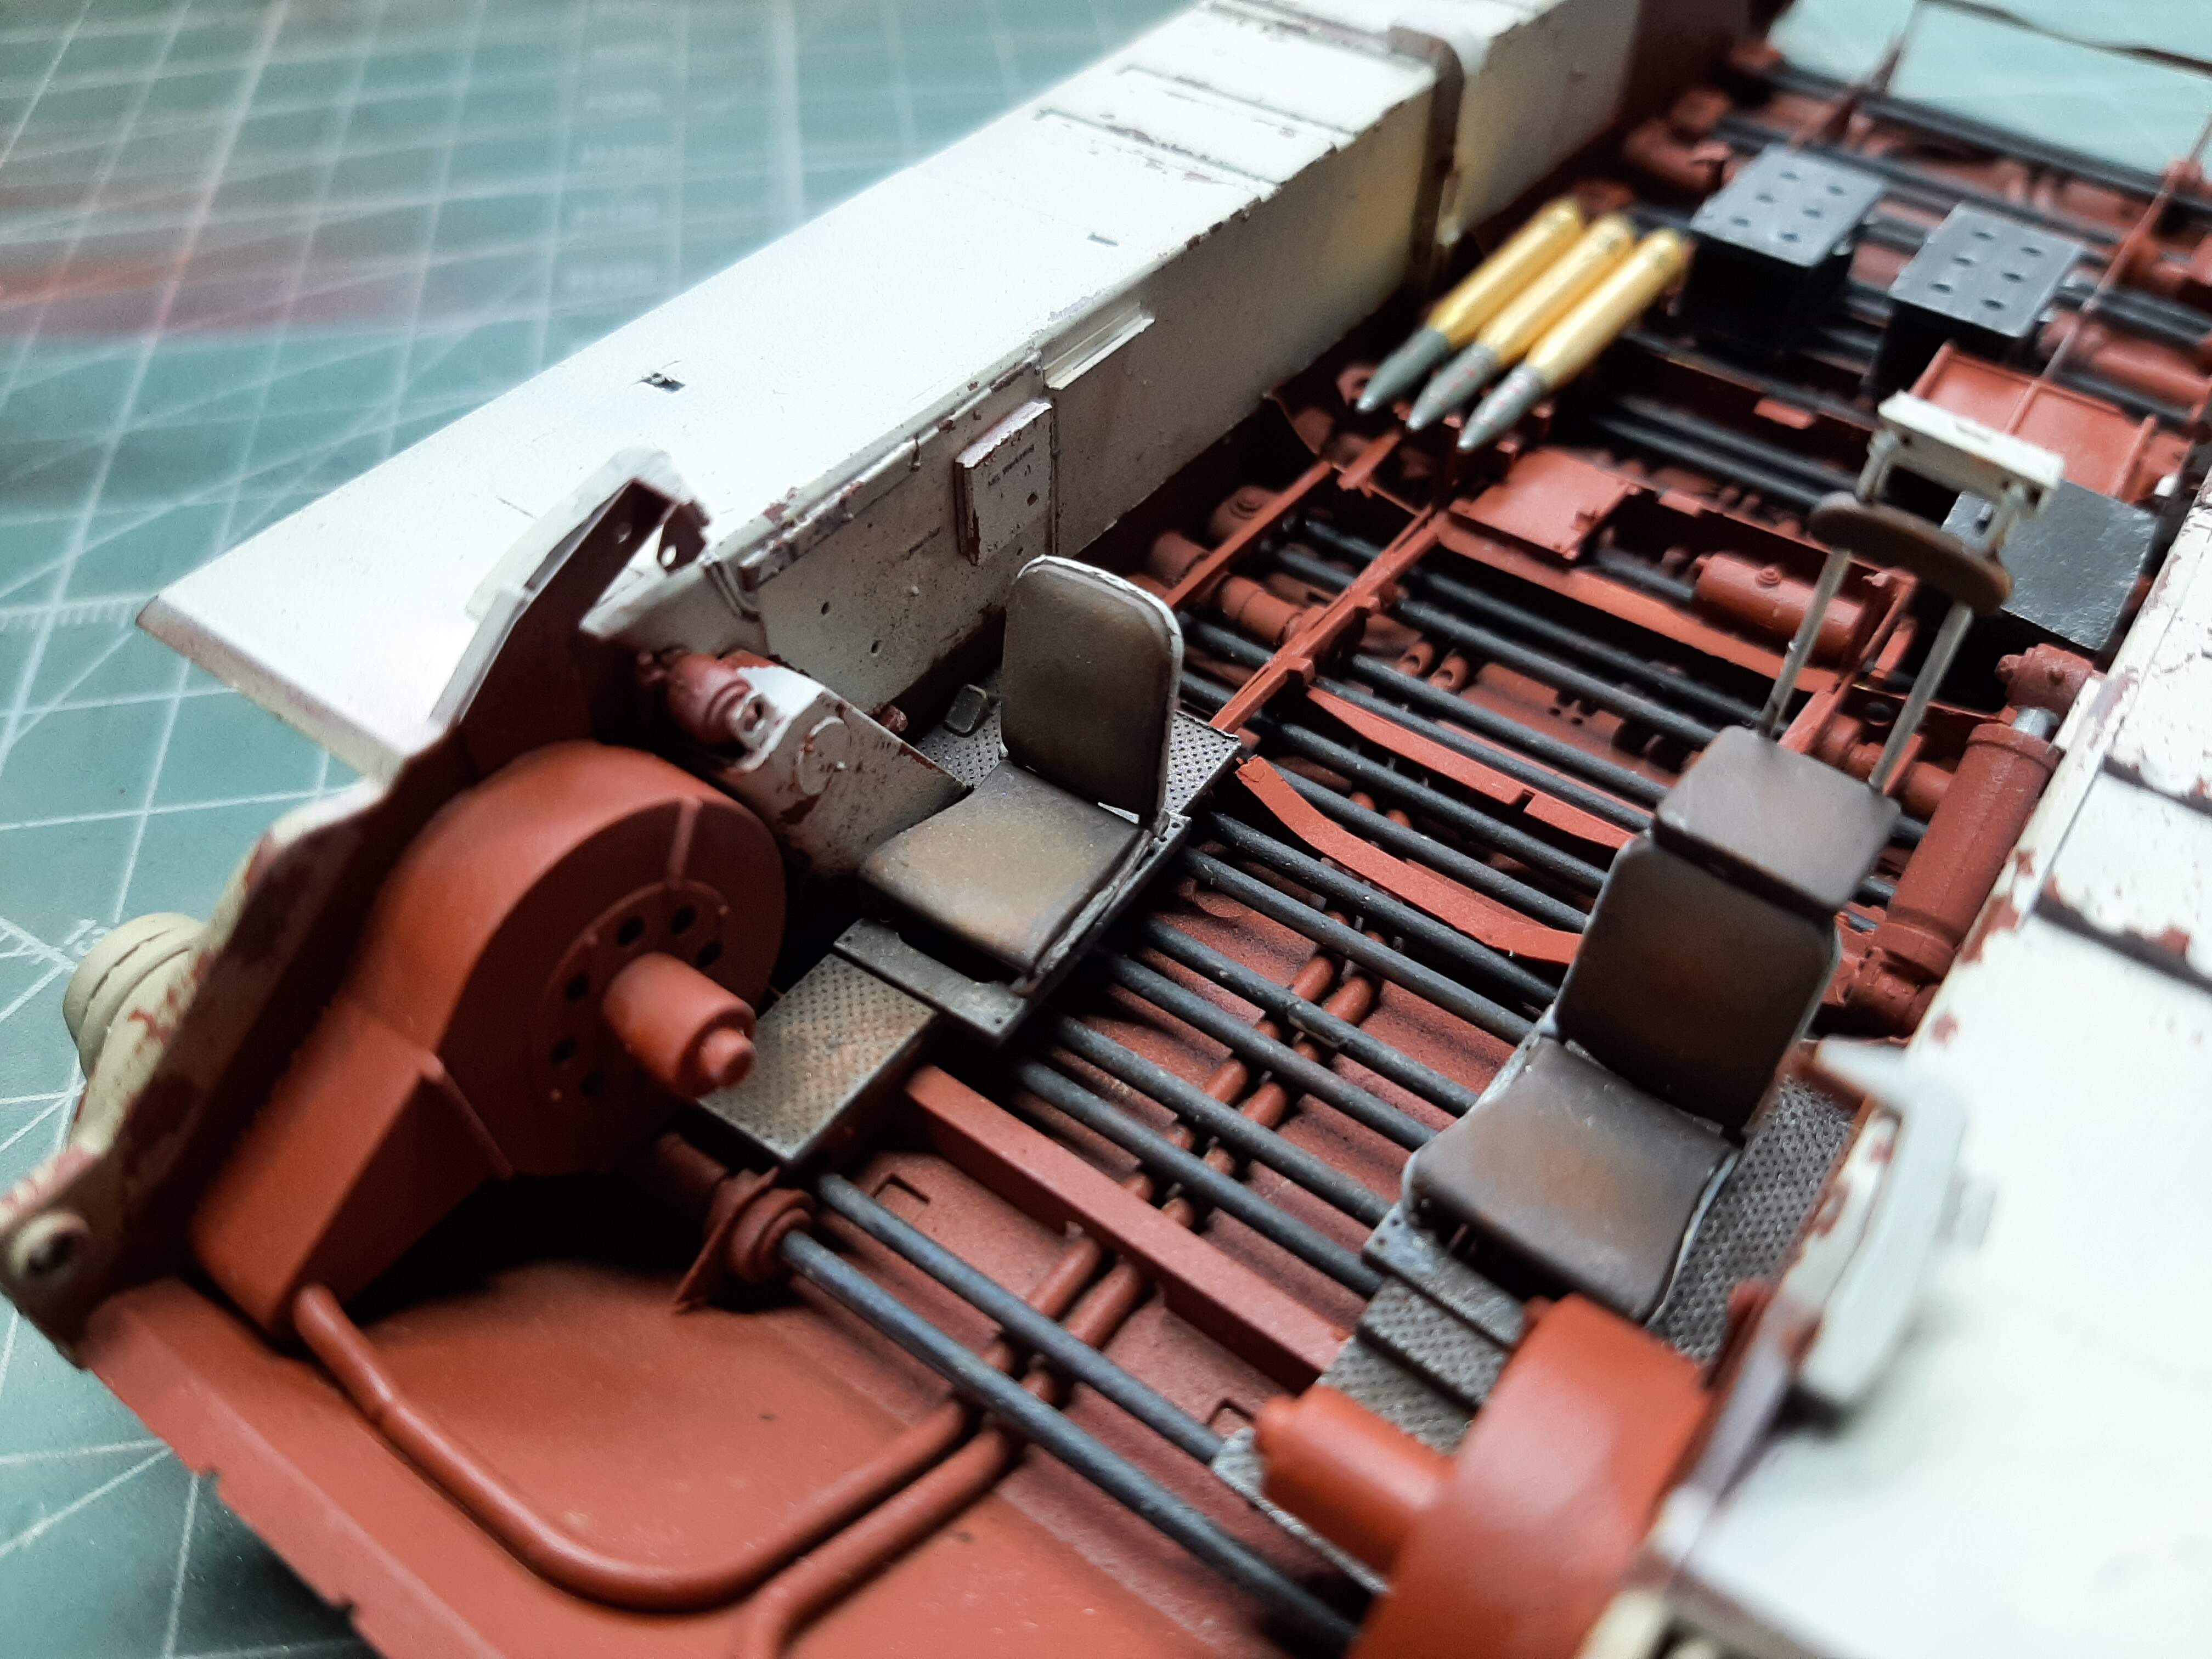
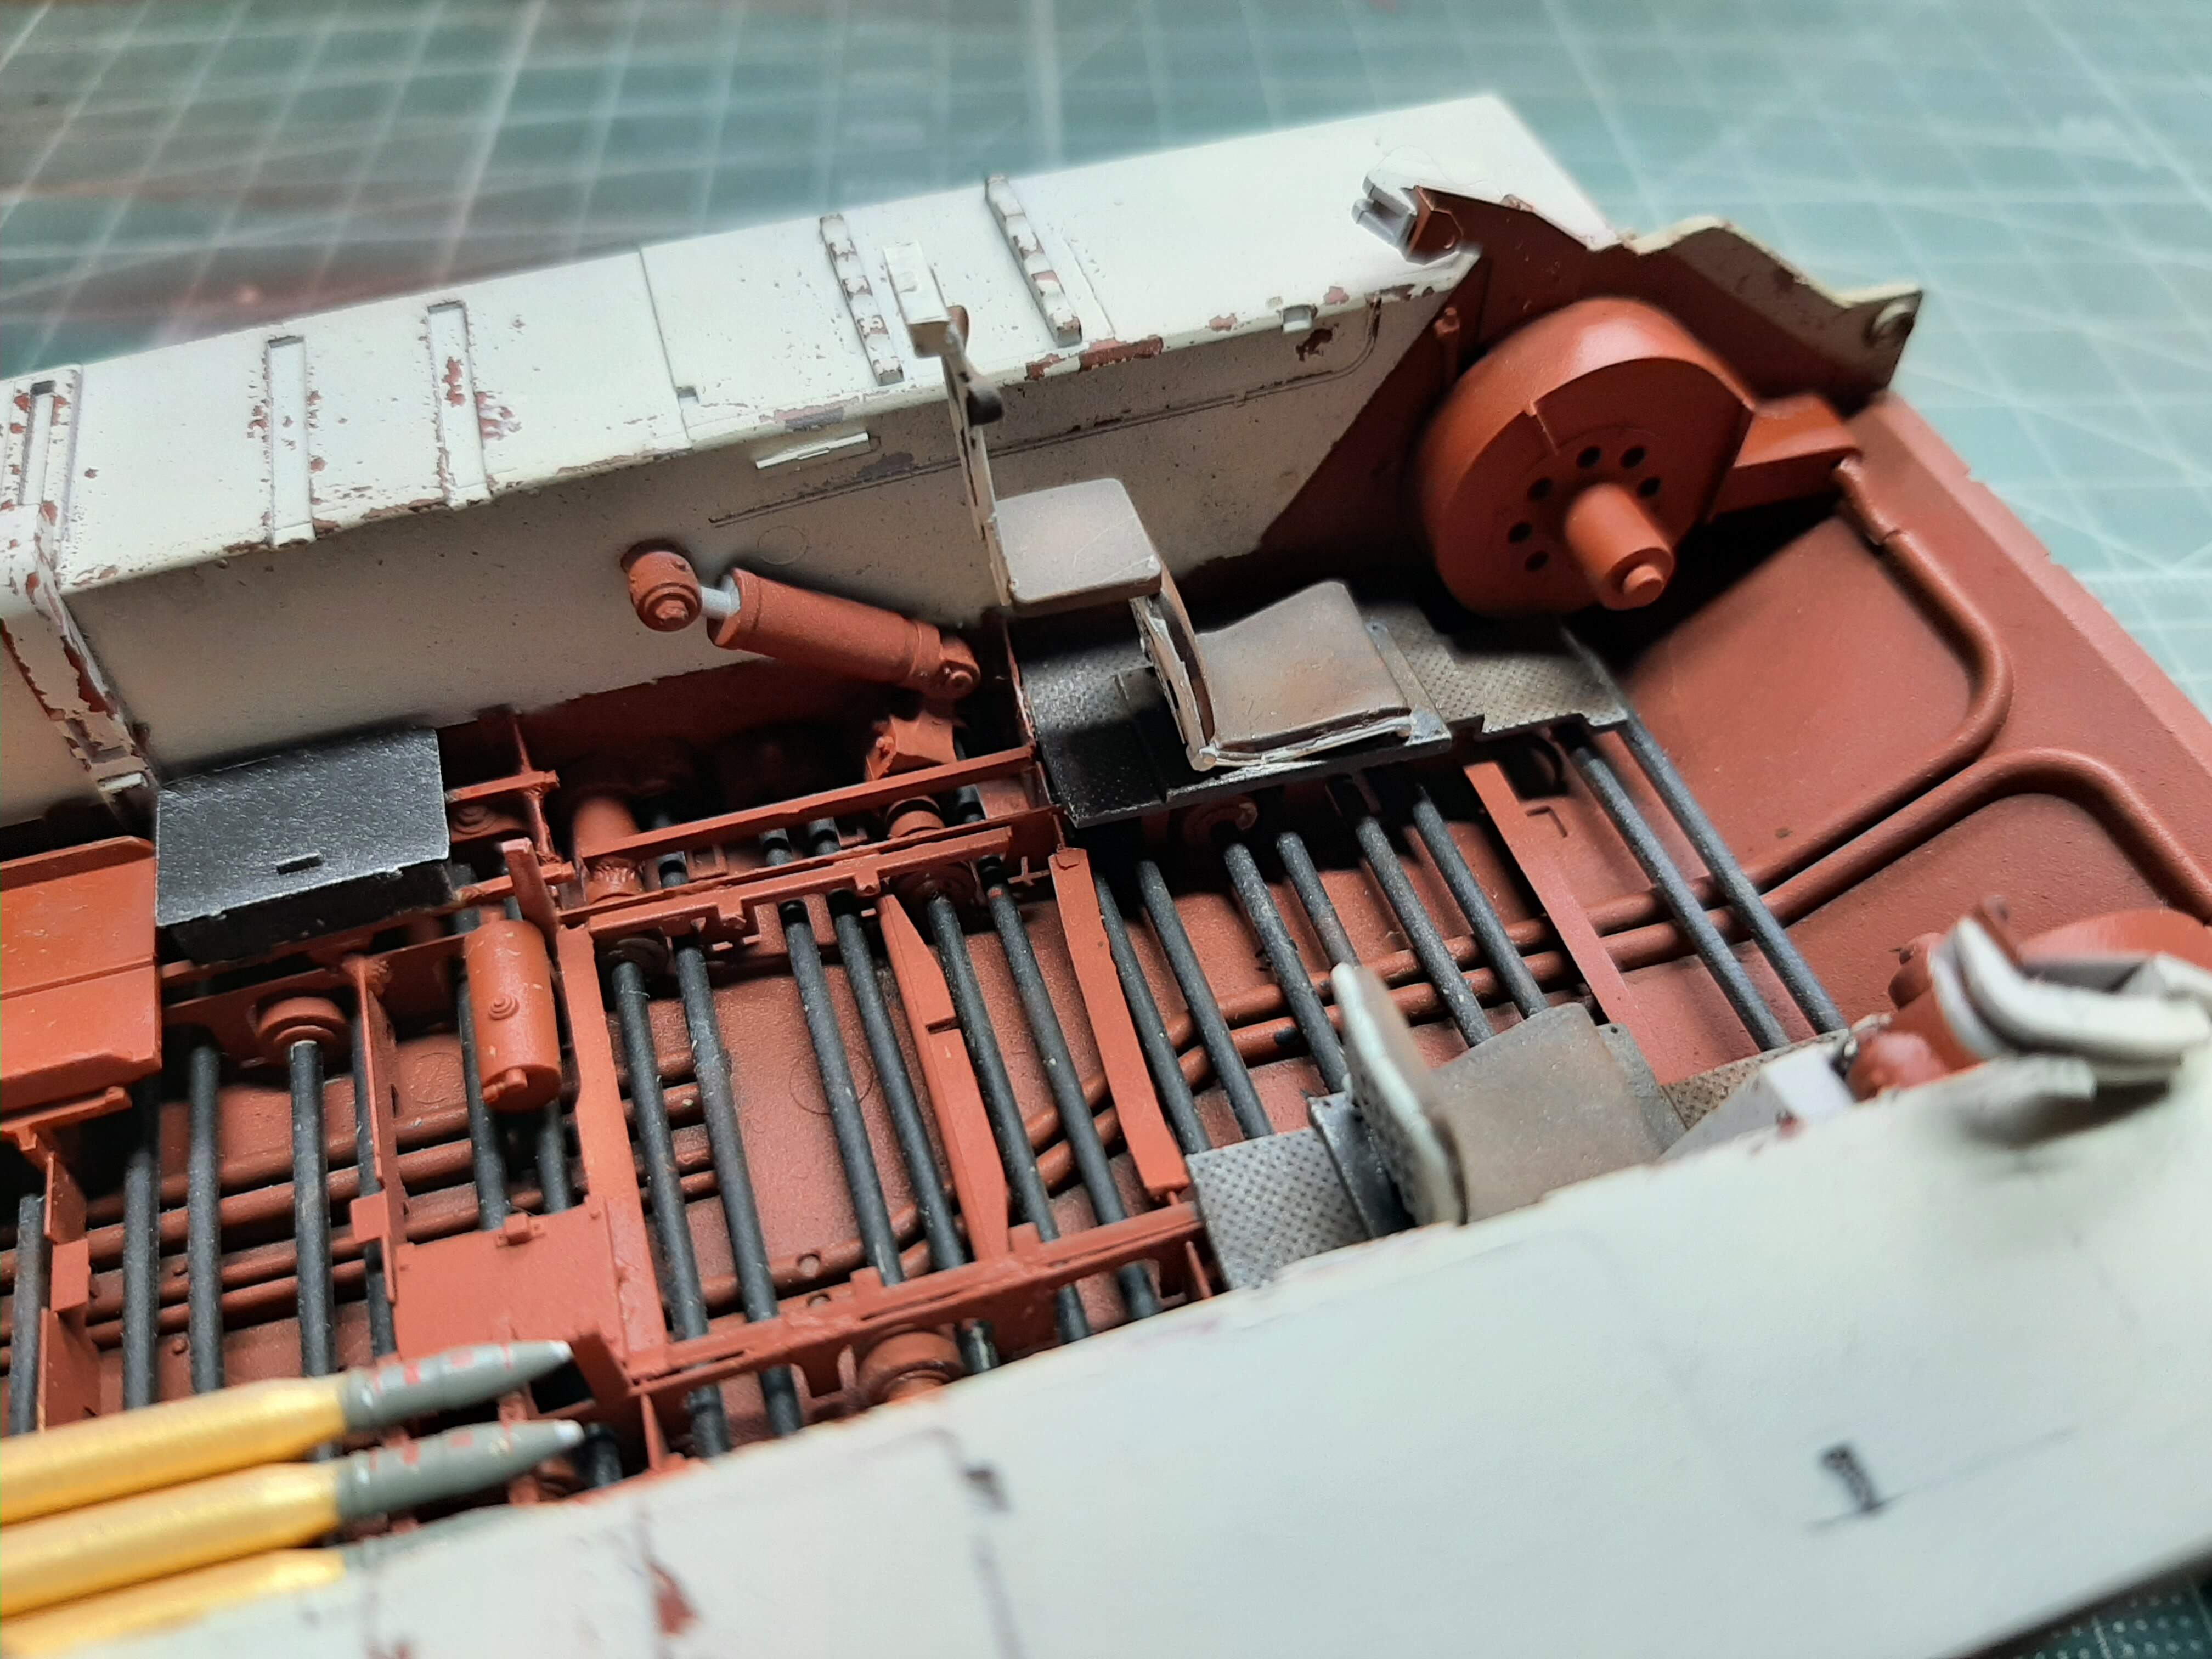
Some progress on the lower hull. Not much because it has taken me four weeks (i can only manage about 4 - 5 hours a week) to paint and apply decals to all 84 75mm rounds. It has been brutal but I stuck with it and now its done. I know that it would have been highly unusual to see a German AFV with a full load out, particularly at the end of the war, but I just want to make the interior as complete as possible.
Anyway, progress on the hull has been limited to completing the driver’s and radio operator’s floor and seats and adding the three (now finished) 75mm shells to the lower hull stowage. I like the attention to detail RFM give to the seat backs, PE springs.
I think I did a pretty good job on the seats myself. Base colour of Dark tracks, dry brushed with Red Leather (both Mig acrylics). I had to do a fair bit of sanding on the floor plates to get them to fit because as i’ve previously said, I didn’t get everything quite lined up when constructing the longitudinal and cross memebrs in the hull floor, but I got there in the end. Bit disappointed that a few of the shells have seams running down them. Not all of them do, but some, and perhaps a little more attention to detail removing them would have been best. I am going to have to live with it I suppose.

5 Likes
Somehow I’ve missed this: fantastic work, really fantastic. It makes me realise what a lazy modeller I am by comparison; if I had to tackle this kit I would have reached for the Mess Webley by now!
Keep it up - very informative.
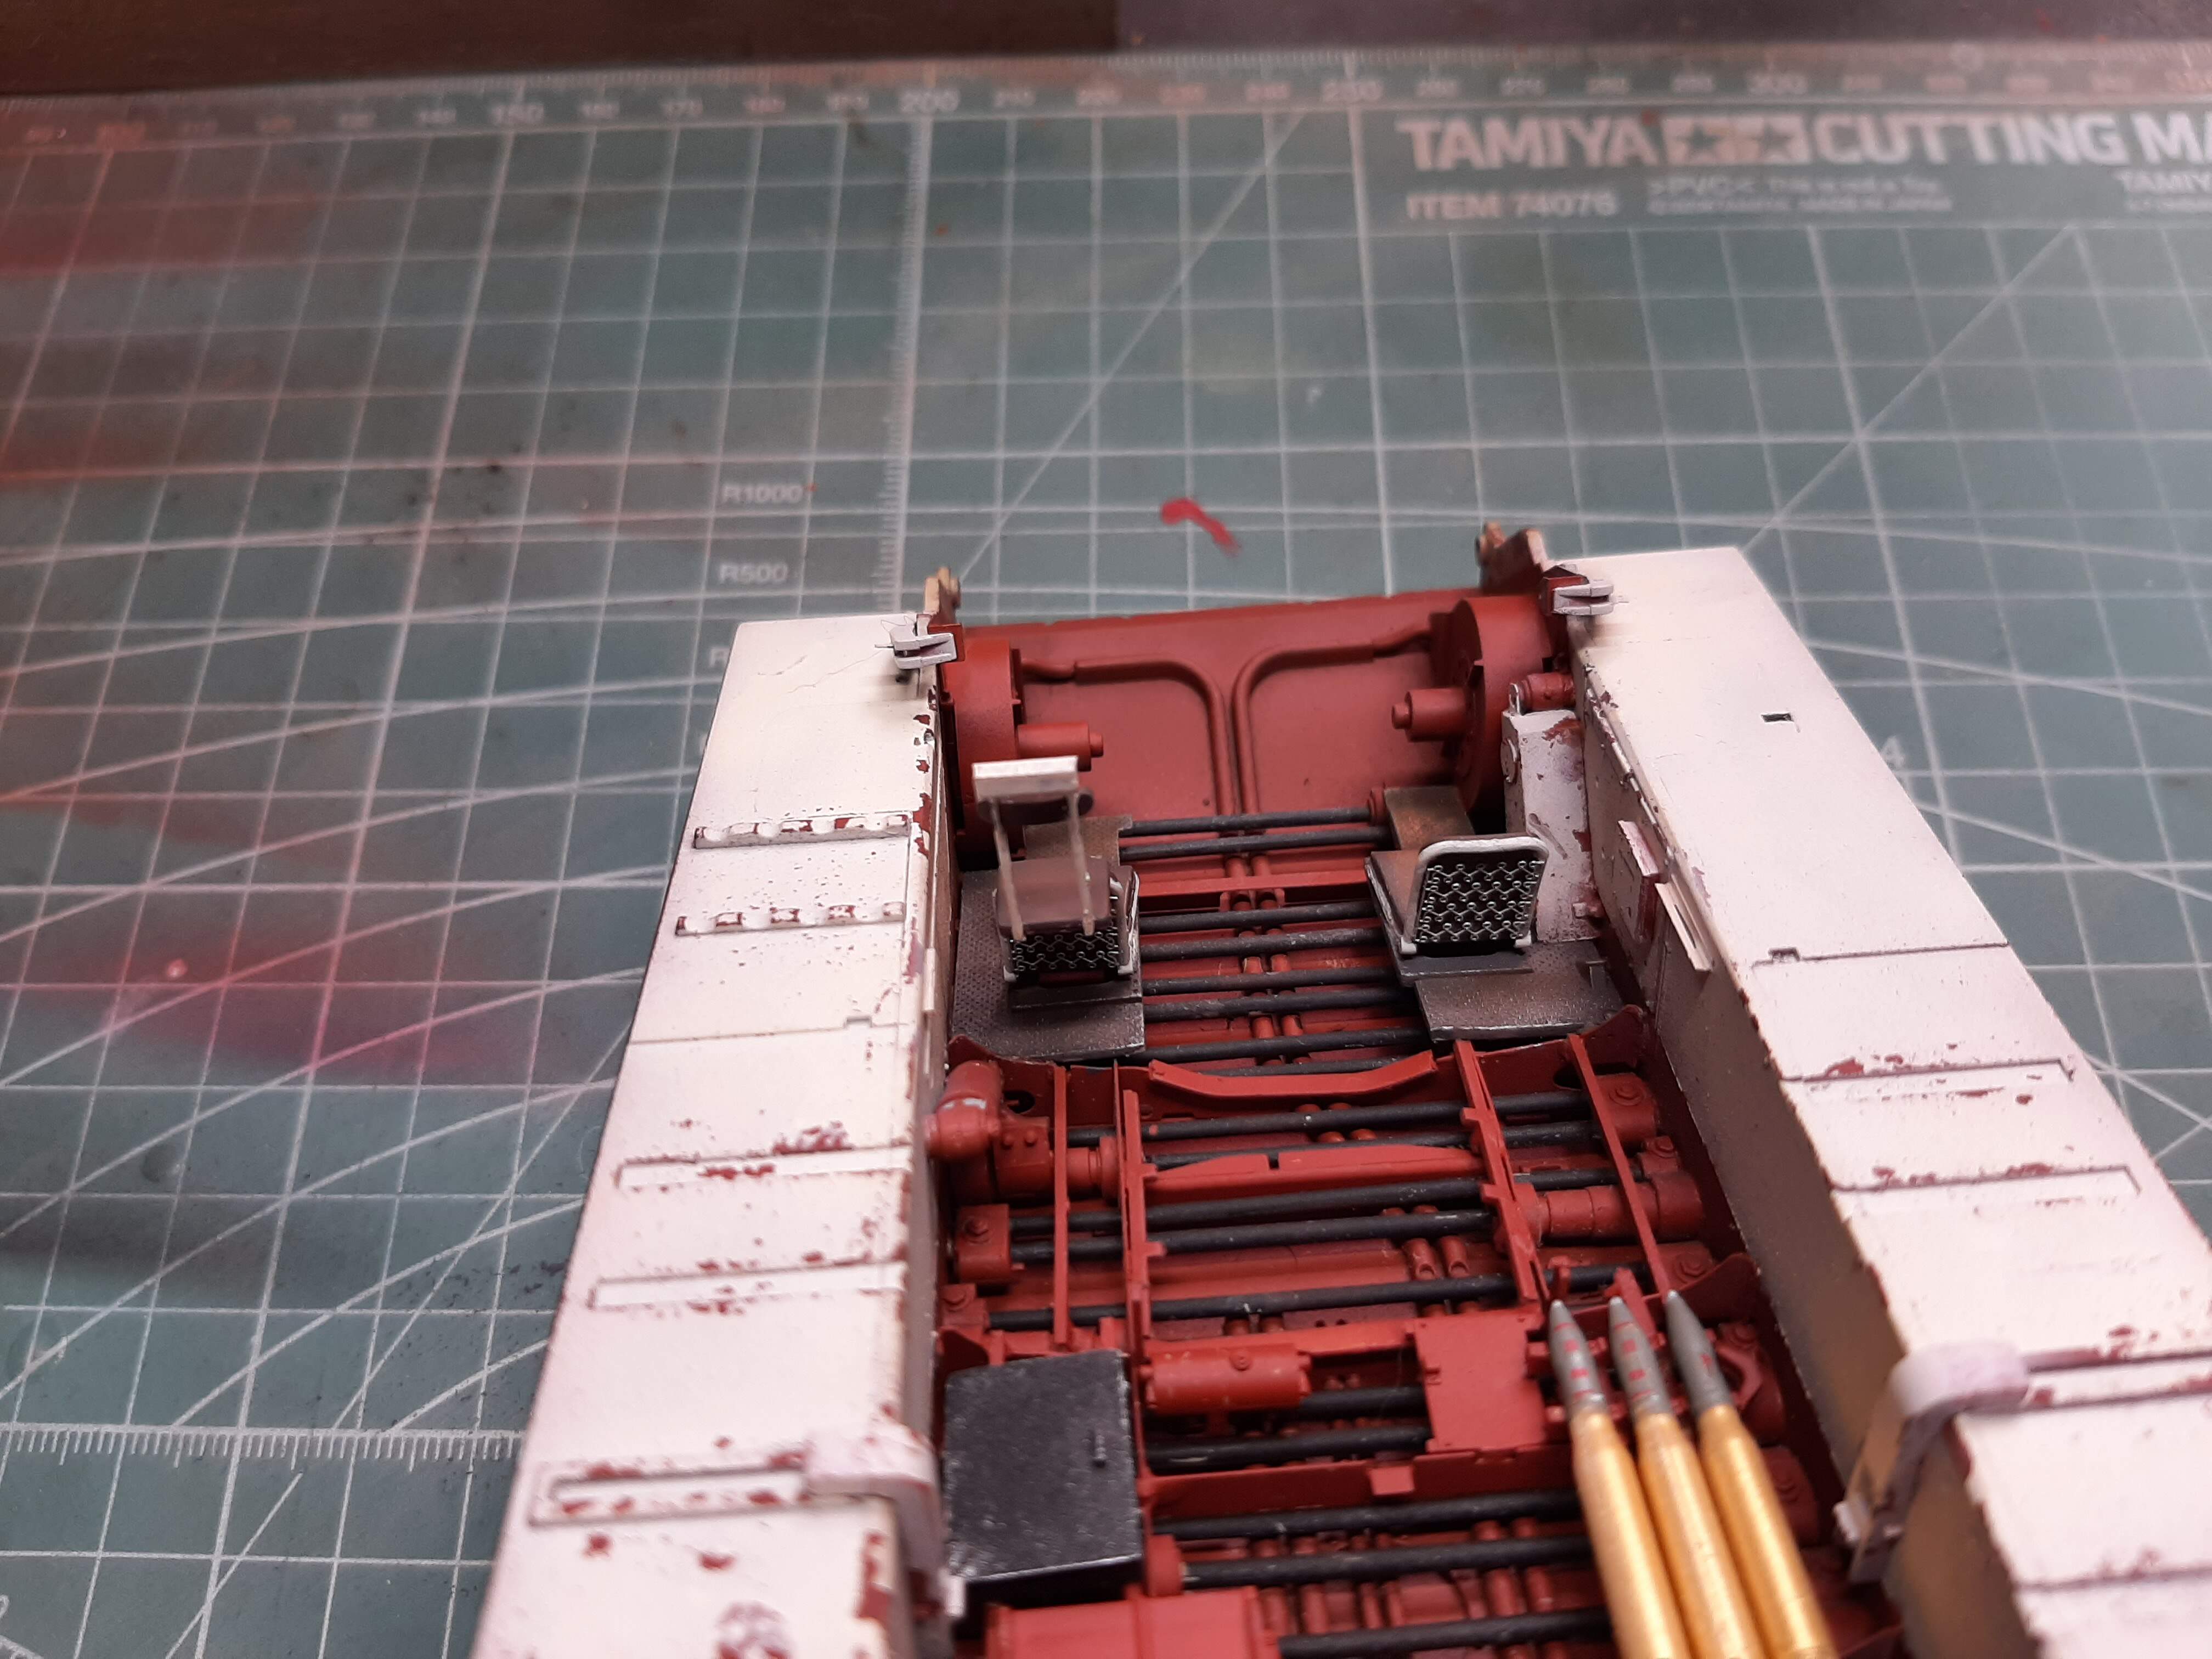
So, the lower hull ammunition stowage is complete and in place. Looks okay I think. Now, working on the transmission.


4 Likes
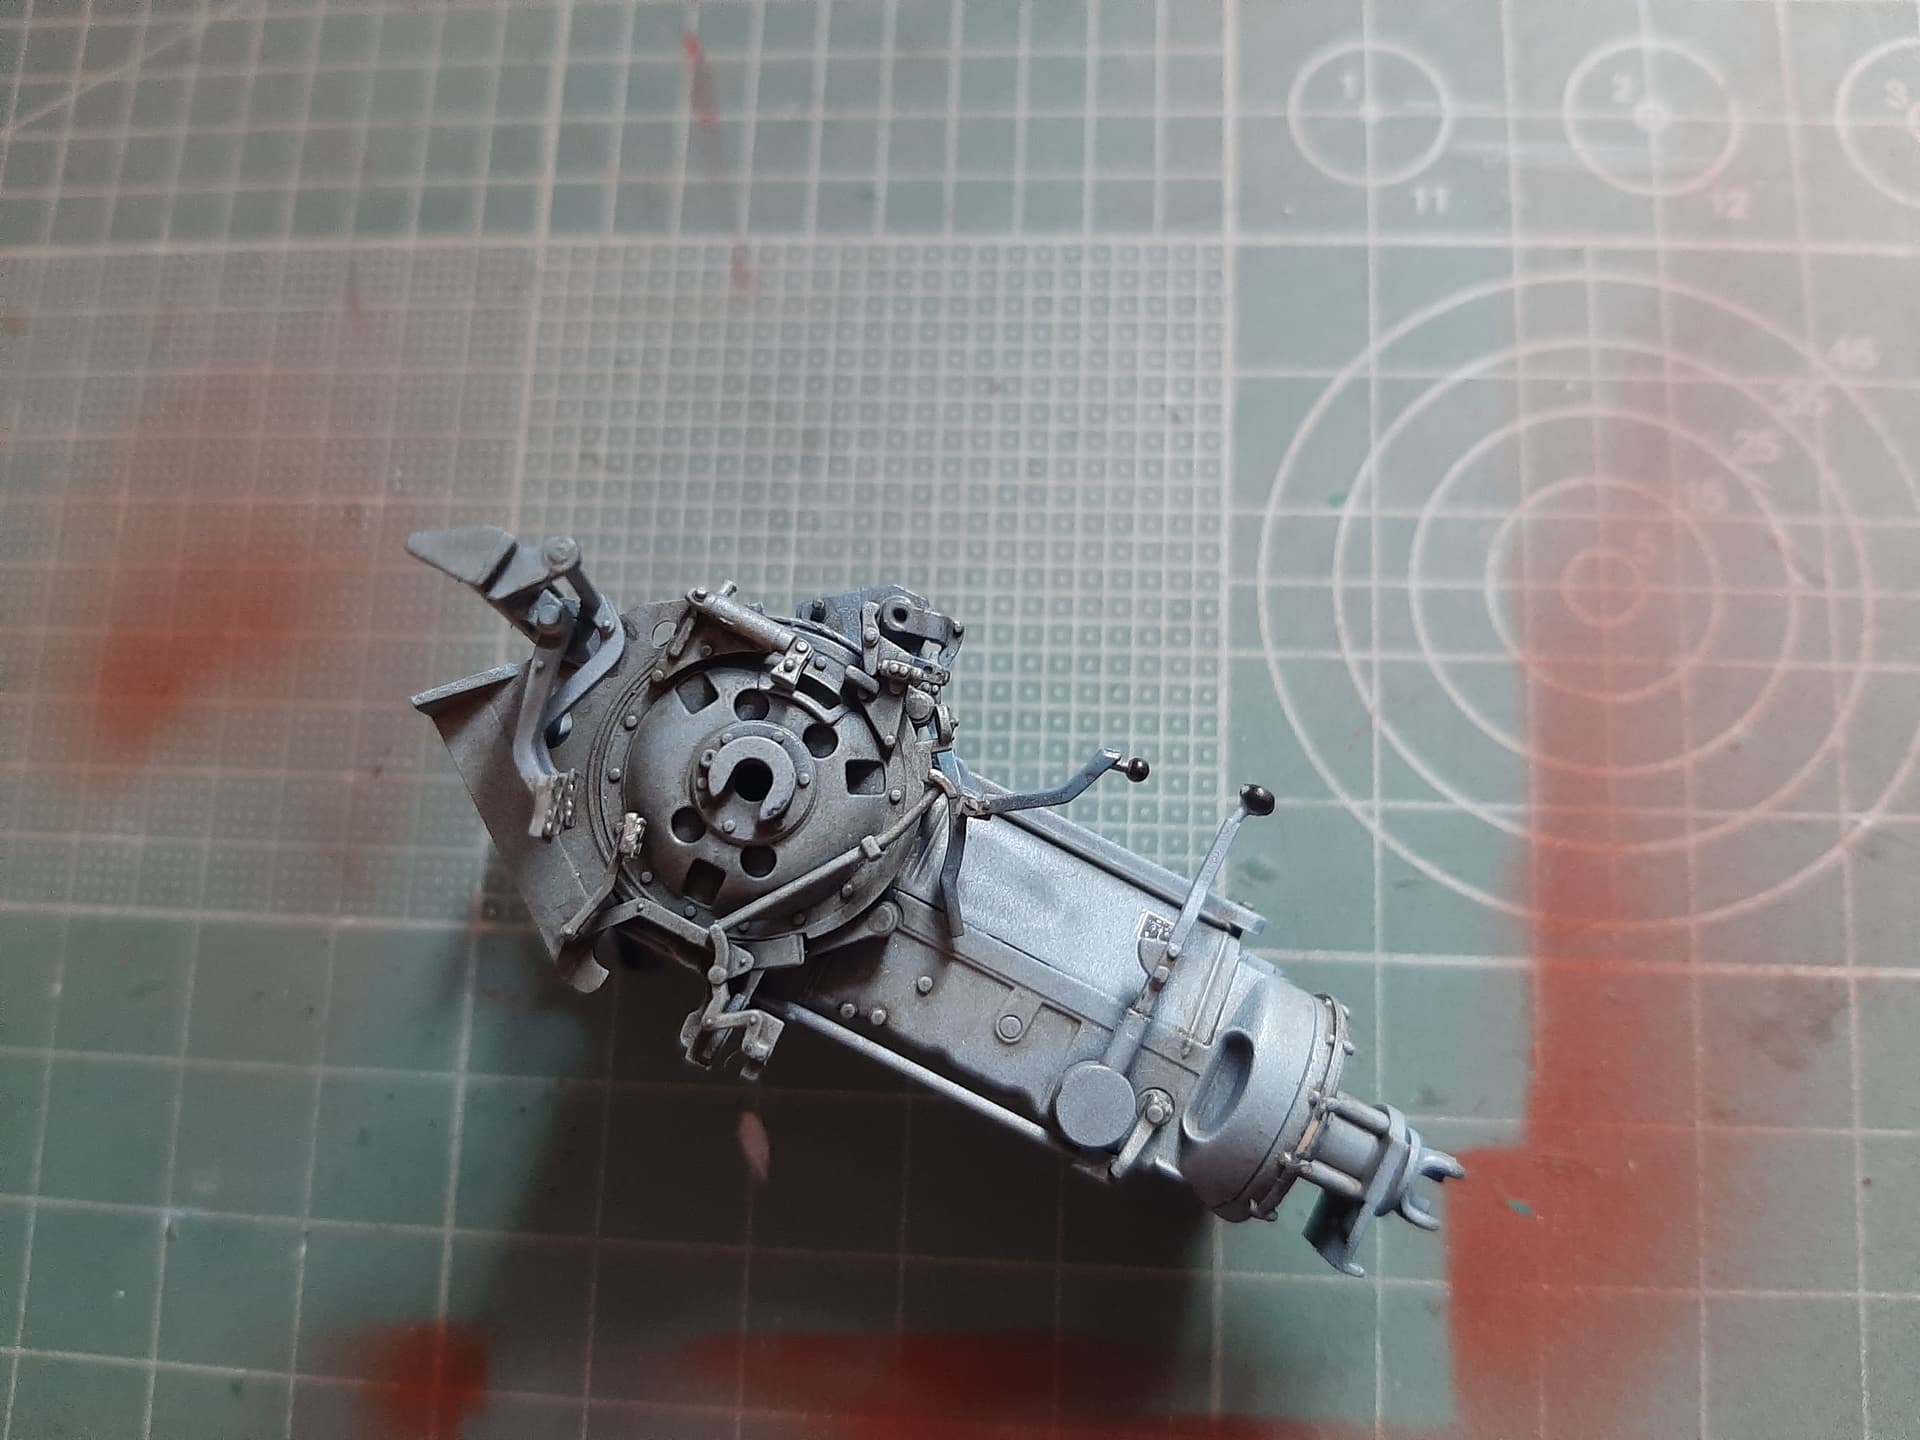
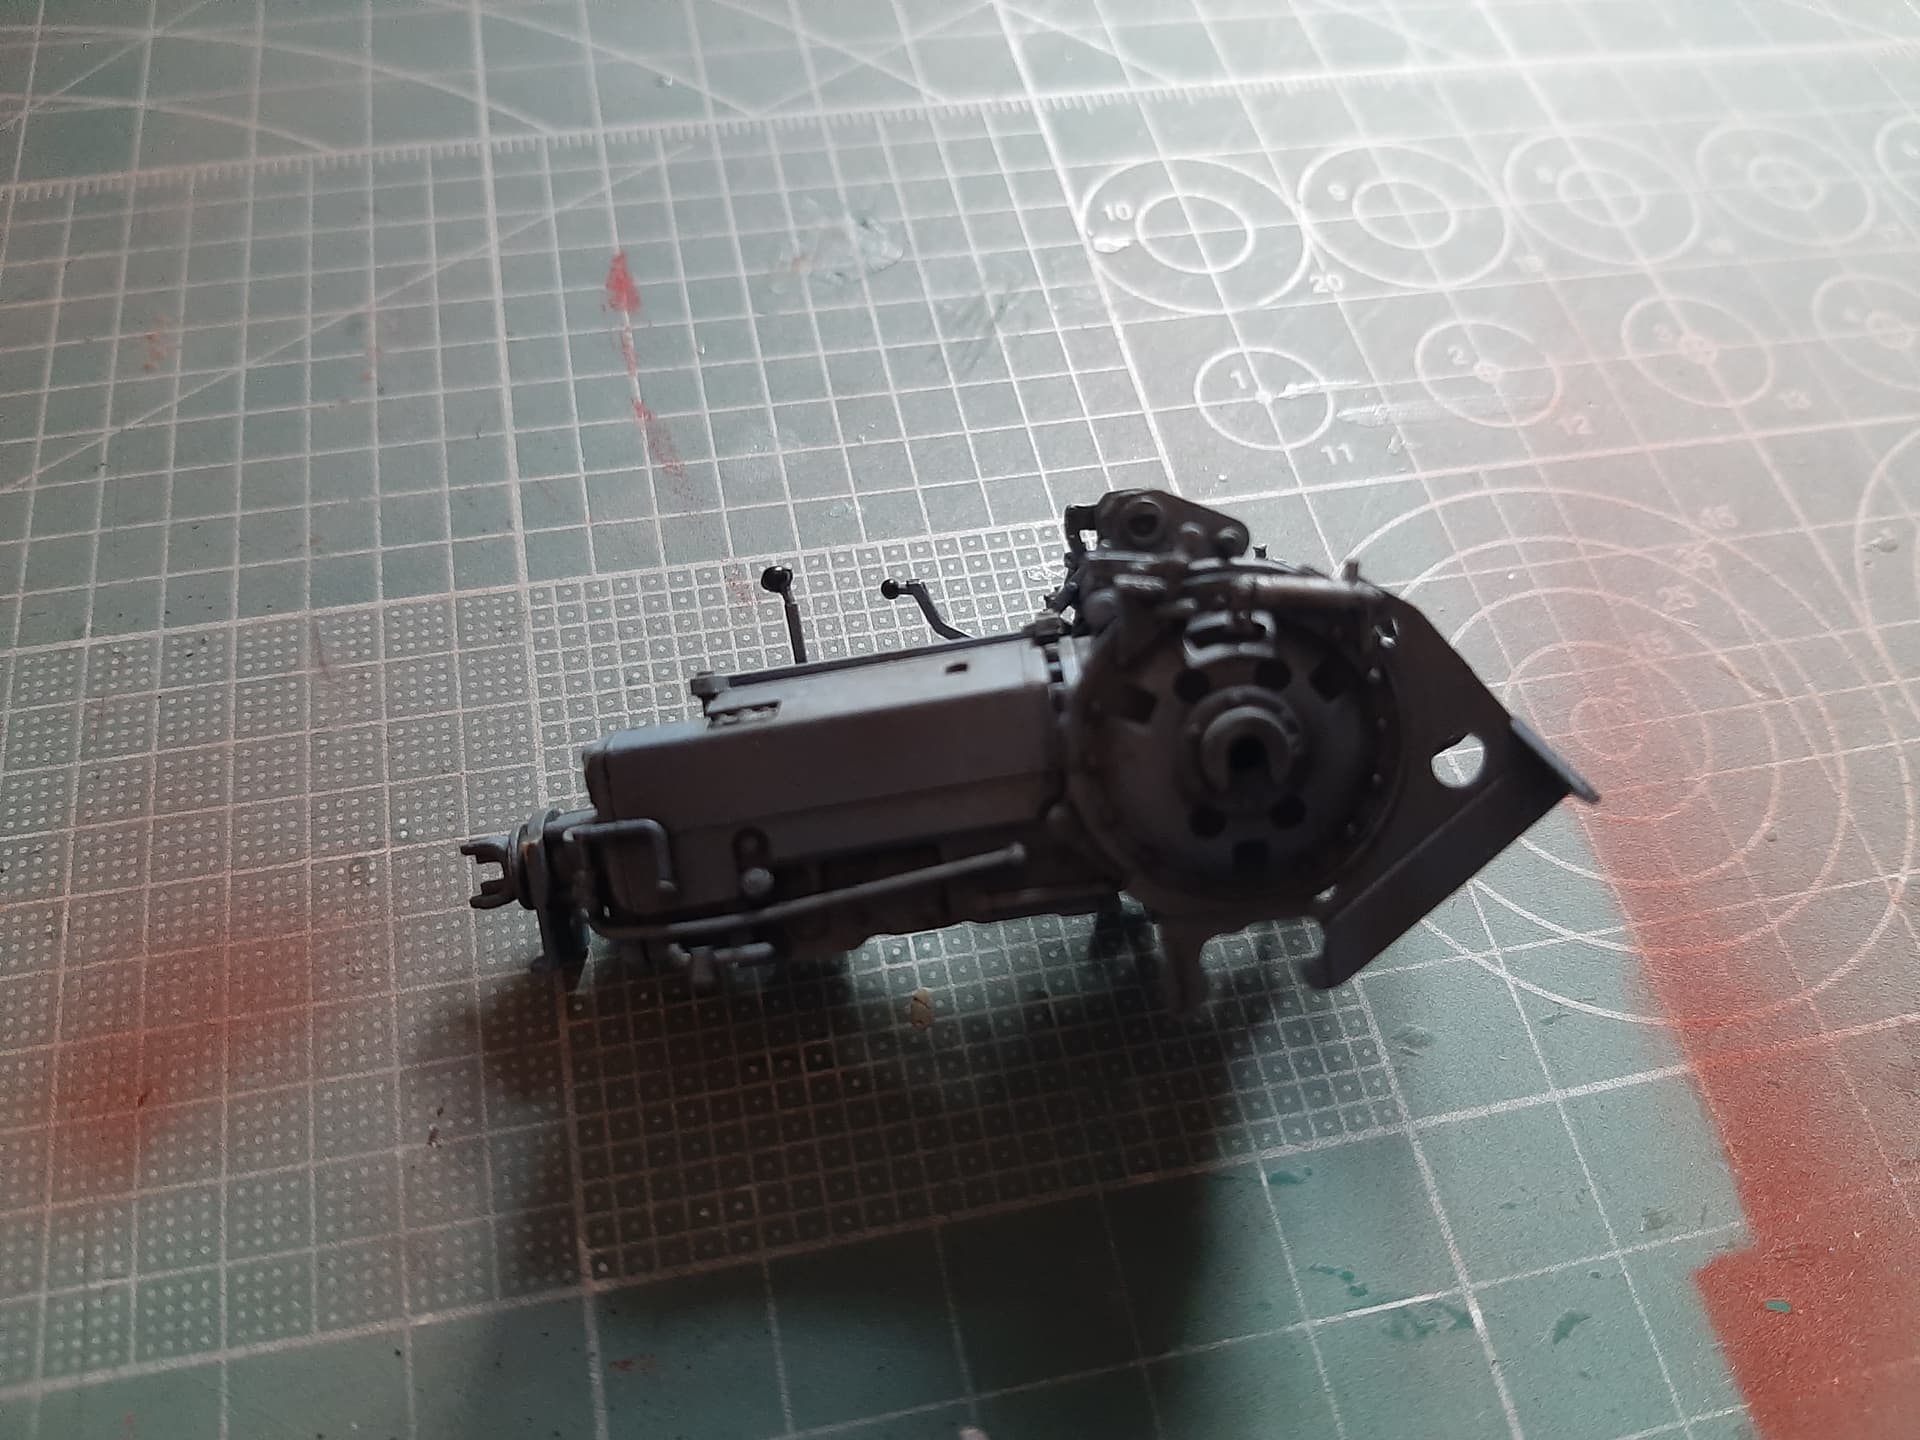
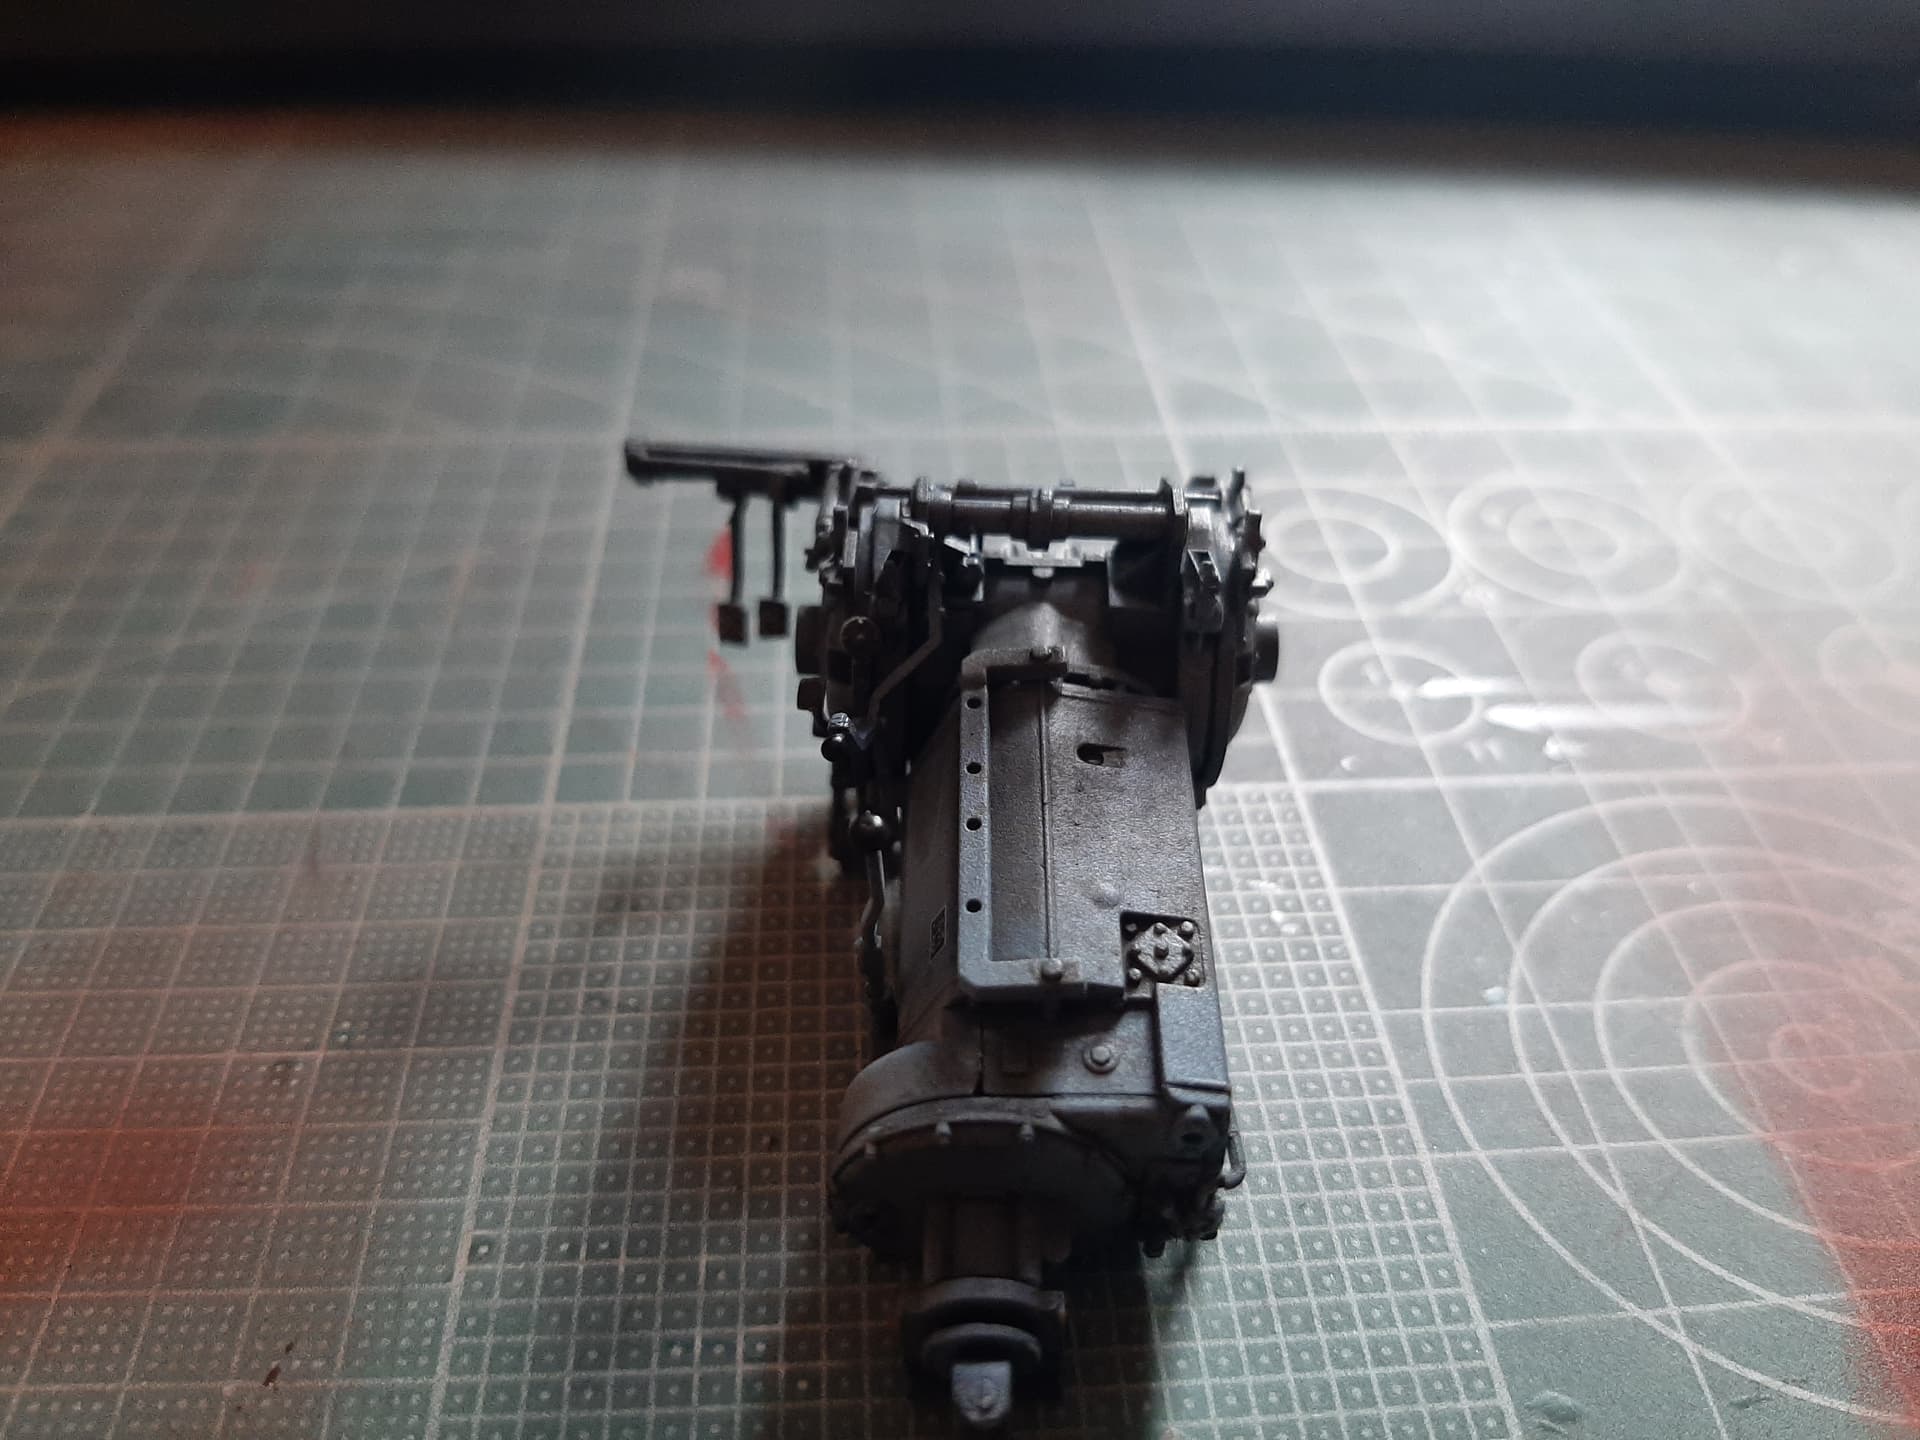
Pictures are not brilliant but the transmission is complete (although not all shown here). Very well detailed. Lots of tiny parts and some PE (which I left off in some cases because I didn’t think it would add anything and I need my sanity - the parts were miniscule).
Undercoat of satin black, then base colour of French Blue and an overspray of a lightened base colour. Weathering done with MIG Engine Grime and Engine Oil.


5 Likes