Fan-freakin-fantastic Tim! Thanks for the pointers on trees. Unfortunately where I live there is nary a twig of heather, but I’m sure there is something that grows very similar in Nova Scotia for peats sakes.
4 Likes
Amazing stuff, i m building Battle of Bulge Diorama too with radio truck…
1 Like
Thanks Barney,
To be honest I am no botanist. I say it’s heather because I tend to find it where there’s a lot of heather - but anything suitably sized will do!
3 Likes
Thanks Matt - be sure to post (or have you already?)
1 Like
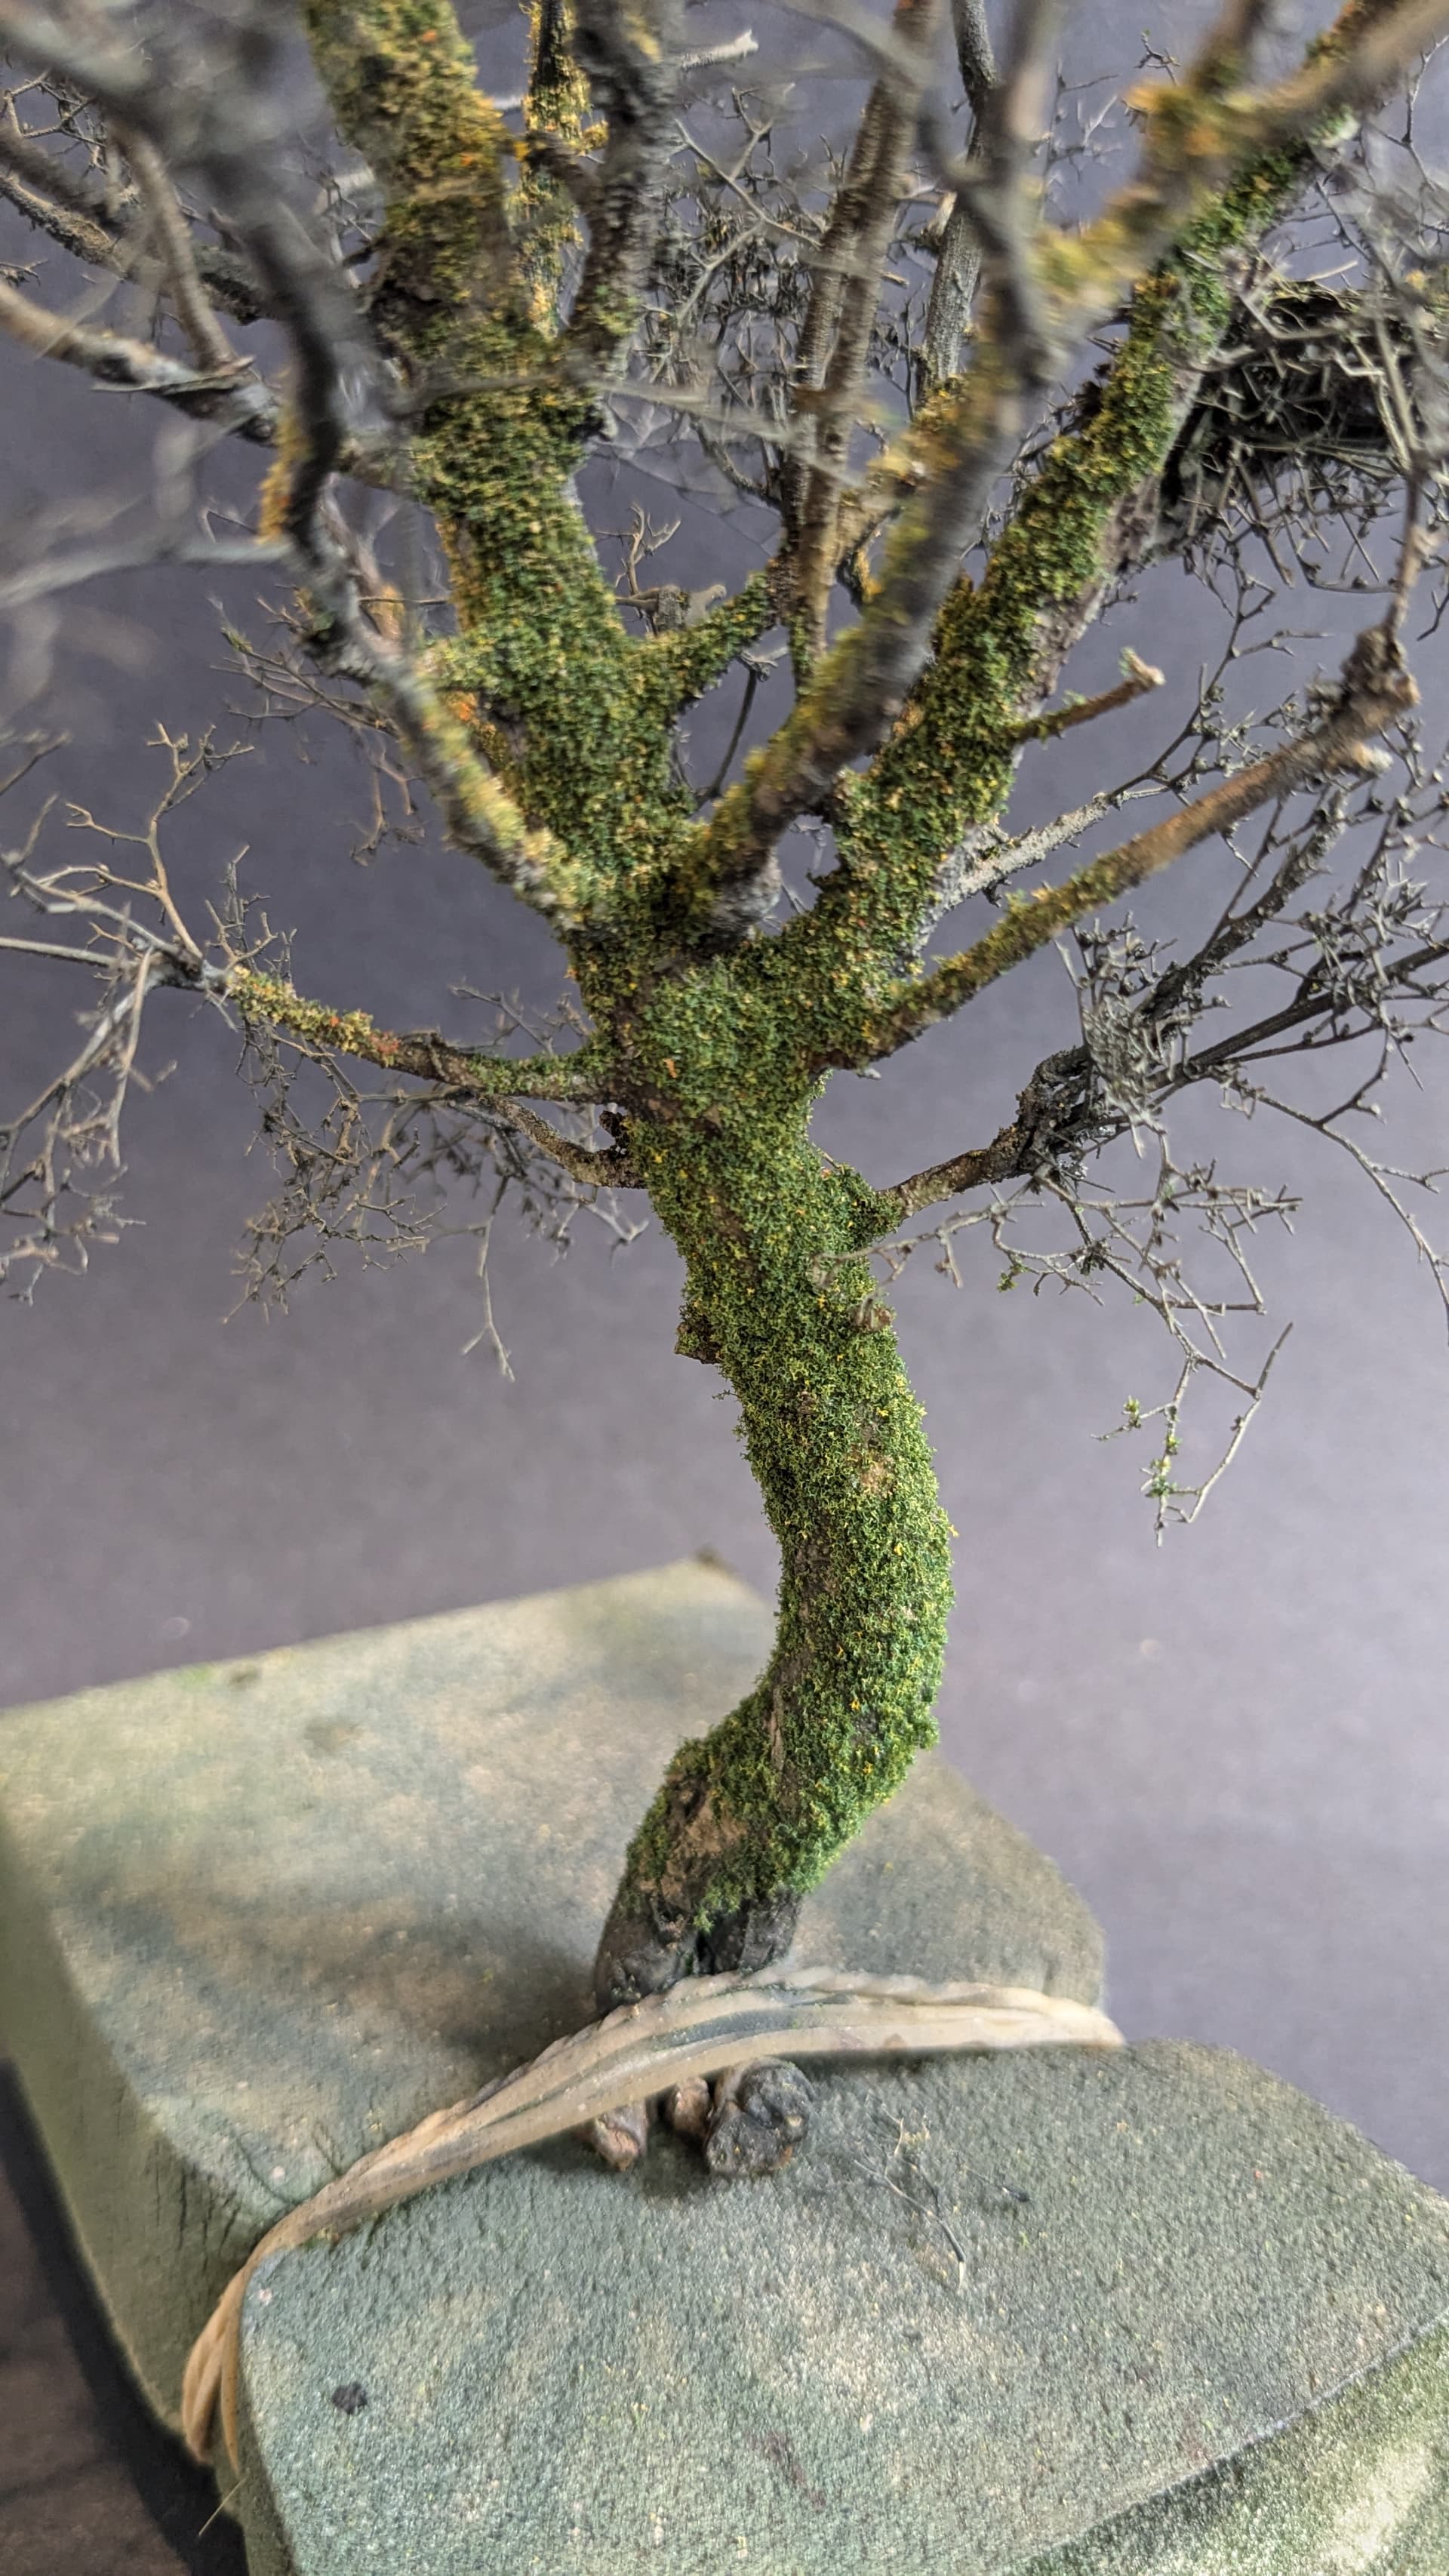
The Tree Part 2
After all the hard work gluing individual branches to the main body of the tree the rest was surprisingly simple.
I started with a thorough base coat in black to unify all of the different parts and then sprayed it with a succession of greyish earth tones (despite what we tend to think, trees are usually more grey than brown). These were gradually lightened to add highlights.
If you compare the shots below with the ones above you may think that the tree now looks a bit smaller. This was partly deliberate: I was going for a stark winter look and whilst the fuller shape would suit a summer setting with foliage, I just thought it looked too ‘busy’…
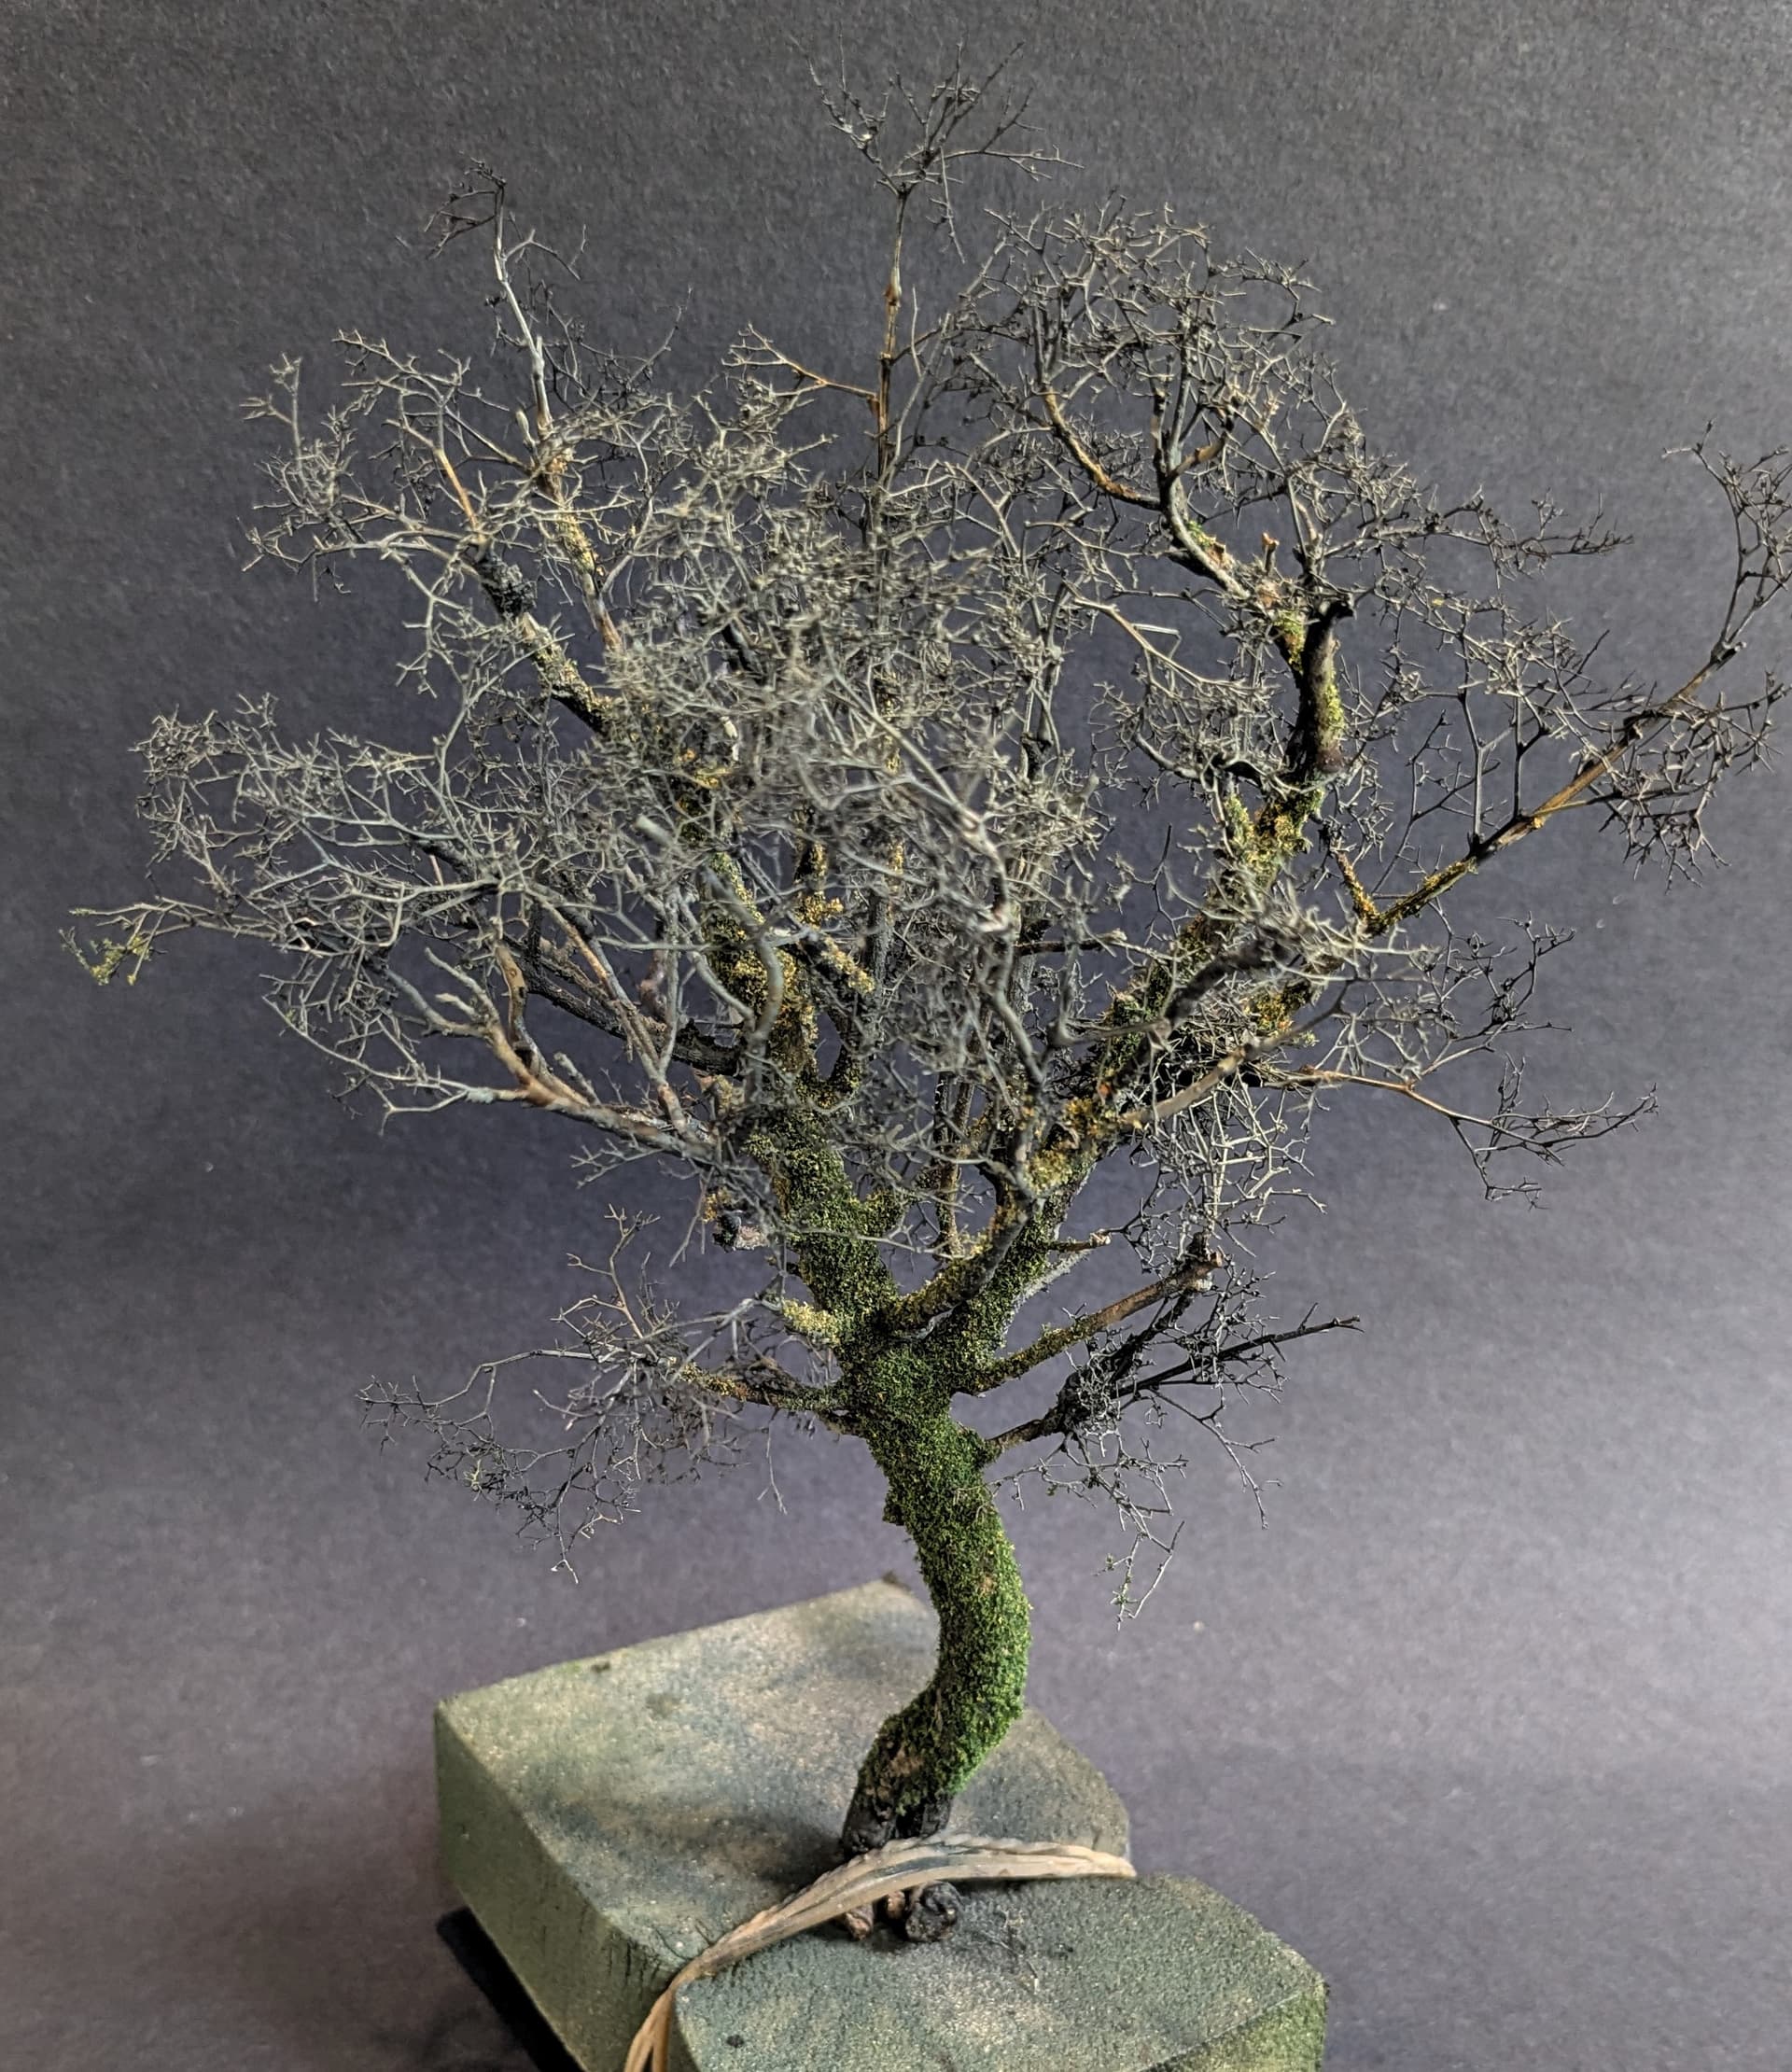

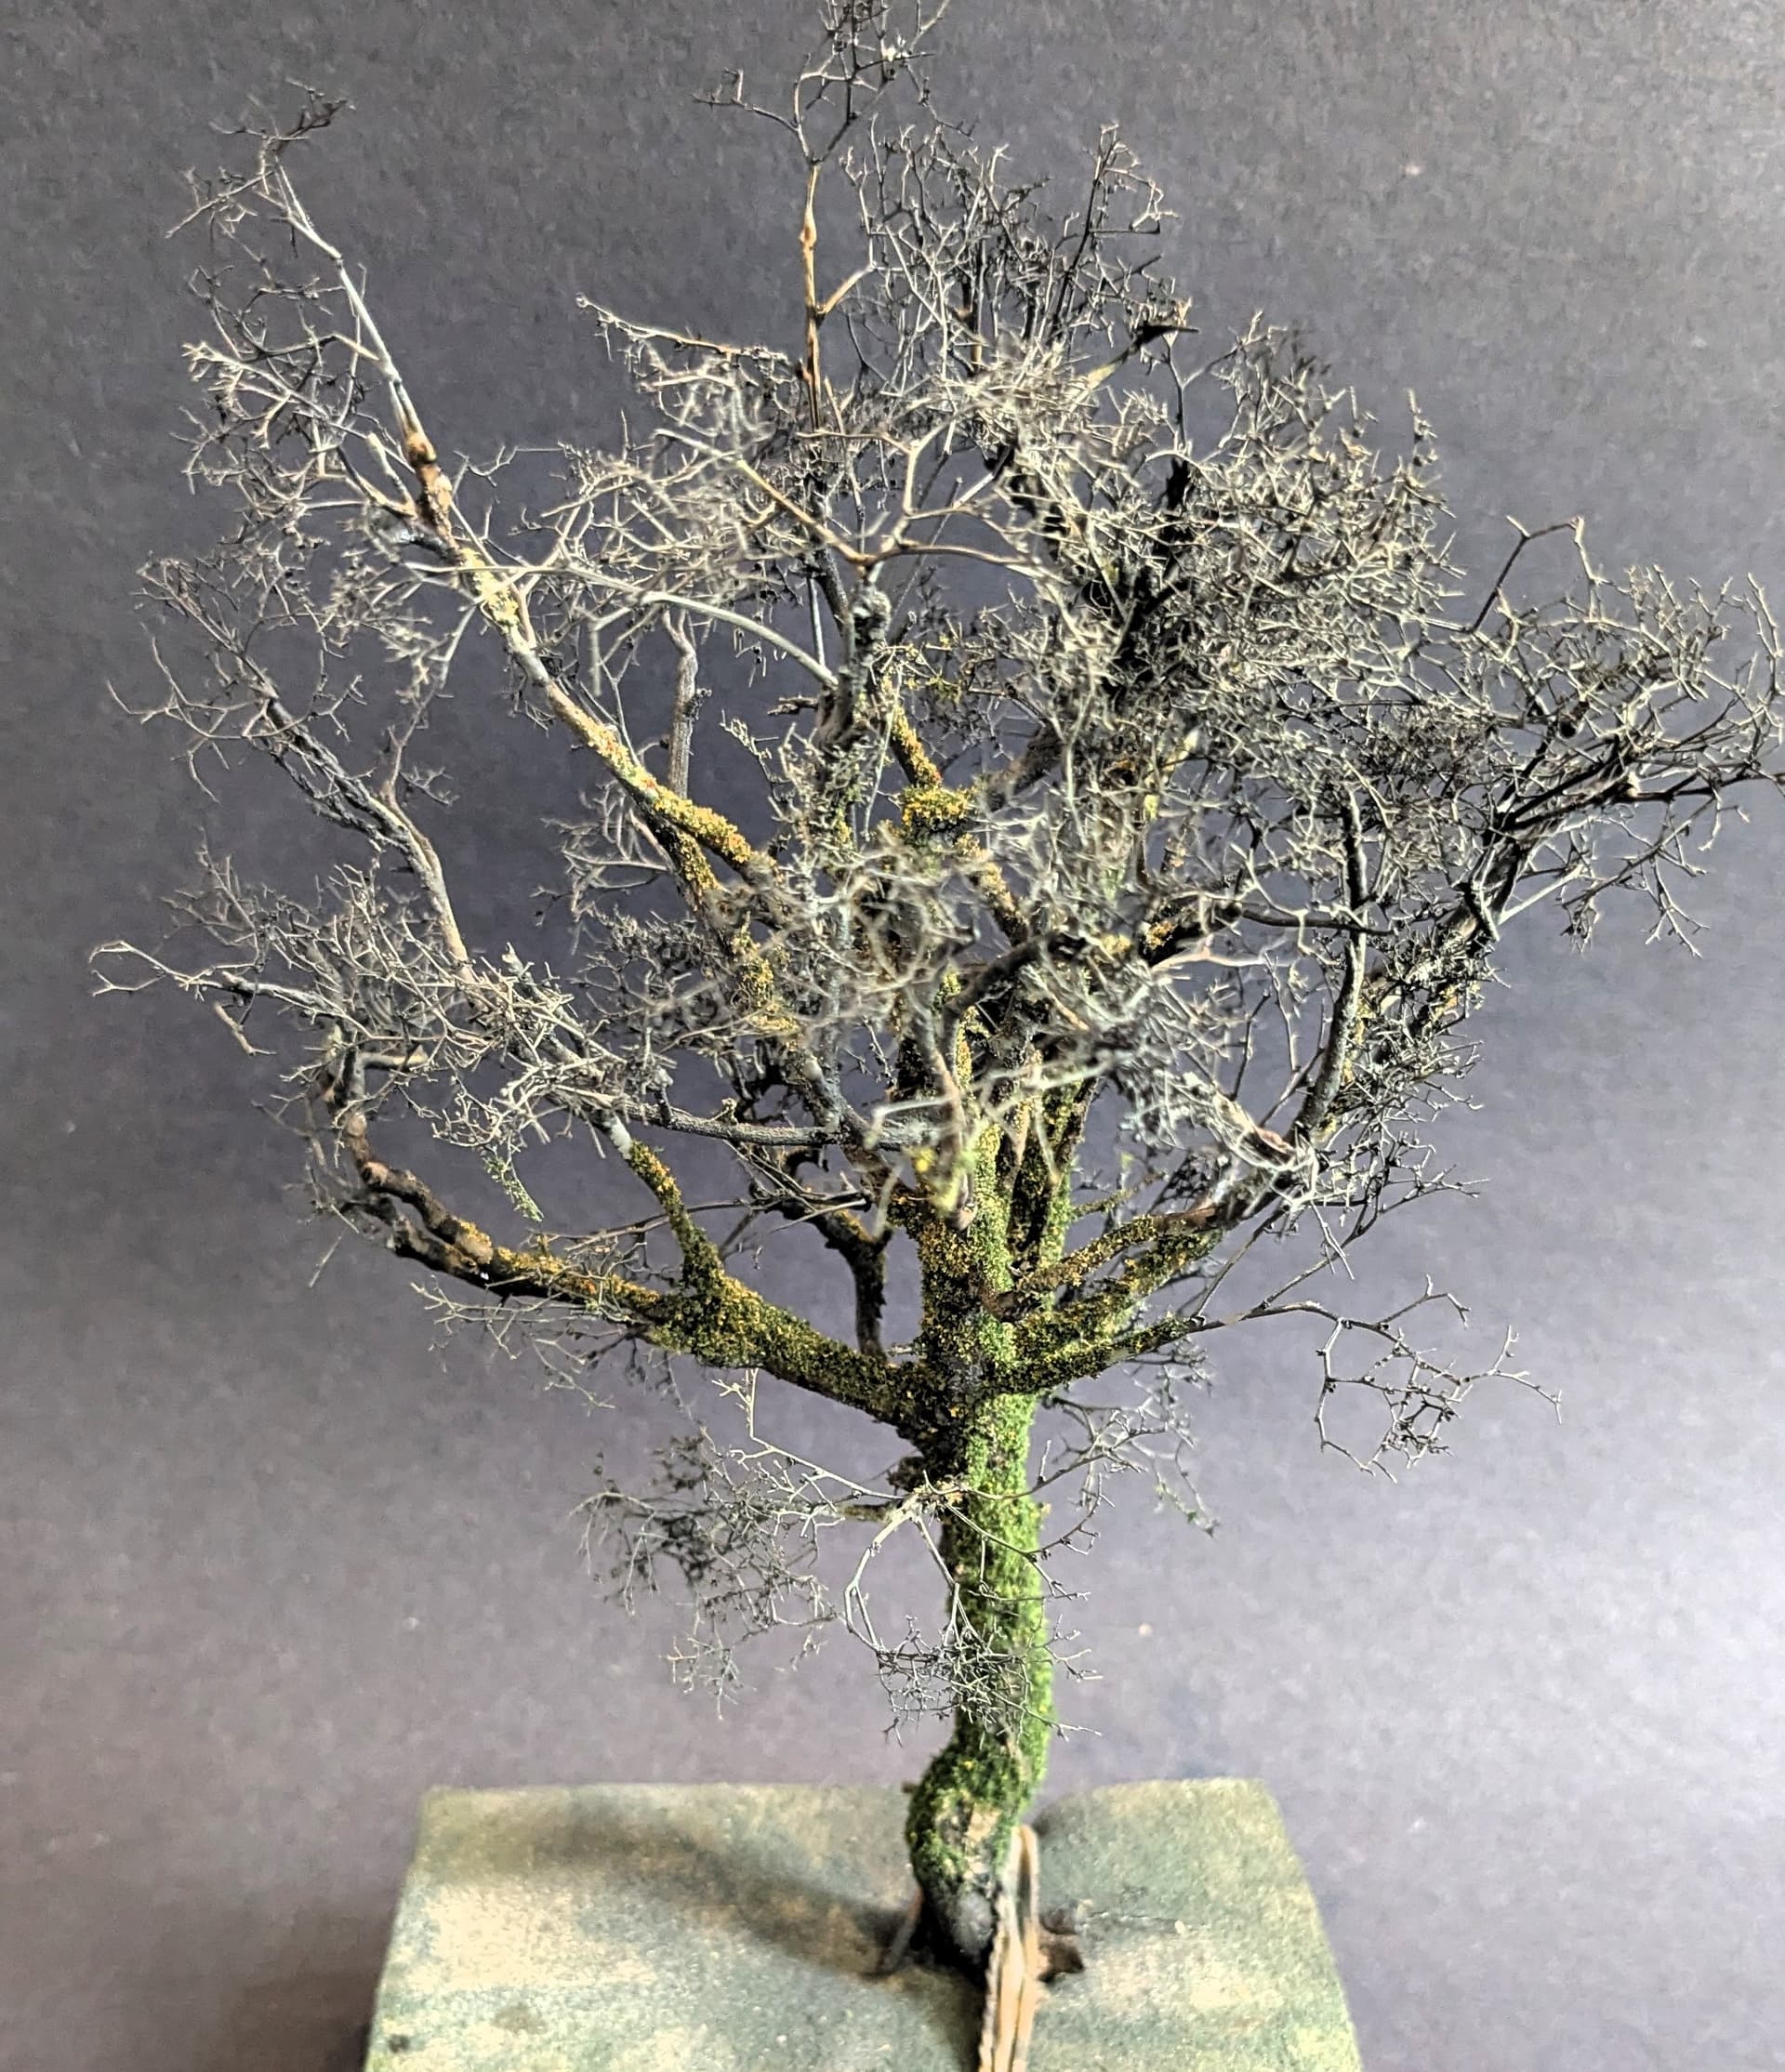
The final touch was to add a variety of moss using the same Landscapes in Detail set that I used for the roof. I also added an old nest from clumps of Sea Grass (not to be confused with Sea Foam which I used for the tree).

I have more plans for the tree: a clump of mistletoe and some mushrooms perhaps, but also something rather more ‘dynamic’ which I will be leaving until later in the build.
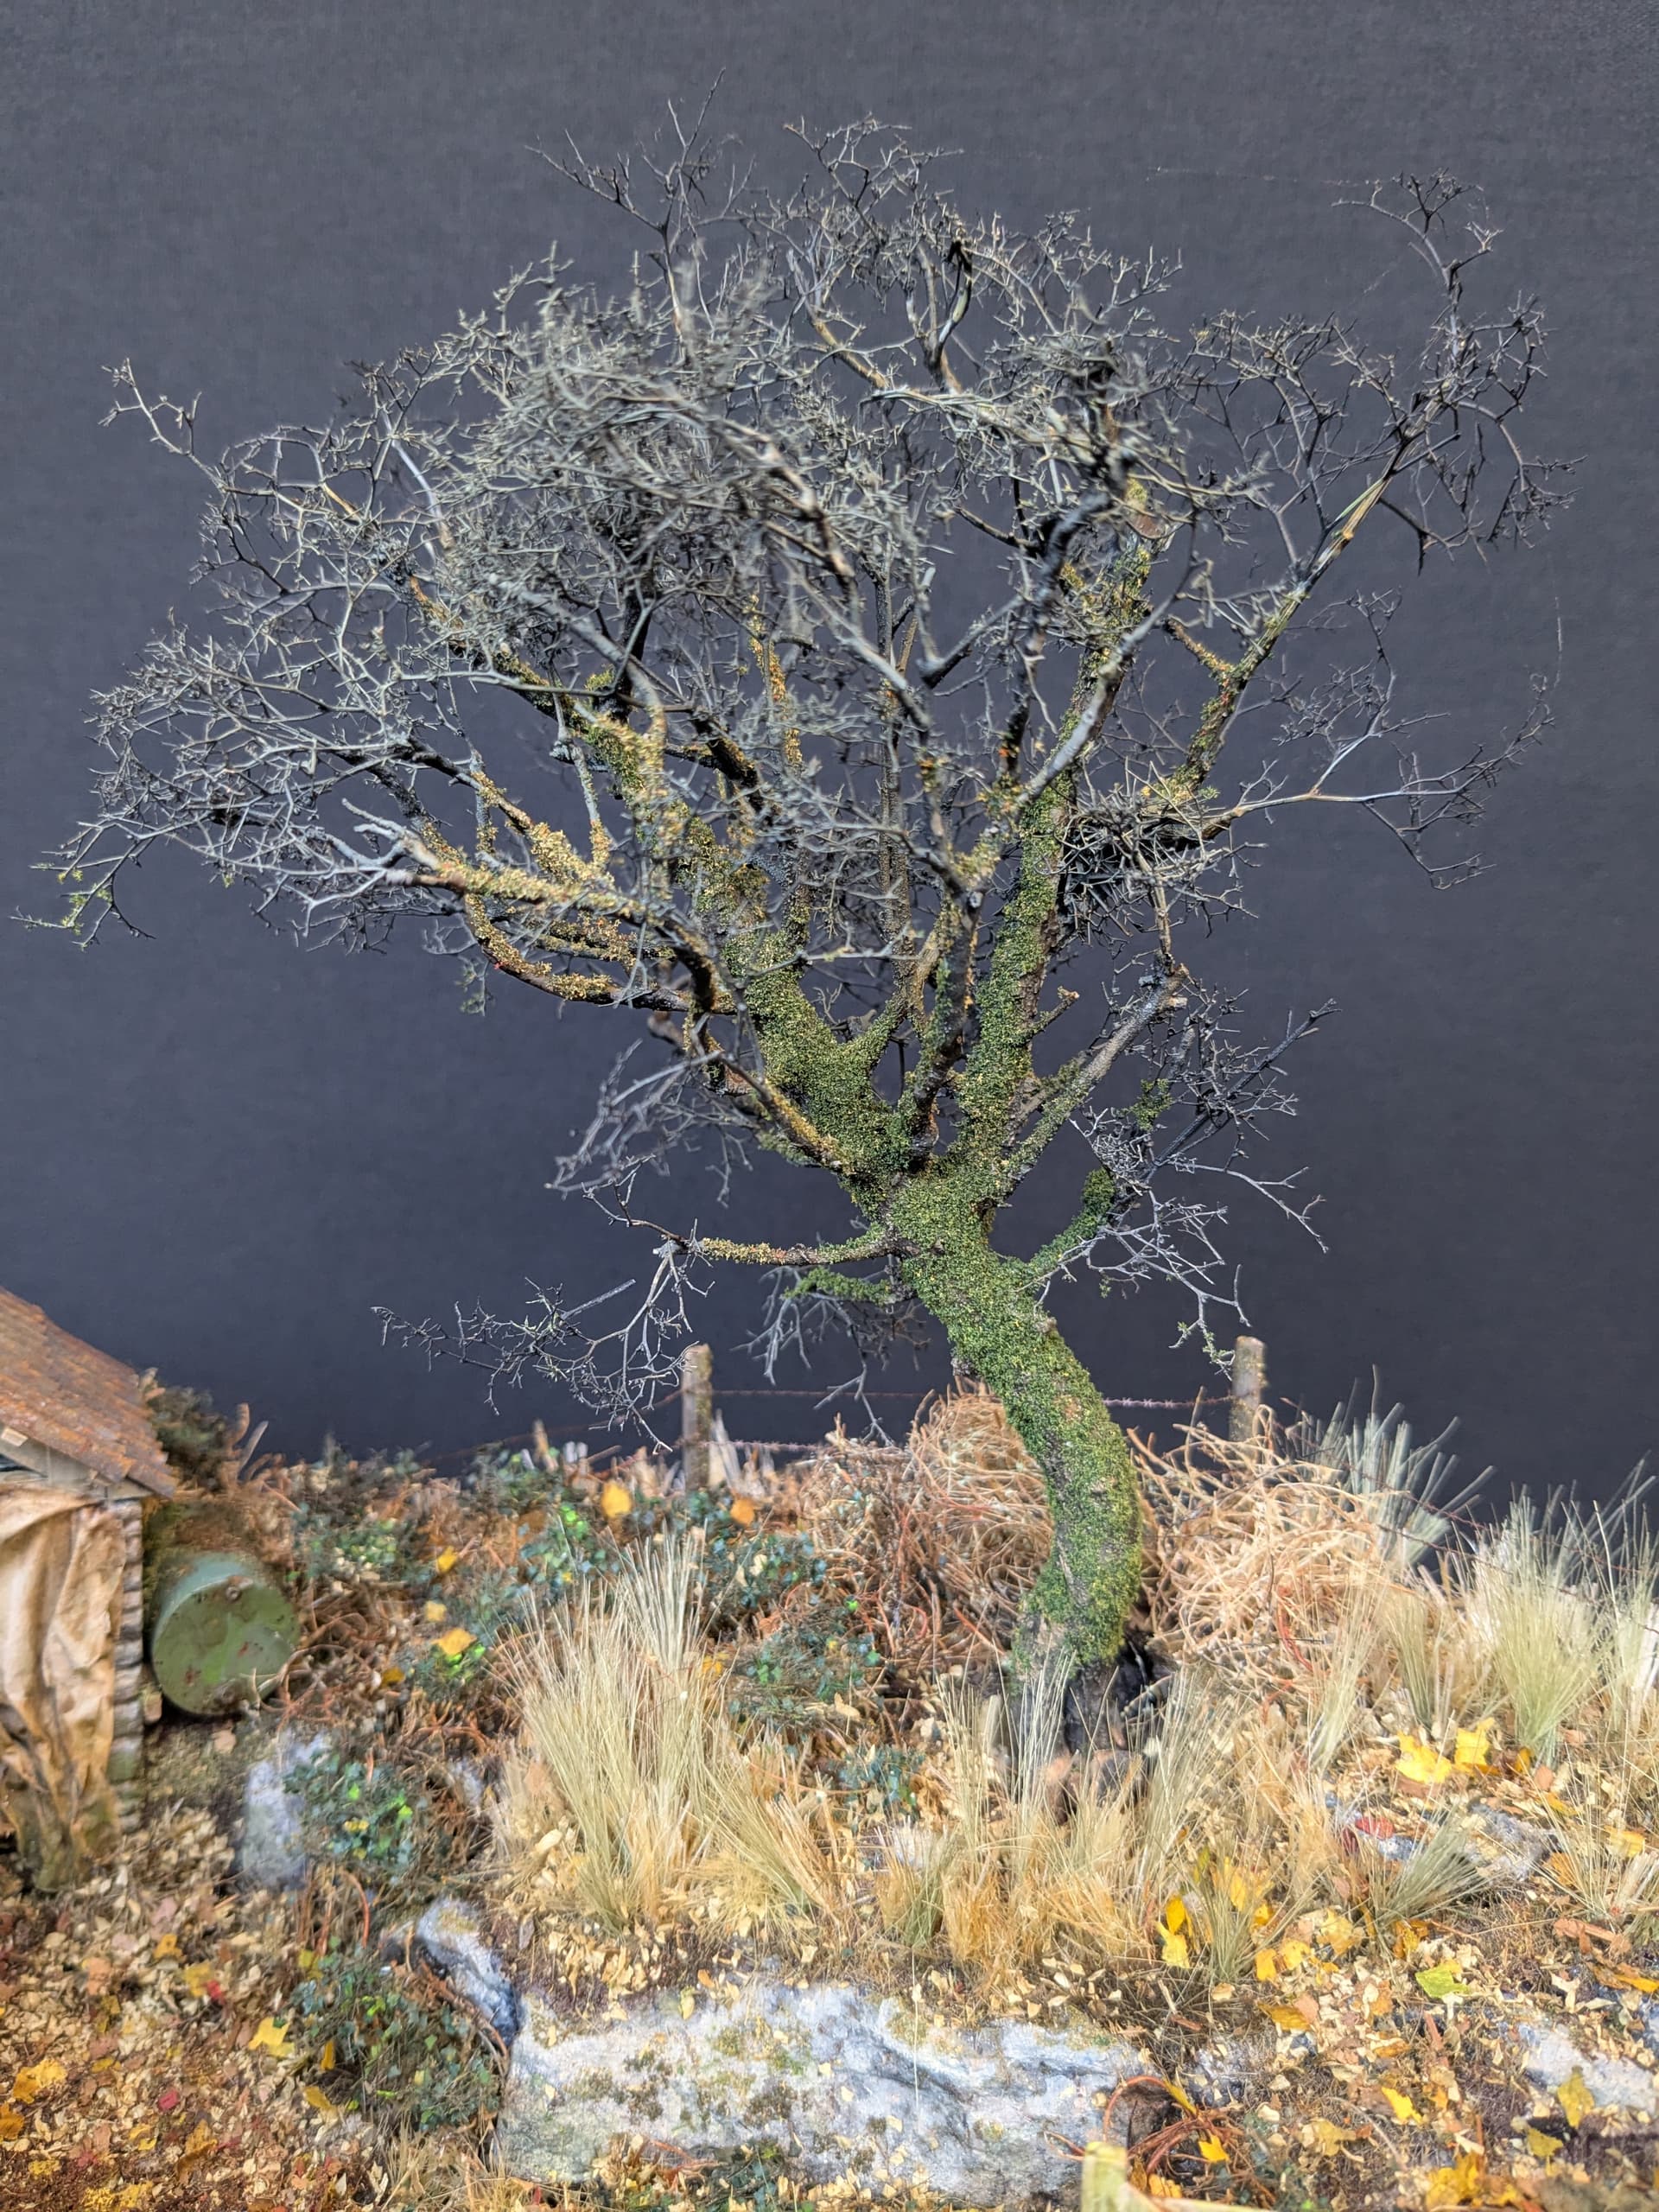
For the present, however, it is not fixed in place. The downside of building a tree with this method (unlike the wire-twisting alternative) is that it is rather fragile. Until I am satisfied that all the groundwork is finished I dare not attach it in case I knock of some of the branches (despite my deliberate pruning, quite a few more branches have gone already!)
22 Likes
Just perfection and the work of a genius.Just mindblowing Tim.Your attention to detail on buildings and groundwork is just breathtaking.
Richard
3 Likes
Lovely job… almost a gothic, kinda foreboding feel for me, if you get my drift from the last photo.
3 Likes
Kinda reminds me of some of the Ents in The Lord of the Rings, Two Towers! Wayne
4 Likes
Thanks Richard,
If I’m honest when it comes to vegetation I probably don’t know where to stop… Maybe I should! ![]()
2 Likes
Thanks Nimrod. Gothic? Foreboding? I’ll go for that!
1 Like
Thanks Wayne. Happy to be given even the slightest comparison to the great J.R.!
2 Likes
Nature Takes Over…

Am I am a frustrated gardener? Or just too lazy to do the real thing… Maybe that’s why I am married to a very enthusiastic and capable horticulturalist.
Don’t get me wrong - I love making the vehicles and figures for these dioramas (and there will plenty more of that to come). But if buildings allow you to step away from precision of accurate dimensions, then flora is yet another step along that path. Freedom! It just has to look right.
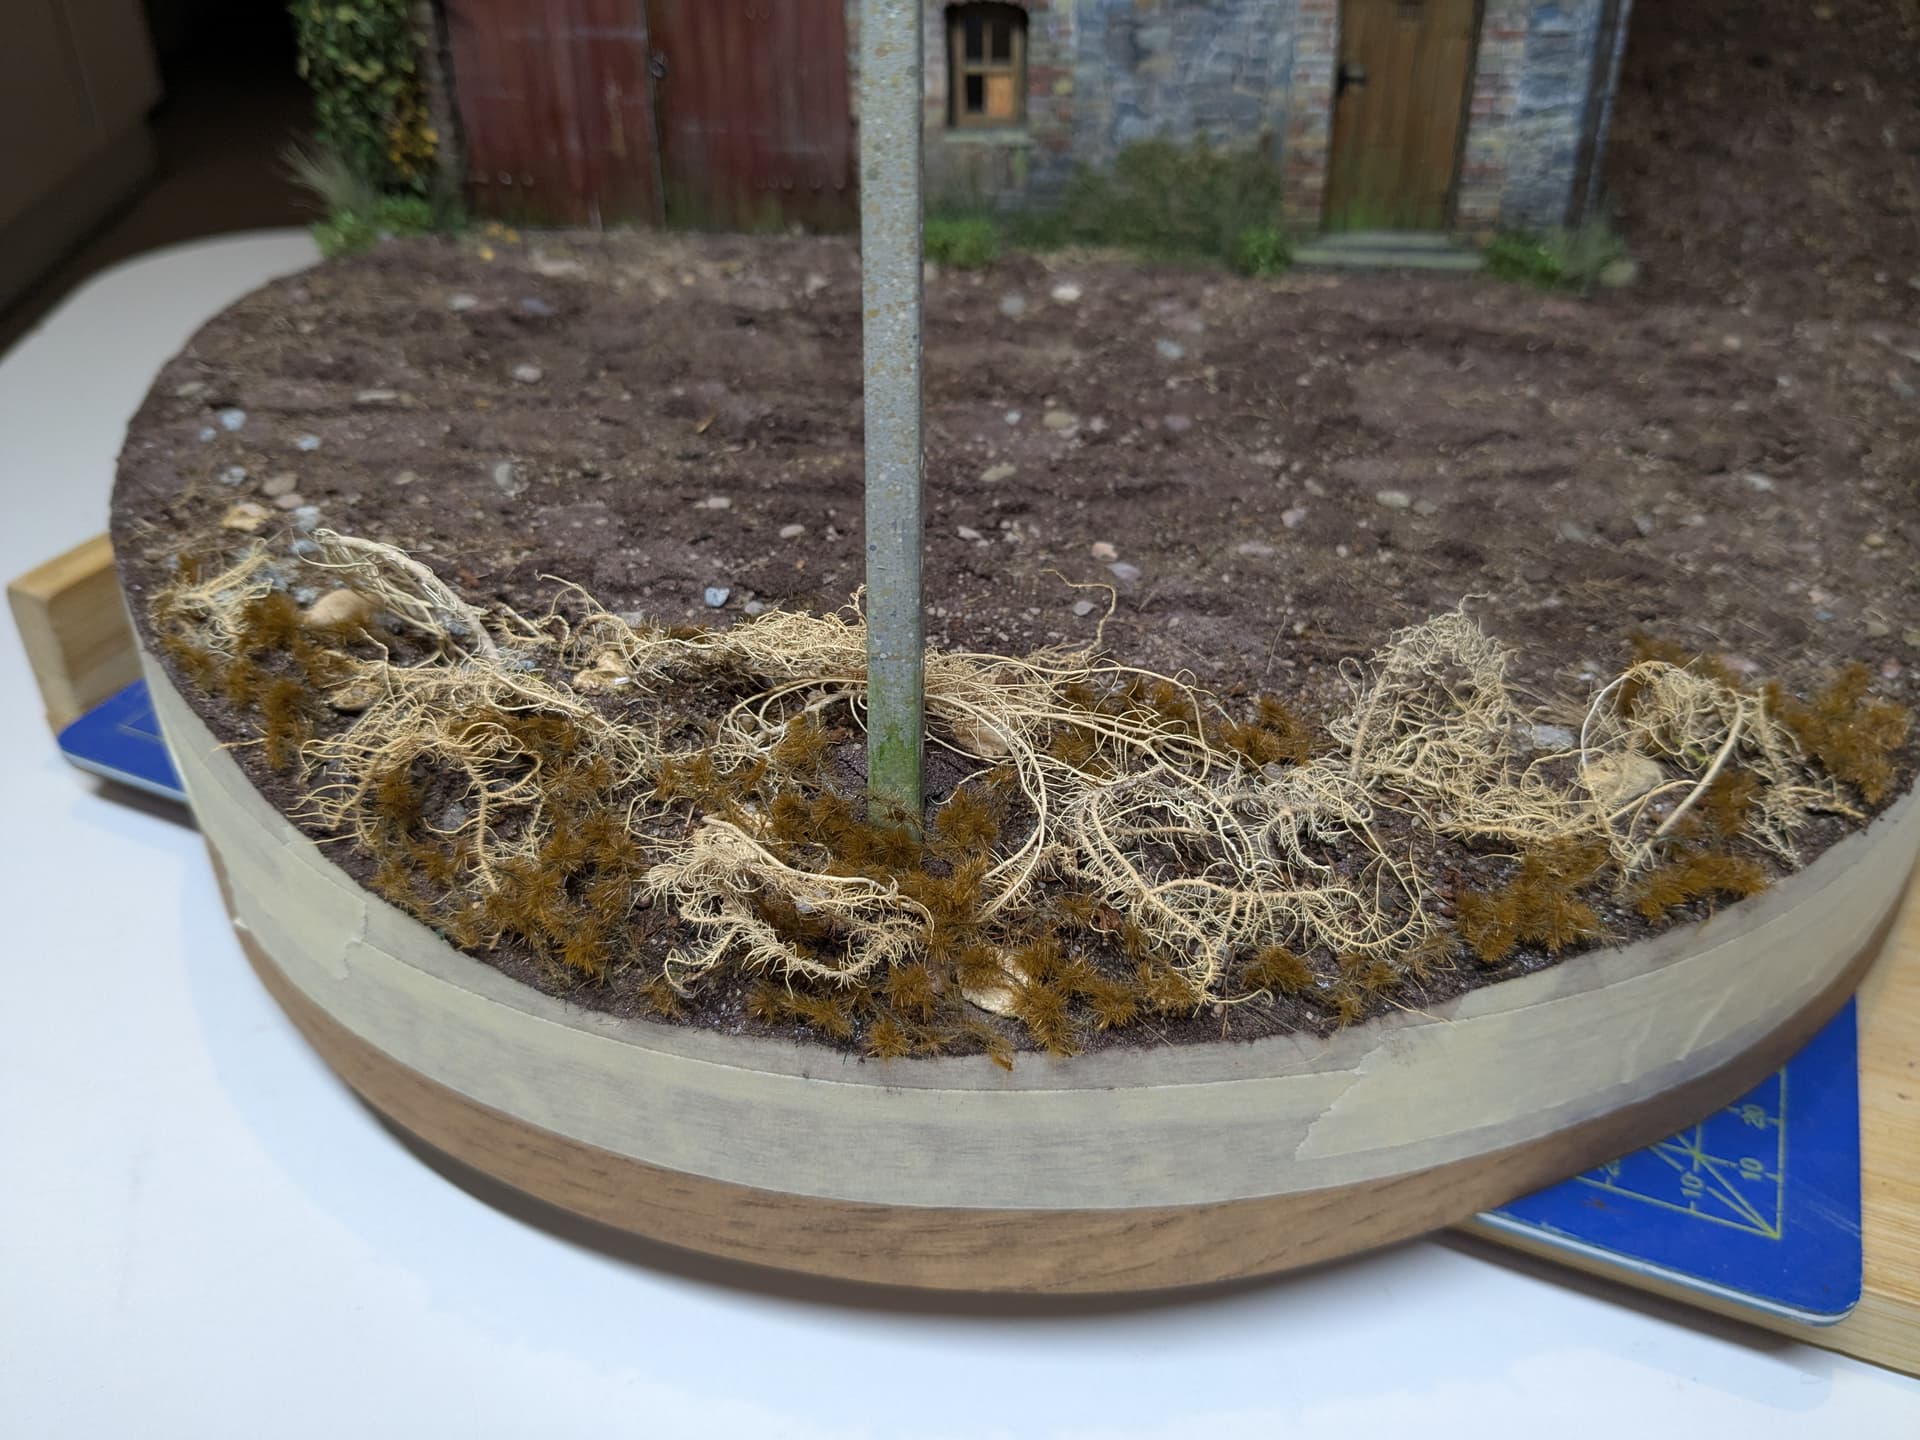
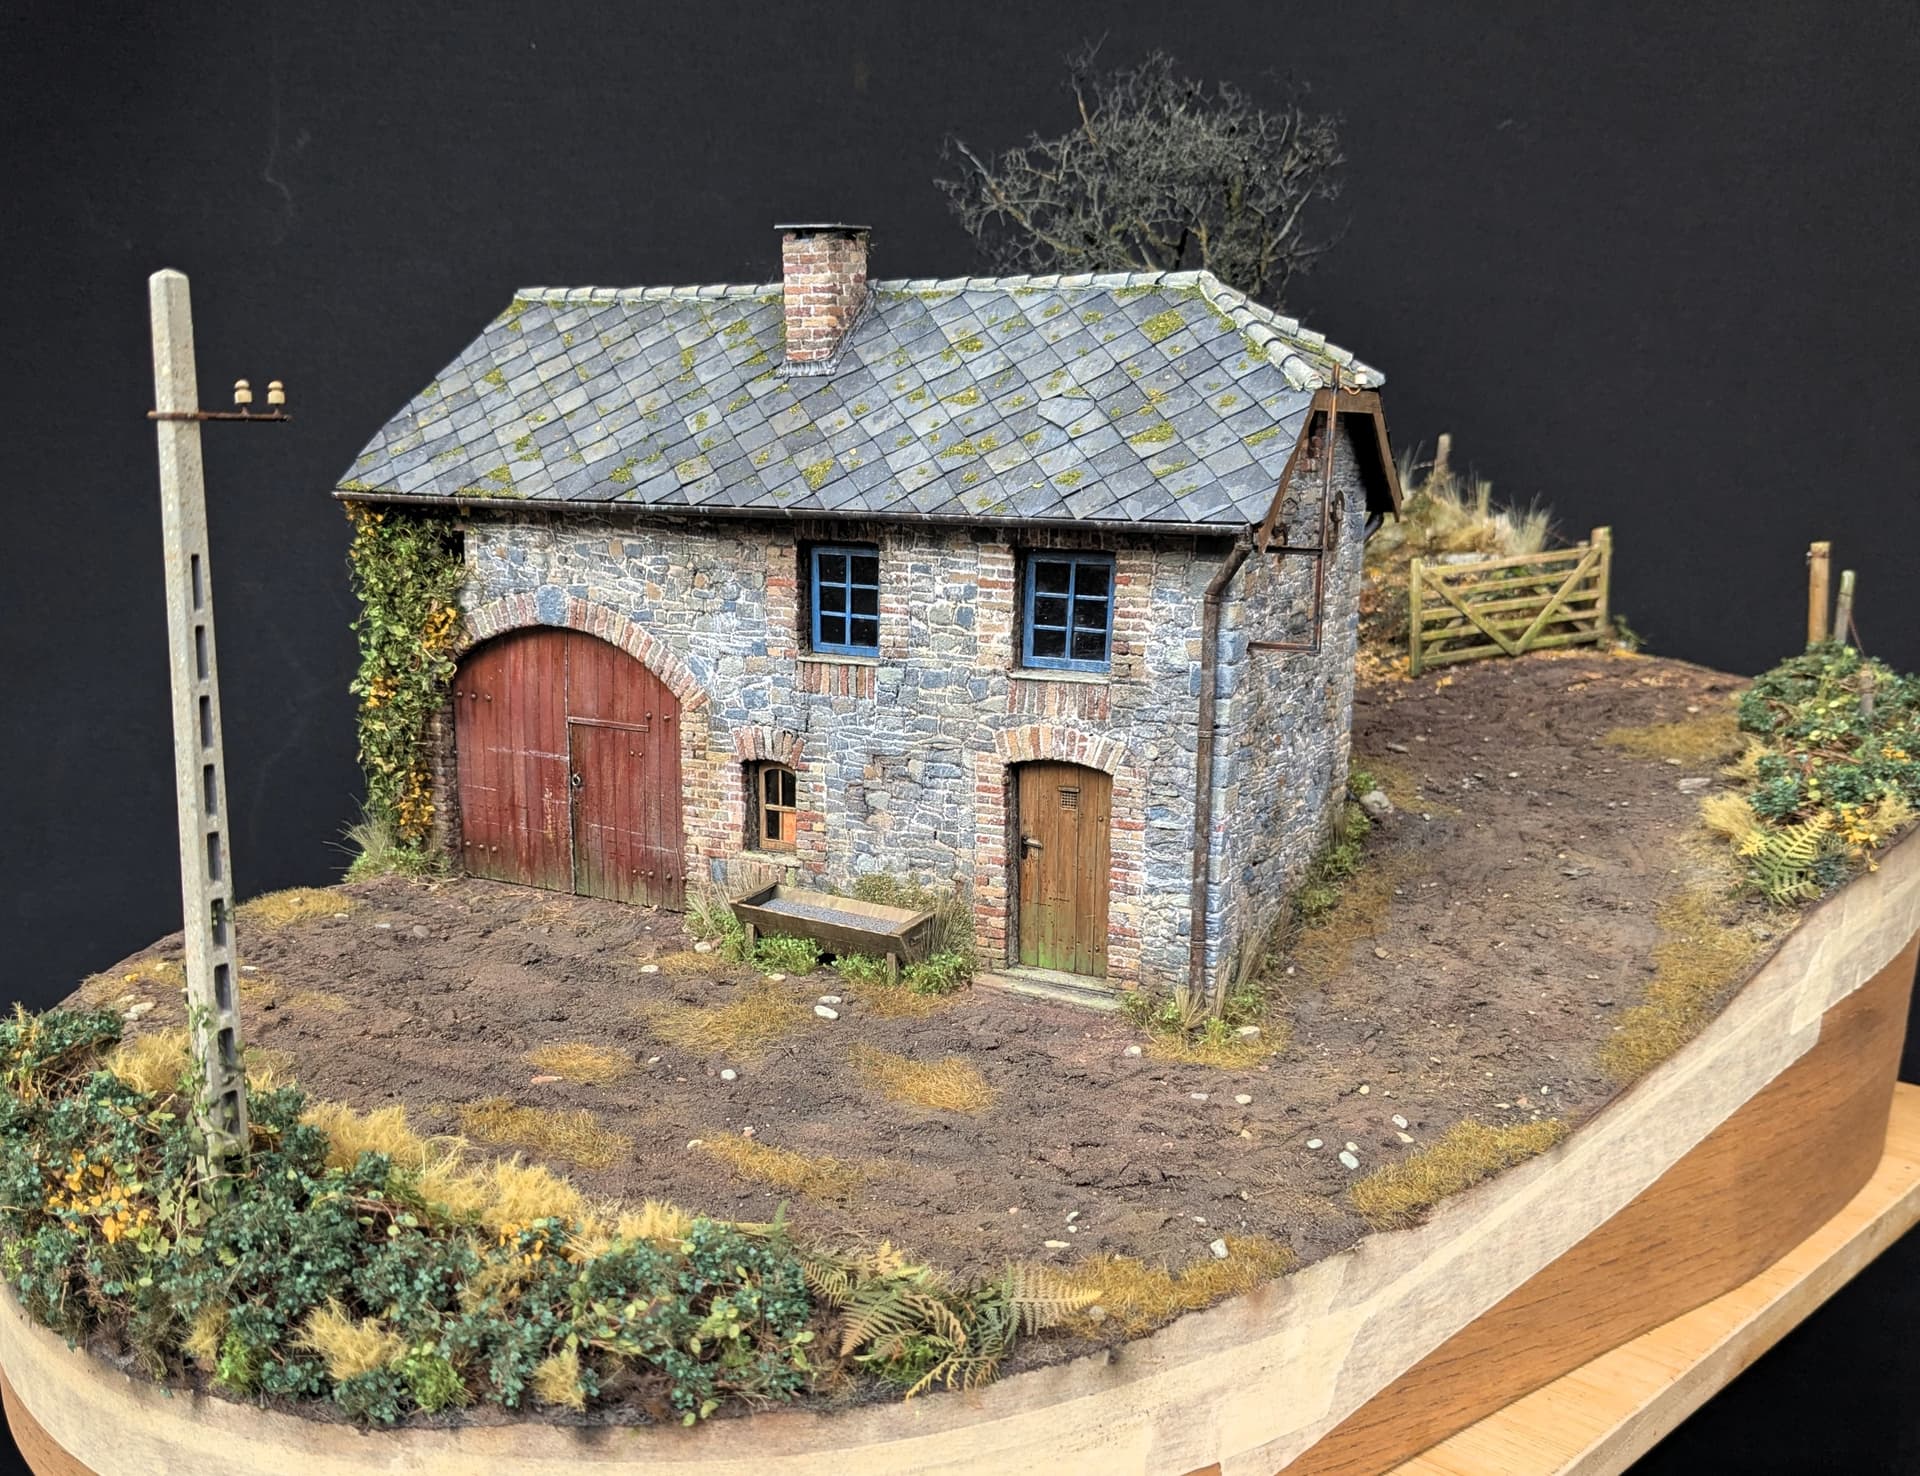
To help frame the scene I planned three areas of undergrowth: the top right beneath the tree, along the front right and the lower edge of the diorama. There is also the ivy growing up the side of the farmhouse.
First I assembled my ‘army’:
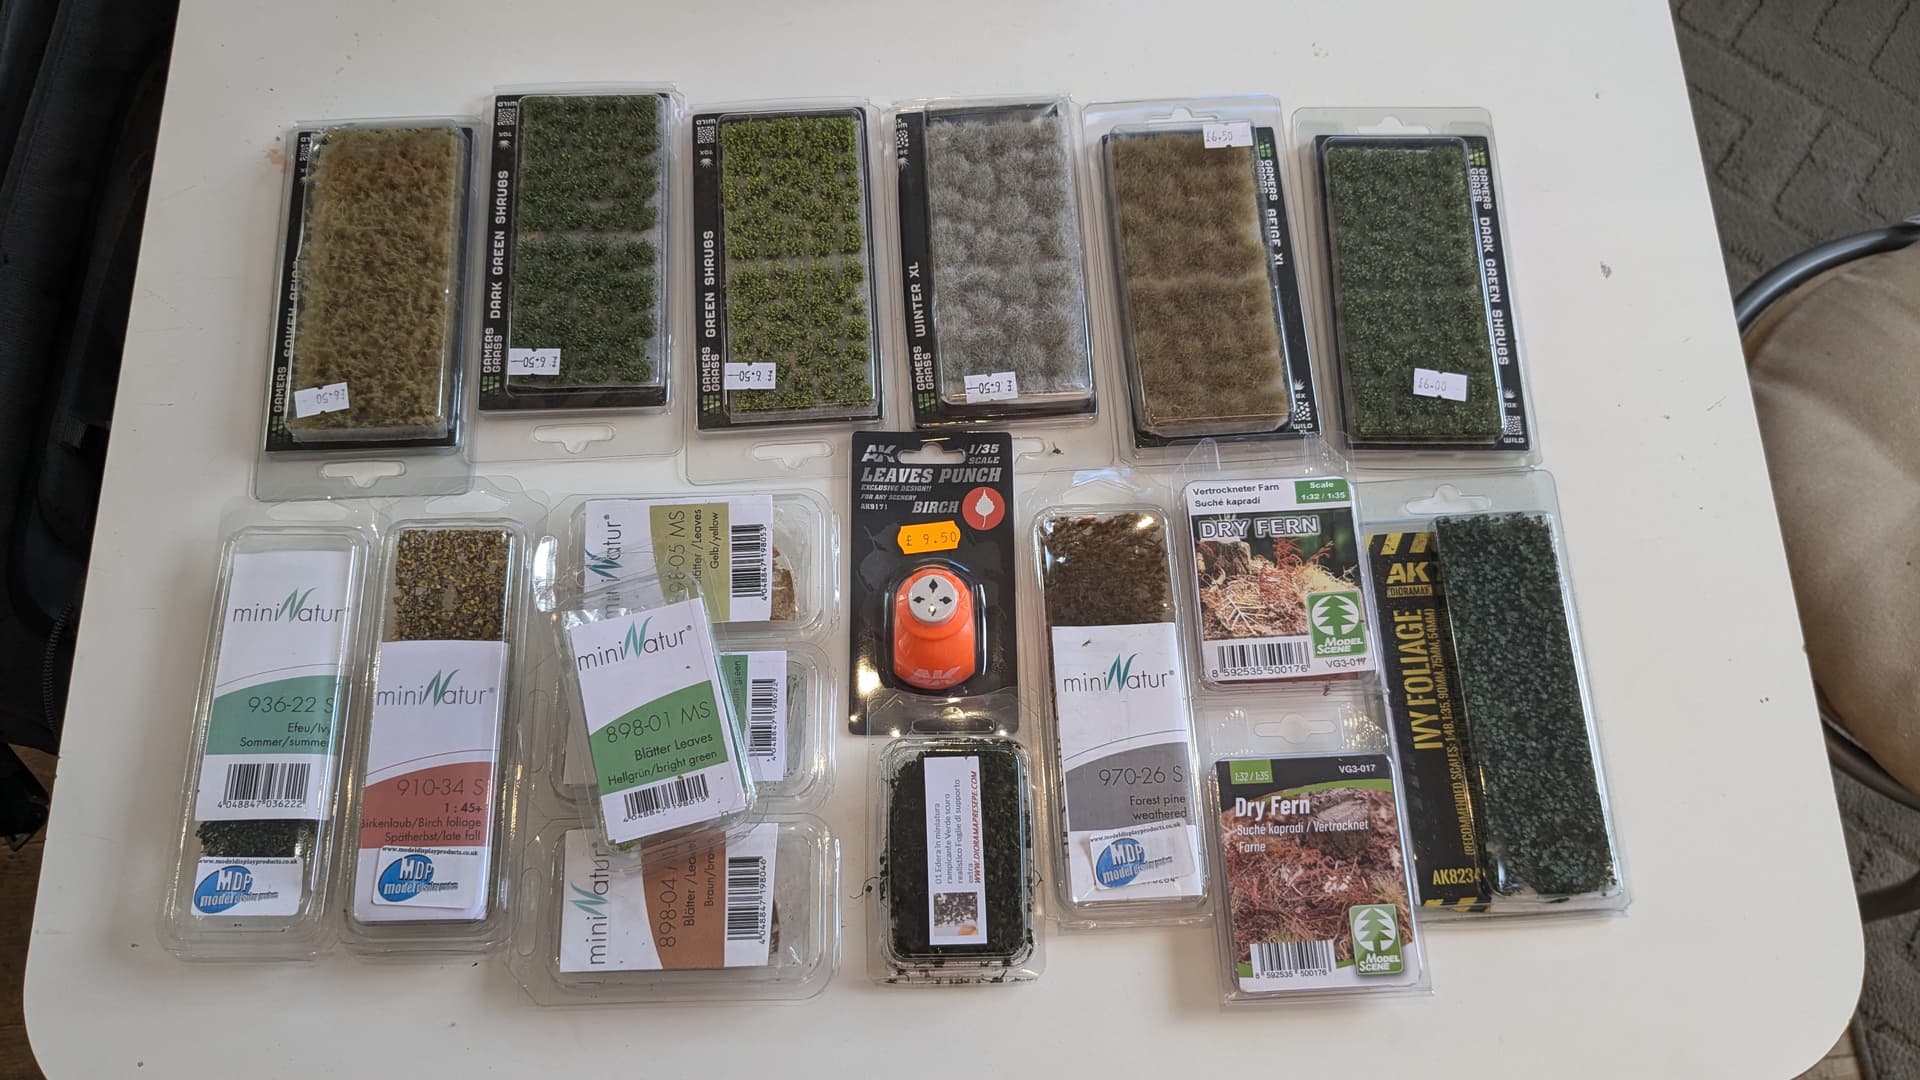
Now I accept that buying foliage sets can seem pricey: a small box of glorified leaves on a net for £6+ seems nuts at first. But there are a few things worth remembering.
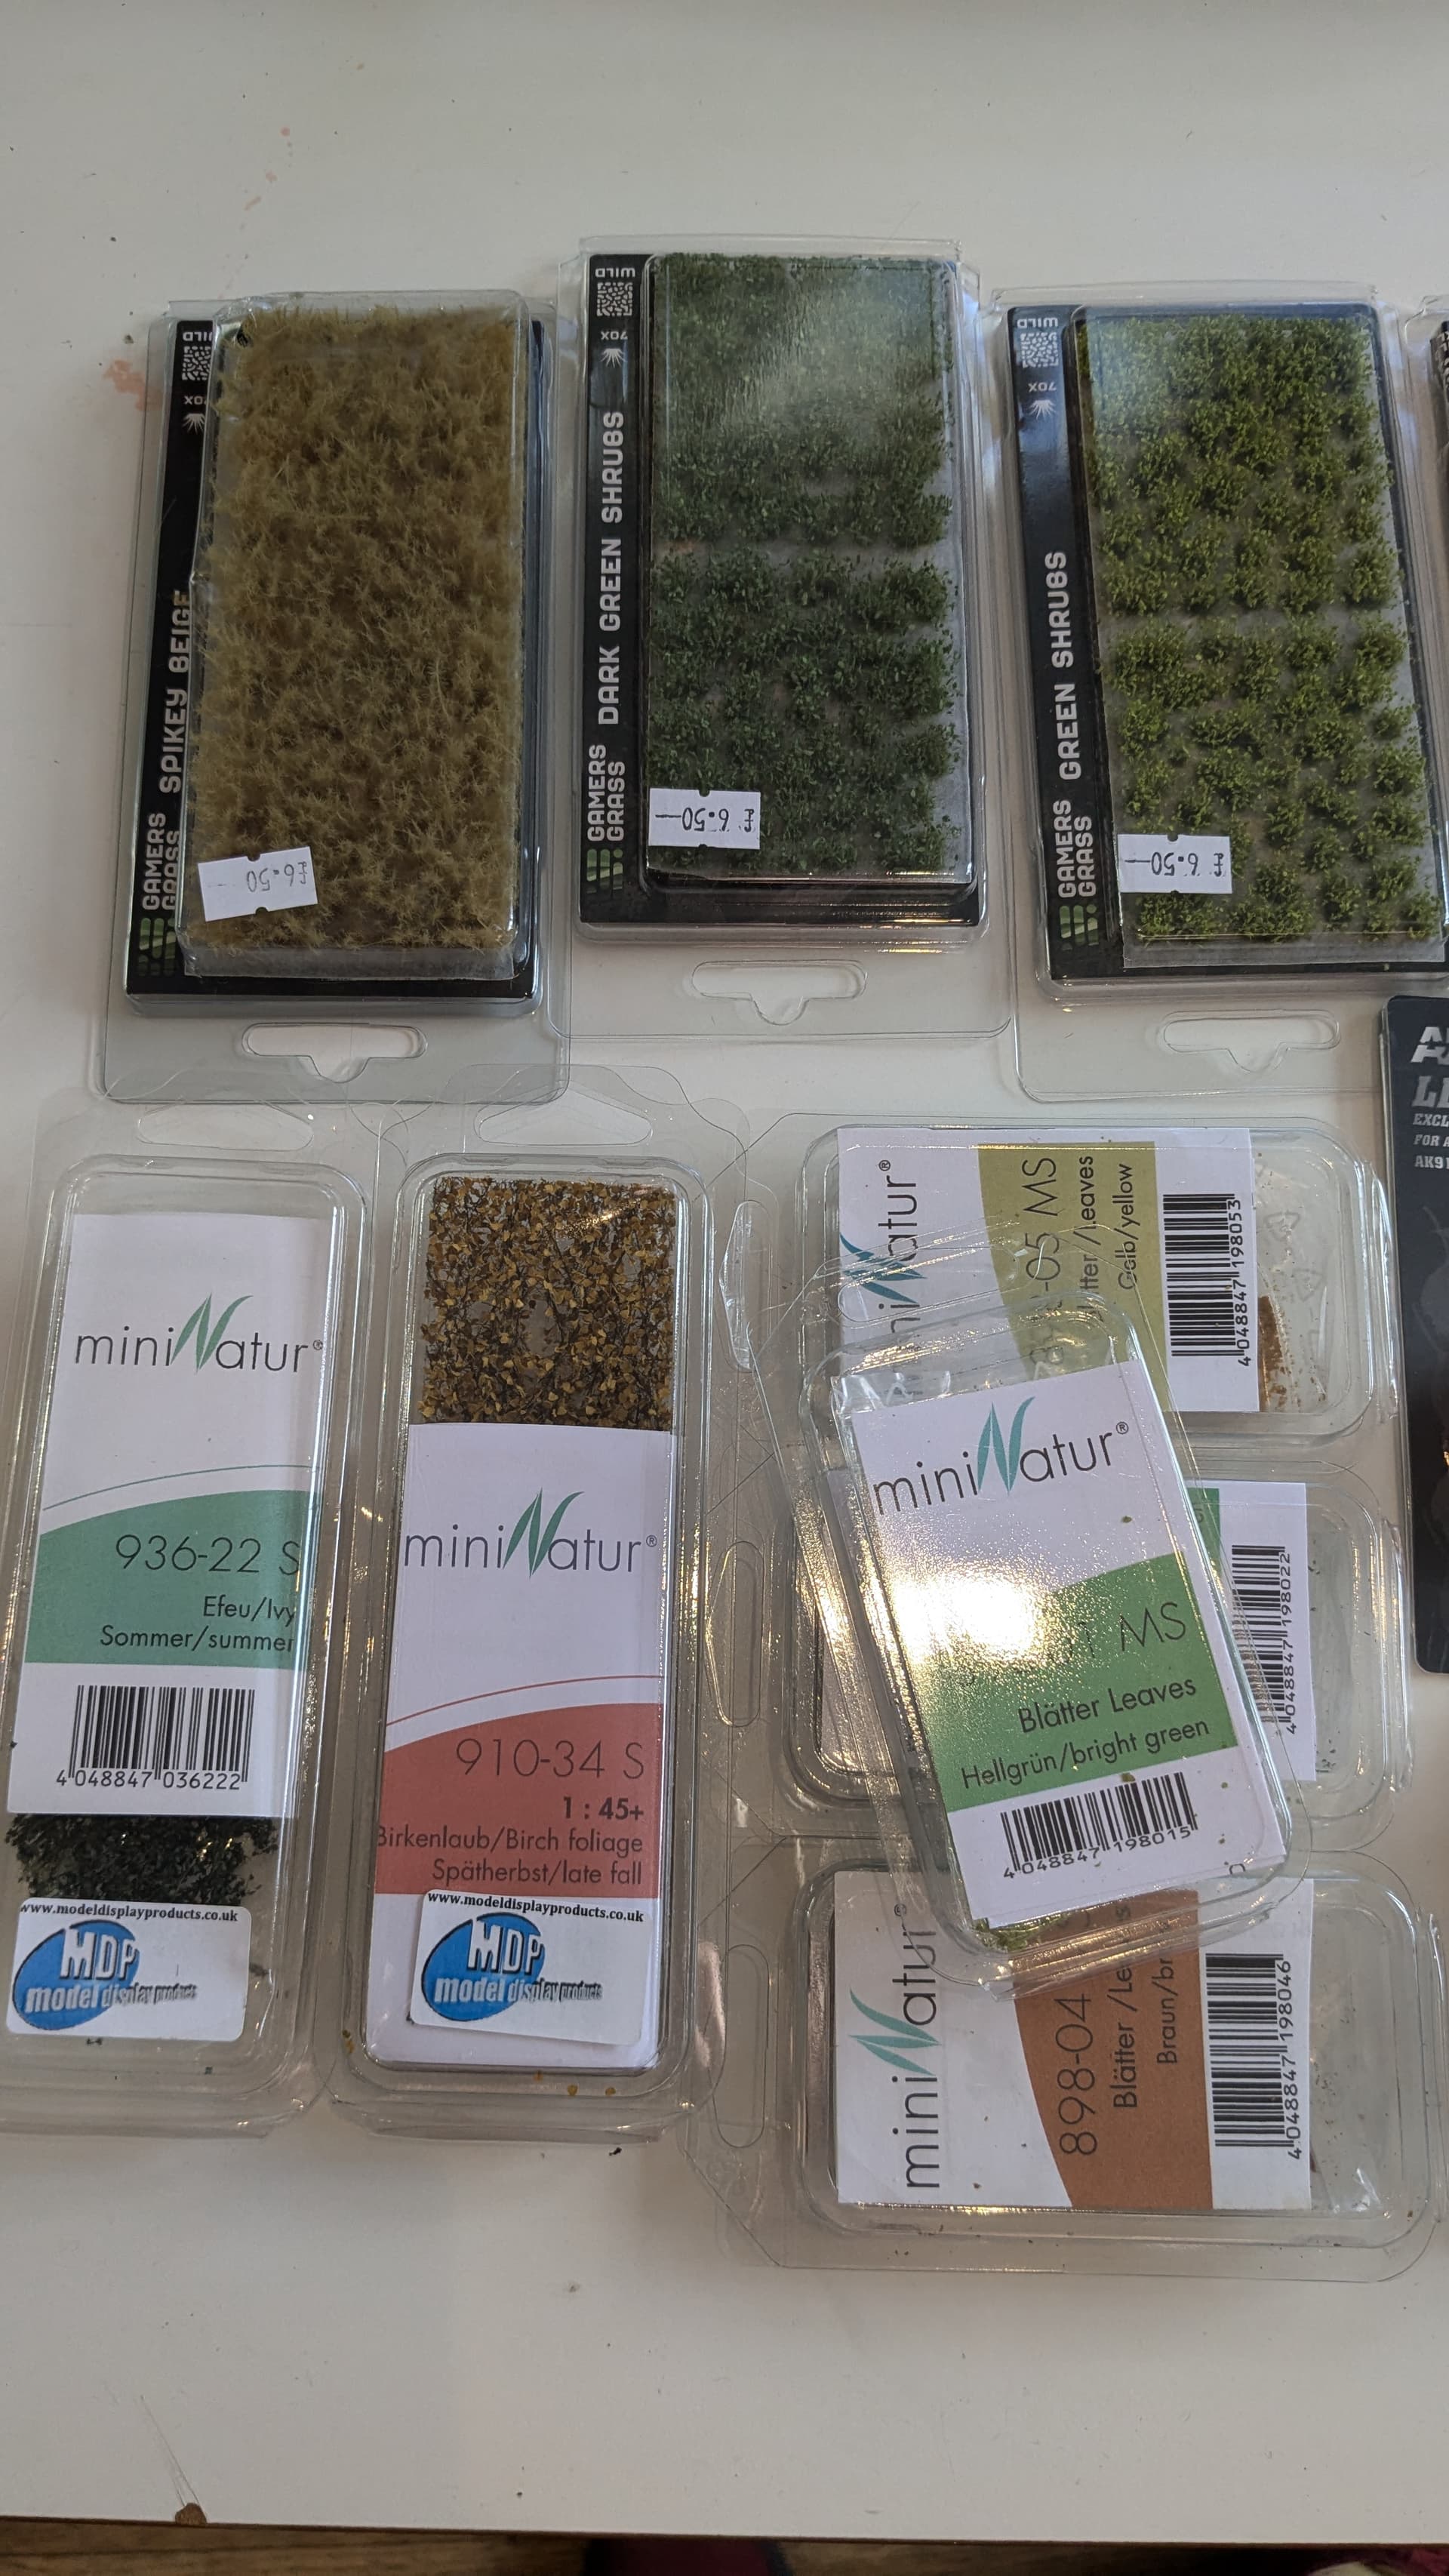
First, this stuff actually stretches out to a lot more than it looks, Secondly, if you actually use it over a structure of branches then it will go even further. Also, for the most part, you can ignore the scales and descriptions: e.g. a lot of sets marketed to wargamers (so I’m guessing 1/72 scale and below) as trees or bushes can also work really well as weeds in 1/35. Different leaf styles will also work equally well as others as long as you avoid some of the more obvious shapes (e.g. oak leaves will always look like oak leaves).
For areas of heavy vegetation I started by ‘planting’ a series of clumps of two materials: ‘rubberised horsehair’ from Treemendus and Medium Lichen from Landscapes in Detail (now sadly defunct I believe).

Despite the name this is actually coated coconut fibre. It’s a staple of model railways.
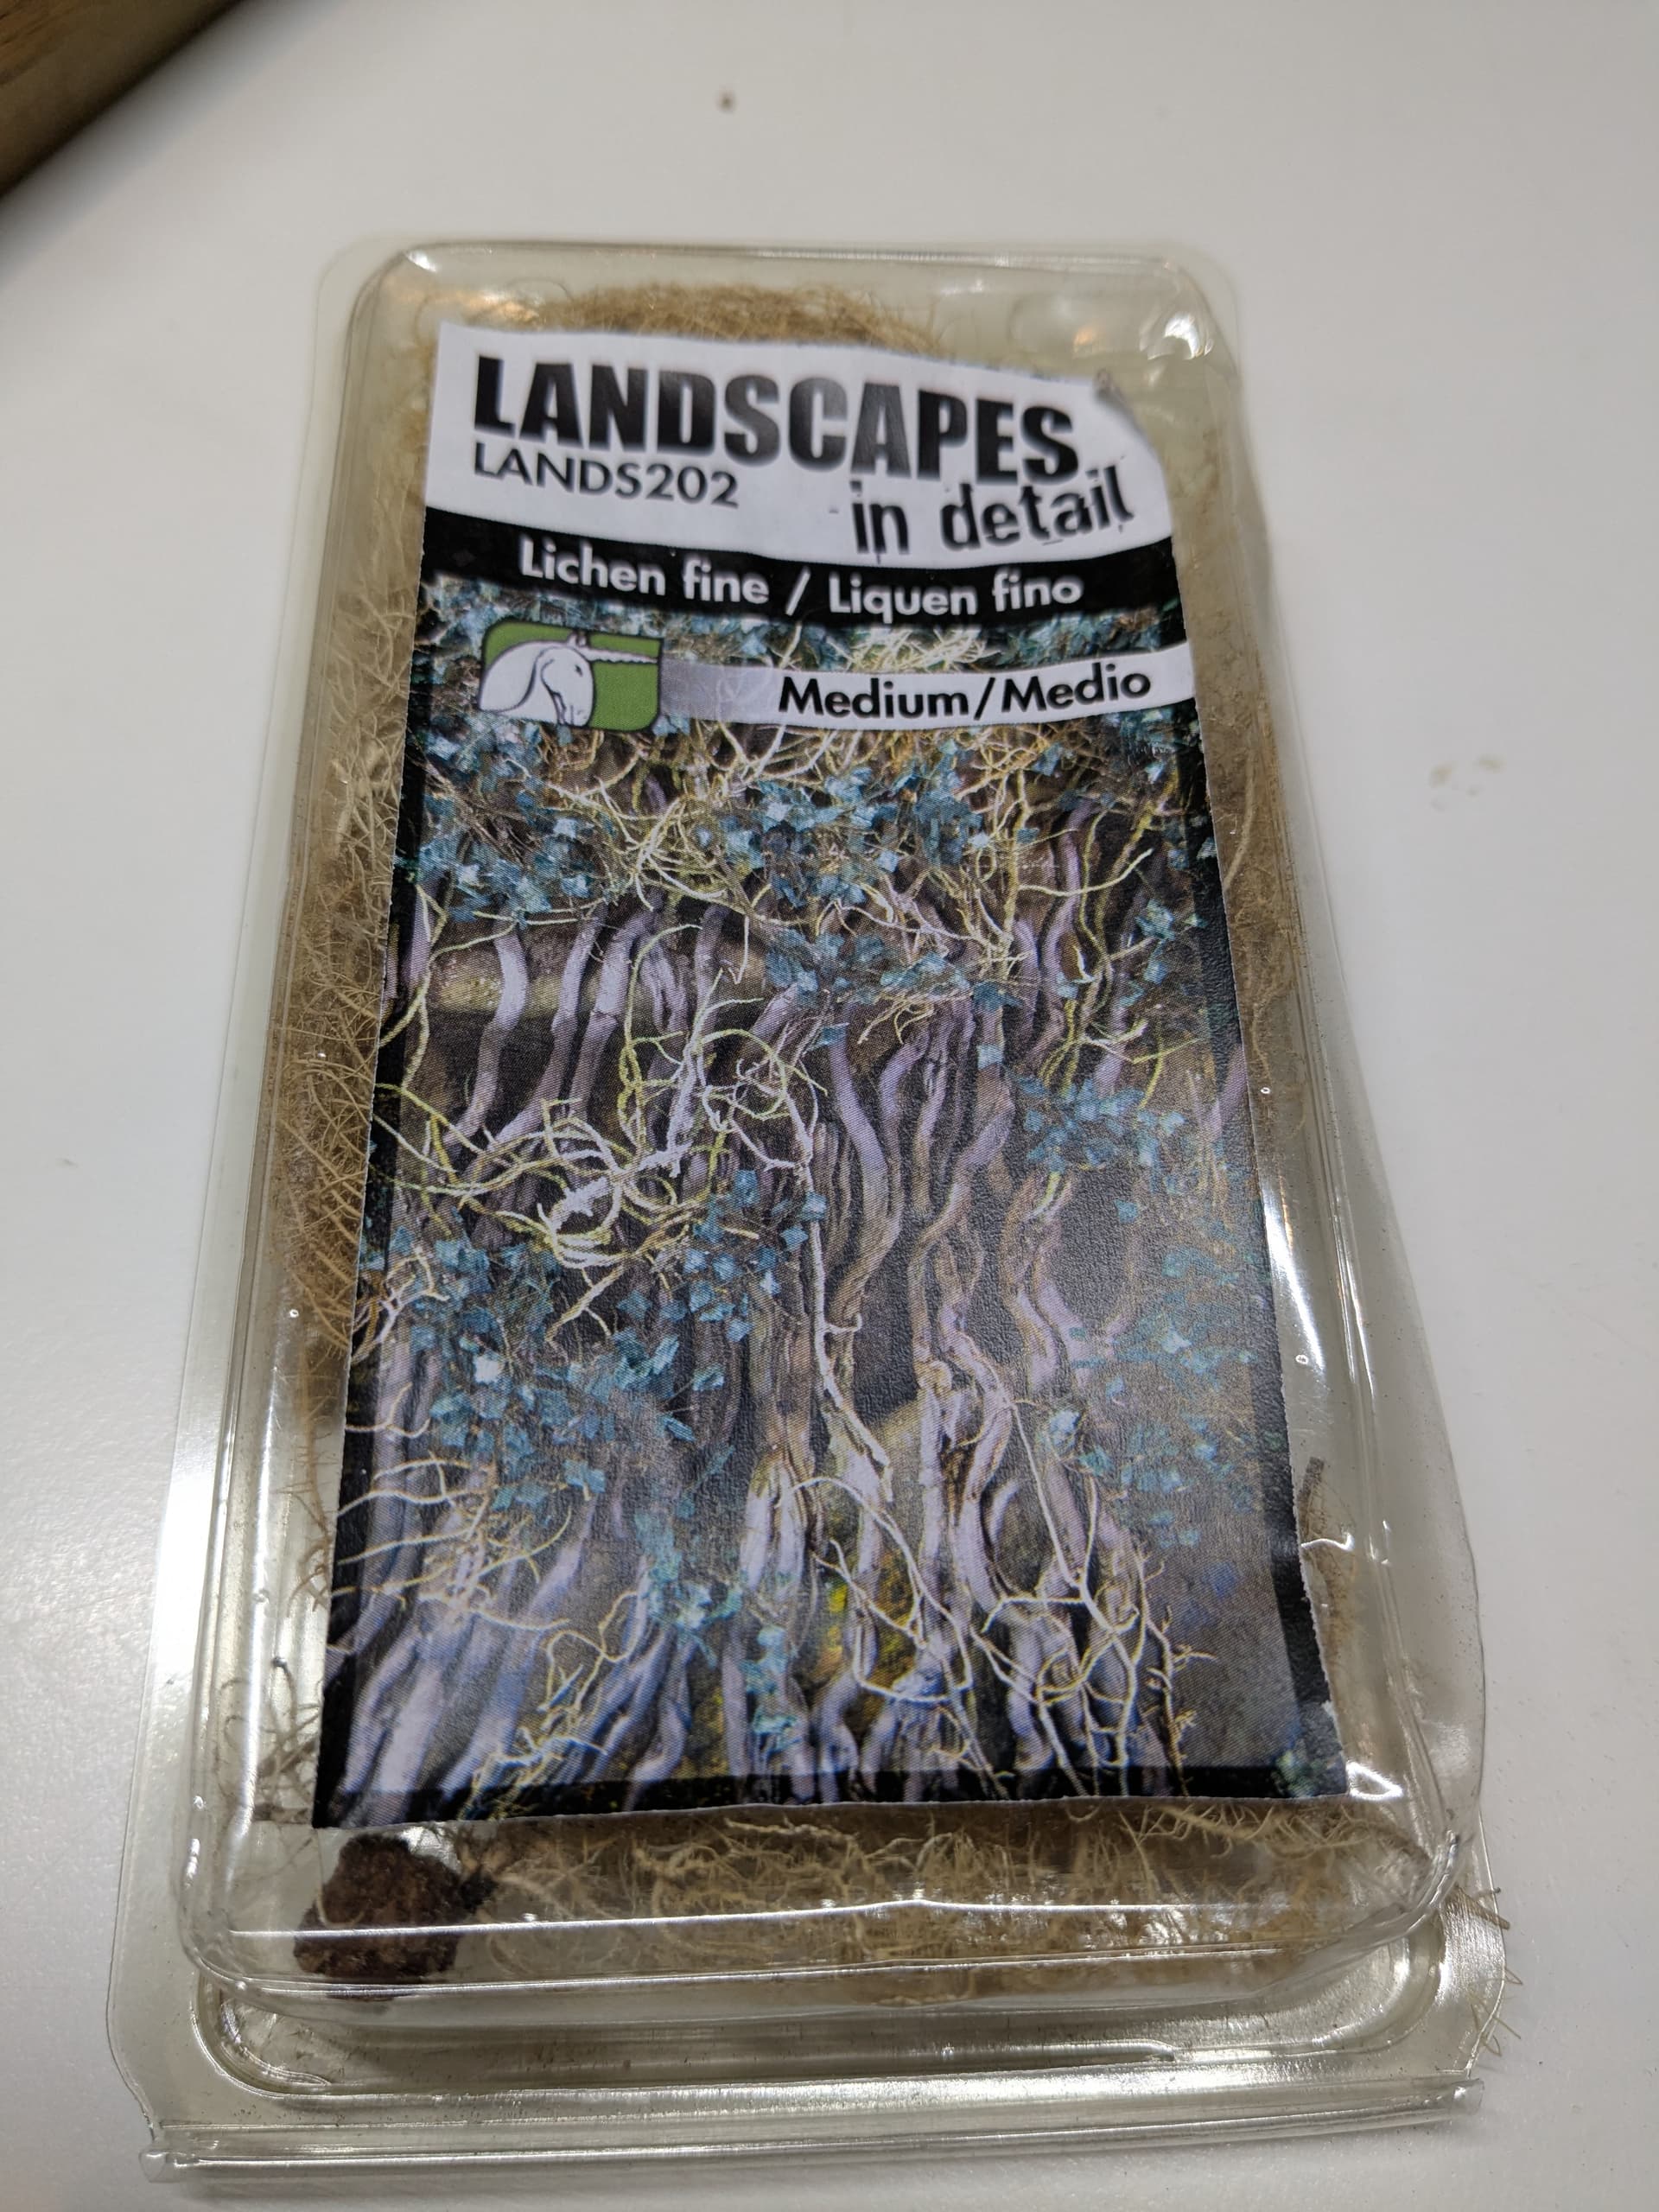
This is, as the name suggests, some sort of natural lichen which works well for twisted branches and tree routes.
I also used the lichen strands to build up the base for my ivy.
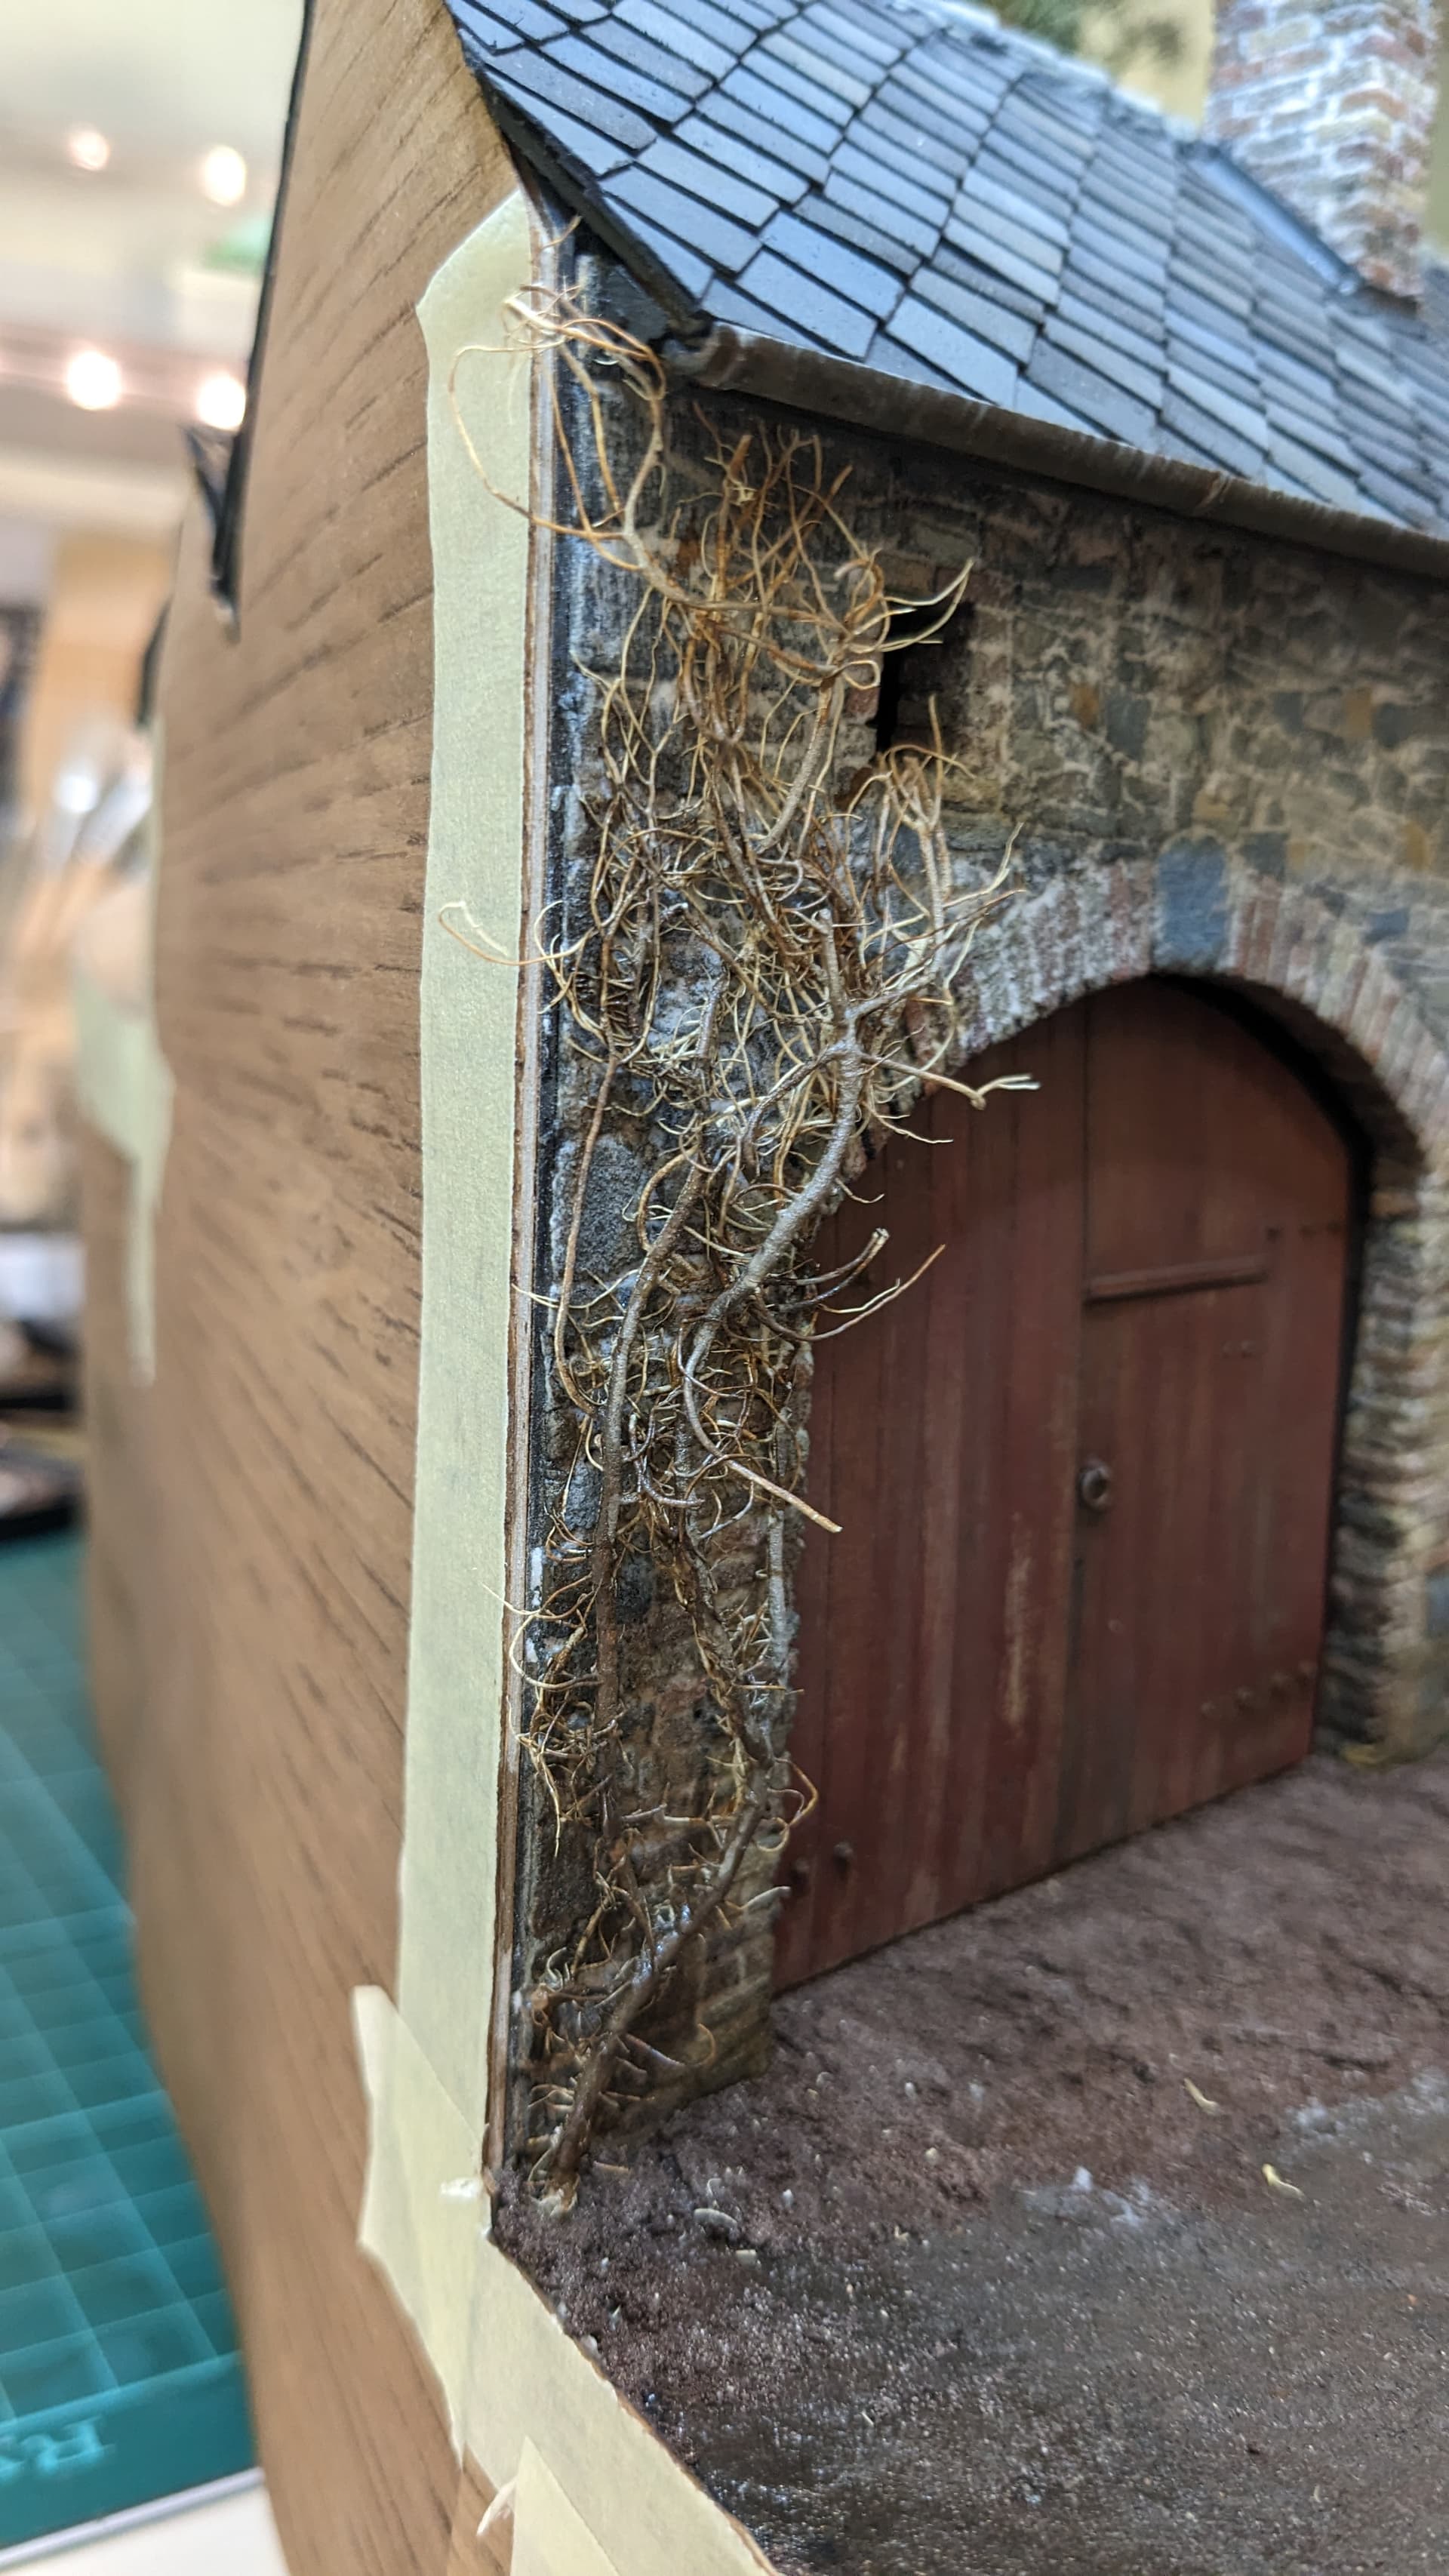
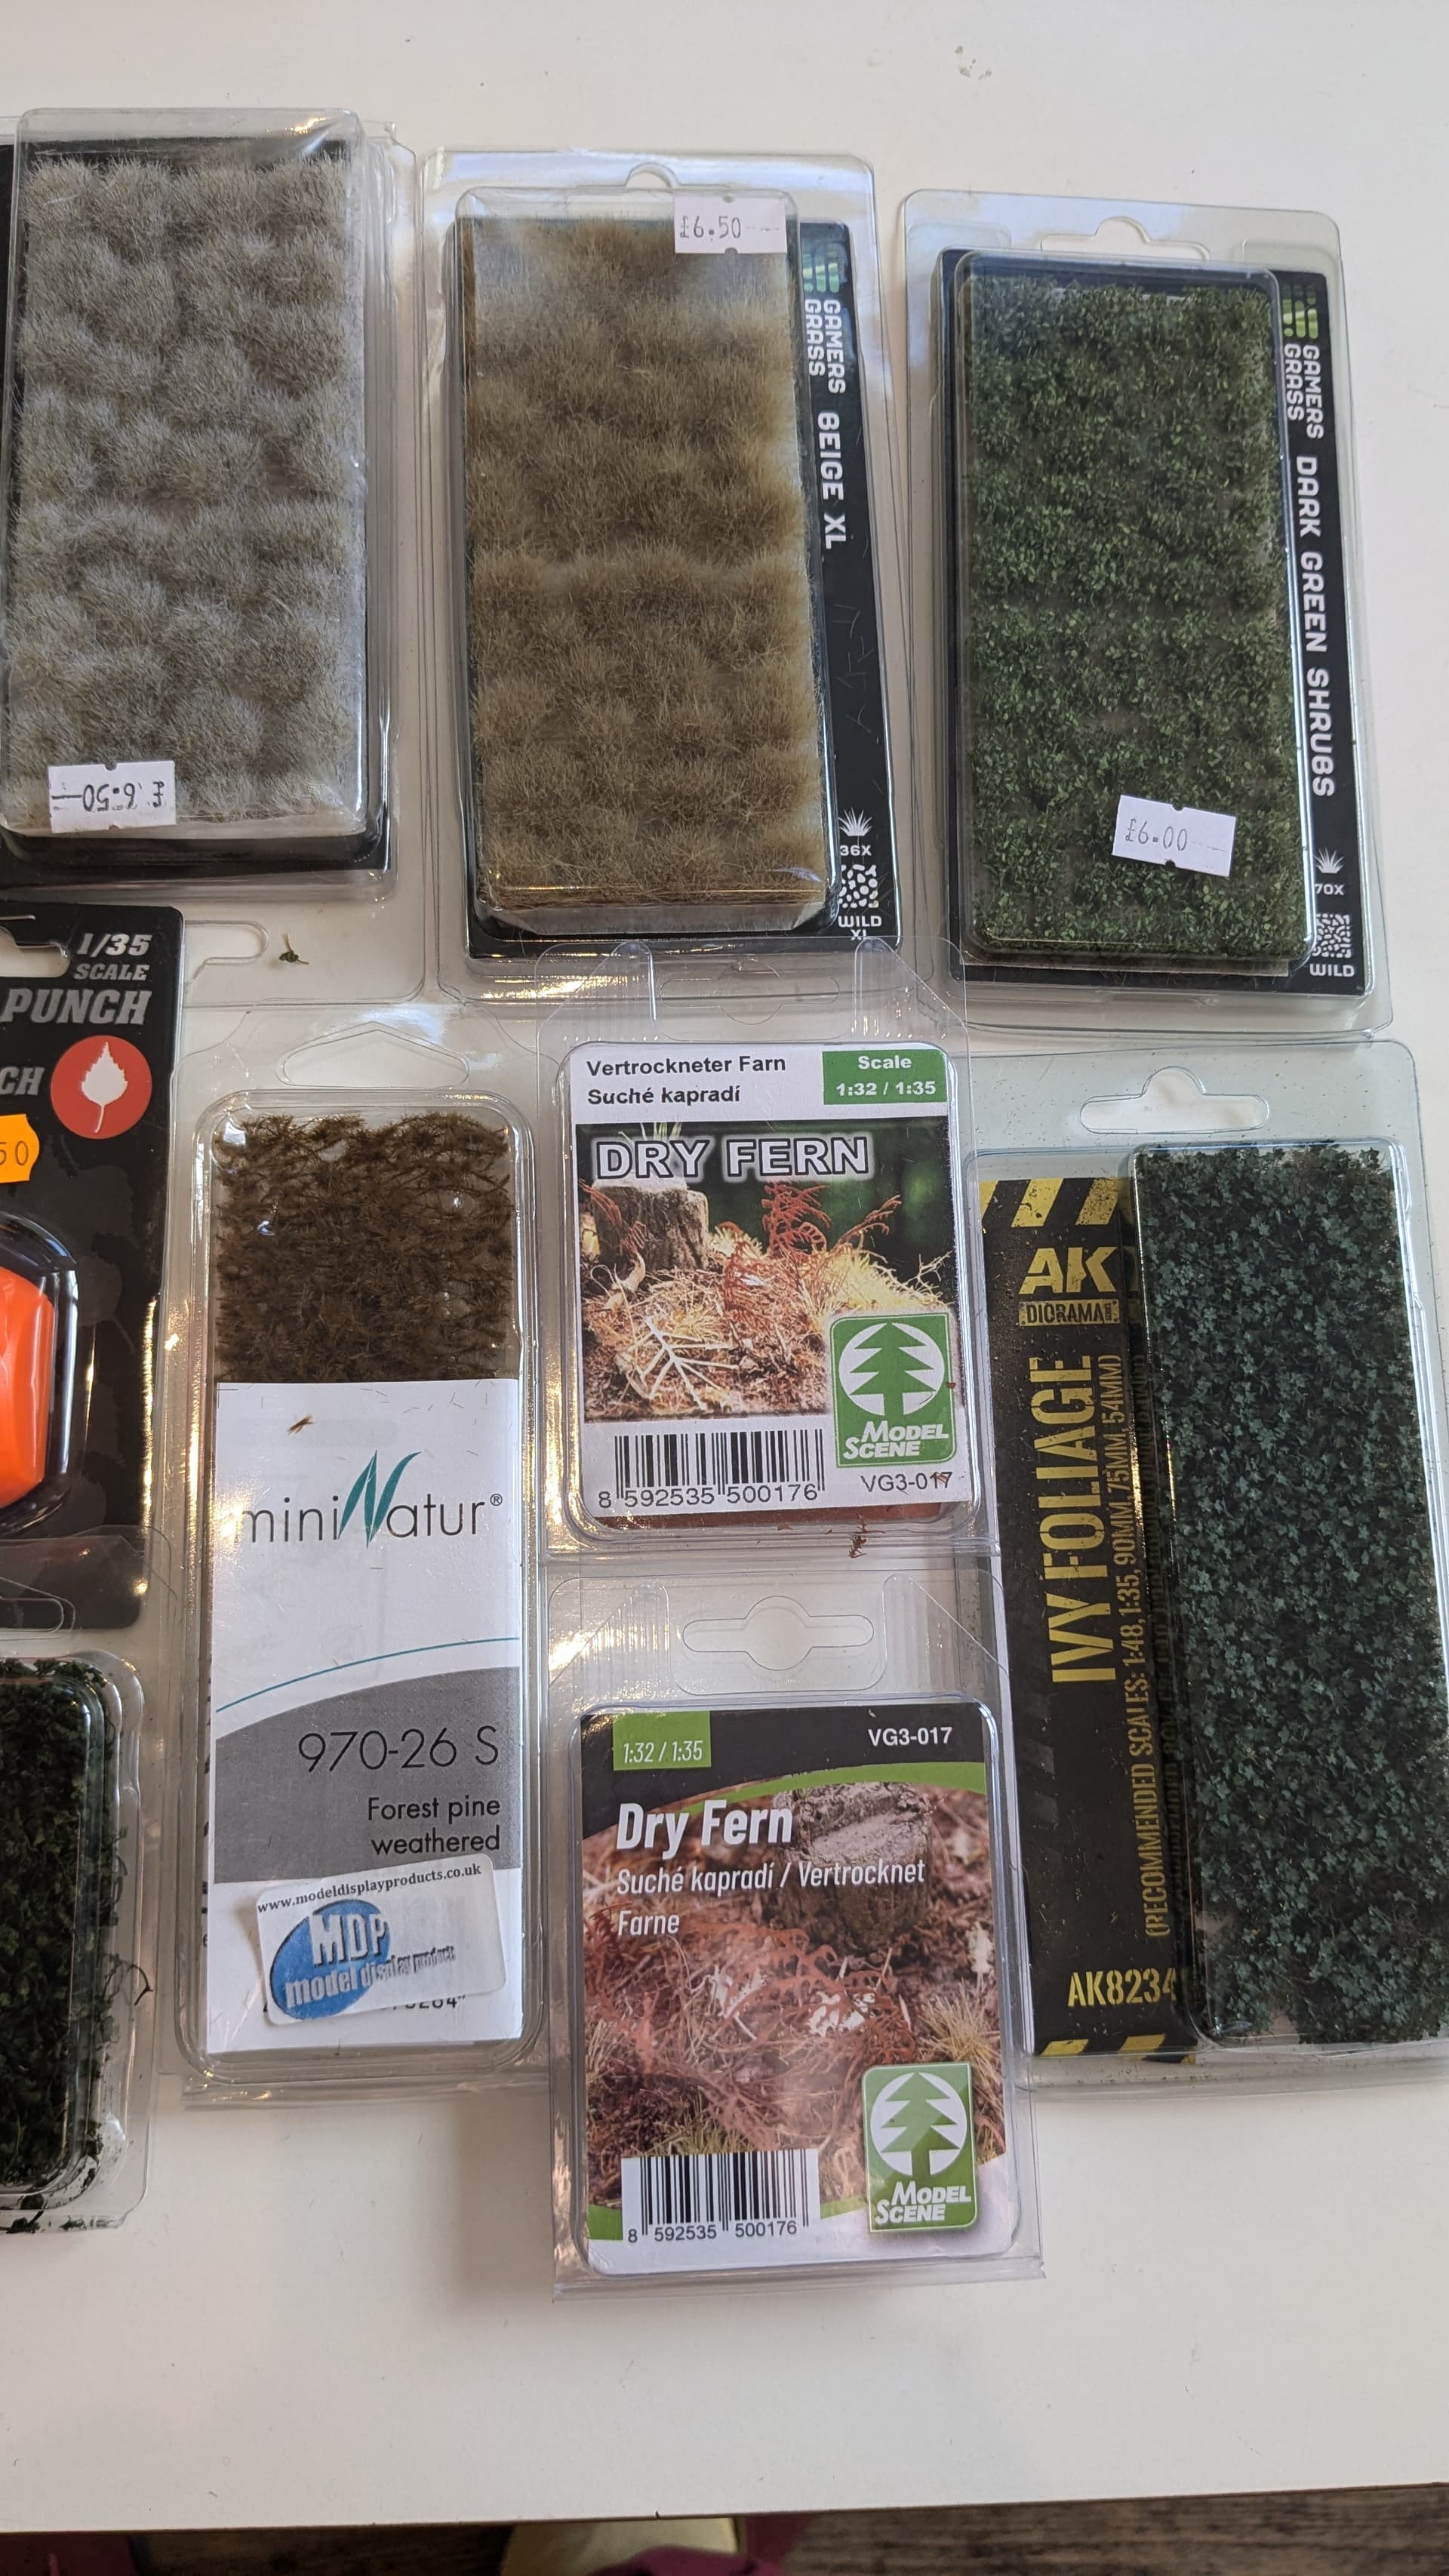
For the ivy on the building I tried two different products:

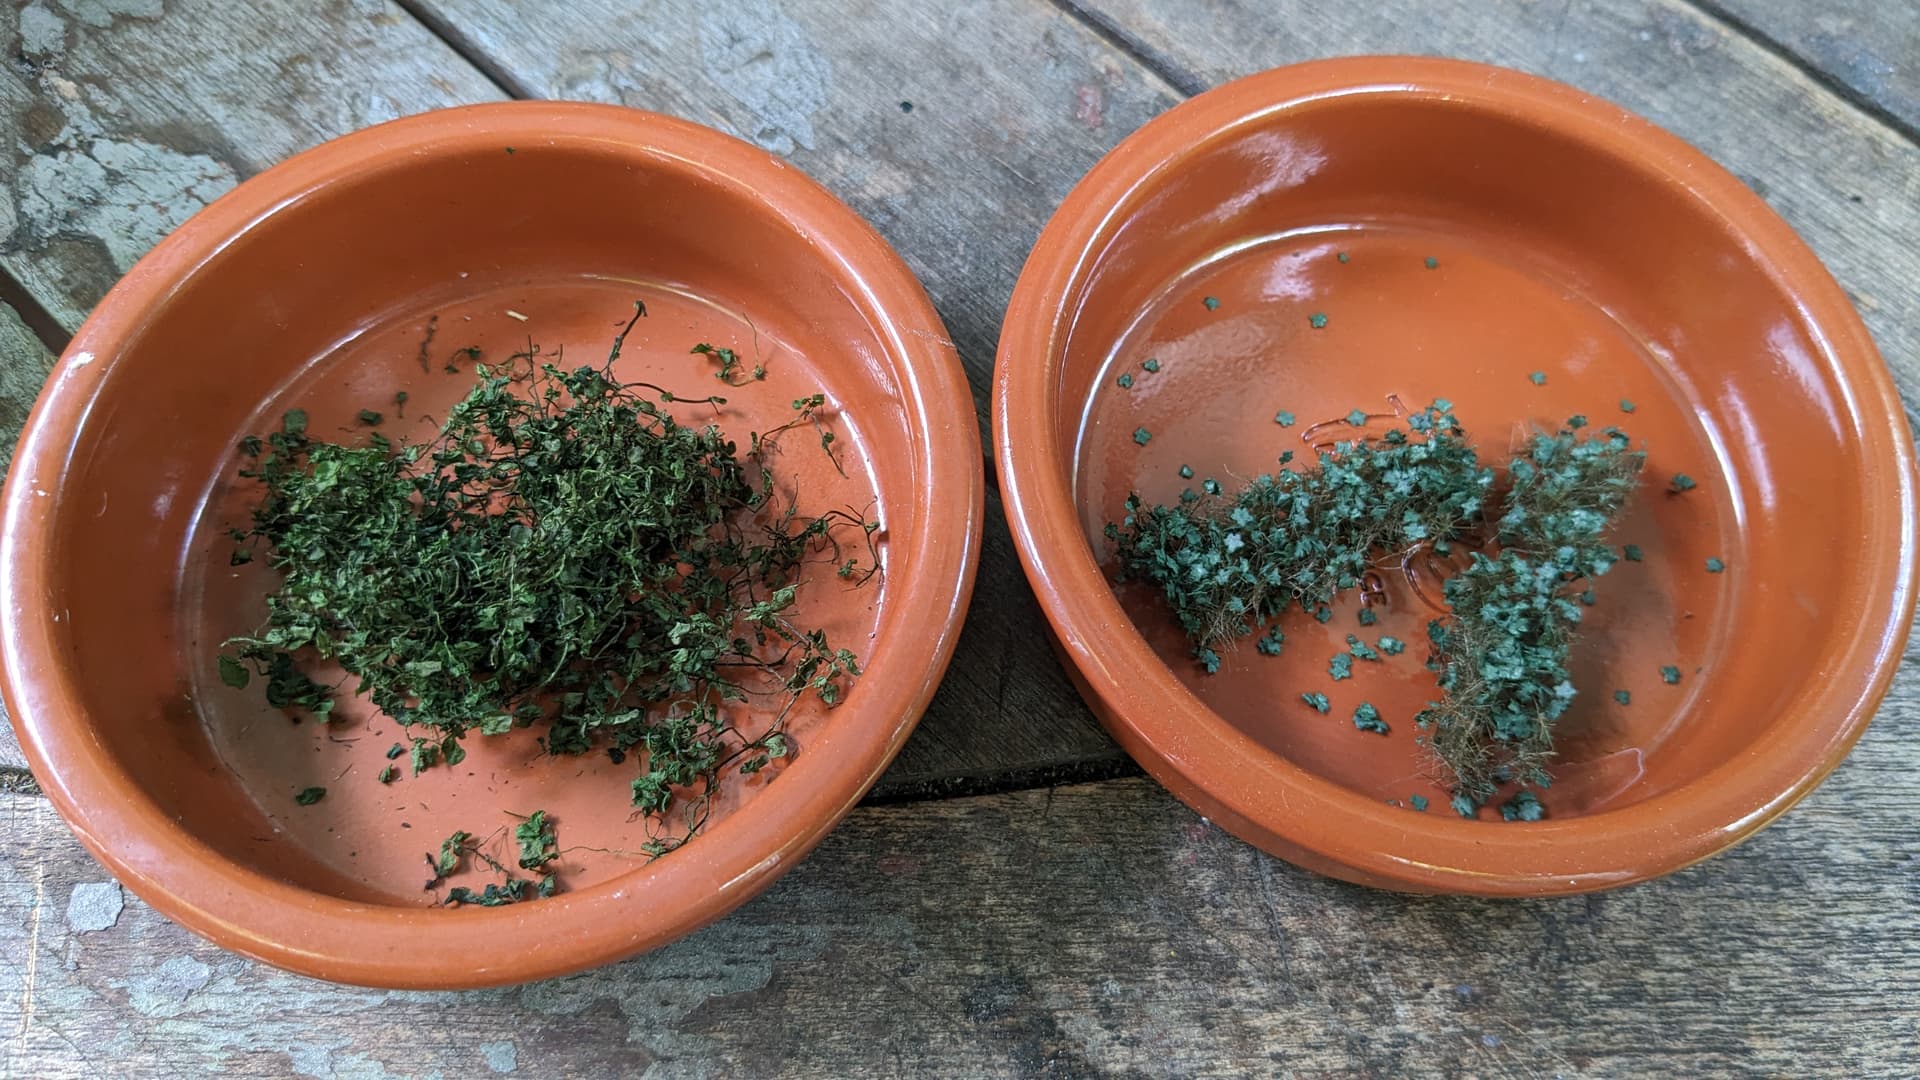
Although the AK ivy looks great in the box, I found that it just didn’t hang right. This is where the netting-backed foliage is a disadvantage, because it’s very hard to use over large unbroken areas without the effect looking artificial.
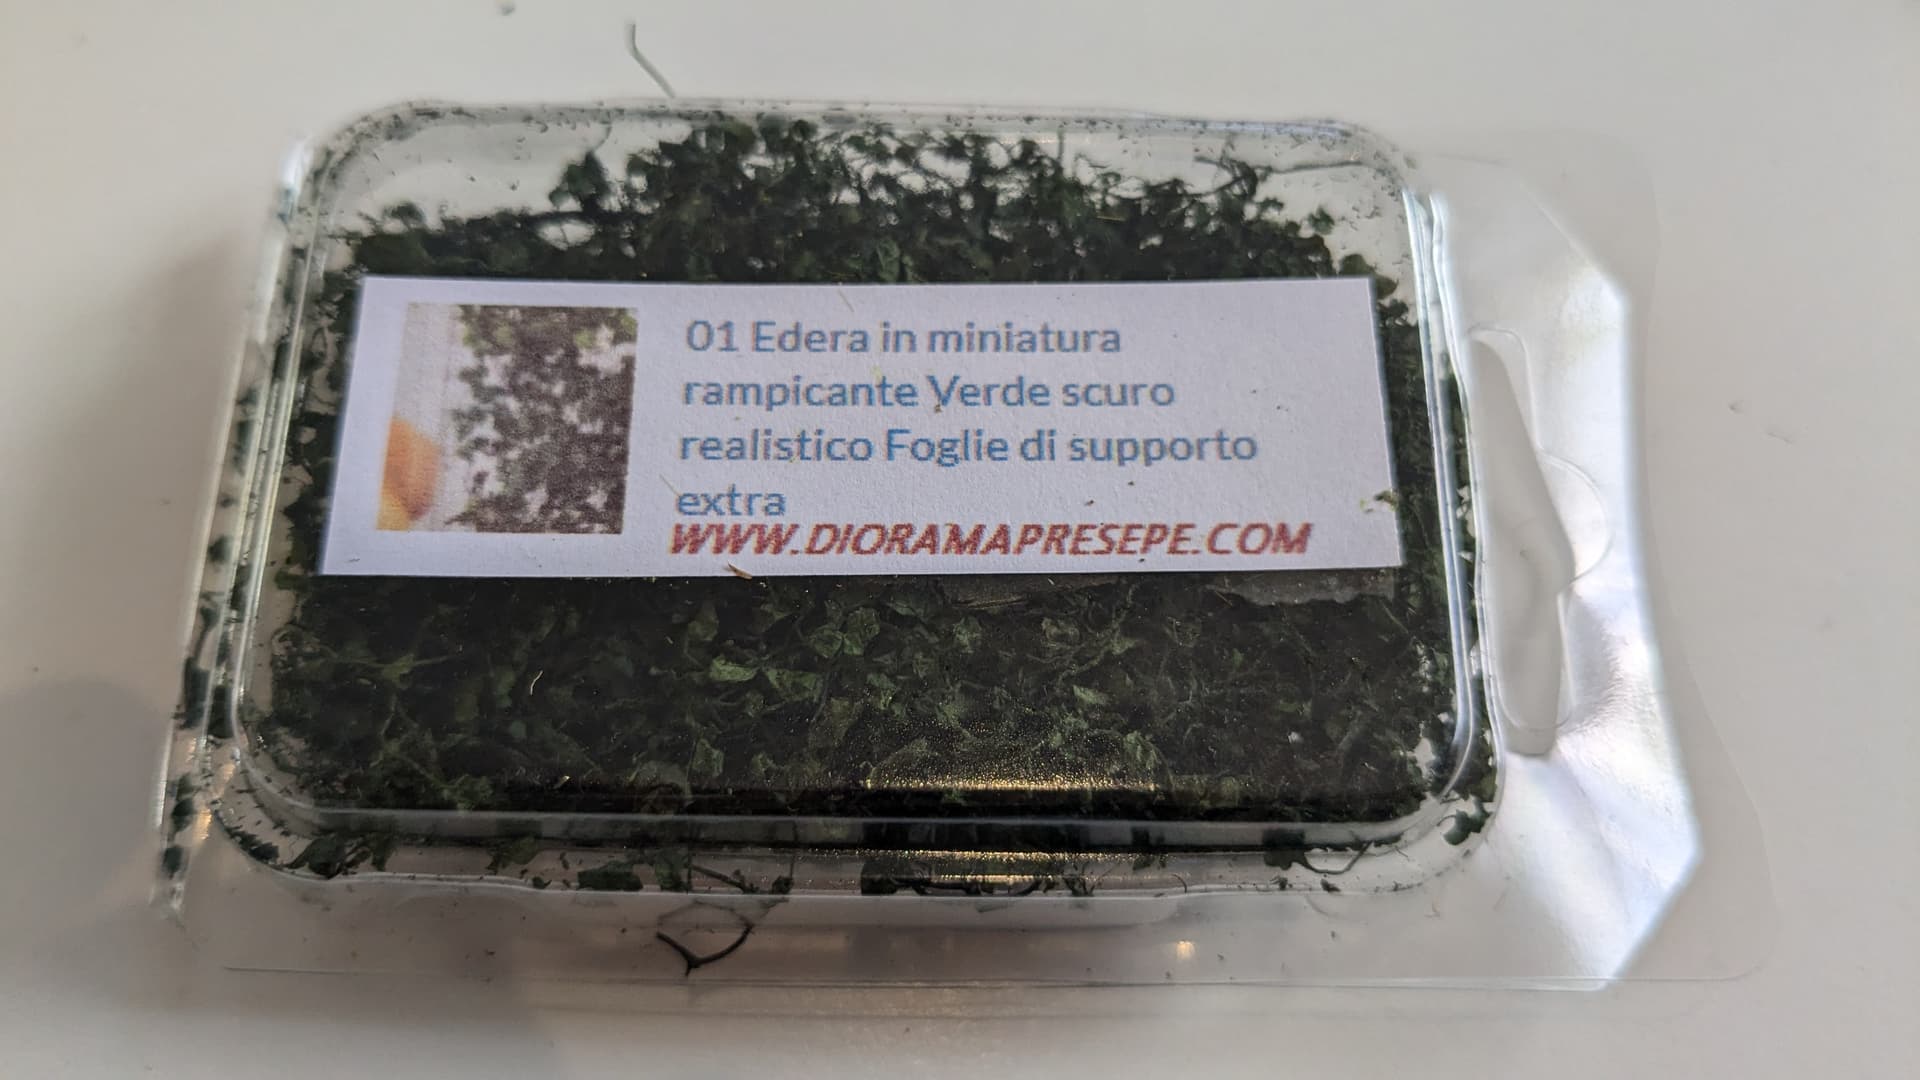
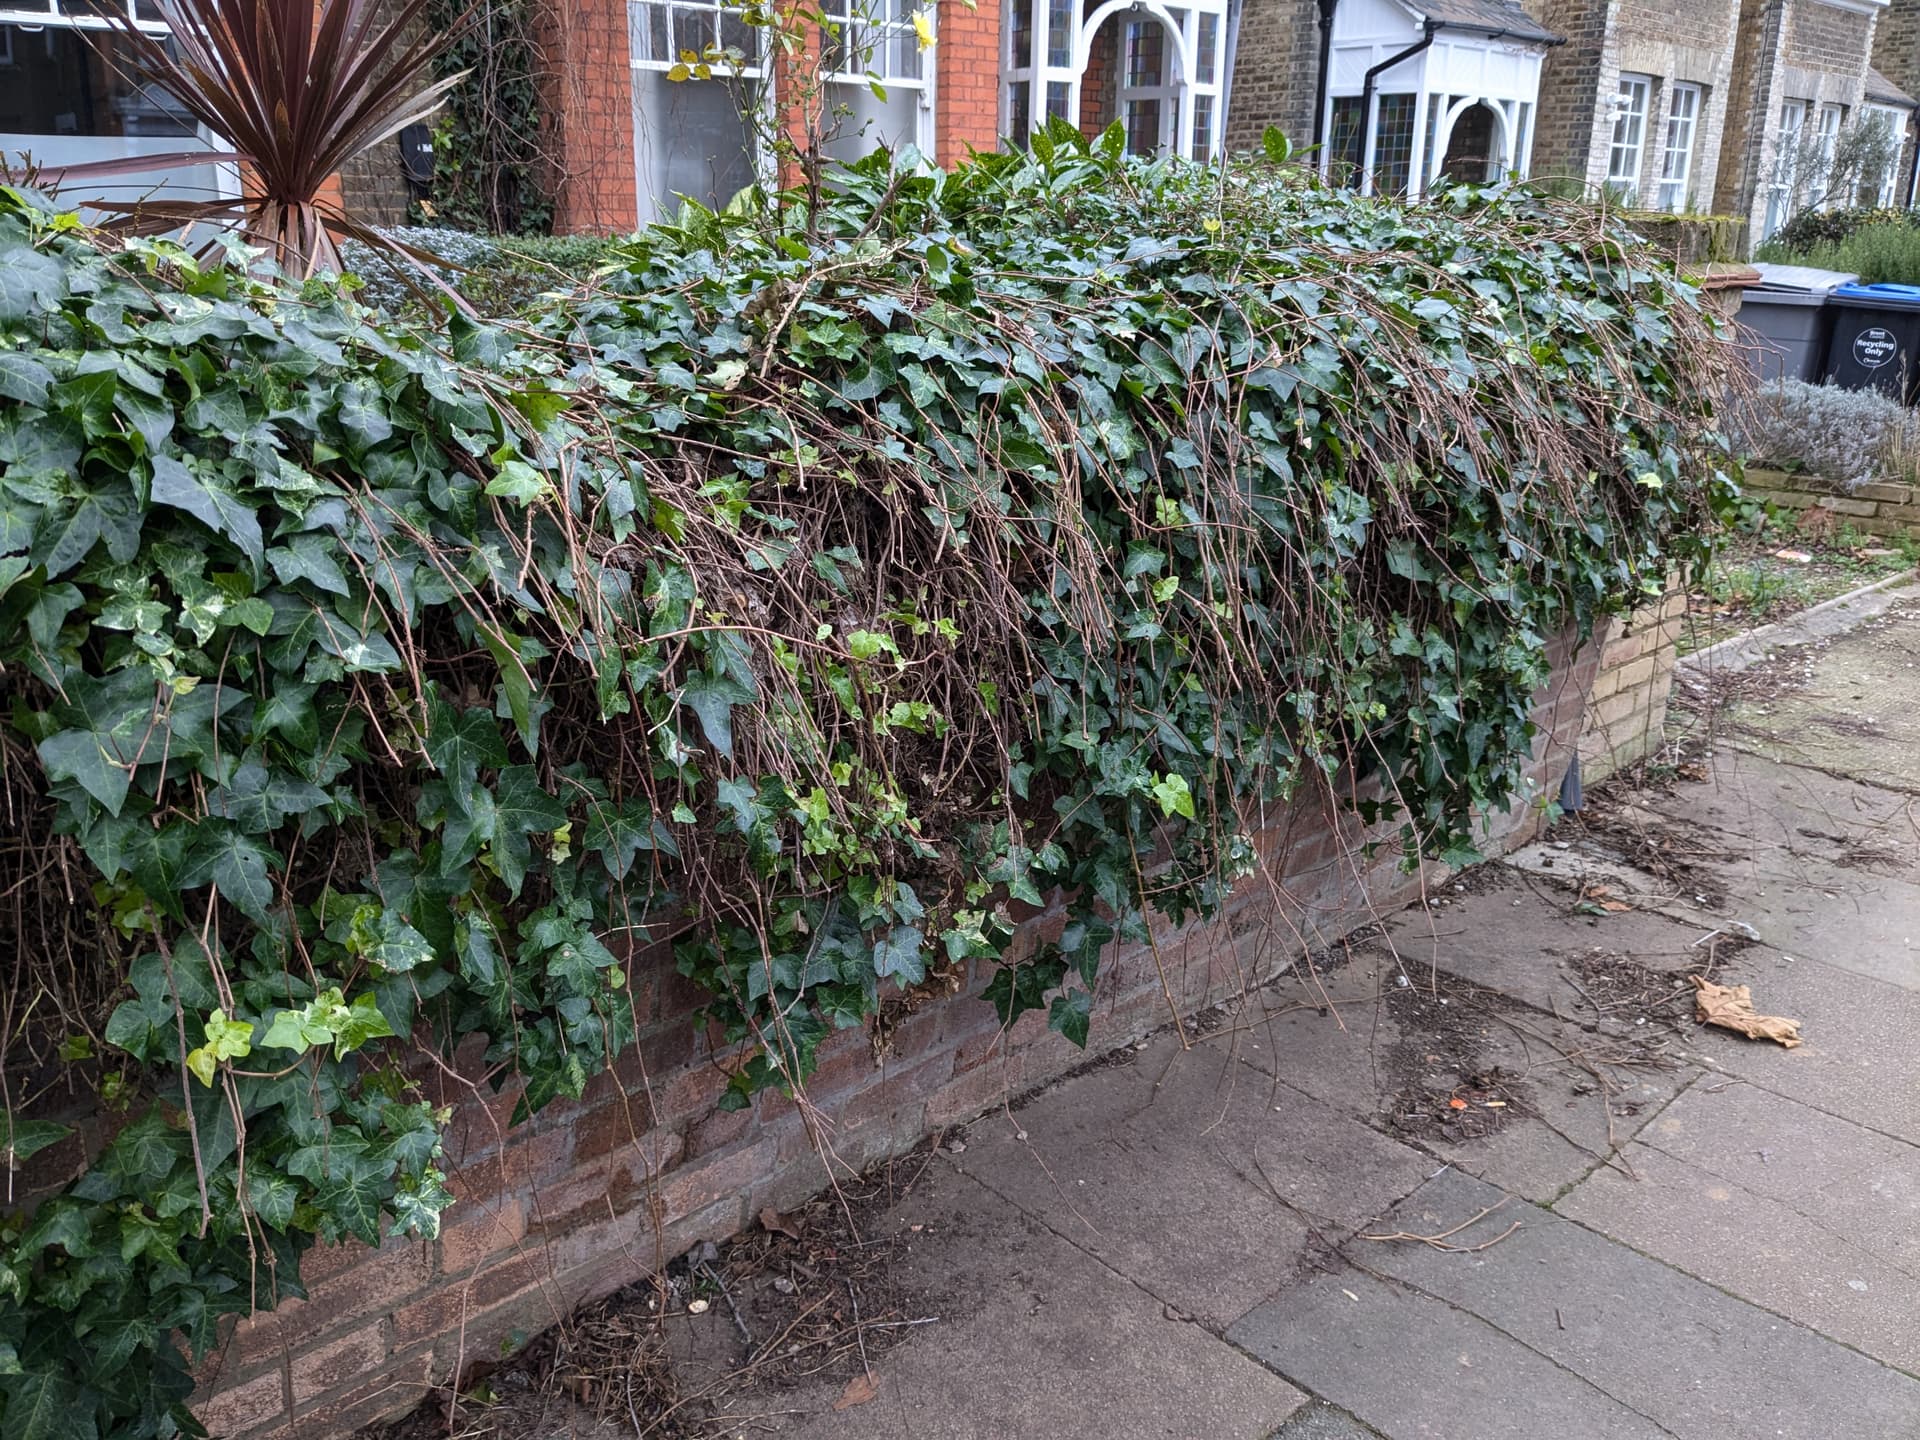
The stuff from Dioramapresepe, on the other hand, whilst looking less enticing at first, actually opens out in a very natural way. That’s probably because its actually a natural, dried plant of some sort. Too bad it’s hard to find beyond ordering directly from their website (although it arrived pretty fast).
The look is just right in my opinion.

To create the look of some dead ivy (which you almost always see alongside the living growth) I mixed in some clumps of Mininatur birch / fall / autumn foliage. The latter still looks a little too yellow perhaps, so I may tone it down with a little brush work in due course.
More to come…
17 Likes

Thanks heaps for showing your process and materials! Very, very useful and appreciated!
2 Likes
![]() I can see how that looks! Luckily I have other vices…
I can see how that looks! Luckily I have other vices…
2 Likes
Thanks Sam - glad to be useful!
1 Like
More vegetation…
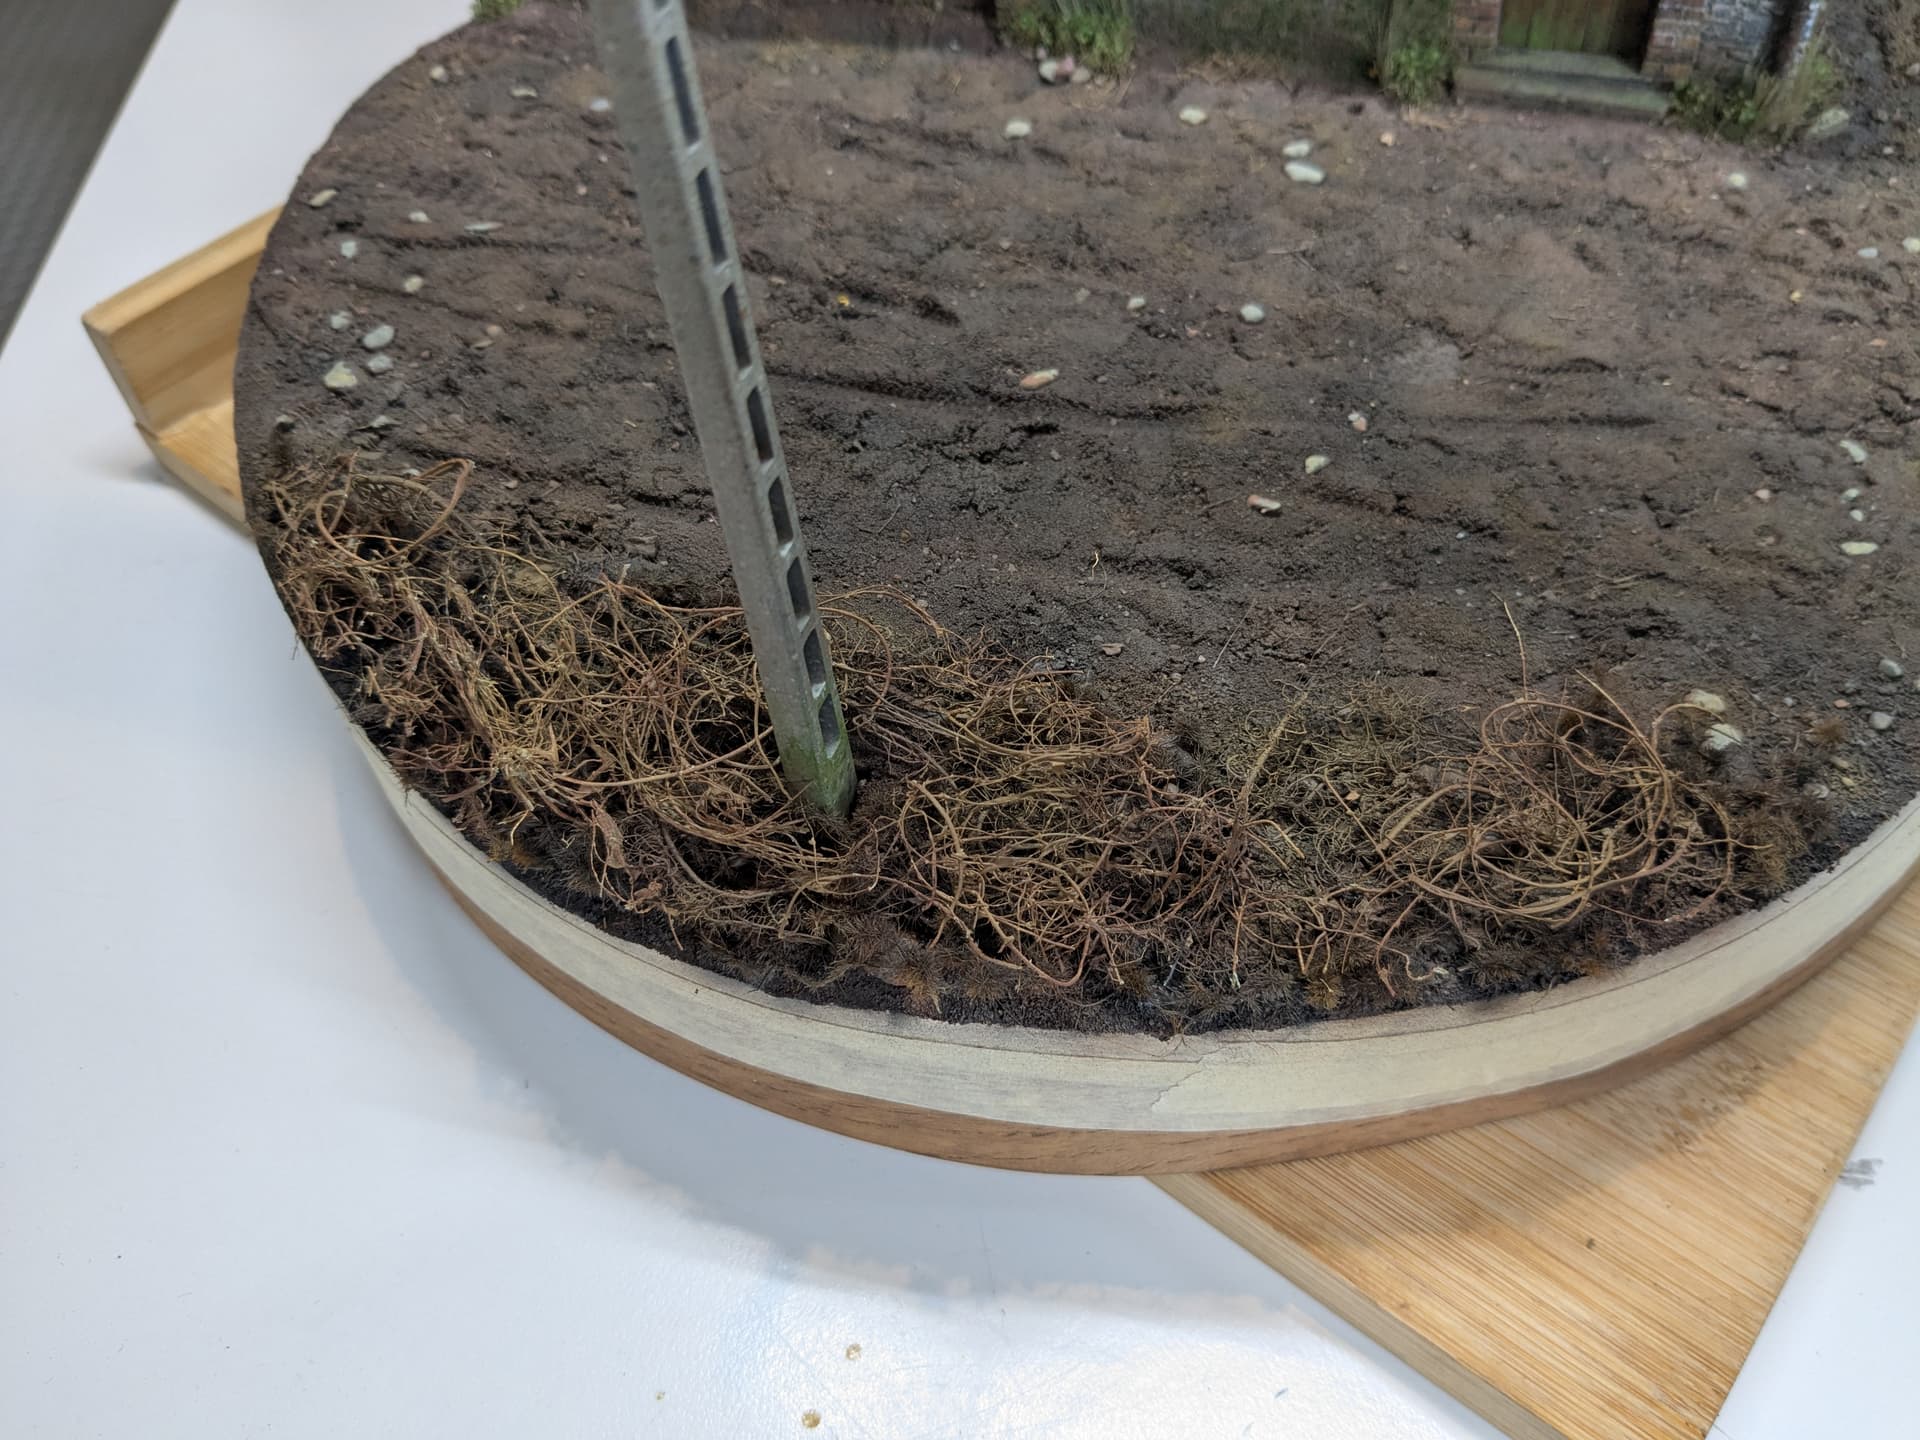
So this is the look I was going for: thick winter undergrowth. At the top is what I would call brambles, below is a type of ivy. I had to remind myself that in winter there is still plenty of greenery around, but it’s often more sparse and you can see a lot more of the branches and twigs beneath the leaves.

So I started with building up layers of the lichen and something called ‘forest pine weathered’ from Mininatur (also known as Siliflor in some countries).
Then I gave it a blast of Tamiya Earth Brown with an airbrush. Whilst I had the paint in the airbrush, I also sprayed groundwork in random patterns to make it more interesting.
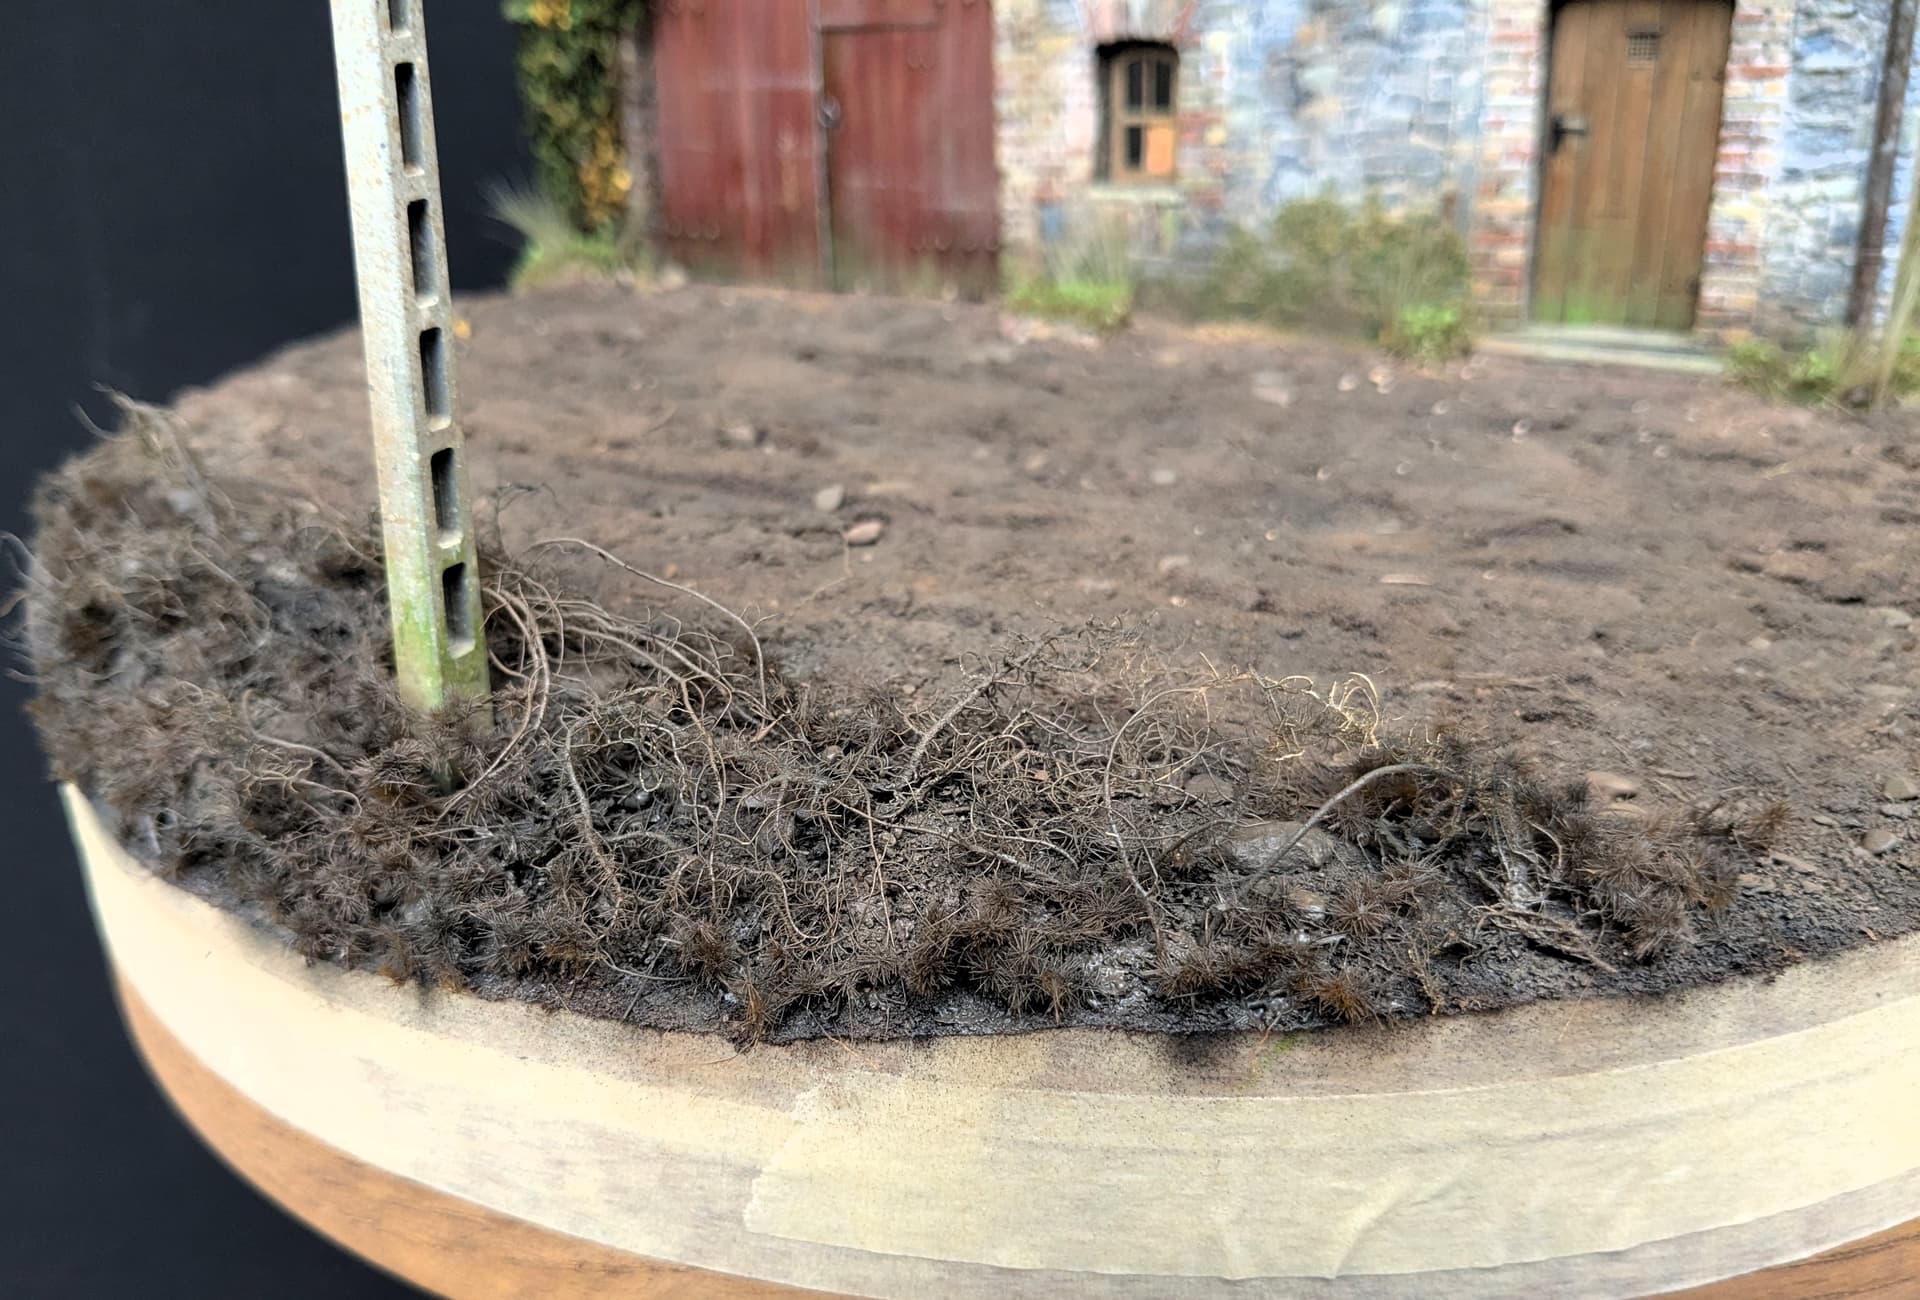
The next step was to add more structure to the shrubs using the horsehair. Although it comes in rectangular clumps, if you cut and tear it carefully then it’s big advantage becme apparent: it has circular patterns which look like the real thing. Another coat of earth tone was then airbrushed, with some yellow added into the mix to give more of a red brown look.
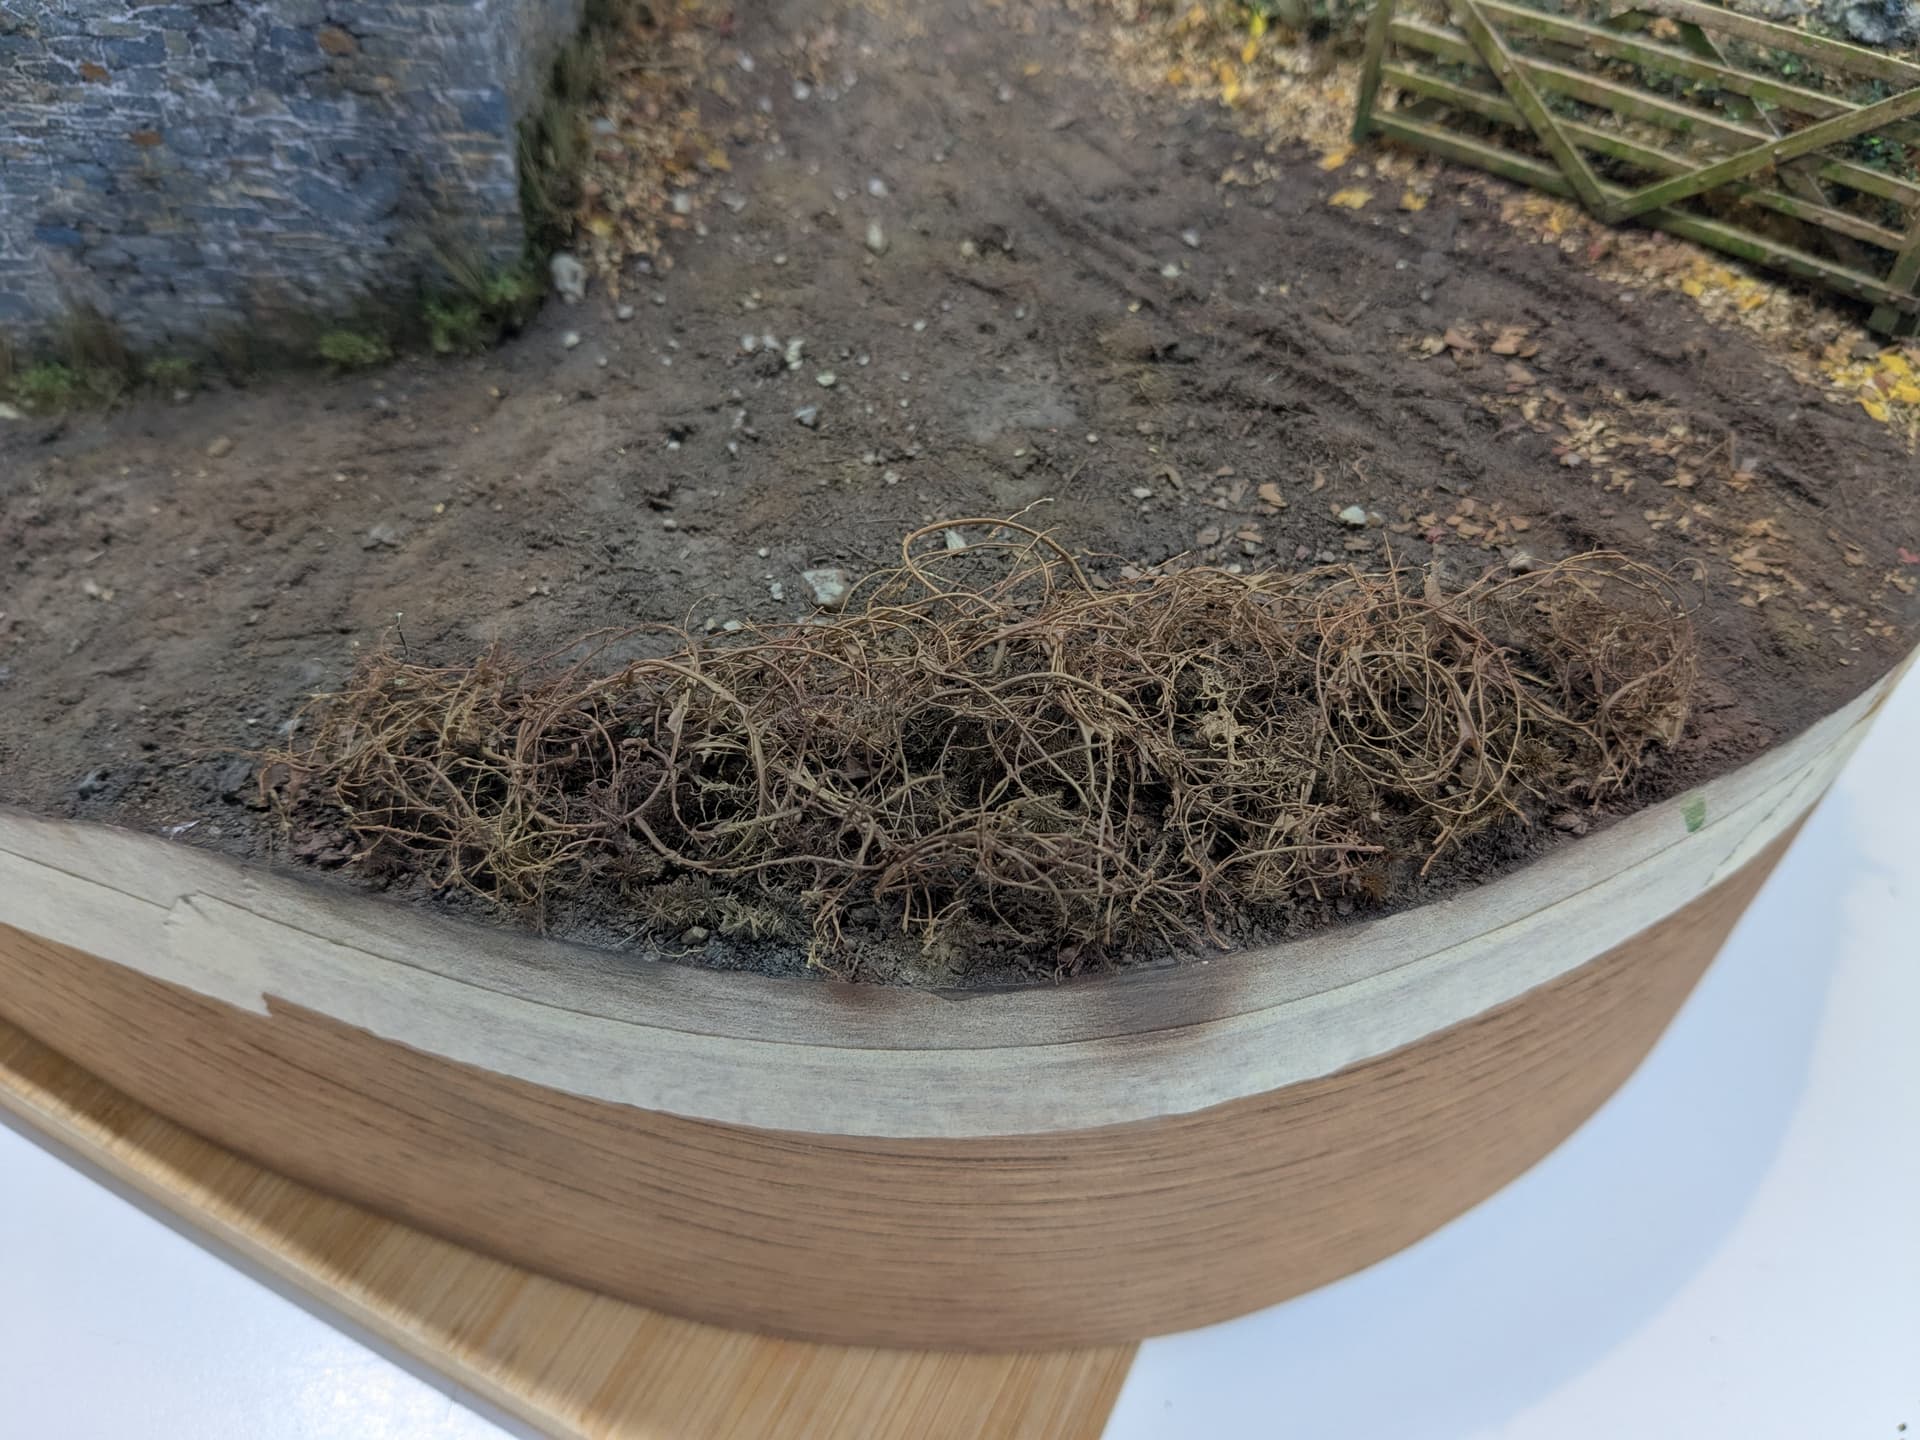

The last stage was to add the leaves. To be honest I was largely winging it here and I have to admit that my first effort didn’t quite work…
I started with Mininatur birch leaves which I had left over from my Malaya 1941 project. These were simply attached by brushing PVA onto the branches and adding clumps which I either cut or tore to shape.
At first they seemed to work well, although they were a bit on the bright side. But this didn’t really matter because I was always planning on toning them.

But in the end I decided that it wasn’t so much the colour that was wrong - but the scale. These leaves just looked too big for the small shrubs that I was after. So I decided to gently rip it all away and go back to the foliage that I had used at the back of the diorama:
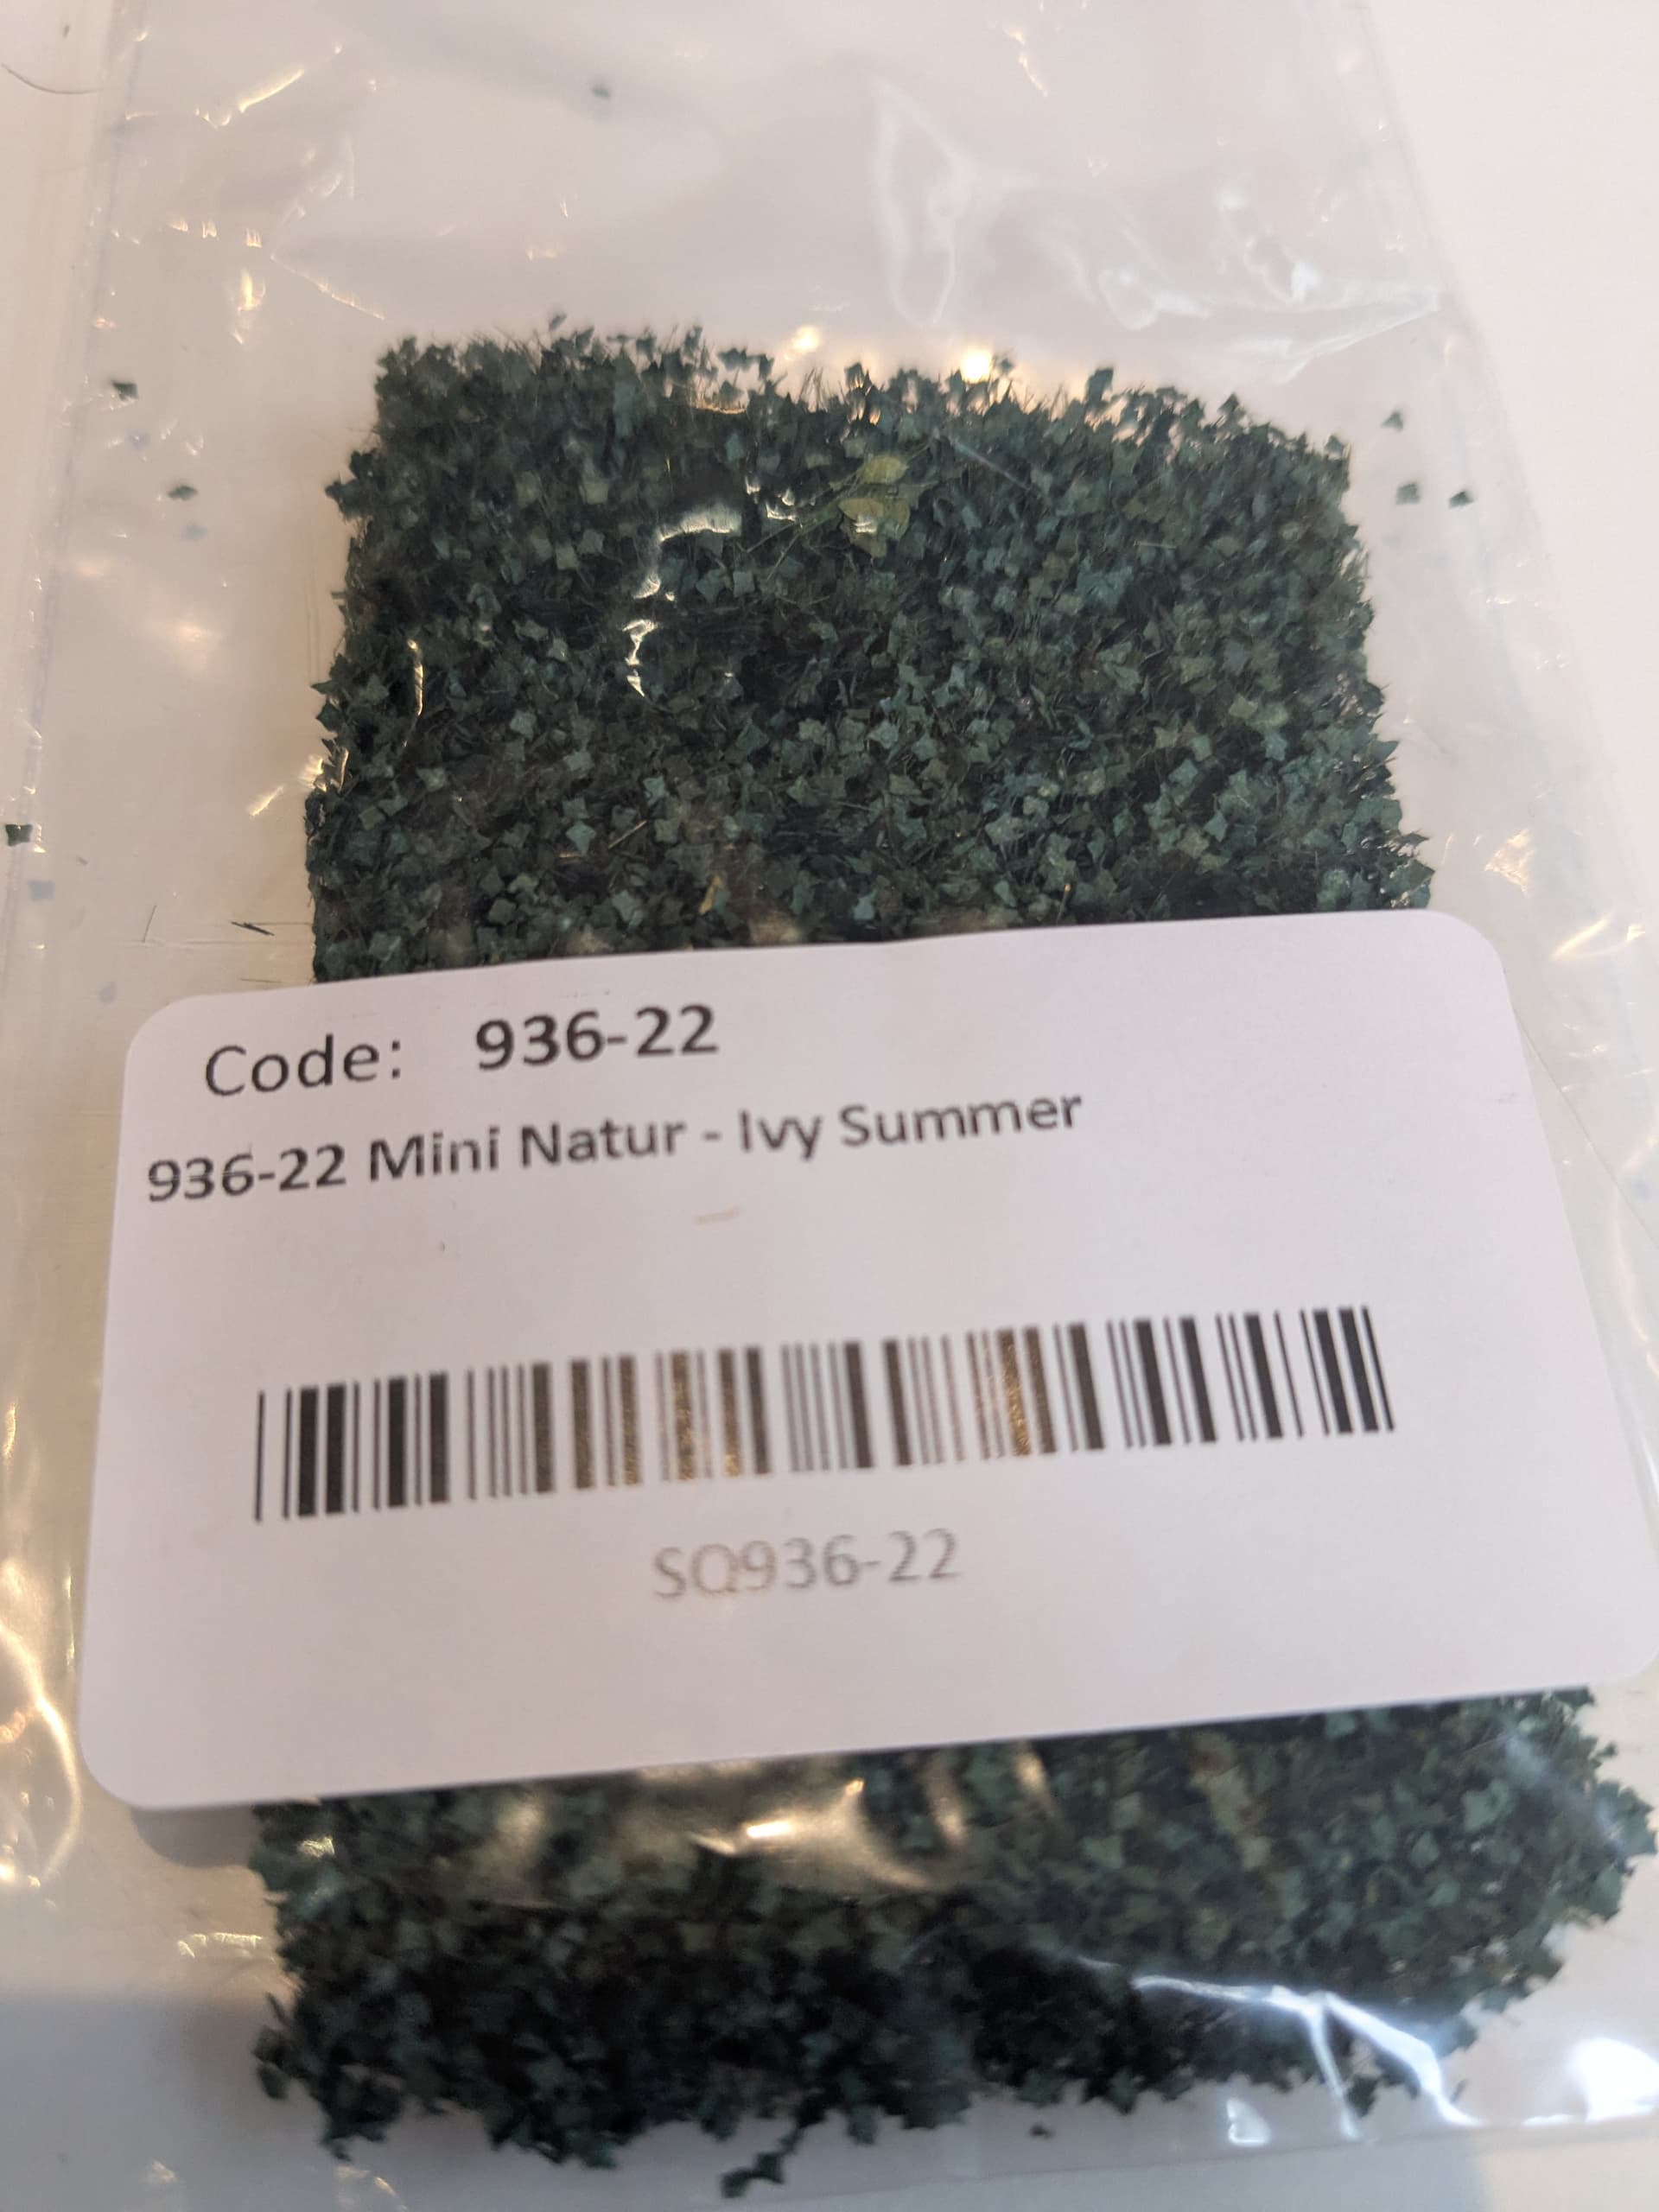
This another MiniNatur product called ‘Summer Ivy’ 936-22. Although the leaves are ivy-shaped, they are so small that - to my eye at least - in 1/35 this just looks like any sort of shrub leaf.
The effect was also helped here and there by some small clumps of dead leaves (the late fall birch foliage I used for part of the wall ivy), as well as the odd bit of birch leaf that had remained attached after I had pulled most of it off.
There is still some work to be done by adding tones with acrylic paints, but all in all I am happy with the result.
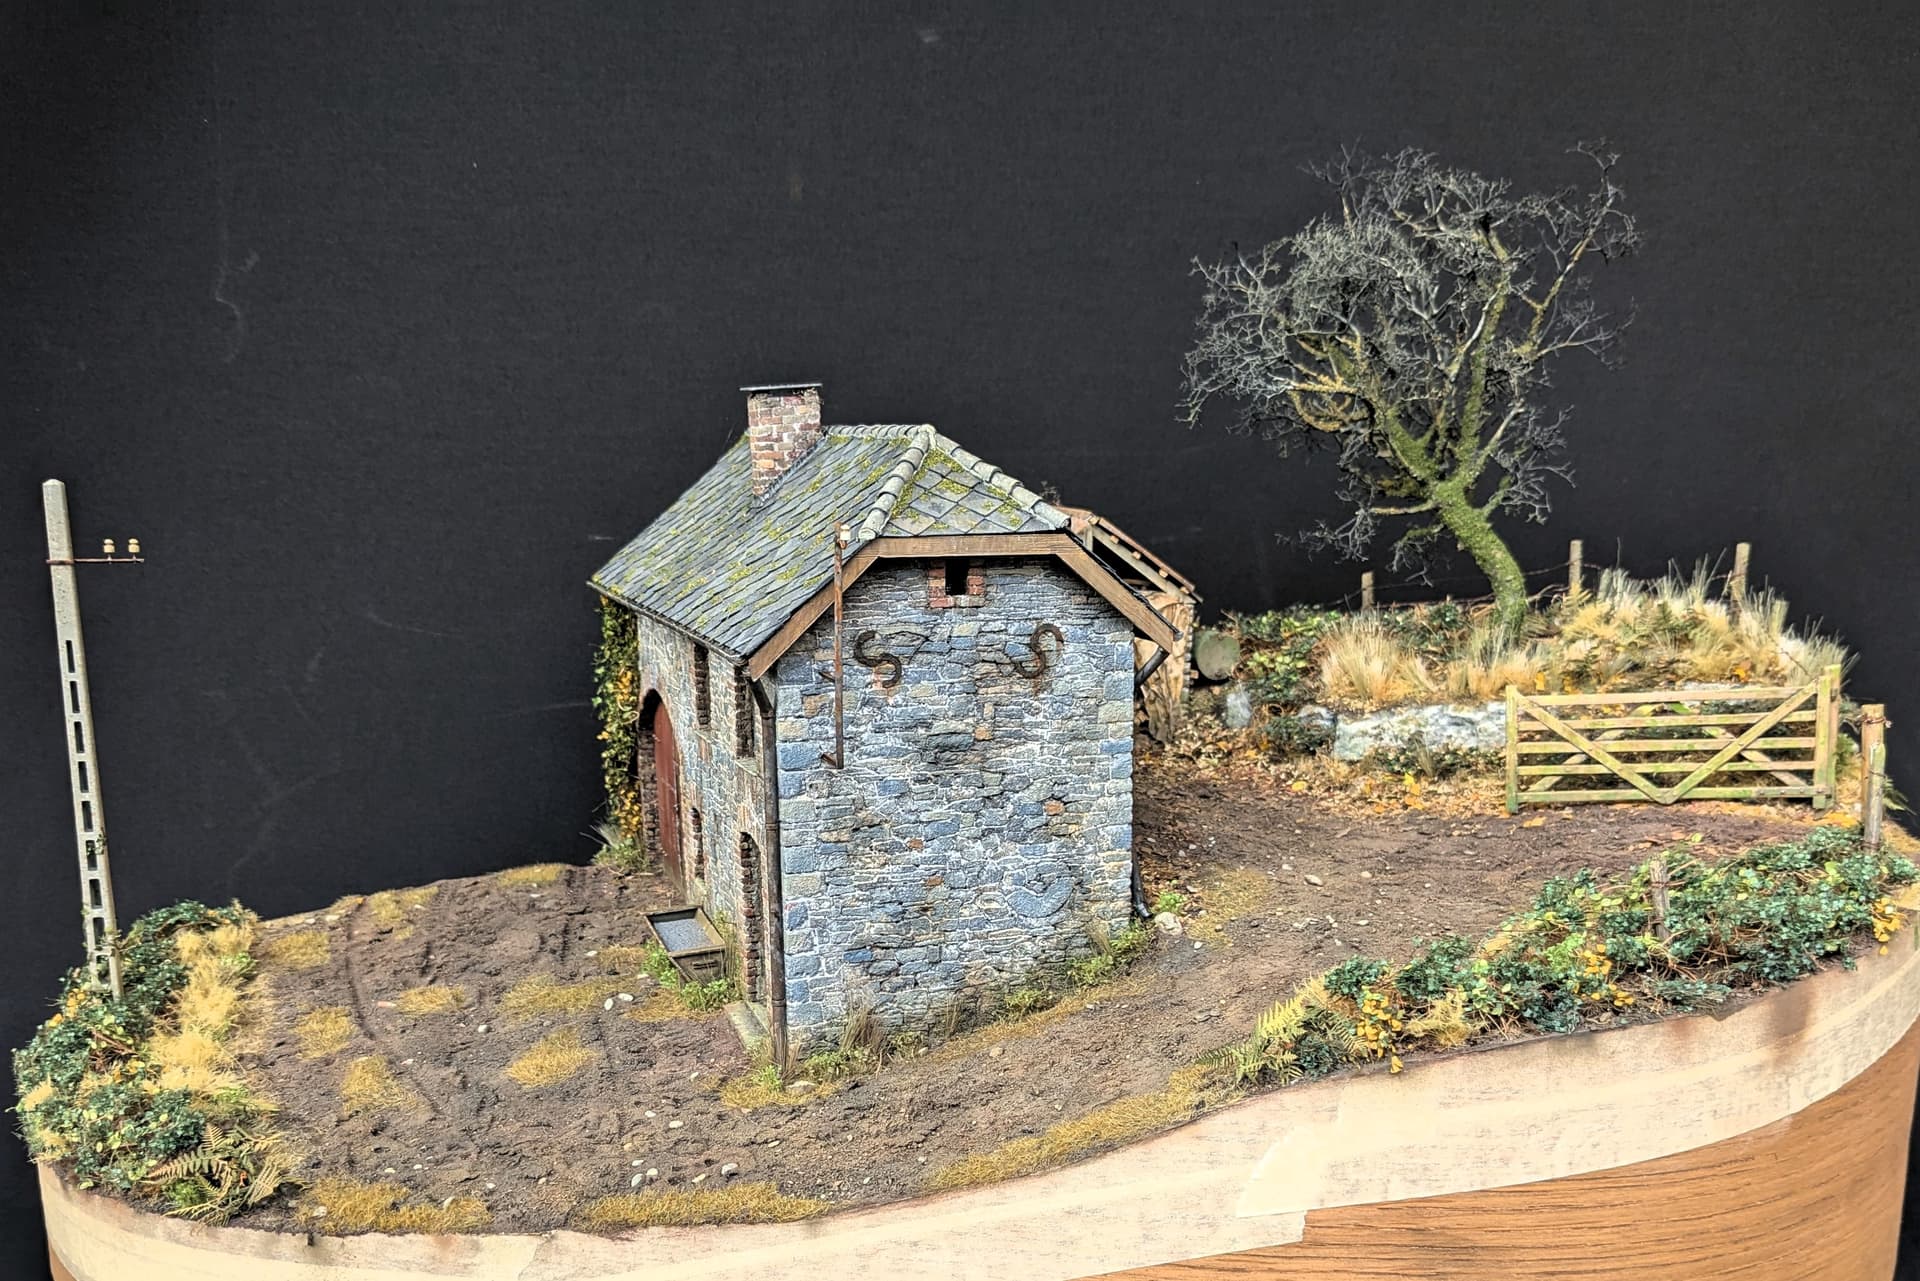
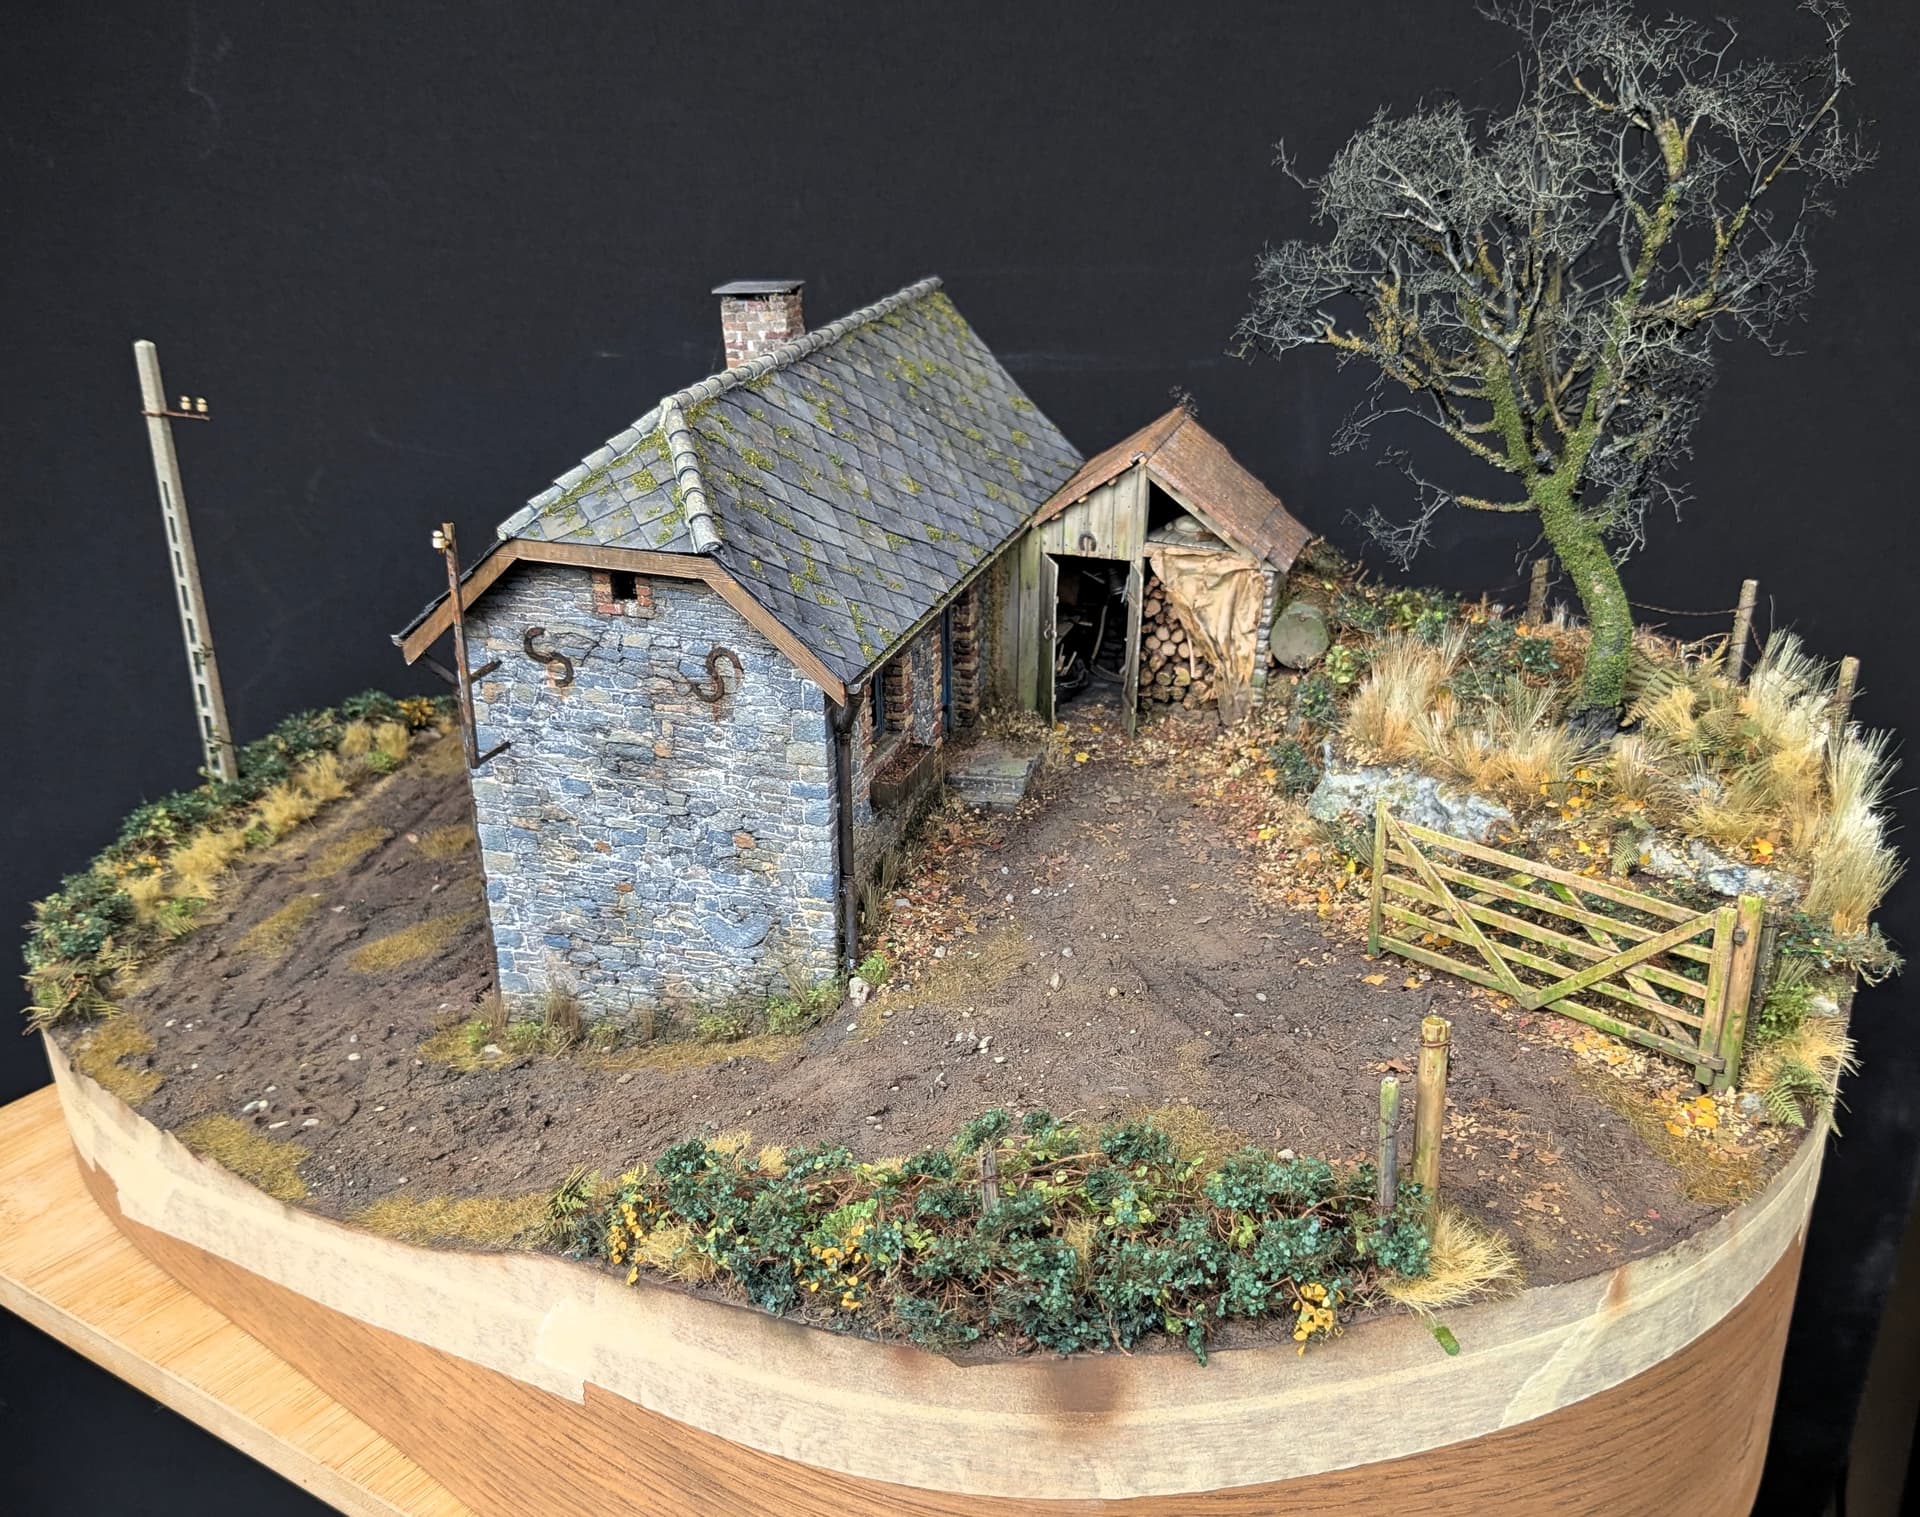
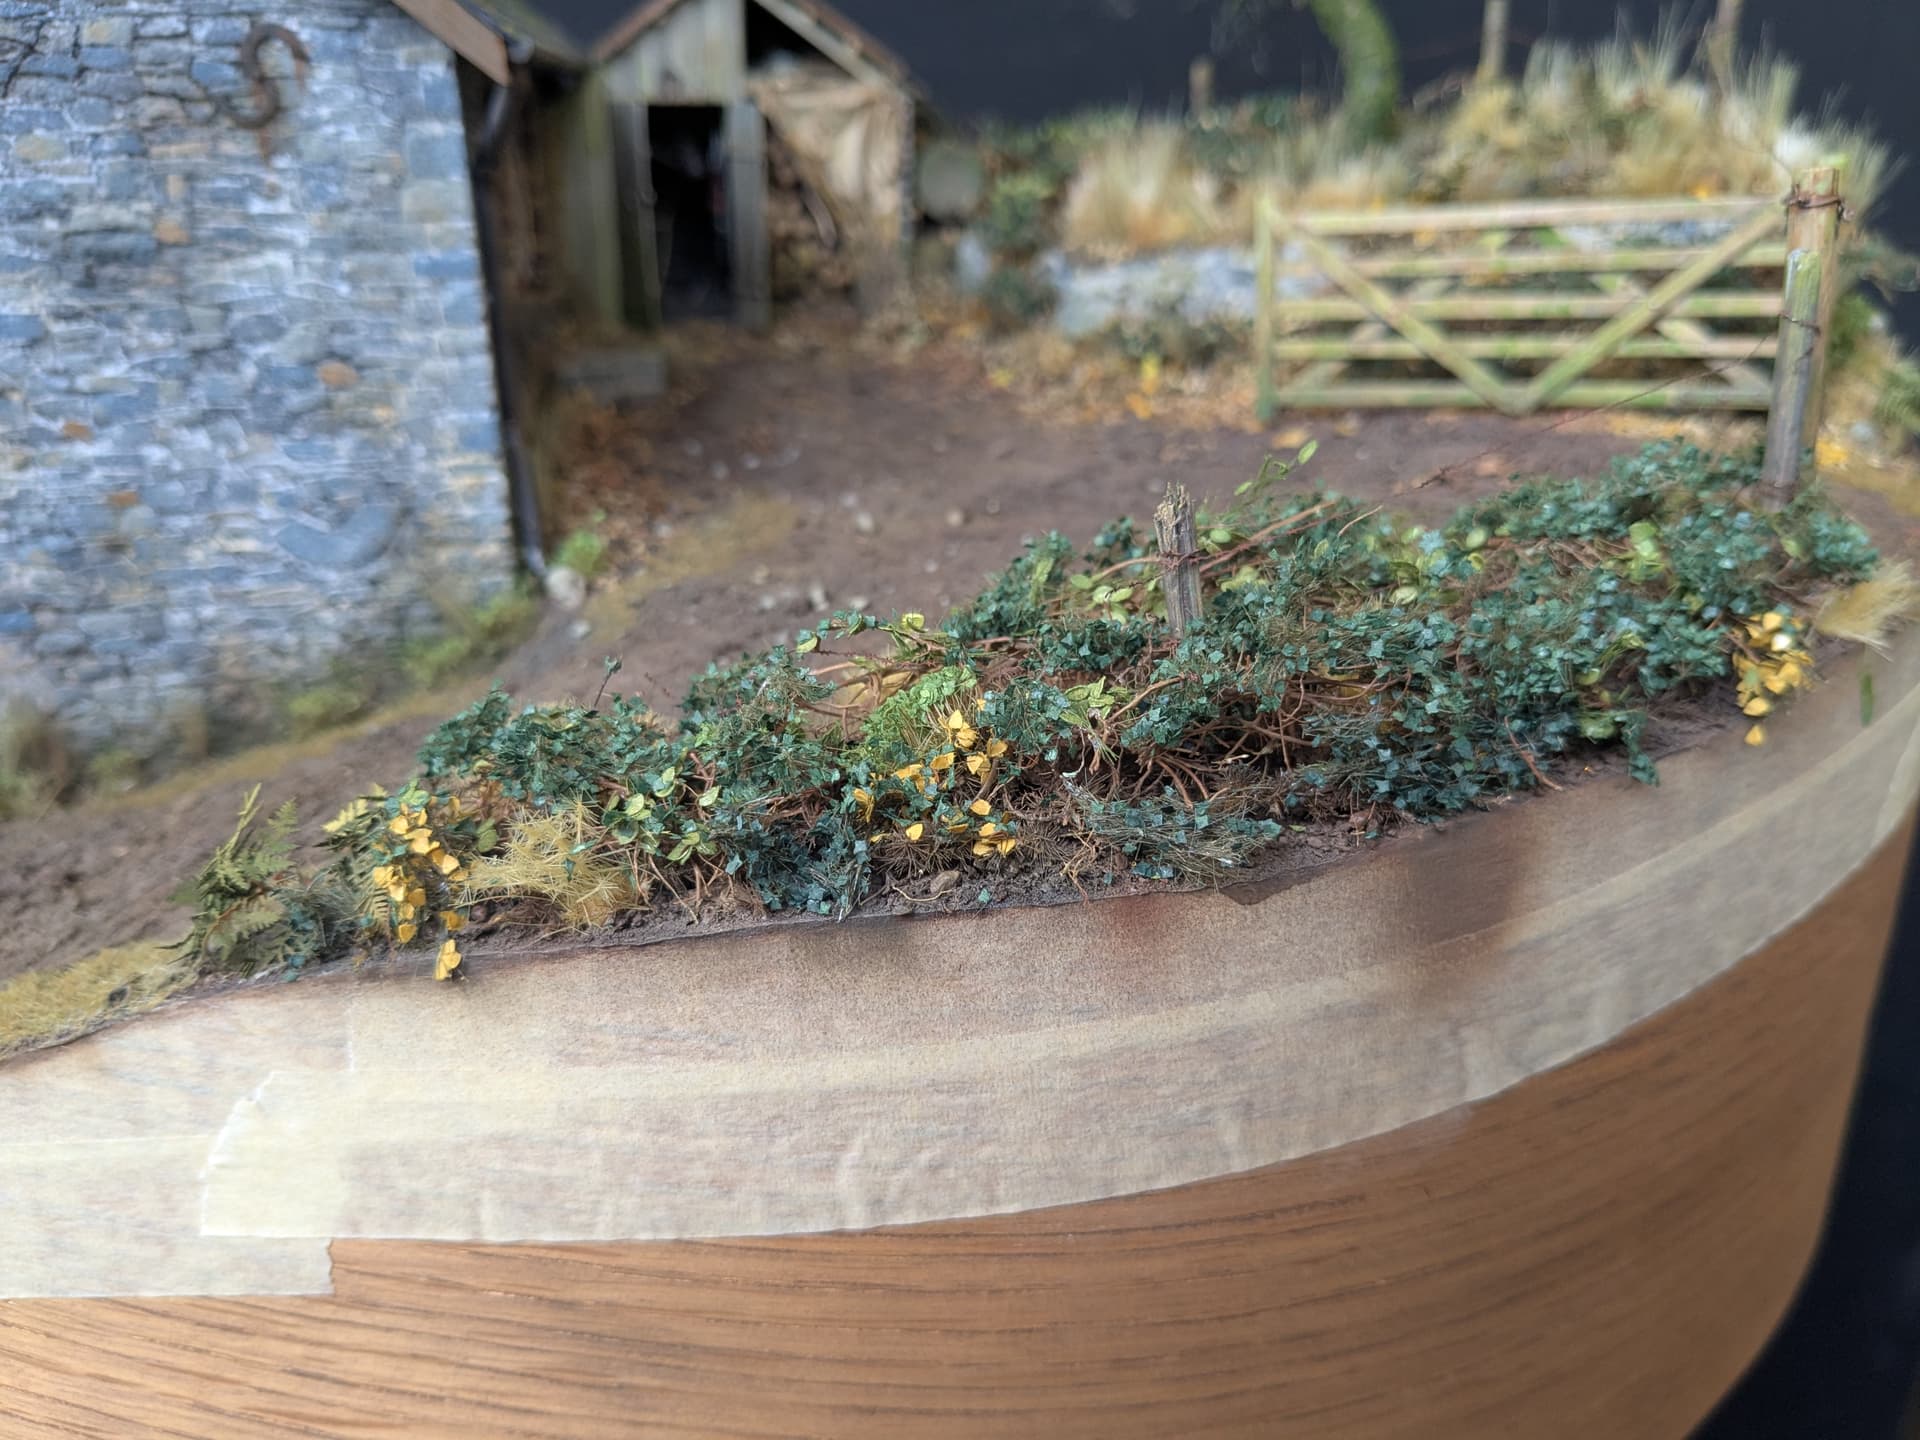

Other foliage was added from the various sets I had acquired, with a particular favourite being ‘Spikey Beige’ from Gamer’s Grass. You will also see some bracken / fern leaves and some ivy climbing up the telegraph pole, all of which came from laser cut paper from Model Scene.
24 Likes
Simply fantastic work there Tim. Incredibly realistic groundwork !
3 Likes
Great update an the work on your veggies look awesome…
2 Likes
Buildings and groundwork absolutely stunning! Need to bookmark this as inspiration.
3 Likes