The dio comes together in a great manner! The Germans soldier must be a tad cold, as he looks a bit pale ![]()
I cannot see what is wrong with the ground work, other than more integration of the vehicles might be warranted…
2 Likes
Thanks Erwin.
Cold isn’t the Schwim driver’s only problem - he’s also lacking a steering wheel at the moment!
Yes, the groundwork is almost there, but not quite. For example, there is no leaf scatter to the left of the house and, even if I don’t go for some snow (I’m still thinking about it), there needs to be cold and damp look… So ice in the puddles, that sort of thing.
4 Likes
The amount of moist/mud/snow/frost mostly depends on the period of the battle you try to depict. In the beginning there was a lot of fog with temperatures just above freezing. Later the temp went down and things started to freeze…
He is an amateur! How on earth do they expect to win a battle with guys like him ![]()
3 Likes
It is looking good Tim!
2 Likes
Reading all the updates on this after being offsite for months. What a piece of art! Seriously, masterclass work. really looking forward to seeing the figures come and bring the whole thing together
2 Likes
Thanks Brock!
I am working on the figures - which is why there has been a pause in my postings - but more updates soon!
7 Likes

Très beau travail. Very well done.
2 Likes
Thanks Manuel…
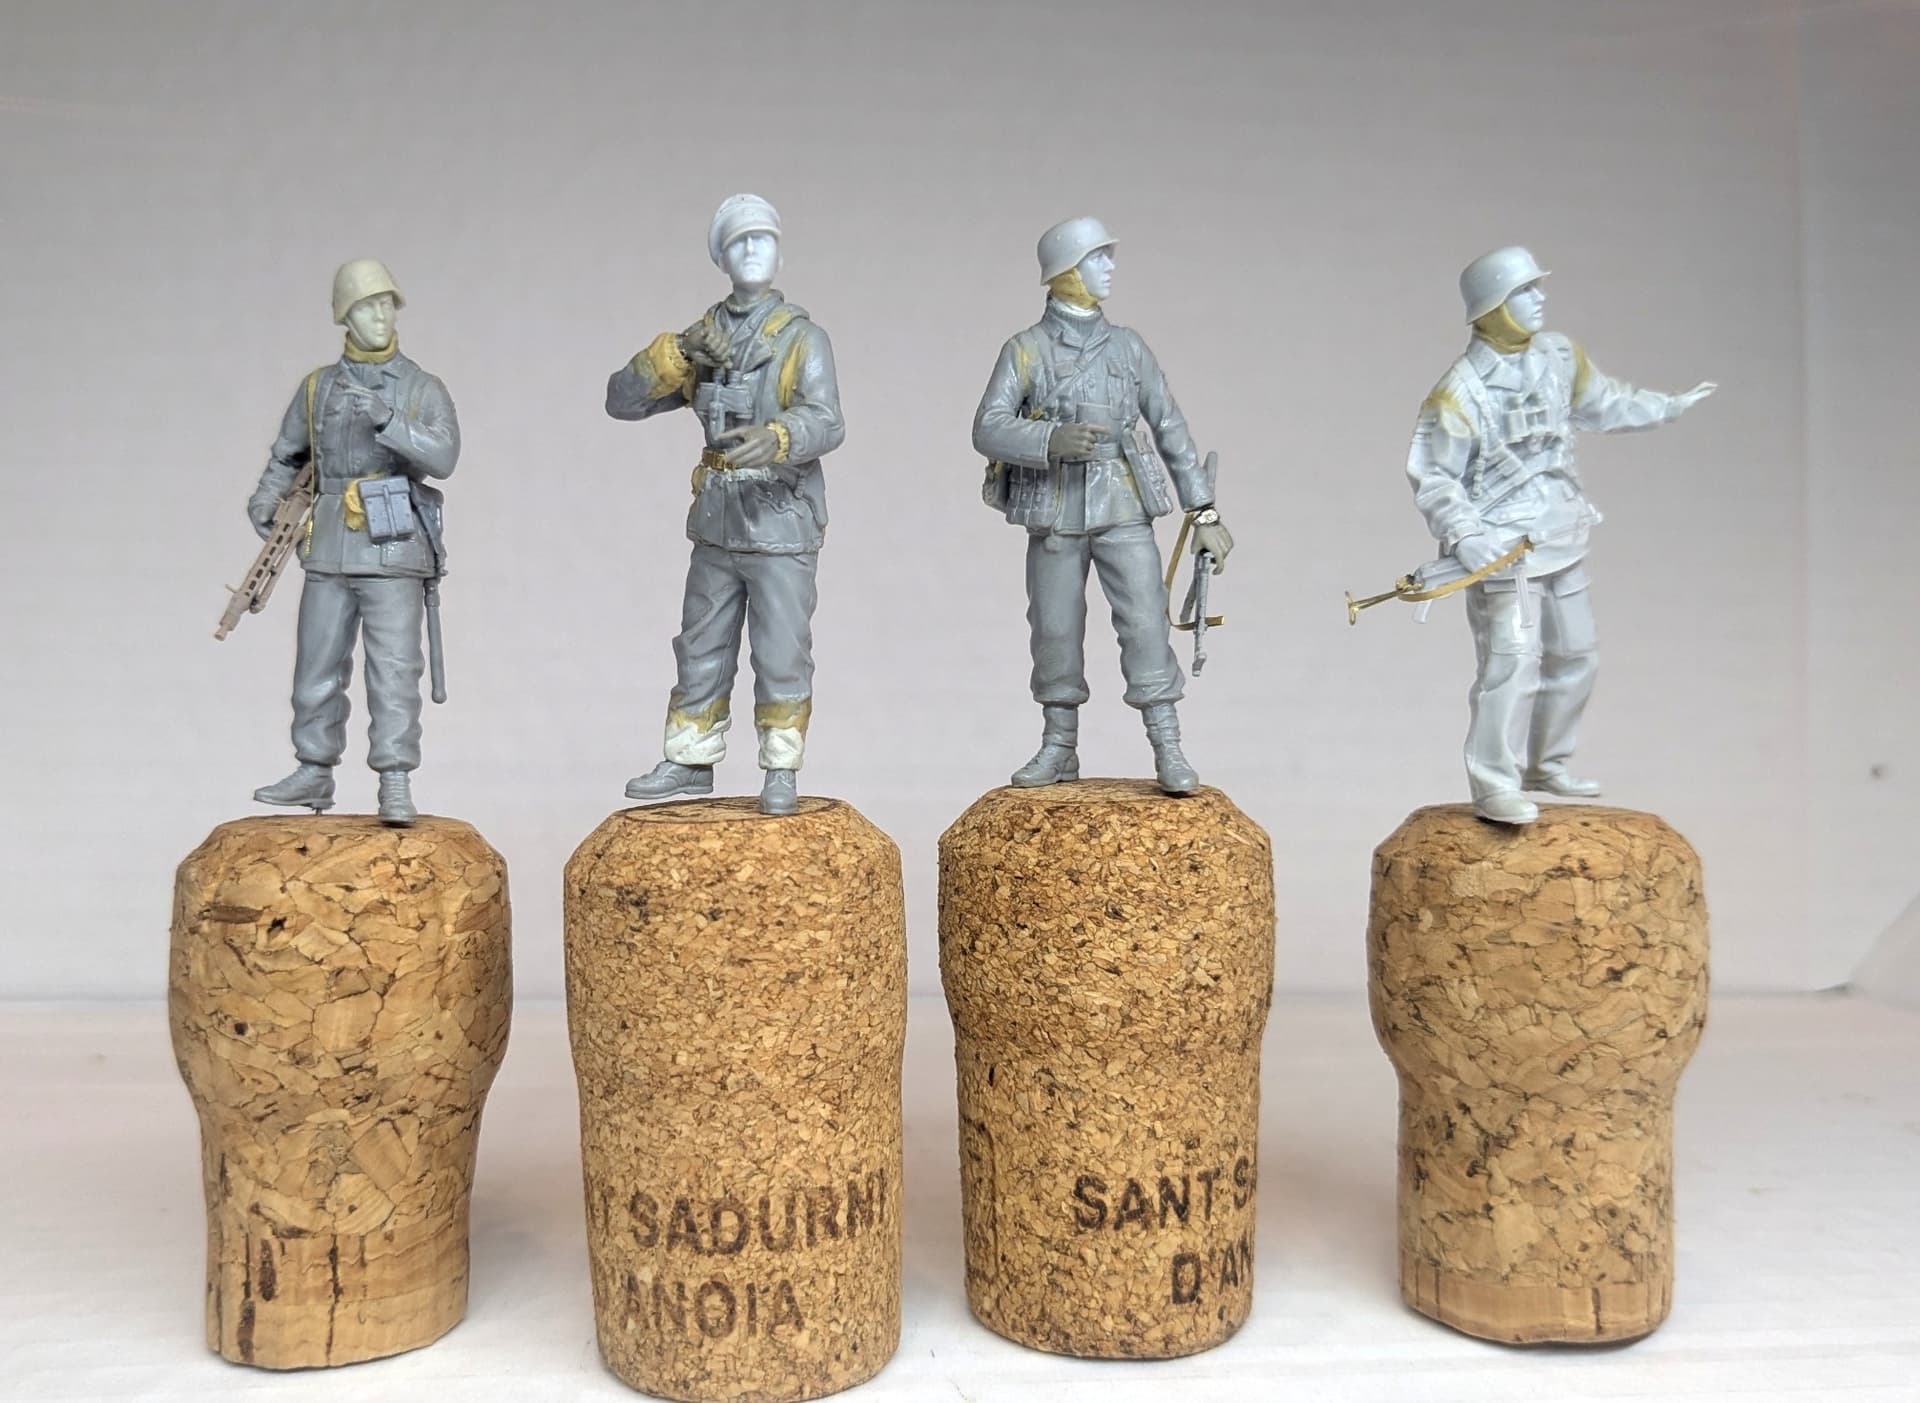
Working on the figures, Part One: the Germans
I shouldn’t leave out my Schwimmwagen driver.
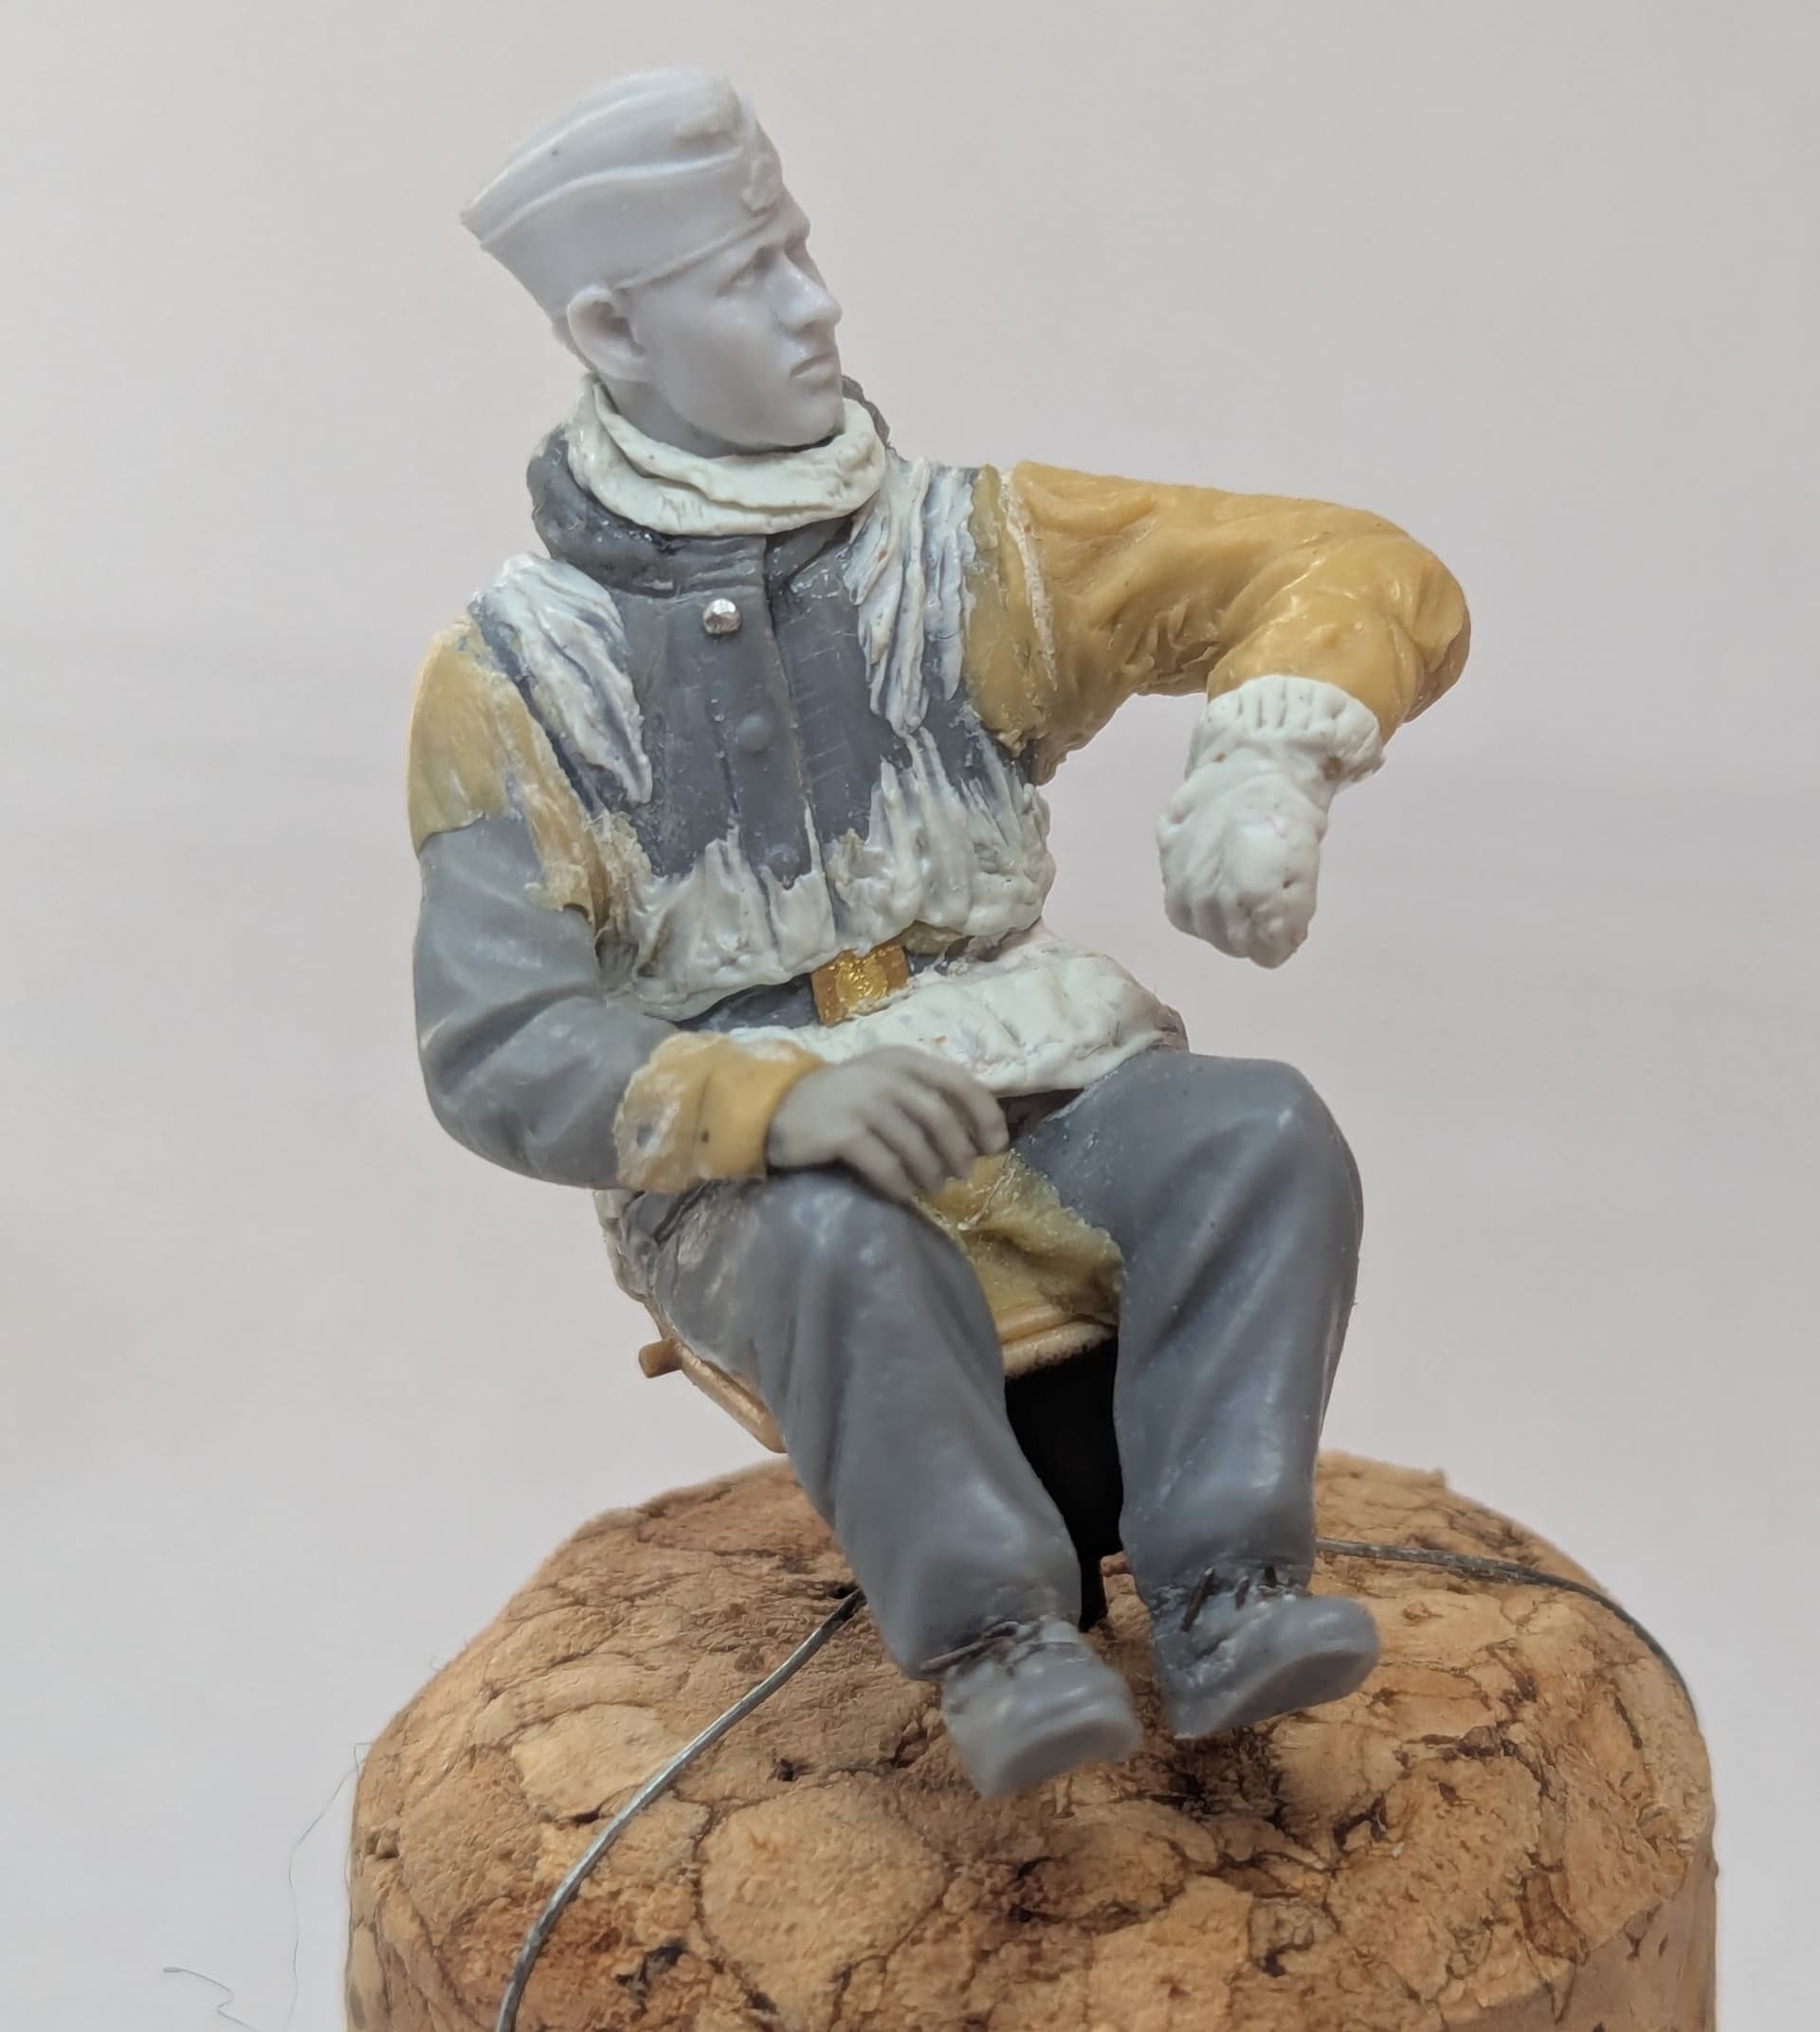
The putty creases make him look a bit of a mess, but, like all of my figures, he is awaiting a coating of Mr Surfacer to unite the finish before I hit him with paint.
He’s a kitbash of Tamiya torso, arms and legs (they look rather small but they won’t when he’s in the vehicle - and most importantly he fits), Alpine head and one Hornet hand (I used any old hand for inside the glove!)
As usual with seated figures, I fitted him permanently in place before I finished the putty work.
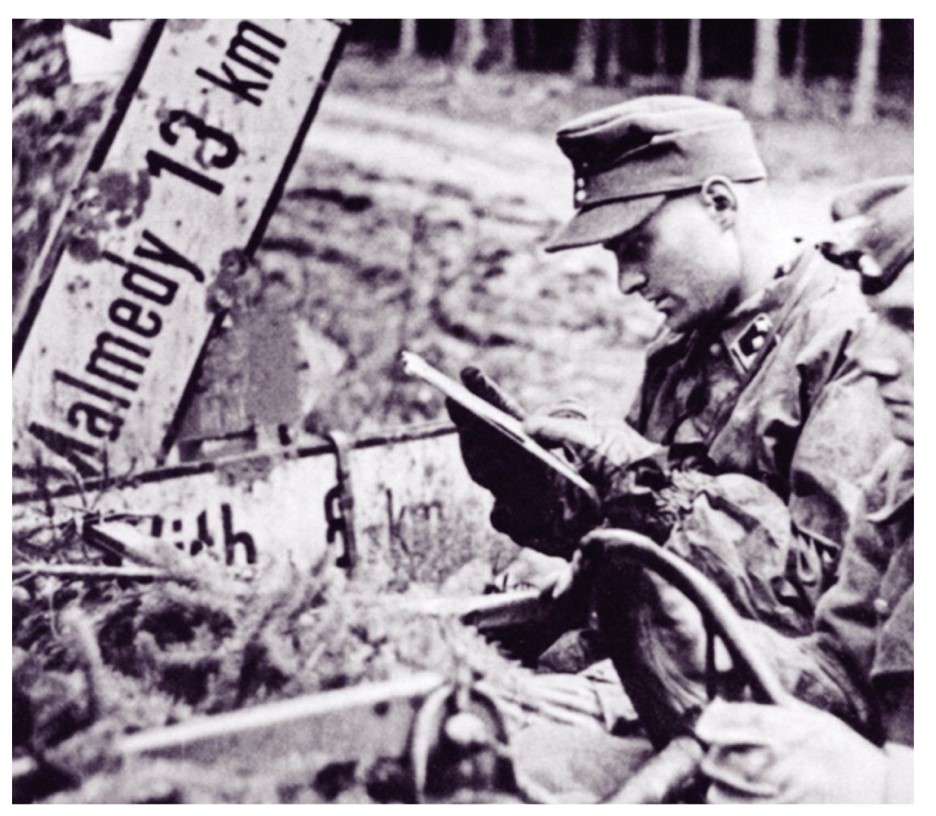
He is based partly on the driver of this Schwimm, glimpsed in a still from the well-known propoganda film showing elements of Kampfgruppe Knittel passing the Kaiserbaracke crossroads early in the offensive. Note the foliage and the thick gloves… he also looks very young!
The officer for whom he was acting as chauffeur is, I believe, SS-Standartenführer Goltz (not SS-Obersturmführer Leidreiter as some sources claim).
The remaining figures come from a variety of sources…
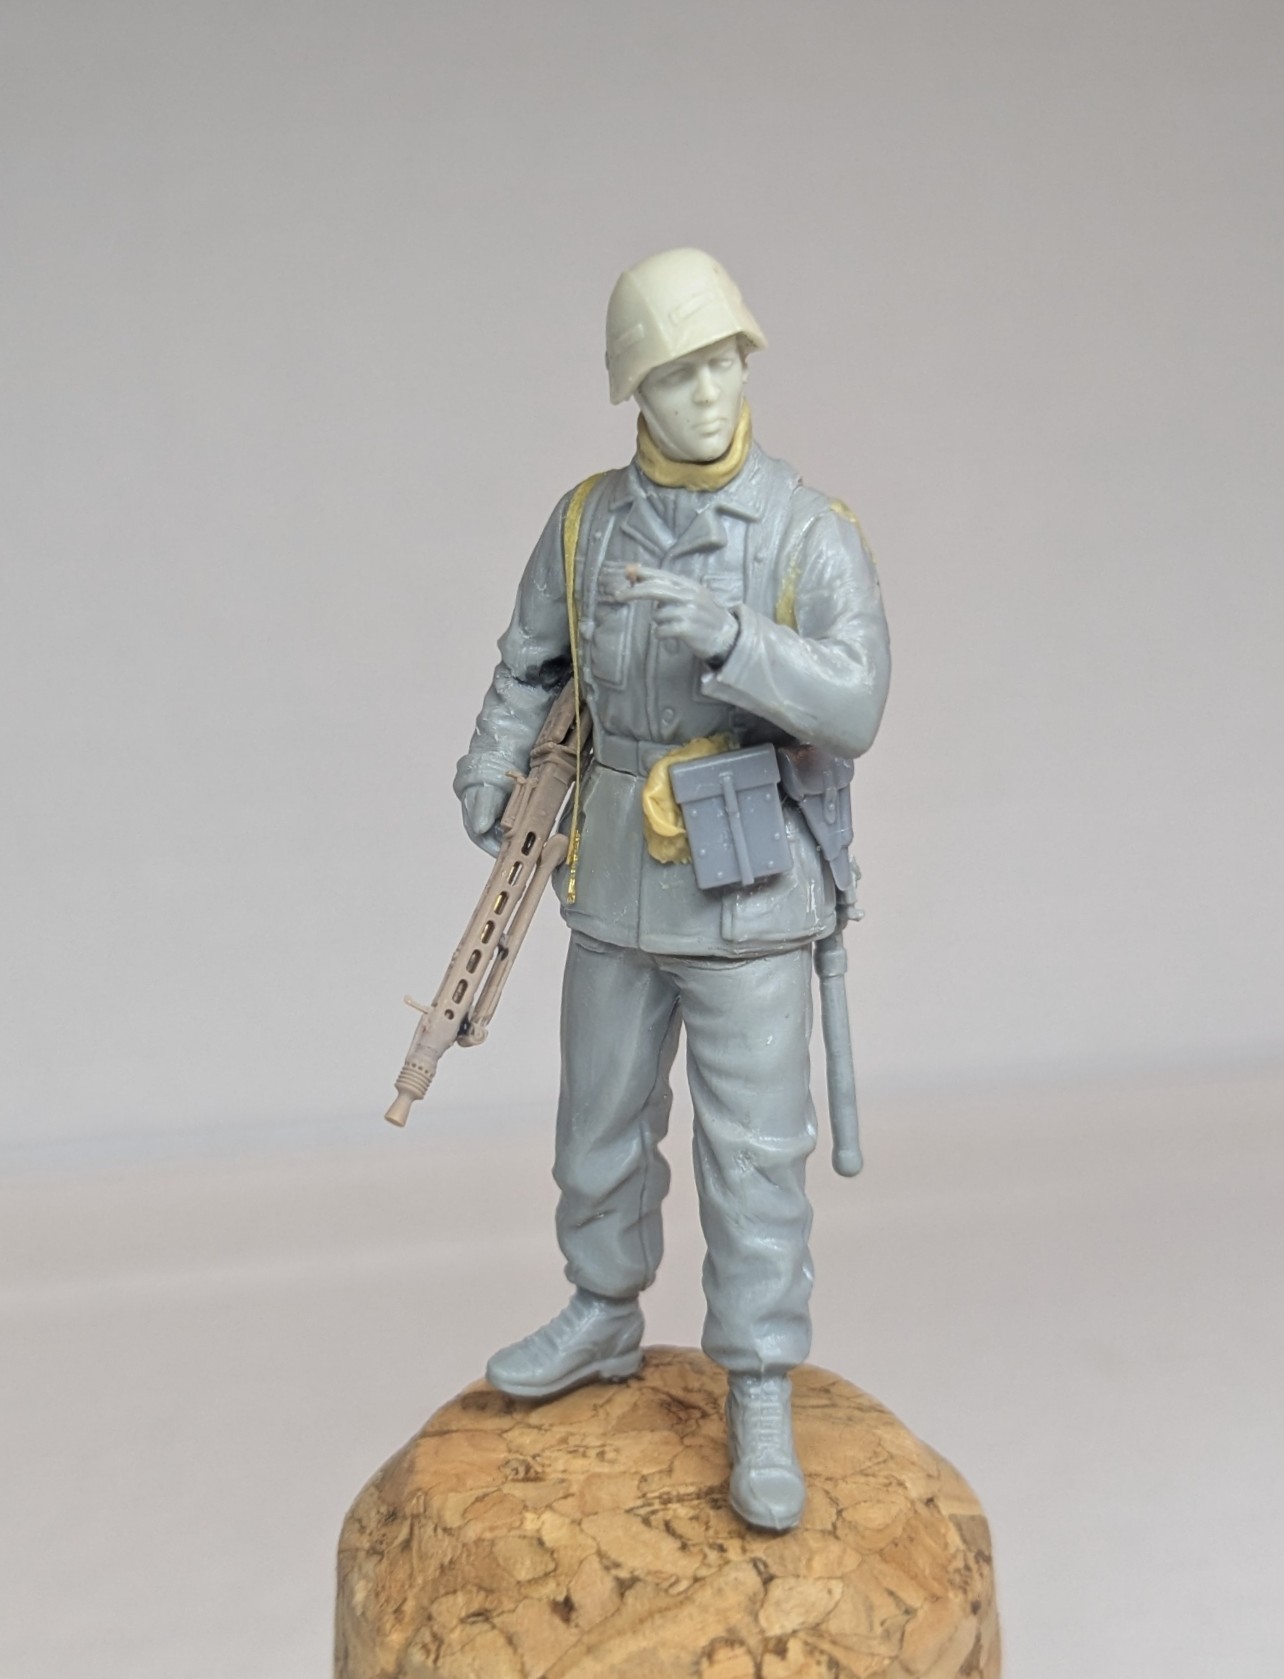
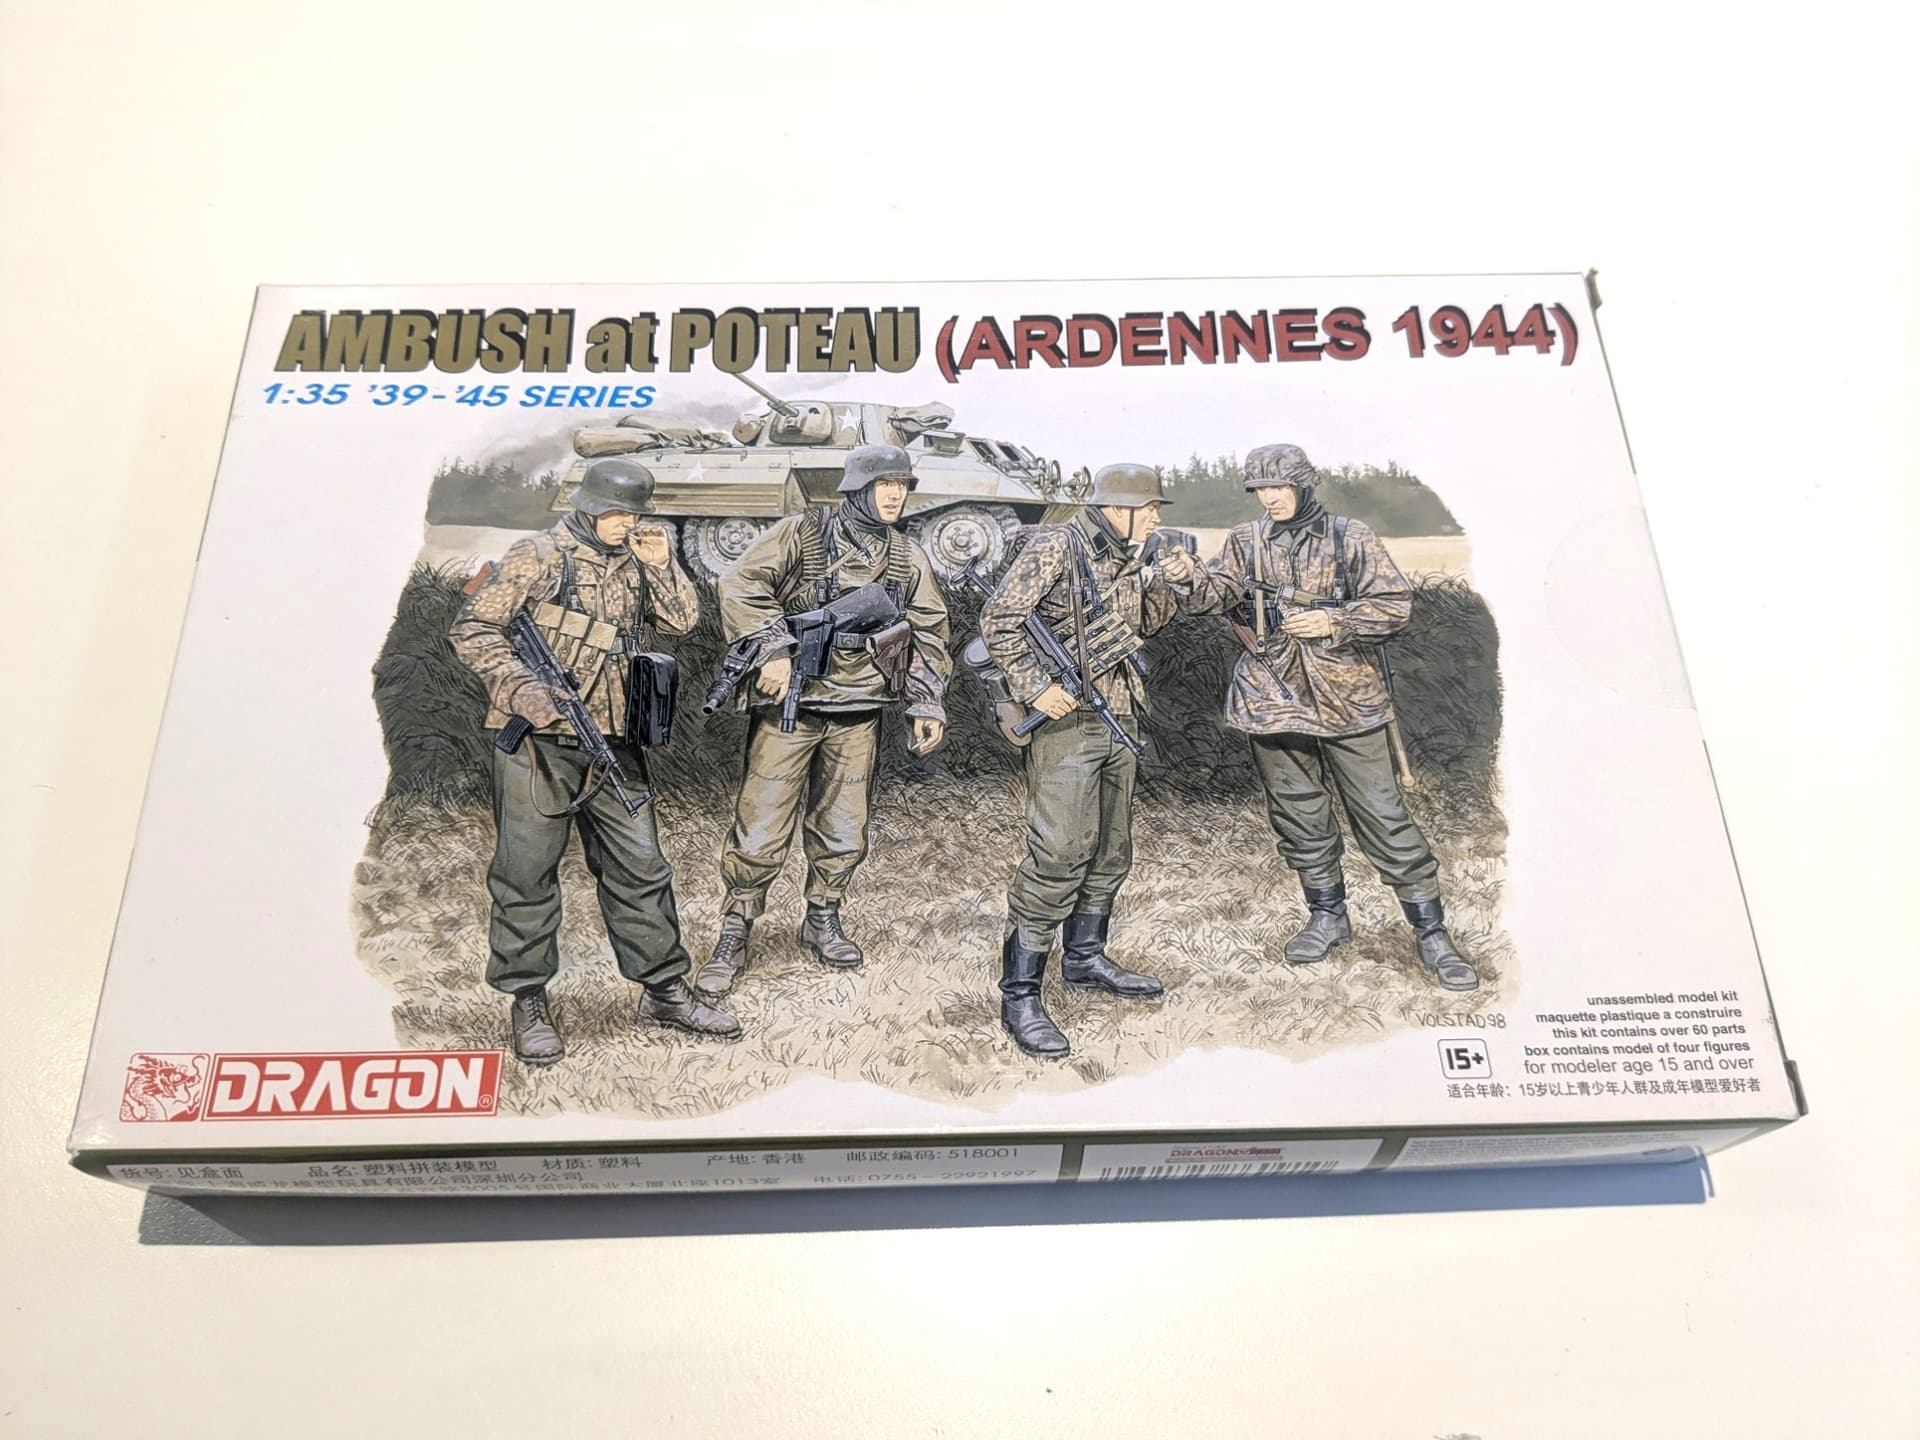
The MG42 gunner is a light modification of a figure from the Dragon Ambush at Poteau set. The MG is from E.T. Model (the strap needs to be clipped in place), the head from Hornet.

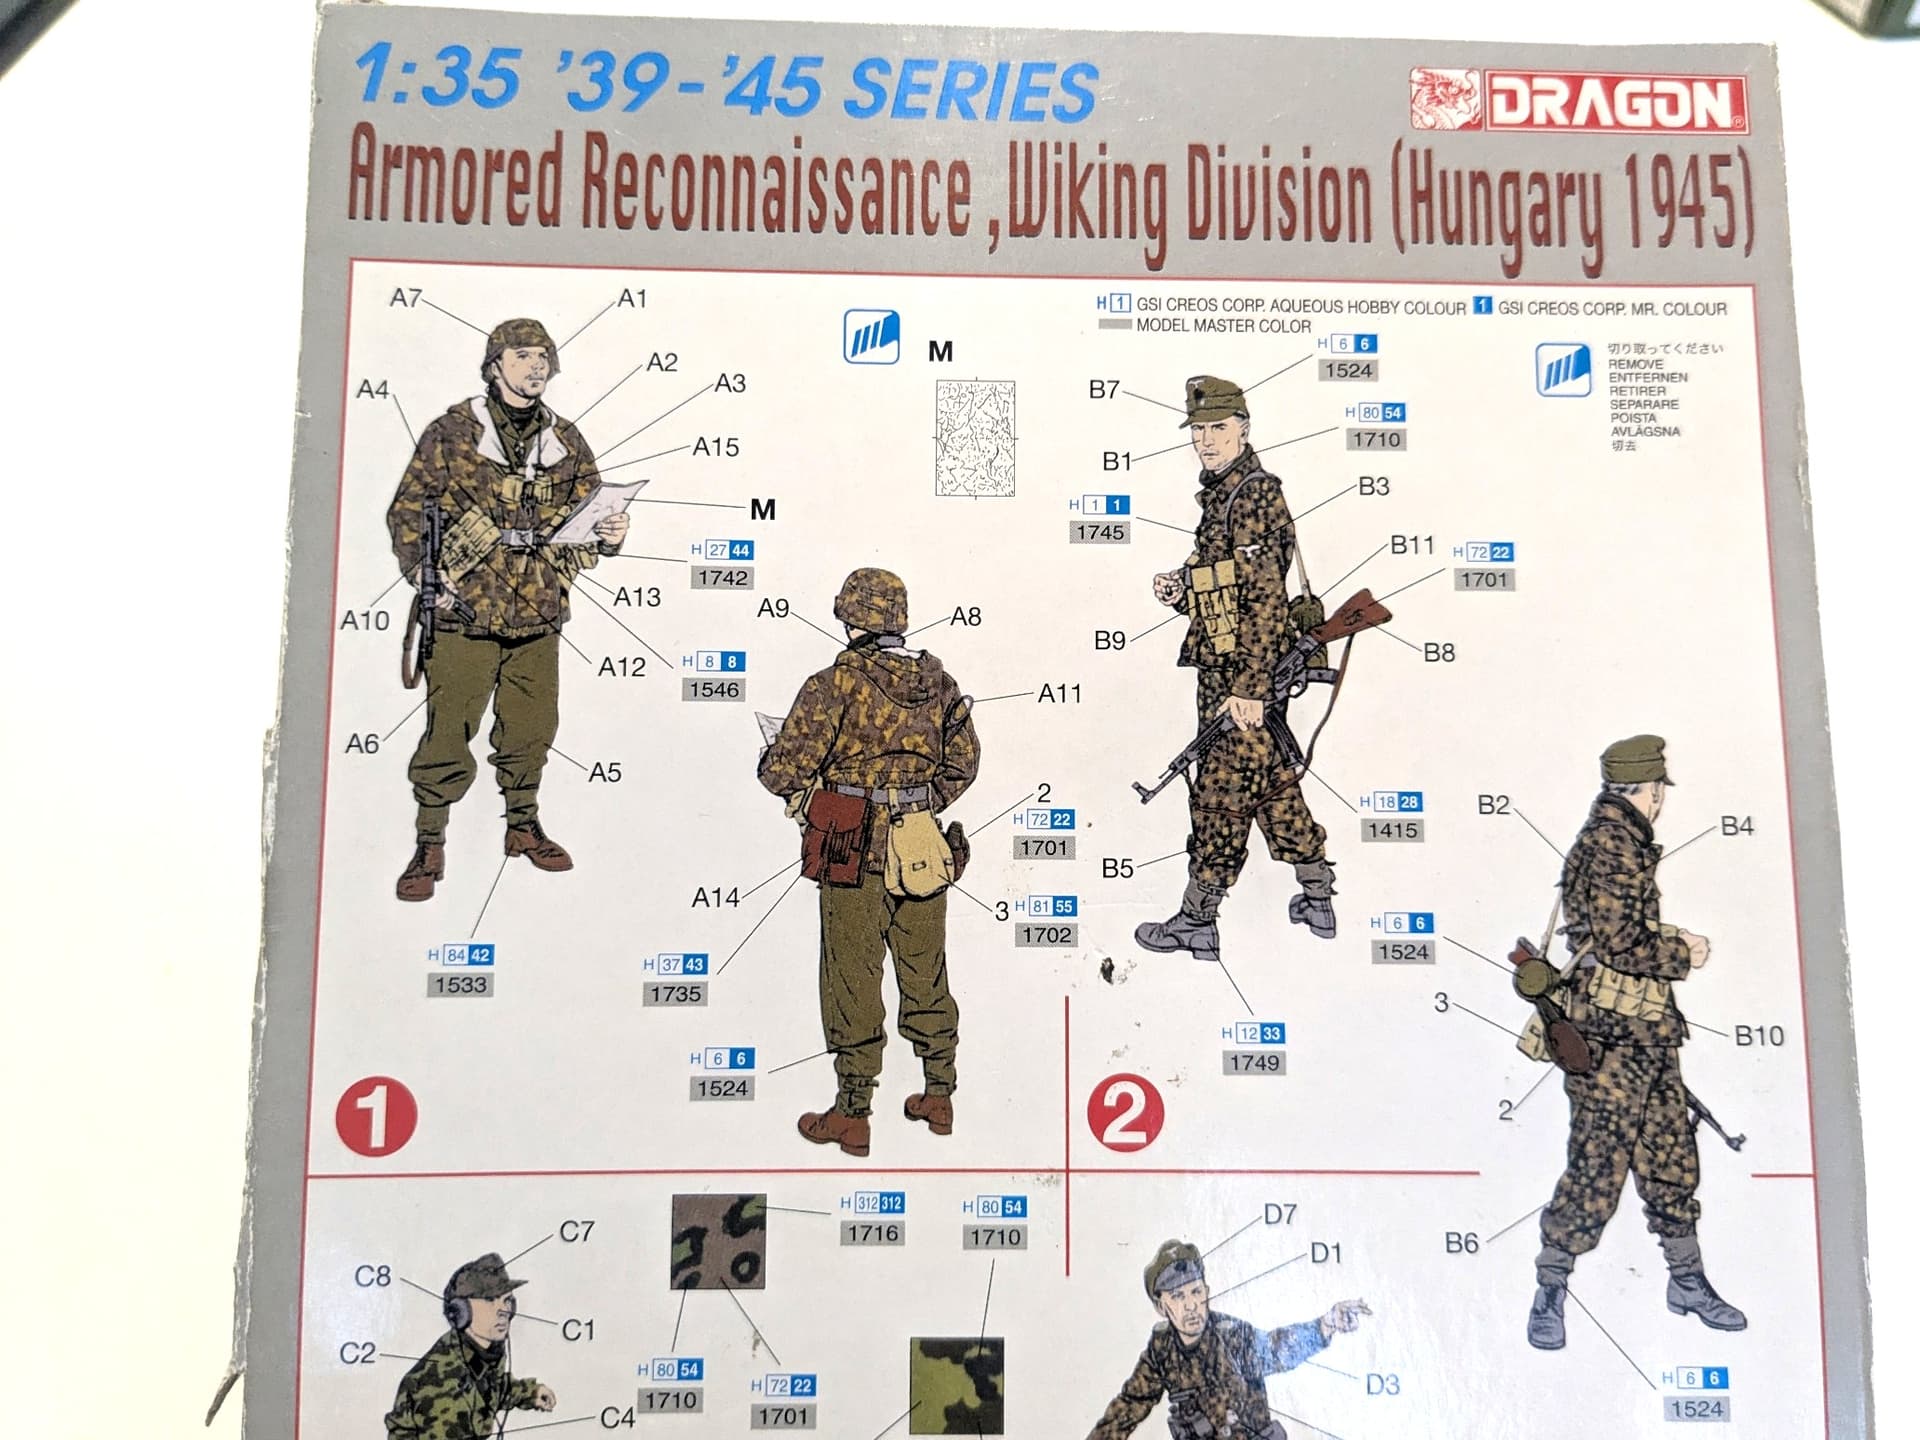
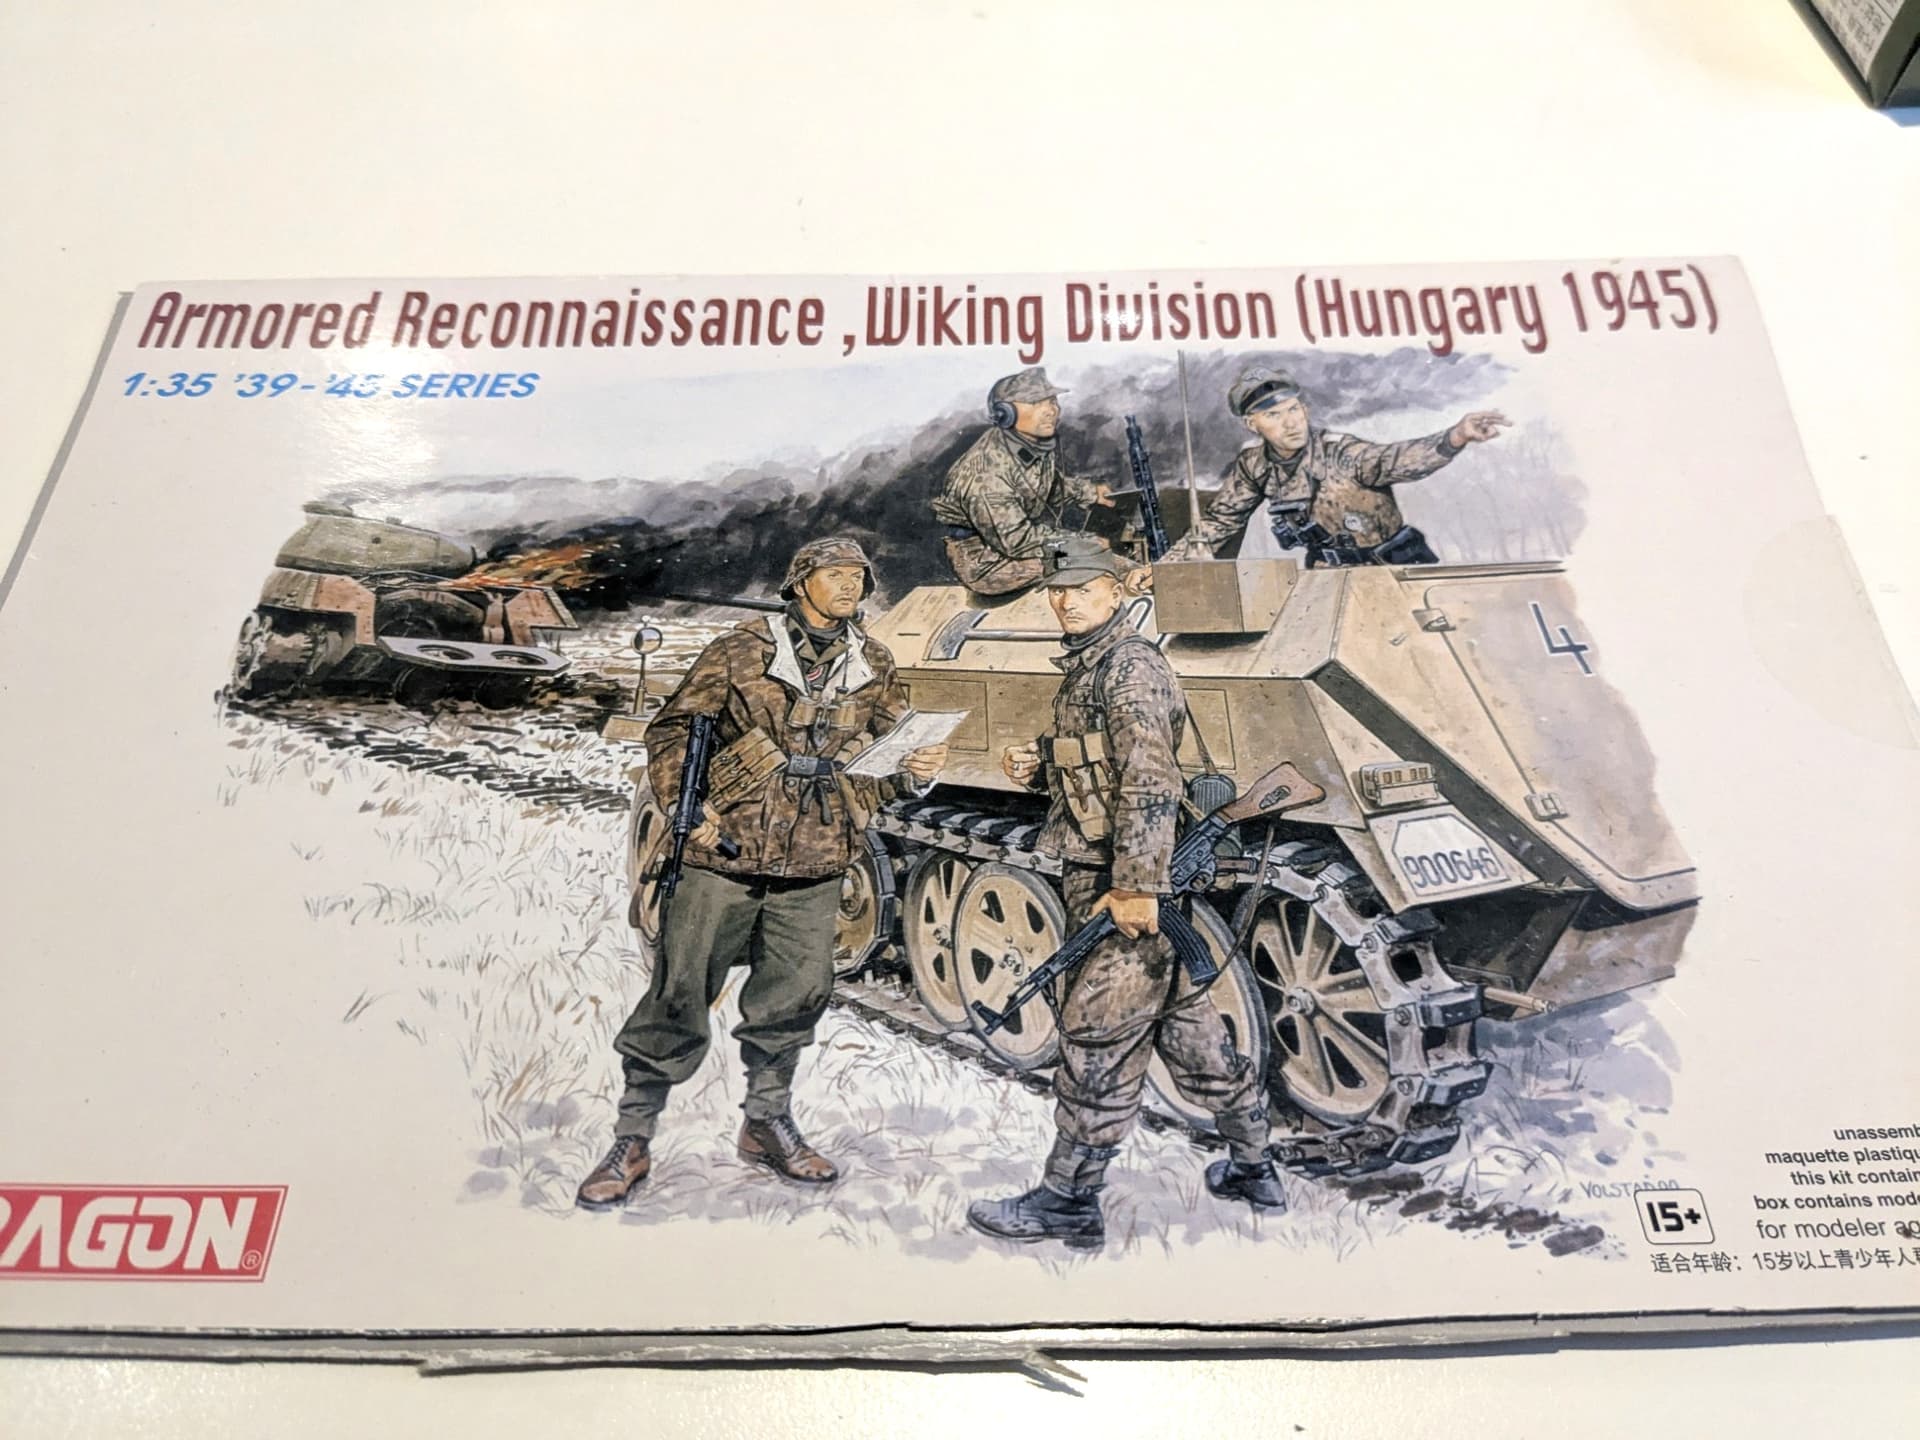
Next we have two figures based on this excellent Dragon set Armored Reconnaissance, Wiking Division (Hungary 1945):
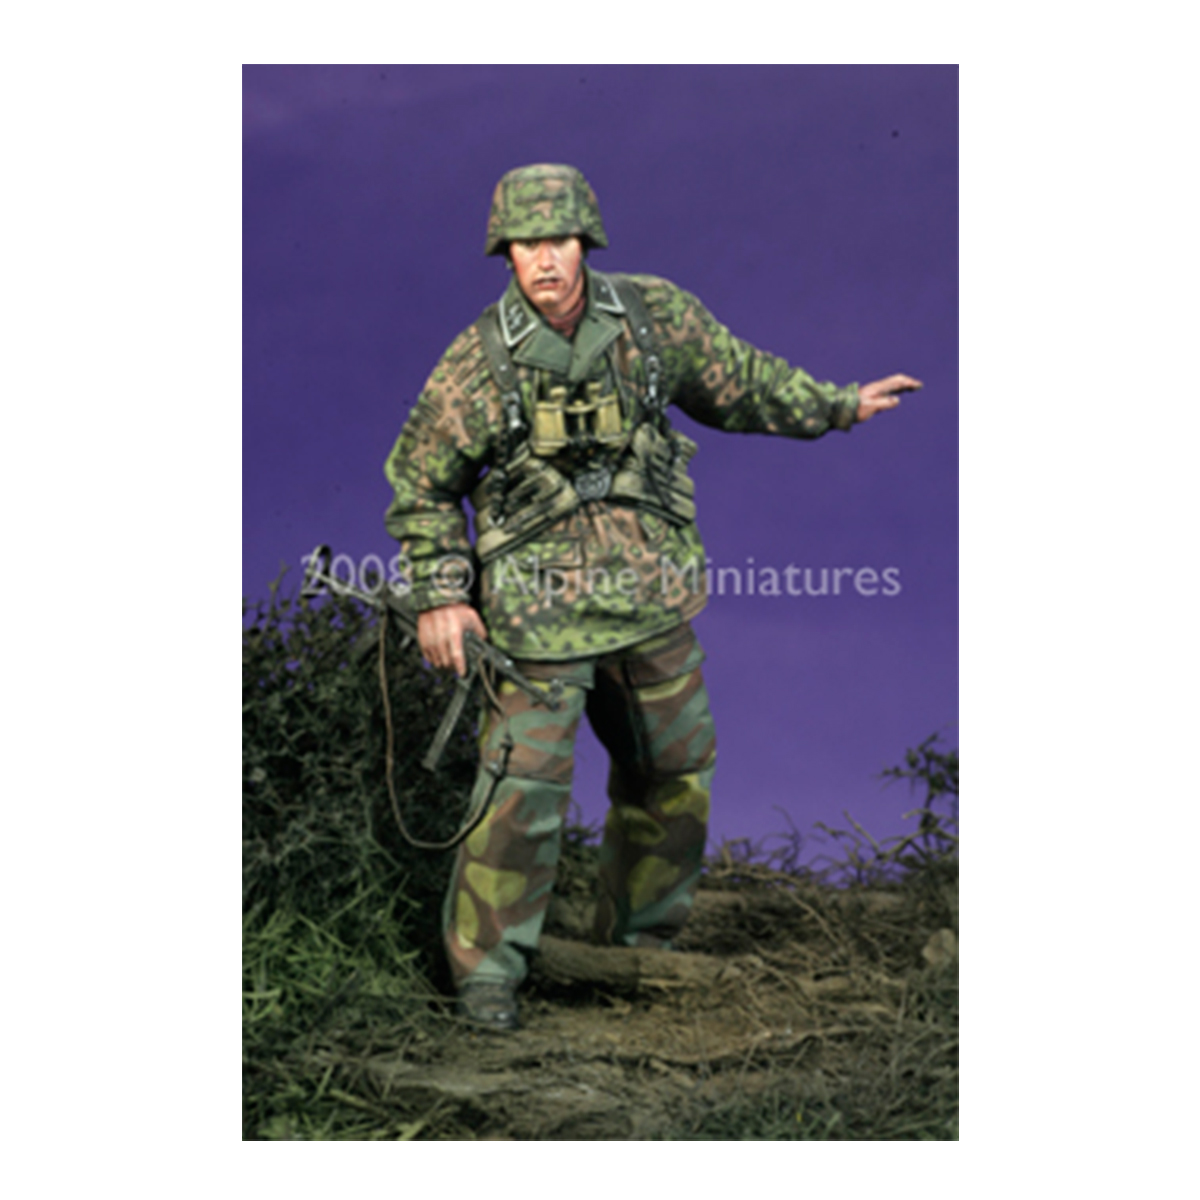
First up is this guy, who is partly based on these two characters from the Kampfgruppe Knittel Kaiserbaracke footage:

They have been named in some sources as Oberscharfuhrer Persin (left) and Unterscharfuhrer Ochsner (right). What I find particularly interesting about the appearance of these SS units in the Ardennes offensive is how ‘relaxed’ they look - and especially here the un-gaitered trousers. It’s also worth noting how NCOs (like these two) often wore visor caps (making them look more like officers) while the actual officers (like Goltz in the Schwimm above and Leidreiter and Hansen below) were wearing field caps. One suspects that the officers were trying to dress down to make themselves less of a target…

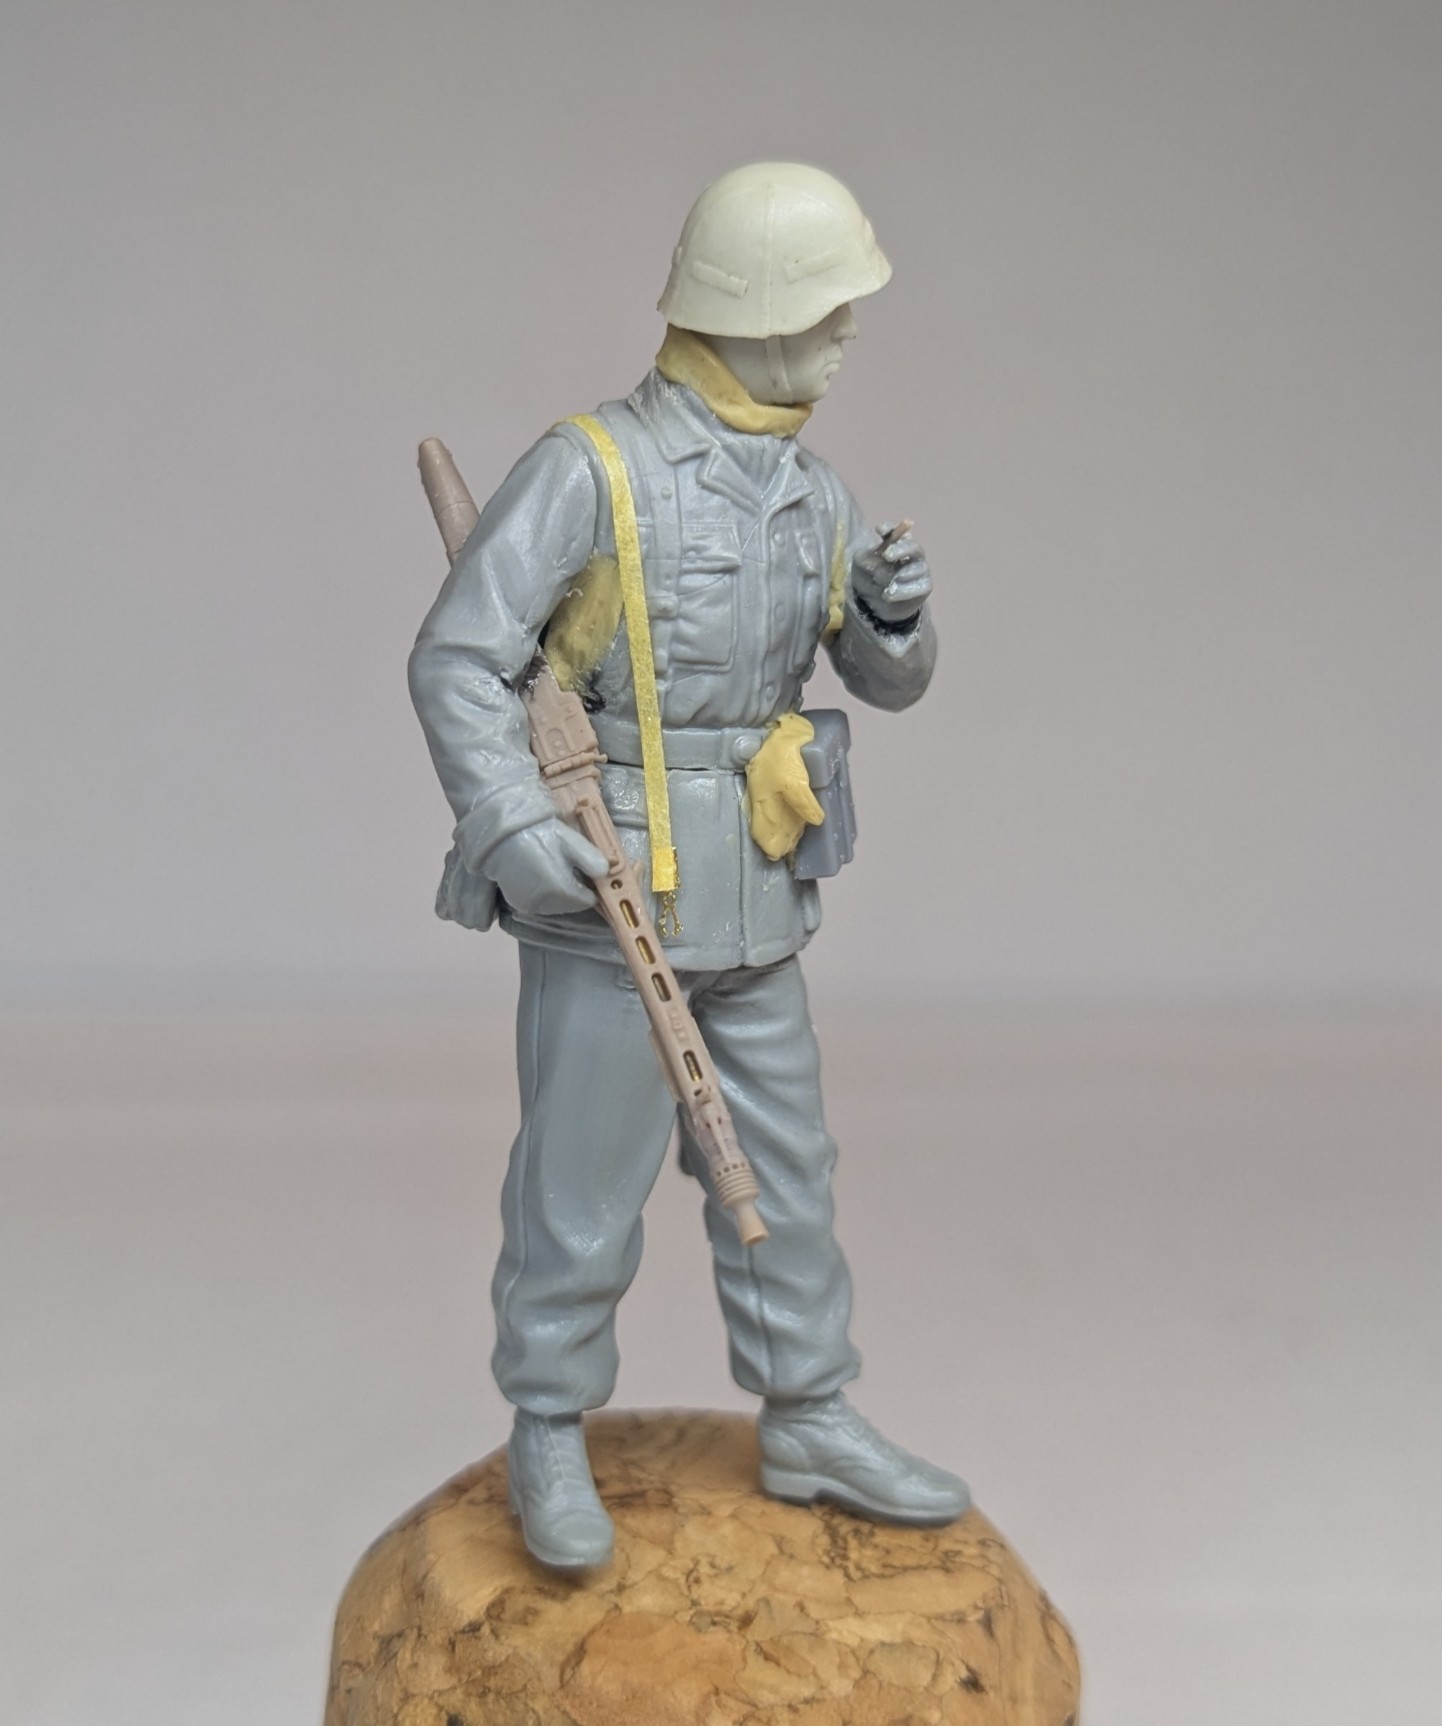
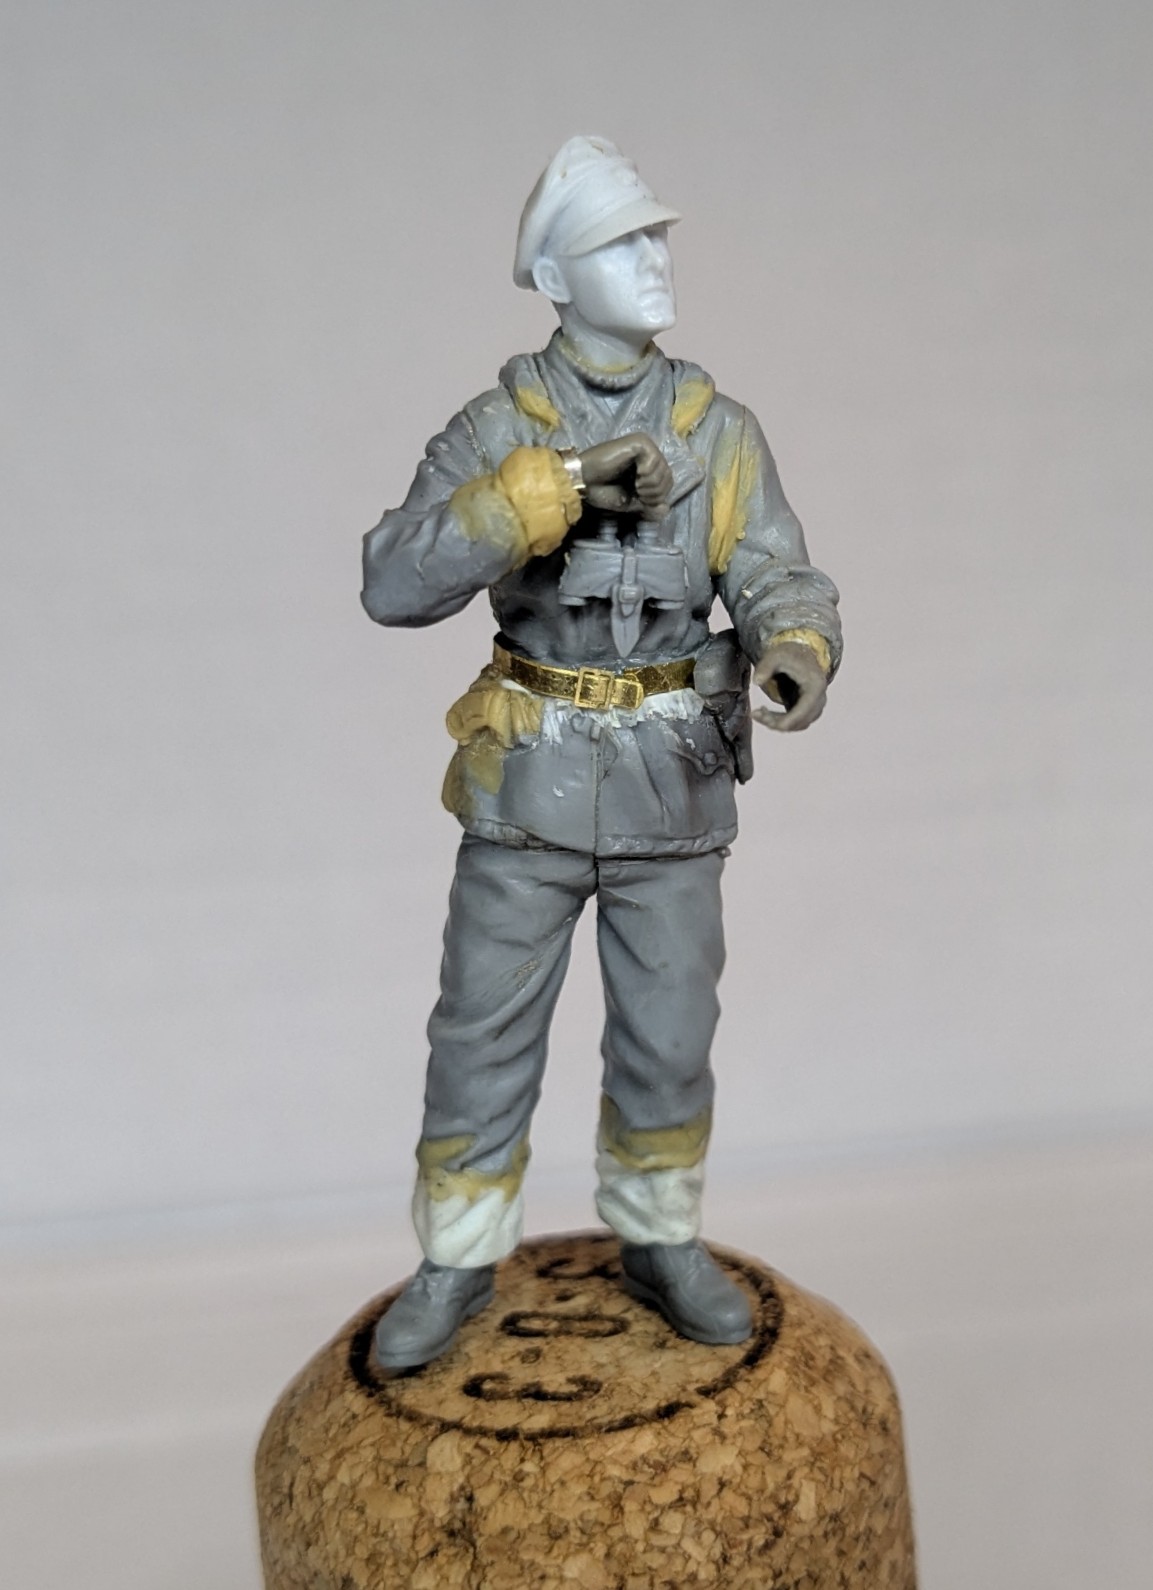
Anyway, whether this is an NCO or an officer, in an obvious nod to my title I posed him looking up anxiously after consulting his watch… and ironically I went for the visor cap because I thought that this would make it more obvious he’s the guy in charge!
The figure is a beautiful sculpt out of the box, but I had to change his right arm and hand then add a watch (from Aber). The head is from Alpine and putty was used to lenghten the trousers and fill out parts of his uniform.
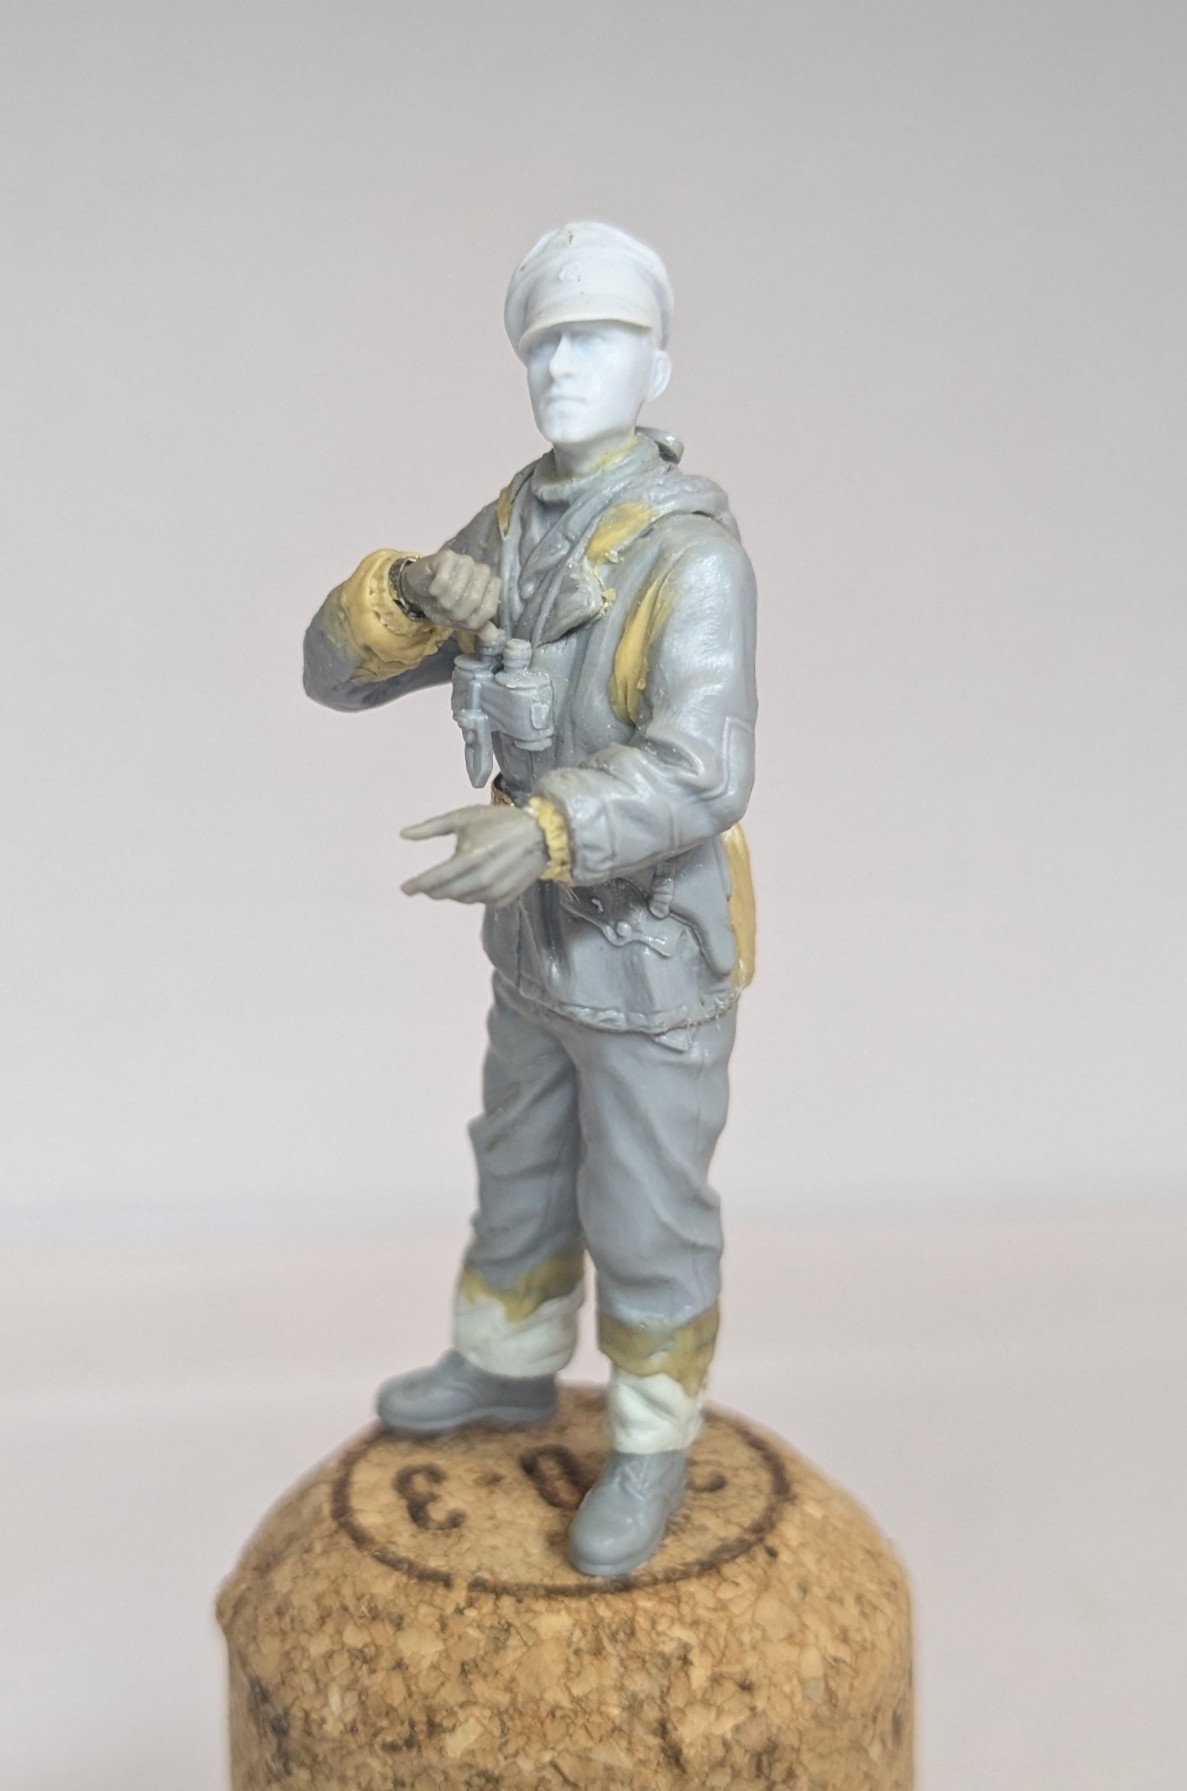
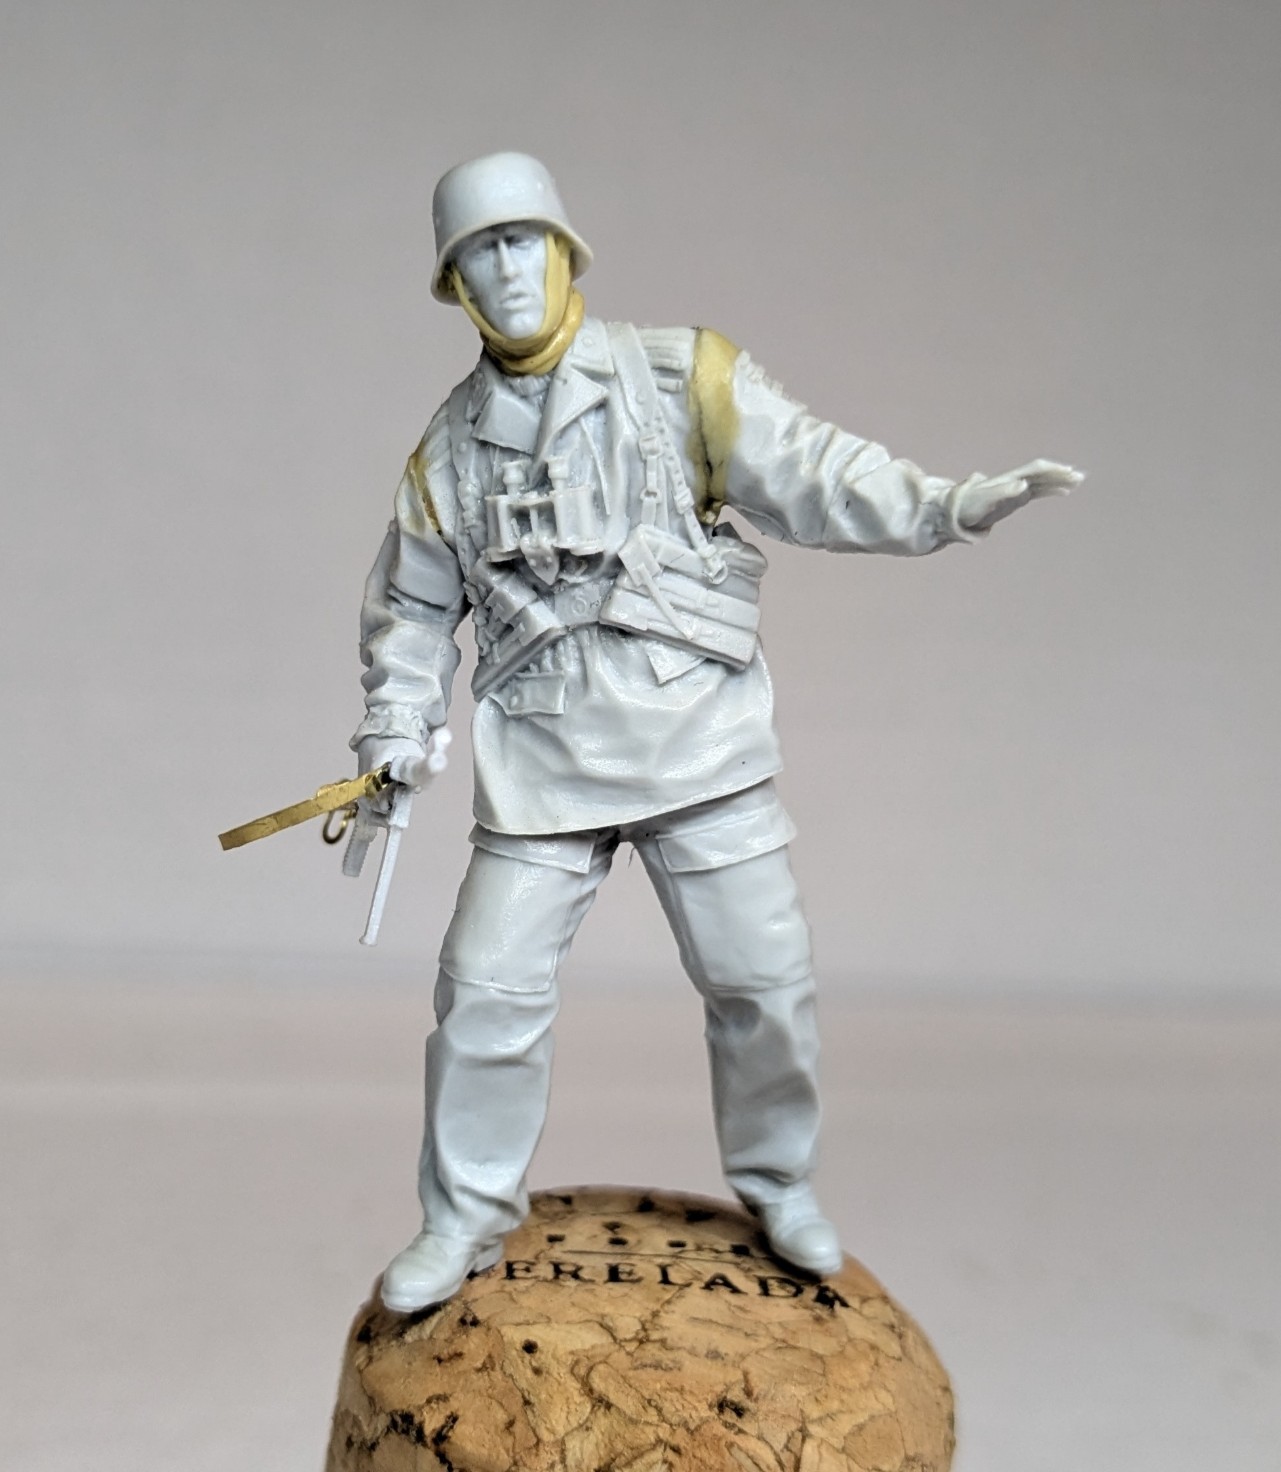
The next figure is hardly modified at all… There’s an Alpine head (with added balaclava) and some extra equipment. but that’s pretty much it. The MG44 pouches were scored at the rear and bent to hug his waist slightly better. The left hand is not attached and the strap still needs to be angled correctly…
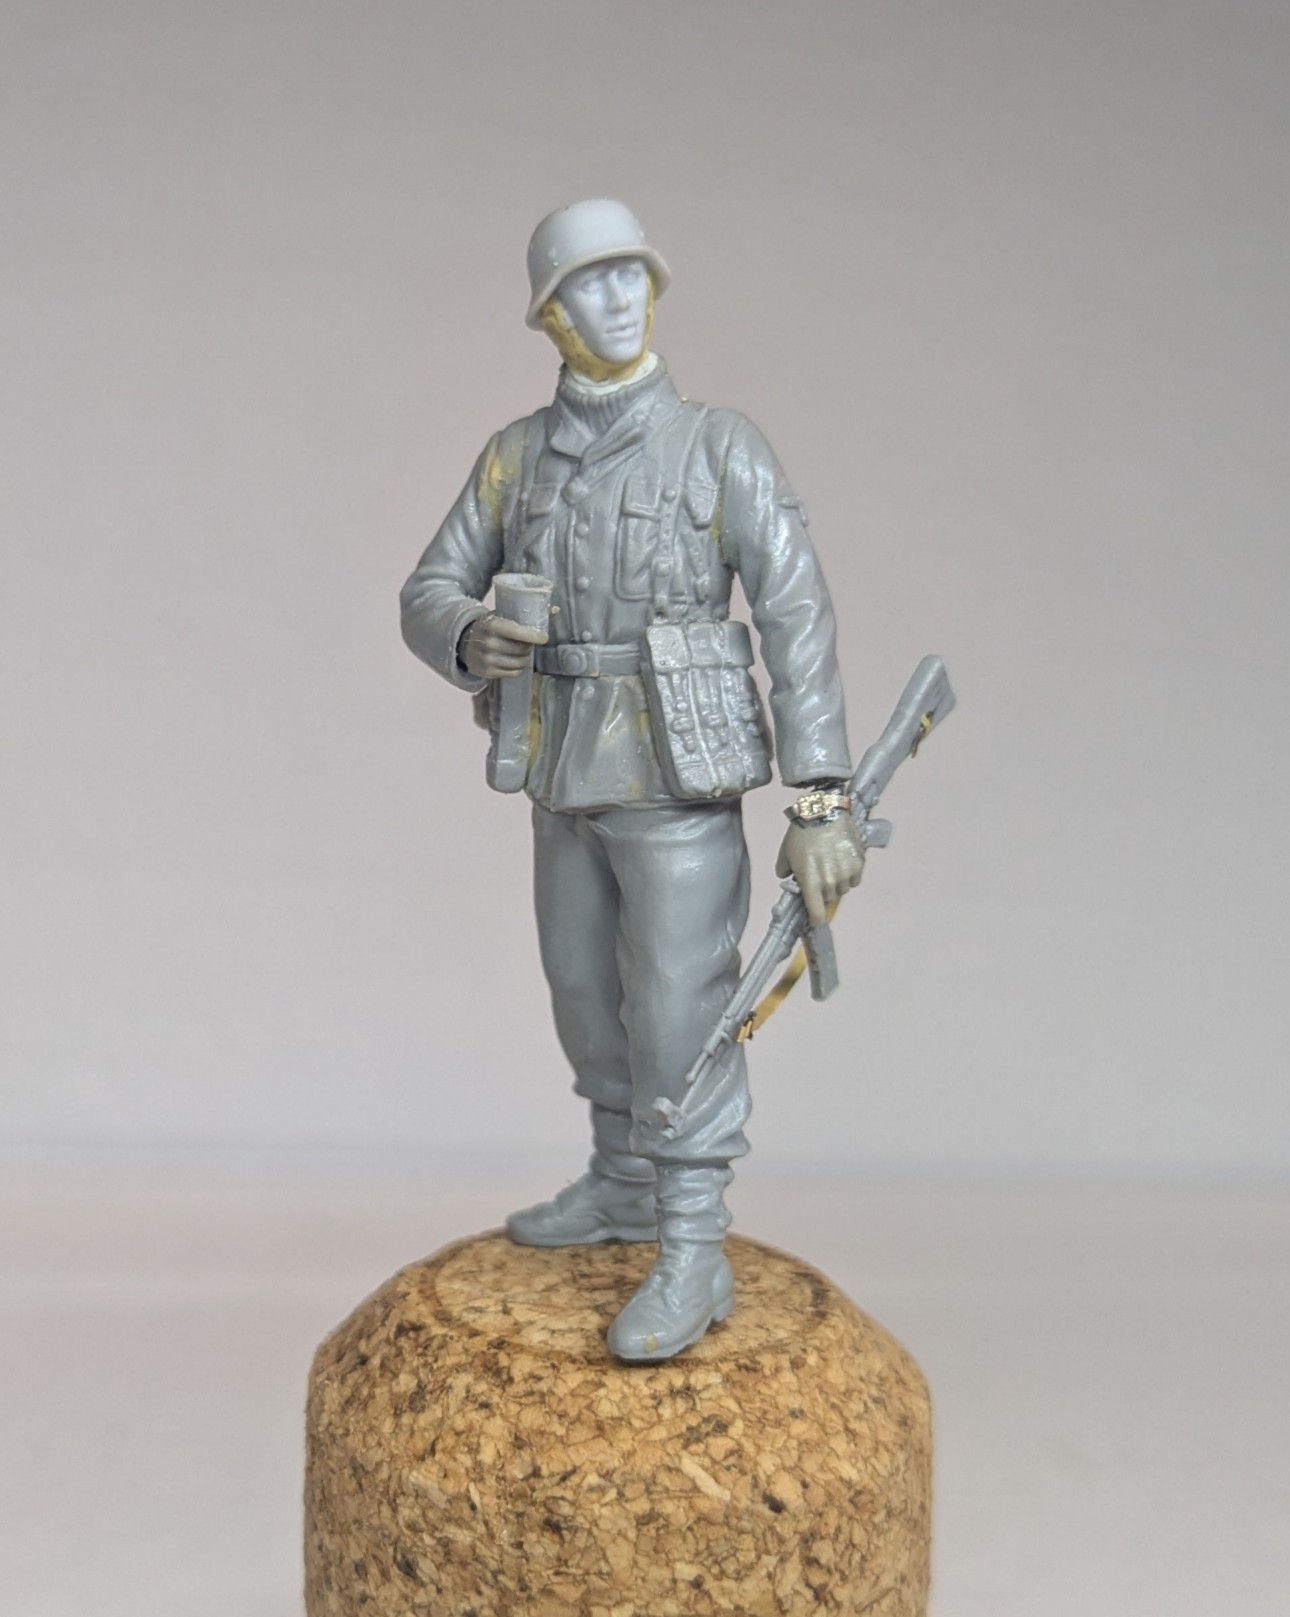
Last of all we have this beautiful Alpine figure…
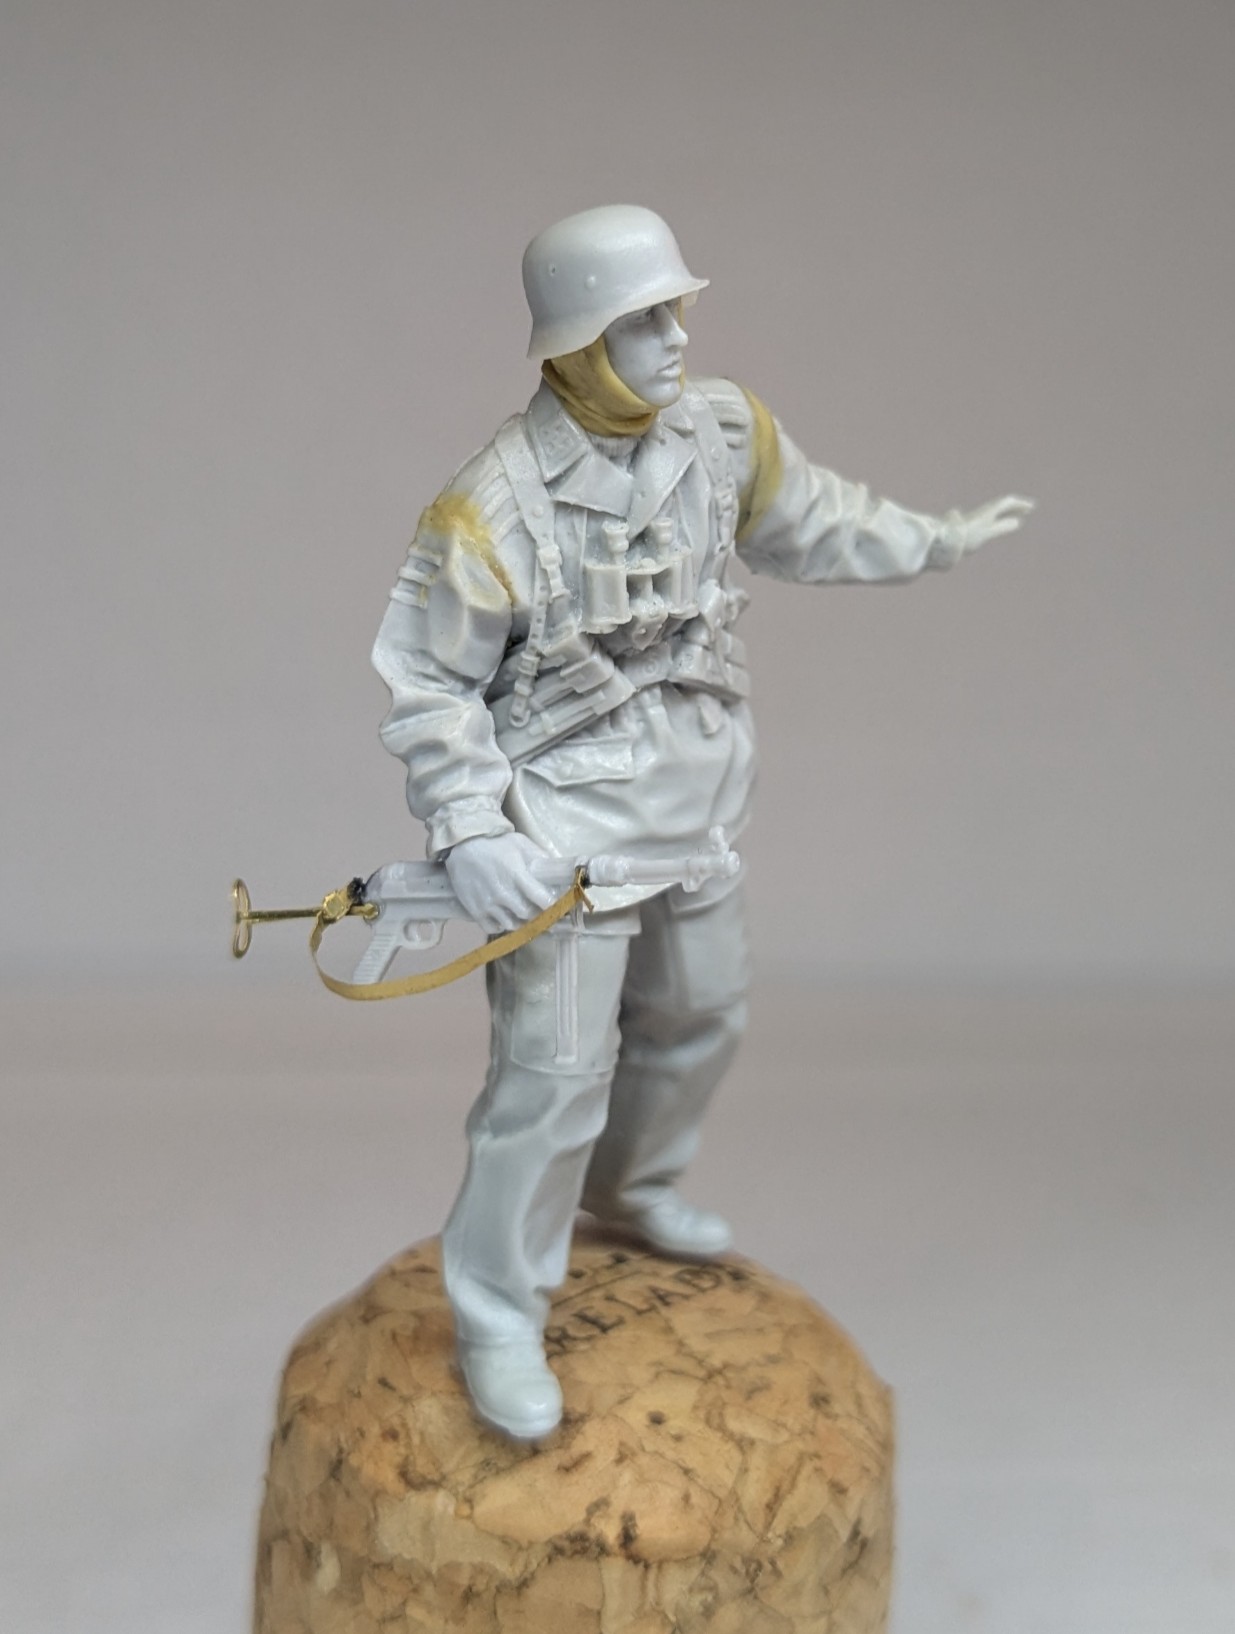
I added a balaclava to give him a more obvious Winter look (and a slightly rounder face - Alpine faces tend to be a little lean).
The only essential addition here was the MP40 strap and extended stock from a Royal Models PE set (the one that came in the set looks OK, but there are limits to what can be achieved with resin or plastic).
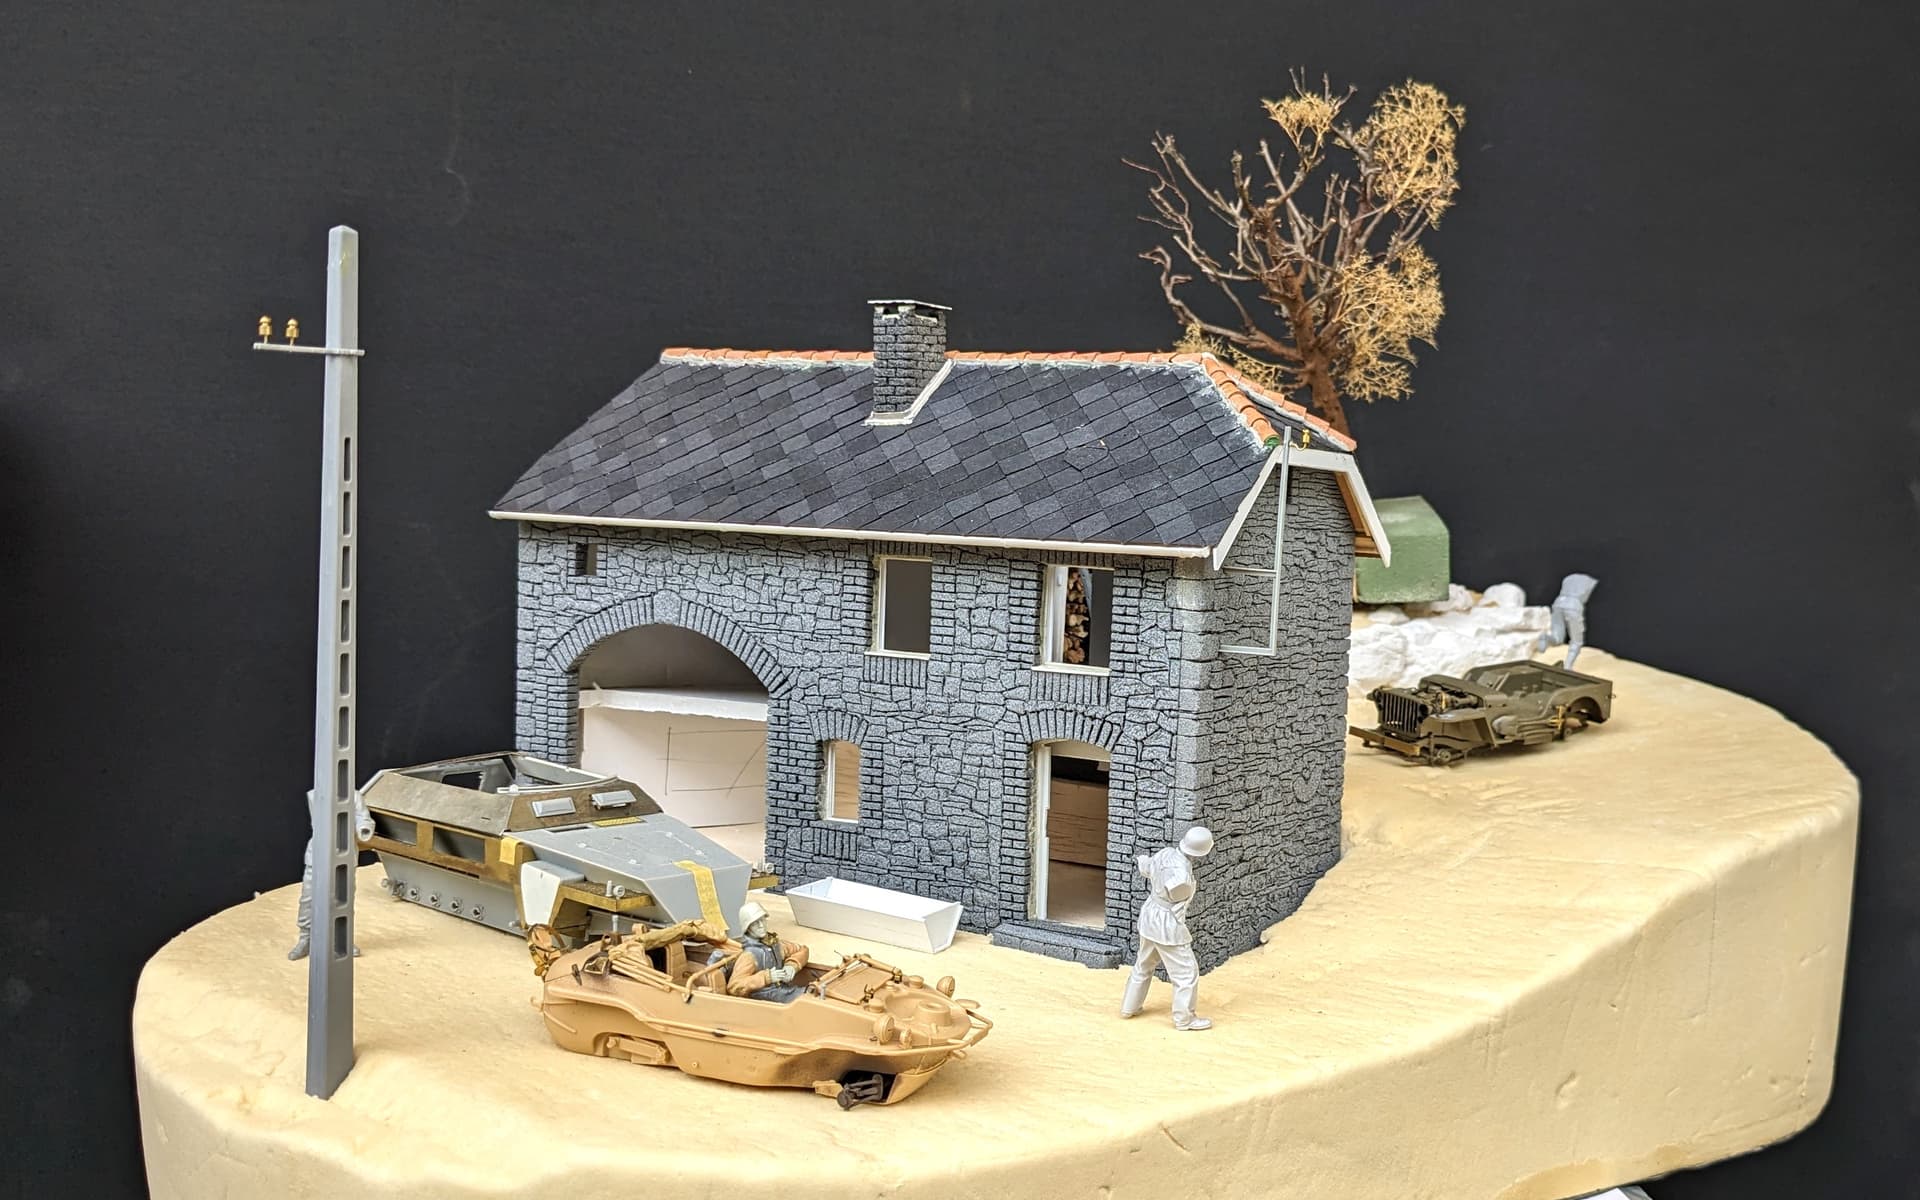
He is a pivotal part of the diorama, because he is literally turning the corner and indicates that this German recce group has pulled up in front of the farmhouse without realising that the Americans are already there… this is why I had him in the picture from quite an early stage in this diorama’s evolution.
As we will see from the next post, the Americans have already sprung into action!
20 Likes
Beautiful figure work Tim. You have really put the work in both with the research and the various modifications. The work to modify the various poses matches with the expressions on the heads you have chosen making for natural looking figs. Great to see them without paint to appreciate what you’ve done with them.
4 Likes
Yes I wholeheartedly agree Tim, excellent figure work. I appreciate the build-up and
varying degrees of mods before priming and paint.
I’ve been following along from the start, love your work.
Cheers
Dave🙂
3 Likes
Bring on the Americans!
As this diorama has progressed the role of the Americans was the last to evolve. I always had the idea that something would be happening on the right side of the building to provide a counterpoint to the German forces gathering on the left, which is why I went for the broken down Jeep. But what would the crew of this vehicle be doing?
My first idea was for some form of ‘heroic last stand’ and so I started to look for suitable figures. Although there are plenty of excellent resin figures of GIs, I couldn’t find any that were suitable. Most of them - e.g. from Alpine - are in fairly static poses. The other problem I had created for myself was the fact that the terrain on this side of the farmhouse has a steep slope from back to front, so any regular standing figure was going to need to be modified.
In the end I found what I needed from these three sets:
Master Box ‘Move! Move! Move! US Soldiers, Operation Overlord, 1944
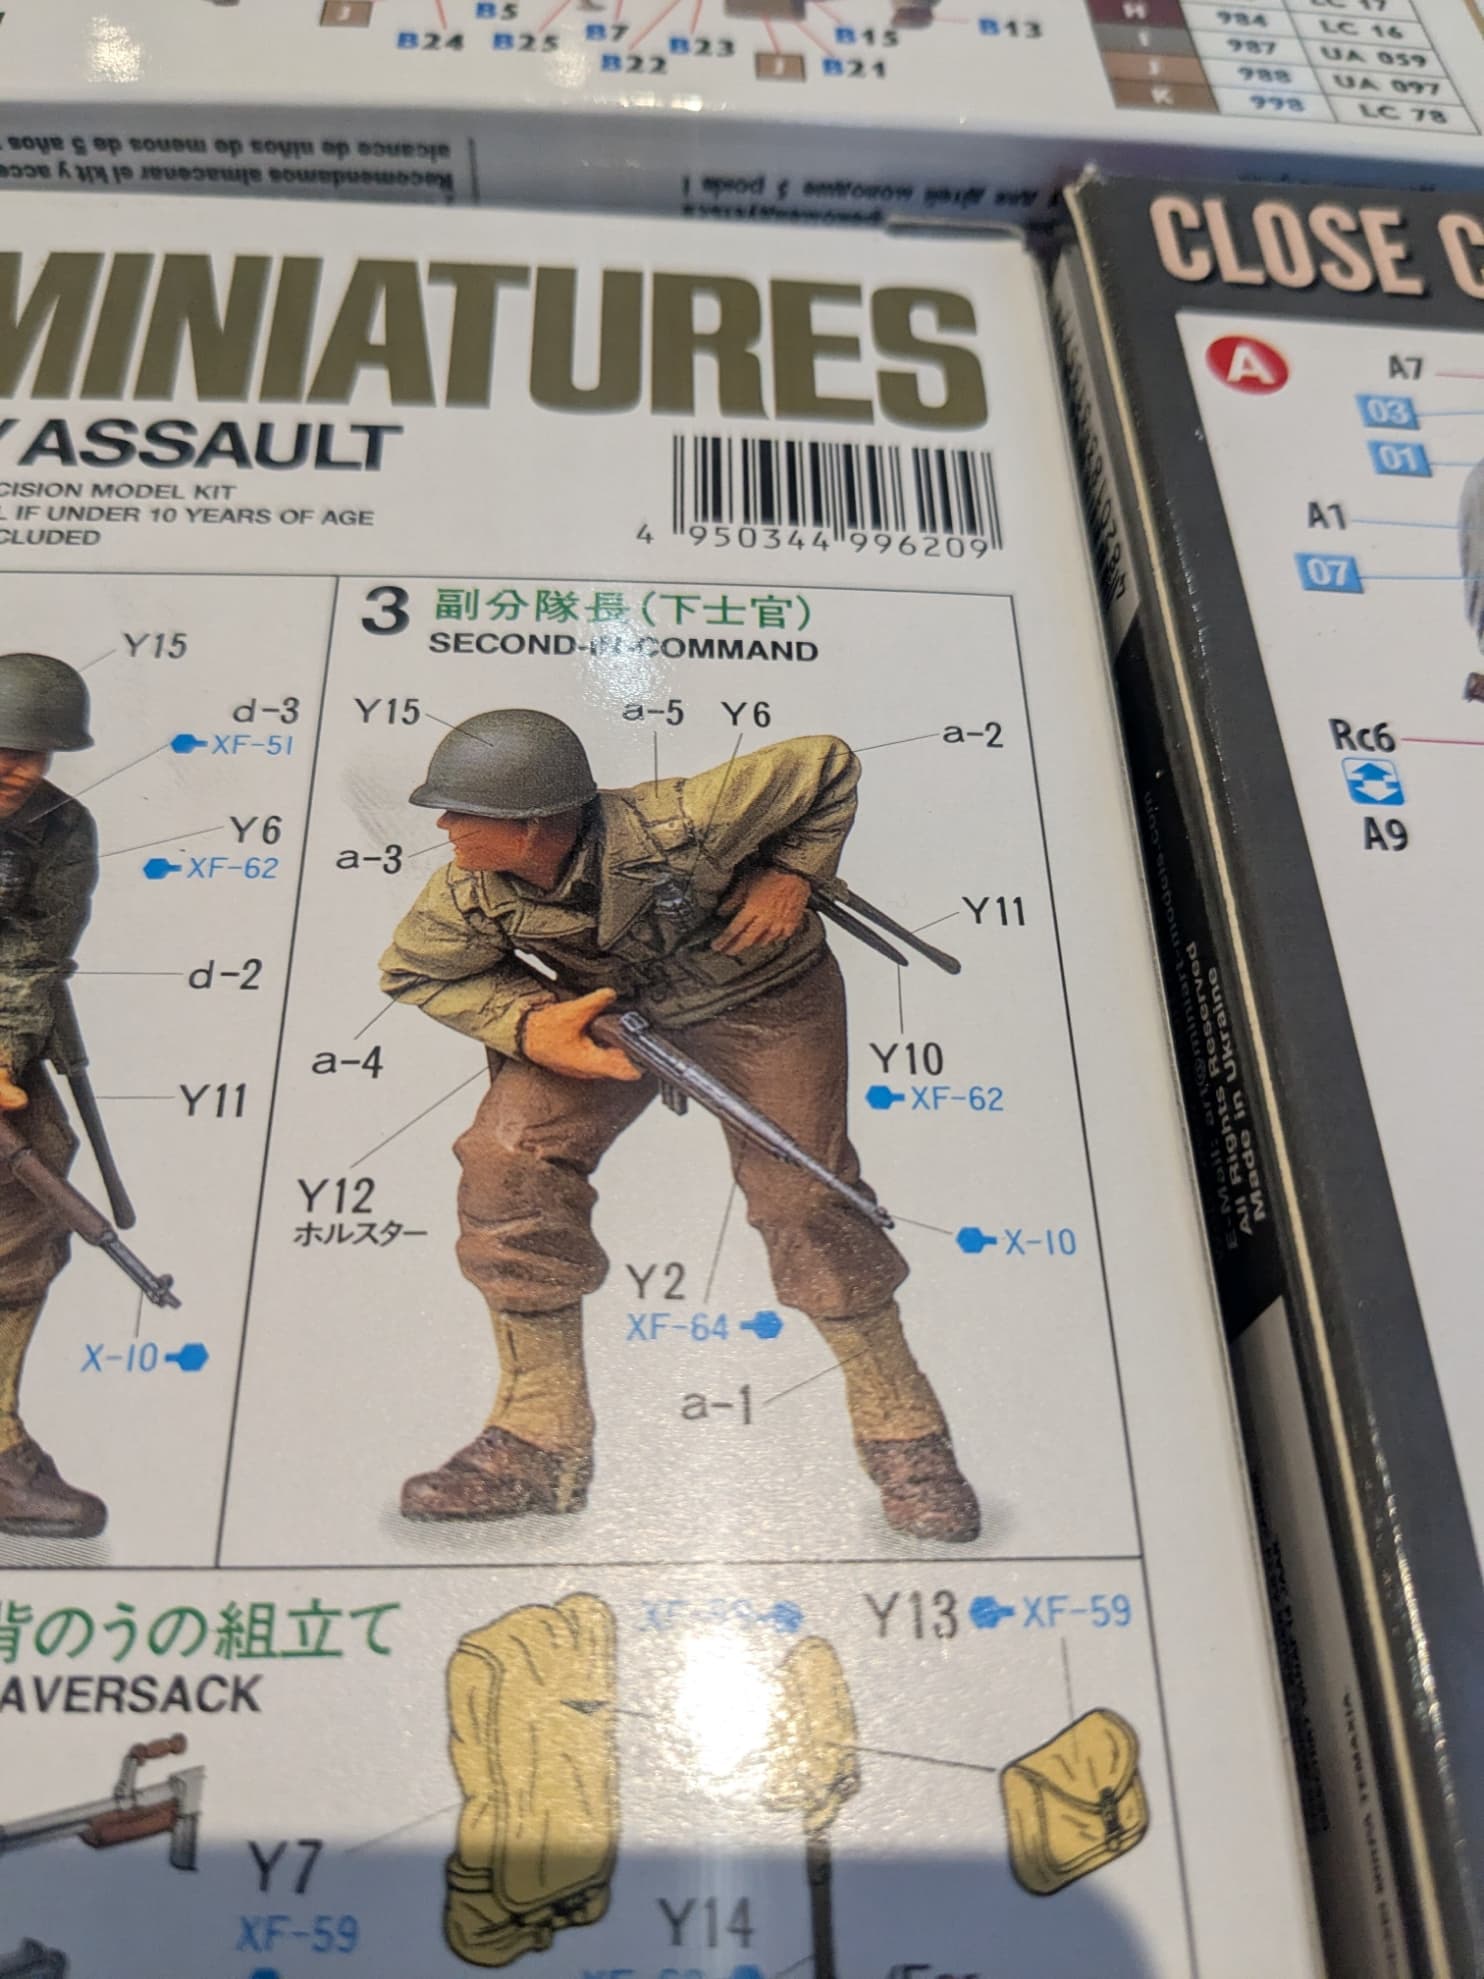
Tamiya US Army Assault Infantry
Mini Art Close Combat US Tank Crew
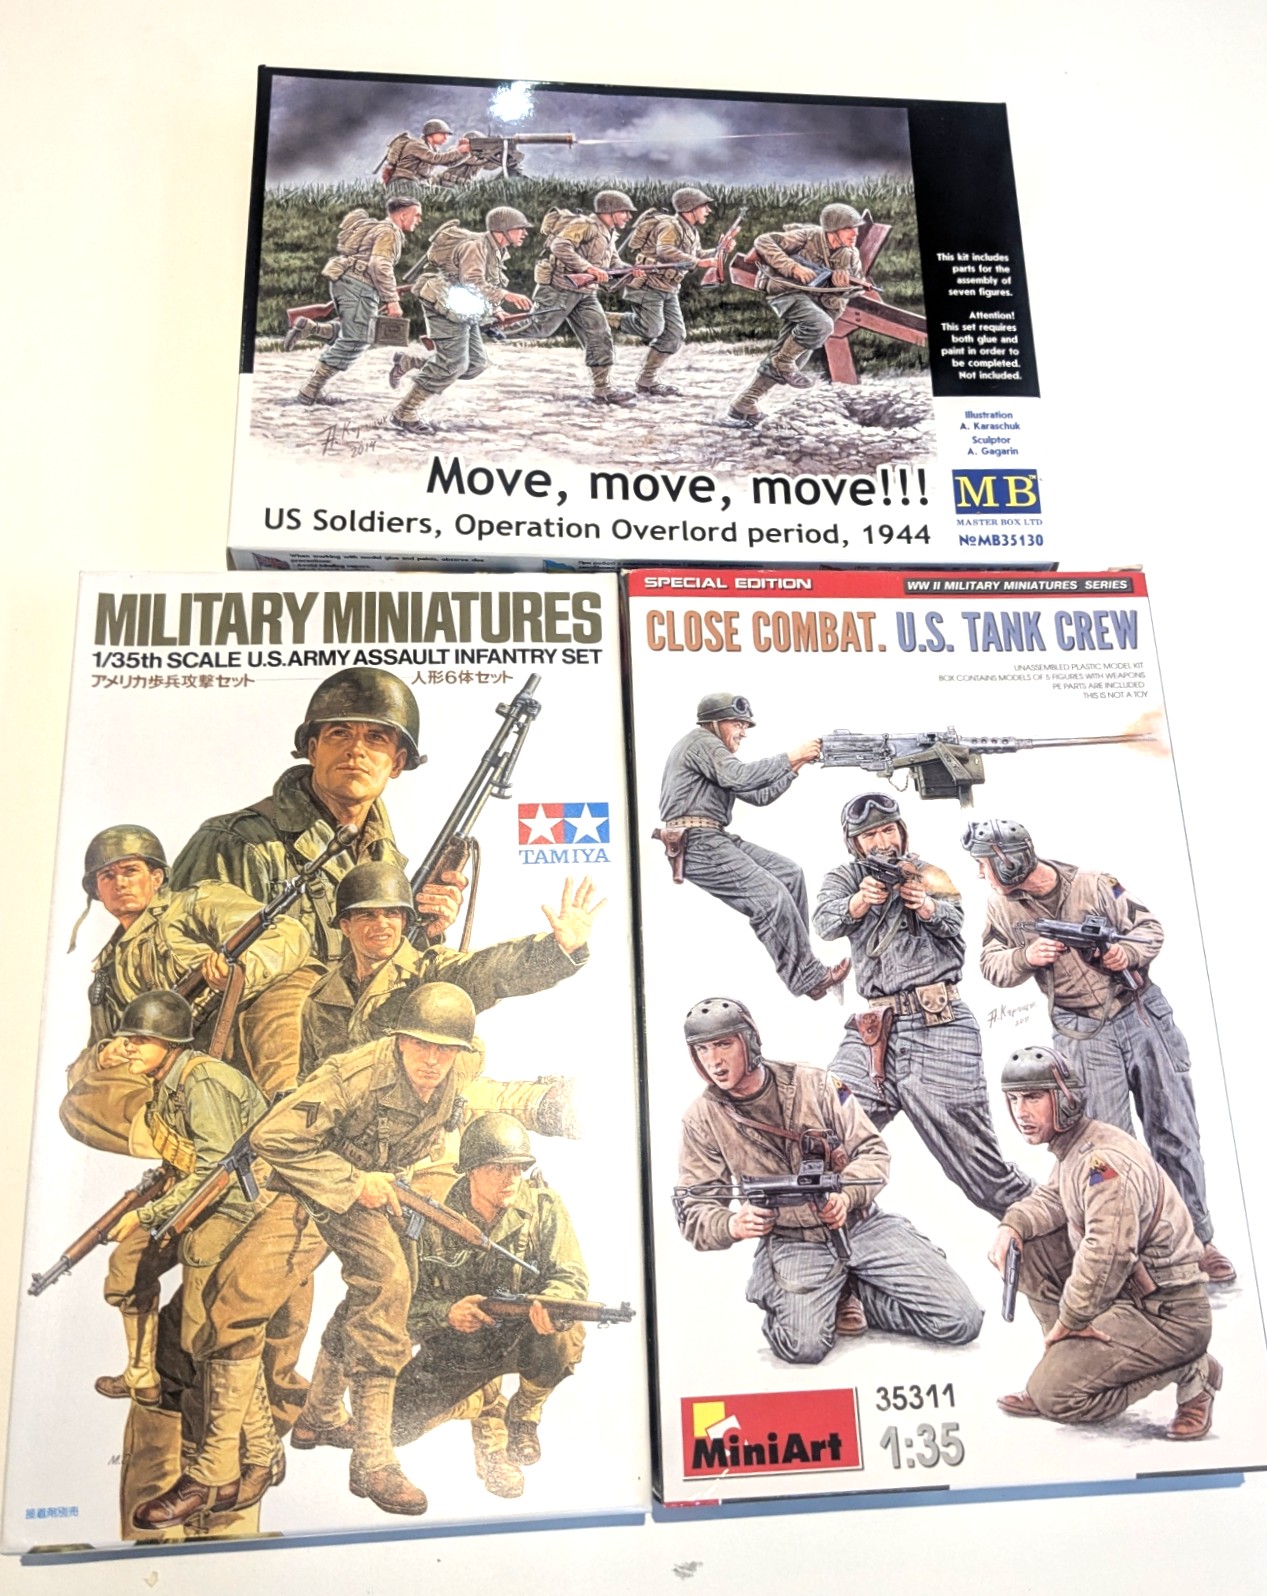
I had not modelled any US infantry since I was in my early teens (the late 70s!) so the first thing I needed to do was educate myself a little bit about US WW2 uniforms. This book really helped:

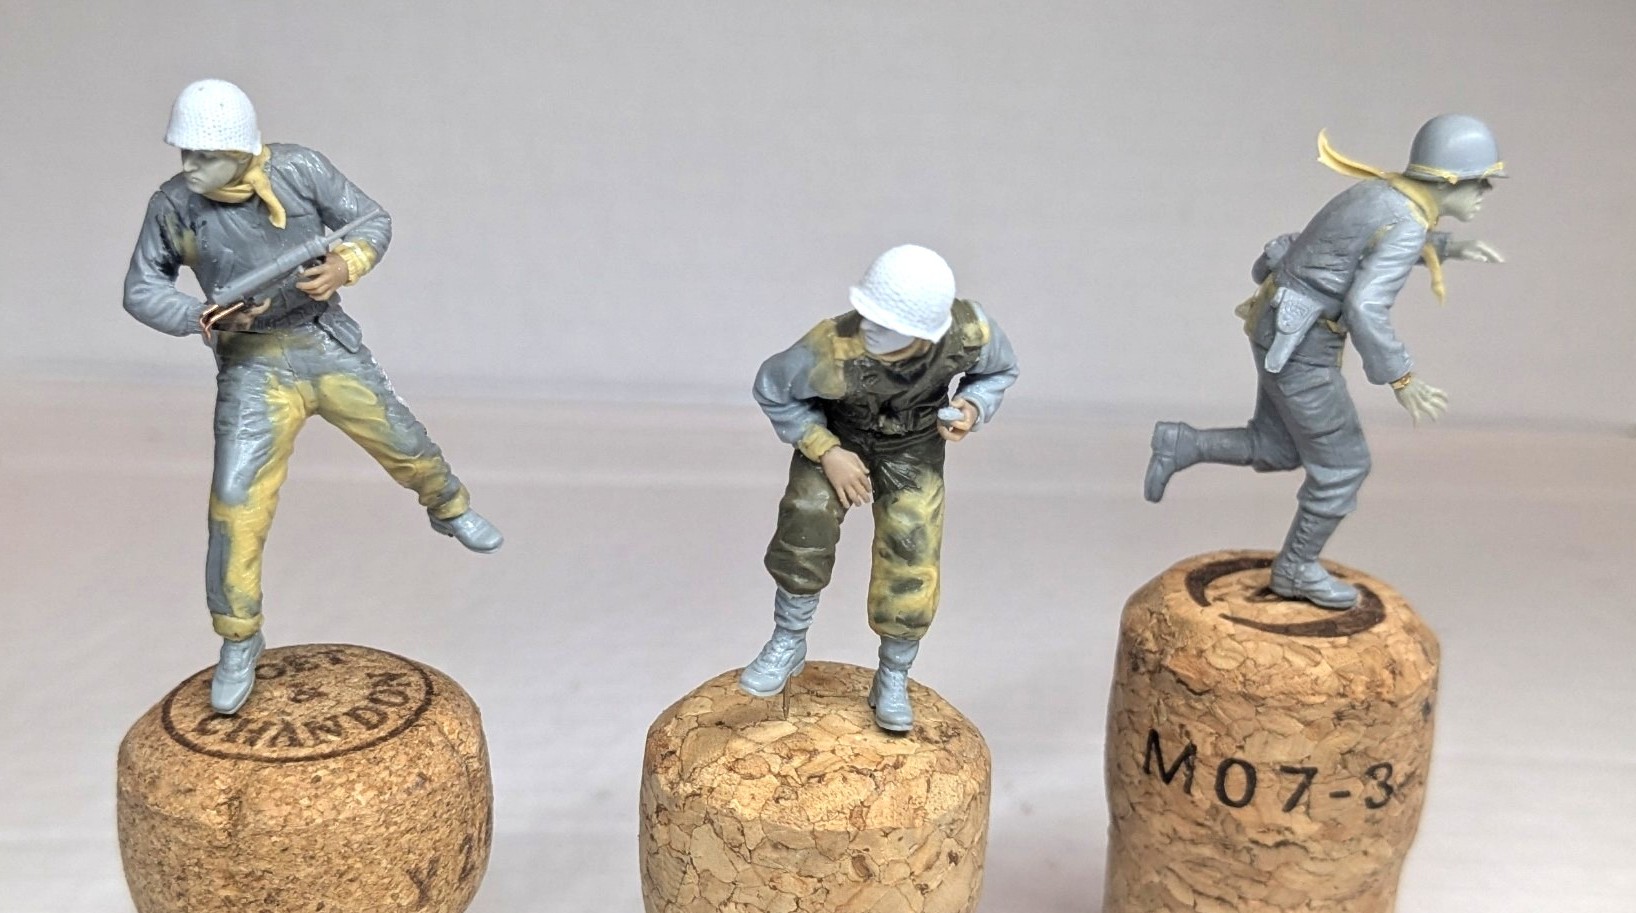
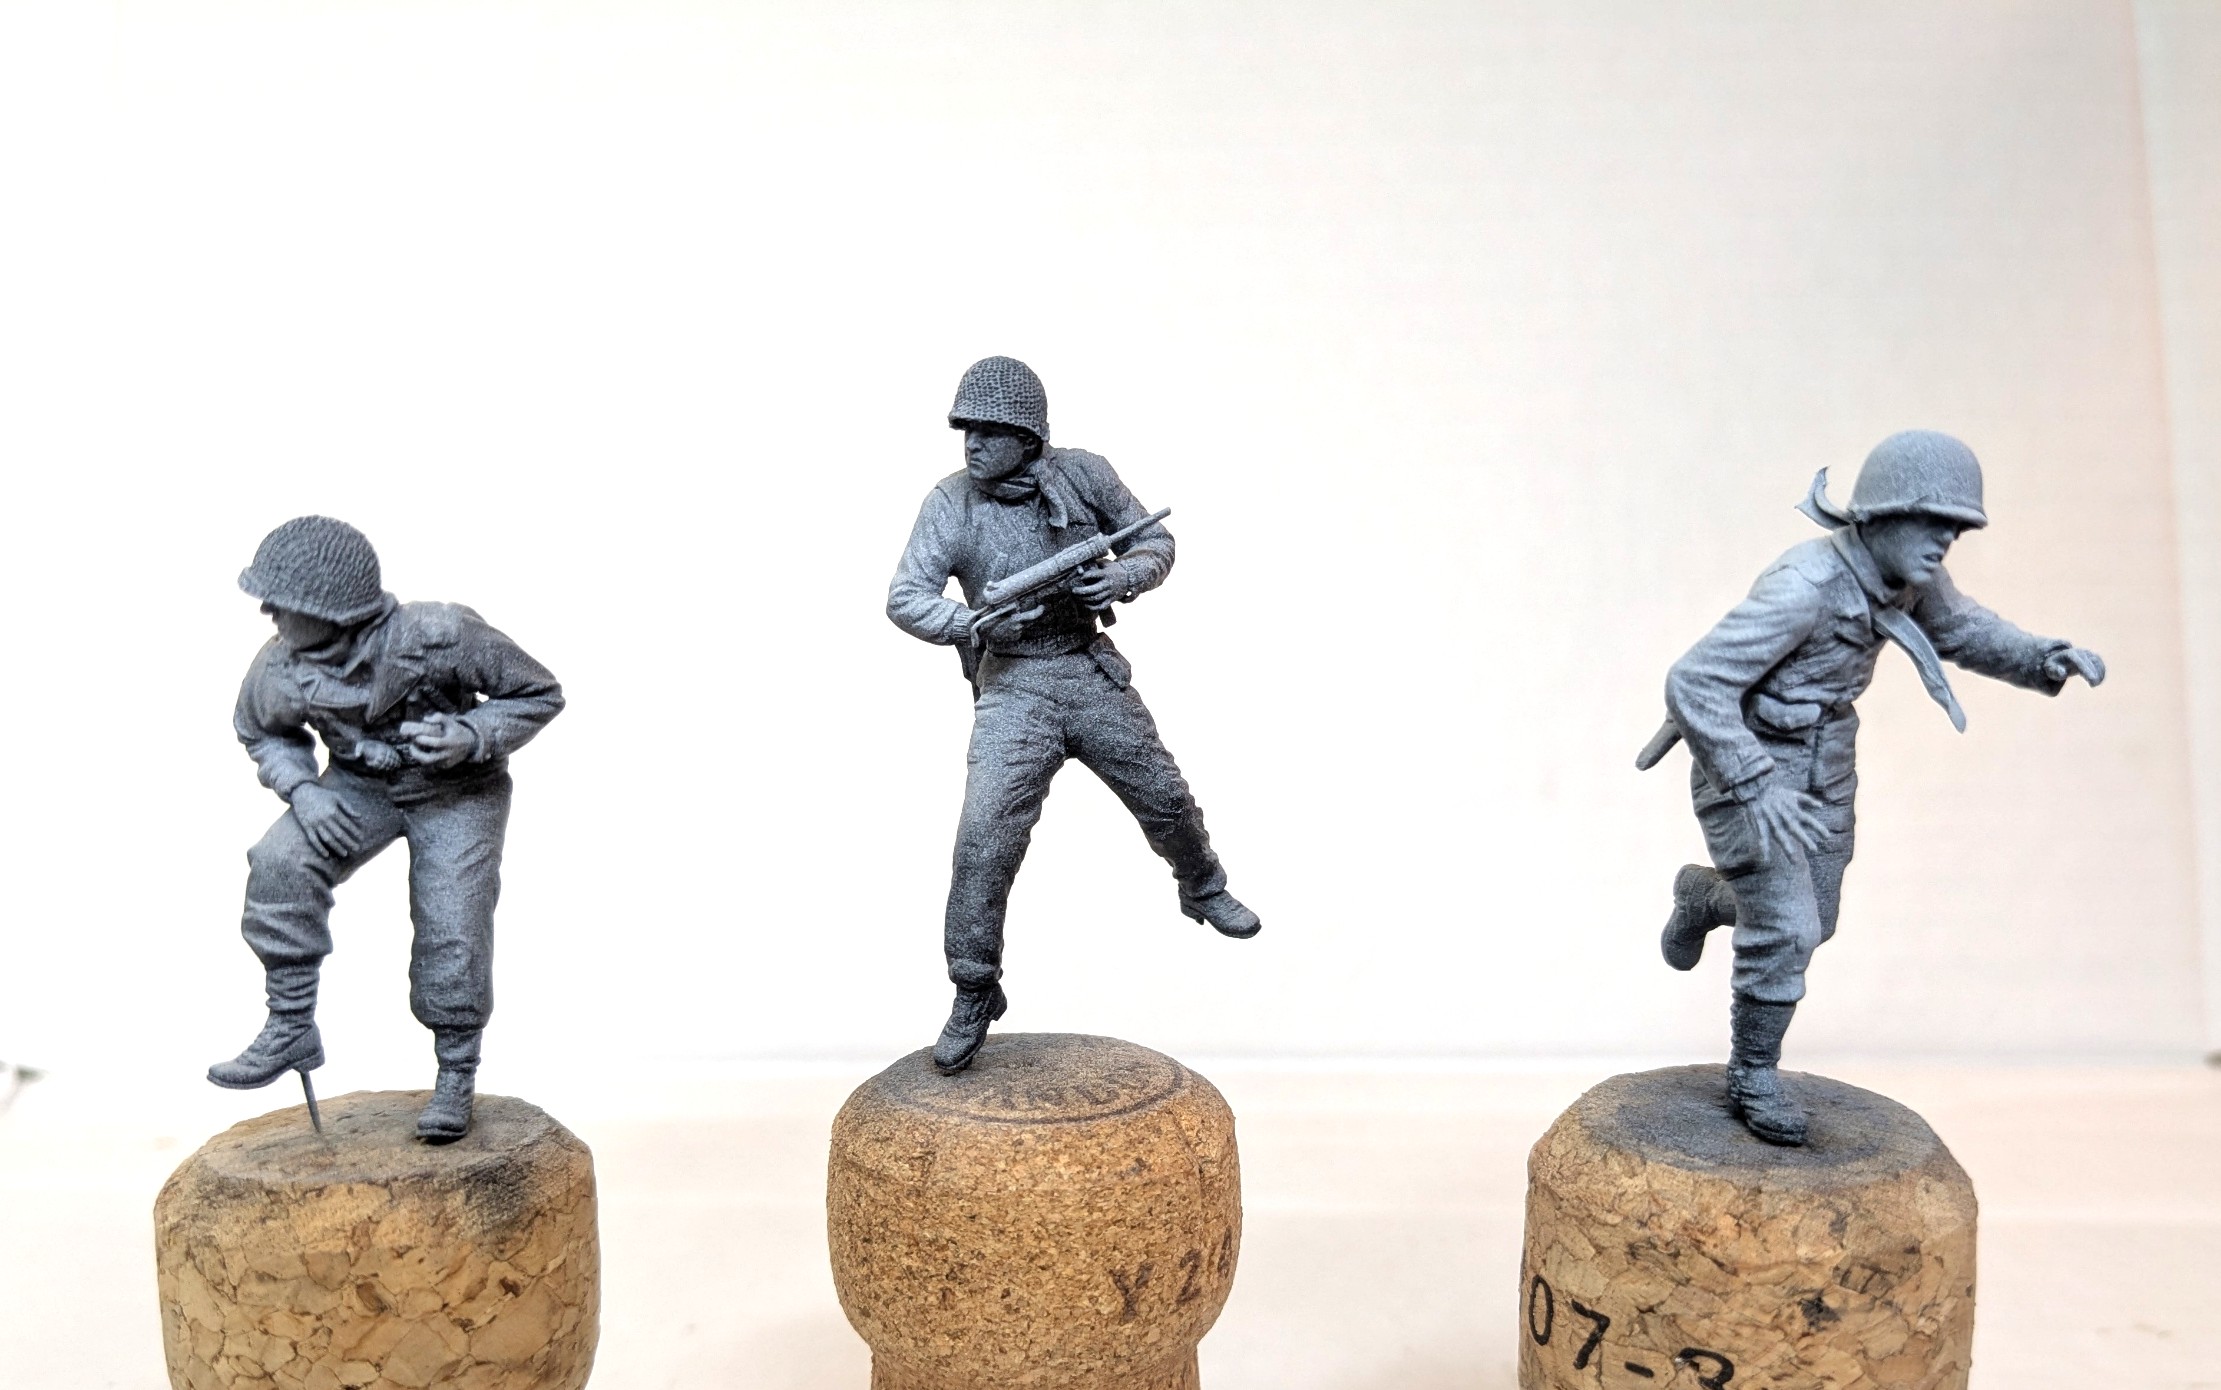
The first set I bought was the Mini Art tankers. I wasn’t exactly looking for tank crew, but this set has some amazing action poses and, given the confused situation in the first days of the offensive, I figured I could get away with a mixed scout group moving up to the front to see what was going on. Of course, any ‘tank crewman’ could just as easily be from a Tank Destroyer.

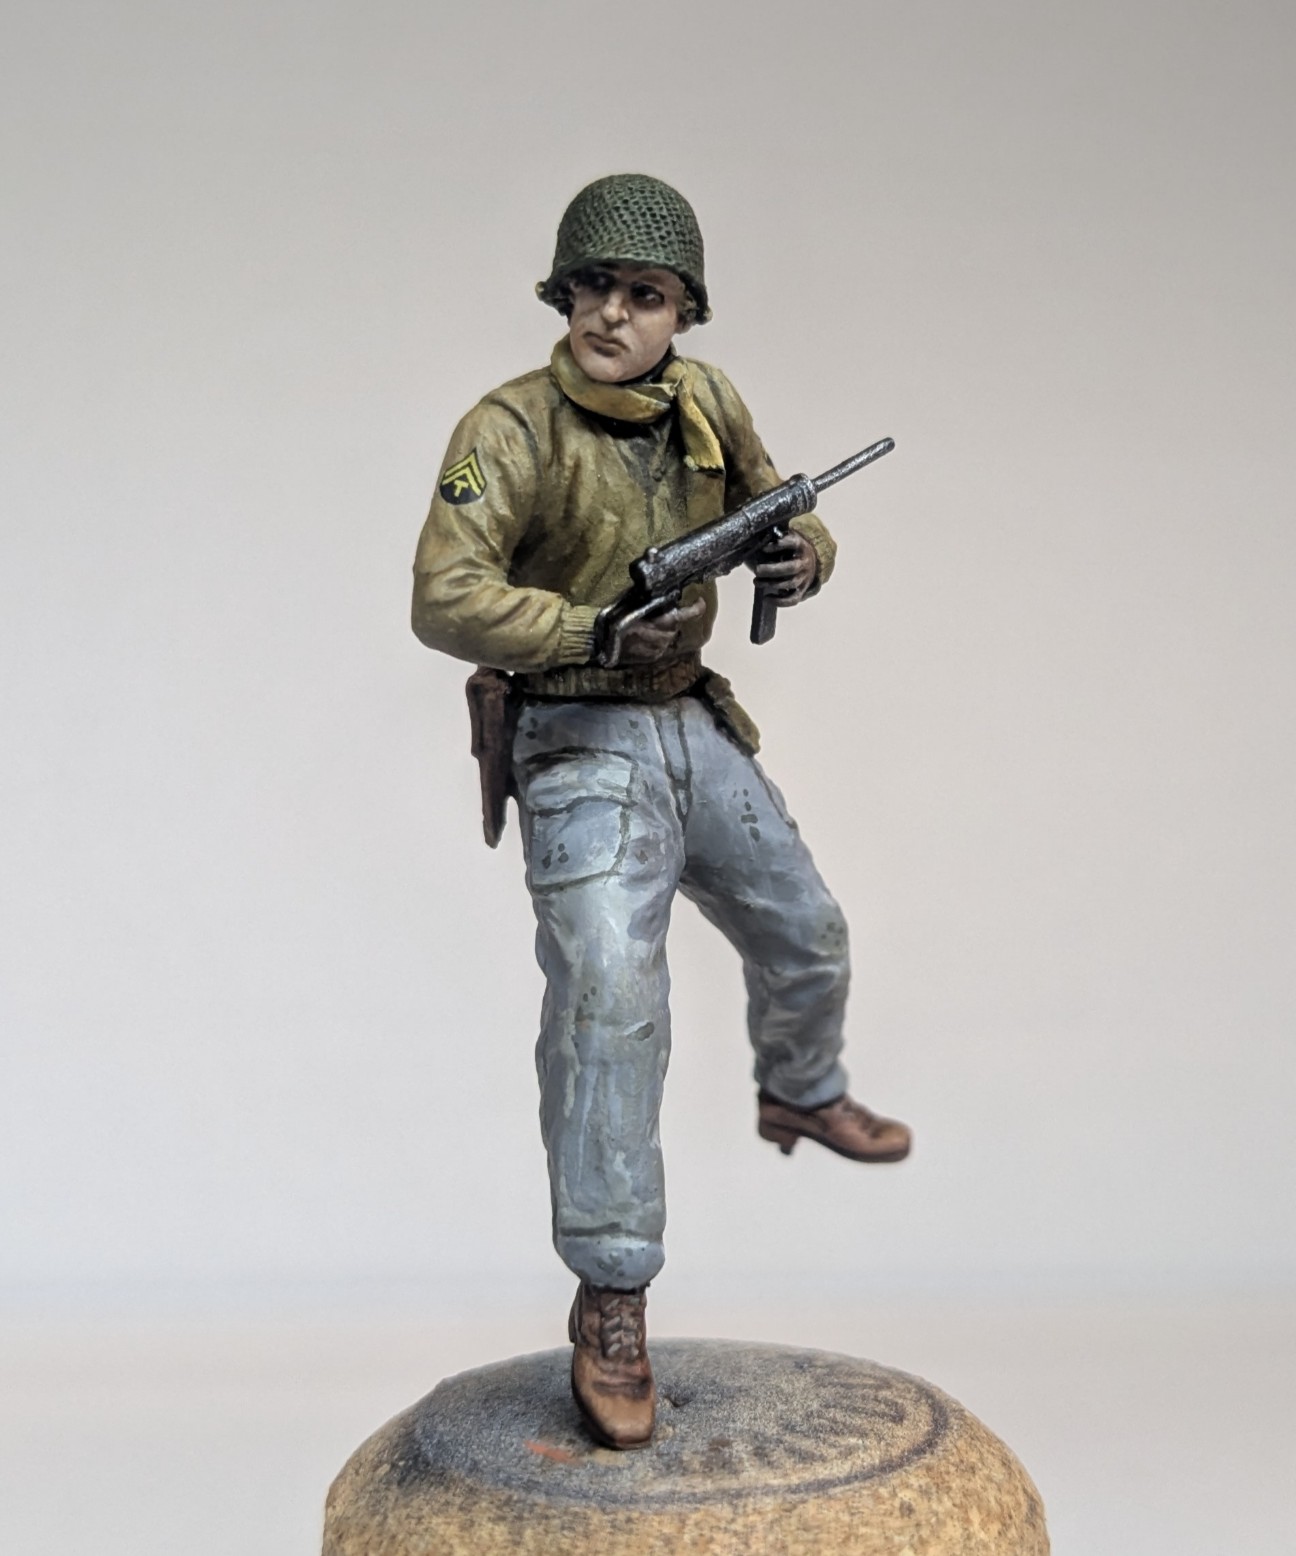
This guy was made from a mixture of two poses from the set (as above). Although the moulding of the actual figures is very good, the set is let down by some inferior holsters. I replaced the one here from a Dragon set. The grease guns are nicely done, but I added the sliding stock from brass wire. The head - with a suitably ‘resolute’ look - is from Hornet and the helmet is sawn off an Alpine head.
Posing the legs and feet was a challenge: I straightened his right leg and replaced the boots with more Dragon parts. I then used Tamiya Quick Type putty to add bulk to his trousers, one cuff, the scarf and some hair (the Hornet head was bald).
The hands are worth a mention: ET Model P35-320 Hands for Figures Type 1. These are by far the best hands I have found, although others from Hornet and Royal Models also come in handy (sorry for that bad pun). The ET ones are a little smaller, so depending on the size of your figure they don’t always look right.

Anyway, I’m happy with the way this guy turned out.
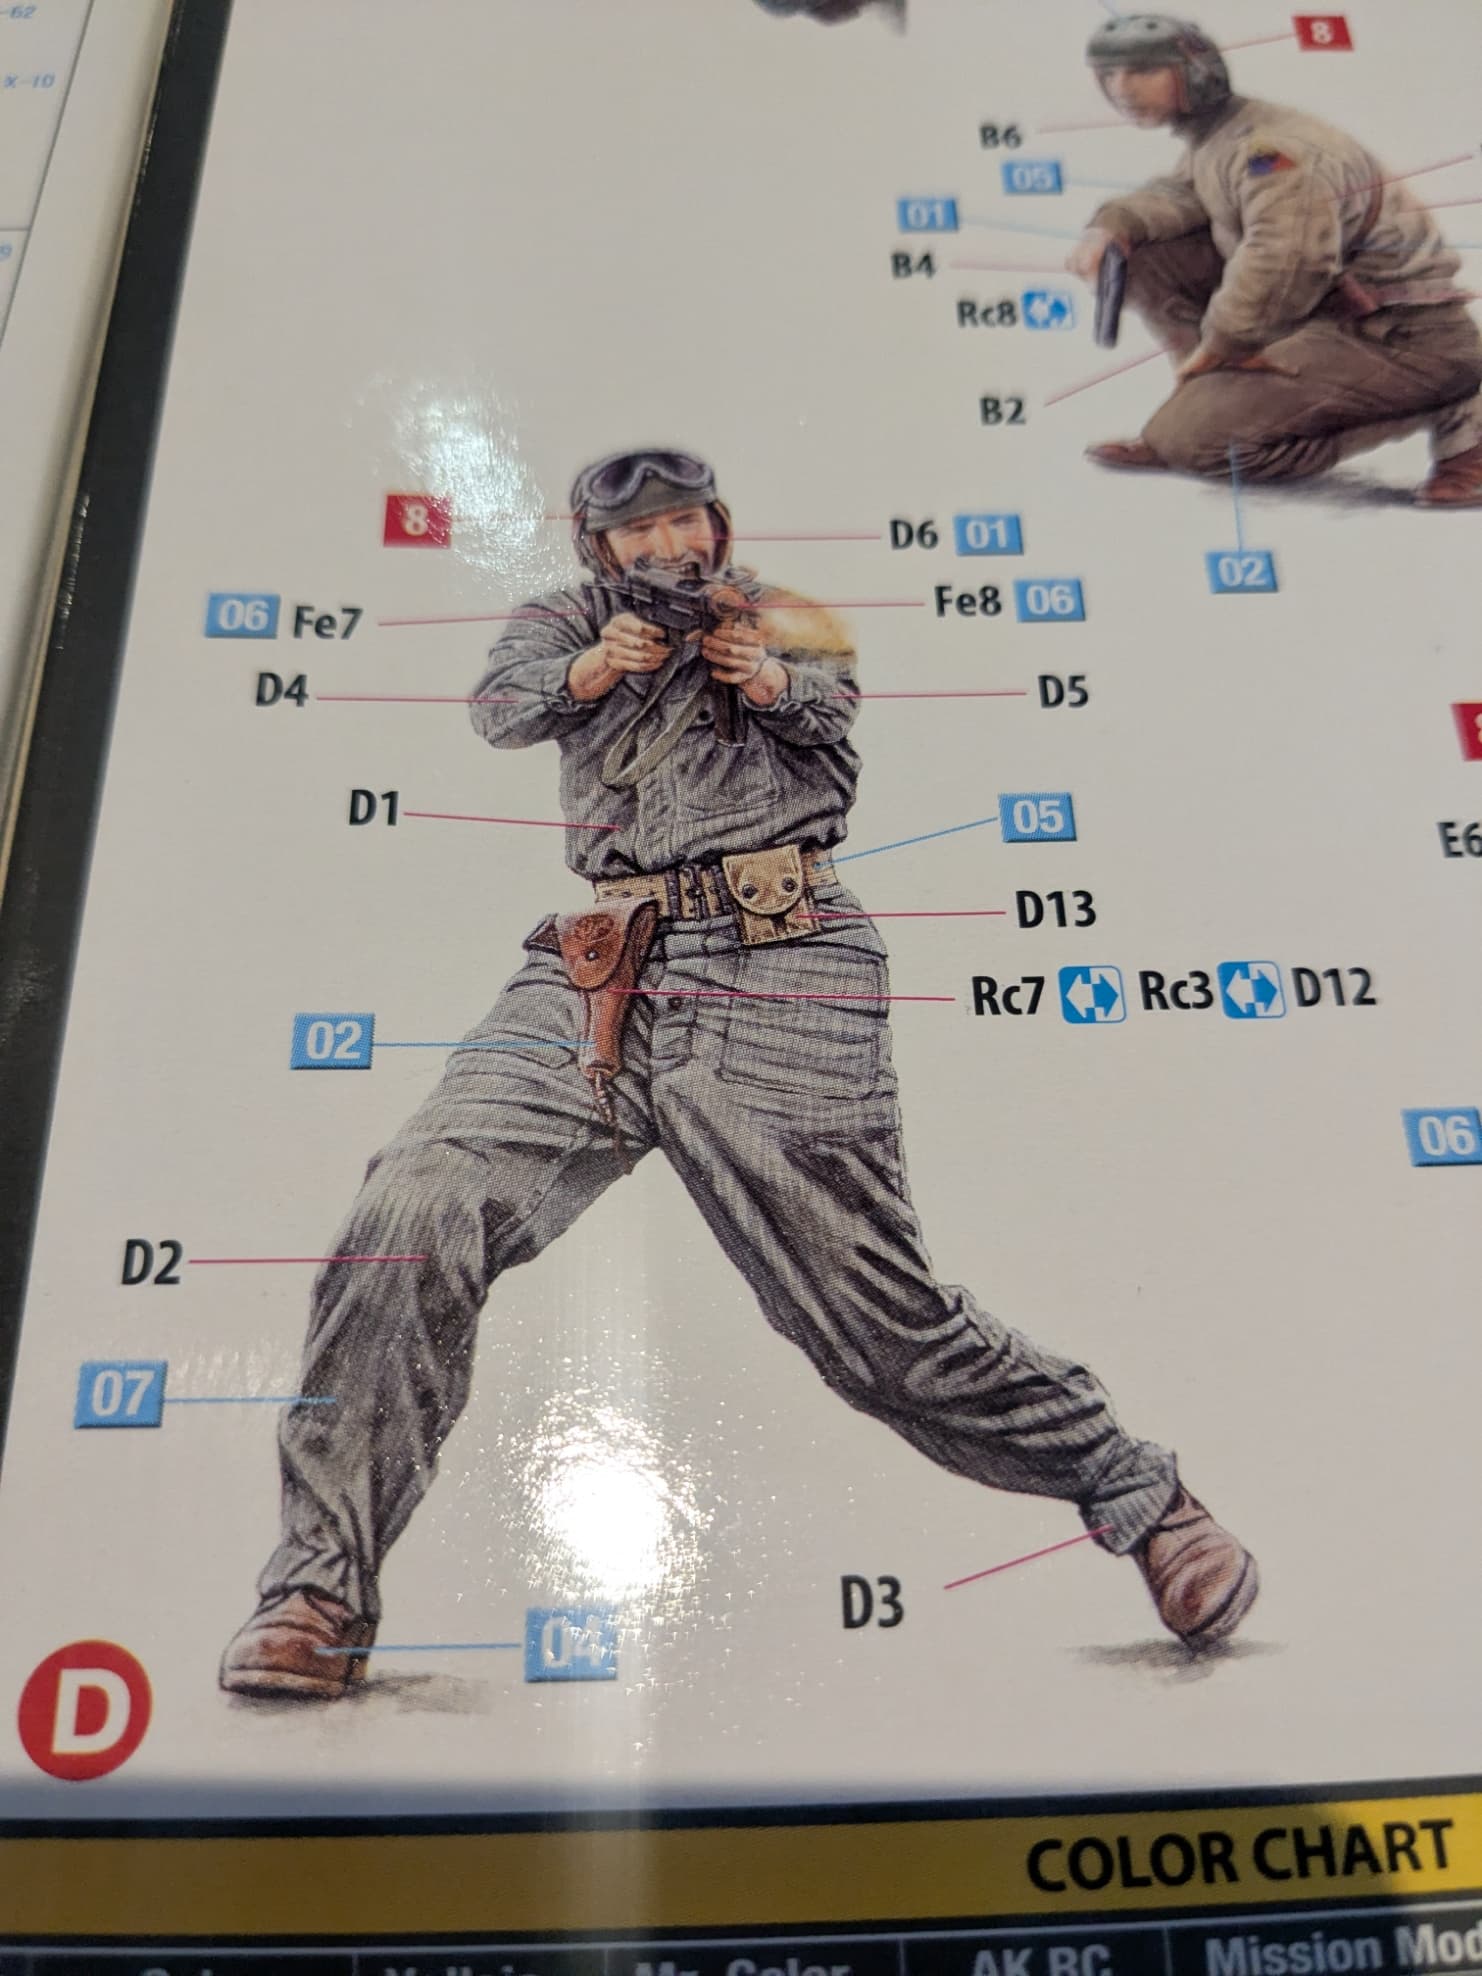
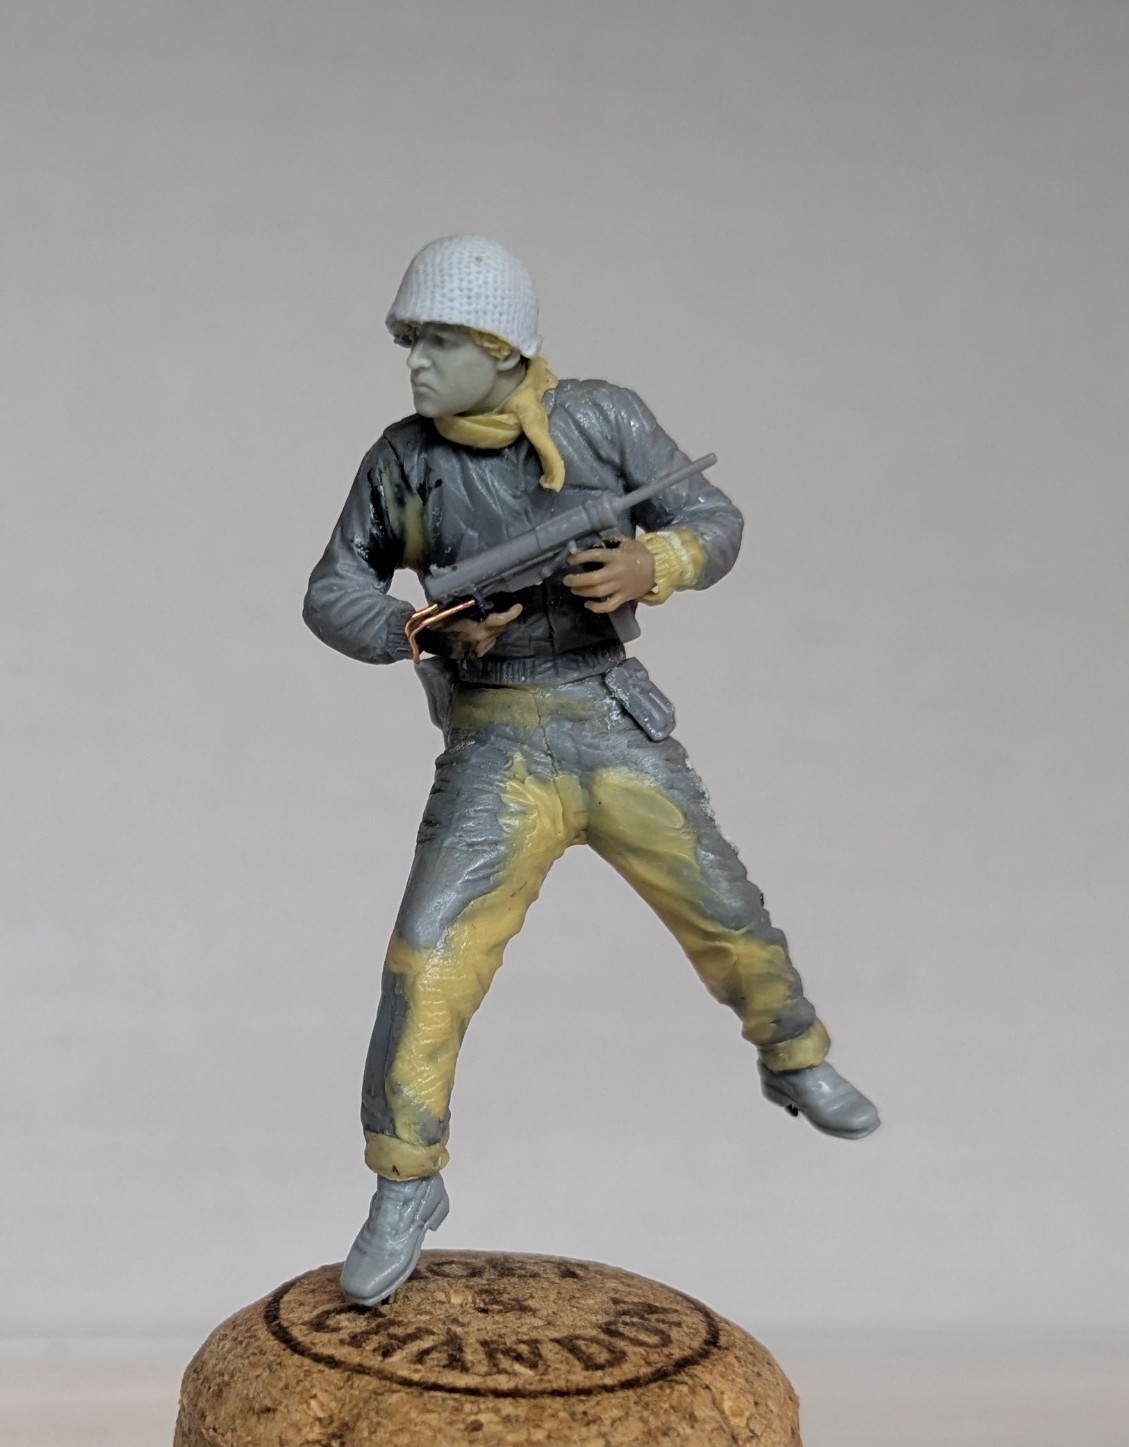
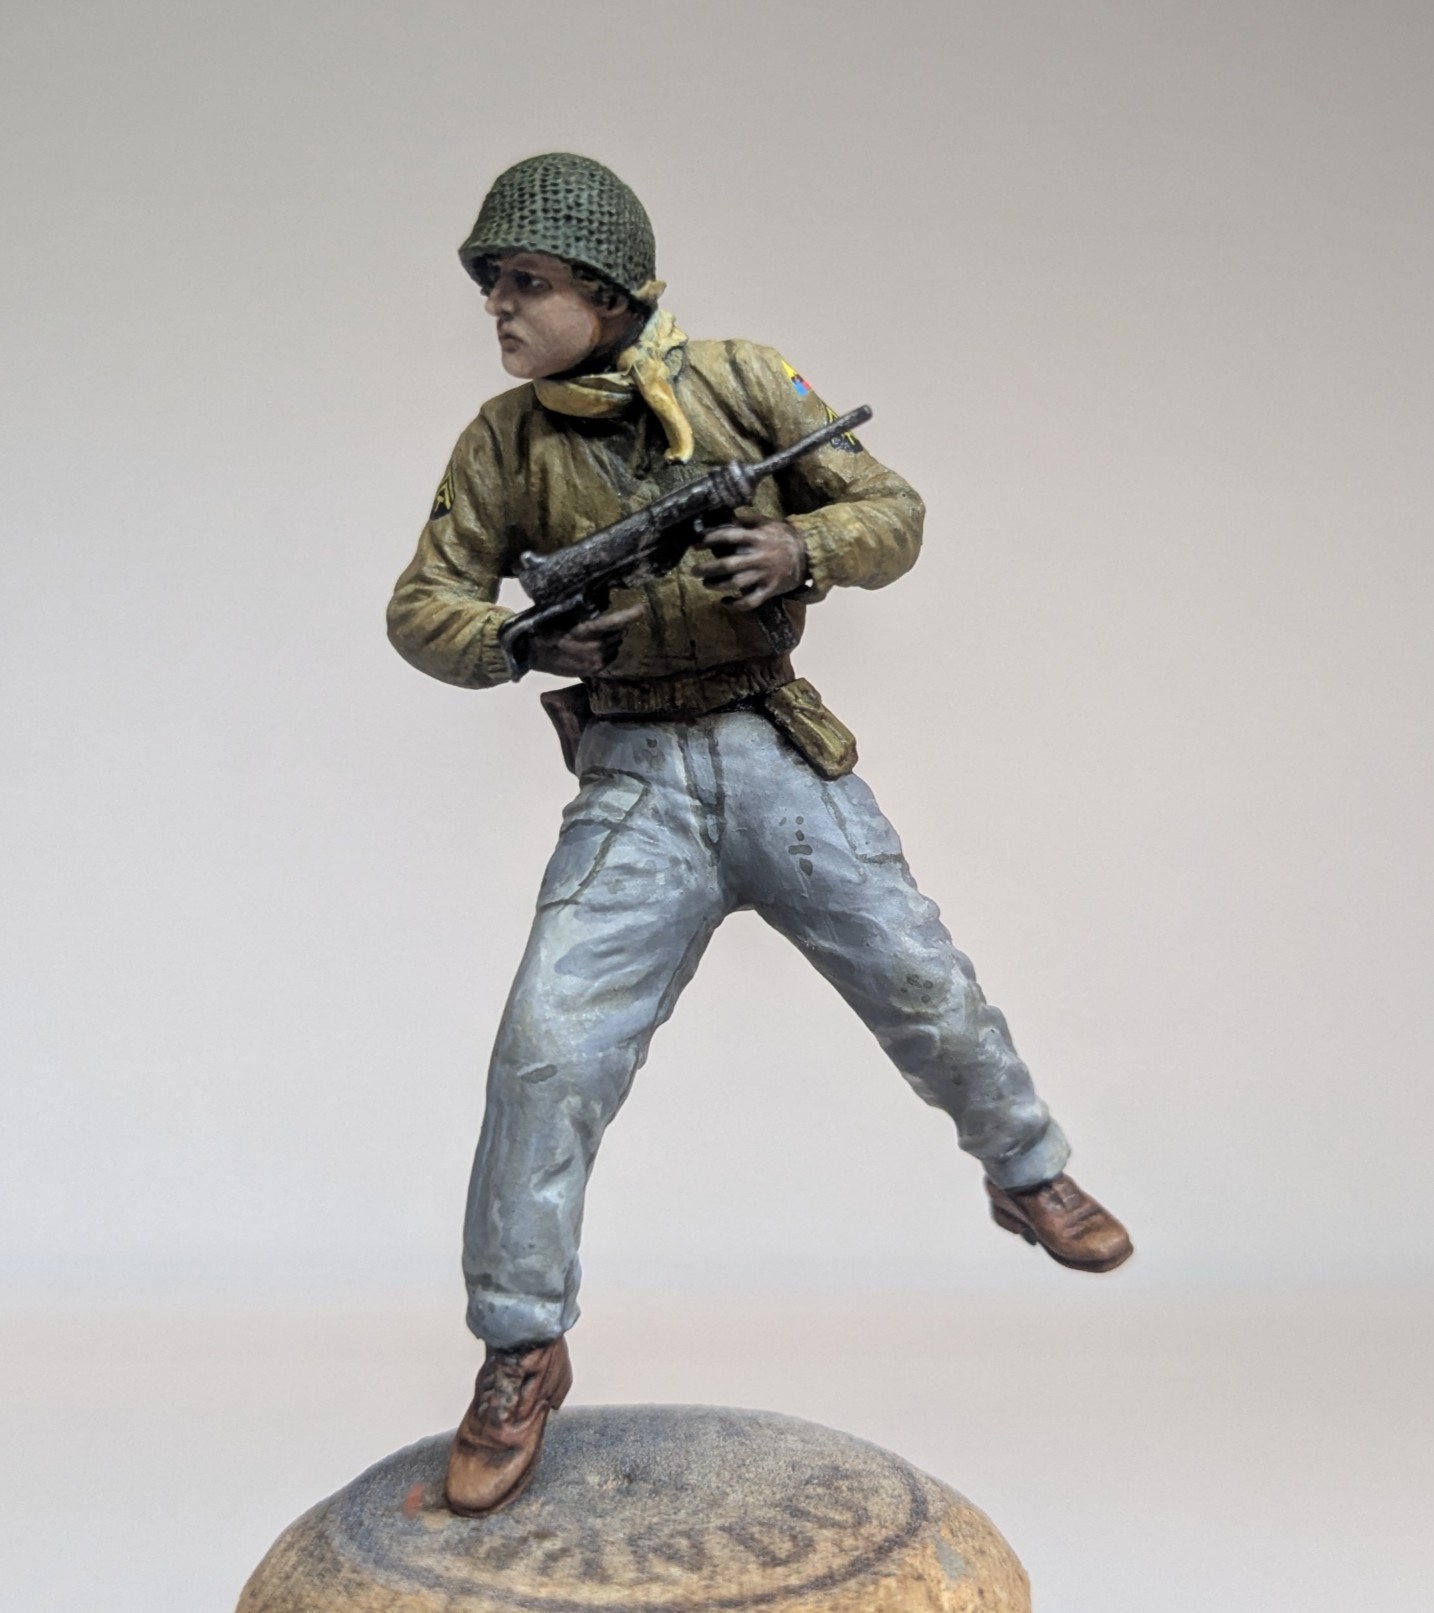
The next figure was the most recent addition. He is based on this guy from the Tamiya set:
As we all know, over the last few years Tamiya have really upped their game when it comes to figures… But this one is actually 30 years old! Despite the age, the pose is excellent and the detail actually pretty good. As well as being very dramatic, it helped for my purposes that he was looking to his right.
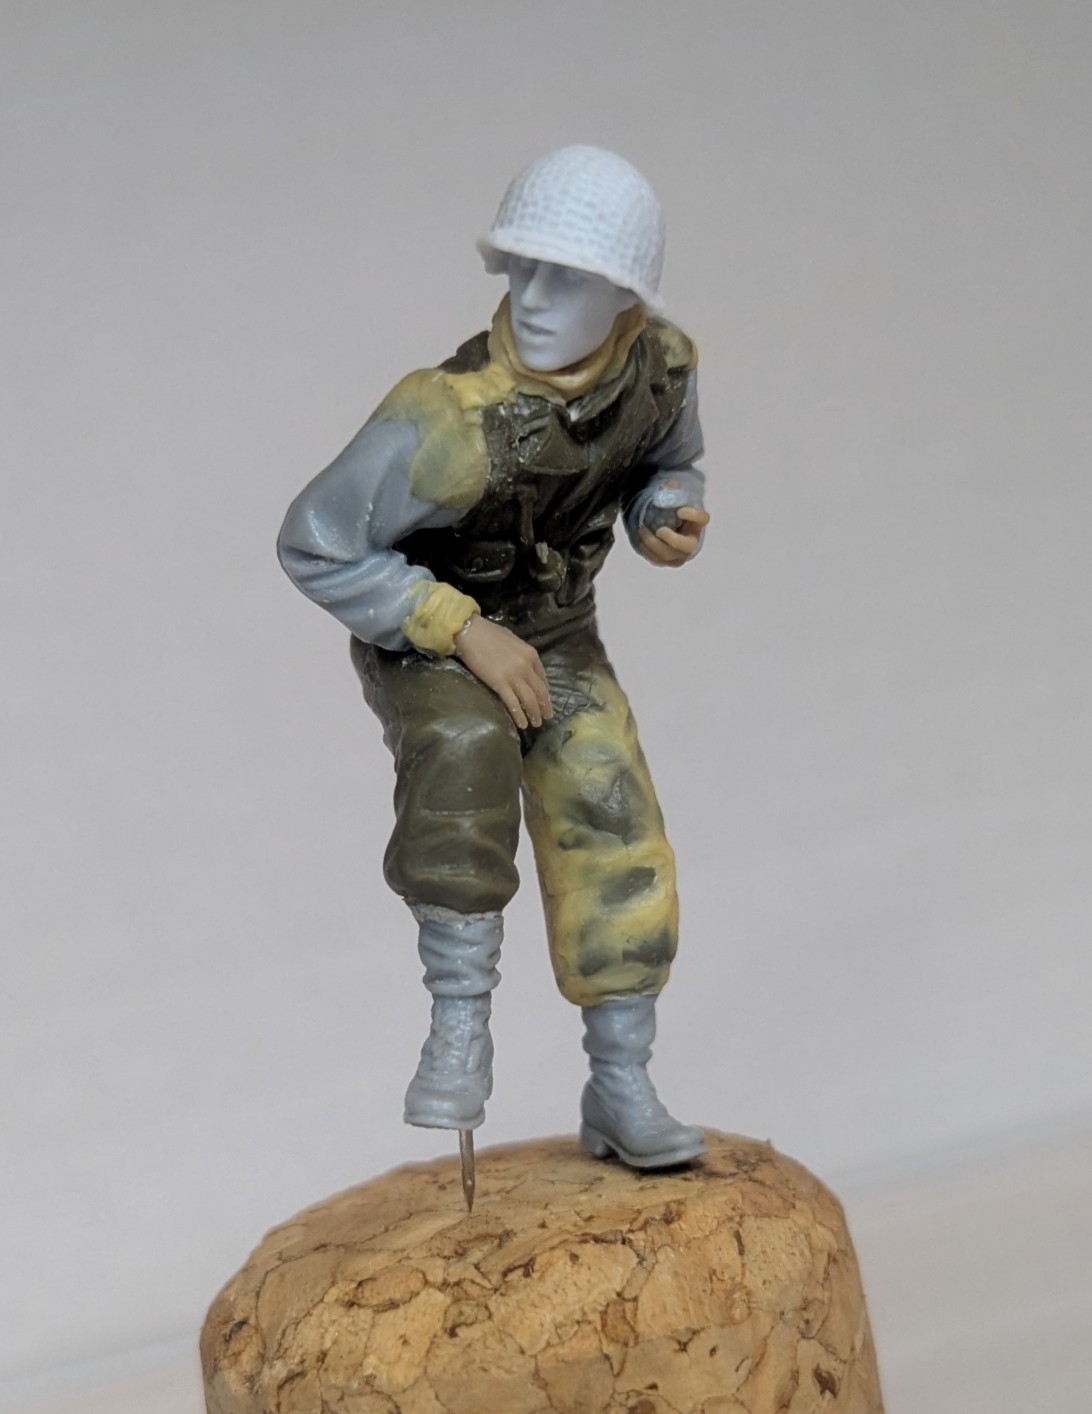
As you can see, I changed the attitude if the left leg, replaced both arms and the boots / gaiters (I think they came from a Dragon US Tank Riders set), added ET Models hands and an Alpine head. I then used Tamiya putty to repair the leg and a few other details, plus adding the obligatory scarf.
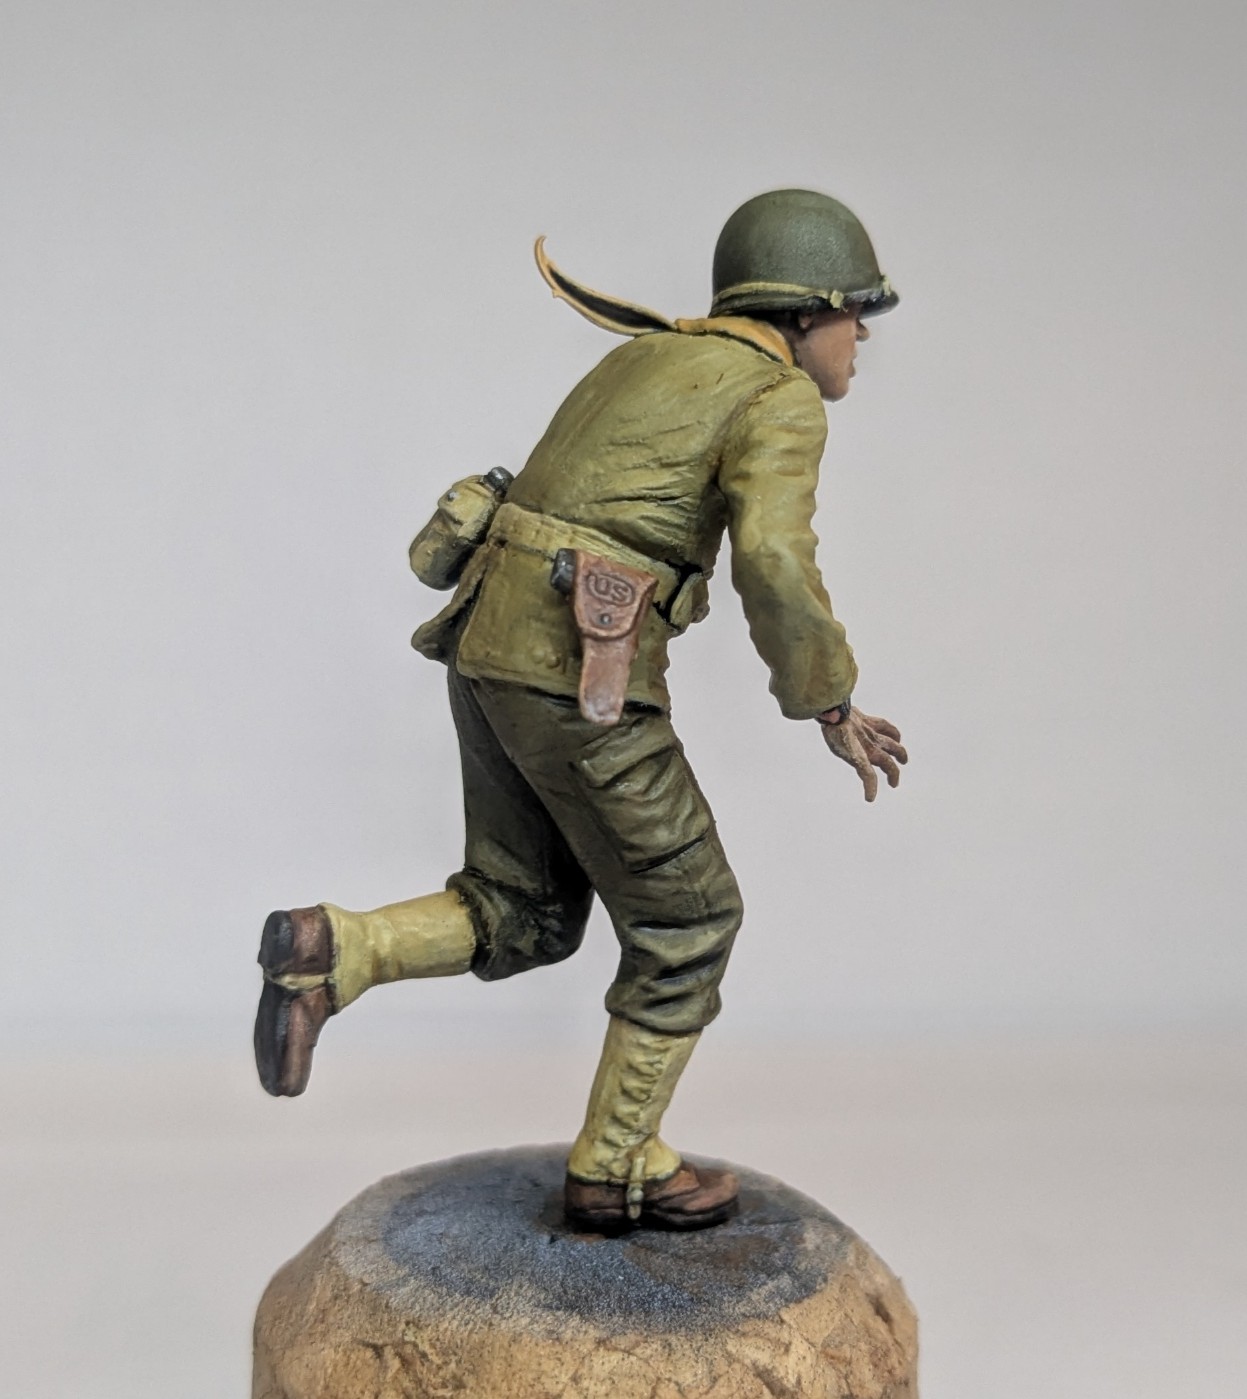
The final touch was to give him a couple of grenades - one in his left hand - to look like a man contemplating his next move. He will be the GI at the corner of the farmhouse, probably locking eyes with the startled Panzer Grenadier at the bottom of the slope and helping to add the urgency to the scene which my title represents.
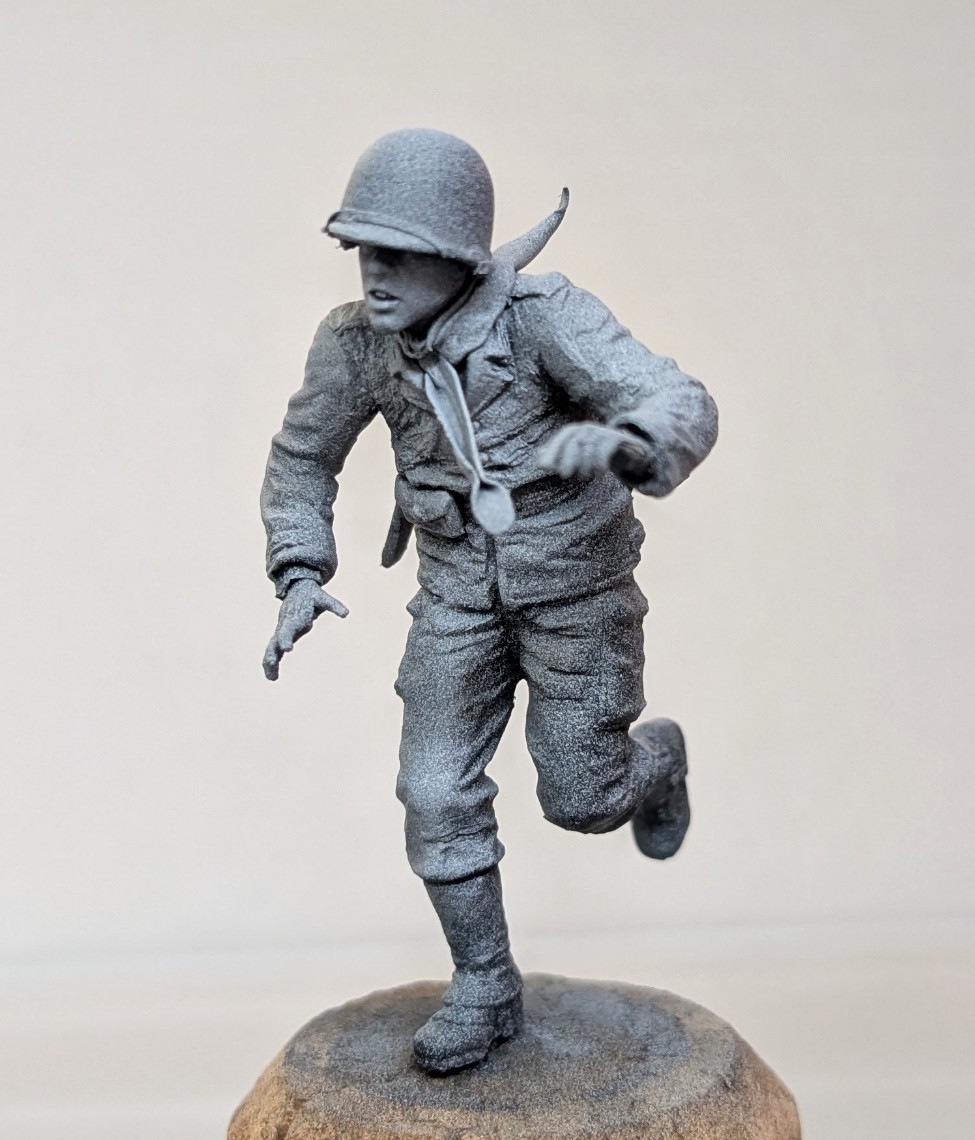
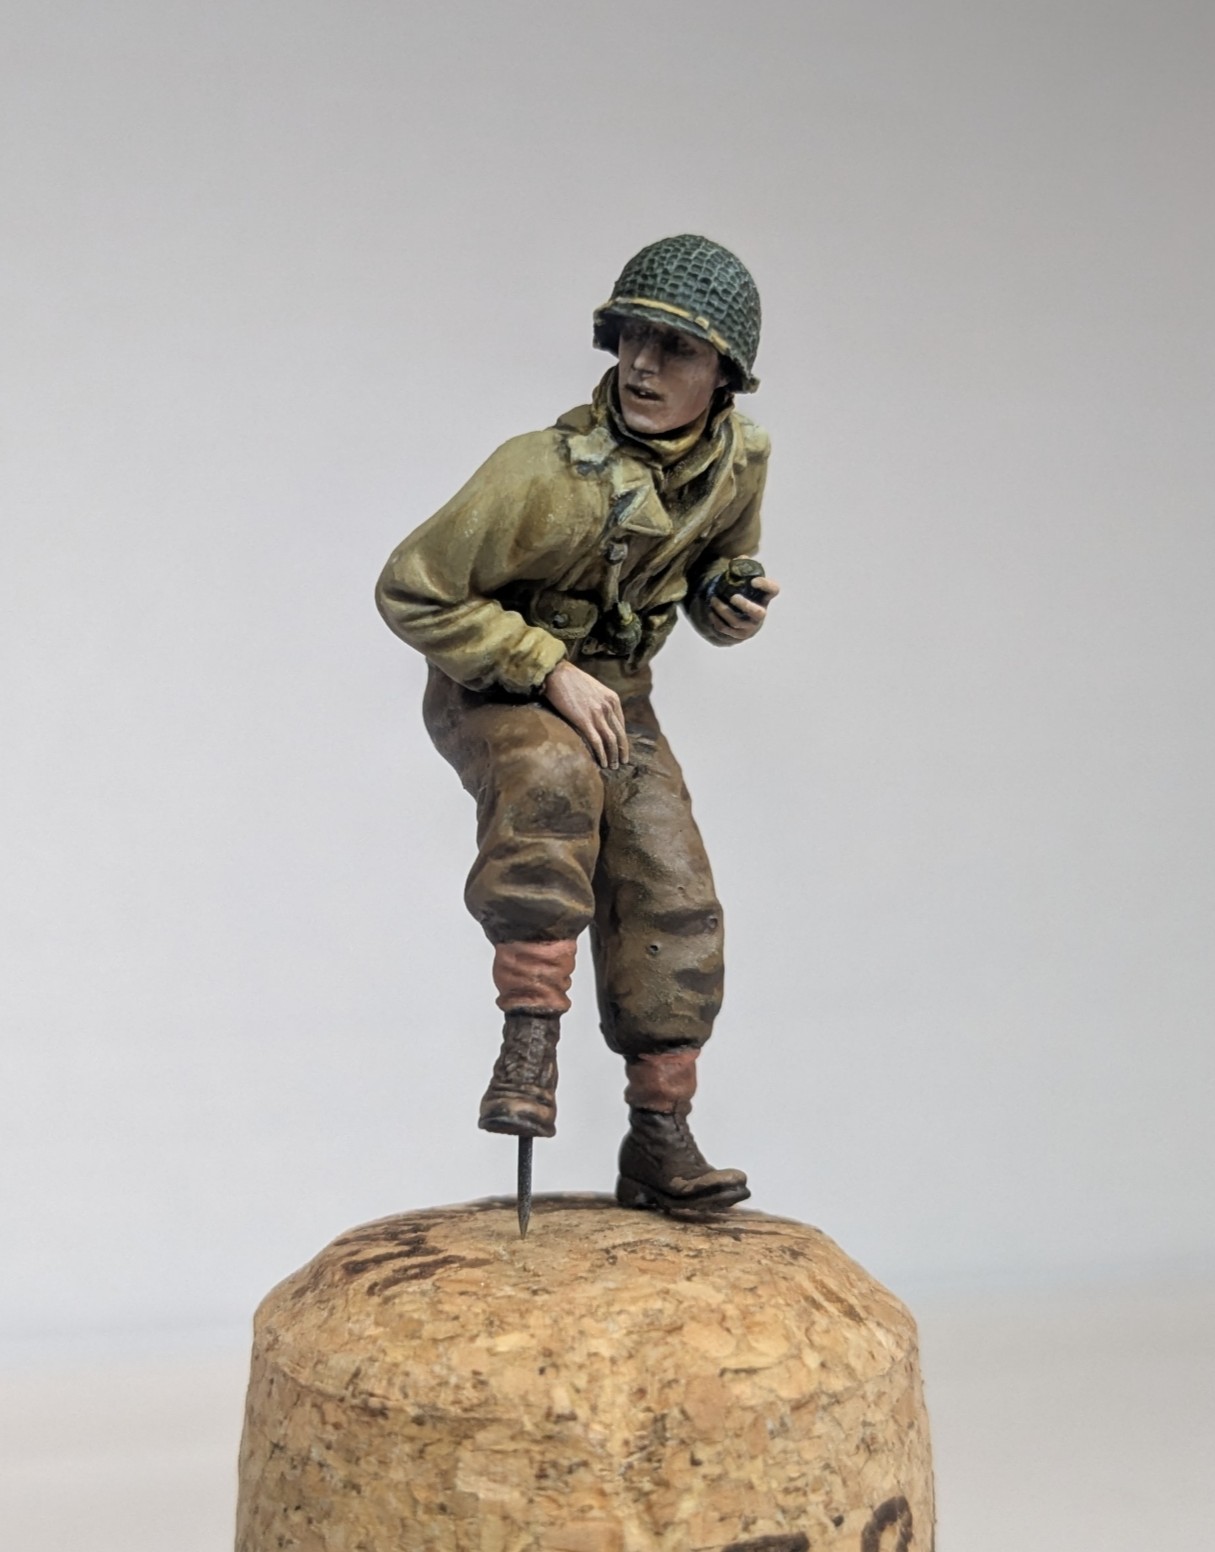
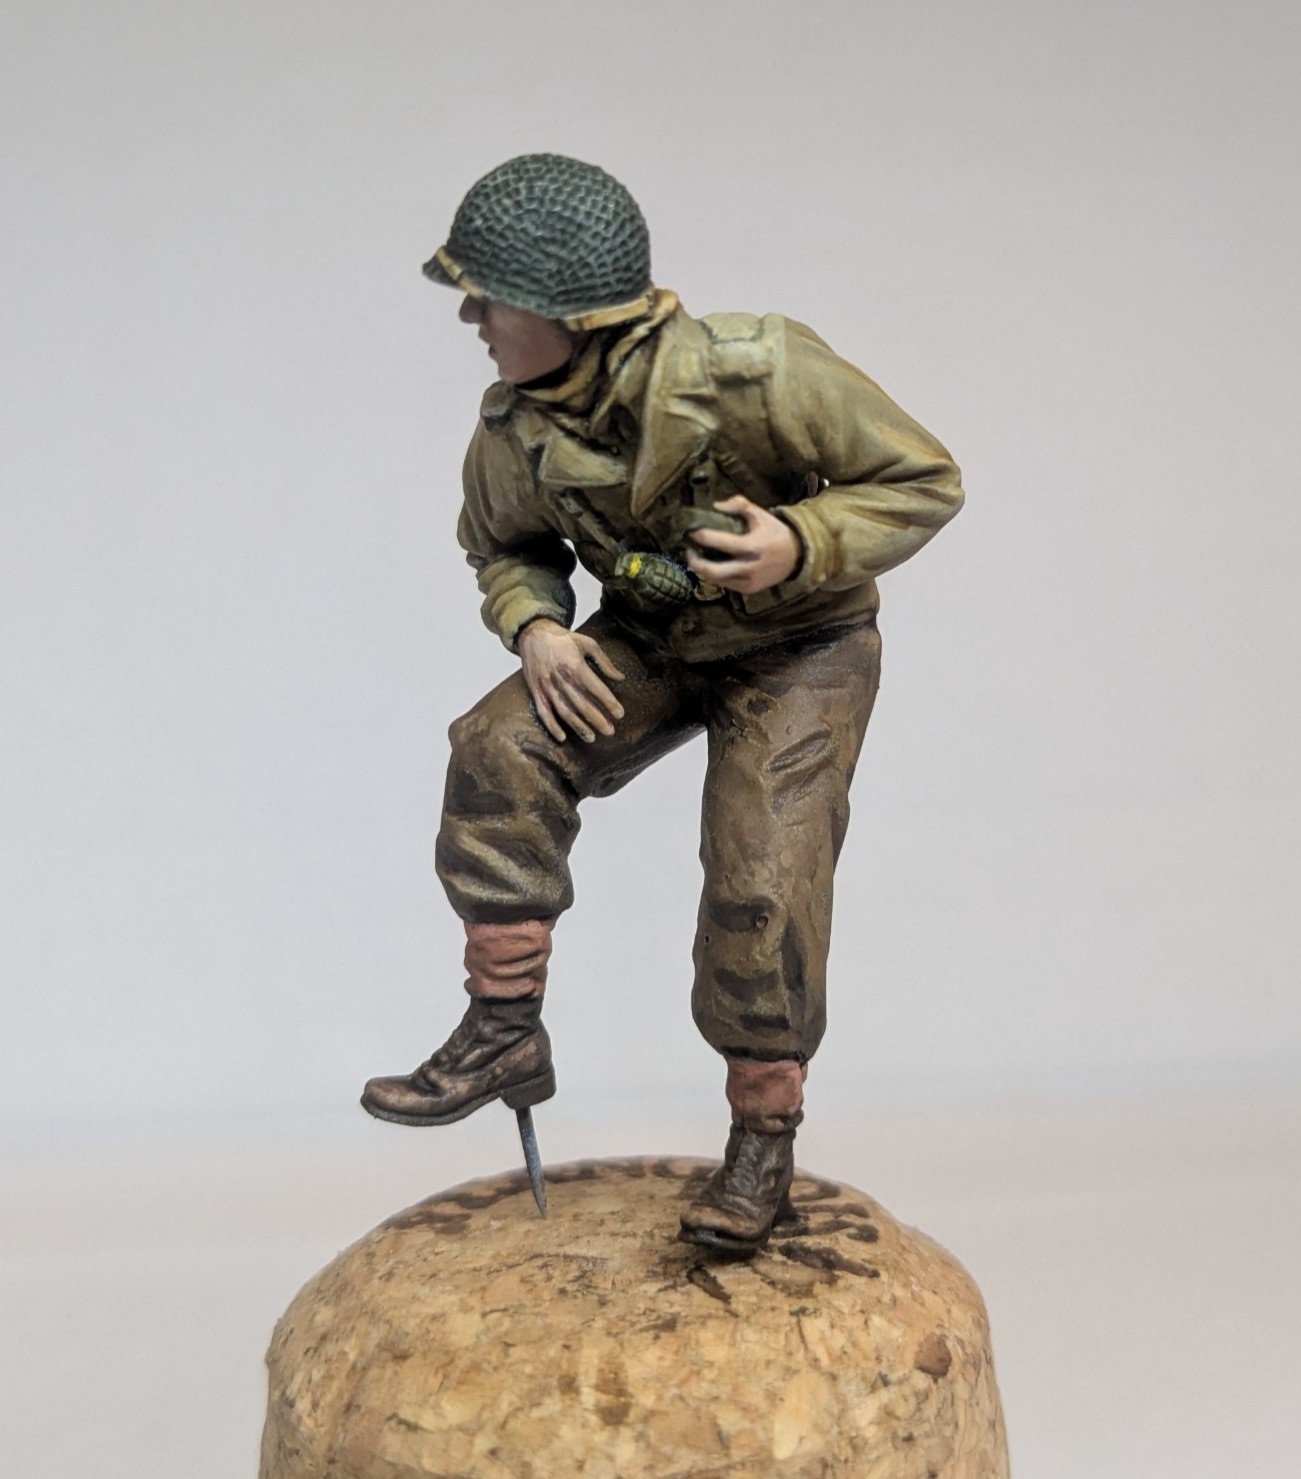
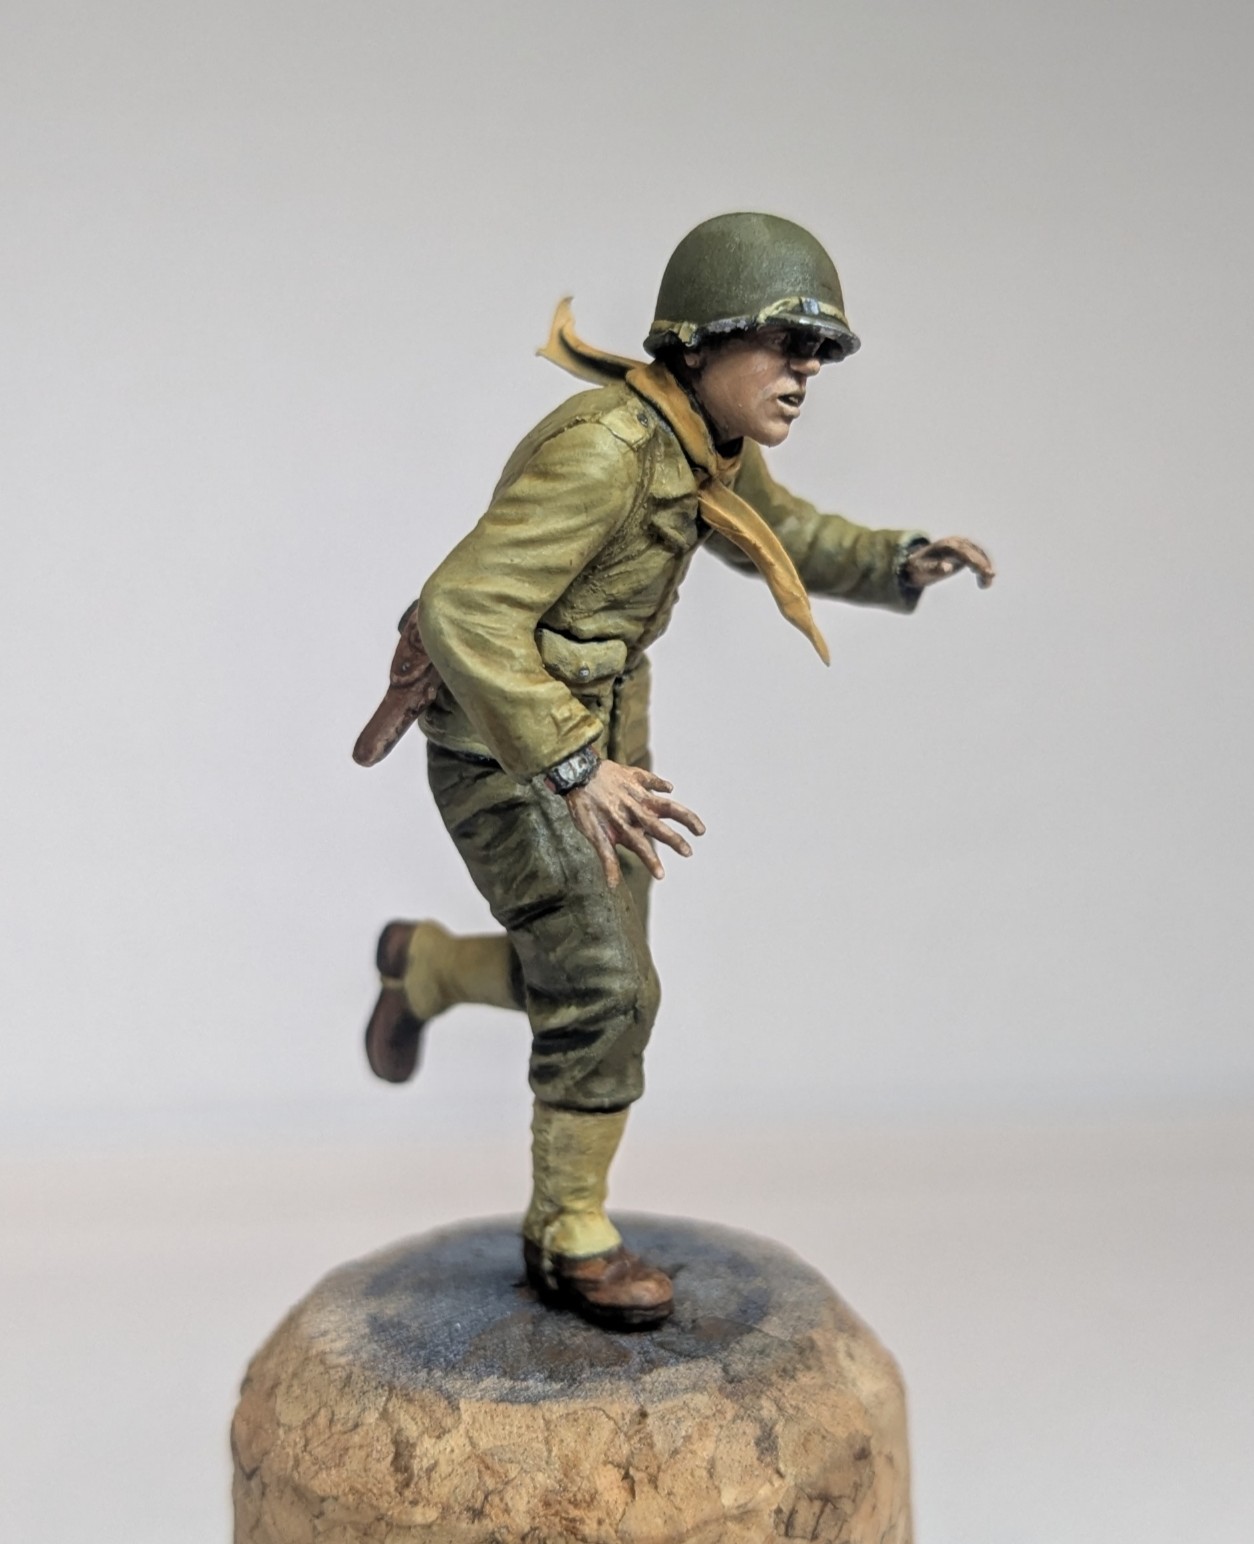
Finally, we have something rather different: the third figure from Master Box.
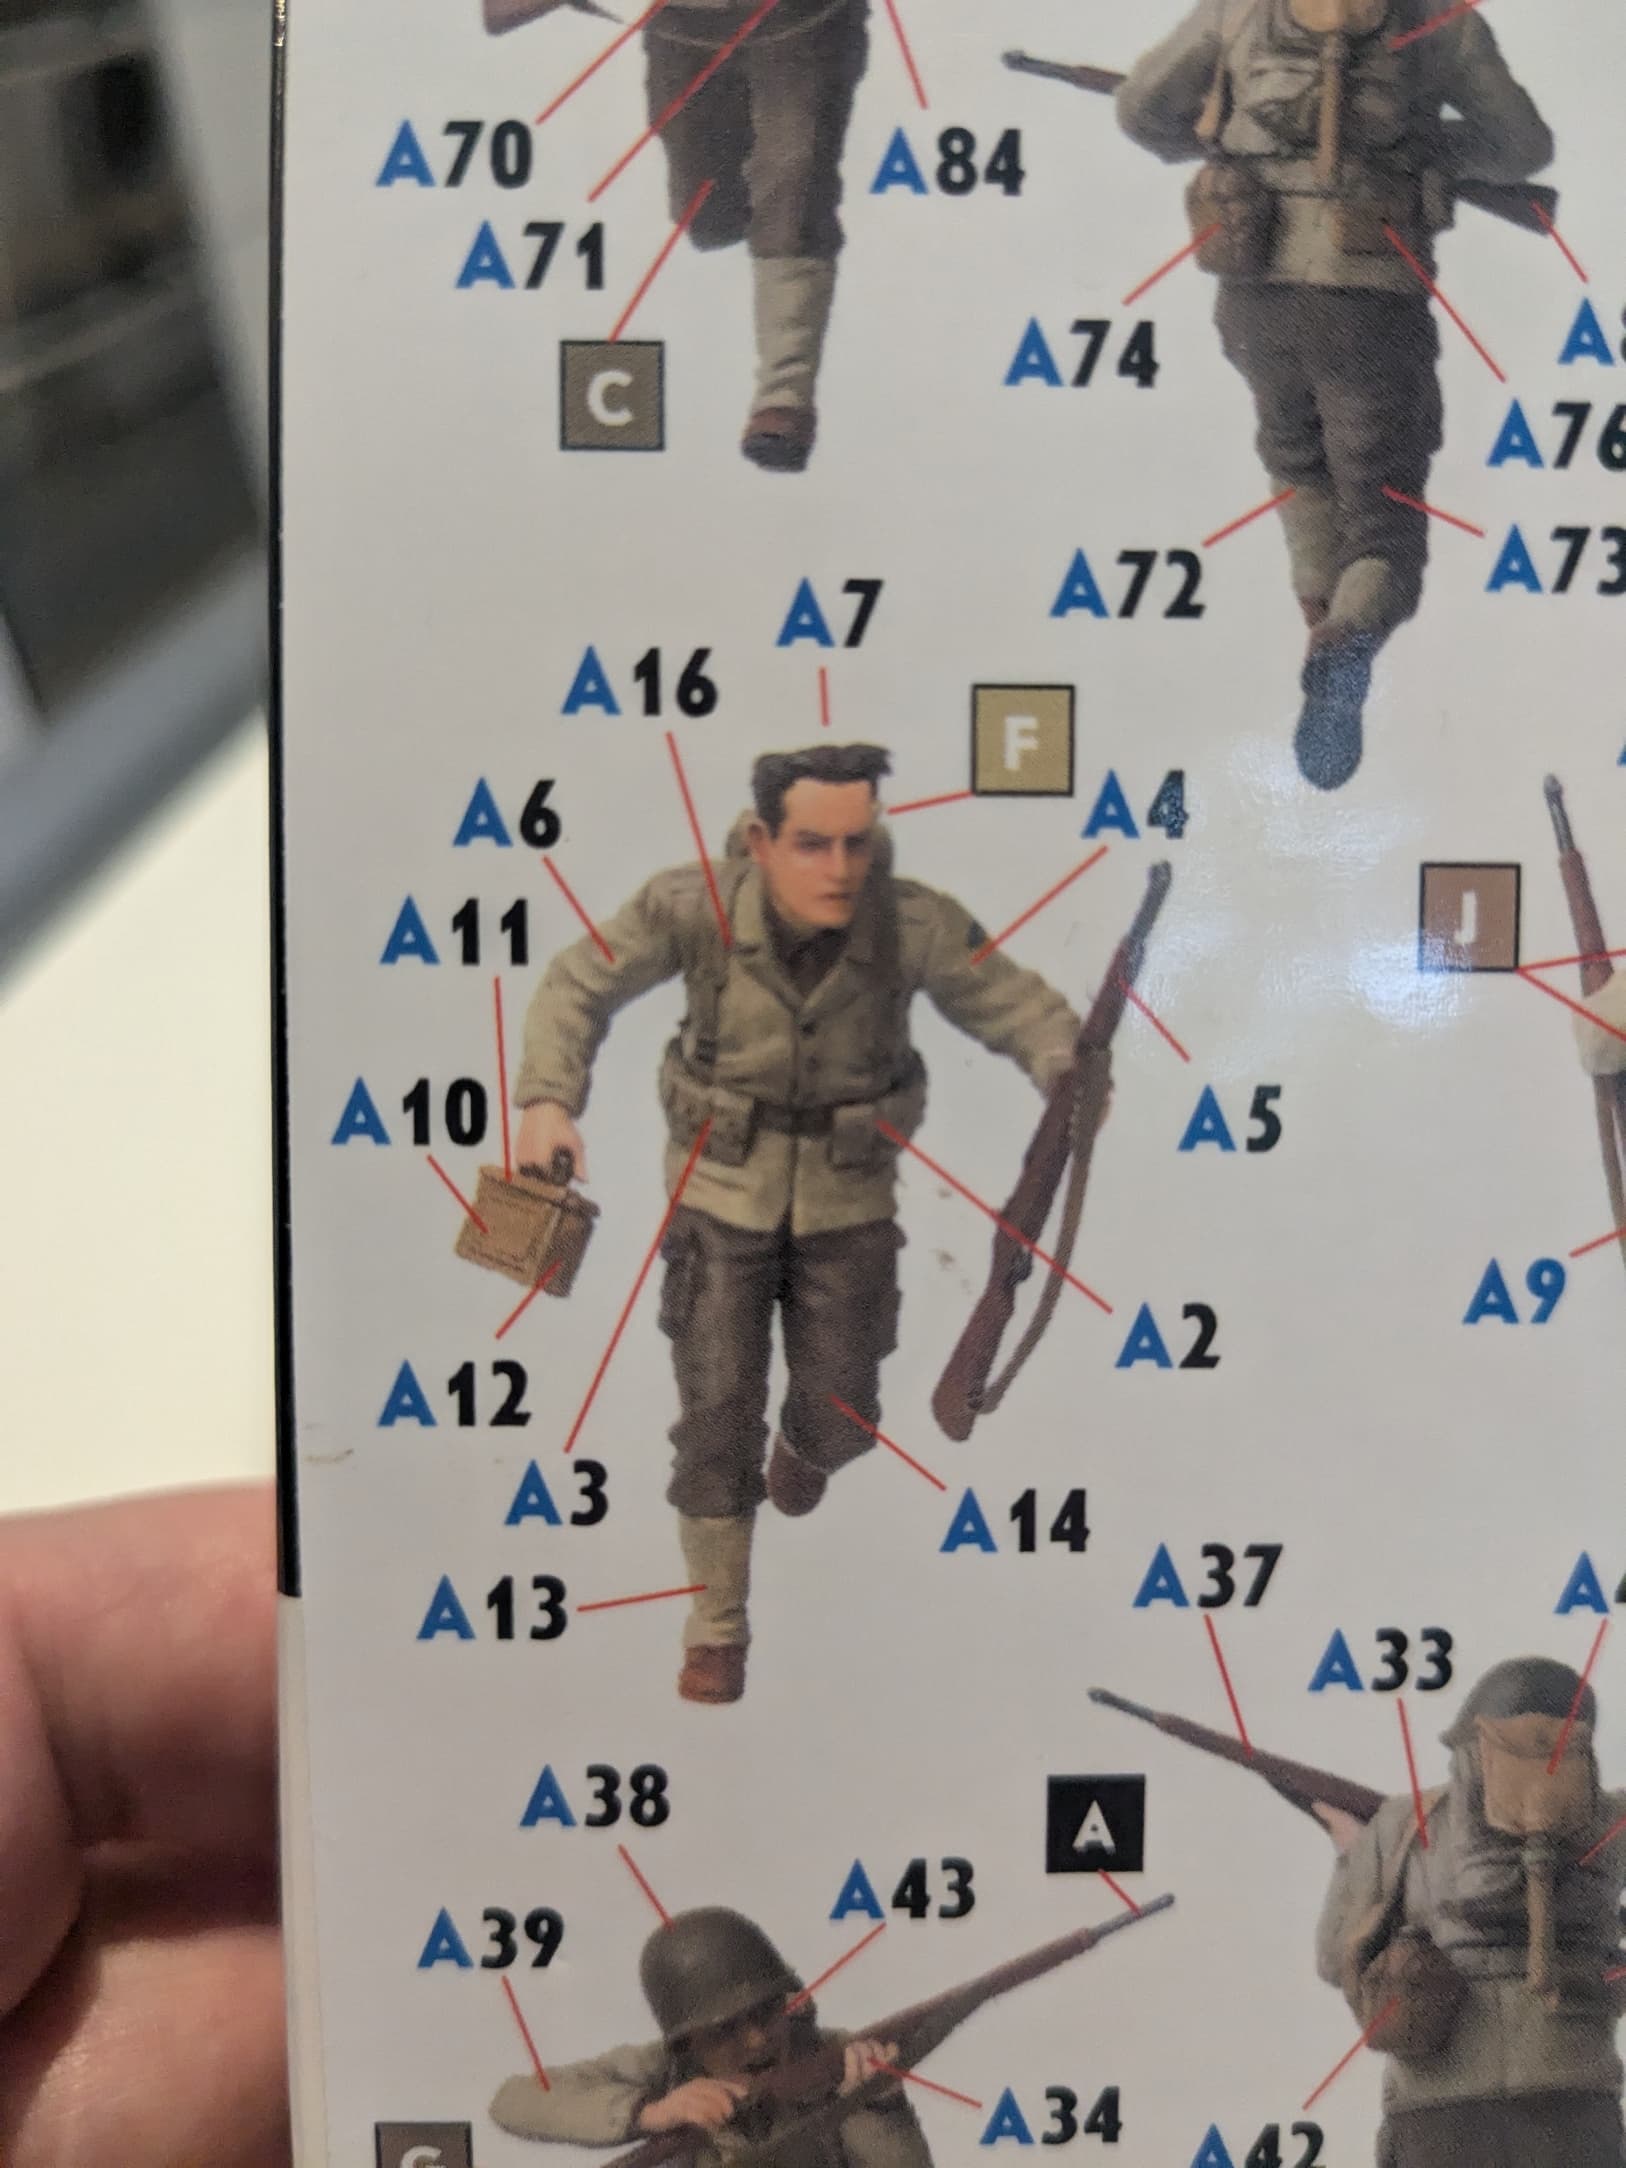
He is largely based on this guy. The artwork really lets this set down, because the poses are excellent and the moulding first class.
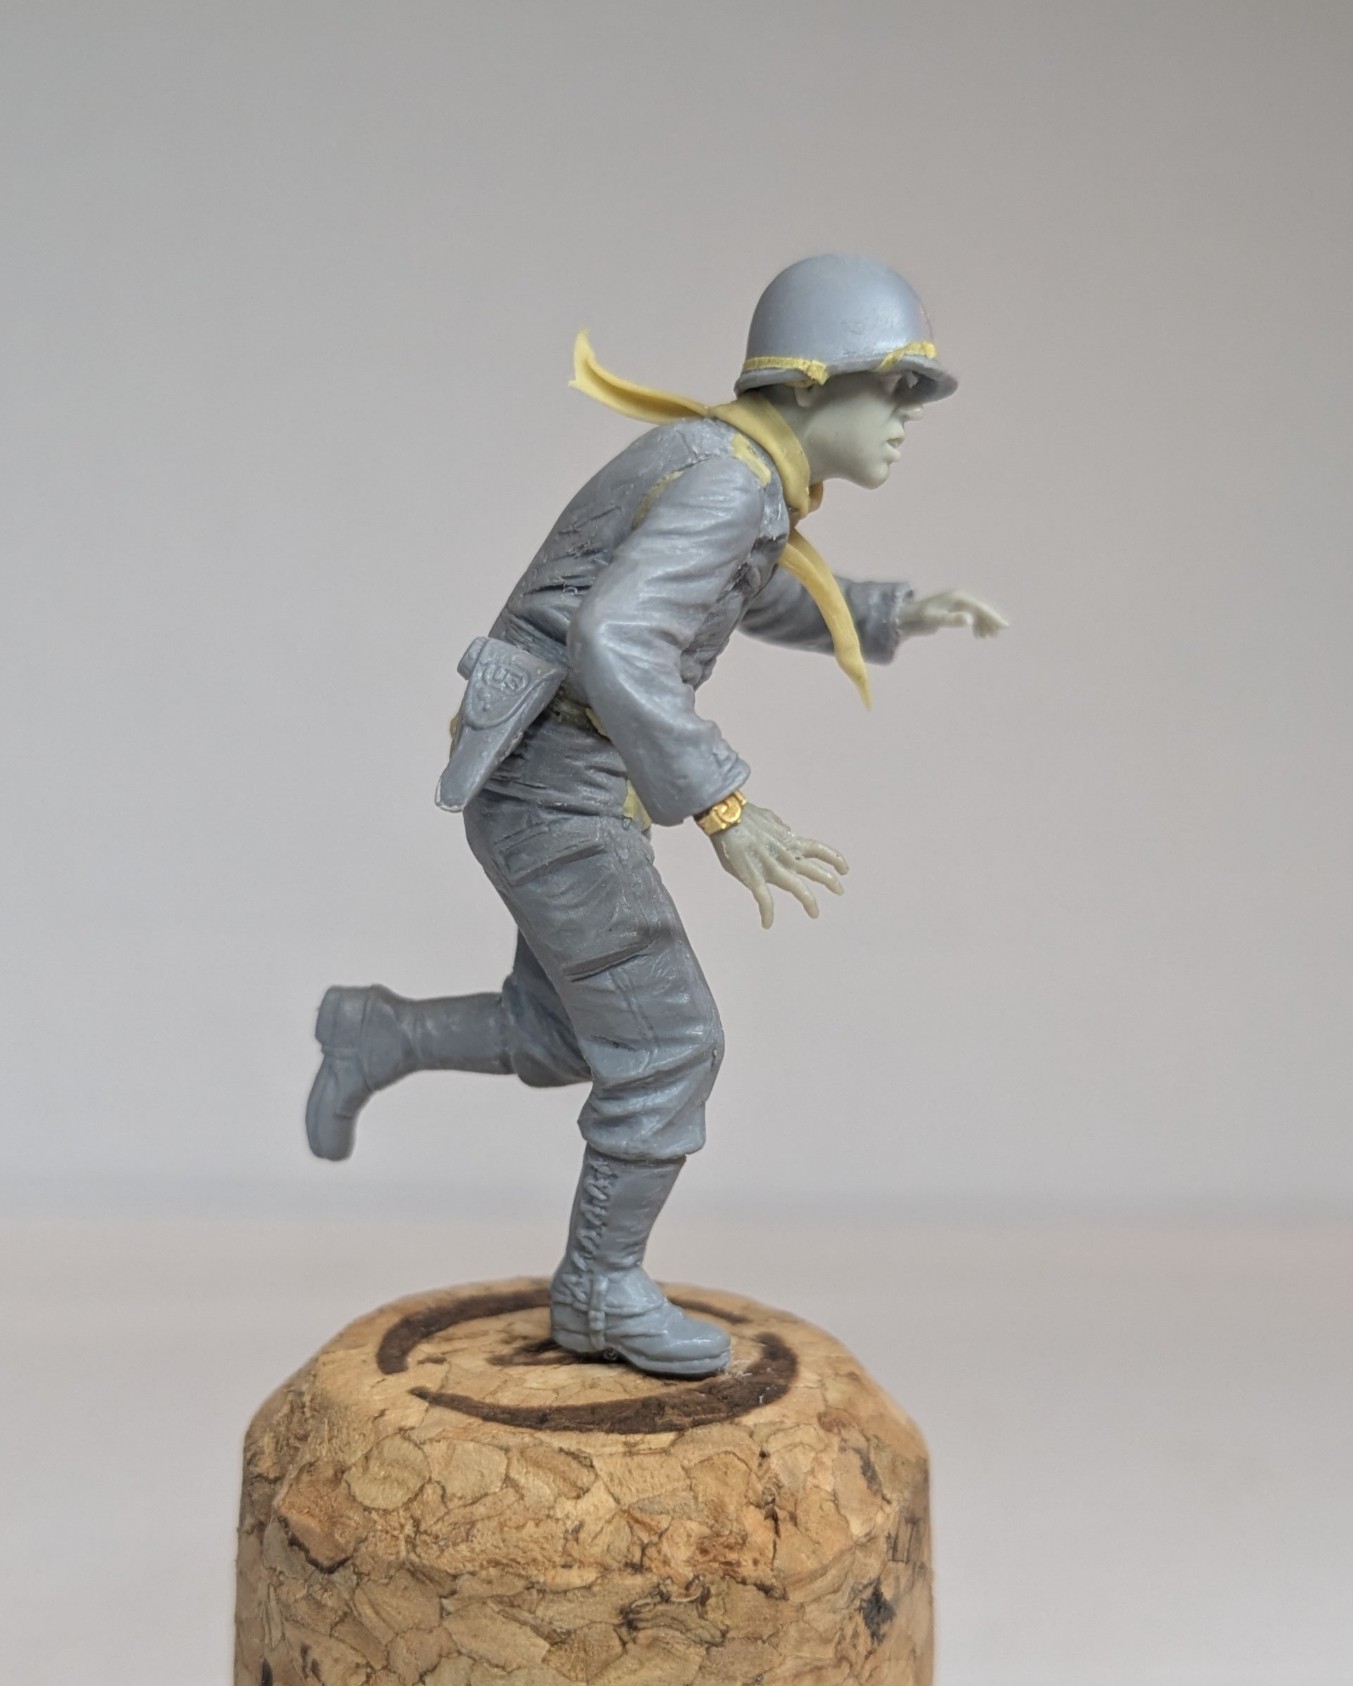

I swapped the arms to give him more of an all-out running look and tried to make his clothing and equipment look like they were flapping as he runs. The scarf (from Tamiya putty) is probably more artistic than accurate, but it just looks more dramatic! The head is another from Hornet and I tried to make the helmet (from Dragon) sit low over his face. The hands are from either Hornet or Royal Models.
At first I thought I would need to lose the calf-length gaiters to make him accurate for the Ardennes, but I have seem plenty of images where these were still being worn late in the war so I left them as they were. Besides, it would have taken a lot of work to replace them. As for the soles or the boots (or at least the one visible here) I believe I am right in saying that these would have been rubber rather than the hobnail boots favoured by the Germans. But please let me know if I should add some sort of texture.
I have to admit that I feel slightly bad for this guy who is running away. I certainly don’t want anyone to feel that I am portraying Americans as cowards, when we all know that the Ardennes saw some of their most heroic acts. But he provides another layer to the drama and, if I am honest, if I was in his shoes I know what I would have done…
22 Likes
Outstanding figure conversions you have there Tom! Can’t wait to see them painted up.
3 Likes
I finally got around to catching up on this epic build here and I hafta say I am gobsmacked ! No surprise since the last one you did was outstanding as well.
Every aspect of the build is so carefully considered and researched and then executed. Nice nice nice.
J
2 Likes
As someone who grew up with Tamiya figures of the 70s and 80s (after which I stopped active modelling) I find it almost alarming to see individually rendered fingers.
I can imagine an old school figure meeting a modern figure and exclaiming “What are those 5 tentacles at the ends of your arms?!. Fingers? Why don’t I have fingers? WHERE ARE MY FINGERS?!”
7 Likes
Great to see more of your figure work Tim! You have really elevated these figures with your modifications- making the poses more natural but also adding more animation to help tell the story. I particularly like the cautious look and pose of the guy with the grenade but I have to say my favourite is the flapping clothing and equipment on the running guy- both the scarf and the pistol holster lifting away from the body just makes the pose so dynamic looking.
4 Likes
I meant Tim ! Sorry buddy
2 Likes
Thanks guys!
Painting the Americans
I began, as with all my figures, with the usual basecoat of Mr Surfacer black followed by an overspray from above using Tamiya white.


This was a bit more spattered than I would have liked but it was still enough to provide highlights as a guide for painting and expose any flaws. This is usually where I find I have missed a seam line or two…
I then hit them with the paint brush.
Because I tend to paint figures at roughly two-year intervals I always need to remind myself how it works. My go-to refresher course is this book The Paint Guide for Figures of World War Two by Joaquin Garcia-Gazquez:
Sadly it’s long out of print, although it can prpbably be tracked down for a reasonable price.
I started with the flesh areas first, using Vallejo Brown Sand 876 as a base colour. Before I went on to add anything else (even the eyes) I used a wash of Citadel Reikland Fleshshade (see more below). The beauty of this wash is that it settles into the recesses on the face and helps to pick out the details, particularly the eyes, nose and lips. If the sculpting is good, it’s a great short cut, but even if the definition is poor it still makes it a lot easier to build up the highlights and shadows from various shades.
As I said above, I have not painted US uniforms for many years and know little about them. I thought that these two paint sets from Life Color would give me a good start:
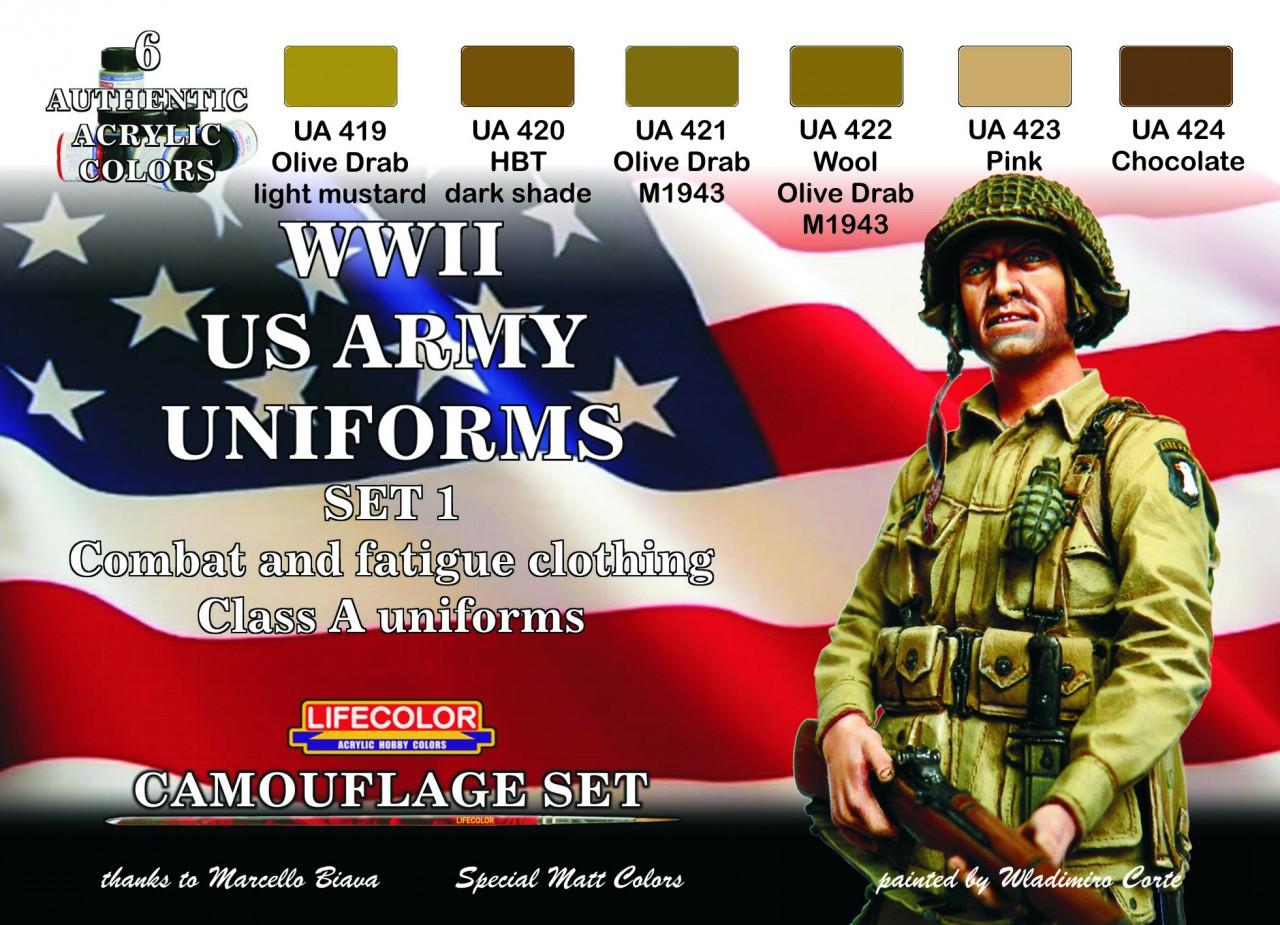
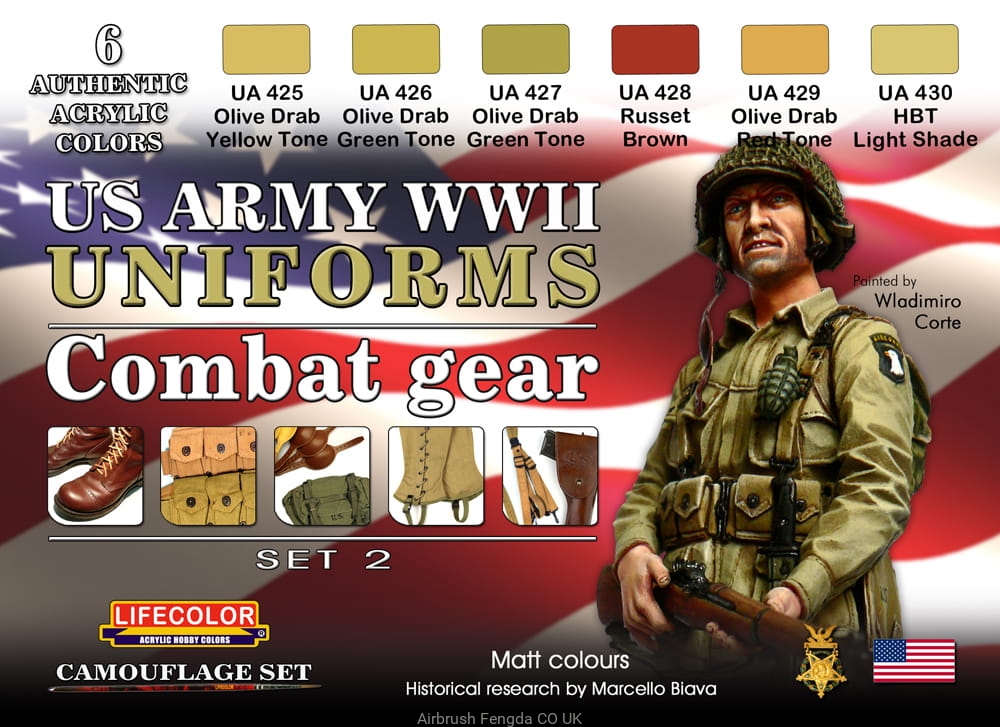
However, despite the many shades on offer, it turned out that they were not as comprehensive as I had expected.
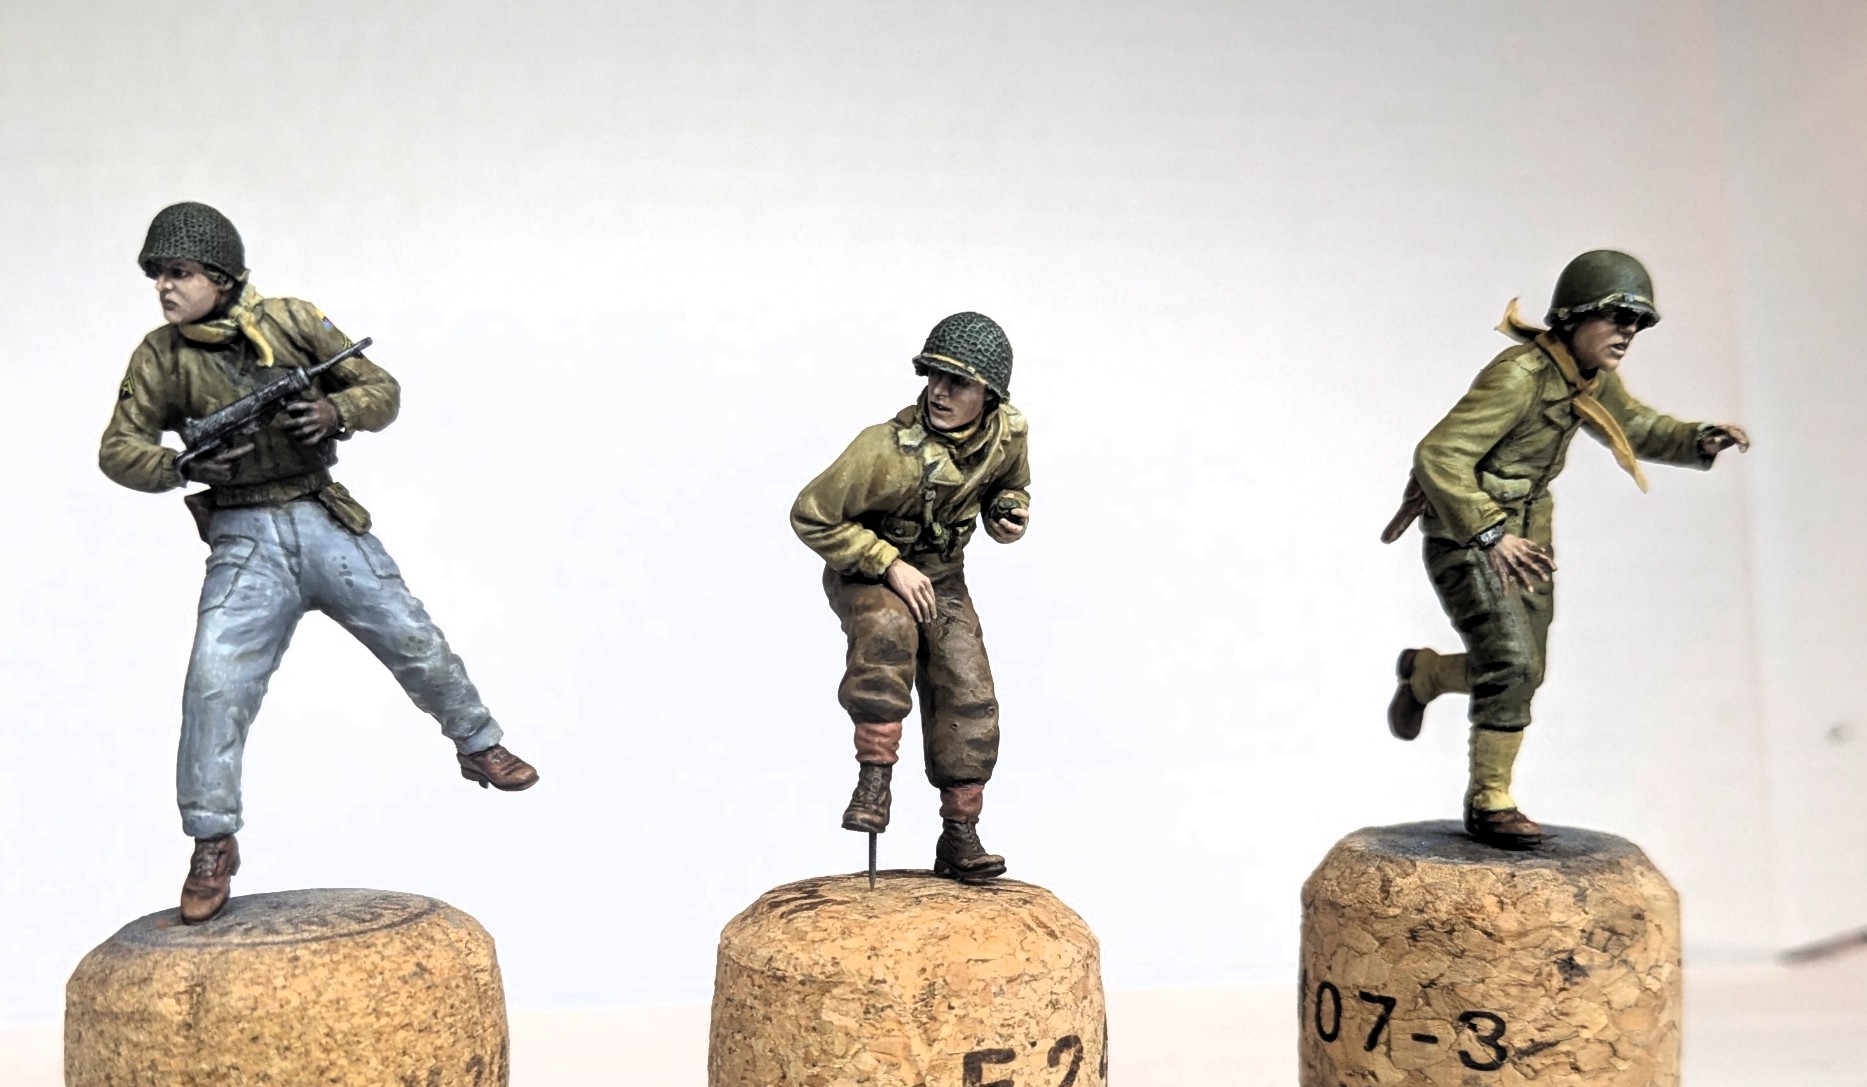
The first challenge was finding a shade to match the tanker’s trousers (actually the lower half of his overalls). Judging from the photos in my uniforms book these were a shade of grey, not green or brown, and even had a bluish tinge in certain light. The Mini Art box art calls out the colour as Vallejo Neutral Grey 70.992 and this certainly looks the part.
The rest of the figure’s unform was finished with various shades of olive drab (russet brown for the boots and holster) from the Life Color sets.
He may need a little more work - I’m not totally happy with the finish on the grease gun for instance - but I’m glad with the way he turned out. I think he has a touch of the young Marlon Brando!
The insignia come from a set by Alliance Model Works (LW35065 1/35 WWII US ARMY Insignia Decal set).
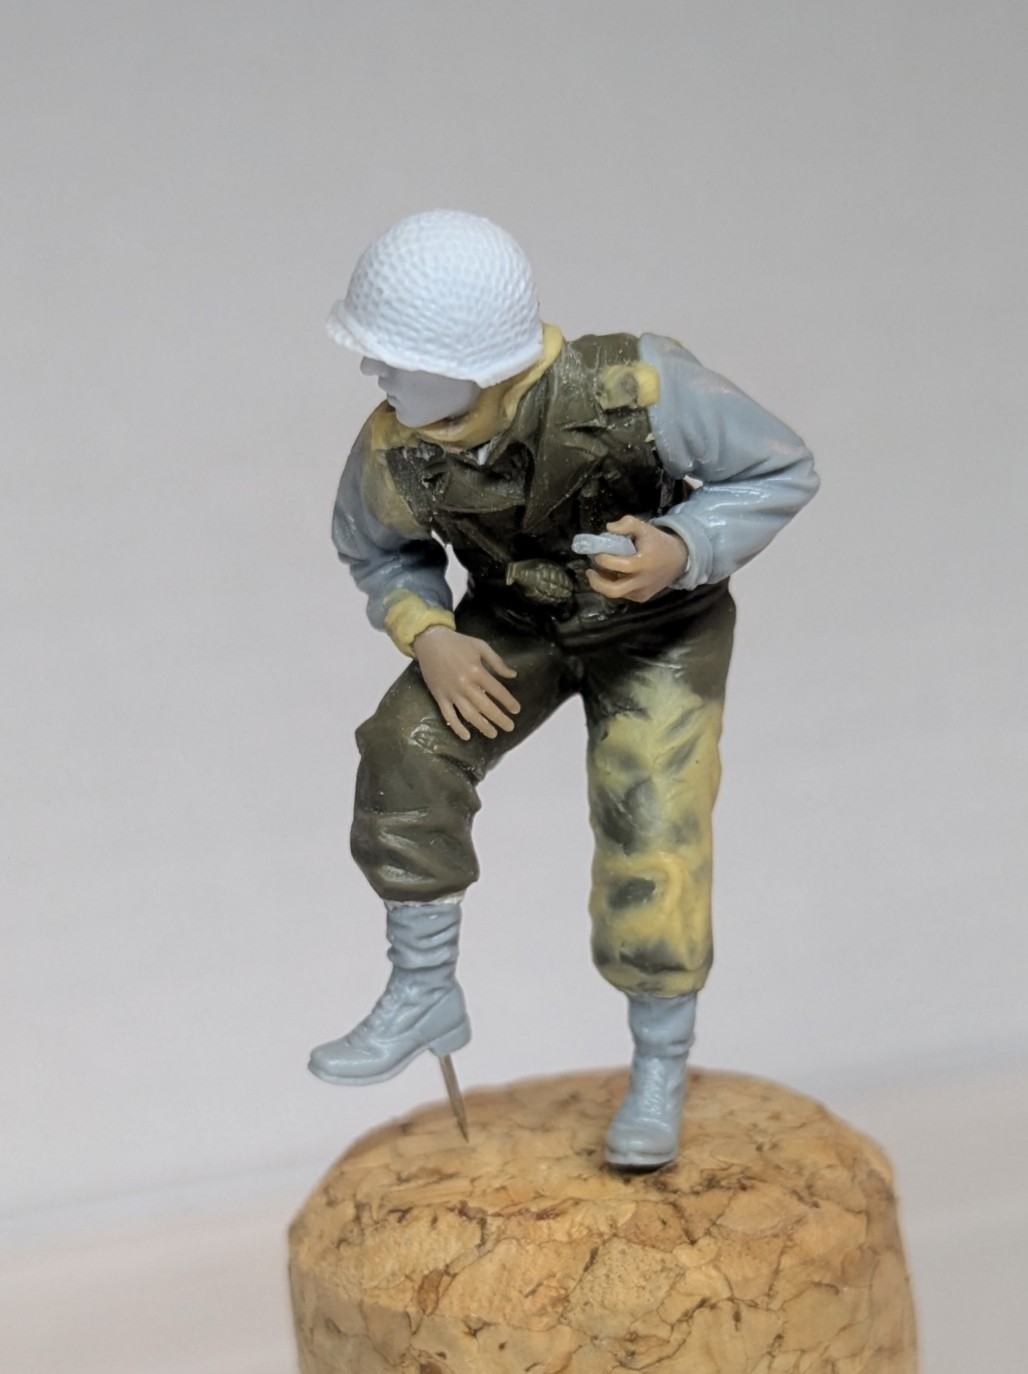
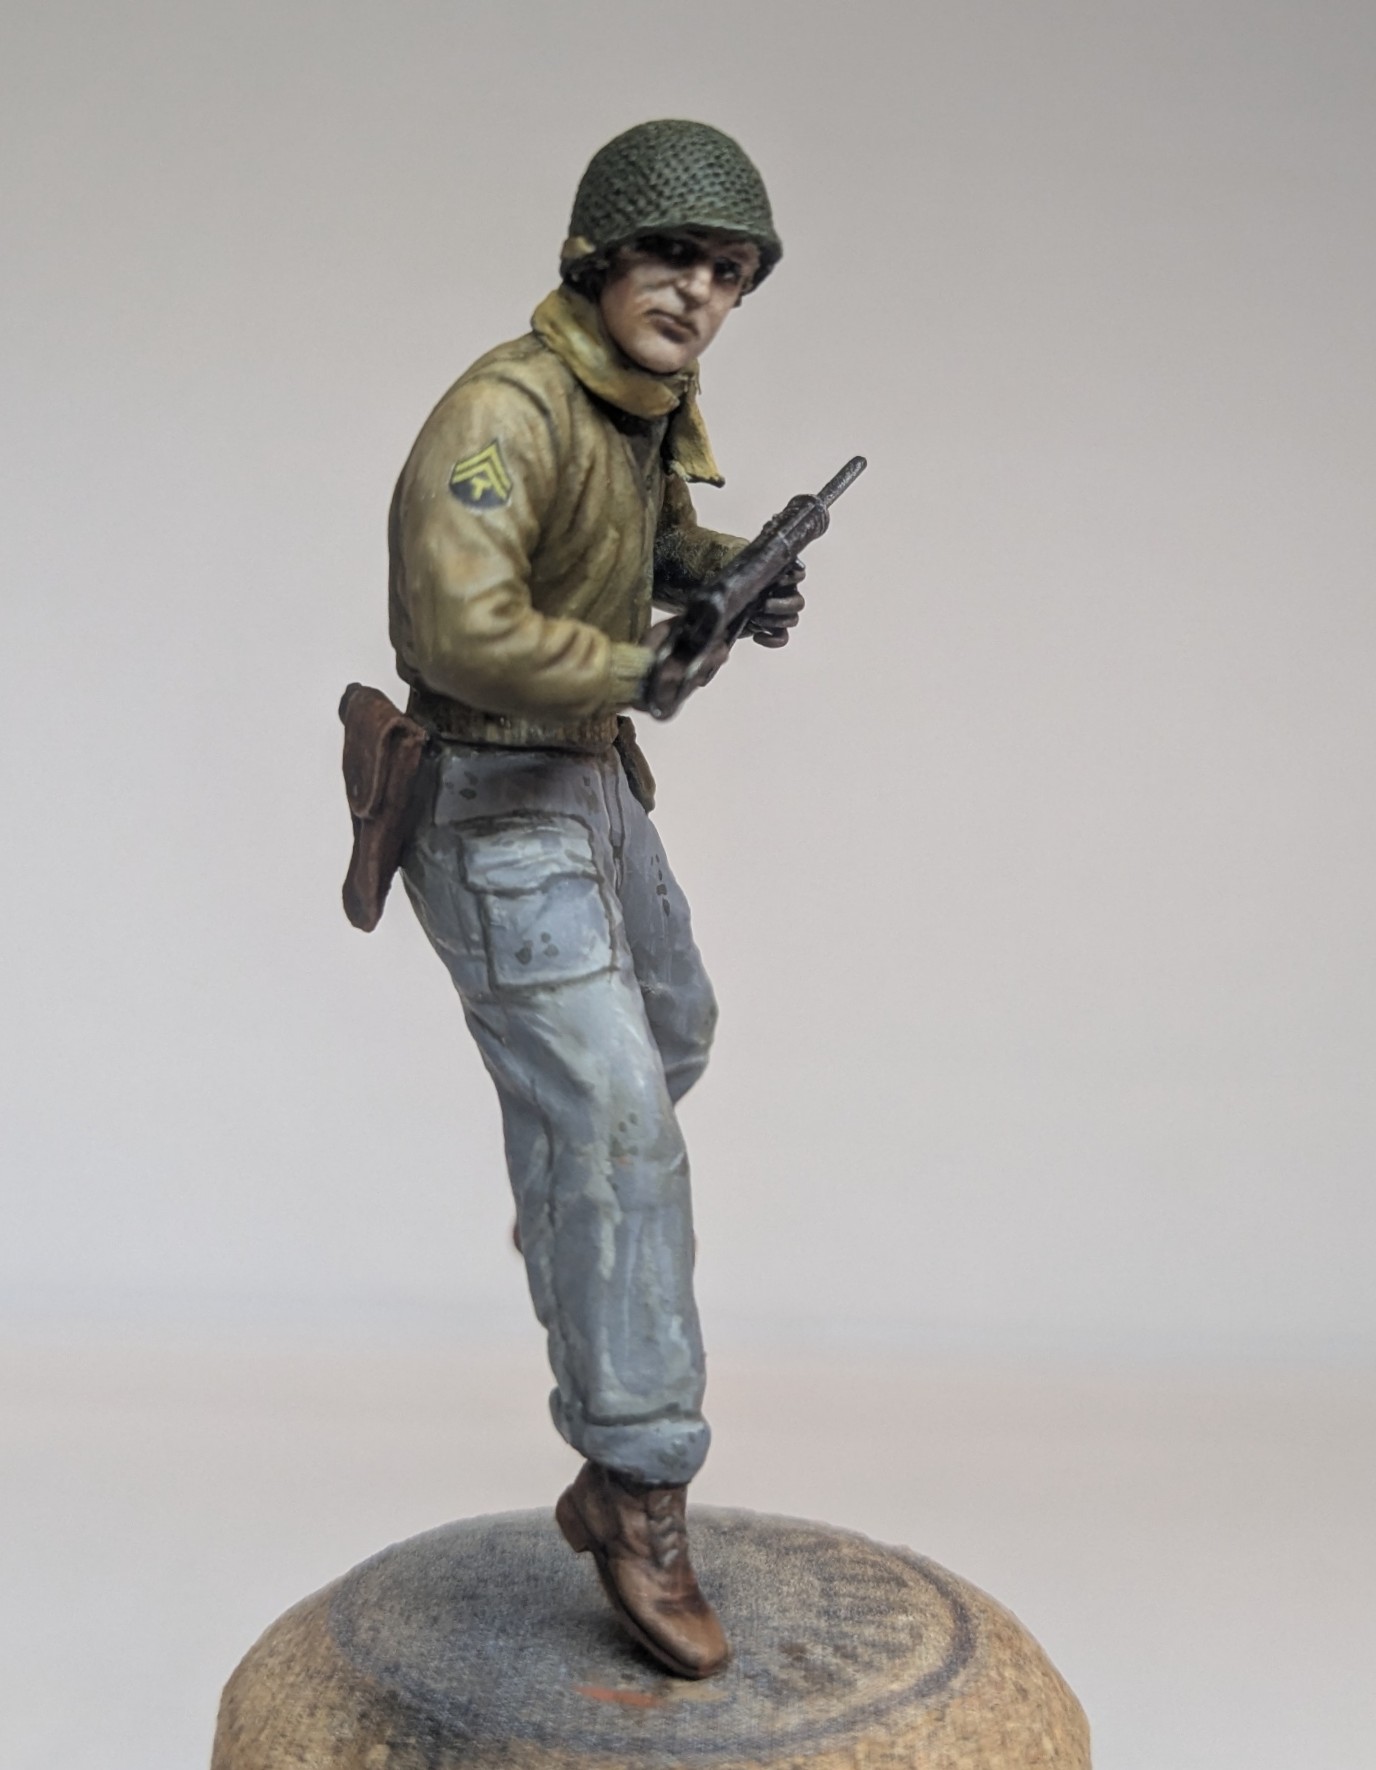
Next the grenade guy…

Here I also had a problem with the trousers. I wanted that distinctive shade of brown to contrast with the greeny yellow jacket, but yet again the Life Color set didn’t have what I was after. So I went with the Vallejo equivalent of the colour called out on the Tamiya rear box art (Tamiya XF 52 flat earth).
The gaiters confused me because they look like German or British ankle gaiters - which I don’t believe GIs ever wore. Then I realised that they were supposed to be the built-in leather tops of the later war combat boots. For some reason these often had a shade of red brown which contrasted with the darker leather of the boots, so I went for that.
Again, I’m happy with how this guy turned out. It shows what you can achieve even with an old Tamiya figure. The Alpine head certainly helps - I love the faint suggestion of a tooth in his mouth. Also note the yellow band around the grenade (something I had never noticed before).
And finally we have the running away guy…

This figure’s uniform was painted almost entirely with the Life Color paints, which certainly provide you with a good range of olive drab shades.
I haven’t given him any rank insignia yet because I can’t decide what would be appropriate. I suppose he can’t be a lowly private with a pistol and no webbing, but should I really have an officer running away whilst his men hold the line? Any suggestions would be most welcome!
The final step on all my figures is to add controlled washes from the Citadel range. Here are the ones that I use:
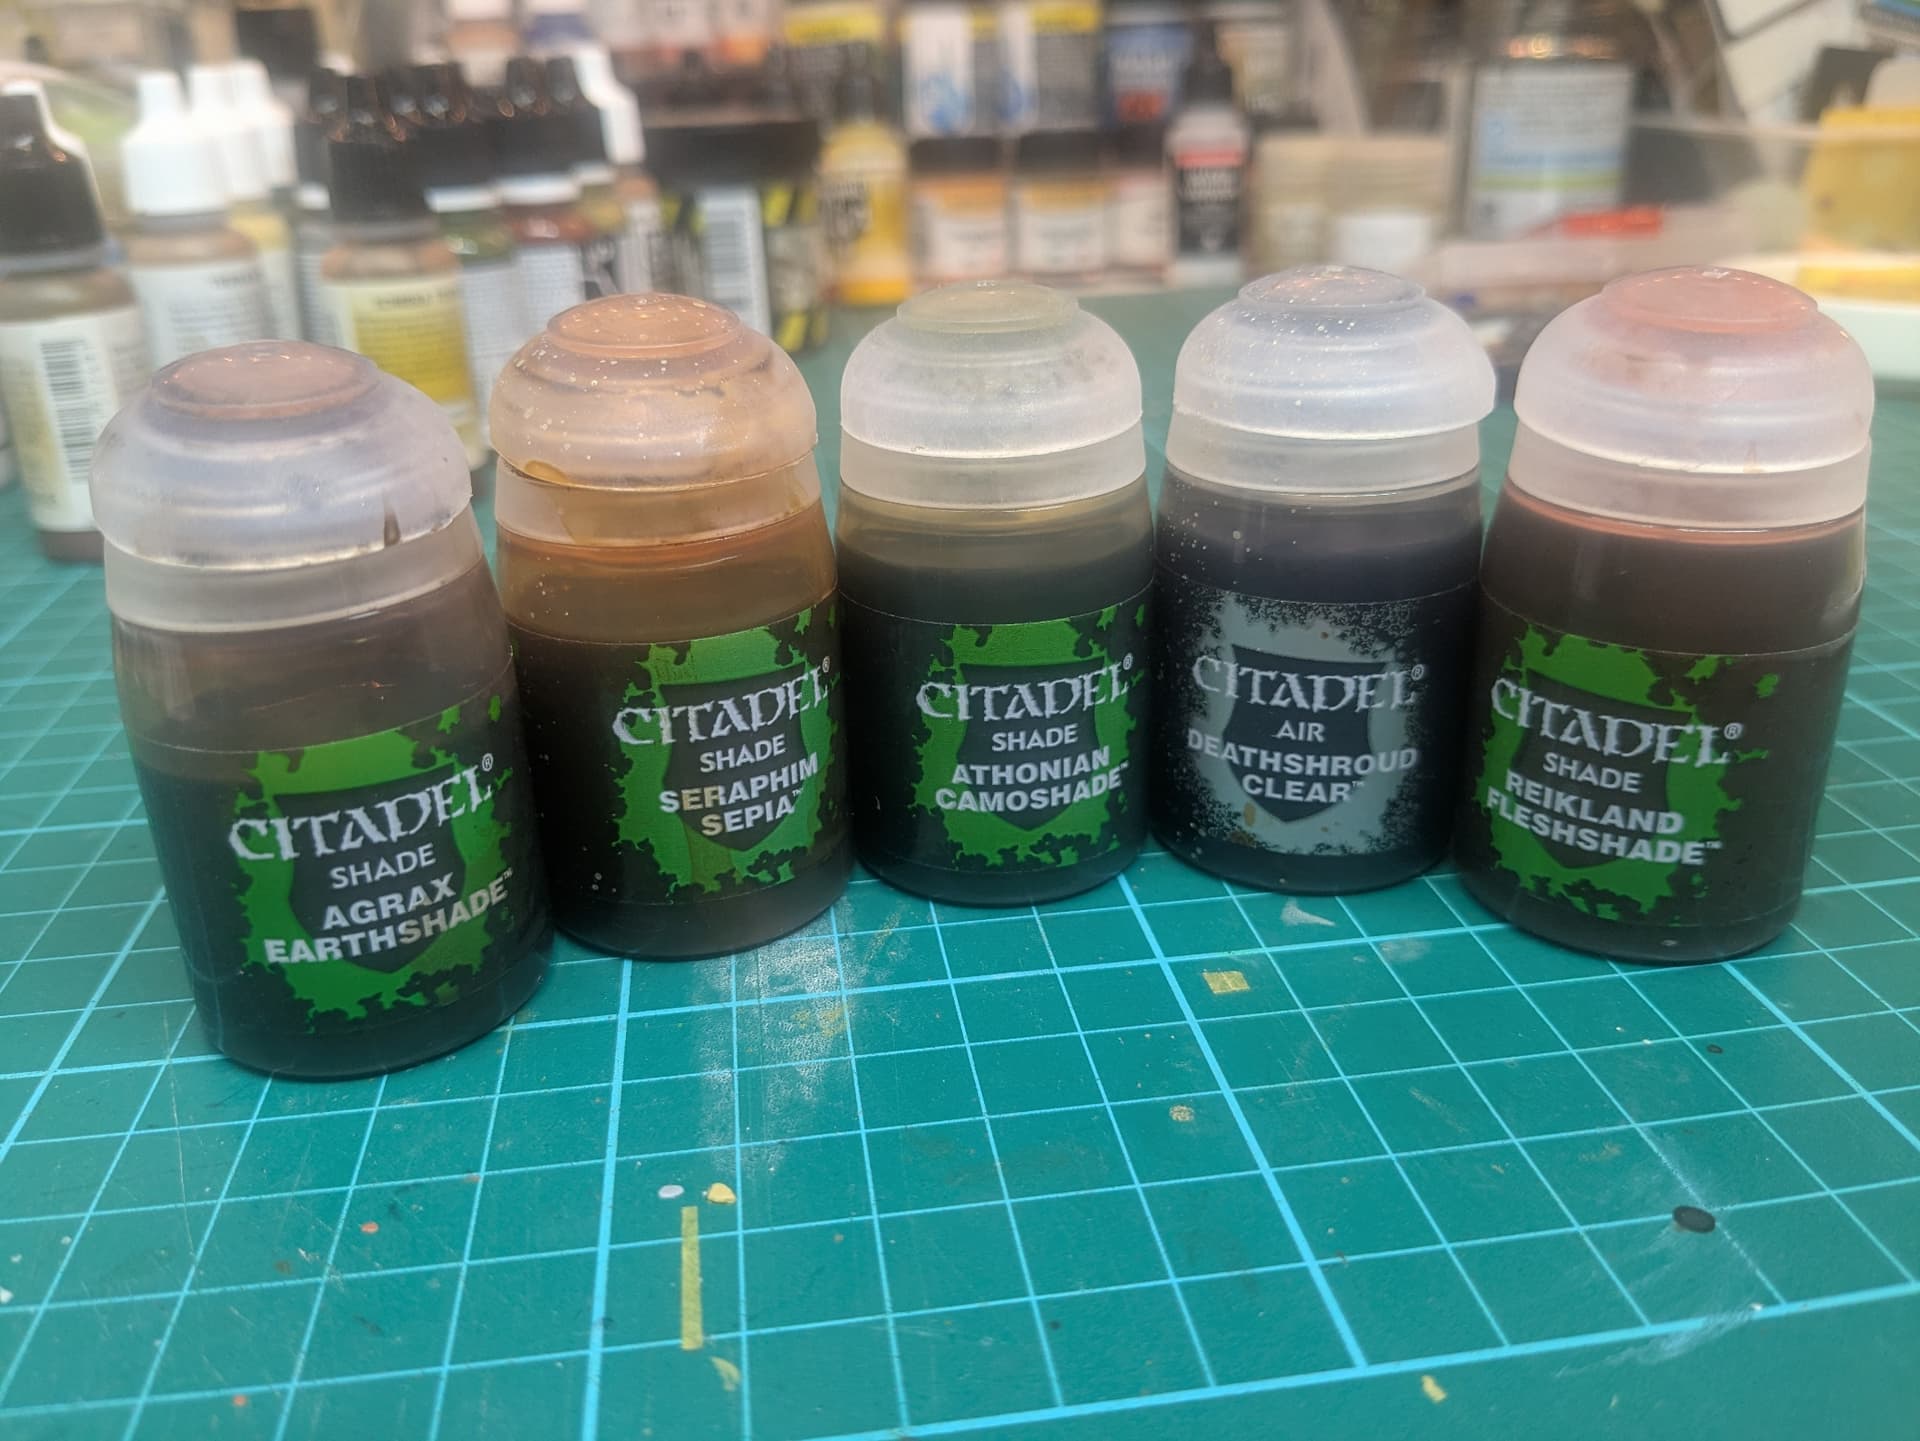
Despite their odd names, I have been using these little bottles of paint for years and I cannot praise them enough. One tip, however: I have learnt that less is more. If you apply them in a careful manner and take care to work them into recesses and away from highlights, then they provide a pleasing glaze to any surface and help to soften any harsh brushwork…
15 Likes
Nice progress here buddy. I also have both those sets of Lifecolor and have found them to be very useful for GIs and British figures as well. I wouldn’t worry too much about there being any “exact color” of American uniforms because there was really no perfect exact color. Just like the German stuff.
J
5 Likes
Jerry, you’re absolutely right about the different shades of uniforms. However, I just wanted those two colours and I was surprised that Life Color didn’t include them…
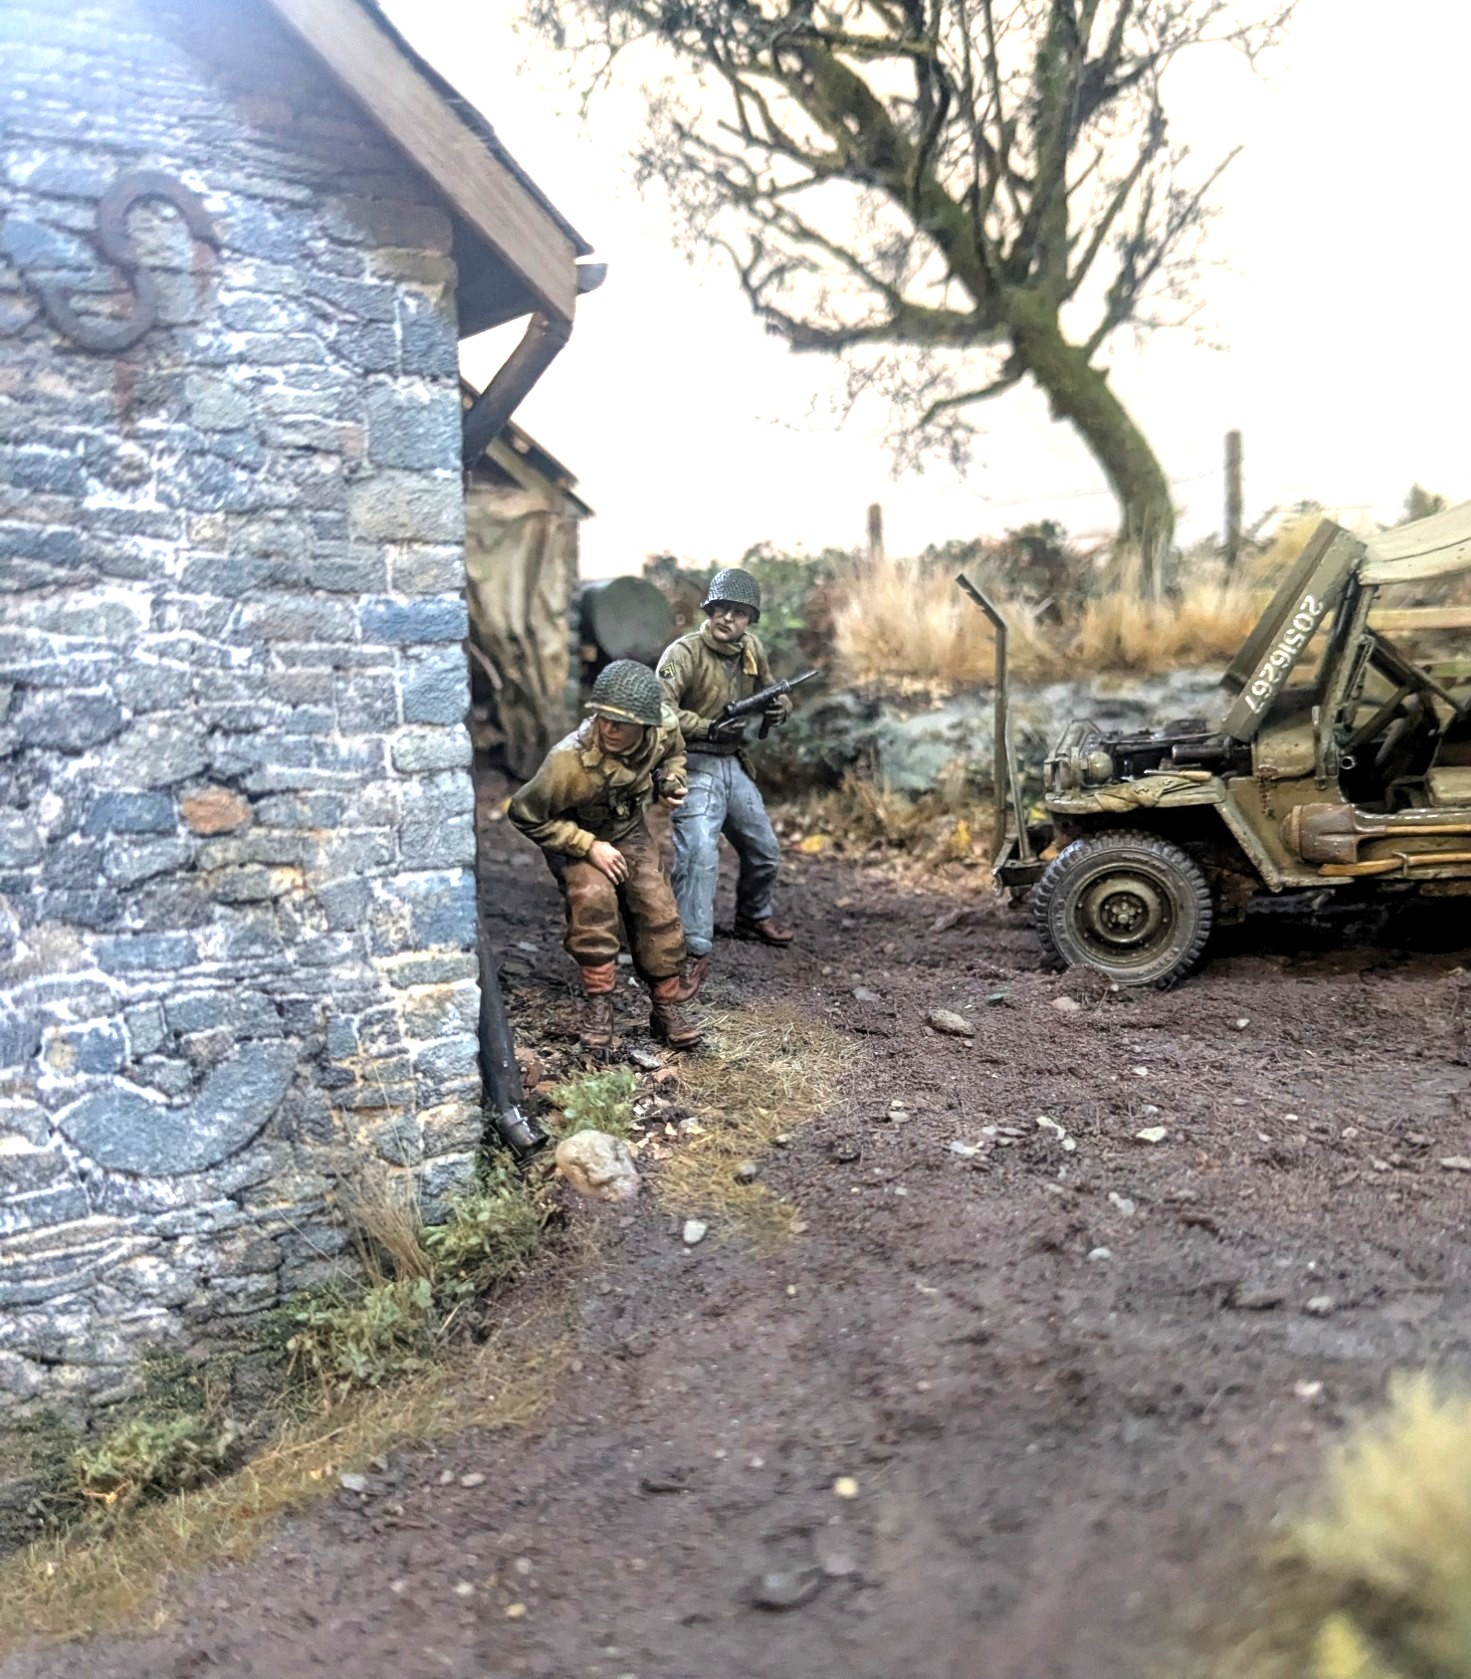
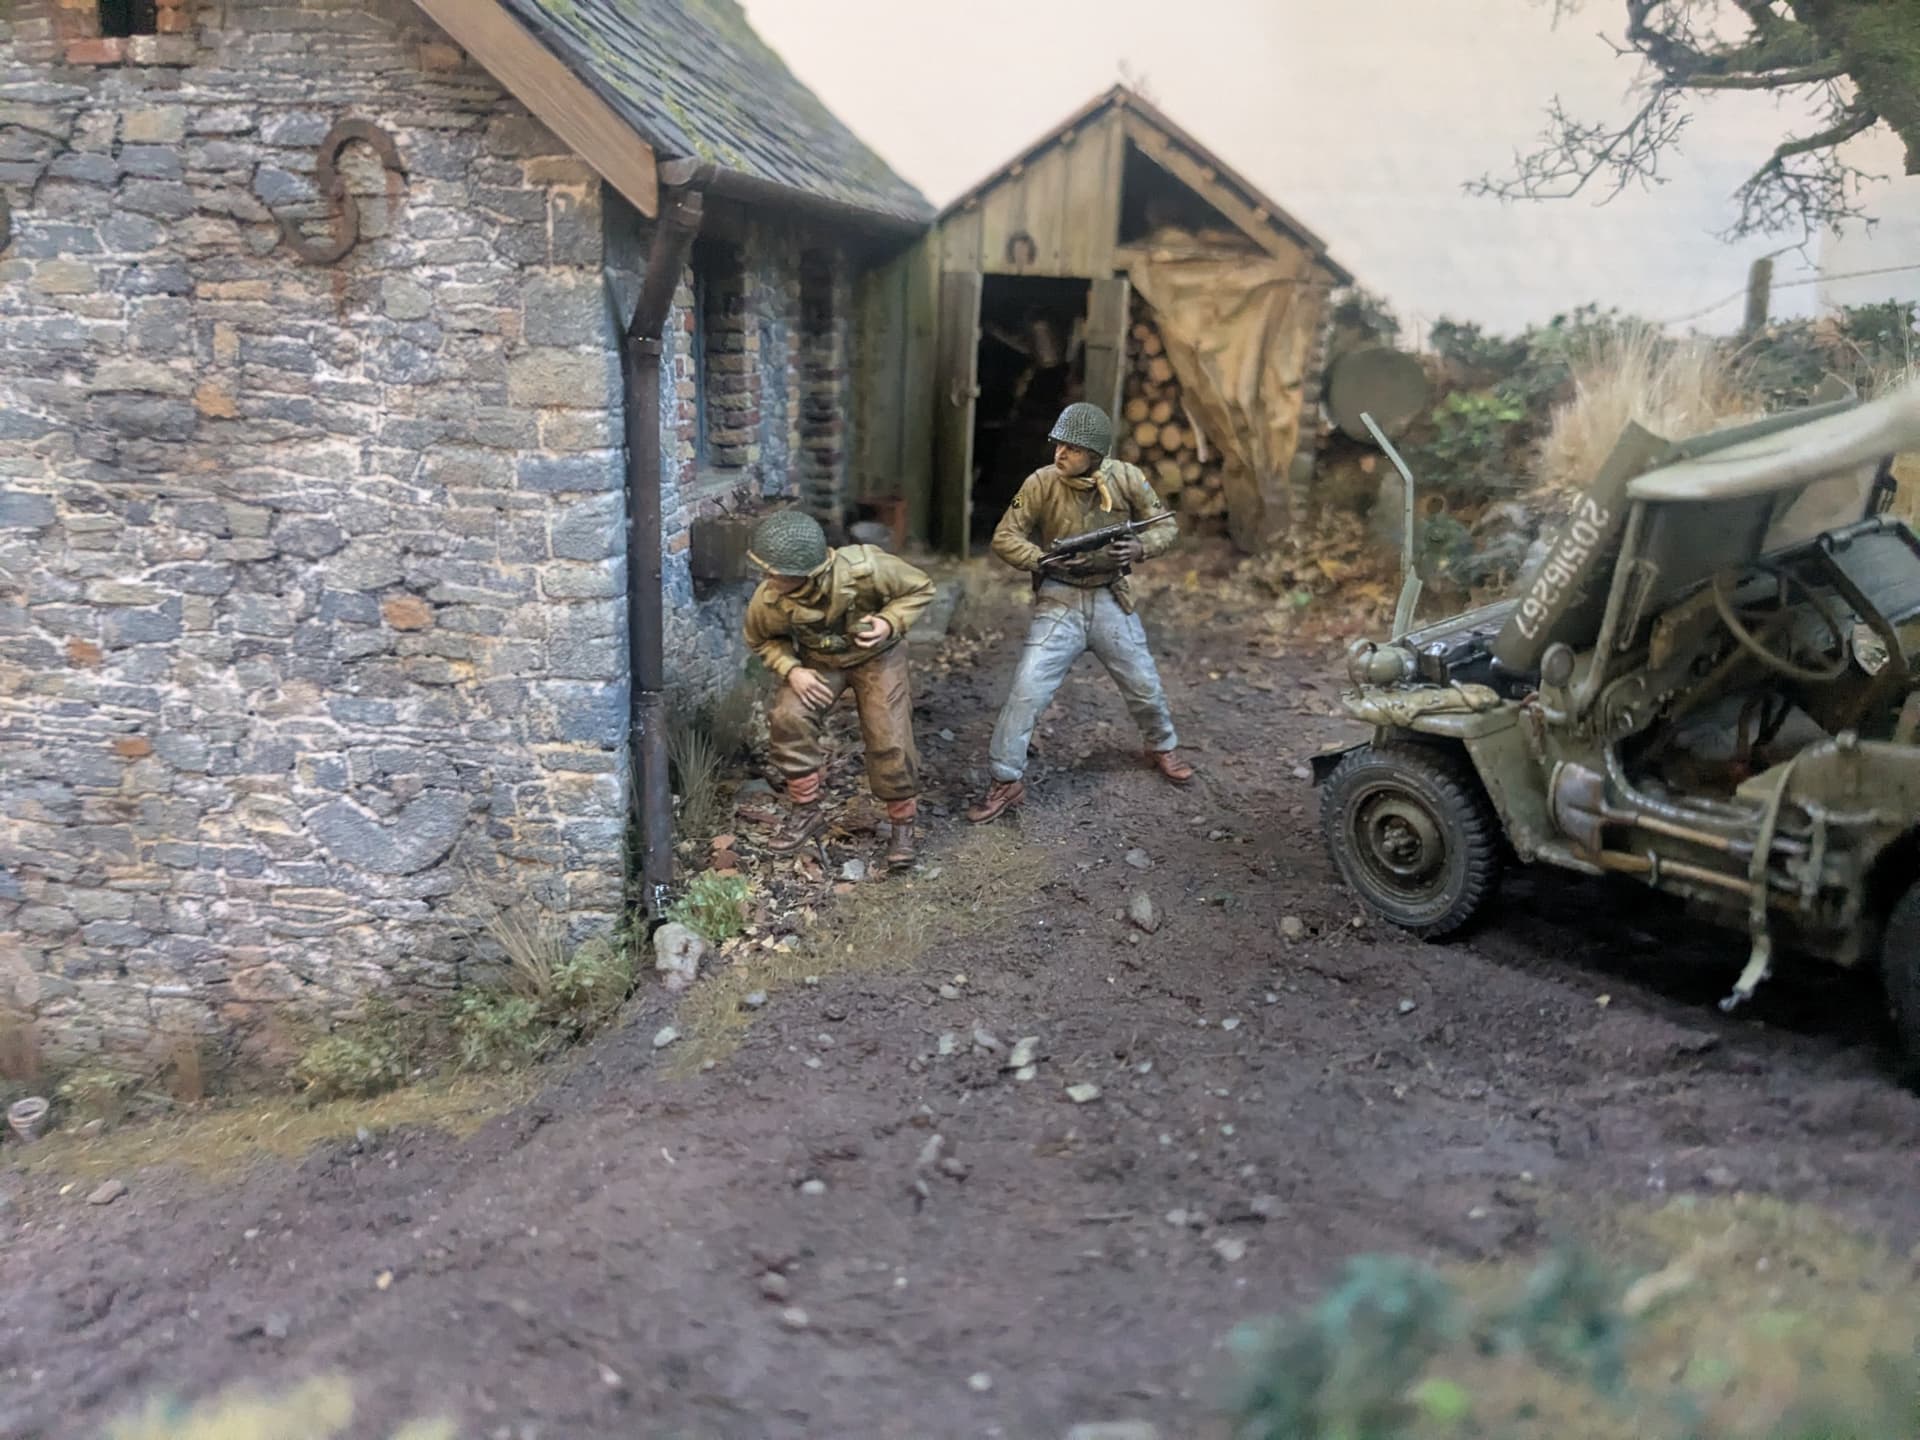
Anyway, we’re getting there. Here’s two of the figures temporarily in place. It’s always a great moment when the diorama starts to gain a human dimension!
25 Likes