Petbatasaurus 
It goes together okay John. Typical Horror Boss kit - missing details, incorrect details, etc. I did not worry too much this time.
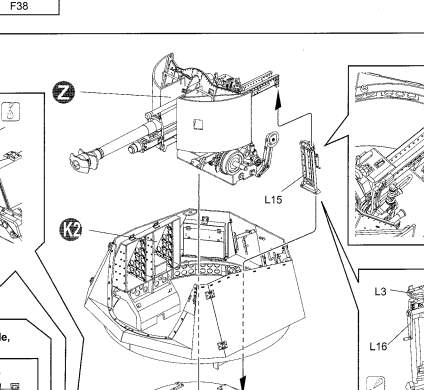
The seat profile is off, some of the under dash area is simplified or a tad fantasy, the FN ammo liner is designed to simply hang off the ammo feed of the gun - no attachment to the gun mount, etc.
I previously mentioned that the rear bin was squashed in mine. I didn’t mention that the chassis frame was also bent. I straightened it as best as I could but the front wheel is still slightly elevated.
I could not find any photos showing the SA80 mounted the way HB said - I find it hard to believe that it would be horizontal on that bar between the seats without any support at the barrel end! Hence the way I fitted them (needed a scratch built plate for the butt to sit on.
There is a PSP sand plate to fit to the side, but HB do not supply the support rails for that. They supply an etch strap, but nothing to hold it! It also needs a ratchet on the strap. I am scratch building the supports and ratchets at the moment.
No mesh for the front basket and no stowage other than the ammo liners that go in the basket at the rear. On that note, once they are painted and loaded you can’t see anything other than a dark shape. I am going to make a simple styrene box to put in the basket (with a tarp or cam net ontop to hide the slightly twisted shape of the basket when viewed directly overhead) and will place the liners in side the rear. I am contemplating scratch building some Bergan’s too. Accurate Armour does a set, but a tad pricey for this build.
2 Likes
Have just bookmarked your post that shows what you did on the assembly and the seat extra detailing etc  all very helpful mate
3 Likes
That land rover looks really sharp. I should build some desert stuff.
…
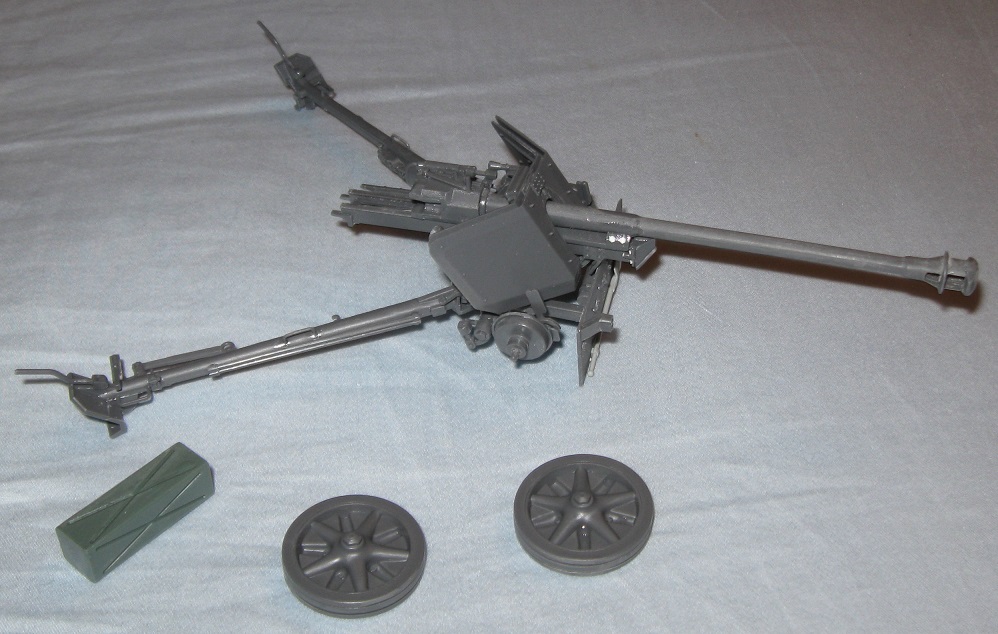
Another package arrived this morning.
I am almost certain I built one of these as a kid. It will be fun to put it side by side with the Dragon PaK 40 already in the display case.
2 Likes
Progress!
This model still holds up quite well and makes for a good nostalgia build. I would not recommend it to a brand new modeler because attaching the gun to the shield is super fiddly. Other than that, despite being surprisingly complicated, everything fits quite well. Sanding out the gun barrel also required significant effort, made more troublesome by my impatience.
I made one rookie move–gluing the gun to the cradle before painting. The rack and pinion gear used to raise and lower the gun interferes with installation so I decided to glue everything in place. Shearing off the mounting pin would have solved the problem and made painting much easier. Oh well.
Many details look soft when compared to more modern kits. From a distance, the gun shield mimics the real thing fairly well but the illusion breaks down on close inspection. I replaced a few bolts, added a better shovel, and used card stock to fabricate some minor fittings.
Since this model will serve as a guinea pig for Badger Sytlenze primer and painting techniques, my willingness to expend more time on construction has reached an end. Hopefully, the primer can get into all the nooks and crannies without pooling in other places. That test must wait until tomorrow.
4 Likes
Looks great Doug. A lot less parts than the Dragon one. Re the fitting of the shield, it is nothing compared to the one on the Dragon LeFh18/40/2 - absolutely no guides for that and all the fiddly bits you need to add are just a nightmare:
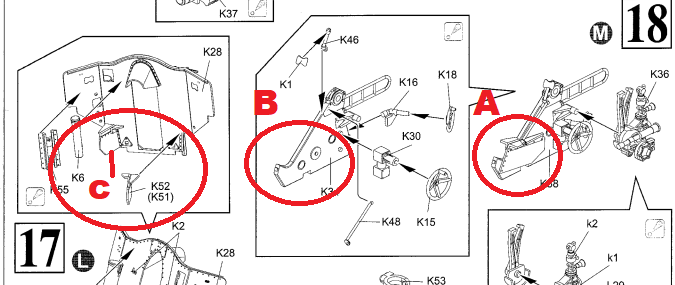
This circled bit A, is not on the part as indicated - see B which shows what is actually on the part. That bit is actually on the gun shied see C. There is nothing to guide the shield placement and it just swivels up and down, which is problematic as it has to be precise so the rounded side armour sits properly behind the vehicle shields and also at the right height to the hull top…
This definitely not a kit for a newcomer…
1 Like
It looks okay for a 50 year old model built up by an impatient person. 
I built the Dragon one…dunno…maybe 13 years ago and remember almost nothing about it.
Those pictures stirred ancient memories and I may have that model in the closet. My model reserve definitely includes a Dragon 10.5cm le.F.H. 18/6(Sf.) auf Geschüetzwagen III/IV , a Dragon Sd.Kfz.164 Nashorn, and a Tamiya Wespe so I will feel some of that hurt, some day, if I live long enough. 
Since you seem to know a lot about German artillery pieces and ammunition carriers, I have a question. The Pak 40 seems to carry a pair of gun cleaning rods on the right carriage fork and a ranging stake on the left carriage fork. I have seen some models with the gun cleaning rods painted in a wood color and the ranging stake painted red and white. However, I have not found a single period picture with a striped ranging stake nor any modern museum example with wood cleaning rods. Further, it was my understanding that ranging stakes were for indirect fire artillery pieces, not direct fire guns like the Pak 40. I know a gun like the Pak 40 can engage in indirect fire, but it was my understanding that such guns do not, as a rule, come with ranging stake(s) as standard equipment. Do you know anything about those rods and their function?
I would love to paint some stripy color on this thing but I’m not gonna do it for giggles.
If I may, I have another question. I noticed on your model that you painted up many of the parts separately, then put them all together. Everything looks very clean. There are some excellent modelers who frequent these forums. When you put all the parts together, do you scrape away paint to get a styrene to styrene connection, connect the parts with super glue, or perhaps use some other adhesive for that purpose?
1 Like
Not sure about the cleaning rods - I’d expect them to be bare wood, but they could be metal tubes? And I can’t think why an AT gun would even have a ranging stake - if they did it must have been marked for visibility. But on the subject of paint/assembly I try to build as much as possible while it’s all raw plastic, even adding the tools before priming. If I absolutely have to leave something off for separate painting I mask the mating surfaces to save on scraping - a bit of Blu-Tac is ideal. I avoid using superglue for plastic-to-plastic joints, but if you do use it you’ll still want to scrape off the paint to get a good joint.
2 Likes
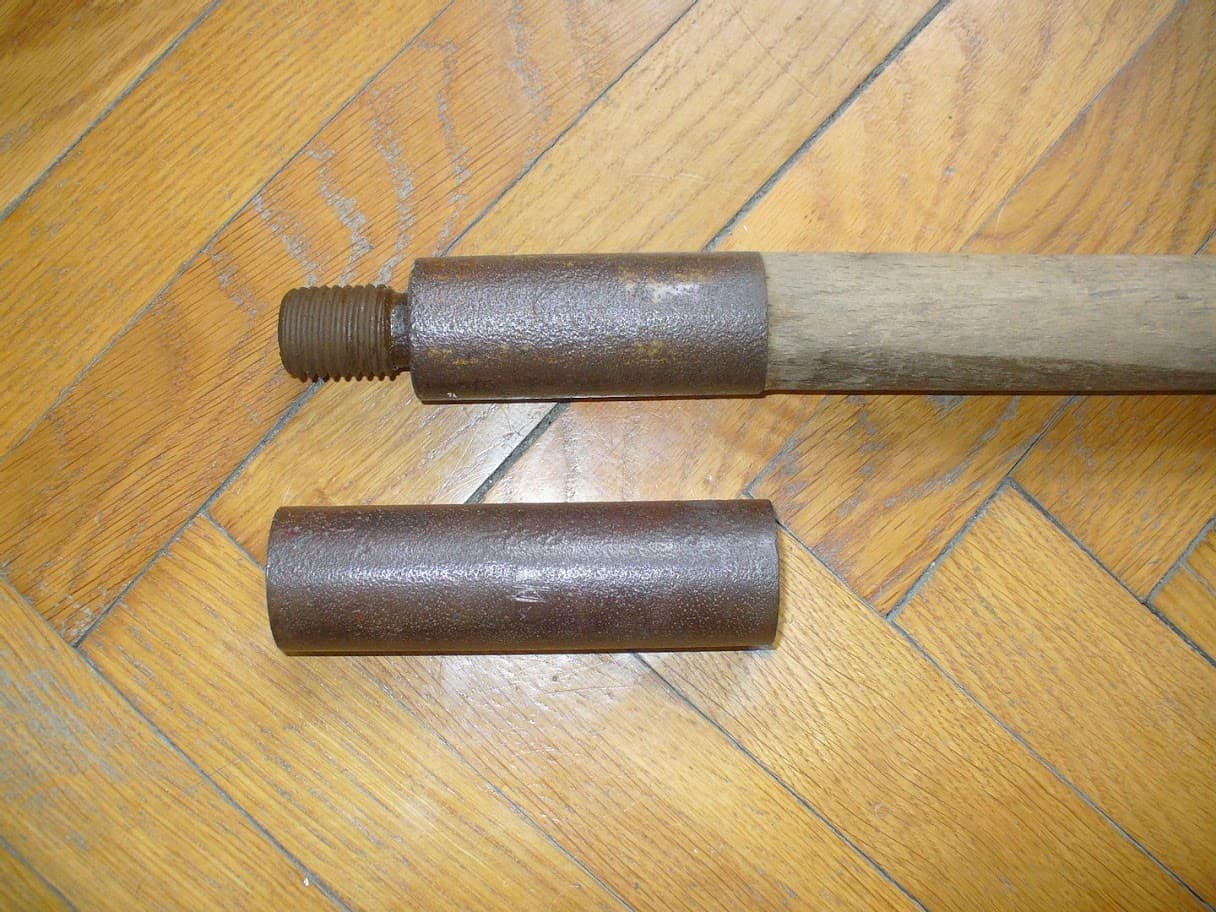
They are the 3 parts of the bore cleaning apparatus. Two sections alone is not long enough. You need a length sticking out the barrel to push/pull. The parts screw together. One end has a screw in fitting, the other the screw. Originally the fittings were brass but this changed during the war when brass became scarce.
Only ones I have seen are aged wood - originally lacquered not painted.
When they switched to steel ends, the ends were probably painted - don’t take my word for that though, it is just my guess. Natural wood gives a nice contrast anyway.
3 Likes
Thank you. That is exactly what I am doing now, minus the Blu-Tac. However, I have not attempted anything with complicated painting requirements like a truck or plane. Three days ago I found some ten year old Blu-Tac in the office, unopened, so I will give that method a try.
1 Like
Fantastic. Thank you for that information. The model will look a little more interesting with some wood grain parts.
1 Like
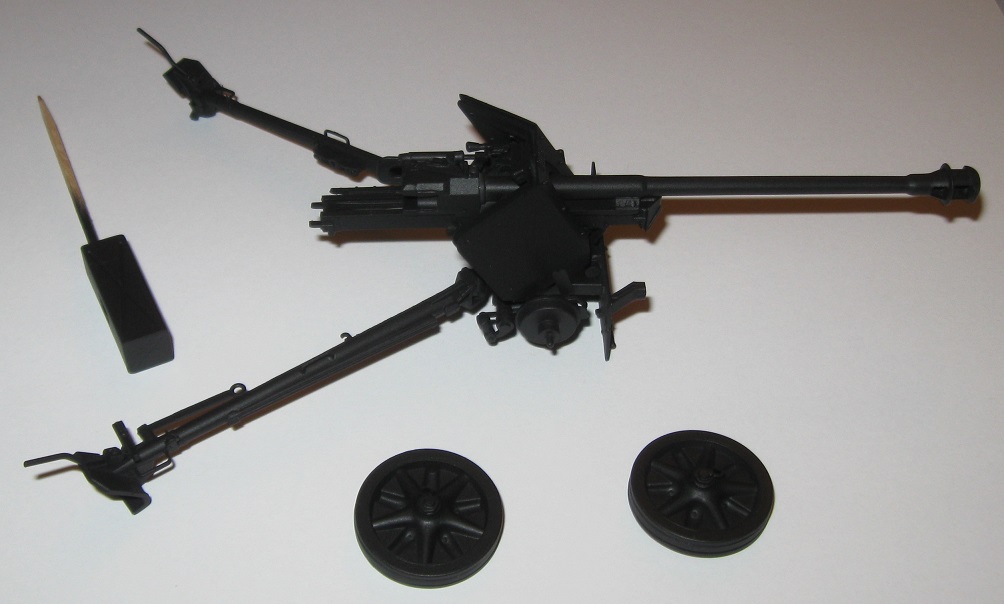
The dark gray gun thingy is now a black gun thingy.
While trying to mount one wheel on a toothpick I accidentally drilled through a hub cap.  To fix that little problem I had to drill out both wheel centers, cut away the hubs, insert plastic tubing to recreate the center, and make new hubs. I do love wasting time.
Initially, Badger Stylenze primer was a pig to spray and really wanted to clog my airbrush. However, through trial and error, I discovered that 5 drops of alcohol (per color cup), 3 drops of flow improver (per color cup), and 35 PSI (no load) solve all spray problems in the local climate. The primer easily reached all the nooks and crannies of the model. It also covered various rough spots with ease and dried quickly. Water and then alcohol flushed the stuff our of my airbrush without any issues. Primer pigment is really fine and super black. If it sands, this stuff is a winner.
The Pak looks pretty good so I will spray color coats in the morning. In another thread someone suggested using Blu-Tac for masking so I will give that a try to create a stripy camouflage pattern. I cannot find any photo evidence for such a pattern in Afrika but…practice model.
4 Likes
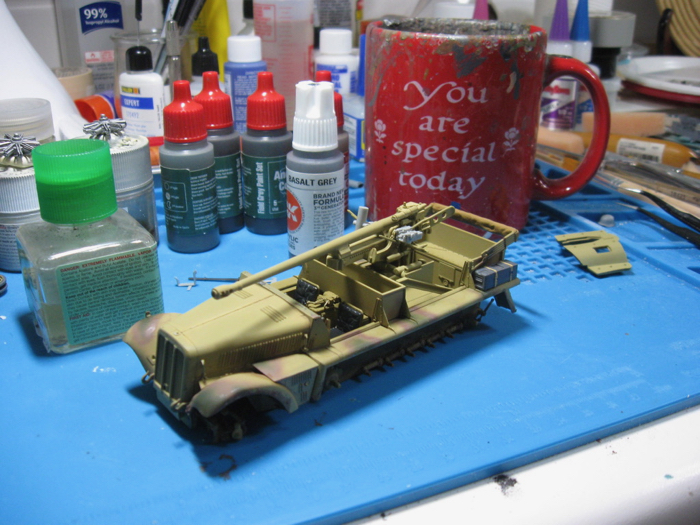
Have all the gun parts assembled, so dry fit them to the hull and it all goes together well. I think I will complete the running gear before I do the final assembly.
Now of course as soon as I saw that and took the pic, I tried to dry fit the gun shield. No go. It doesn’t look like the gun shield will go over the assembled gun. Where to trim???
7 Likes
Phil, is it not possible to slide the shield along the gun from the muzzle to make it fit without trimming?
1 Like
I could not find a way to do it, so I filed the insides of the shield and had to sand the top of the shield to get it to go down far enough to fit the attachments between the shield and the gun mount. Usually I think of things like this as my error, but in this case, I’m not sure how to have built it any differently…
1 Like
Bummer Phil. Not user error really. You did it like Dragon instructions show it, but I think you needed to add the muzzle break after it had been poked through the shield, not before. Same was needed on my LeFh18/40/2
1 Like
No guts, no glory…
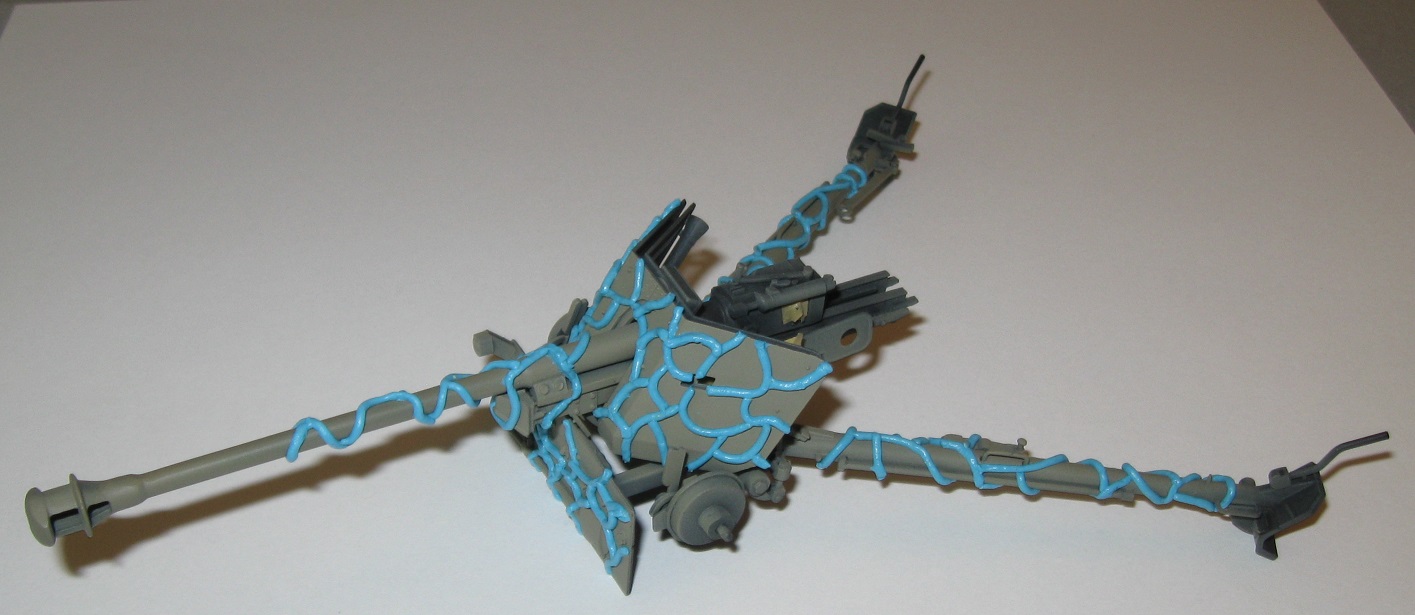
Tryin the Blu-tac stuff.
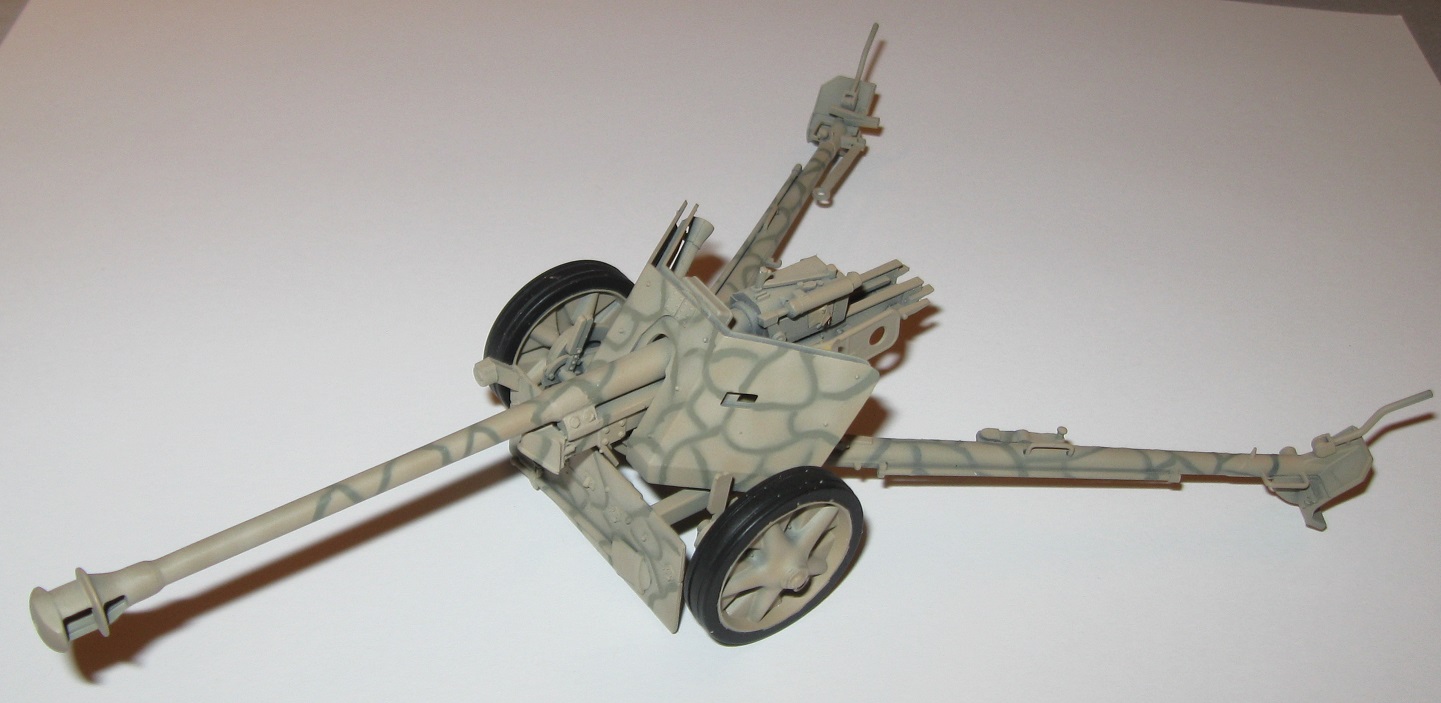
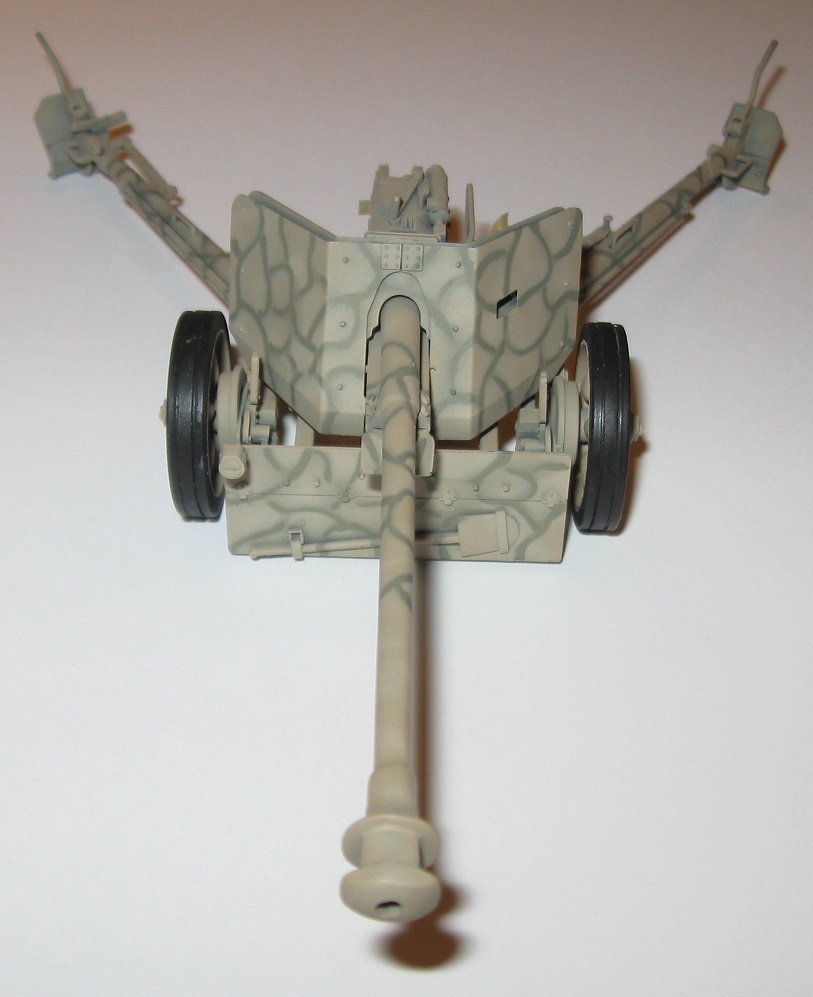
It’s kinda messy to work with but I’m pretty happy with how this turned out for a first try.
The camouflage looks fairly close to the real thing. Poor lighting in my airbrush area definitely makes things harder but once I dirty everything up a bit, this could turn out okay.
11 Likes
I think that looks very nice and a good match to the real thing.
2 Likes
WOW! That Blu-Tac application and result are just outstanding! I’ve been using poster putty (Blu-Tac) for masking for decades with great success. I think it’s the best thing out there for camo masking. Superior to Panzer Putty, Silly Putty, or Pla-Doh. But I’ve never tried to roll it that thin and the method to do that camo pattern hard edged has always escaped me. What a fantastic outcome you’ve achieved. Bravo and thanks!
3 Likes
It wasn’t the muzzle break that it stuck on, but part of the lower frame the barrel rests in. I think the order would be to put the shield over that frame before you drop the barrel in.
2 Likes
Doug, that is an outstanding result. Looks absolutely awesome!
2 Likes