Thank you! I am happy I could contribute something useful! ![]()
I just finished adding oil paint to the Pak and it definitely looks interesting.
Thank you! I am happy I could contribute something useful! ![]()
I just finished adding oil paint to the Pak and it definitely looks interesting.
Thank you! I think this model is going to turn out okay.
Over the last week I tried two more Blu-tac experiments that did not work but the stuff definitely opens up many camouflage possibilities.
I used it in reverse to what you did for my Malta Camo Valentine. Sprayed the stone colour than added blobs of Blu-Tac and pushed it to shape the ‘stone’ segments then carefully airbrushed in the dark green. A laborious job, but the effort was worth it.
I find that as the Blu-Tac gets used and used it is easier to work with, until eventually (a couple of years of use) it starts to get too stiff.
That looks excellent! British Malta camouflage really is distinct and dramatic.
A bit more progress on my Dana. Quite a nice kit but with extensive construction with lots of parts.
More to follow ![]()
That’s a big chunk of plastic Jesper, but it looks like it’s building up very well…
Oooh, than Dana looks cool ![]() !
!
That will look great next to my G6 Rhino, when I build it.
OOB!! No corrections? Wimp… ![]()
Just kidding - I could not resist Jesper. Glad you are having fun with it and it is going together well for you. It is an impressive sized kit when done.
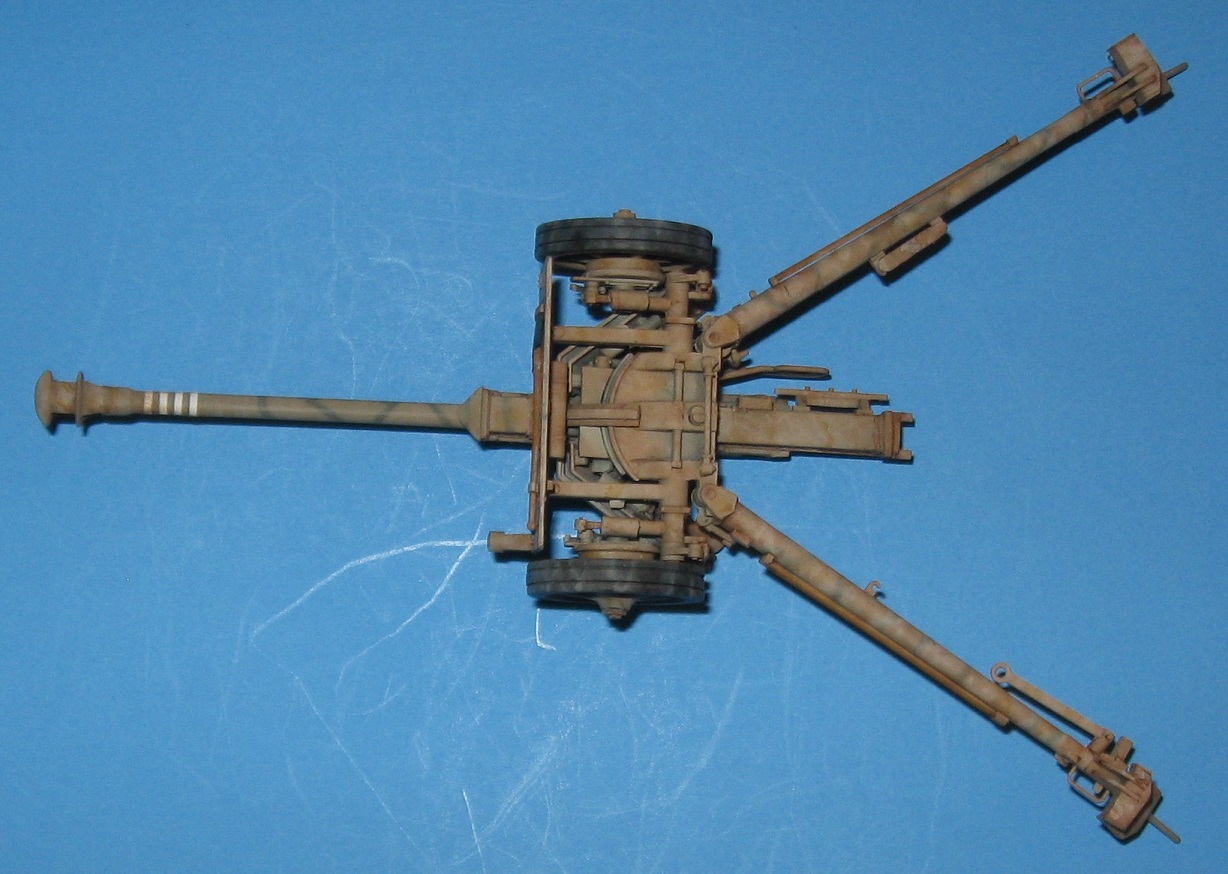
I am calling this done…
The paint job is a bit messy but…I tried.
Camouflage and markings are fictitious.
Since this represents a gun used in the desert, it was made to look dusty, not rusty. Fittings were painted based on an example in the former Littlefield Collection.
Thank you for letting me join this campaign. It was fun trying new things and racing to complete a project in 19 days.
Great build, Doug. Came out very well.
You inspired me to try out that camouflage method at some point.
Congrats on finishing ![]()
![]()
Thanks for the comments on my Dana. Quite a beast!
Lots of stuff to do still. All the PE work is still missing.
@petbat, definitely chickened out on all the extra work ![]() But I will try out a very unique Ukrainian camouflage for it - unless I chicken out in the last minute
But I will try out a very unique Ukrainian camouflage for it - unless I chicken out in the last minute ![]()
Thank you!
I am very envious of the DANA you are constructing. That and a Rhino from South Africa are on my Must Build List.
My Dana is now done with construction incl. all the PE parts. Getting ready for the base coat. I am not really up for rushing it to get it done. I want to do a very unique and intricate camouflage scheme.
Is it possible with a months extension? If not, no problem. Although I would prefer to finish it for this campaign.
It takes a lot of paint too Jesper.
Indeed, Peter! And with all the exposed engine parts there is a lot of subassemblies ![]()
Unless you are leaving the engine hatches open, once the covers go on, you see nothing of the engine Jesper. Very little is seen from underneath too.
Well, it must be visible through the engine grille, but maybe the turret blocks most of the view.
Trust me my friend…
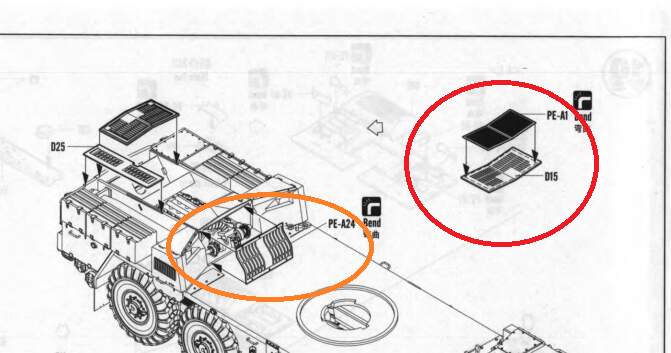
With the etch piece under the rear Grill (red Circle), you see nothing through it. The forward (orange) grill does let you see the parts immediately behind it, but you only see through it when the turret is side ways:
Here is a picture with the turret removed:
Turret on and side ways:
Turret facing forward:
As you can see, with the turret on all you can see is just a hint of what is behind the grill. Paint the engine area and especially this part behind the grill, Dark Green and you are done!
I was never happy with the paint job on this, which is why it never really got weathered properly. I plan on stripping it back and repainting it soon.
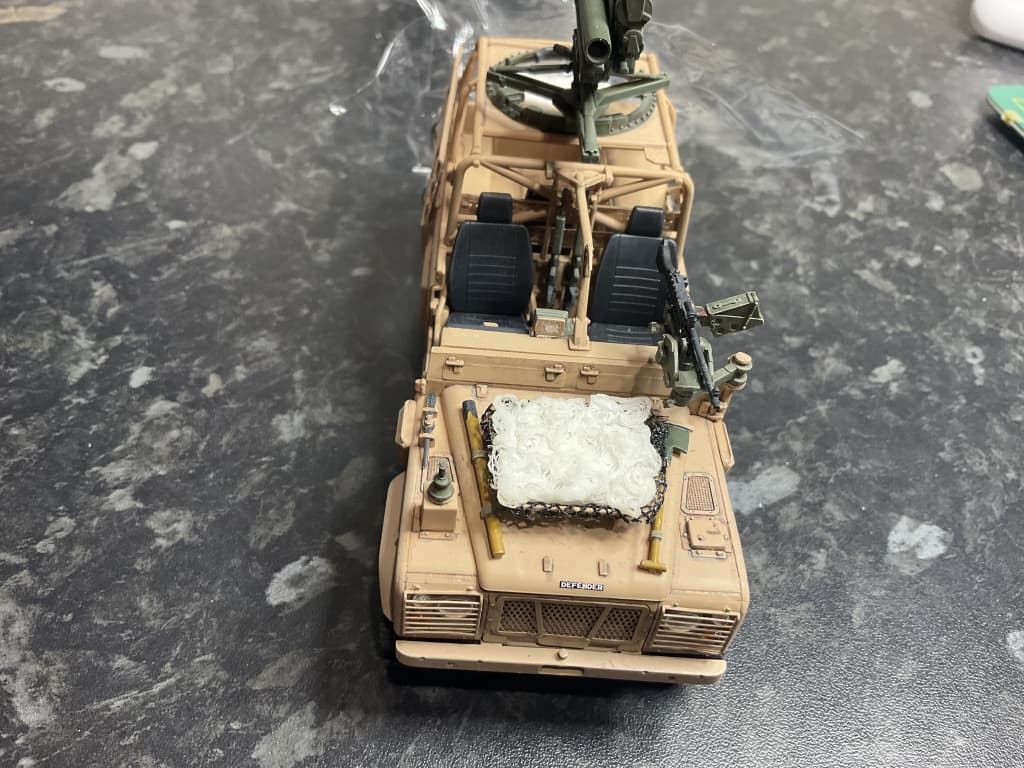
I have done a little work on the Land Rover. I have been putting off doing the scratch built stowage but have started that. Technically all I need is to add the steering wheel and it is done…
A start on the camo net. This was soaked in PVA and allowed to set in a ‘basket’ of food wrap. This way it takes the shape but can be removed for painting. The actual black net used on the frame is a piece of Tamiya nylon mesh I had in the spares bin.
Tarp added to the rear. The food wrap will stop the Milliput from sticking so I can remove and paint. I made the brackets out of evergreen to hold the PSP . Some Tamiya tape and scratch built ratchets to hold it all together. I thought I had taken a pic of these before I added them to the kit but can’t find it.
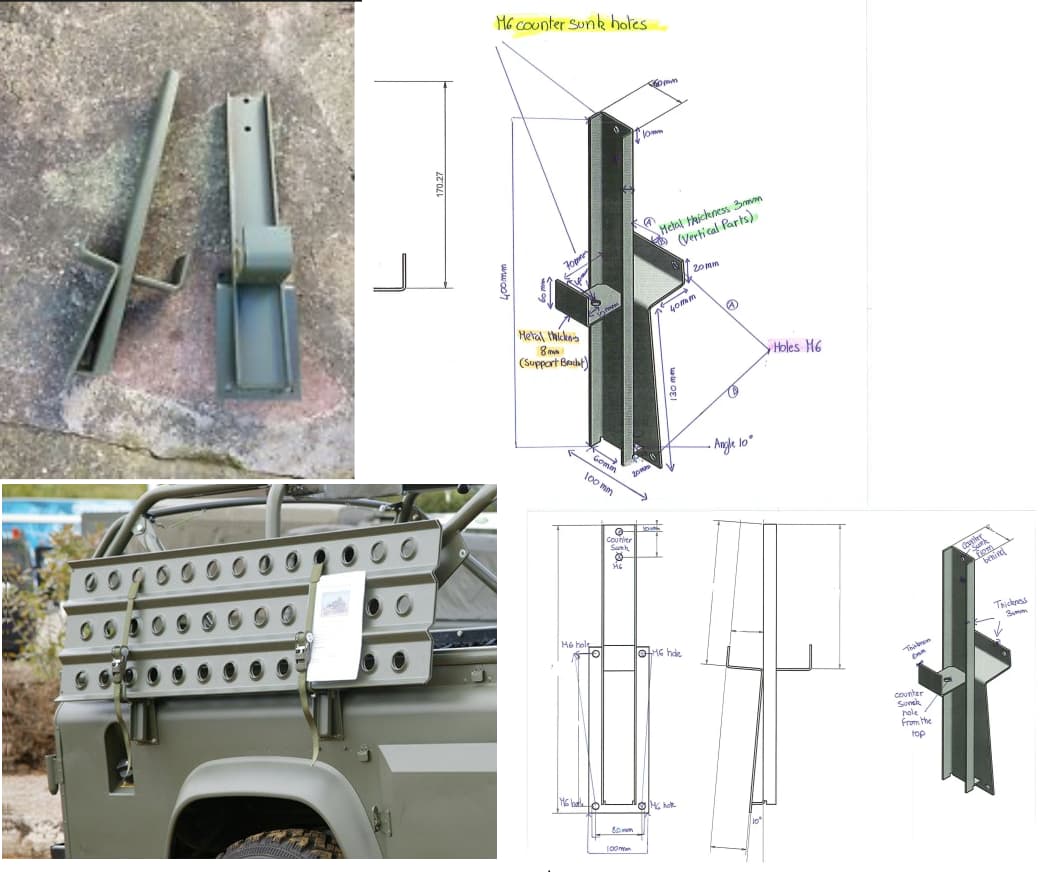
@Johnnych01 John, my decals fell apart after dipping in water. I suggest you spray Tamiya clear over your set before you think about using them. Also, in case you want to make the racks for your Landy, here are the measurements:
@petbat, I trust you ![]() I will give it a quick coat of black and the drybrush it metallic with a quick wash.
I will give it a quick coat of black and the drybrush it metallic with a quick wash.
The interior I will give a bit more attention.