Nunu 1/24 scale BMW M8 GTE car

Making good progress Joel! The decisions manufacturers never cease to baffle us. PE front discs and nothing for the back? I assume they gave styrene instead. They’ll still look pretty good those wheels which show off the front set up really well.
Looking forward to more.

cheers
Michael

Michael,
Thanks for stopping by and checking out my build to date.
I think that once again I didn’t explain myself correctly. All 4 brake discs are PE on the front side, but all 4 backs are just the basic bare plastic. I’m assuming that they the figure that no one will see them, so no PE parts, yet they bothered to do the rear axle housing, half shafts, boots, and drive shaft with full painting instructions, yet outside of the half shafts no other parts will be visible. Go figure that one out.

joel

Those brakes are insanely well detailed. BTW, you’re in my prayers Joel.

Oh HELL yeah!!! This is looking SUPERB!!! Will be watching for continued progress here Joel.

HGBarnes,
It’s always a treat to have you stop by and check out my progress to date. And thanks for keeping us in your prayers. Believe me, we can use all the help getting through one medical issue after another.

joel

1 Like

Joseph,
Great to see you on the Automotive boards. So glad that you’re liking what I’ve accomplished to date.

On my way to checkout your latest update.

joel

1 Like

Well I’ve finally found time to catch up on your build here Joel, you’ve made some great progress on the details around the brakes and the work on the rear wing and clear parts is just awesome!

Cheers, D

D,
thanks for checking out my Bimmer build to date. i’m thrilled that you like what I’ve accomplished to date.

Been working on the interior so I can get it primed and painted, but there’s assemblies that are fighting me with every part, and one assembly that’s actually winner it’s battle :tired_face:
joel

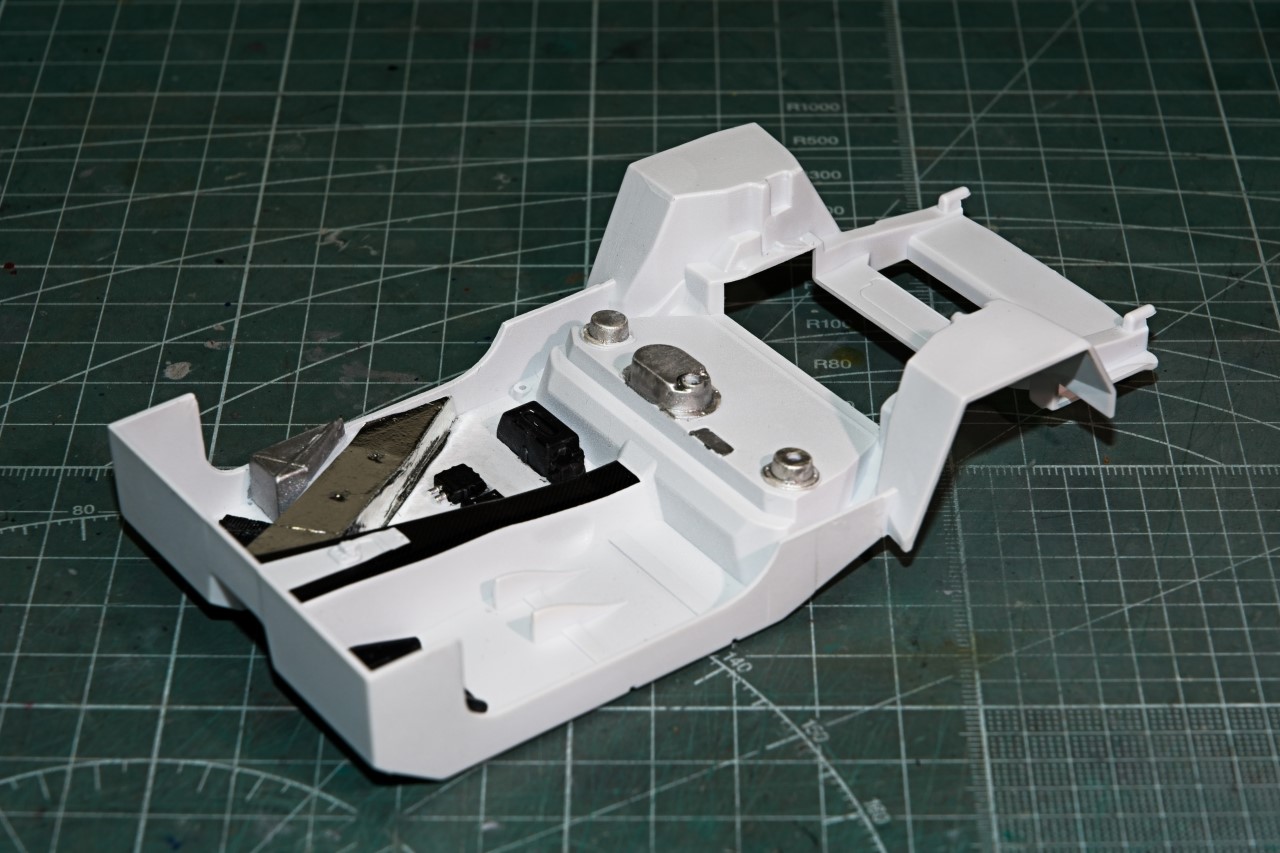
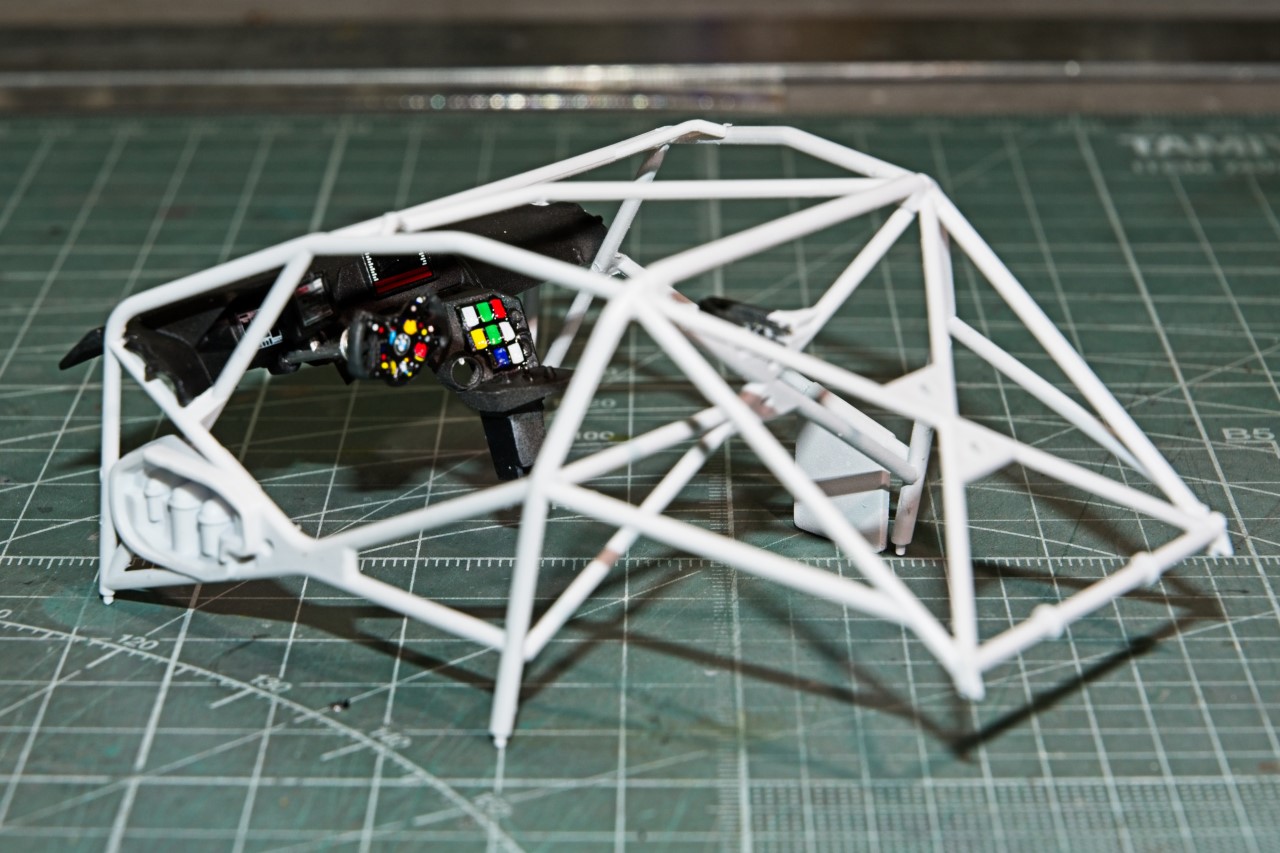
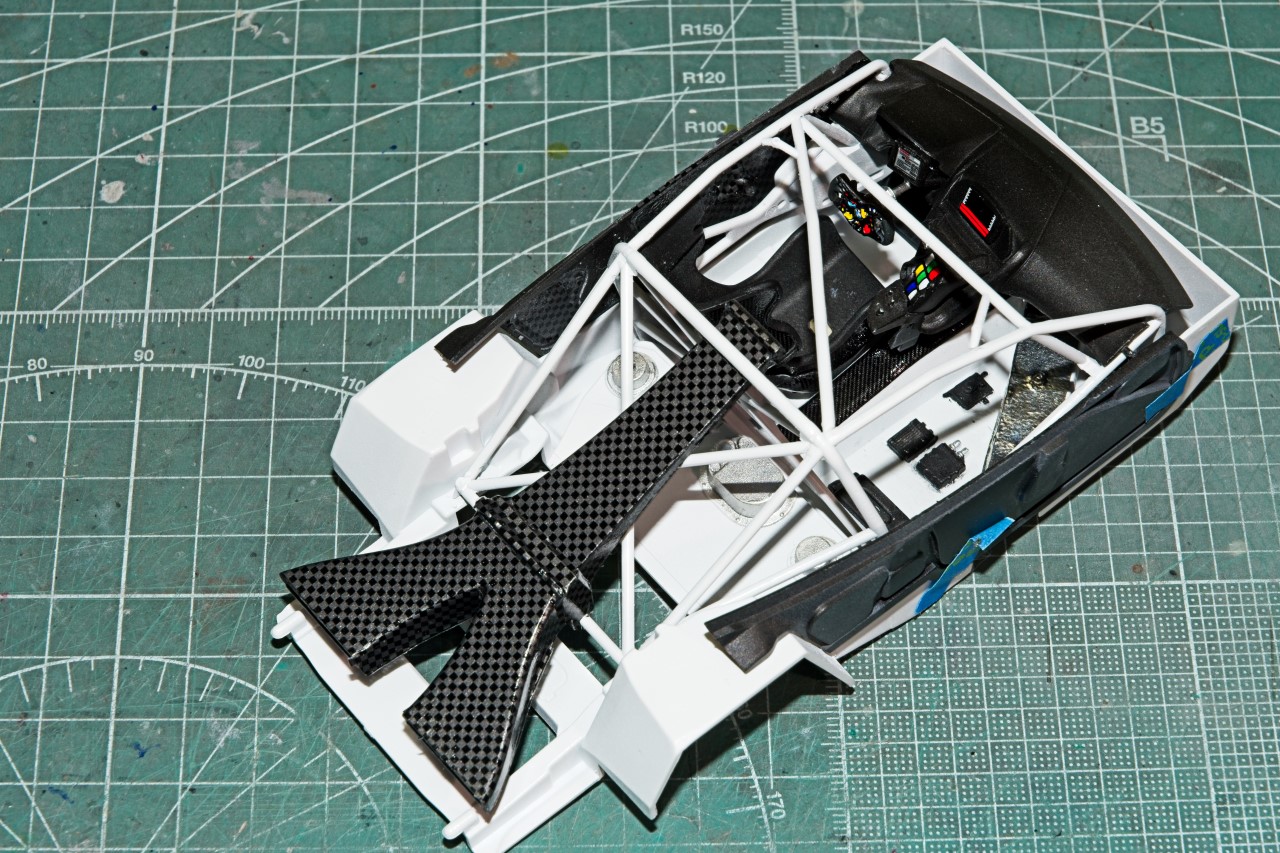
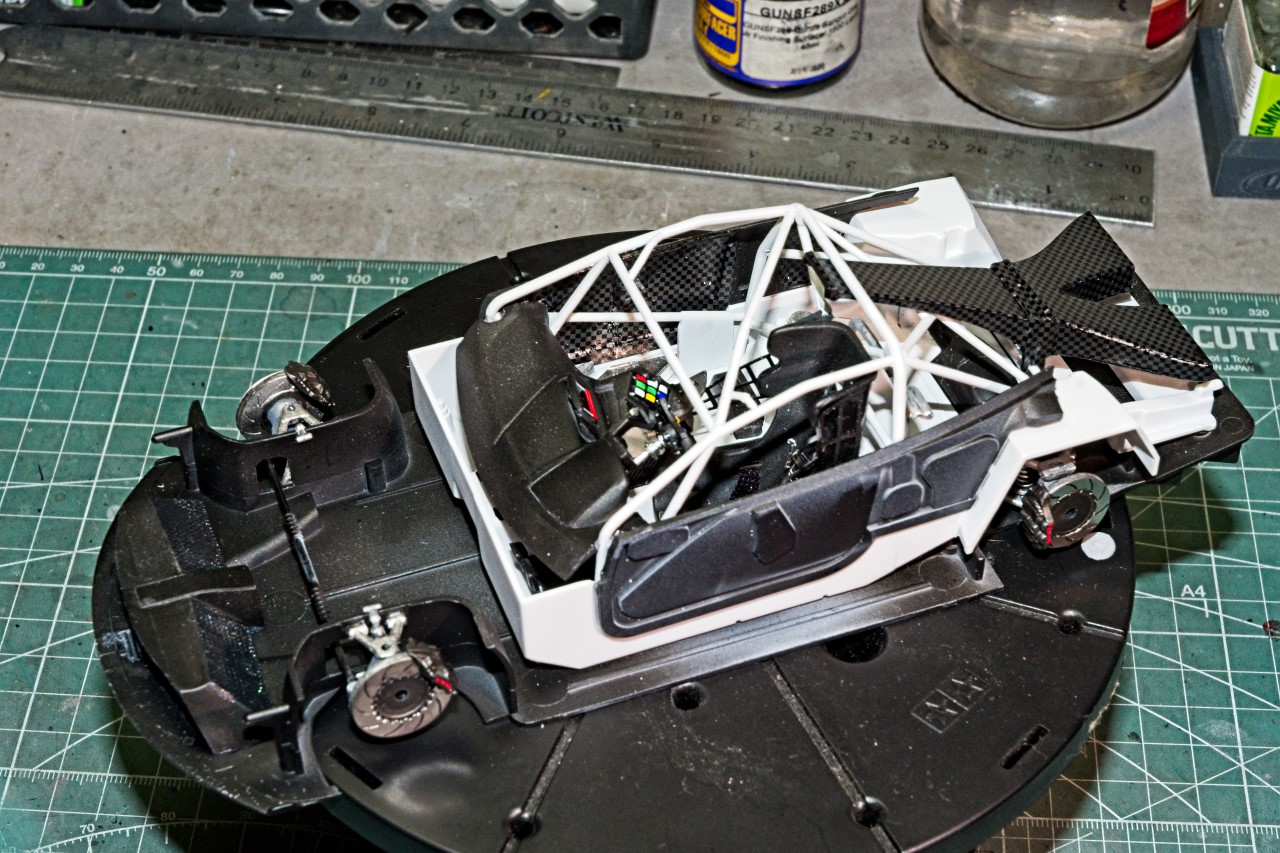
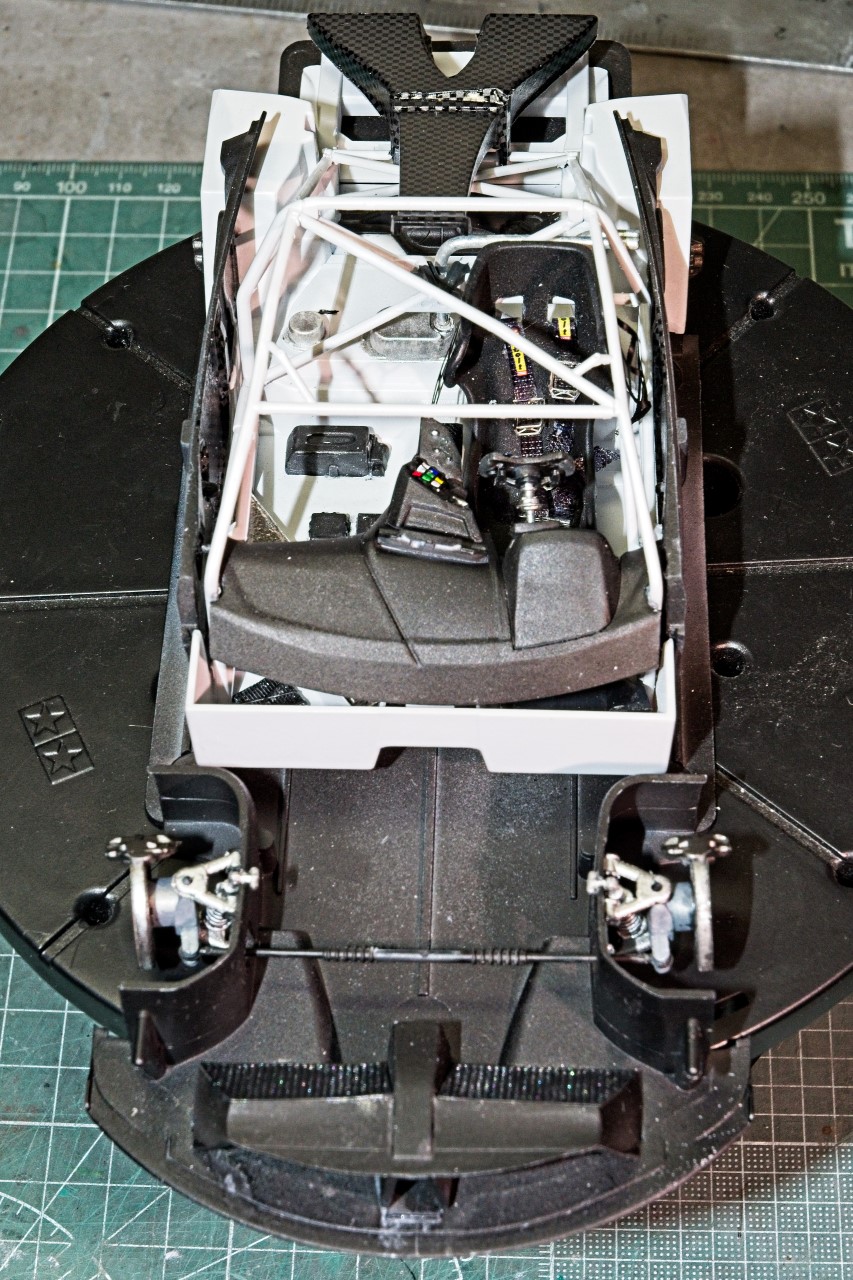
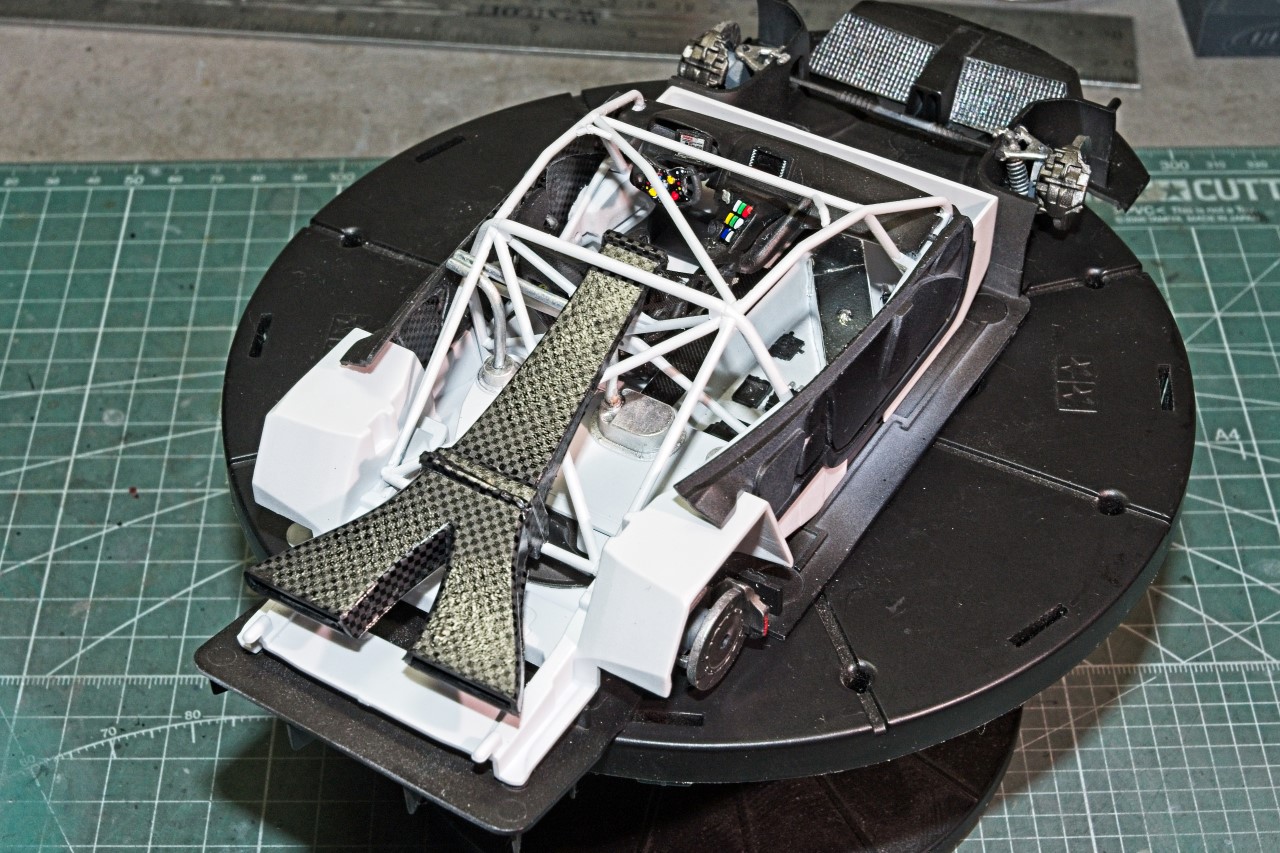
My focus over the last few weeks has been completing the major sub assemblies for the interior. The Dash, door cards, Driver’s seat, what I’m assuming is a large air intake, the roll cage, the steering wheel were all built, as well as the interior pan, then they were primed in my basic mixture of Tamiya Gray/White lacquer primer.
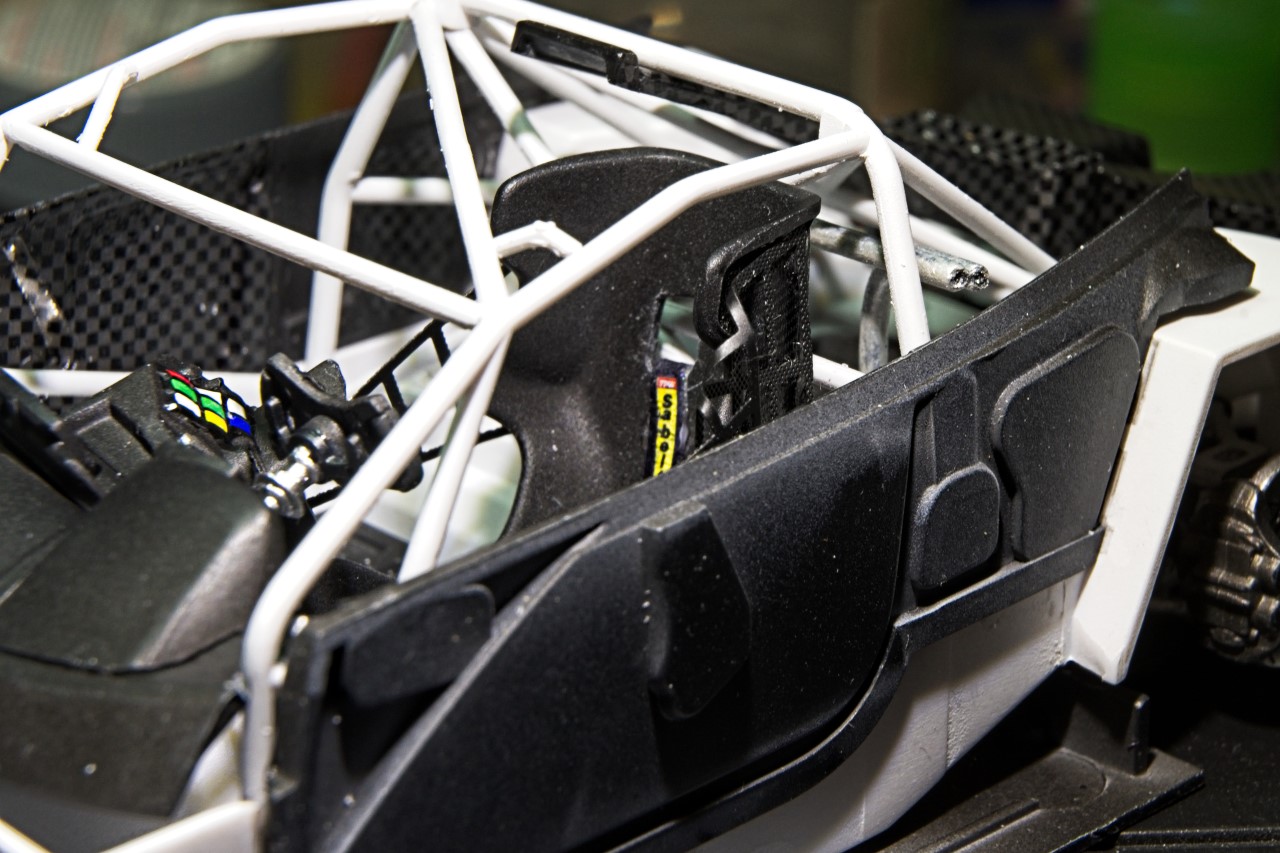
The roll cage and the chassis pan were painted in Tamiya X-2 Gloss White. I then hand painted the various molded electrical boxes Tamiya FX-1 Flat Black, and the two intakes for the gas tank, and cover for what I think is the fuel pump area Acrylic Flat Aluminum. The center consul top is a Carbon fiber decal. The structural raised area in the front right had a Aluminum sticker supplied with the kit, but try as I might I couldn’t get it to lay down flat, so I replaced it with Chrome Bare Metal Foil. The dash steering wheel assemblies were air brushed with Mr. Color Semi gloss Black, then the 4 computer screens had their decal faces applied.


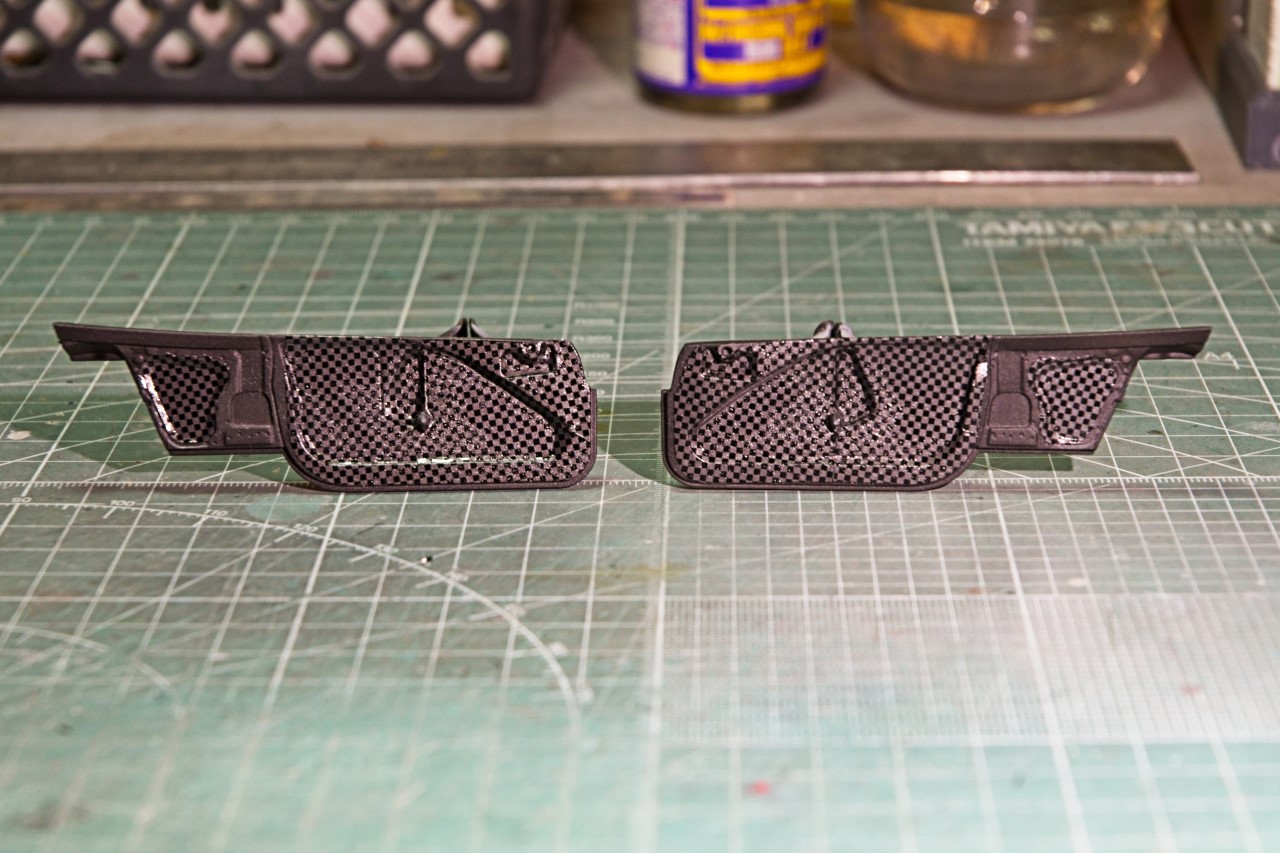
The Door cards were also painted with Mr. Color semi Gloss Black, and then the large Carbon fiber decals were applied which was no easy task as the door cards had several recesses and raised areas that asked more of those decals then I thought they could conform to. But the Microscale system, especially the Sol really helped, and then the Solvaset worked it’s magic. The end results are more then acceptable.

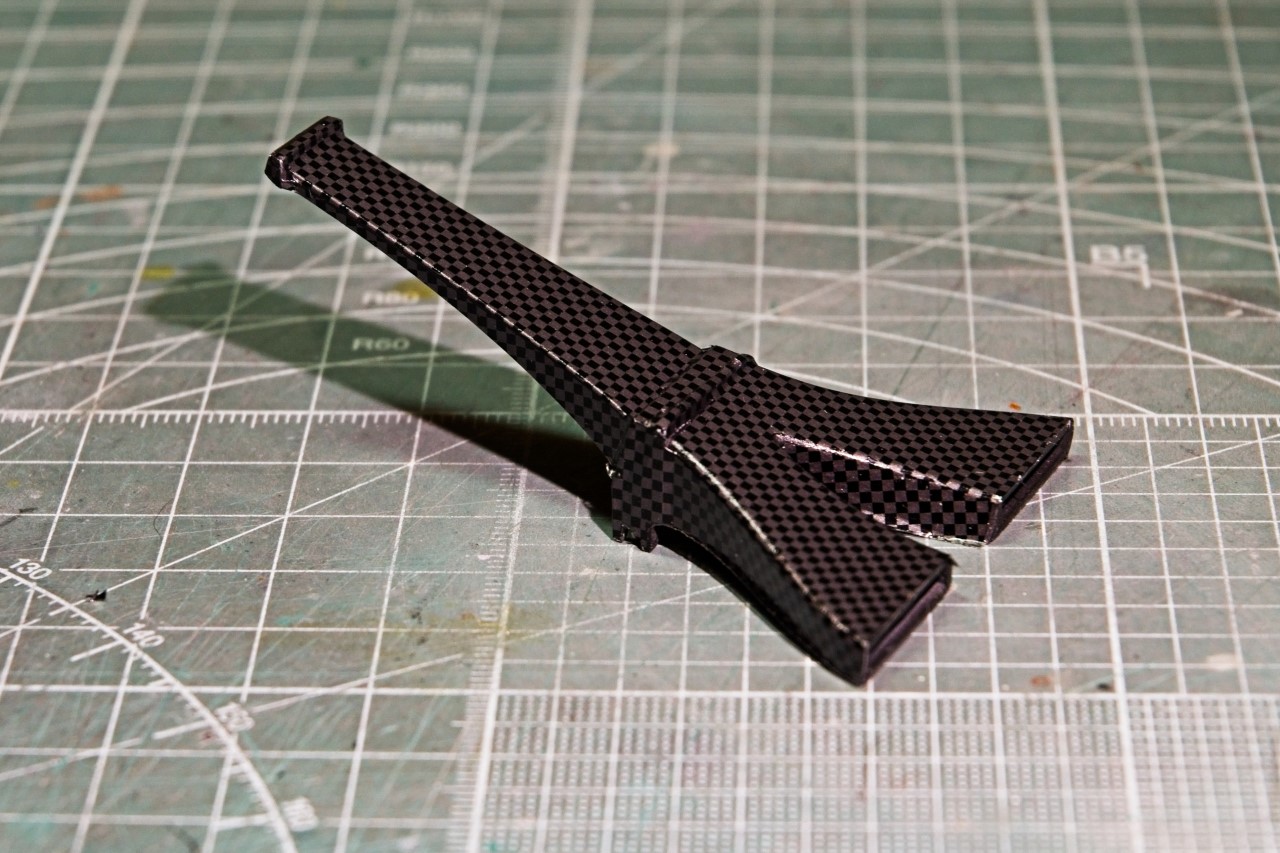
Next up was that large air intake. All four sides received plus the V were separately decaled.

The dash assembly was dry fitted in the roll cage and the fit was perfect.

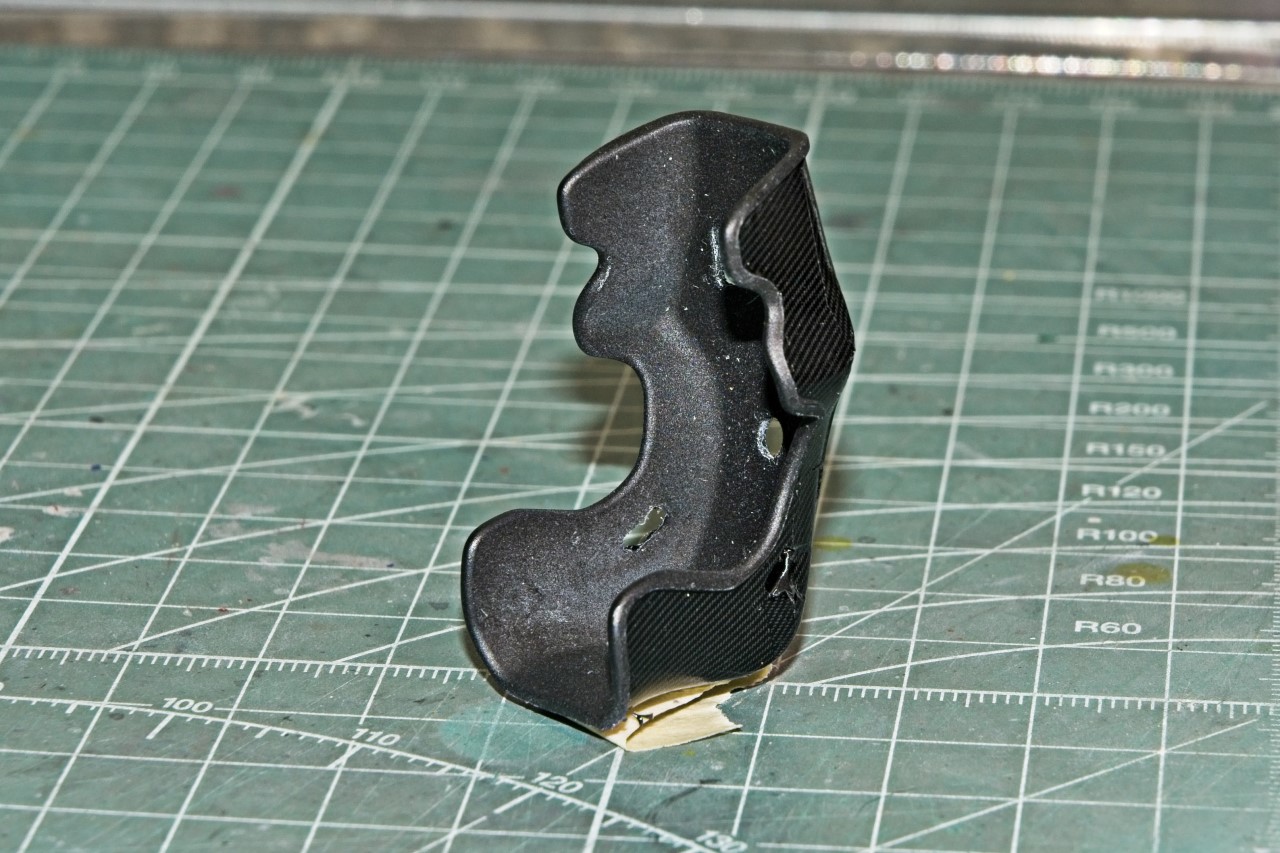
Finally I addressed the seat. It to was air brushed with Mr. Color Semi Gloss Black to represent the driver’s shell. The outside of the seat is Carbon Fiber. The detail up set has one decal that has to wrap around from one side, the back, and then the other side. Well, I couldn’t for the life of me get it to remotely lay down. So put it back on it’s backing paper and let it dry for a few hours. I then cut it in half, and then cut each piece in half once again. The 4 pieces each laid down just fine, but I now have 3 seams when I shouldn’t have any. Still, it looks way better then my 1st attempt.

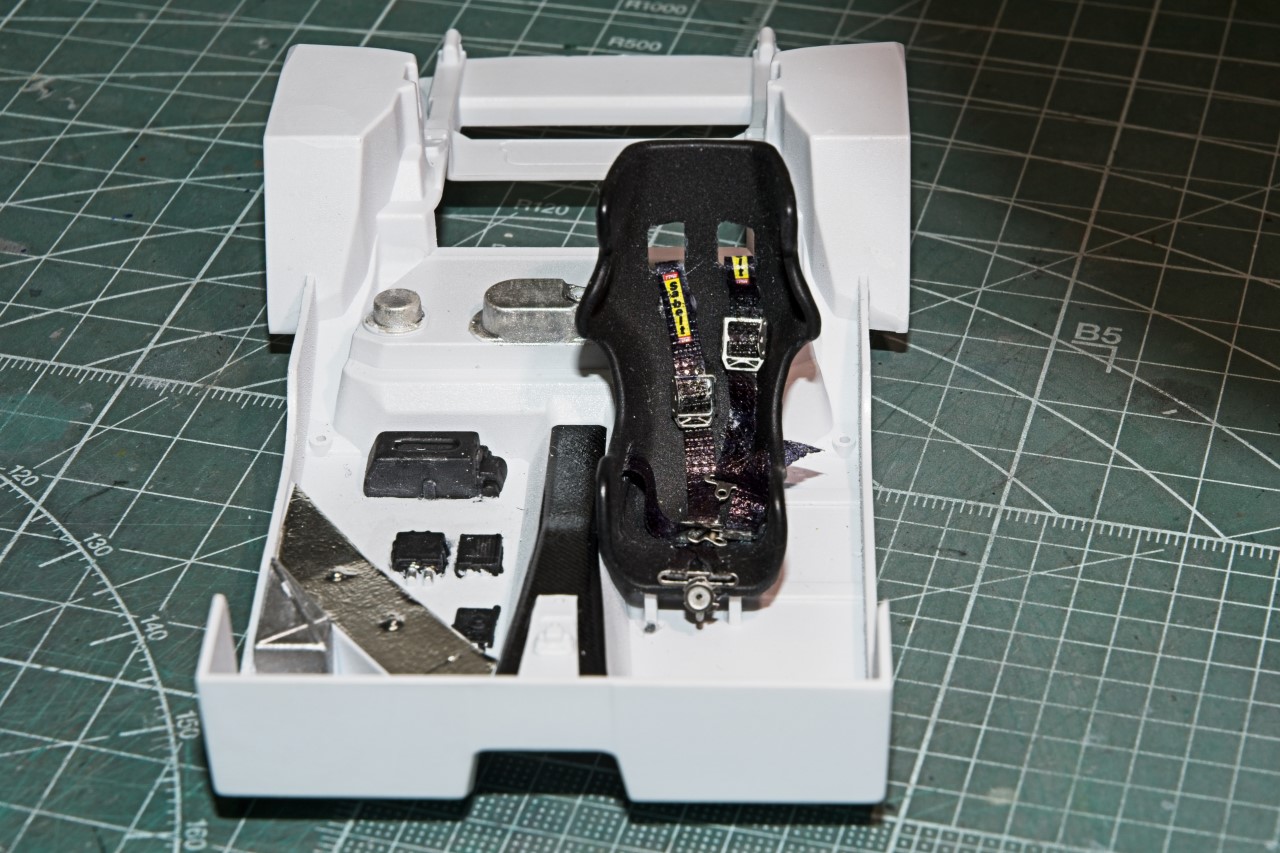
Finally, I dry fitted all the assemblies.

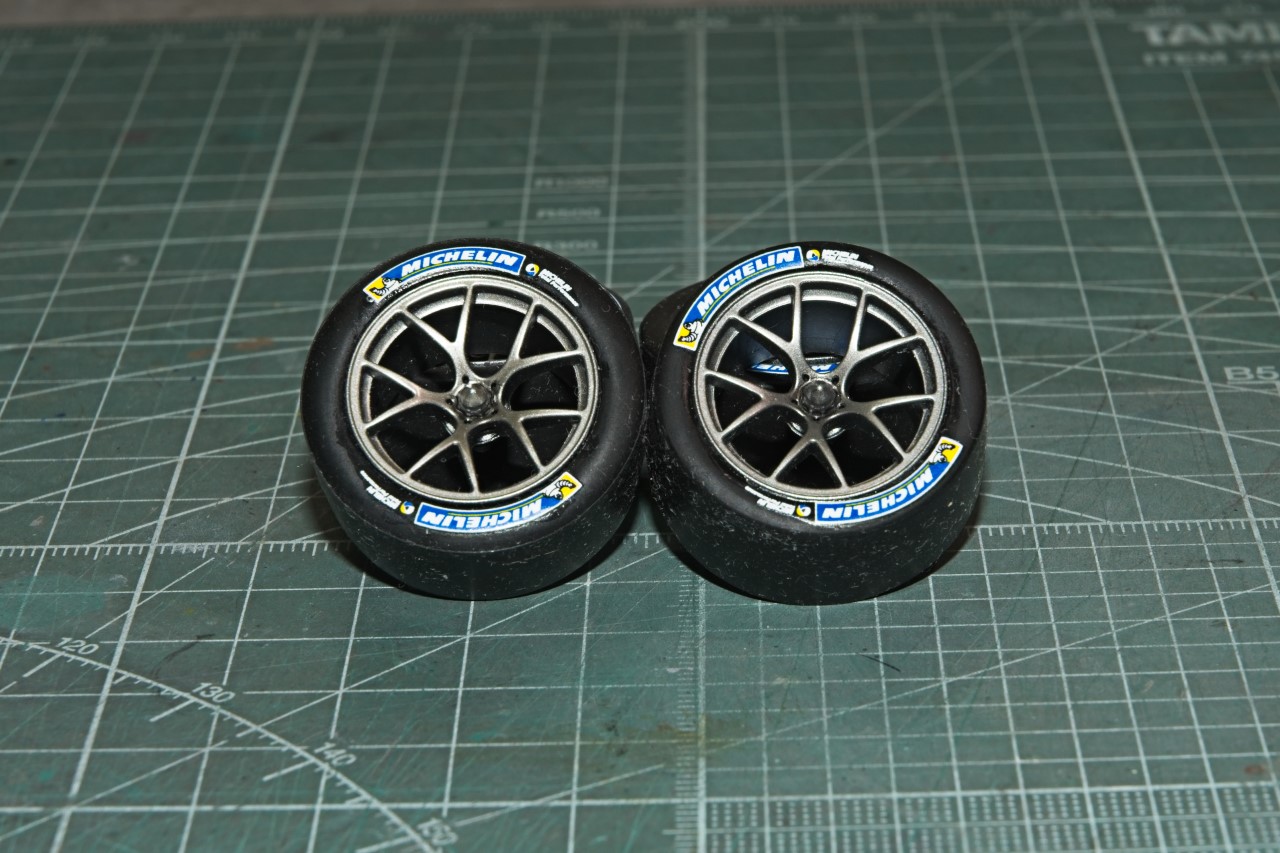
Next up is tackling the 6 way racing harness and all that PE, the tires/wheels, and then it’s back to more detail work and decaling on the body shell.

joel

6 Likes

Looks good Joel - nice save on the seat decal !

Richard,
Thanks for checking out my build of late. The seat was a royal pain in the butt for sure. I just realized that I didn’t post a picture of the back of seat that shows the seams. Will try to get one posted this weekend for sure.

joel

1 Like

That seat came out good with the way you worked around the wrap around decal issues.

Great work, with all those carbon decals Joel.

Joseph & Jesper,
Thanks guys for stopping by and checking out my build to date. The CF decaling has certainly been a learning experience. At this point I’ve opted not to bother with the CF decaling of the bottom of the chassis nor the diffuser at this point as most of it will never be seen, and it’s time better spent on visible areas. Then again, I just might do the diffuser and the front splitter as a compromise.

joel

Spent a good deal of time this week working on the 6 way racing harness. The kit only has decals and they’re marginal at best. One of the reasons is that I bought the Nunu detail up set is that they include Black ribbon which is correct for these BMW M8 GTE cars plus all the PE needed for the various buckles and latches. The instructions for the detail set gives you the correct length that each belt needs to be, but you still have to add an additional length to each one as you need to attach or glue the end to the back of the belt after it passes through the buckle/latch. I usually use regular ACC for this as PVA glue takes way to long to start to tack up.

As usual, these ribbons like almost all I’ve used from various sources just fray every time I cut them. I’ve tried brand new #11 and #10 blades, brand new PE cutters but they all frayed just the same. and the fraying makes it just about impossible for me to get the ribbon through the PE part slot even when I cut it at an angle.
One of my friends on my other model racing list; Ben suggested Medical Cloth tape, but i didn’t have any. What I had was a plastic type of medical tape that I got from the eye surgeon.


Easy to cut, doesn’t fray, and the adhesive has just enough stick.

I painted each piece with a Black Magic marker which dried in a few min. Looks good. Next time I use it, I’ll try some Mr. Color Lacquer Flat Black and see how that works.
To complete the harness assembly I needed to apply the Sabelt yellow logos. Strange that the detail upset doesn’t have them and neither does the kit decals as just supply decals for the Harness assembly. So into my decal box for misc decals and sure enough I have several on a sheet from Indy Cars. I applied them just like I would any decal, but skipped the Micro Sol and went straight to my Solvaset. A few doses and the decal just snuggled right into all those nooks & crannies.

What usually is a super frustrating job that I try to avoid at all costs, turned out to be a pretty enjoyable experience. Go figure!!

Here’s what the 6 way seat harness looks like installed.

I tried to move around the belts for a more natural look after the driver got out, then everyone laying perfectly. Either way works, it’s just my preference.

joel

3 Likes

Great idea using medical tape ! Belts look really good .

Richard,
Wow, that’s gotta be a record for a reply and look. Try the medical tape as it’s vastly superior to anything I’ve ever tried.

joel

1 Like

Little actual modeling time this past week, but I still managed to forge ahead and complete the interior.

Added the two gas pipes that run from right behind the driver’s seat to the duel intakes for the gas tank.

The detail PE set included the driver’s elastic restraint that wraps around the seat and attaches to the cockpit frame. The PE set has the restraint as two separate pieces that you’re supposed to use the long rear leds of each so they can meet behind the seat. Sounds easy, but you can’t install them till the dash and roll cage is in place. I really struggled with how to install them with the roll cage getting in my way no matter what I tried.

1st issue was actually getting the rear of each to kind of roll around the seat and then finding a attachment point to glue the front of the PE strap to. The right side one was shall I say a real pain to align correctly. But the left side for a parked car is completely wrong. In order for the driver to enter/exit, it has to be released from the dash attachment point so that it just hangs down the side of the seat. Now this is PE and it doesn’t like bending as though it was a flexible material. I annealed it and tried to roll it so it would lay in the open position. Next, I air brushed both pieces with Mr. Finishing 1500 Black primer, but just looking at it the primer loved to chip off, so touch up after touch up was needed. Still, it doesn’t look half bad once installed in the cockpit.


Next up I glued the large intake in place and then the door cards. Stepped back to admire my work. Dumb Ass me forgot to take pictures before the door cards were installed, so now photographing the finished interior became a real challenge. One that I just couldn’t get the pics I wanted.

My attention turned to finally finishing the tires. I had previously primed the 4 wheels with Mr. Finisher 1500 Black, so the next step was to try to match the non-stock Aluminum color of the wheels. I ended up using a mixture of Tamiya Titanium Silver and Titanium Gold. When dry I added a Black wash to each wheel hub. The tires are nicely molded with no centerline seam. At least ones that I could see. I glossed the tires with Pledge then added the SK decals. When dry a coat of Microscale Matt to dull the overall finish of the tires only.

joel

4 Likes

Man alive… that looks gorgeous!

1 Like

Great to see more progress here Joel, the interior detailing right up to your usual high standard!

The wheels turned our very nicely as well, the colour mix looks superb.

Cheers, D

1 Like