HG,
Always great to have you stop by, and a real bonus when you give my efforts a thumbs up.
joel
HG,
Always great to have you stop by, and a real bonus when you give my efforts a thumbs up.
joel
D,
Thanks my friend for your constant support and appreciation of my most modest efforts. The Bimmer is getting there for sure as I’m on the final lap now.
joel
JA
Blown away by your cockpit detailing and the harnesses look as they should. If you didn’t struggle, you have missed some of the details, which obviously you didn’t.
Tires and wheels are spot on the money and look fantastic.
Bro.
Bro
Glad that you finally made the show here. Great bunch of guys.
And of course I’m thrilled that you like what I’ve accomplished to date.
Later
joel
Looking seriously good Joel. Love the color blend, for the wheels. That one goes in my notebook.
Regarding the fraying ribbon; I always ad a touch of CA glue to a thread or ribbon, before or after cutting. Just a tiny drop, where I want to cut or a drop to the already cut end. That way you minimize fraying.
Jesper,
Thanks so much for stopping by and liking how the color turned out on those wheels, it’s always much appreciated.
Never even thought of using a drop of CCA glue on the ribbon ends. Gonna try that tip for sure.
joel
Finally after nearly 2 weeks, another update. Just can’t seem to get the old Mojo flowing right now. Gee I wonder why?
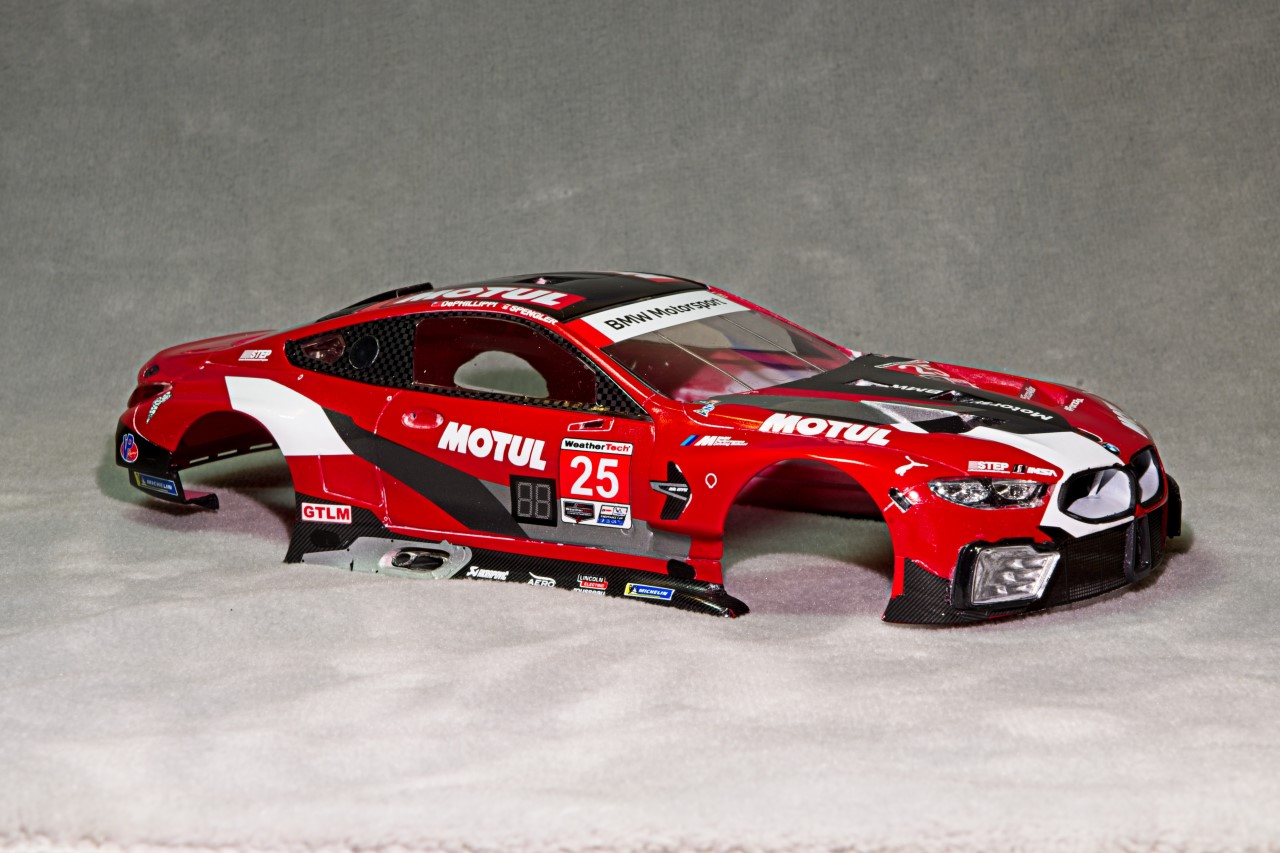
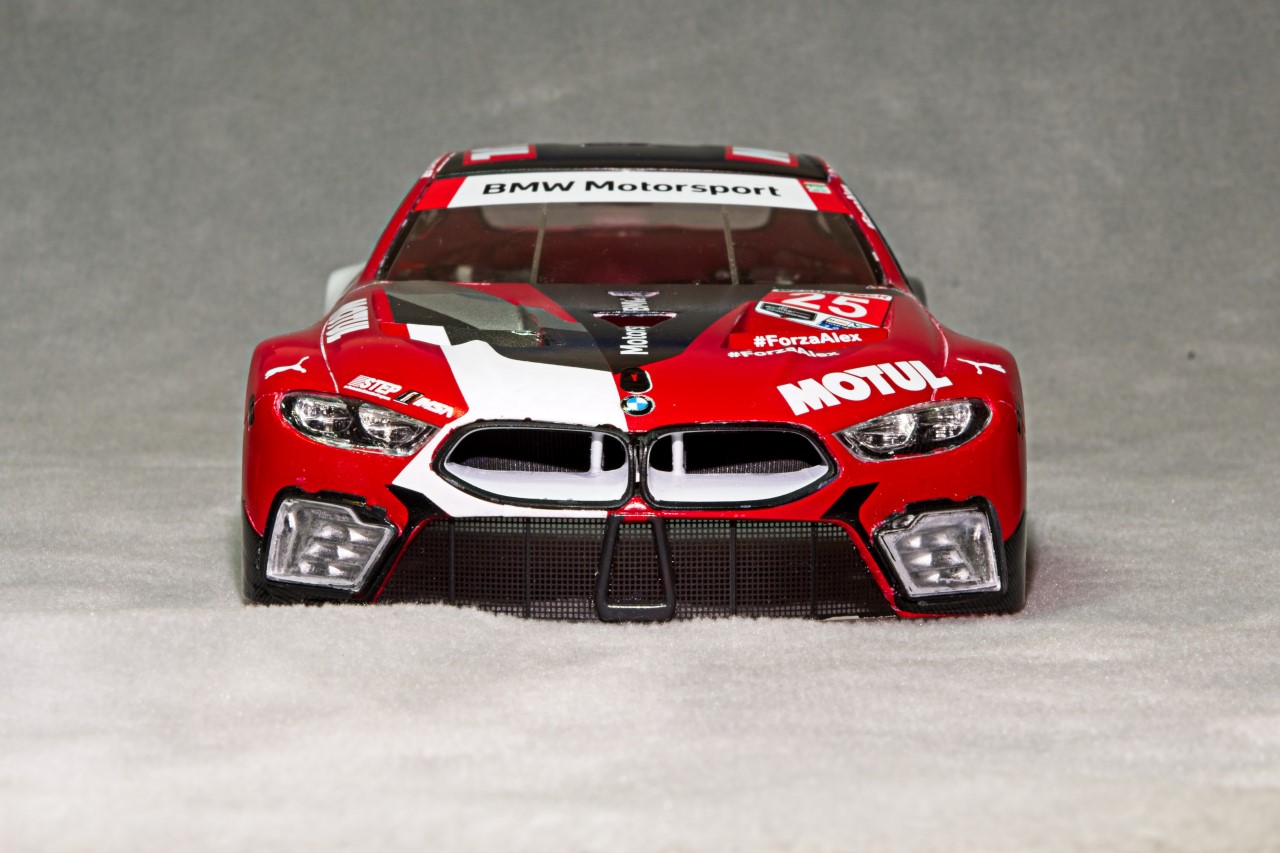
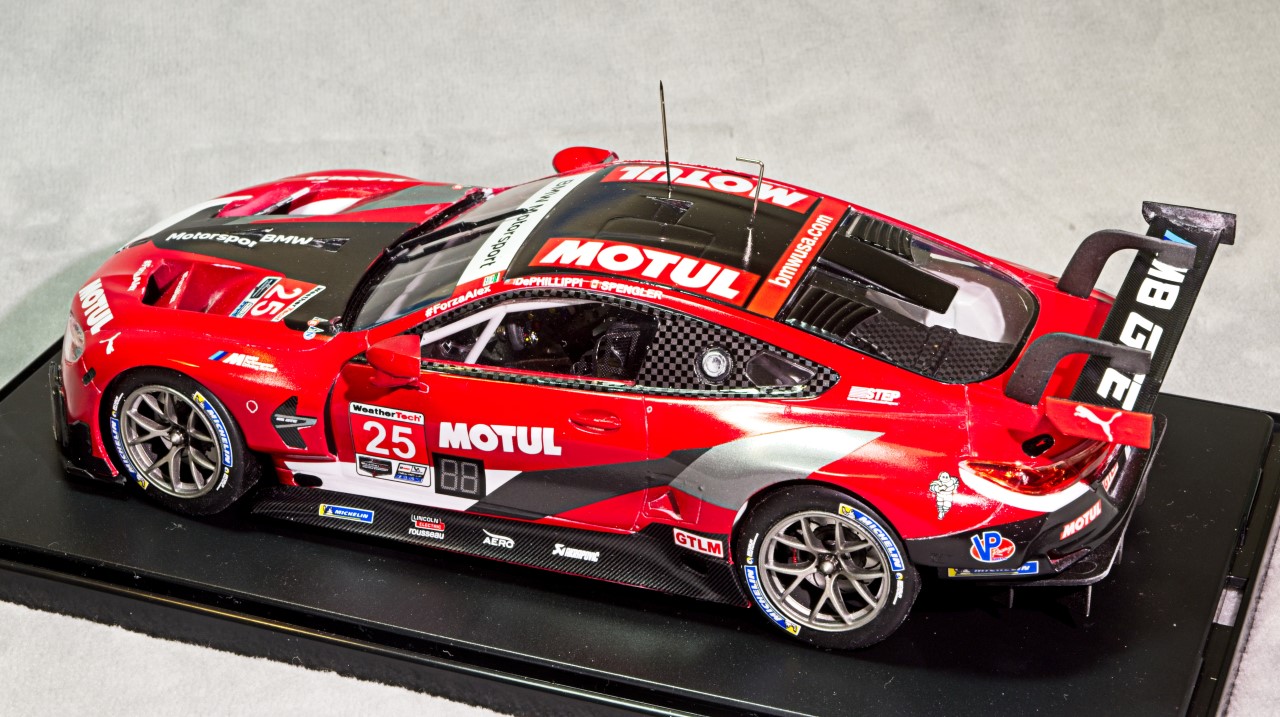
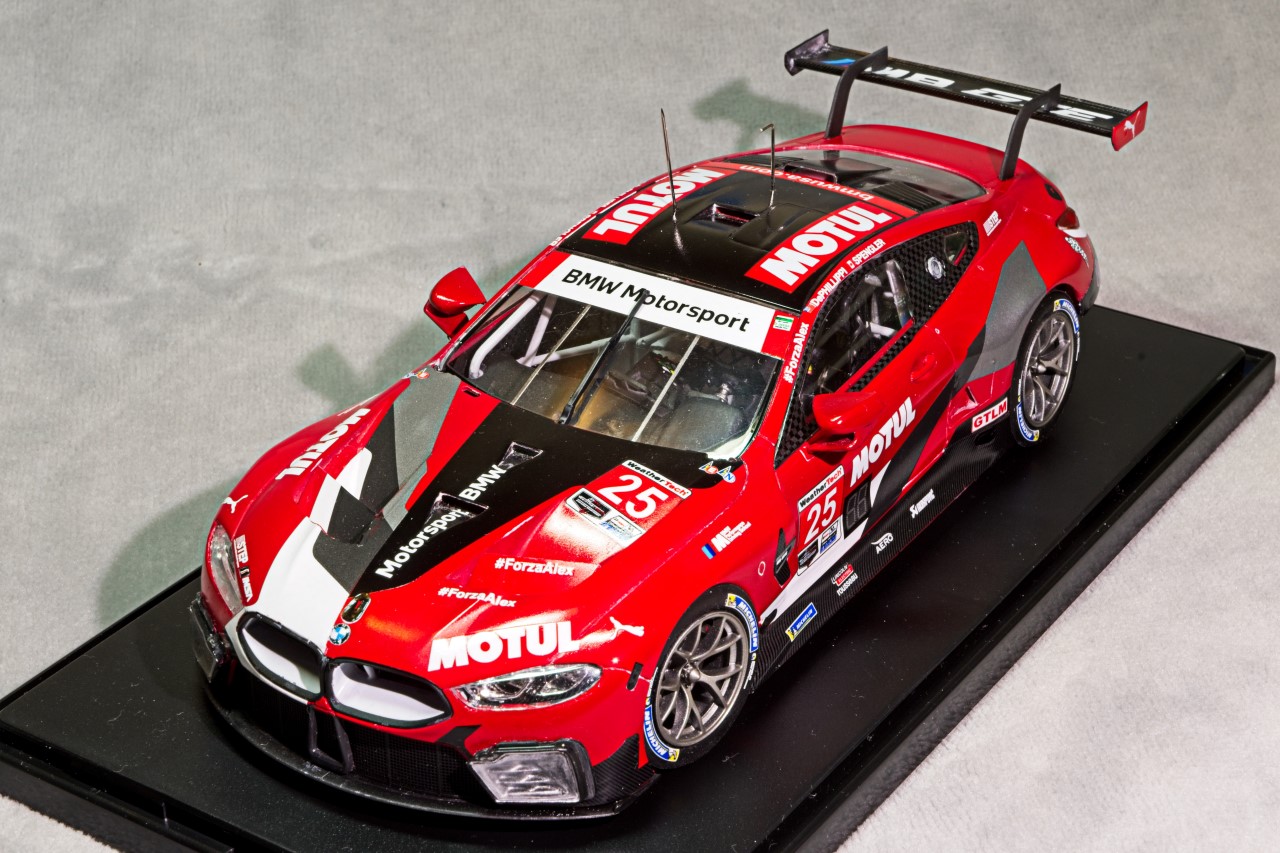
For the most part, the body shell is complete with the addition of all the various glass including front and tail light covers. While the windshield, side glass, and rear glass fit like a glove, the front and rear light lenses all needed a lot of TLC to even roughly fit, but I think I got them close enough.
The large intake screen on the bottom of the front clip is painted PE, that needed to be rolled some what to match the contour of the clip.
The body has been rubbed out, polished, then waxed. I’m still struggling with getting some of the excess wax out of the panel lines. Worst job in modeling as I truly suck at it. A water spray via my Air Brush usually works OK, but we’re in the middle of a massive blizzard, so opening the window for the spray booth exhaust is out of the question.
All that’s left to do once the body and the chassis are joined is add the door handles, antennas, mirrors. tires & wheels.
Here’s a few pics of the body as a teaser. I did notice that I must have chipped the white decal where it wraps around into the BMW twin air intakes that was a tough sub assembly to install. A little well thinned Tamiya Acrylic gloss White will take care of that issue.
That is one amazing looking beast Joel. For the wax I usually use a paint brush and water and for the stickier bits a shaved toothpick. Good luck with the weather, it’s midsummer here, a balmy 25C.
cheers
Michael
JA
Amazing work on the Bimmer’s body shell - painting and decaling look fantastic.
Bro
More Willstein paint and decal magic !
I’m in the same boat - have some parts to spray for the Alfetta but it was 13 degrees this morning and I dare not open the shop window .
Cracking stuff, Joel! 
Michael,
Thanks for the tip. The brush did work, but I need to buy a smaller flat bristle brush to get down into the recesses.
Sunny day here but the temps are in the single digits. Just 7 degrees this morning.
joel
hey Bro,
Thanks for stopping by and checking out my Bimmer. Already fixed those nasty white decal chips even though they do look like track damage.
On the last lap and I can see the checkered flag at this point.
joel
Richard,
Can’t get much colder then it is this morning at 7 degrees F. No painting for me till we get to the mid to high 20s.
Decaling is my favorite part of modeling these days, as all the race cars I’ve been modeling have these complex schemes.
joel
hey Russelle,
Thanks so much for stopping by and checking out the progress on the BMW M8 GTE car. Glad that you like my efforts to date. Like I told my brother, I’m in the last straight to the finish line that I can finally see.
joel
7 Degrees!!! Then I realized just how cold that is, as we’re using Celsius down here, which is around -14!!! which sounds so much colder… ![]()
I hate to tell you, but we’re in a bit of humid heatwave here, last night only got down to 70(F) after a hot and humid day yesterday of 93(F)!!! ![]()
Here it’s 3°C, with a mix of rain and sleet. I’ll rather have snow or sun 
Beautiful work Joel. Bummer about the chipping around the air intake, an issue one would rather be without, but with your skills, you’ll have this fixed in no time.
Russelle,
Please send some of that excess heat my way. It would be greatly appreciated.
joel
Jesper,
Yep, sleet is the worst by far.
Already repaired the decal chipping the best I can, or should I see the best I can see to repair even with my Optivisor on. The Bimmer crossed the finish line yesterday, and I’ll be shooting the final set of pictures and posting them in a few days.
joel
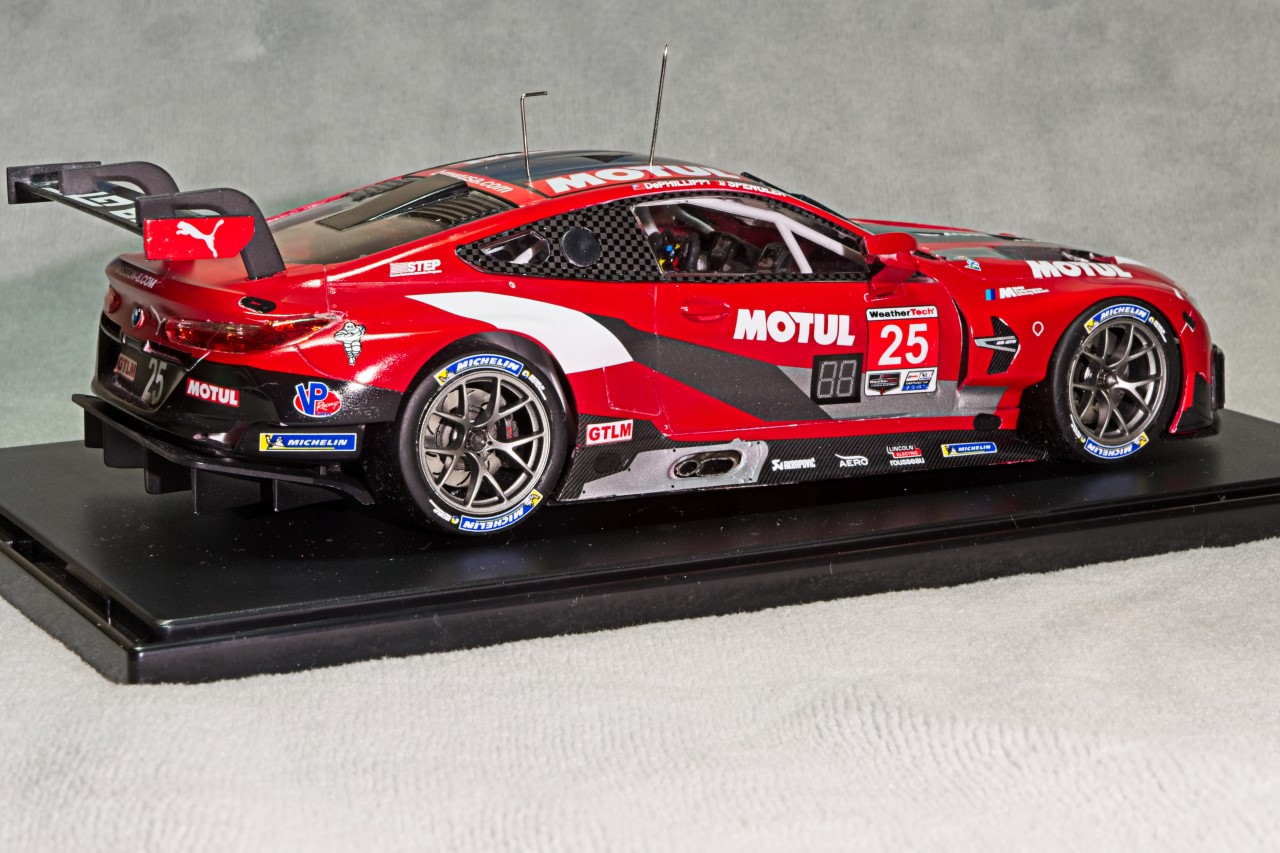
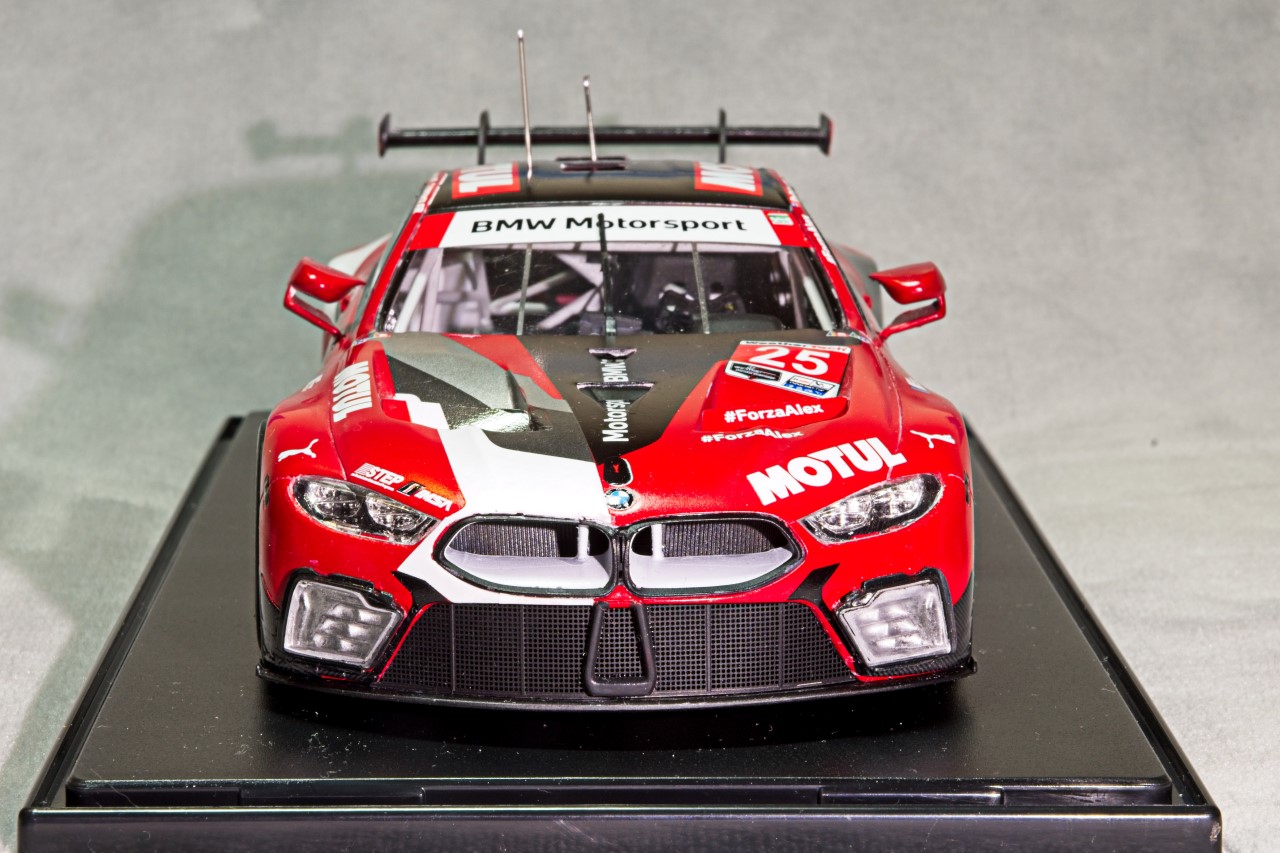
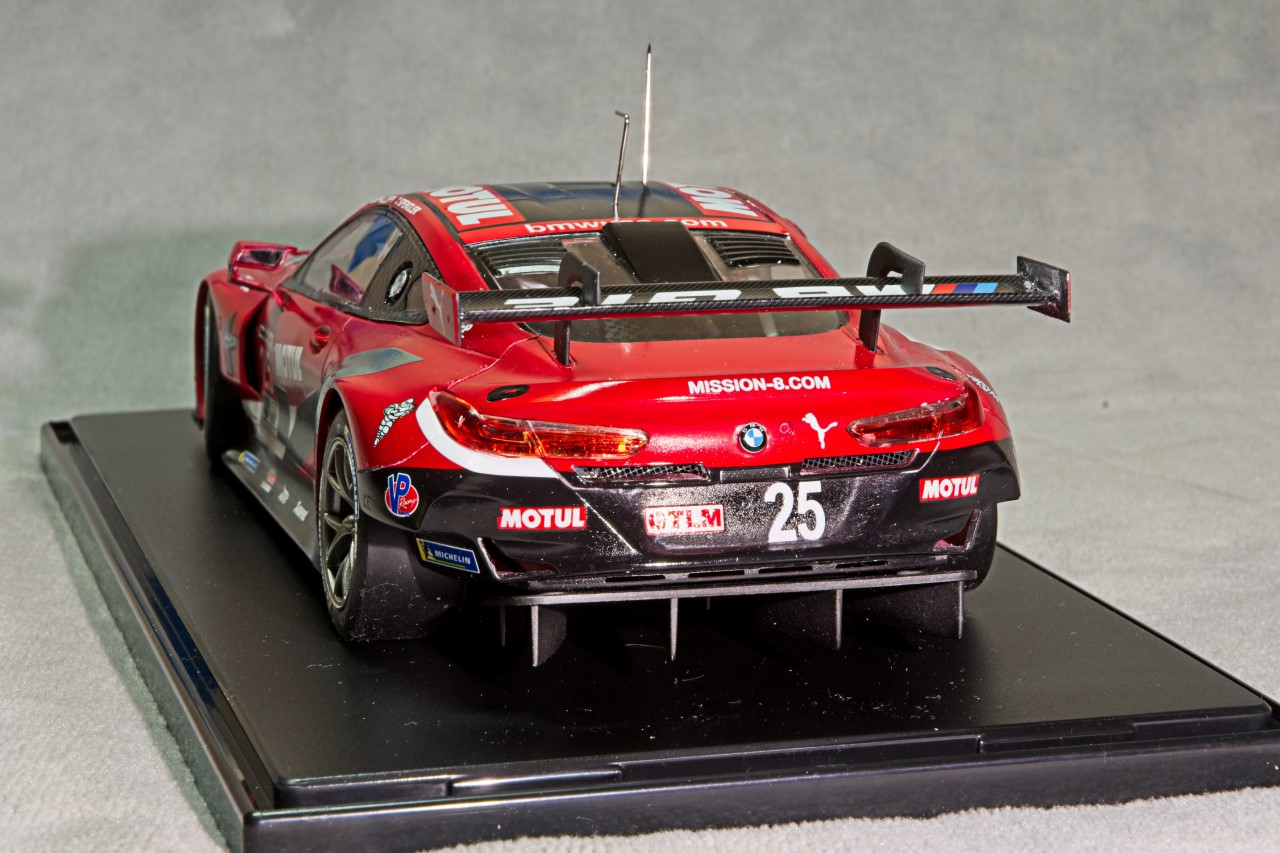
Well, after nearly 4 months the BMW M8 GTE has finally crossed the finish line. Overall, I really enjoyed the build as Nunu really upped their game with a very detailed and well fitting kit. The SK decals were as usual worth every penny, as the 3 sheets really gives you your monies worth. Even the White over the bright Red had zero bleed through.
I’d be the 1st to admit that the build isn’t by any means perfect on my part, and a few issues still remain, but out of pure fear of making them worse in the attempt to make them better, I did what I safely could do, and called it a day.
Next up on my bench is another personal favorite, naturally another Porsche: the Fujimi 1/24 scale 1970 John Wyler Gulf Porsche 917K.
Here’s a few pictures of the finished model.
joel