For what it’s worth this is my method. It’s used on whatever track material I’m using, whether old Tamiya rubber bands, modern formula DML bands, Magic Tracks or whatever. It’s not supposed to work on rubber bands because I’m still stuck in the Humbrol enamel rut which is supposed to make them drop to bits, but I’ve got tracks that were painted 30 years ago still together. I start off with the same Humbrol Matt Black overspray primer that everything gets. This is followed by a mid rust brown colour, which is dusted on, almost like an overspray, not worrying too much about coverage (I’m aiming for the gaps between the track blocks to stay black here). Next is light earth getting into all the corners, then a hard dry brush with an oily steel (Matt Black mixed with Silver). Certain tracks, e.g. Cletrac type such as fitted to German WW2 half tracks, then get the top surface of the rubber blocks picked out dry with Panzer Grey. Finally a good dusting with some old MIG powders I’ve got lying around. I’ve seen German WW2 vehicles running at Bovingdon (especially the Tiger) and this pretty much produces the result in miniature when the ground is dry and dusty. I don’t tend to go for heavy mud, as I don’t want to bury all the detail I’ve paid for! To this mix, from my observation, you could add some static grass to depict torn up grass.
I like to use Humbrol Track Colour for the “mid rust brown colour.”
Ken
First time really giving pigments a go, pr acting on old panzer iii tracks, what do you guys think? Too heavy, too light, unrealistic or good?
I based them with a dark gray pastel wash and then used various shades of dry brushed brown pastel
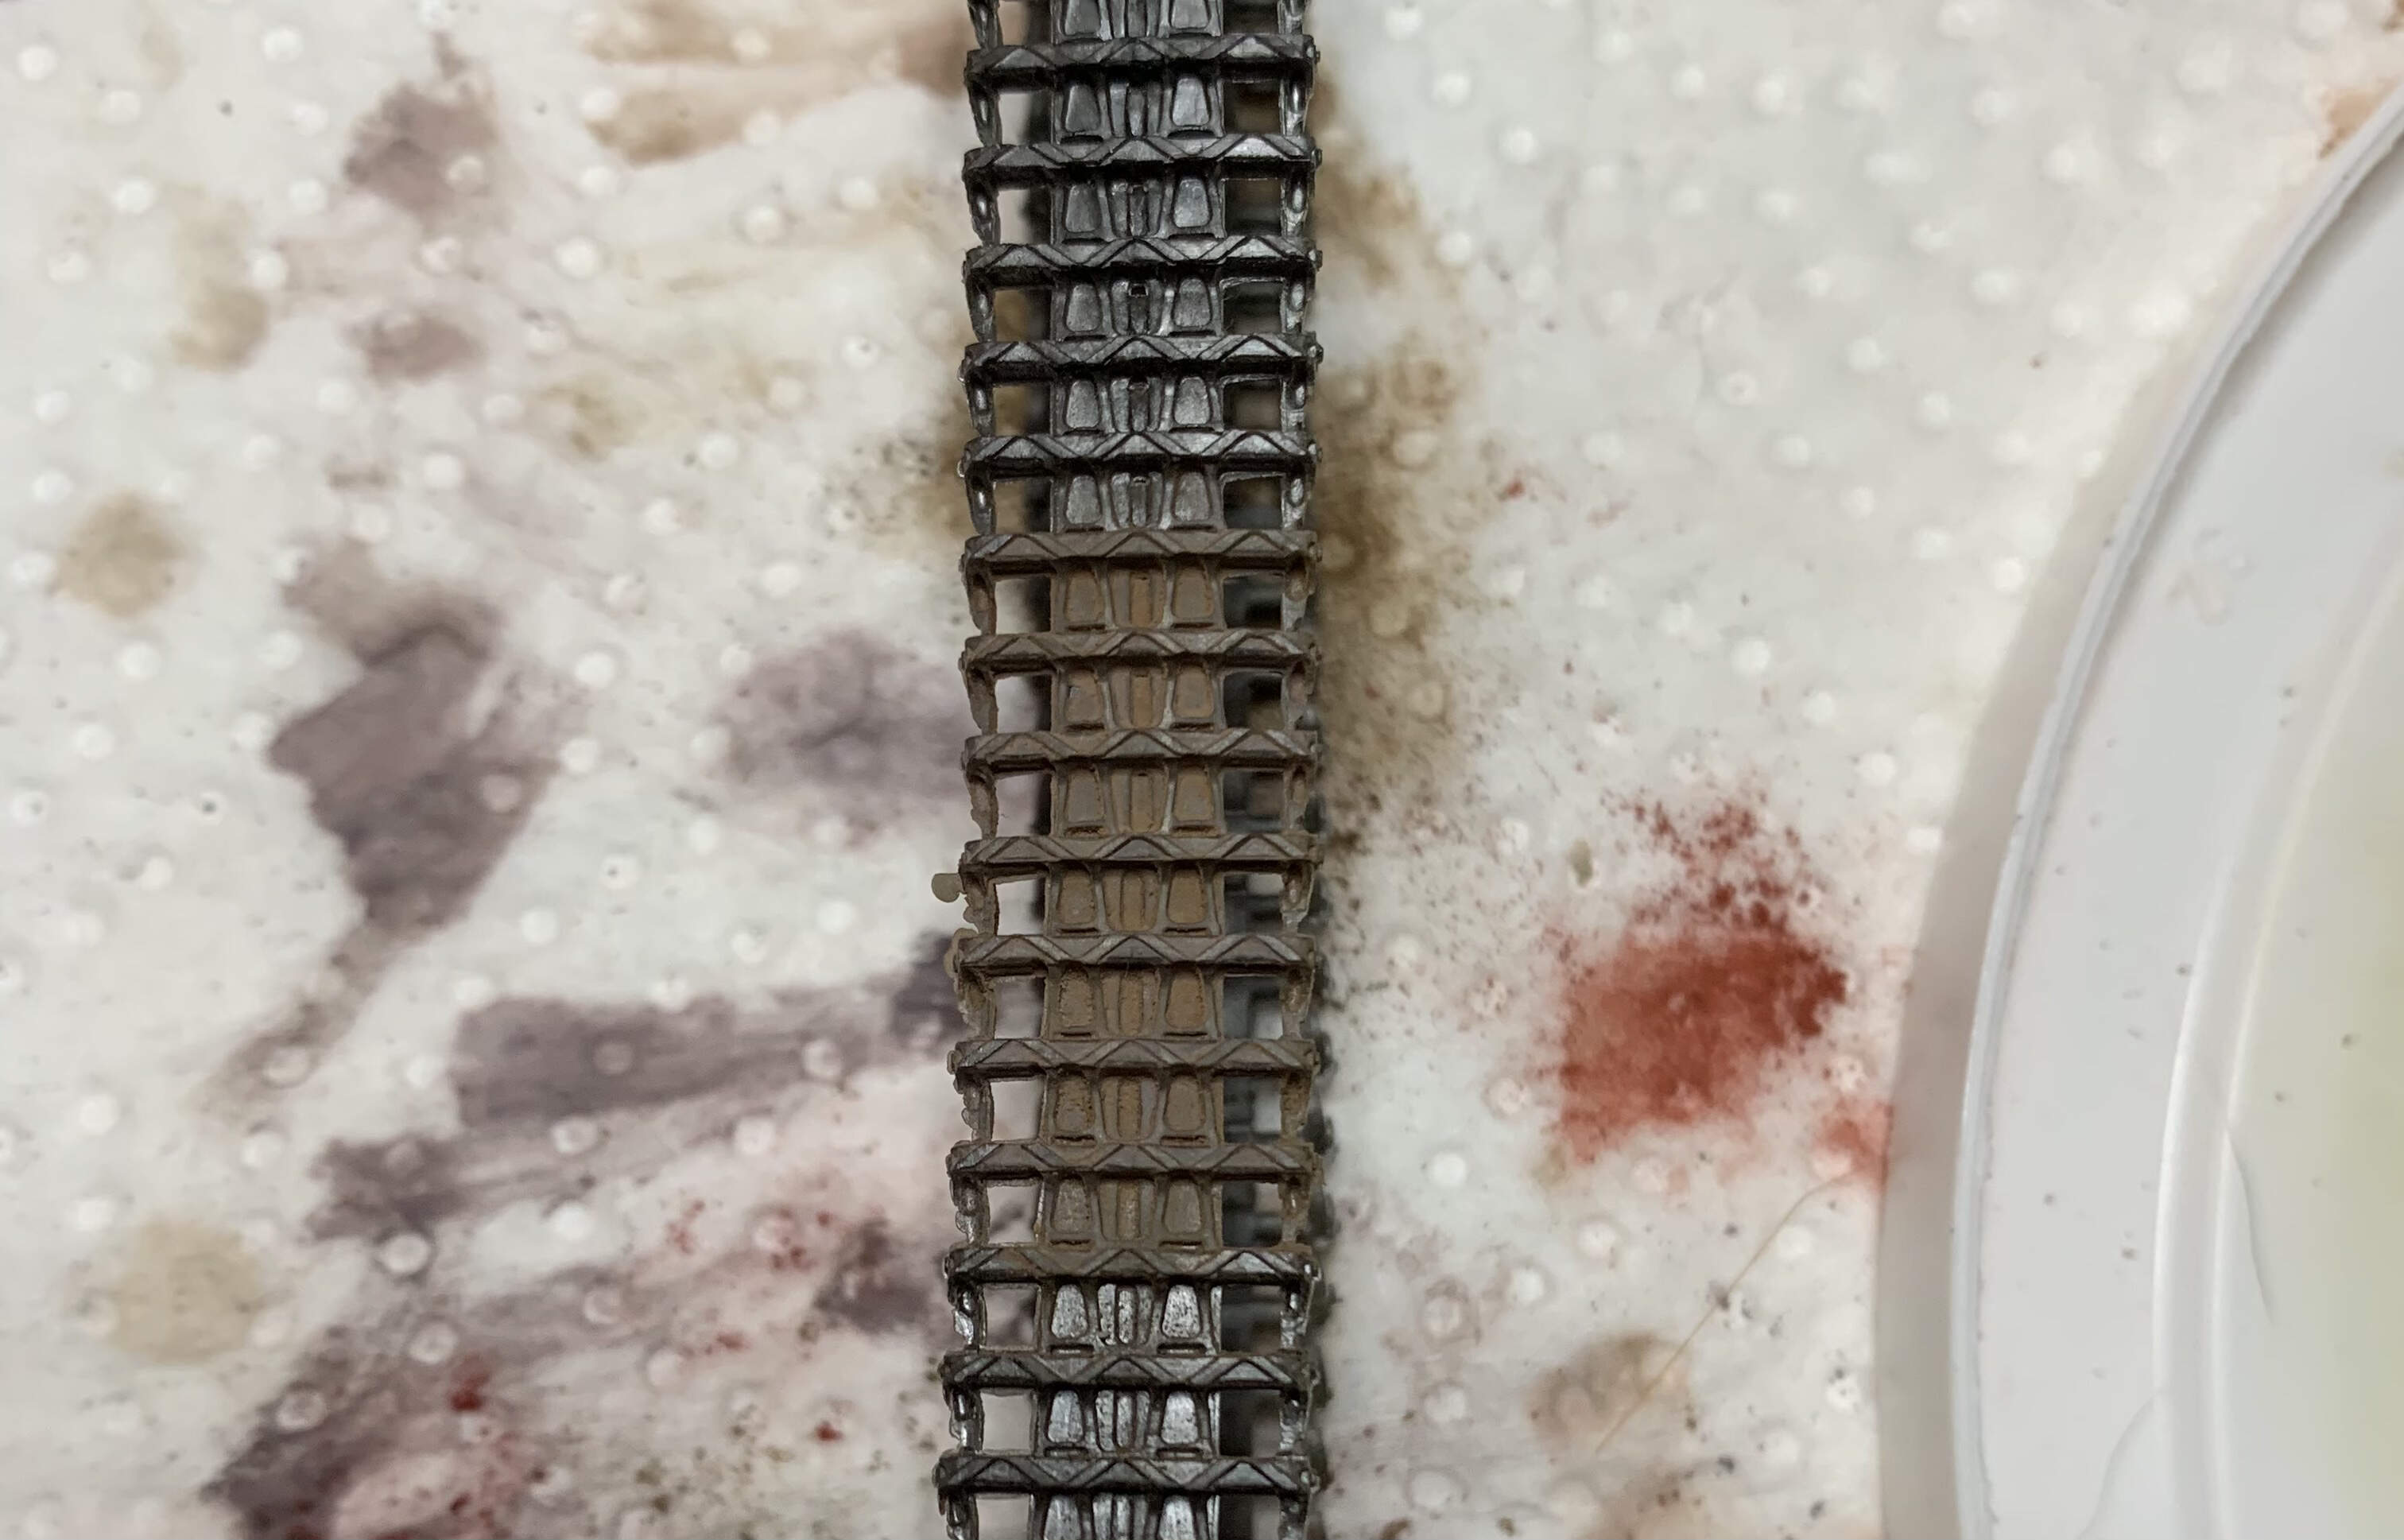
I tried pushing it into the gaps leaving the points that contact the ground only slightly dusty
I think with weathering it’s there’s always the factor of personal tastes so it’s very difficult to give a cut & dry answer.
Right in my mind has a lot do with do with:
-
the tracks look like they belong on the tank for the environment where the tank is located.
-
The builder likes how the tracks look
Others will have different views.
With that said, there are definitely many ways to do it. A lot of it is just playing around experimenting until you find the look you want.
In my humble opinion, that’s best or easier accomplished with a wash as it will settle to the recesses away from raised details rather than pastels or pigments. Then followed with drybrushing on the raised details, and last by pastels to blend and tune the other two effects.
Do you havea few pictures of real T-55 tracks in the field to reference? That can help a lot too with deciding what’s wanted in my opinion.
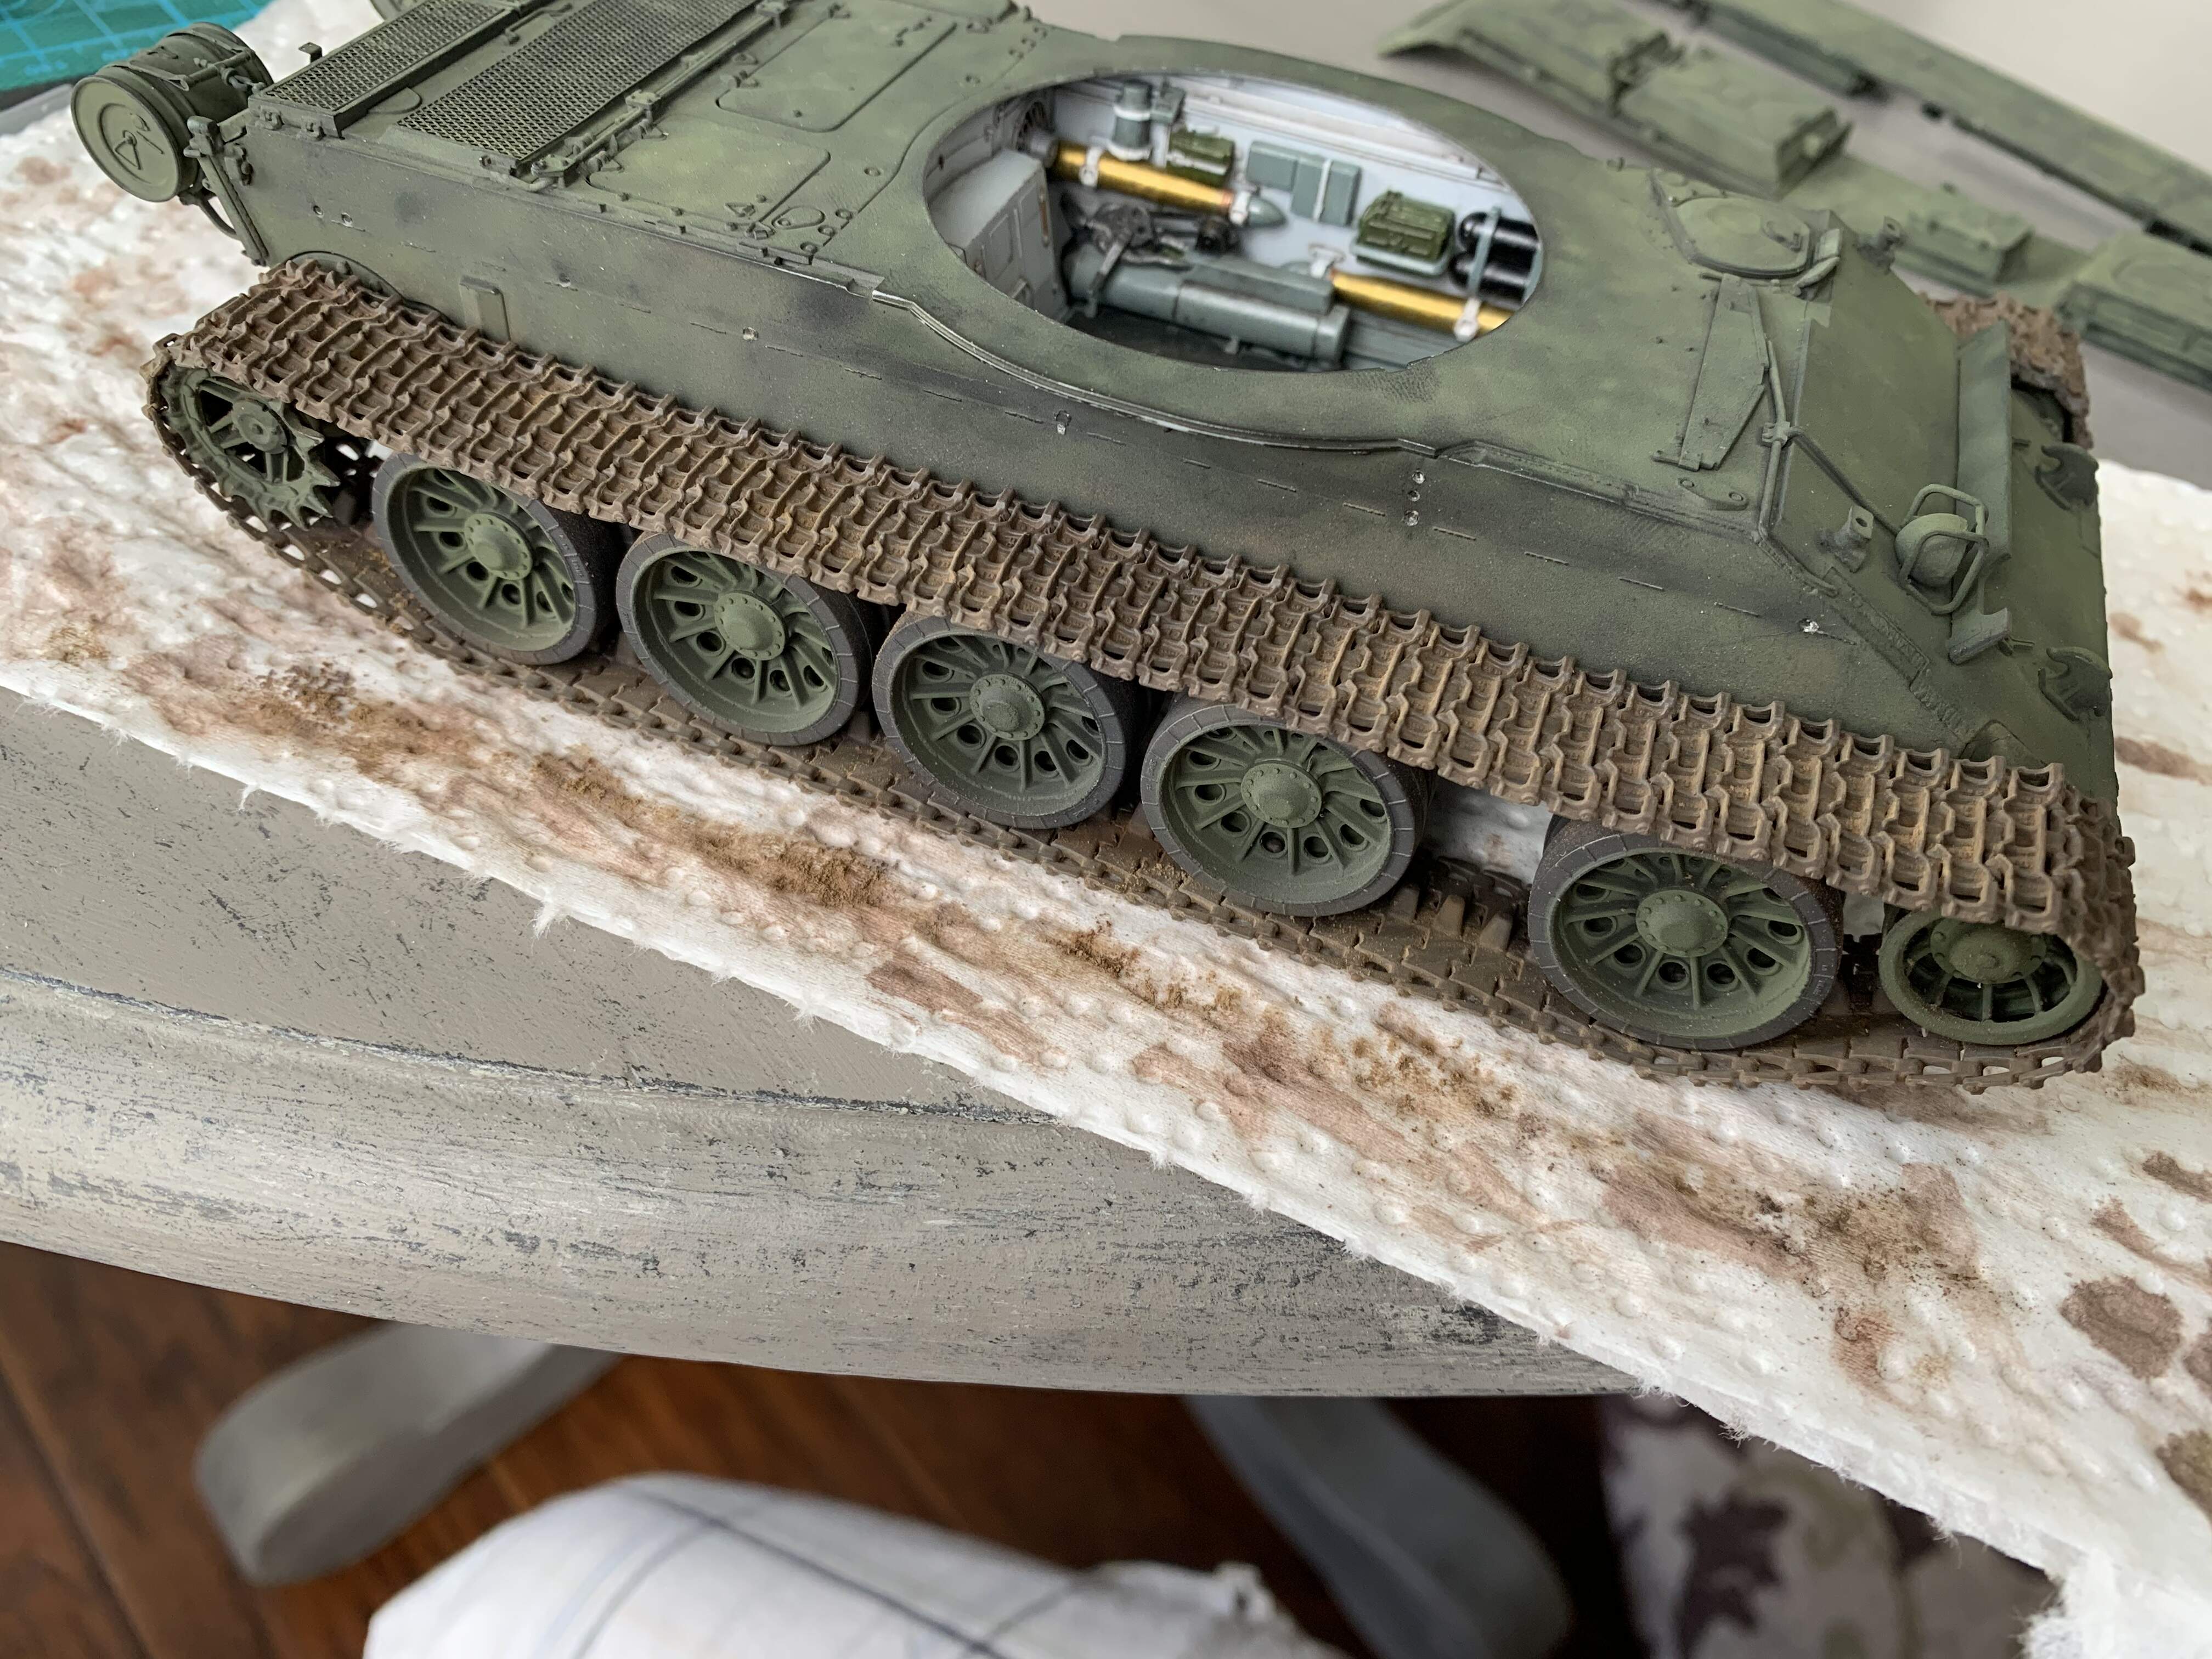
I’ve struggled a bit to find T-54 track pictures, and when I do they are all museum pieces with pristine tracks
The one I am depicting was used in the Hungarian uprising so it would have been driving down paved roads and cobbled streets. I do not want to depict it too muddy or anything, just dusty with some light rust/dirt built up and then contact points with the road worn a bit more without dirt
I think for wear and weathering a T-55 track should be fairly close and a decent general guide for those effects.
What you have as a base looks excellent for where you want to take the weathering.
I’d paint a section of those Pz III tracks as a test strip in Dark Iron. Then hit them with a thin dirt colored wash mainly aiming for the recesses. Light wash because if more effect is wanted do second application. Tanks attract dirt like little kids ![]() Then lightly dry brush the exposed metal effect as desired.
Then lightly dry brush the exposed metal effect as desired.
Just my thoughts, others may have more opinions ideas etc.
Good call, really trying to resist overdoing it. I just want a bit more interest in the tracks than straight dark iron but I don’t want to make them look over the too dirty, maybe a dirt coloured wash, then dry brush with graphite folllwed by a light dusting of earth coloured pastel to blend
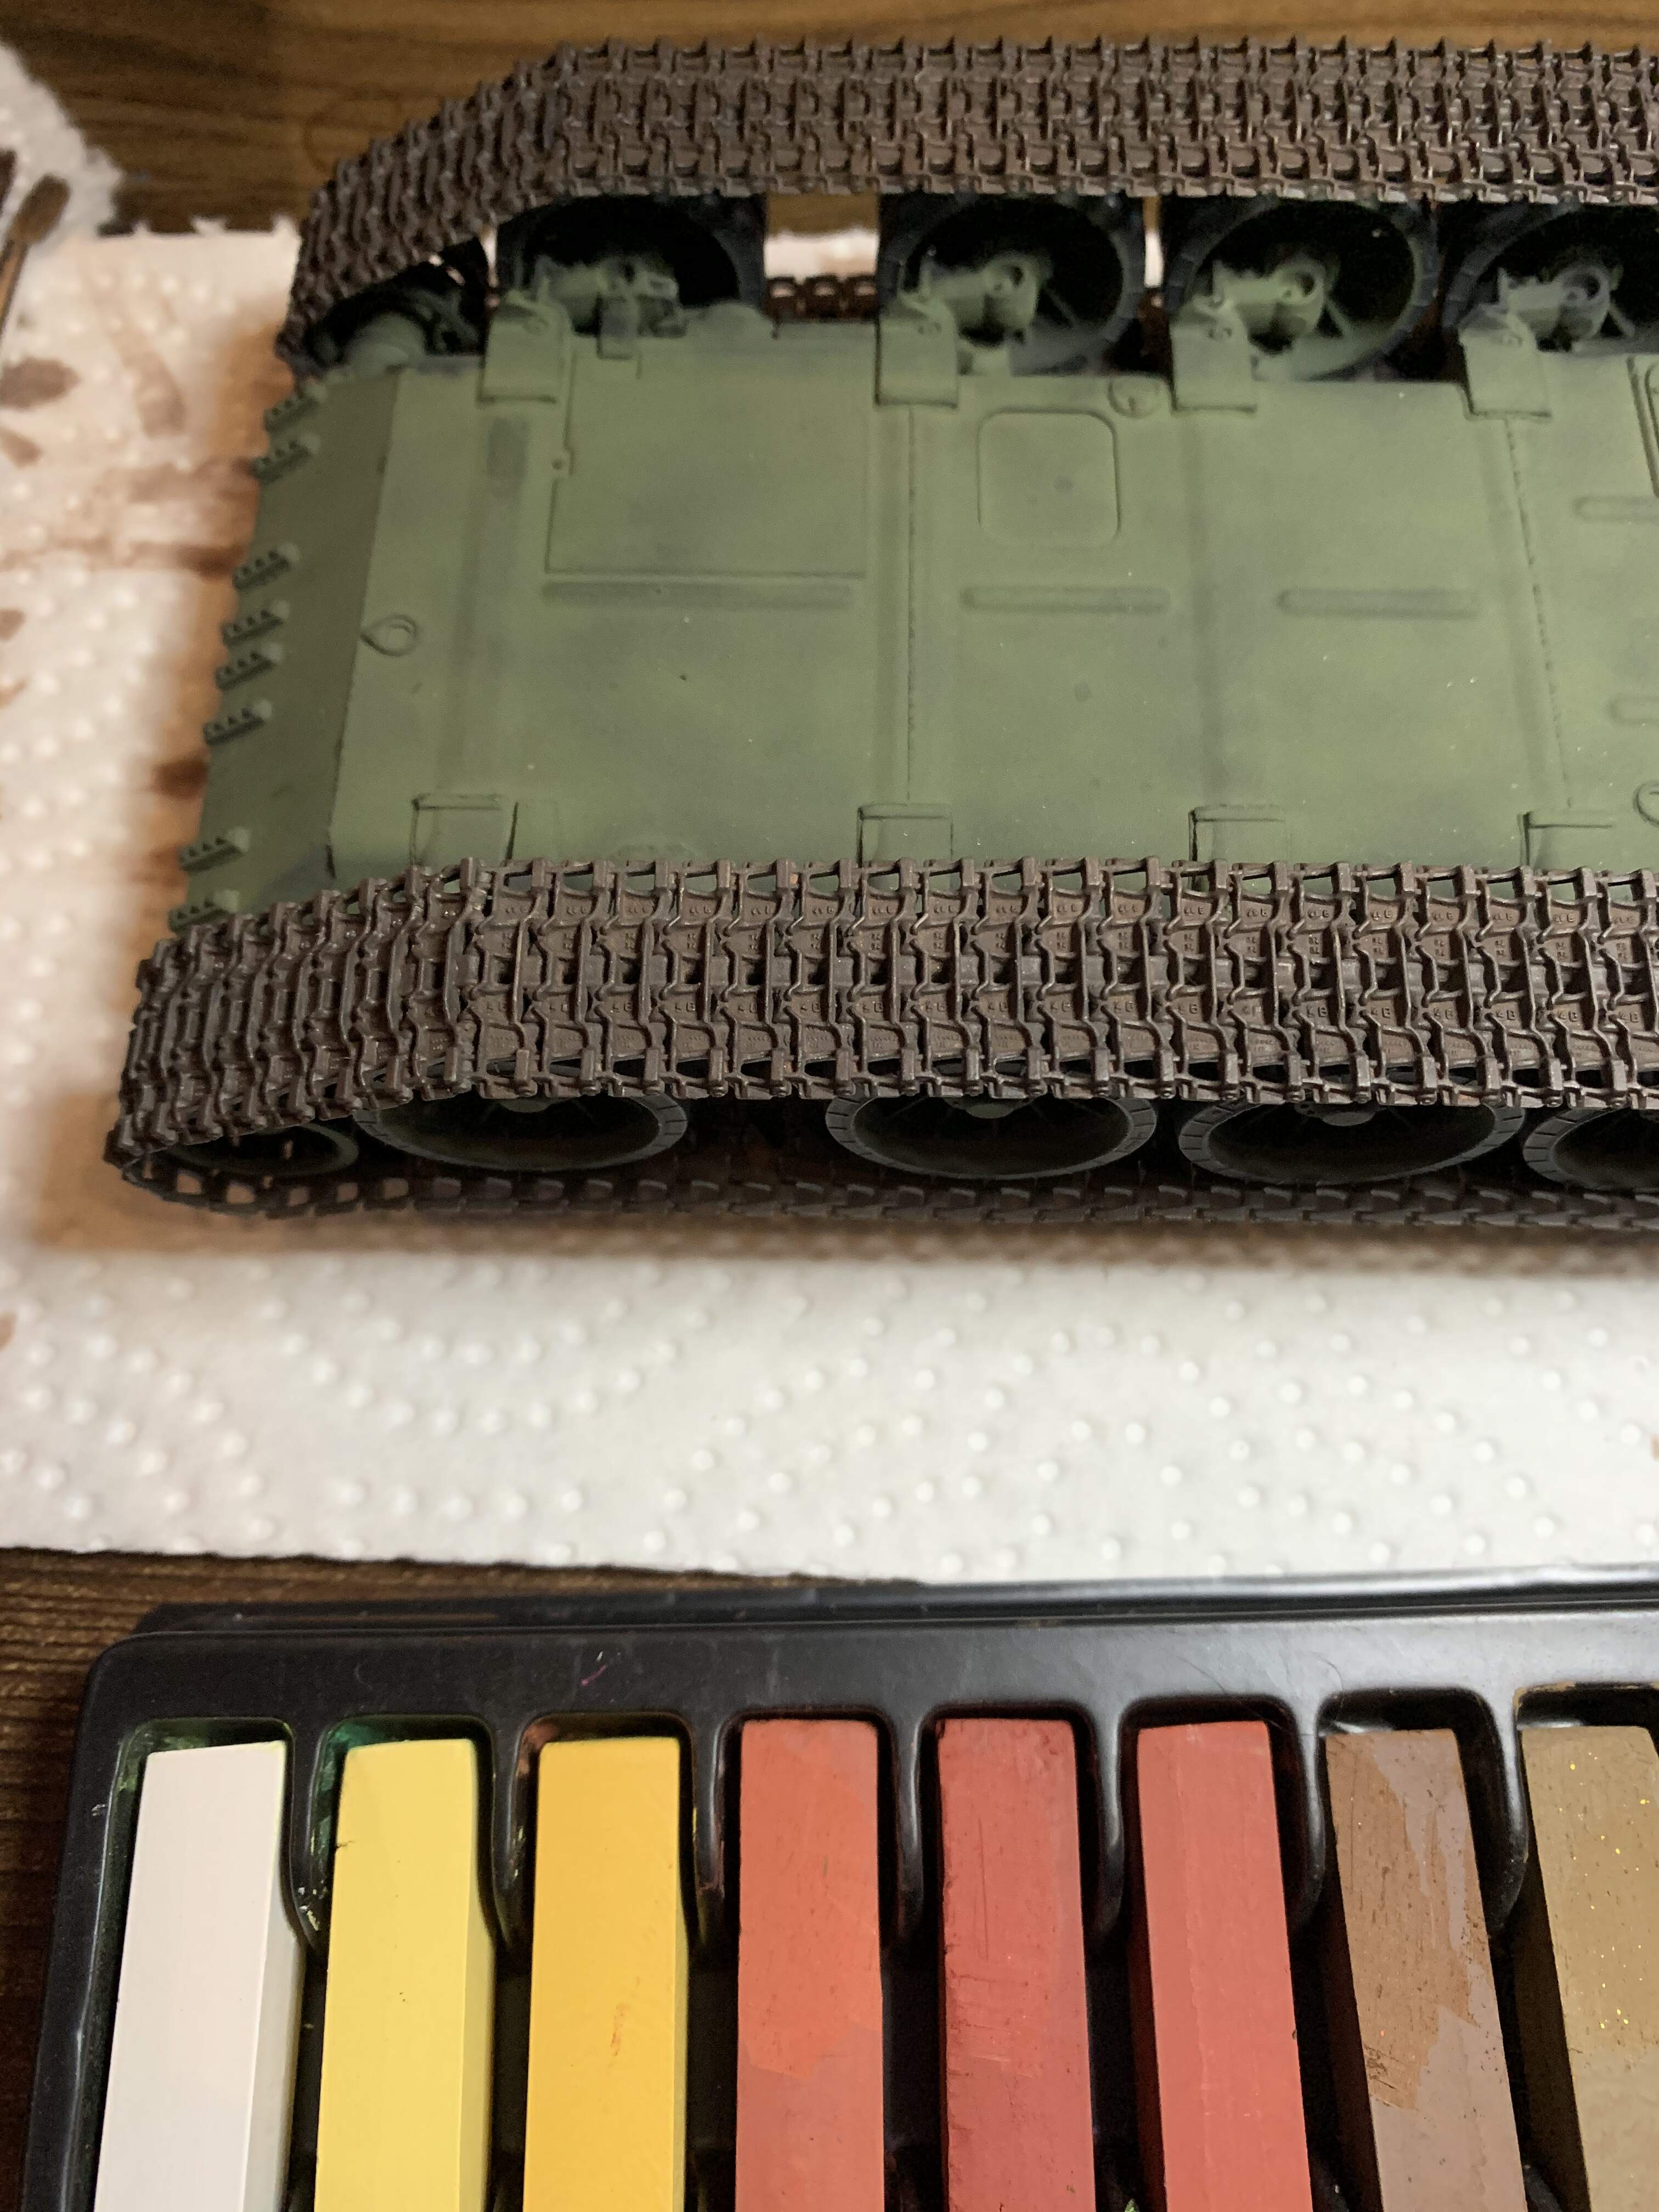
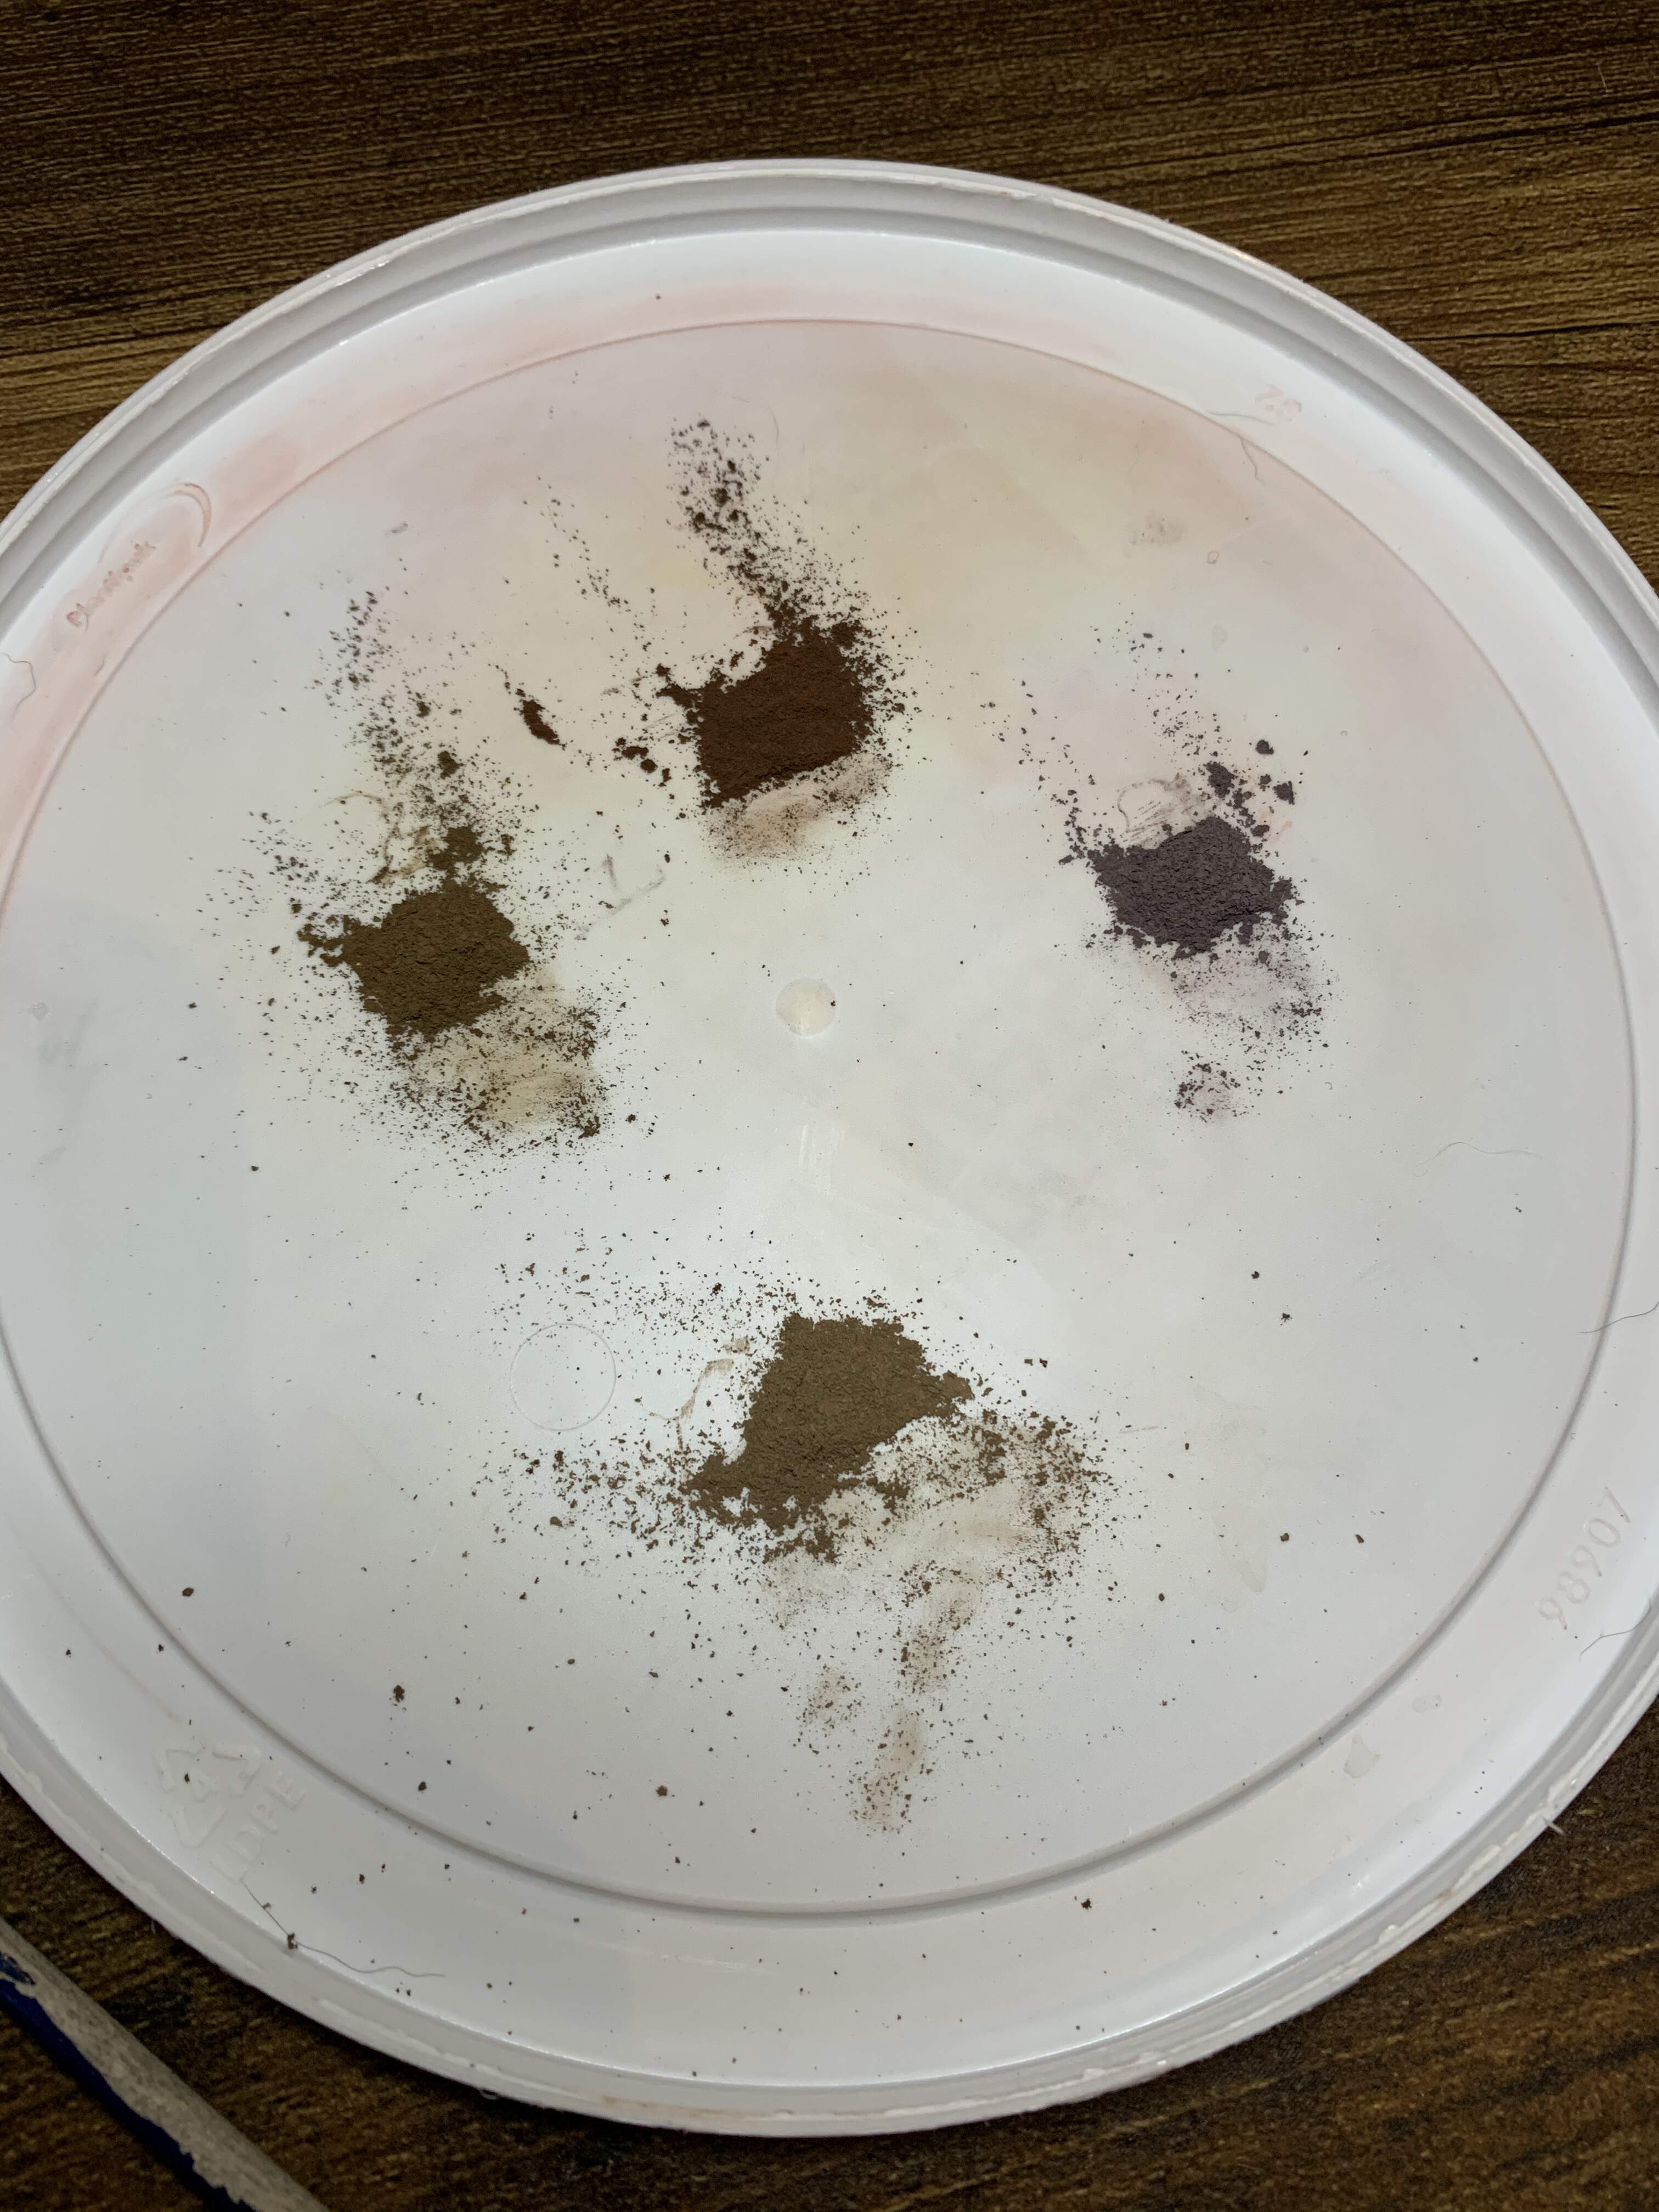
Did a dirt color wash earlier and have now hit one side with pigments rubbed in and blended. Used for colors a grey color applied first, then a red brown earth that looks rusty, followed by a mid brown and then blended with a light dusty brown. Pretty happy so far

I think @Armor_Buff has hit the nail on the head in terms of weathering your tracks @Mead93. I think you are now on the right path to getting some nicely weathered and dirtied up tracks. The only thing I would add is that to get the pigments to sit down into the recessed areas of the tracks you really need to work them with the brush- an old brush still with some shape, preferably a round one. Don’t be afraid to use a decent amount- any excess can just be blown or shook off. If you feel you have used too much then a quick rub with your finger should knock the effect back a little.
There’s a lot of good discussion about working ![]() pigments
pigments ![]() in the thread below. @SdAufKla mentions using Tamiya X-20A as a carrier. Zippo lighter fluid for me but I don’t do a lot with
in the thread below. @SdAufKla mentions using Tamiya X-20A as a carrier. Zippo lighter fluid for me but I don’t do a lot with ![]() 's (other than eat’em at breakfast & BBQ’s
's (other than eat’em at breakfast & BBQ’s ![]() )
)
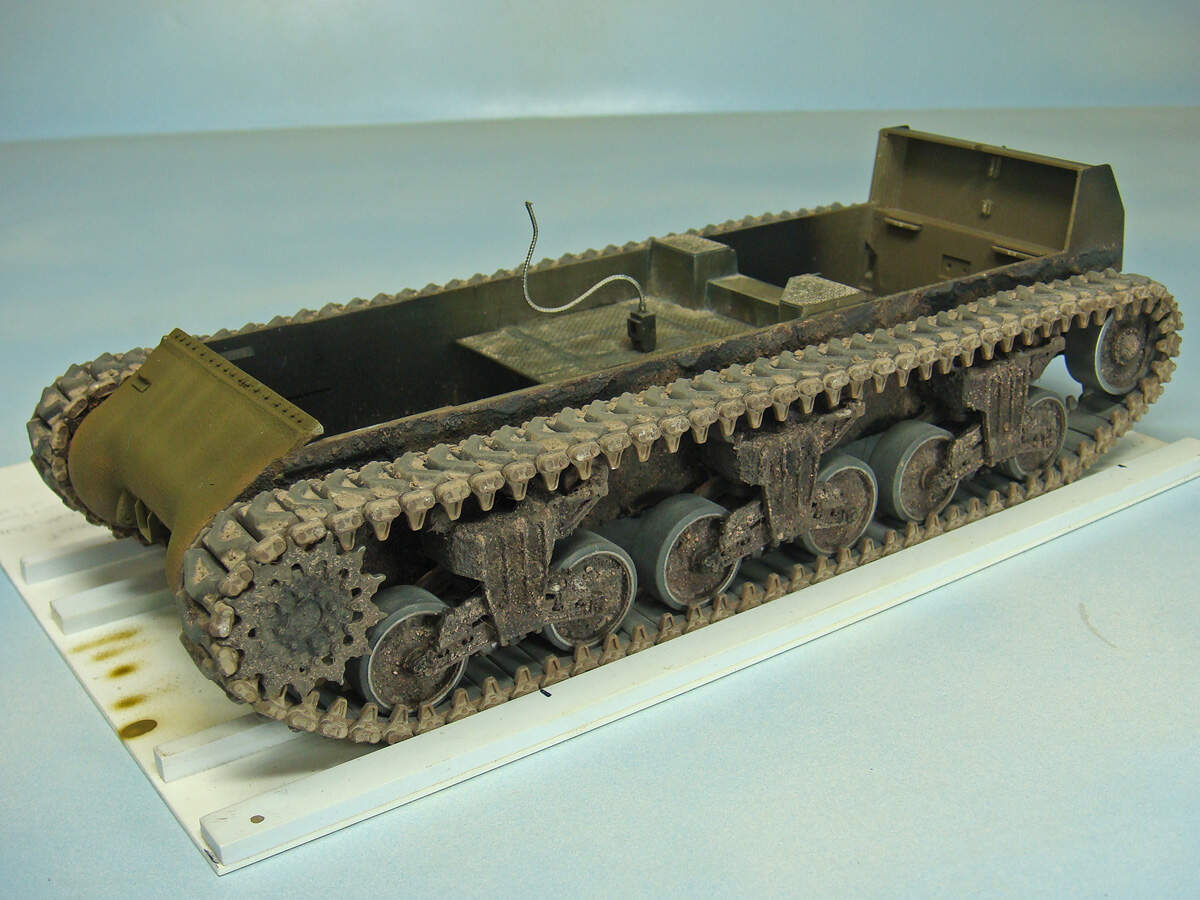
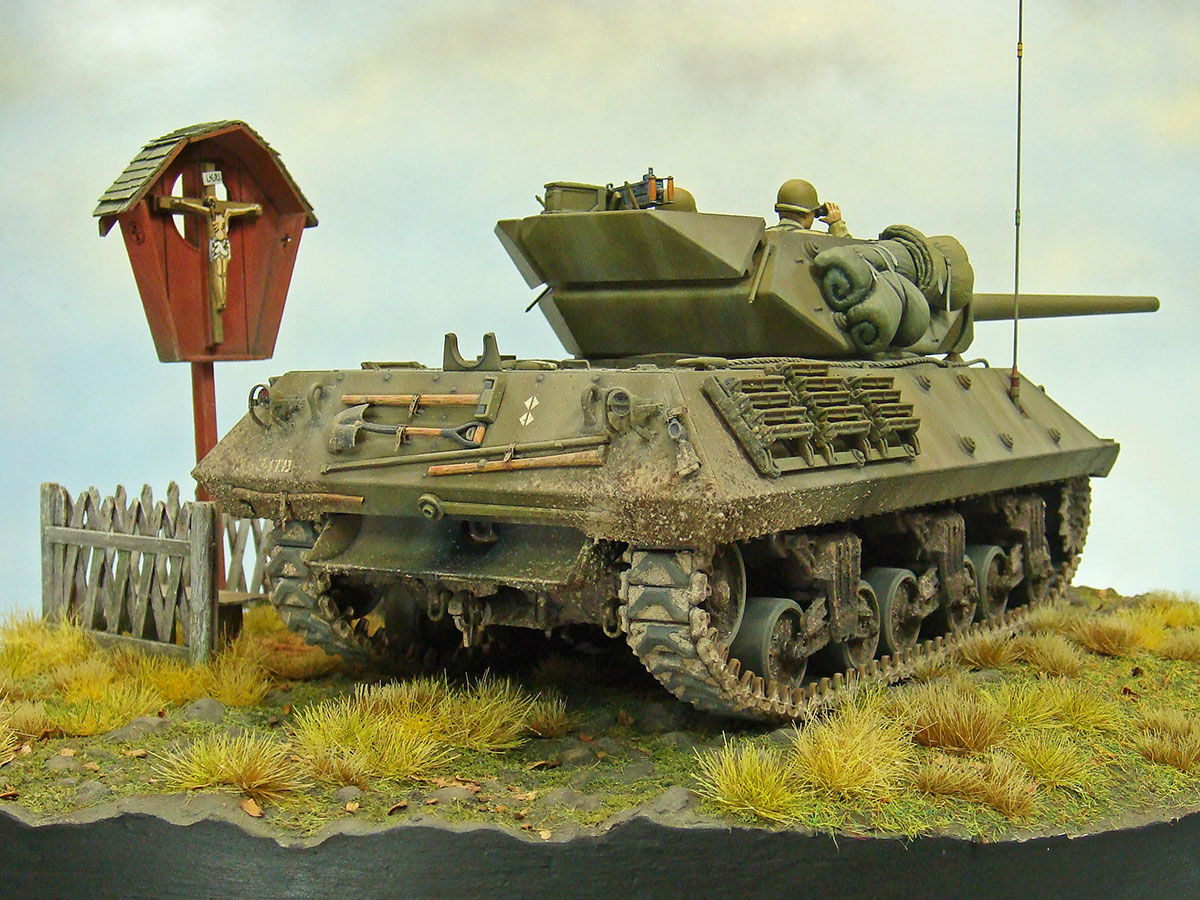
As an example of adding pigments to replicate packed earth down in track recesses, I’d offer up these. These are a set of DML link to link Sherman tracks added to a Tamiya M10.
After assembly, the tracks were simply airbrushed with a dark gray color overall and then the end connectors were airbrushed with a rusty color. I made no particular effort to mask these since subsequent weathering them blend the colors even more.

While still off the tank, and working first the sides then the tops, the tracks were wetted with Tamiya X-20A to work as temporary pigment fixer. I then used a recycled spice jar with large “sprinkle holes” to drop a pigment mix on the wetted areas. The X-20A will hold the pigments in place and draw them into the recesses.
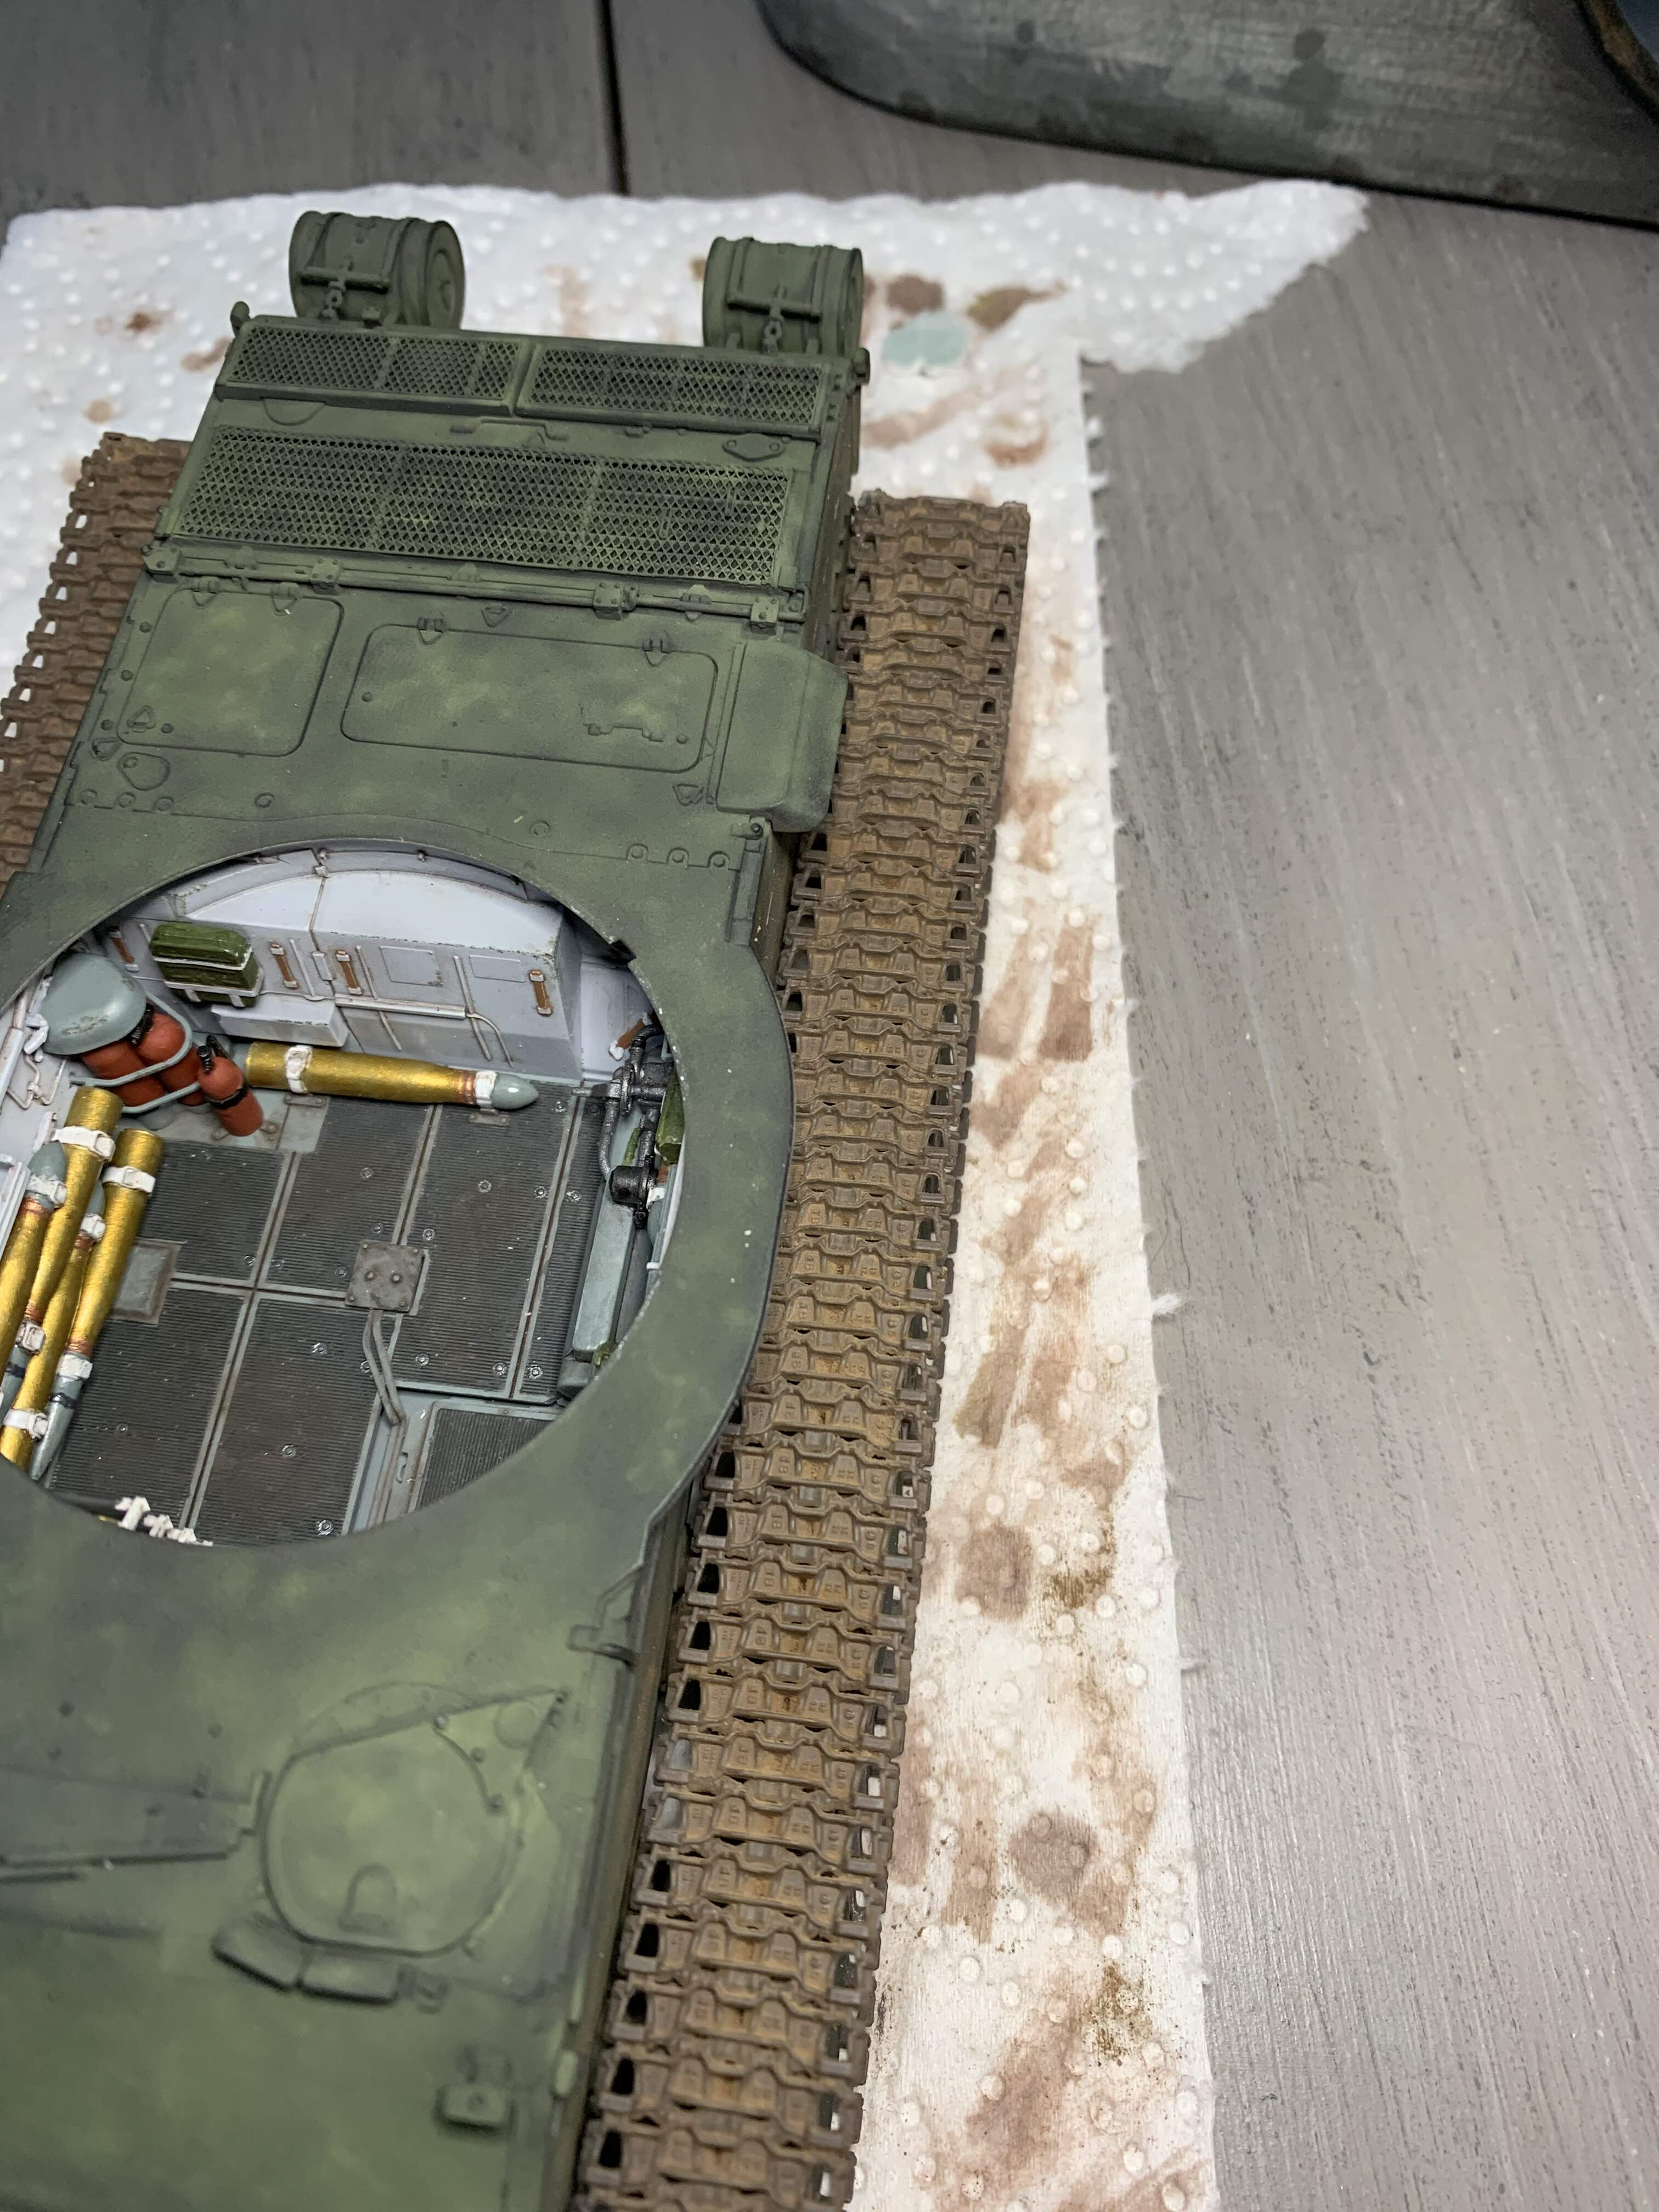
The tops were done using the same method but applying the X-20A more selectively in the three recesses on the sides of the chevrons. The pigment mix was again just sprinkled on. Once the X-20A was dry, I used a soft water color brush to gently dust off the excess pigments until I was satisfied with the look.
This stage is where the “temporary” fixer proves its utility. The X-20A will hold the pigments in place against gravity but not much else. This allows any unwanted excess to simply be rubbed or brushed away.

I then airbrushed the tracks with Testors Dull Coat to work as permanent pigment fixer. I sprayed this on in a couple of “mist coats” first, followed by a heavier application. Once the Dull Coat was dry, the tracks could have been left as is, but I knew that I would still be doing some considerable handling of the model as I finished it, so I followed the Dull Coat with artist acrylic matt medium SLIGHLY diluted with water. The Dull Coat prevents the matt medium from totally dissolving the pigments into a slick mess and helps them retain their soil-like texture.
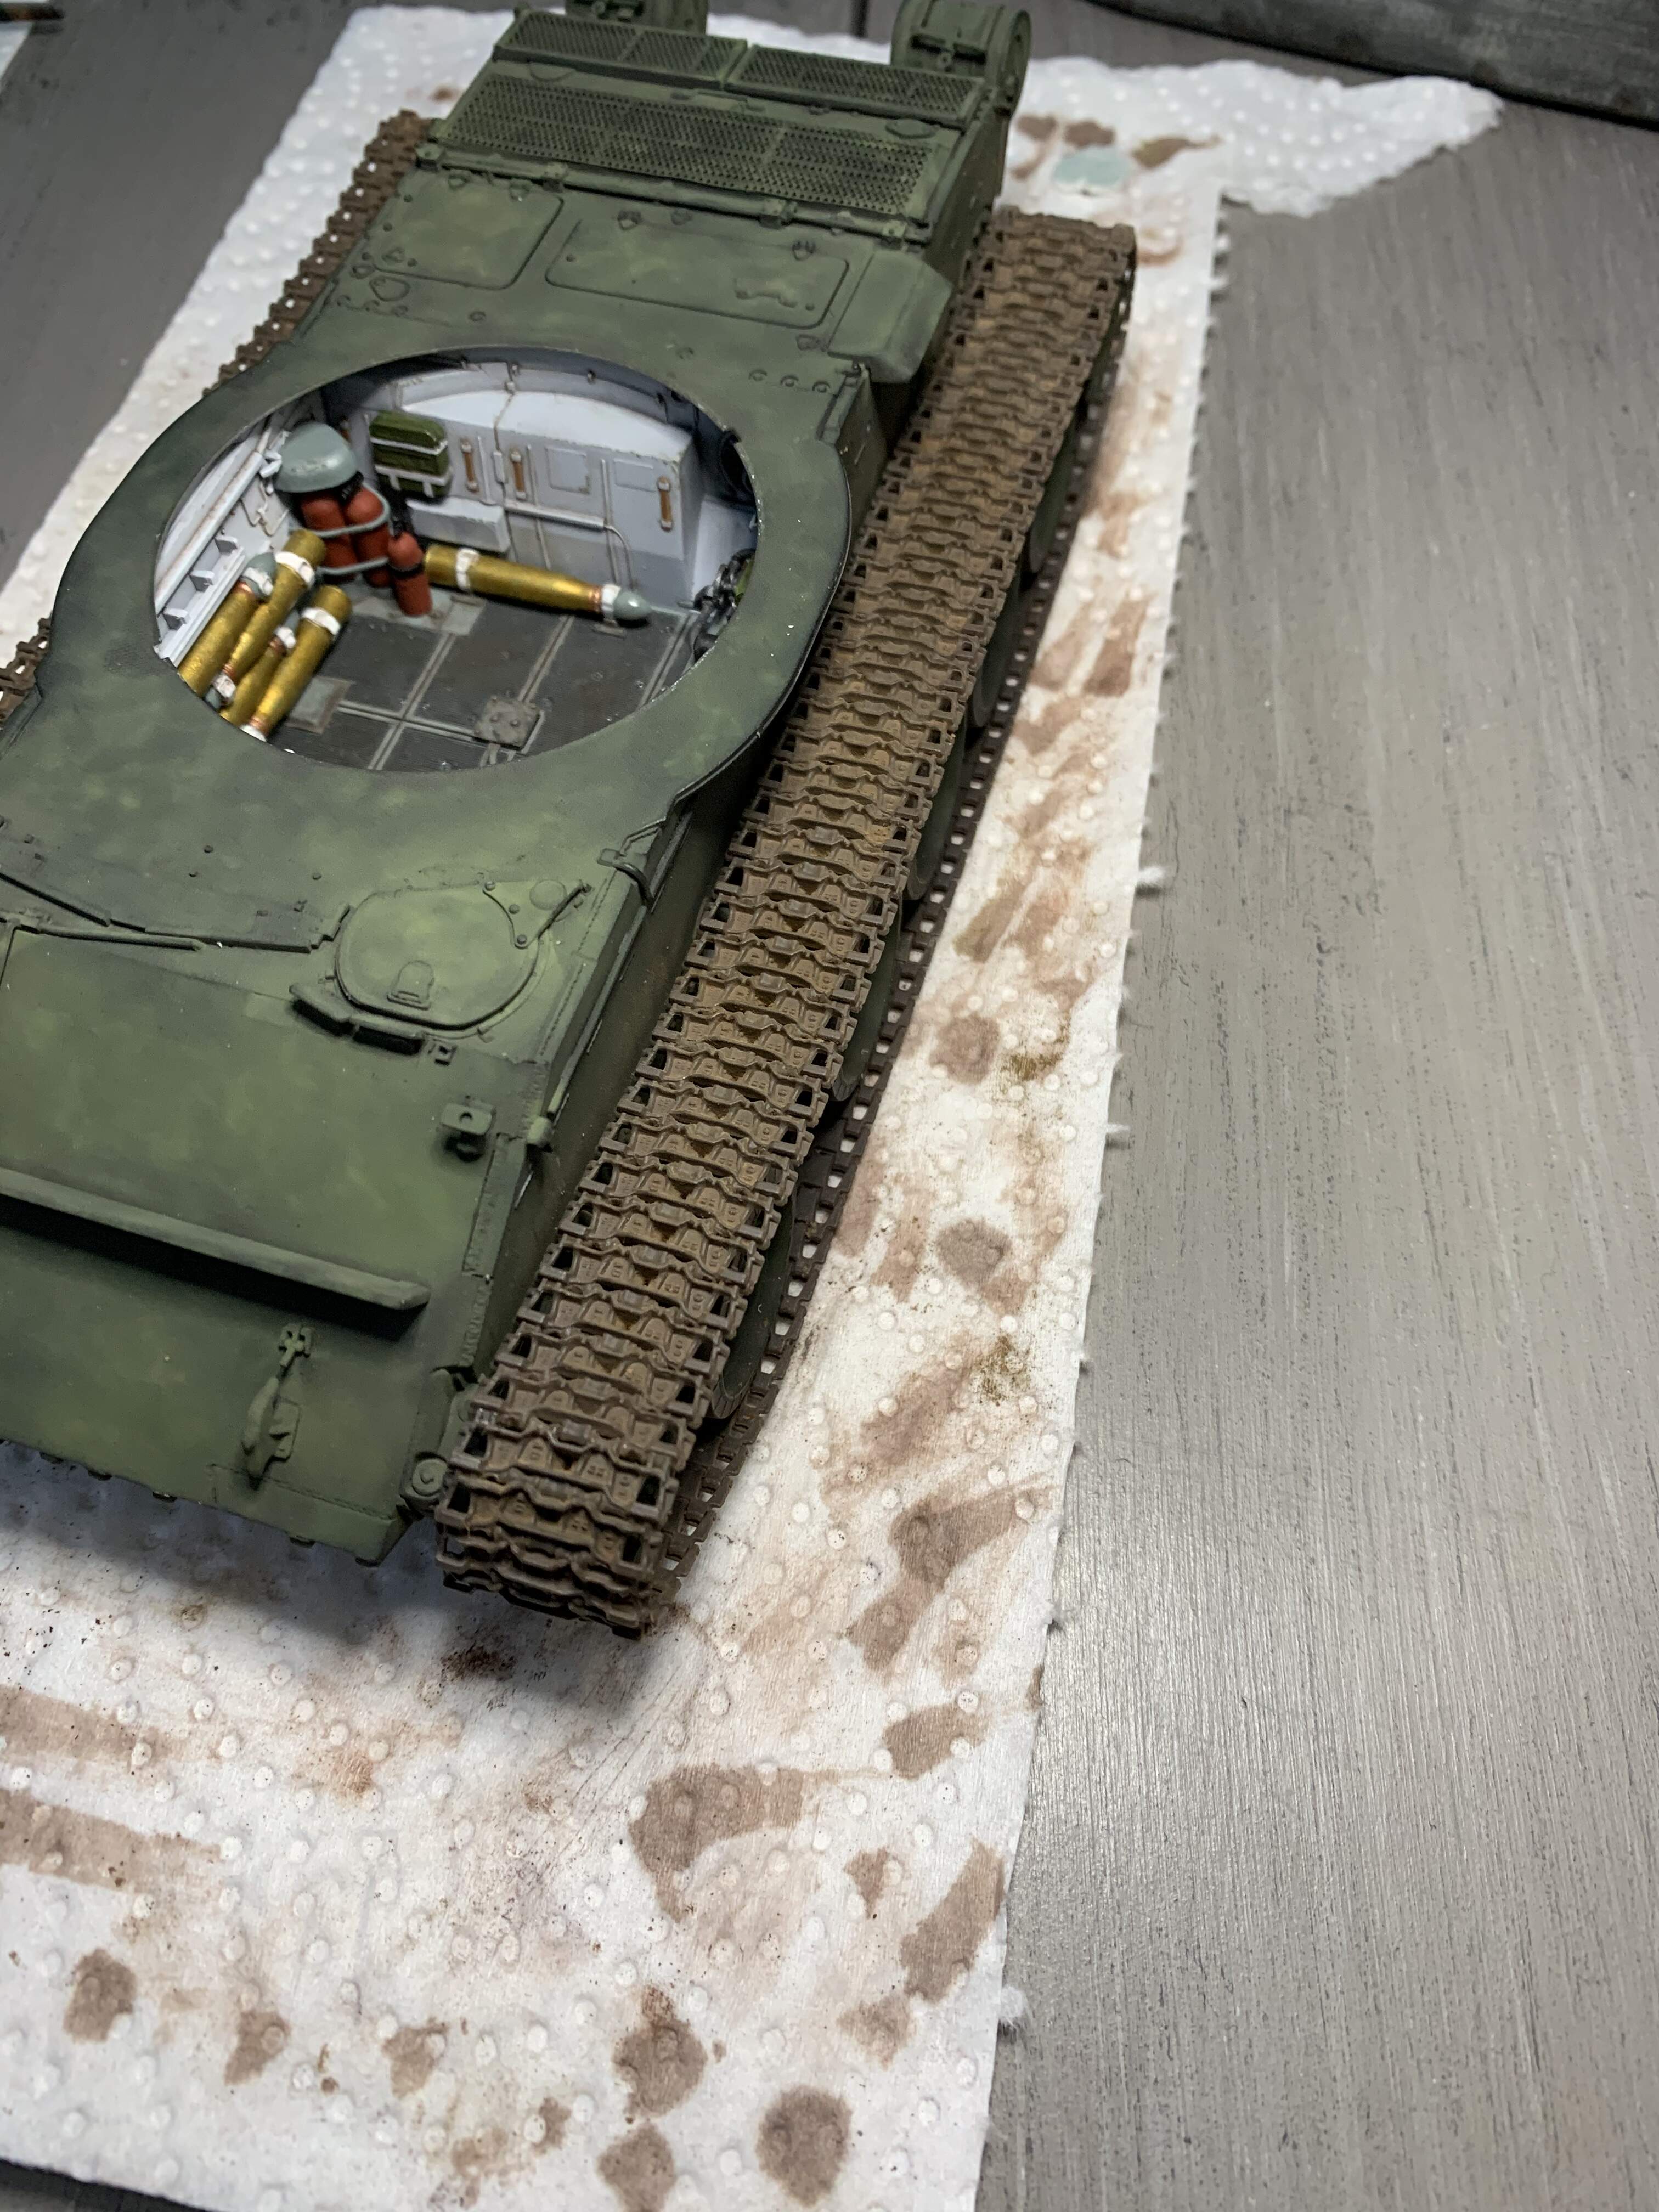
So, three successive applications of fixers, each performing its own purpose: the X-20A to temporarily hold the pigments in place while still allowing them to be “worked;” the Dull Coat to harden the pigments and protect their texture; and finally the artist matt medium to solidify and preserve their texture against any additional handling.
Finally, I went over the rubber chevrons with some dark gray artist chalk pigments ground from a stick. I used this same dark gray on the inside rubber faces and also around the rubber tires on the roadwheels.
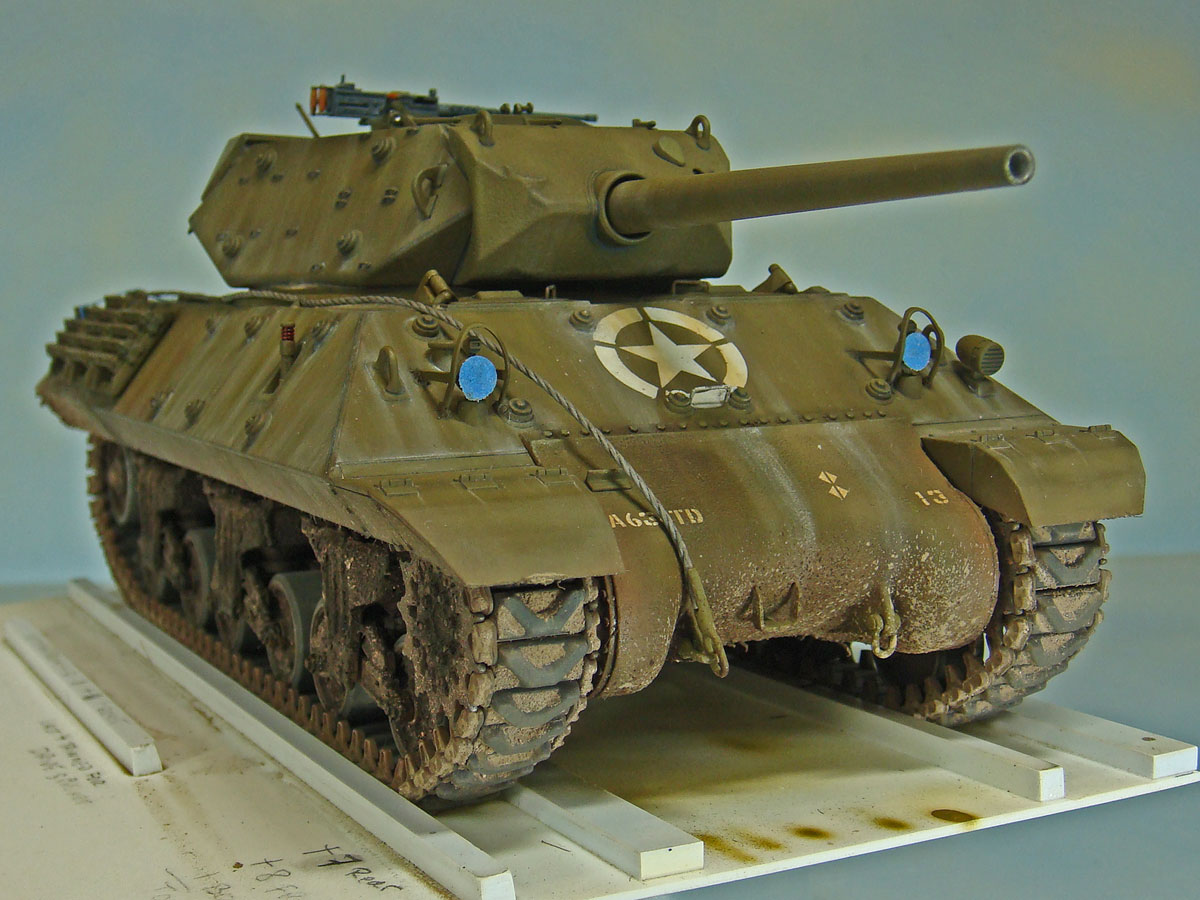
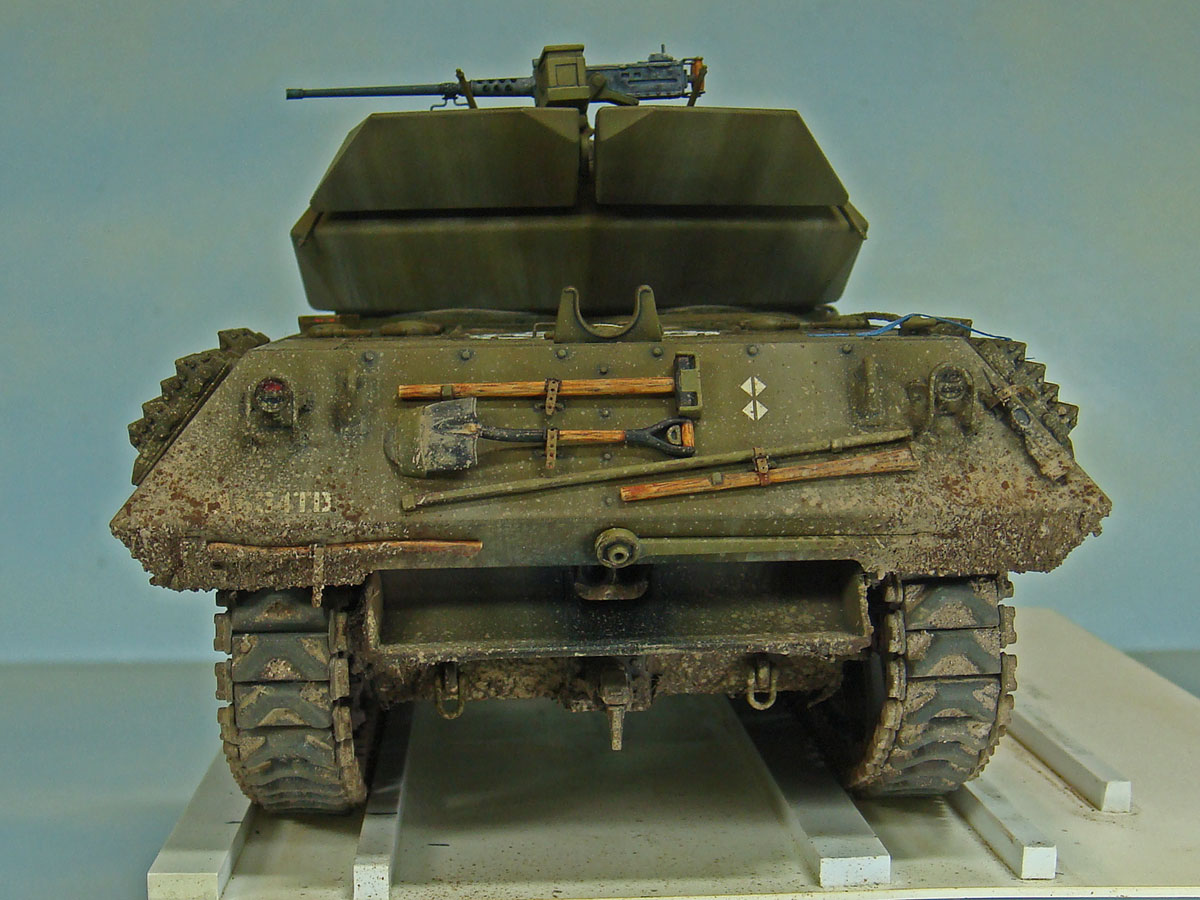
Note that the heavy, 3D pigment textures on the hull and suspension were done with pigments mixed with acrylic matt medium which worked both as a fixer and creating the “mud mixture” which could be spattered on. The spattering was done with a small, stiff bristled stencil brush, loaded with the mixture and the brushed along the edge of a piece of styrene card to “flick” or “spatter” the “mud” off the bristles.
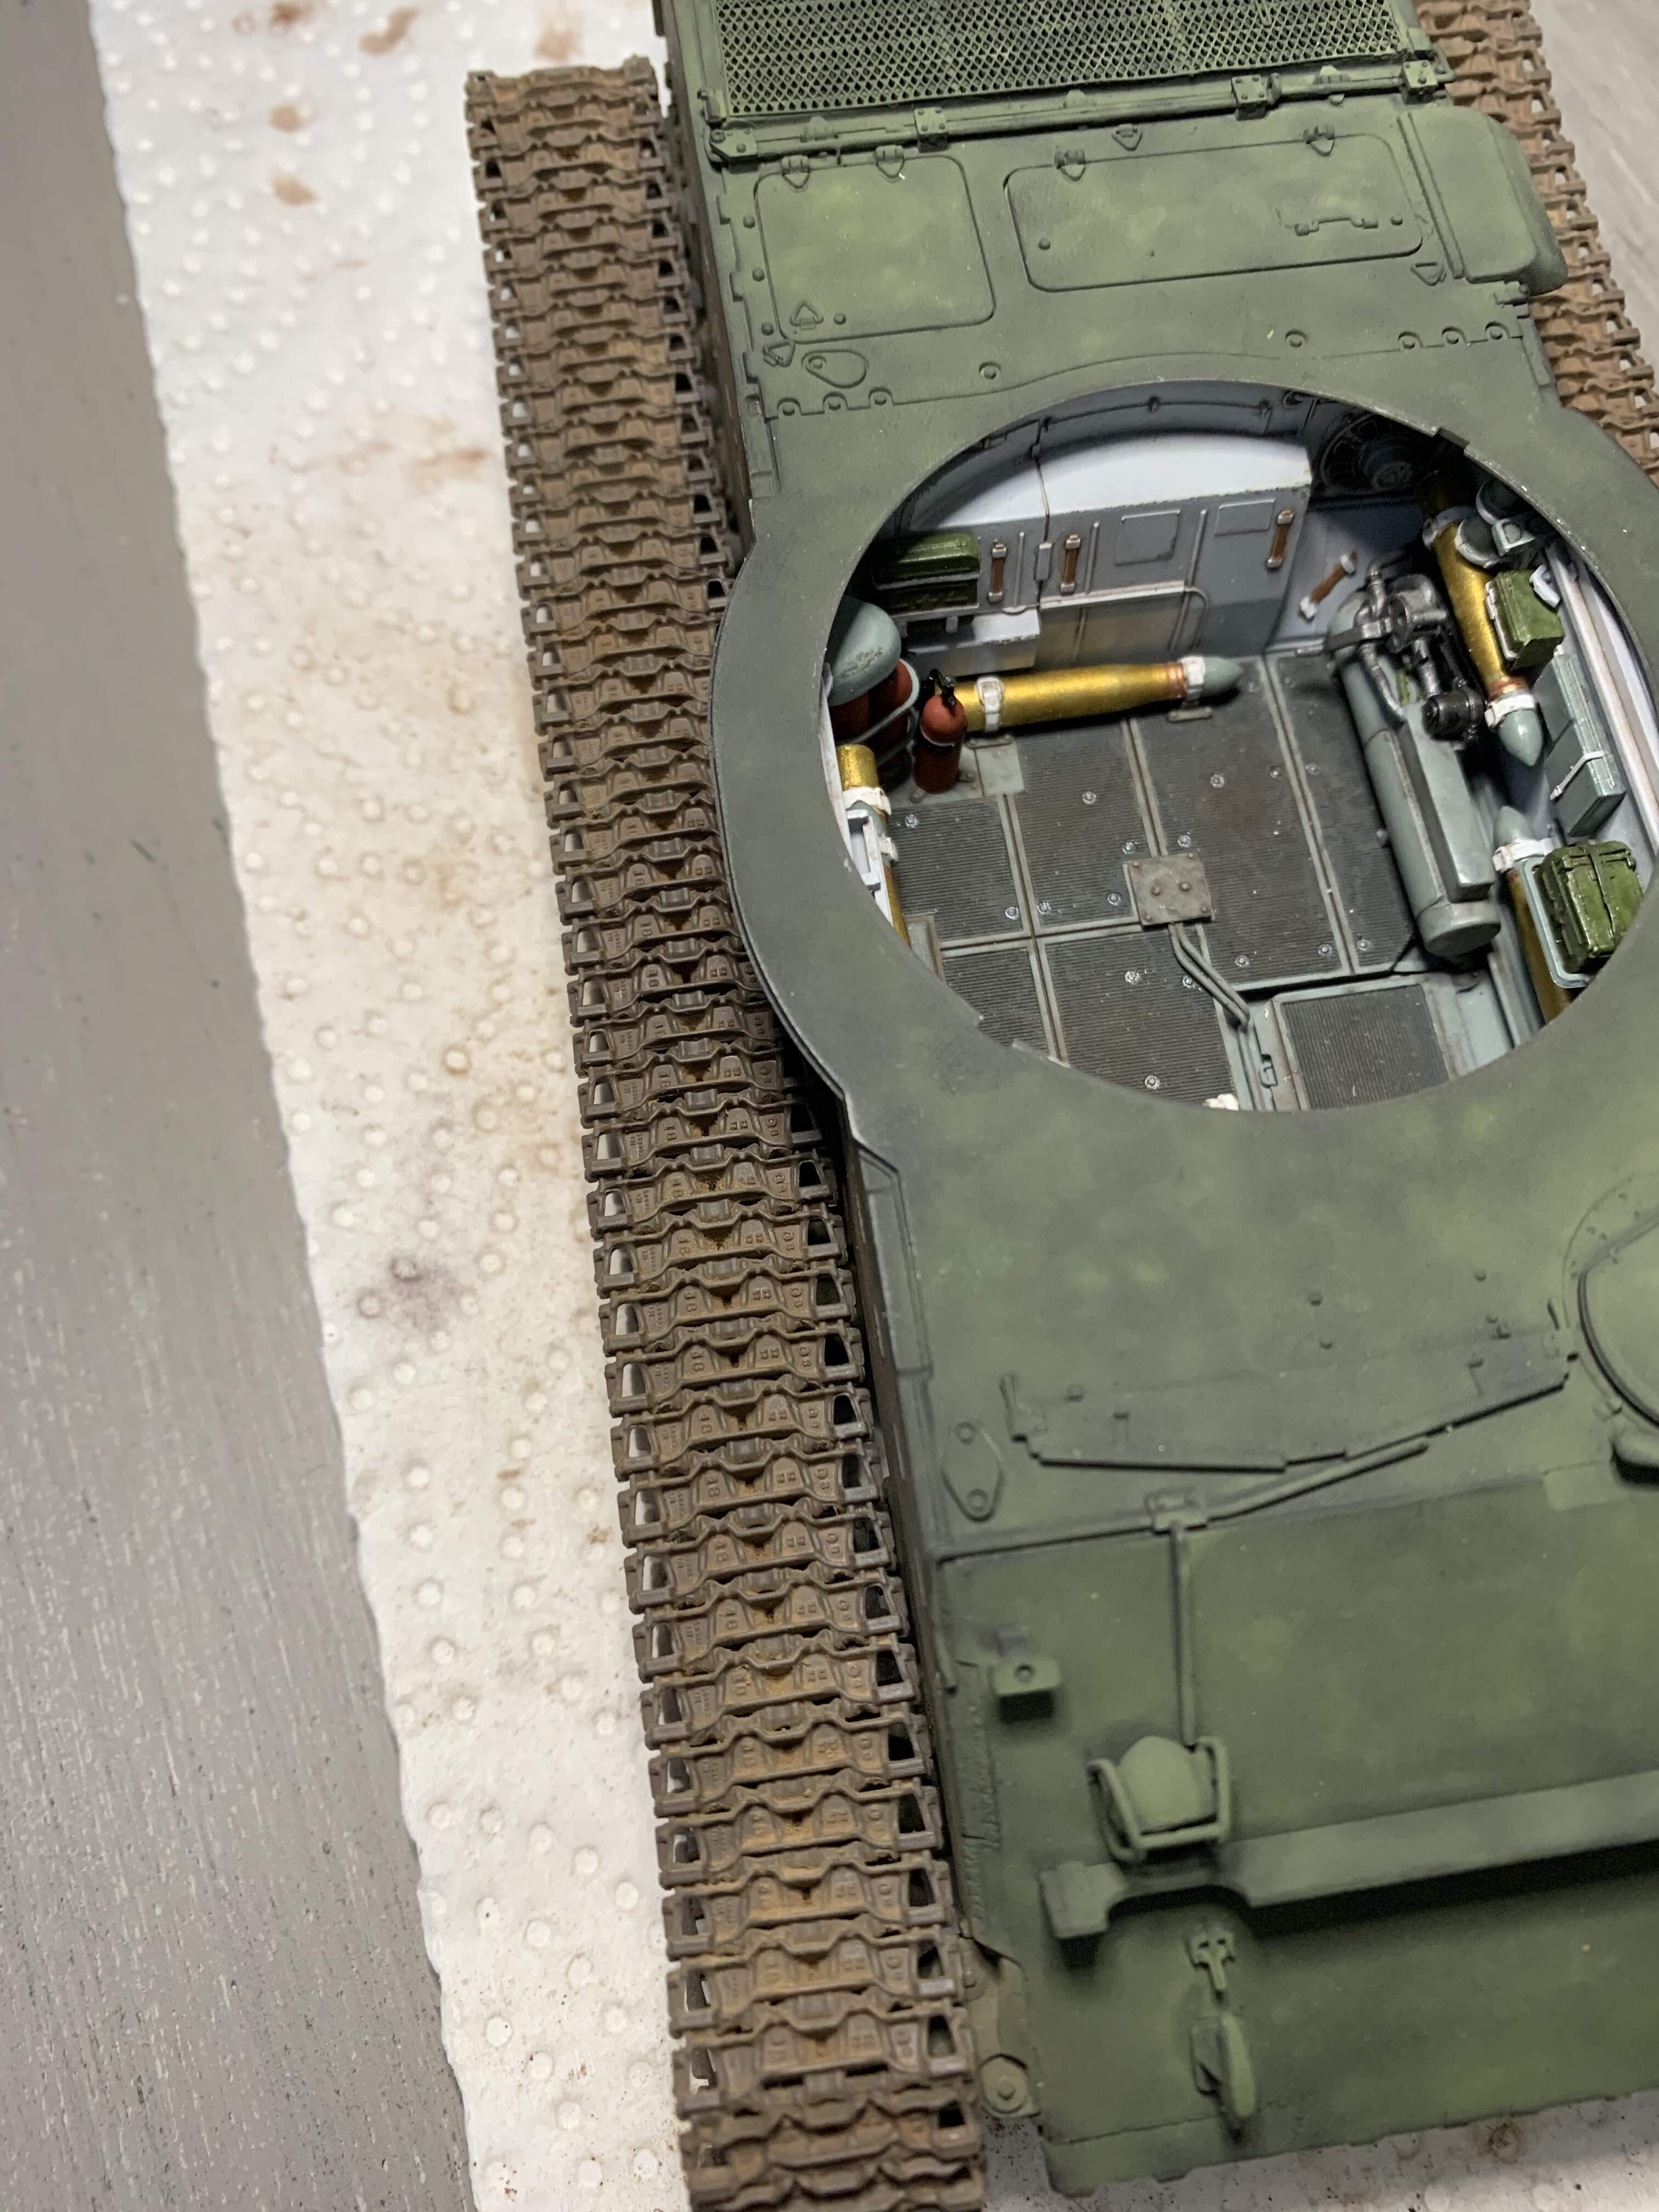
A further note would be that the very heavy 3D earth textures were added to the hull and suspension during initial construction using artist textured acrylic gel mediums and then pre-painted during the base finish. These areas received washes before and after the pigment “mud” spattering evolutions. All of this was done before the tracks were added.
Basically, the final desired look was decided on before I started the build, and the earth textures were planned and incorporated into the process at different stages. The pigments were just one aspect, and the different fixers used each performed a specific purpose at the stages when they were needed.
I should mention that a friend of mine uses ordinary water as a temporary pigment fixer. He has a small mister bottle (used to water house plants) and he wets the tracks using that before and after he adds the pigments. He also just sprinkles the pigments on using a recycled spice bottle / jar.
Like @Armorfarm and a couple others suggest, my friend doesn’t use any other fixers. He just puts most of his models on bases and leaves them.
Thank you Mike, I knew you would have an outstanding explanation of how to approach pigment use on tracks.
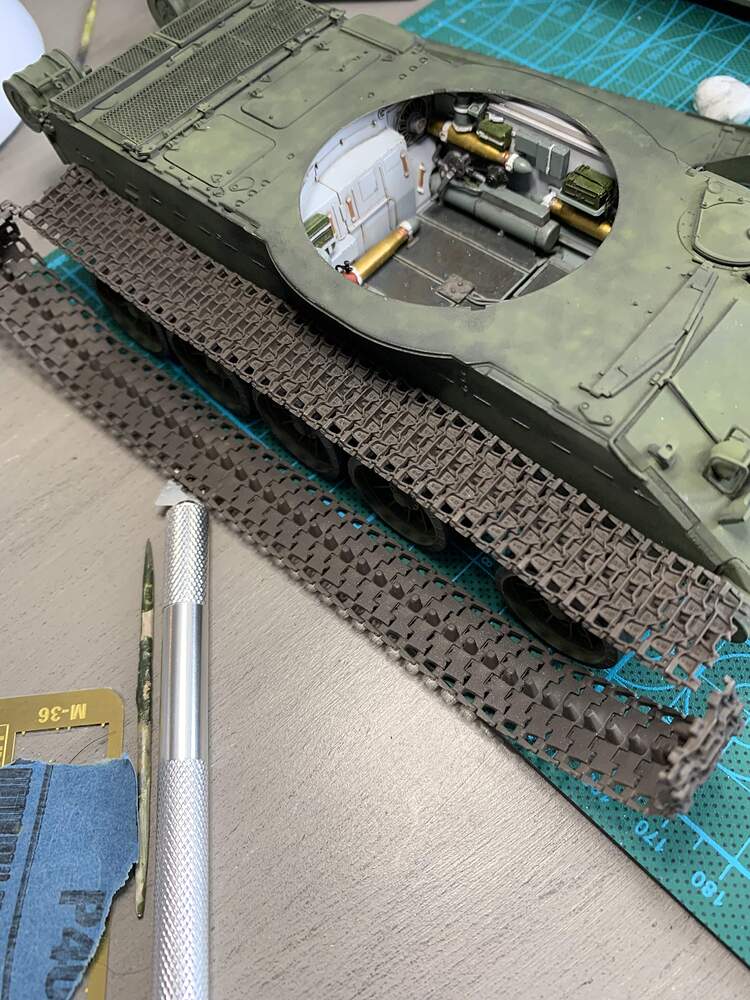
Thanks for all the great advice. I’ve worked in my pigments to the recesses and then softly brushed away excess. Here is what I have now.
I decided to forgo the metallic highlights. I’ve review lots of pictures of T-54 tacks and they just don’t get the shine. I have noticed they get quite packed with dirt. I may use the method @SdAufKla suggested above to add heavier mud to the tracks.
Again I am going for more of a dusty look than muddy here as the vehicle is from the 2nd Guards Mechanzied division in Budapest during the Hungarian upraising
Looks good! 
In the end, the only thing that matters is that you get the final appearance that you envision and want. There are also many different paths to most final destinations, so there are also many different techniques, methods and materials that can you there.
Thanks. I’m trying my best to get better at weathering. It’s easily my weakest area. A lot of my builds fizzle out at this stage as I am often unhappy with my weathering results and I find it’s the stage where you can ruin a perfect build up to that point
FWIW, my best advice for finish and weathering is to have some fairly clear vision of what you want the final model to look like before you even start the kit. Refine that vision as you progress with the build. Anticipate and plan for your finishing and weathering as you build and incorporate any steps possible when they will best contribute to the final outcome.
Don’t think of “finishing” and “weathering” as two separate and distinct stages or processes but rather as parts of a continuum. That continuum is composed of layers that build up, one on top of the others, with each contributing something to your goal.
Once you have a mental image of what you want the model to look like, think backwards through that image to see the layers that have been combined to create it.
On the very top might be a light, very recent dusting that mutes all the colors and blends all the harsh contrasts. That very light dust layer might then be though of as the very last layer of finish to be added. Under that light dust might be heavier dust and dirt layers that have been streaked and blurred under rain and dew and fog, dried into more opaque coatings as gravity has drawn the dirty layers downward.
However, over those streaked layers might be spatters of mud or dirt kicked up. But those spattered areas might themselves have layers of older, dried lighter colors under newer, fresher darker colors. The streaks should possibly be done before the spatters, and the lighter spatters done before the darker ones.
The basic finish color may be lightened from sun fading and ground in dust and dirt, yet it might also show darker areas of the basic color(s) that have been exposed by the action of the crew rubbing the paint down to its original, darker color. All of this is perhaps under the newer, fresher layers of spattered mud, rain streaks, and light, fresh dust. So the basic finish might need to be distressed before any of those effects have been added by starting with a lighter shade and adding perhaps sponge “chipping” with a darker shade of the base color around the hatches and areas where the crew moves and works. Perhaps you’ll want to add those dark smudges or rubbed areas at a later stage, or even repeat them over some intermediate layer.
Oil, fuel and coolant water staining might have their own progressions with the newest effects on the top and the older, perhaps mixed with dust and dirt layers under those. Rings of dirty petroleum products spilled over and over, with the older darker rings on the edges and the newer, fresher, perhaps even clean to the original paint color towards the centers…
And so it goes. A decal or marking that needs to go over a white painted square might suggest that a spot of white paint is airbrushed on as the first painting step, then reverse masked with a square of tape to removed before the decal is applied on top.
Heavy 3D earth textures might be best added as the hull is constructed, but before the suspension components are added so that all the area is accessible. This might further suggest that these areas be painted in dark earth colors at the same time the basic hull colors are painted on.
There’s a logical sequence to create the final look you want, all you have to do is think it through, from the outside to the inside, the top layer to the bottom layer.
Occasionally, I will actually write out a finishing and weathering “plan” to work out the different steps in sequence. This can help with things like reverse masking markings and doing heavy, 3D textures early in the construction process when areas are open and accessible. It also helps to enable you to see places where you might want to deviate from your “normal” finishing and weathering processes and try something new or different.
So, sure, I do have a “personal” finishing and weathering “style” that does generally flow in a sequence that repeats somewhat project to project. However, I don’t tie myself to that sequence. I usually have some (often research based) idea of how I want a particular model to look when it’s done, though, and I make at least a mental plan of the finishing and weathering steps to get there along with a clear idea of when and where I’ll need to start those steps (even very early in the basic construction).
Also techniques and materials should be considered as if they’re a collection of tools that you can take out and use depending on the desired result. There are no “mandatory” must always use techniques or materials, and there are no “must always follow” sequences.
Like anything else in this hobby there is a learning curve to finishing and weathering. In my opinion the best way to approach improving these skills (or any other for that matter) is to focus on 1-2 areas at a time and master them first. Once you have accomplished these move on to 1-2 more and so on. Trying to do everything at once generally leads to increased frustration, ends up in complete failure at worst or less than satisfactory results at best. The combination of frustration and repeated failure often leads to abandonment of what ever you are pursuing. This is the approach I have taken in many of the things that I do and have found that it greatly decreases the level of frustration and failure while allowing me to experience incremental successes that eventually get me to the end goal.
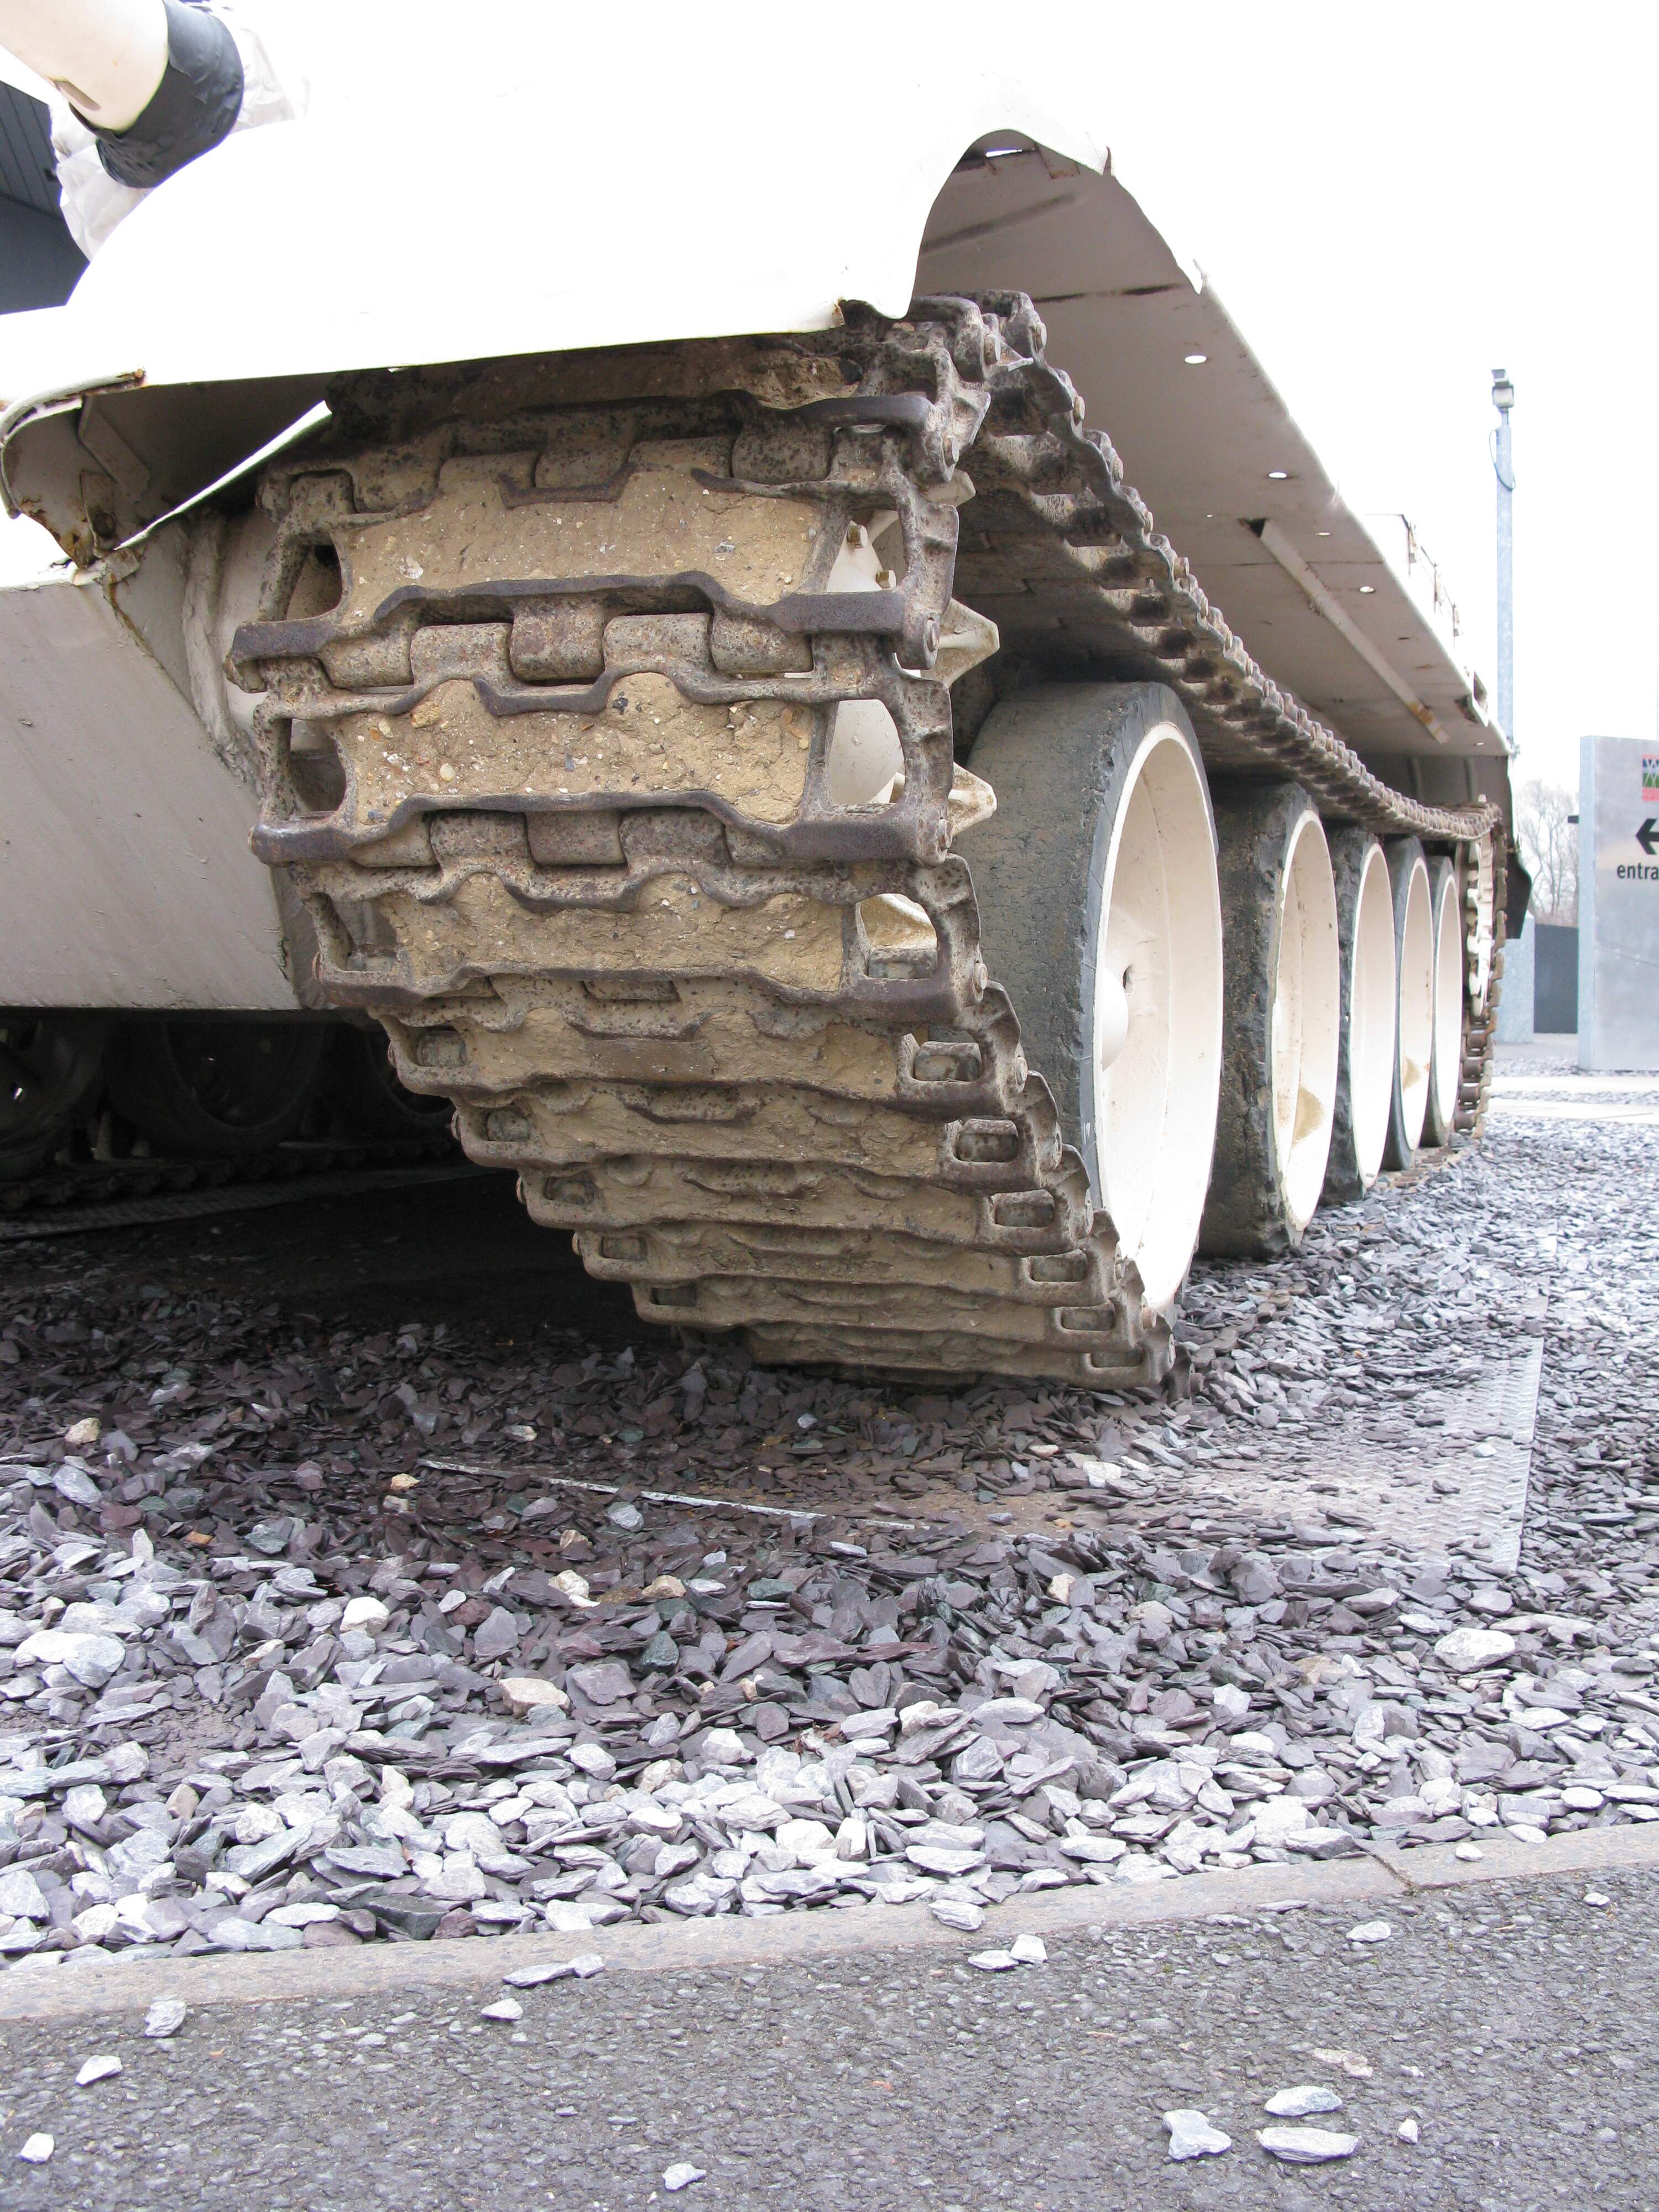
Basic colour looks good to me, and I agree with what you say. This is a heavily used T-72 track, you can see they are similar. Lots of packed dirt, but no shiny metallics; perhaps where the light hits it there is the appearance of a a brownish grey colour on the top edge. Finding clear photos is the best guide if you can get one for the scenario you’re looking for. Here you can see the subtleties of the different tones.

On pigment fixing in track treads, I sometimes use oil paint. It provides a colour base, it’s sticky enough, and stays moist long enough to get the pigment on, without wetting the pigment like liquids do. It means you can see straight away what it looks like, without waiting for the fixer to dry. It can also be mixed in or allowed to kind of stick on the top of the paint. If you make a mistake then it and the paint can be adjusted or removed with white spirit etc.
I think I’ve gotten them to a point I am happy with for now. Mostly going for the dusty look. Once I finish the build (mostly attaching fenders) and small parts for now. I may go back and sprinkle some more dust on some parts and add a bit of dried mud

Looking pretty good there @Mead93.
Put some paint on my own tracks yesterday.
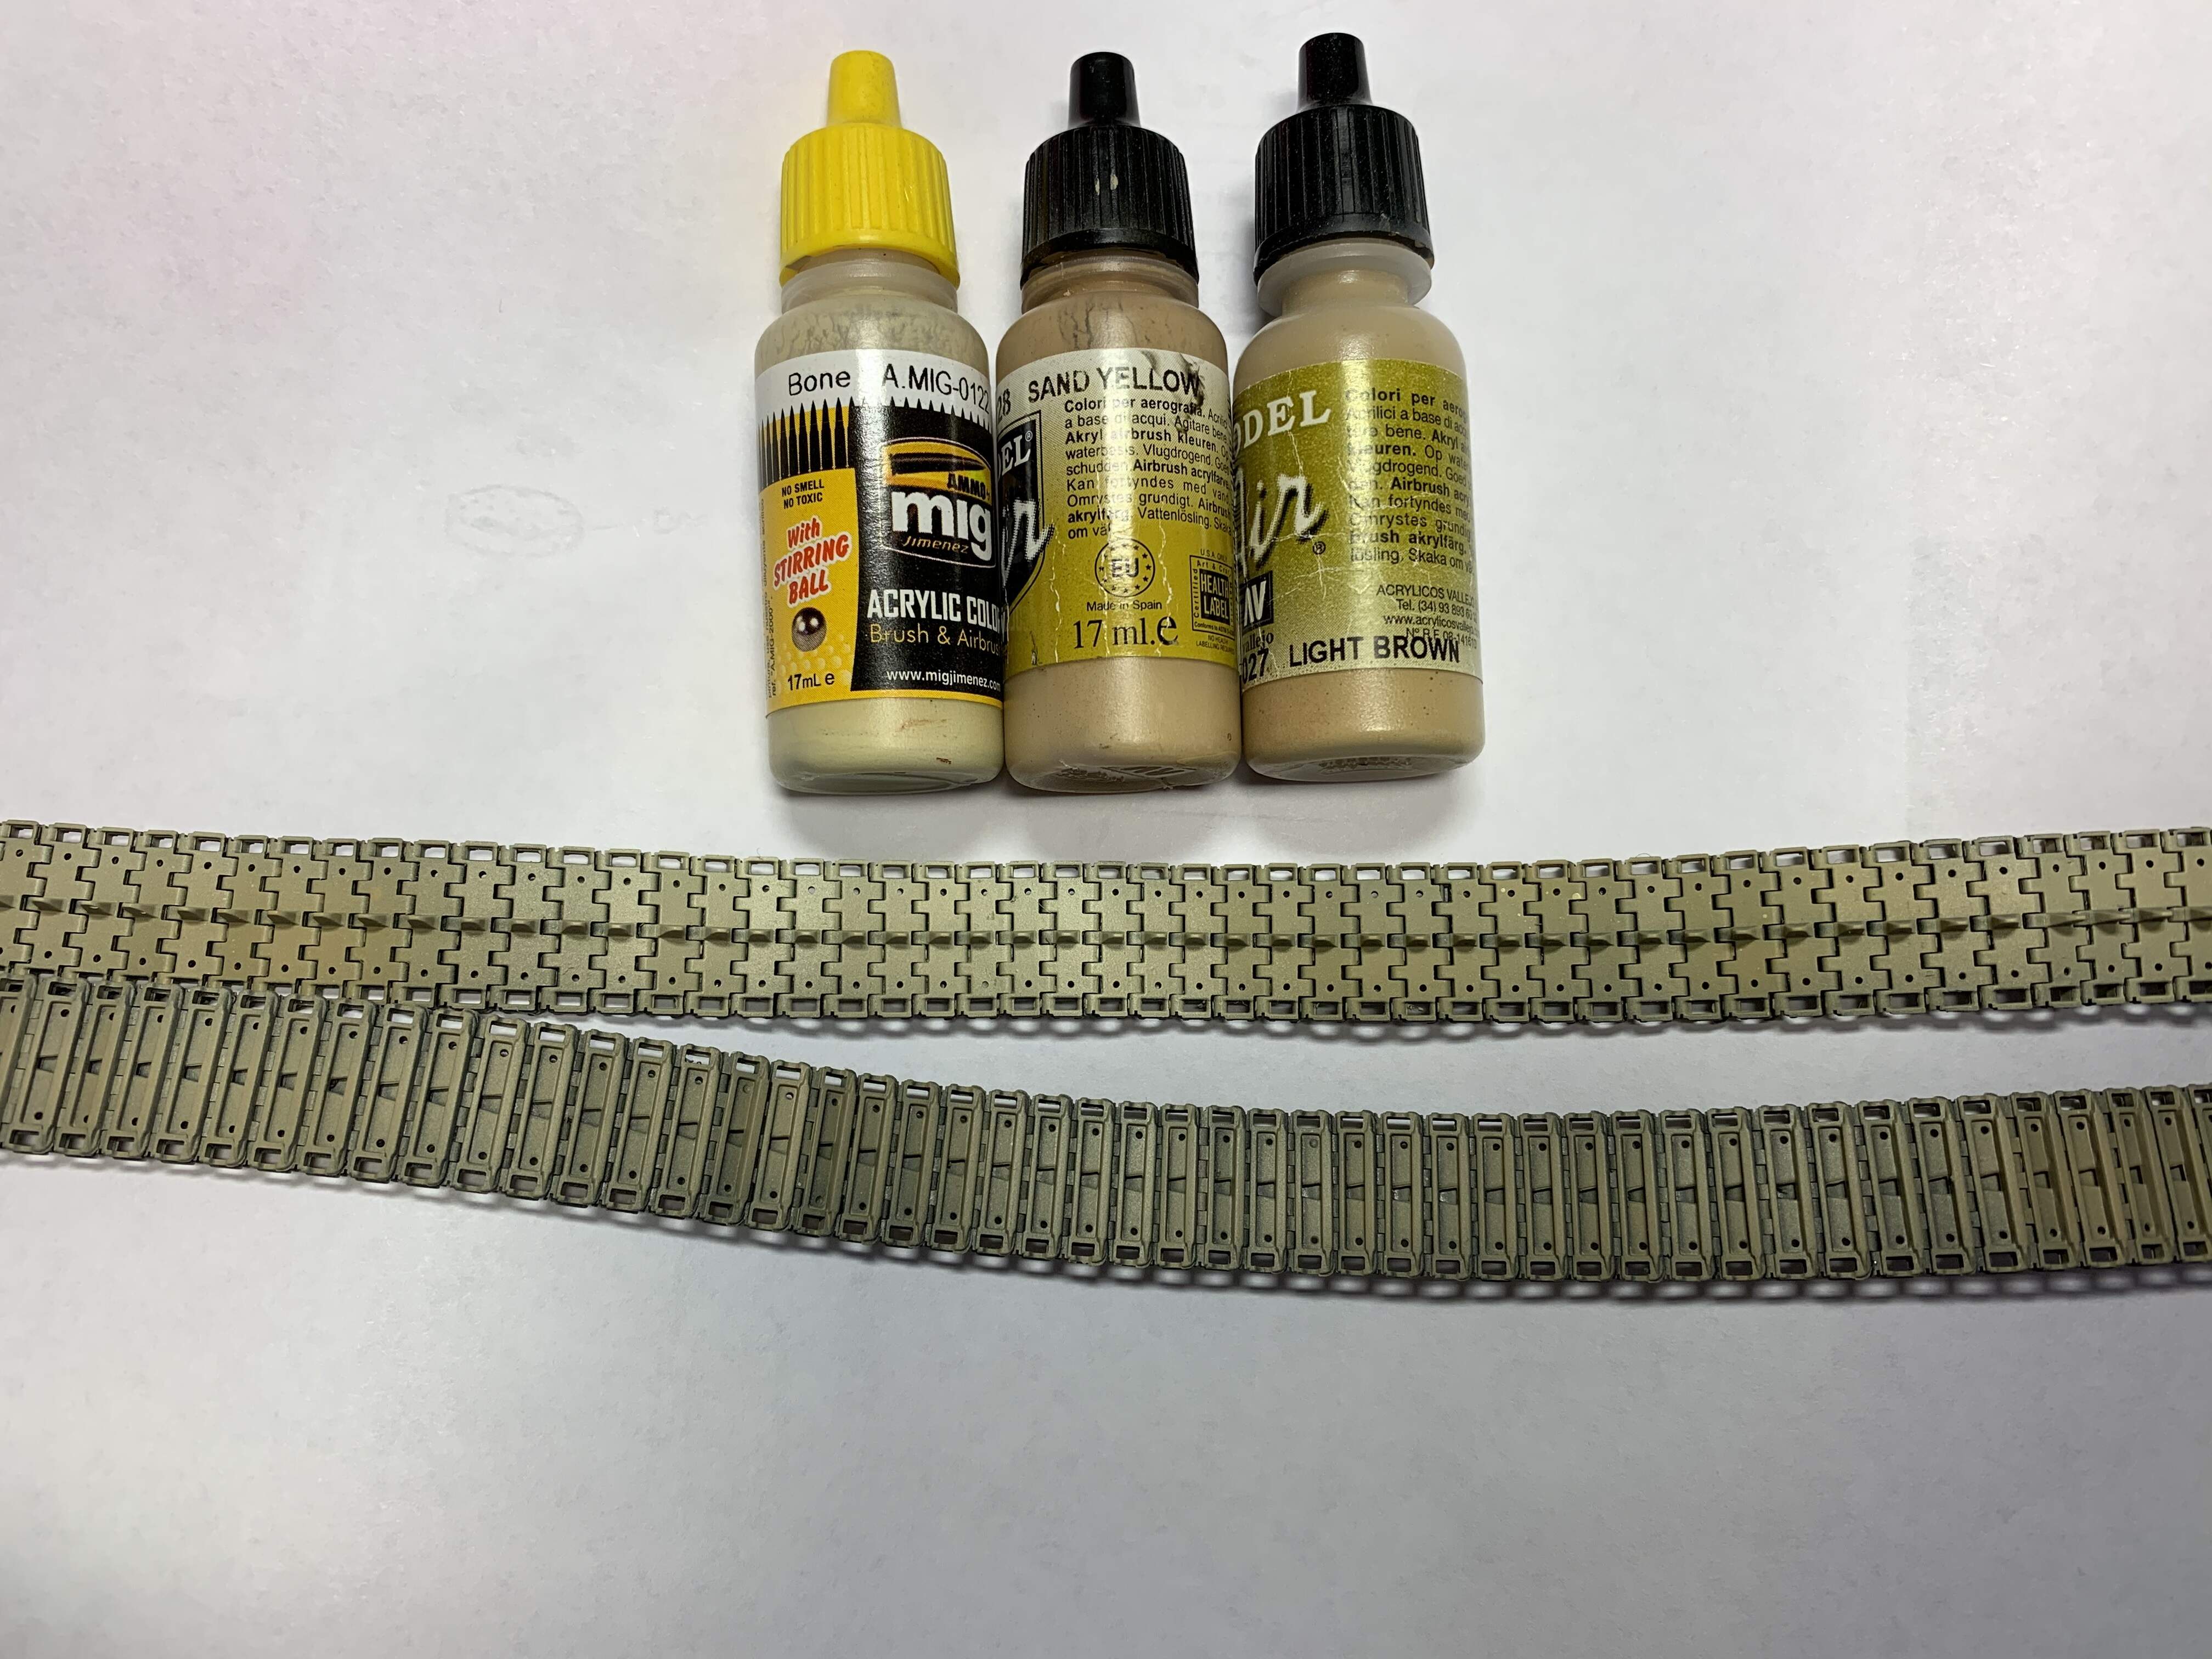
My method in this is to use two similar shades (the Vallejo ones in the pic) and then a brighter shade (the Ammo one). I always keep the first coat from the airbrush very dilute to see how it looks and settles before adding any more coats.