The wire hanging of the back of the Jerry can holder is for the commander to see were the back end , ends for when closed down reversing close to an object
2 Likes
Thank you very much Frank, that is great to know. I will be adding that detail for sure now.
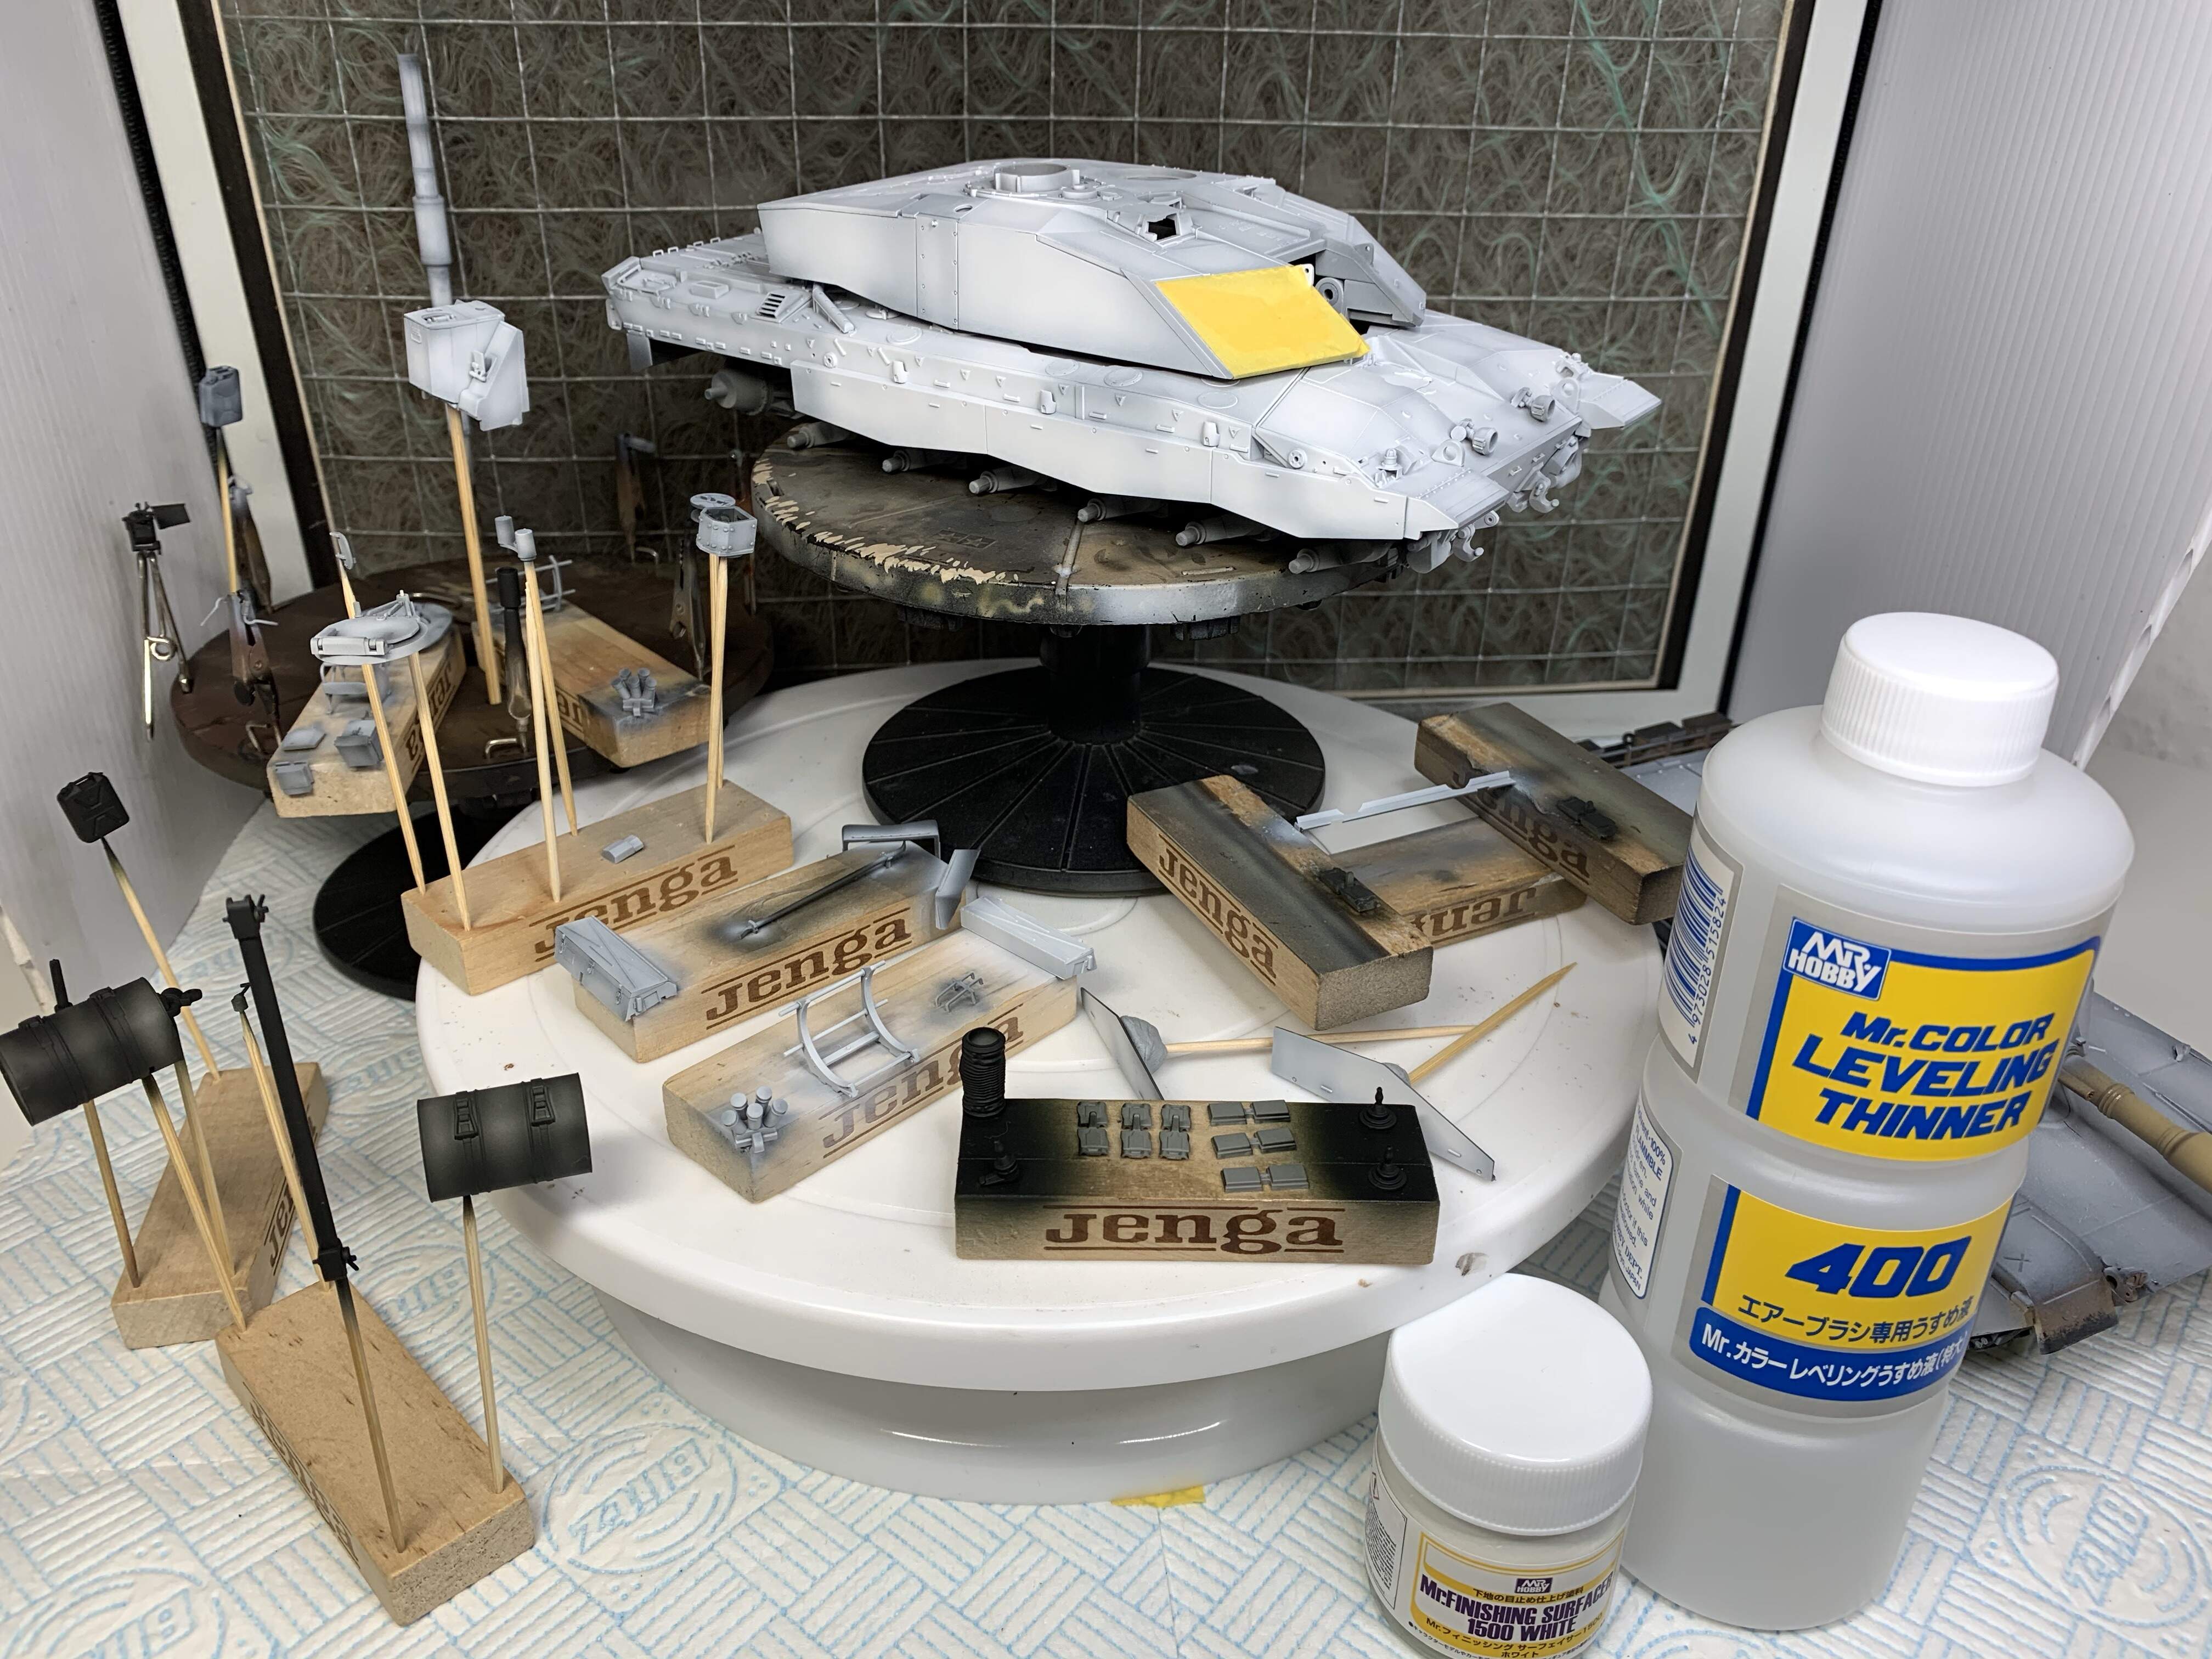
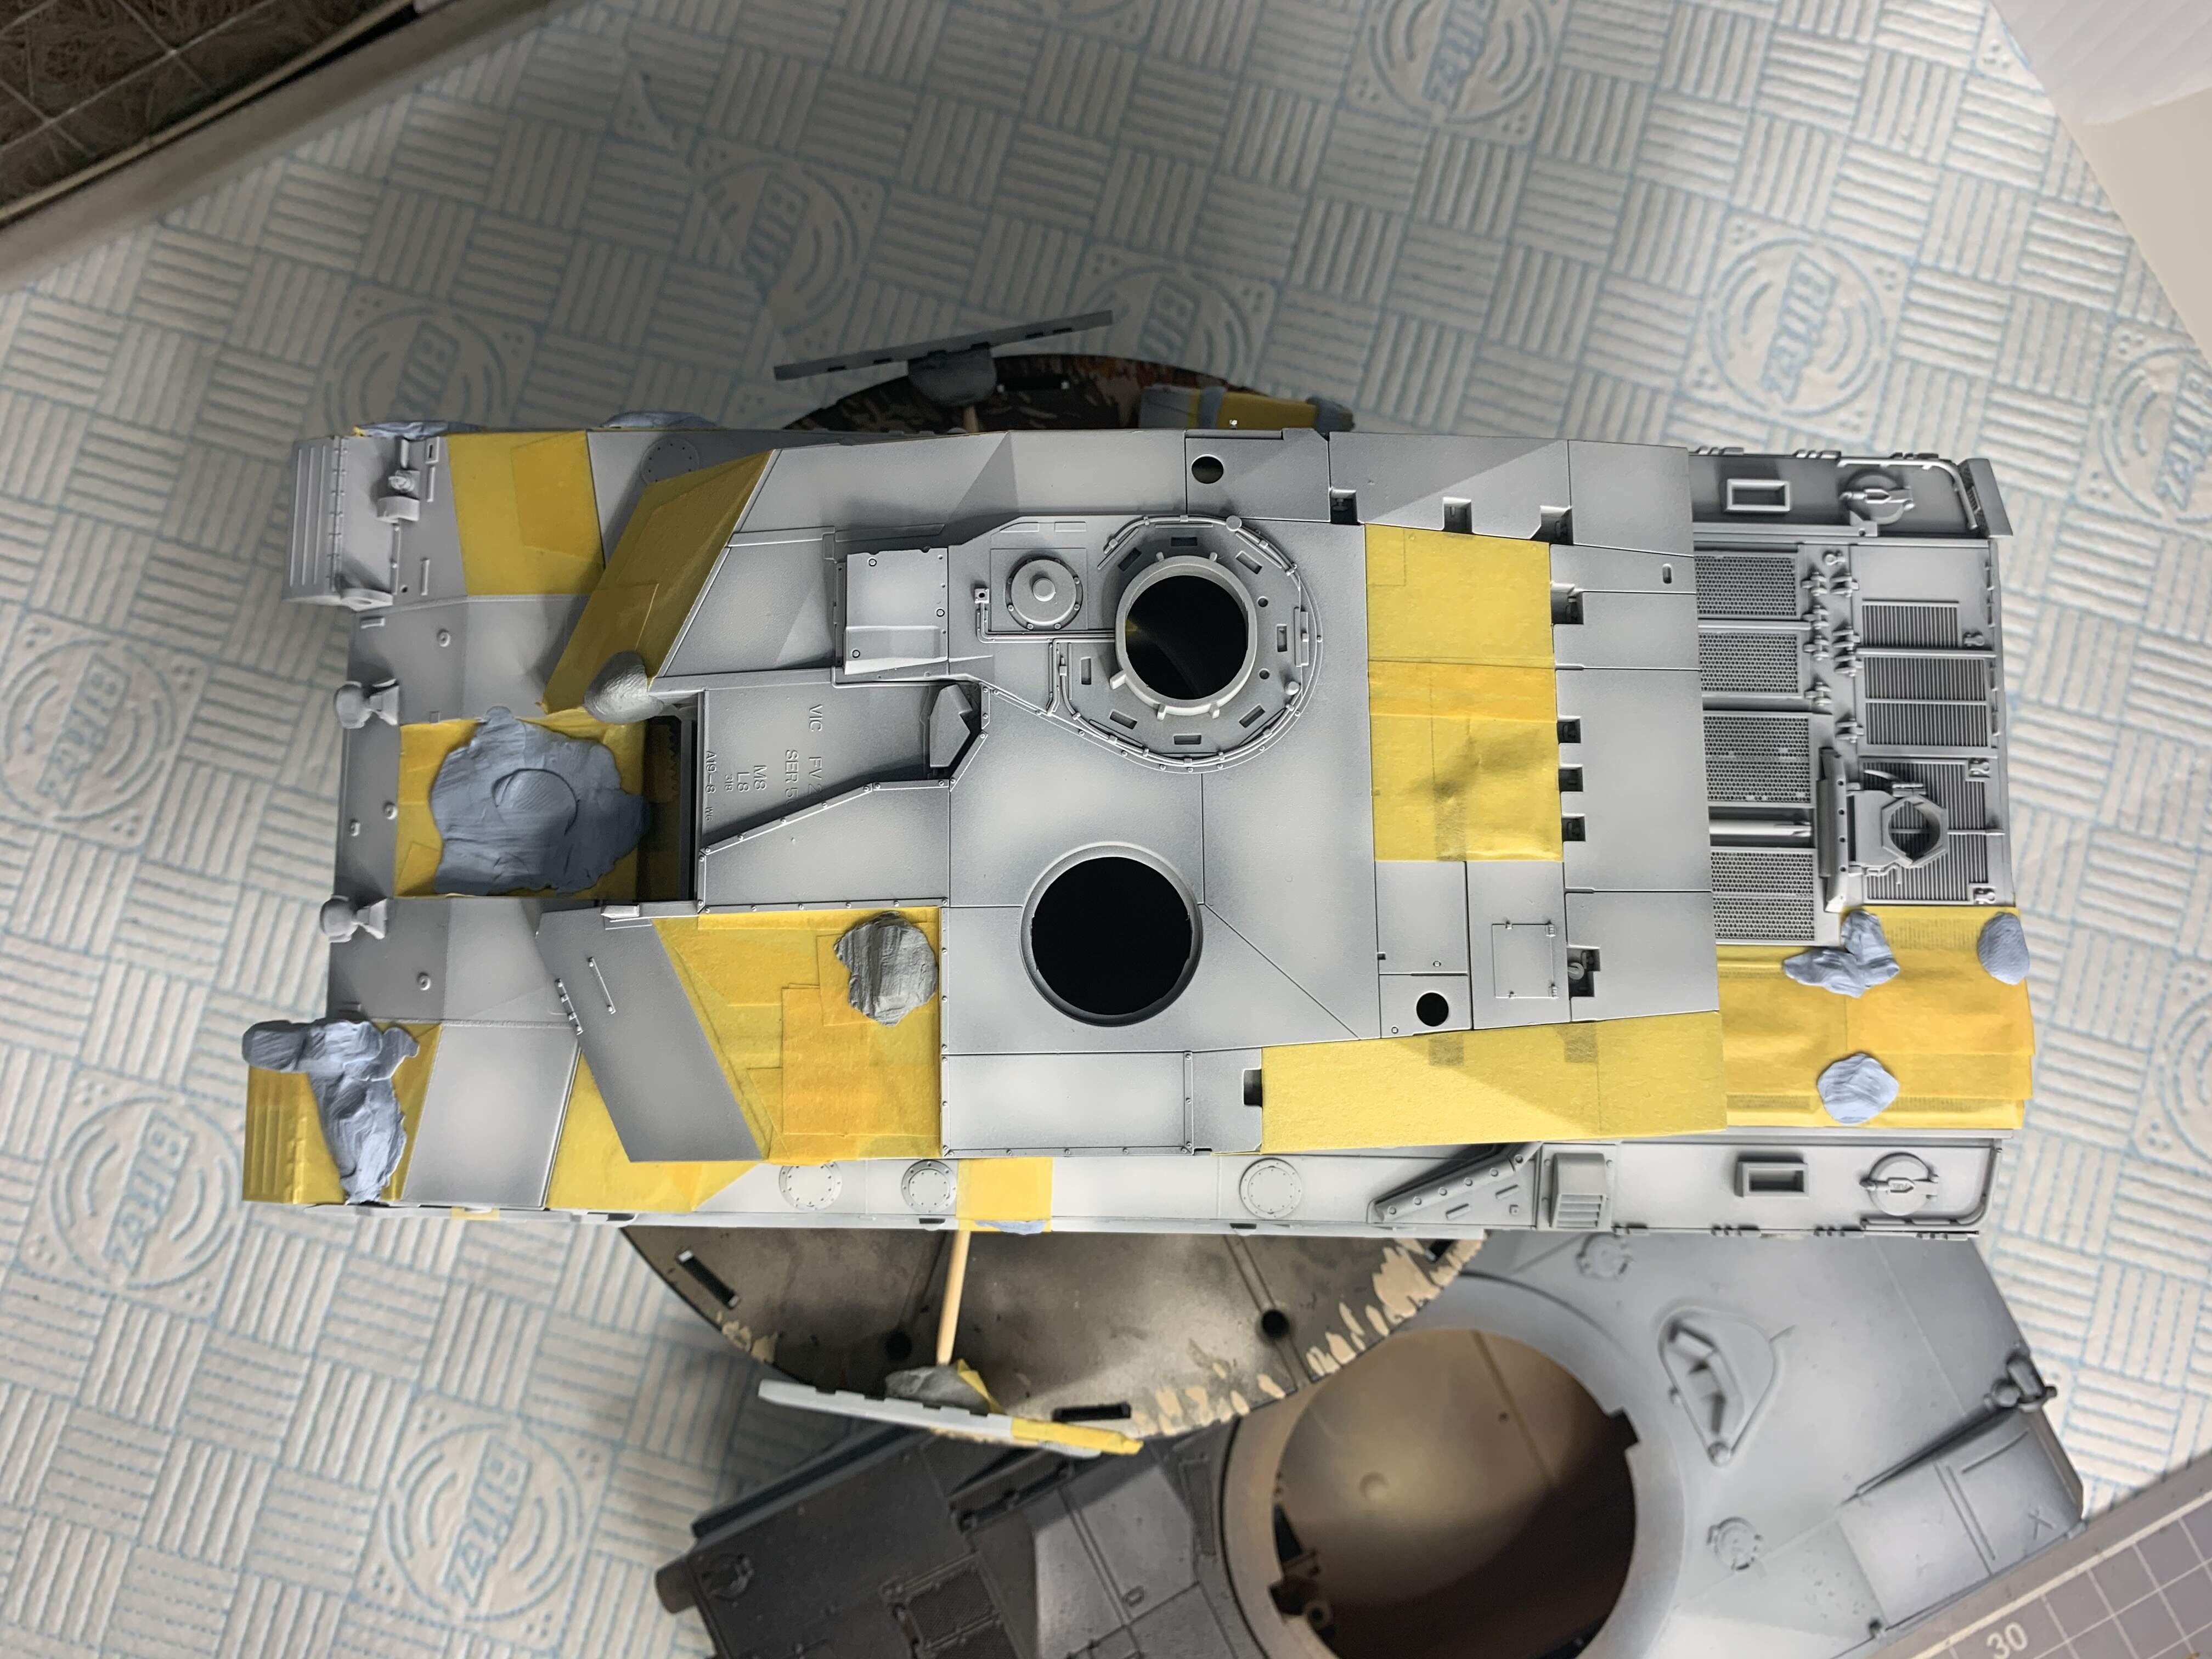
I have started putting the white on using mr surfacer 1500, the first time I’ve used this stuff and I am very impressed with it. I put some simple preshading on first with tamiya rubber black, strange putting paint before primer I know, but it is working out. Will post more pics when I start masking for the grey.
Cheers, J.
1 Like
Wish I had one …That must be why my Chally in Germany always had dents in the back lol
3 Likes
Hi all,
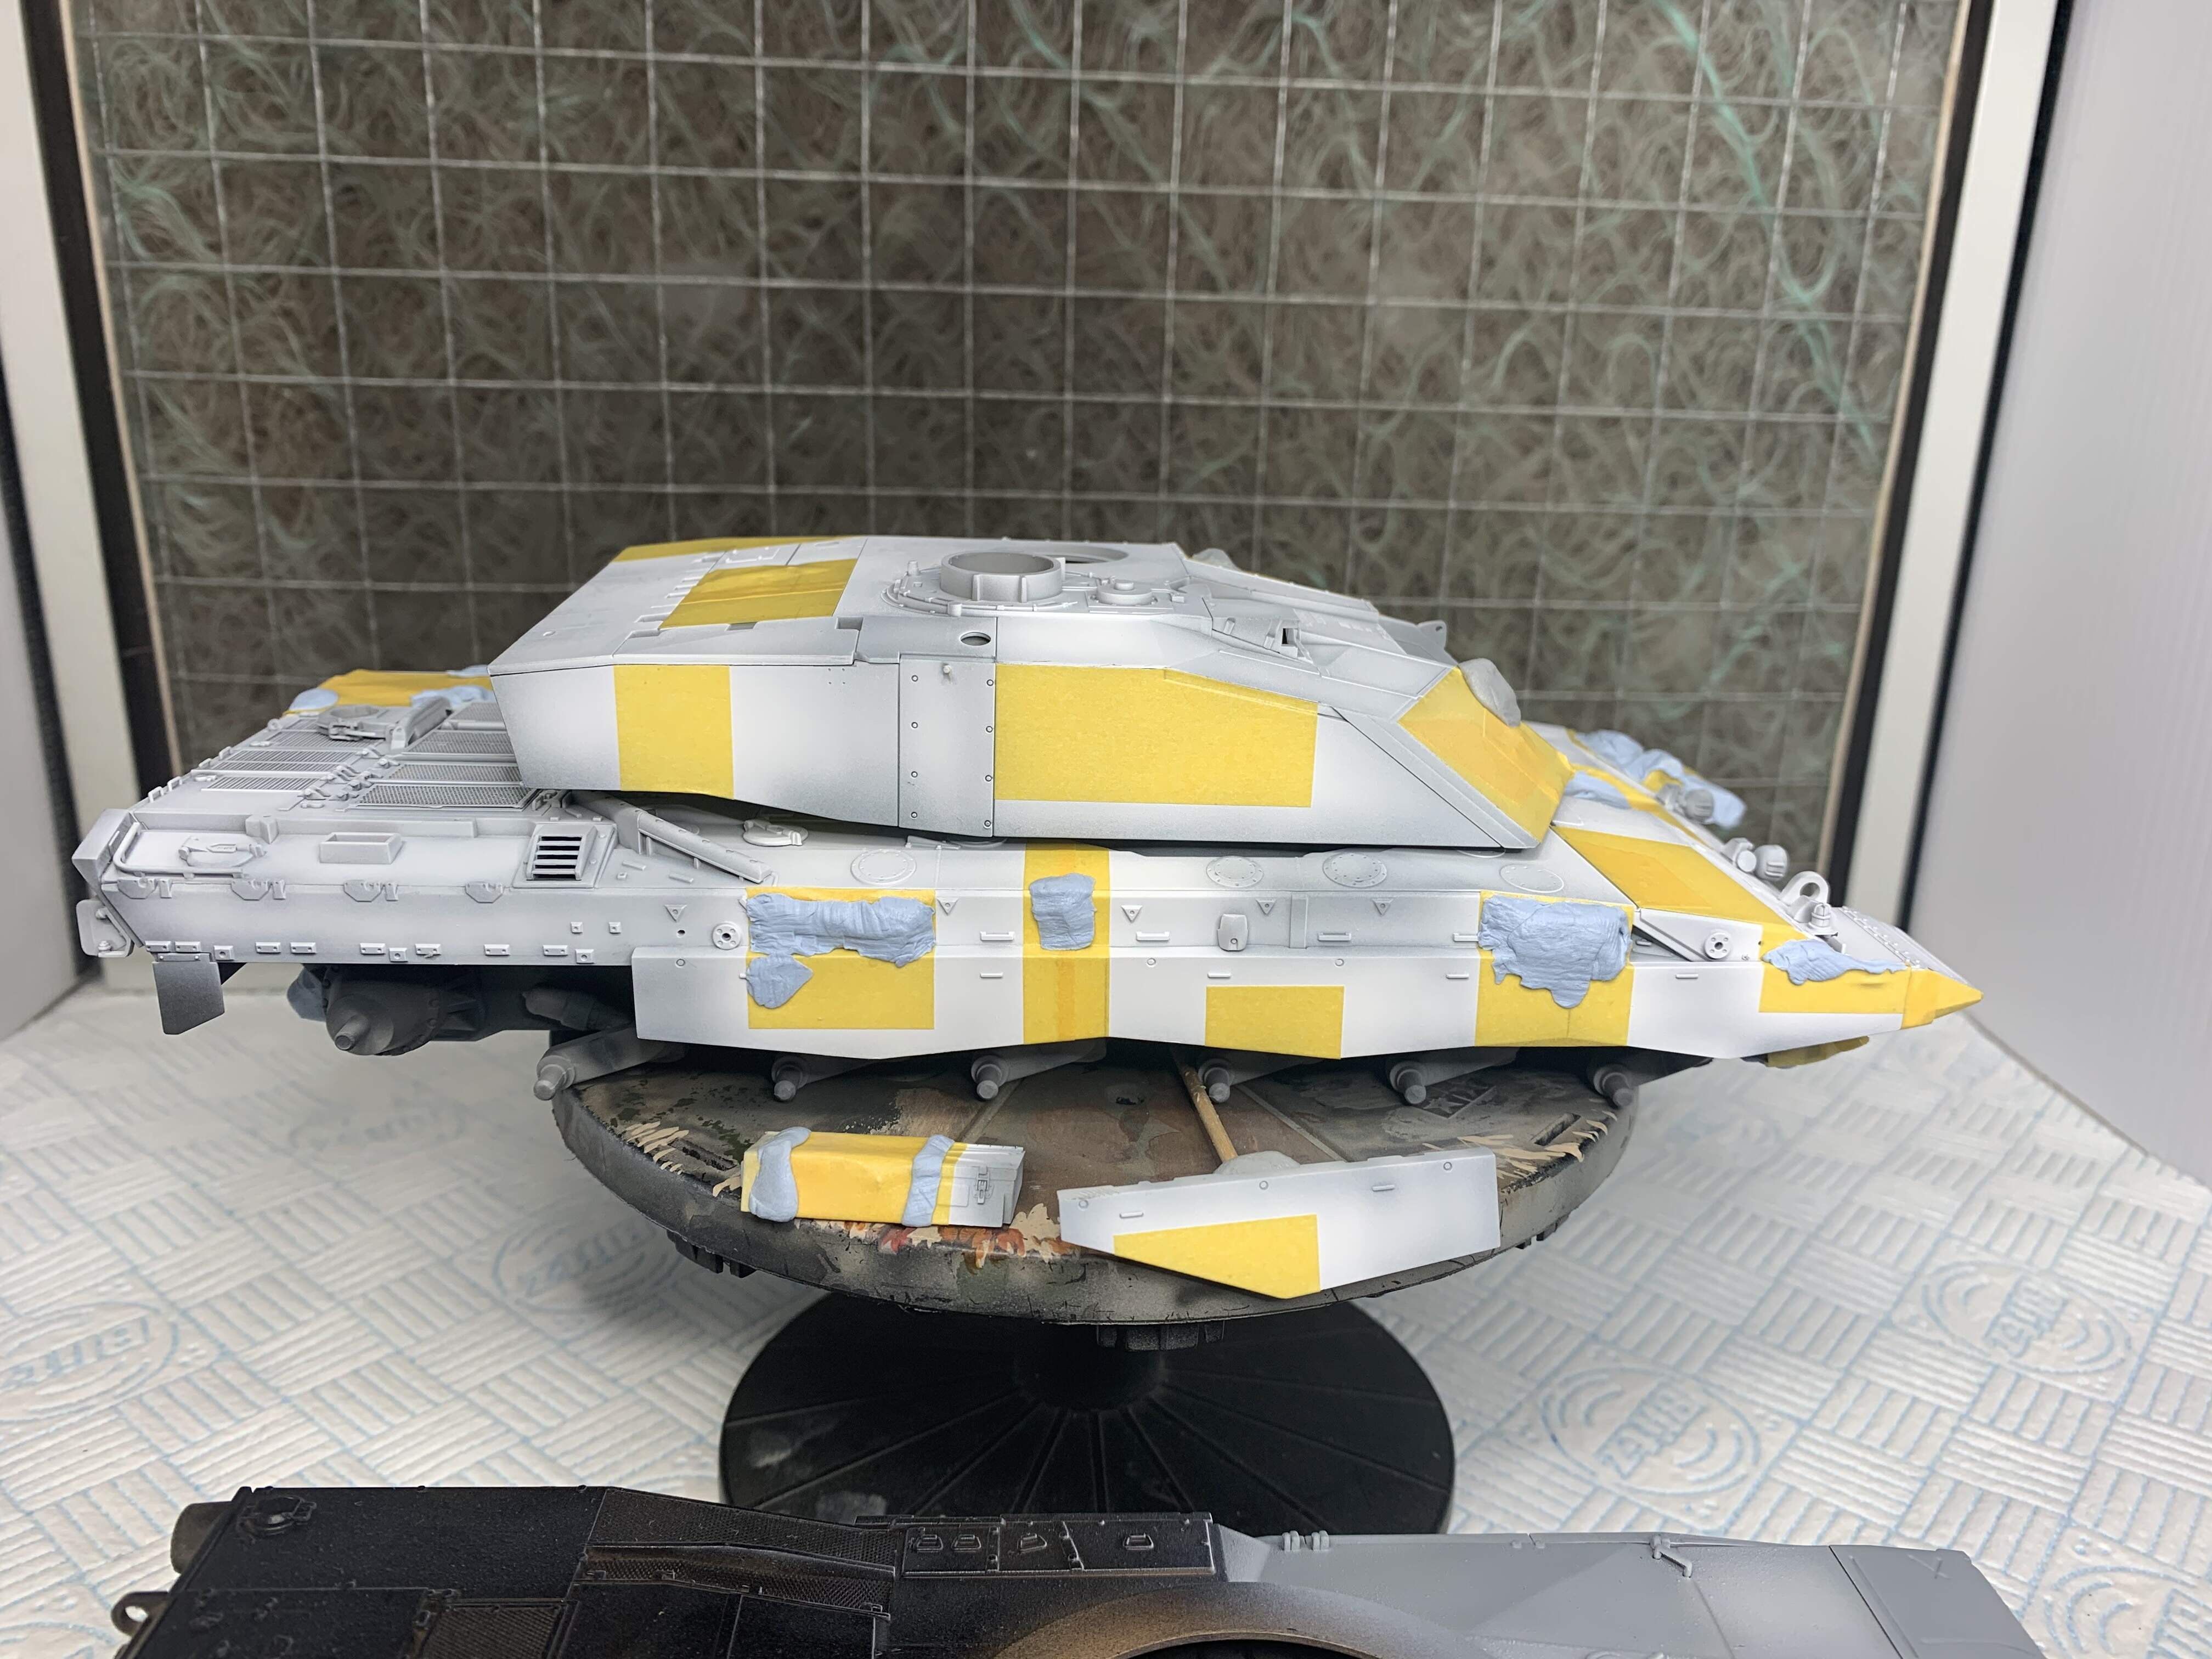
I am now fairly happy with the white and have started the masking marathon. The mr finisher is going to be my go to white from now on, I know it’s a primer but it sprays better than any other white I have tried.
Onto the grey now. I liked the finish I got with ammo mig blue grey on the chieftain, so I am going to do some spray outs to see if I can match it with tamiya and ak real color paints. The practice piece is peeking out in the pic!
Cheers, Jim.
7 Likes
Nice start Jim, let the masking marathon begin 
1 Like
Thanks John,
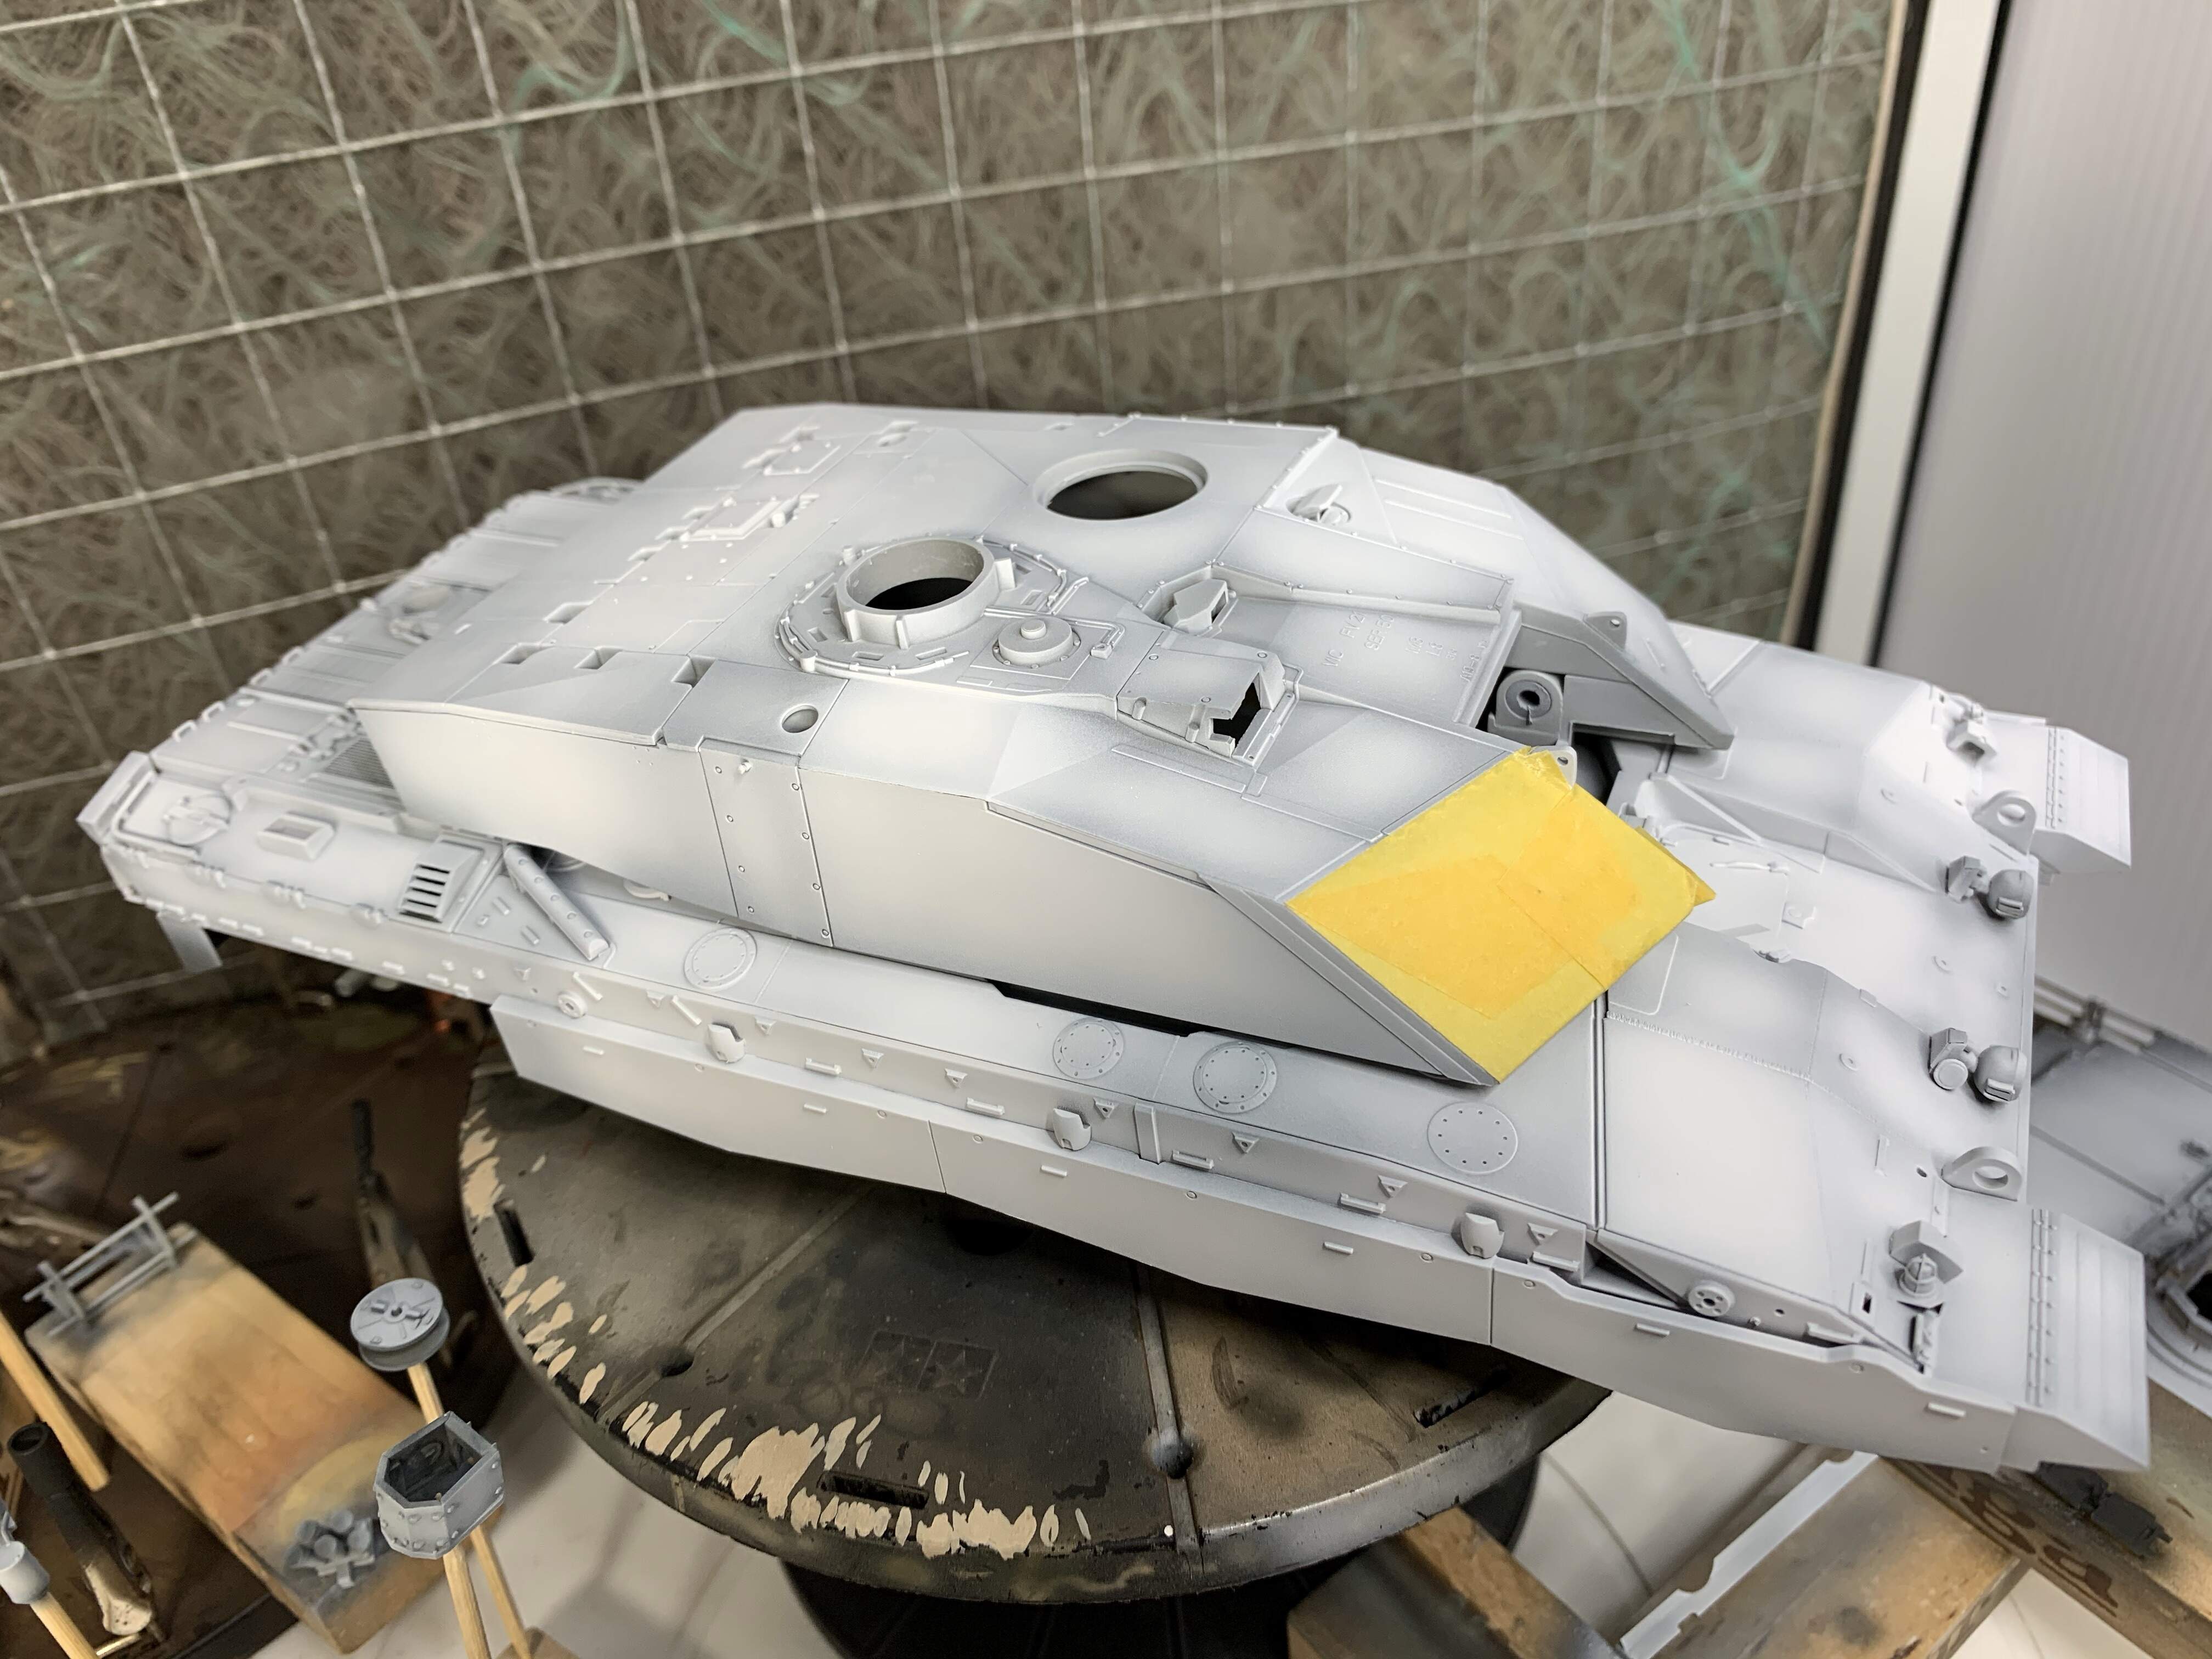
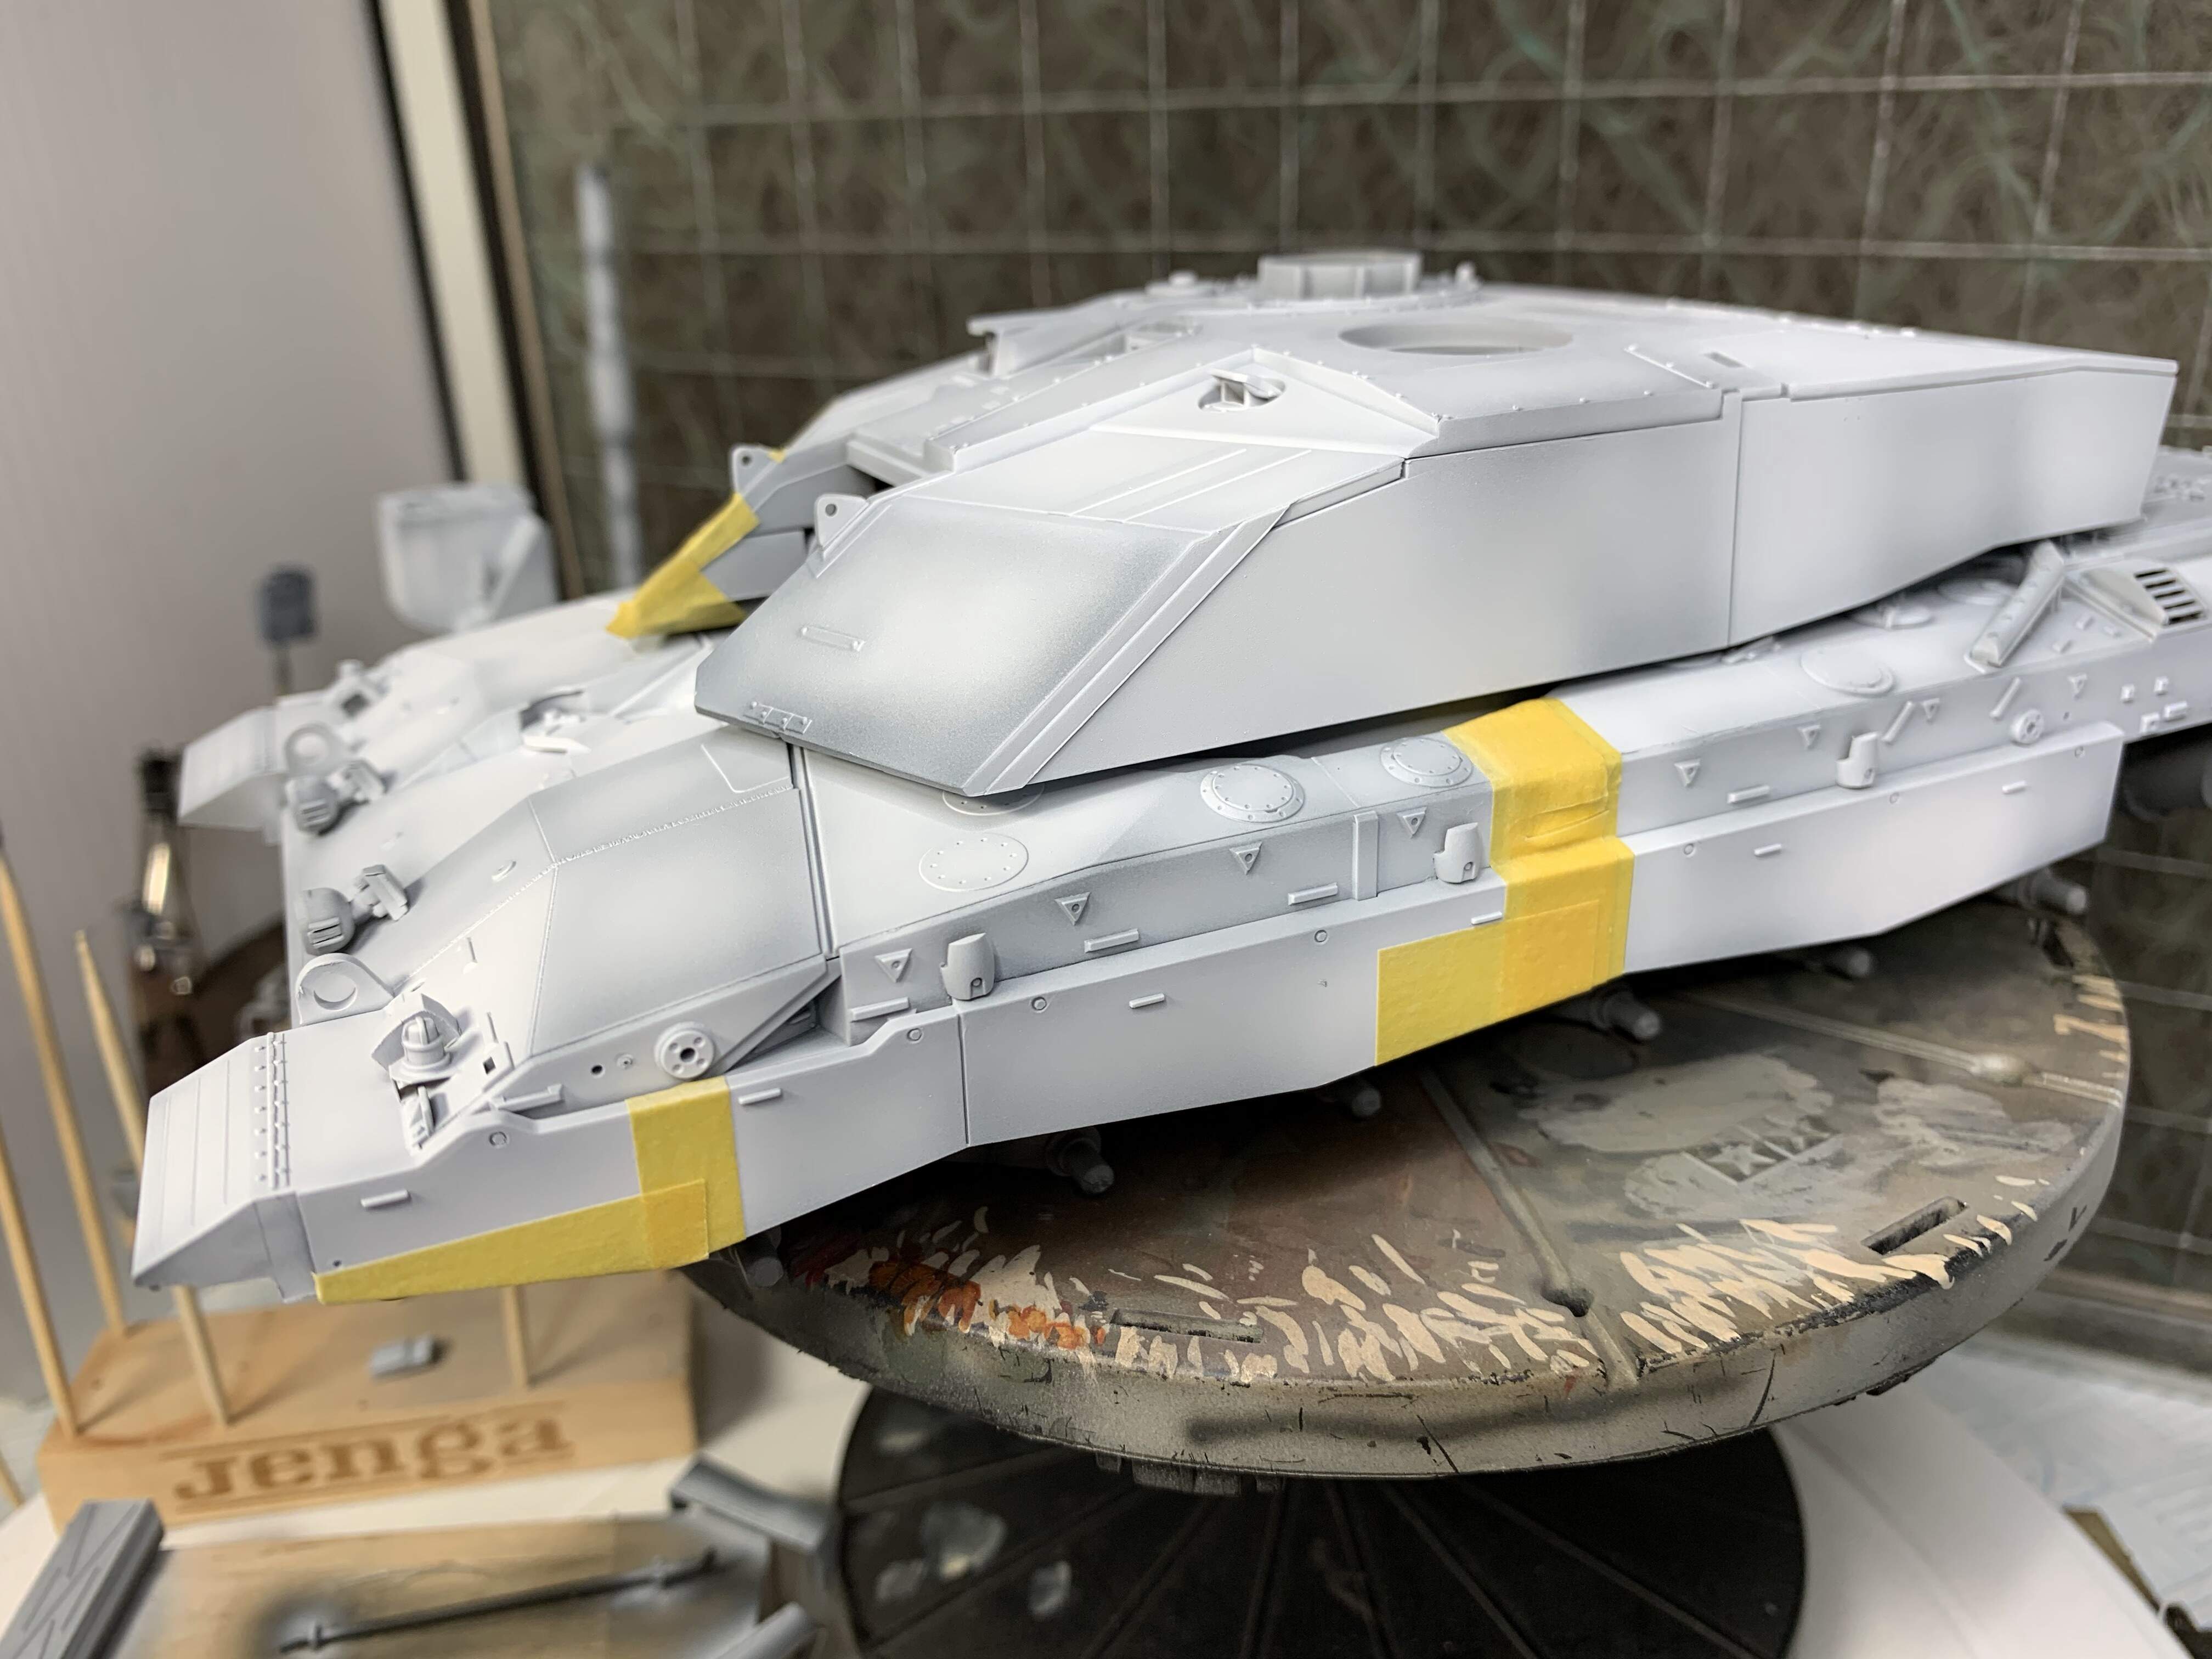
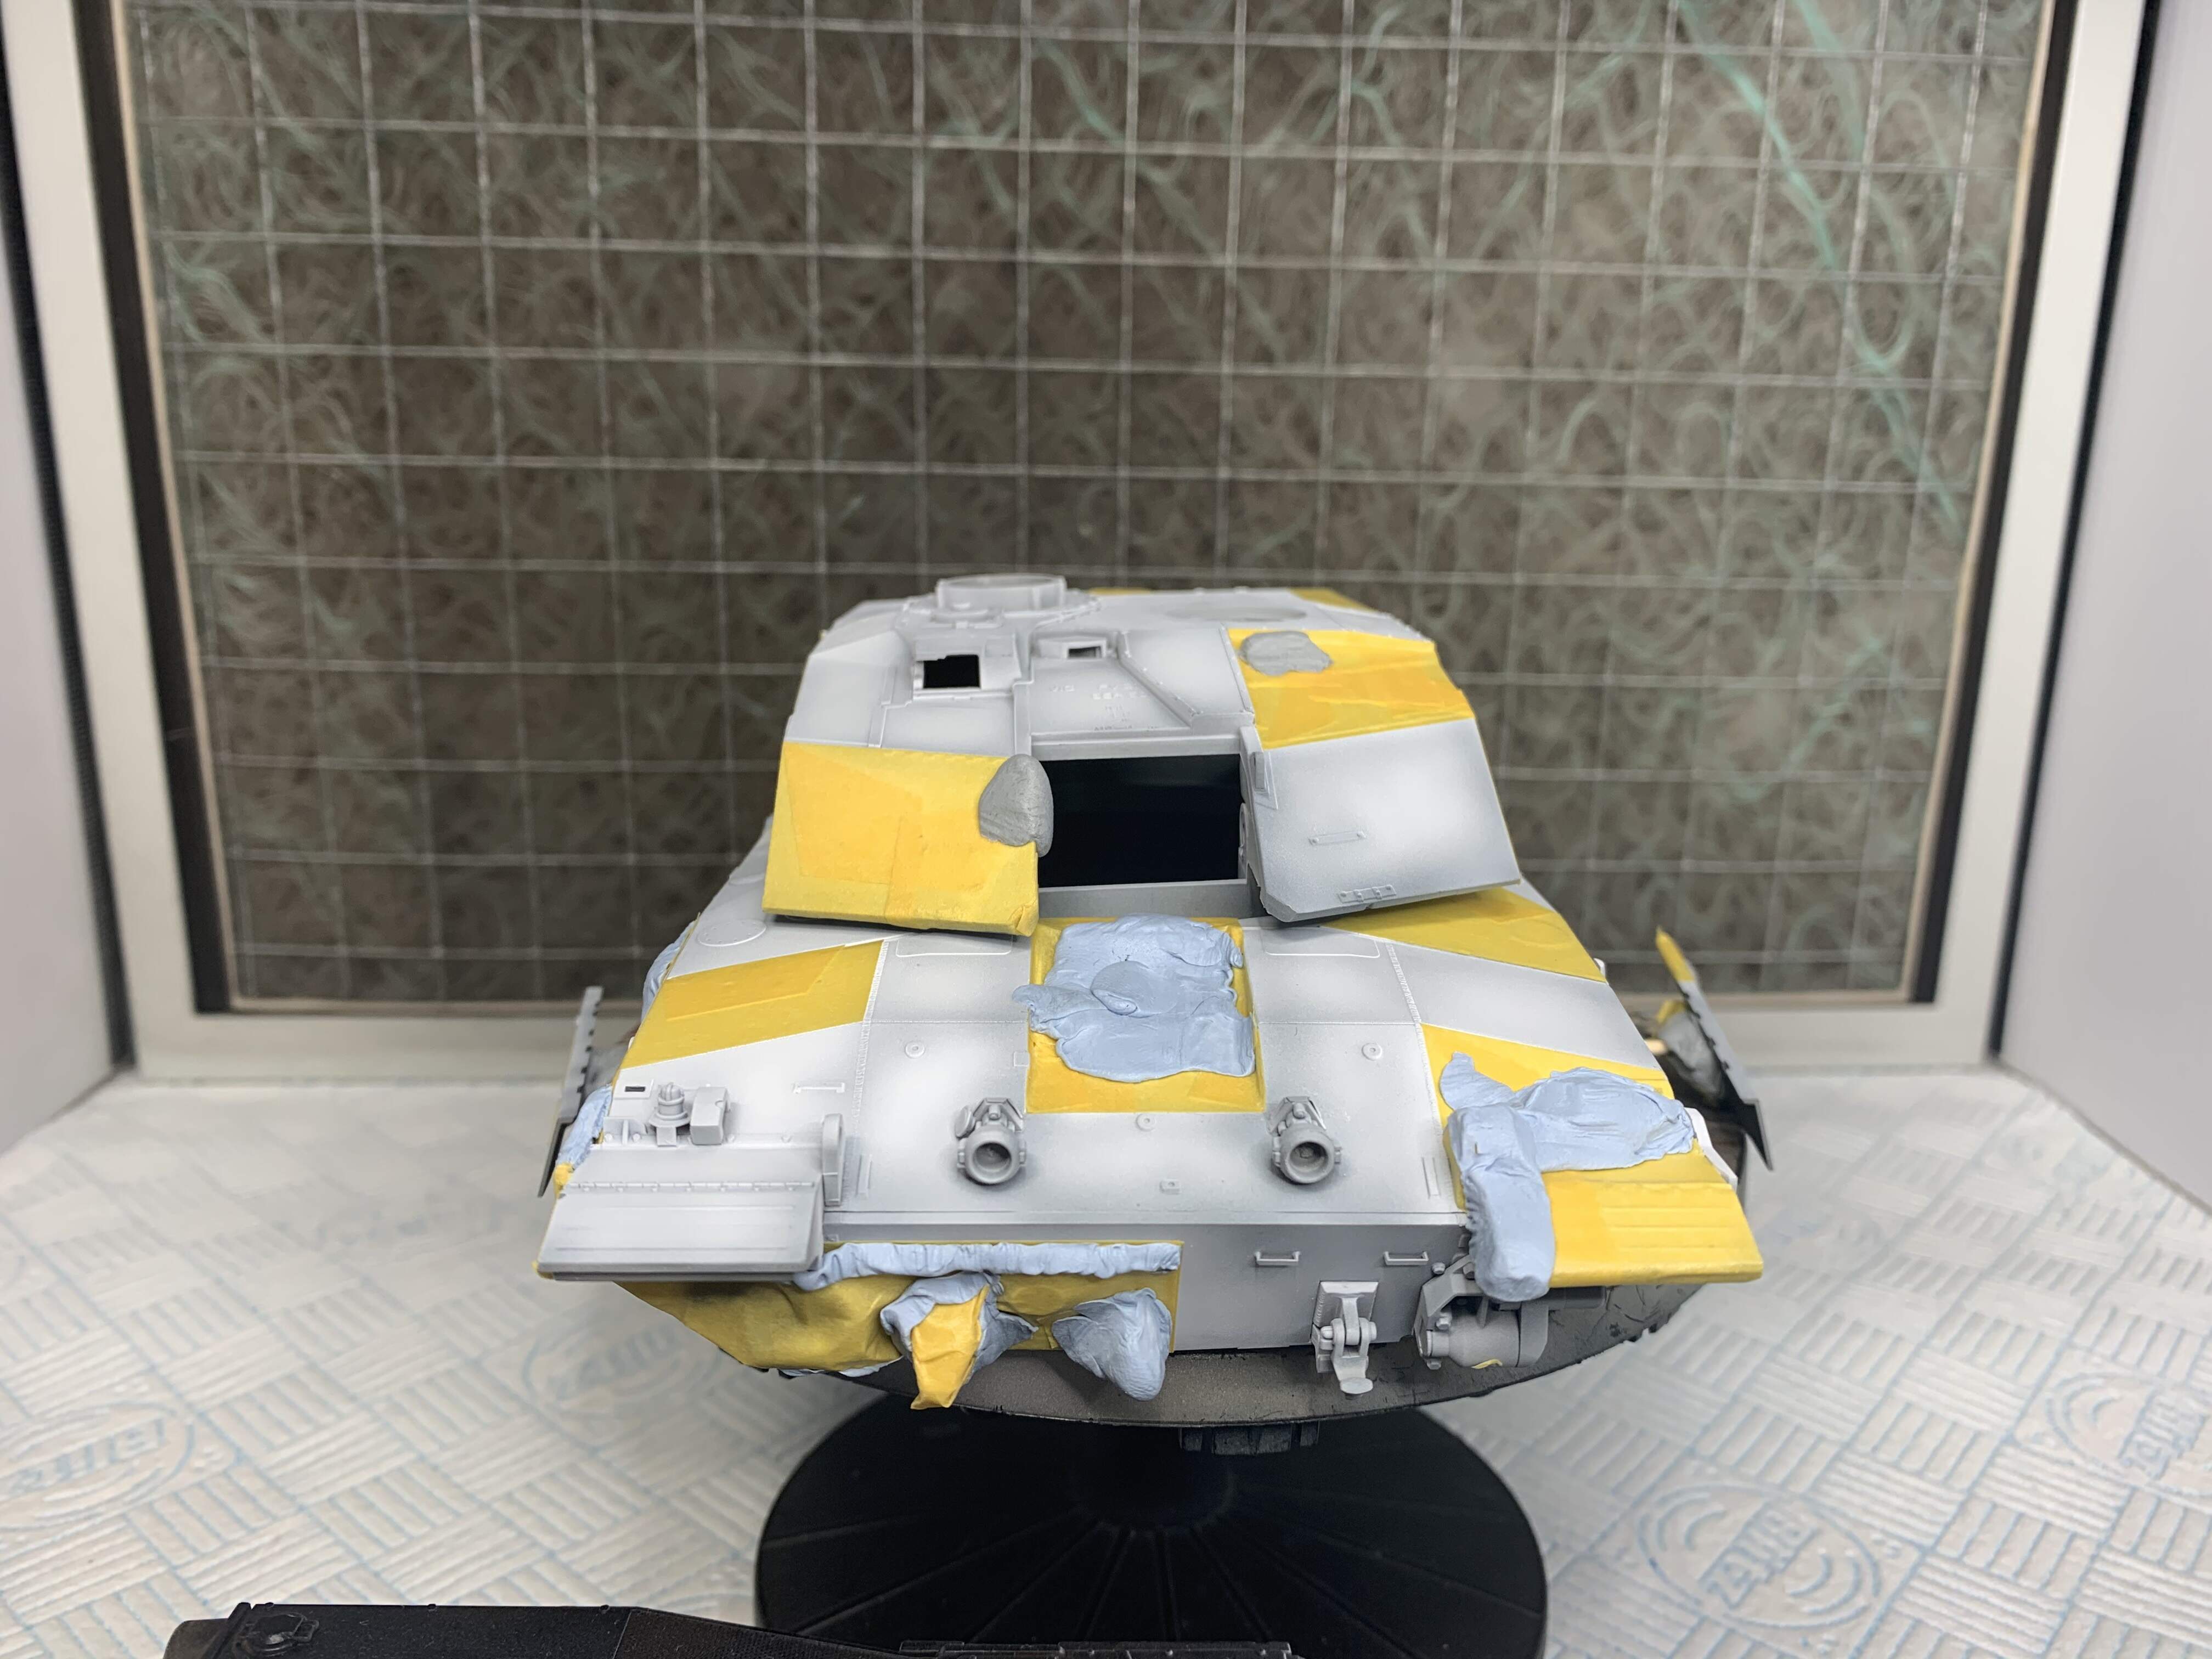
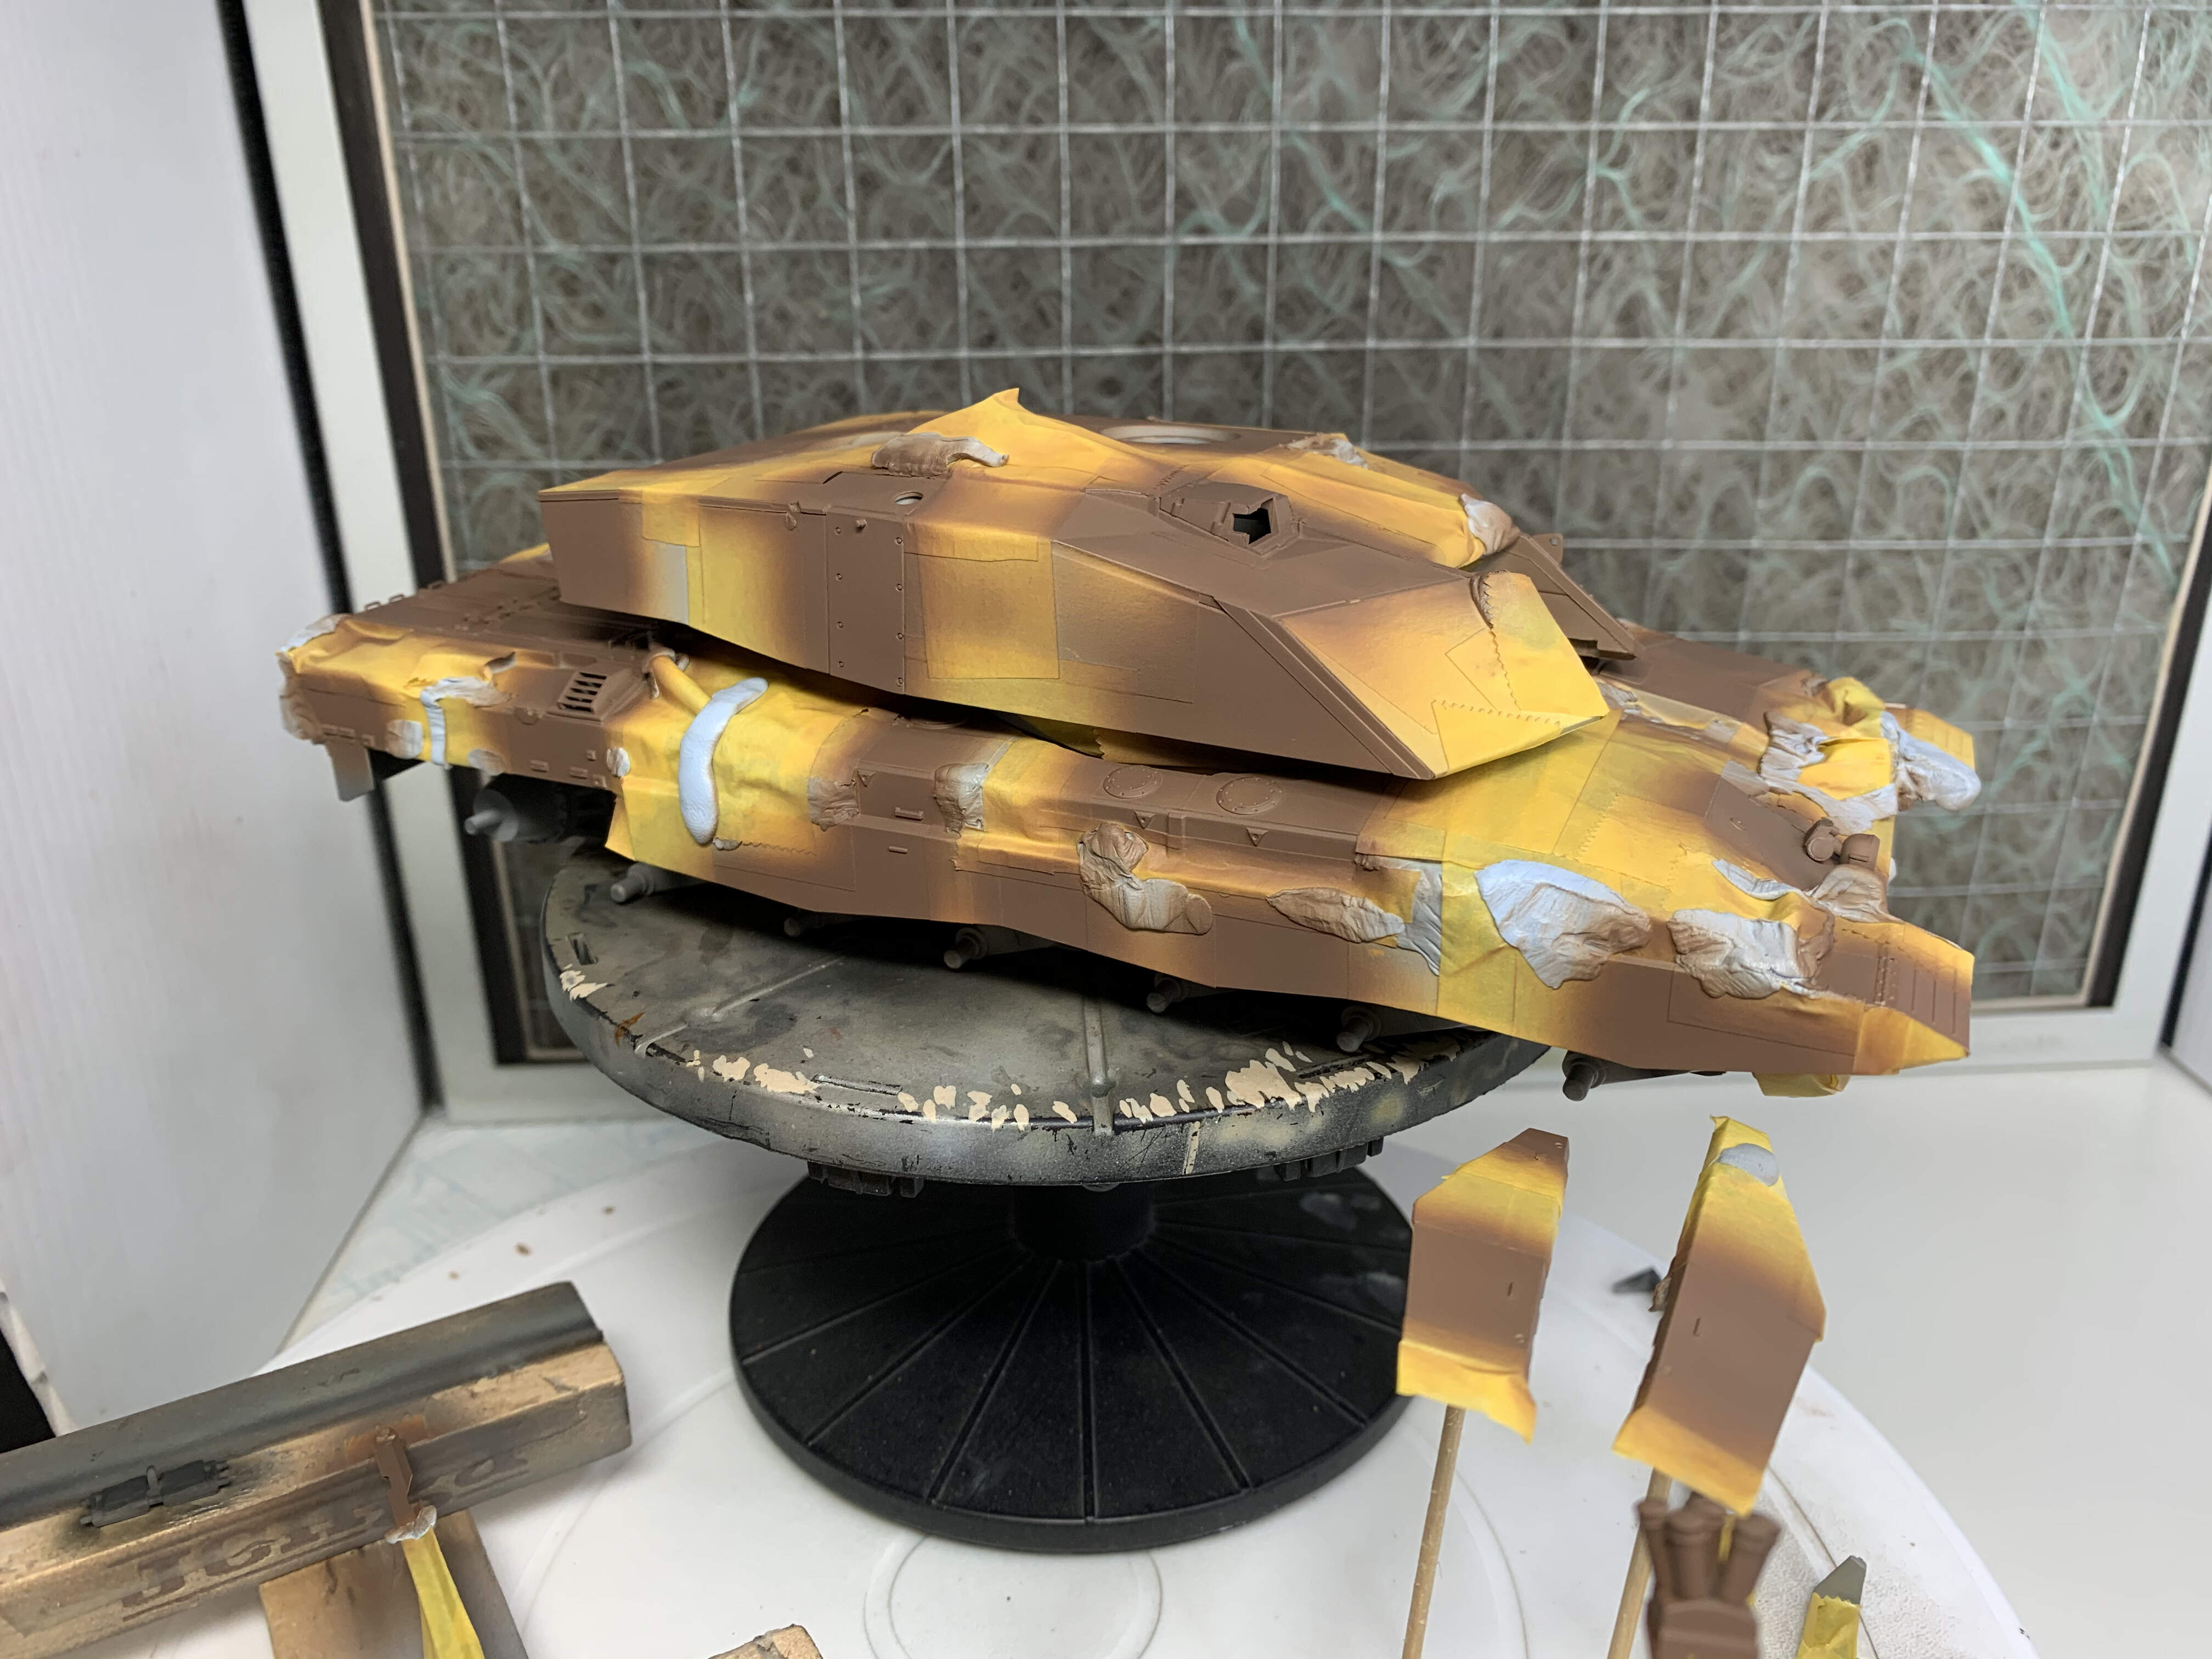
That’s all the white now masked. Easier than the chieftain, but still pretty tricky in places.
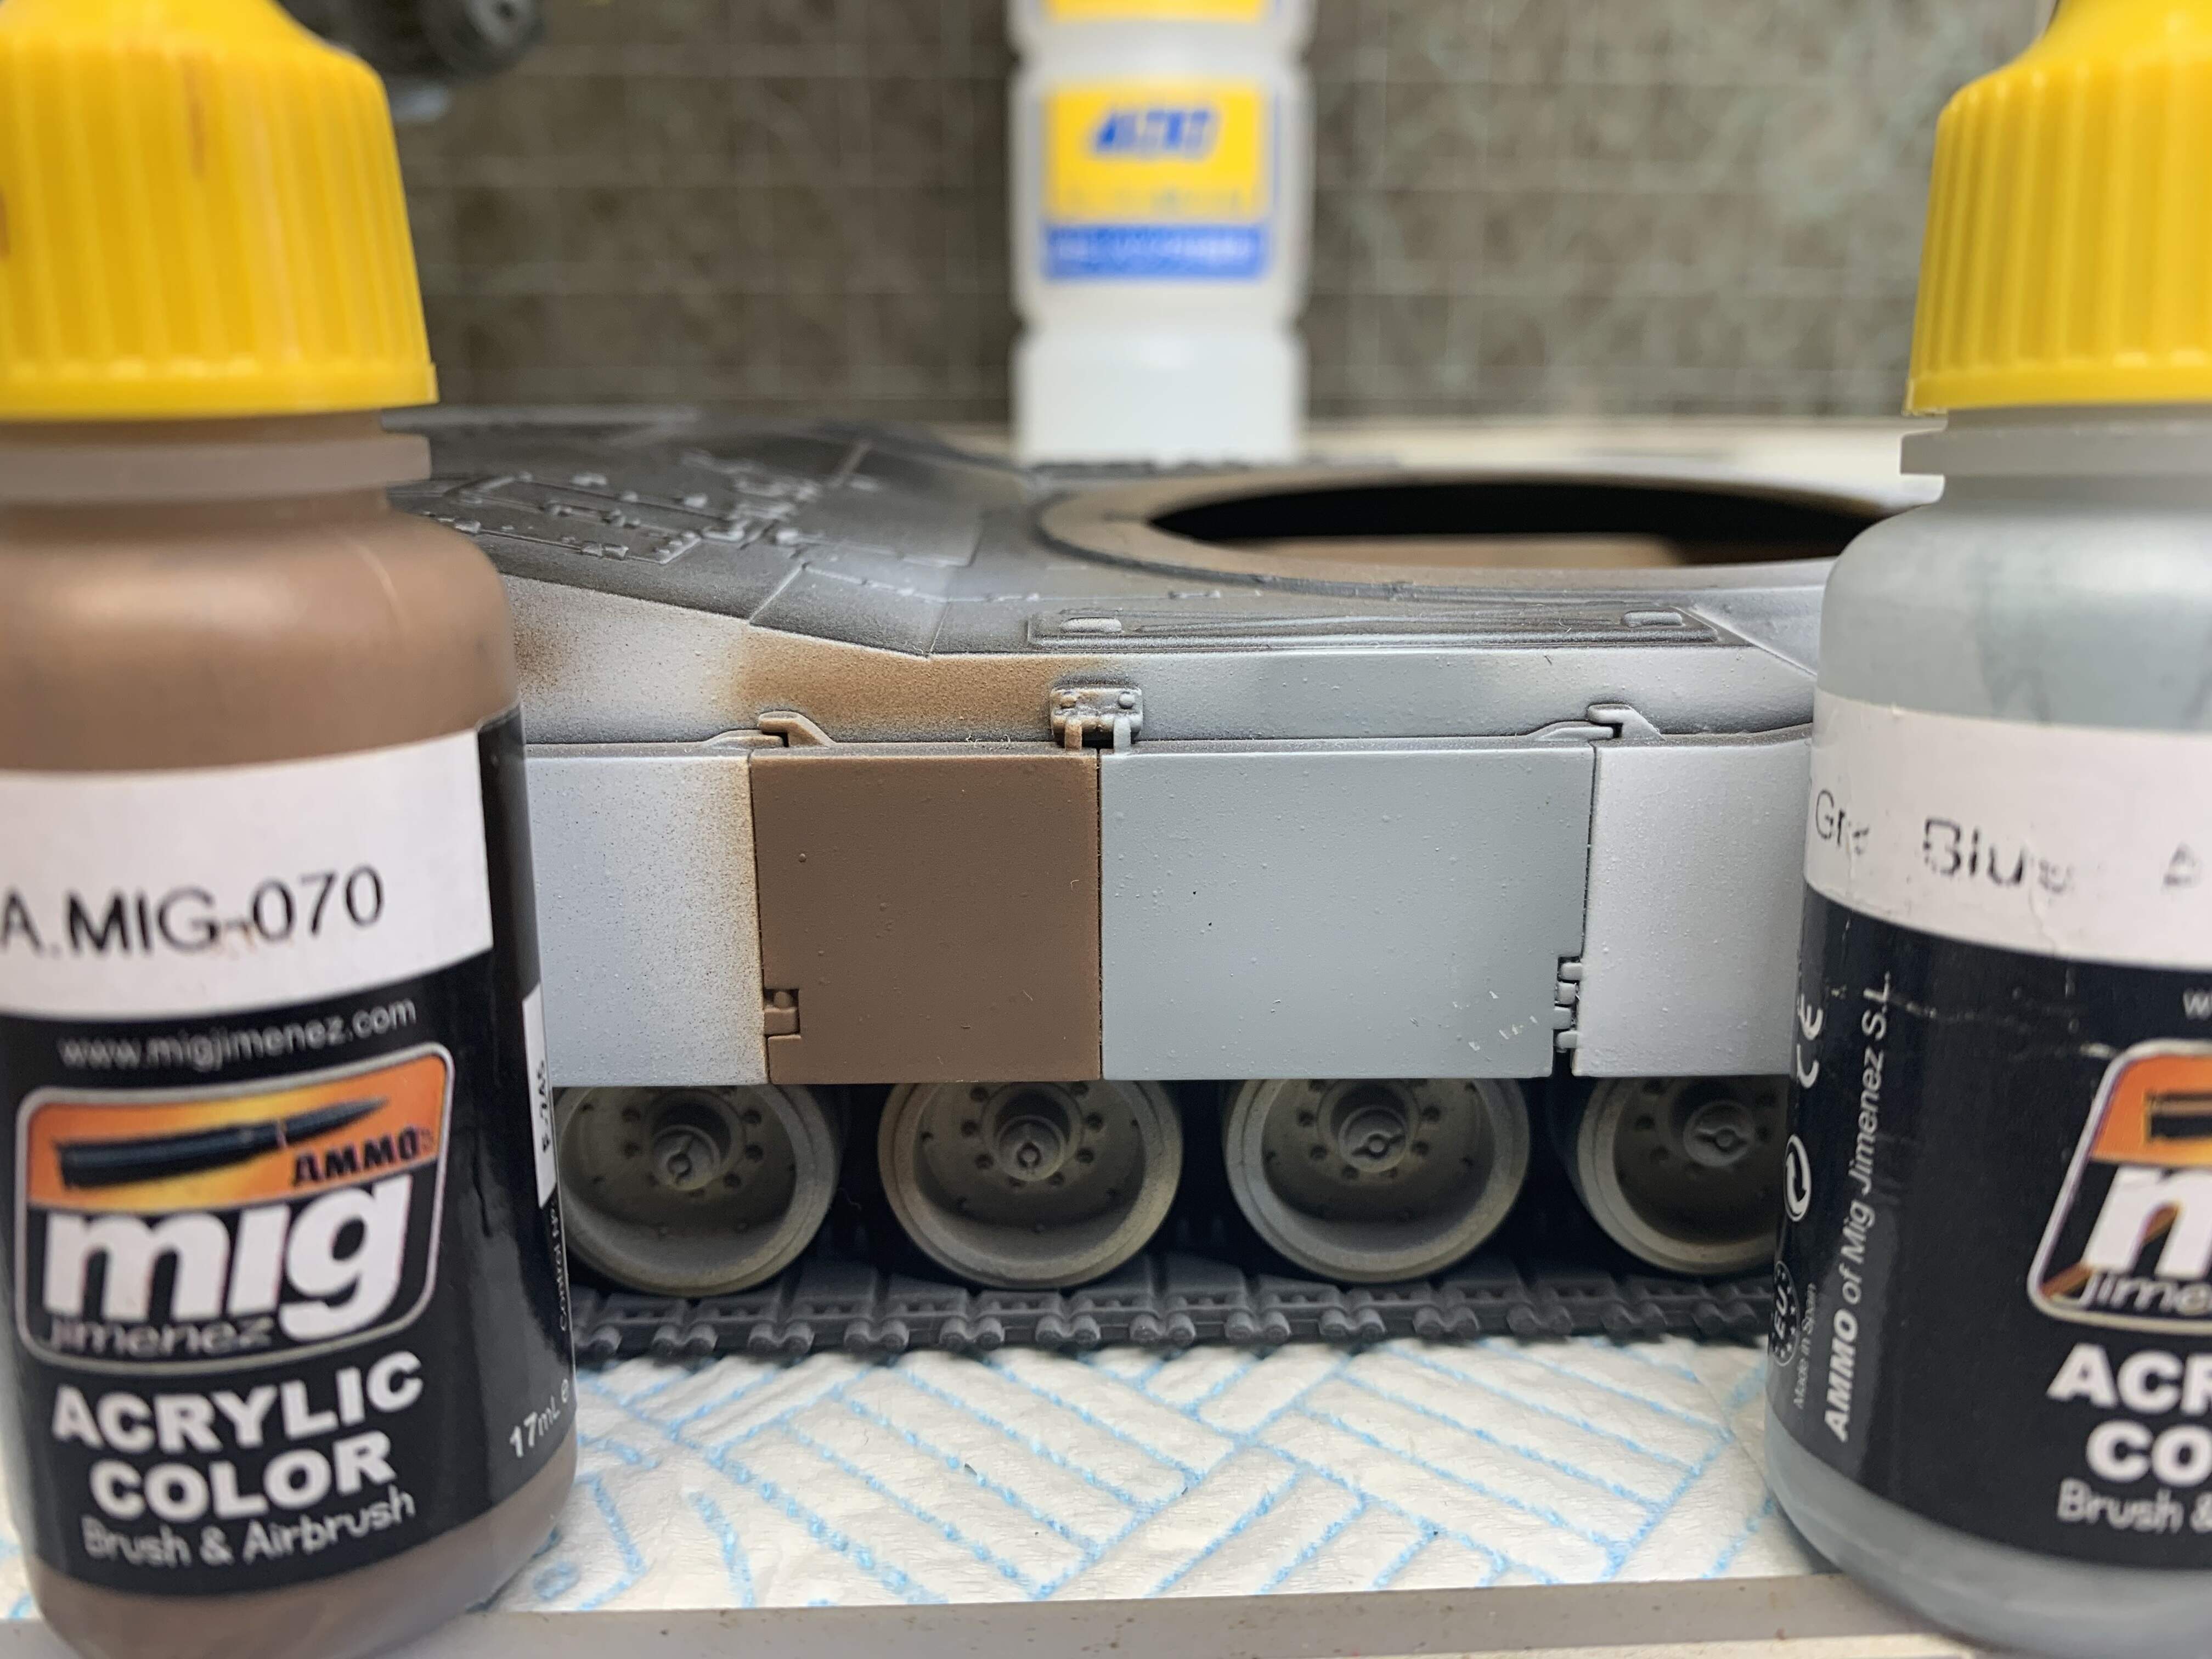
But, more interestingly, I have discovered you can thin mig ammo paints with mr colour levelling thinner! I think I probably mixed them 1:1 paint to thinner. Almost no tip drying, and laid down pretty smooth even on pebbly old abrams test mule, especially the brown, which was very rough with their own thinner. In the pic you can see where I have damaged the finish on the grey, but that took a fair bit gouging with an extra sharp fingernail, and only about an hour after painting.
I was going to try tamiya or real color paints, but I want to match the colours on the chieftain and display them together, so this works out well, as long as I have enough paint left…
Defeats the purpose of non toxic paints, but I’m happy to know this works.
Cheers, Jim.
7 Likes
That looks rubbish …  of course I’m kidding … looks great as usual, and you must be the masking master now surely lol … it was hopefully a bit easier as they kindly followed most of the major panel lines when they did the cam this time. Its still a lot of work though so hats off to you for sticking to it …(no pun intended)
And that poor old M1 … that is getting some proper abuse … I hope it gets a fitting retirement to a happy place eventually lol
2 Likes
Awesome work Jim!
1 Like
Thanks John and Ezra, much appreciated as always guys.
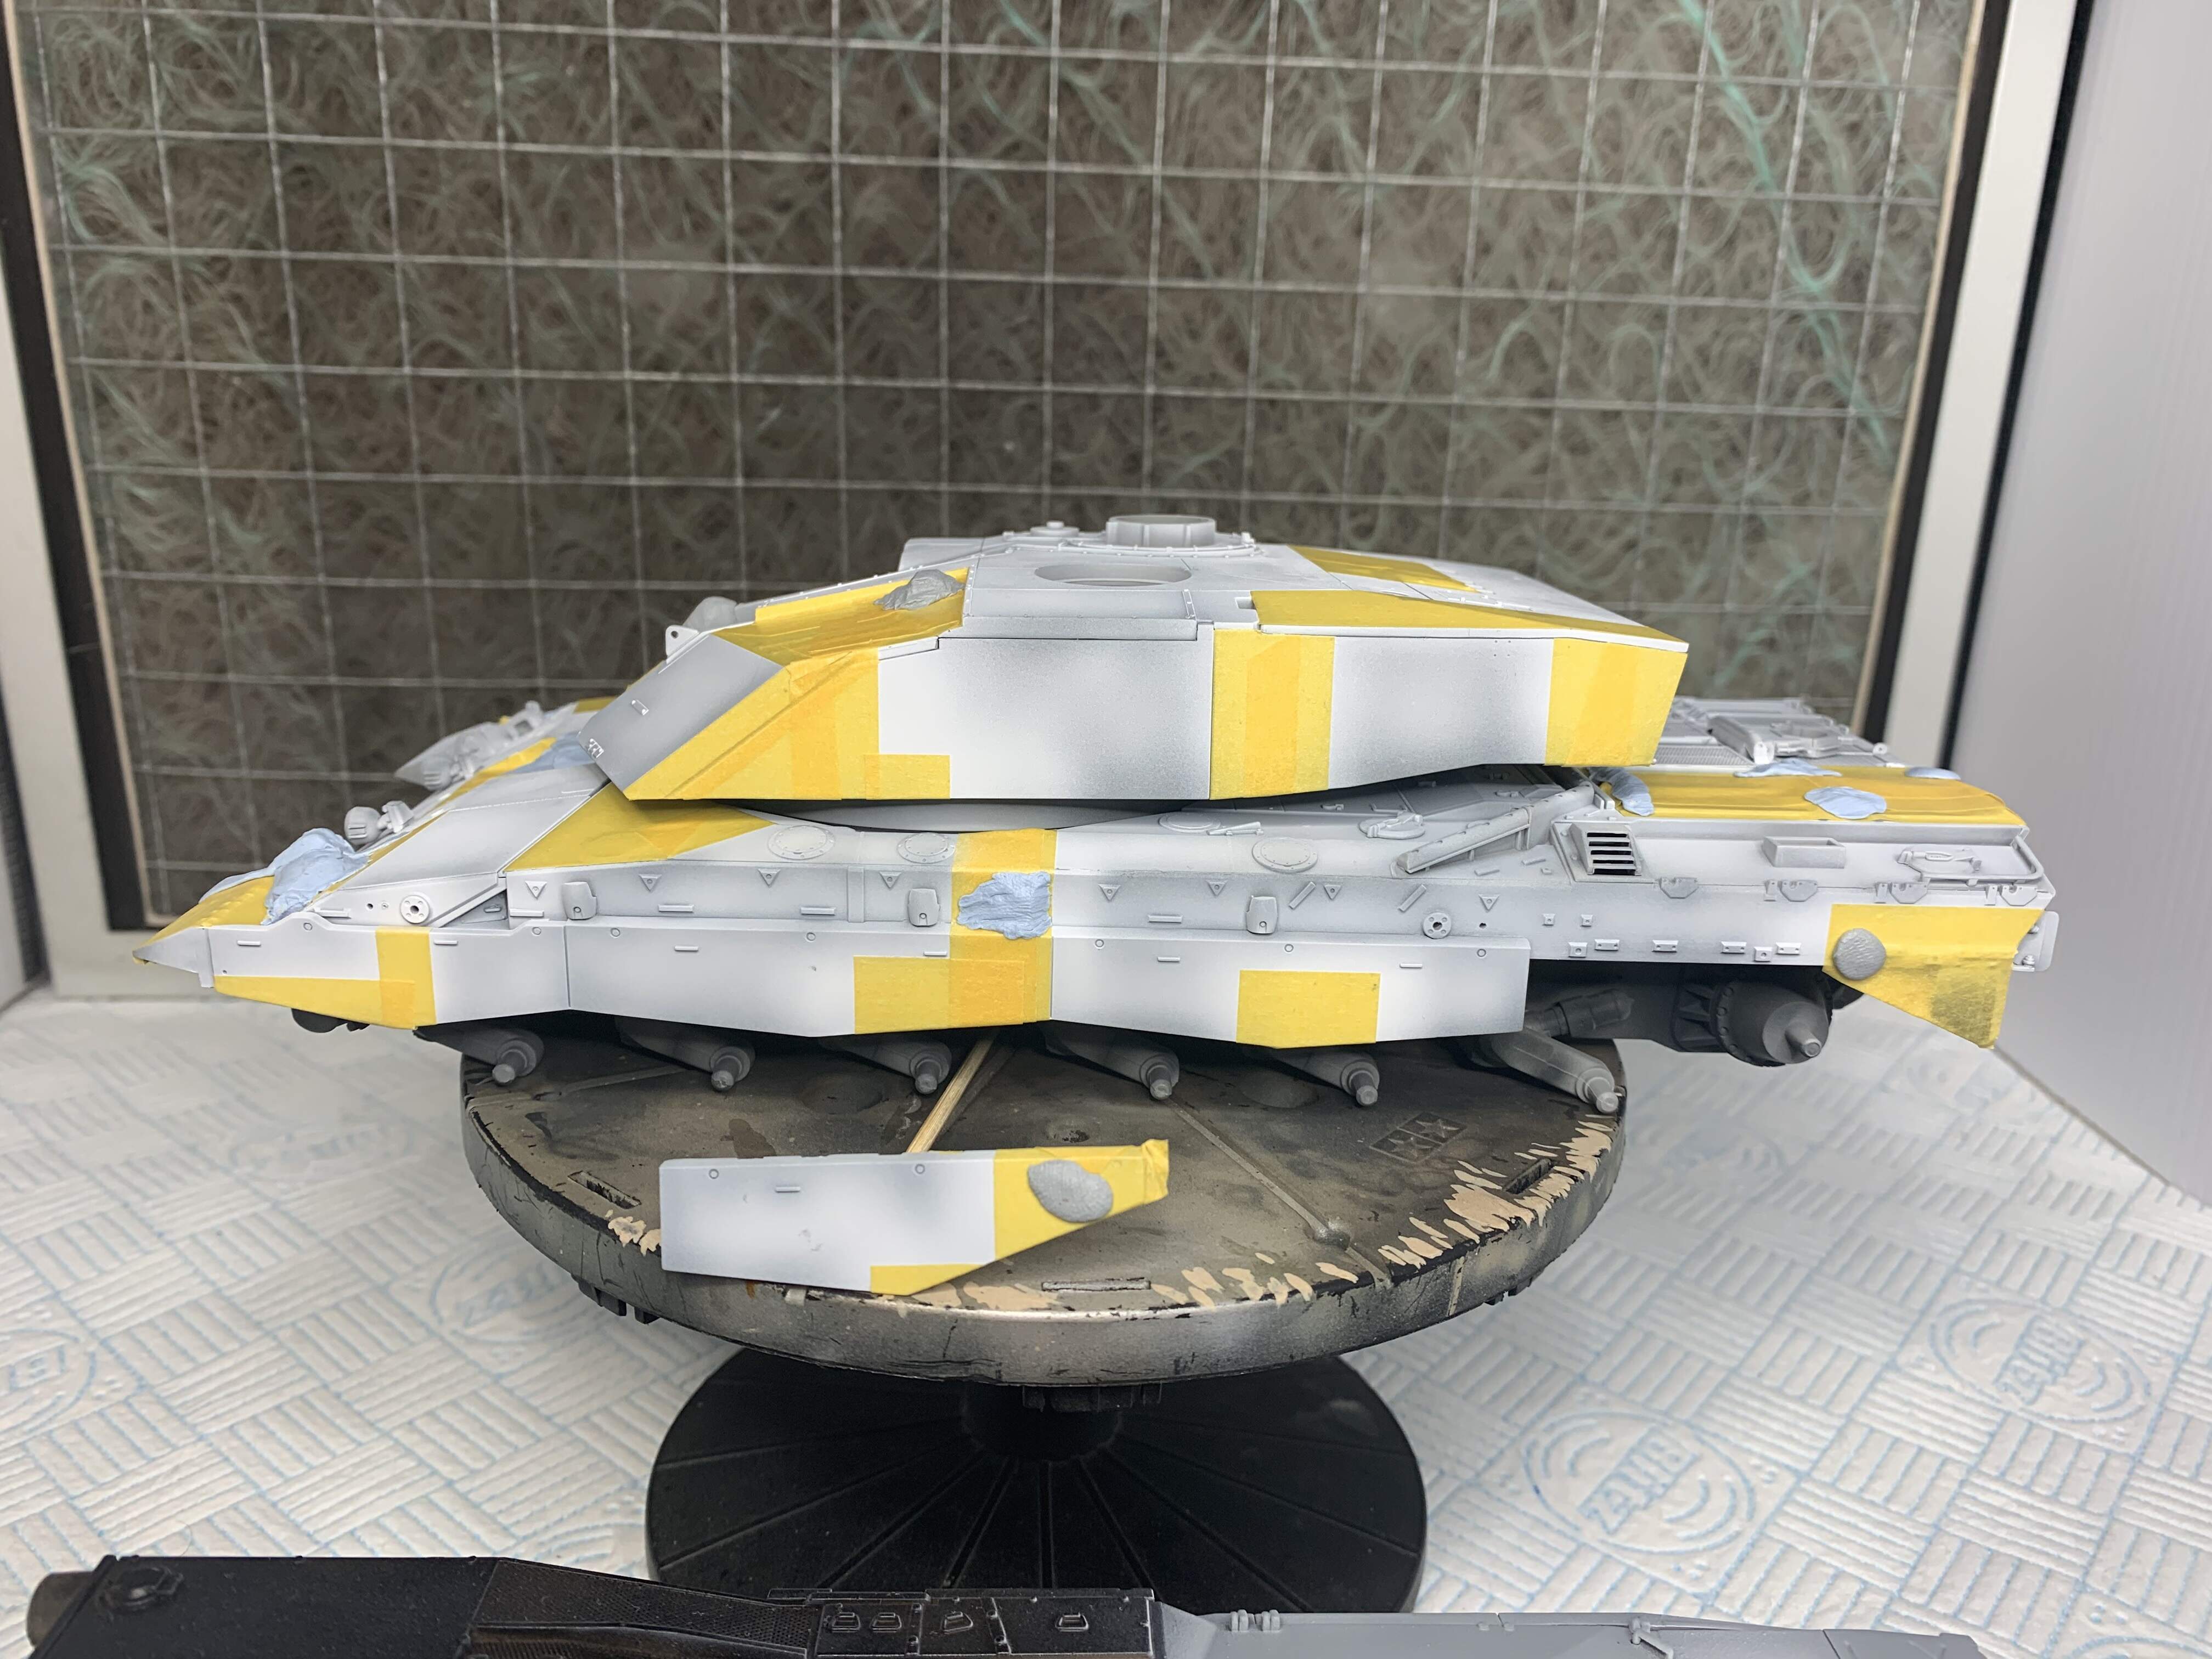
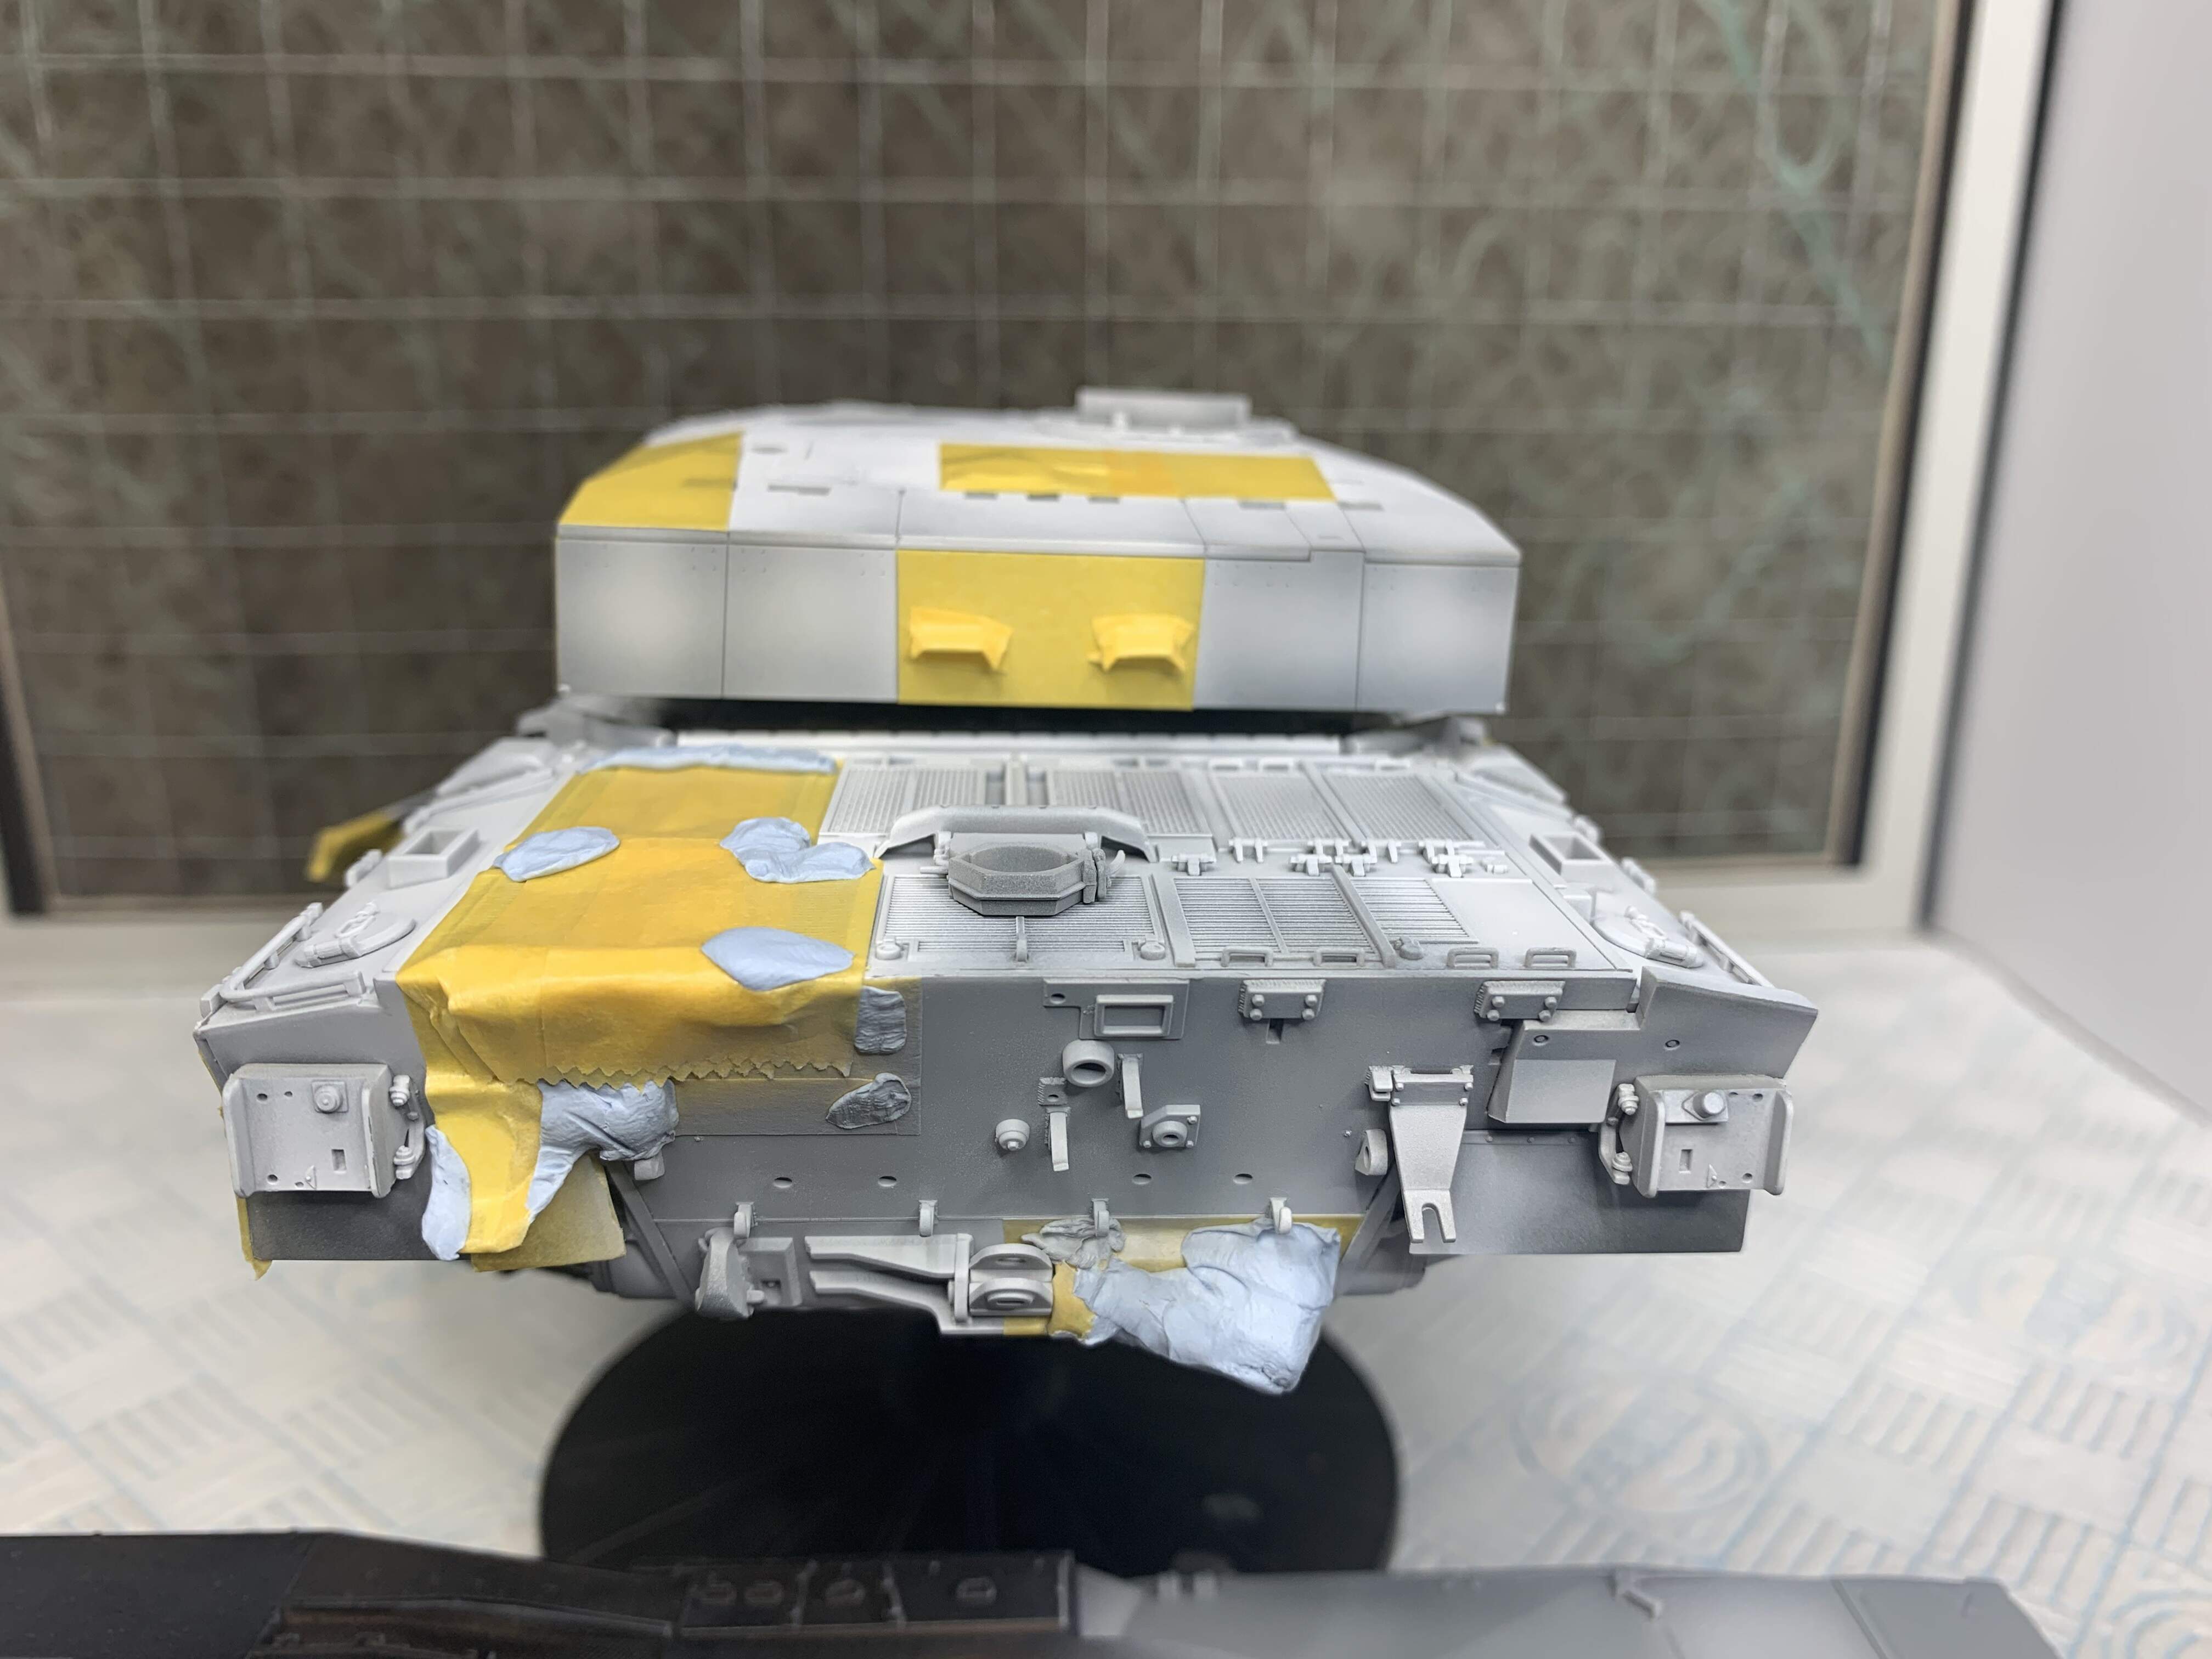
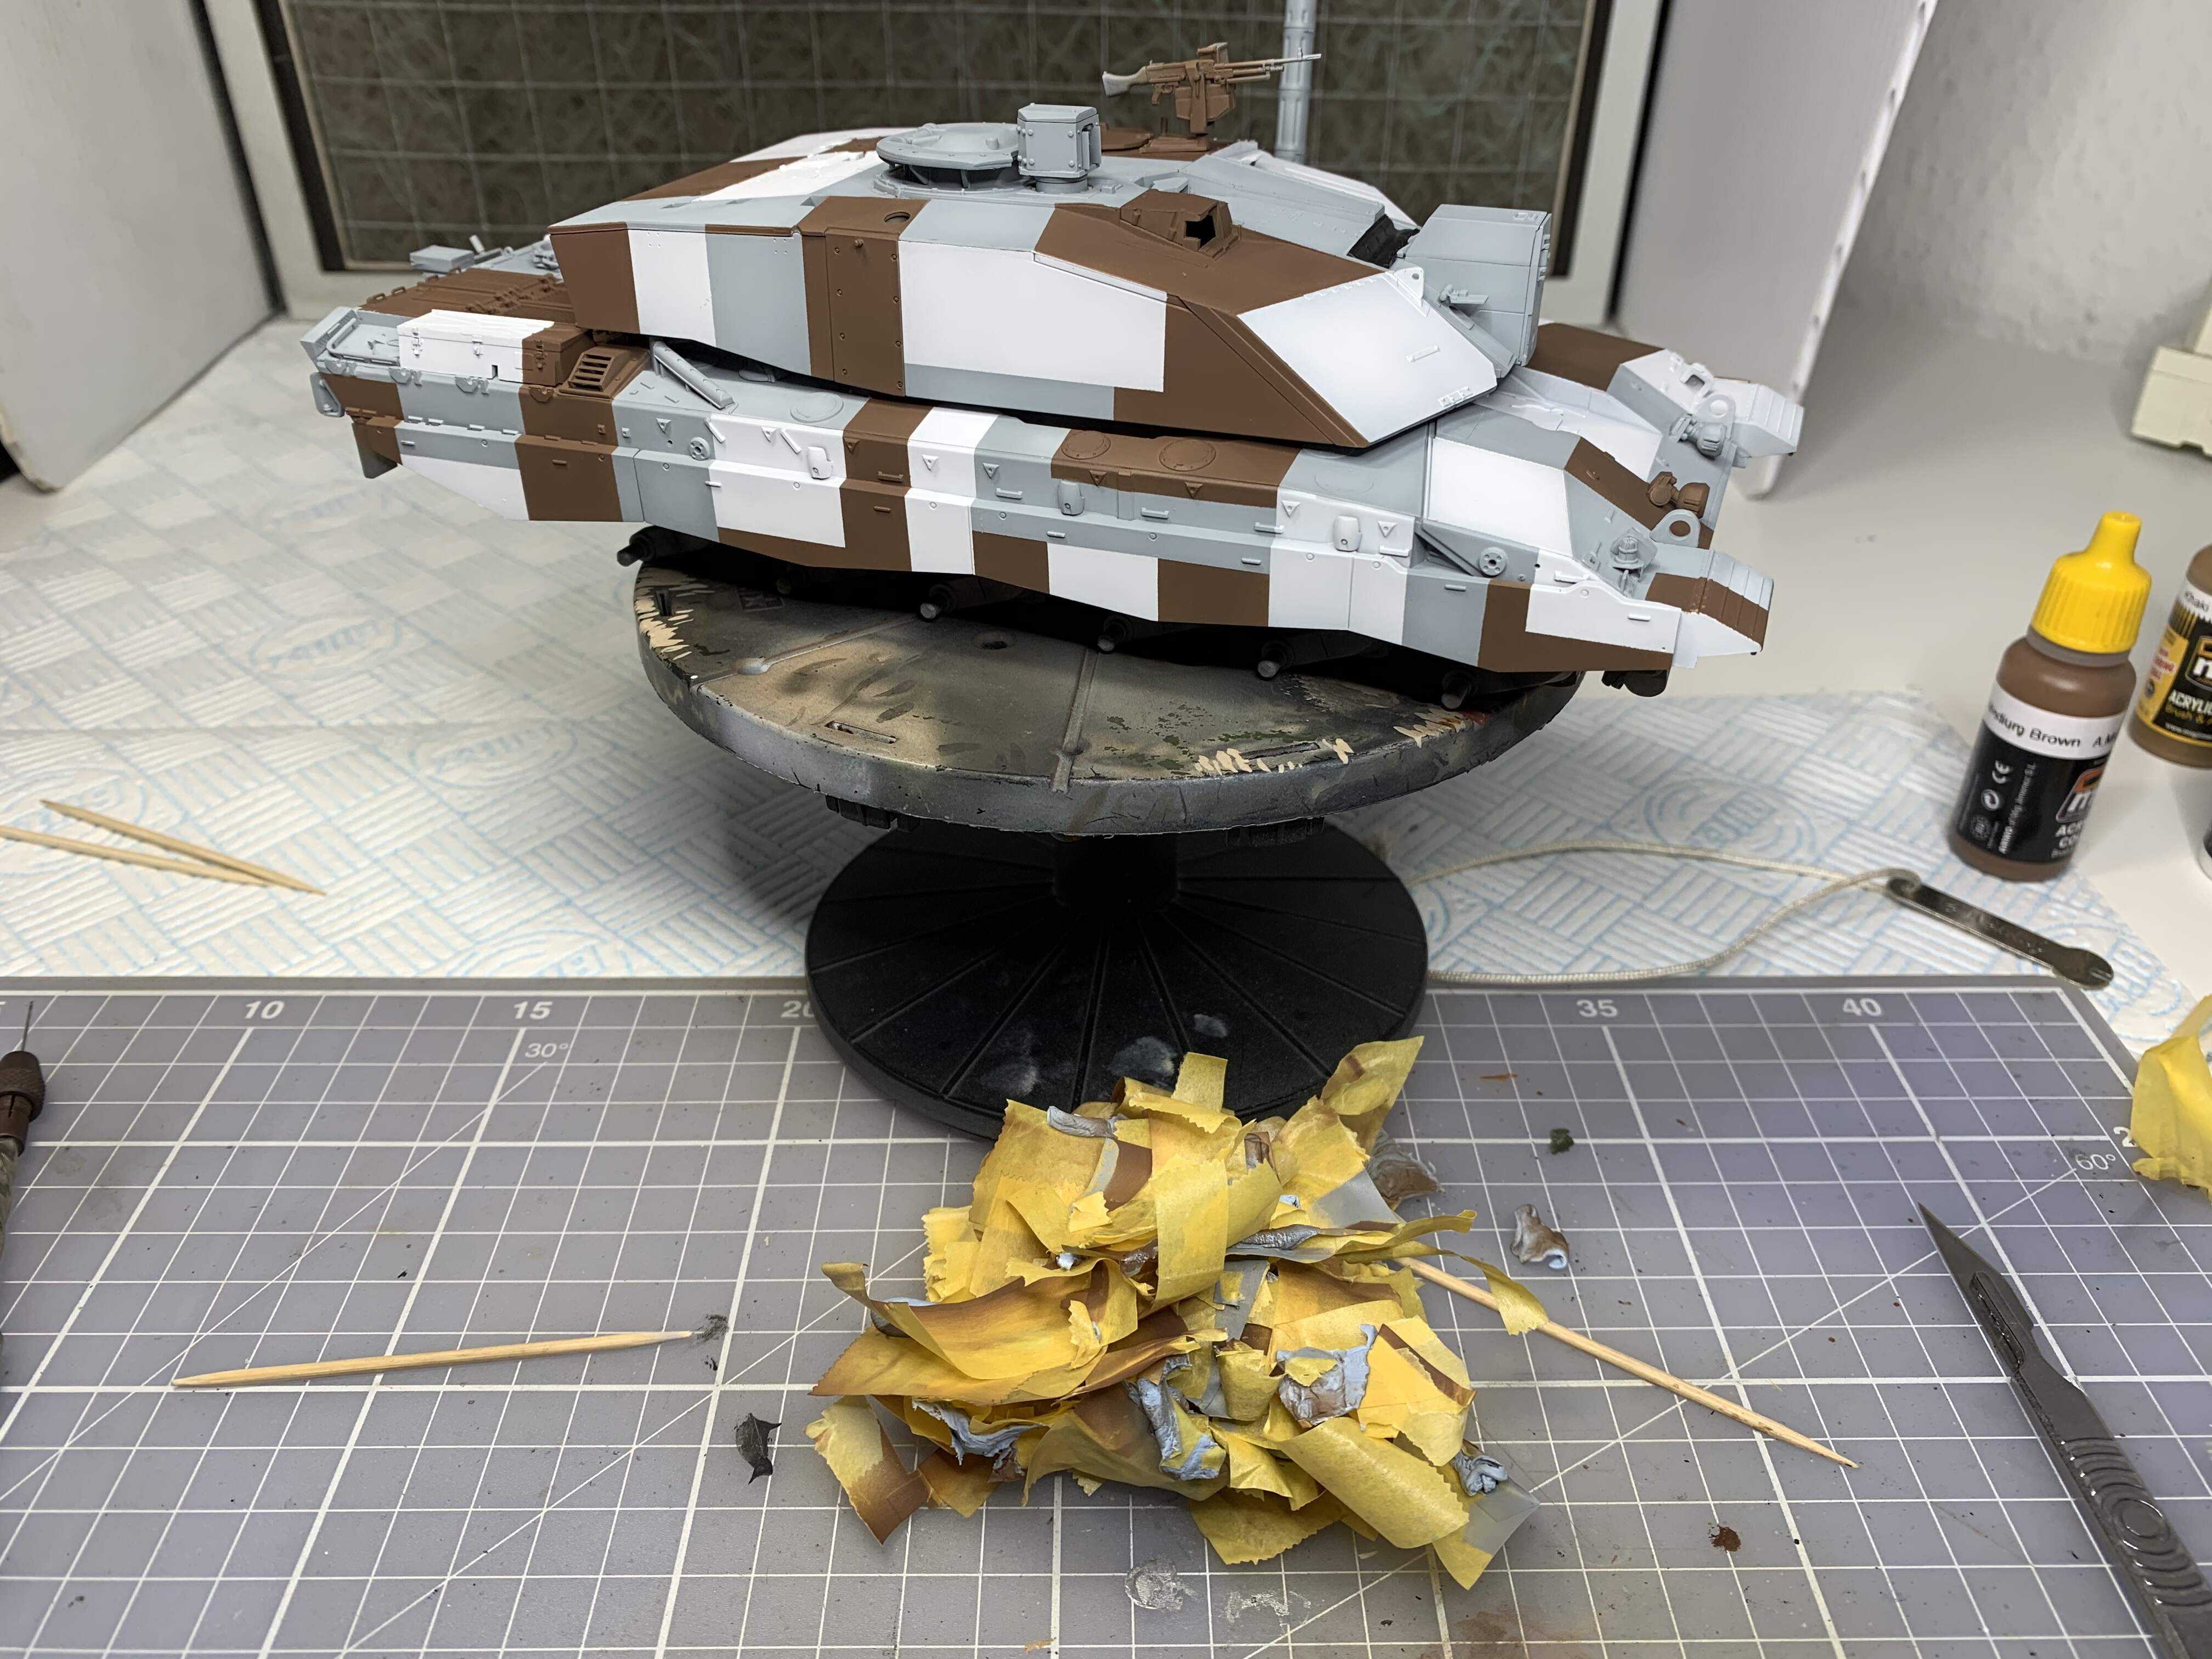
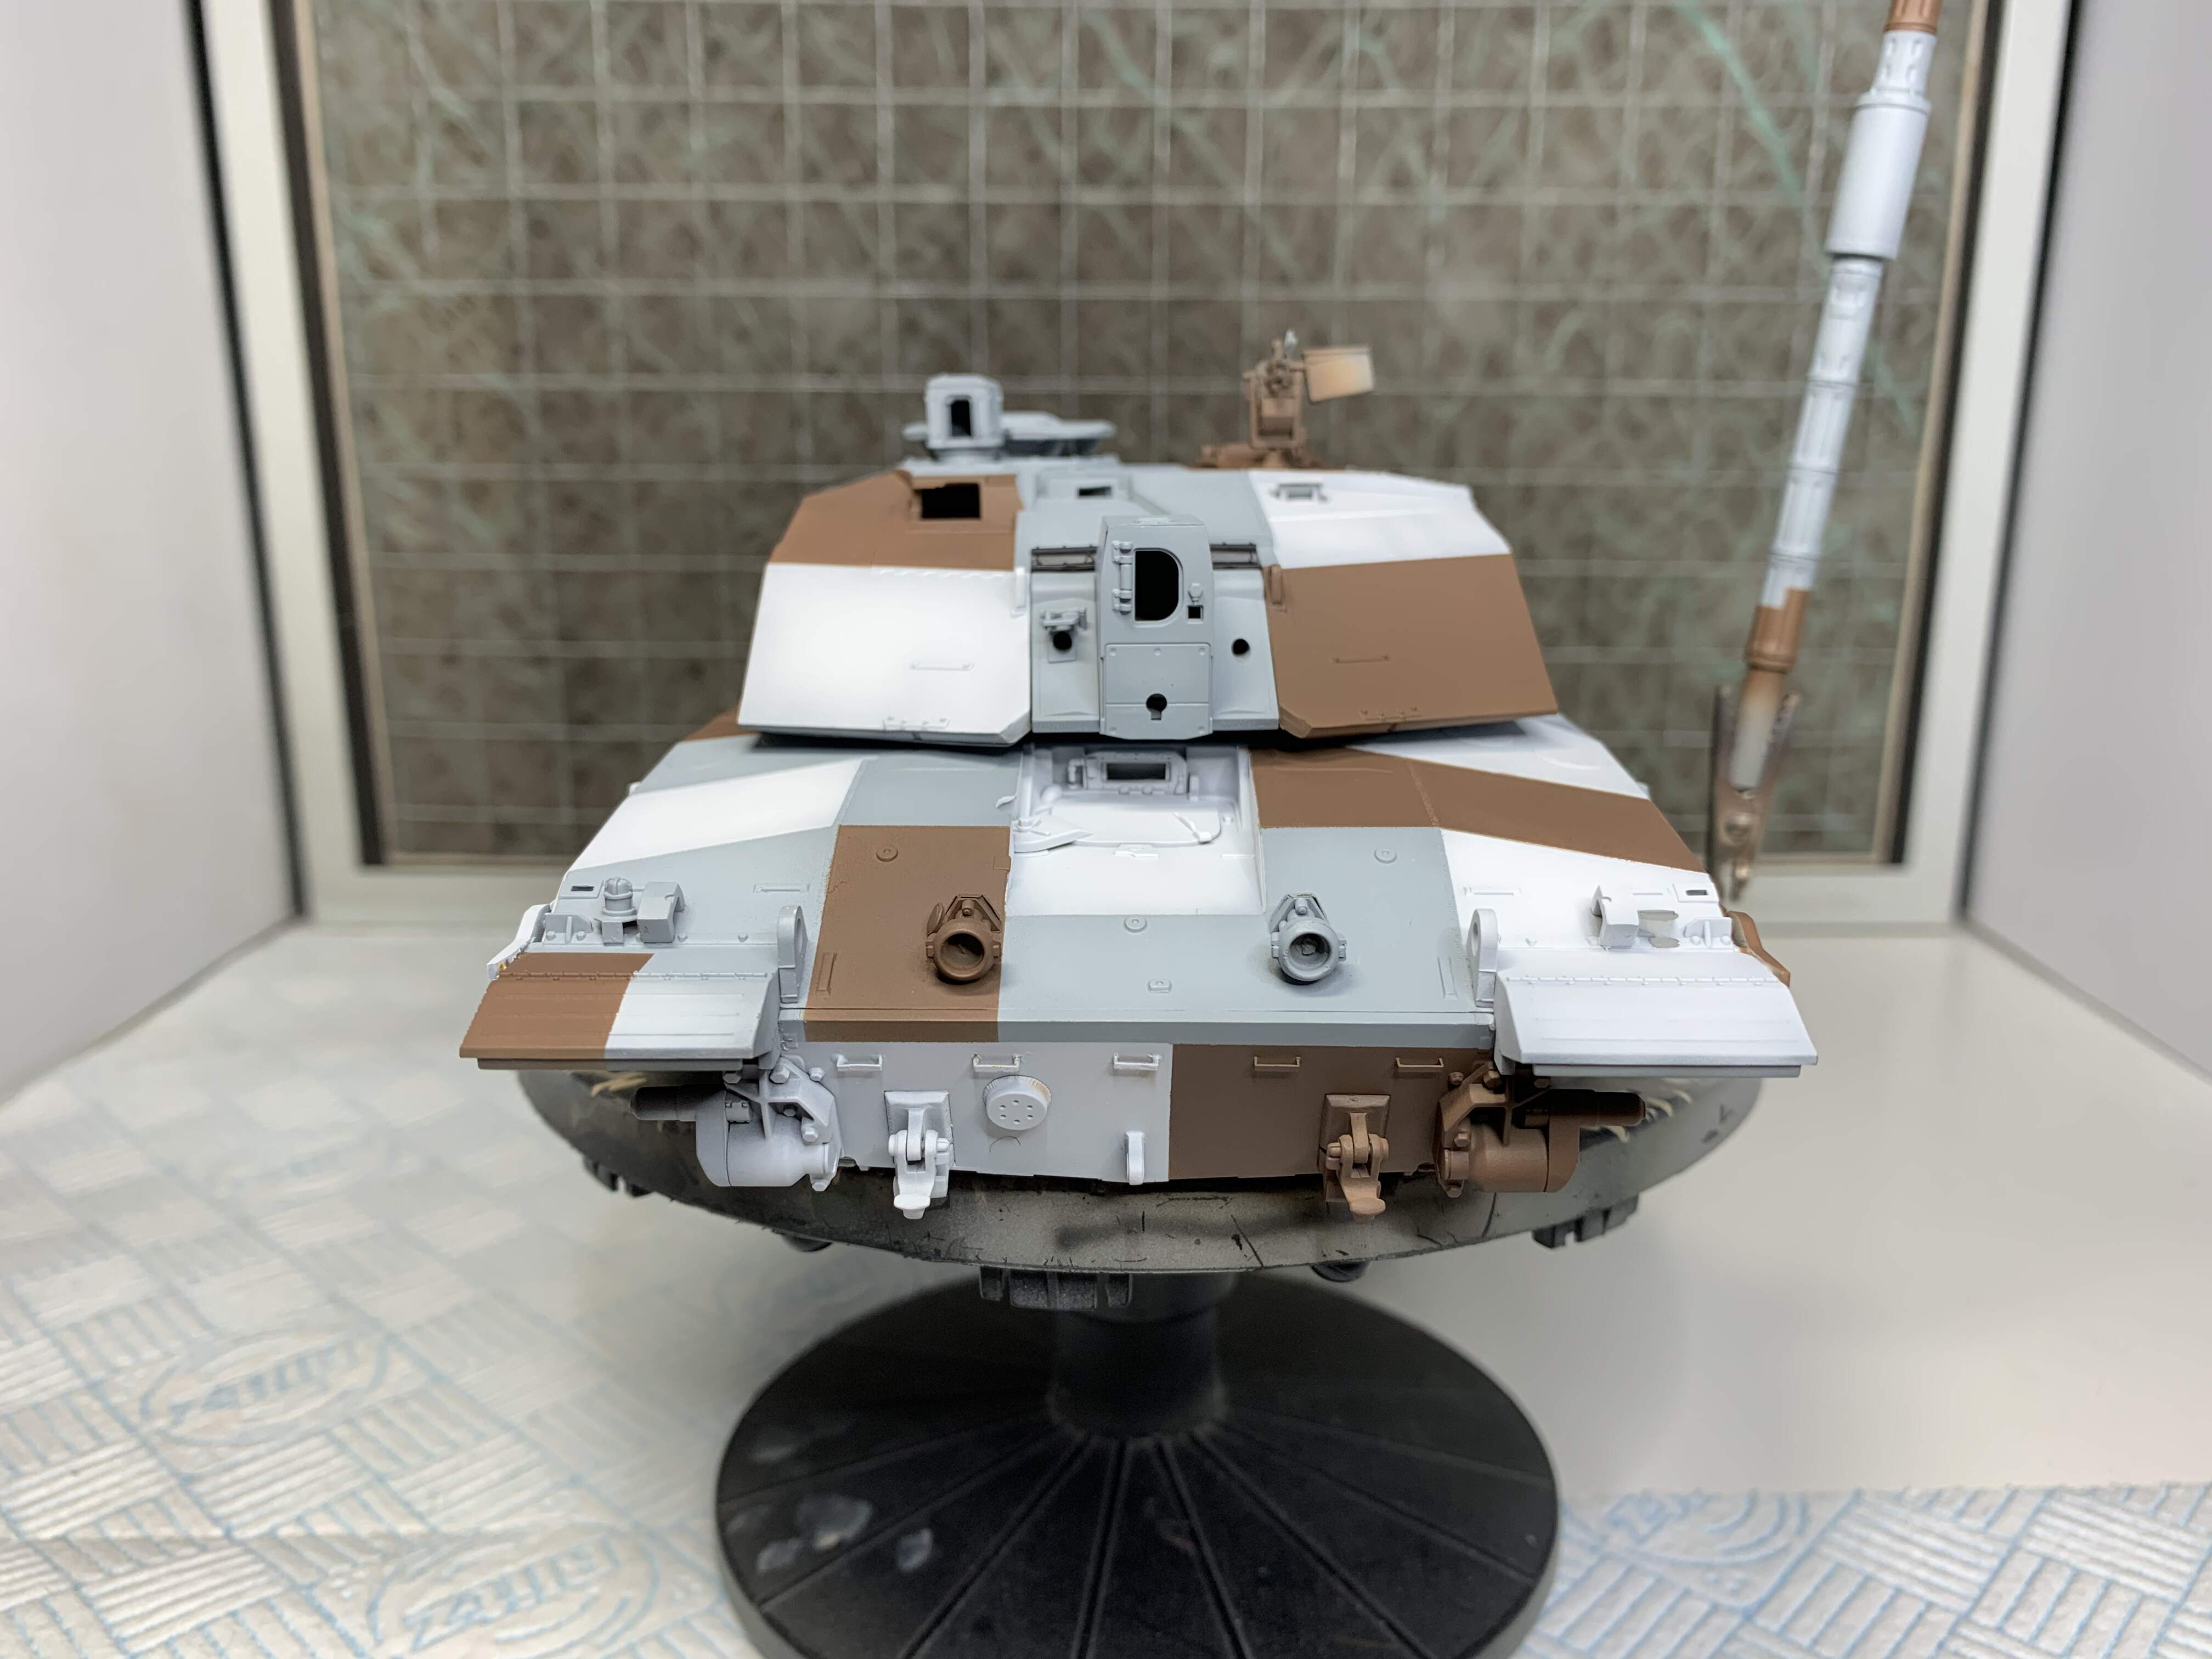
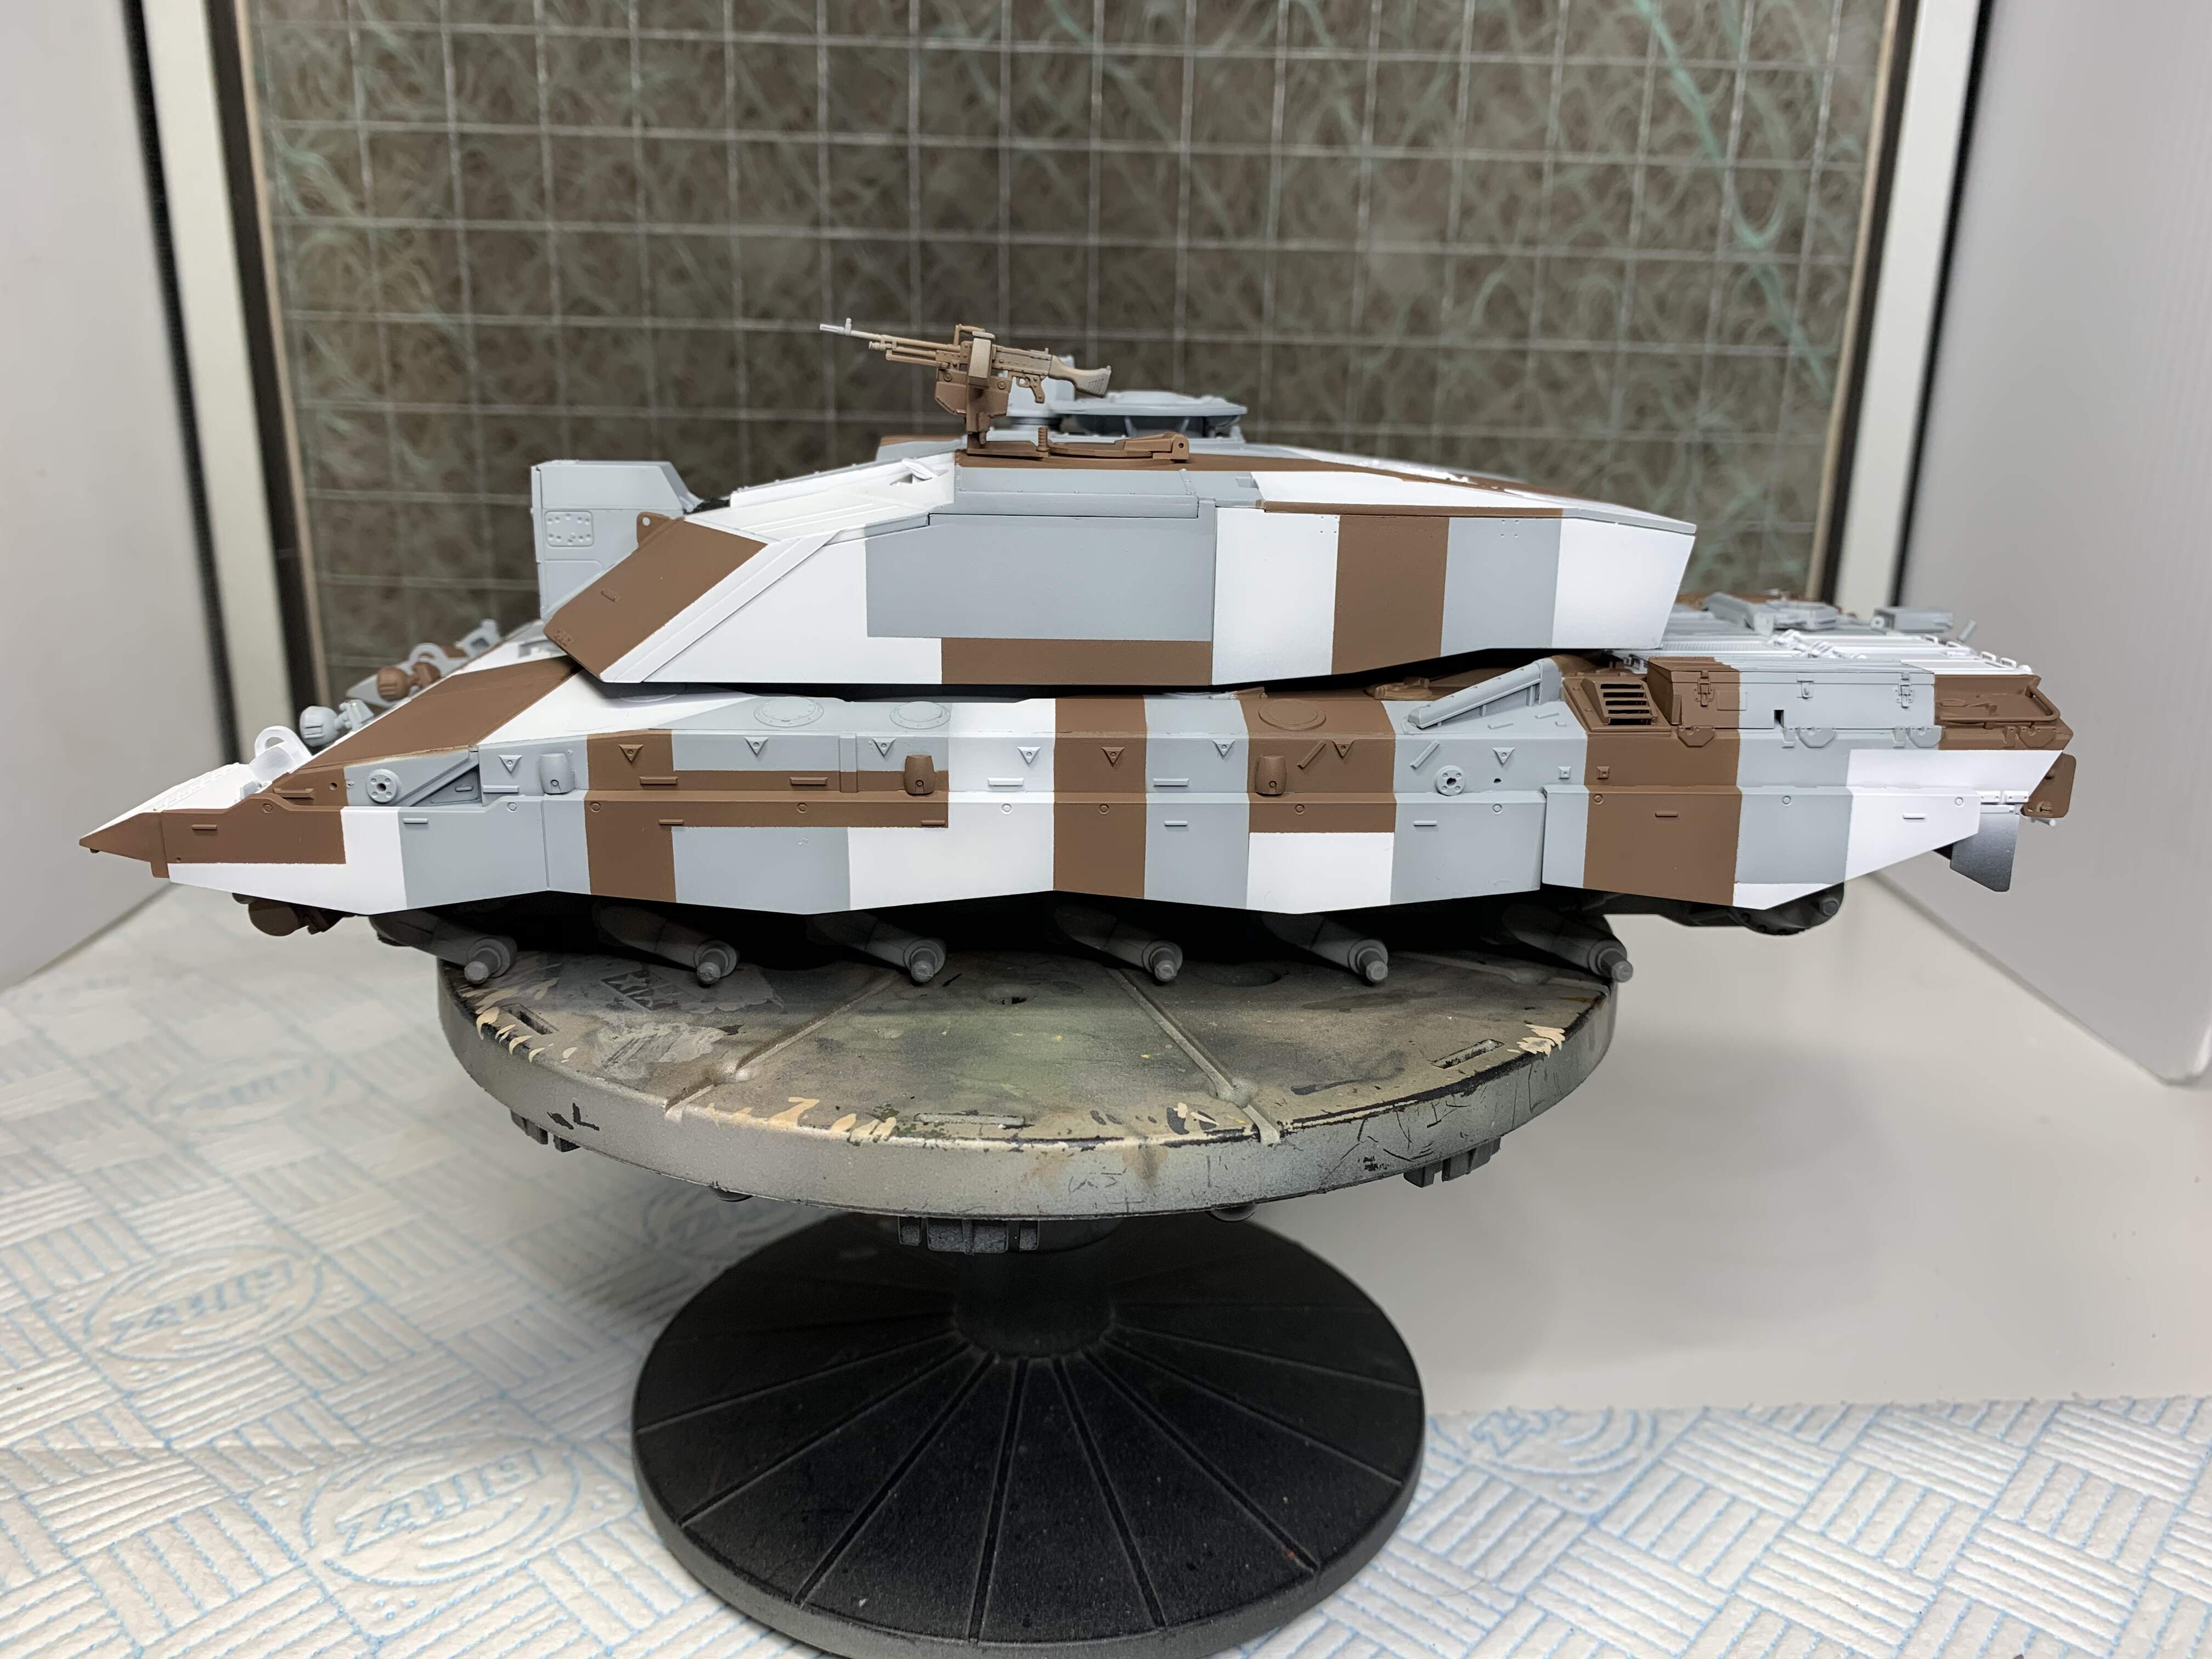
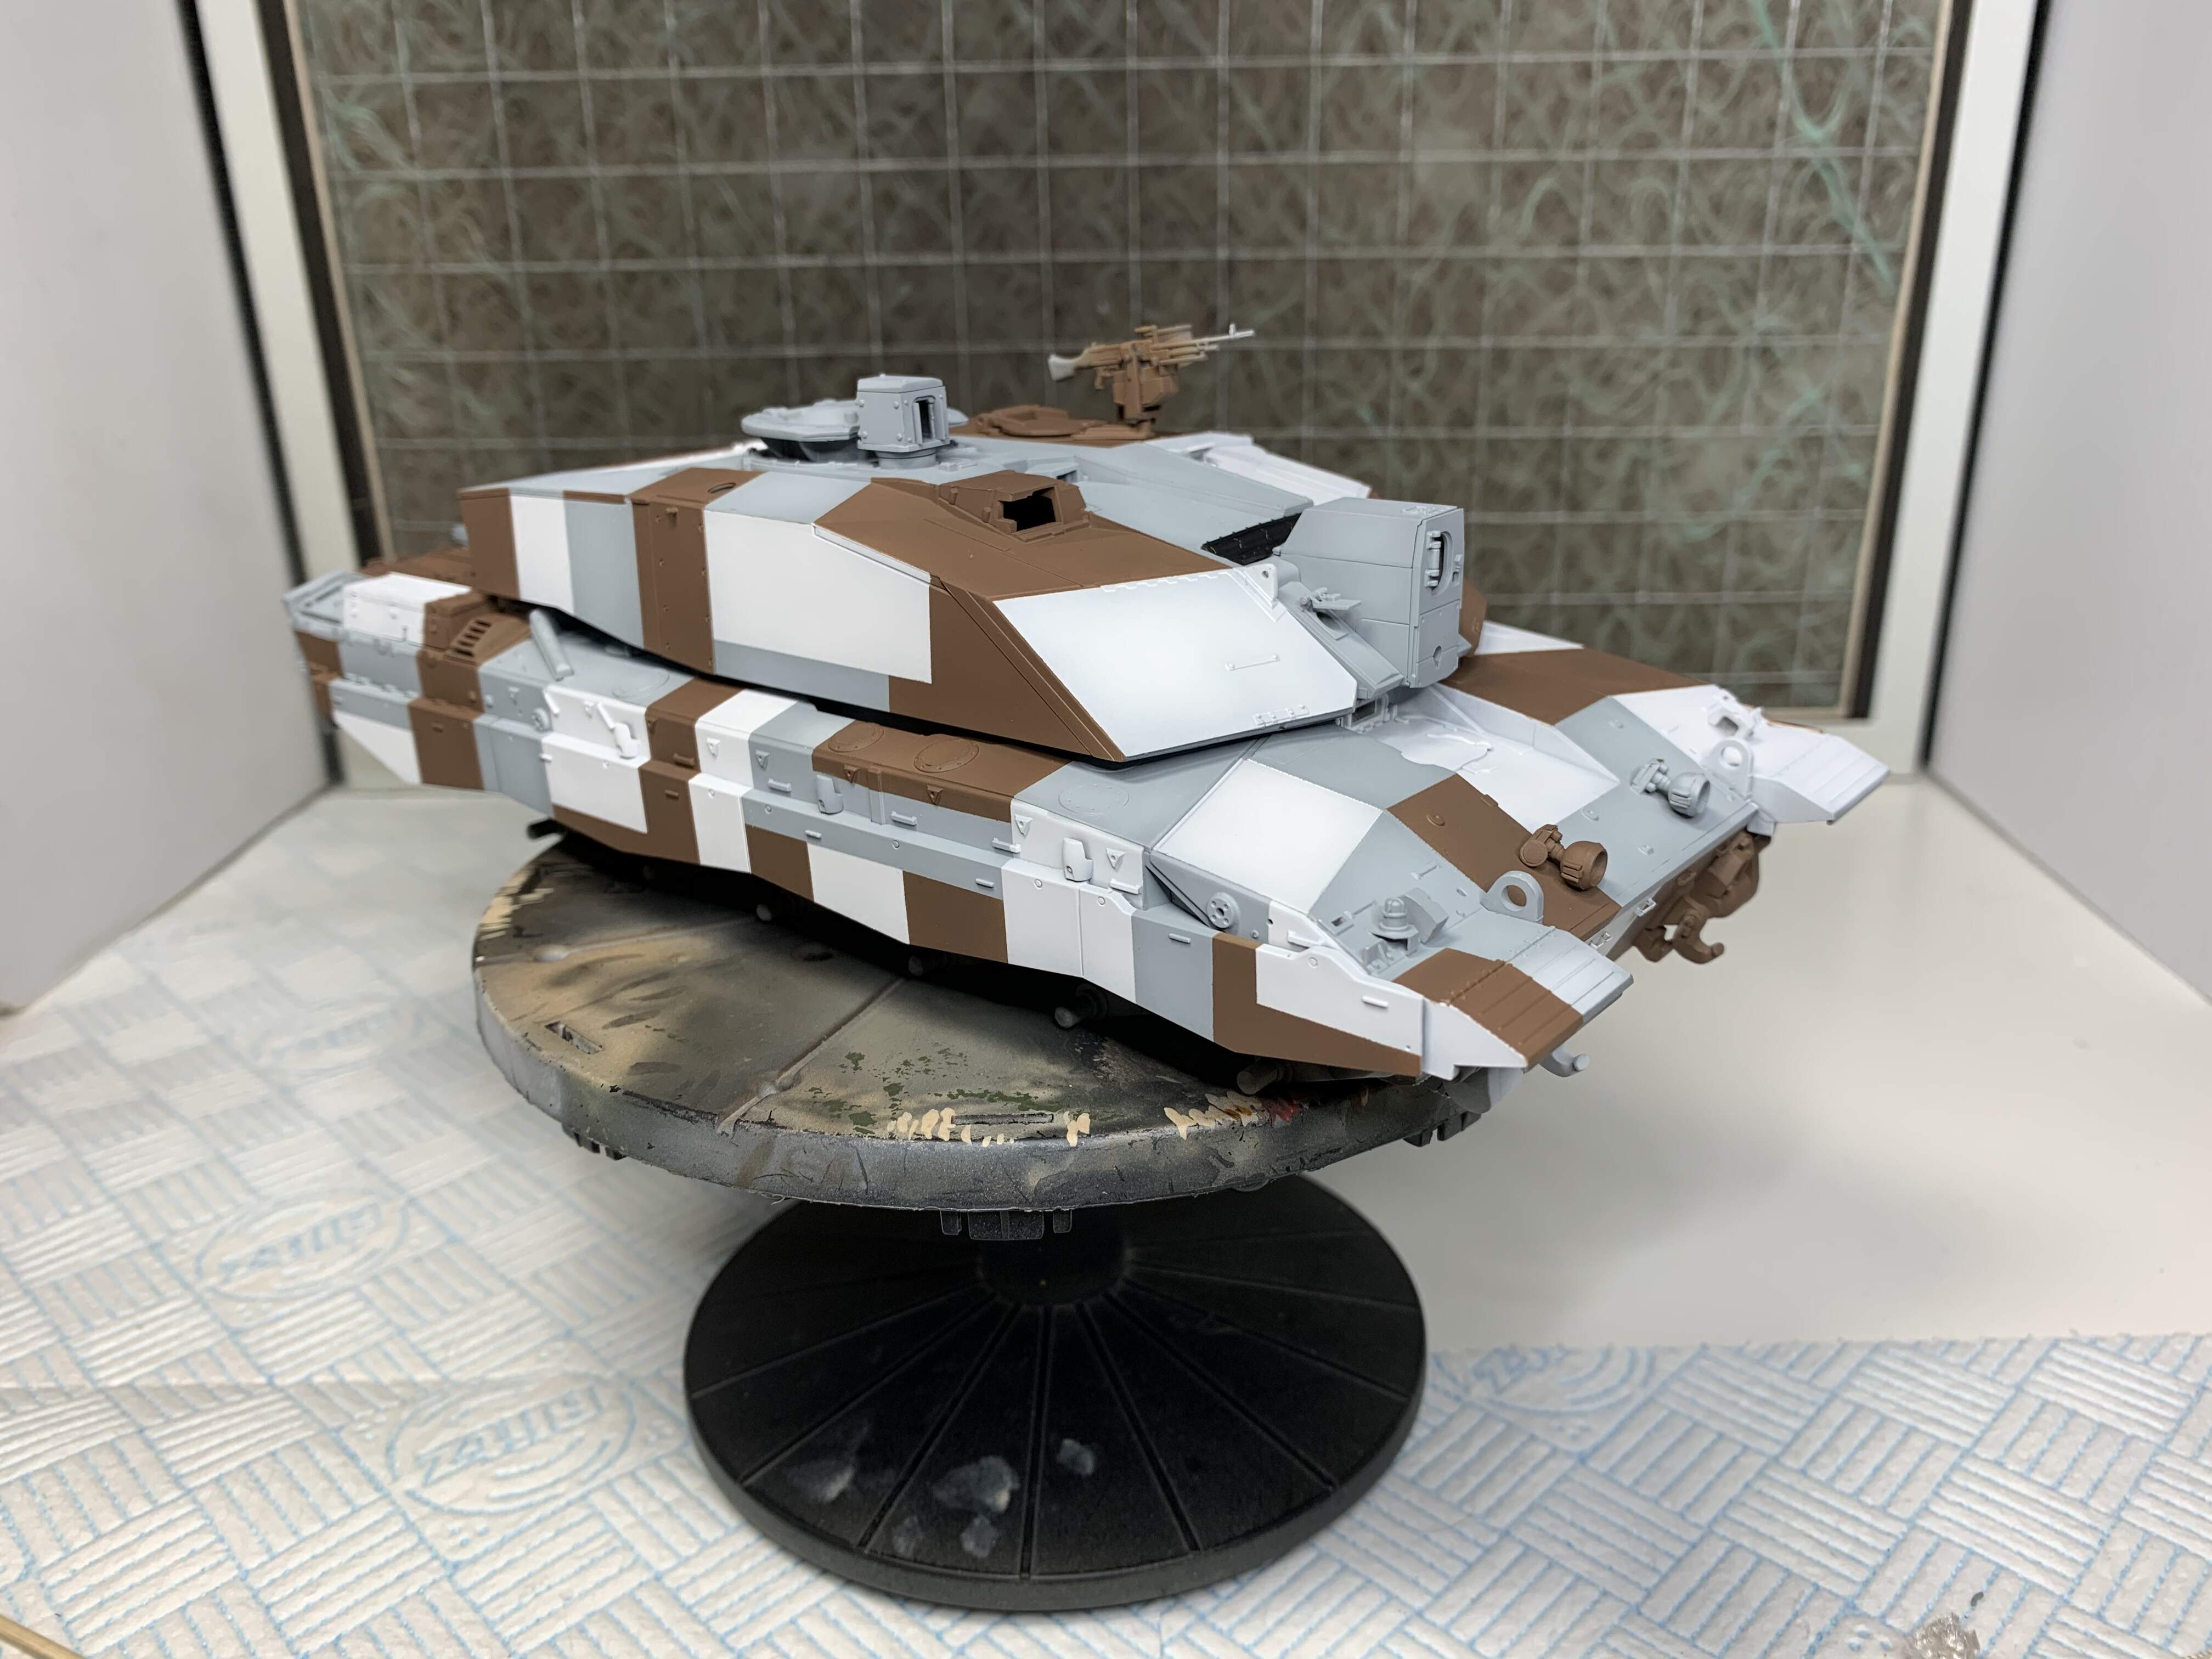
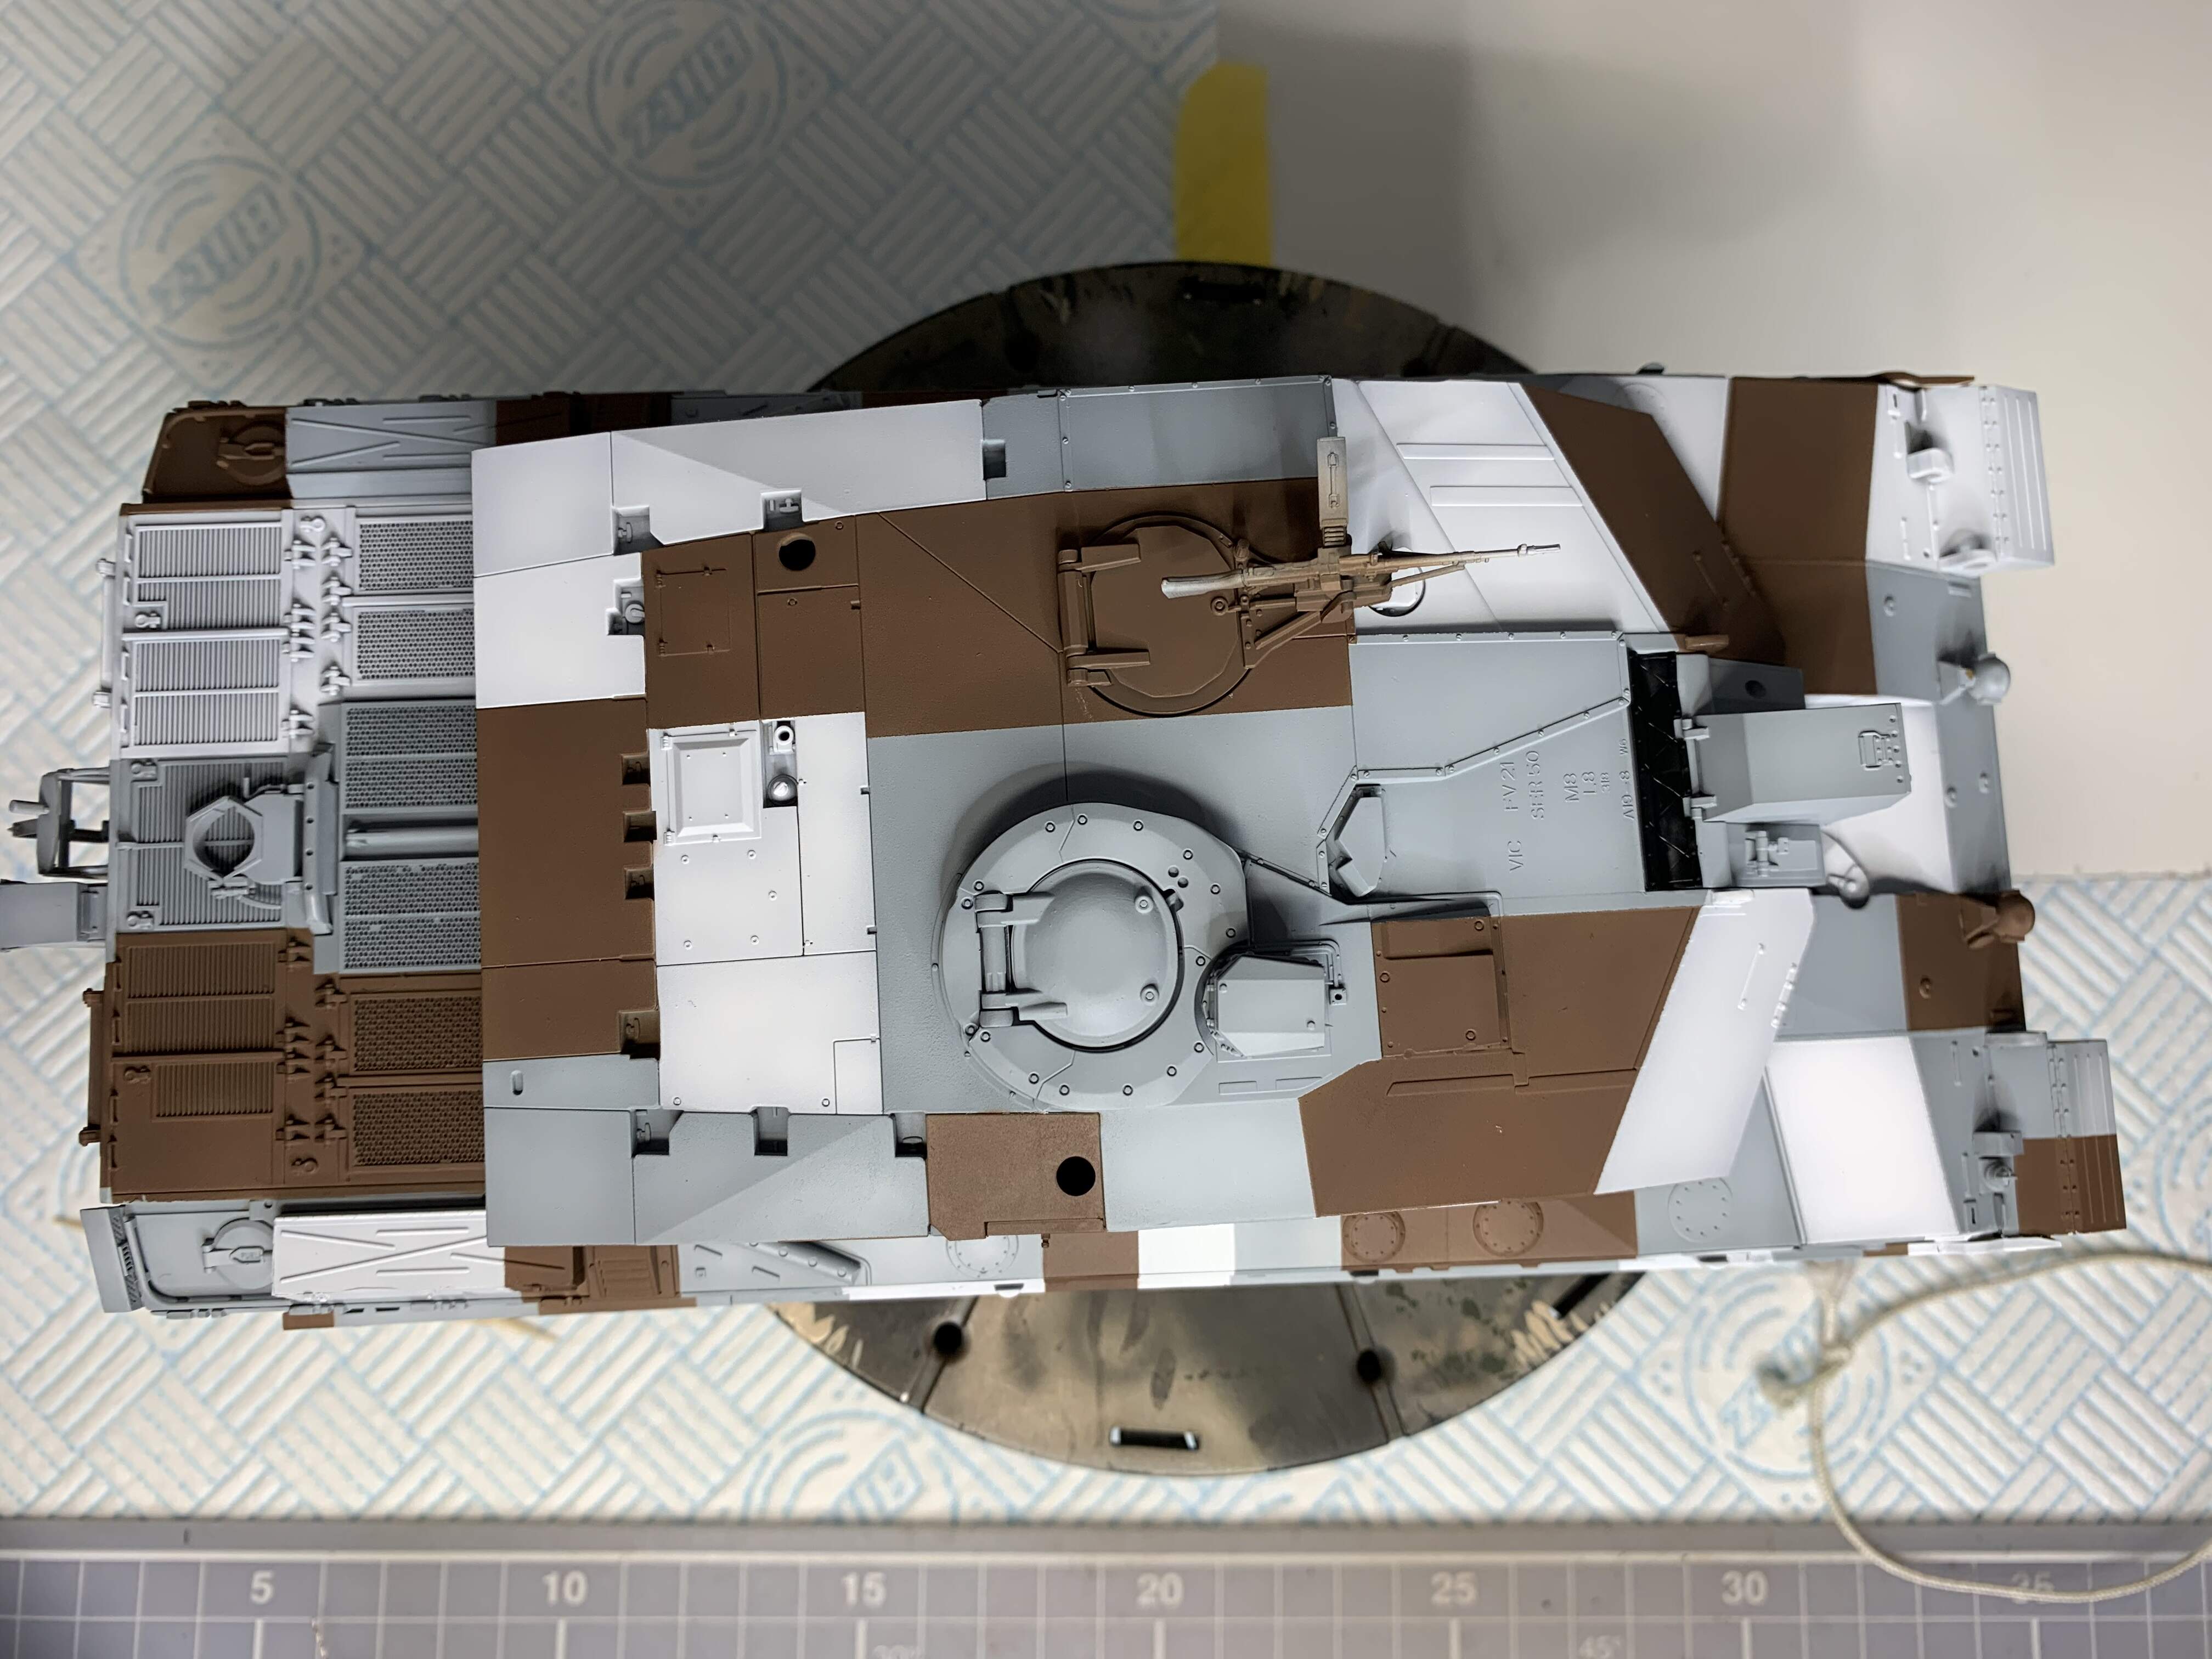
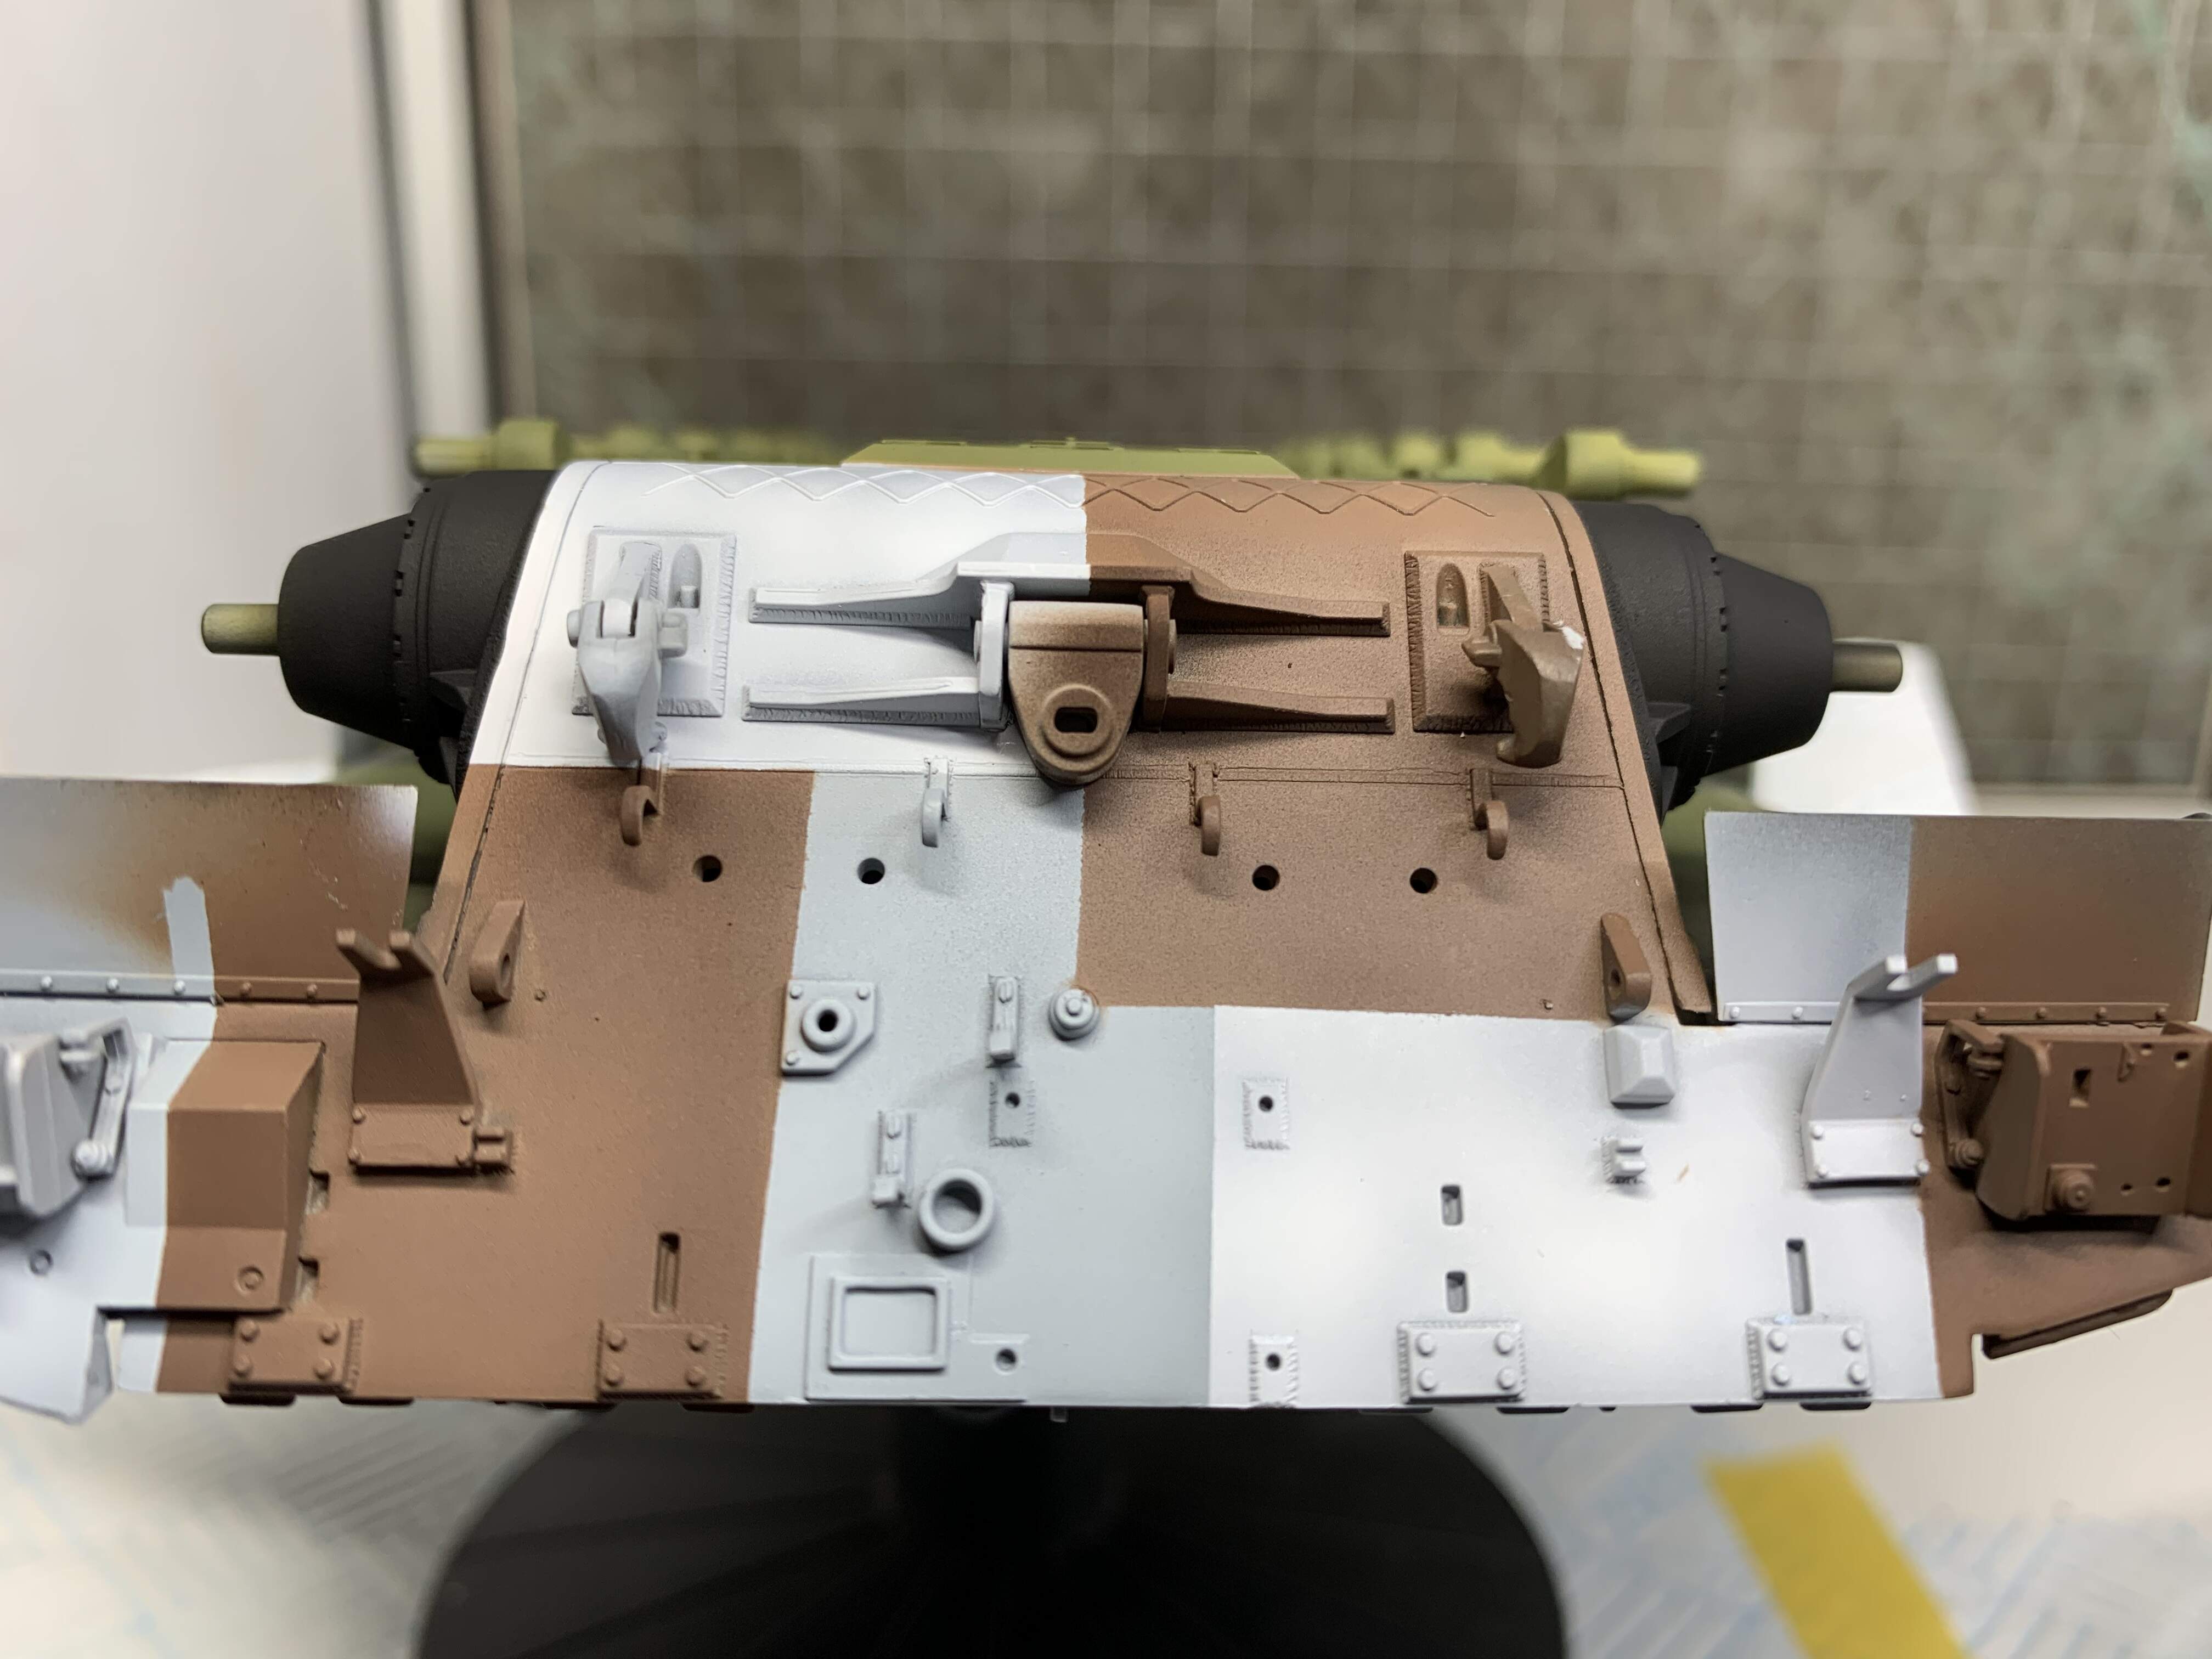
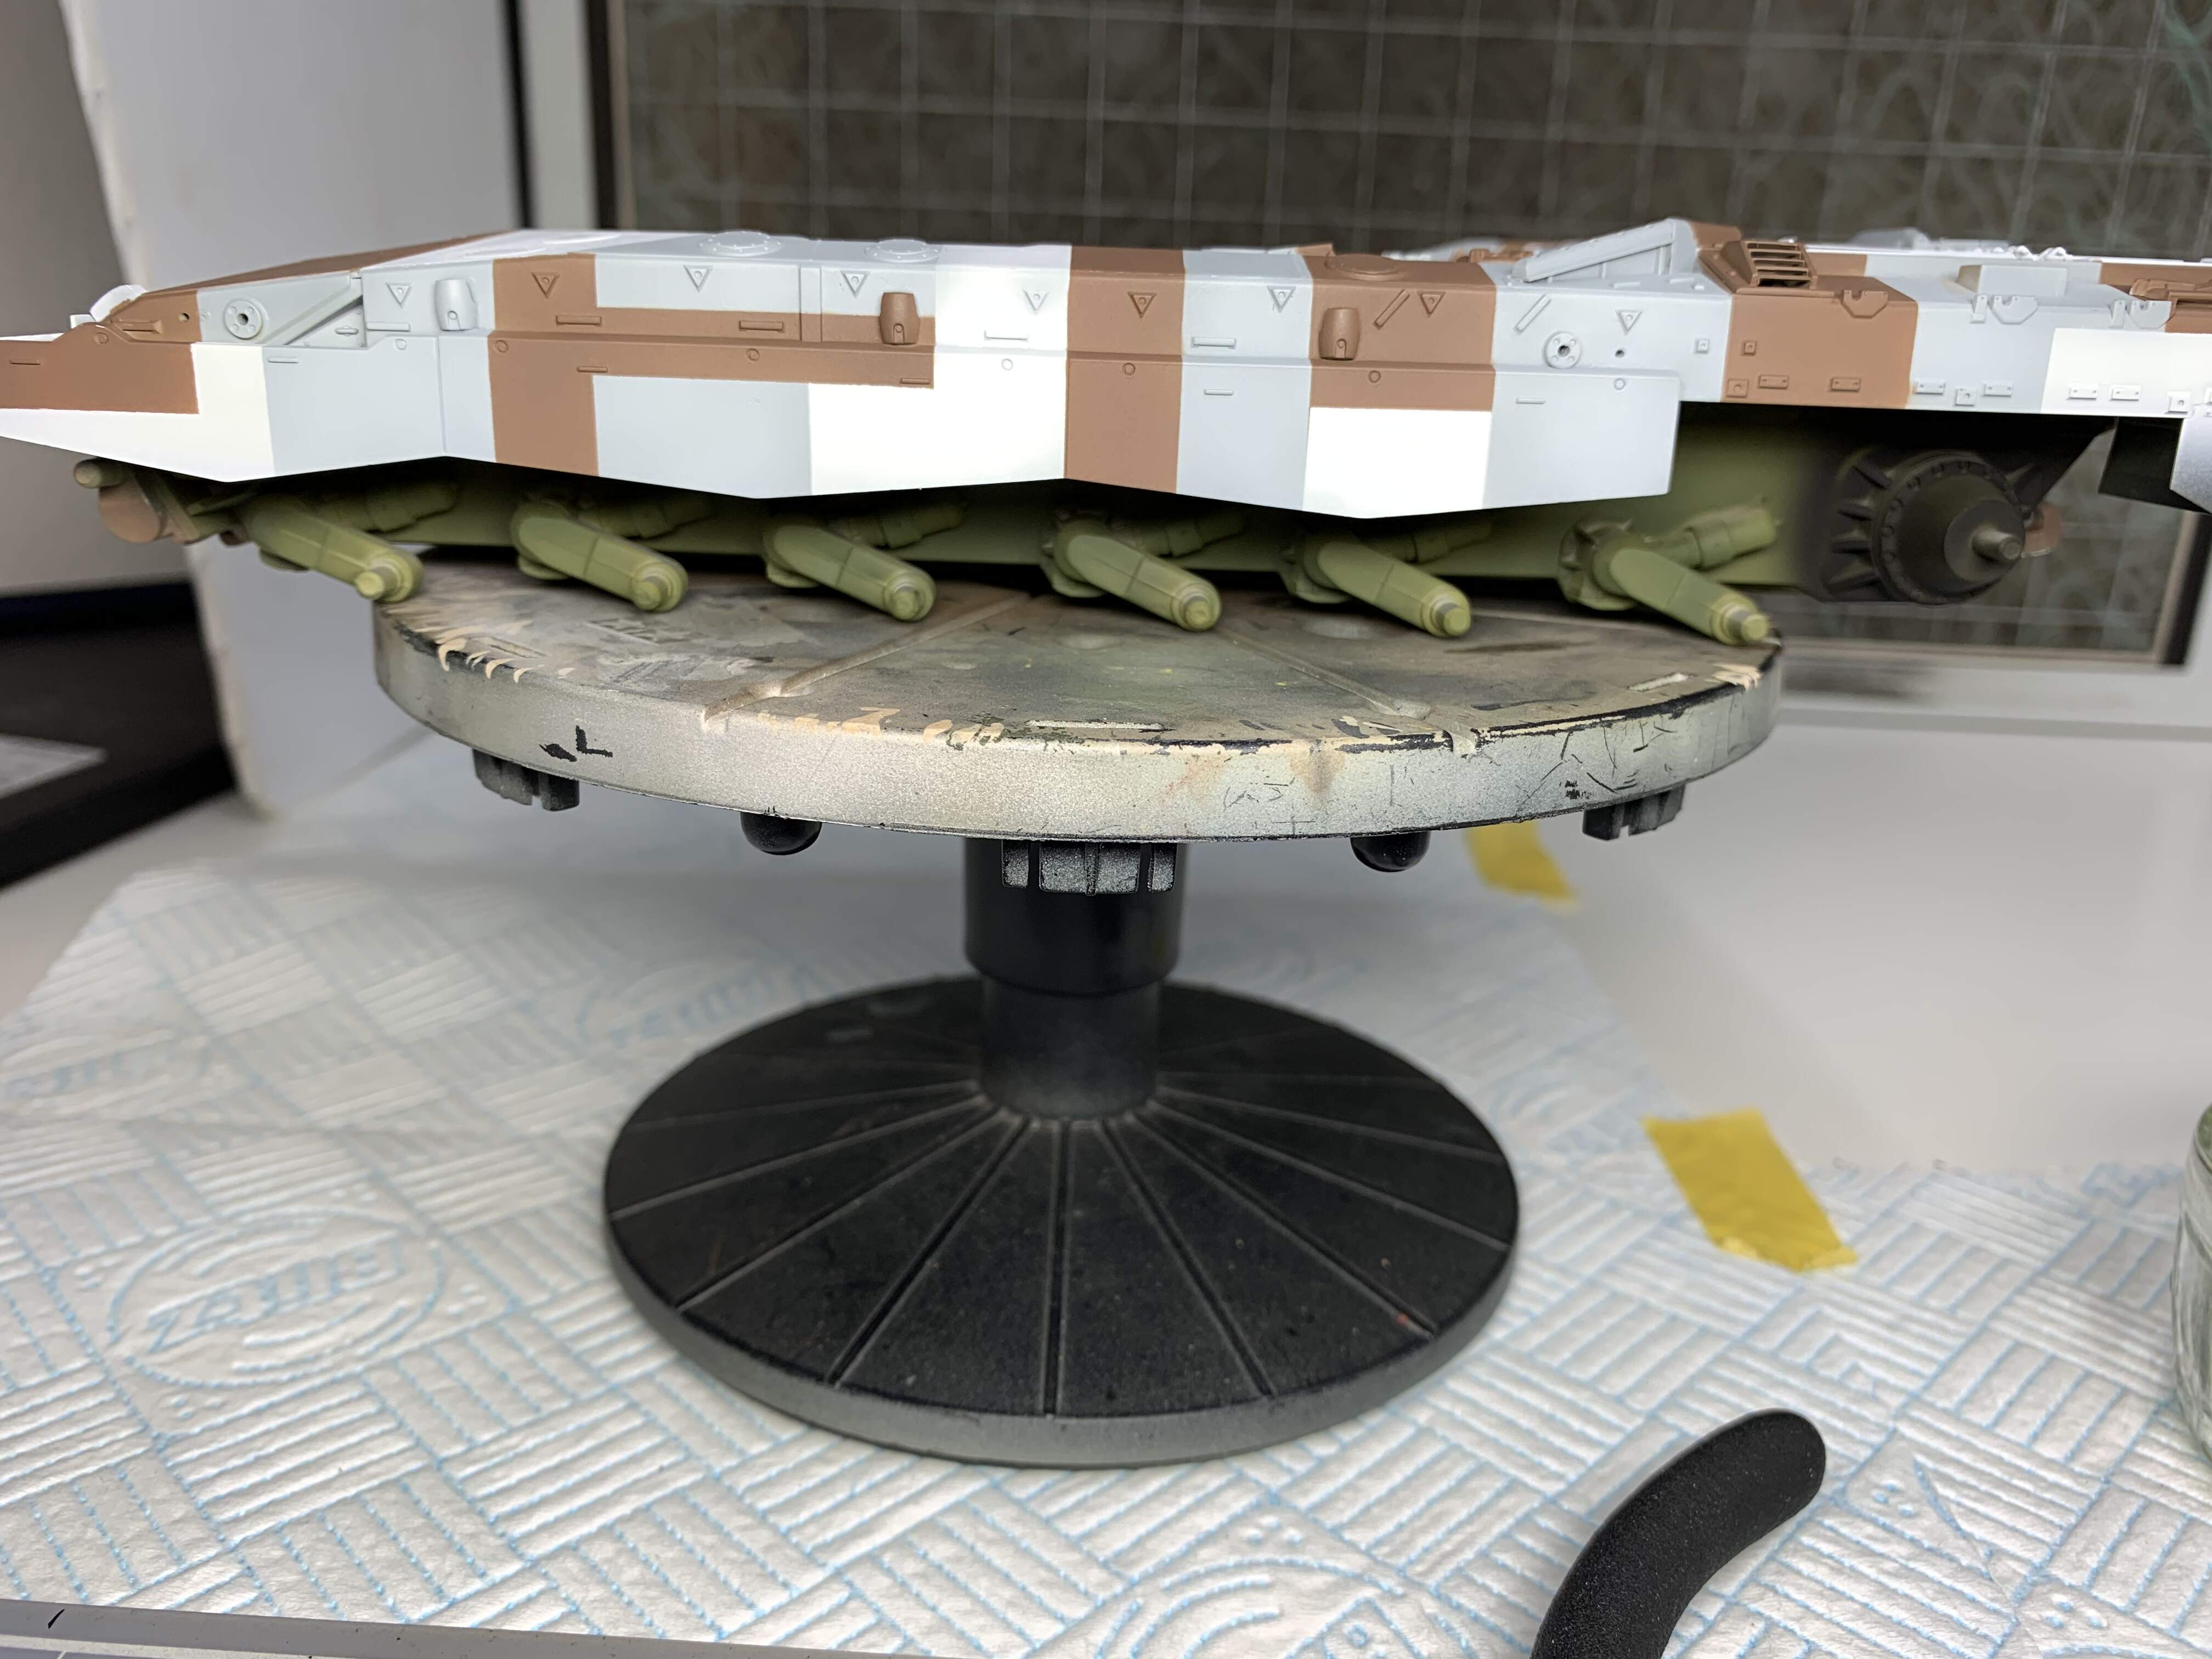
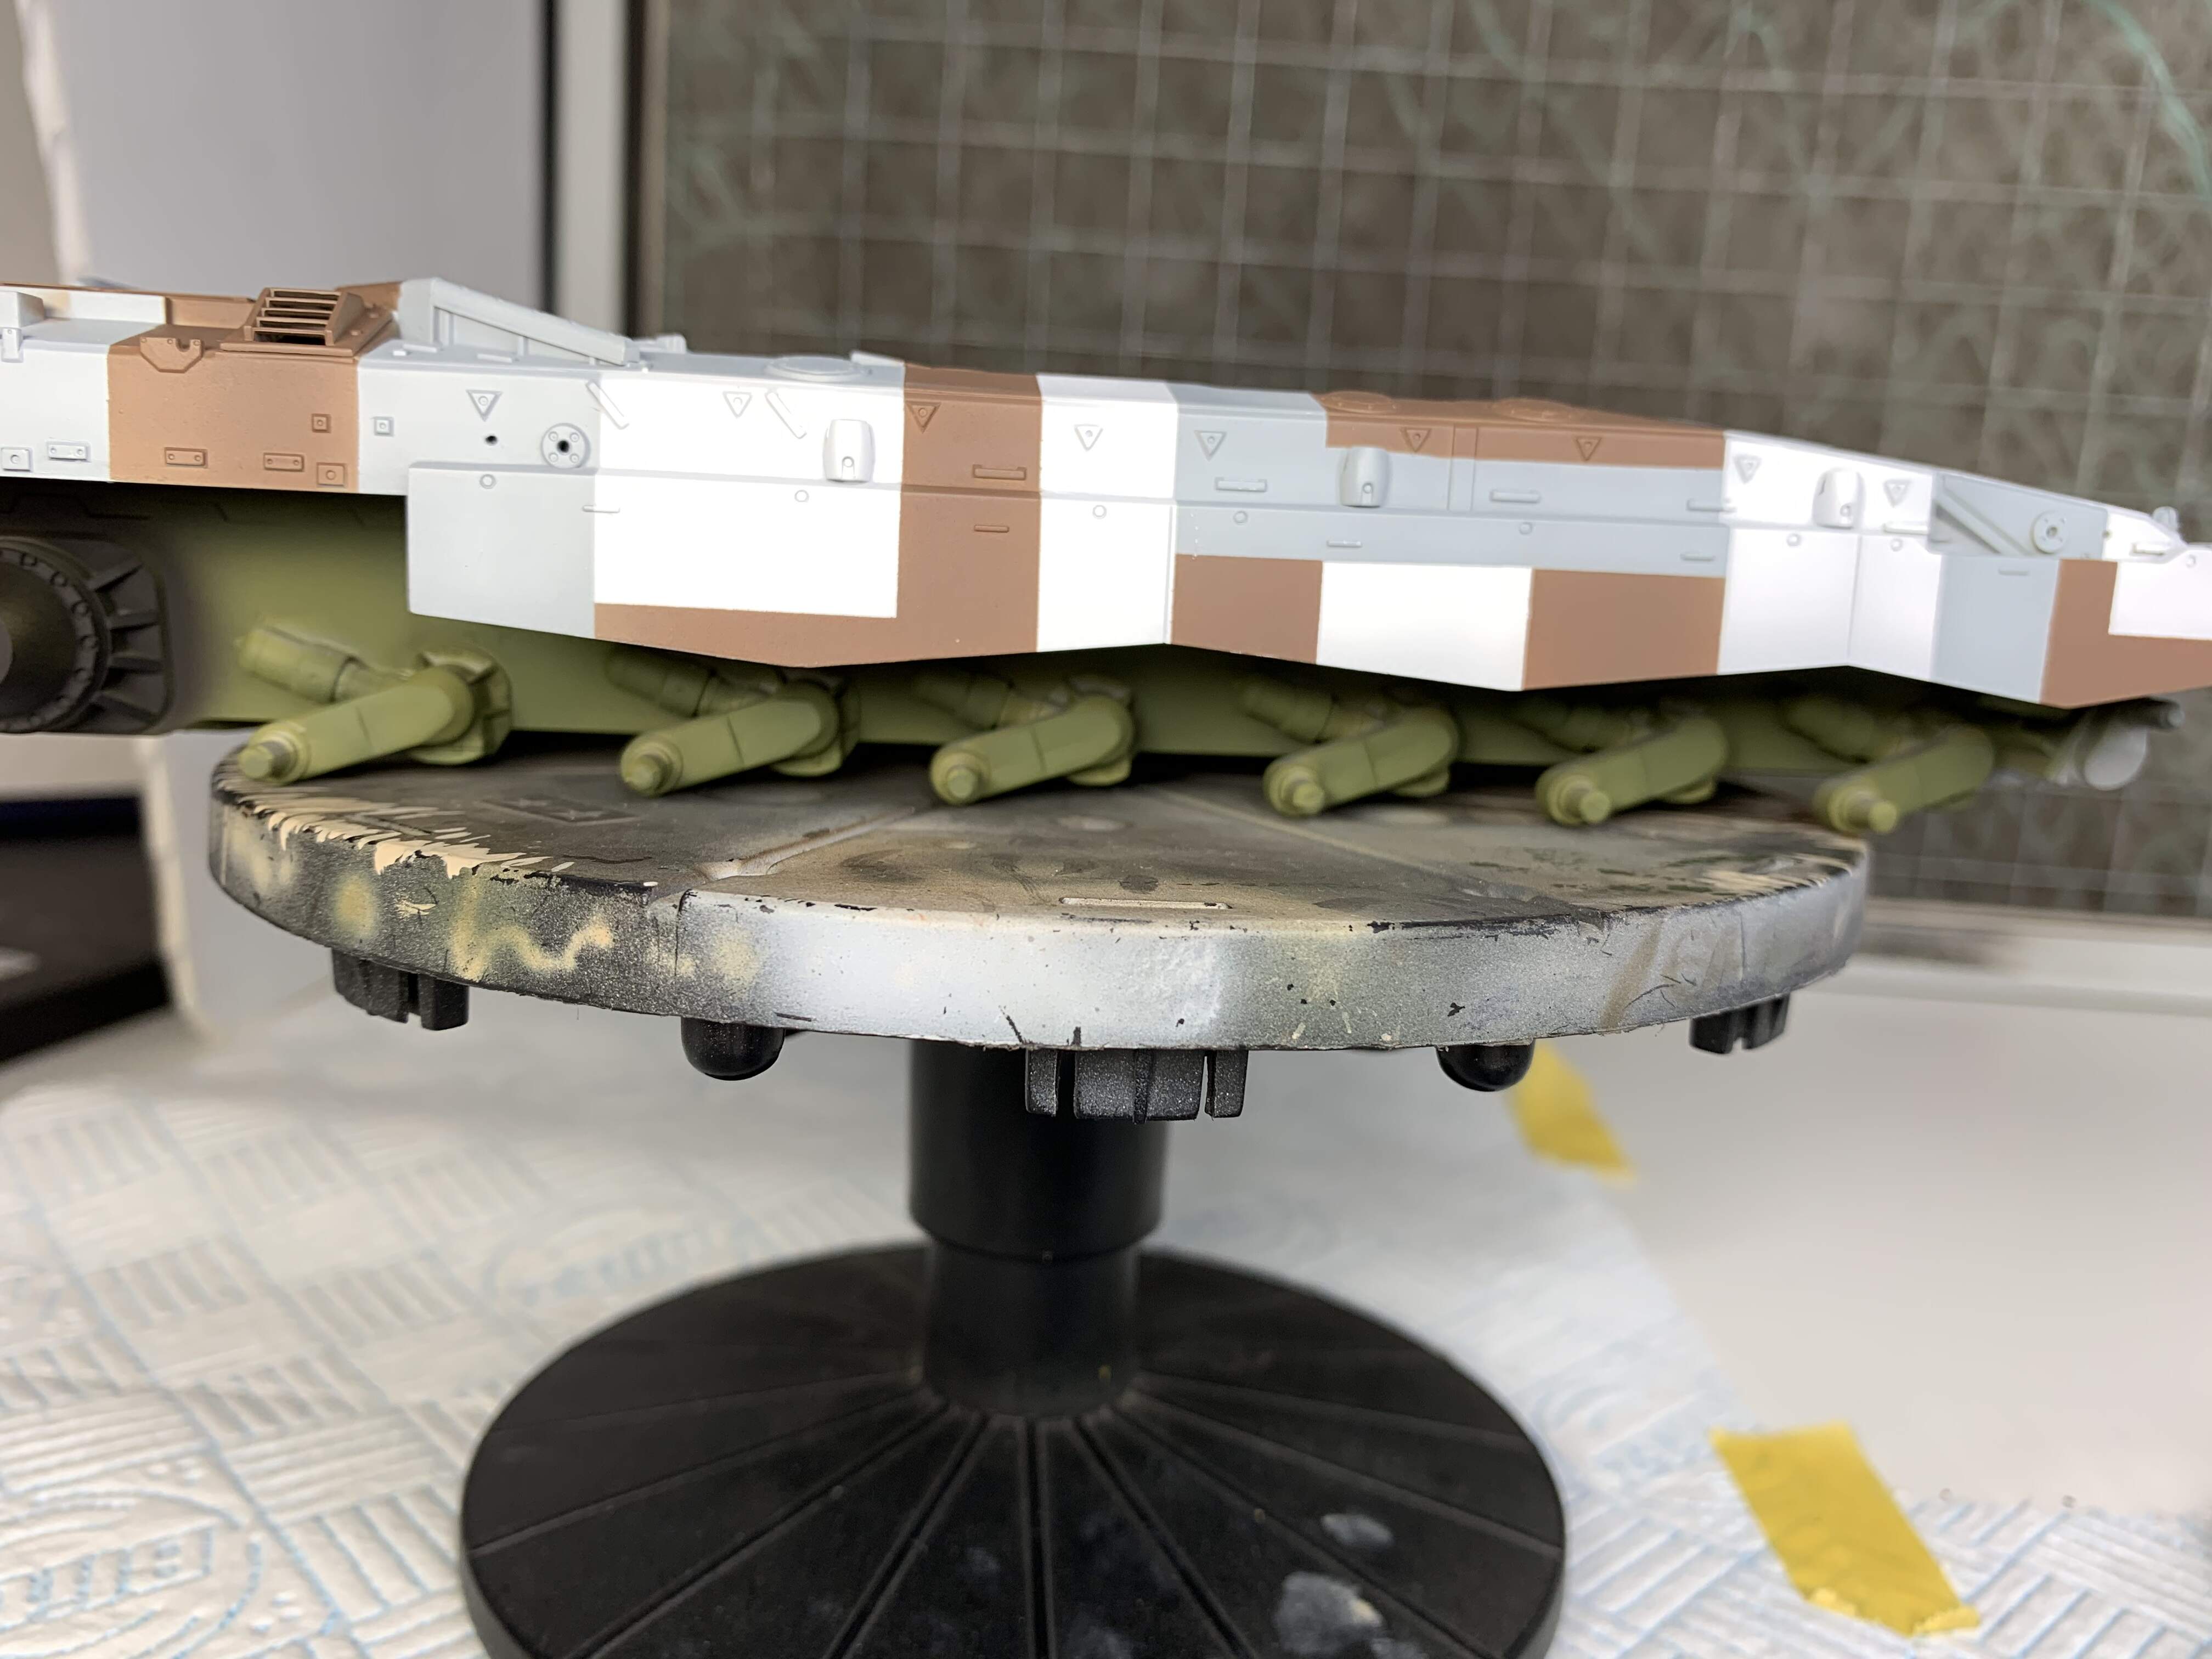
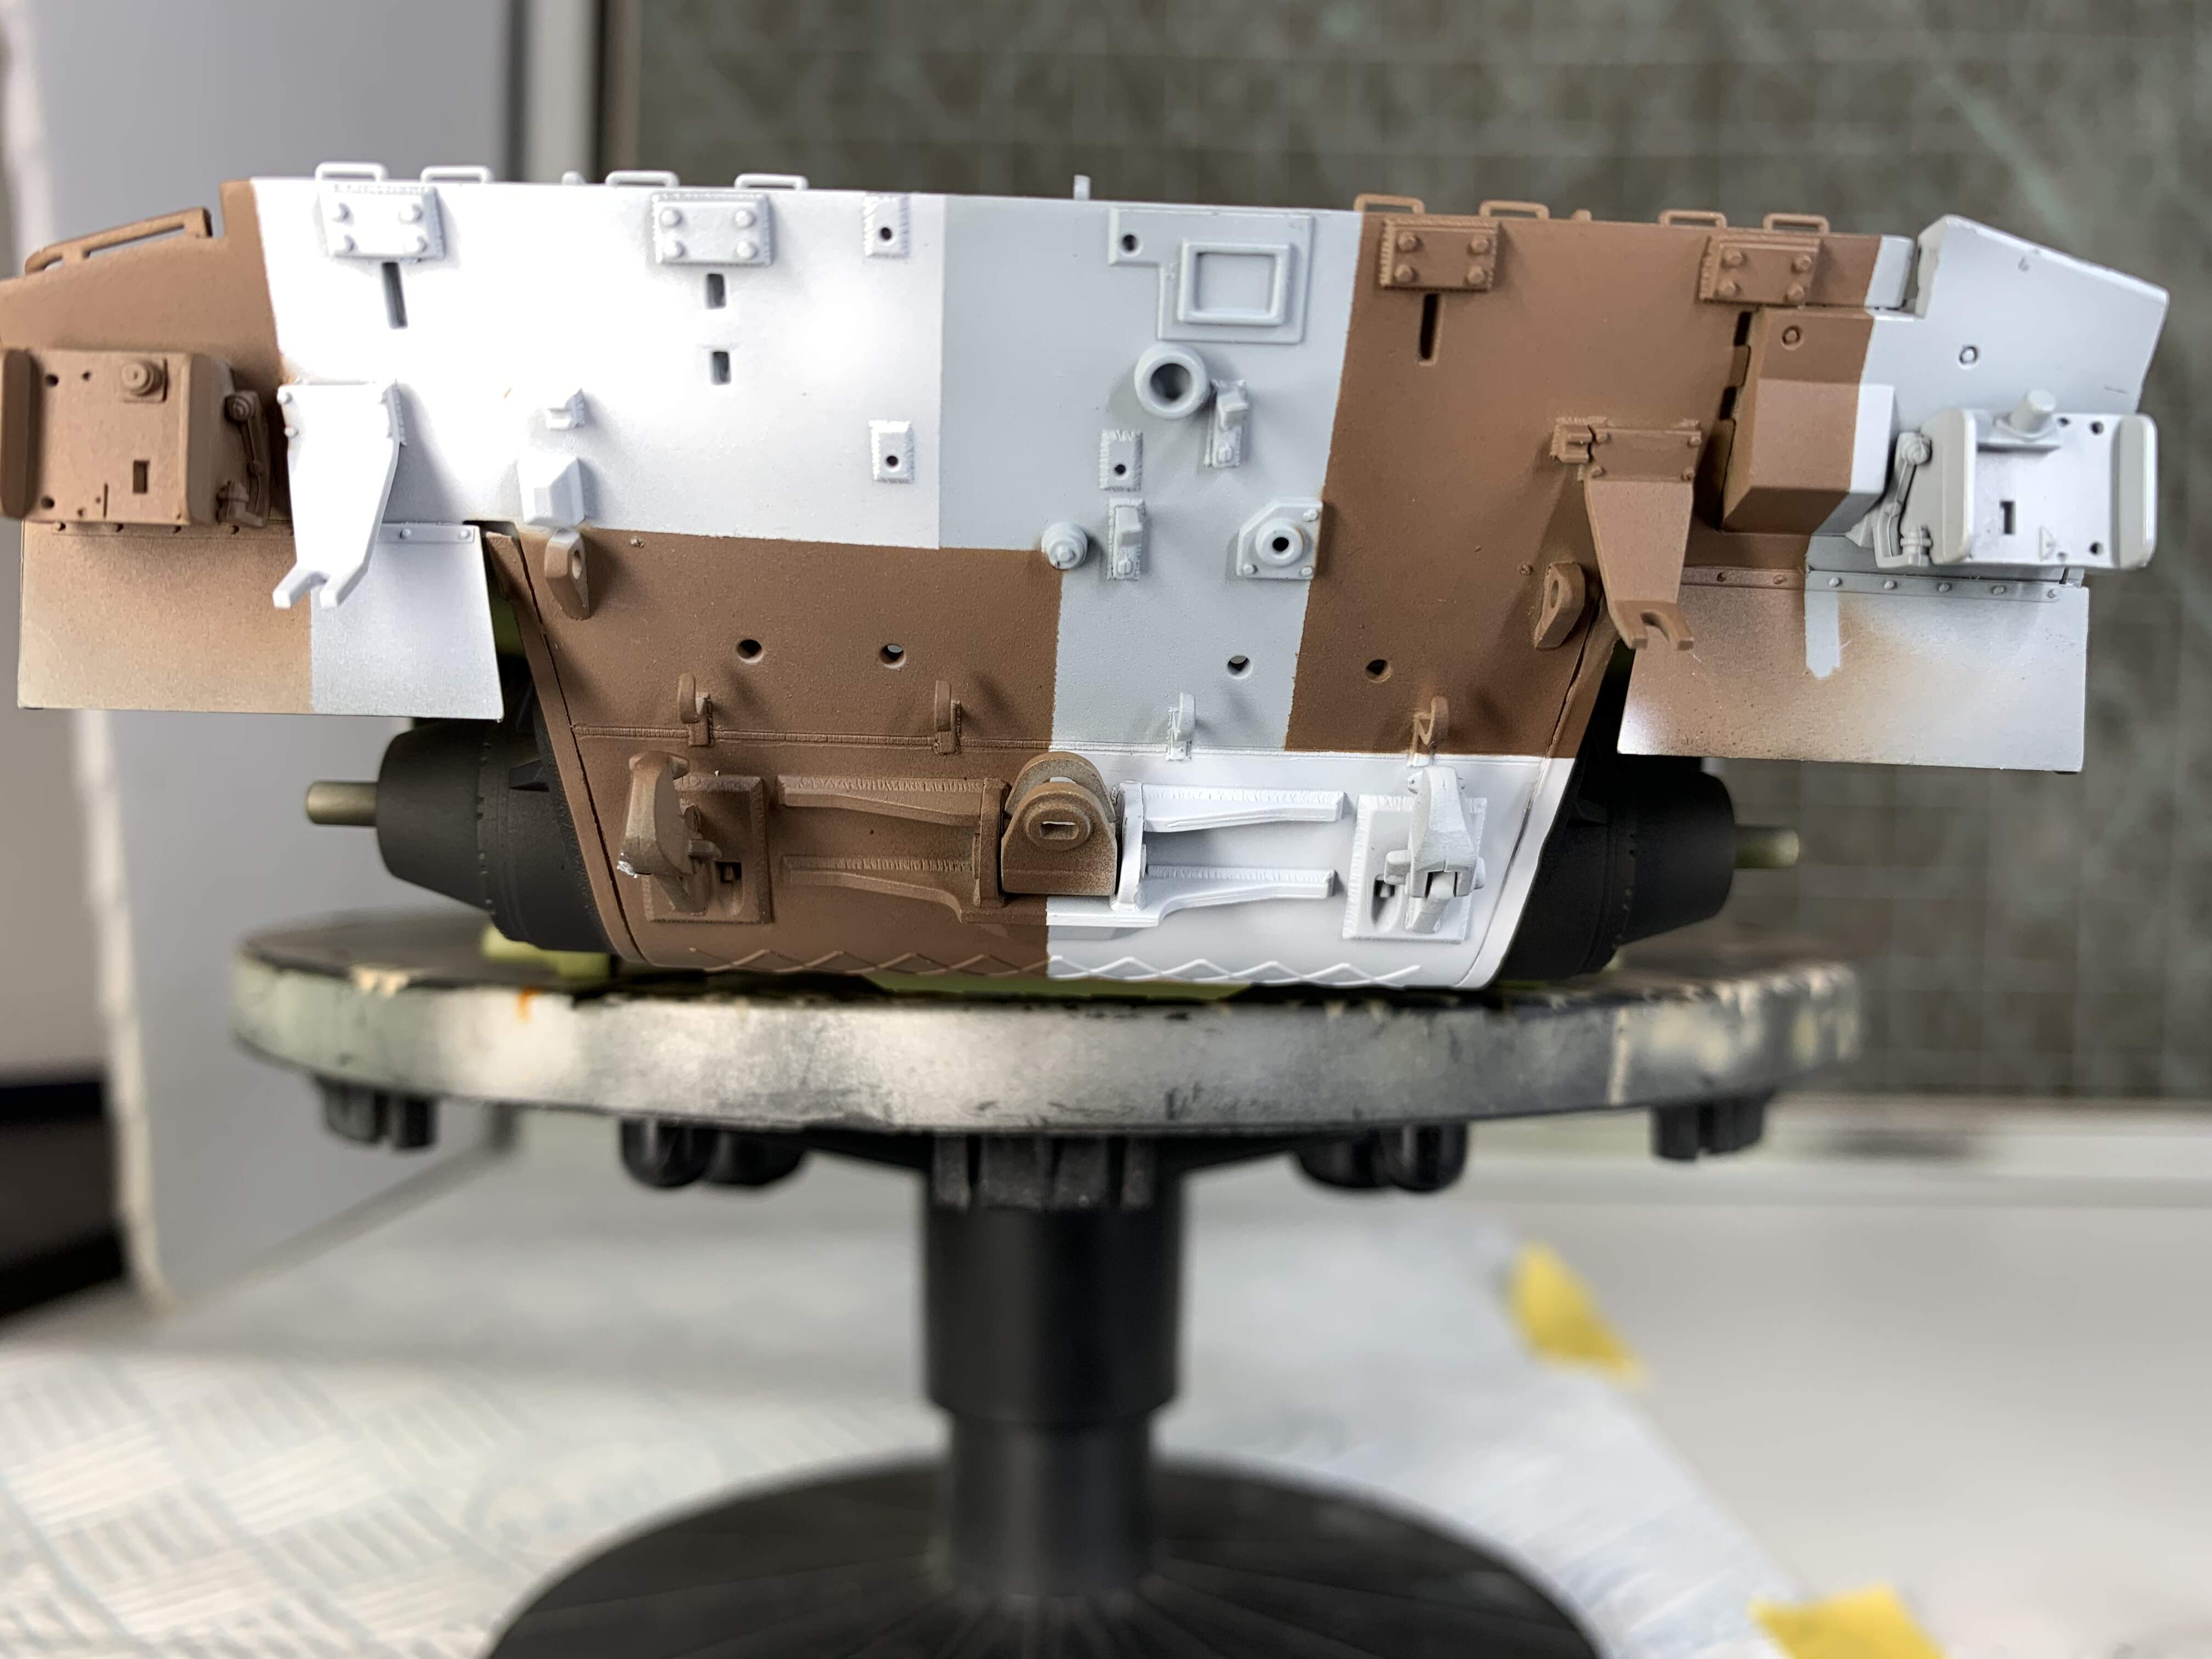
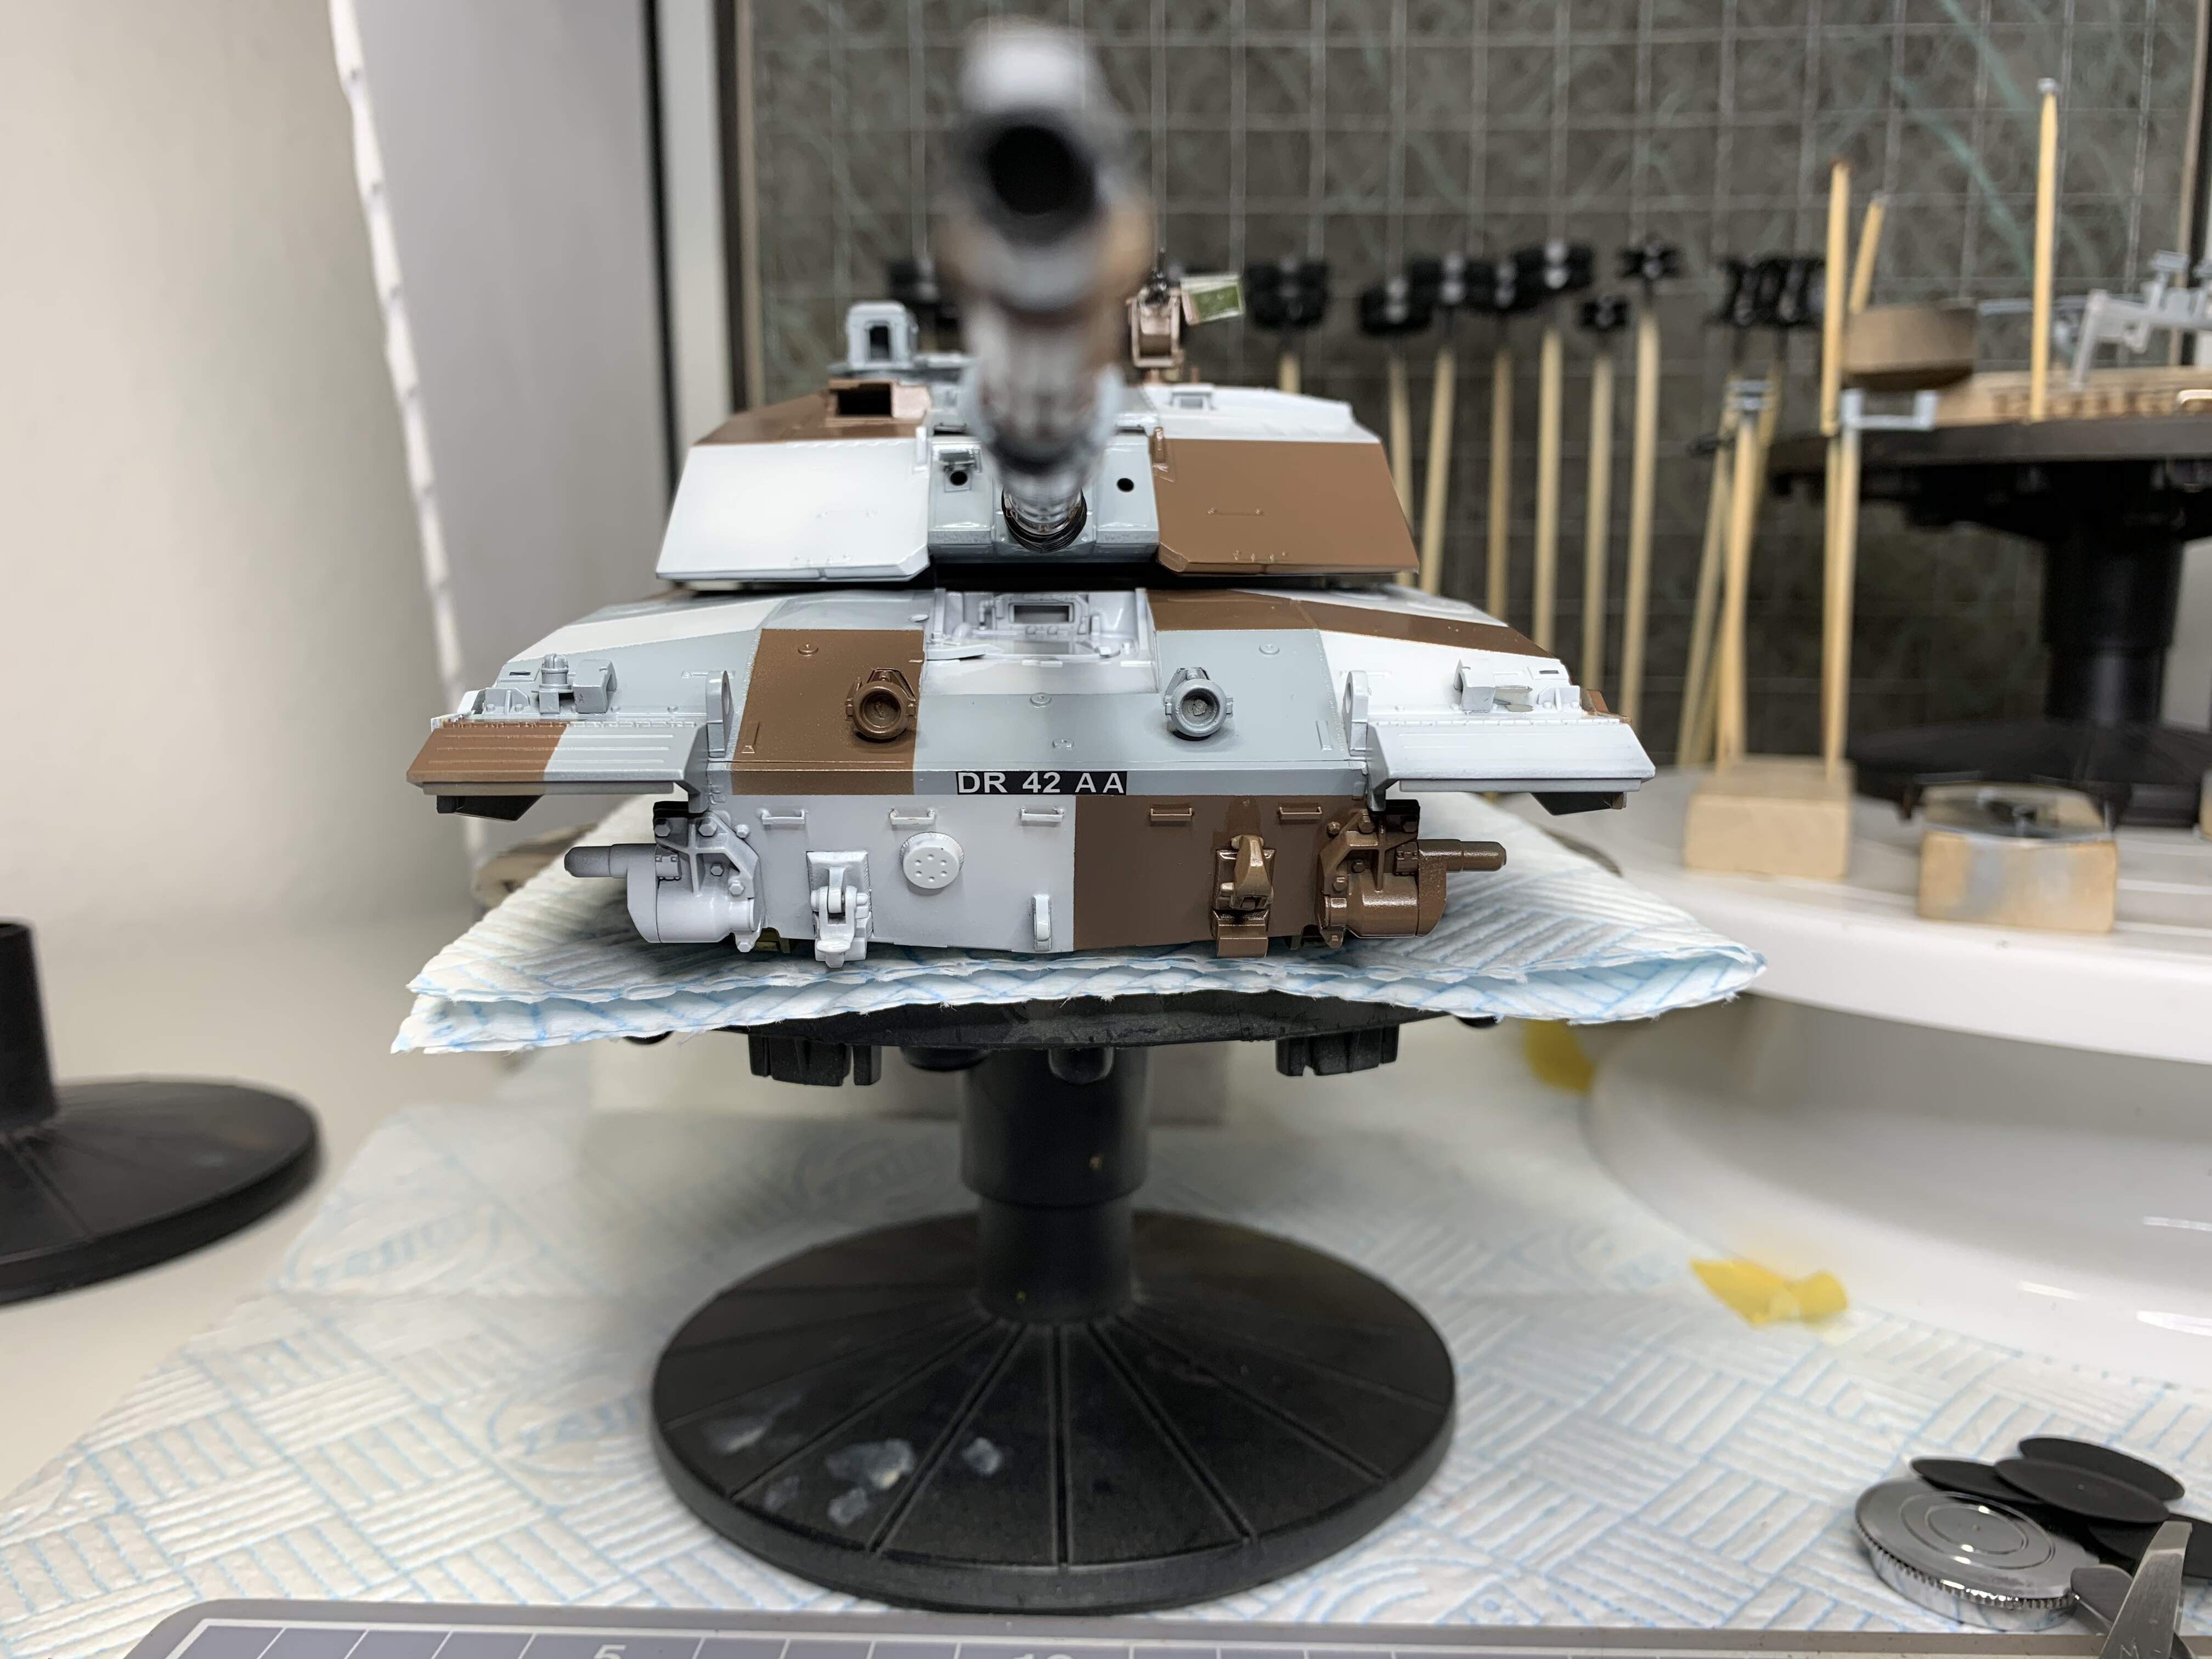
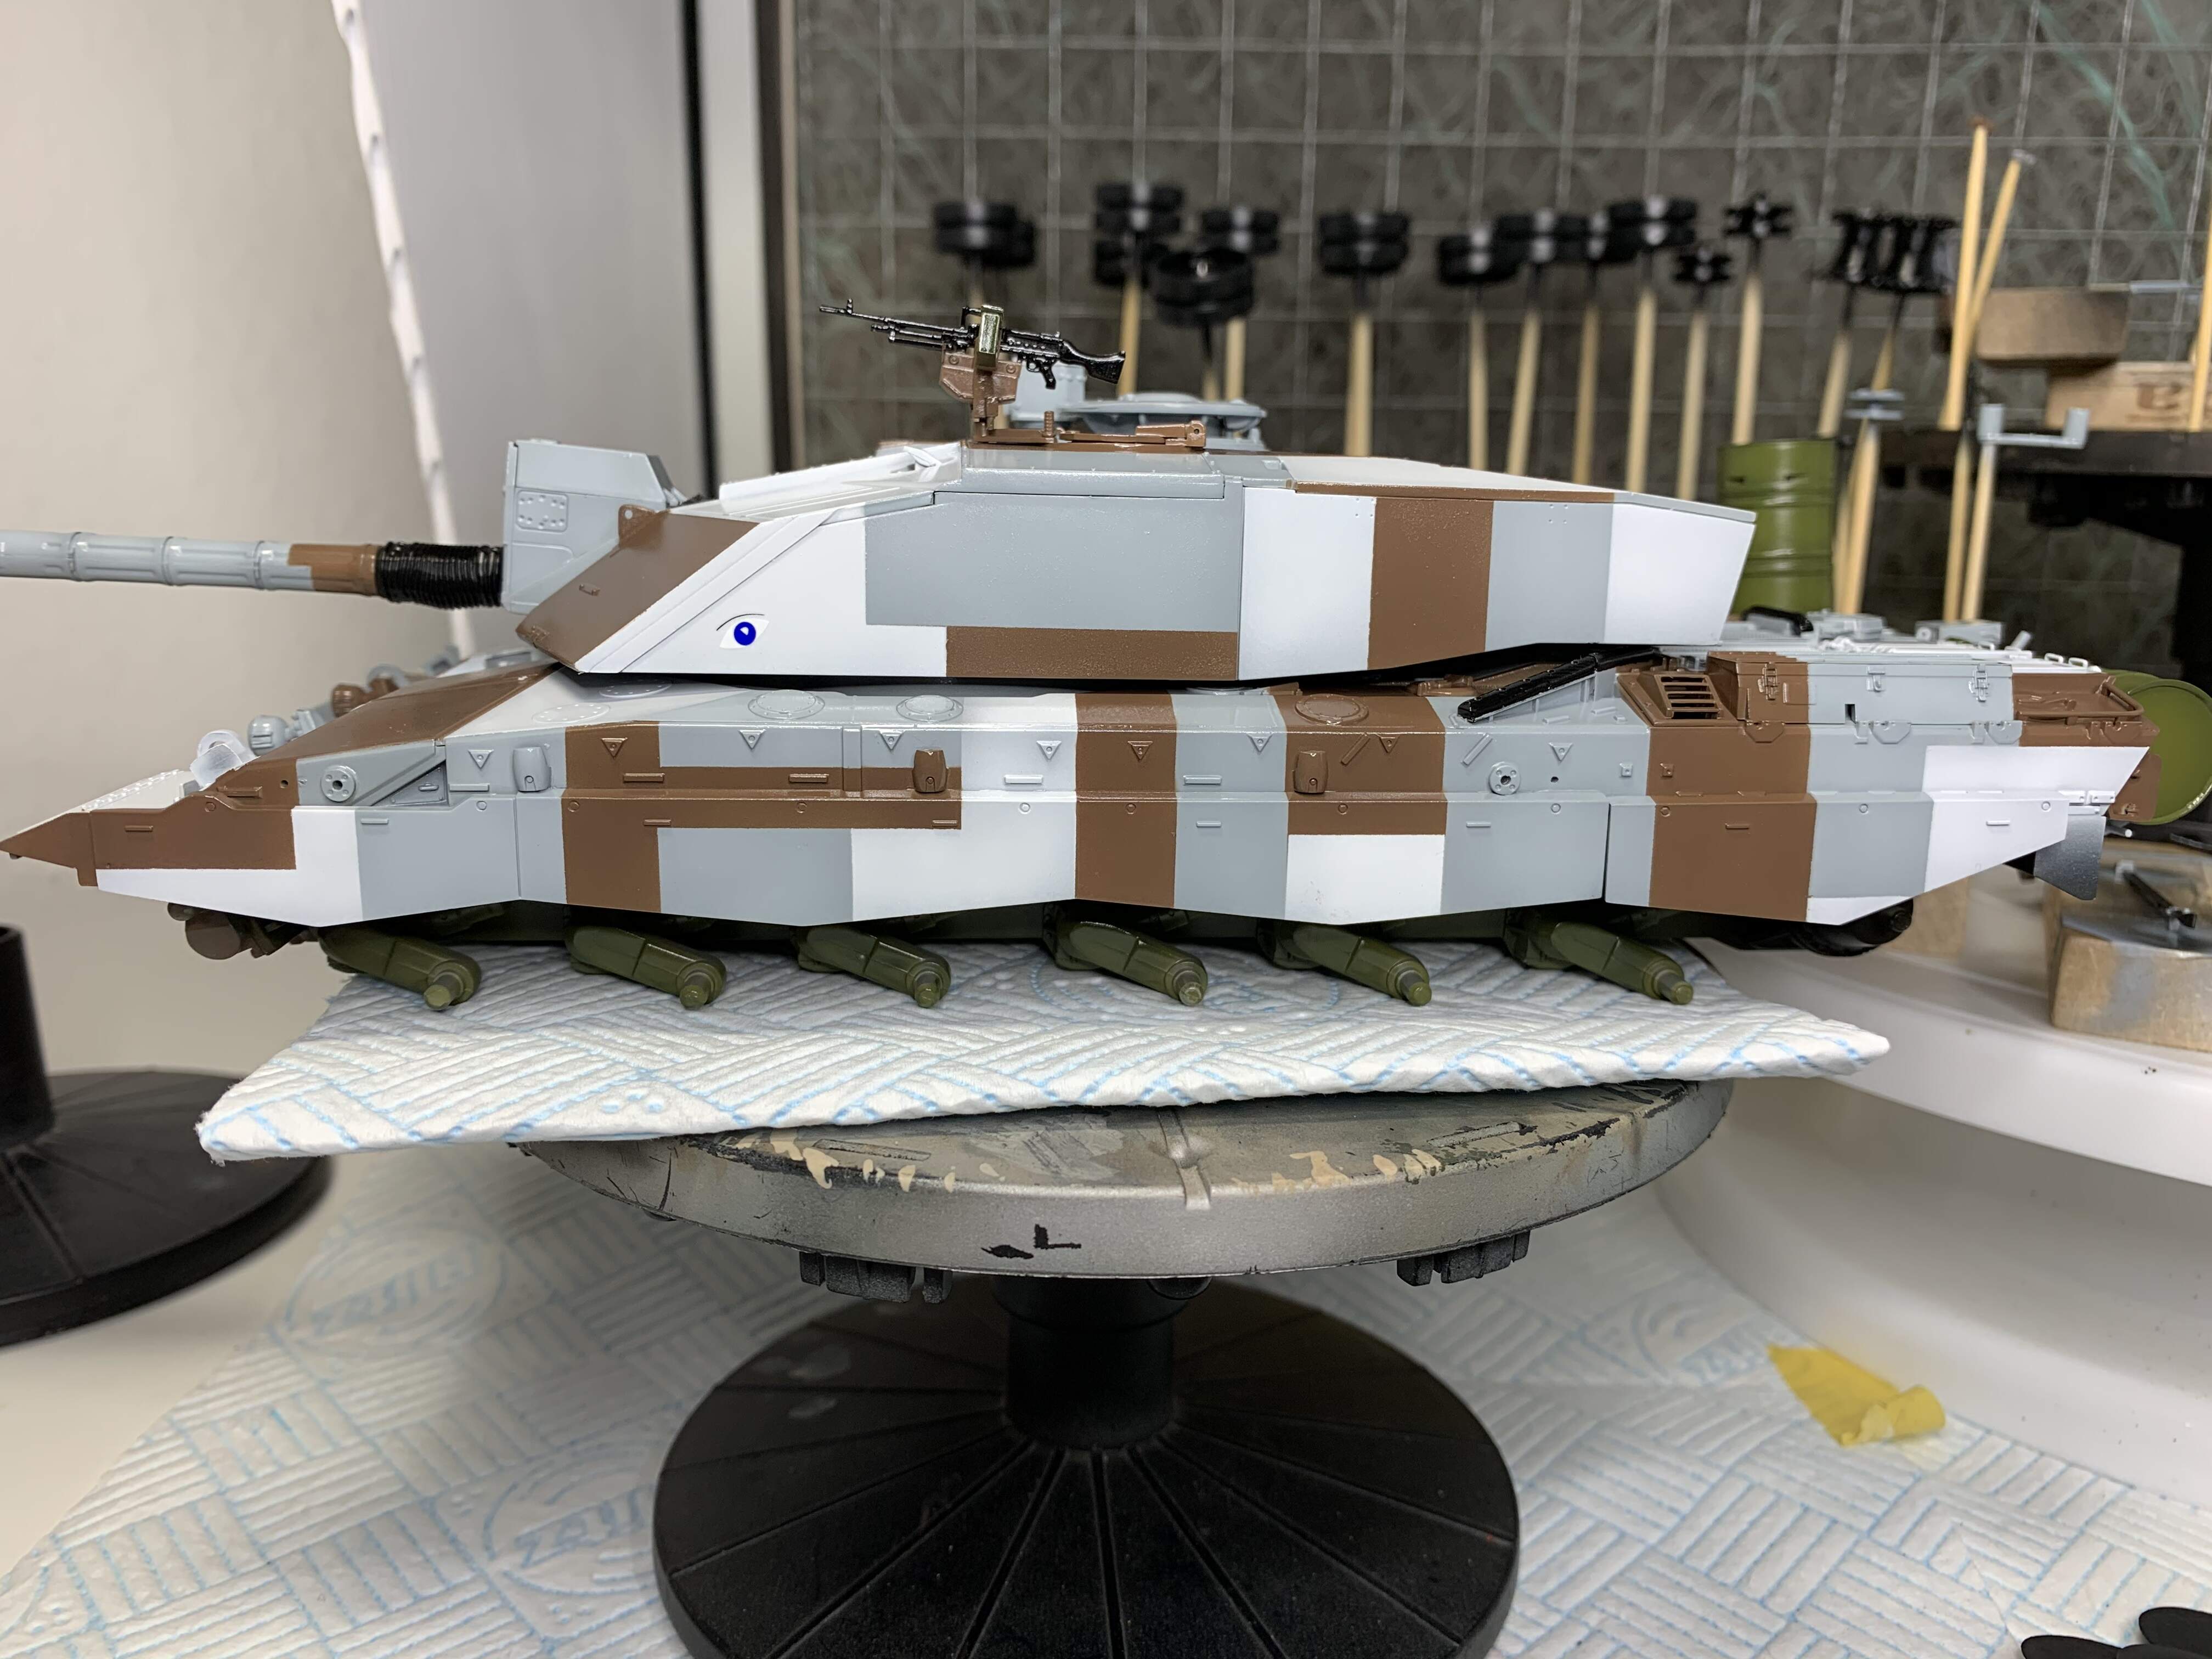
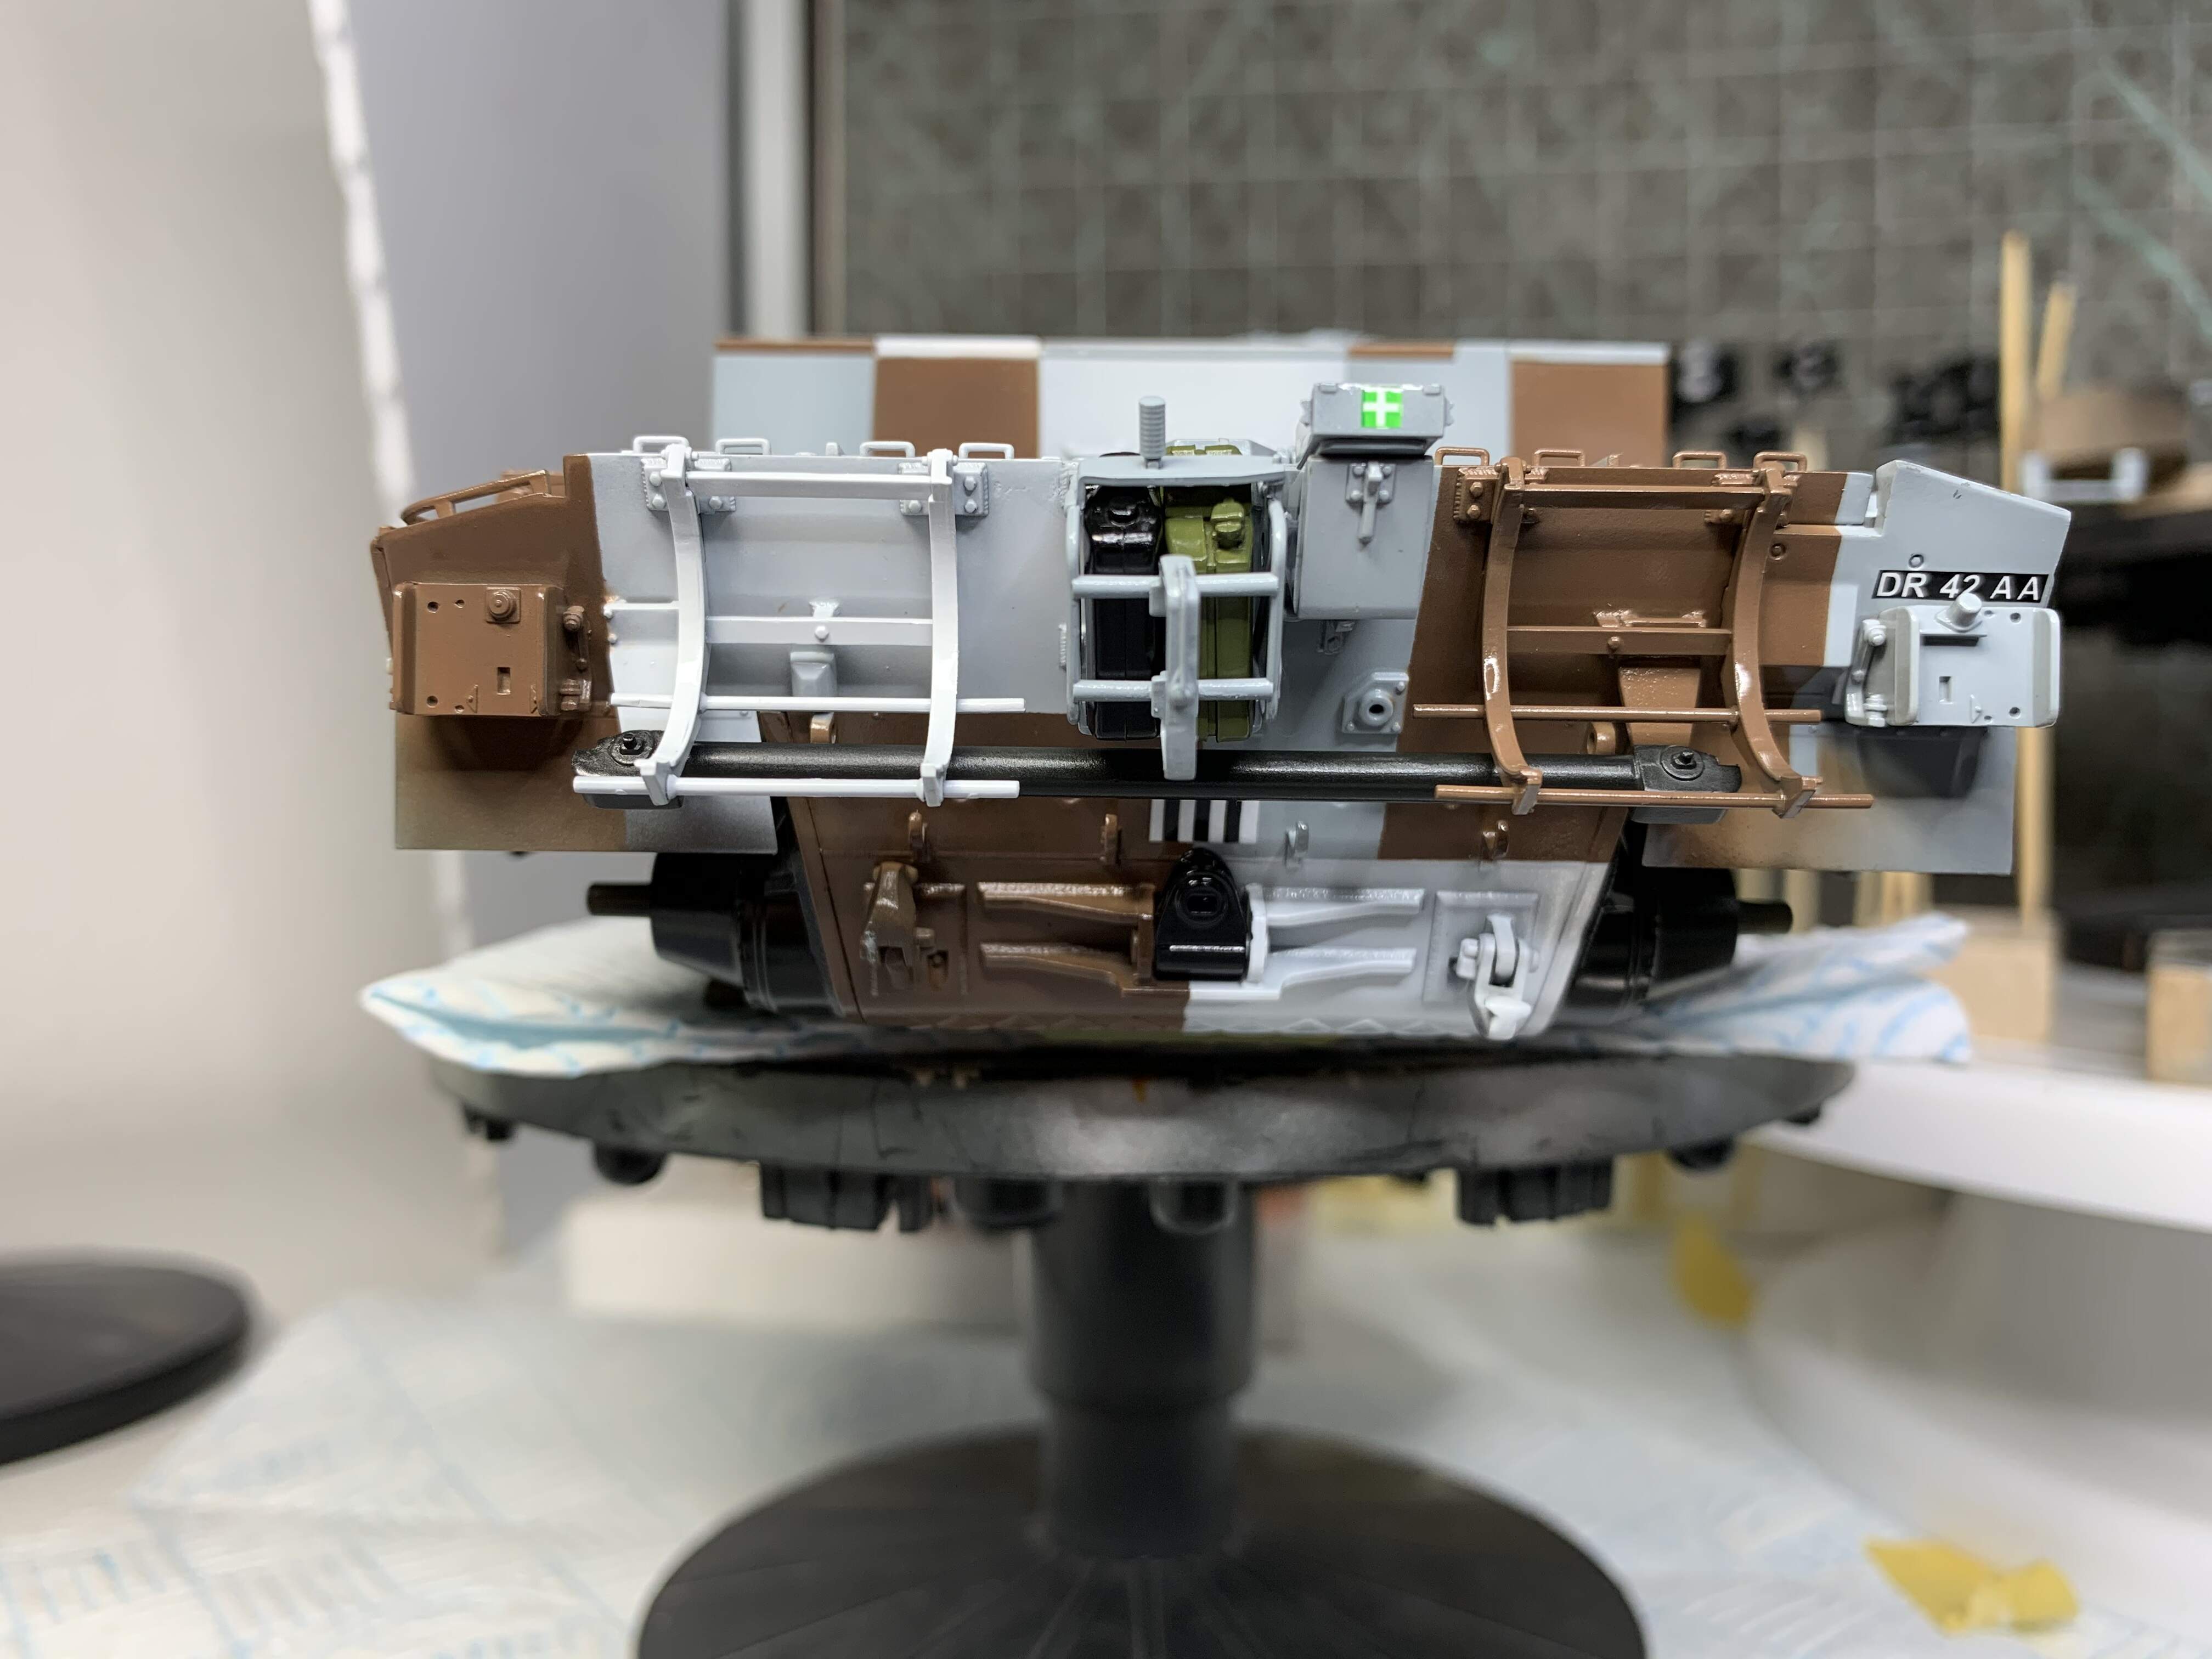
I now have the three colours on. The edges aren’t as crisp as I would have liked, maybe a combination of using the mr color thinner and a bit of impatience from me. You can see it in the pics but it actually looks fine without the magnification, and the weathering will cover some of it anyway.
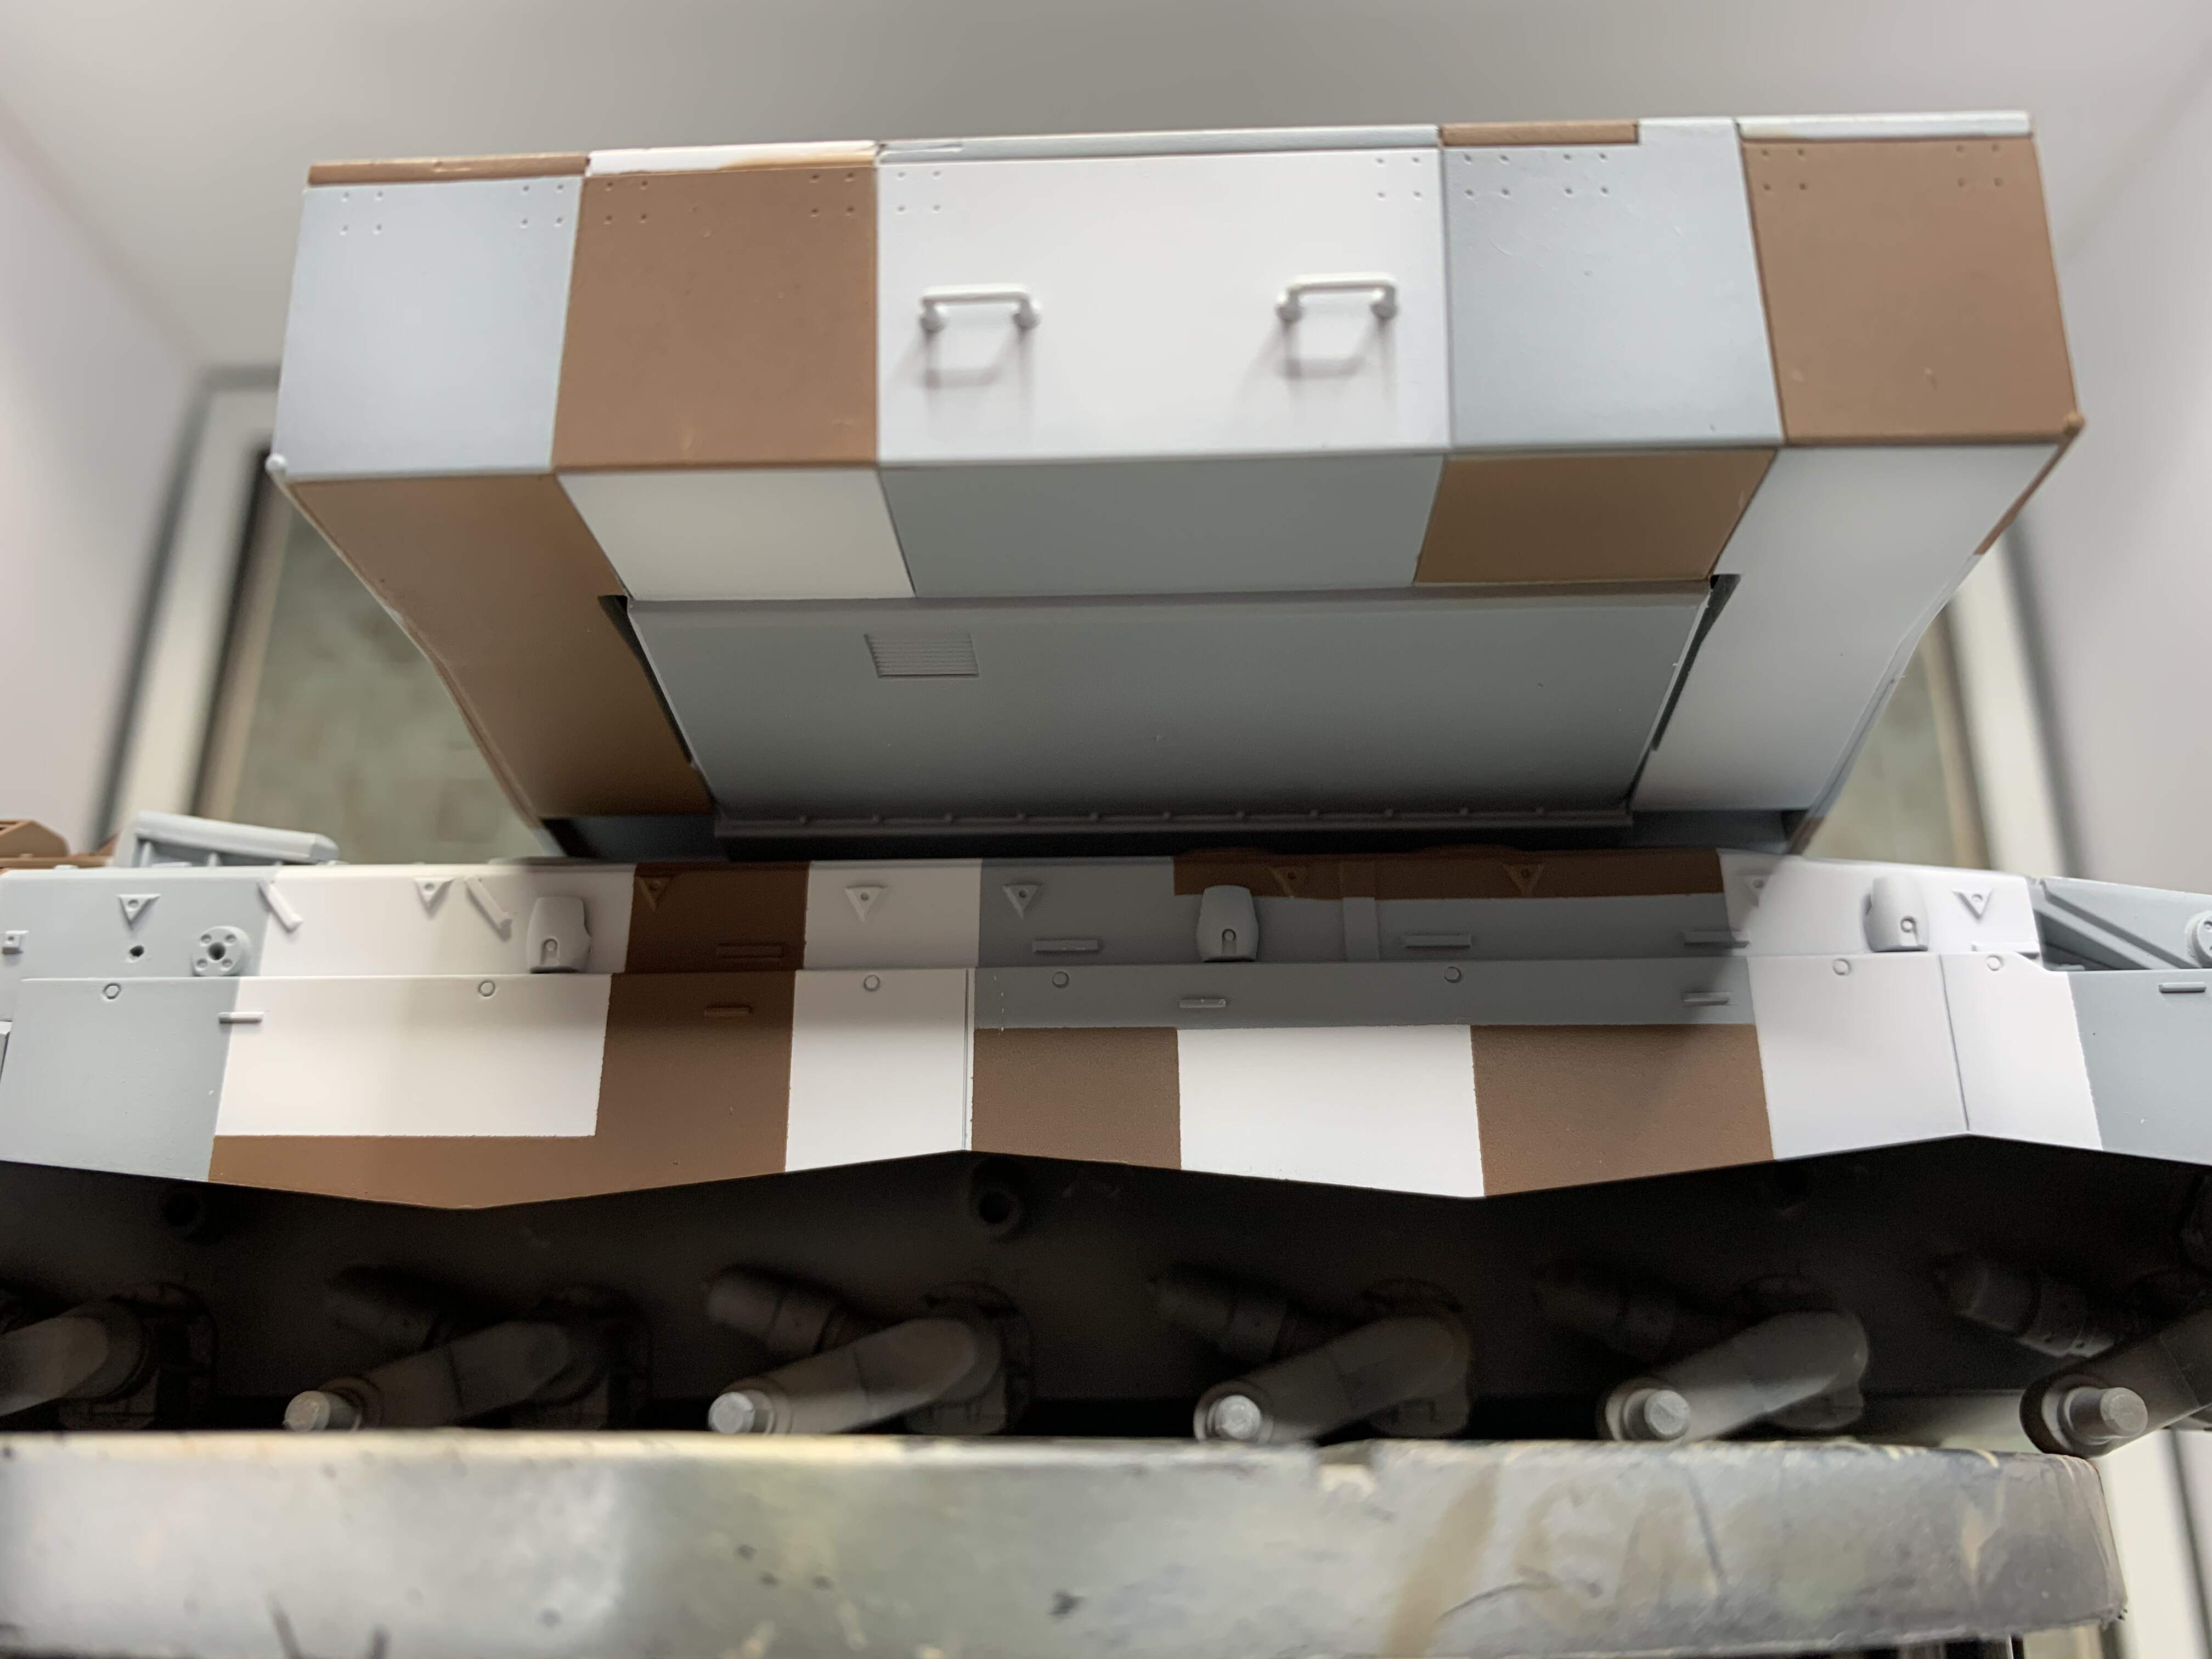
Quite pleased with the bits on top of turret sides, and I remember thinking how daft it was to mask and spray the colours on the bottom of the turret, but I’m rather tickled with that!
A couple of bits of overspray to sort, and paint the green on the suspension and lower hull, black on the wheels and detail paint the other parts to come.
Thanks for looking in, Jim.


7 Likes
Looks really smart Jim. The lines in those pics look very neat and clean so well done on another great finish. It will look sweet next to the Berlin Chieftain.
1 Like
Nice work! 
1 Like
Shaping up nicely. Wish I had the patience to do all that masking.
1 Like
Looks great to me! Very nicely done.
1 Like
Thanks fellas, the masking is actually quite therapeutic in a way. A lot of cross checking reference images and trying to place everything fairly accurately.
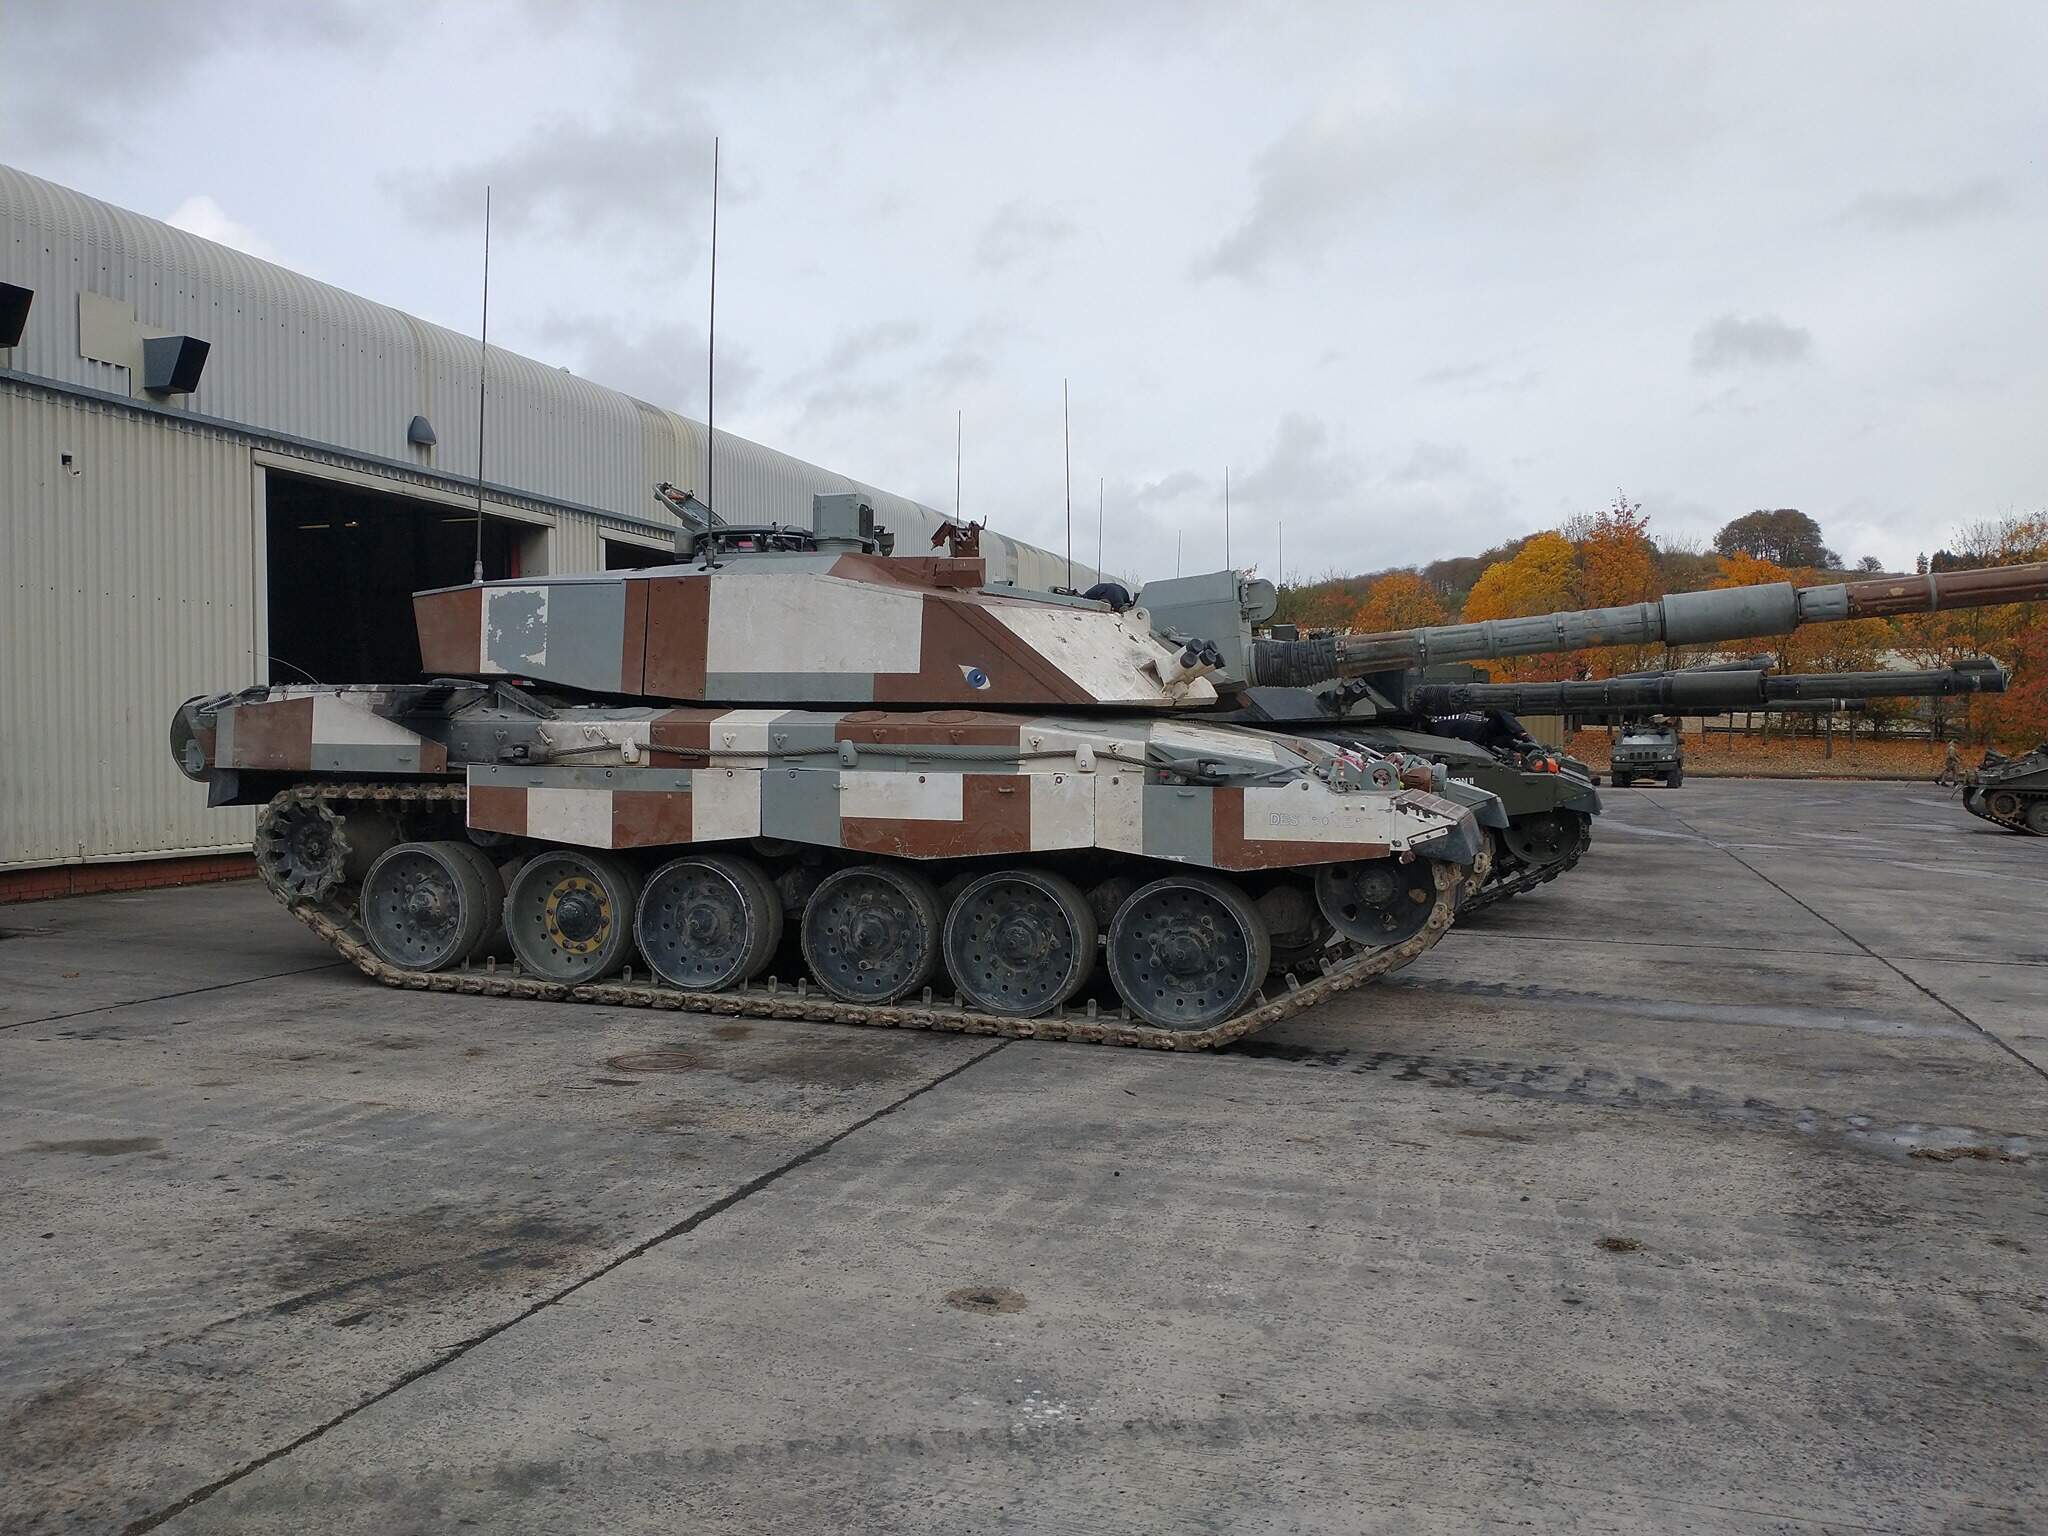
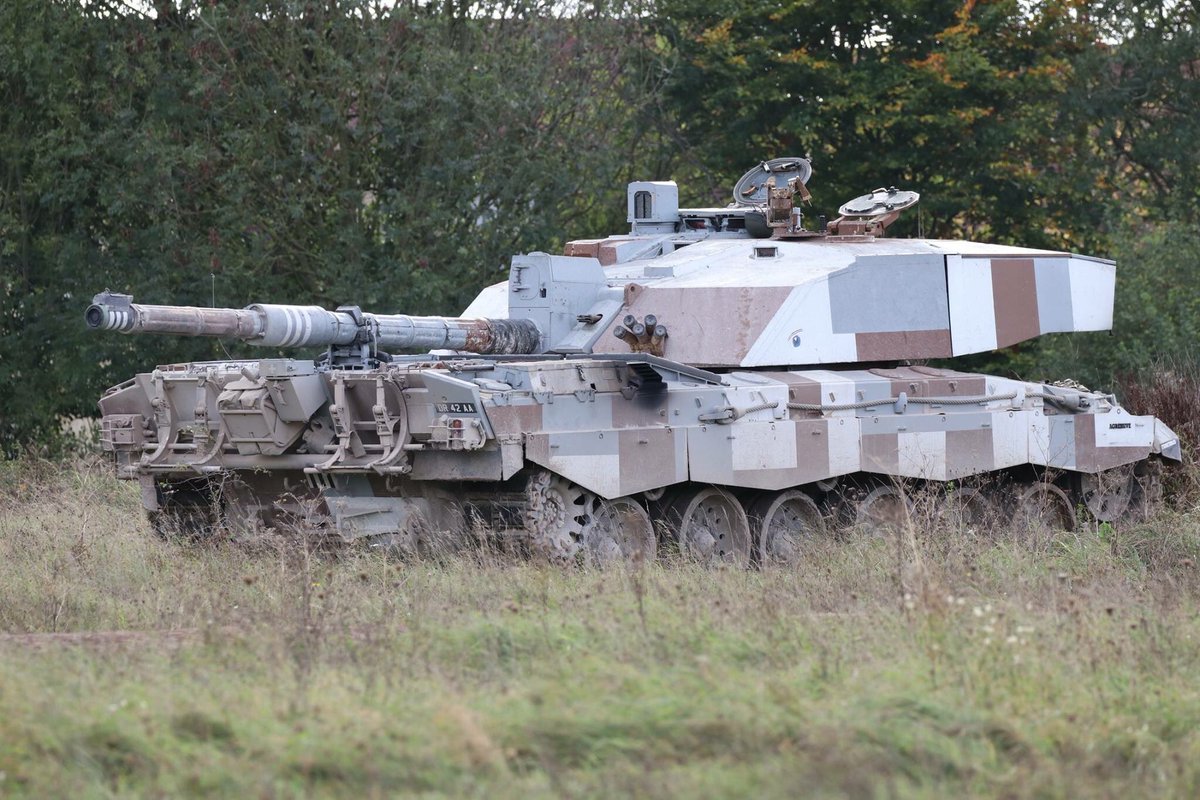
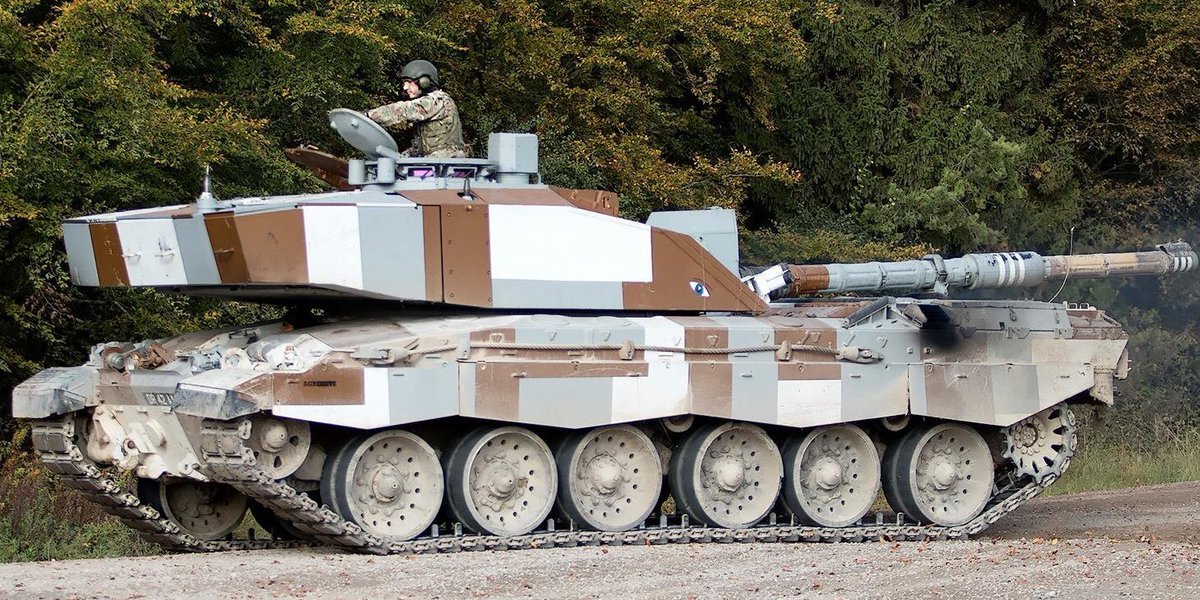
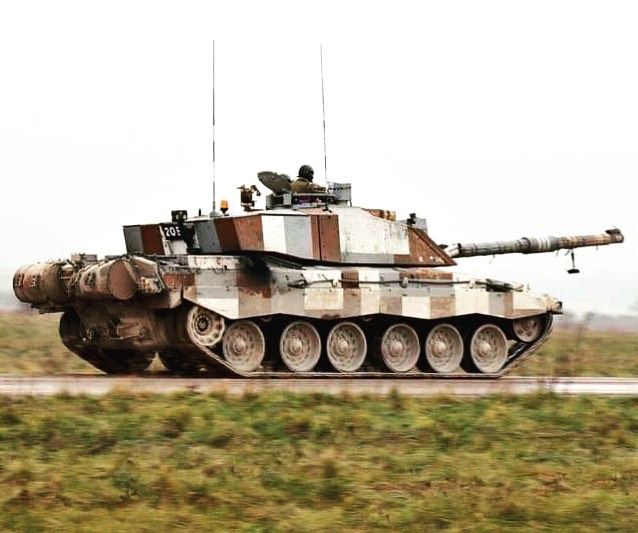
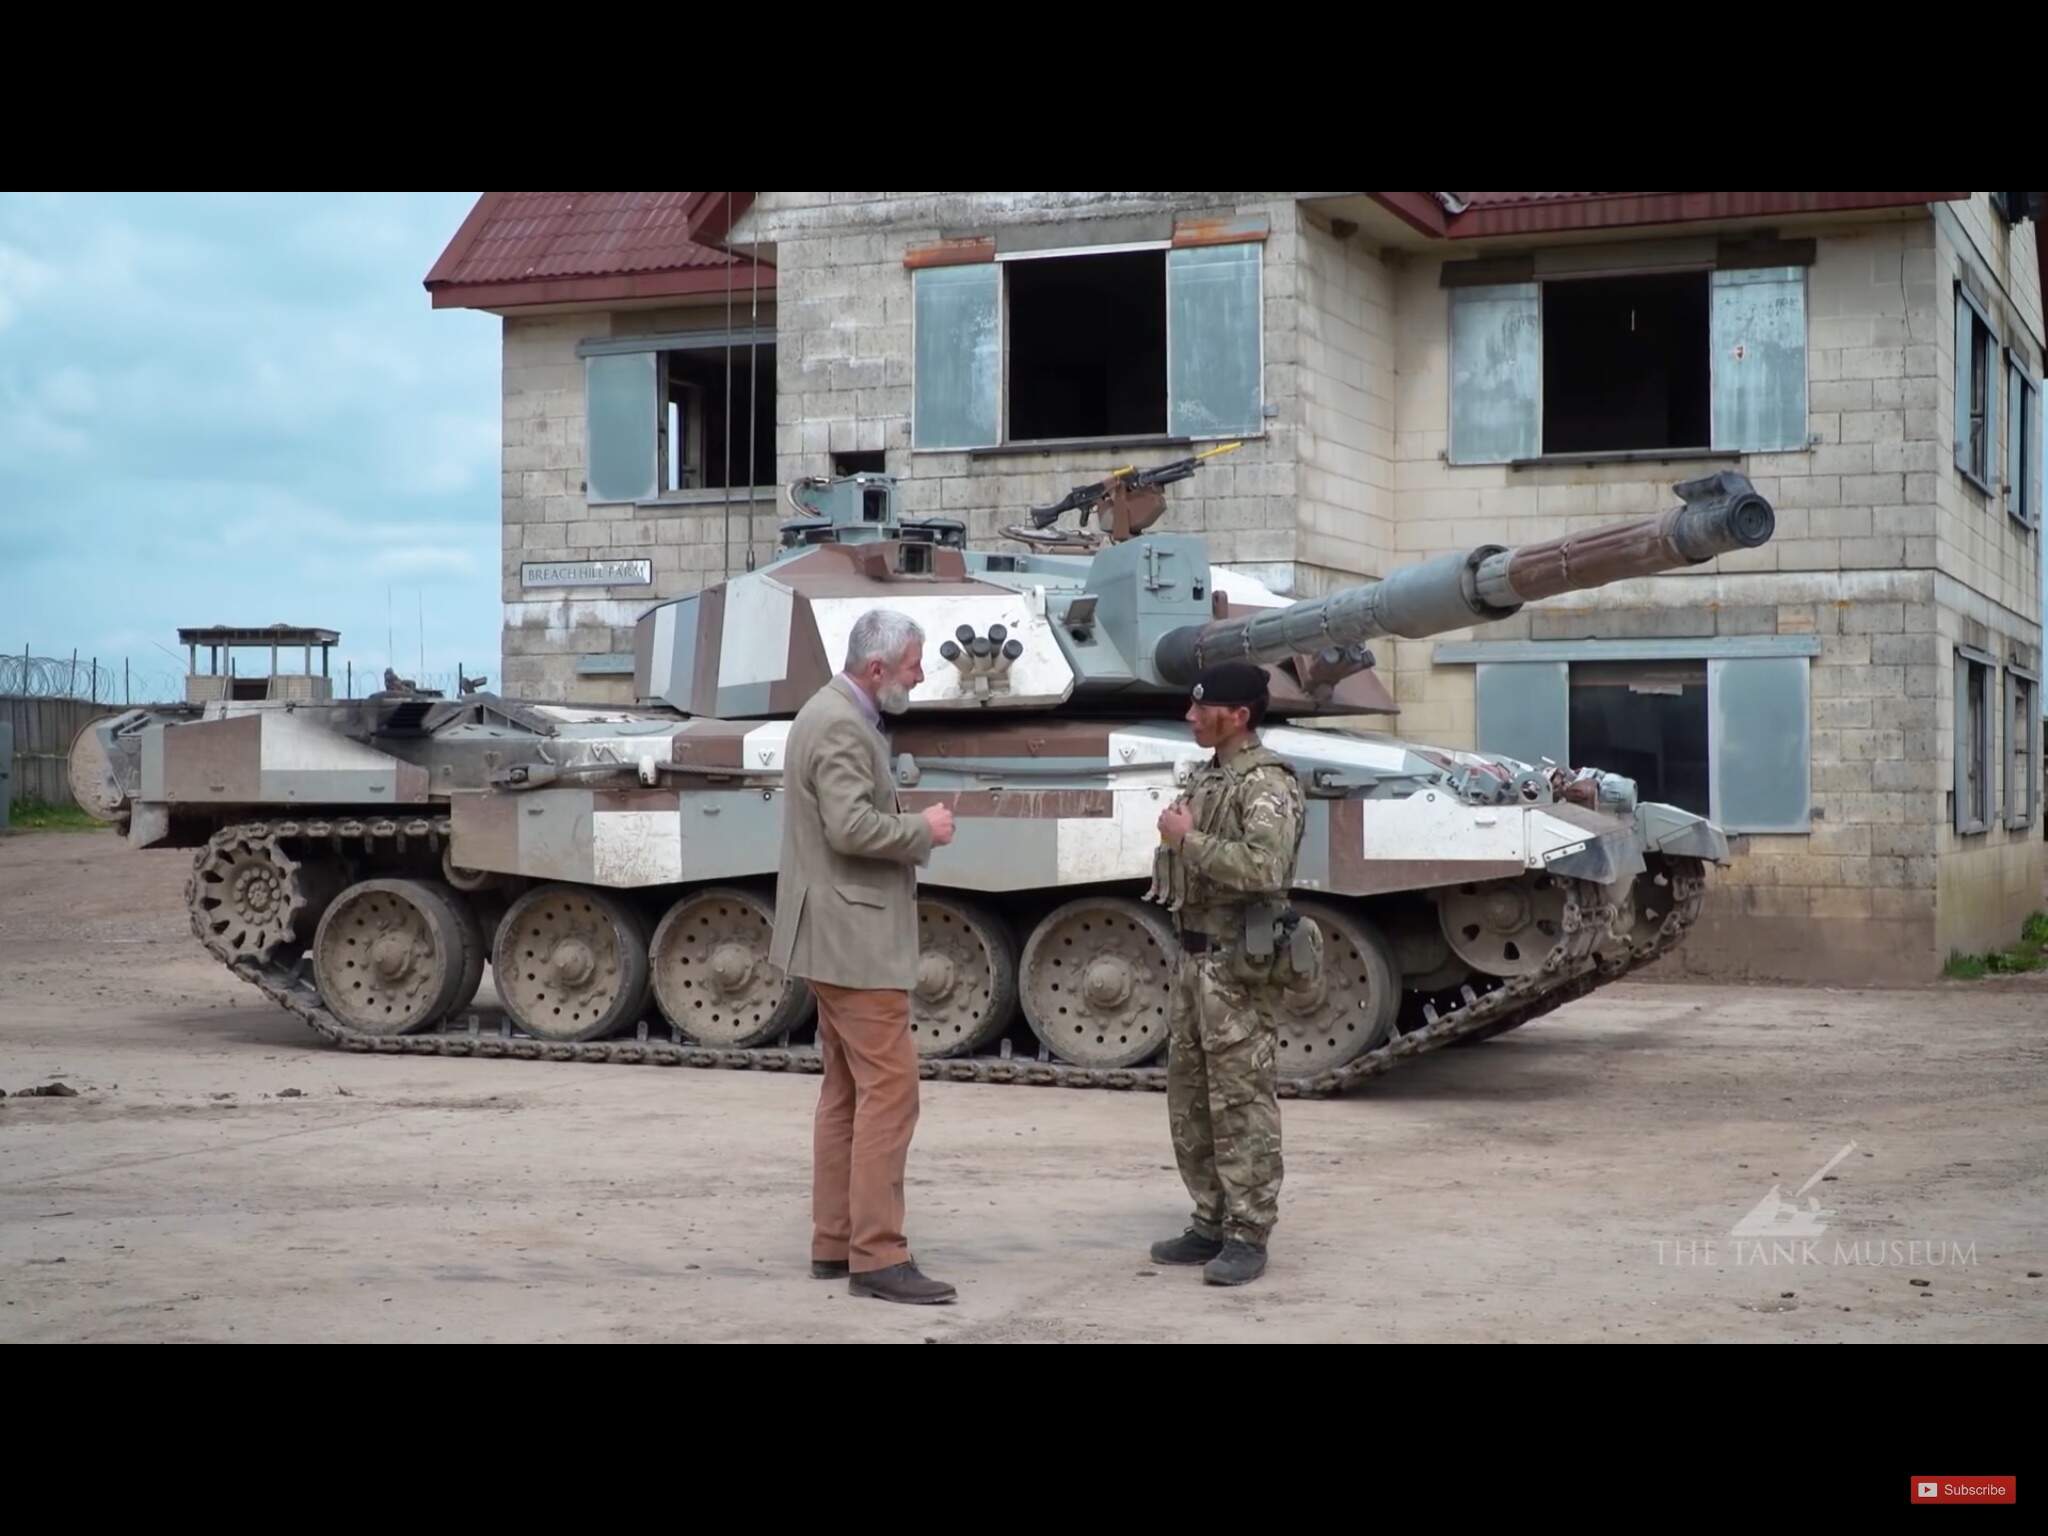
The colours will match the chieftain nicely, but I think the weathering will be a lot more on this, using images like these for inspiration;


2 Likes
Wow didn’t realize the challys got so beat up . Excellent!
1 Like
Very nice. You did a better job of the masking than me!
1 Like
Really a great job, love that camo, I have done the same on a Chieftain, but the Chally is amazing with that camo, love it.
1 Like
Thanks again to all for the kind words and encouragement!
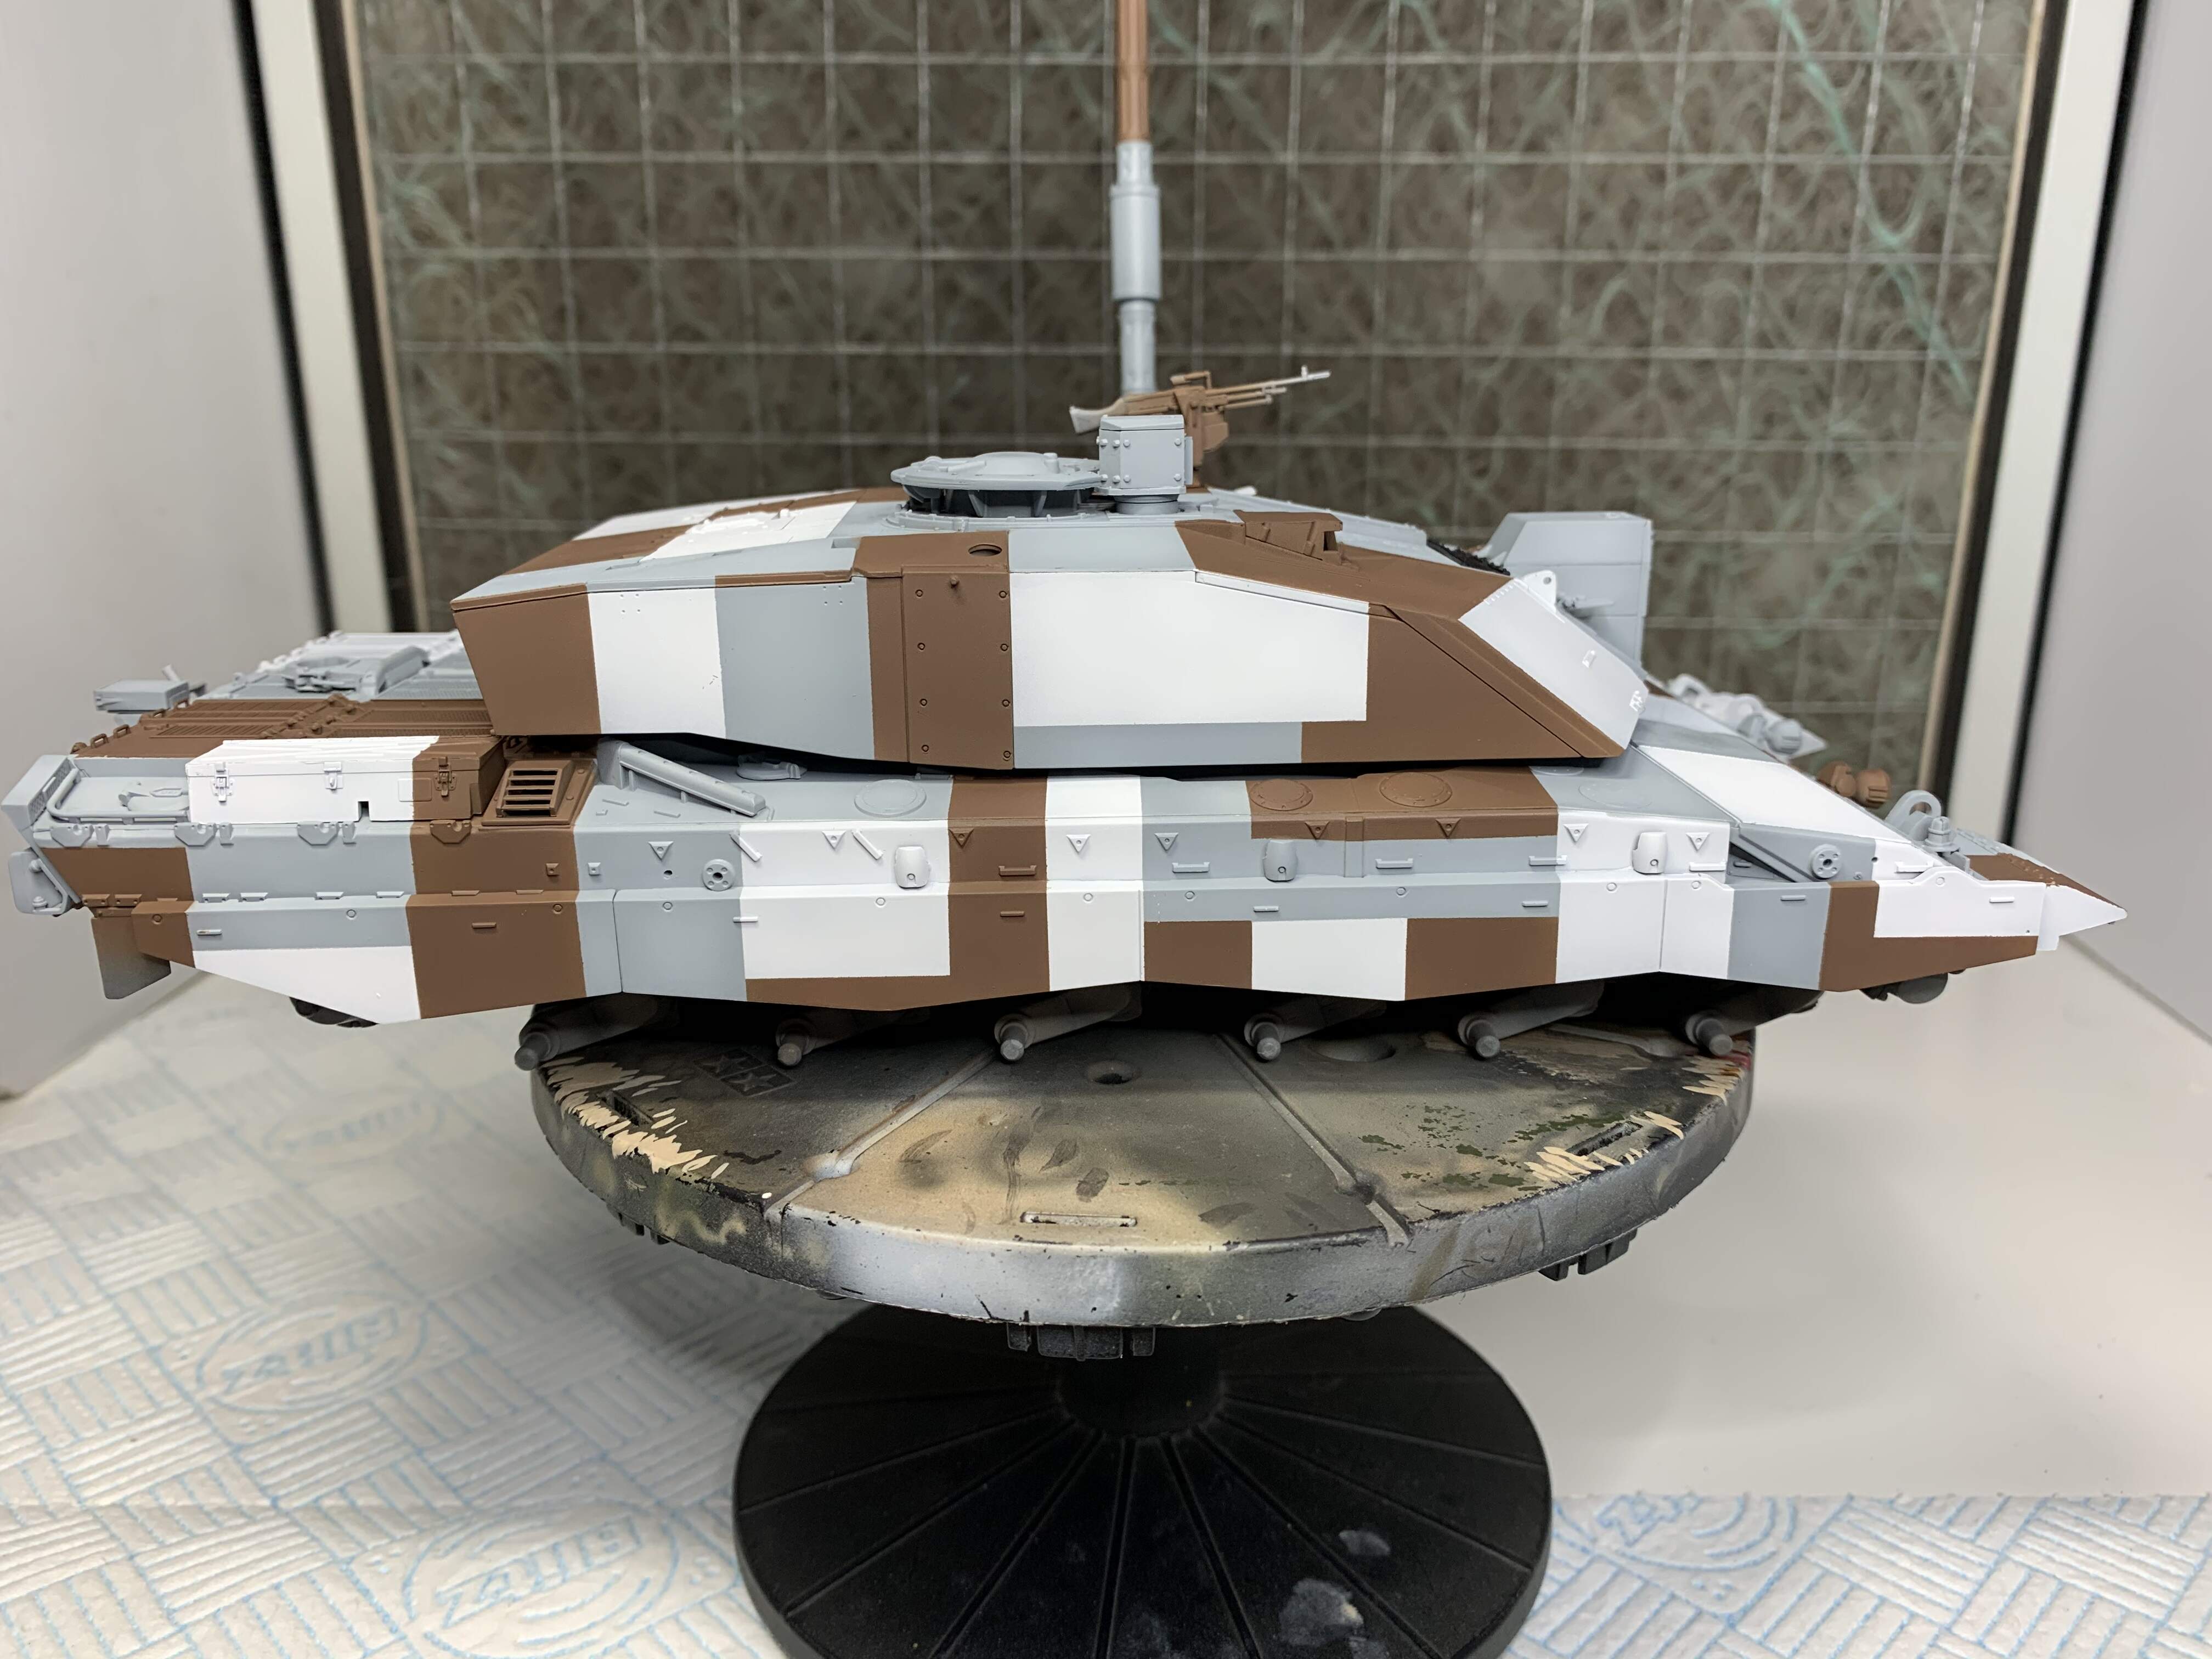
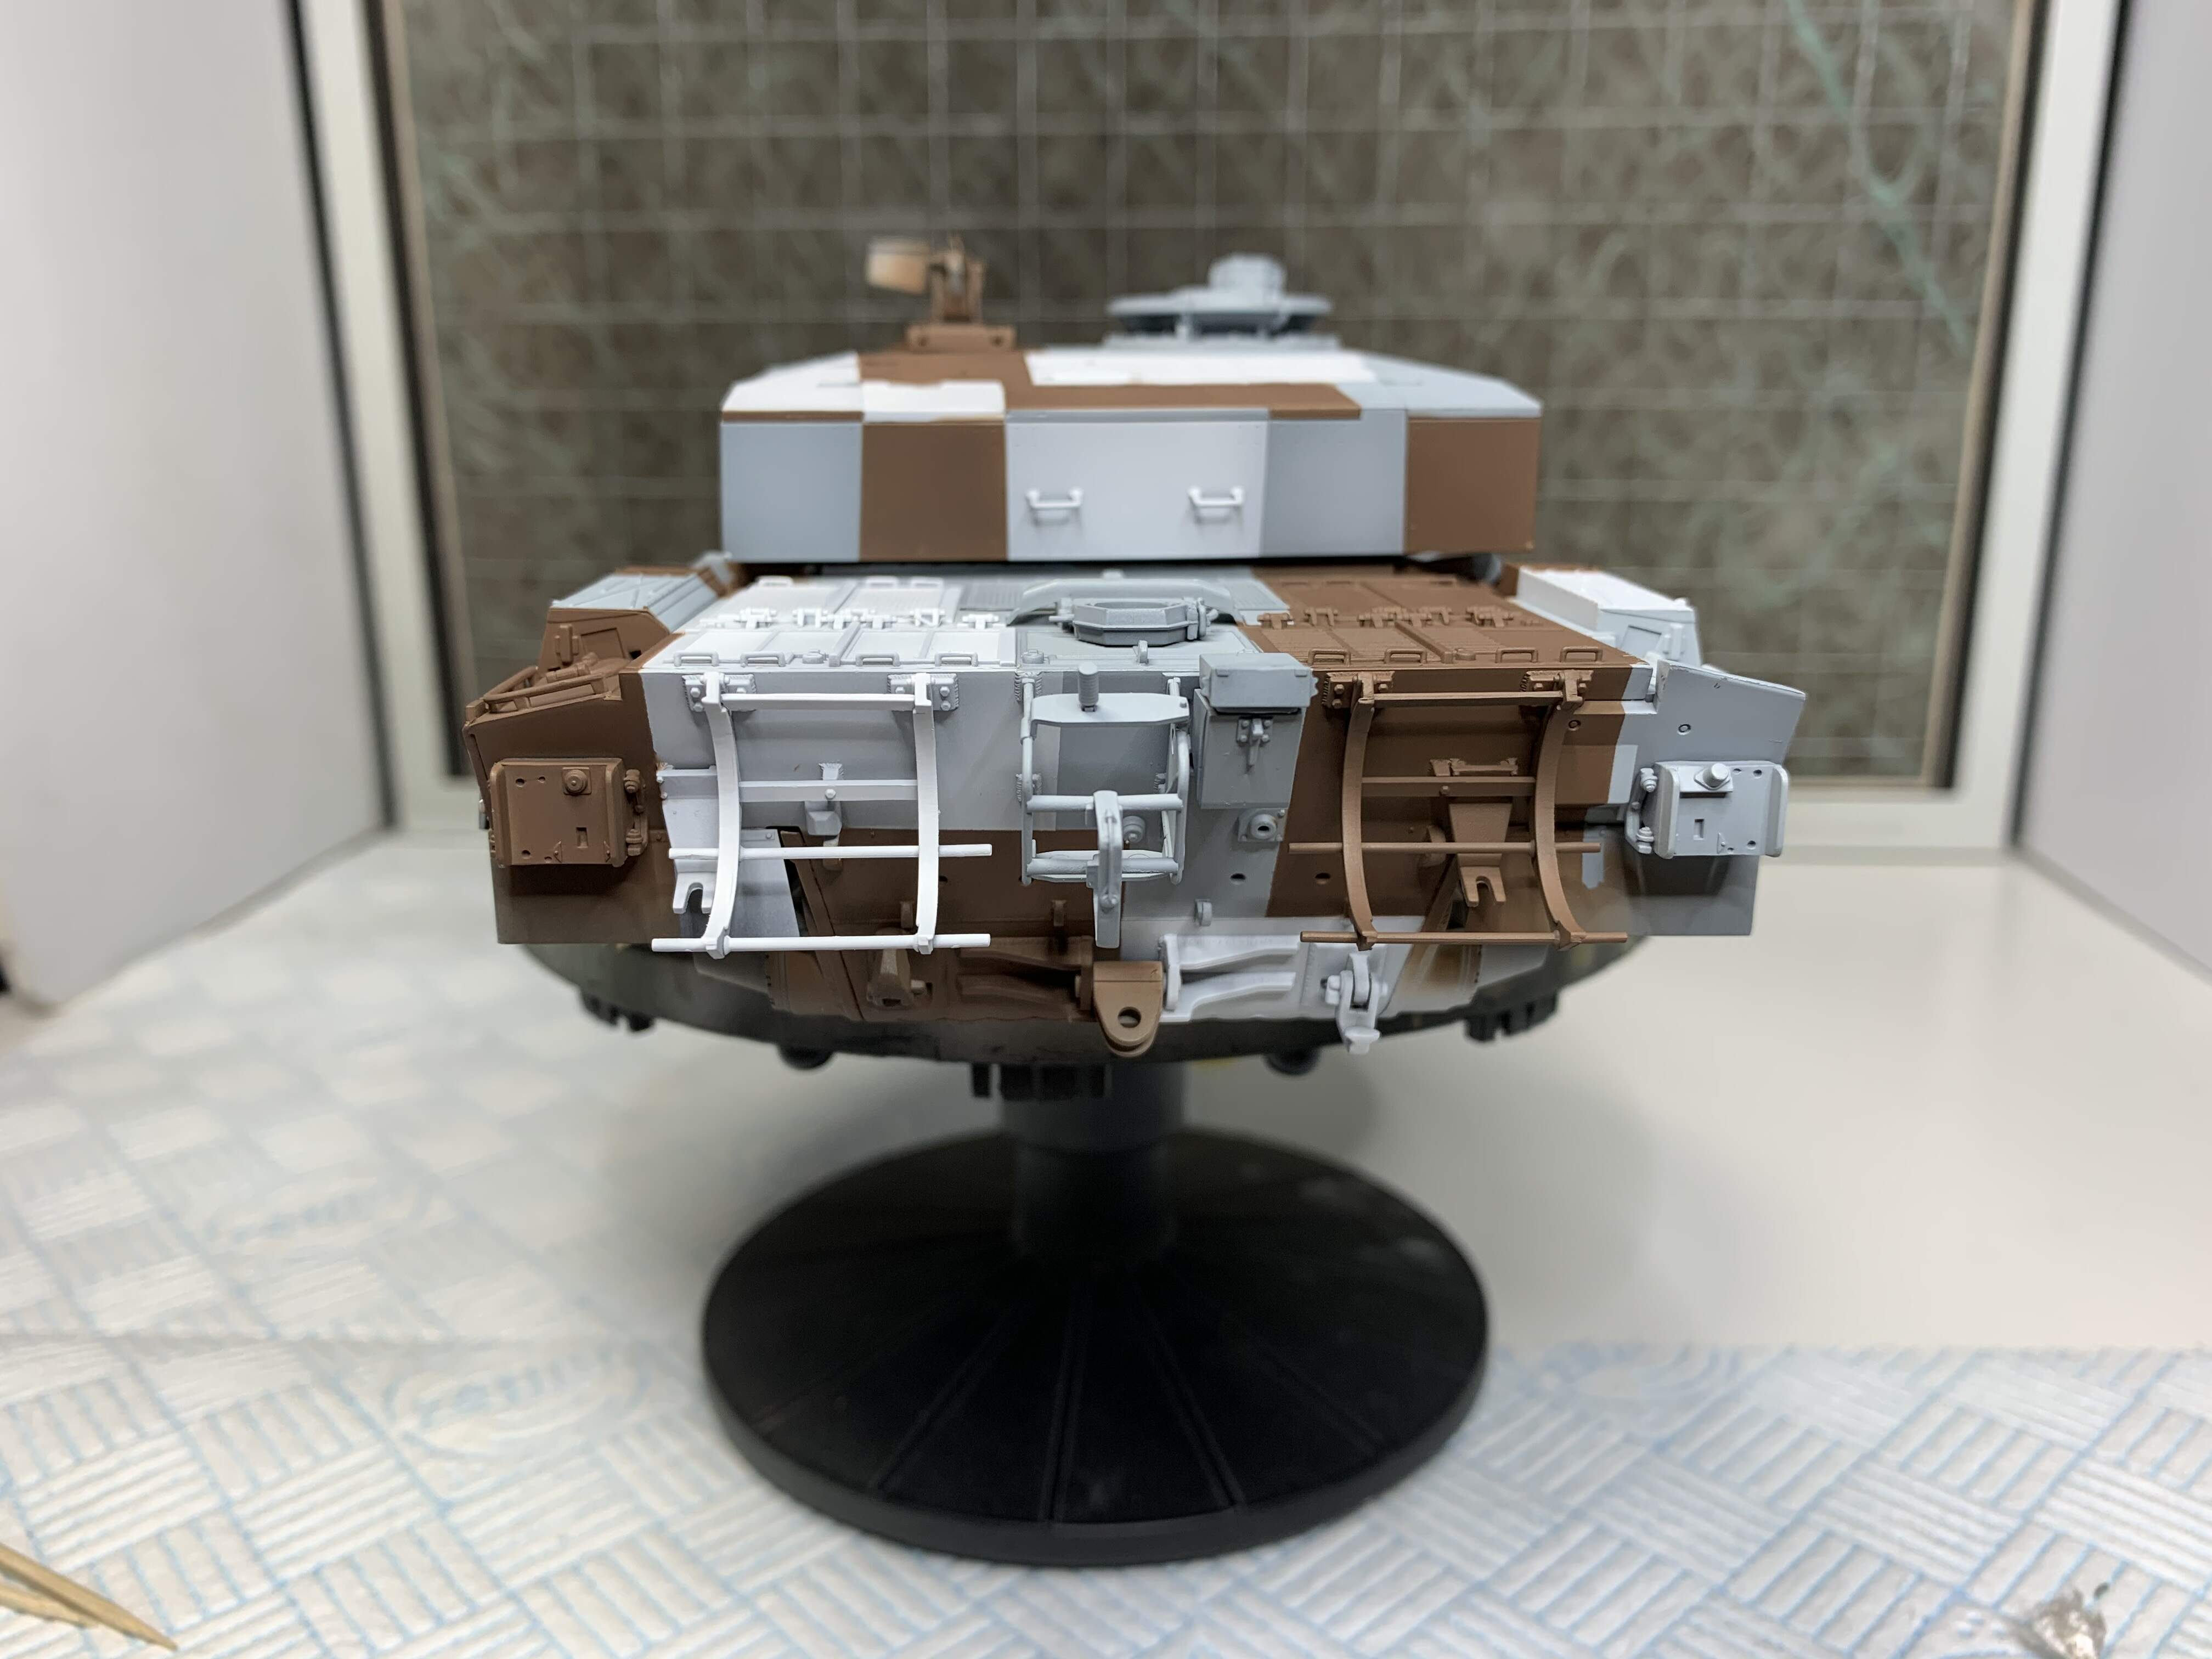
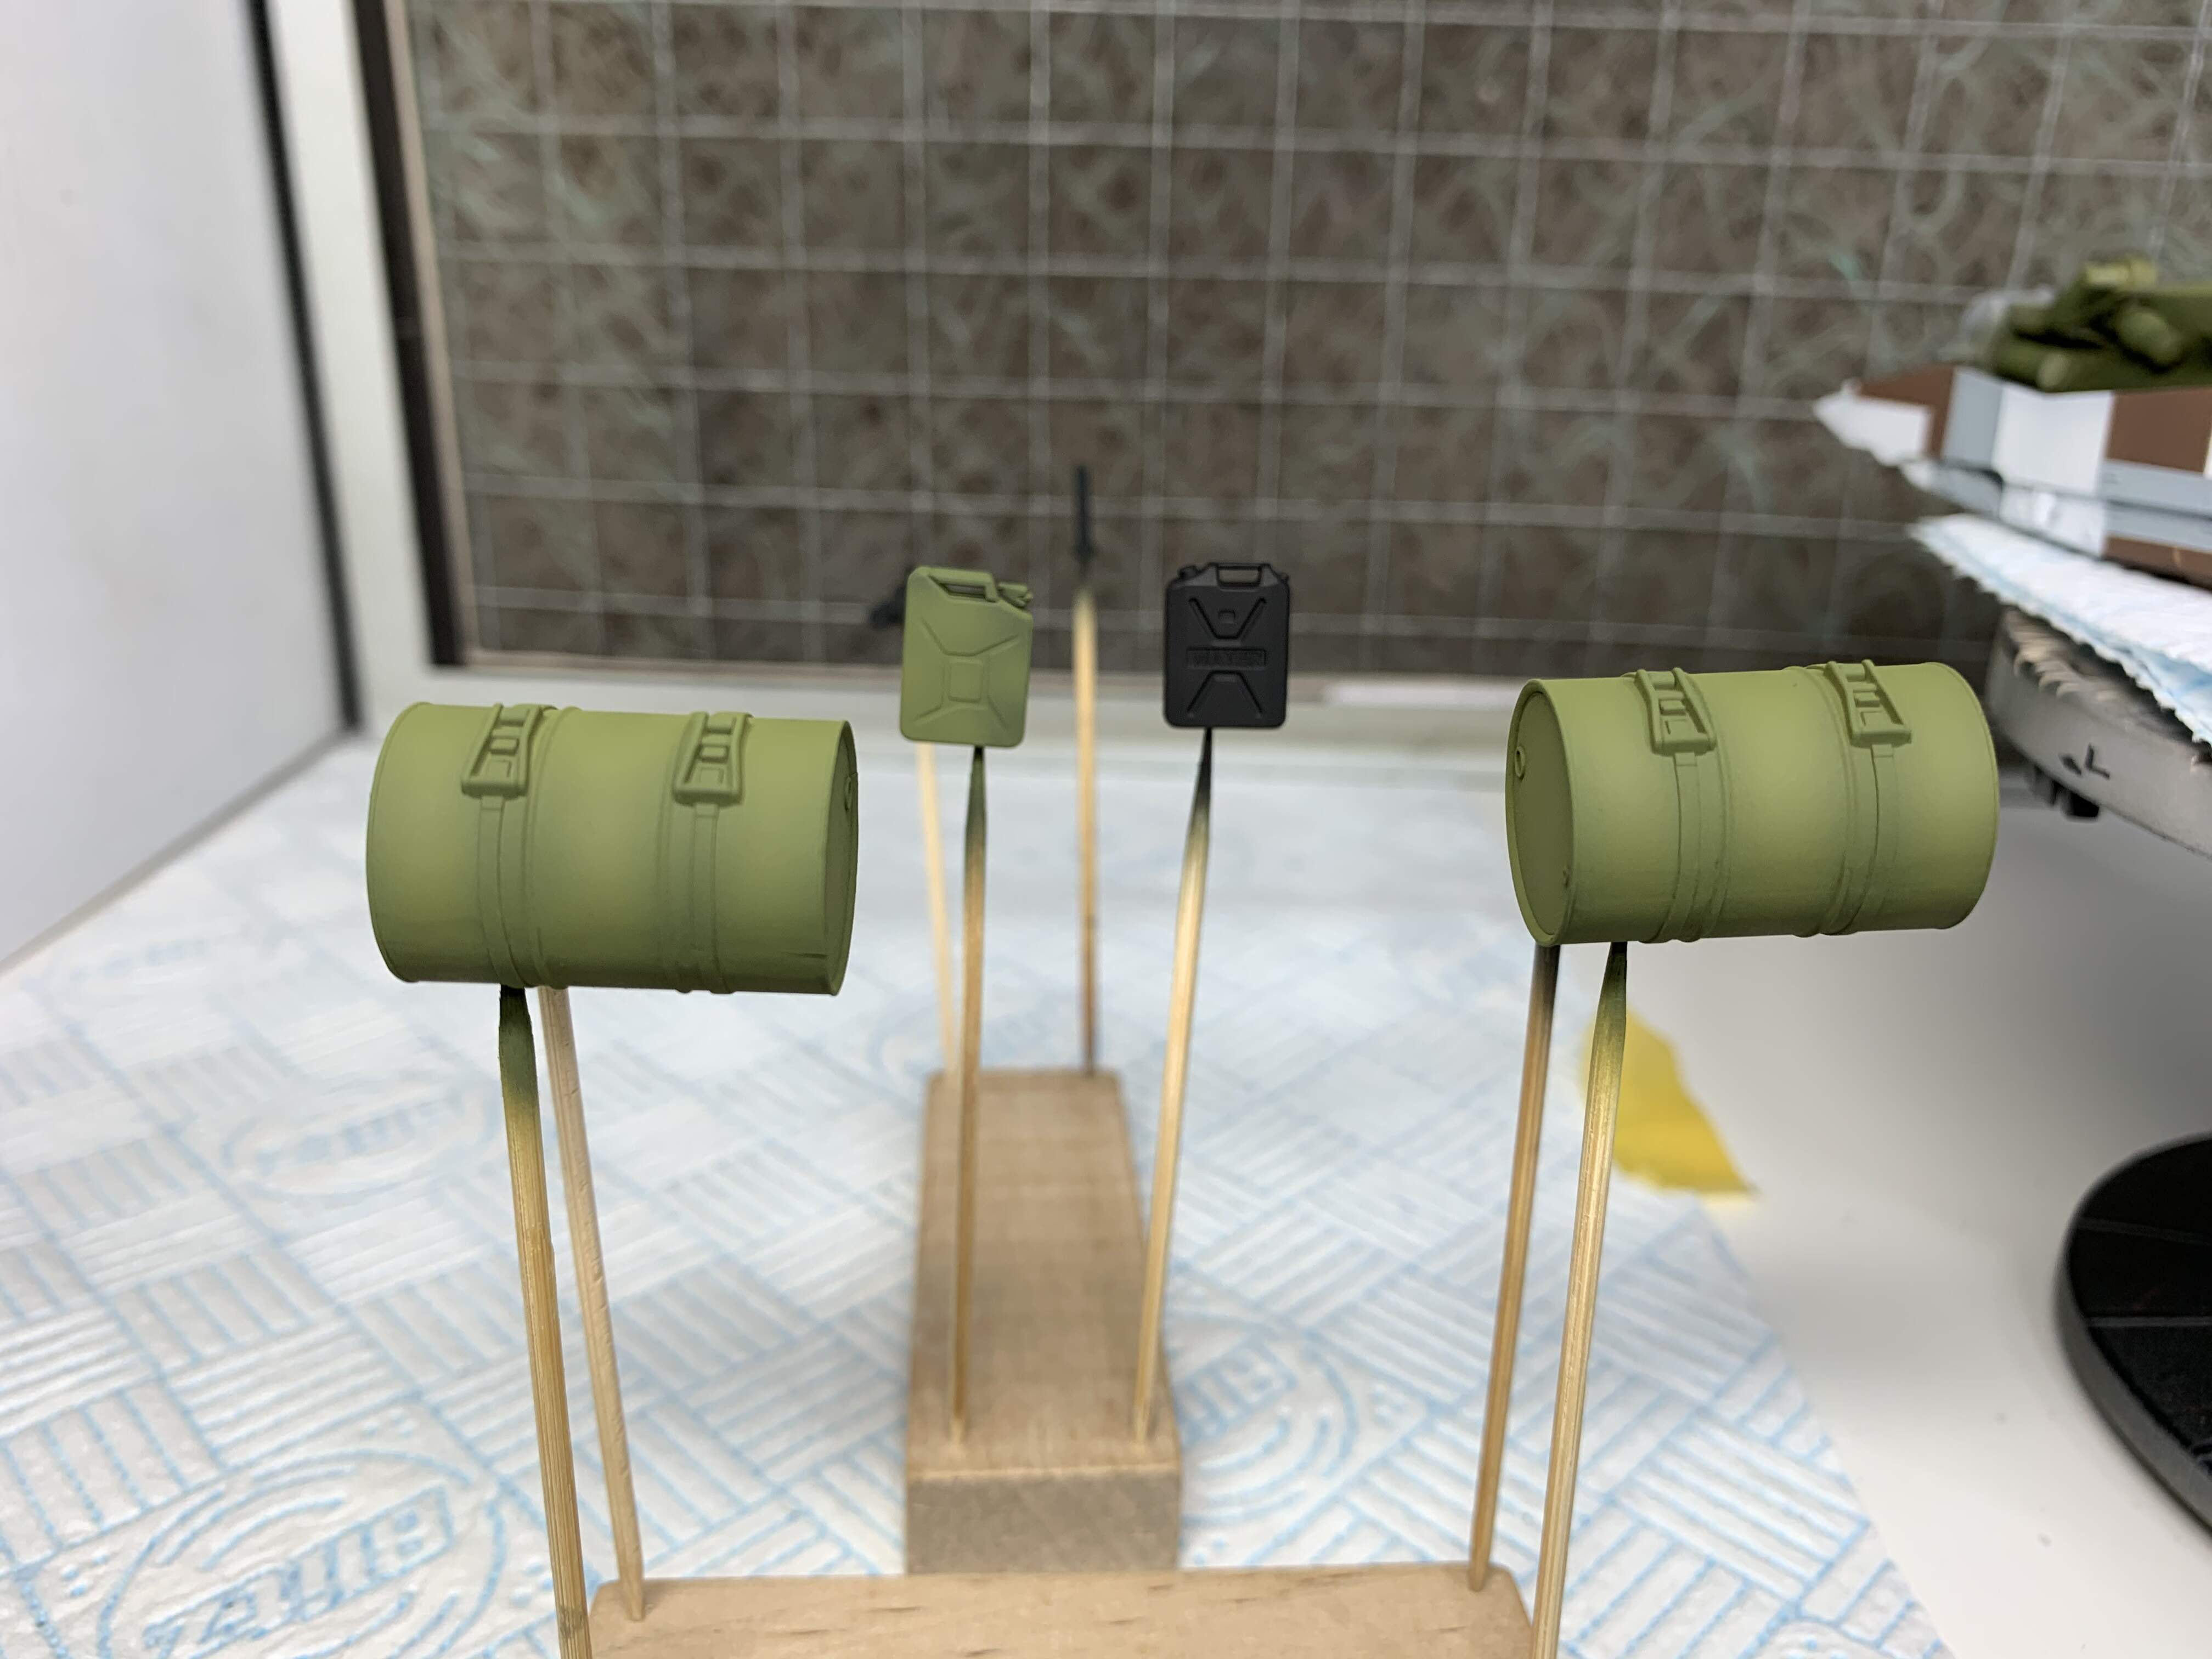
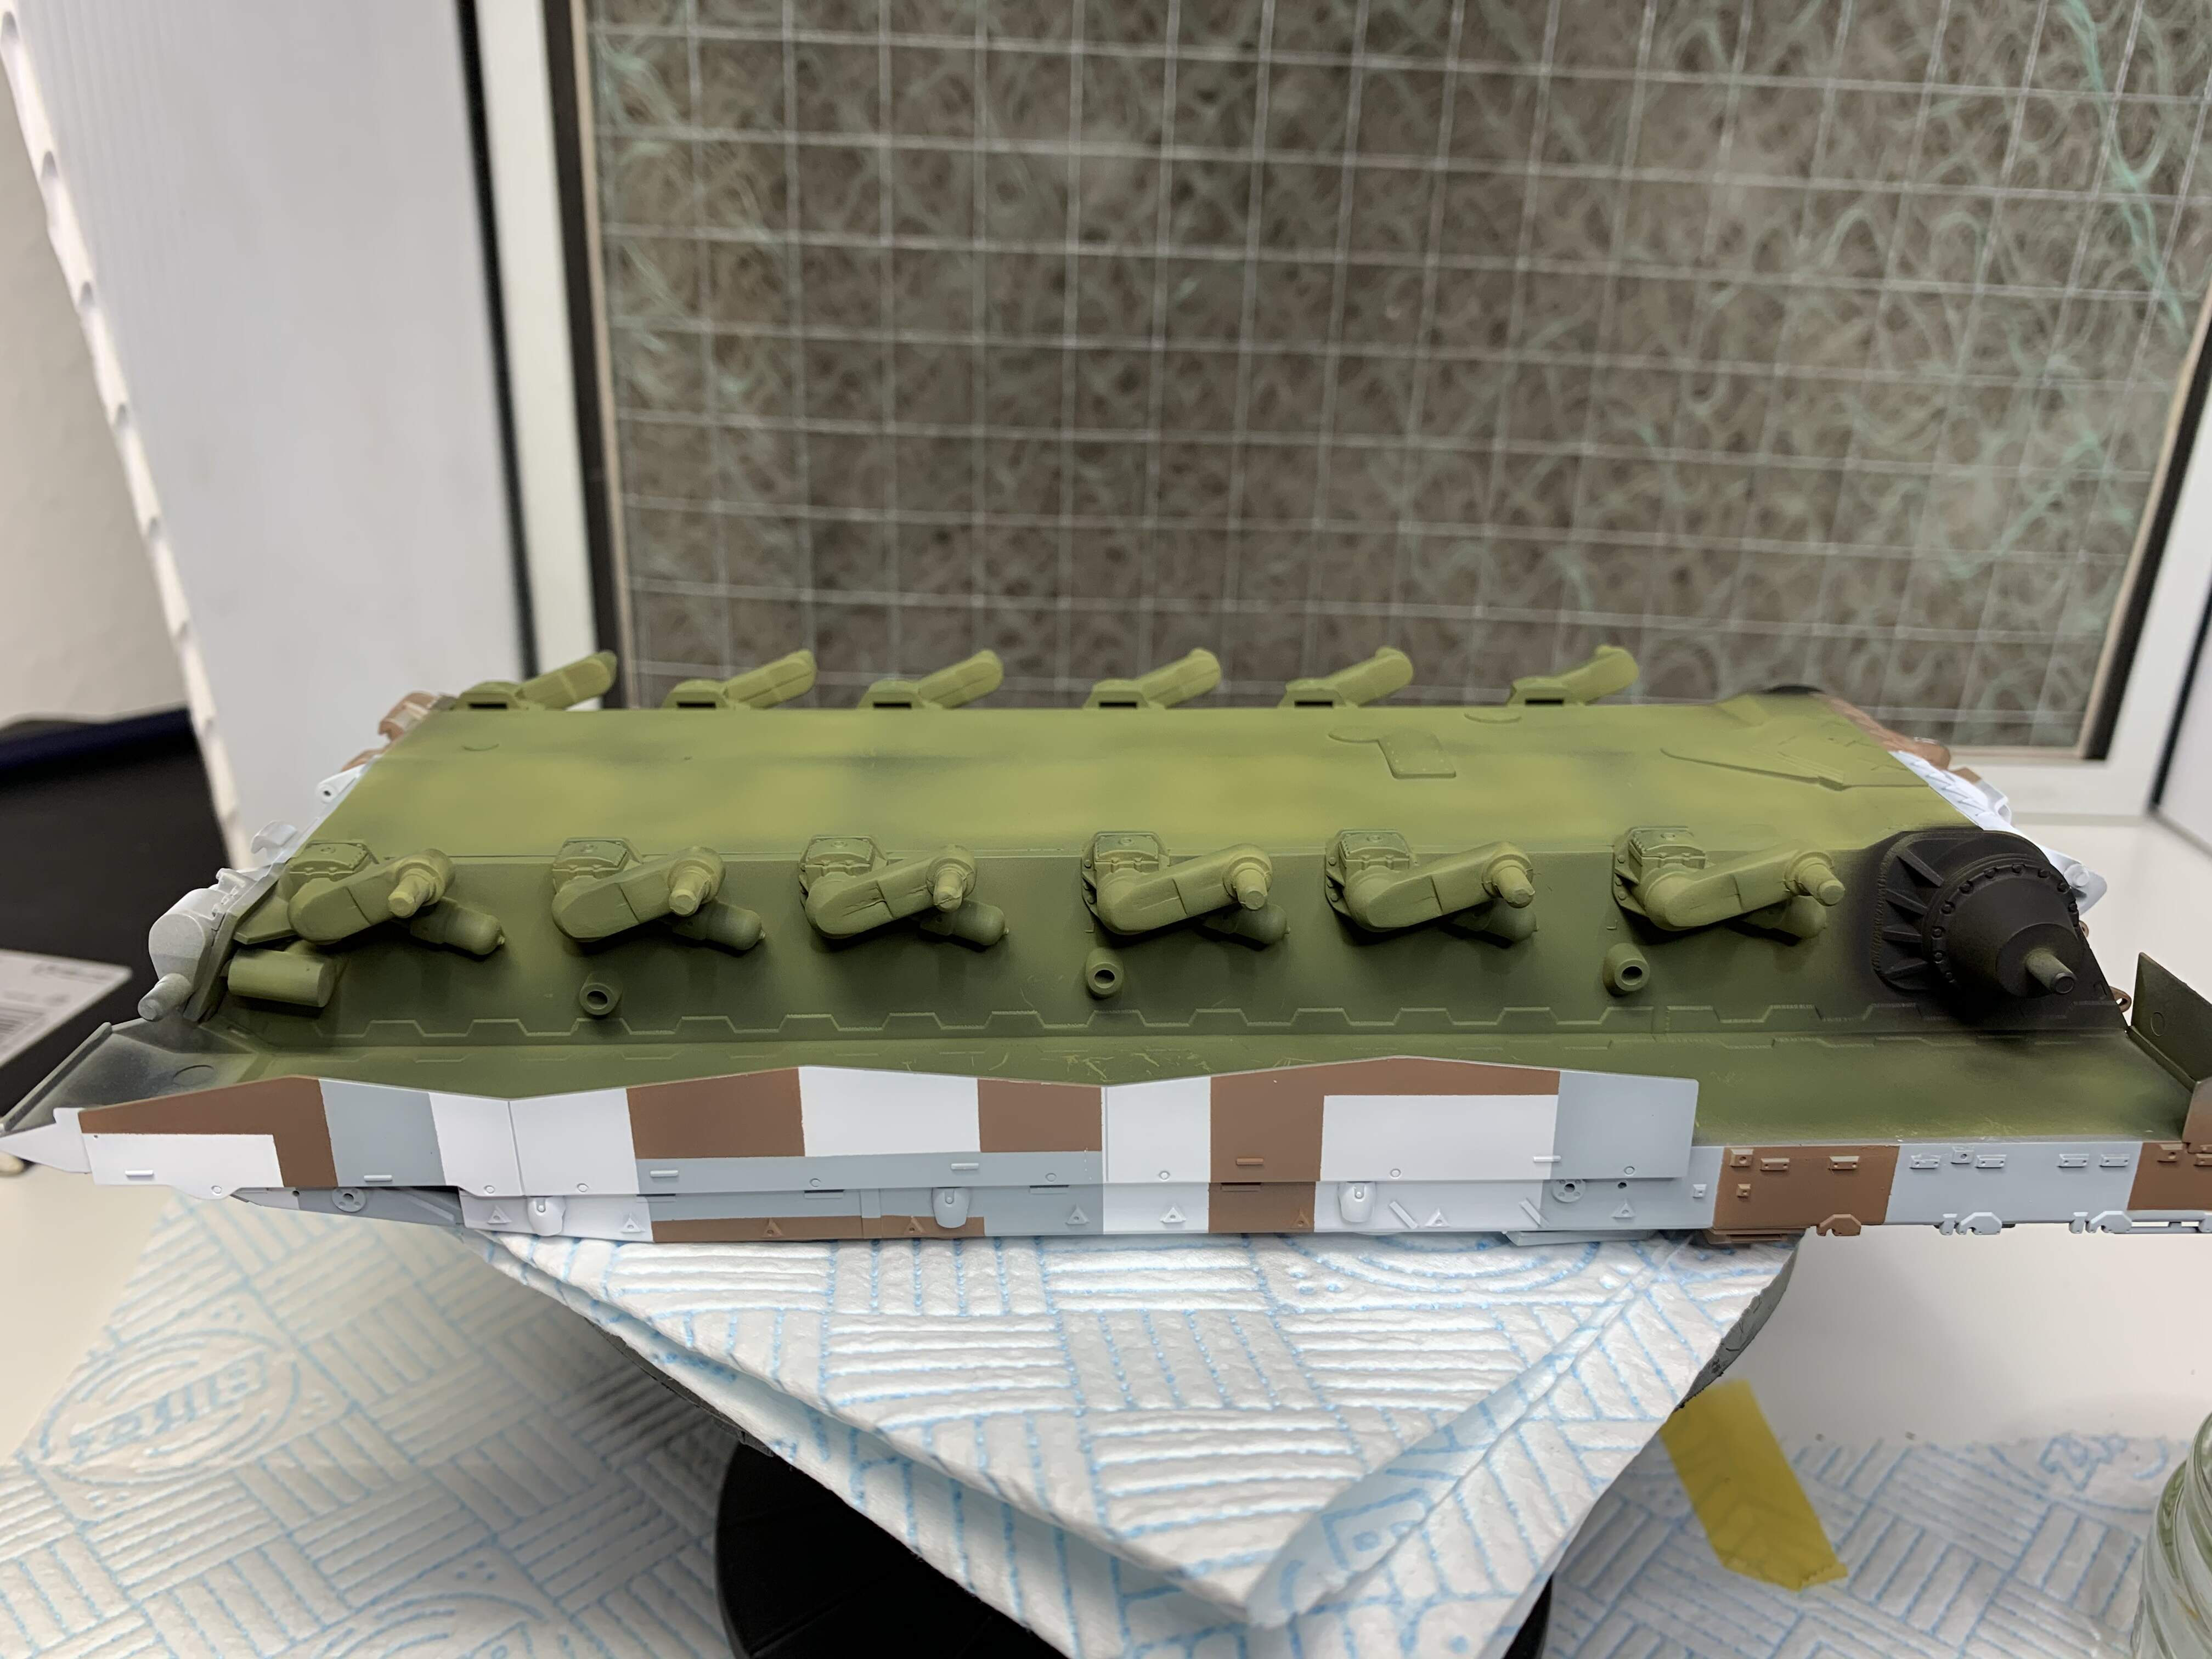
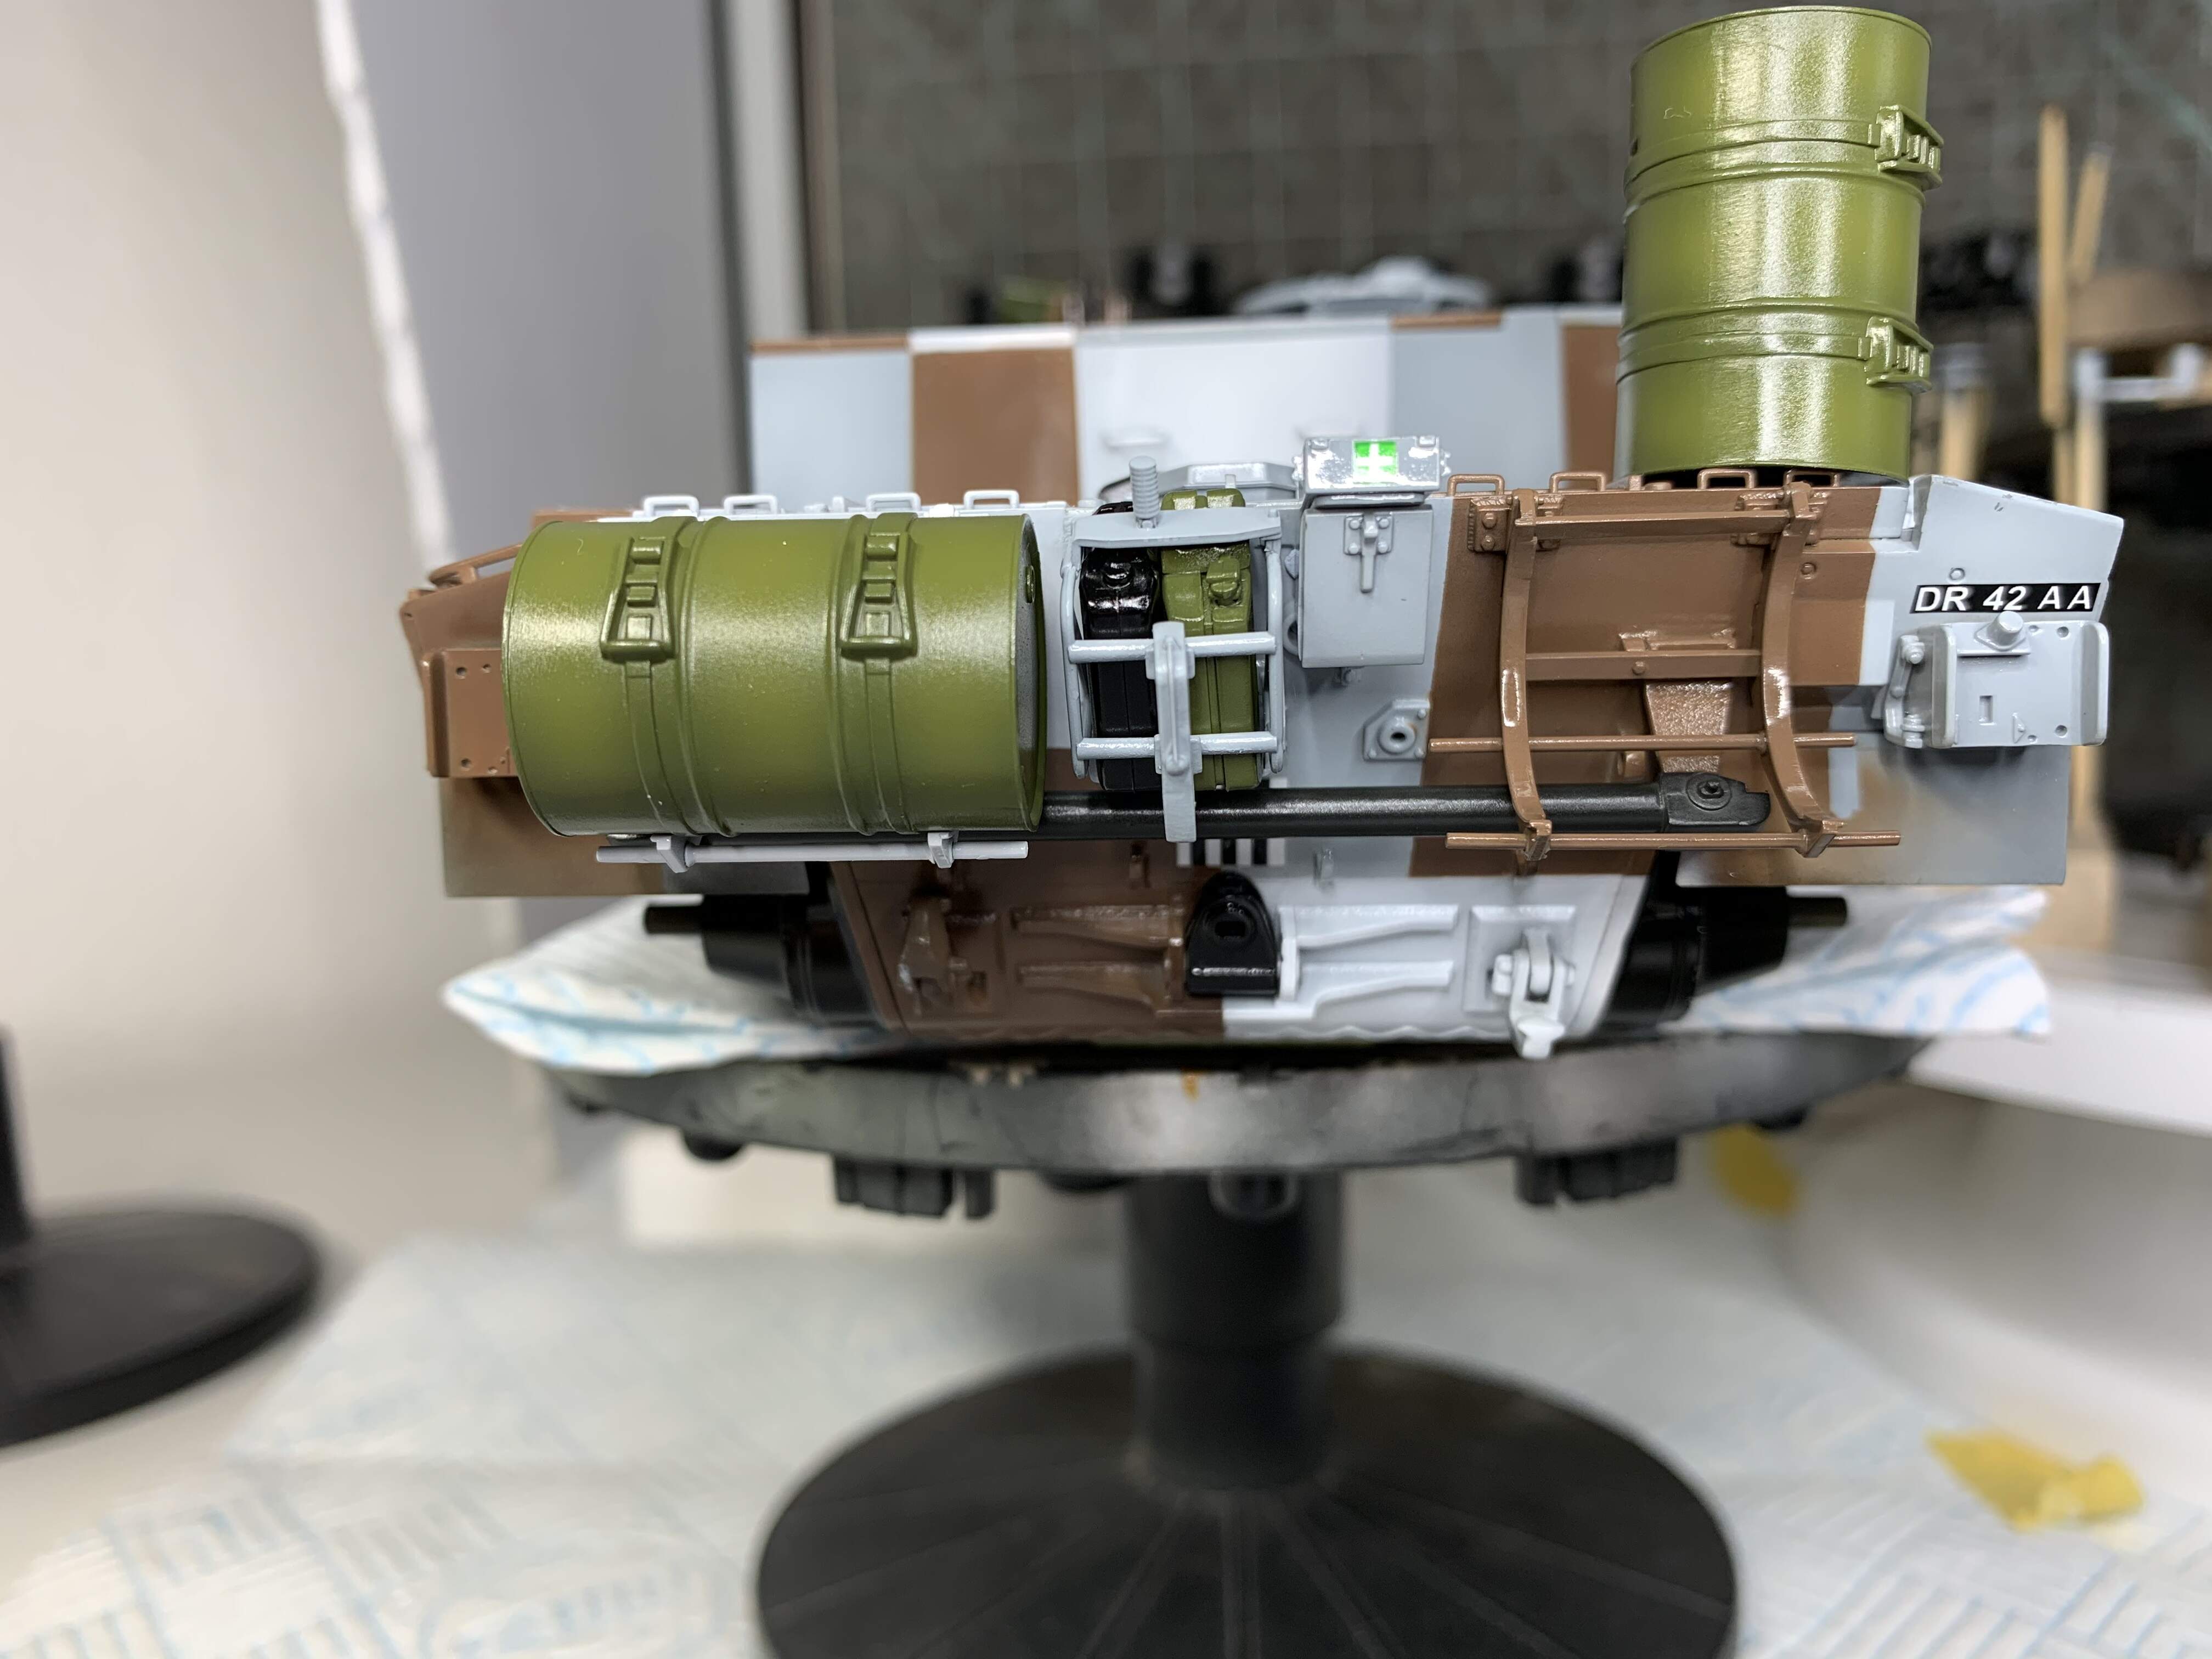
I have applied the NATO green to the hull and fuel barrels. The pic I have of the freshly painted camo from the back suggests the drive “hubs” are black, so I have painted them thus. I didn’t mask for the black on the front side as I reckon there’s a good chance this wouldn’t have been done on the 1:1 scale beastie. I was going to do it all in black but with @Catsrcool reference and others I went with the green, plus it’s a nice contrast. It won’t really be seen anyway with the running gear and weathering on.
Tamiya NATO green, 50:50 with tamiya lacquer thinner, retarder type(orange cap) then lightened with tamiya yellow green. As always this finish will darken plenty with weathering etc. And, boy, was it good to spray with tamiya paint again!
Onwards! J.
7 Likes
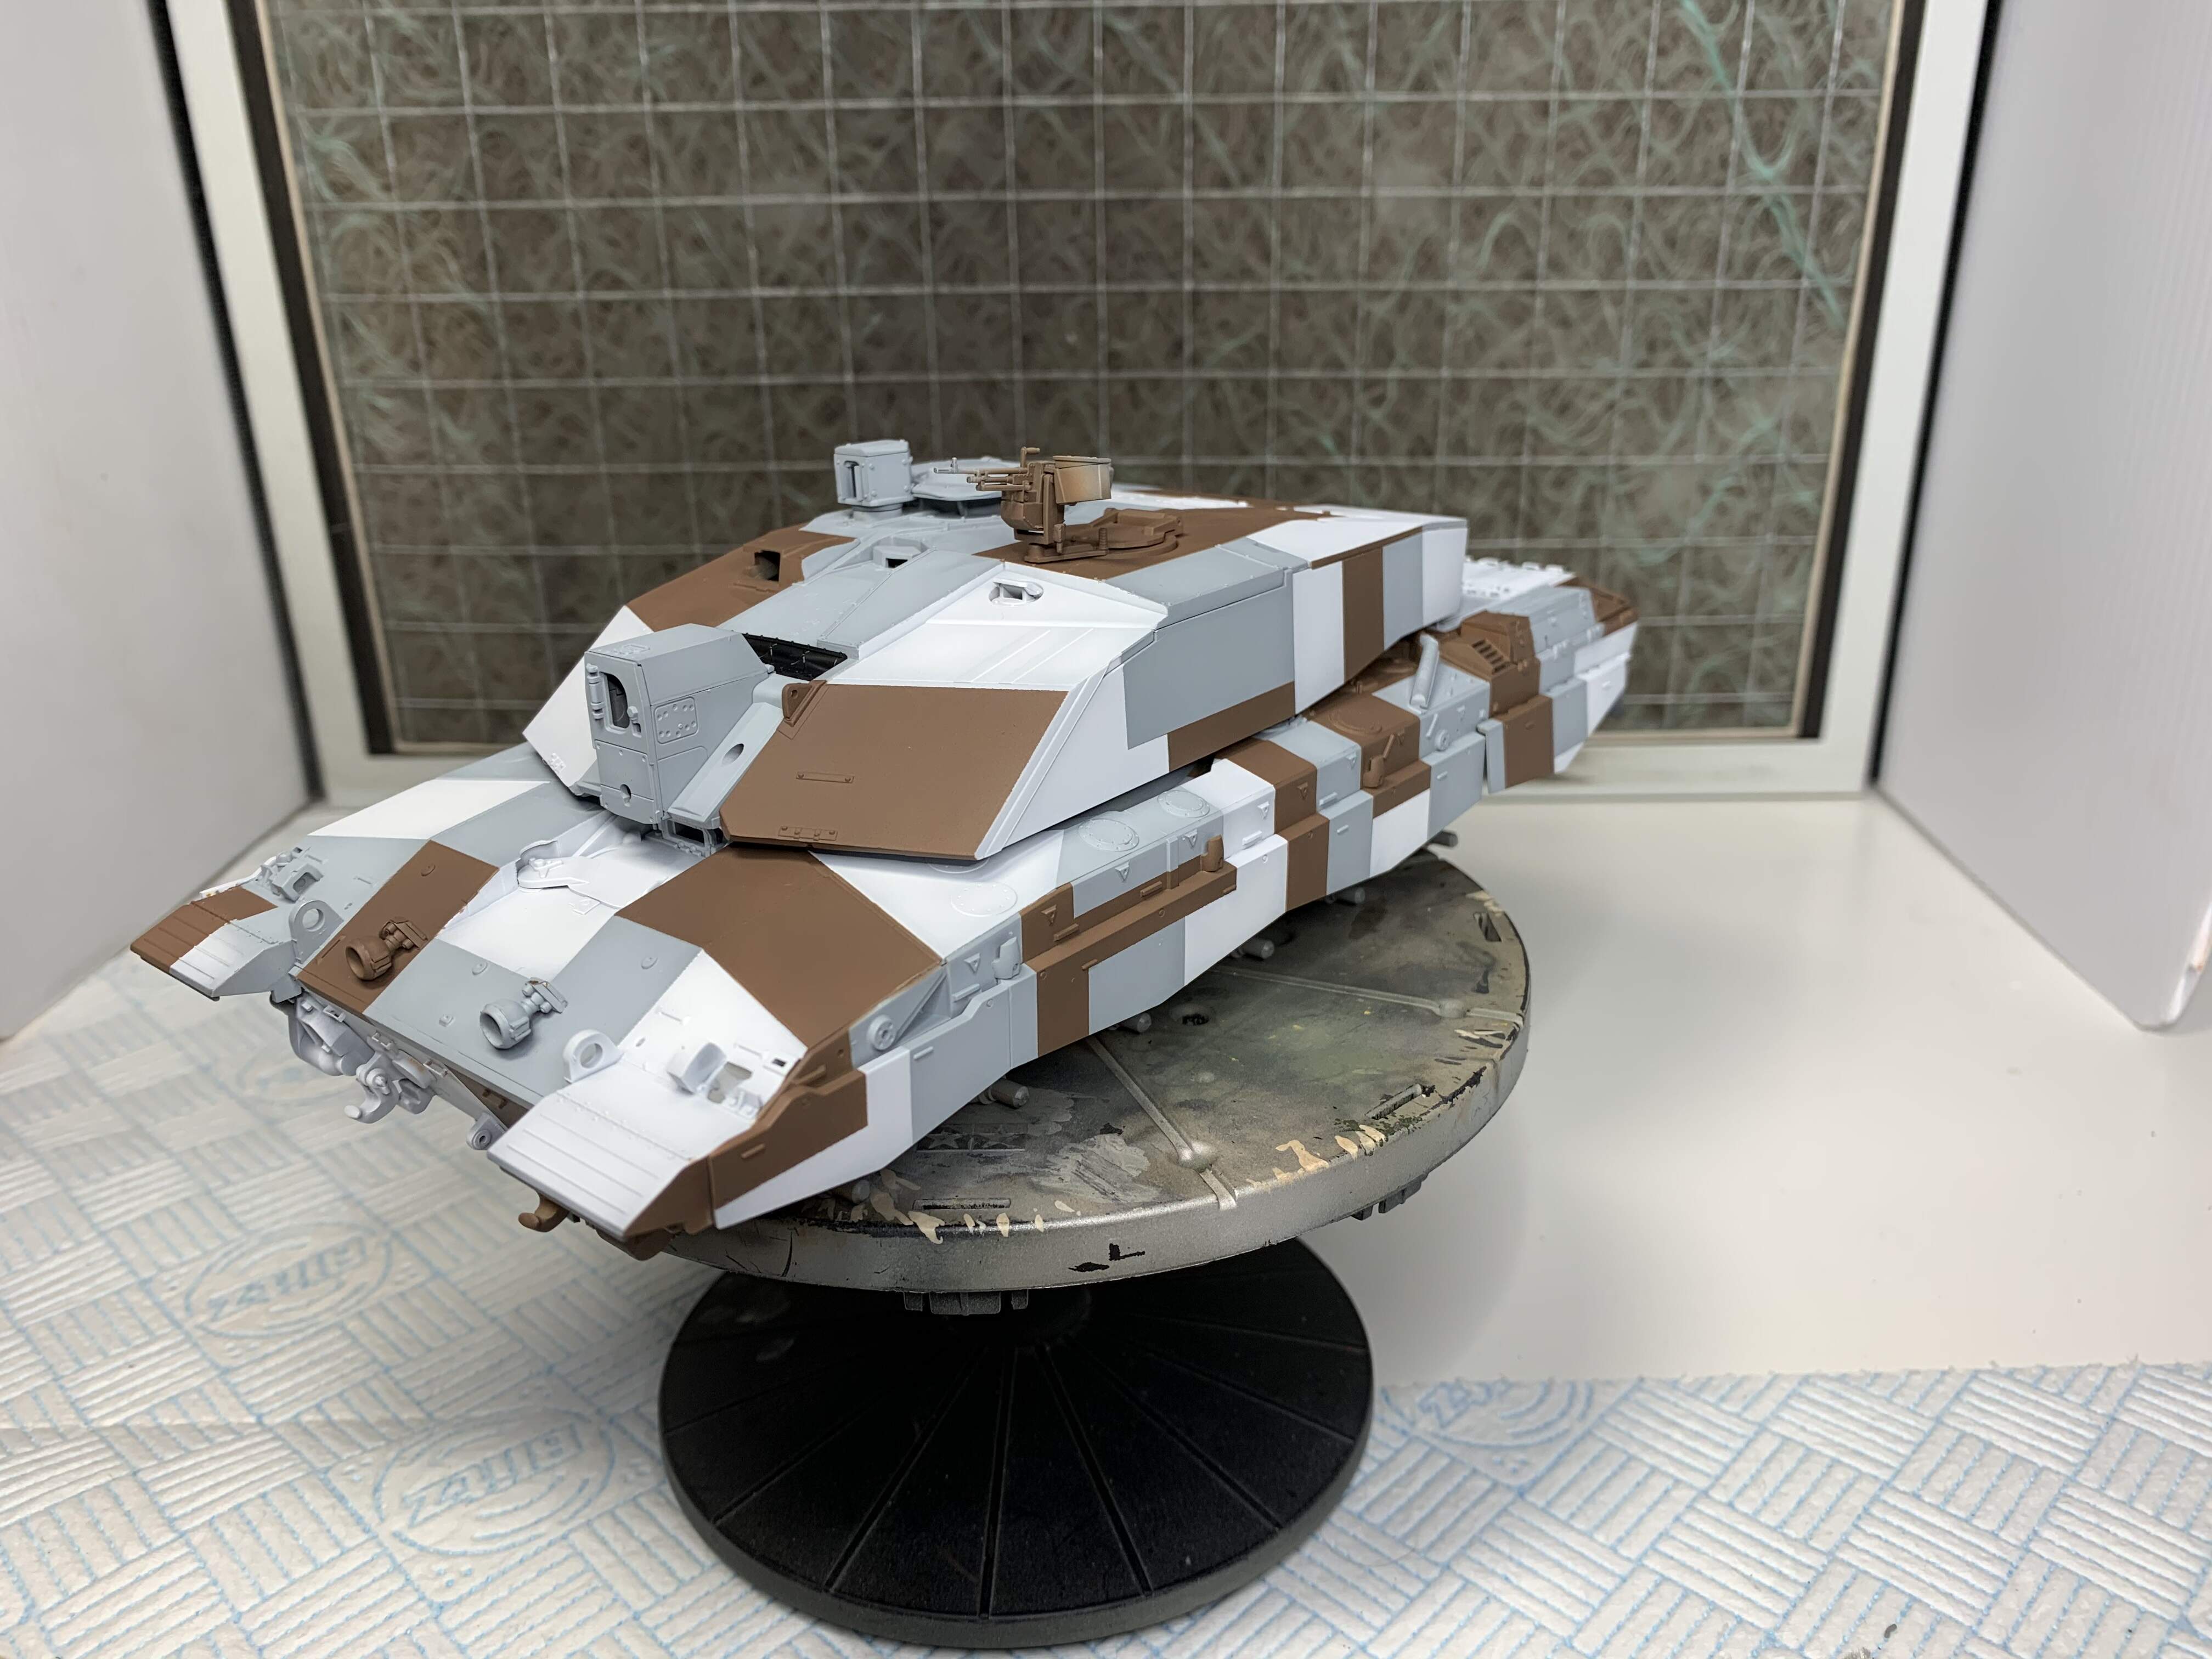
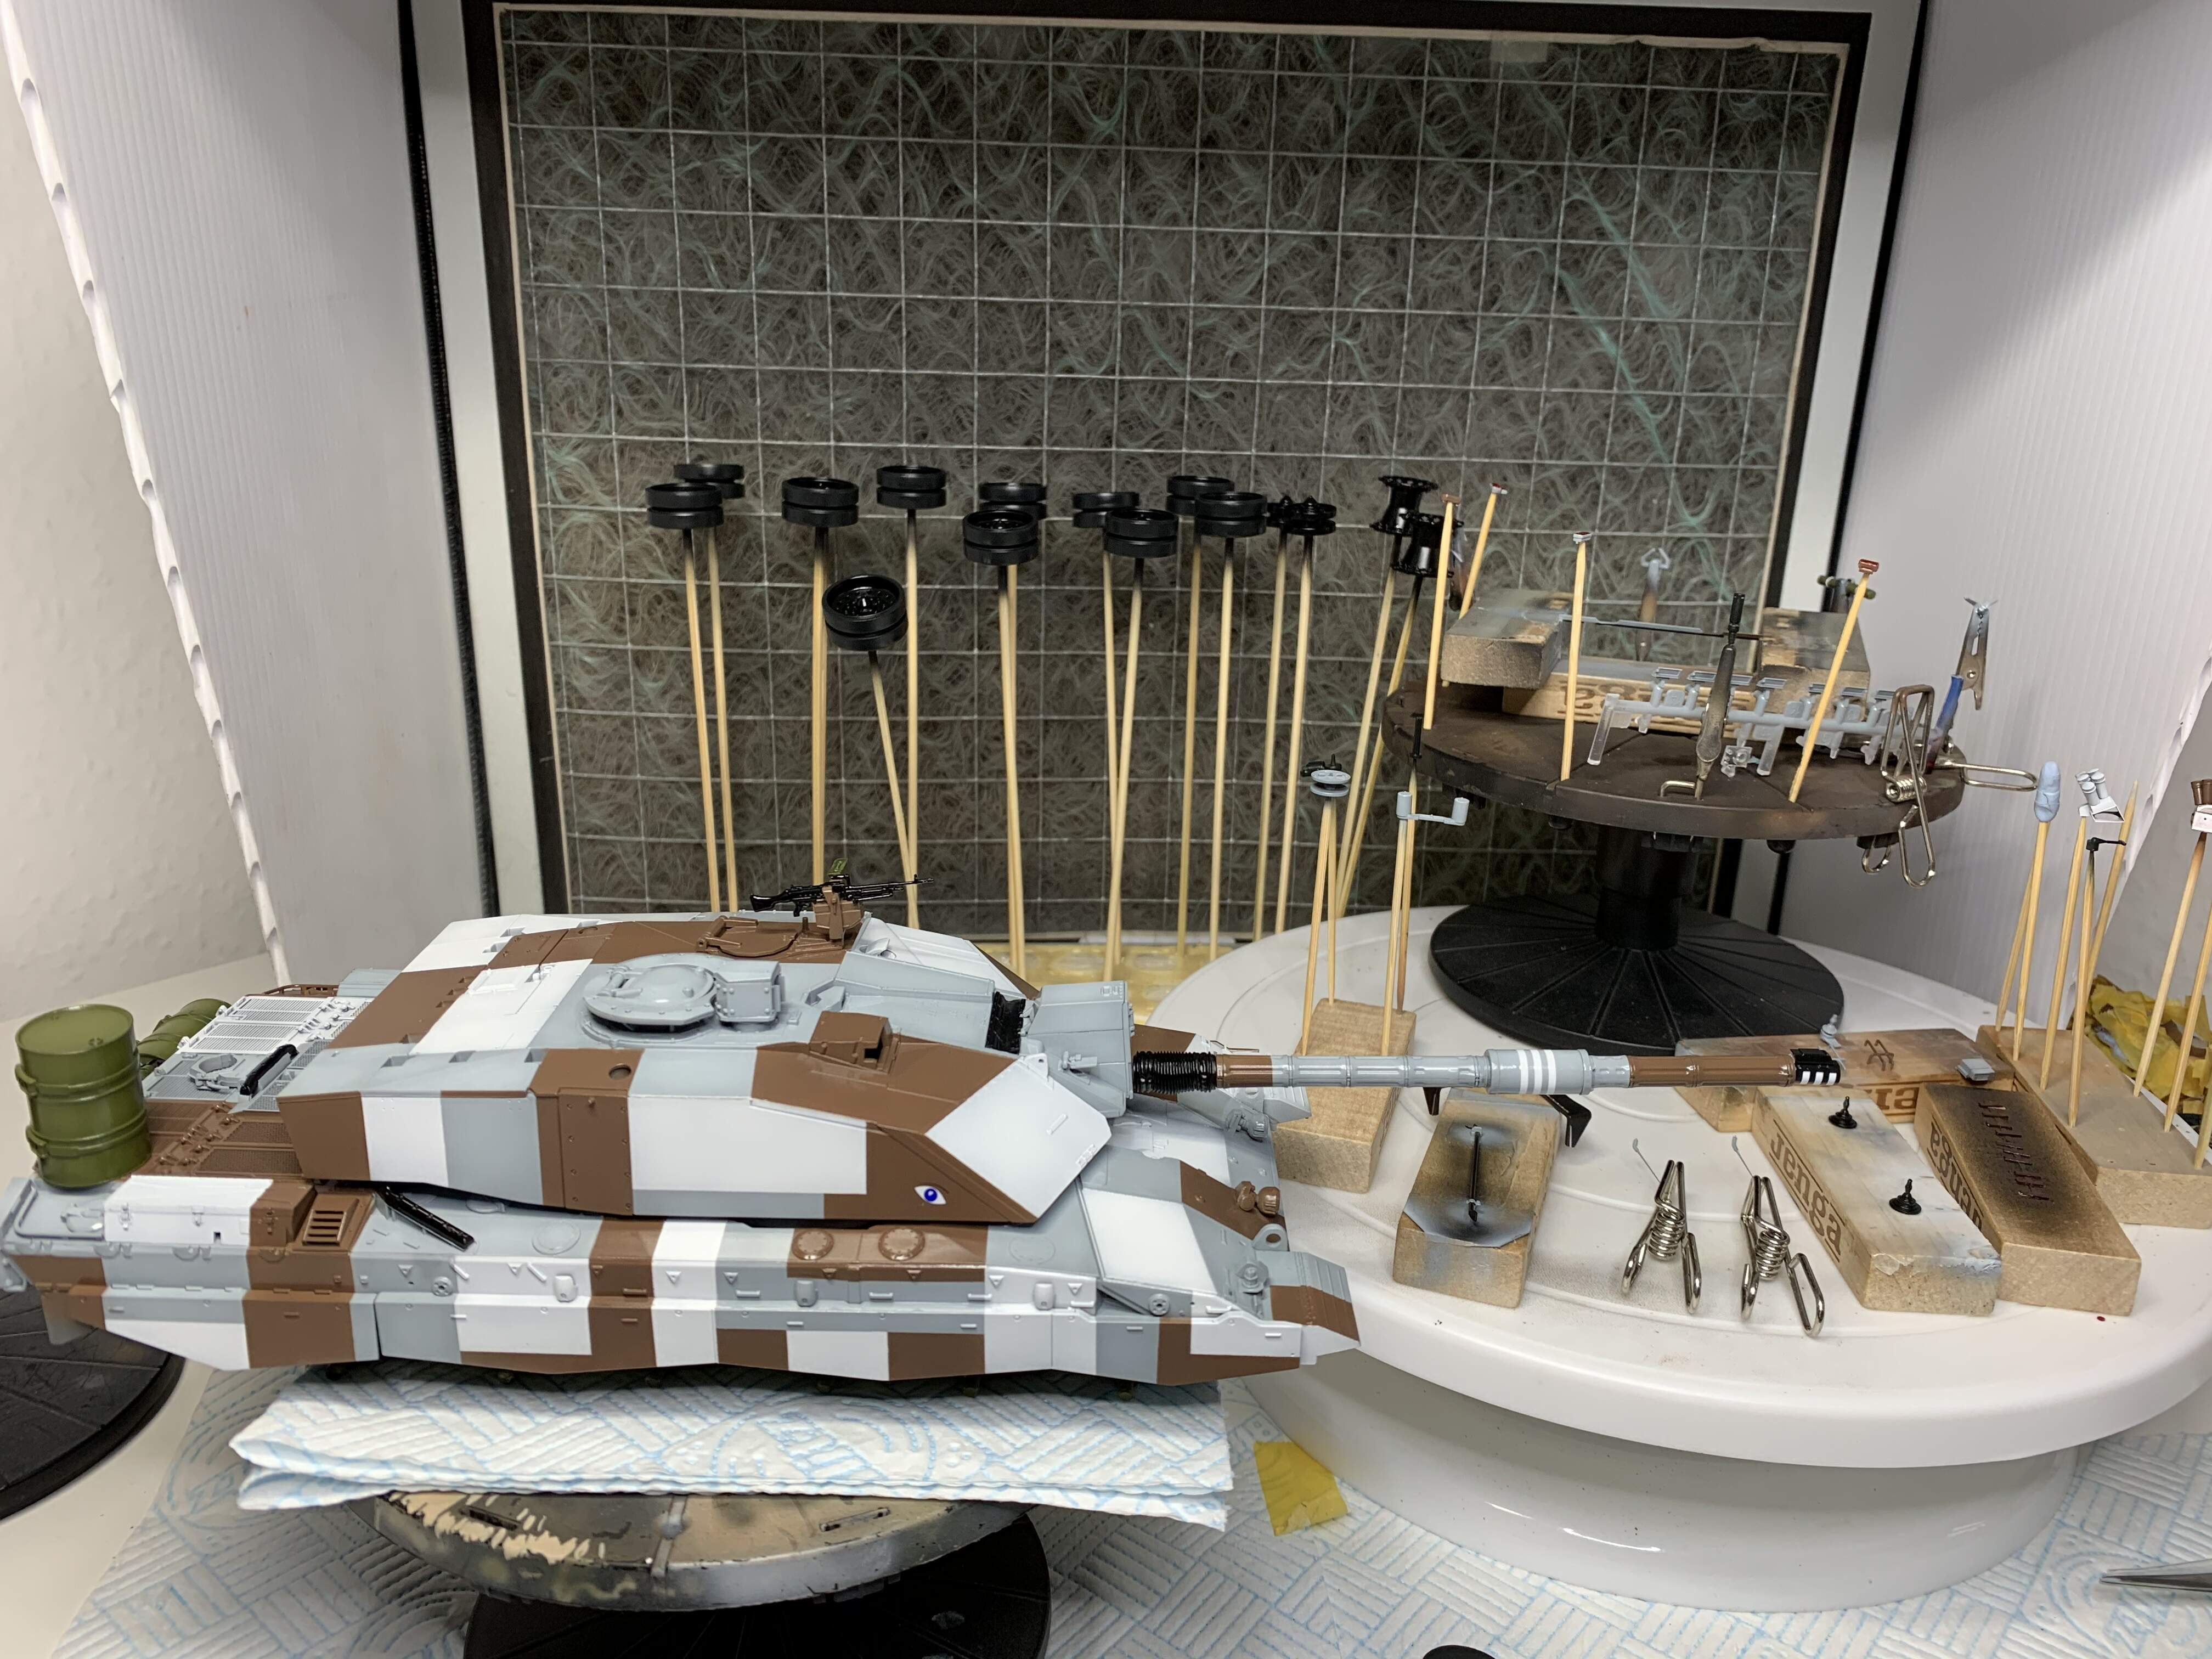
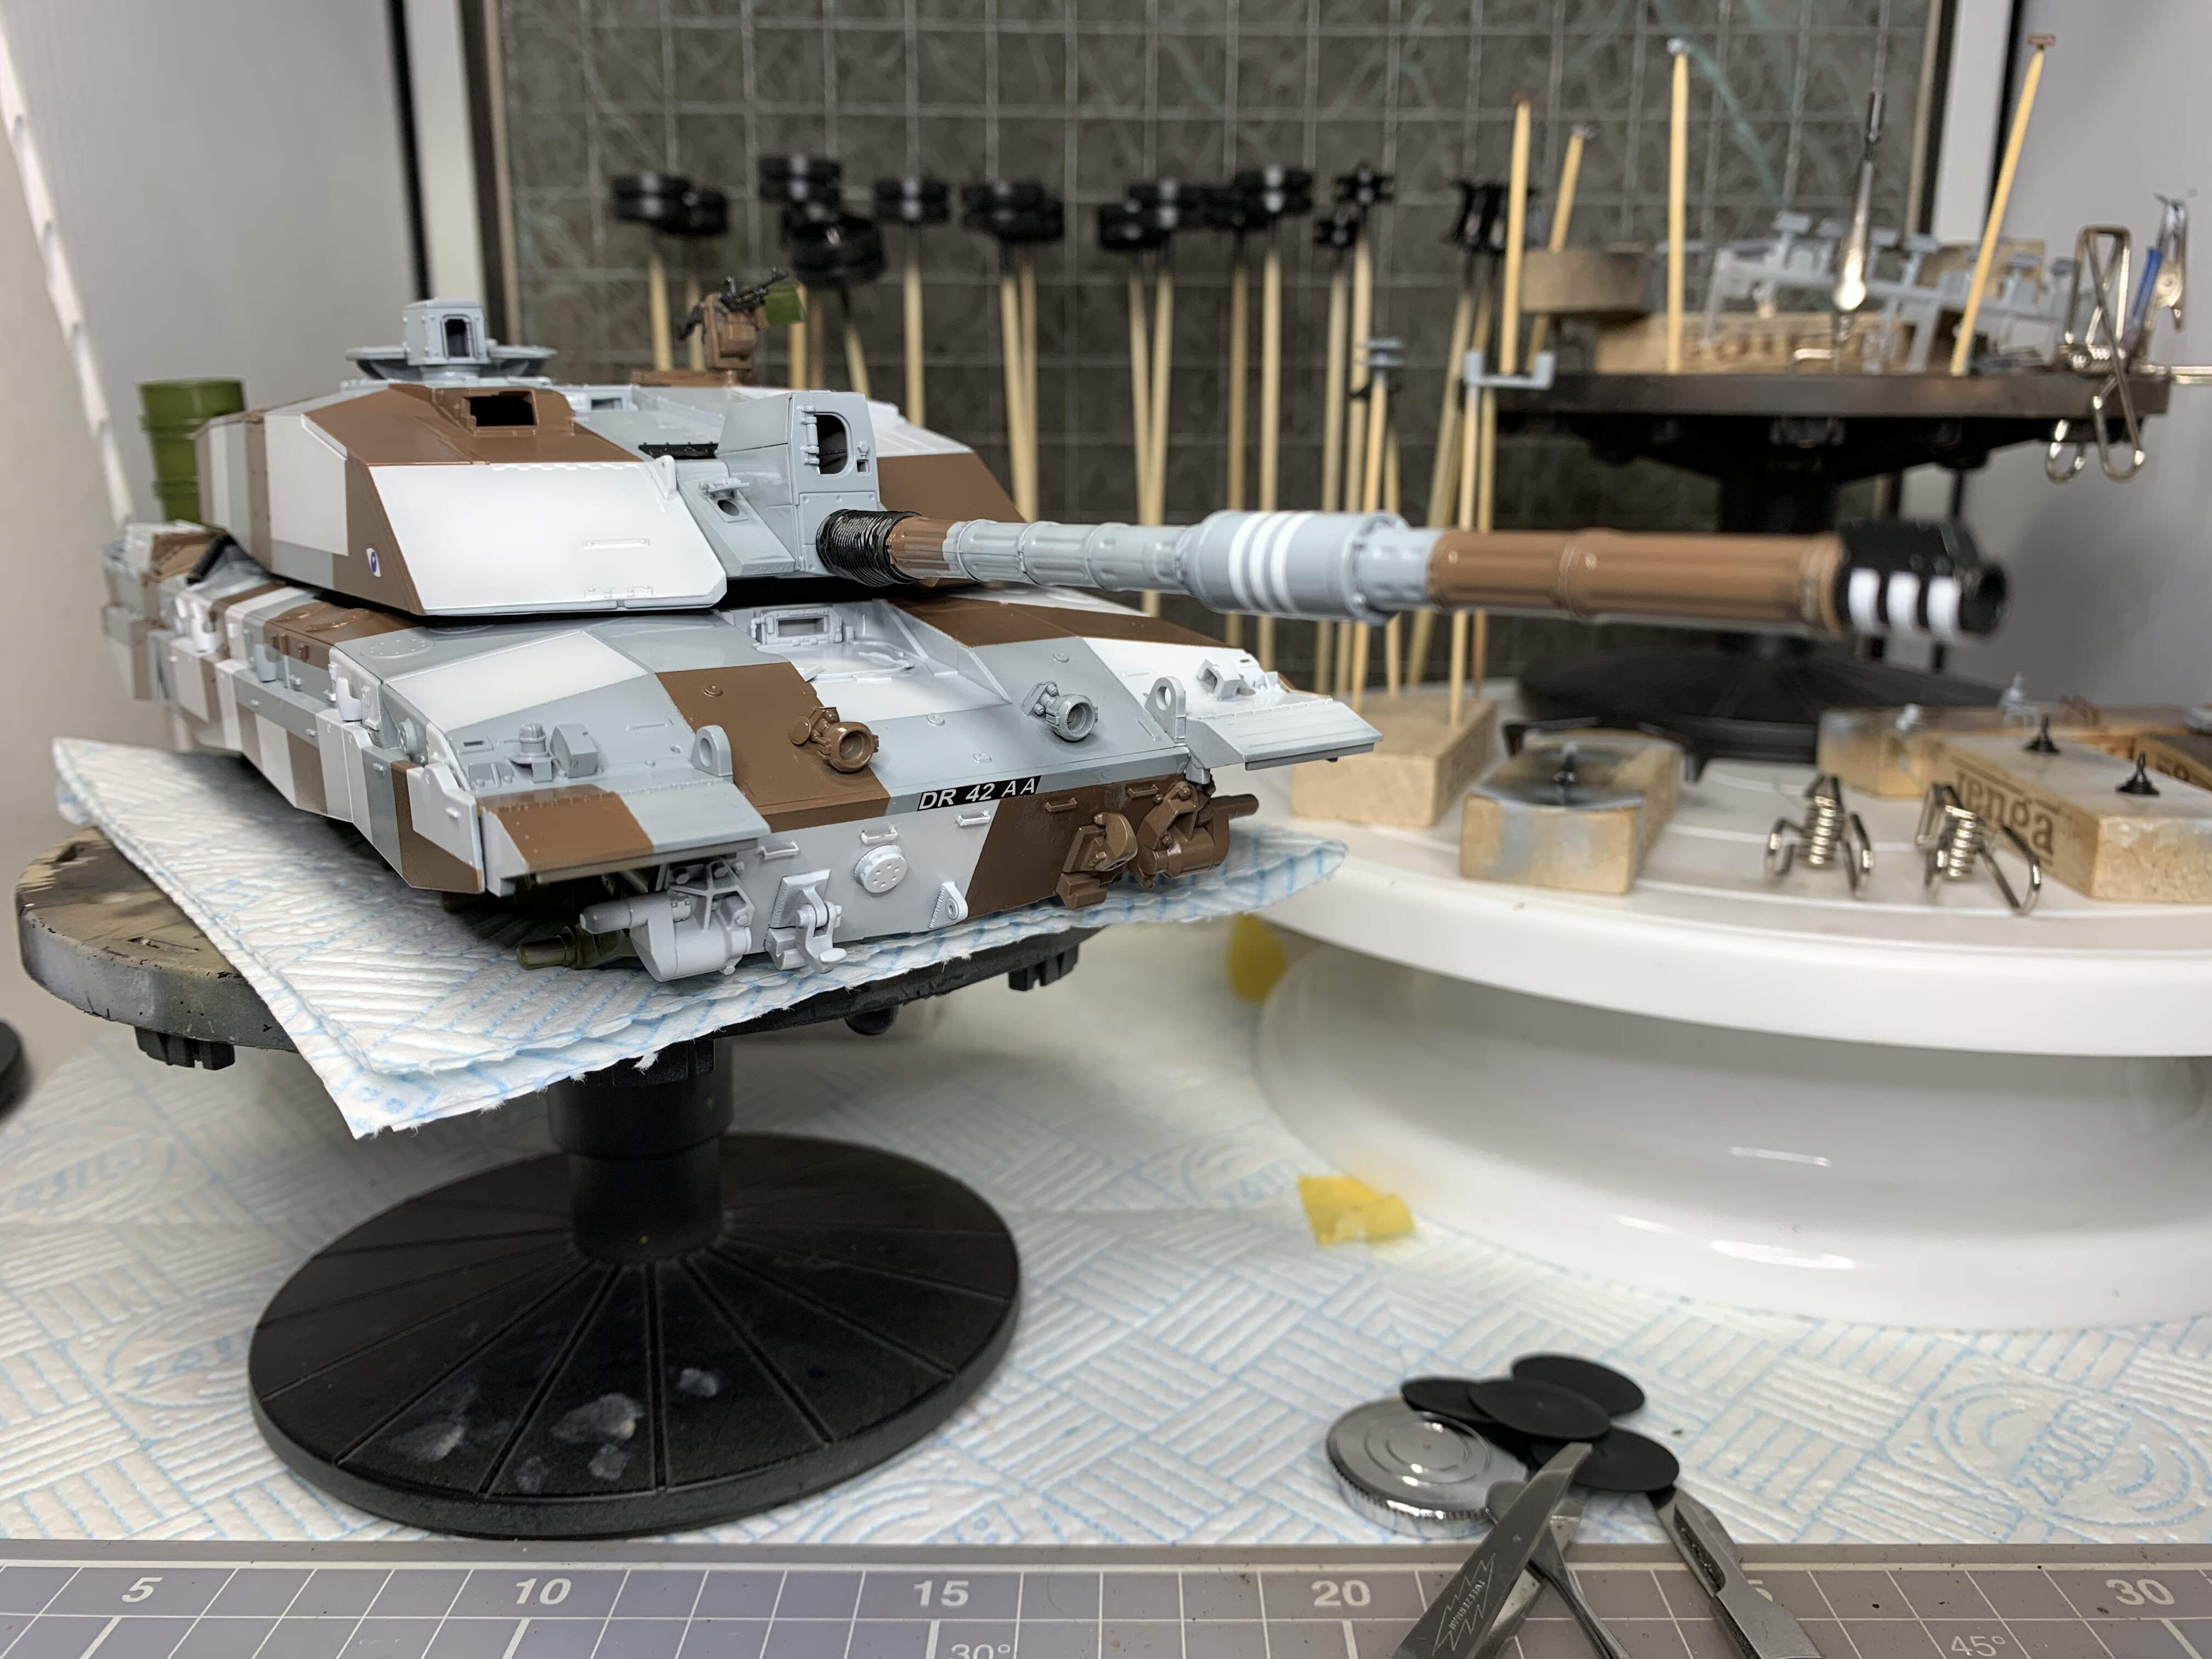
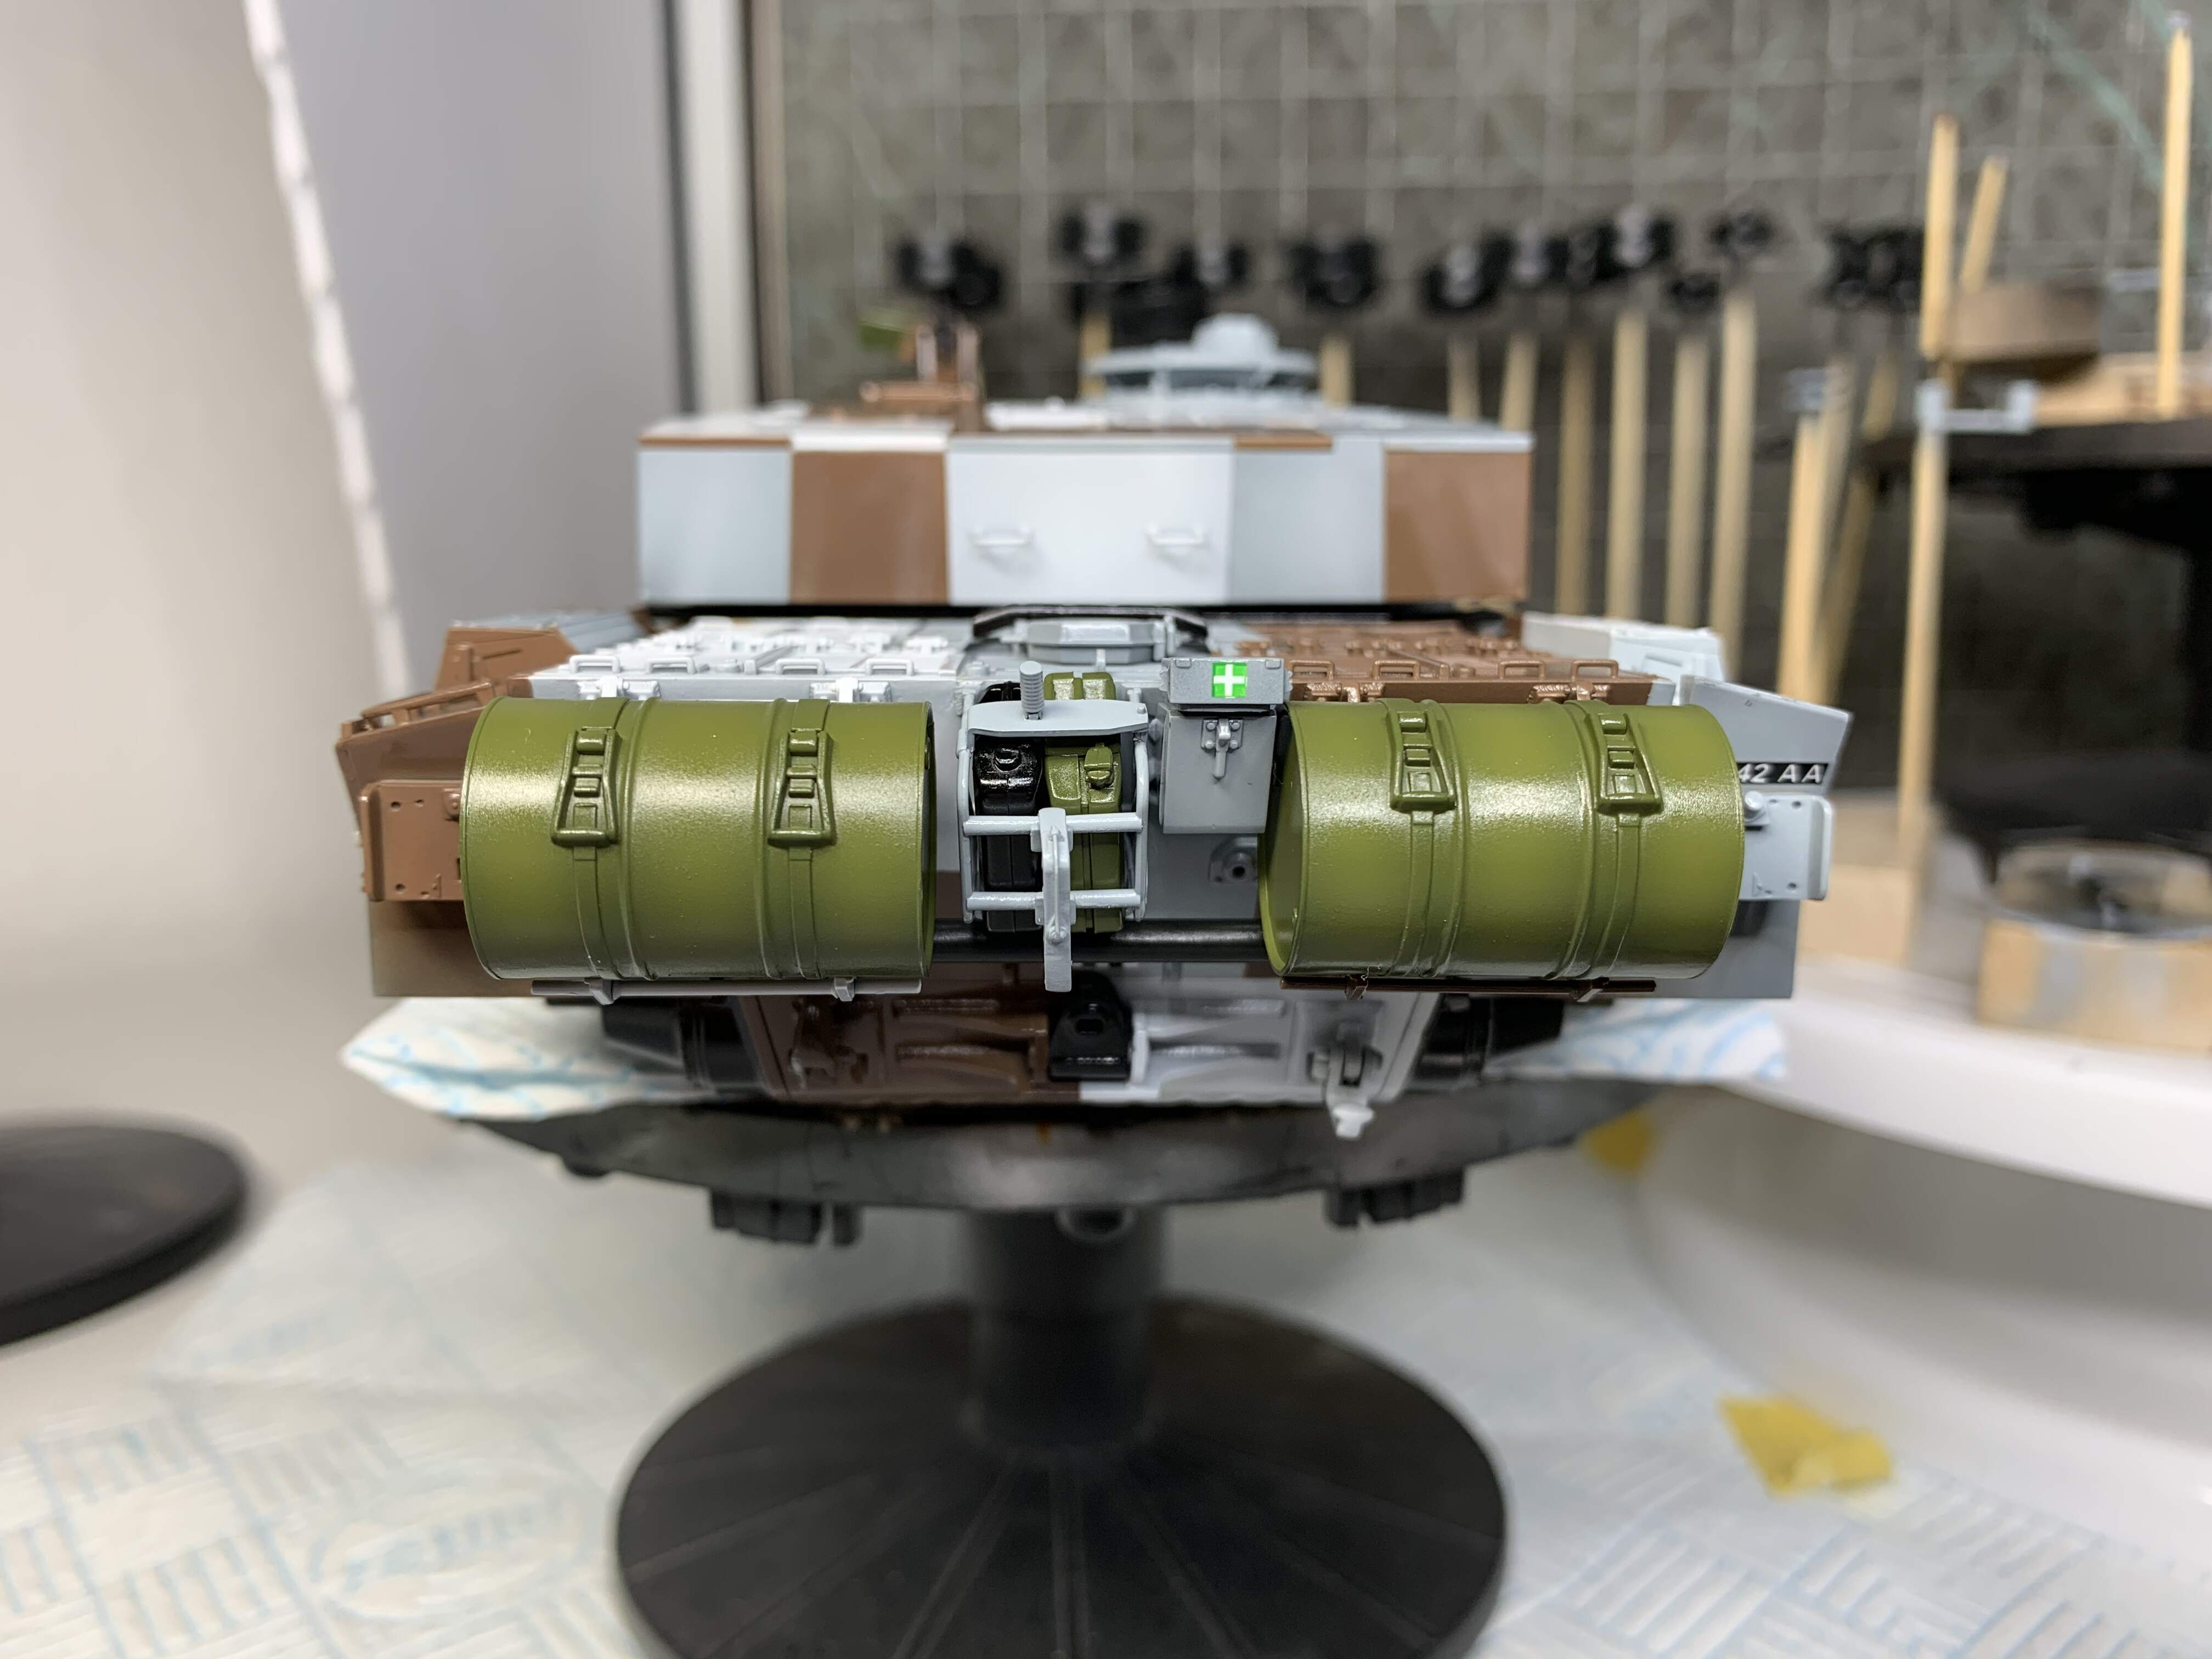
That’s the gloss on, and the decals, all eight of them, which I have covered in gloss too. Tamiya x22 thinned 1:1 with mr color levelling thinner(I love this stuff!) Some more detail painting done, mg, rubber strips on engine deck, etc. The wheels have been painted Tamiya xf1 black and the “tyres” xf85 rubber black. Had to trim the gun barrel decals as they were slightly too long.
I’ve dry fitted some parts for the pics, still to decide what to do with the fuel drums, although the friction fit is quite good so will probably have them removable. The pics are showing the green much brighter than it actually is.
Onto the weathering stages now!
Cheers, Jim.
5 Likes
Progressing very nicely. Following has almost convinced me to try the Berlin camo.
2 Likes