I wonder if it was the word I used to describe a uniform finish freaking out the software?
@iwatajim @Tank_1812
That watchword list needs some tweaking …
I could guess that the nudity filter was triggered by ‘n-a-k-e-d eye’, you should have written
‘eye without clothes’ instead.
The filter for indecent behaviour could have reacted to ‘s-t-r-e-a-k-i-n-g’, should have been written ‘running around in public without clothes’
Just be happy that you didn’t mention any of the military logistics centres usually labelled ‘a-r-s-e-n-a-l’ (or the English football team).
H-o-m-o-genous might possibly have triggered a filter for s-e-x-u-a-l orientation
Picatinny Military Logistics Centre (a-r-s-e-n-a-l)
6 Likes
Ha, Thanks Robin, I’ll try not to use such “distressing” terms in the future!
Cheers, J.
1 Like
It does get extremely silly after a while …
I wonder if that filter has any type of learning function?
- System complains about word
- Mods reject the complaint
- System strikes the word from the list
The list should not contain words that have a legitimate use (a-r-s-e is not allowed but should be allowed when used in a-r-s-enal and enal is not a misspelling of a-n-a-l which itself is legitimate in a medical science context even if they can circumvent it by writing rectum and rectal instead)
Oh well, rejecting these automated flags gives me something to do …
4 Likes
A busy mod is a happy mod. ![]()
4 Likes
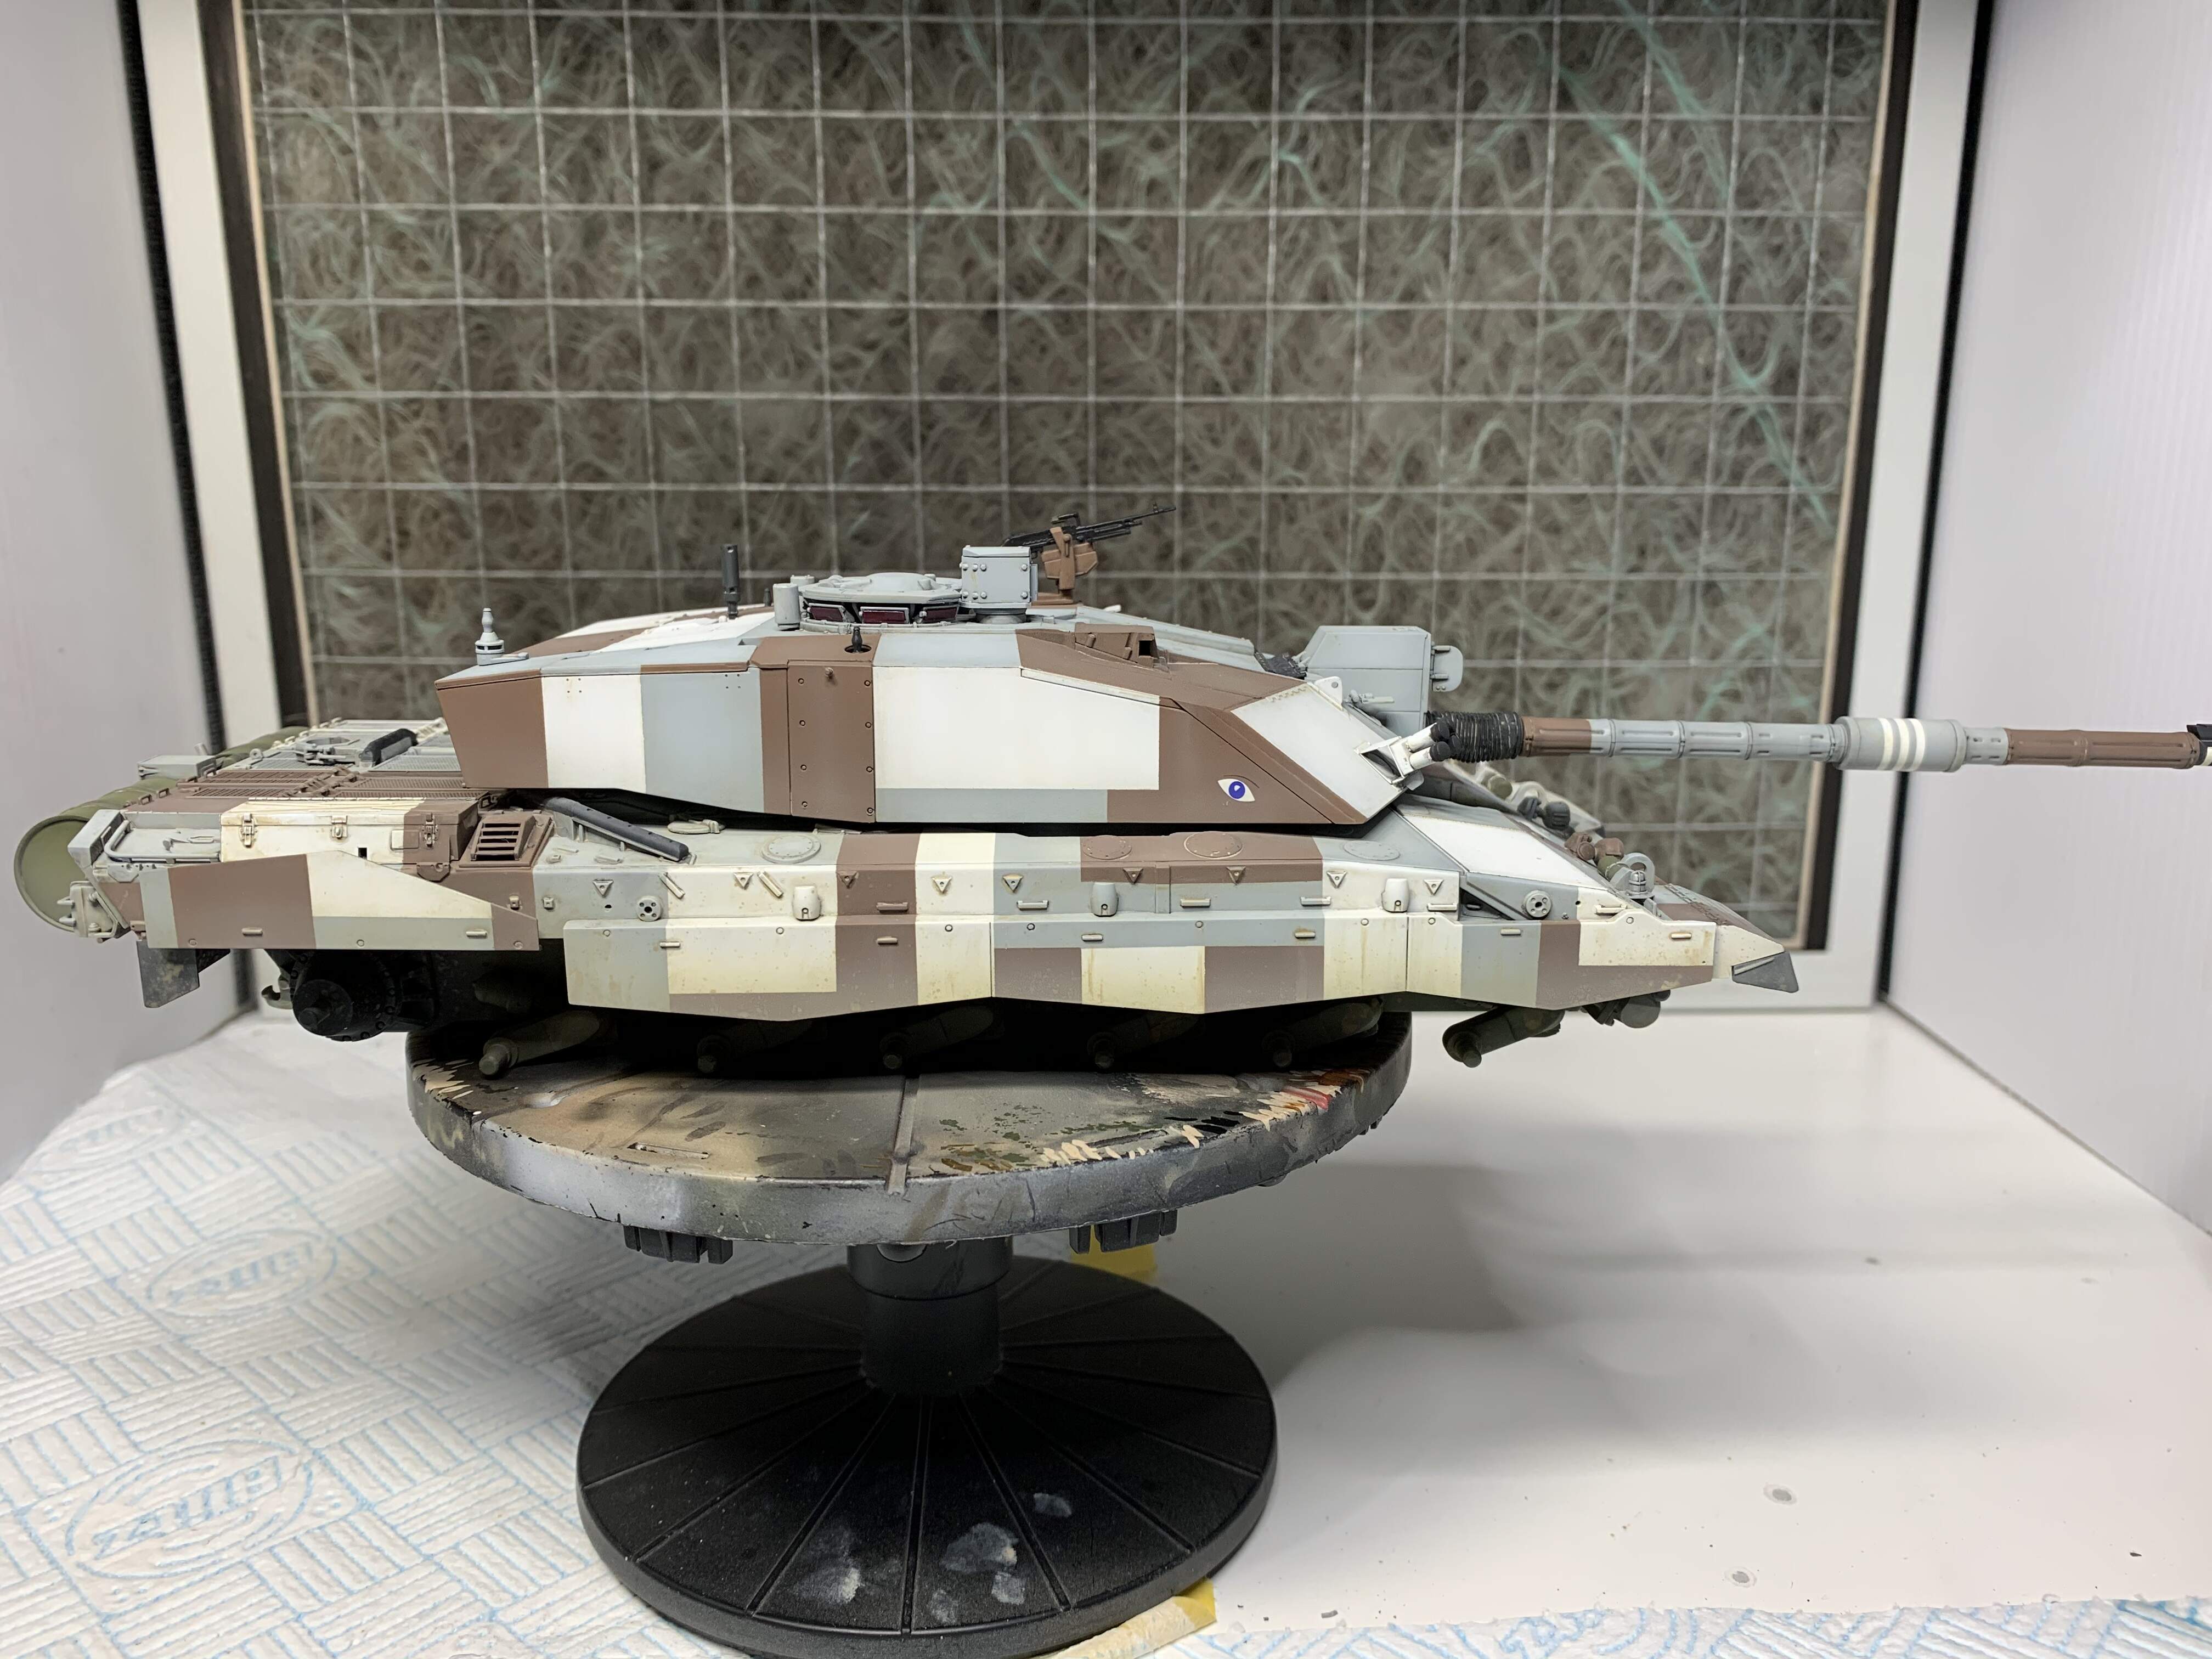
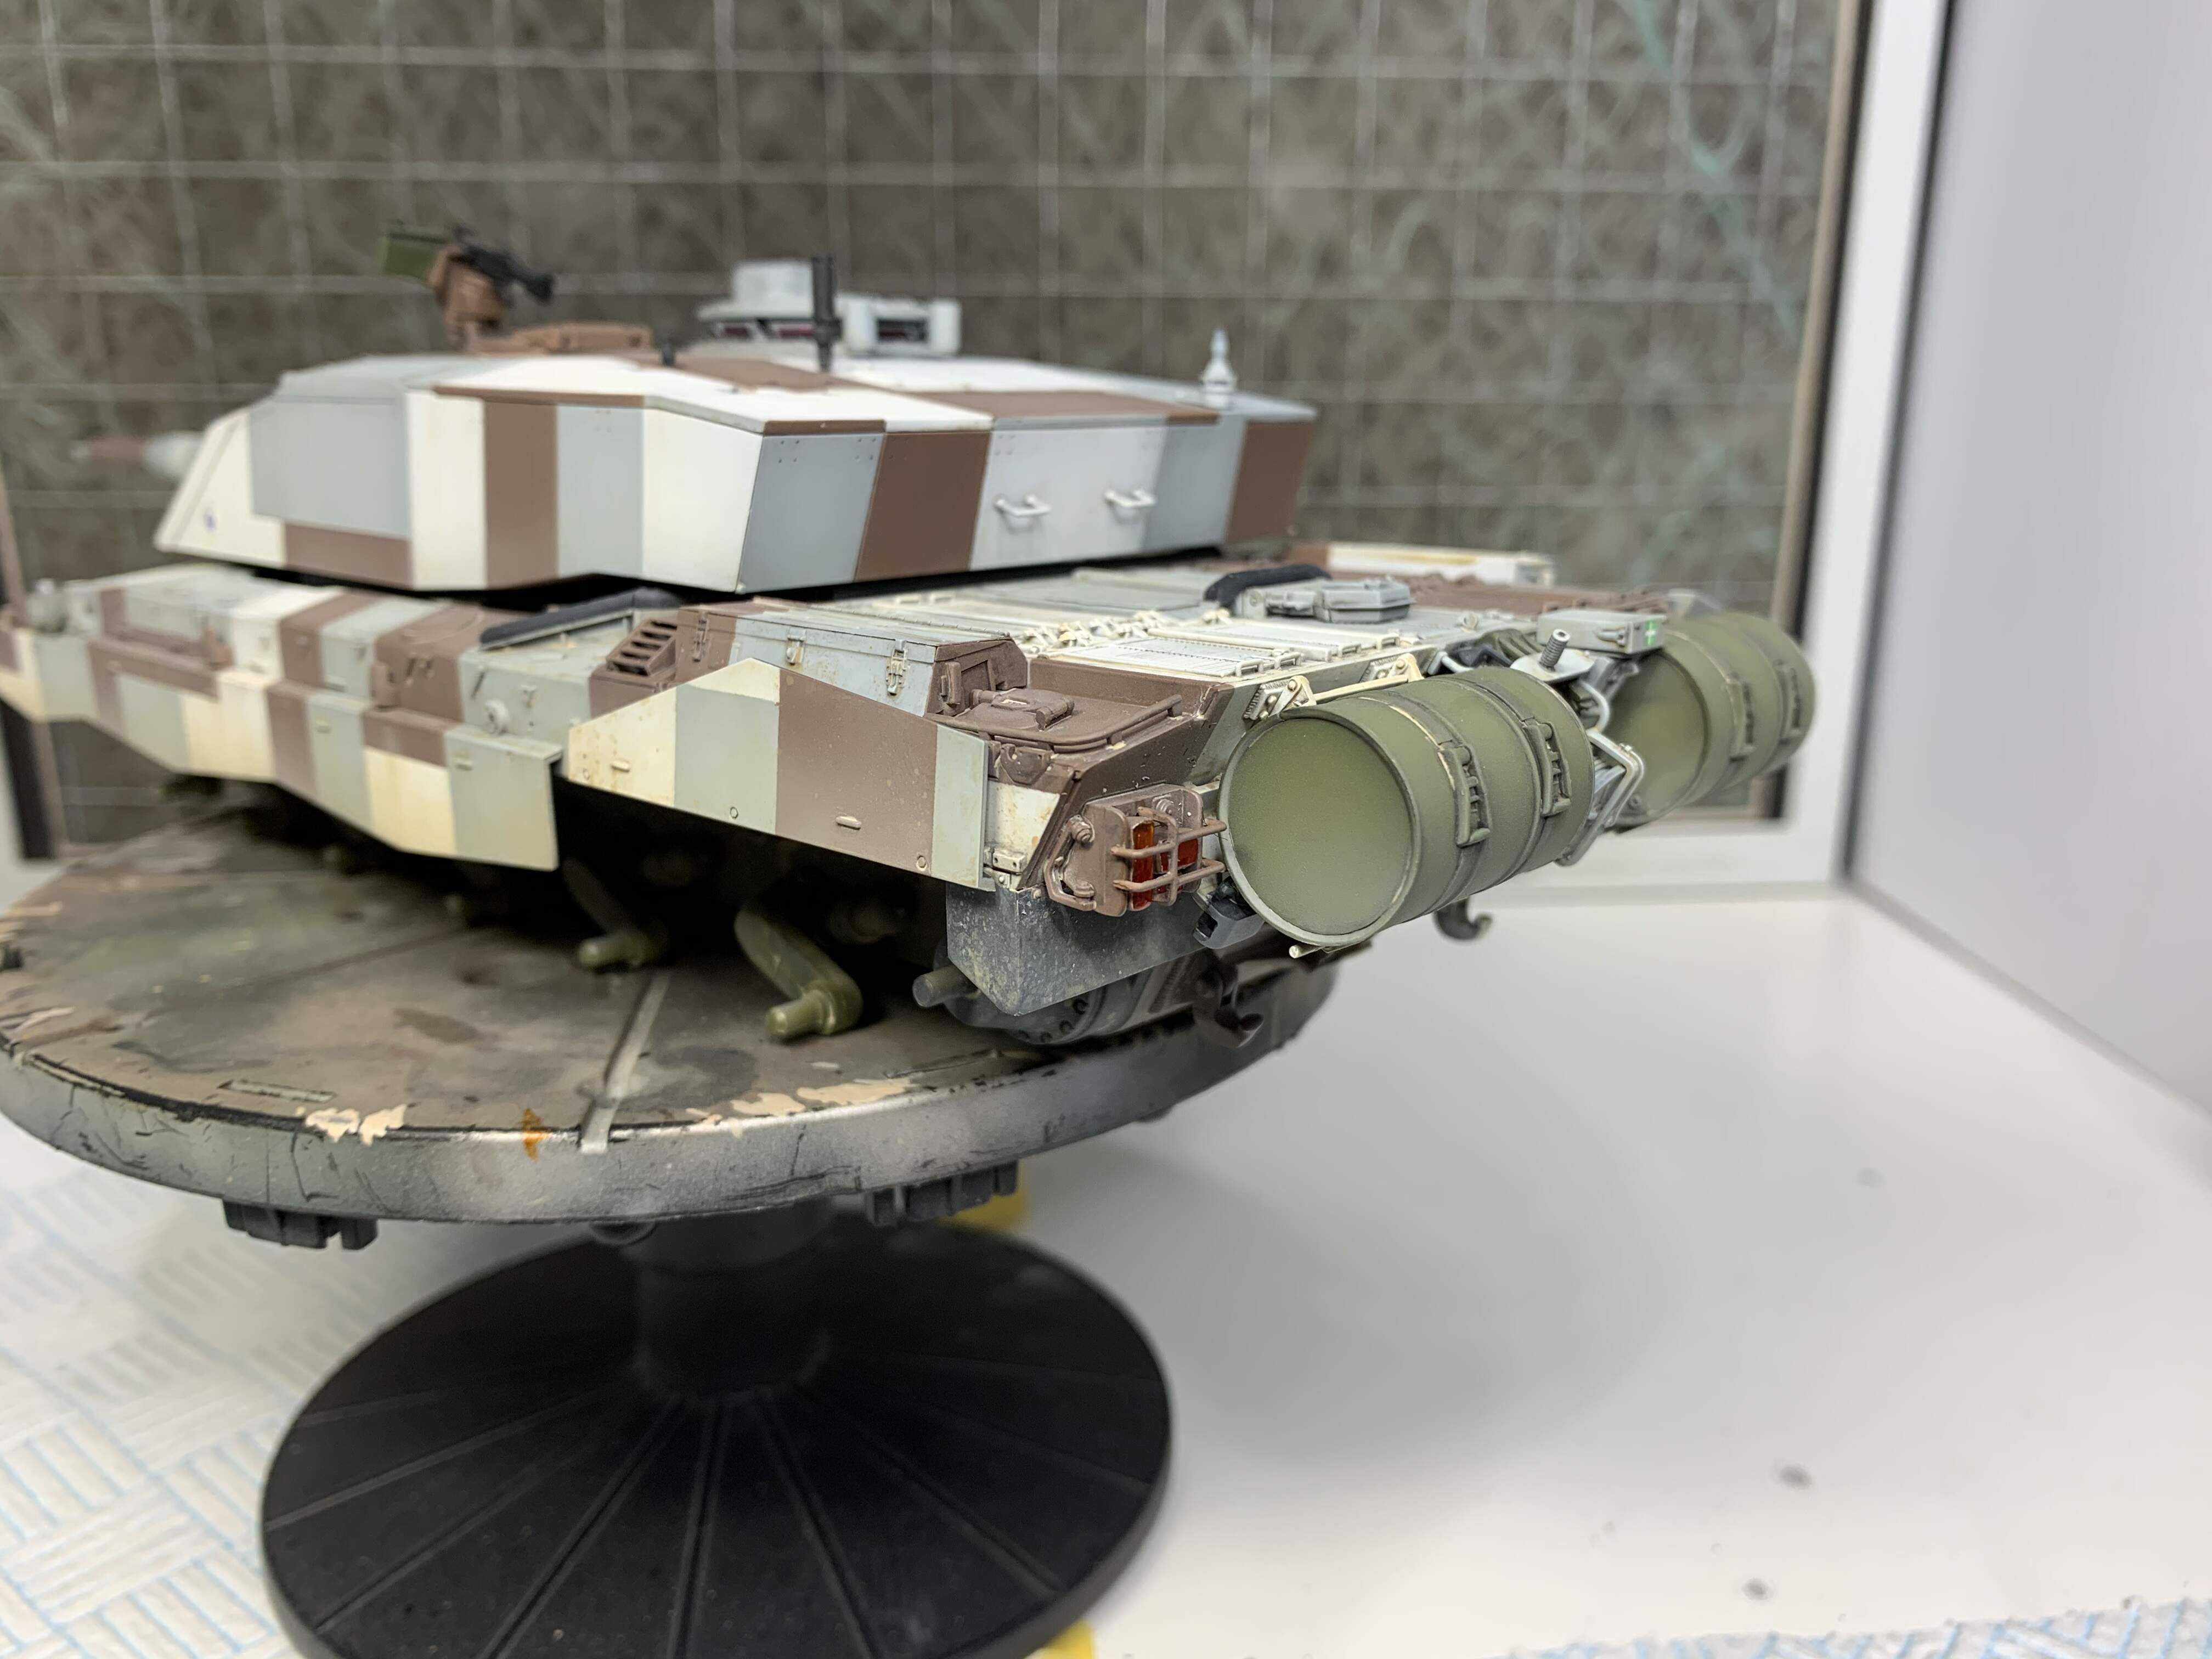
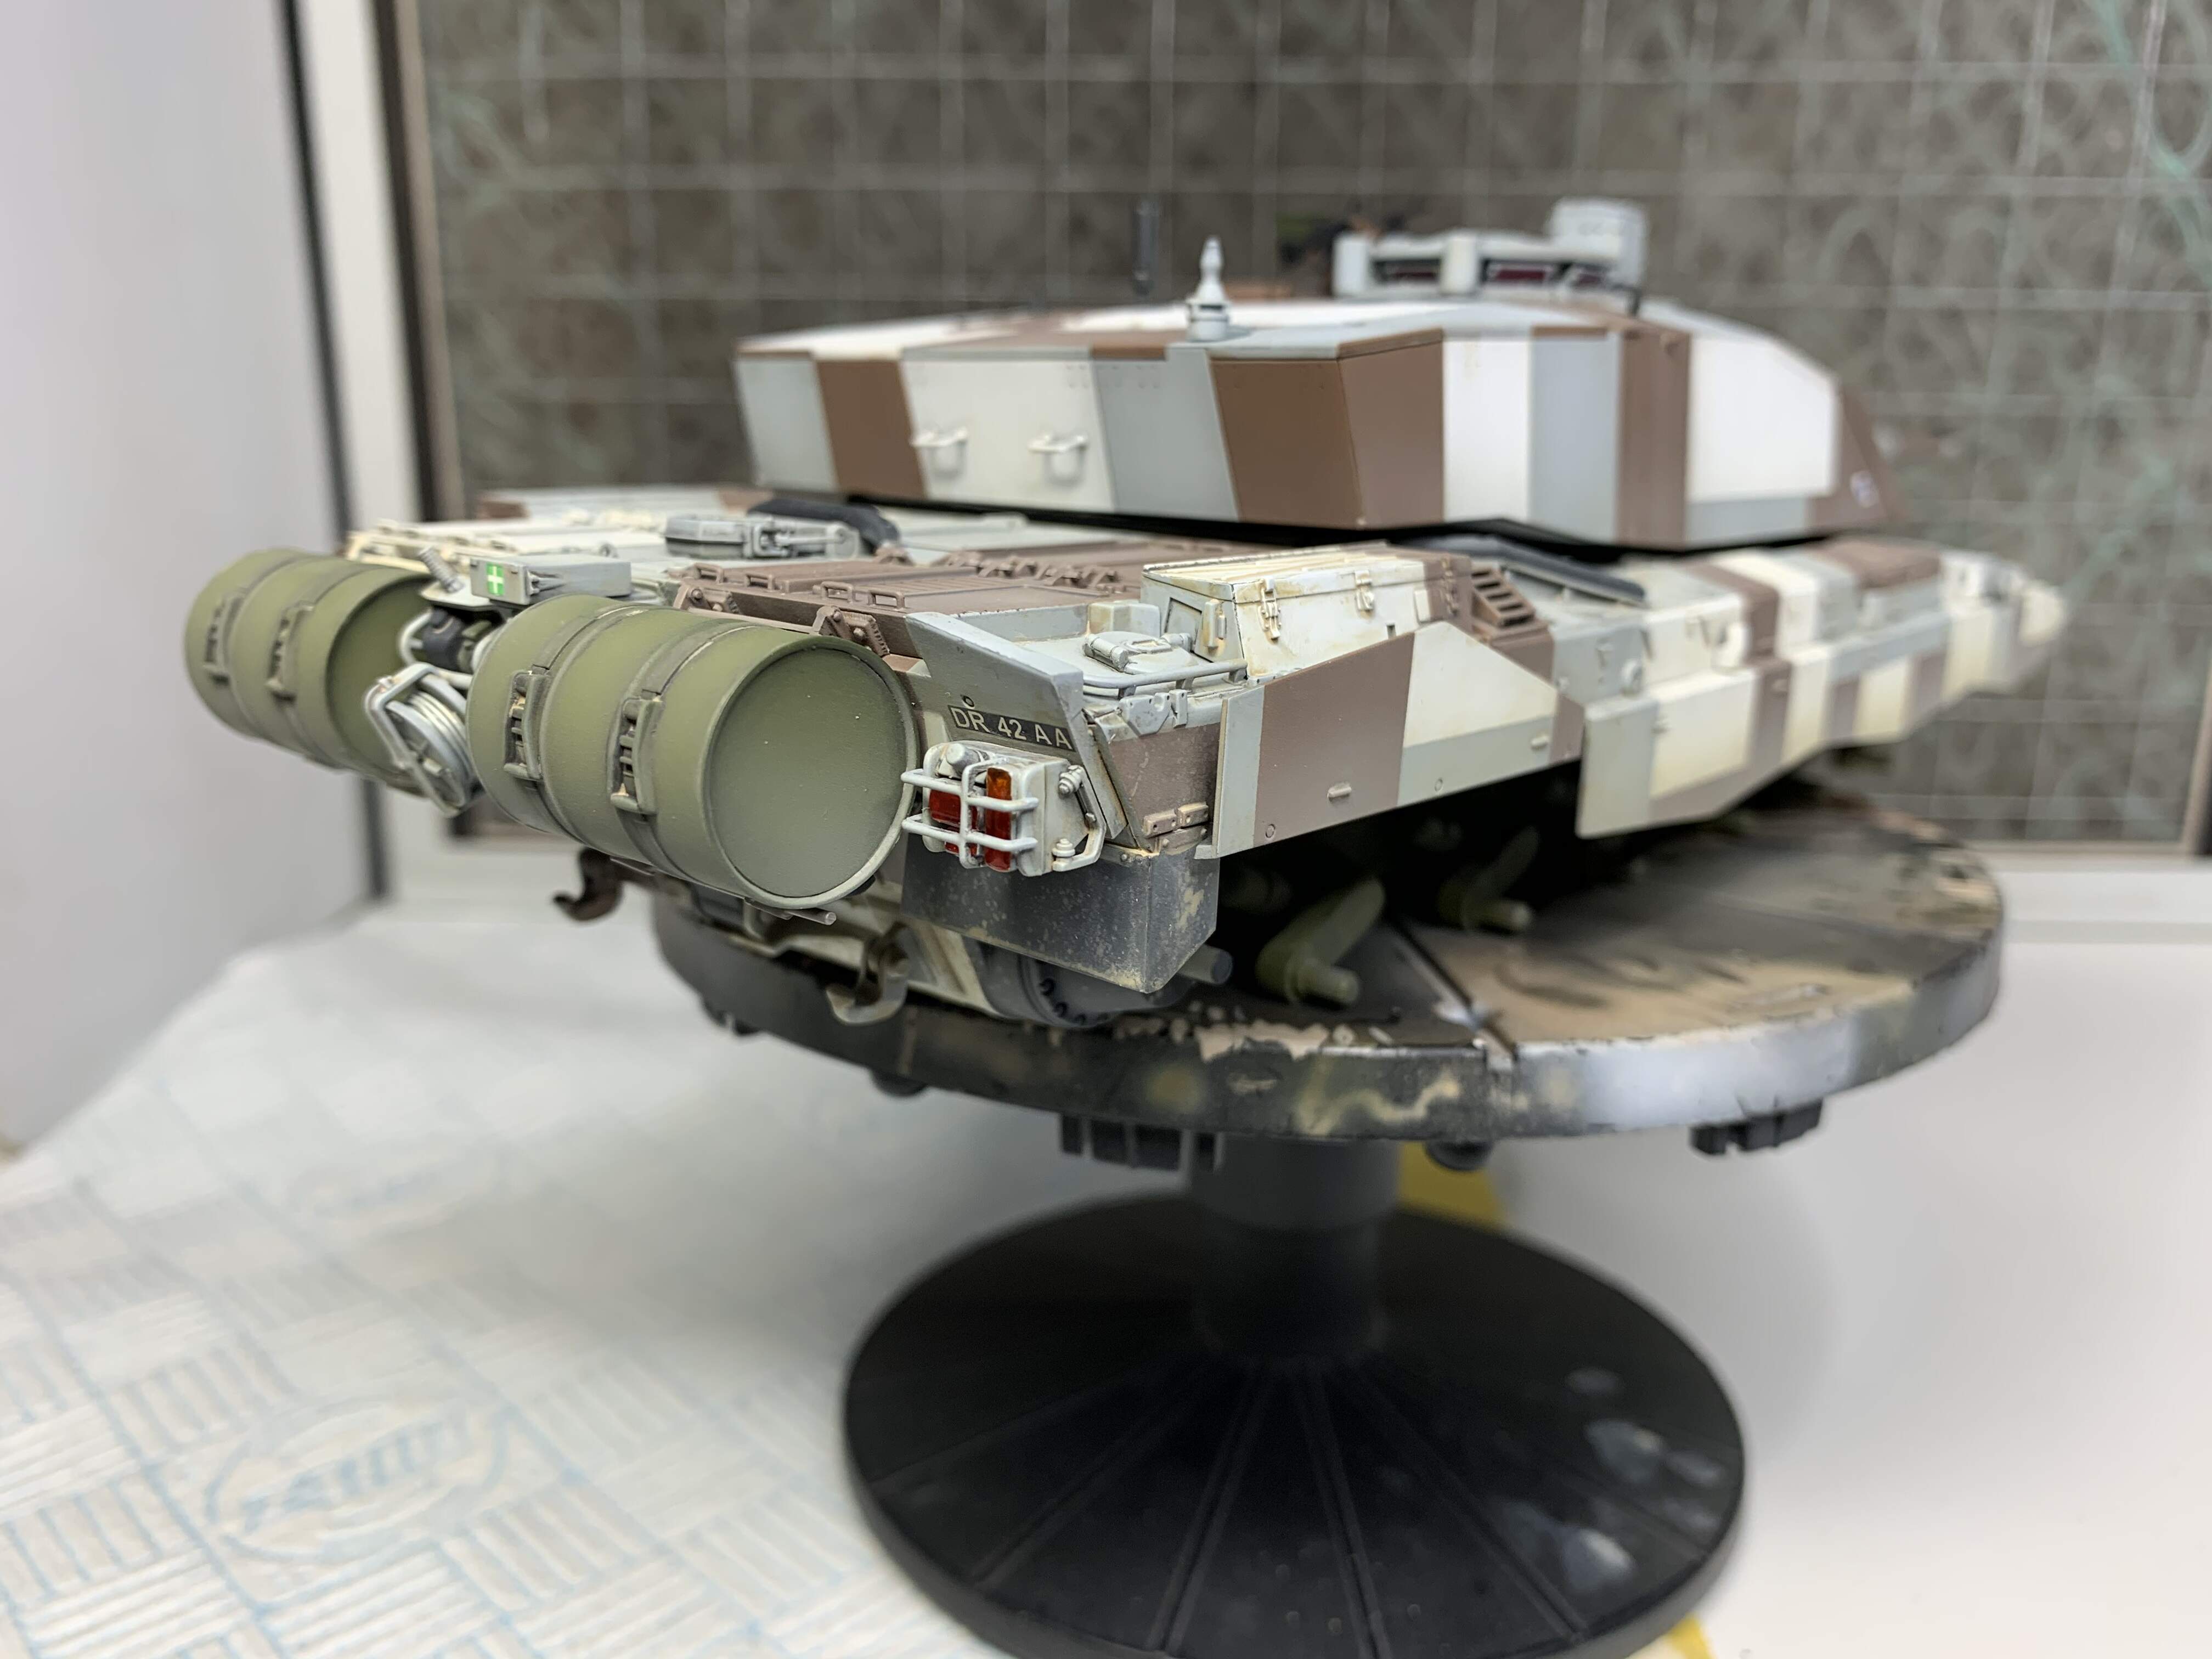
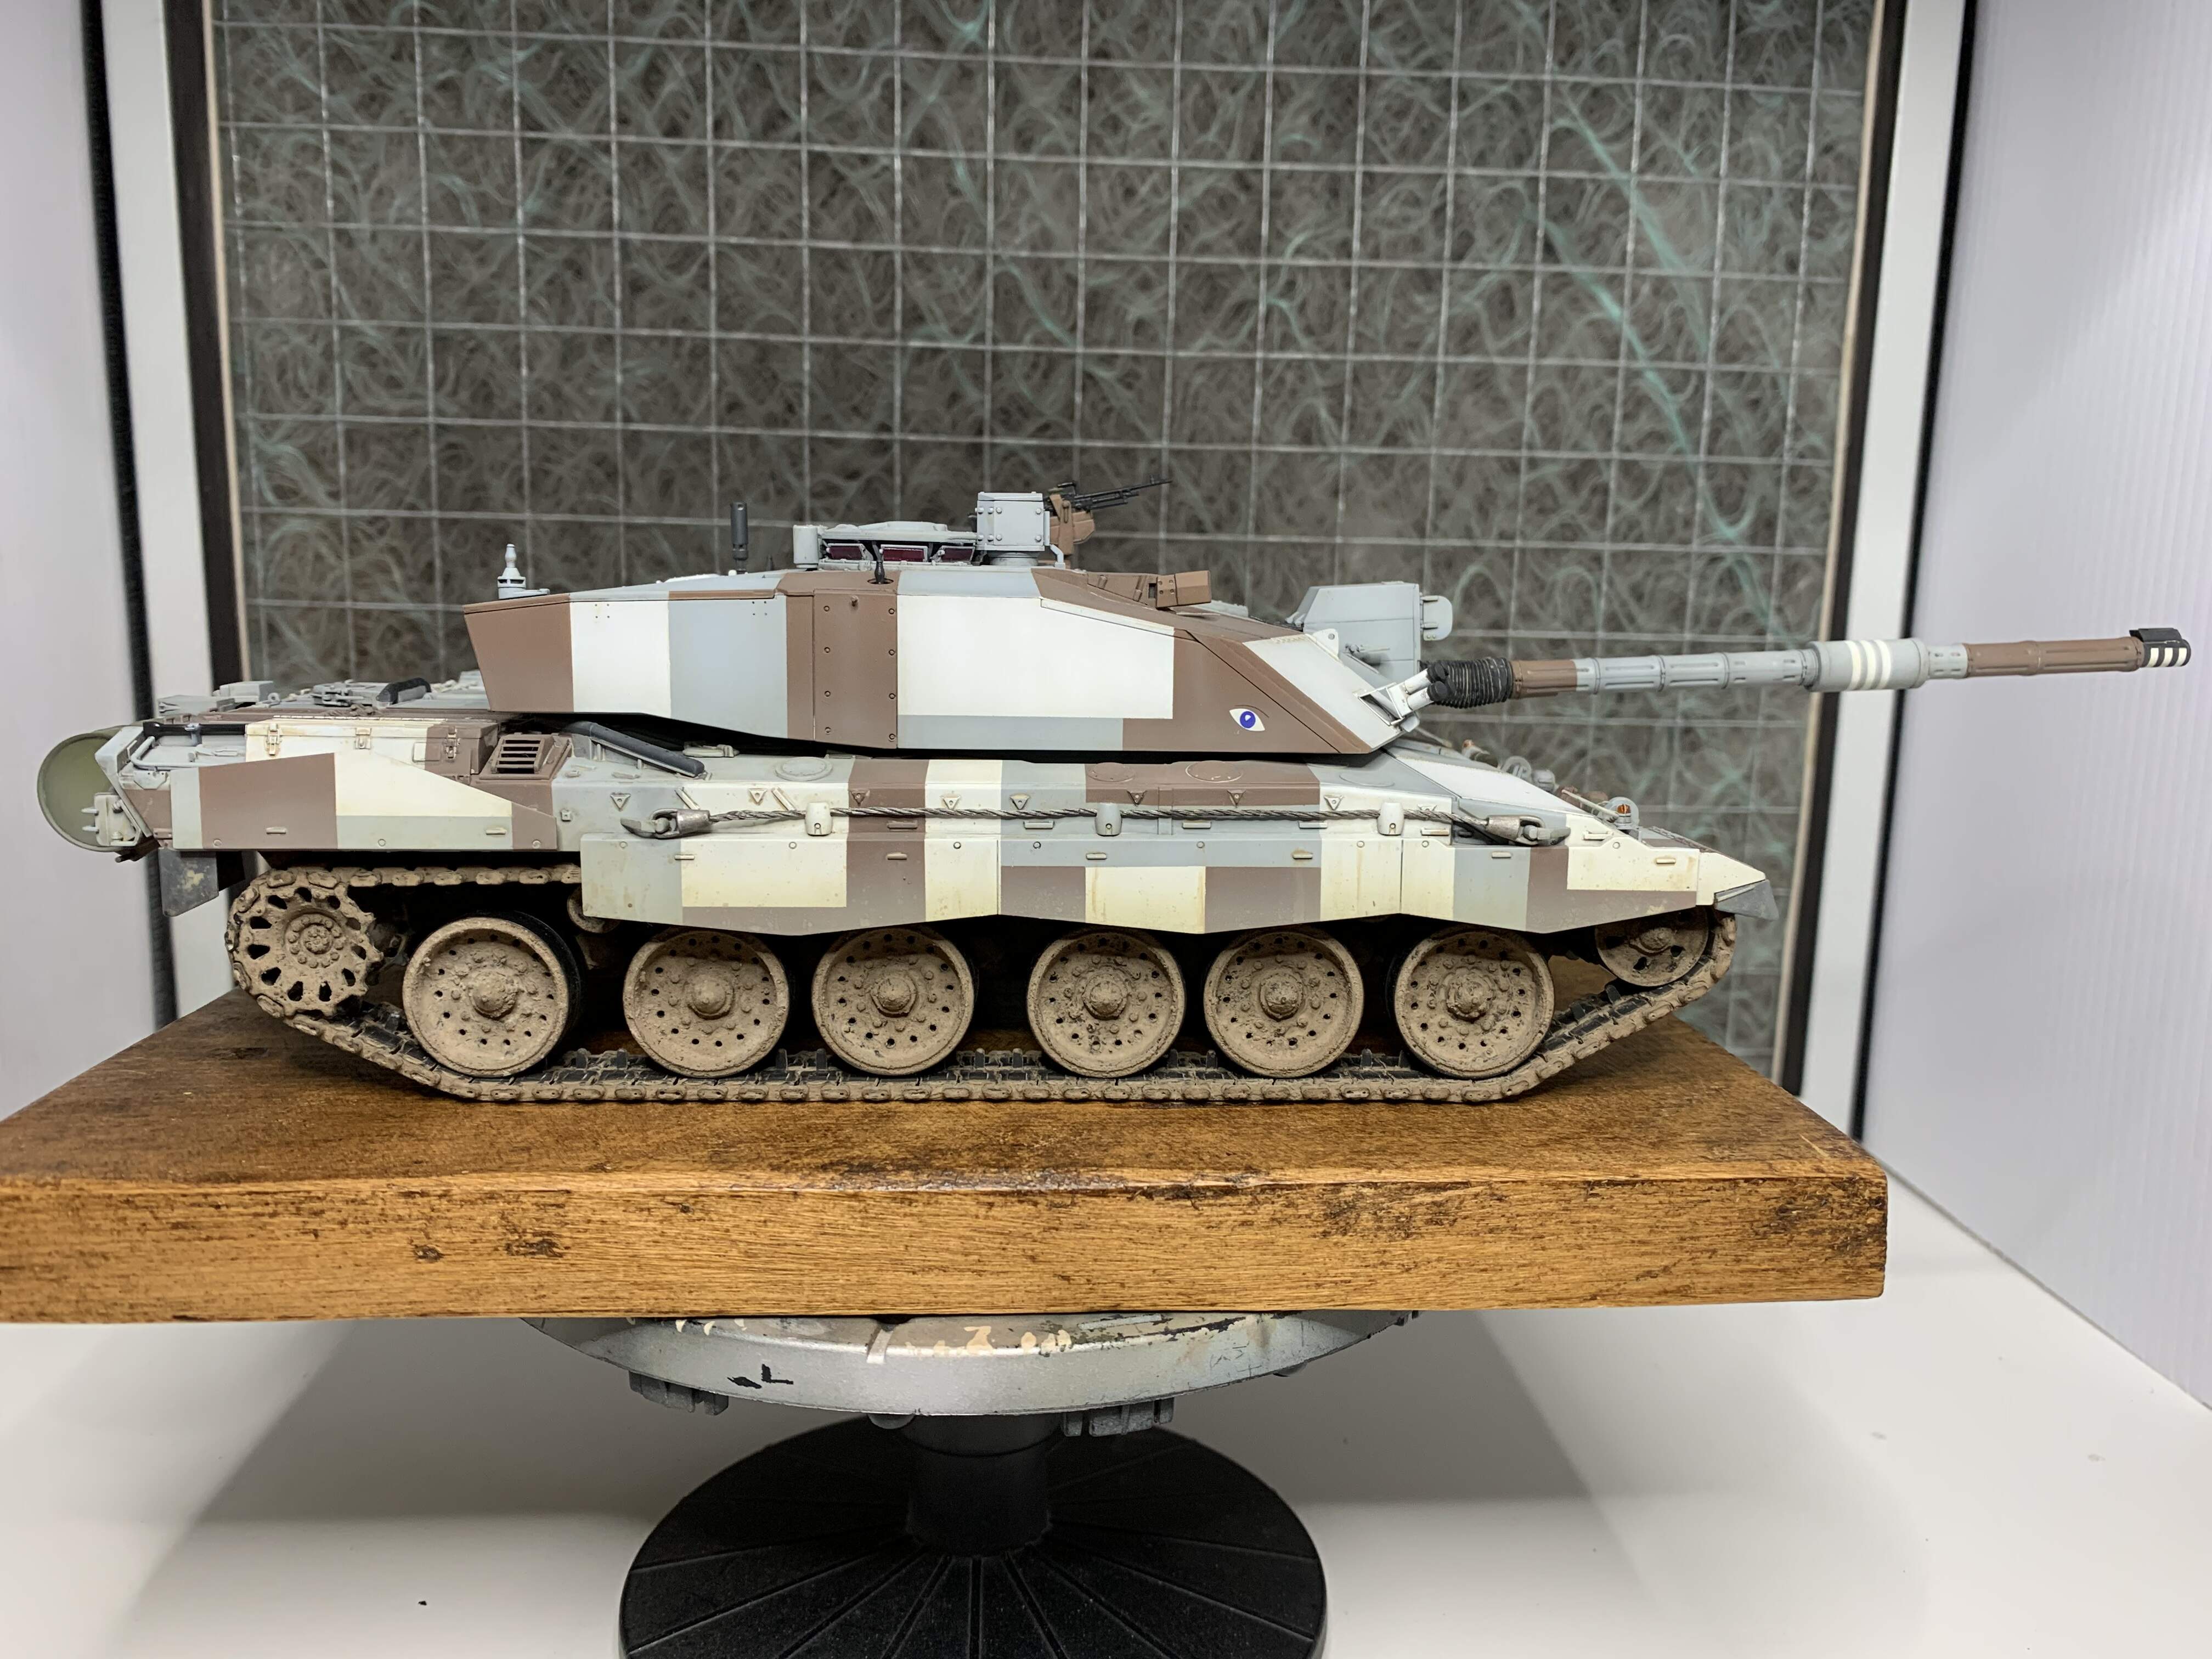
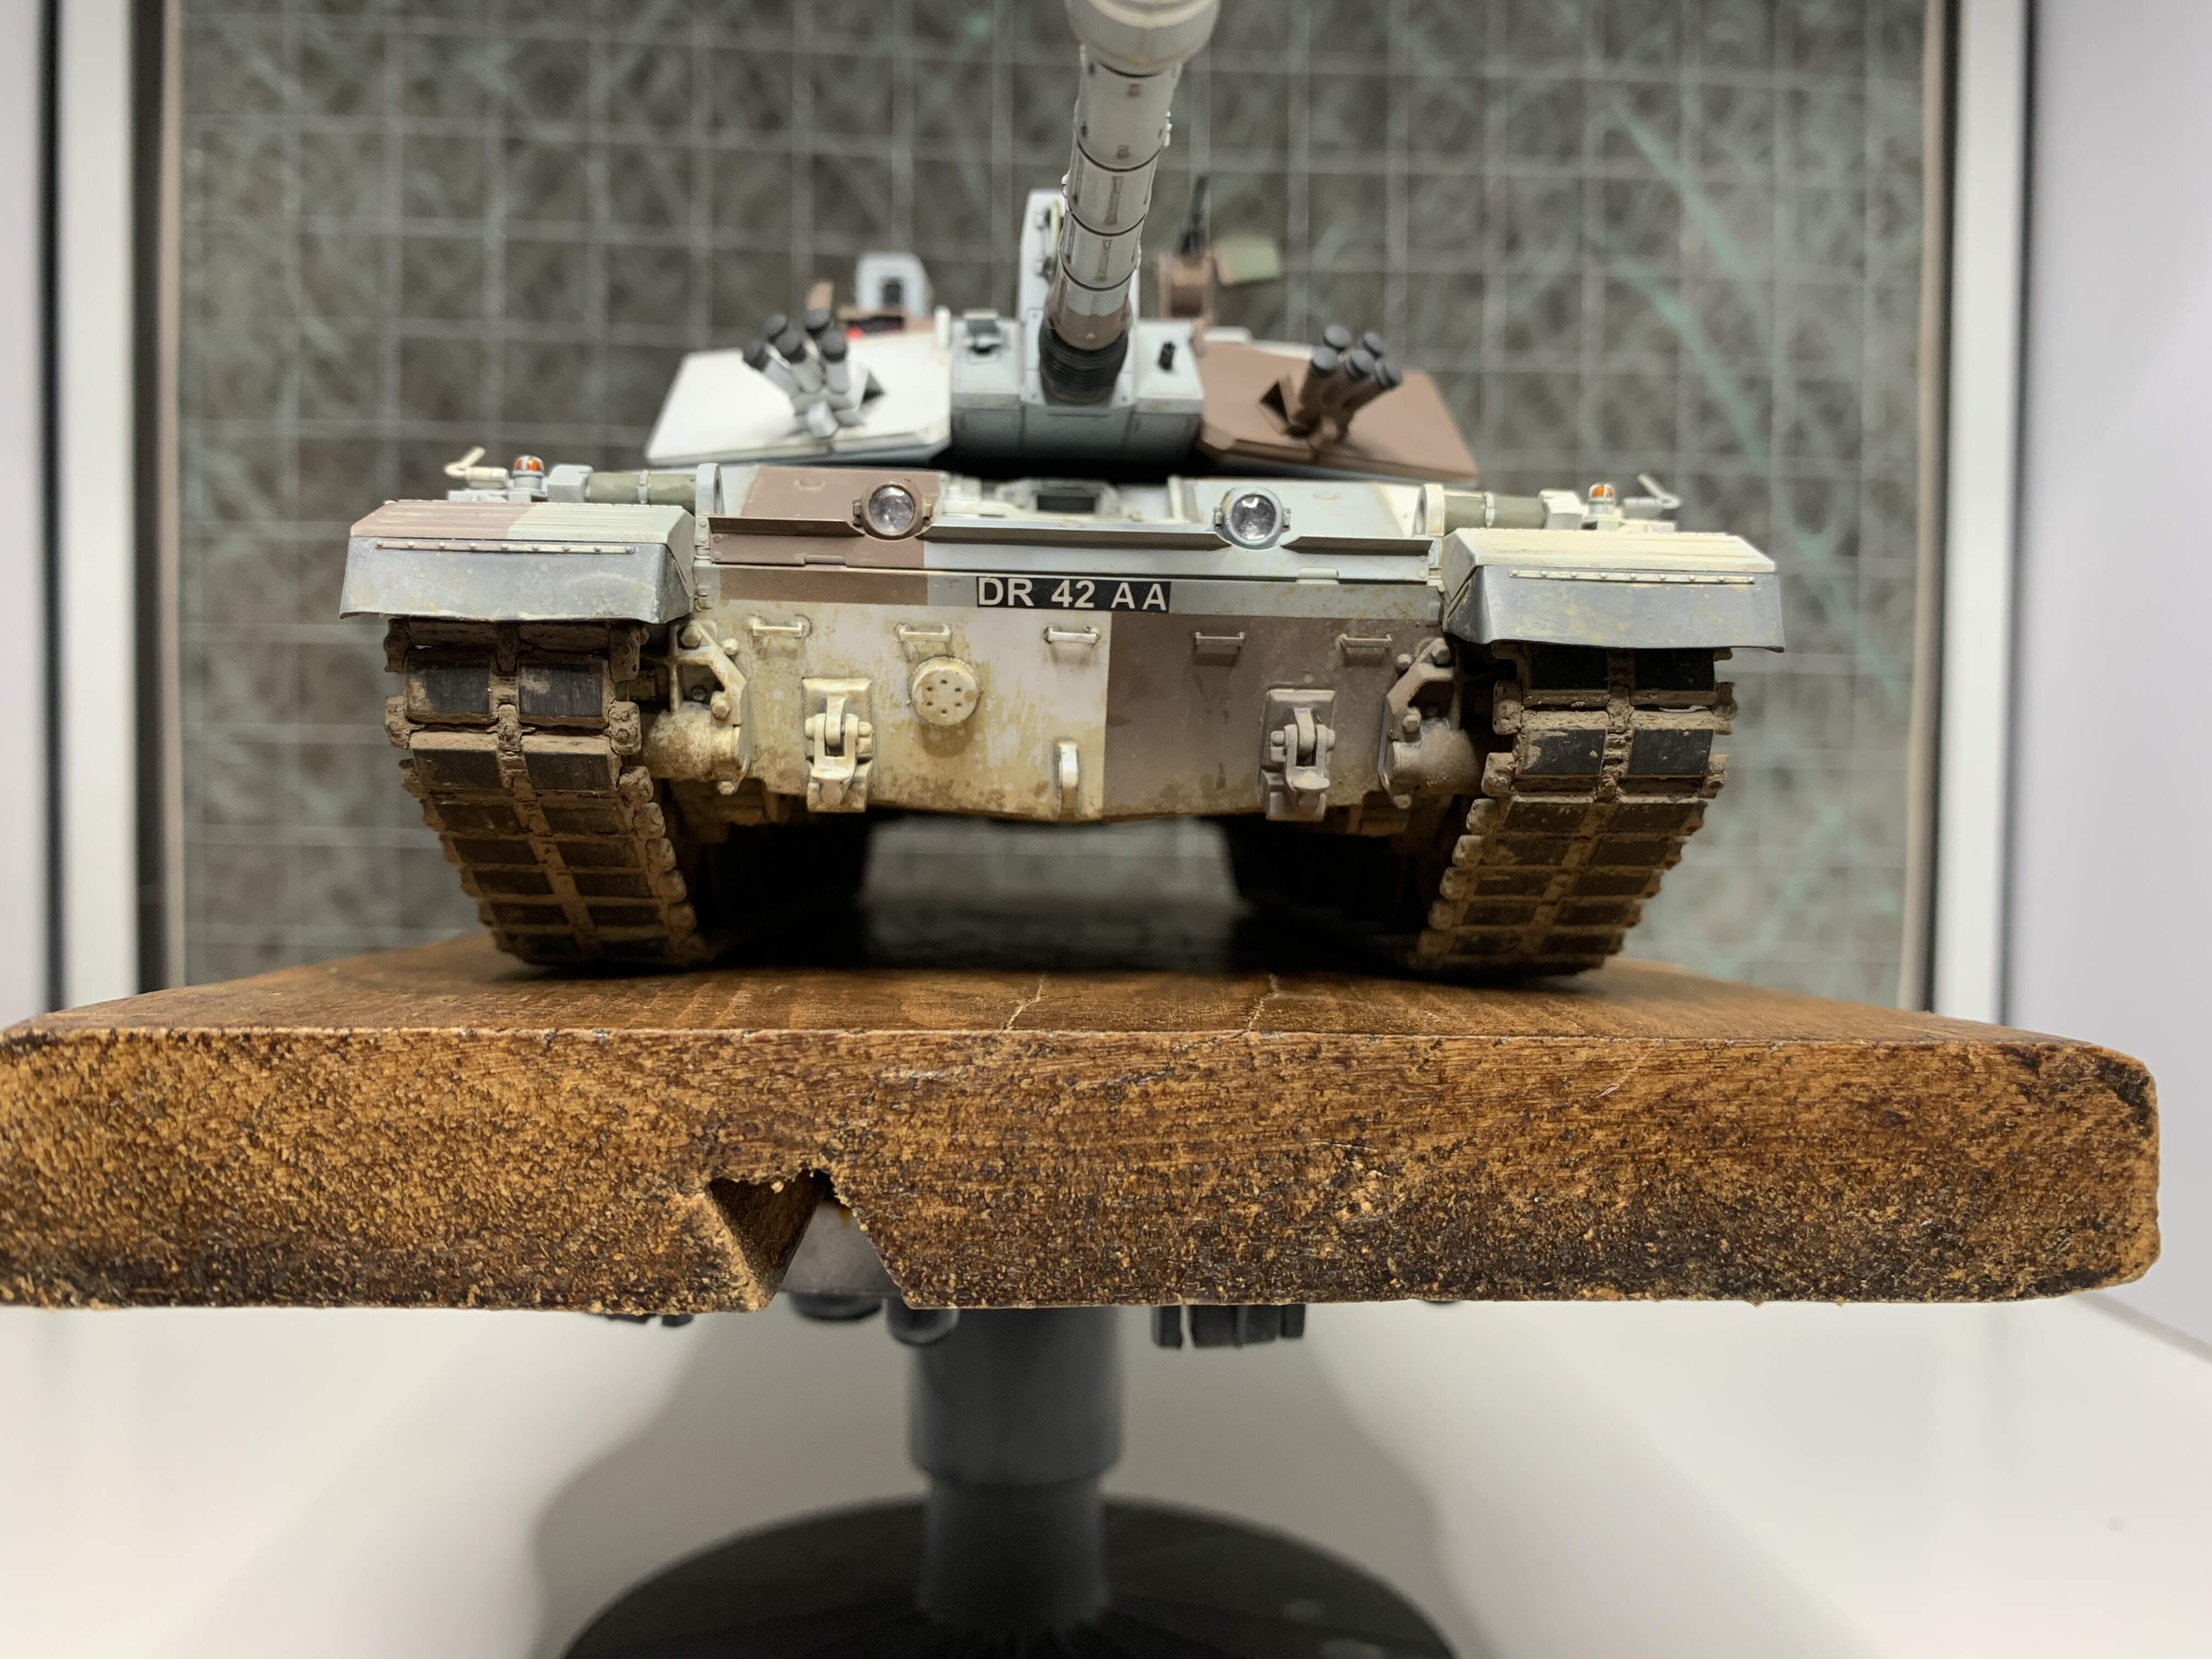
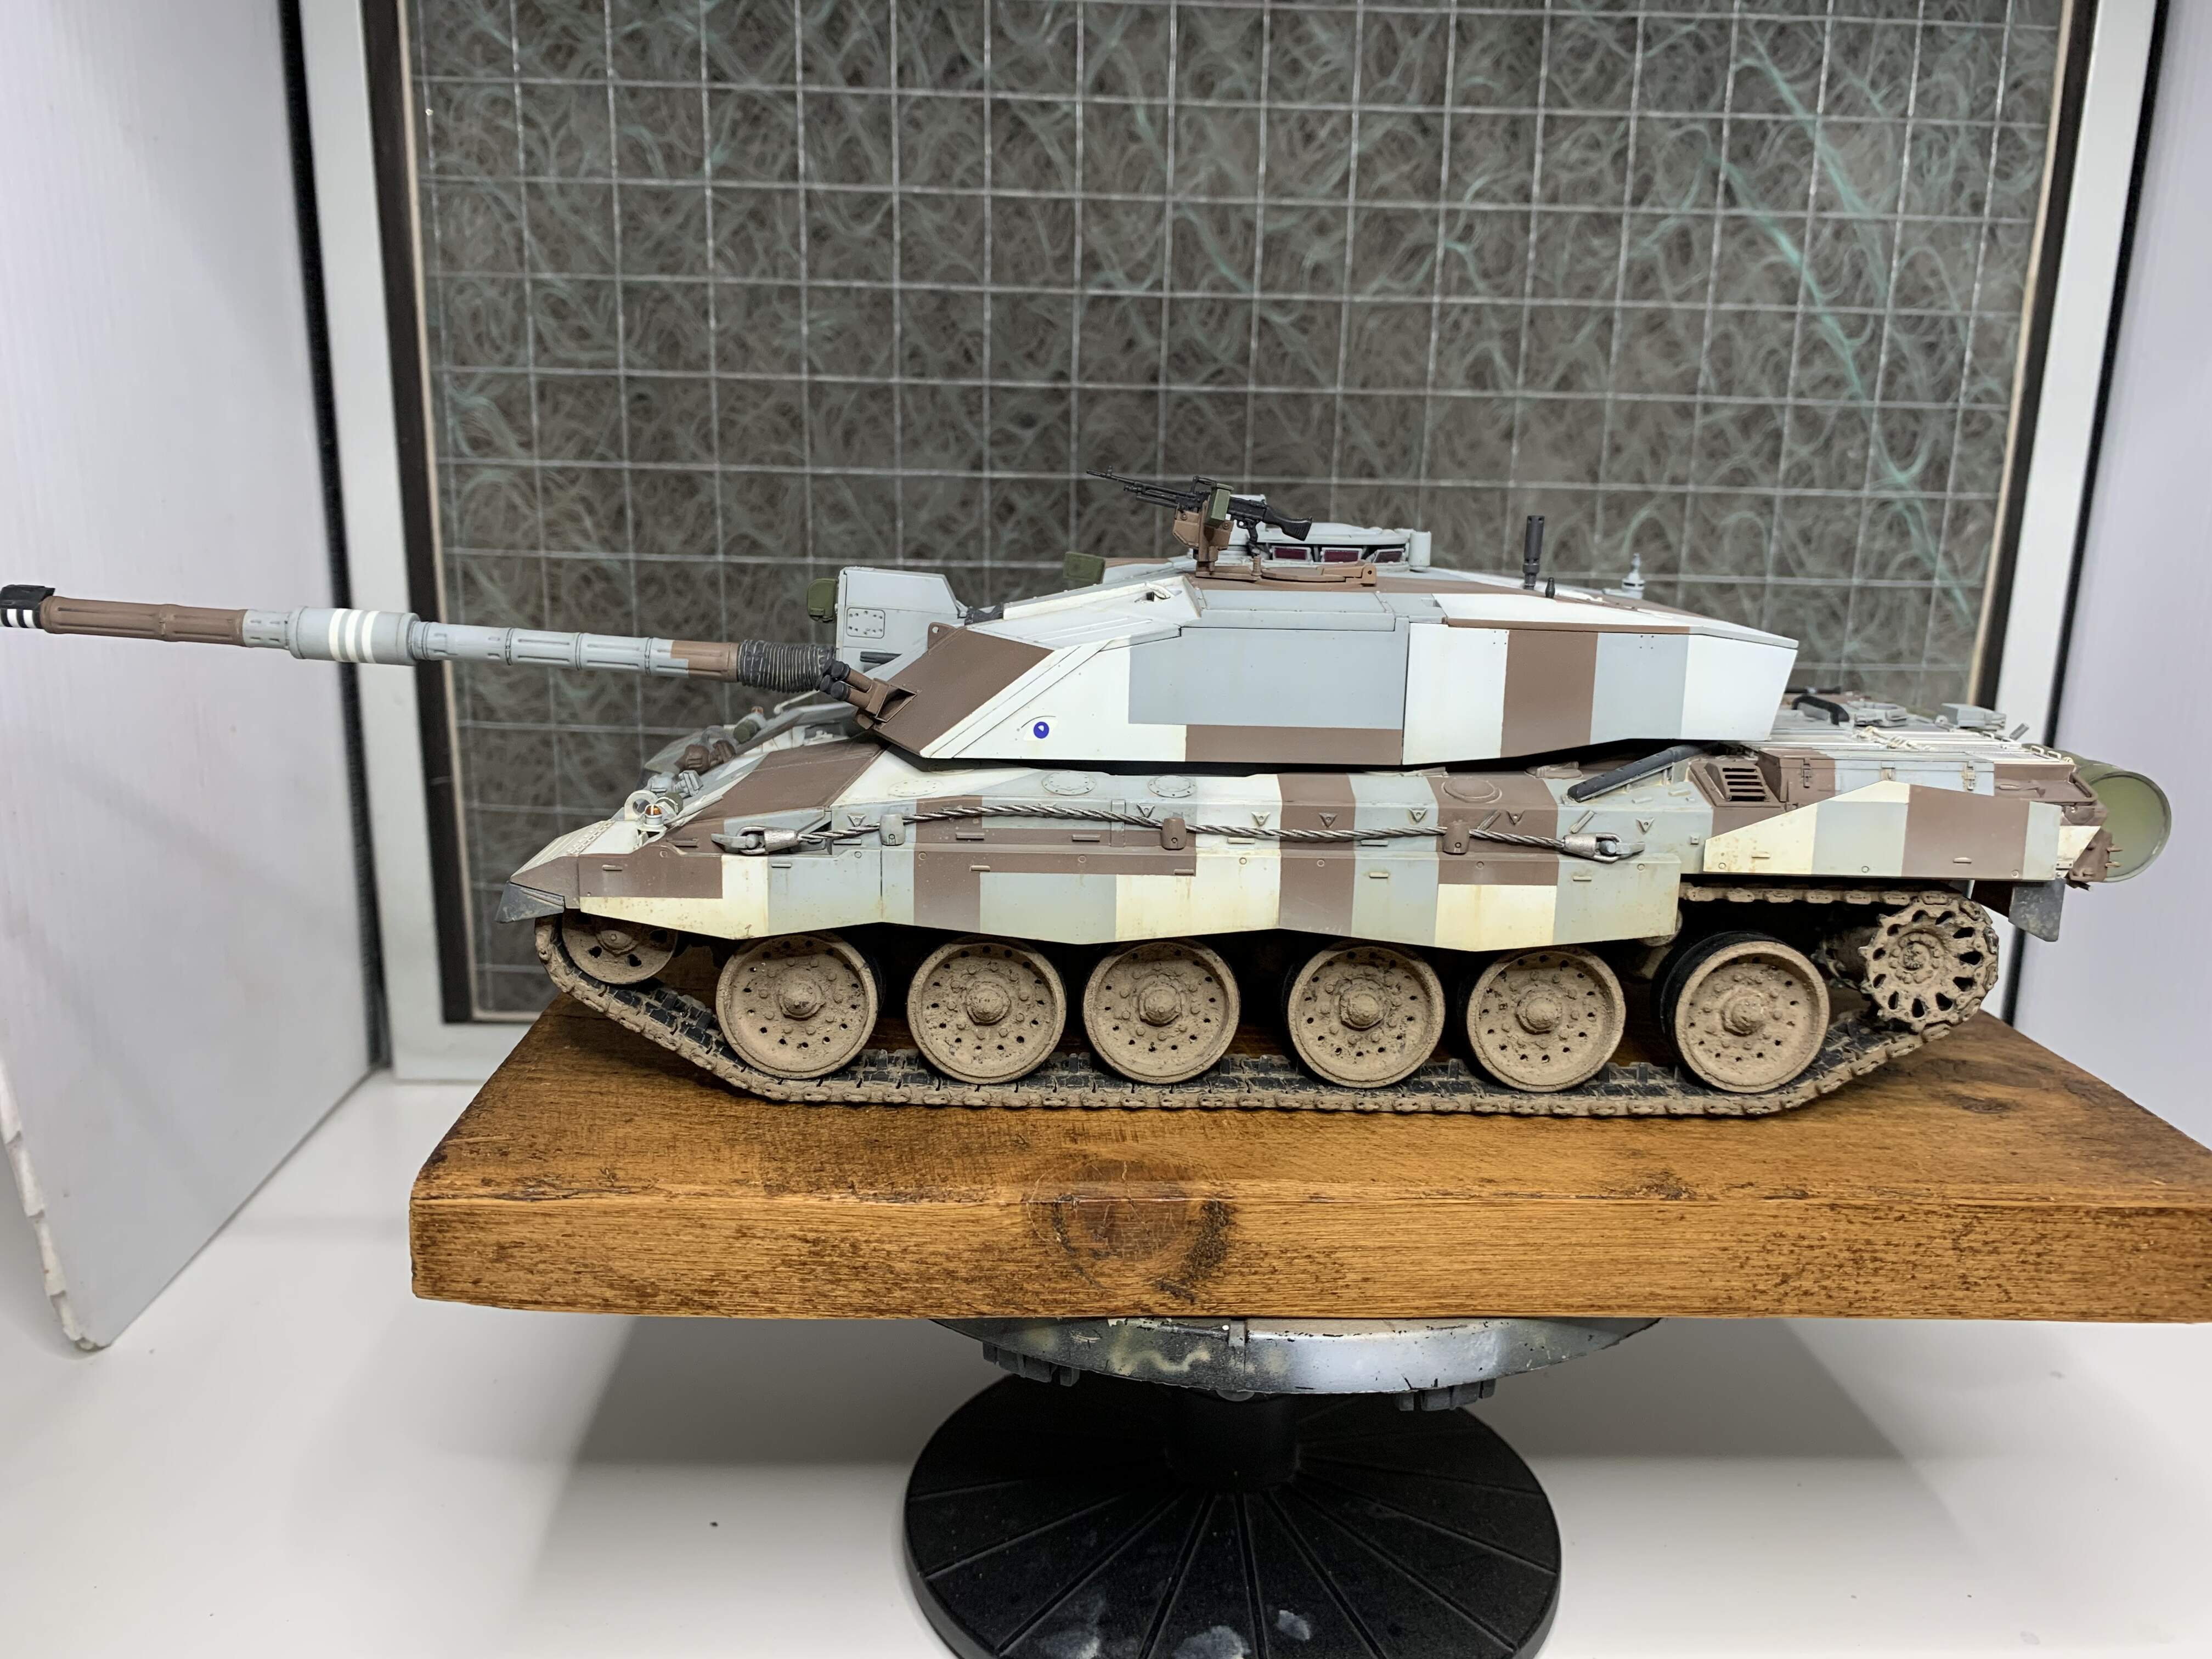
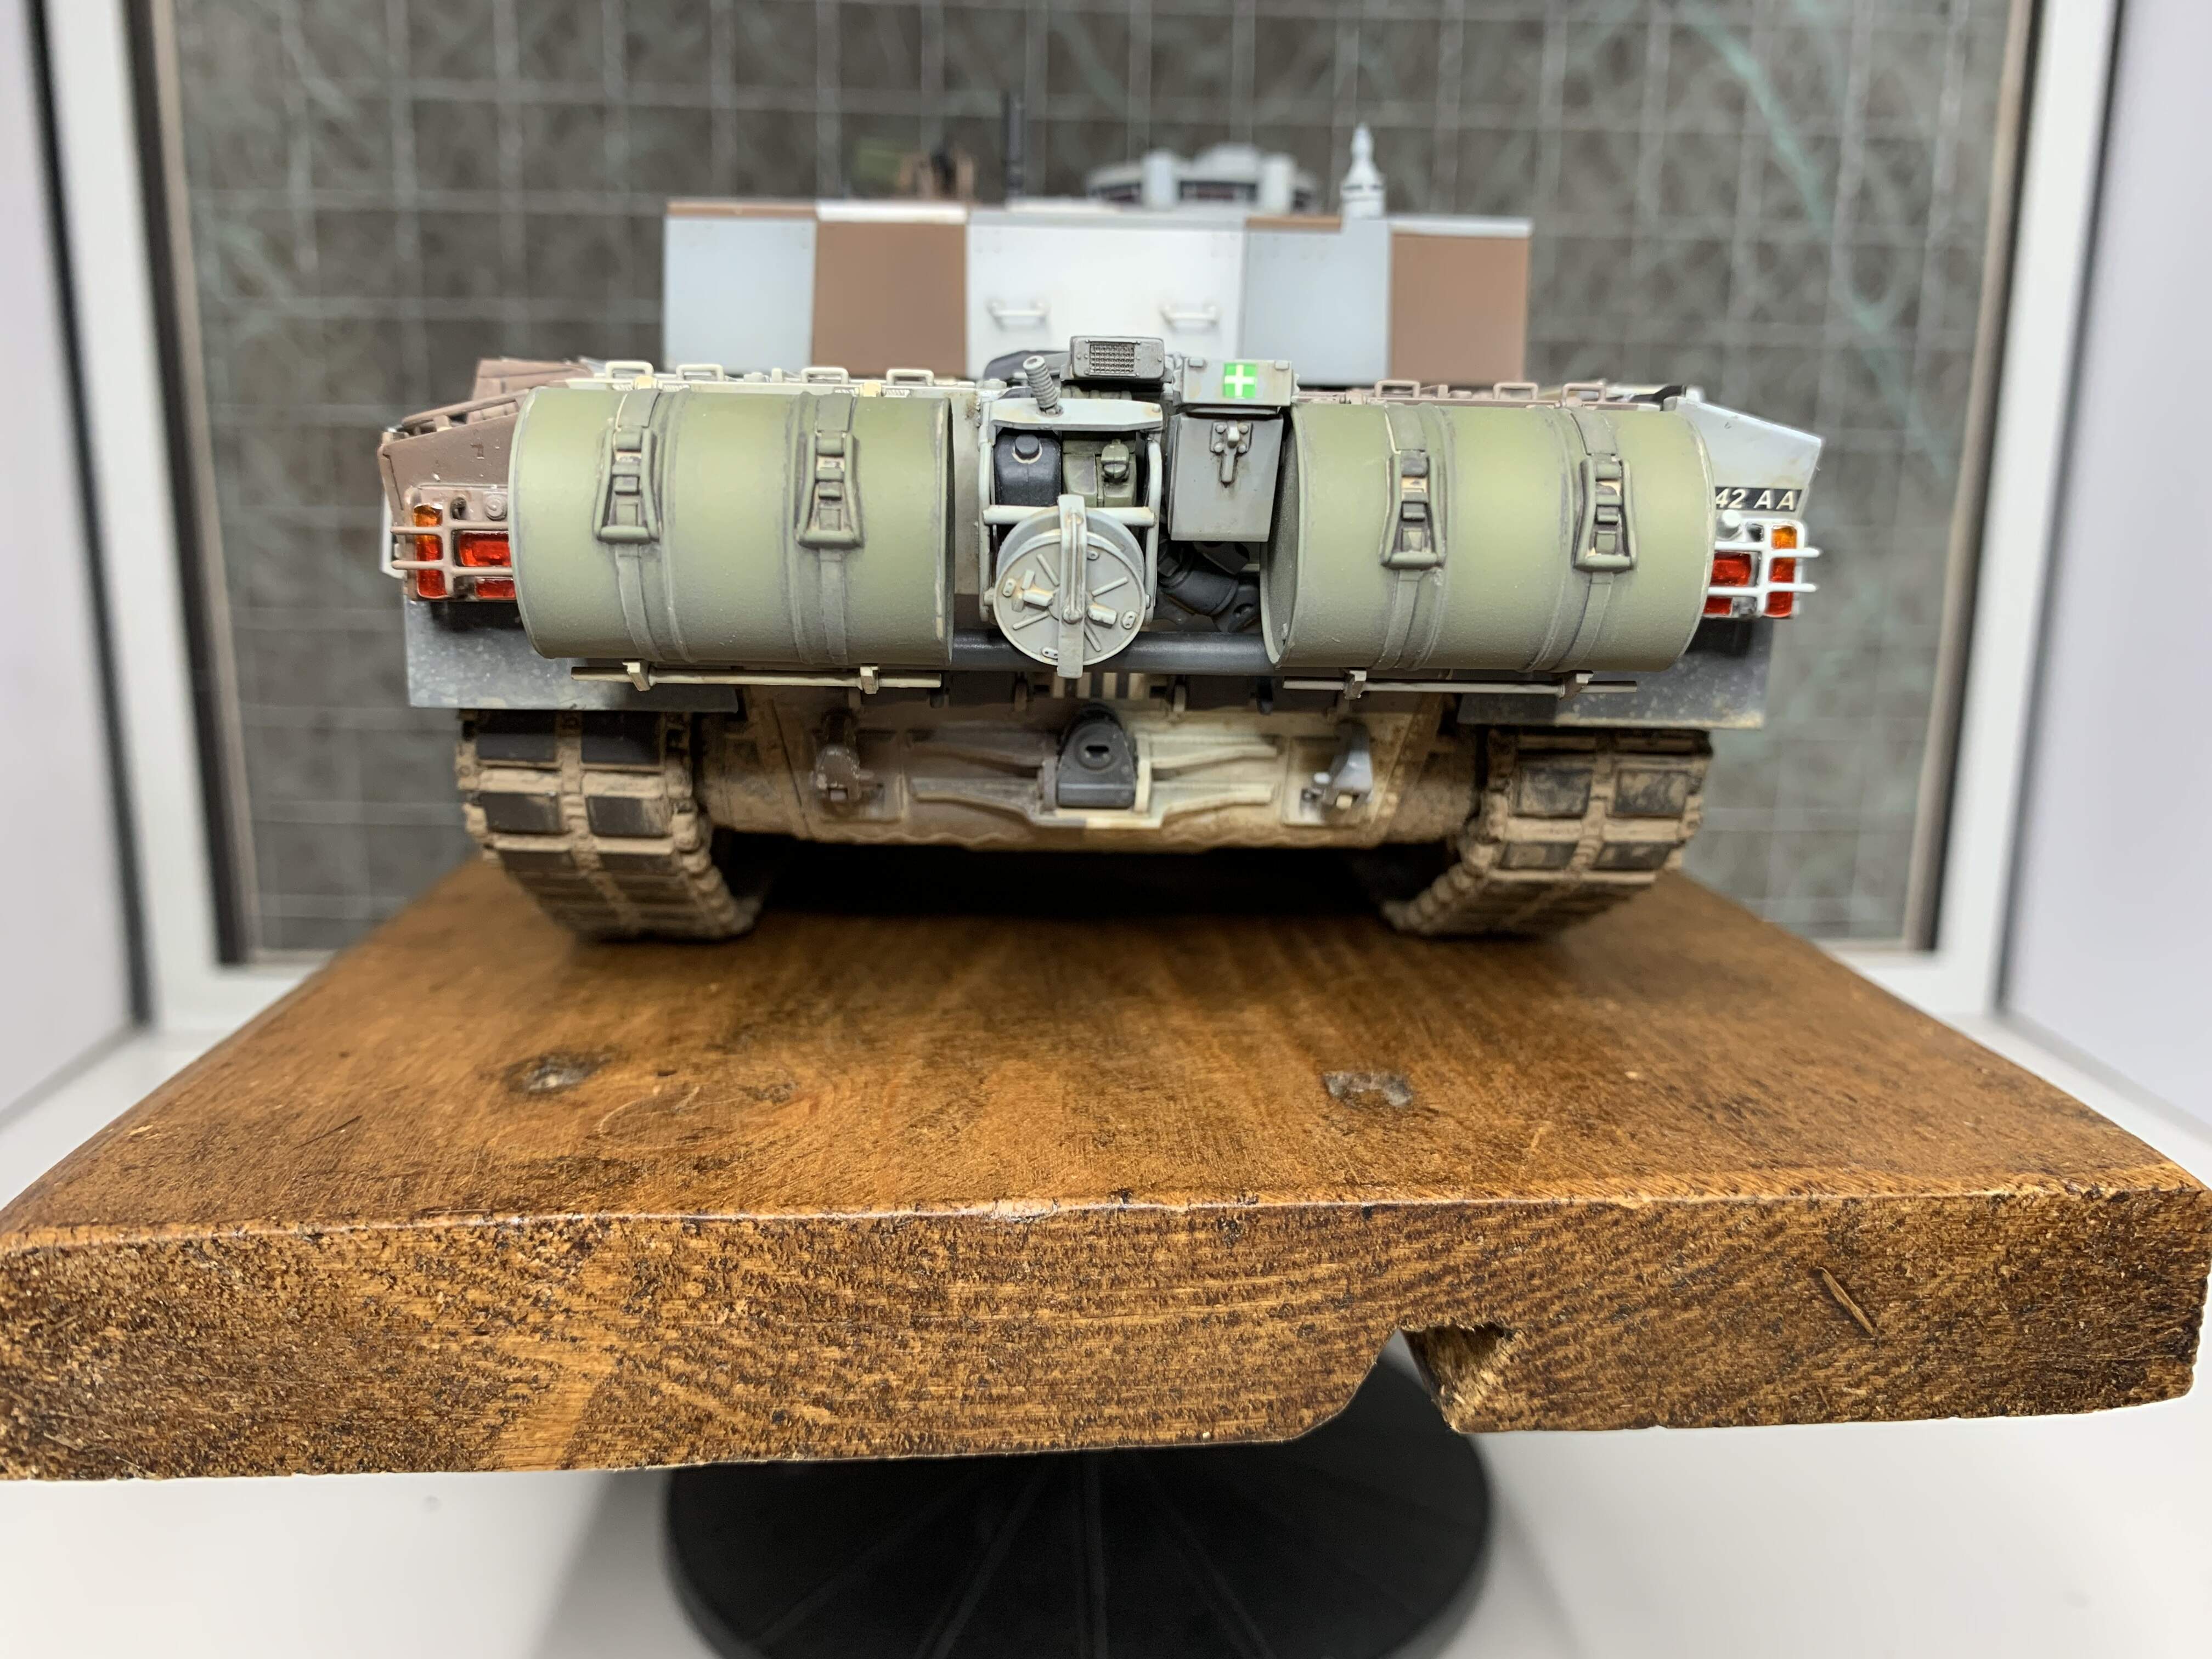
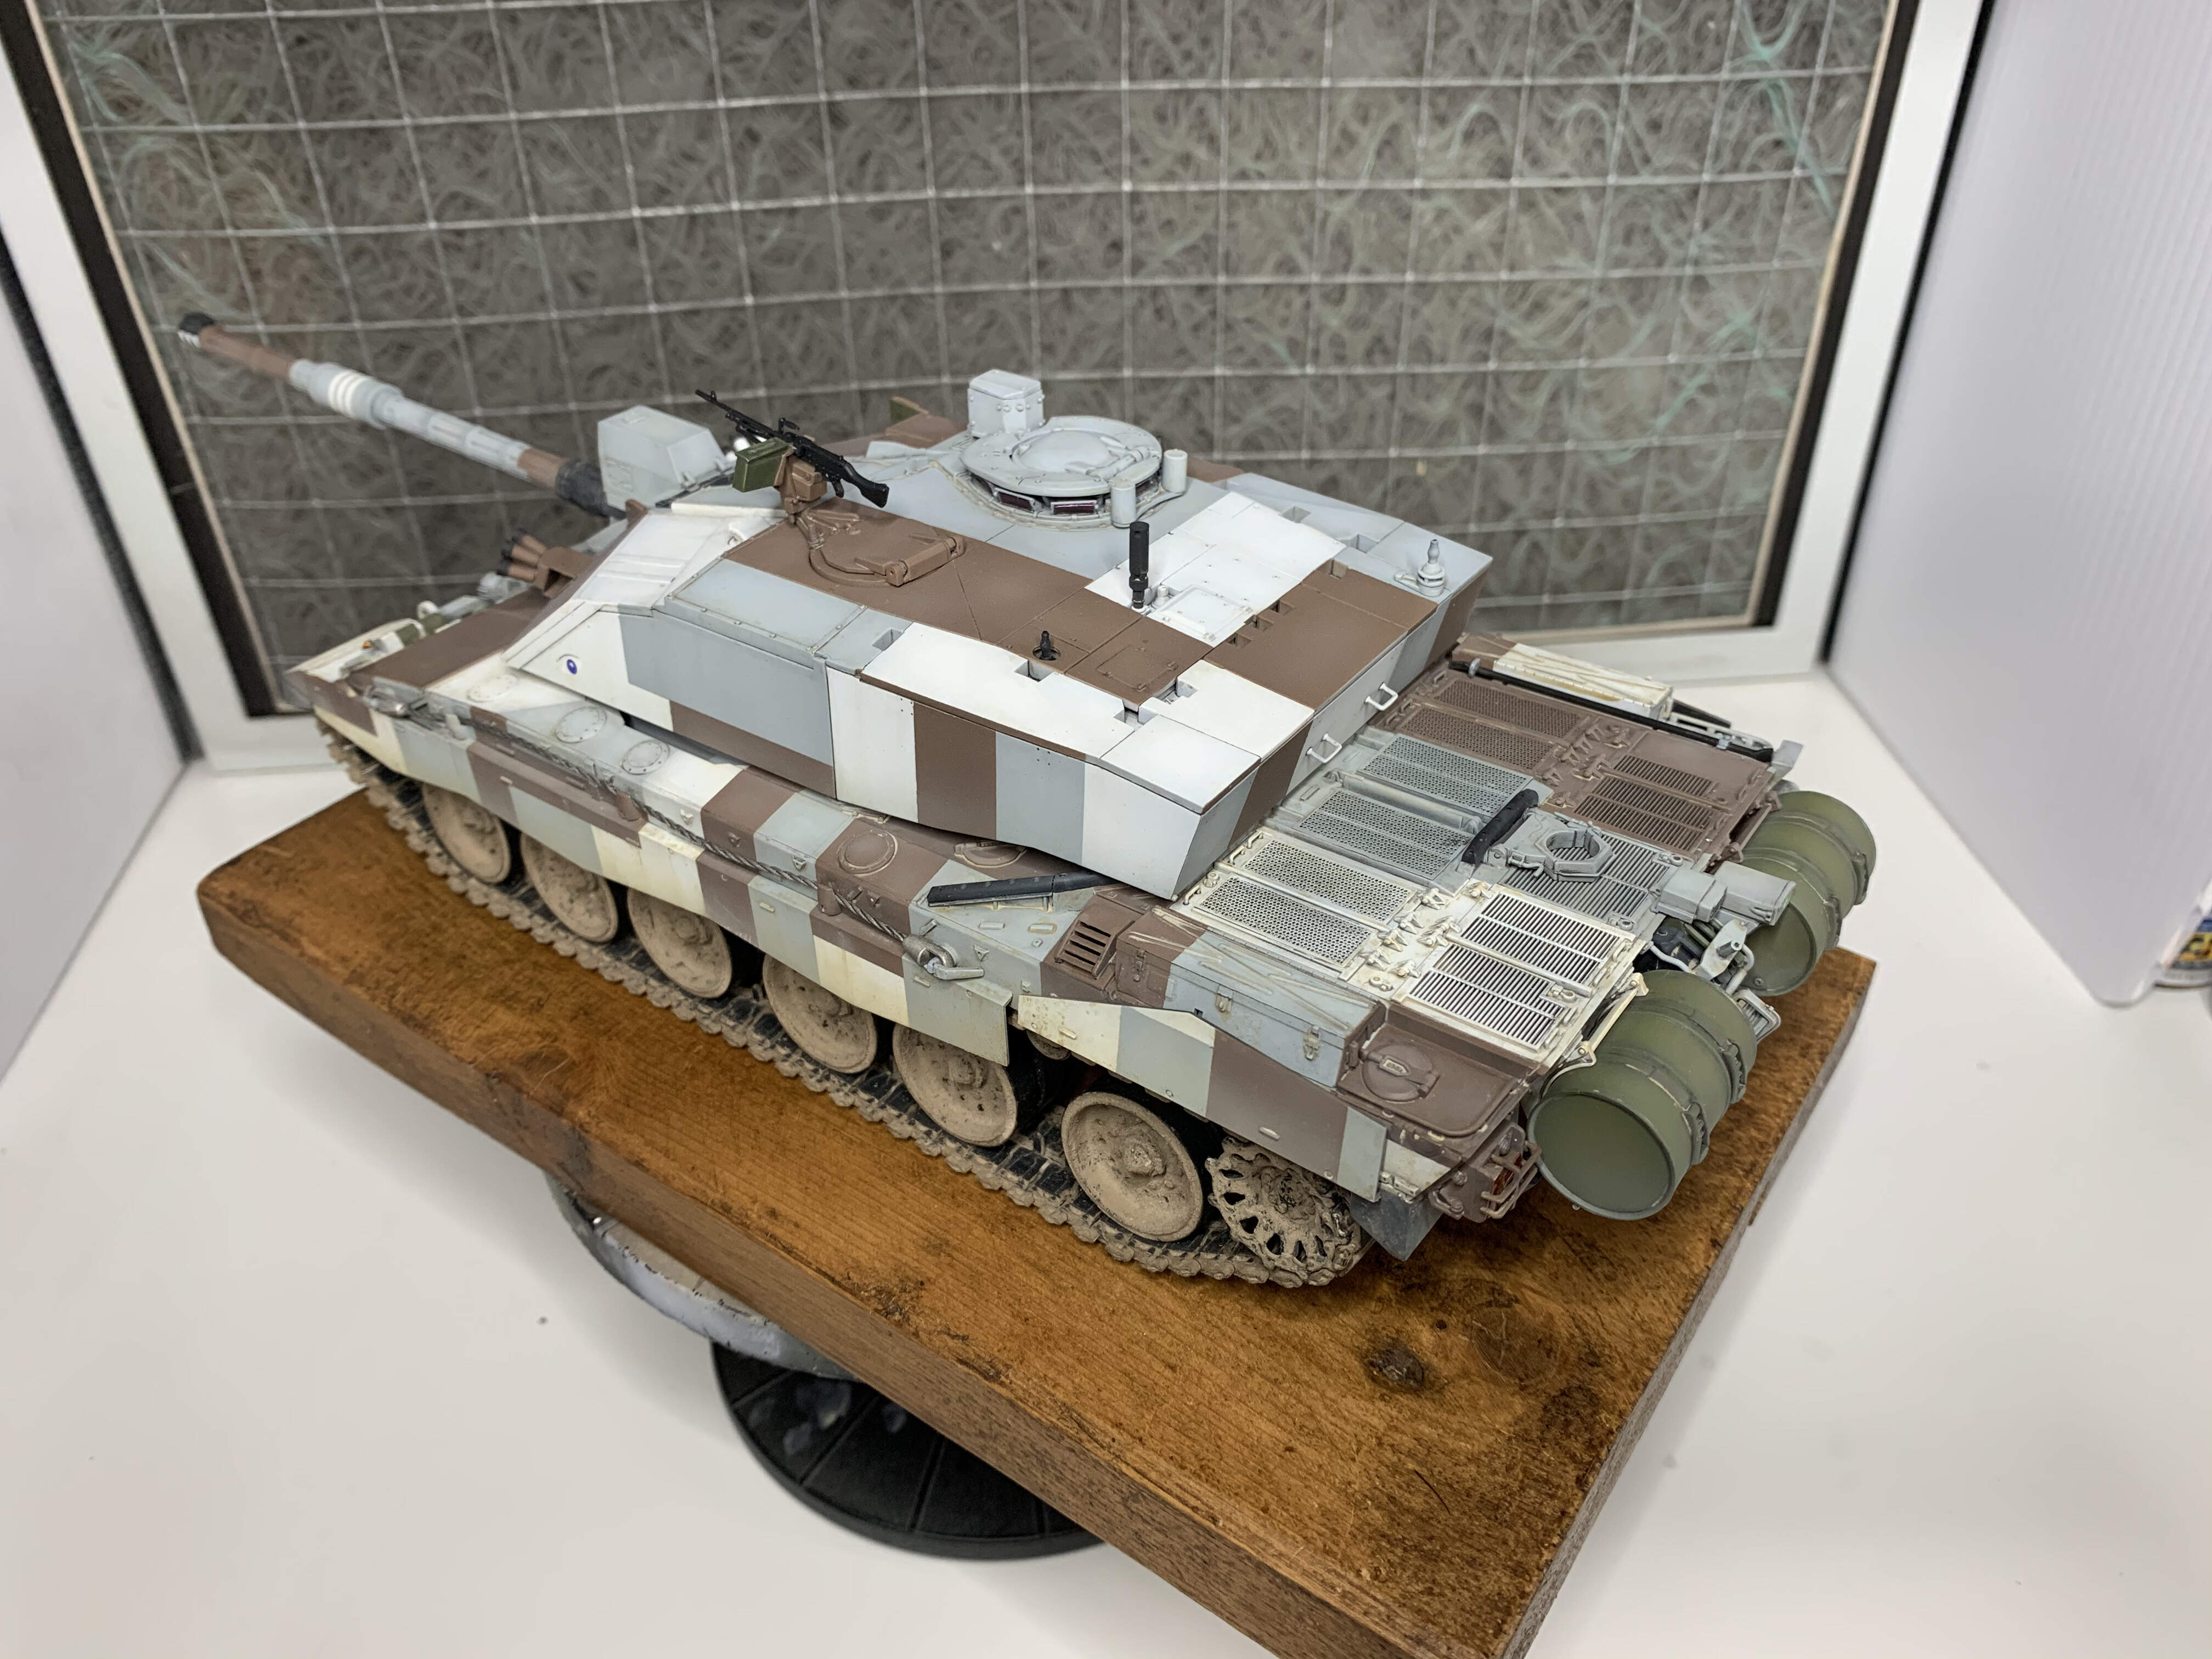
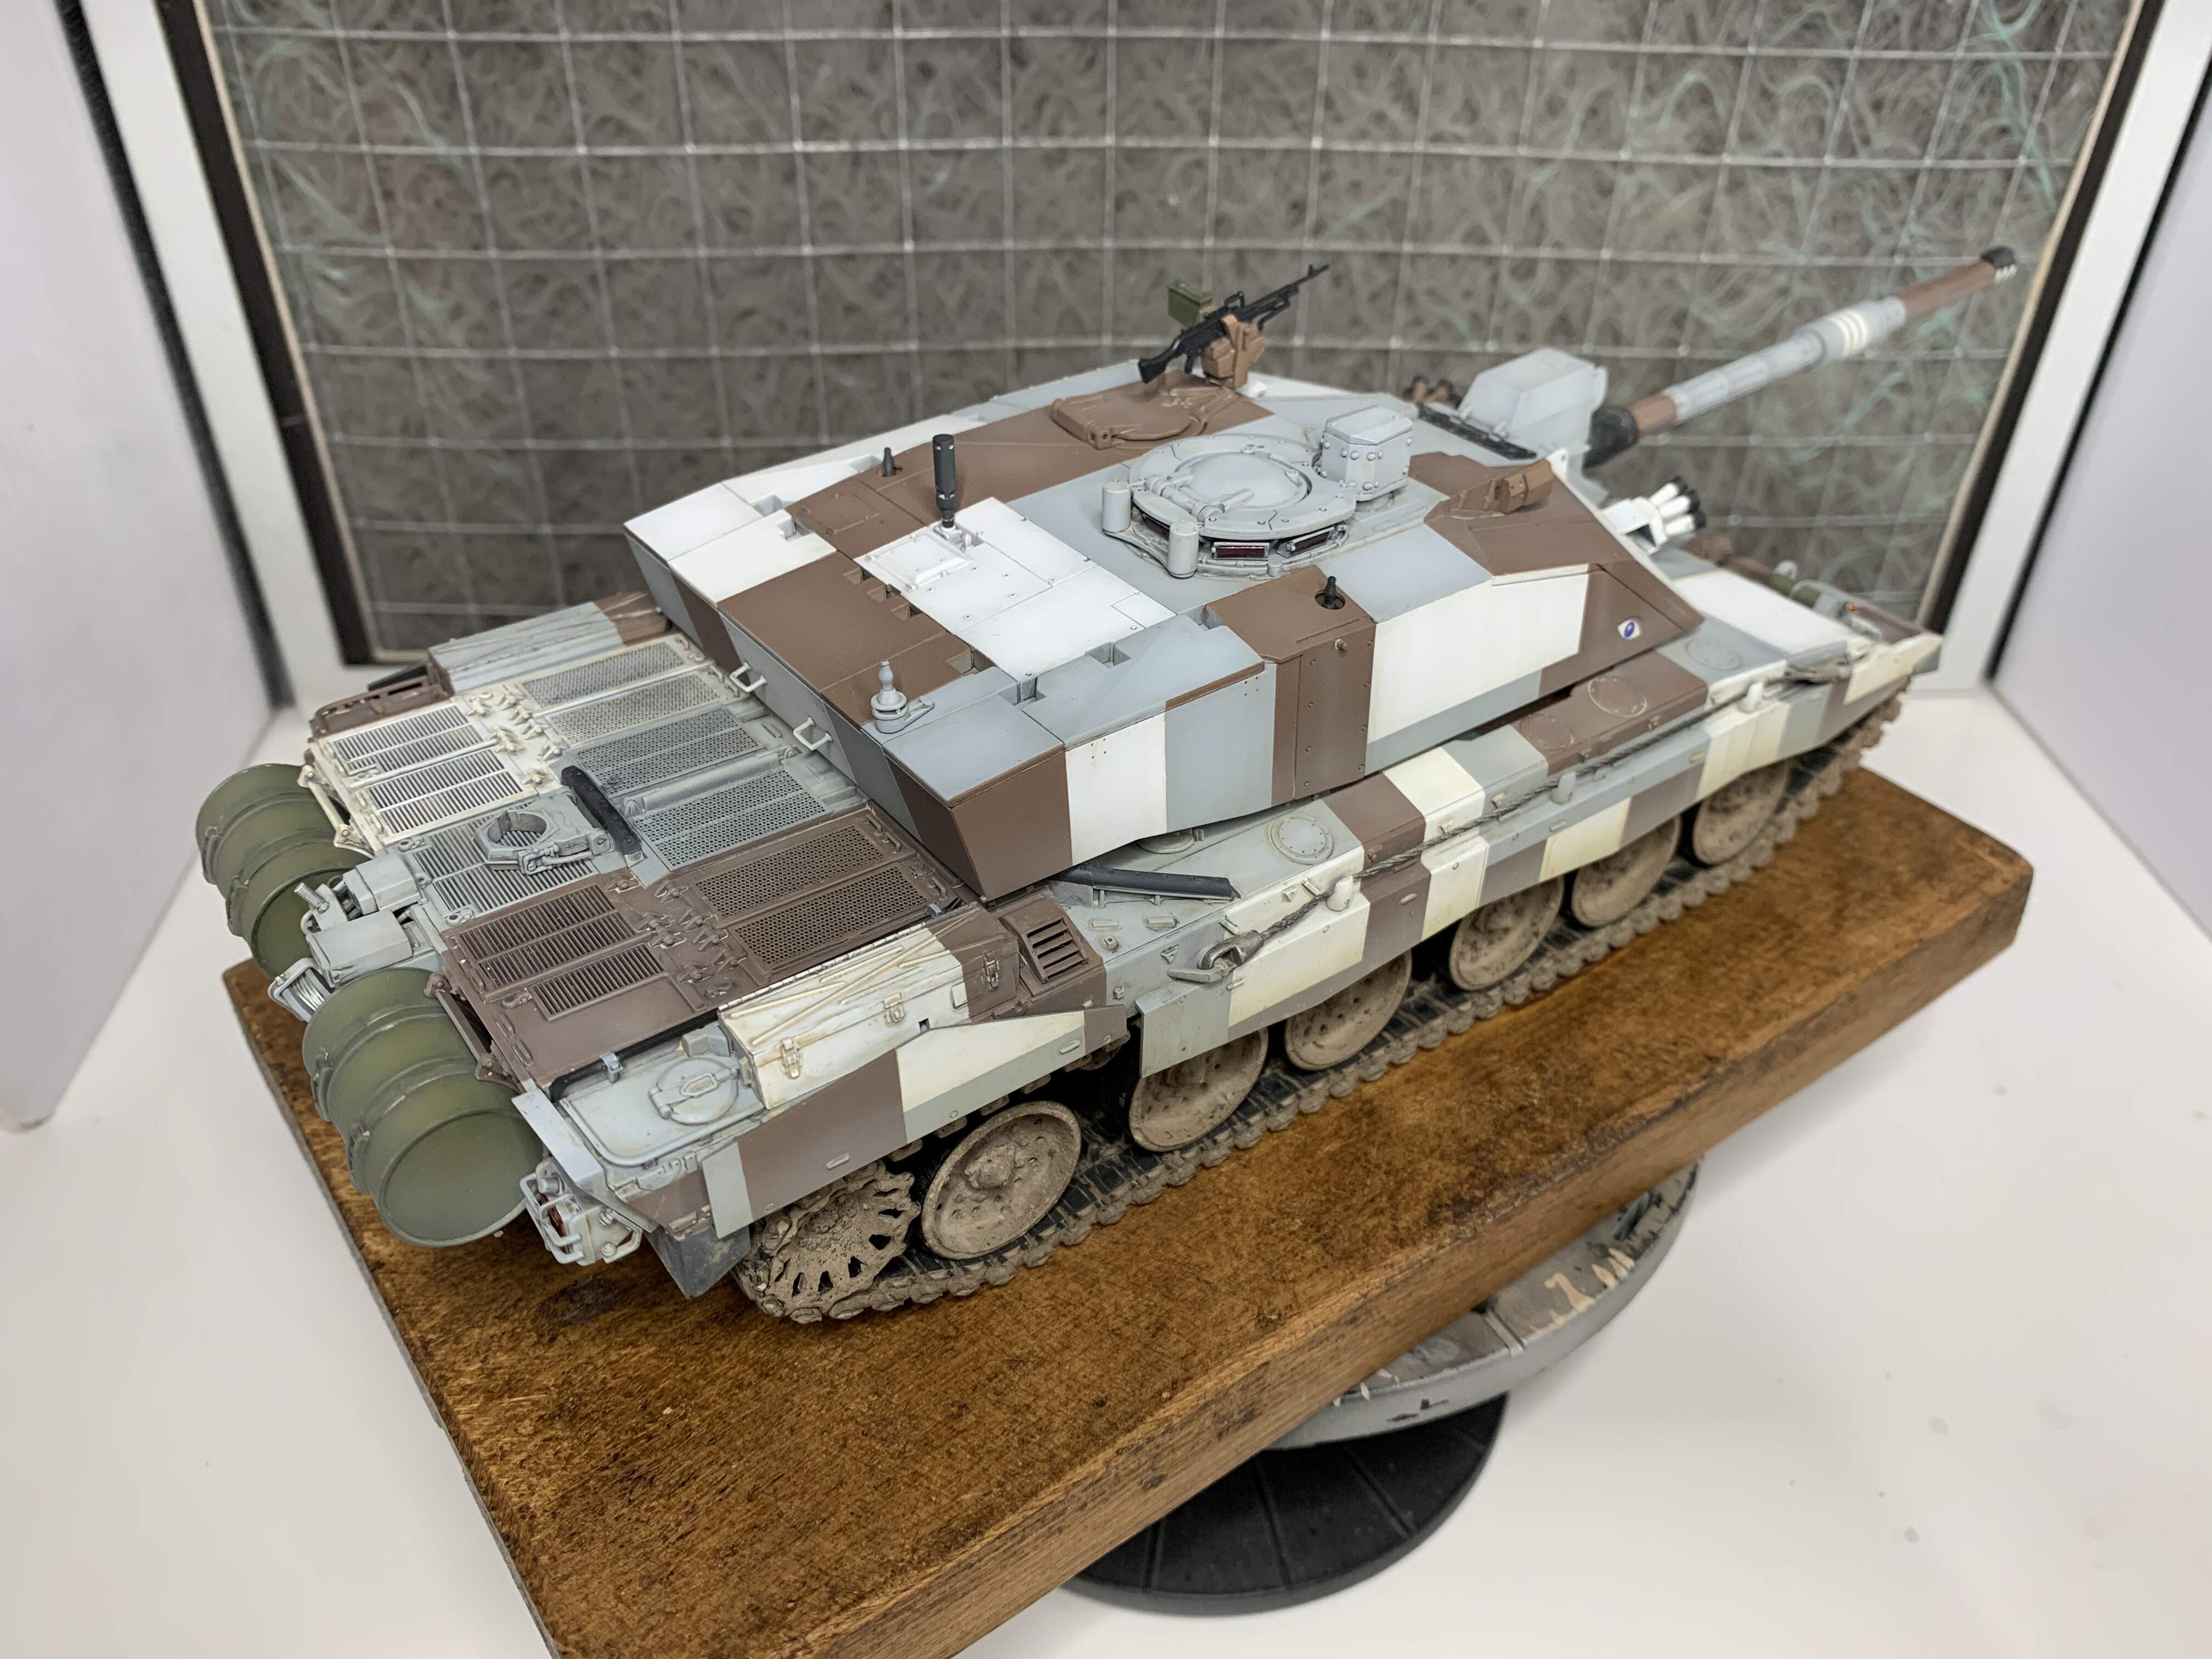
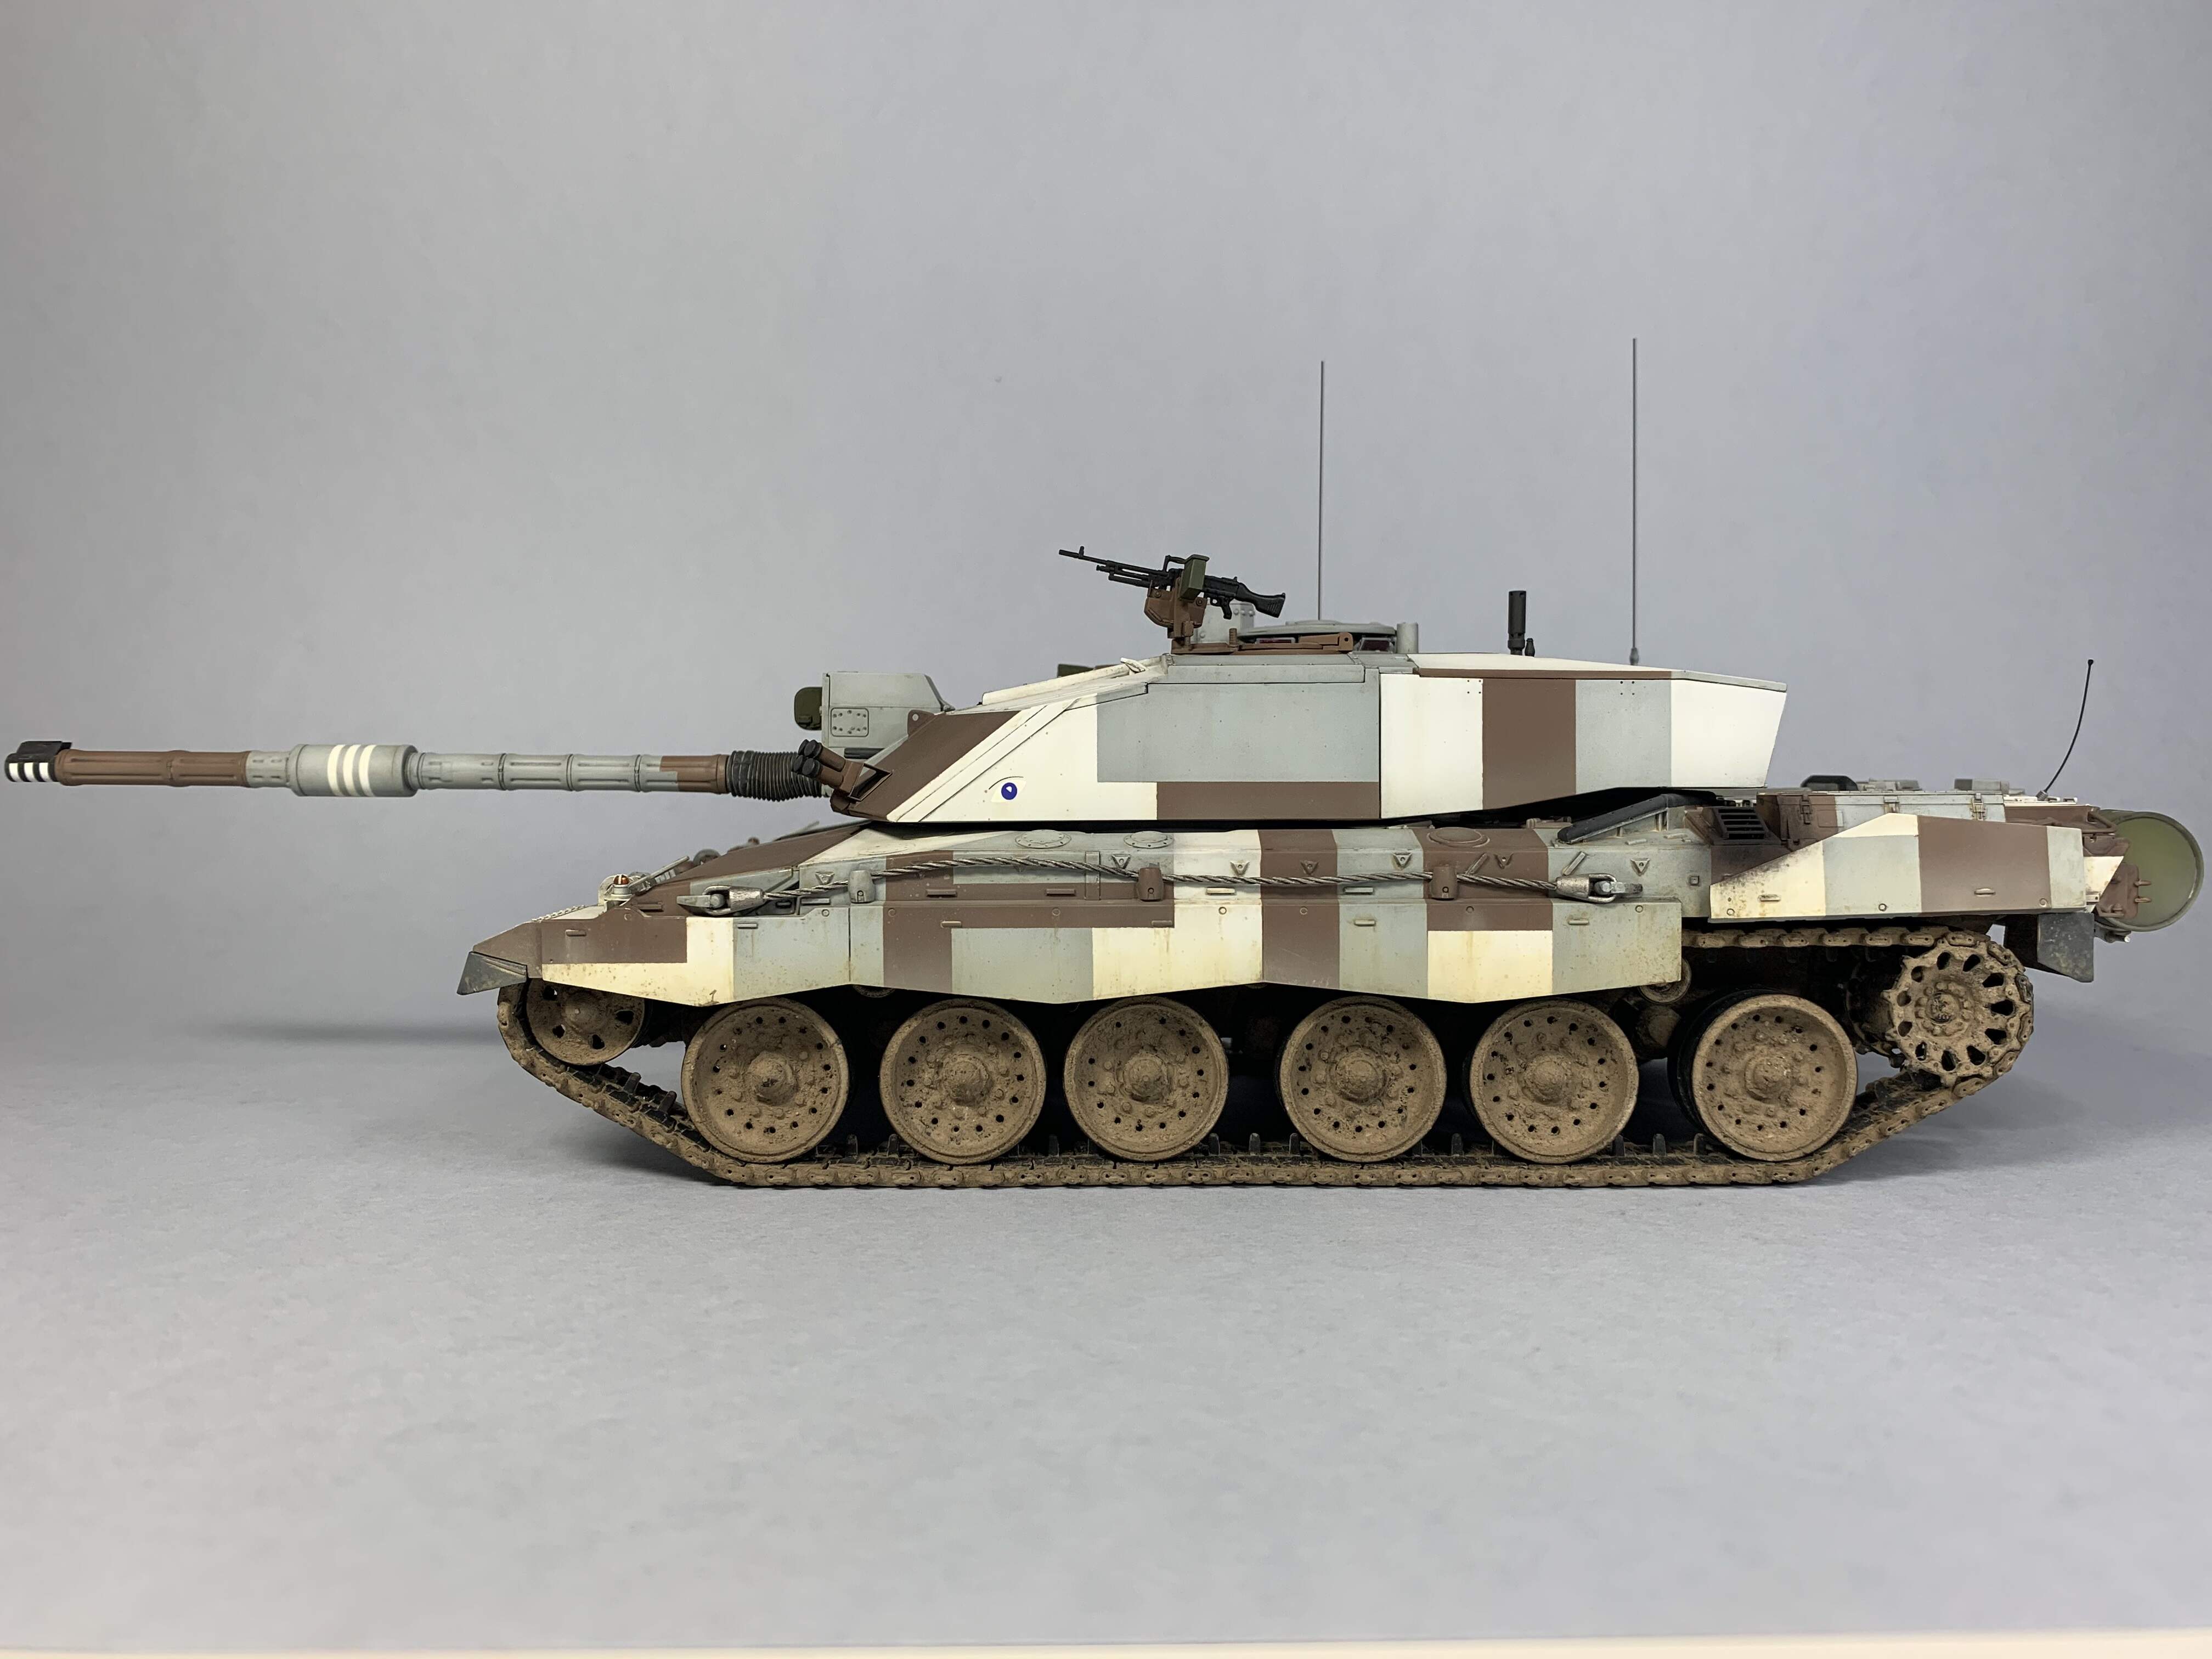
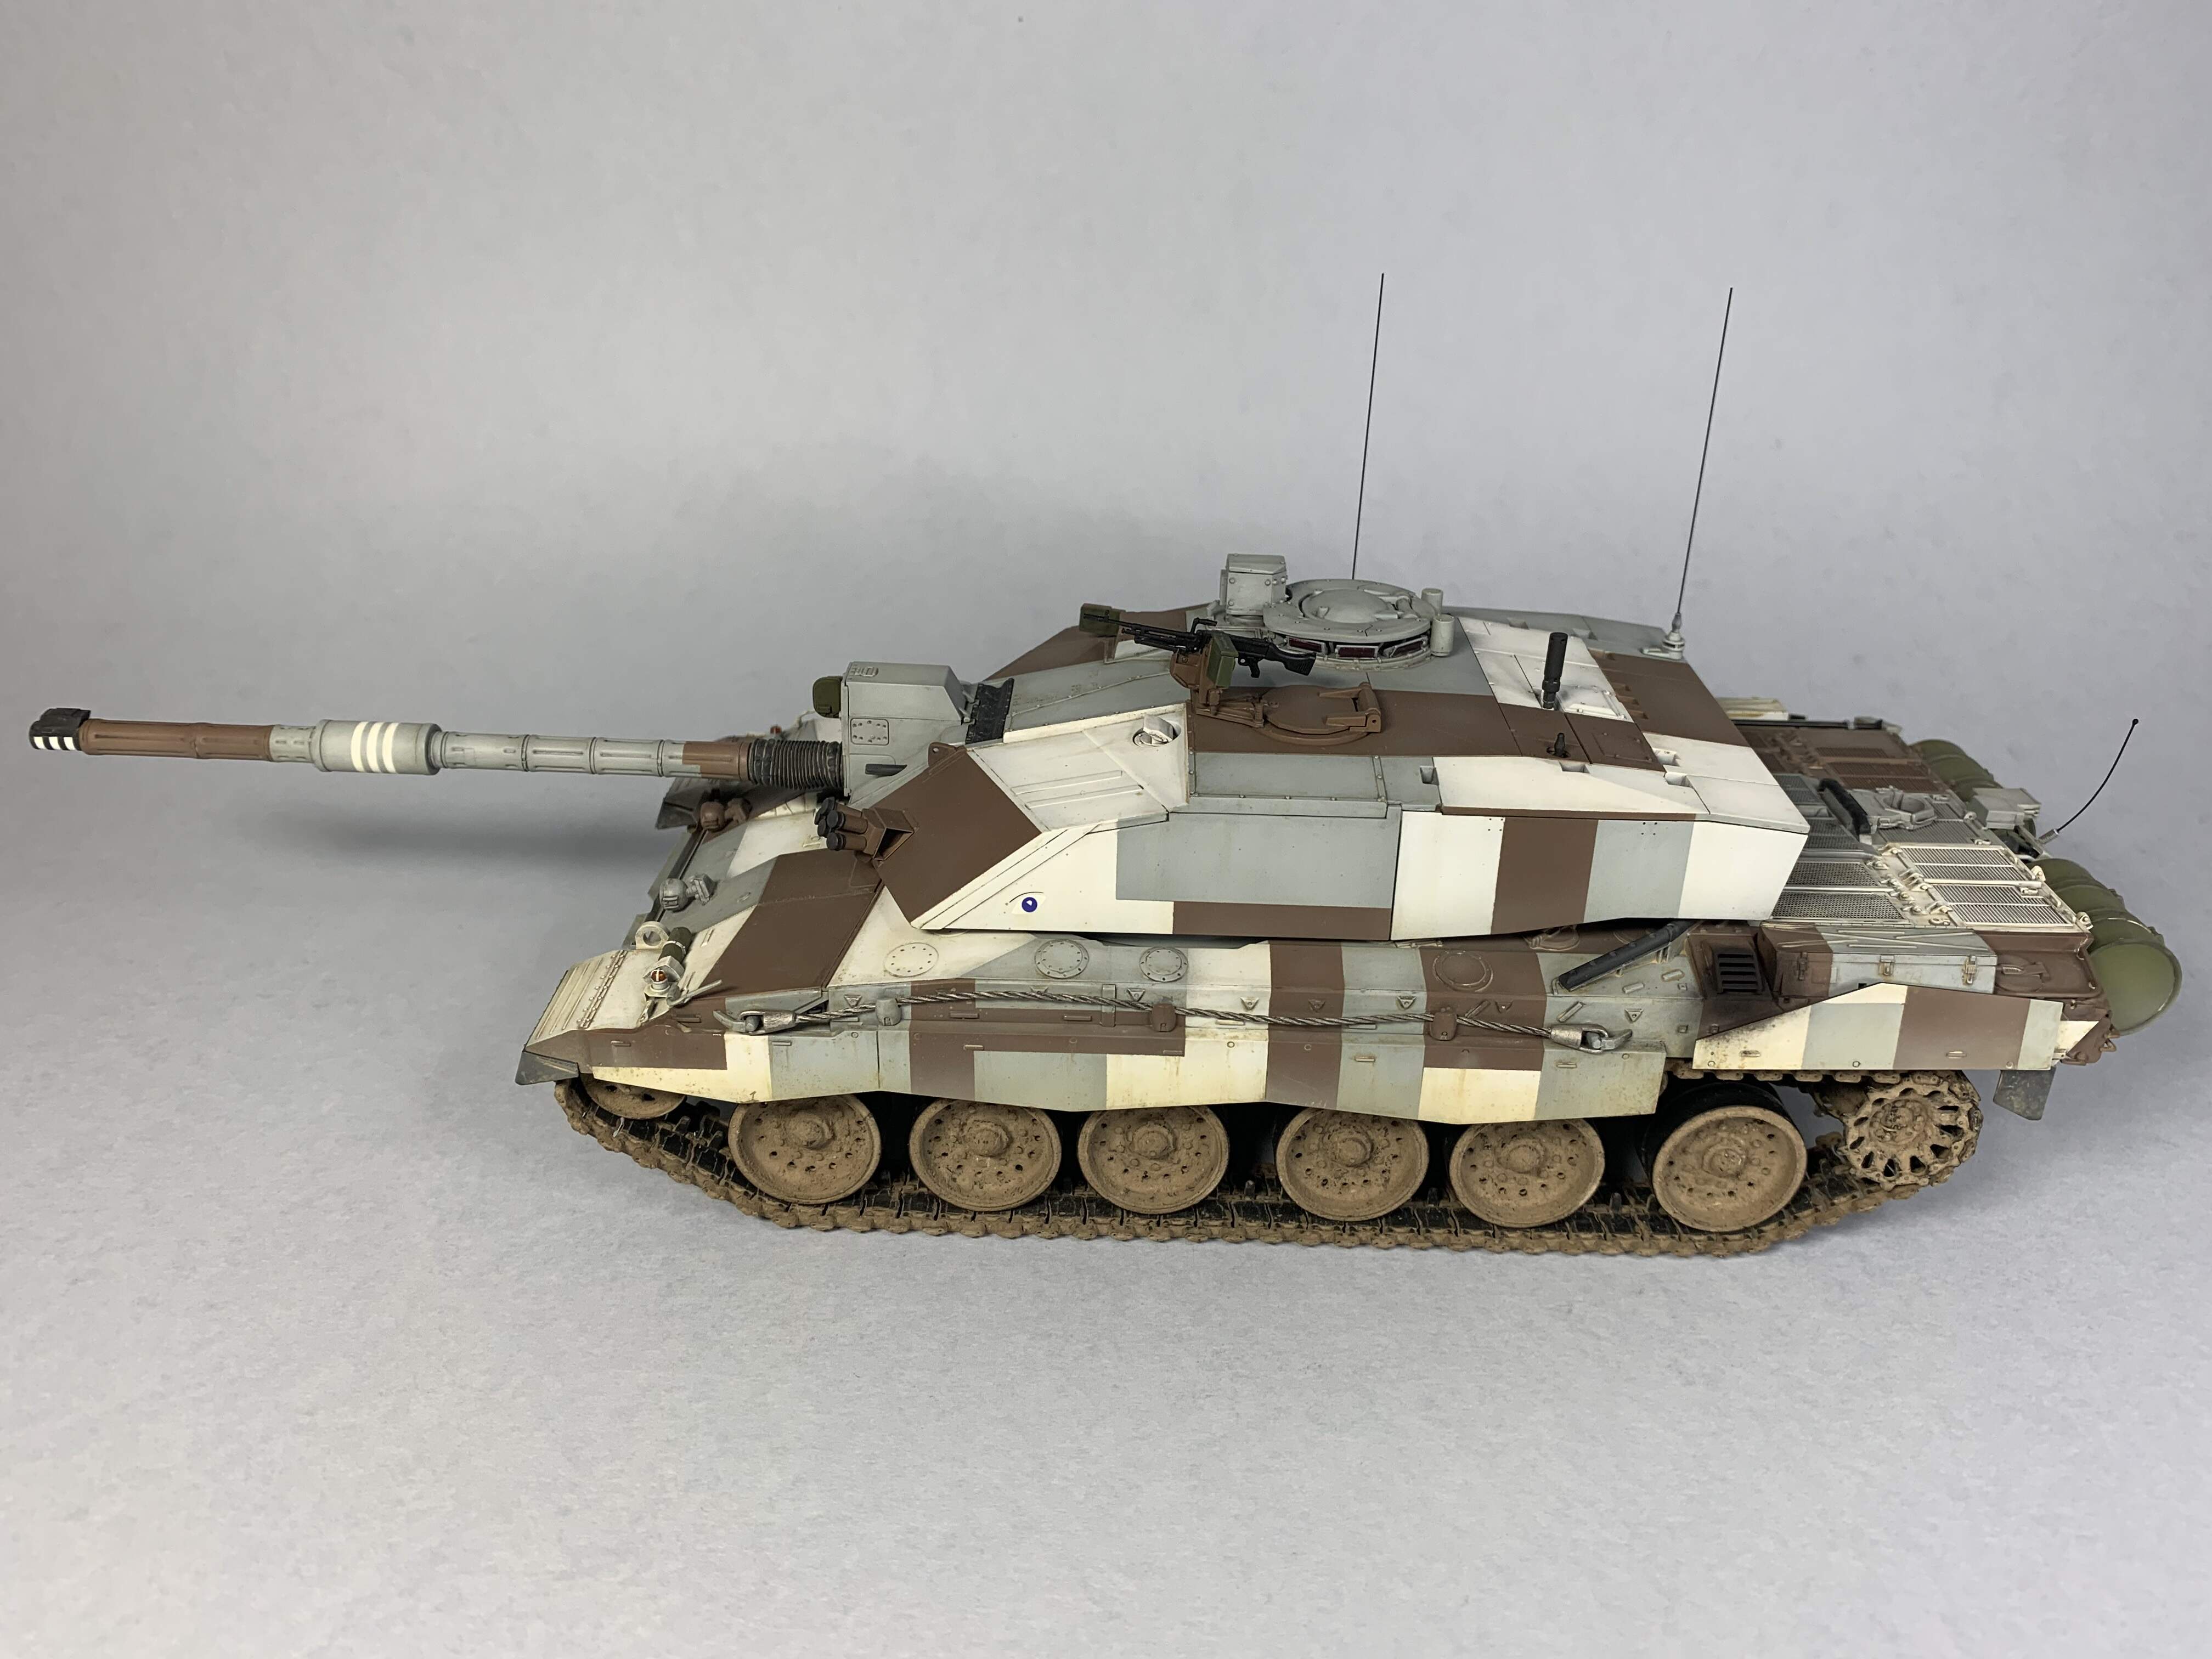
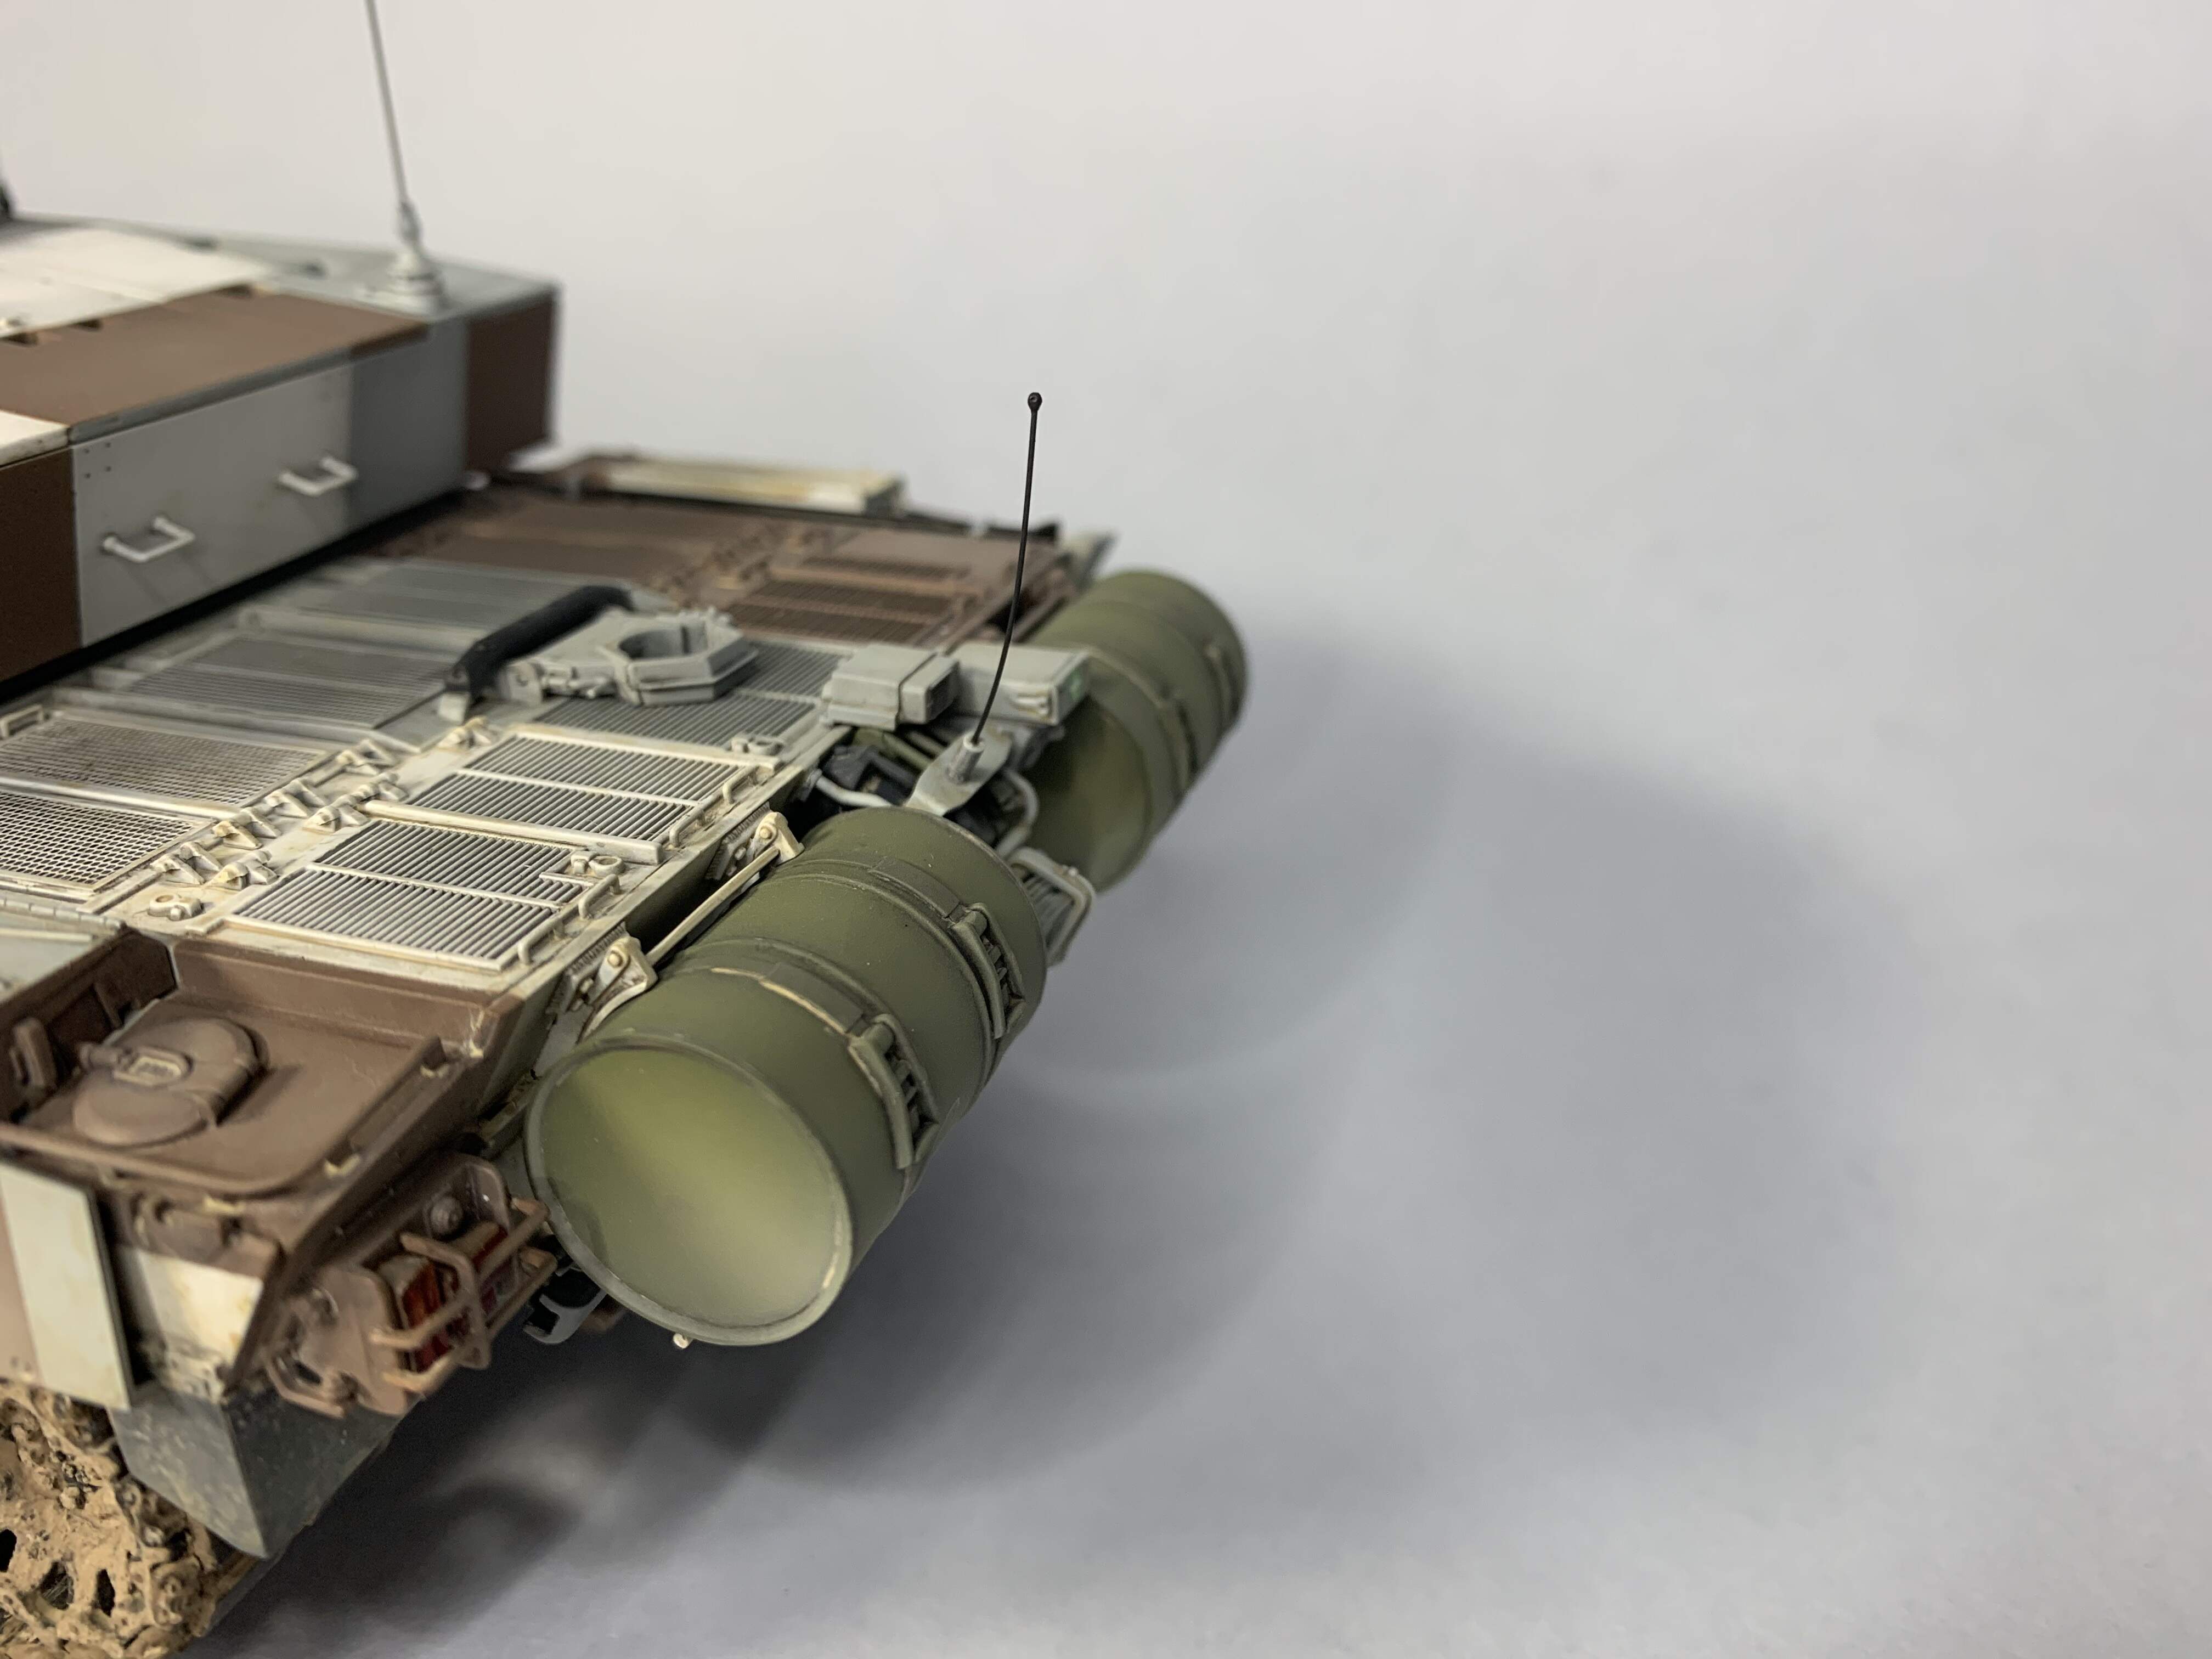
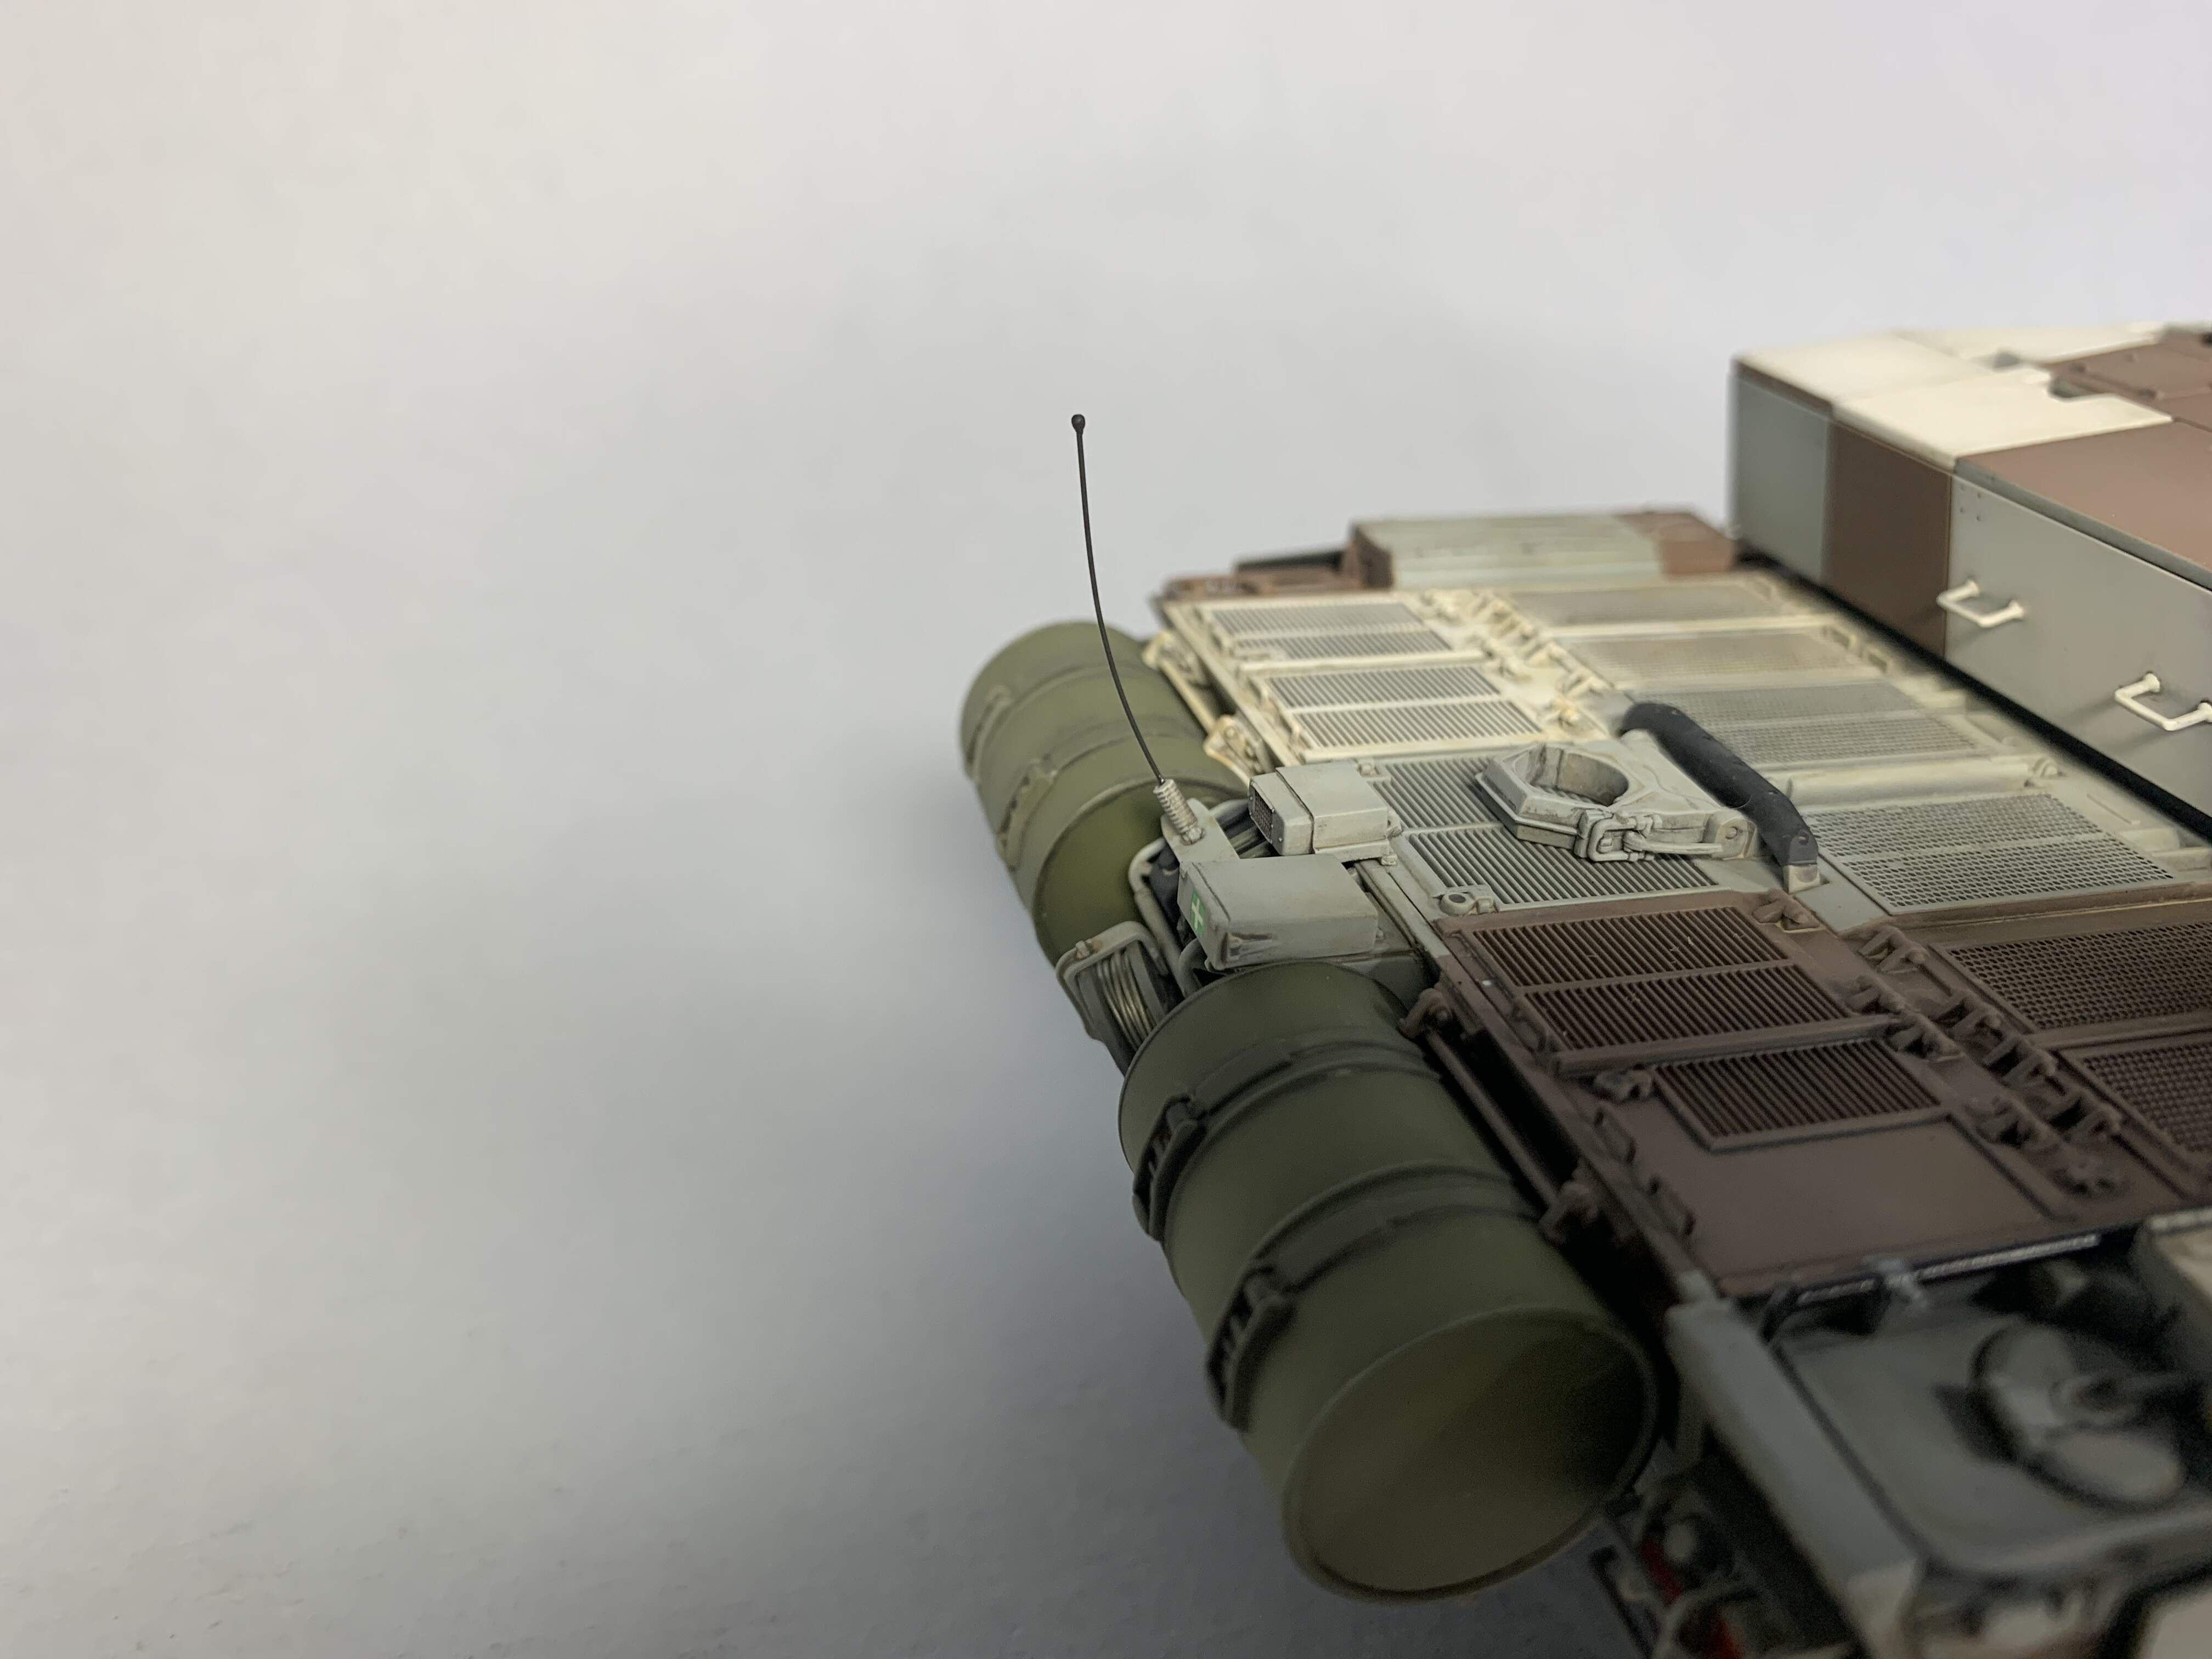
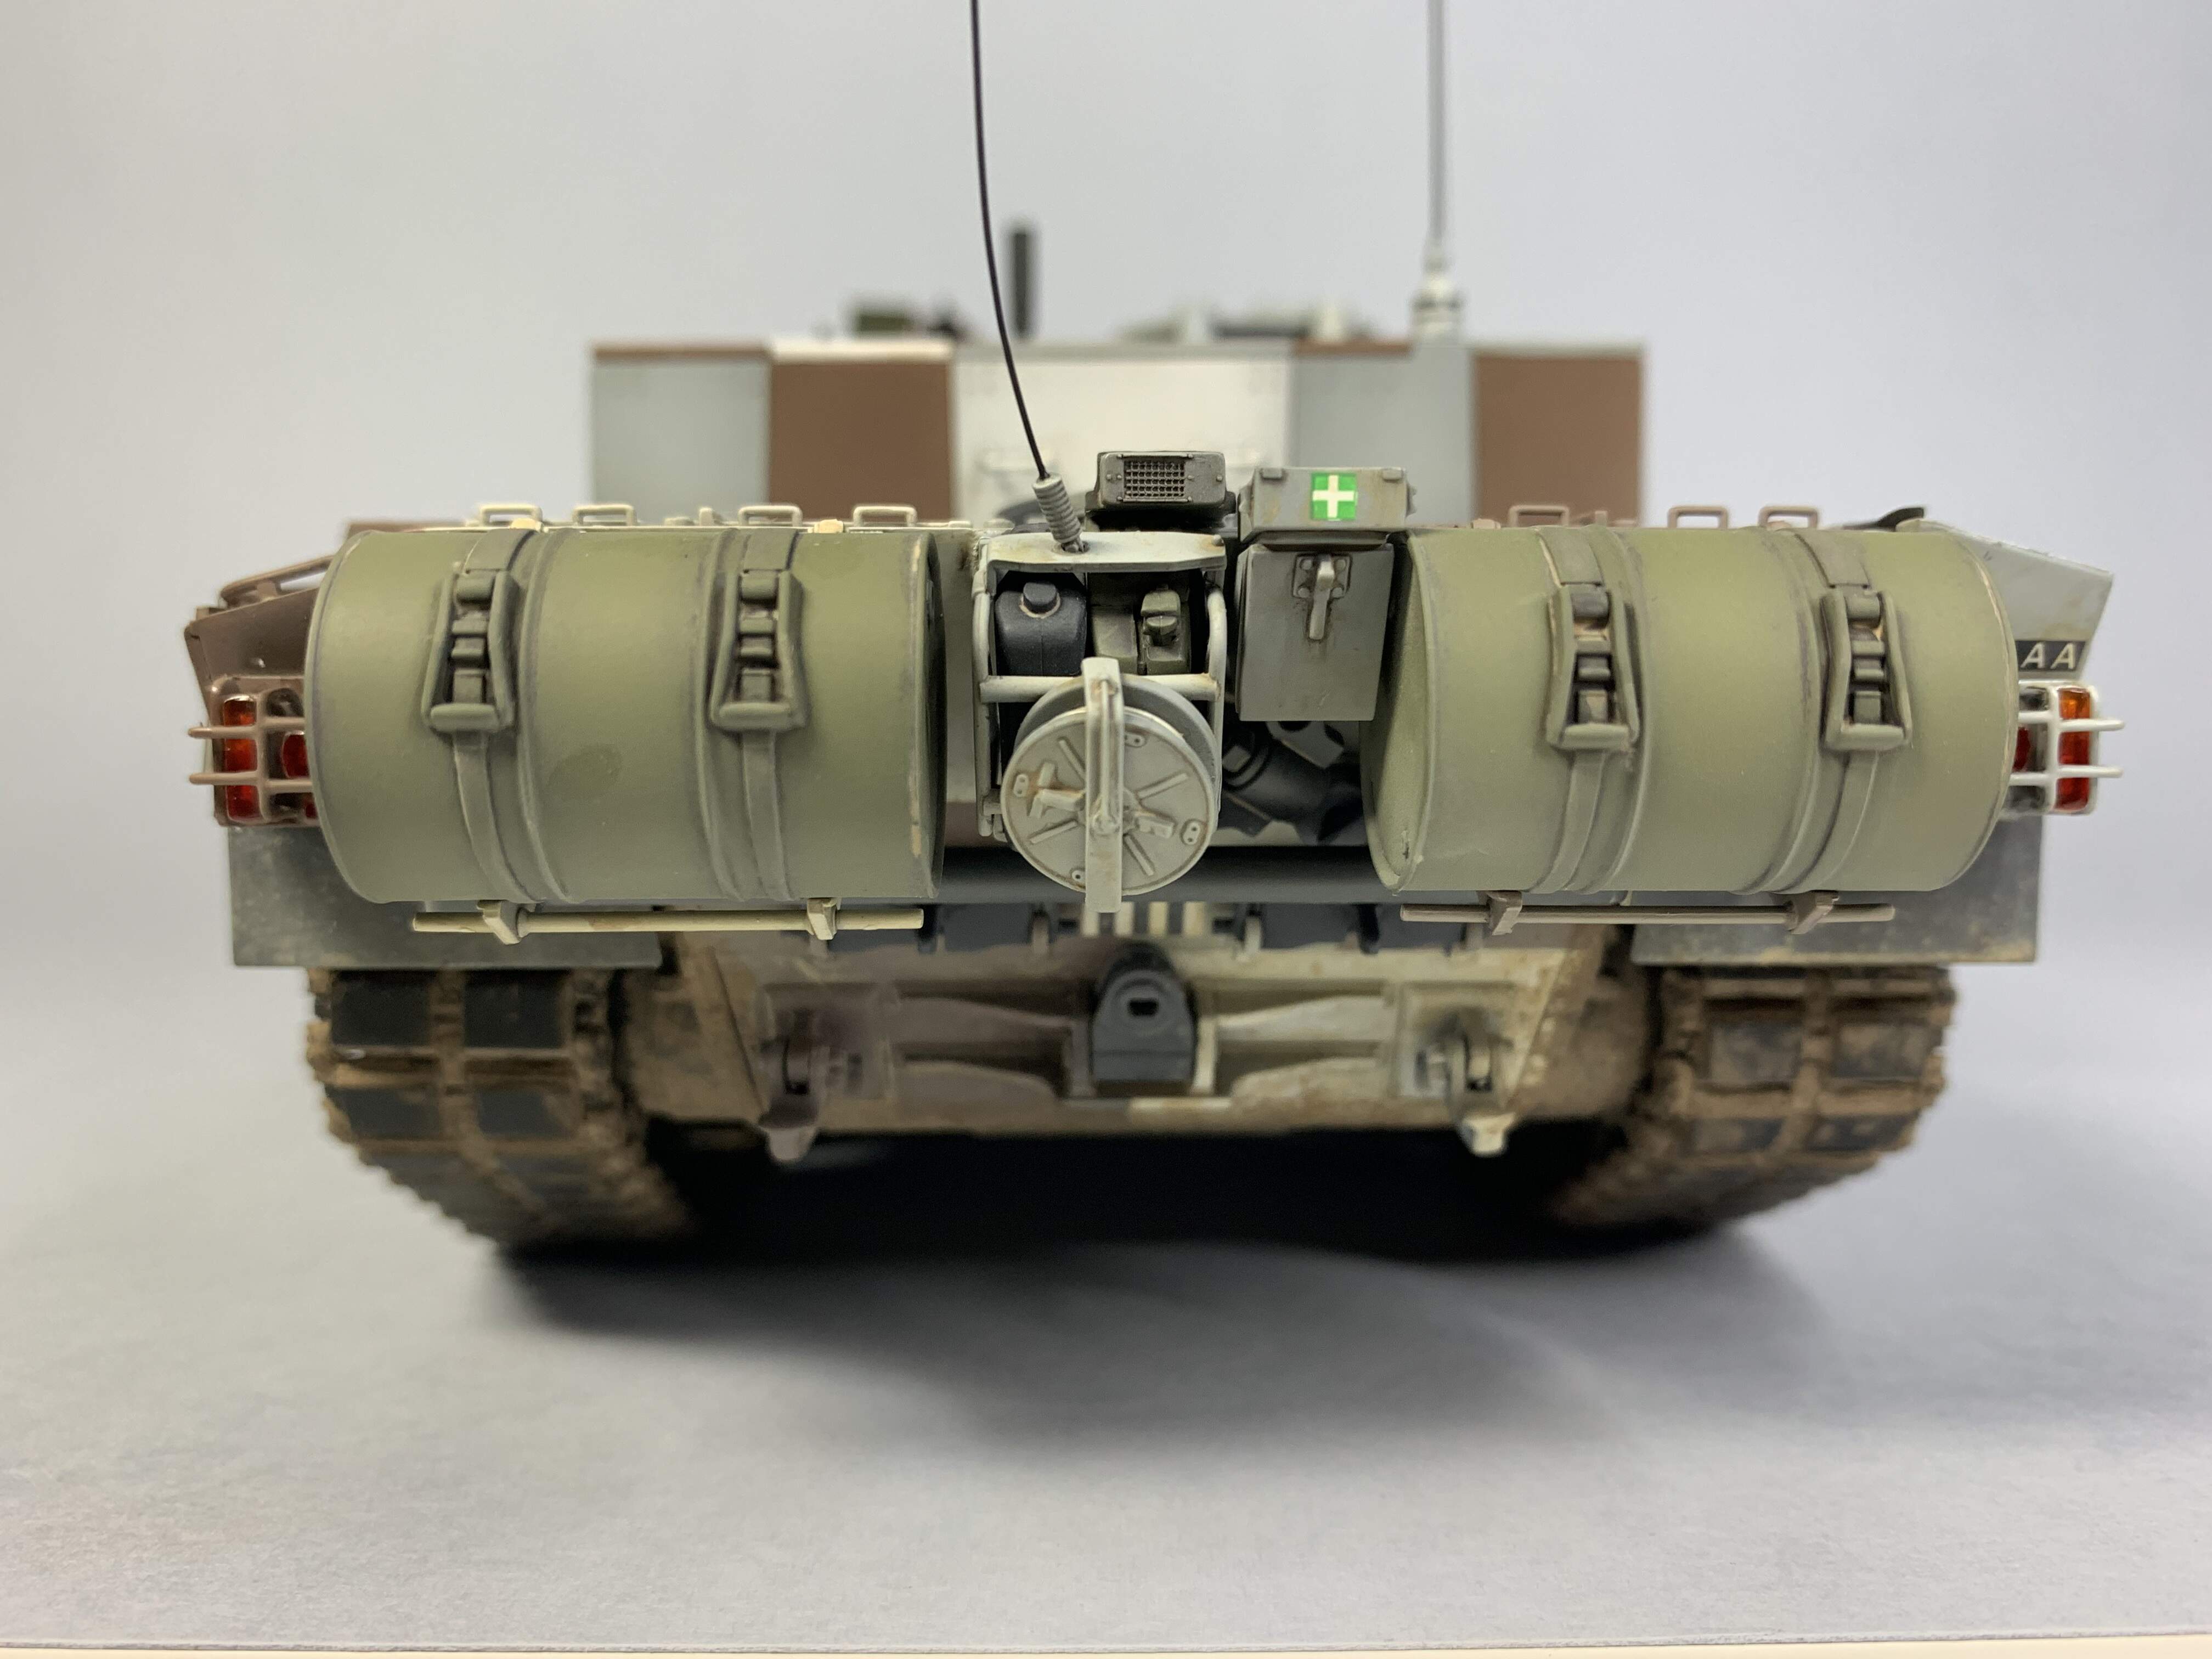
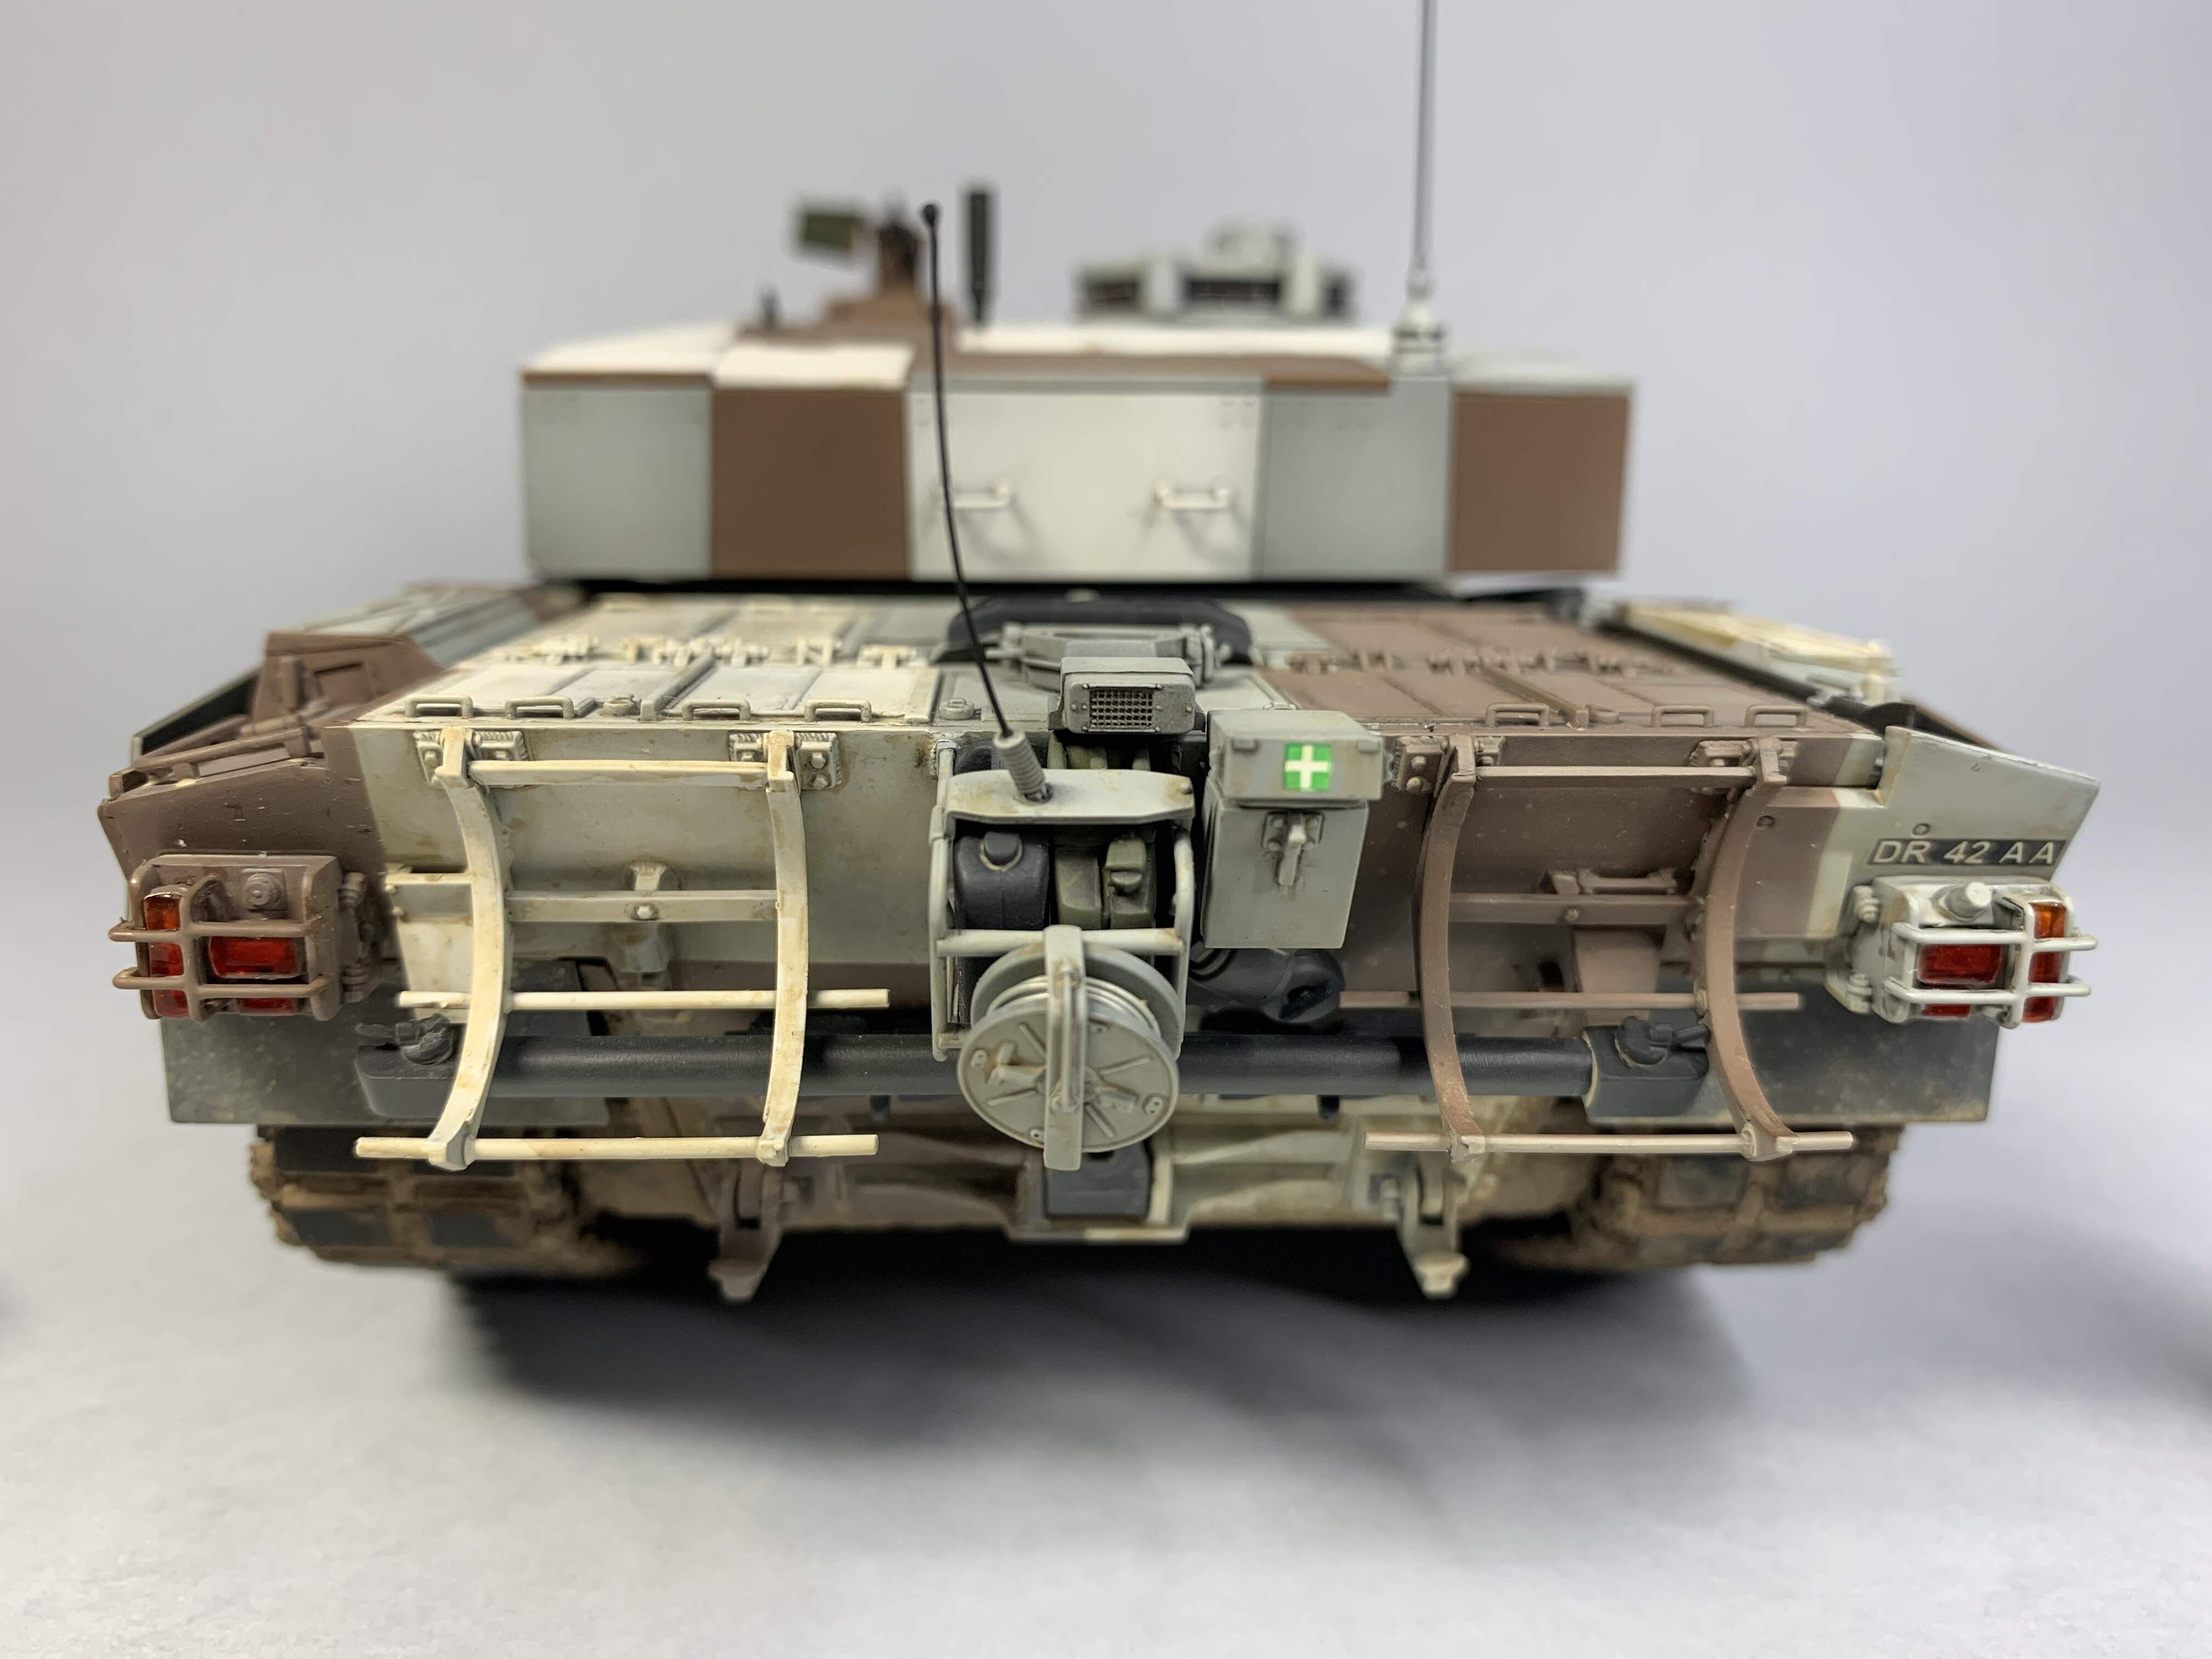
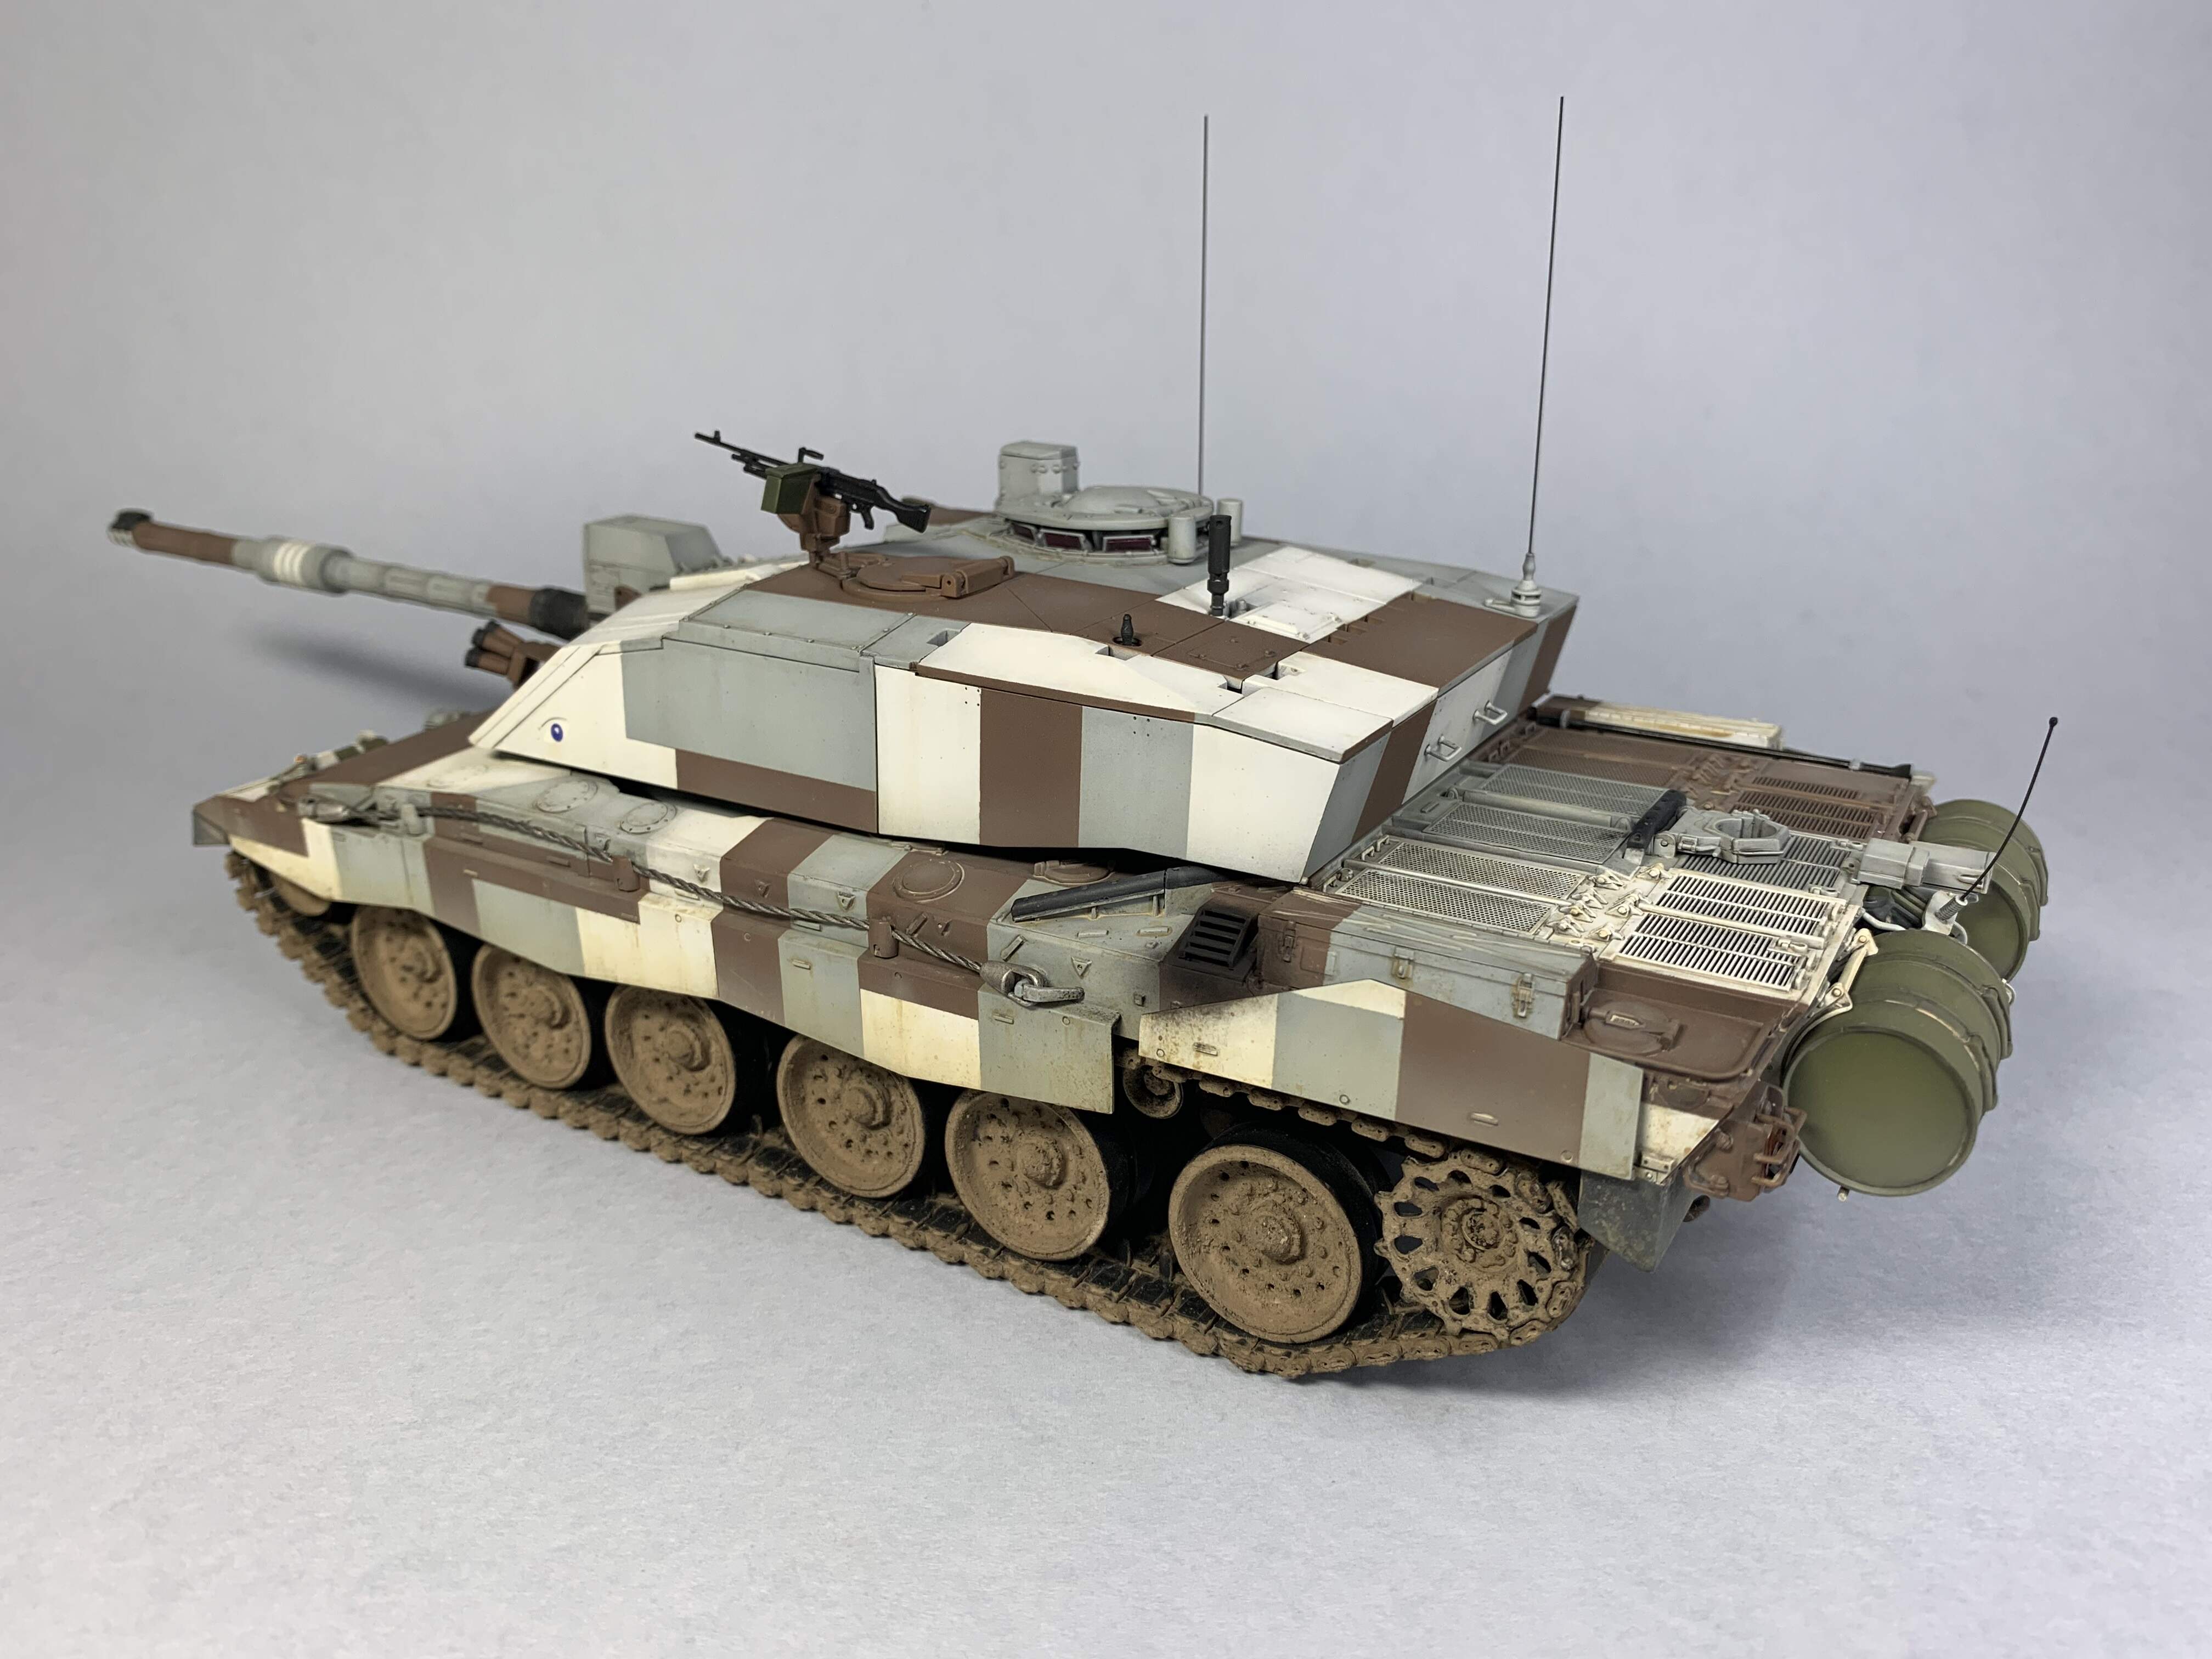
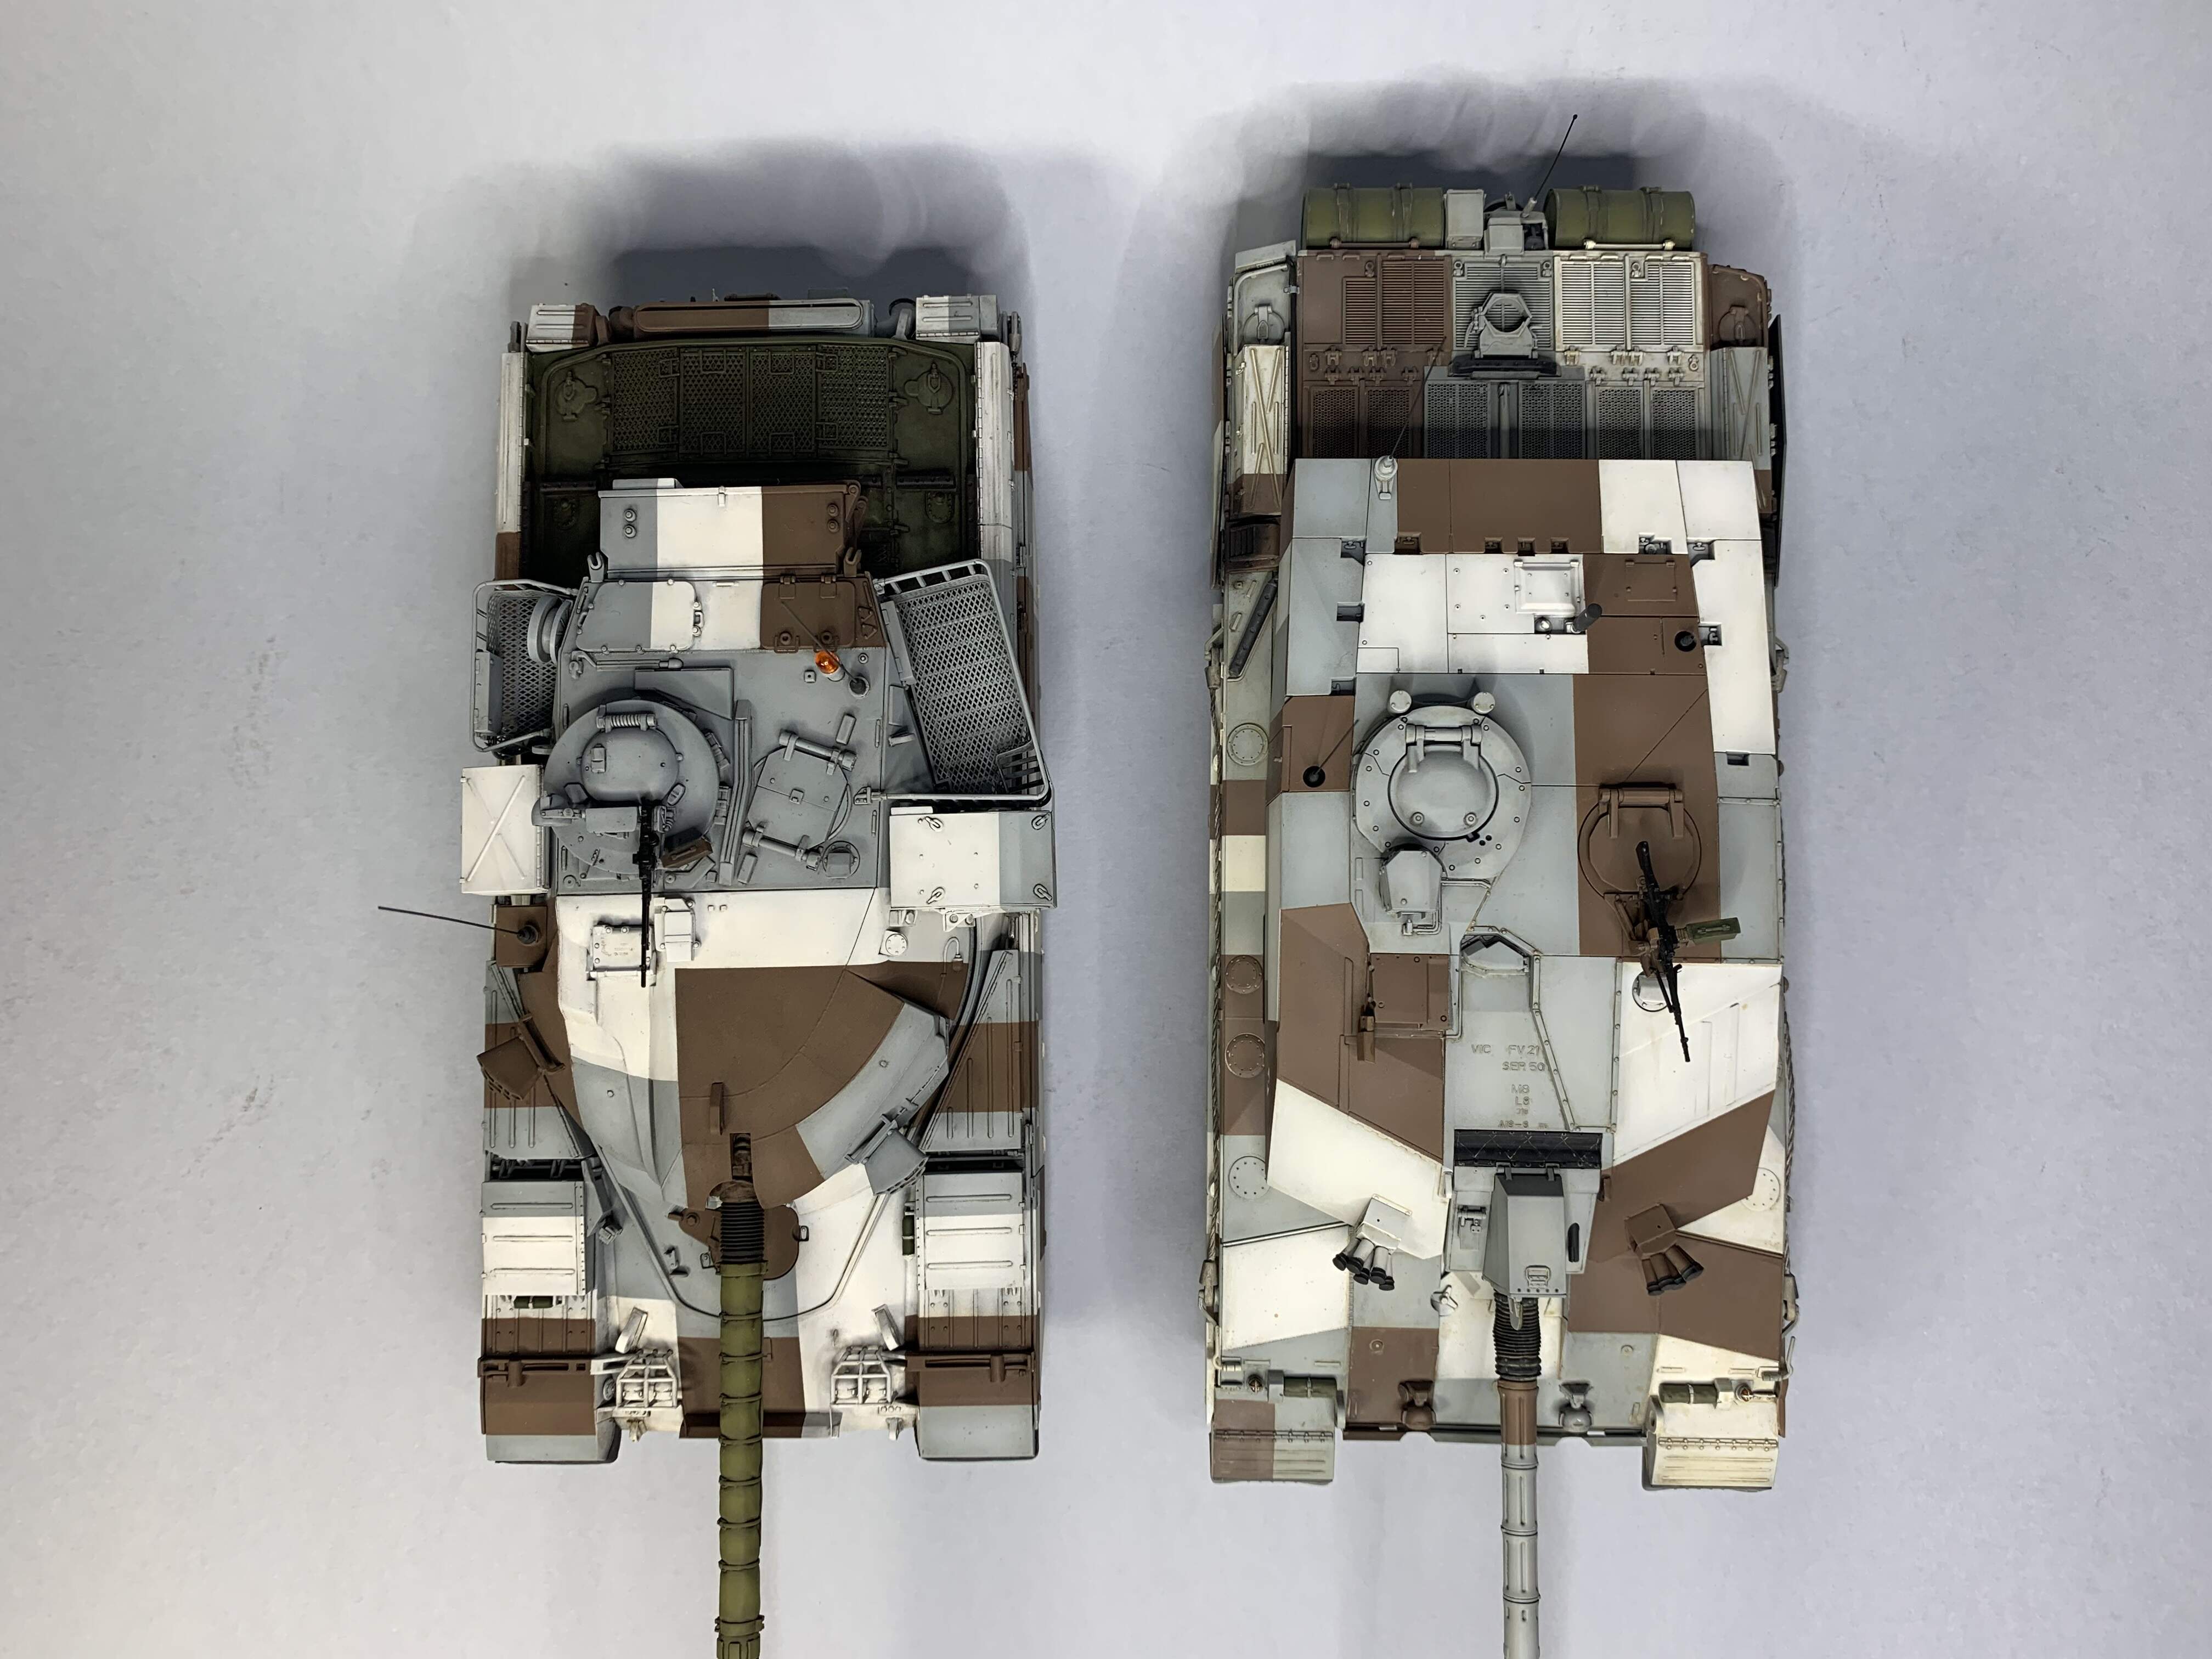
Another quick update. More weathering done. Splashes and streaks with AK light dust deposits, and airbrushed very thin tamiya deck tan, concentrating more on the usual places. Rear parts just about done, and I did keep the Fula drums removable. Rear skirts still to be attached properly.
So, running gear, tow cables and a few small details like the front lights and optics to go.
Cheers, Jim.


8 Likes
Looking amazing Jim!
1 Like
Beautiful!
1 Like
That’s a good job on the weathering Jim, nice and gentle…looks like it’s been on a days dusty training out on the plain … (SPTA- Salisbury Plain Training Area) 
2 Likes
Looks excellent Jim !
1 Like
Looking really good, impressive. I`ve bookmarked your pictures as reference for my own build 

1 Like
Subtle but impressive!!!
1 Like
Thank you everyone for your kind comments, they really mean so much.
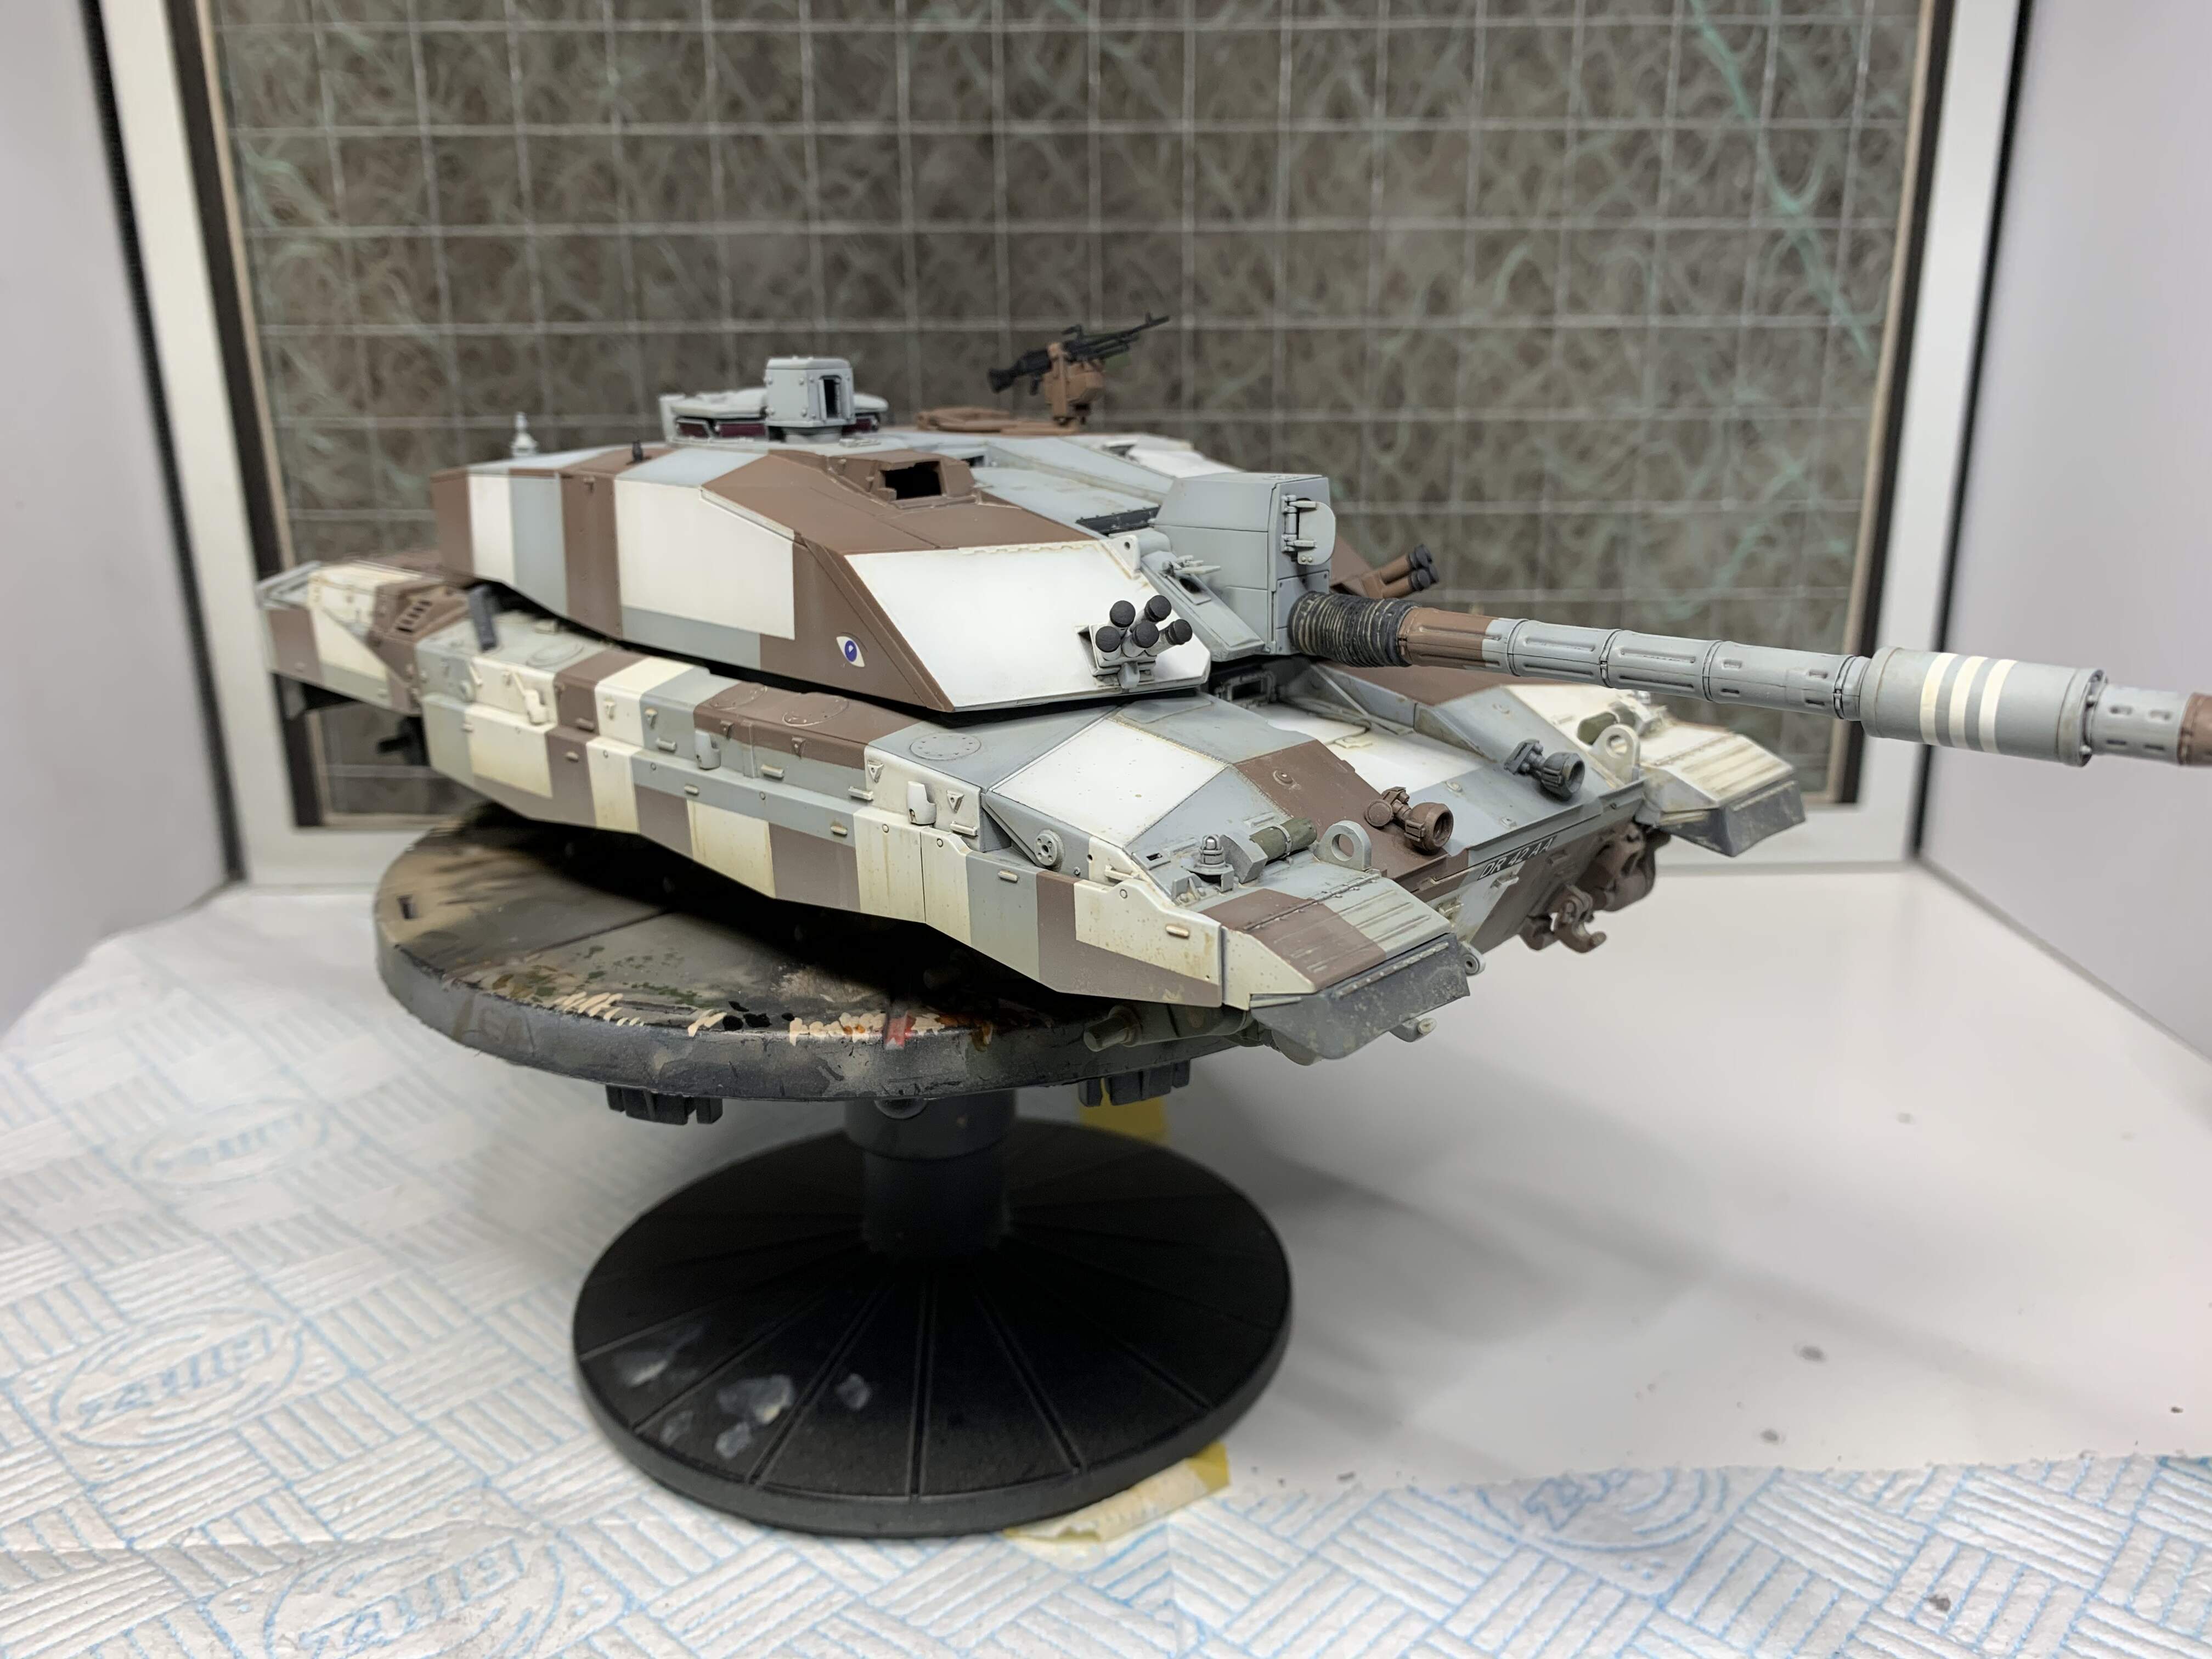
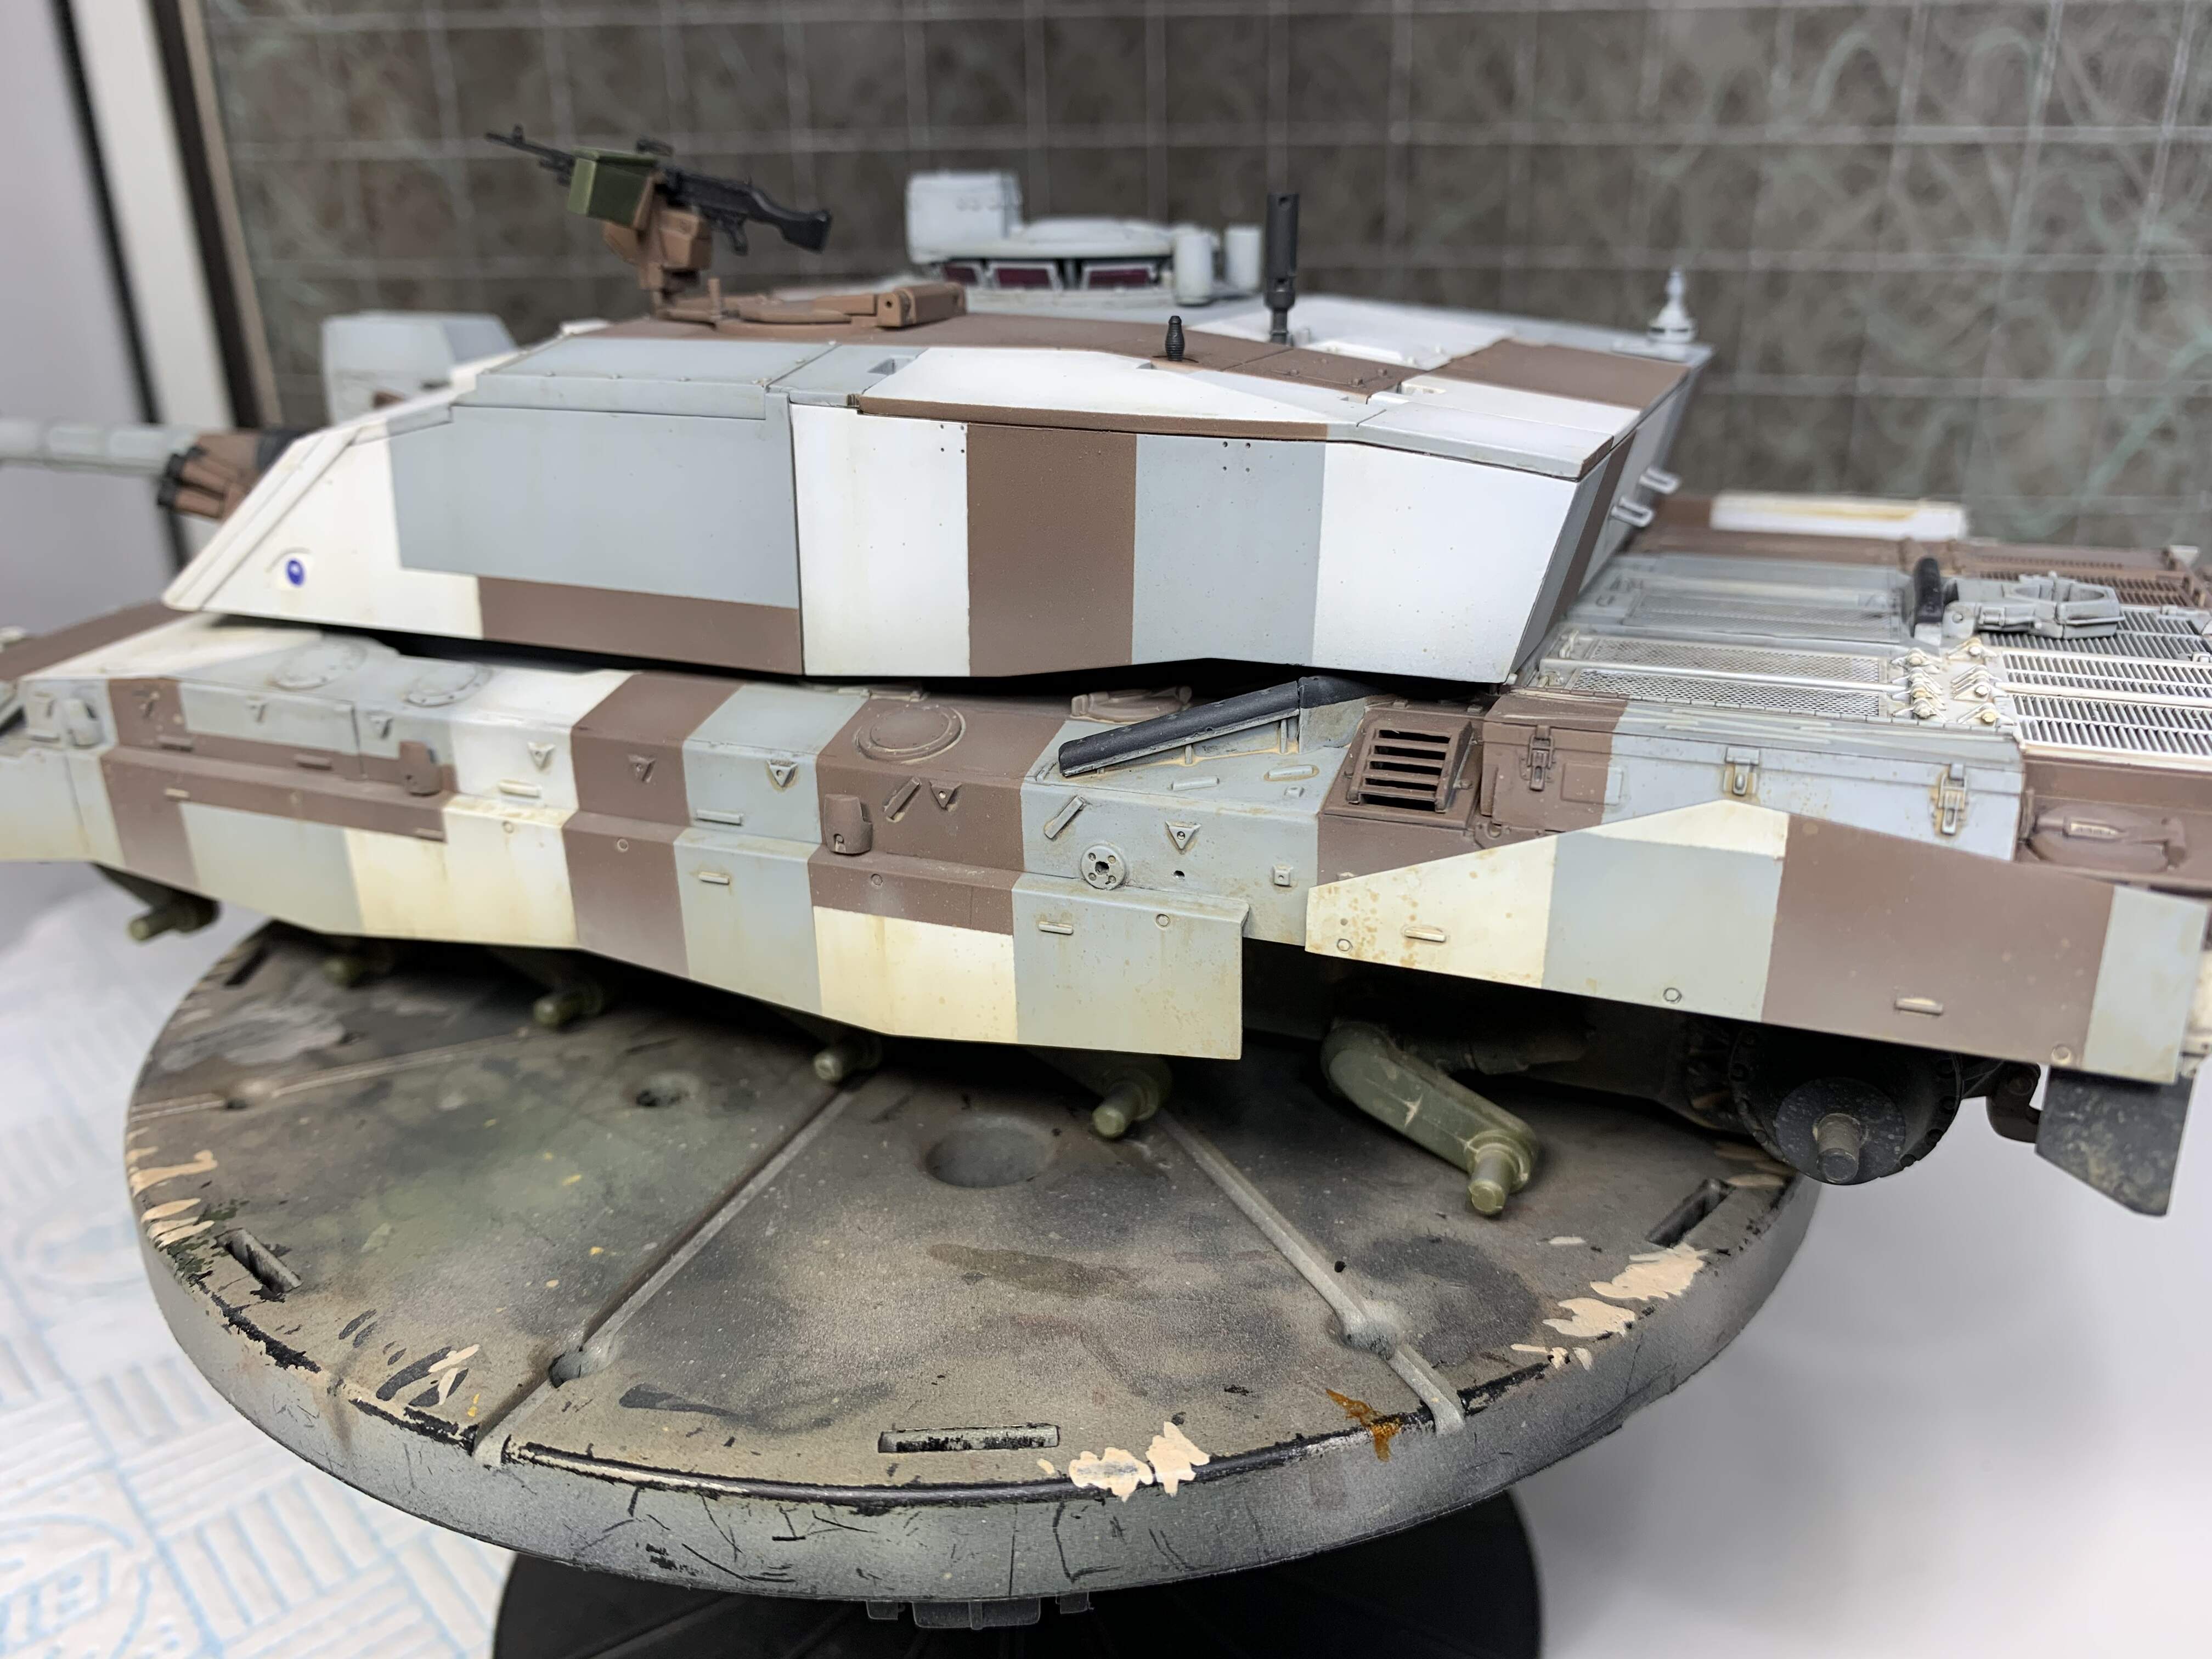
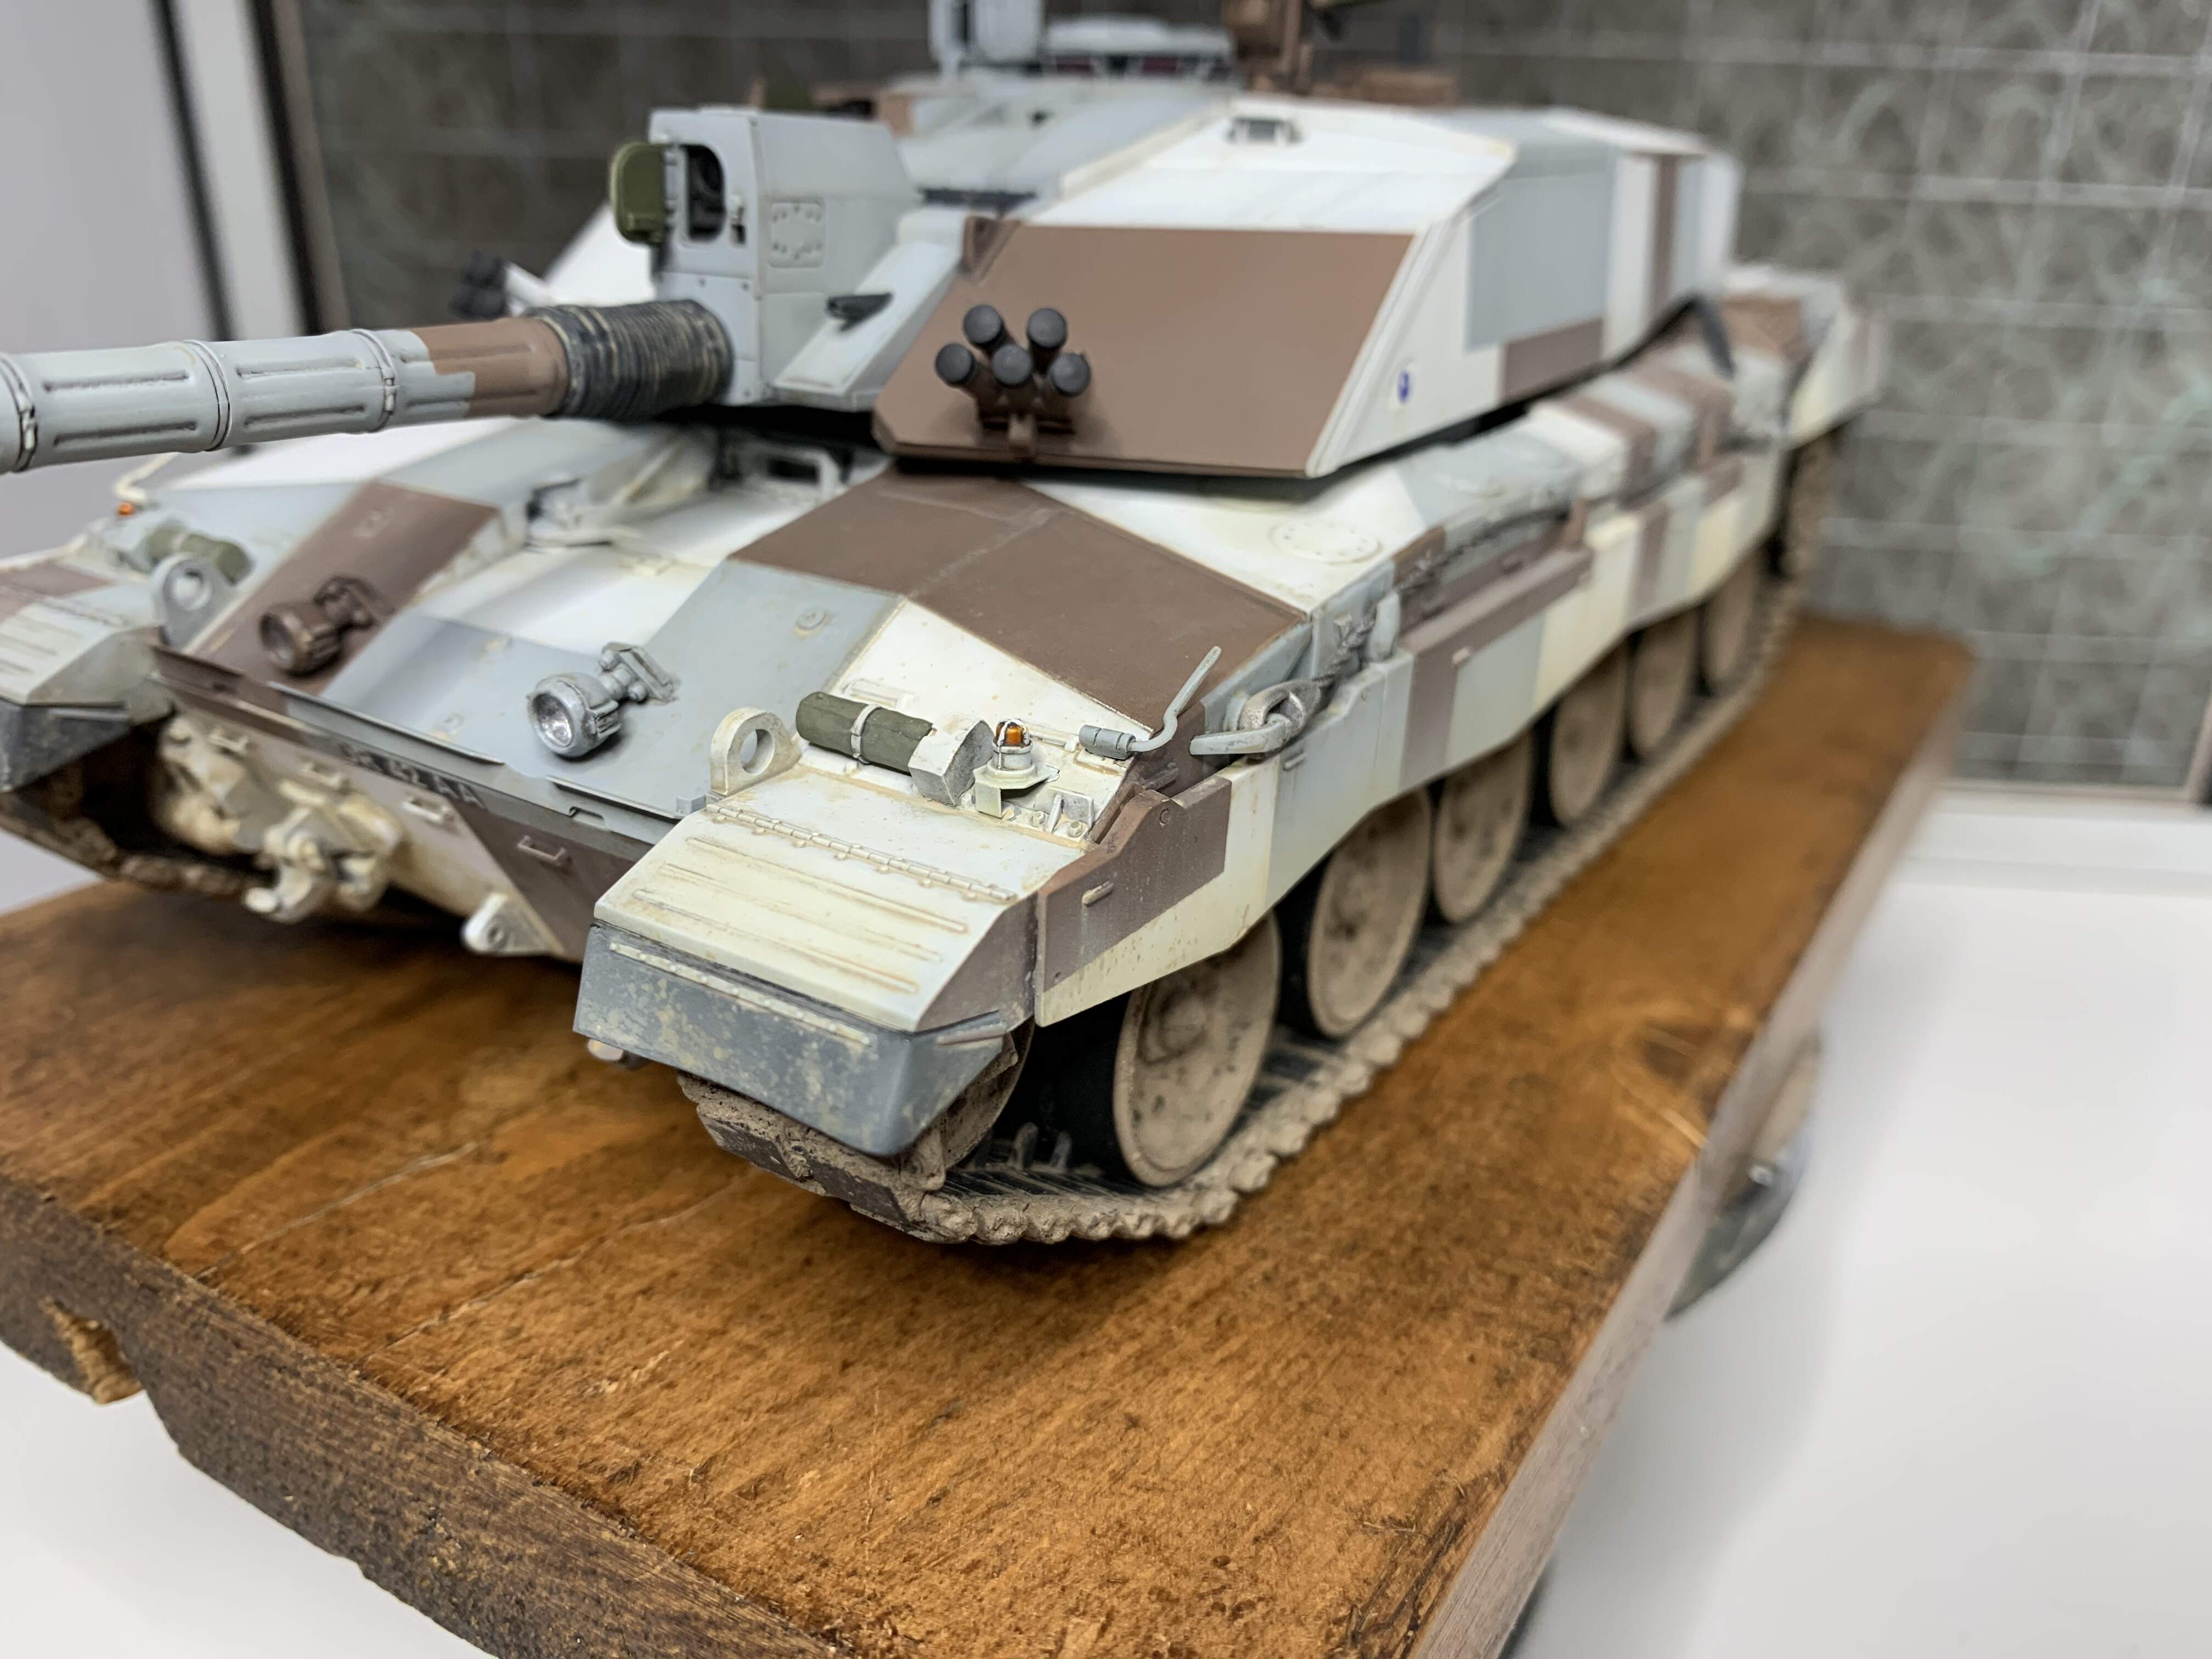
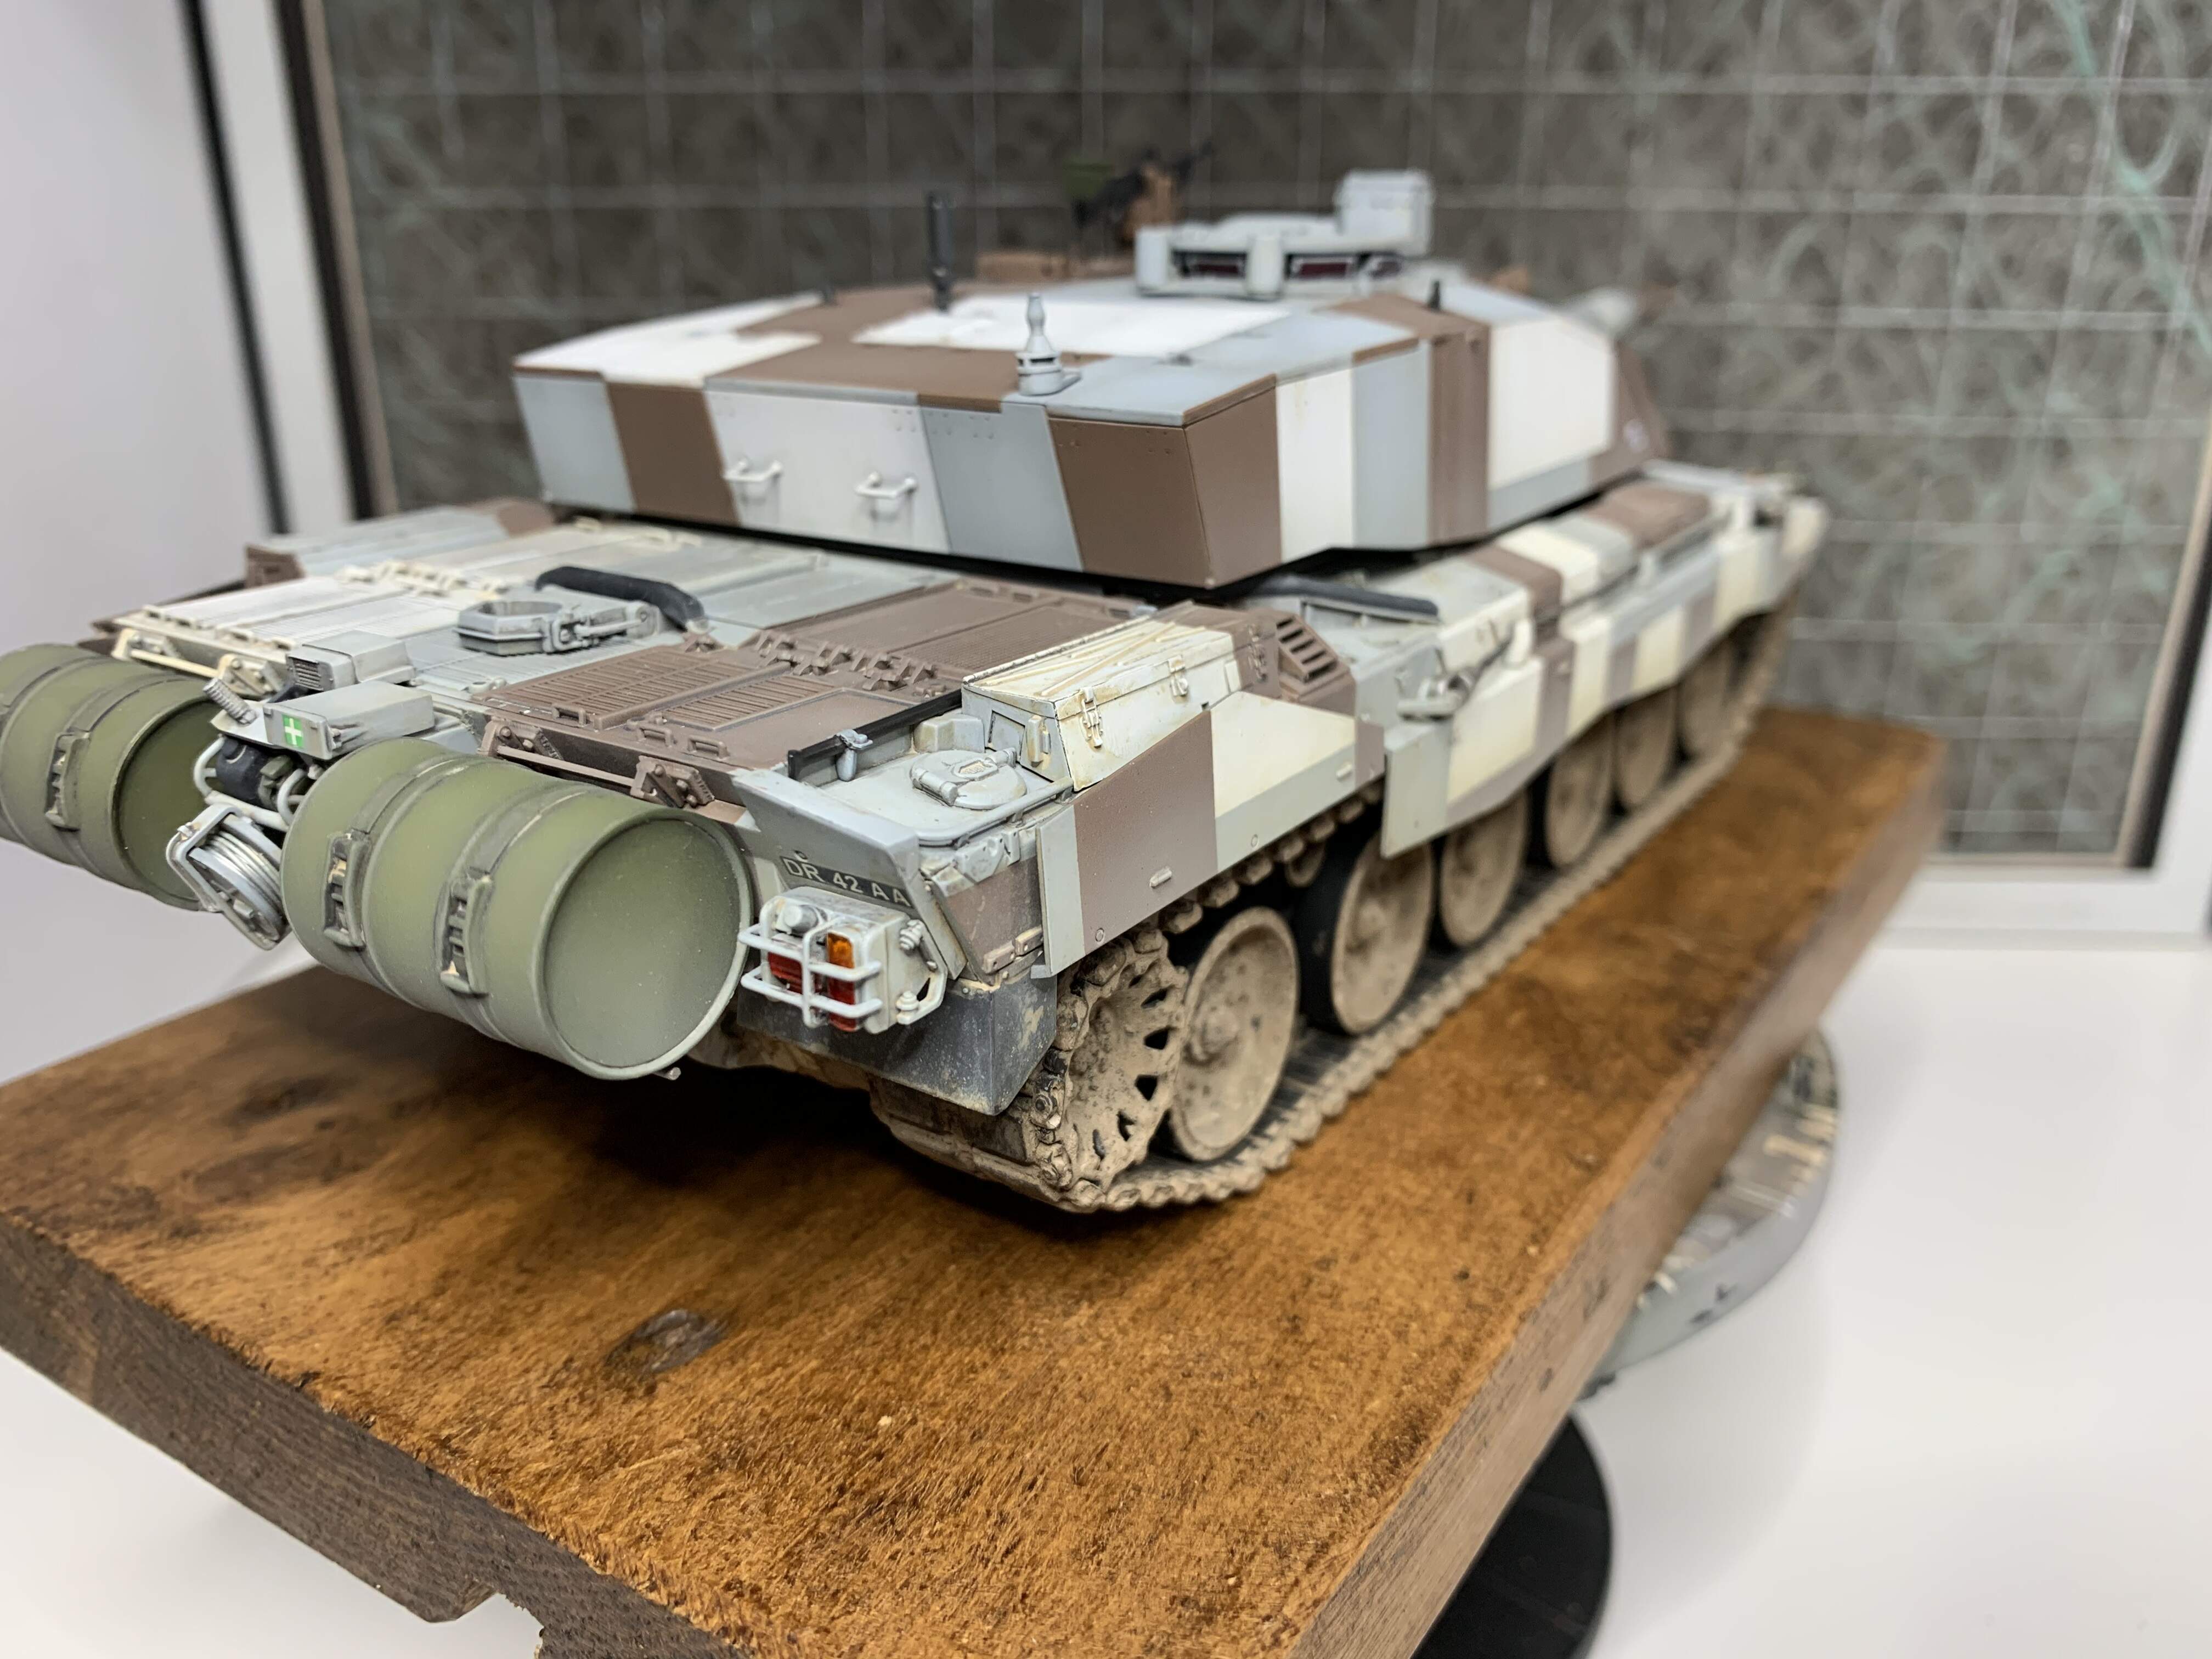
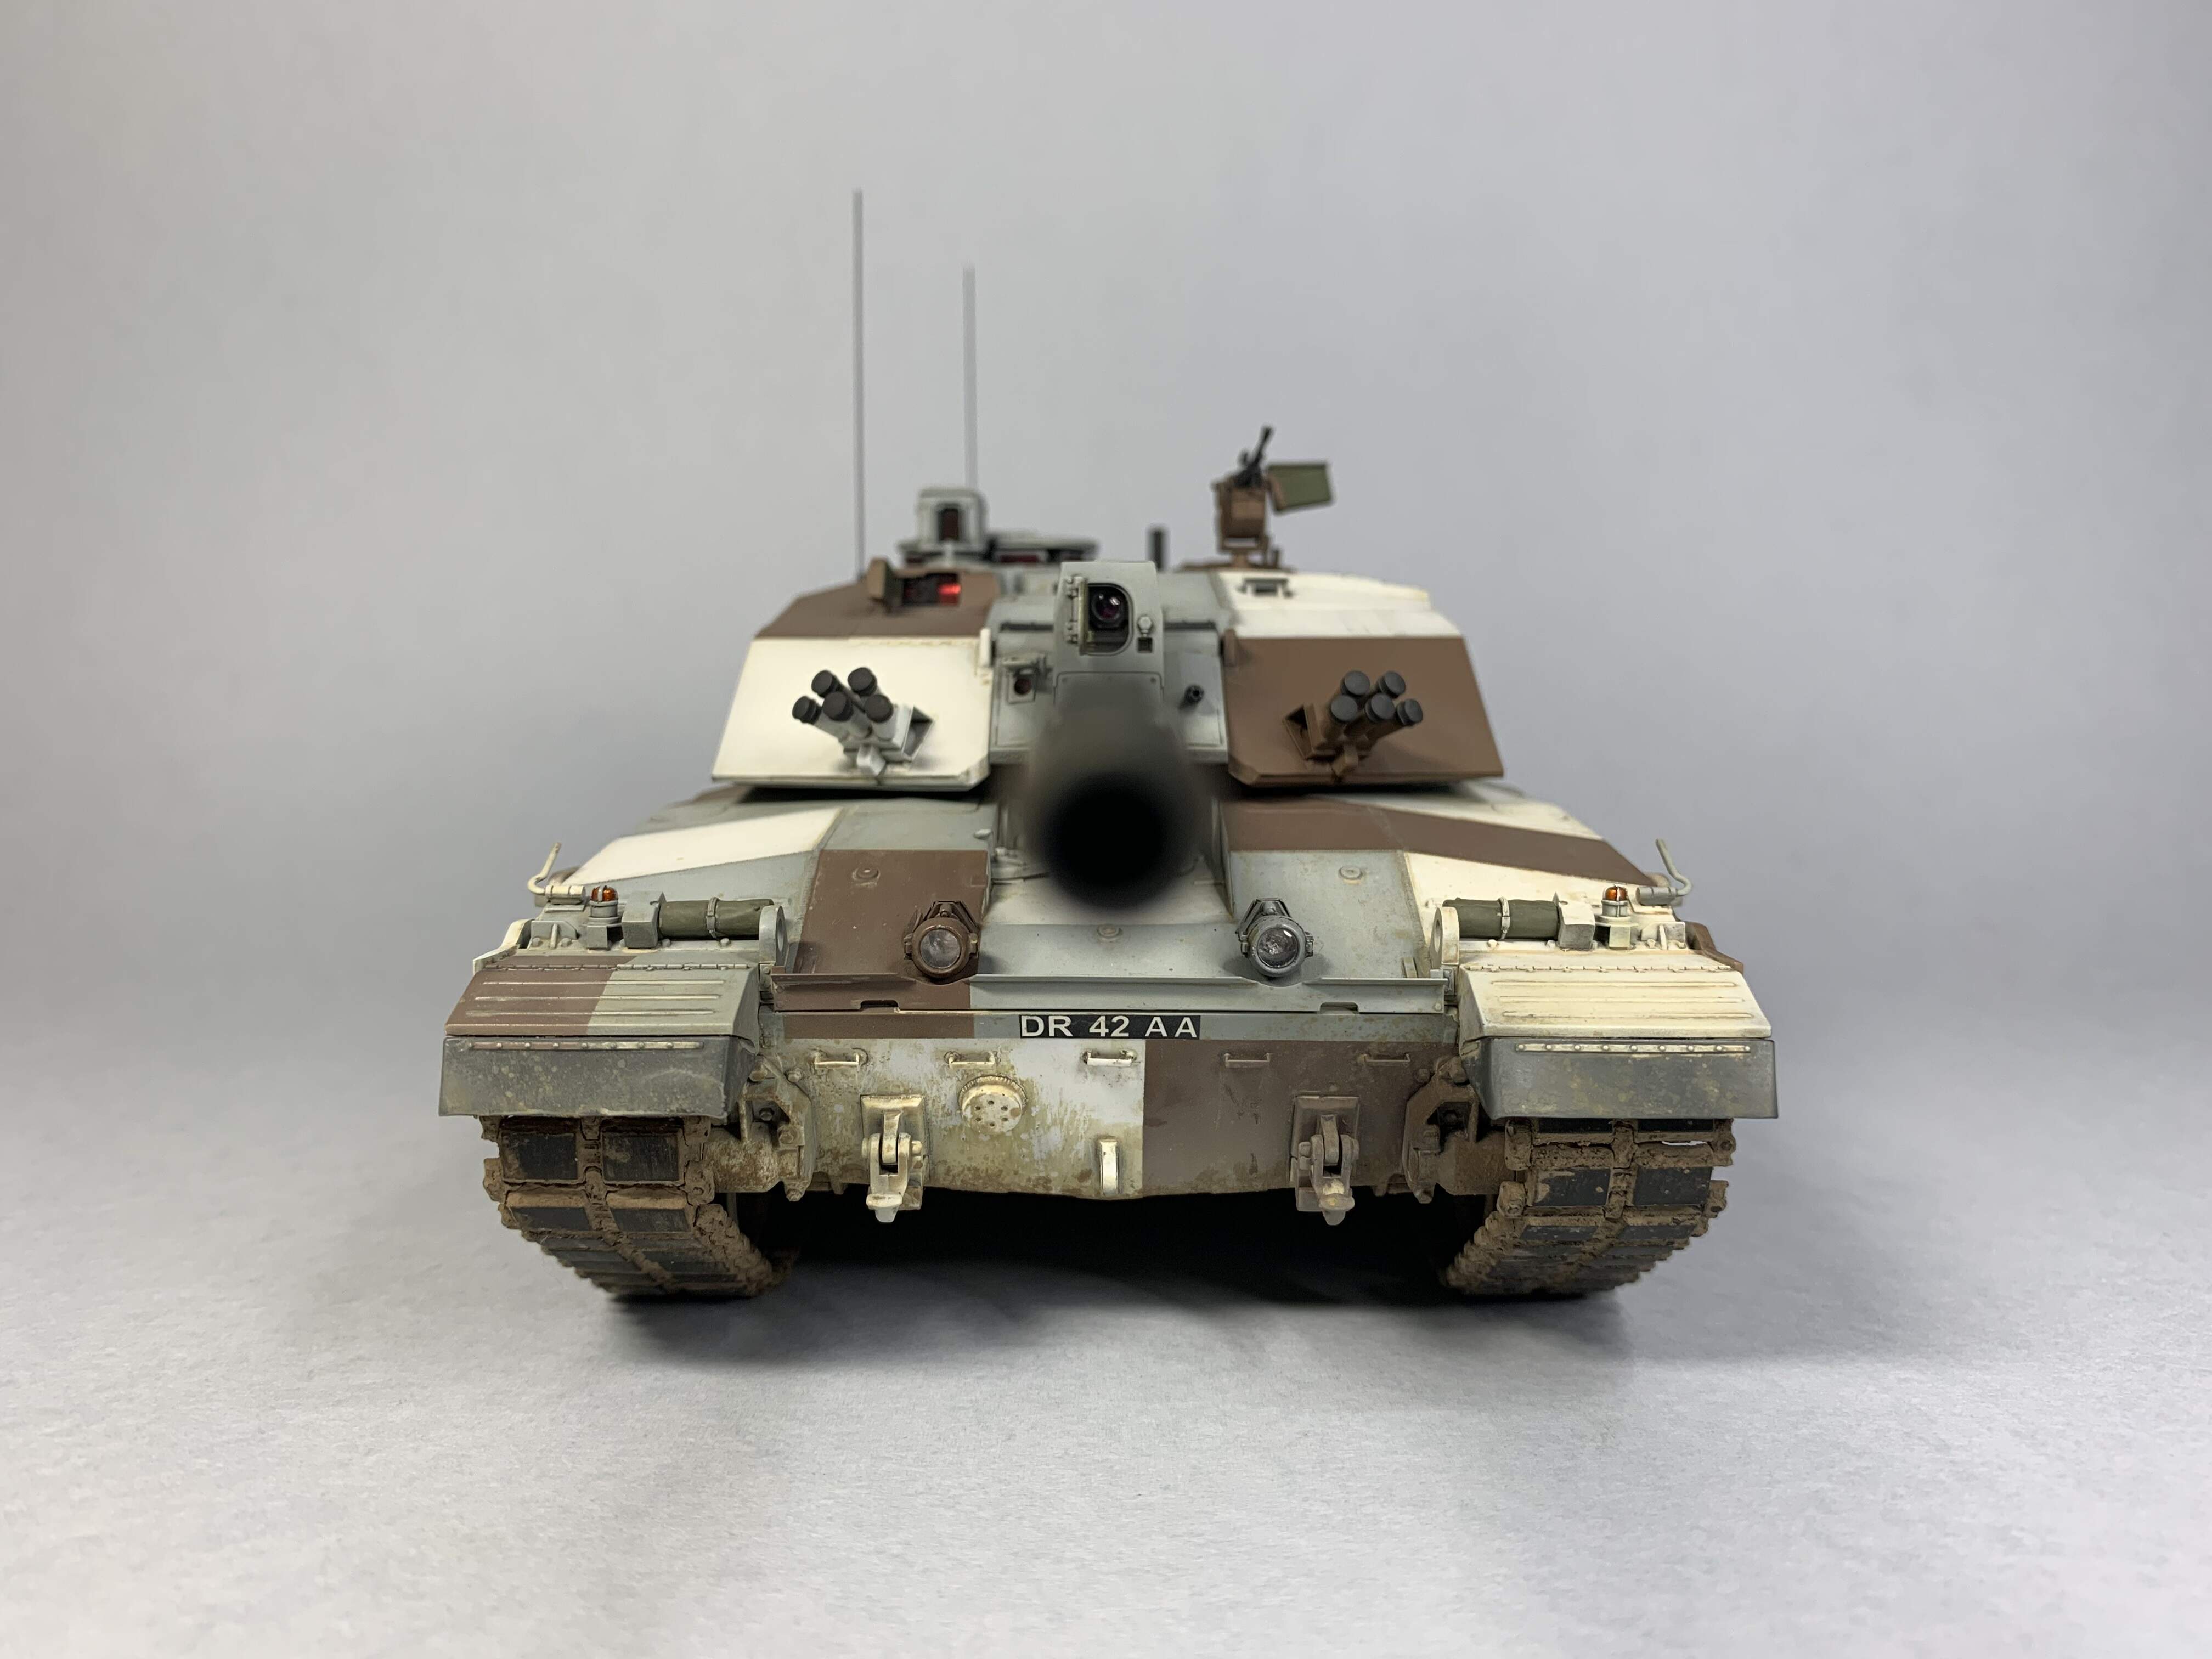
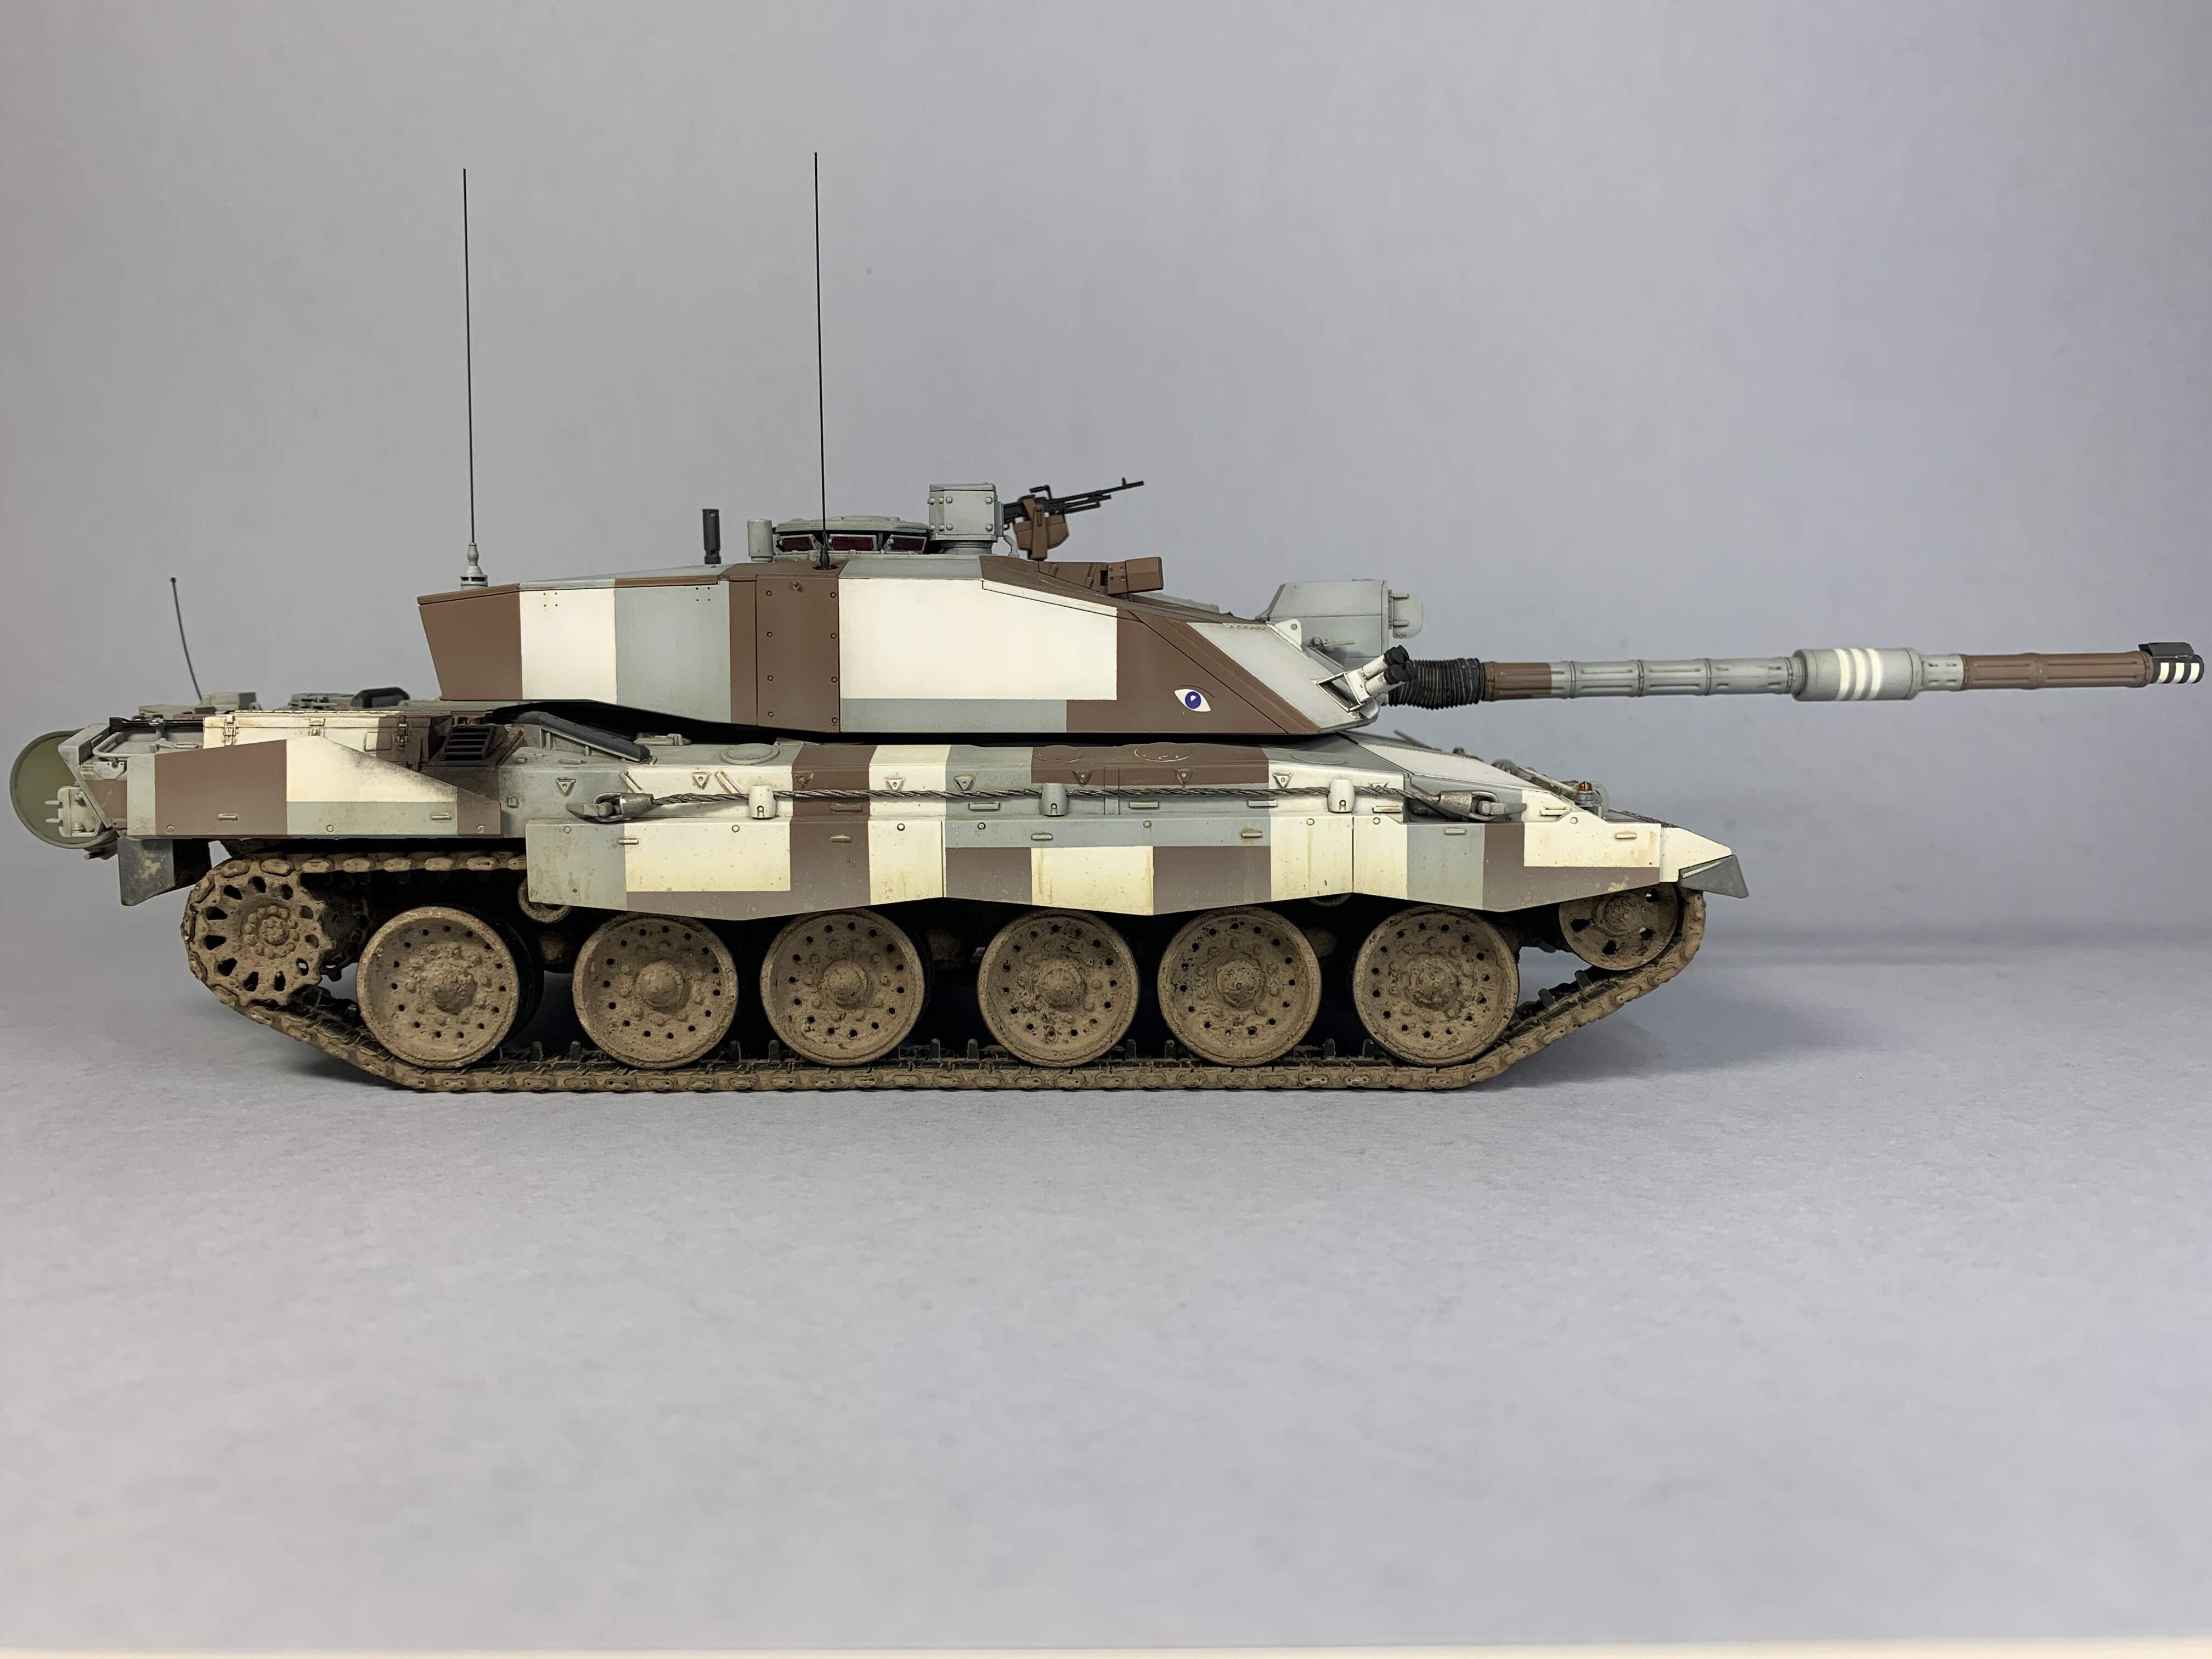
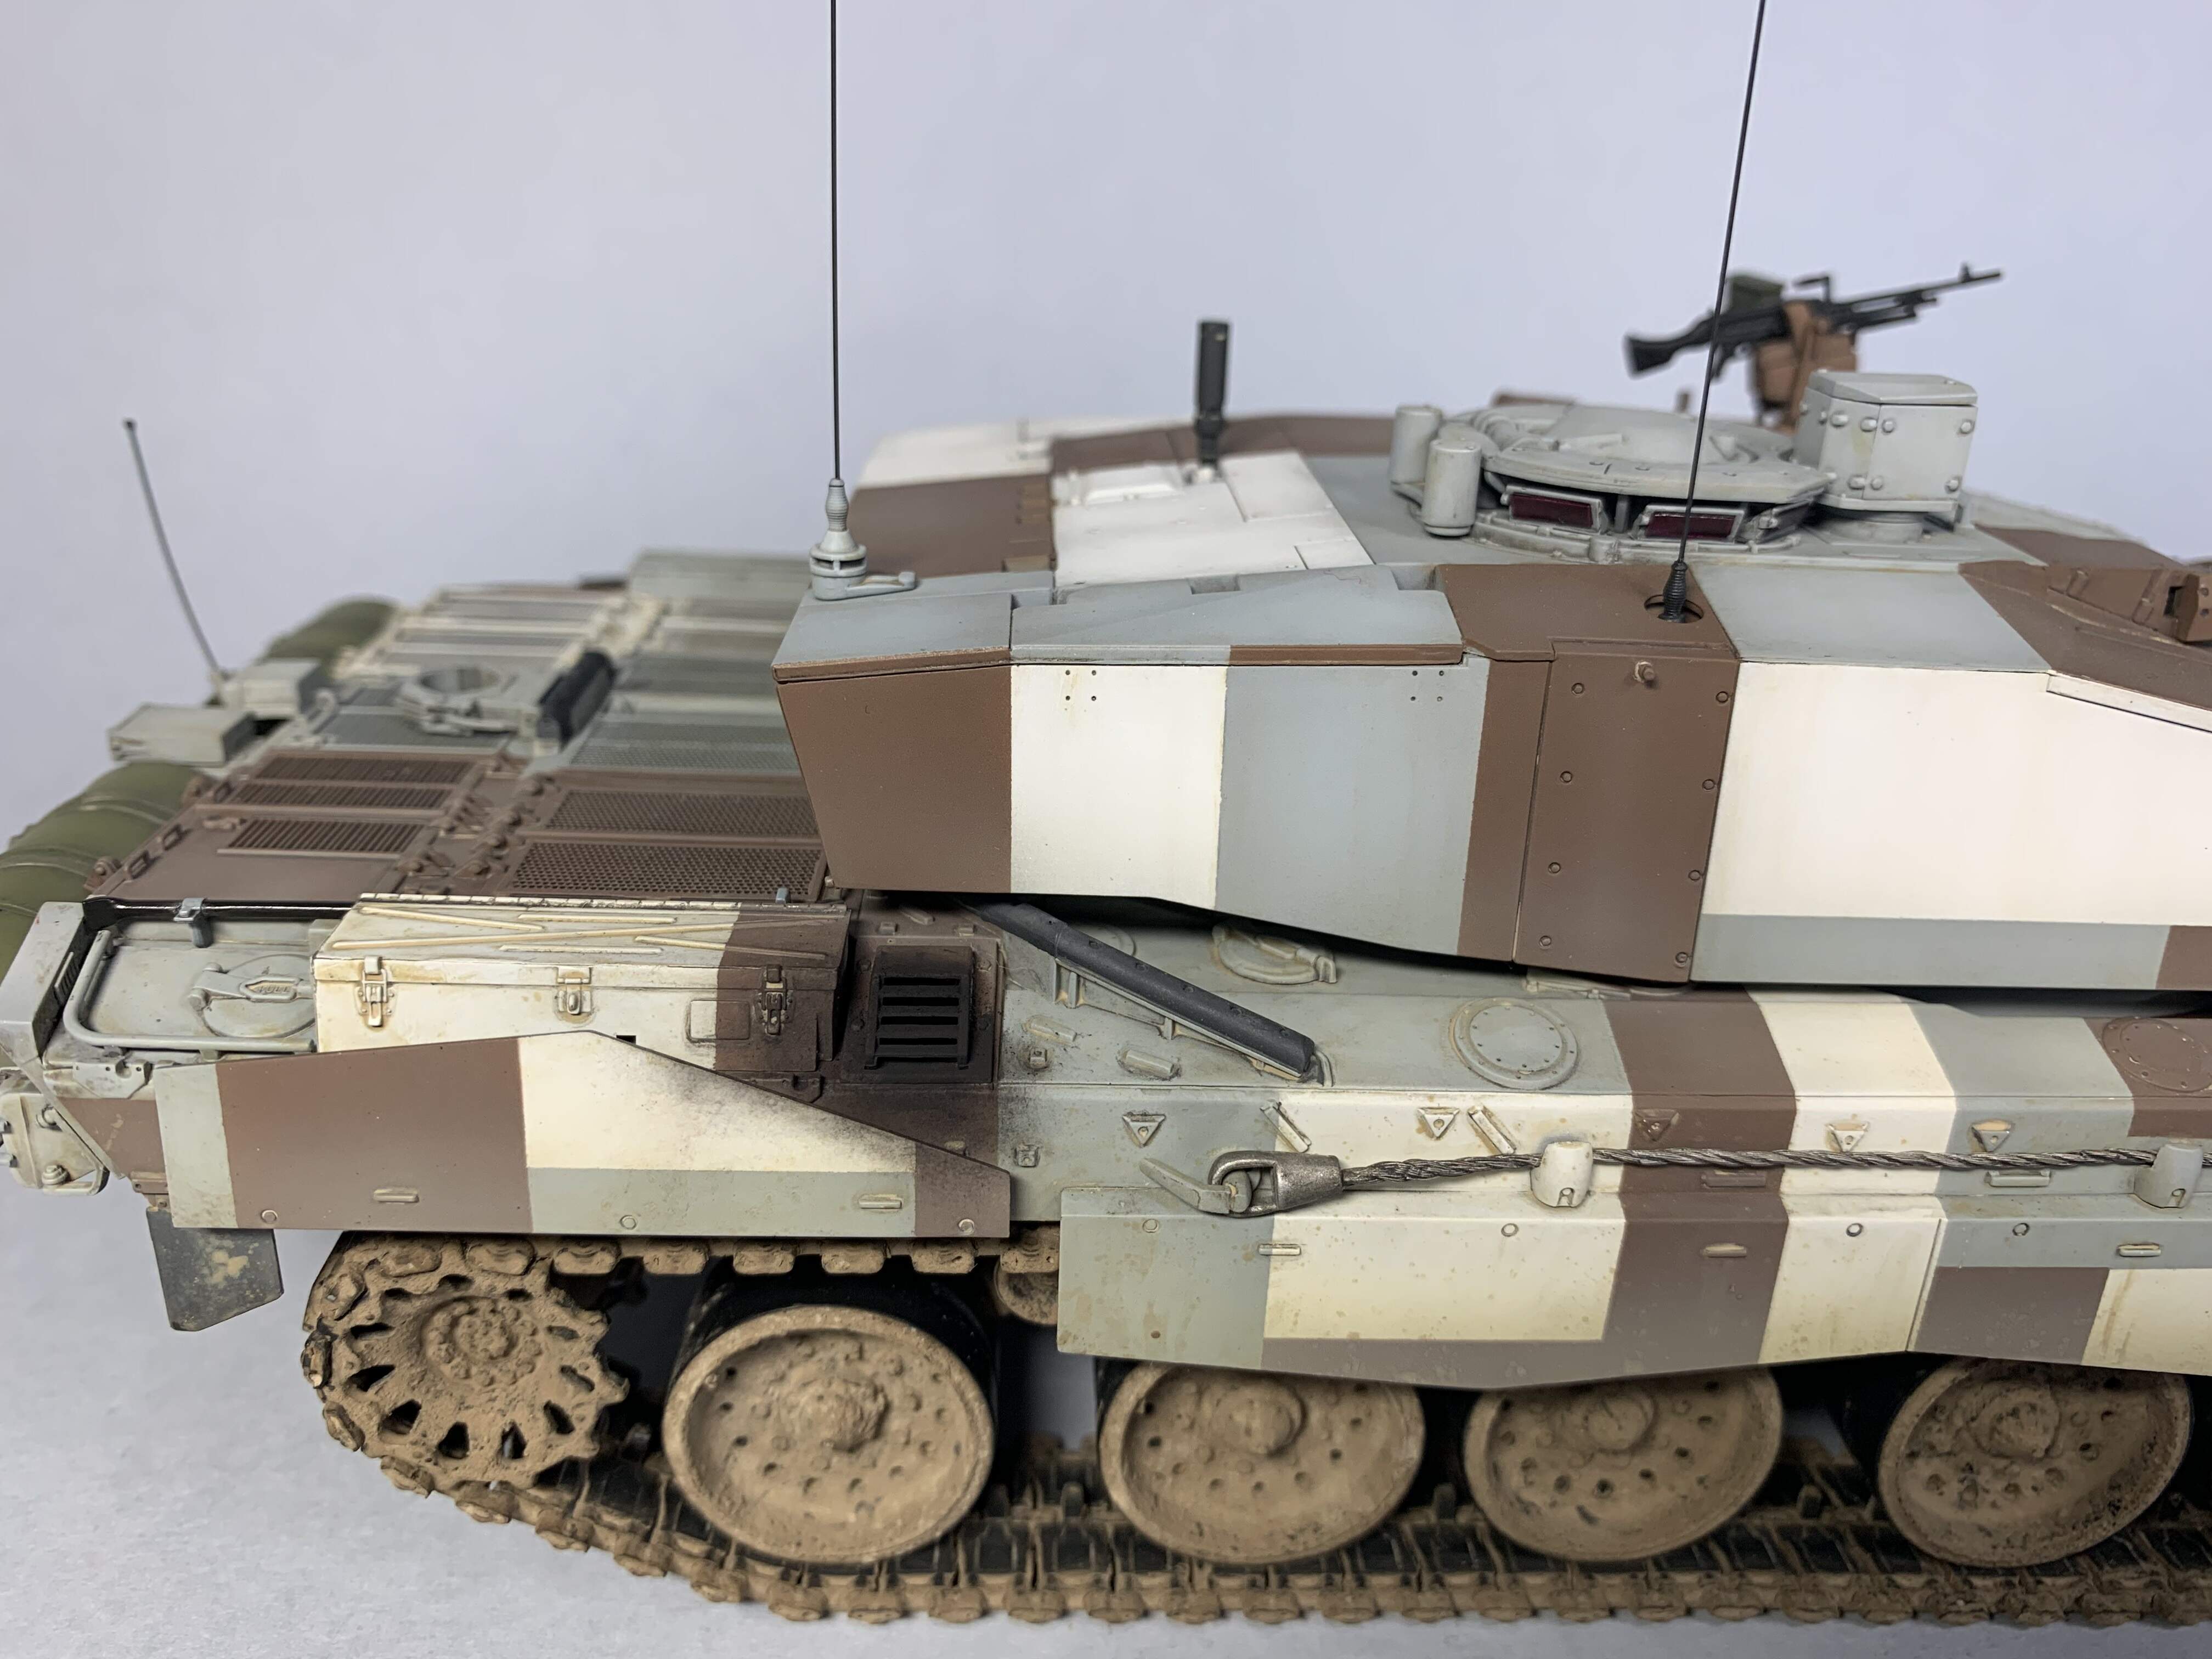
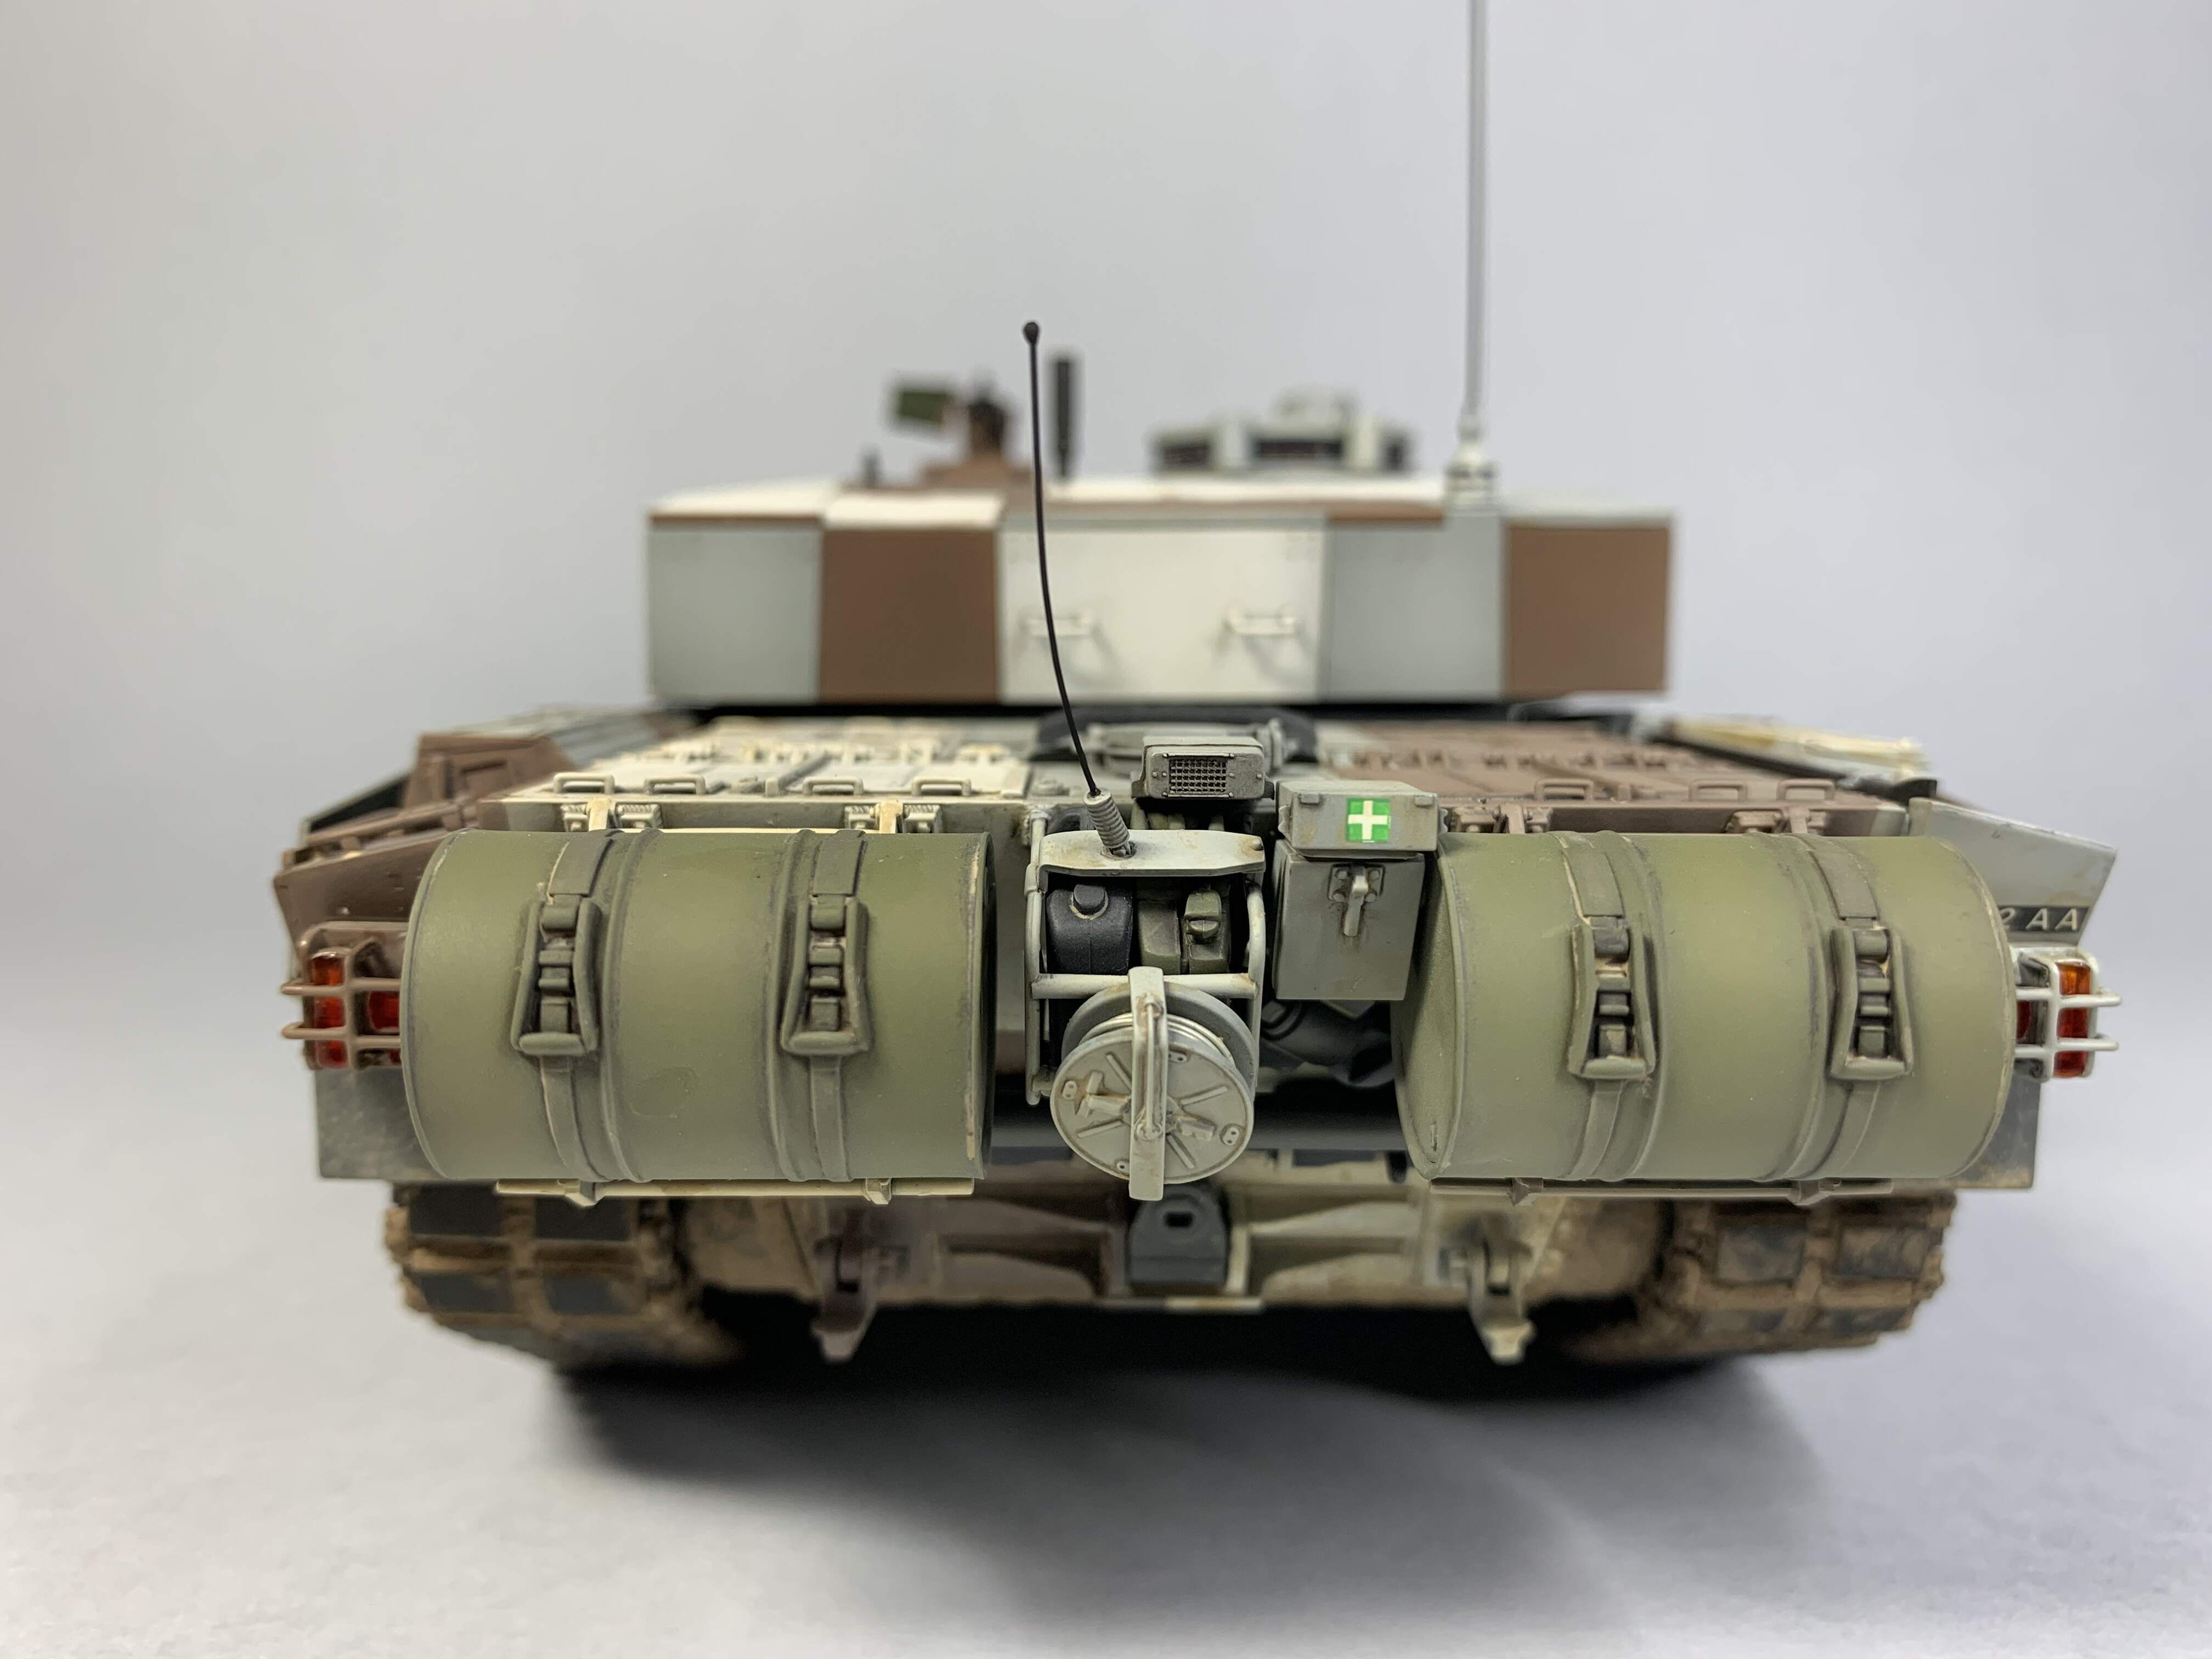
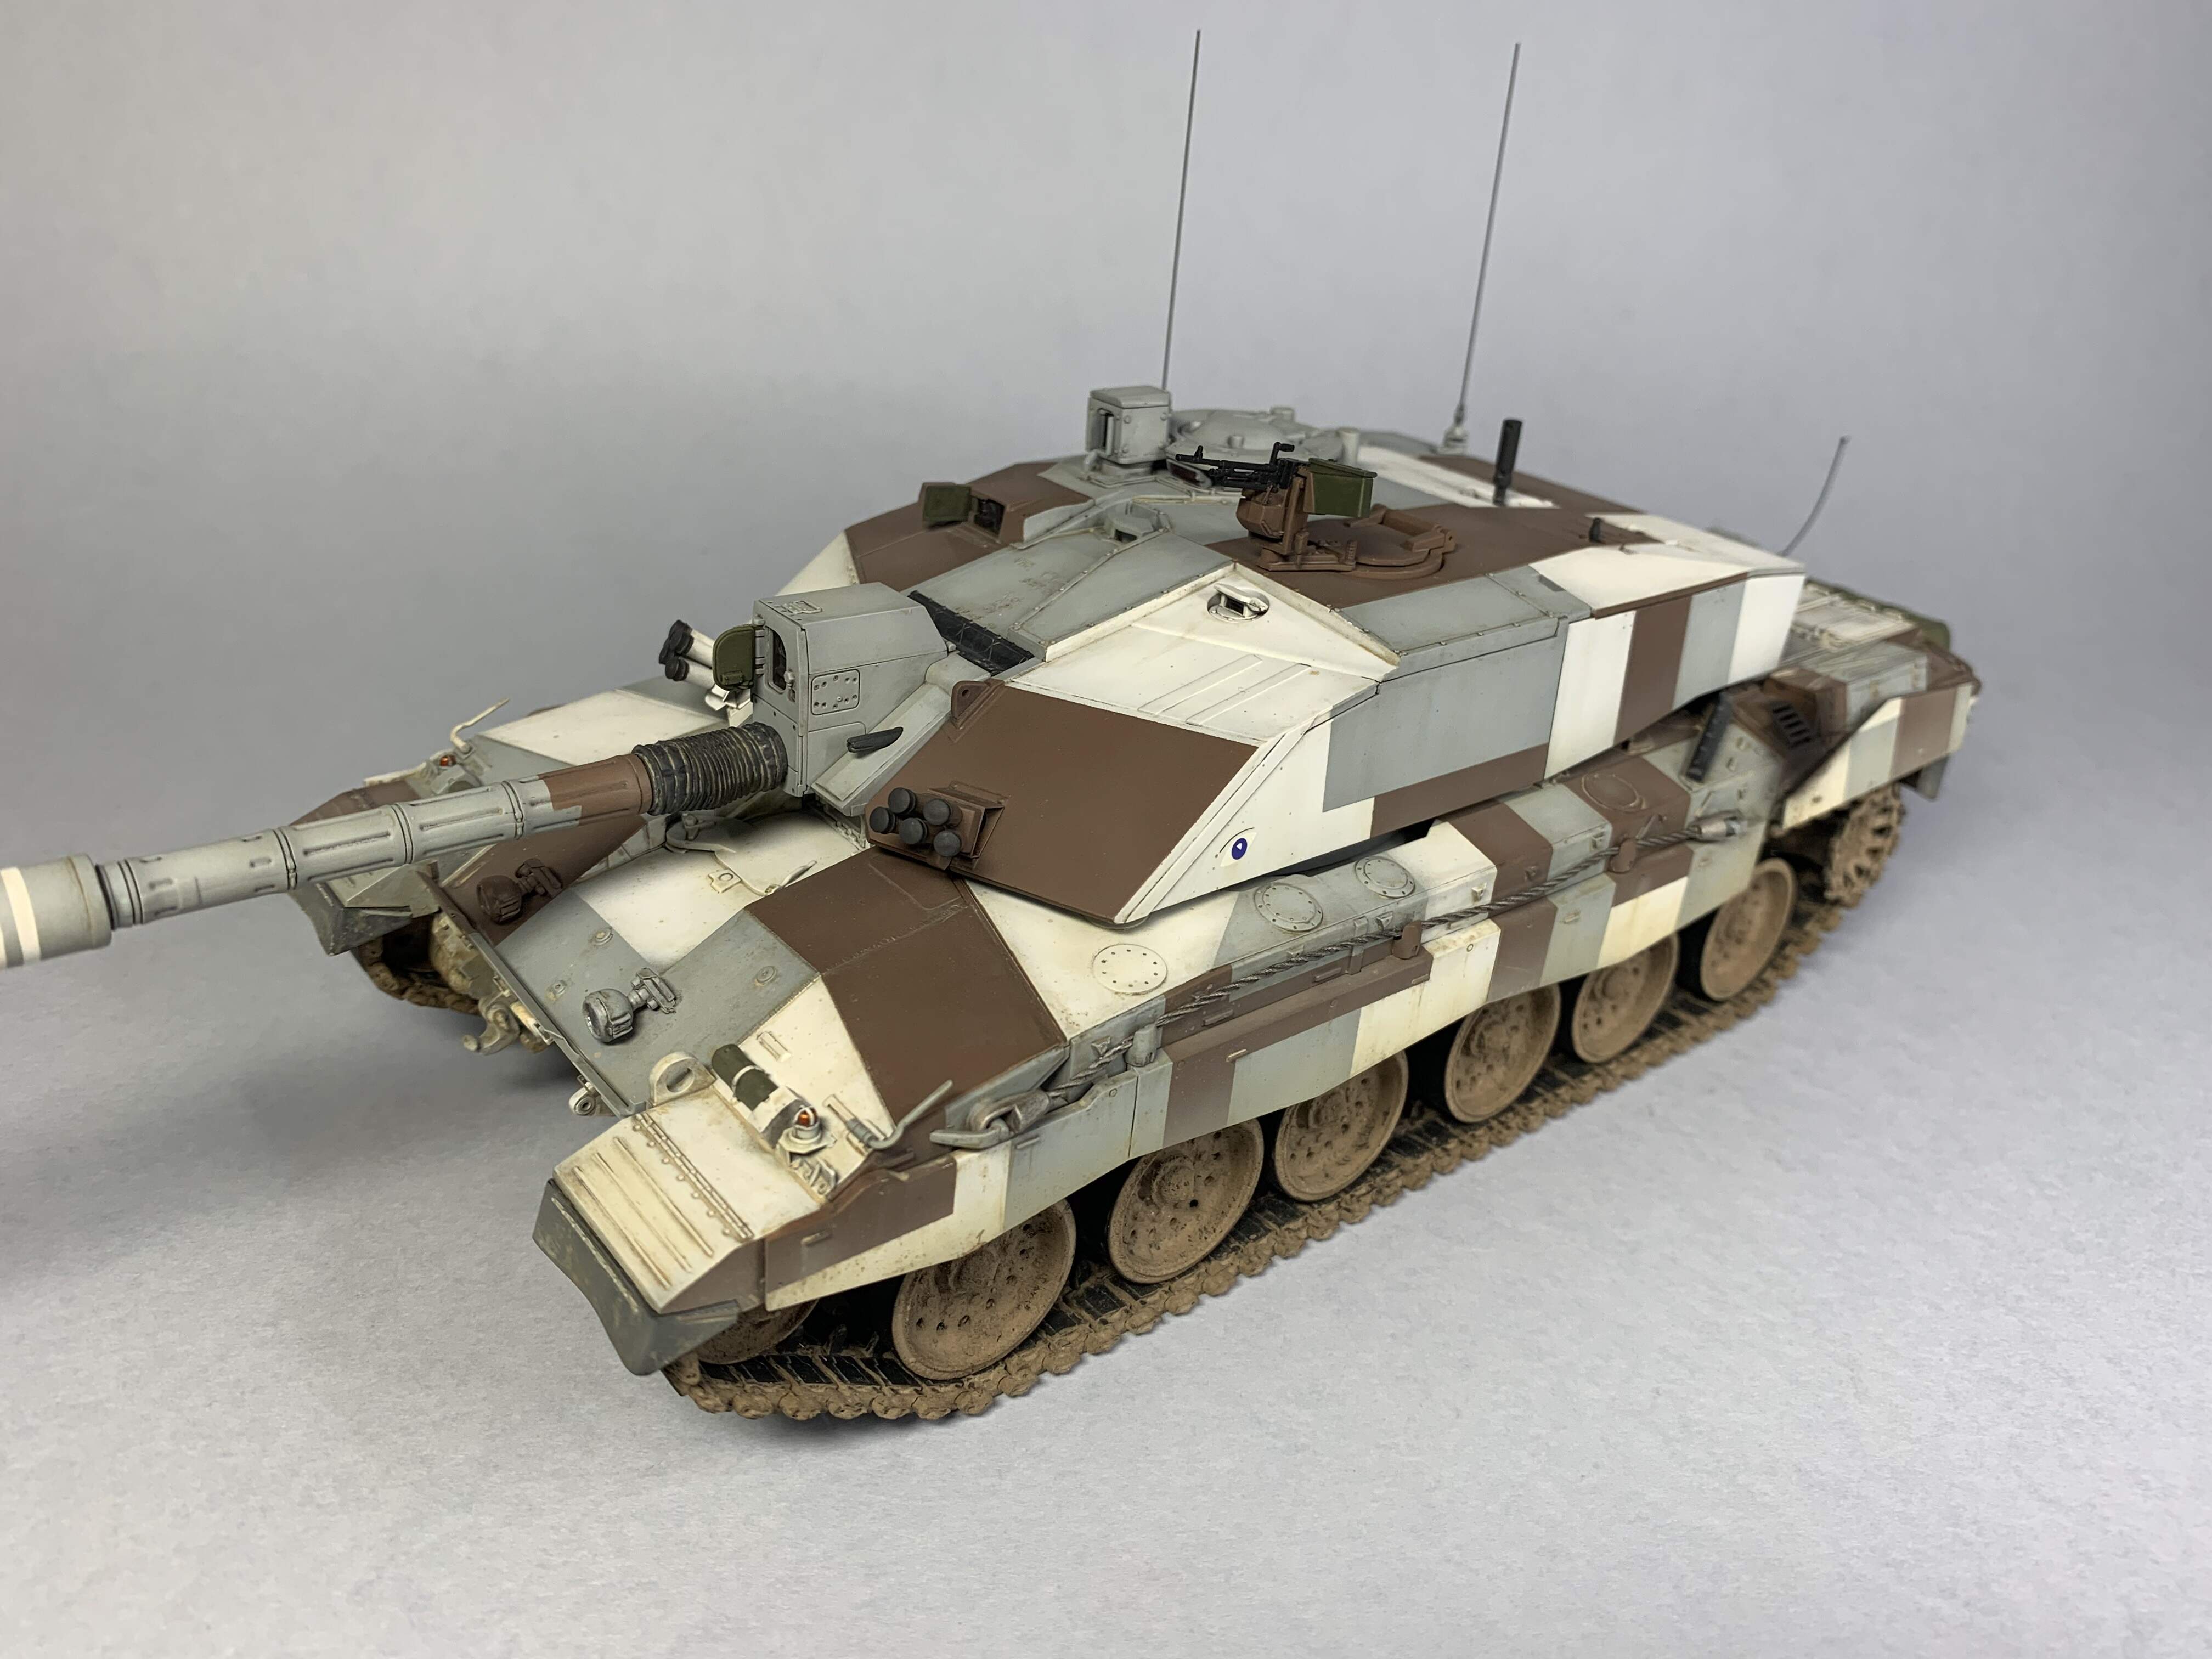
I am just about finished this, only some very small details to address but 98% there. I tried to make the running gear look something like the actual pics posted above.
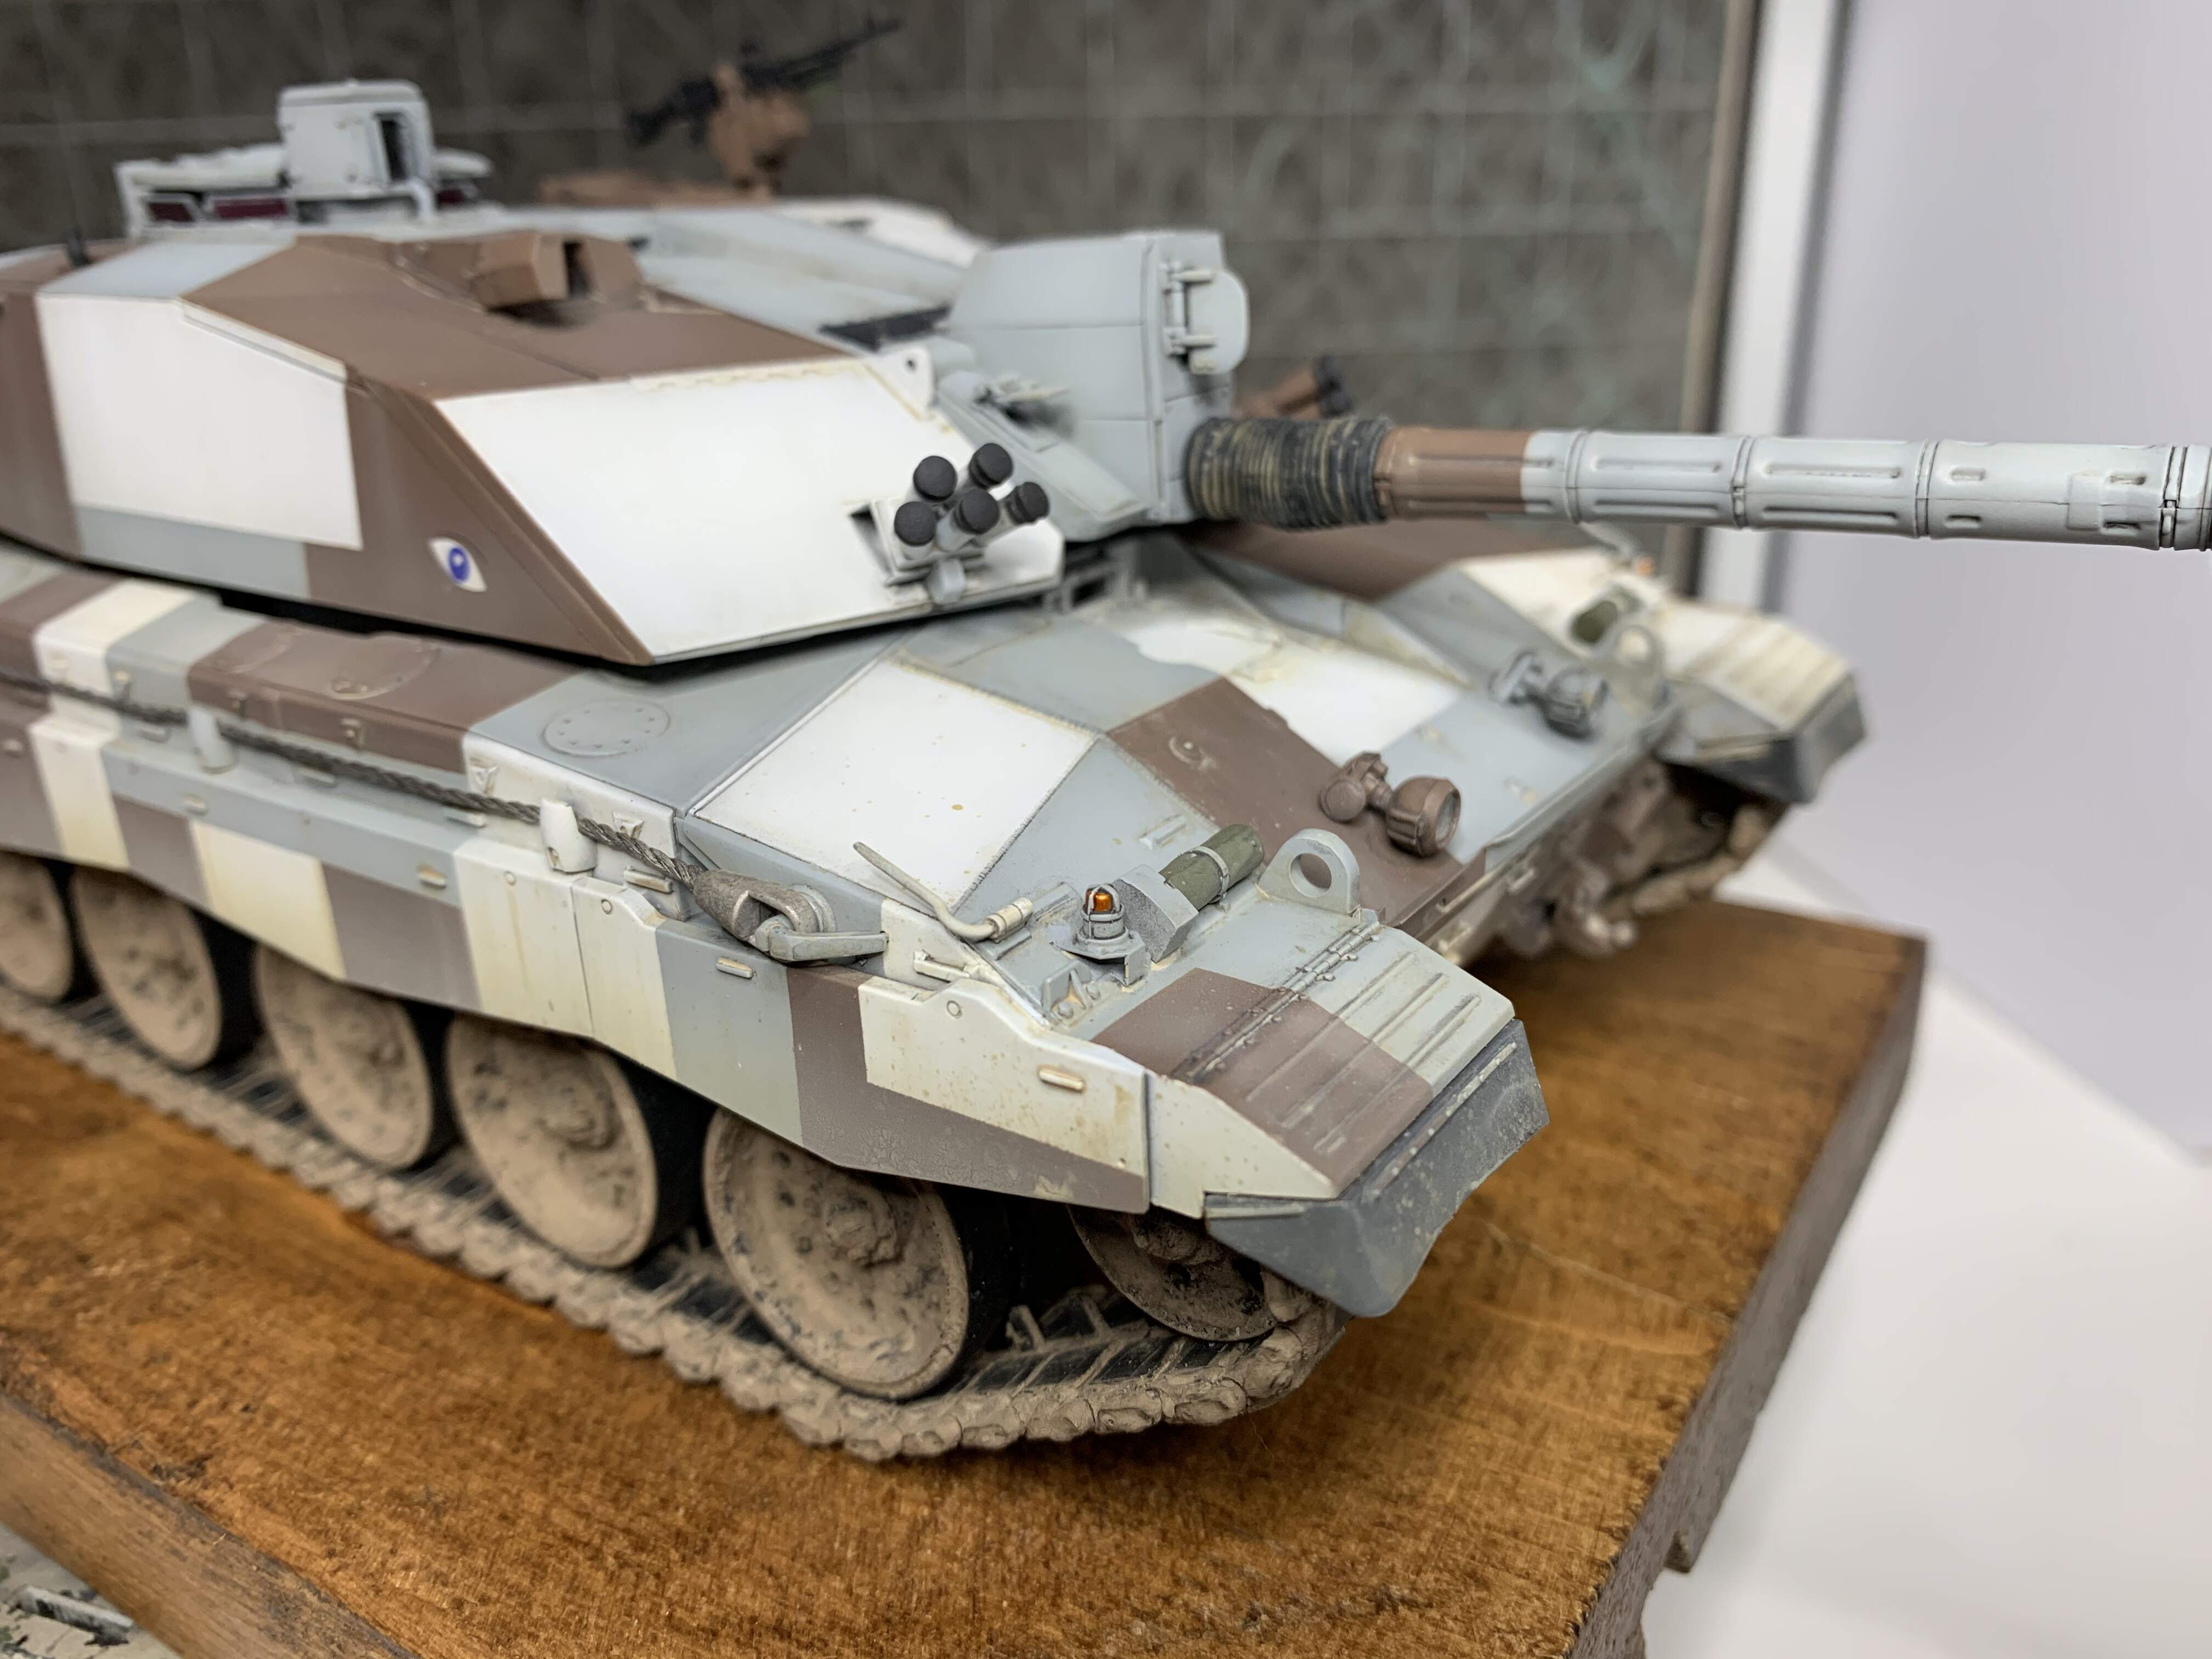
I replaced the string tow cables with some I stole from the stash.
I painted the orange lights on the front, along with the headlights.
Managed to paint the side mirror holders the opposite colours but kinda like the contrast.
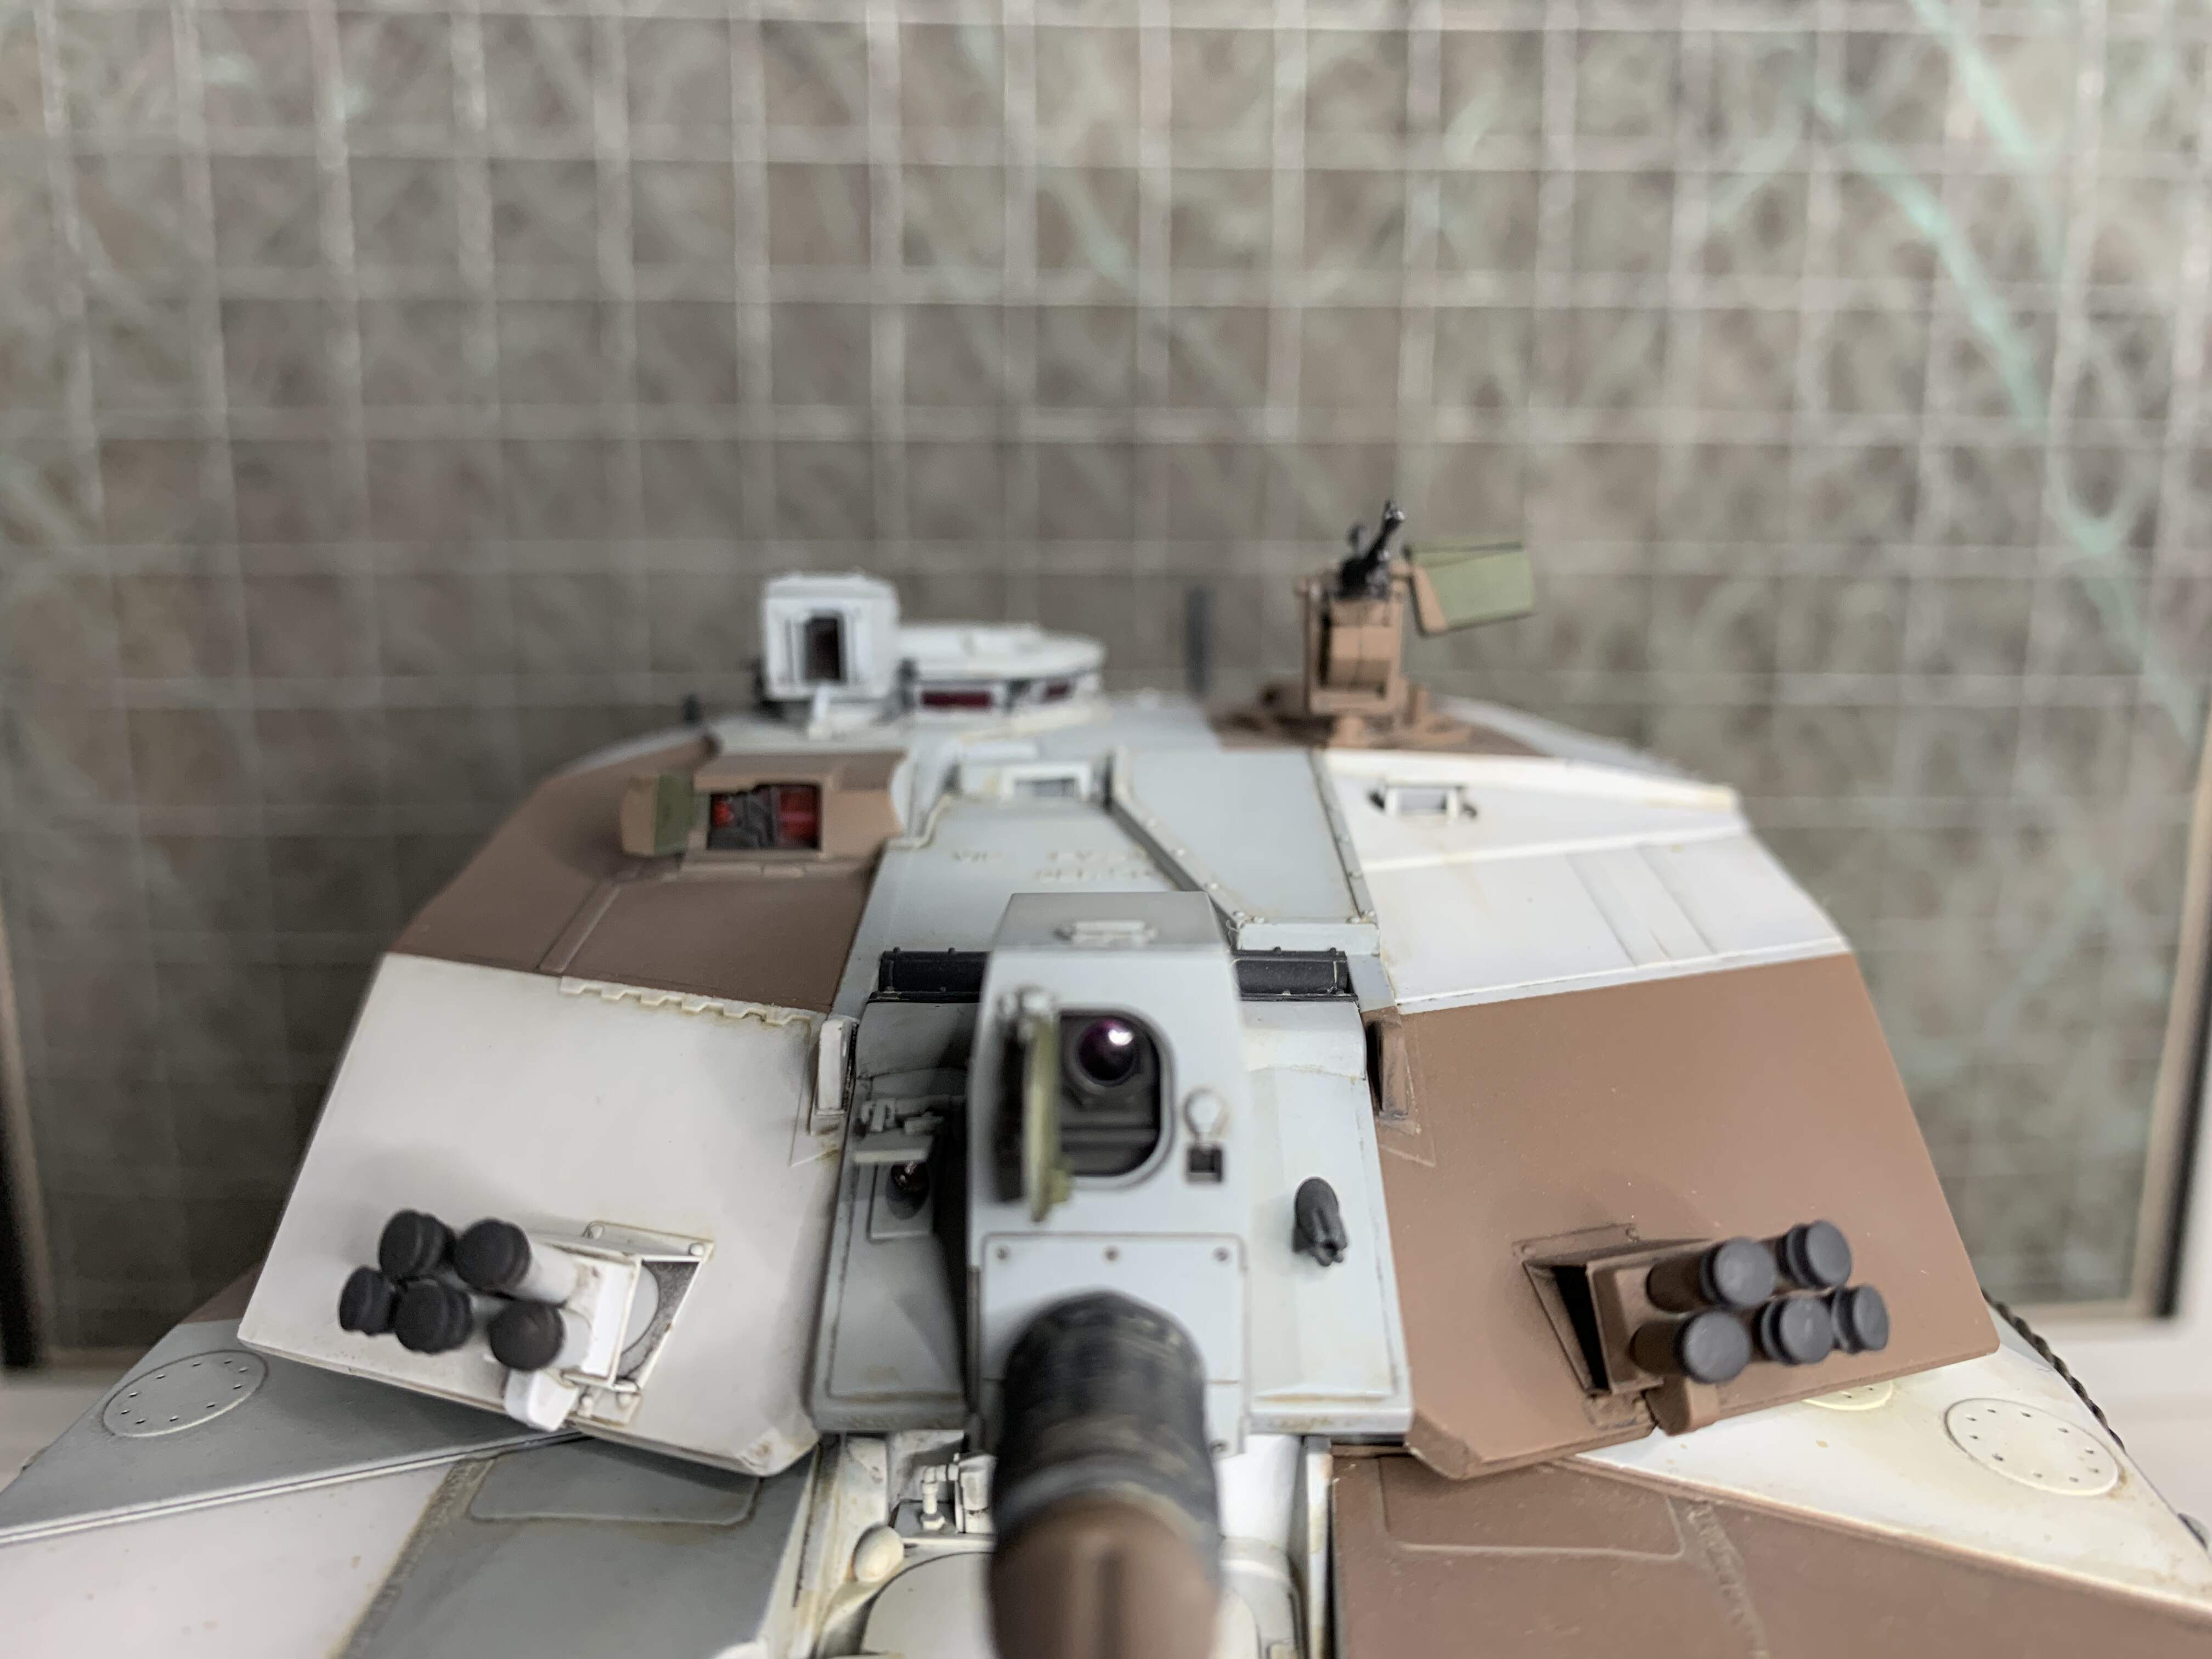
Had some fun with the optics, which I will tone down with some Tamiya smoke but adds some visual interest from the front.
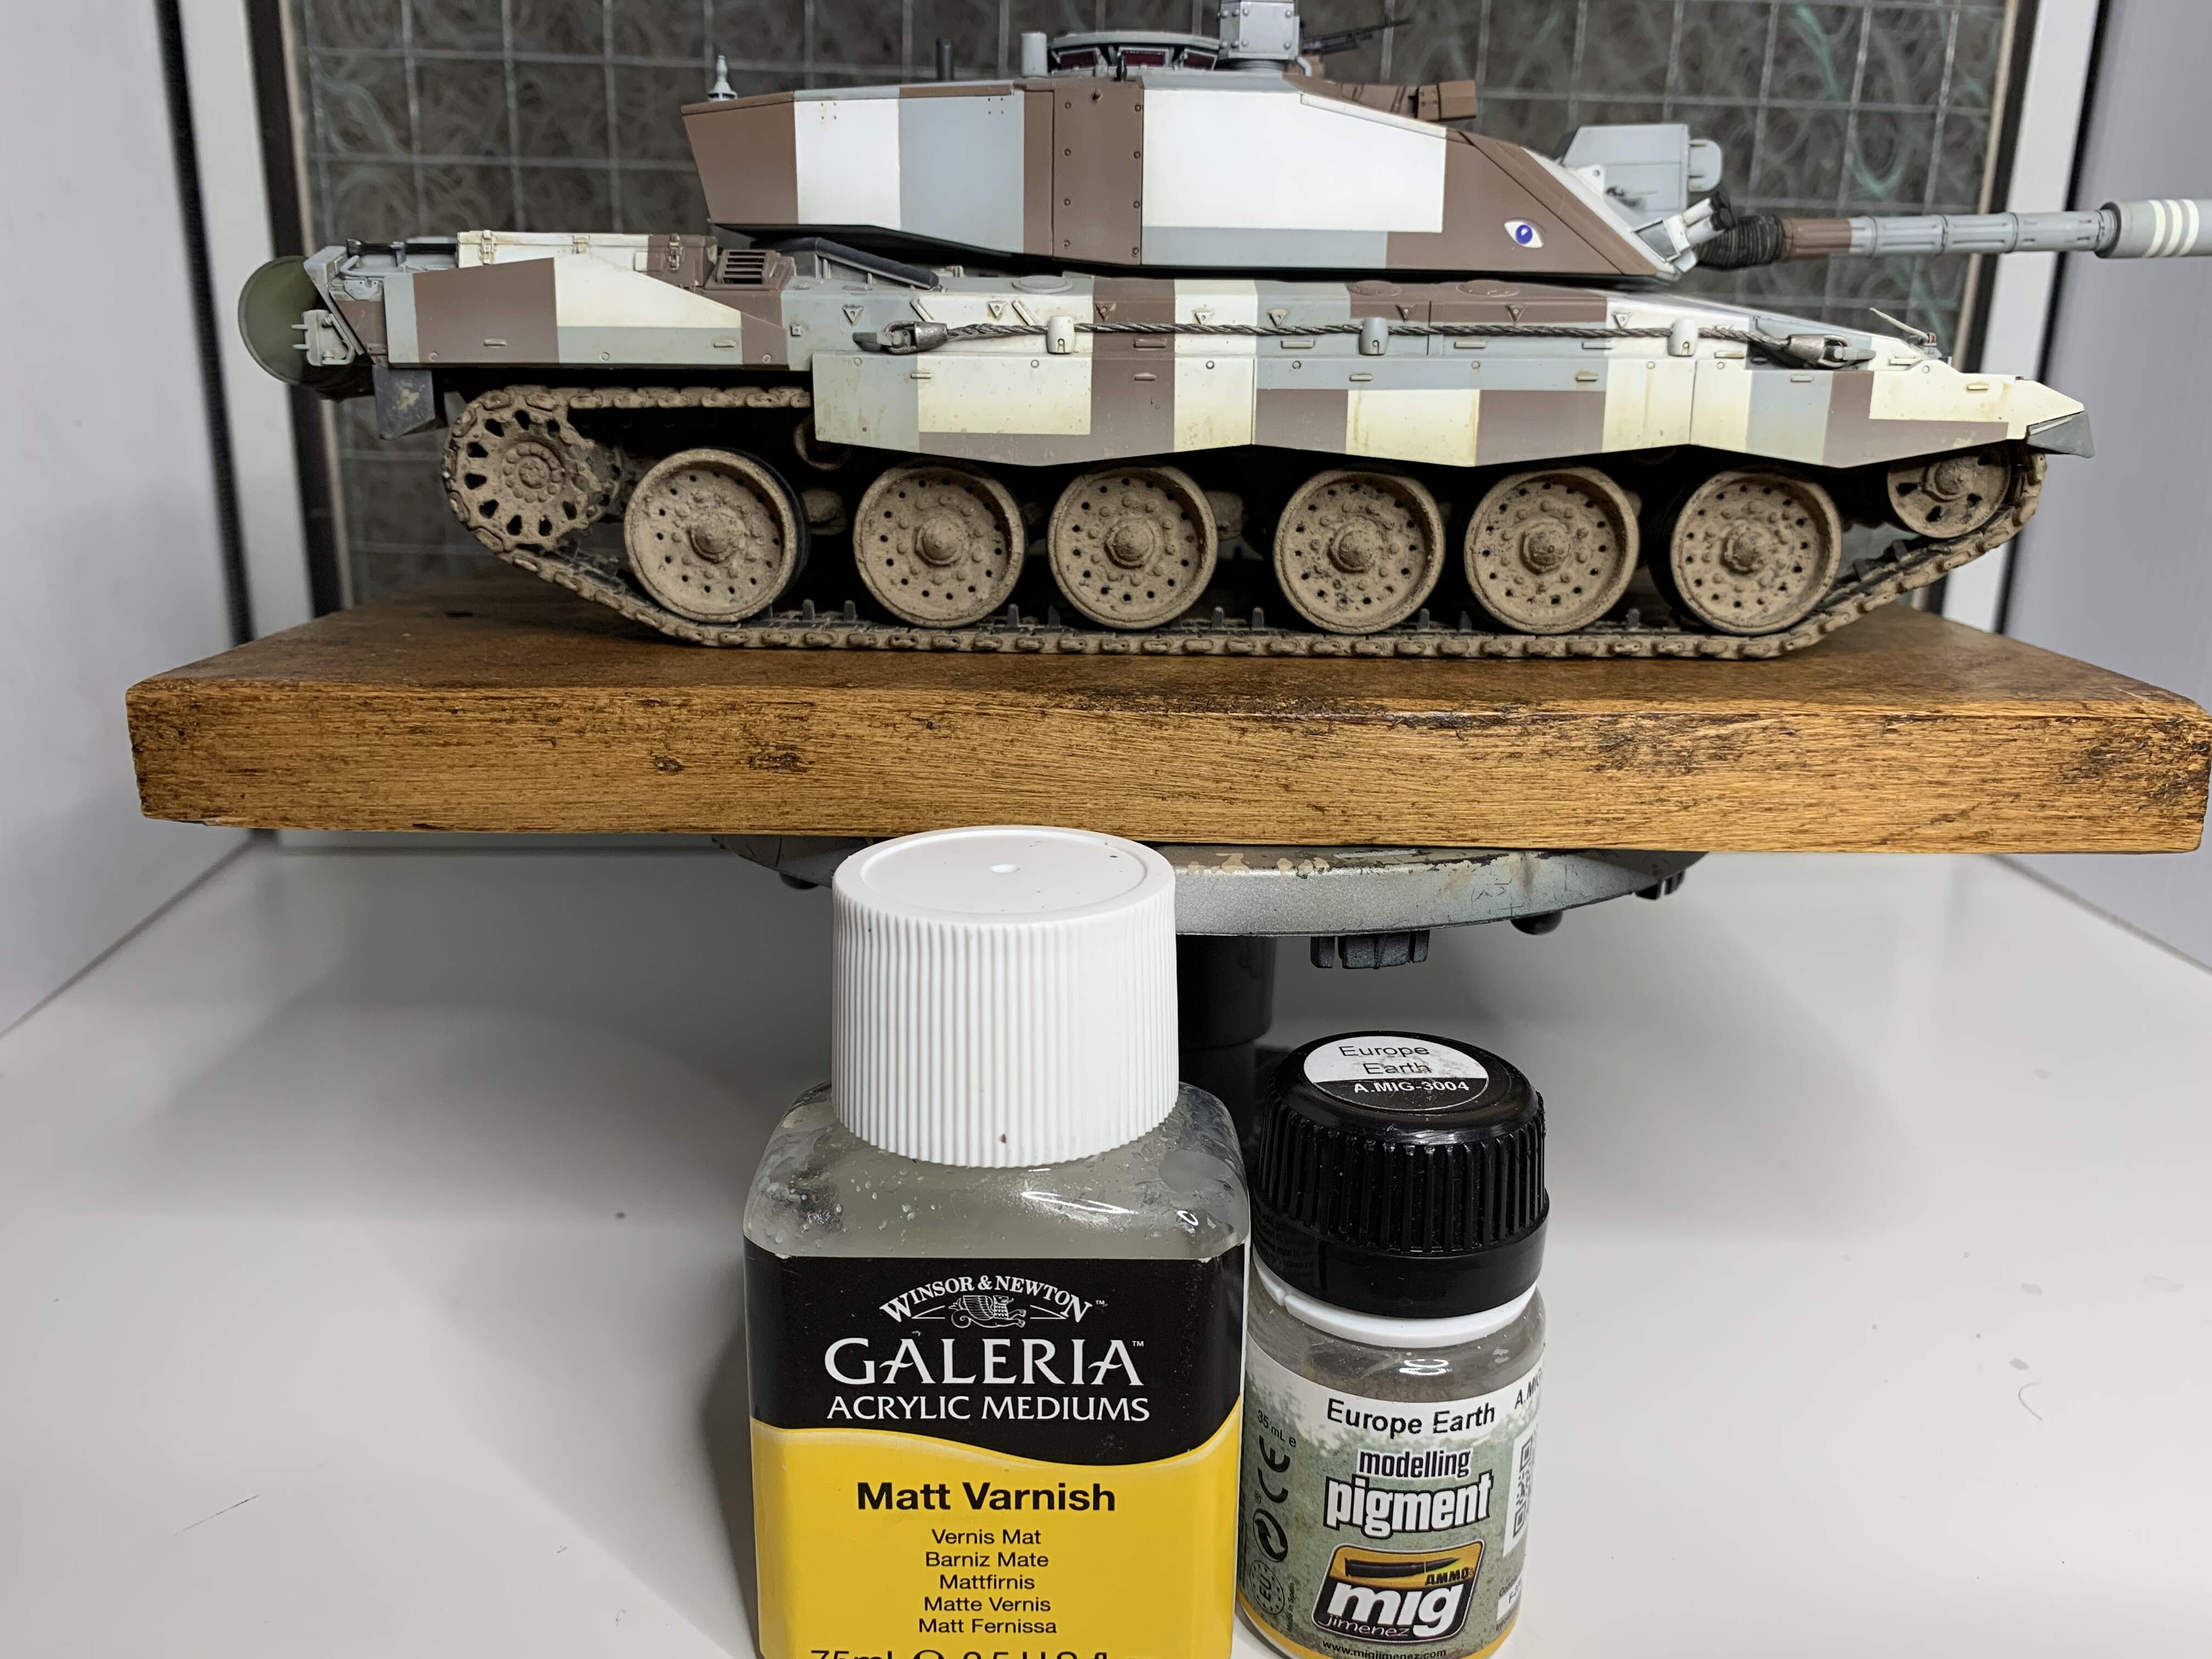
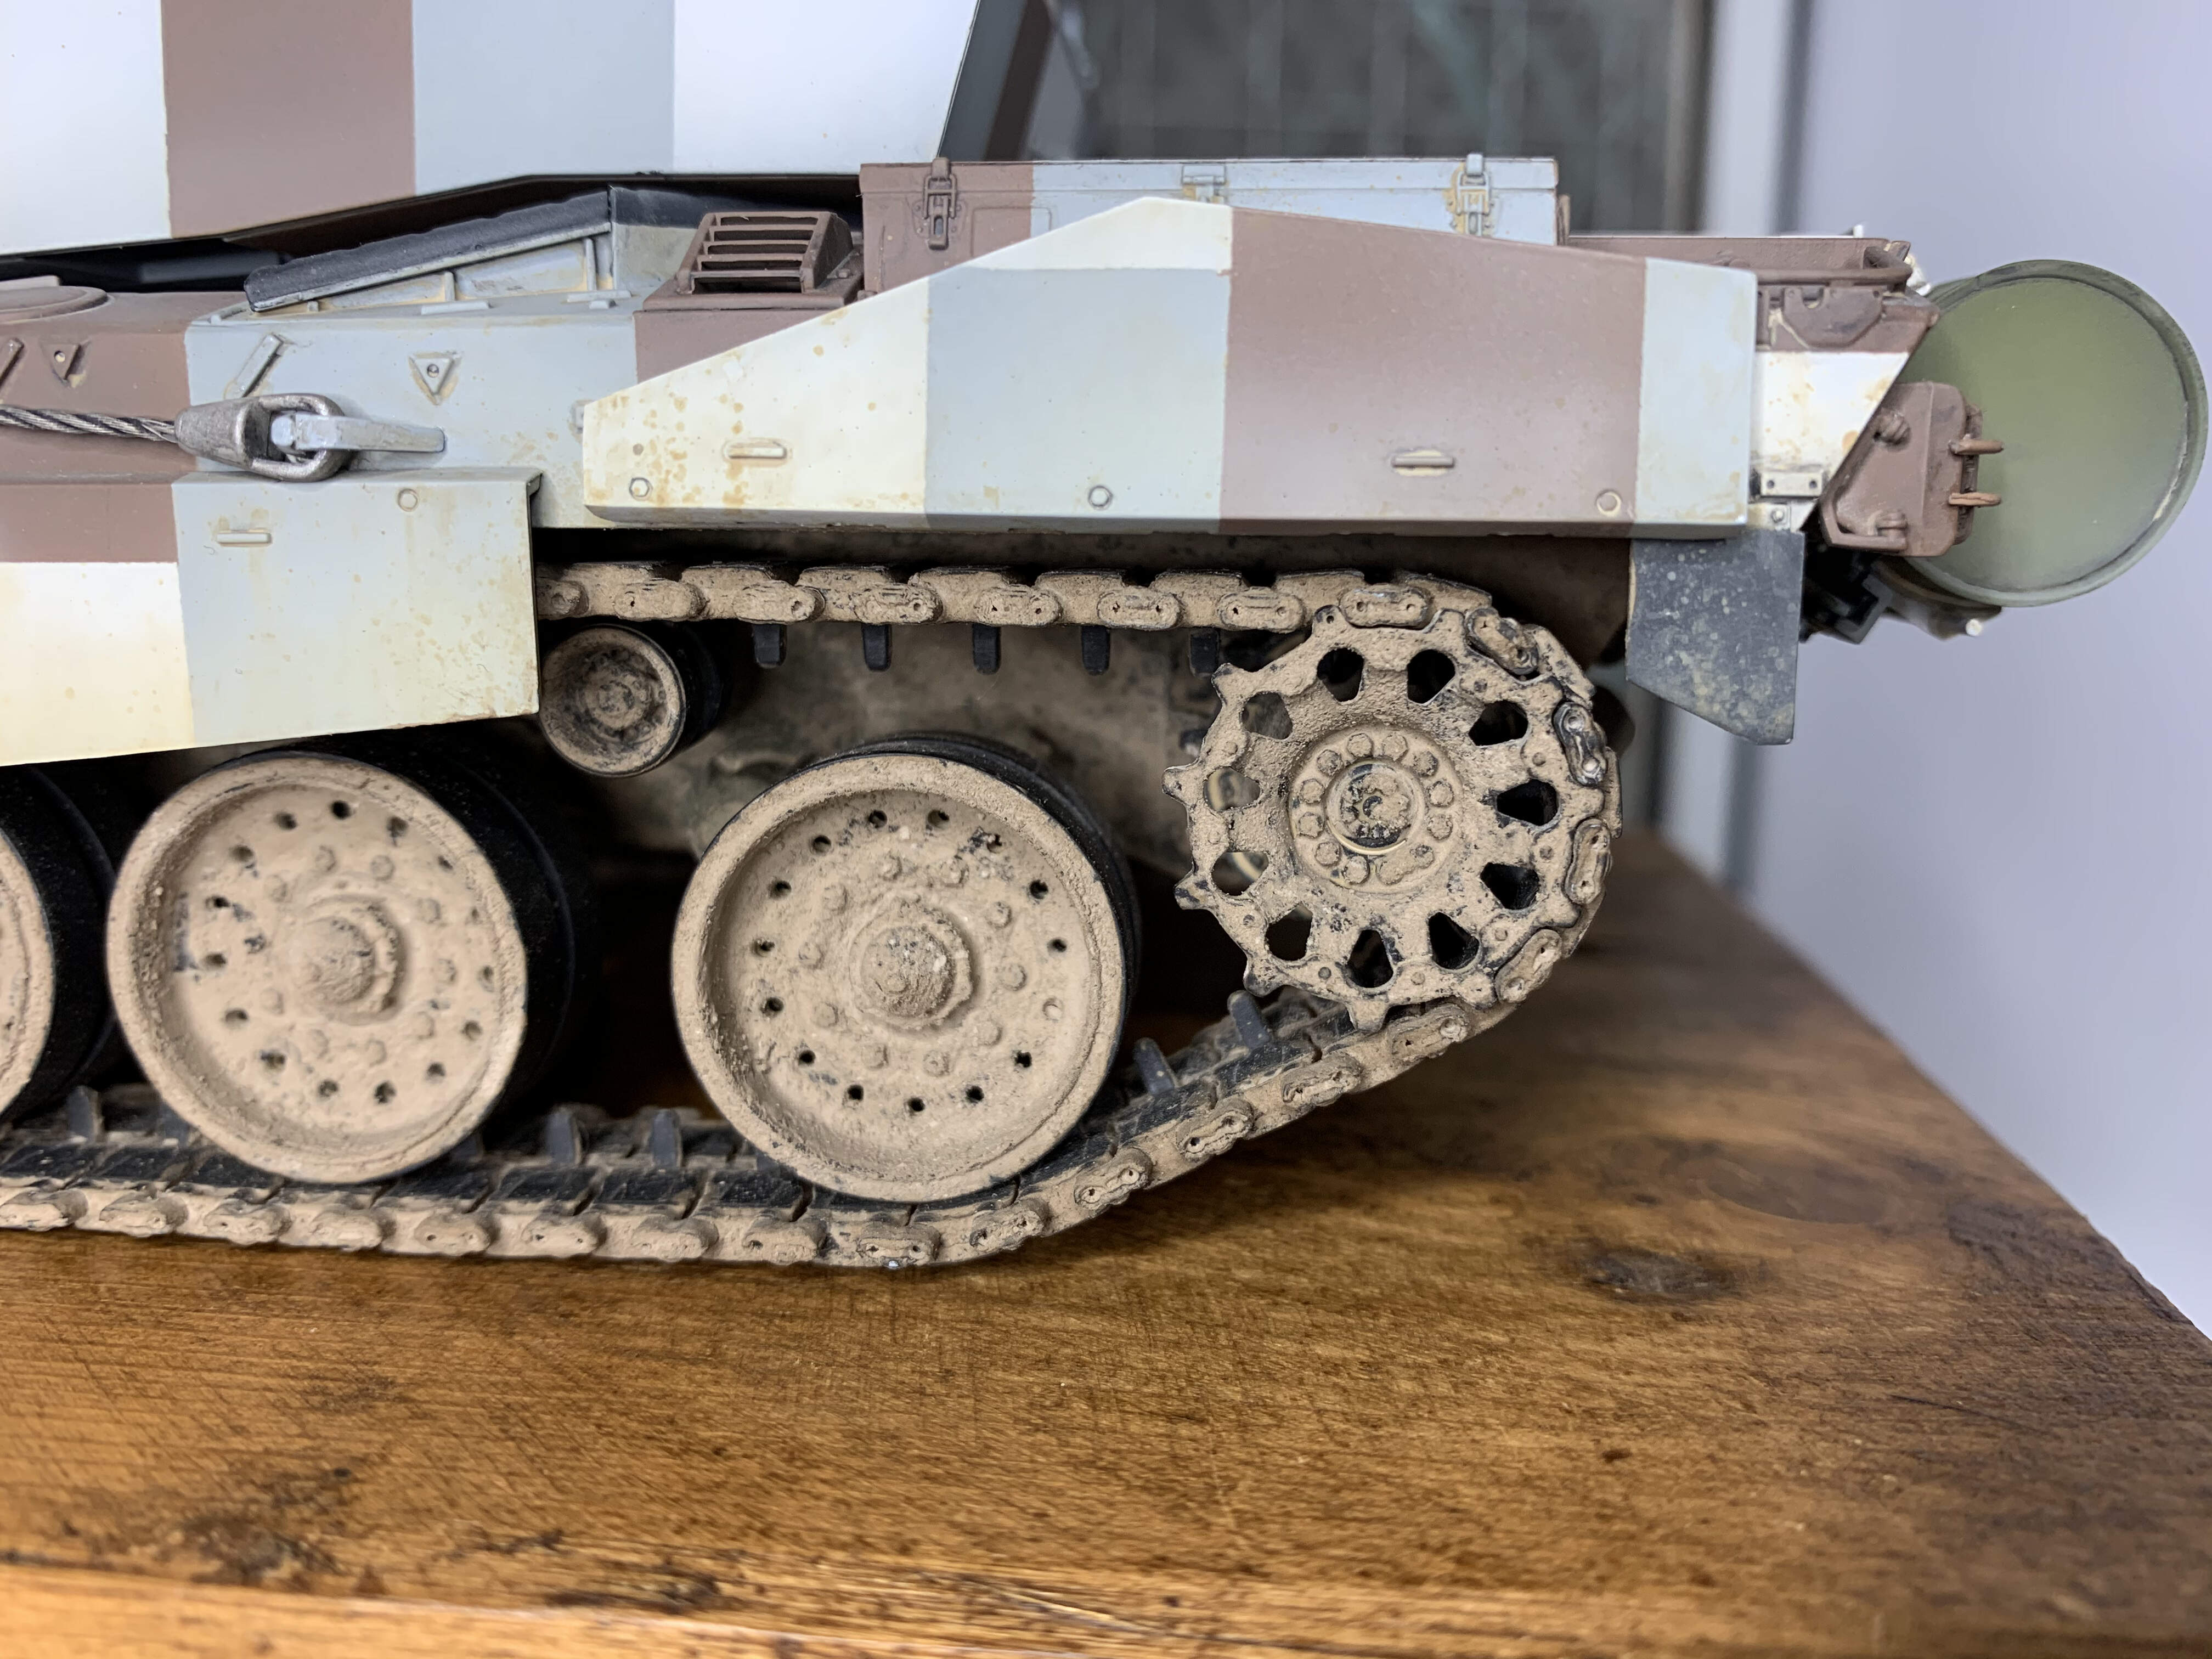
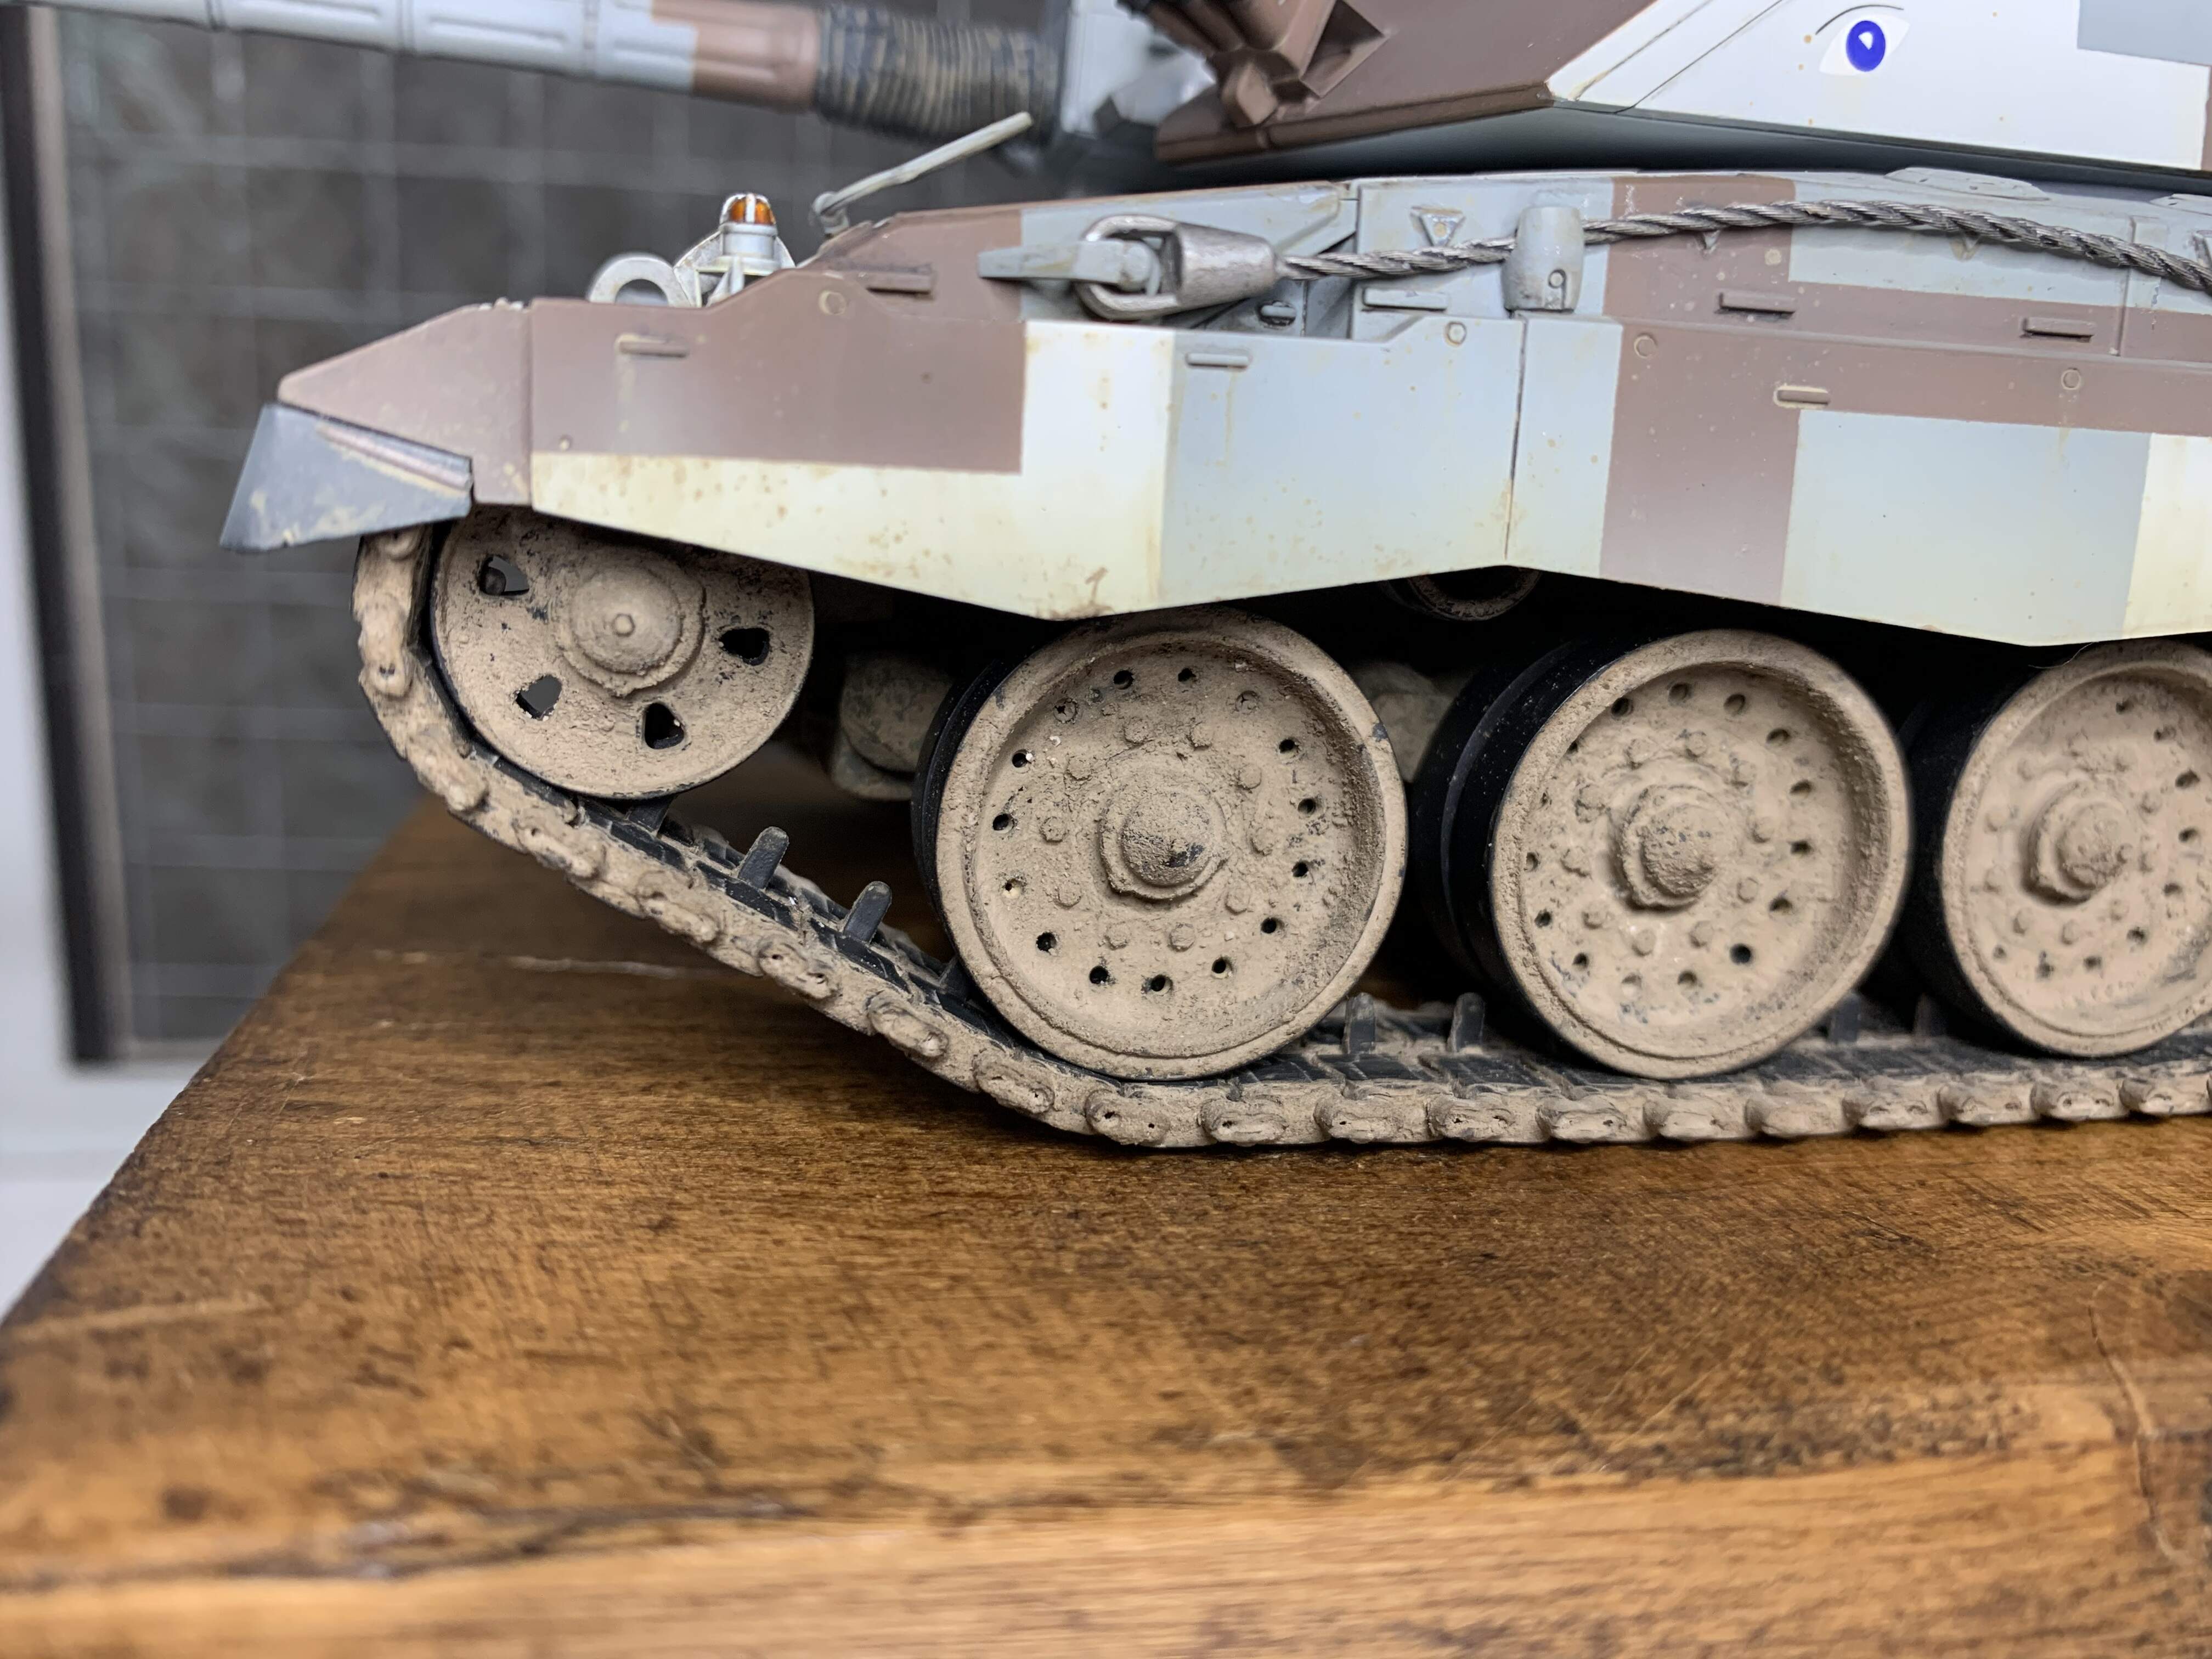
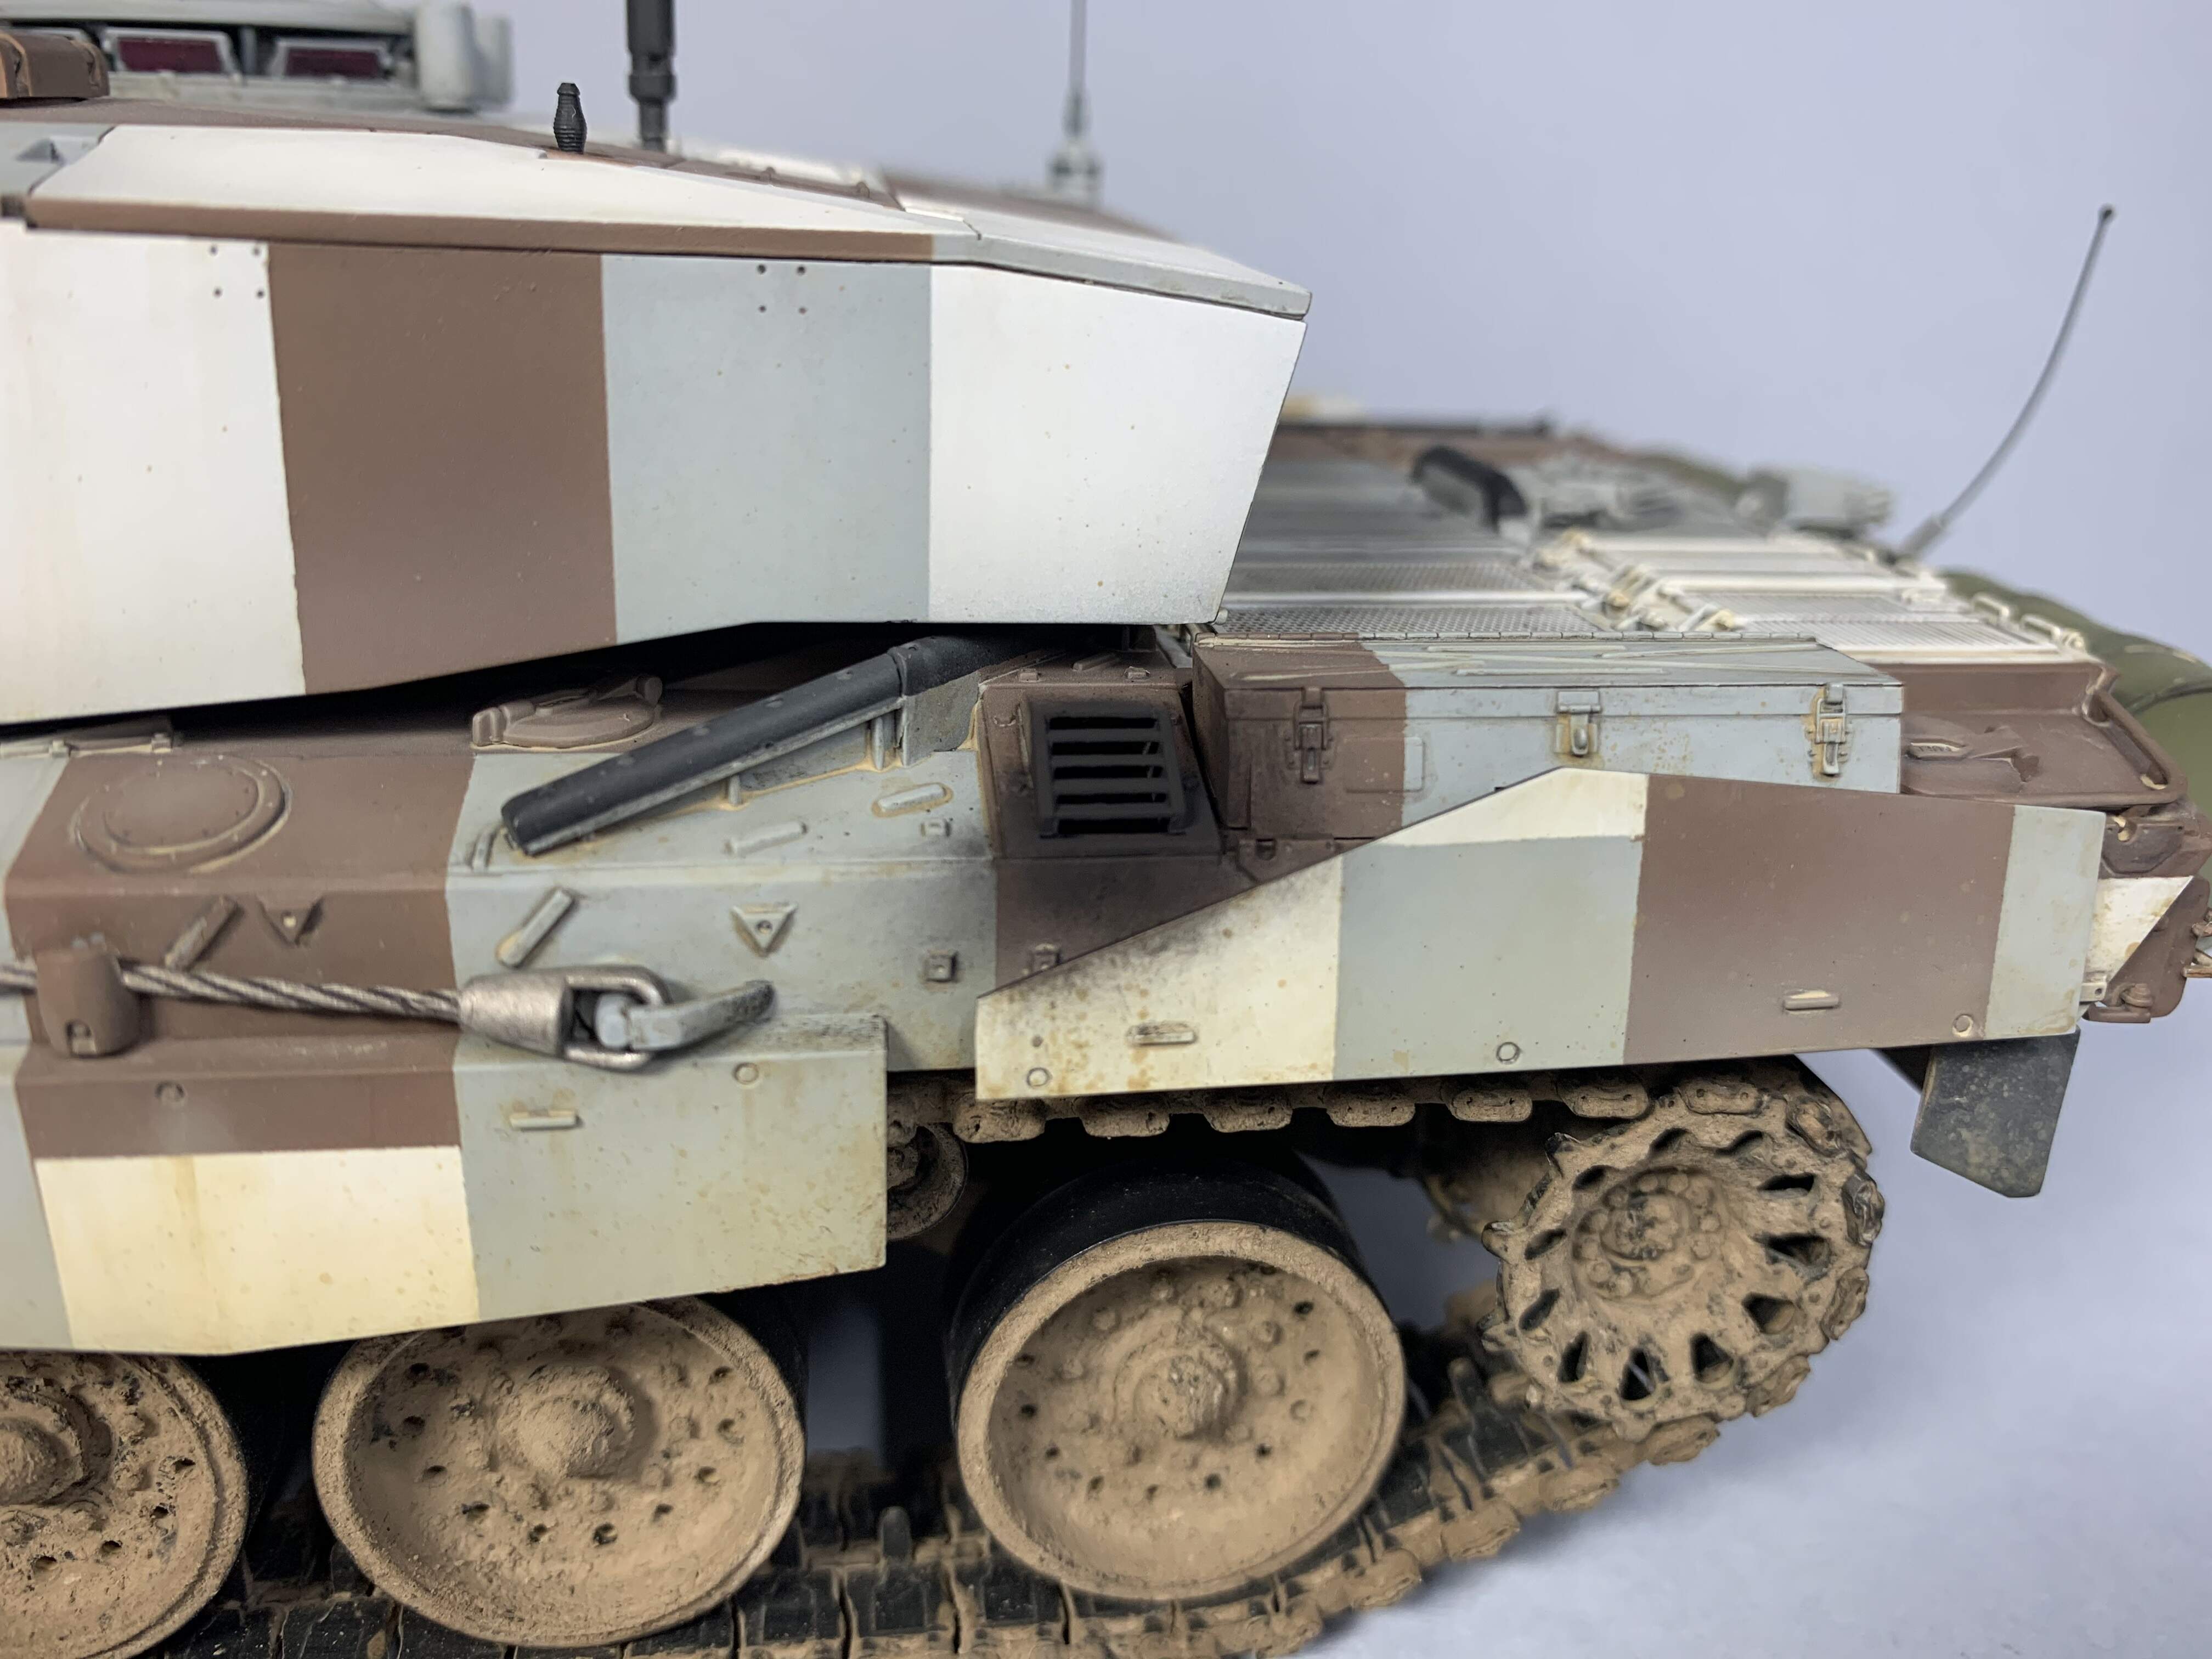
The running gear. I made a thin paste from mig Europe earth pigment and Windsor and Newton galeria matt varnish, daubed this on by brush, then used a wide, thick brush with dry pigment to stipple and add texture. Did the same with tracks, which were painted black, removing the excess from the pads and inner contact points as I went using lots of cotton buds. This was an experiment that thankfully worked out…
I’m looking forward to sooting up those exhausts too!
Thanks again all!
Cheers, Jim.
7 Likes
Wow John that is just excellent work on the weathering!
1 Like
Very convincing weathering! Another gorgeous build overall.
1 Like
Very nice Jim, you have got a really good used dirty wagon. And not over done. Tracks and running gear are very nice and very realistic. This one is defo on my to get list, I will go for the far simpler BATUS OPFOR scheme.
1 Like
Really nice, ditto above remarks
Mal
1 Like
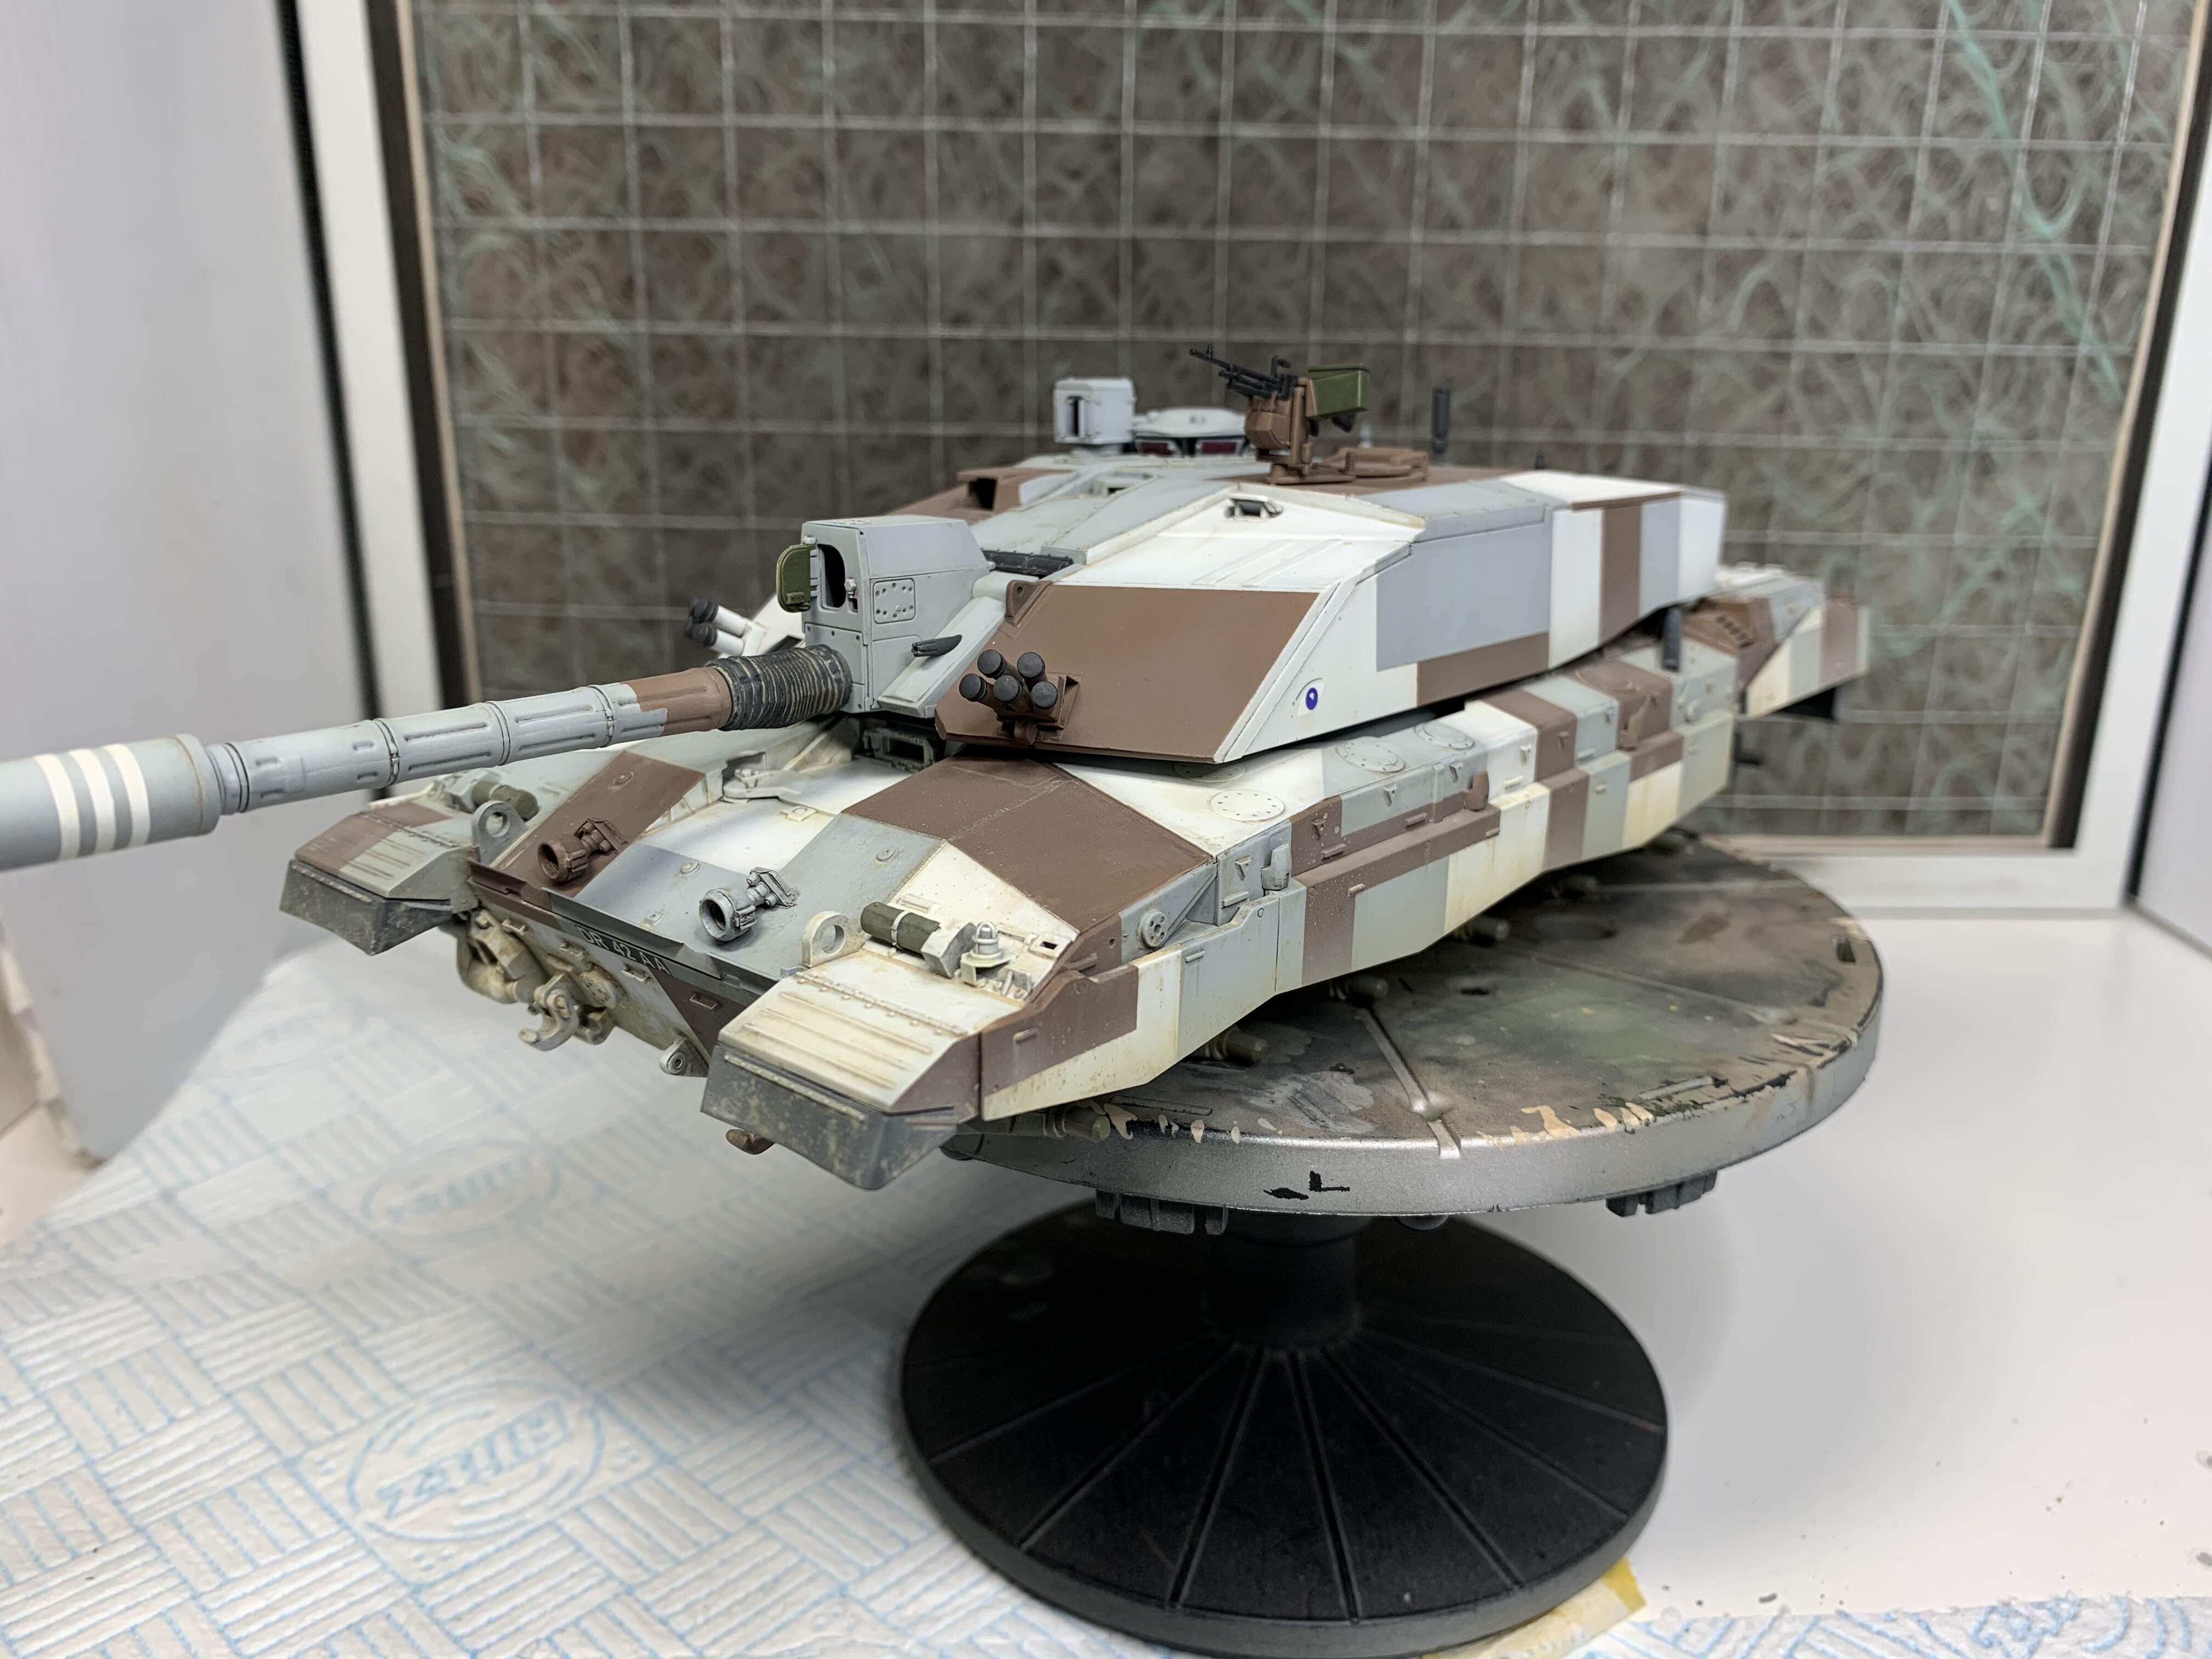
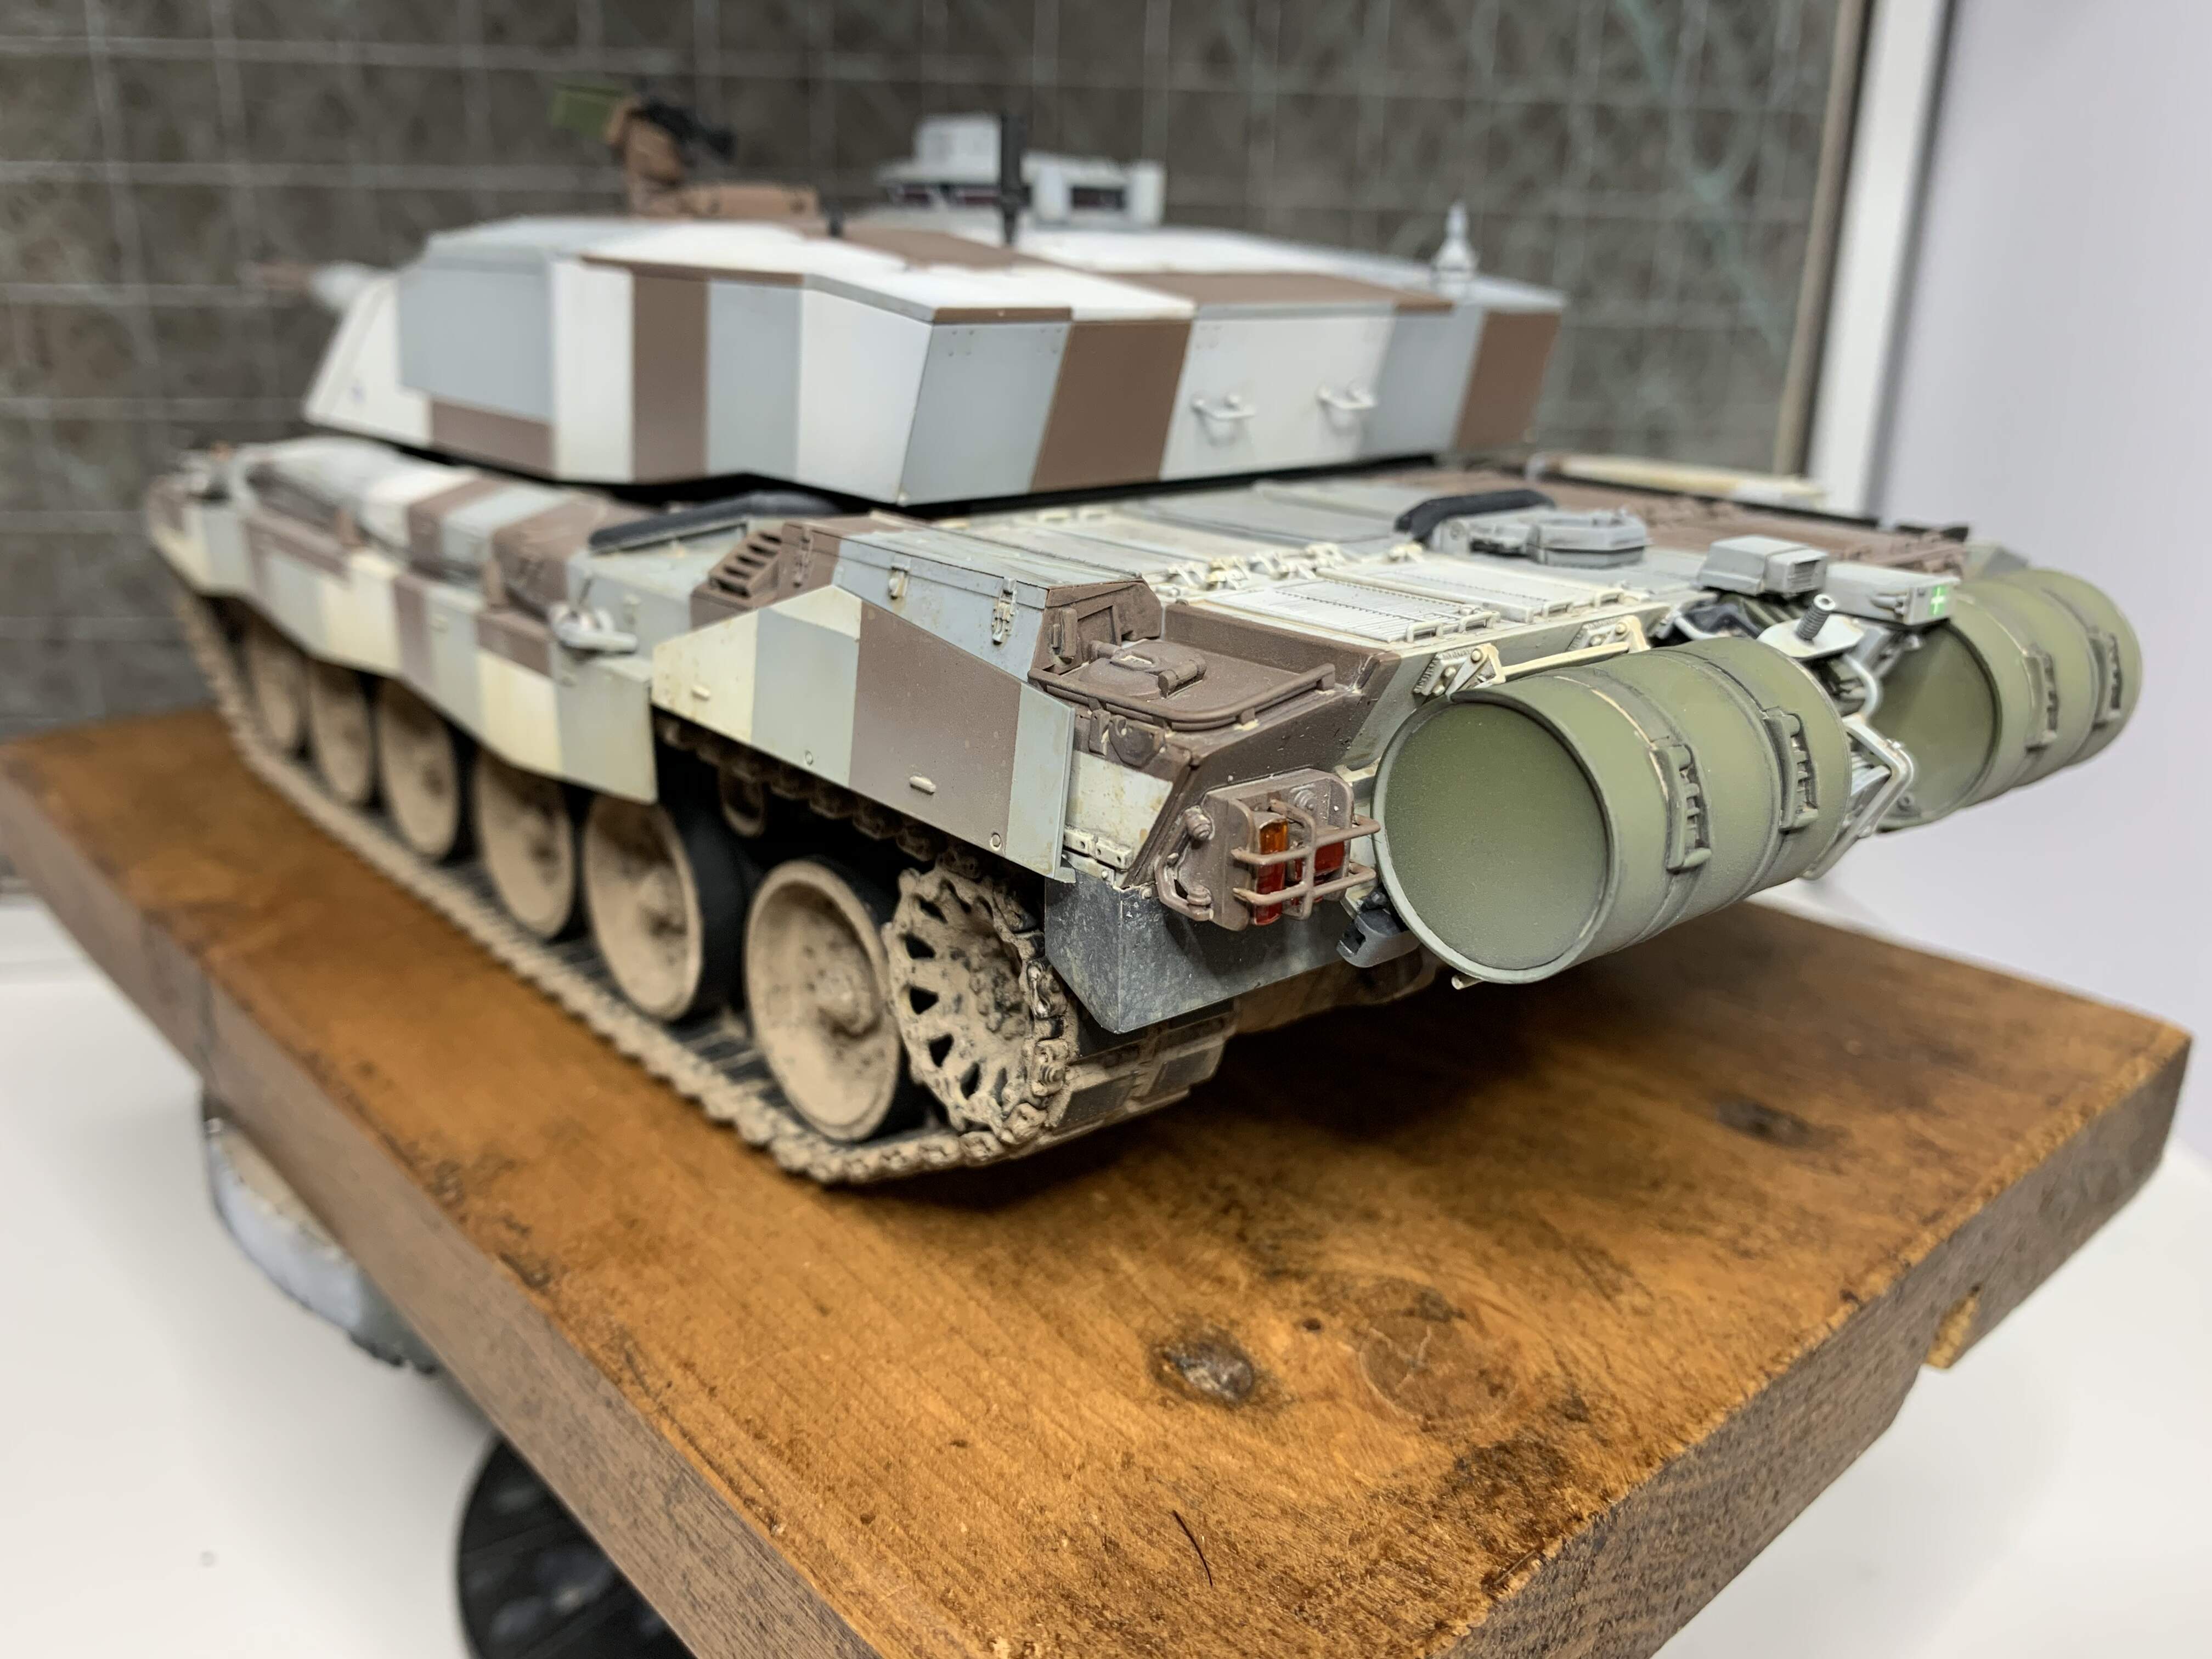
The contrast of the green/olive drab fuel drums to the rear really sets off the model. Excellent use of color in my opinion.
It Rocks!
1 Like
Thanks a lot guys, weathering this camo hasn’t been the easiest task so I’m really glad you all like it!
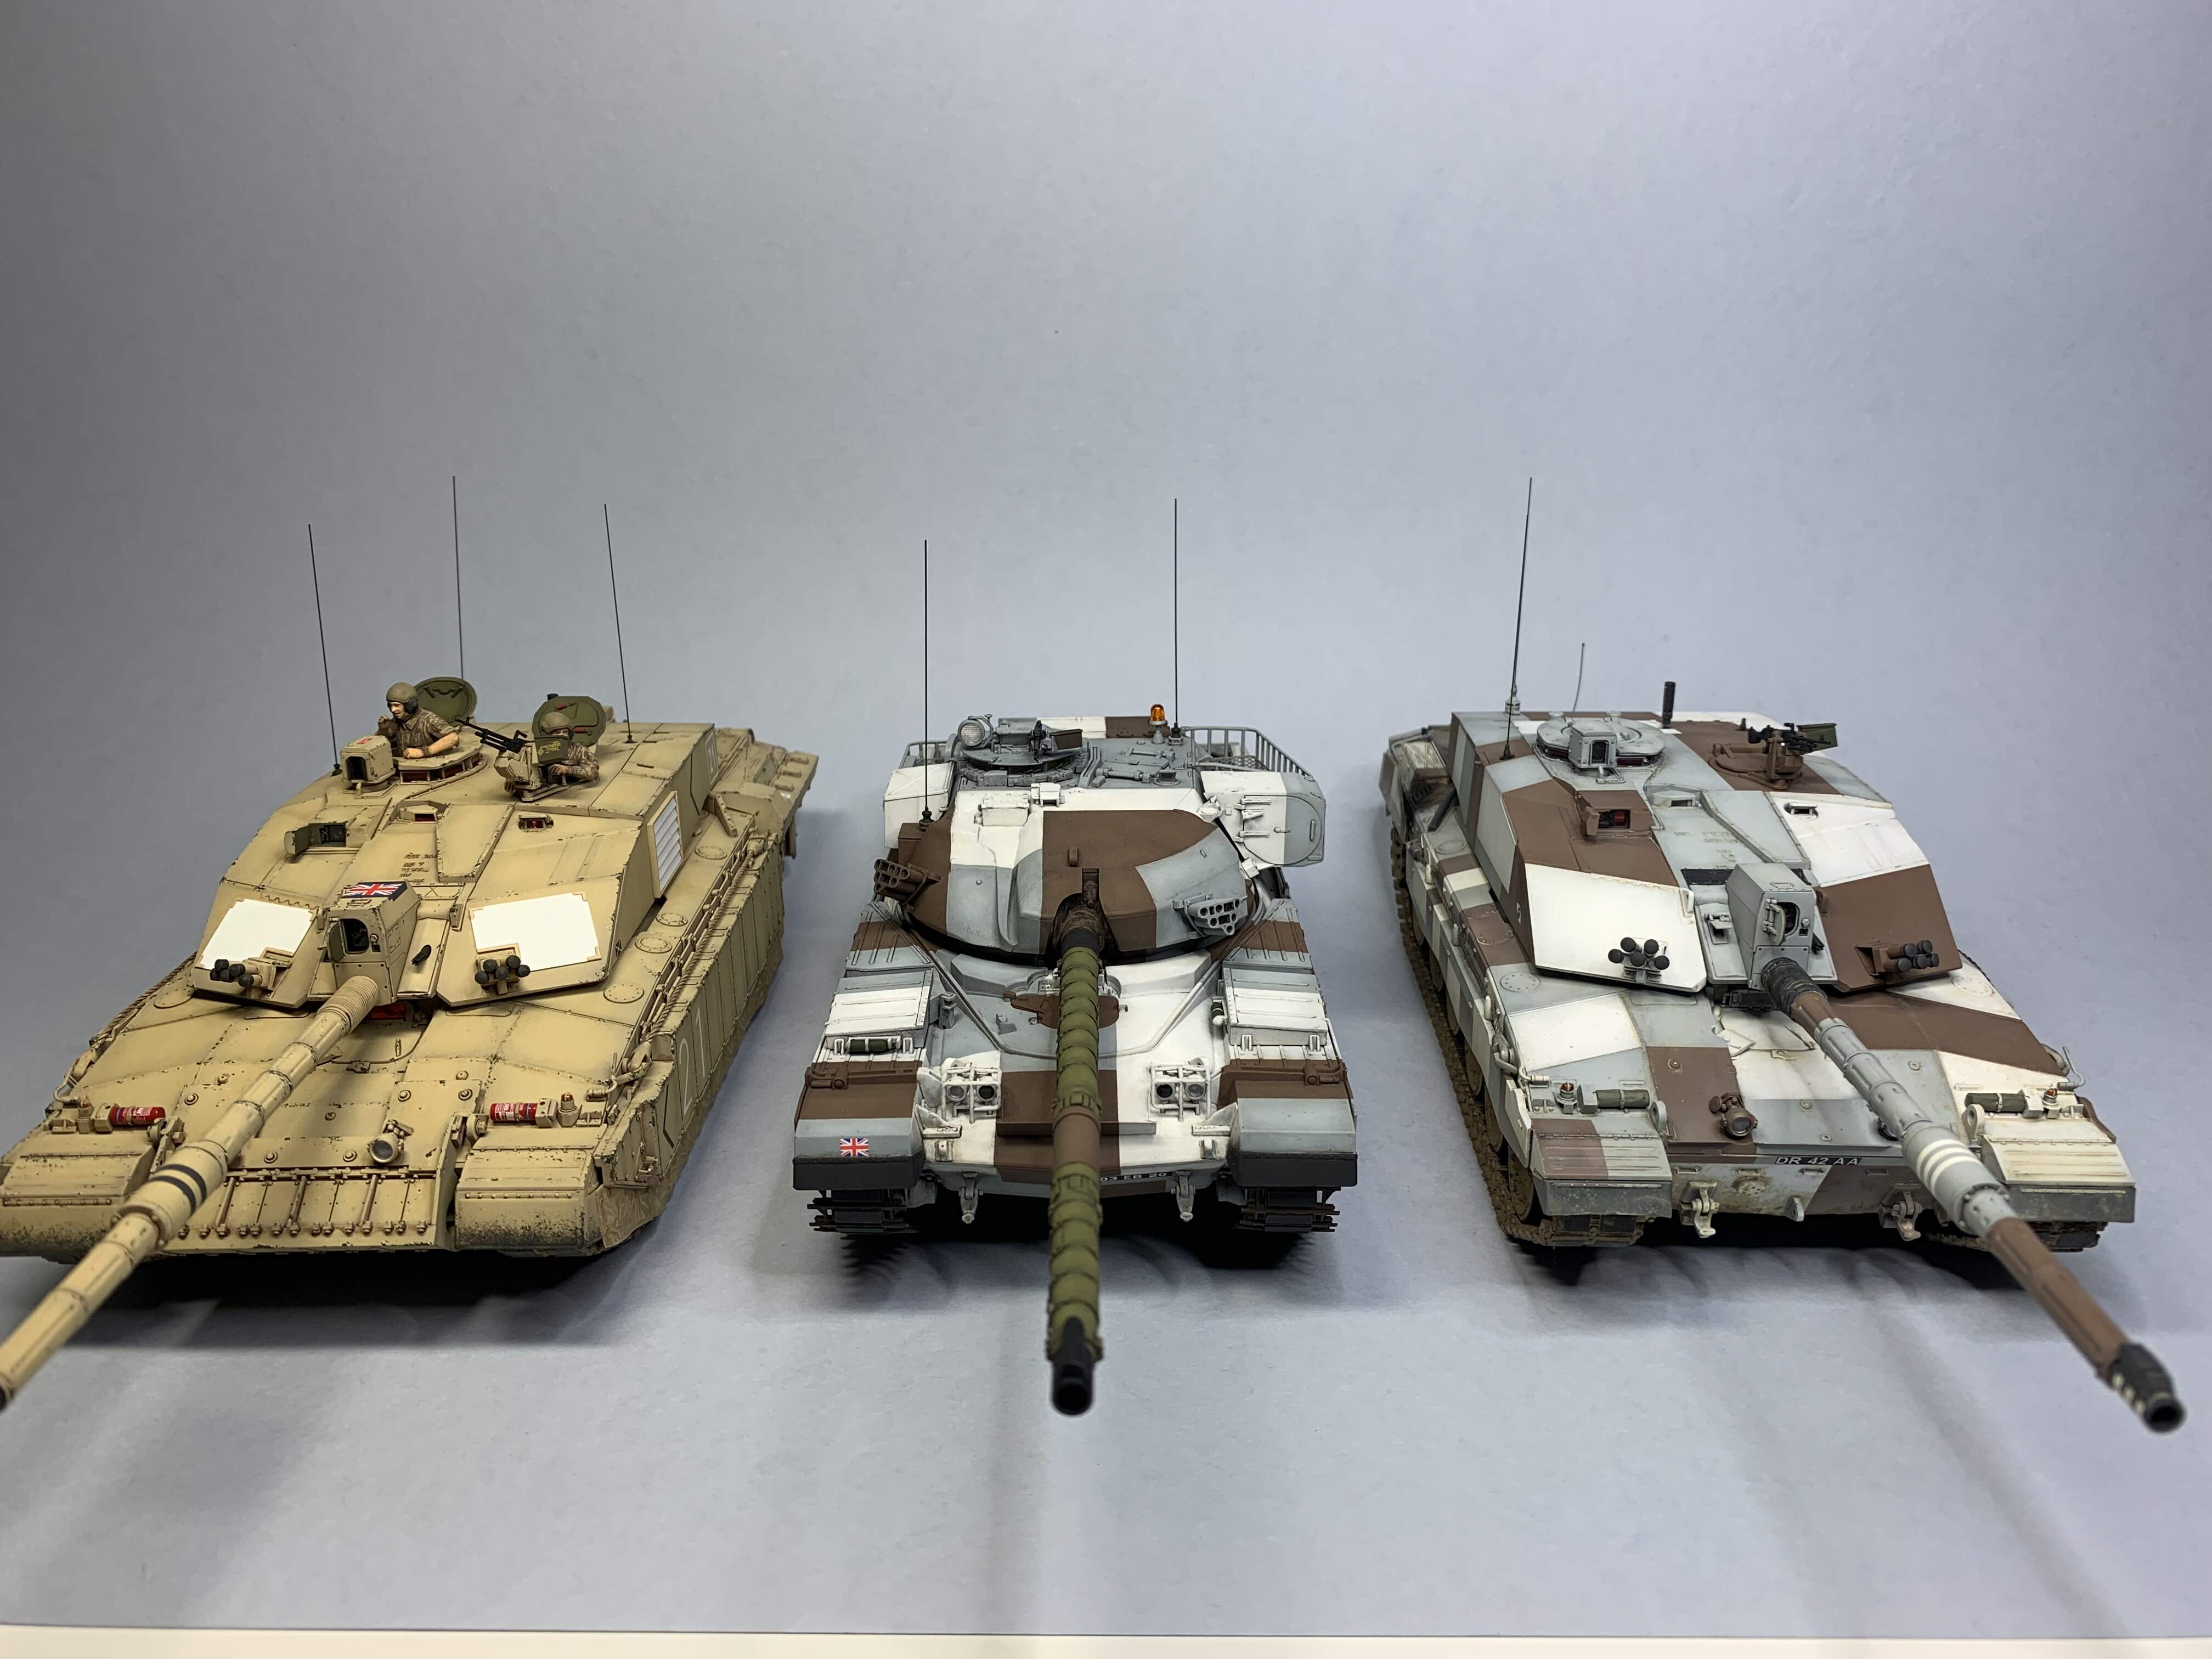
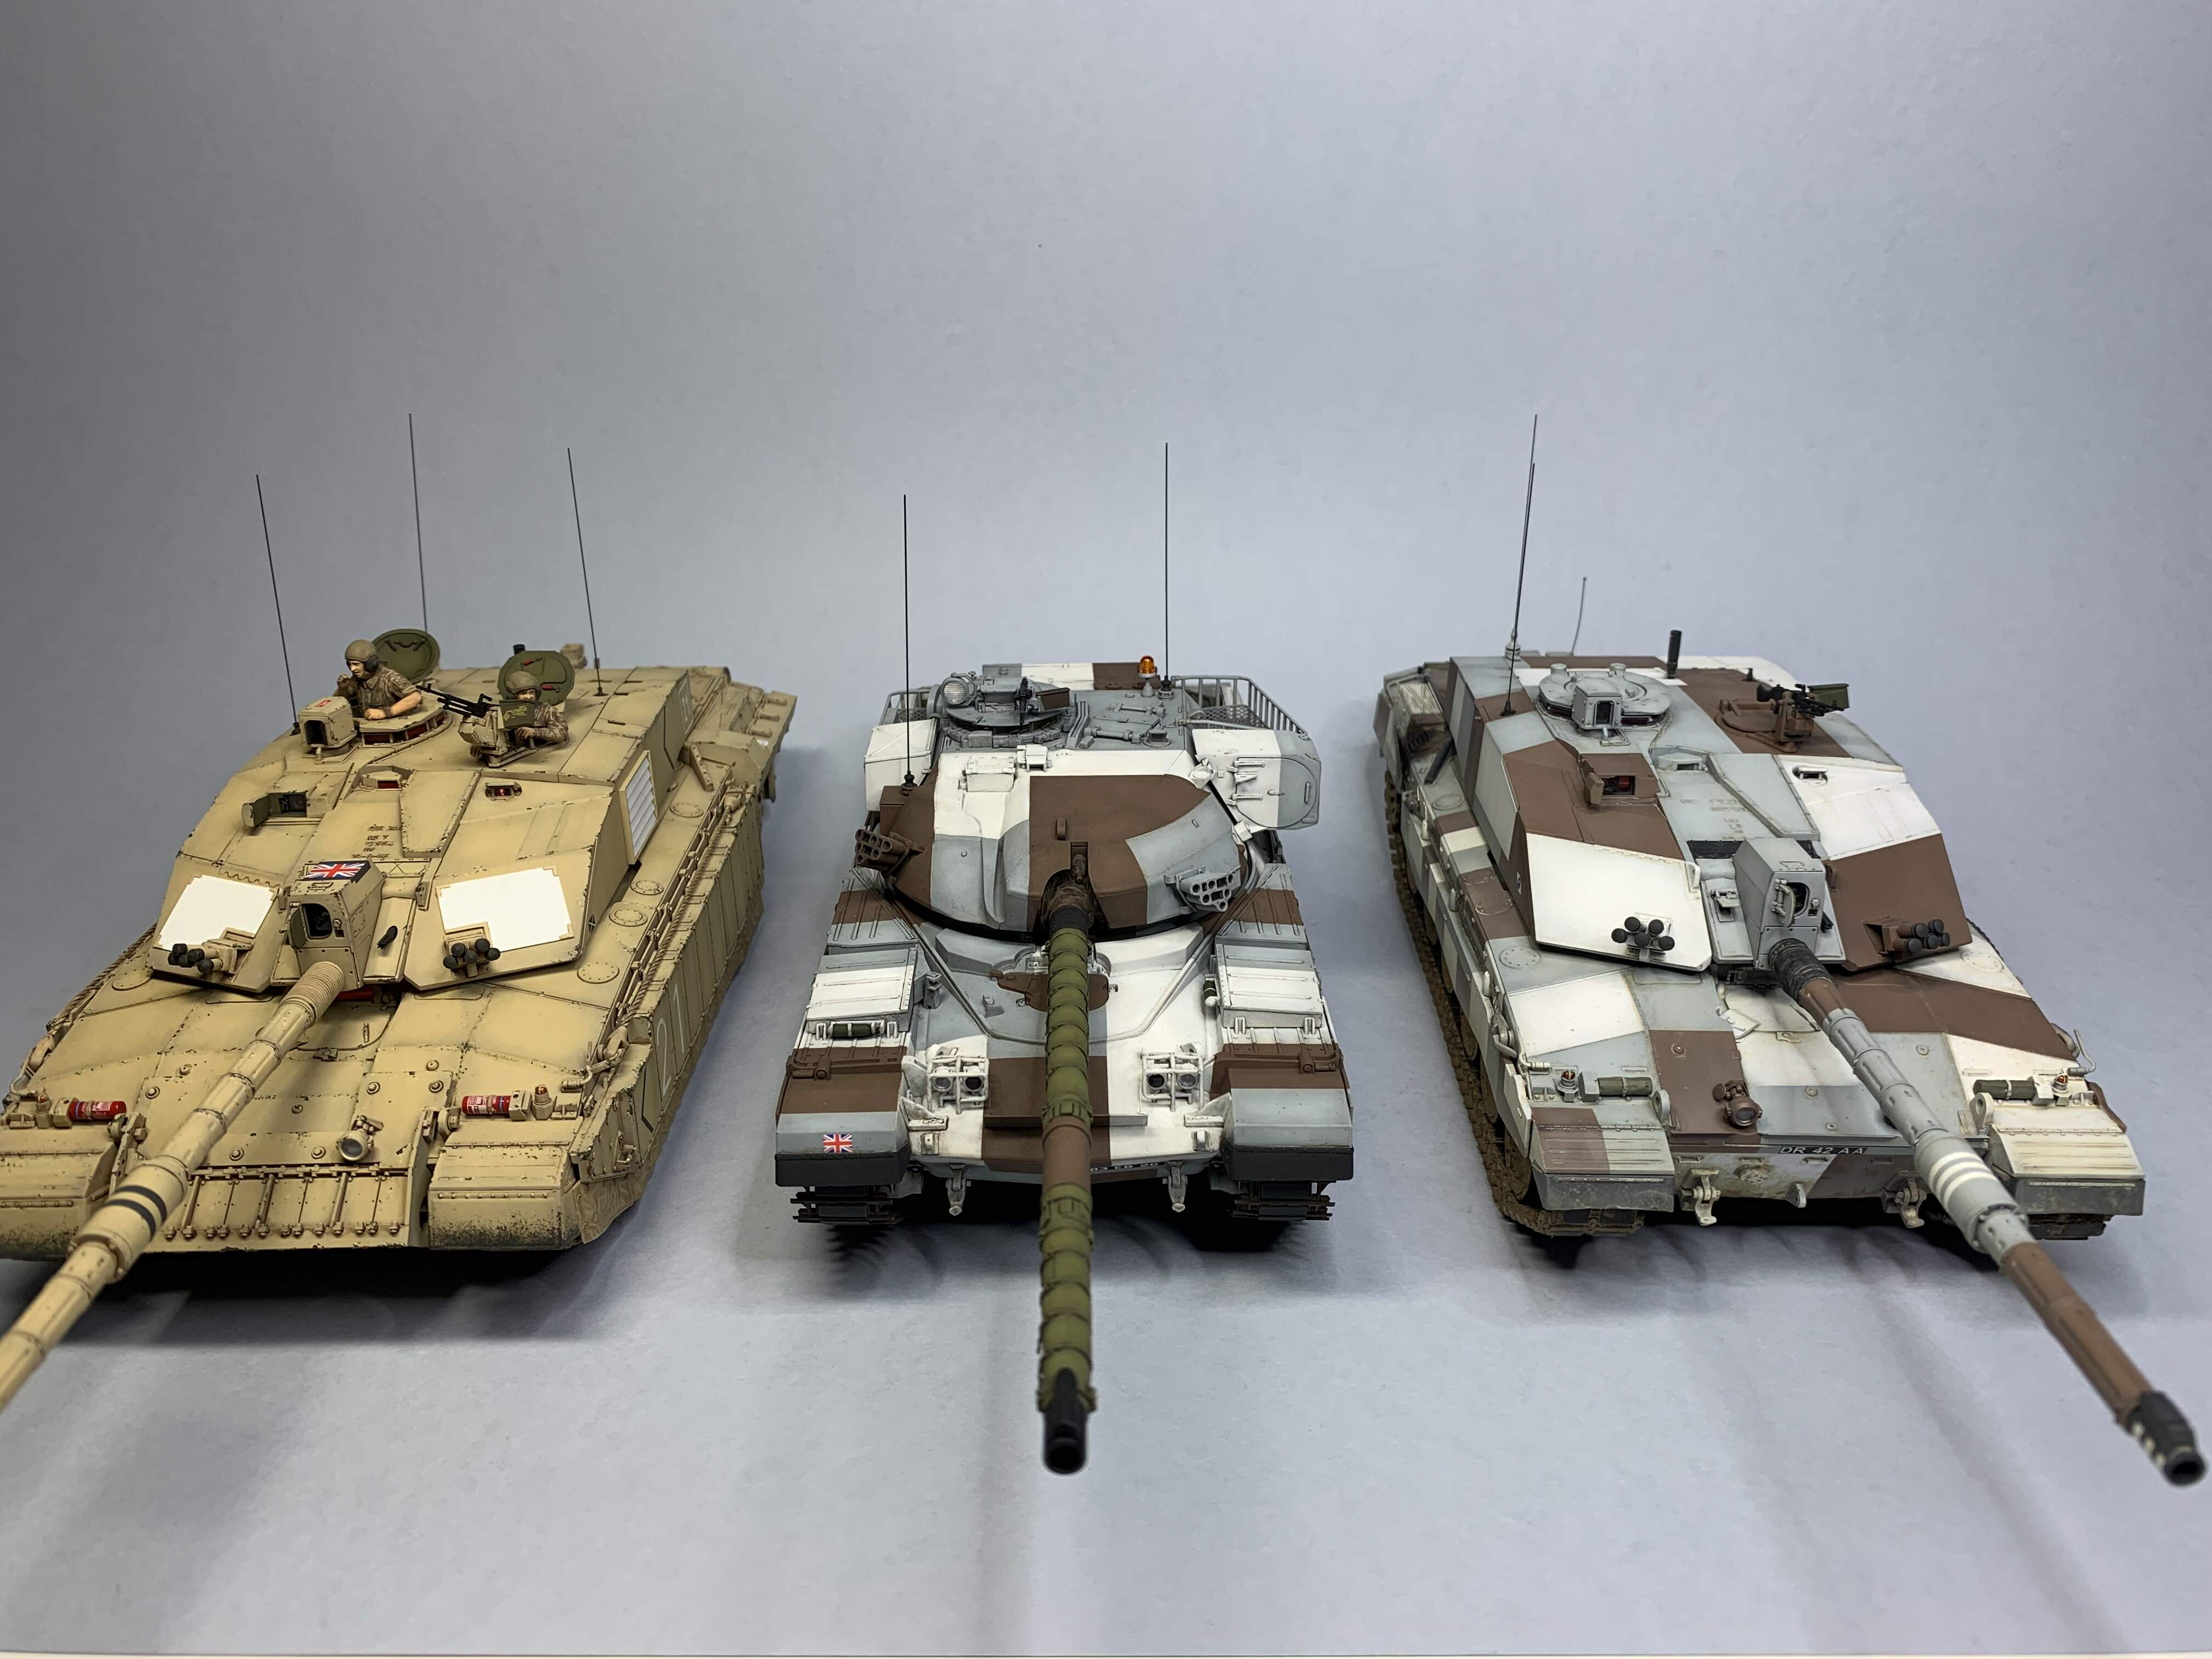
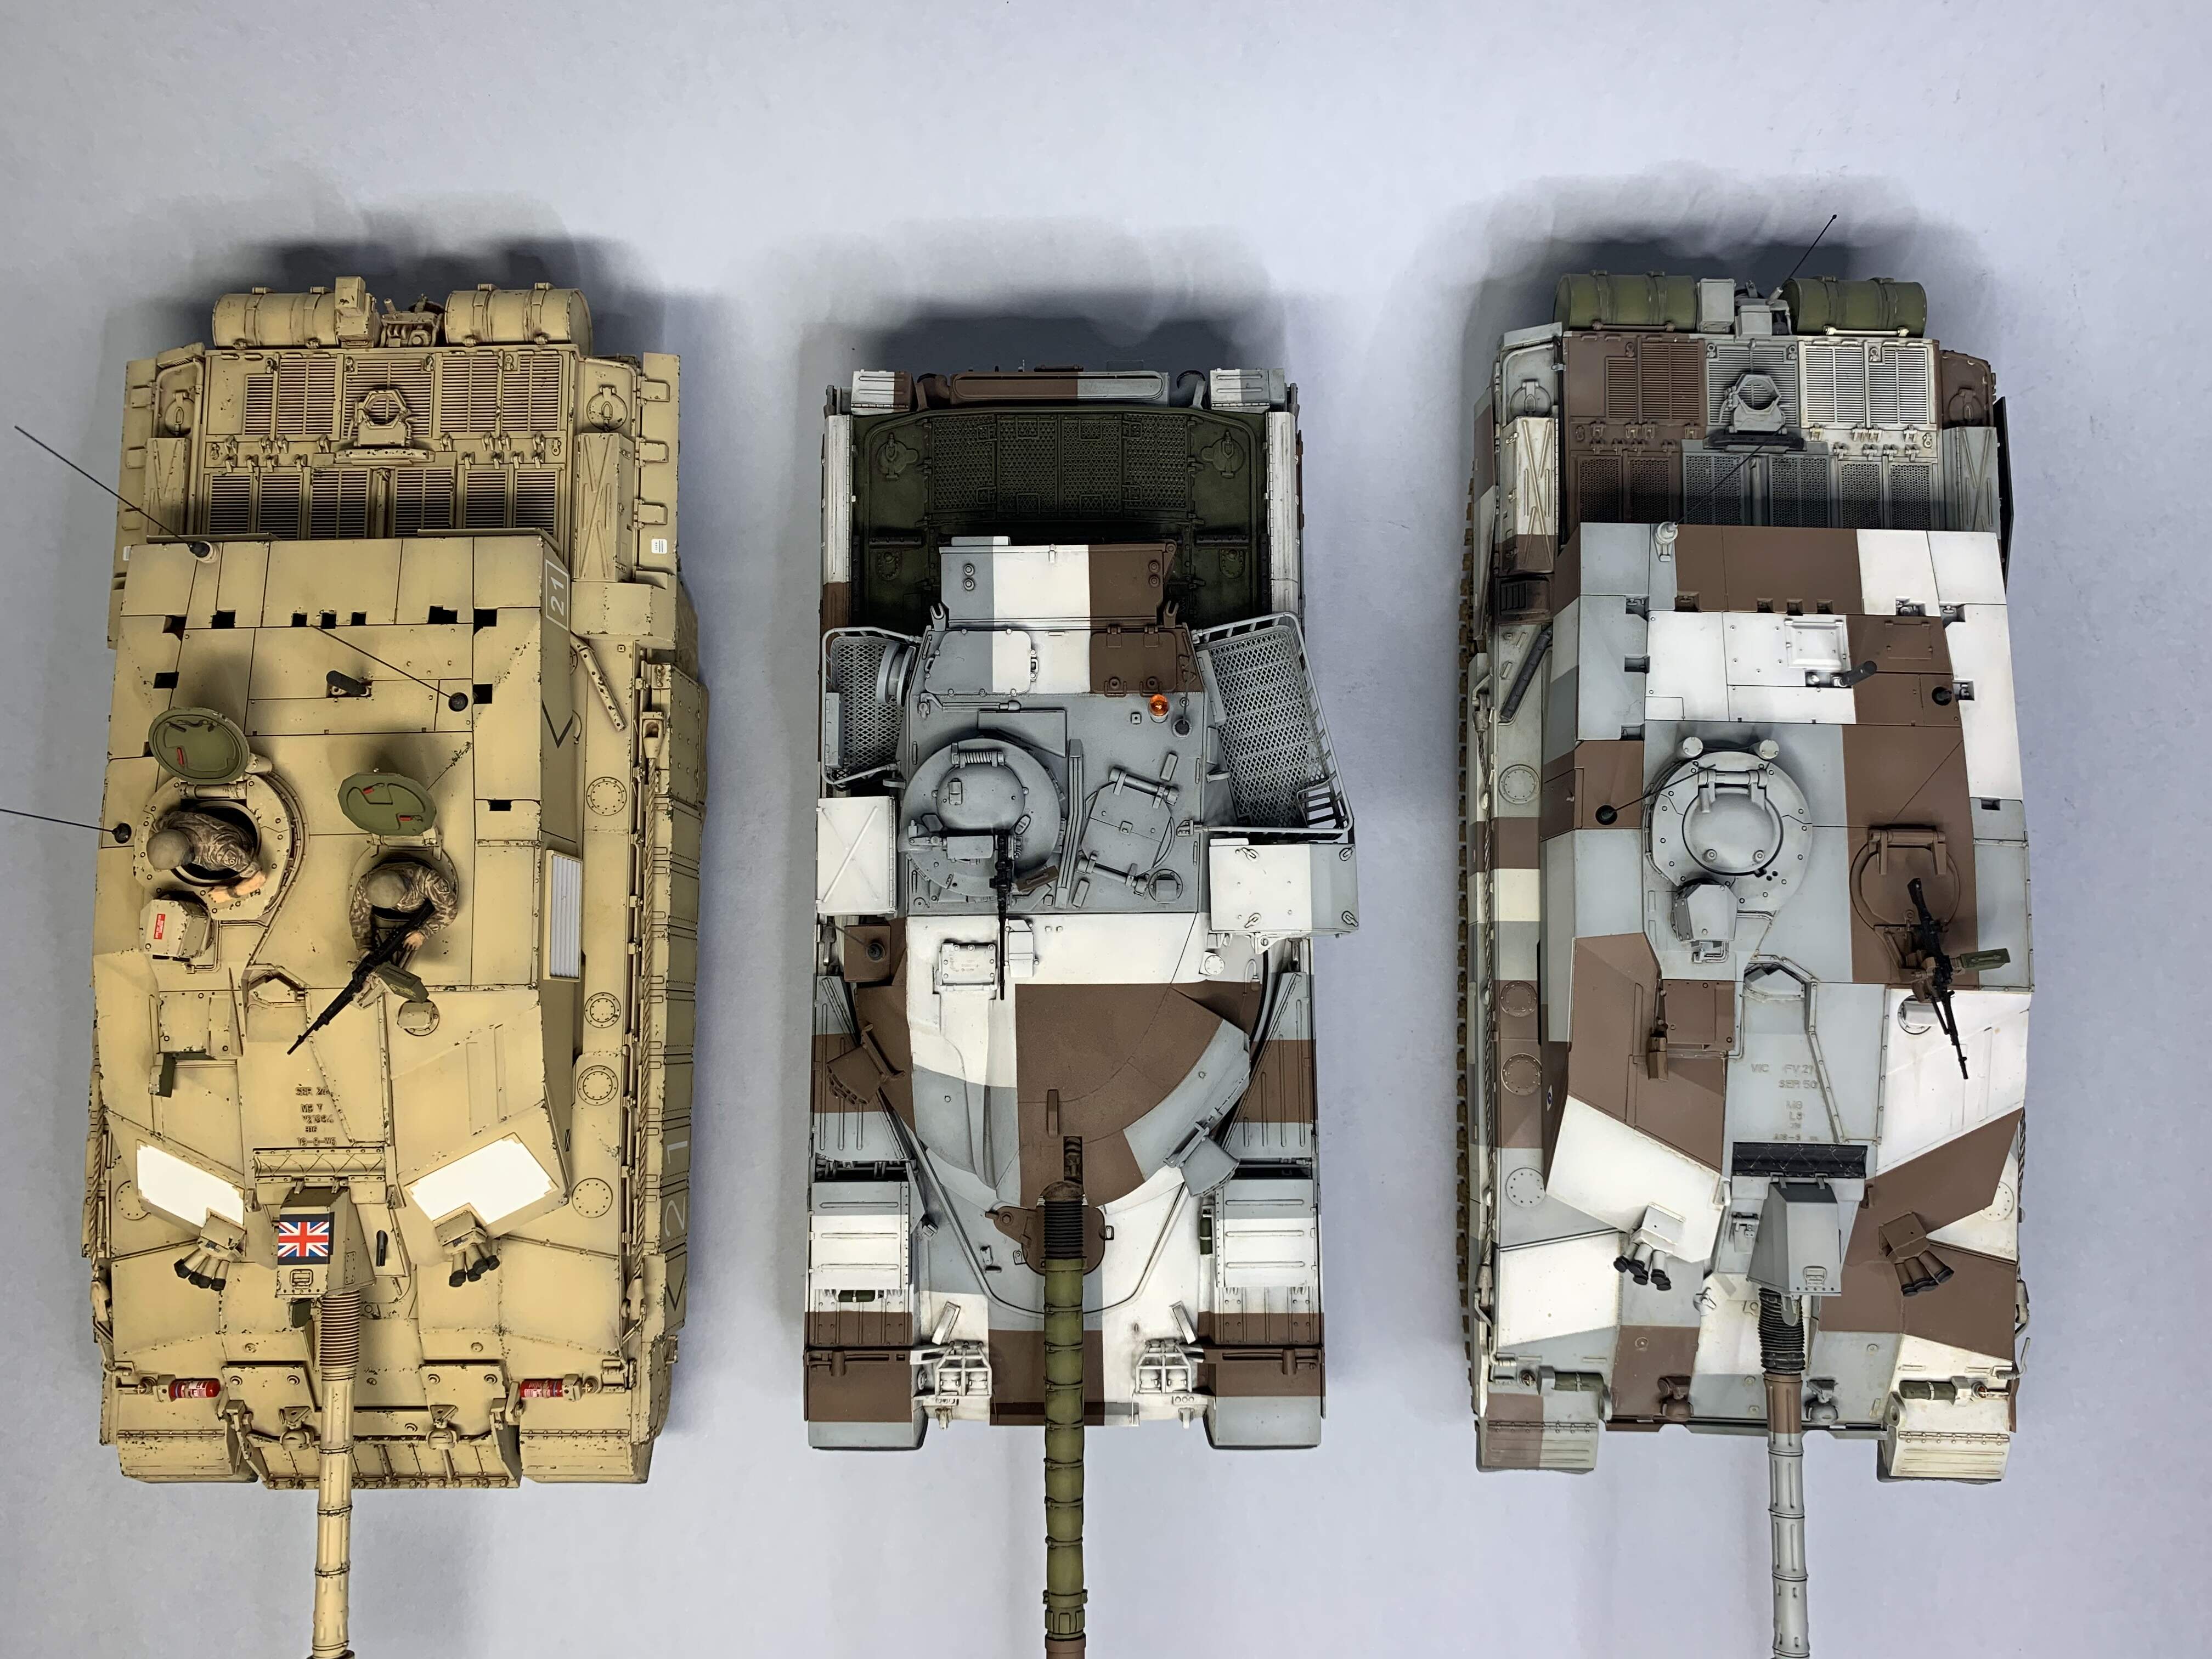
@Johnnych01, thanks mate, the kit has its issues but I wouldn’t hesitate to recommend it. The turret looks a bit bigger than the Tamiya Chally 2 but not that much in it. Will post some side by side pics once all buttoned up, and against the neutral background. Also thought from the pics I hadn’t managed to get the wheels level, but turns out the wooden plinth is warped! All nice and straight on a level surface.
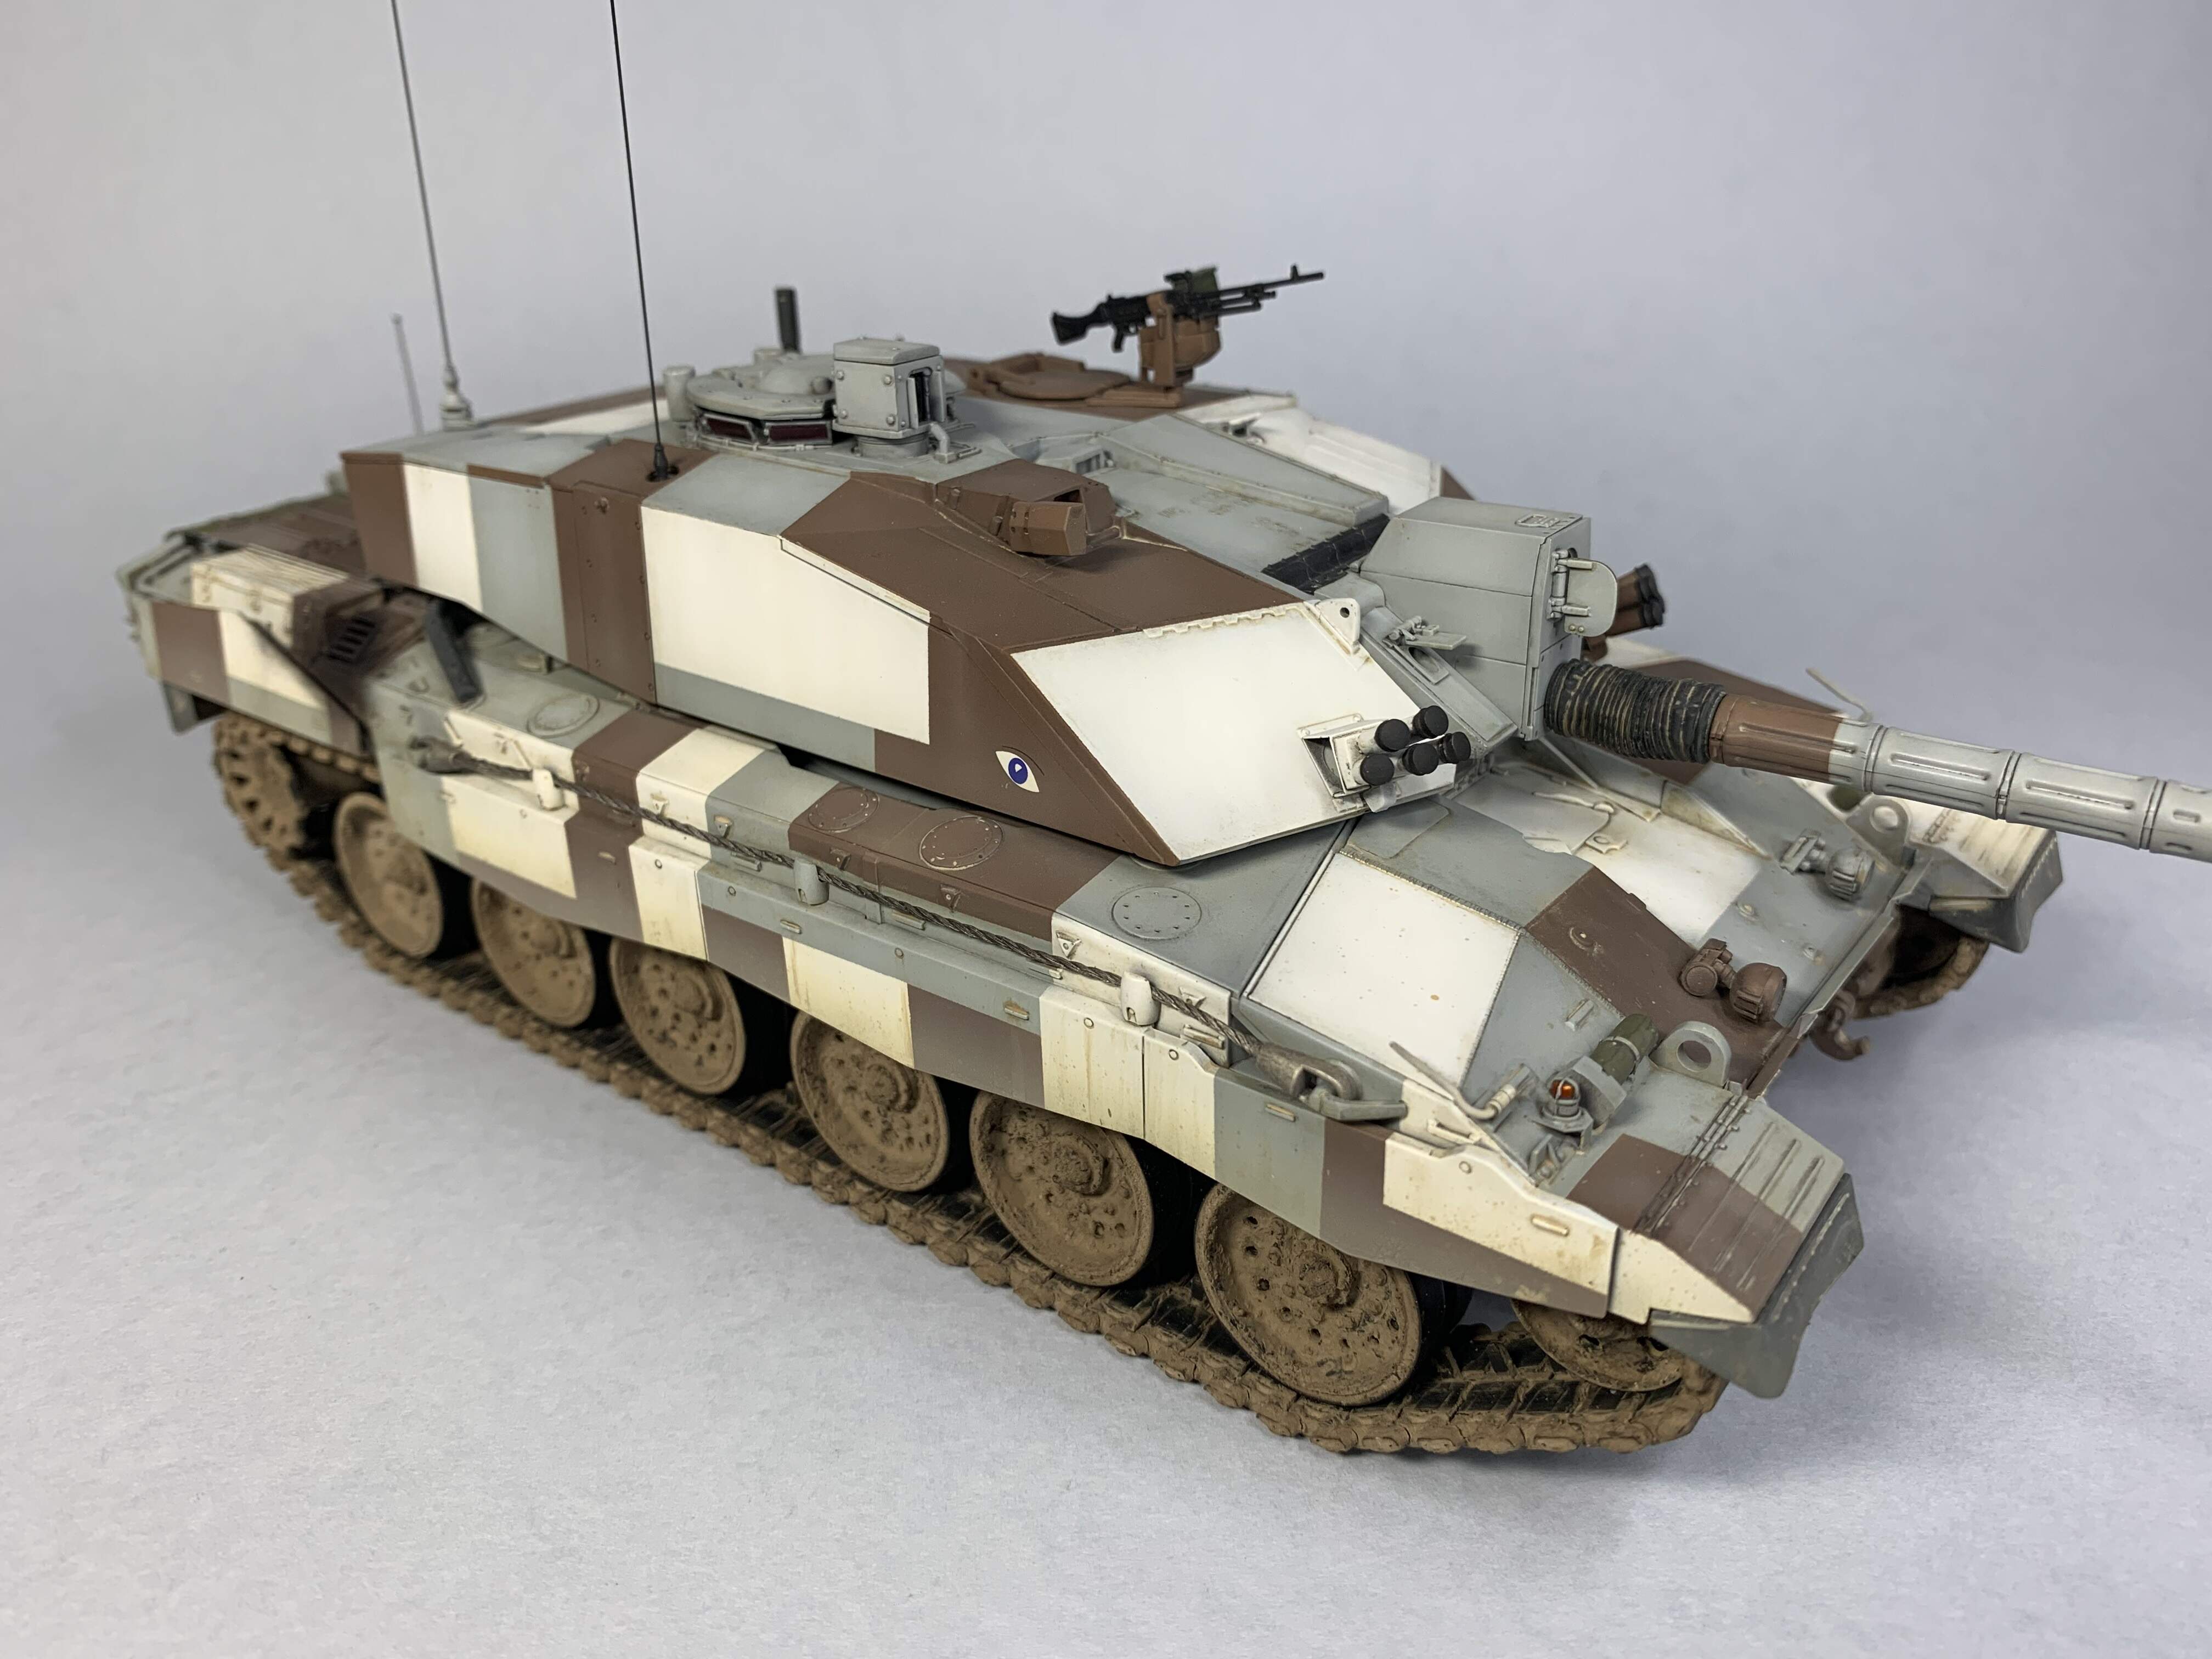
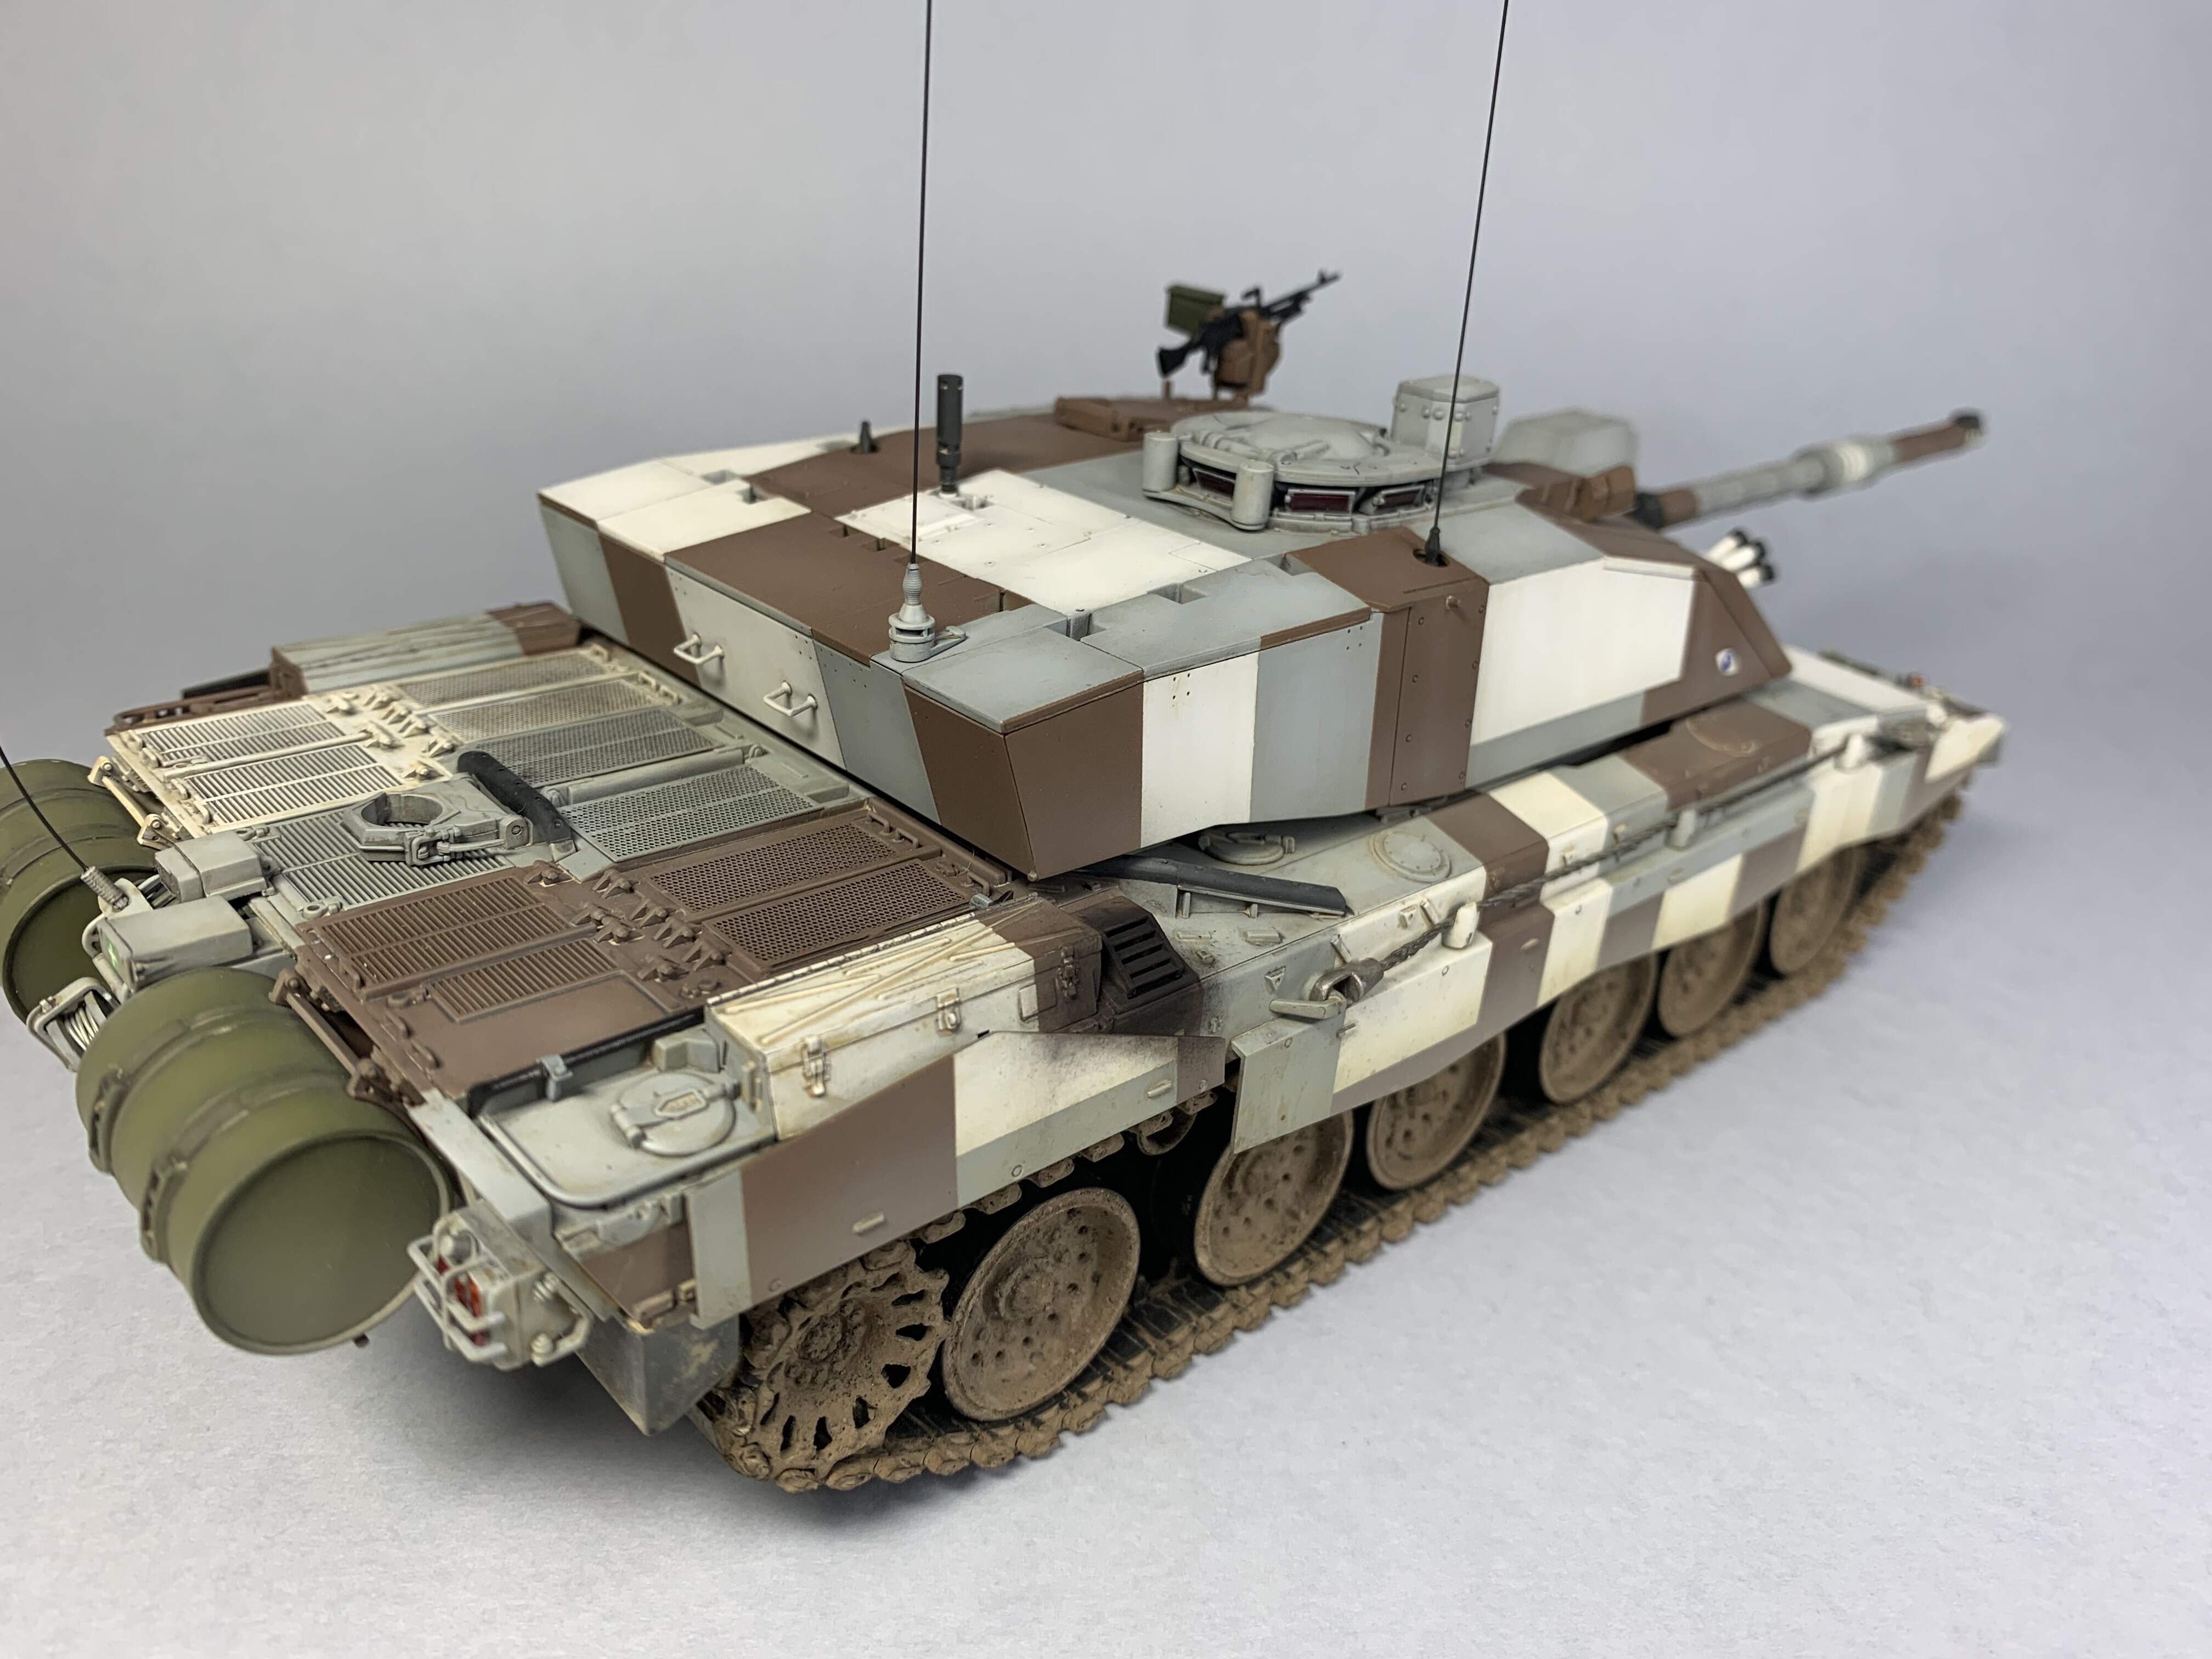
@Armor_Buff , thanks Wade, I felt the camo needed that bit of contrast like the Chieftain has with the green thermal blanket on the barrel, and my research showed green fuel drums used occasionally so that seemed ideal. I used Tamiya NATO green highlighted with a little Tamiya yellow green added.
Thanks again, Jim.
1 Like
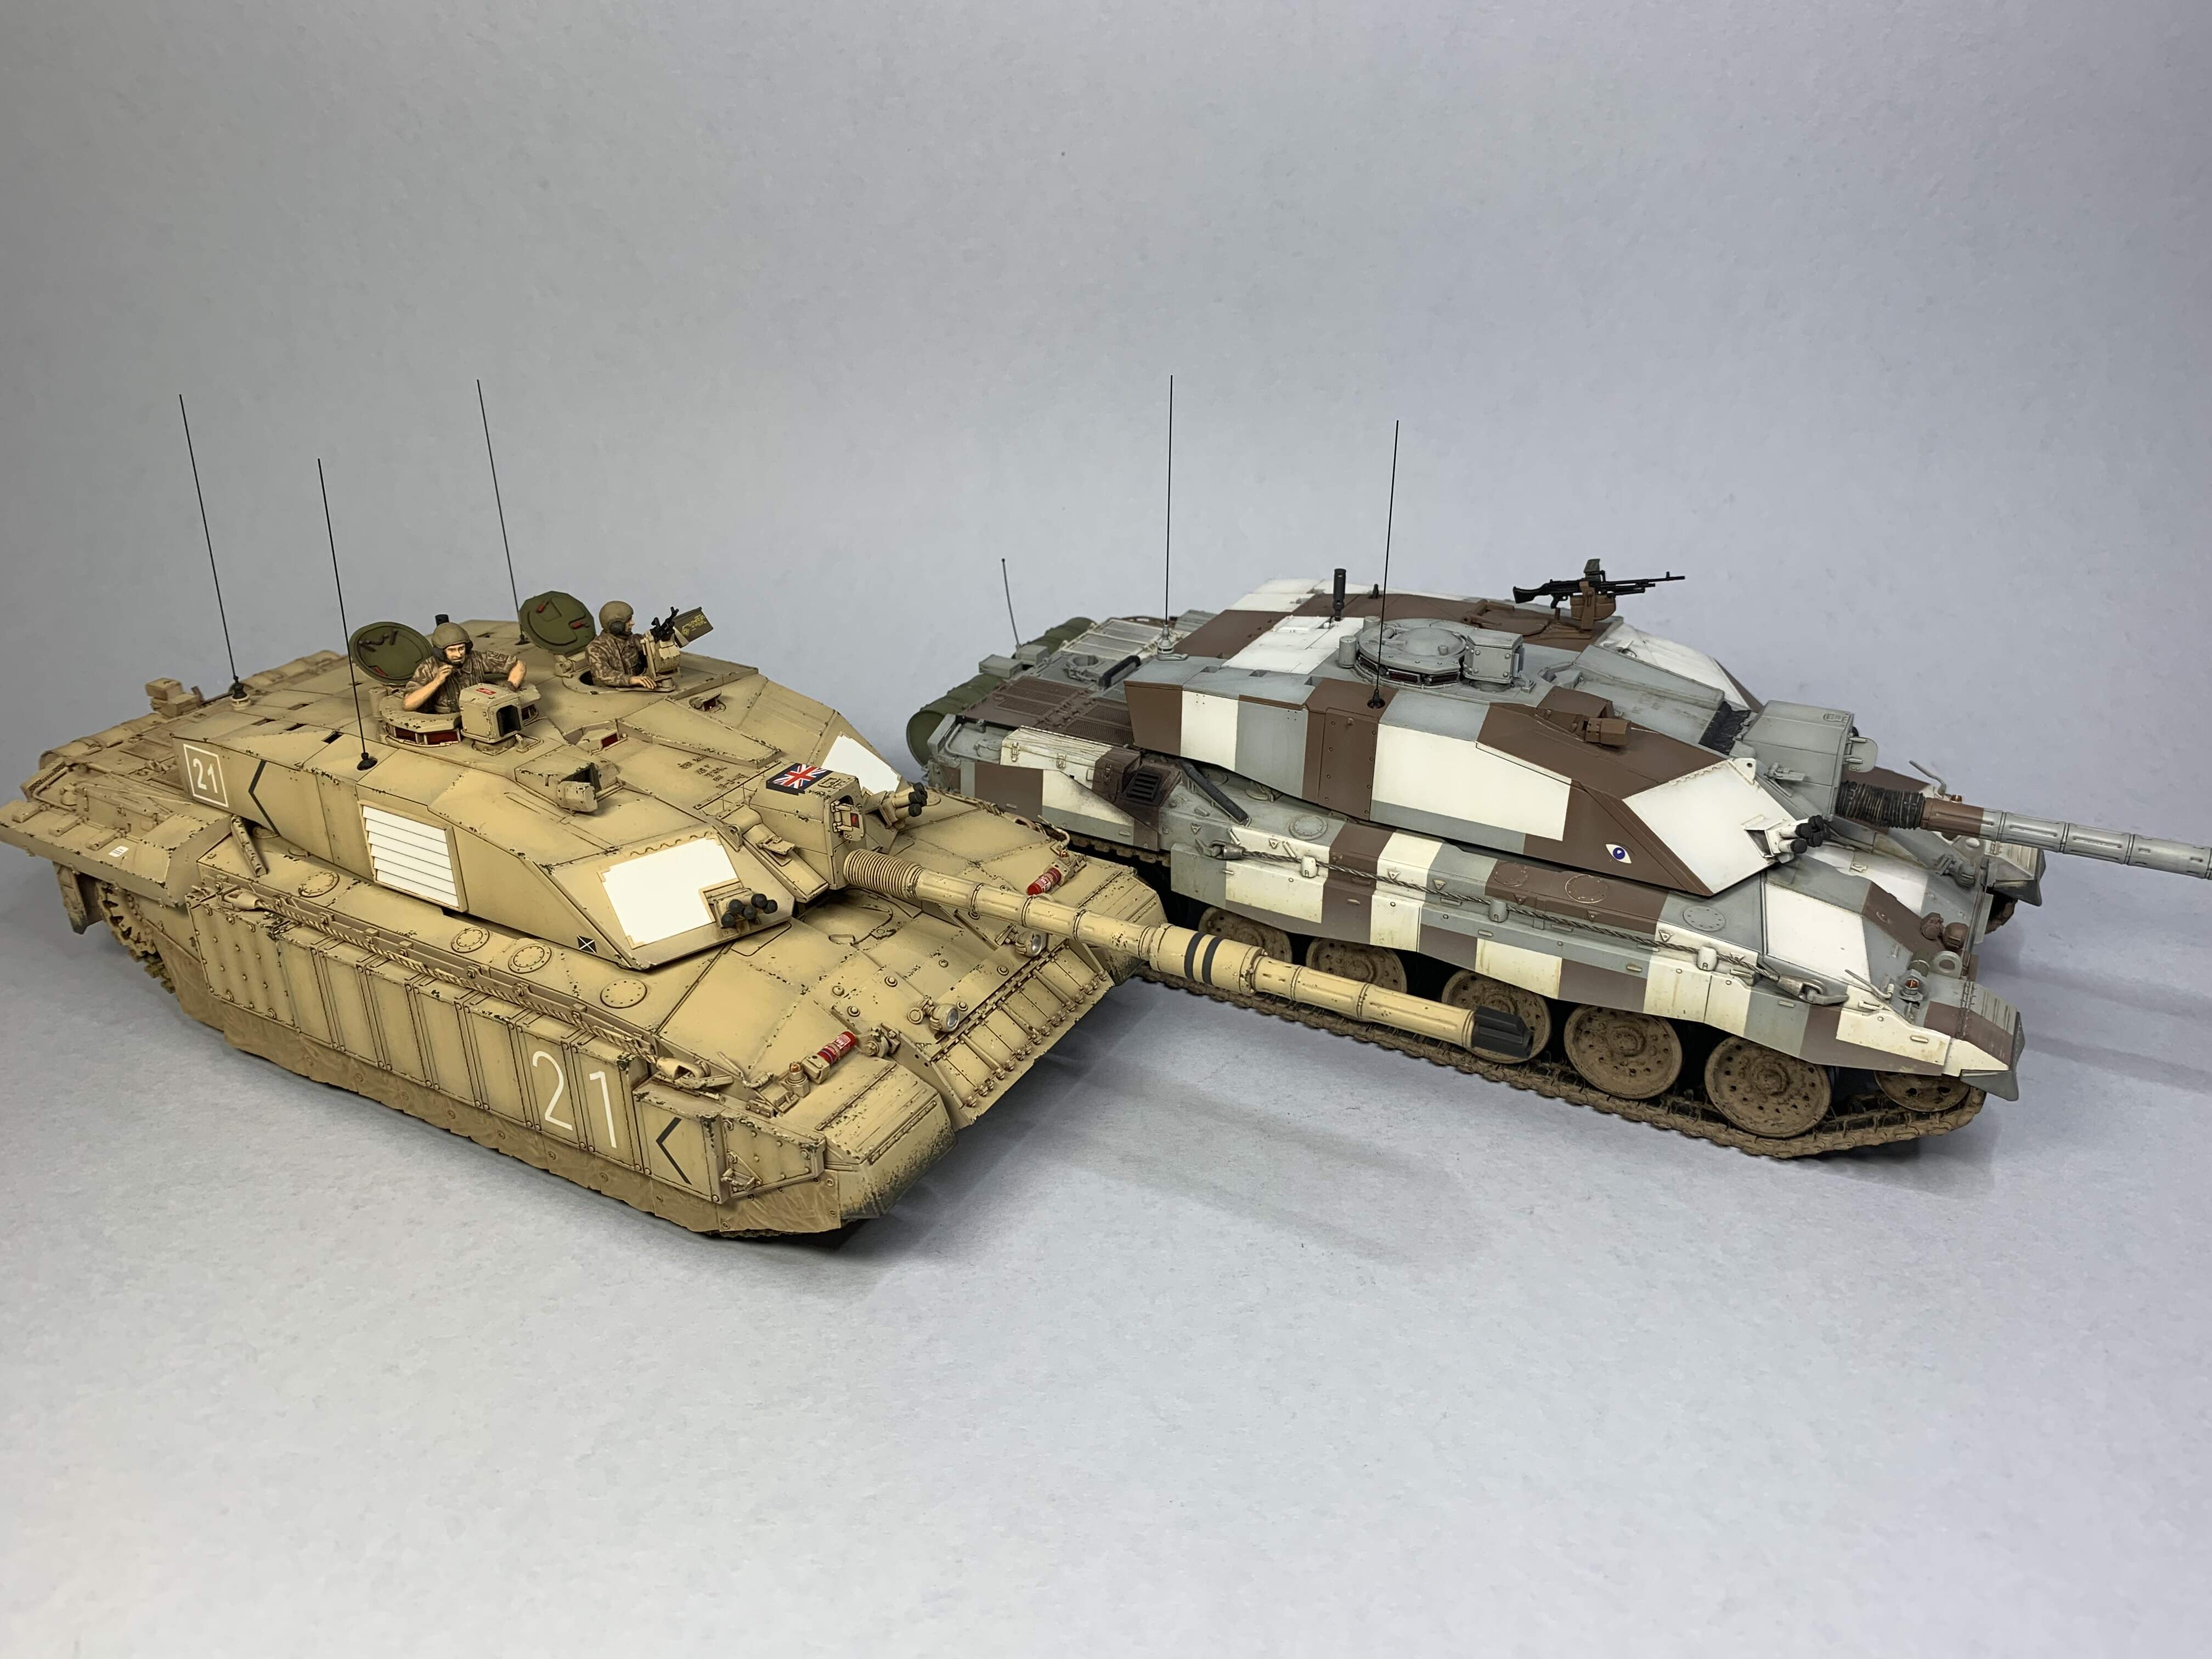
Hi all, and thanks again for looking in!
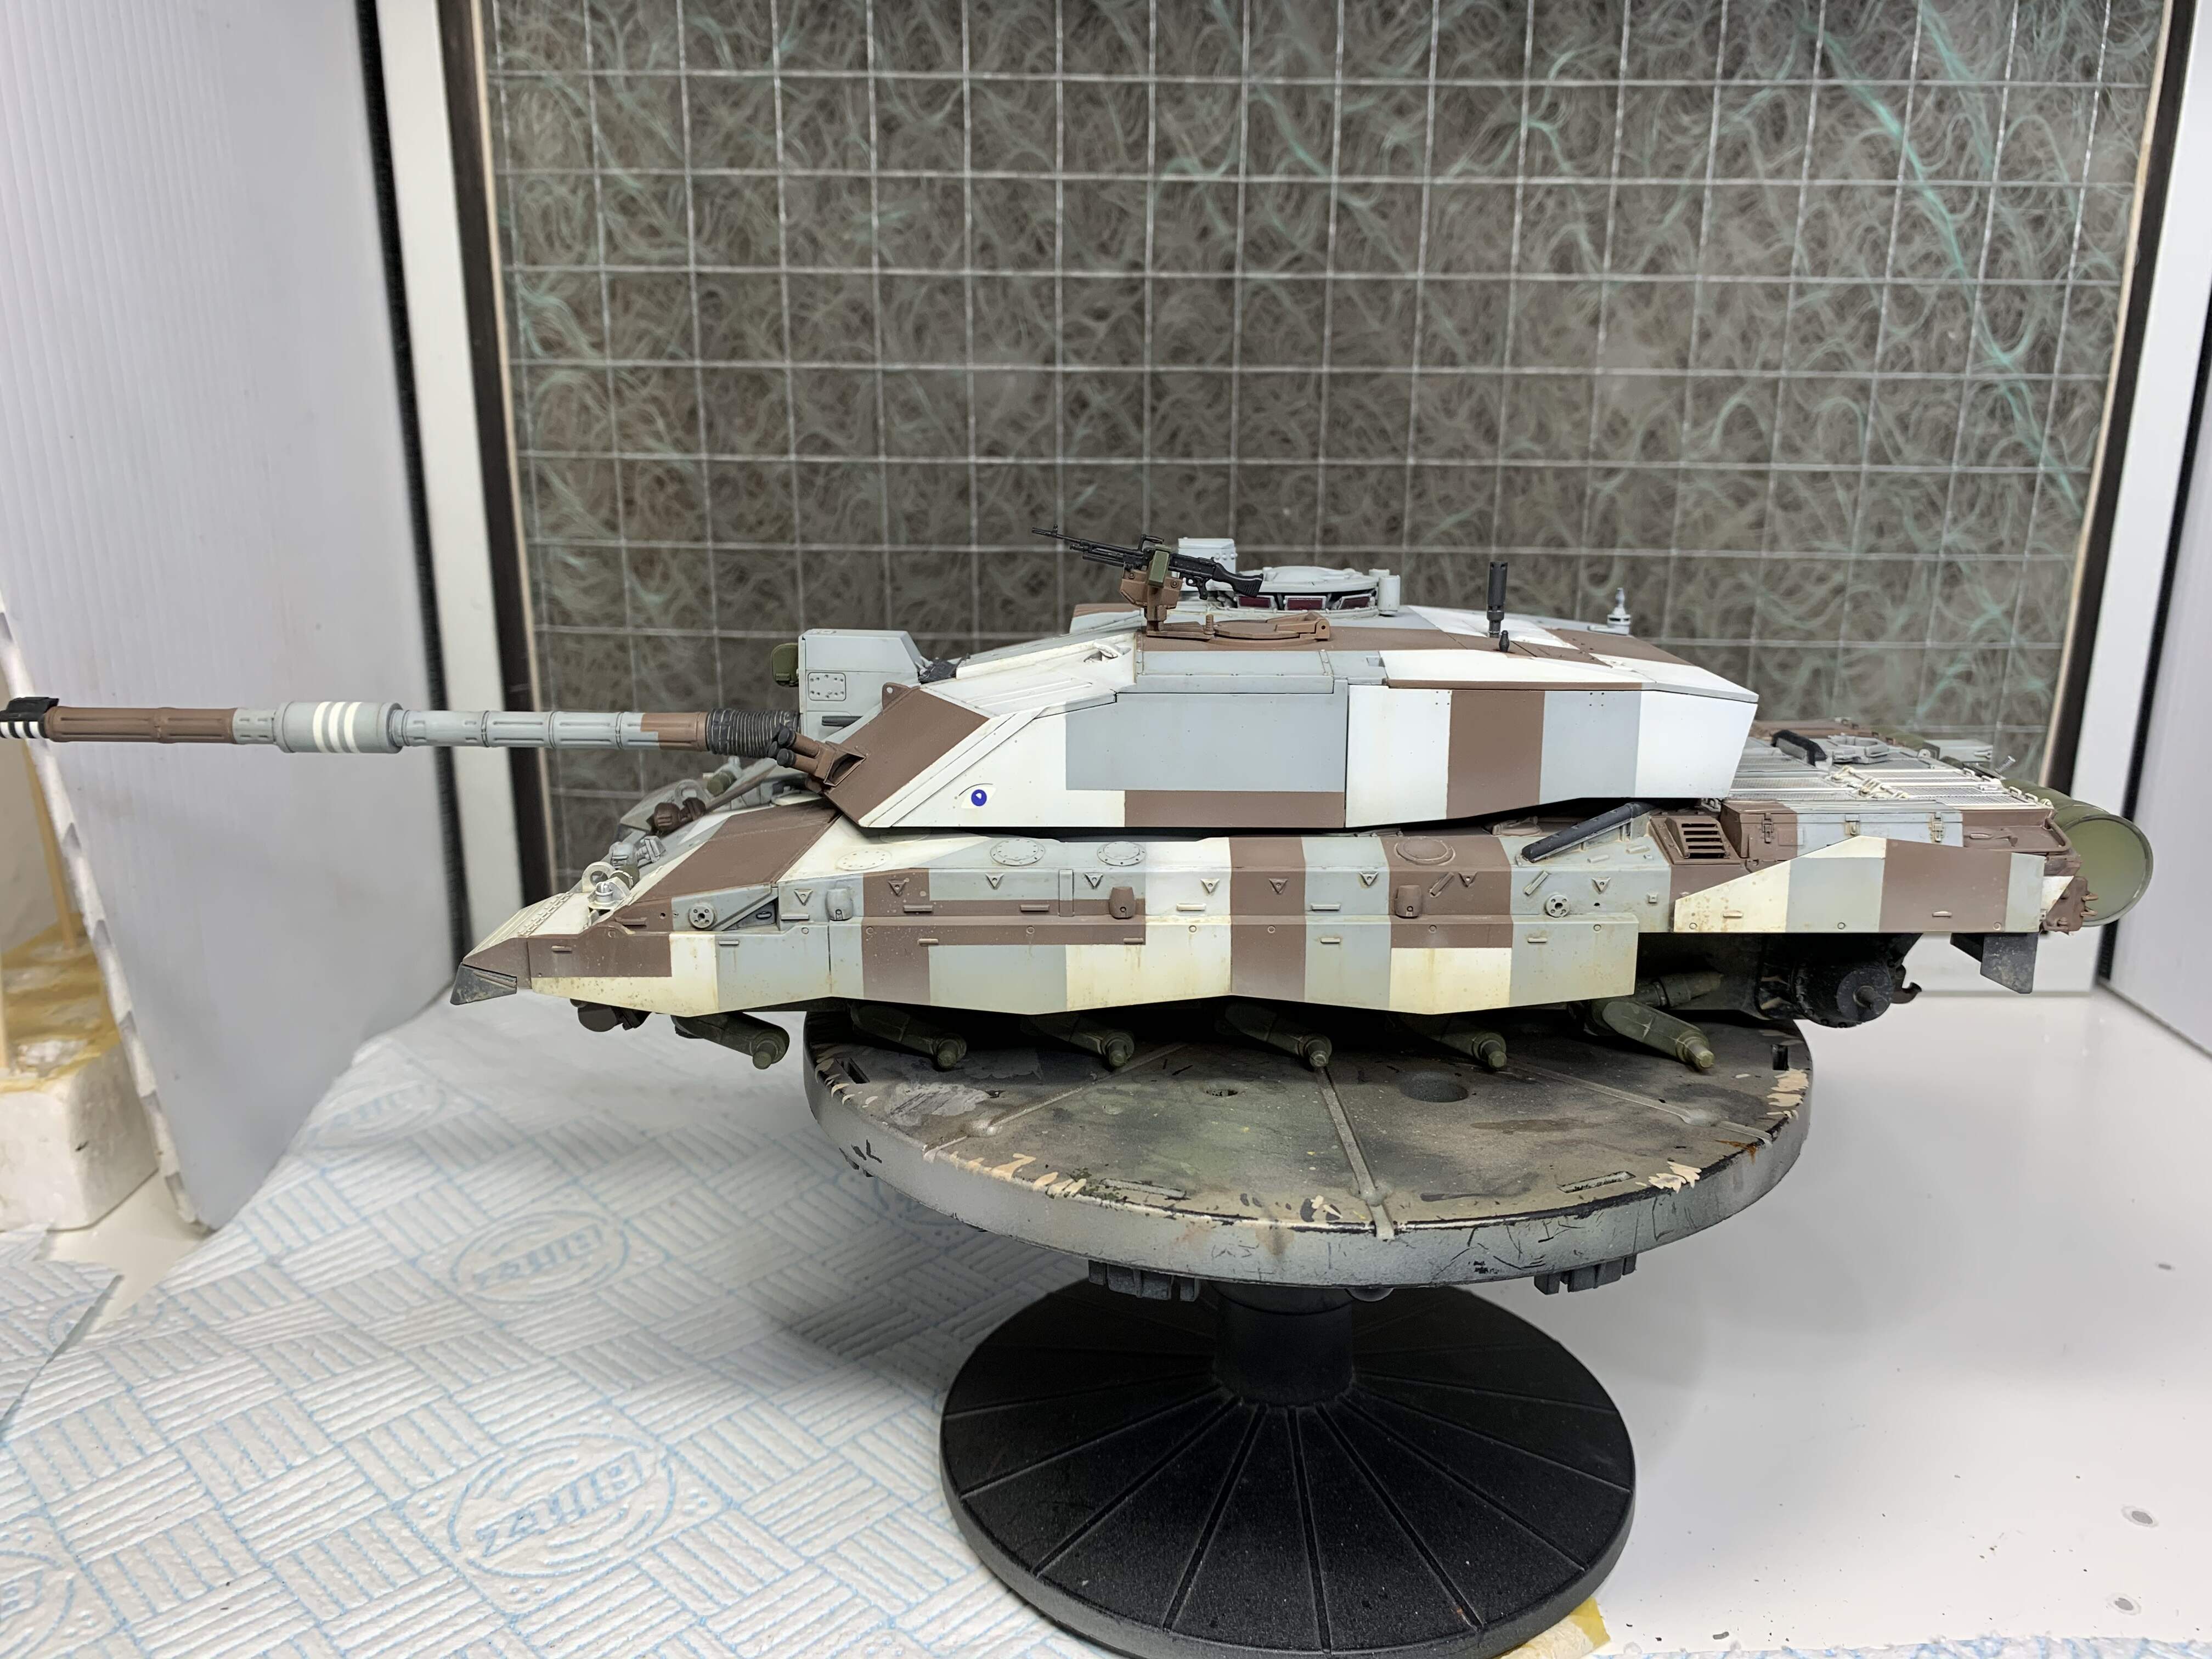
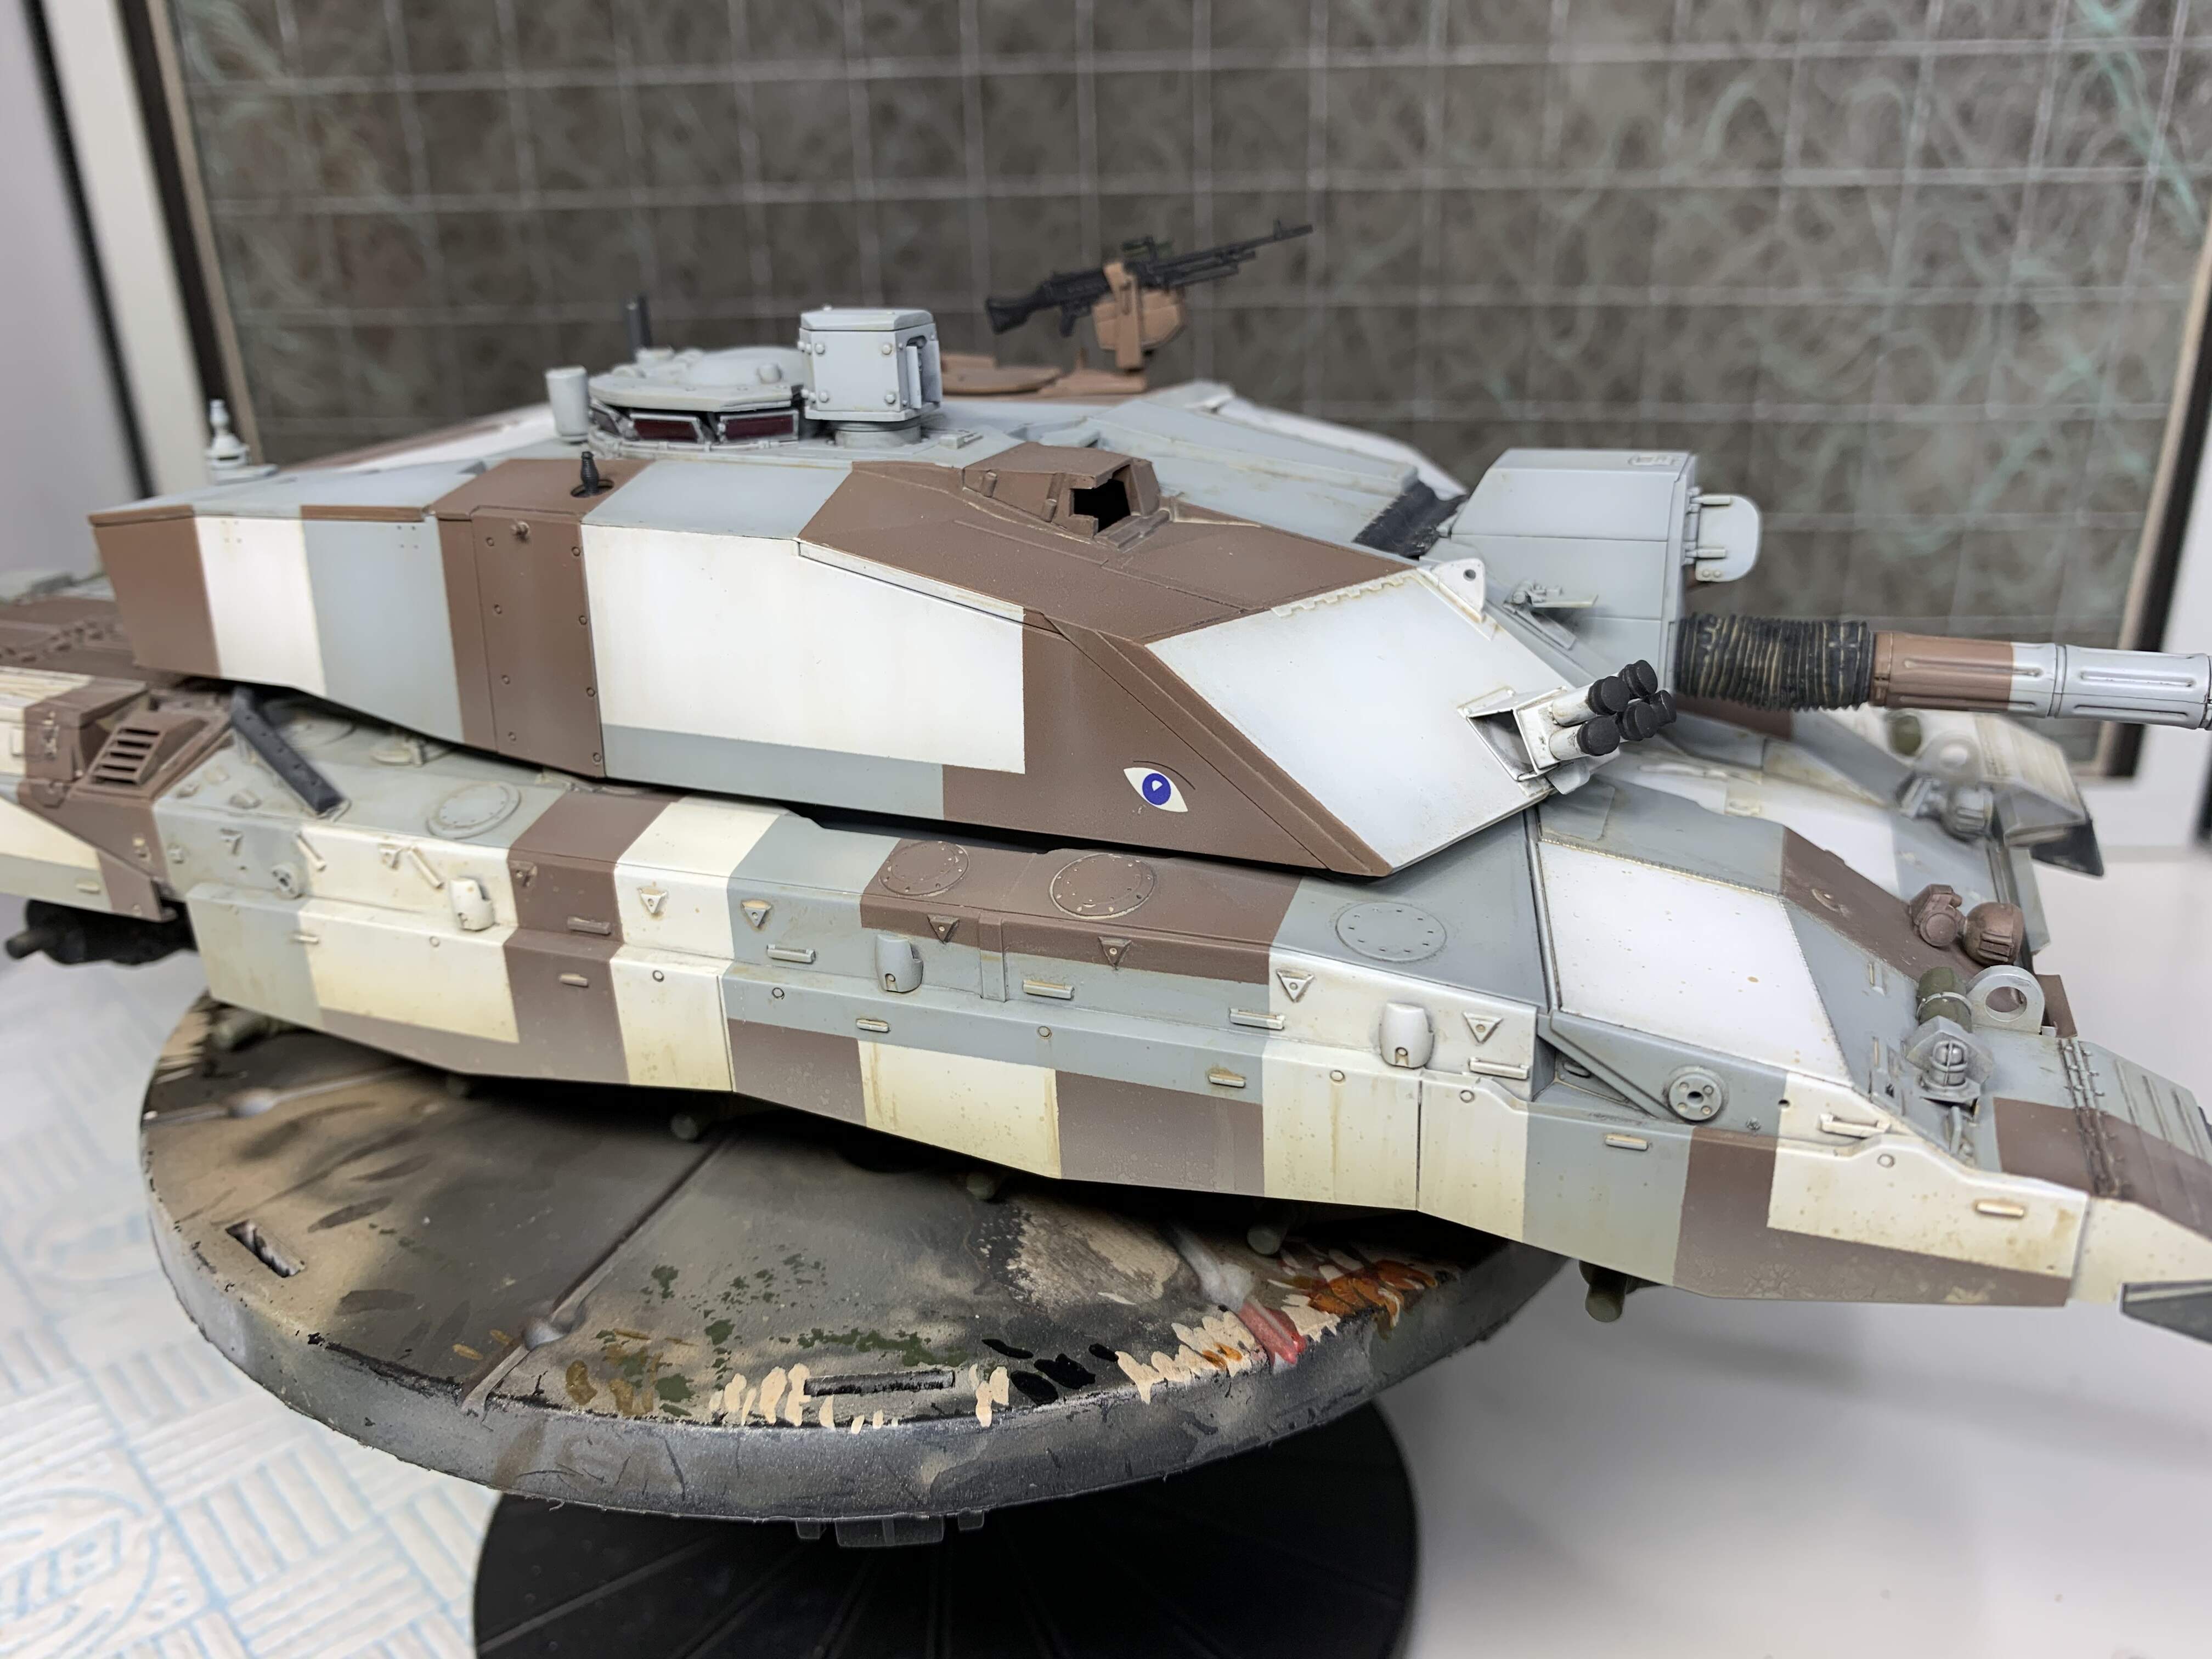
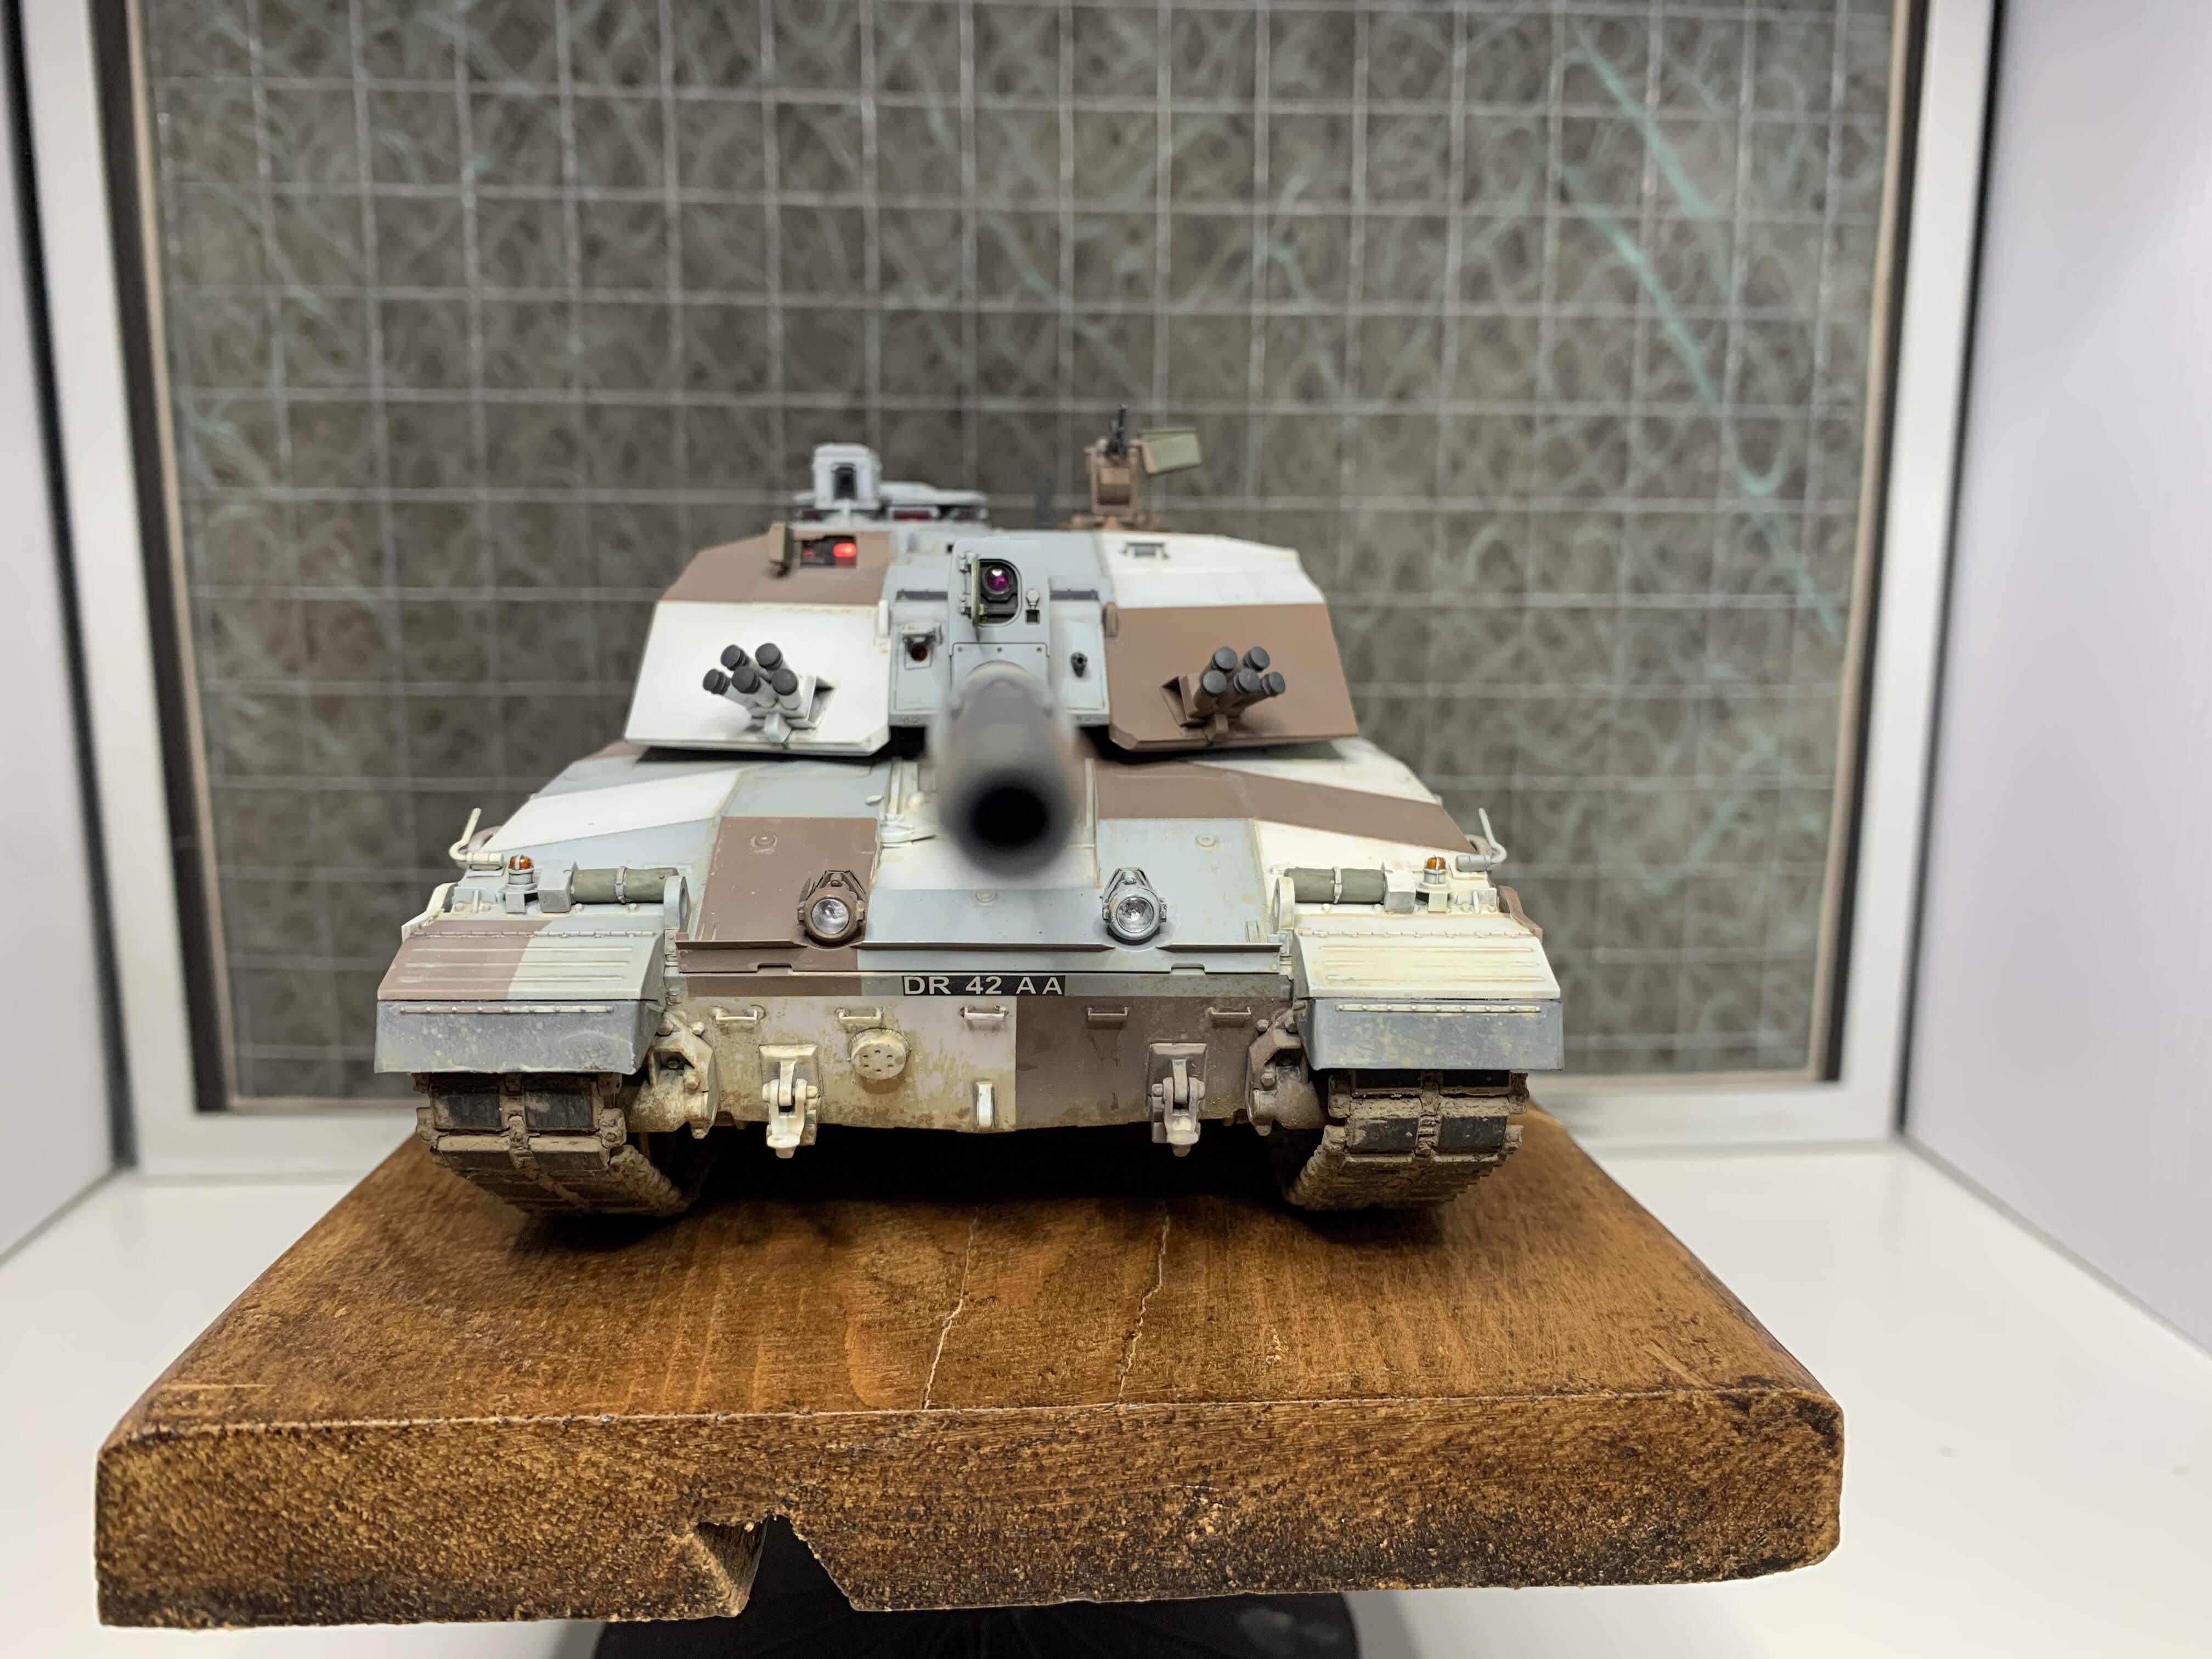
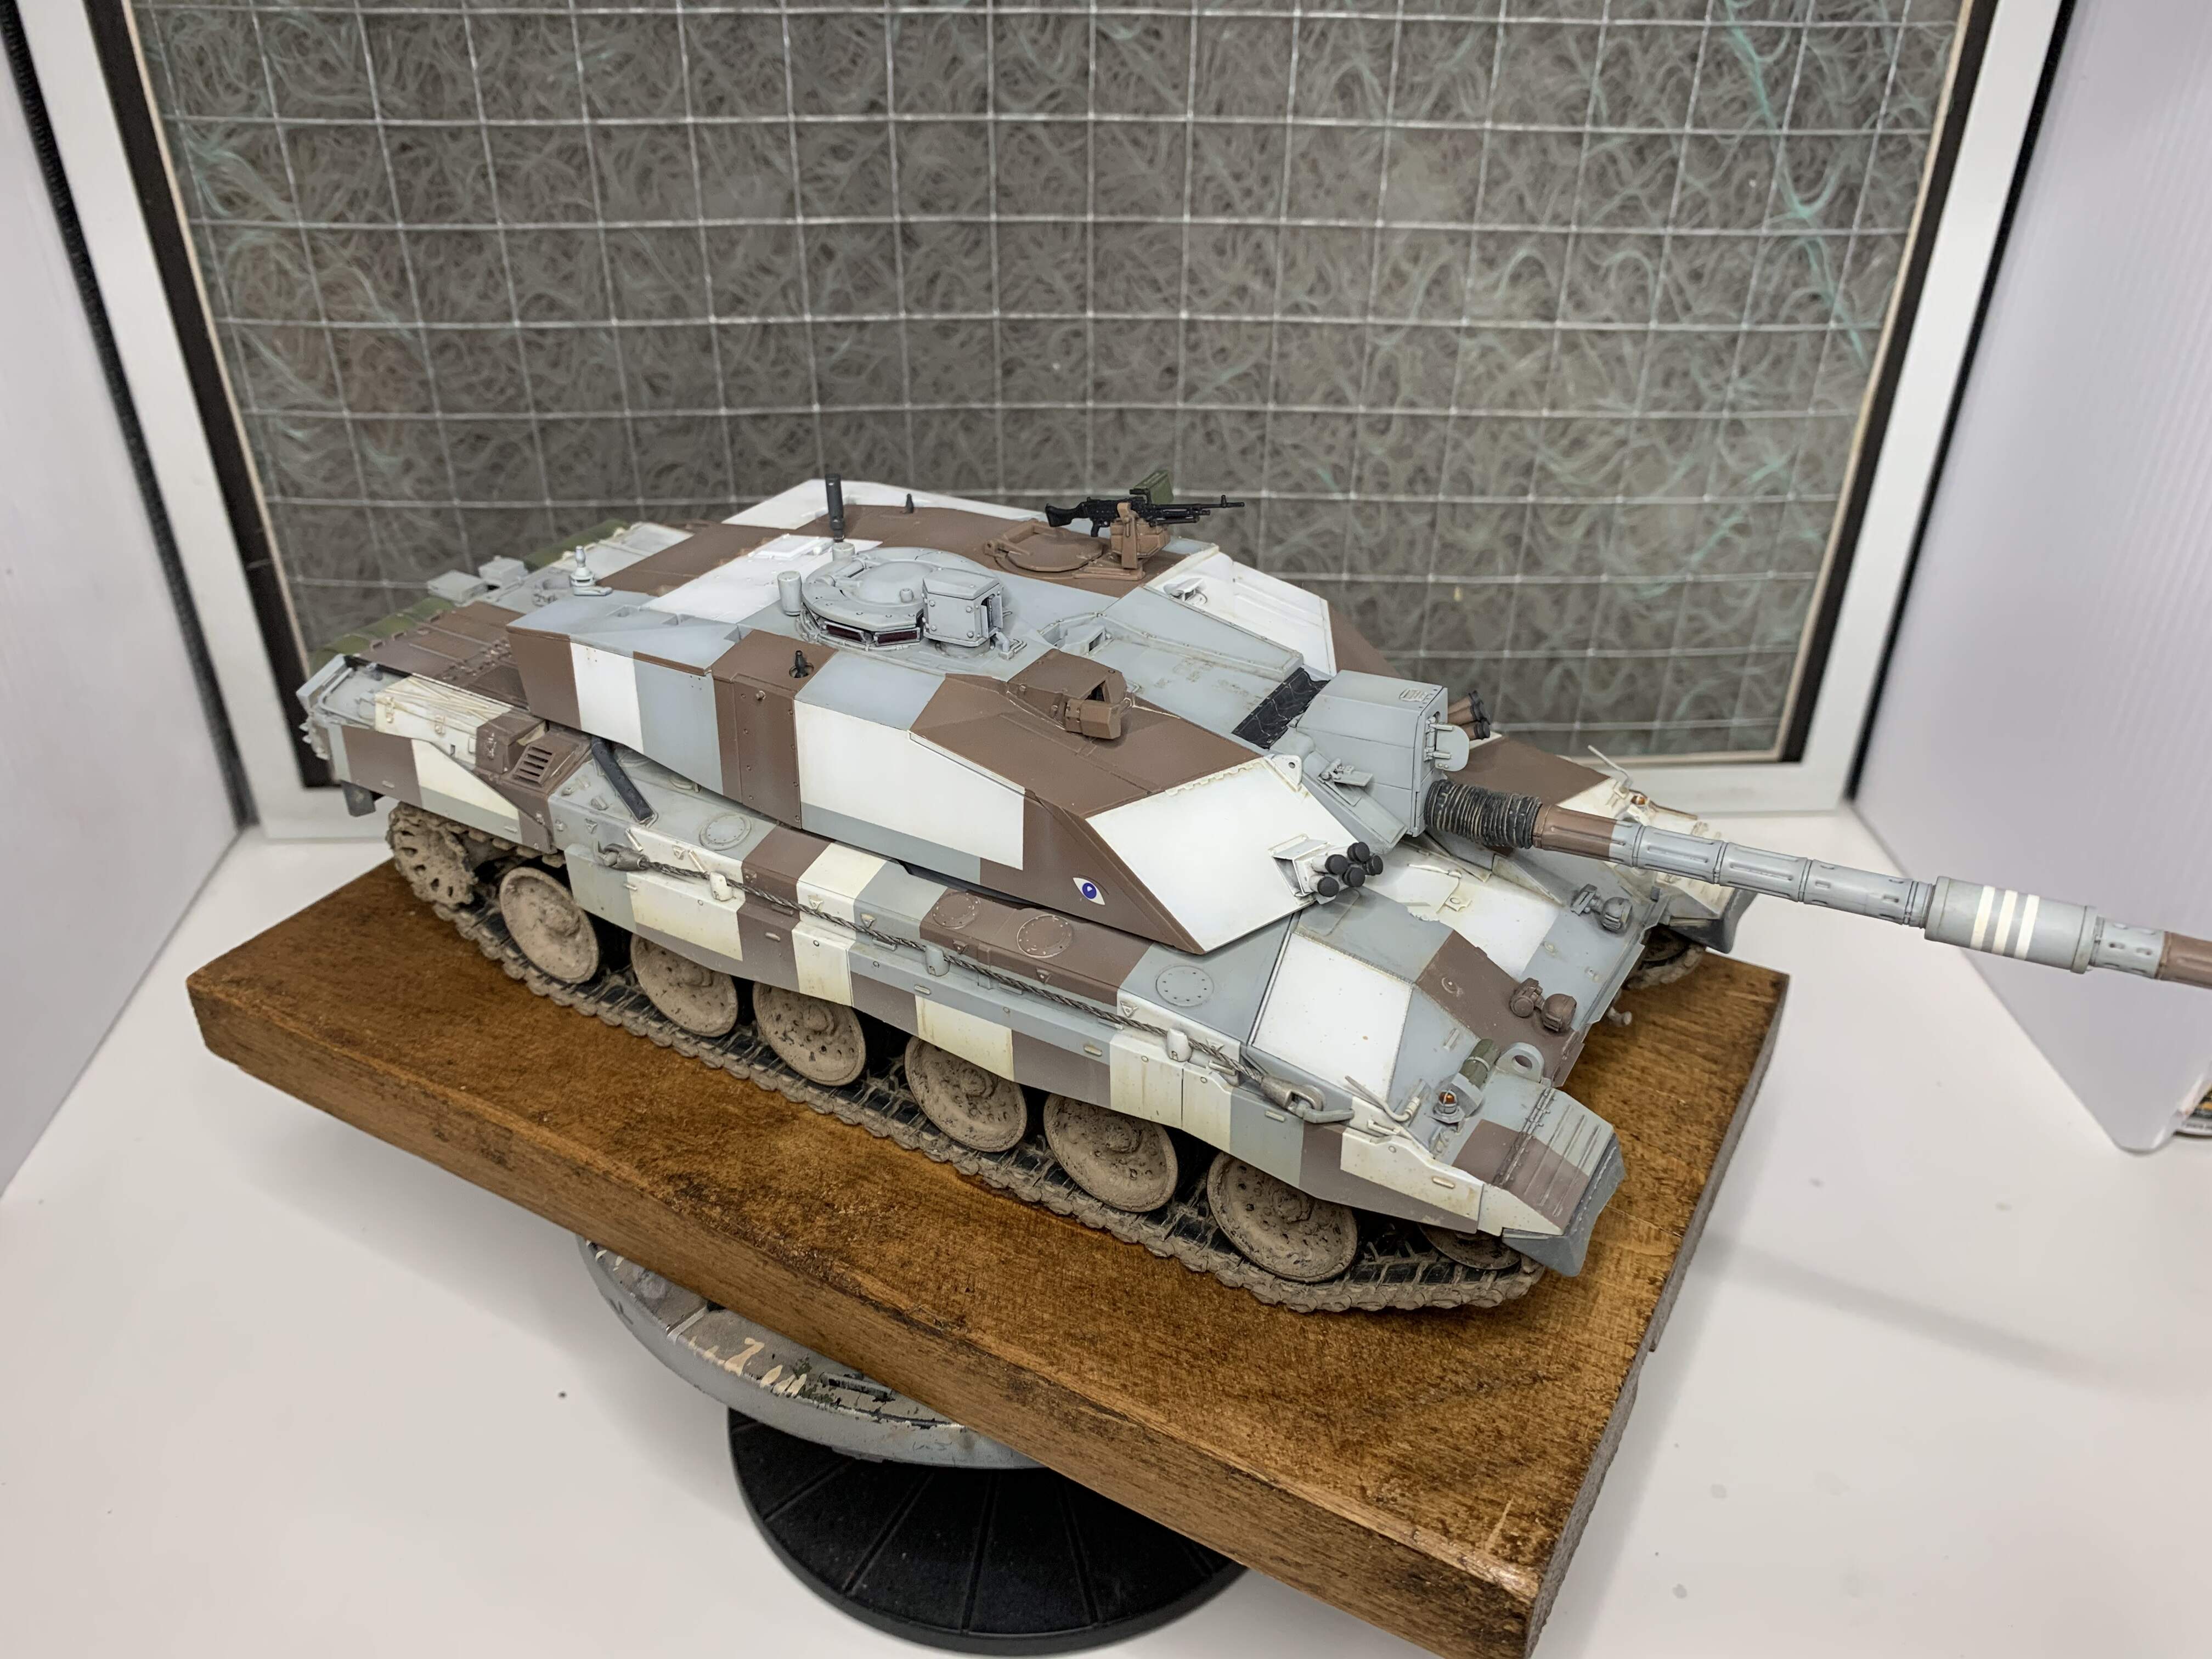
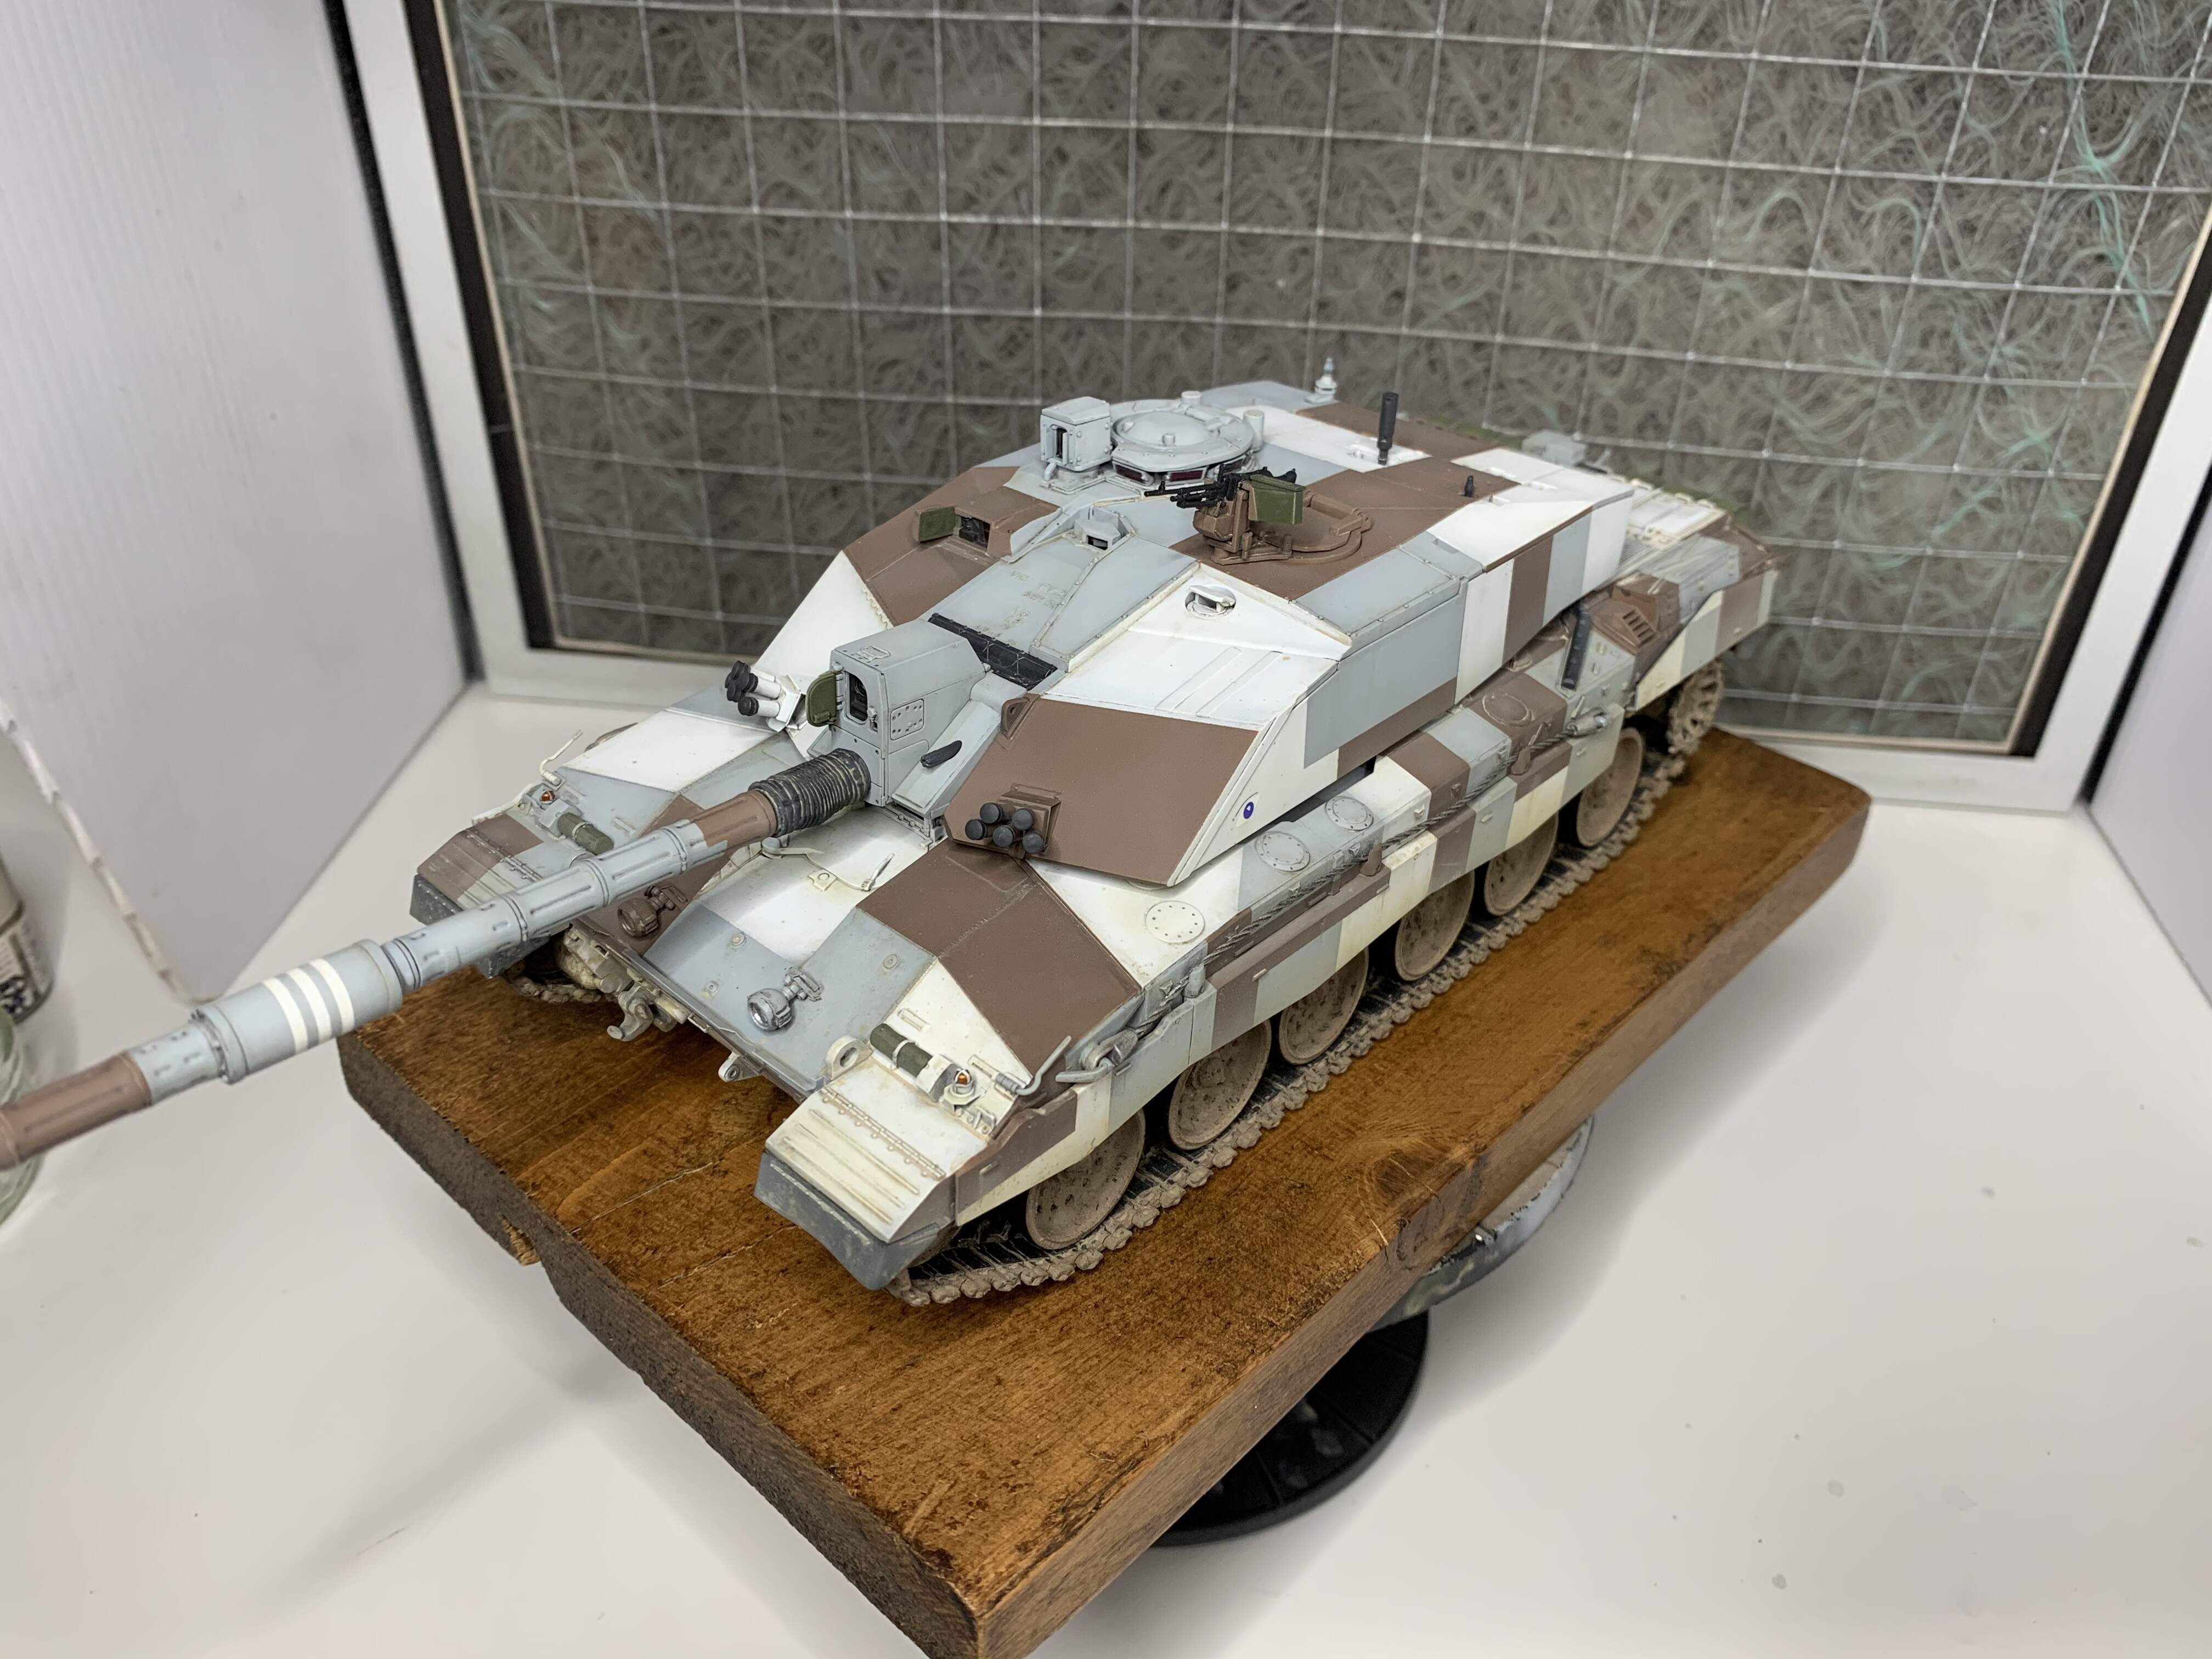
I’m calling this one finished. Antenna are on, reference pics show just the two. And the “reversing gauge” is present too. Exhaust staining is added with black pigment. And the rest of the glass is in.
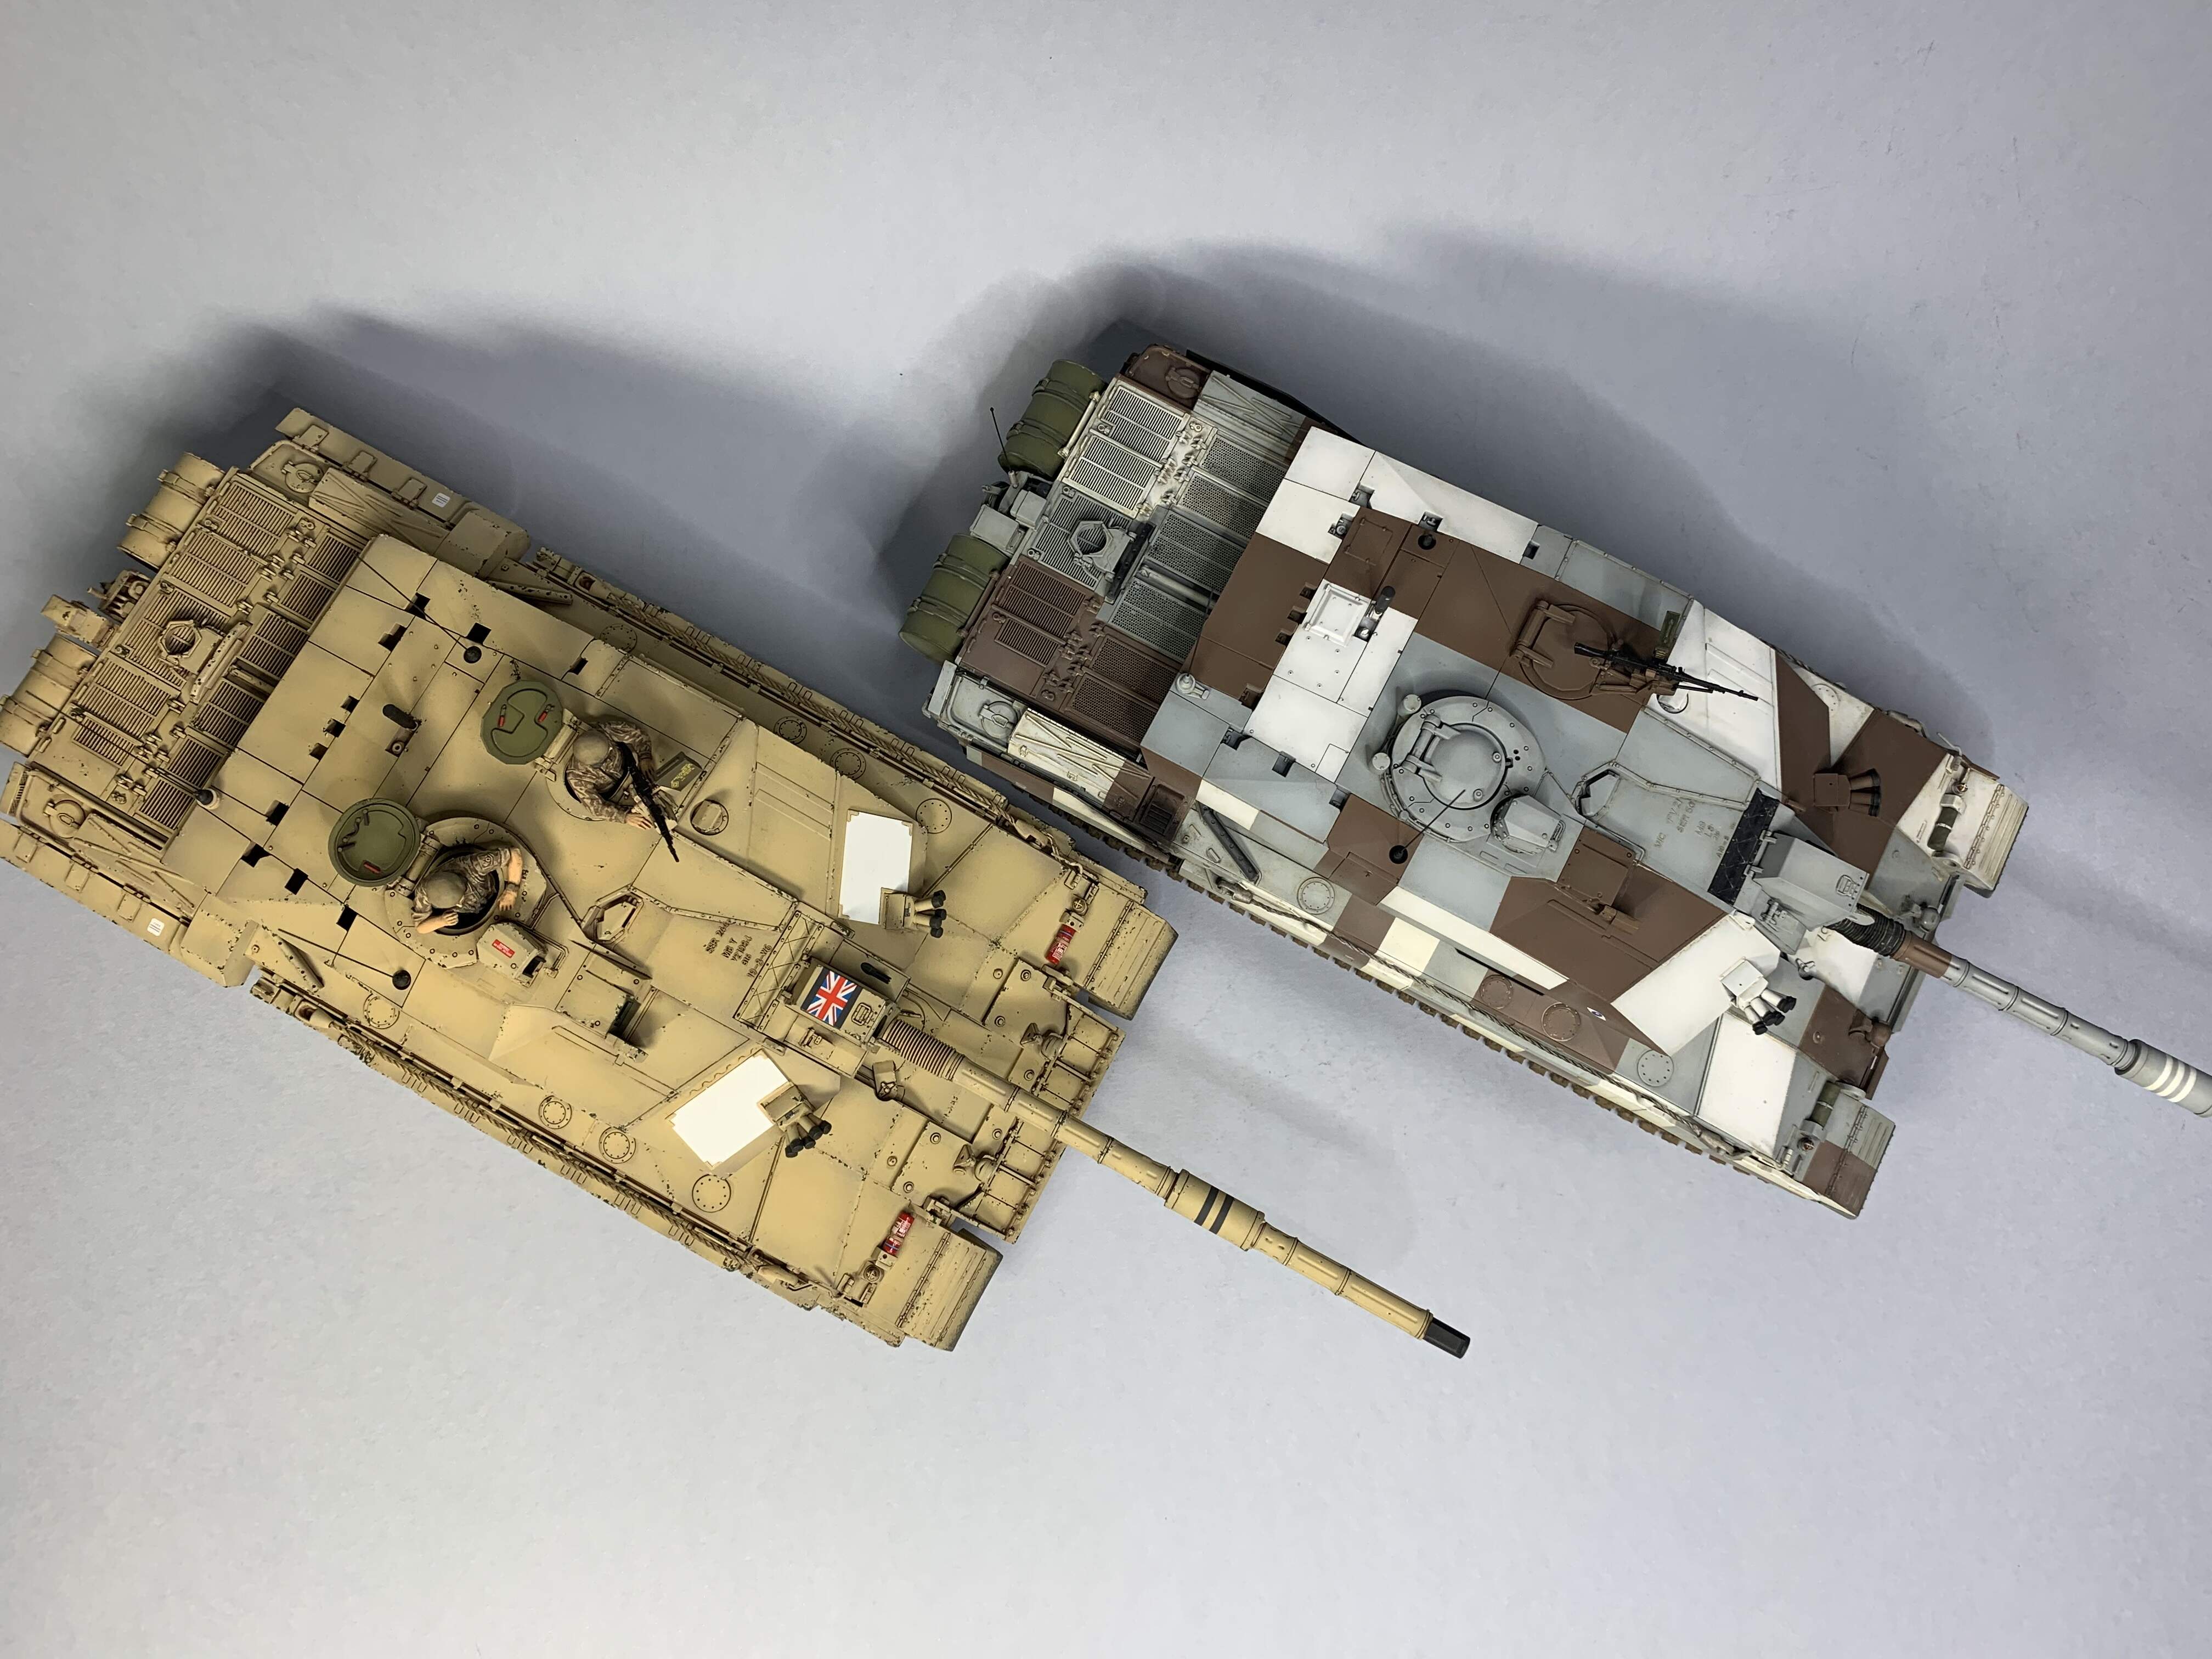
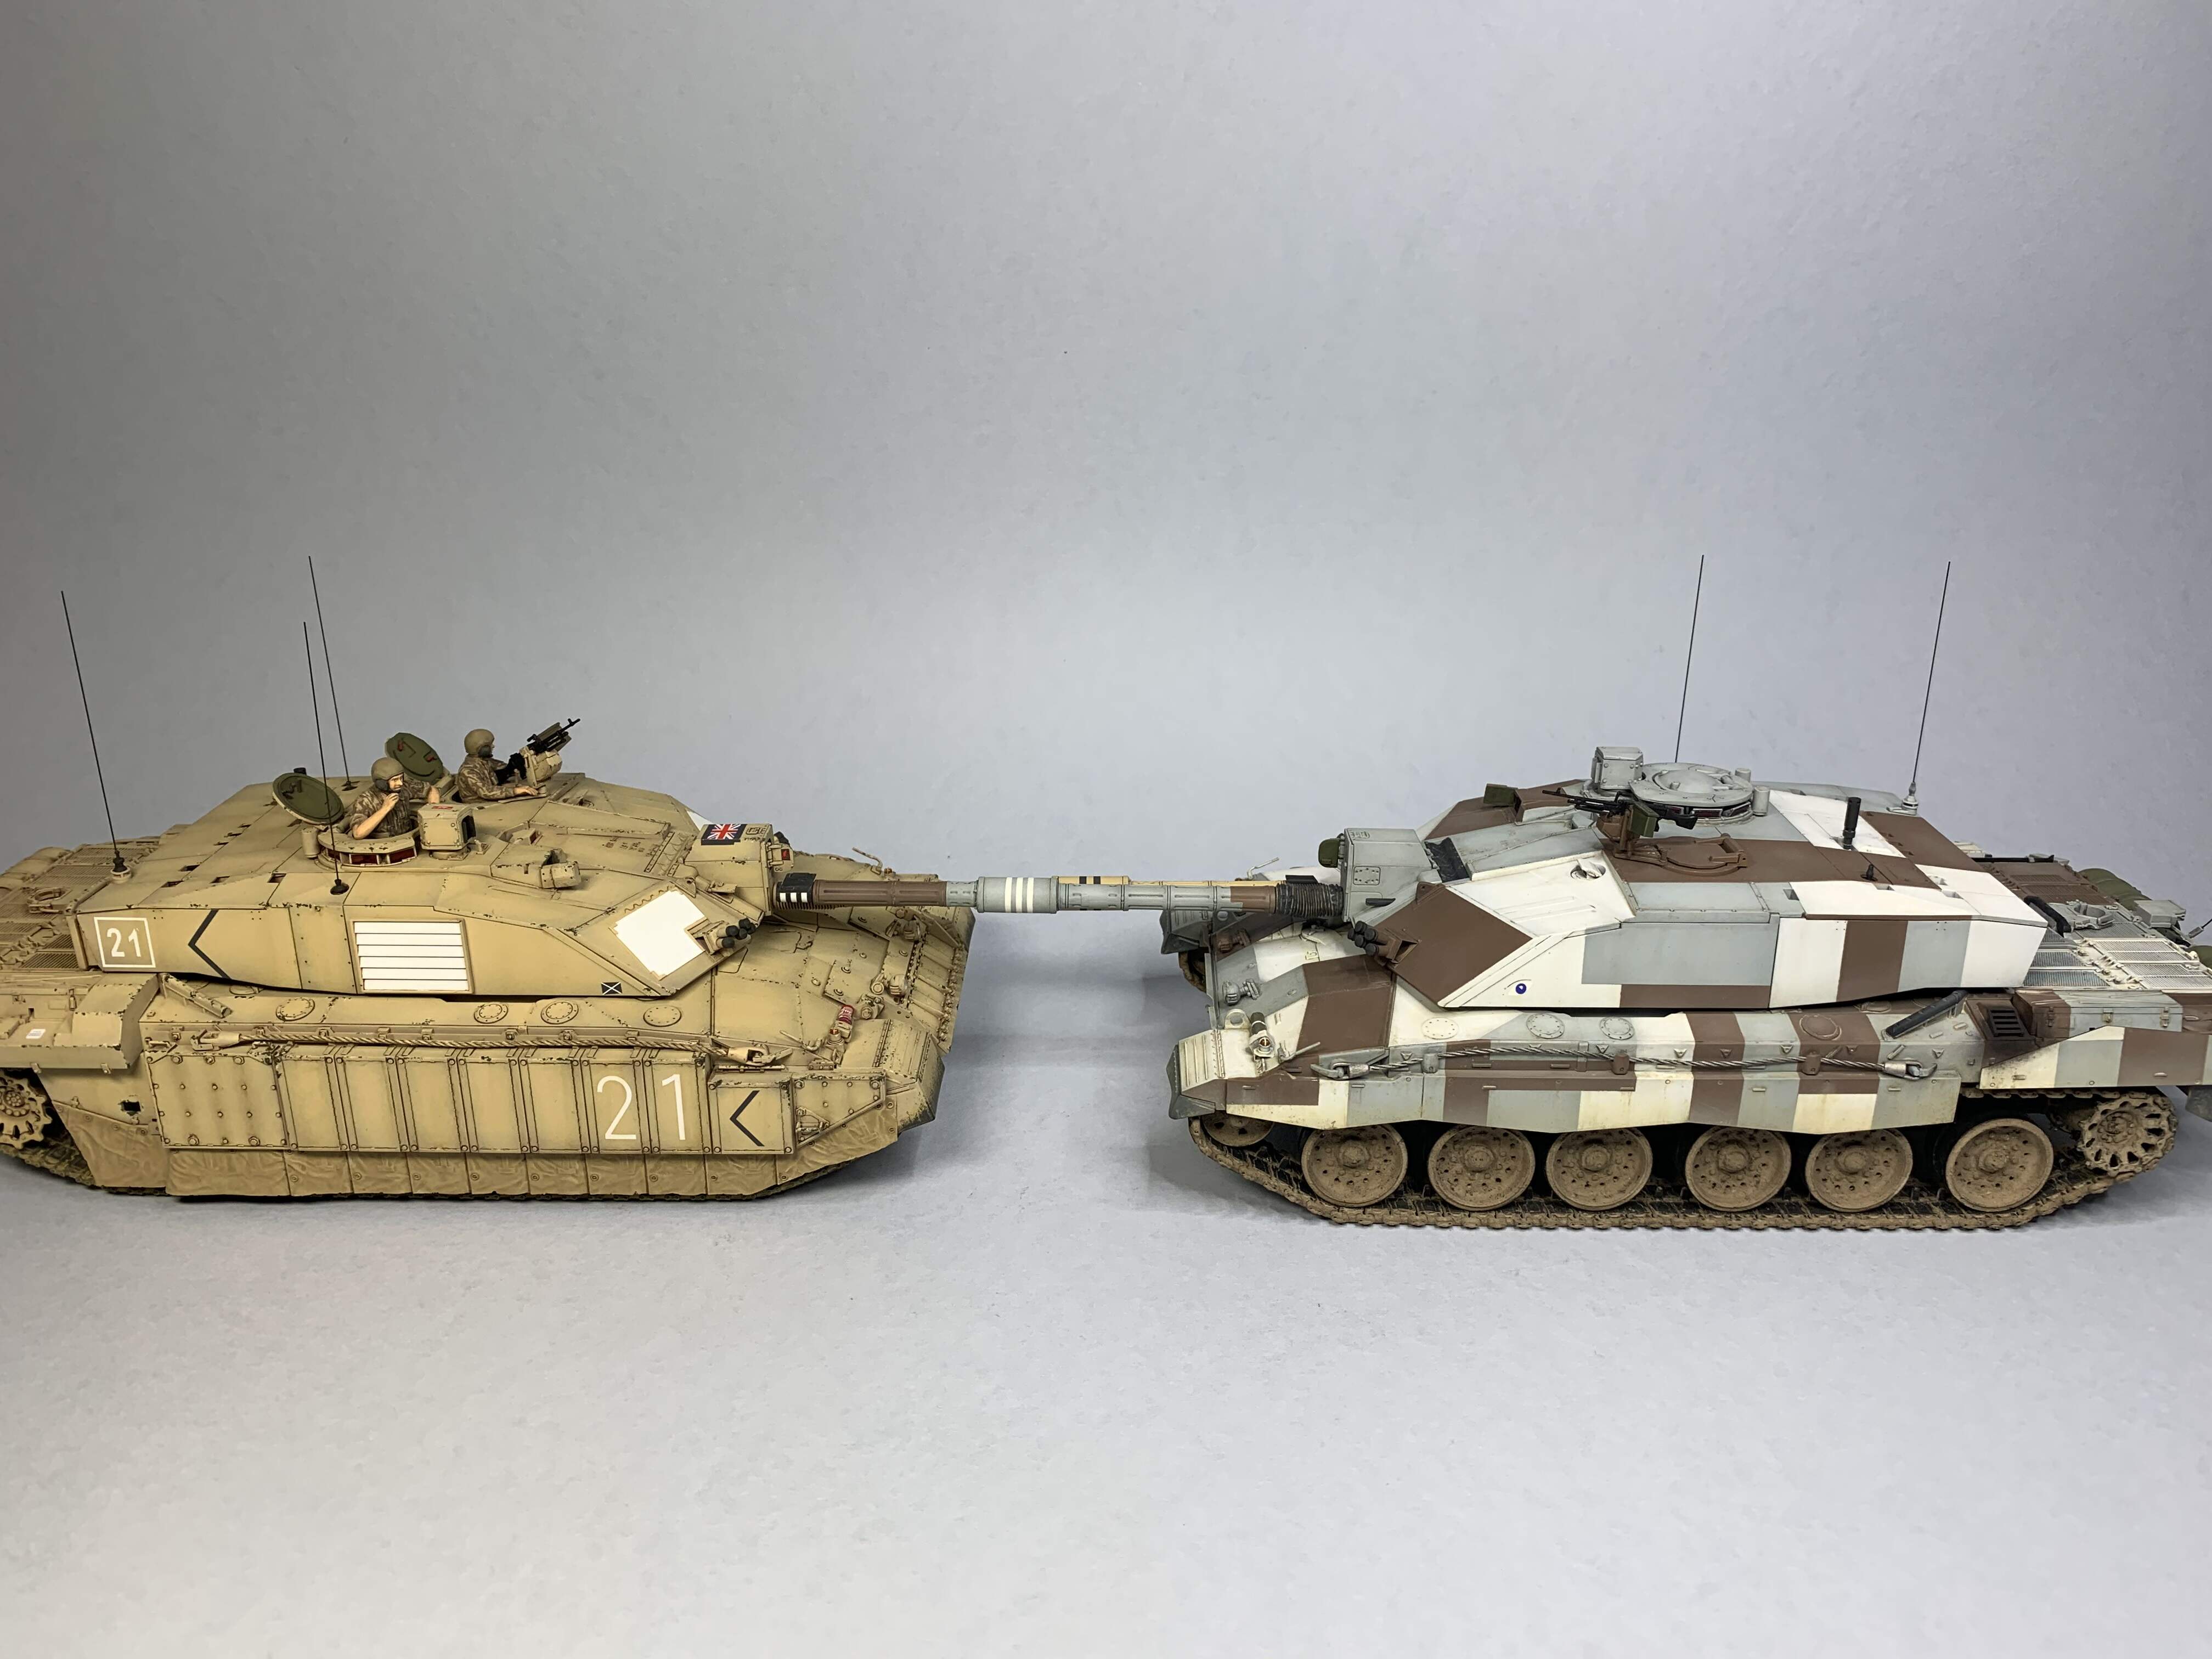
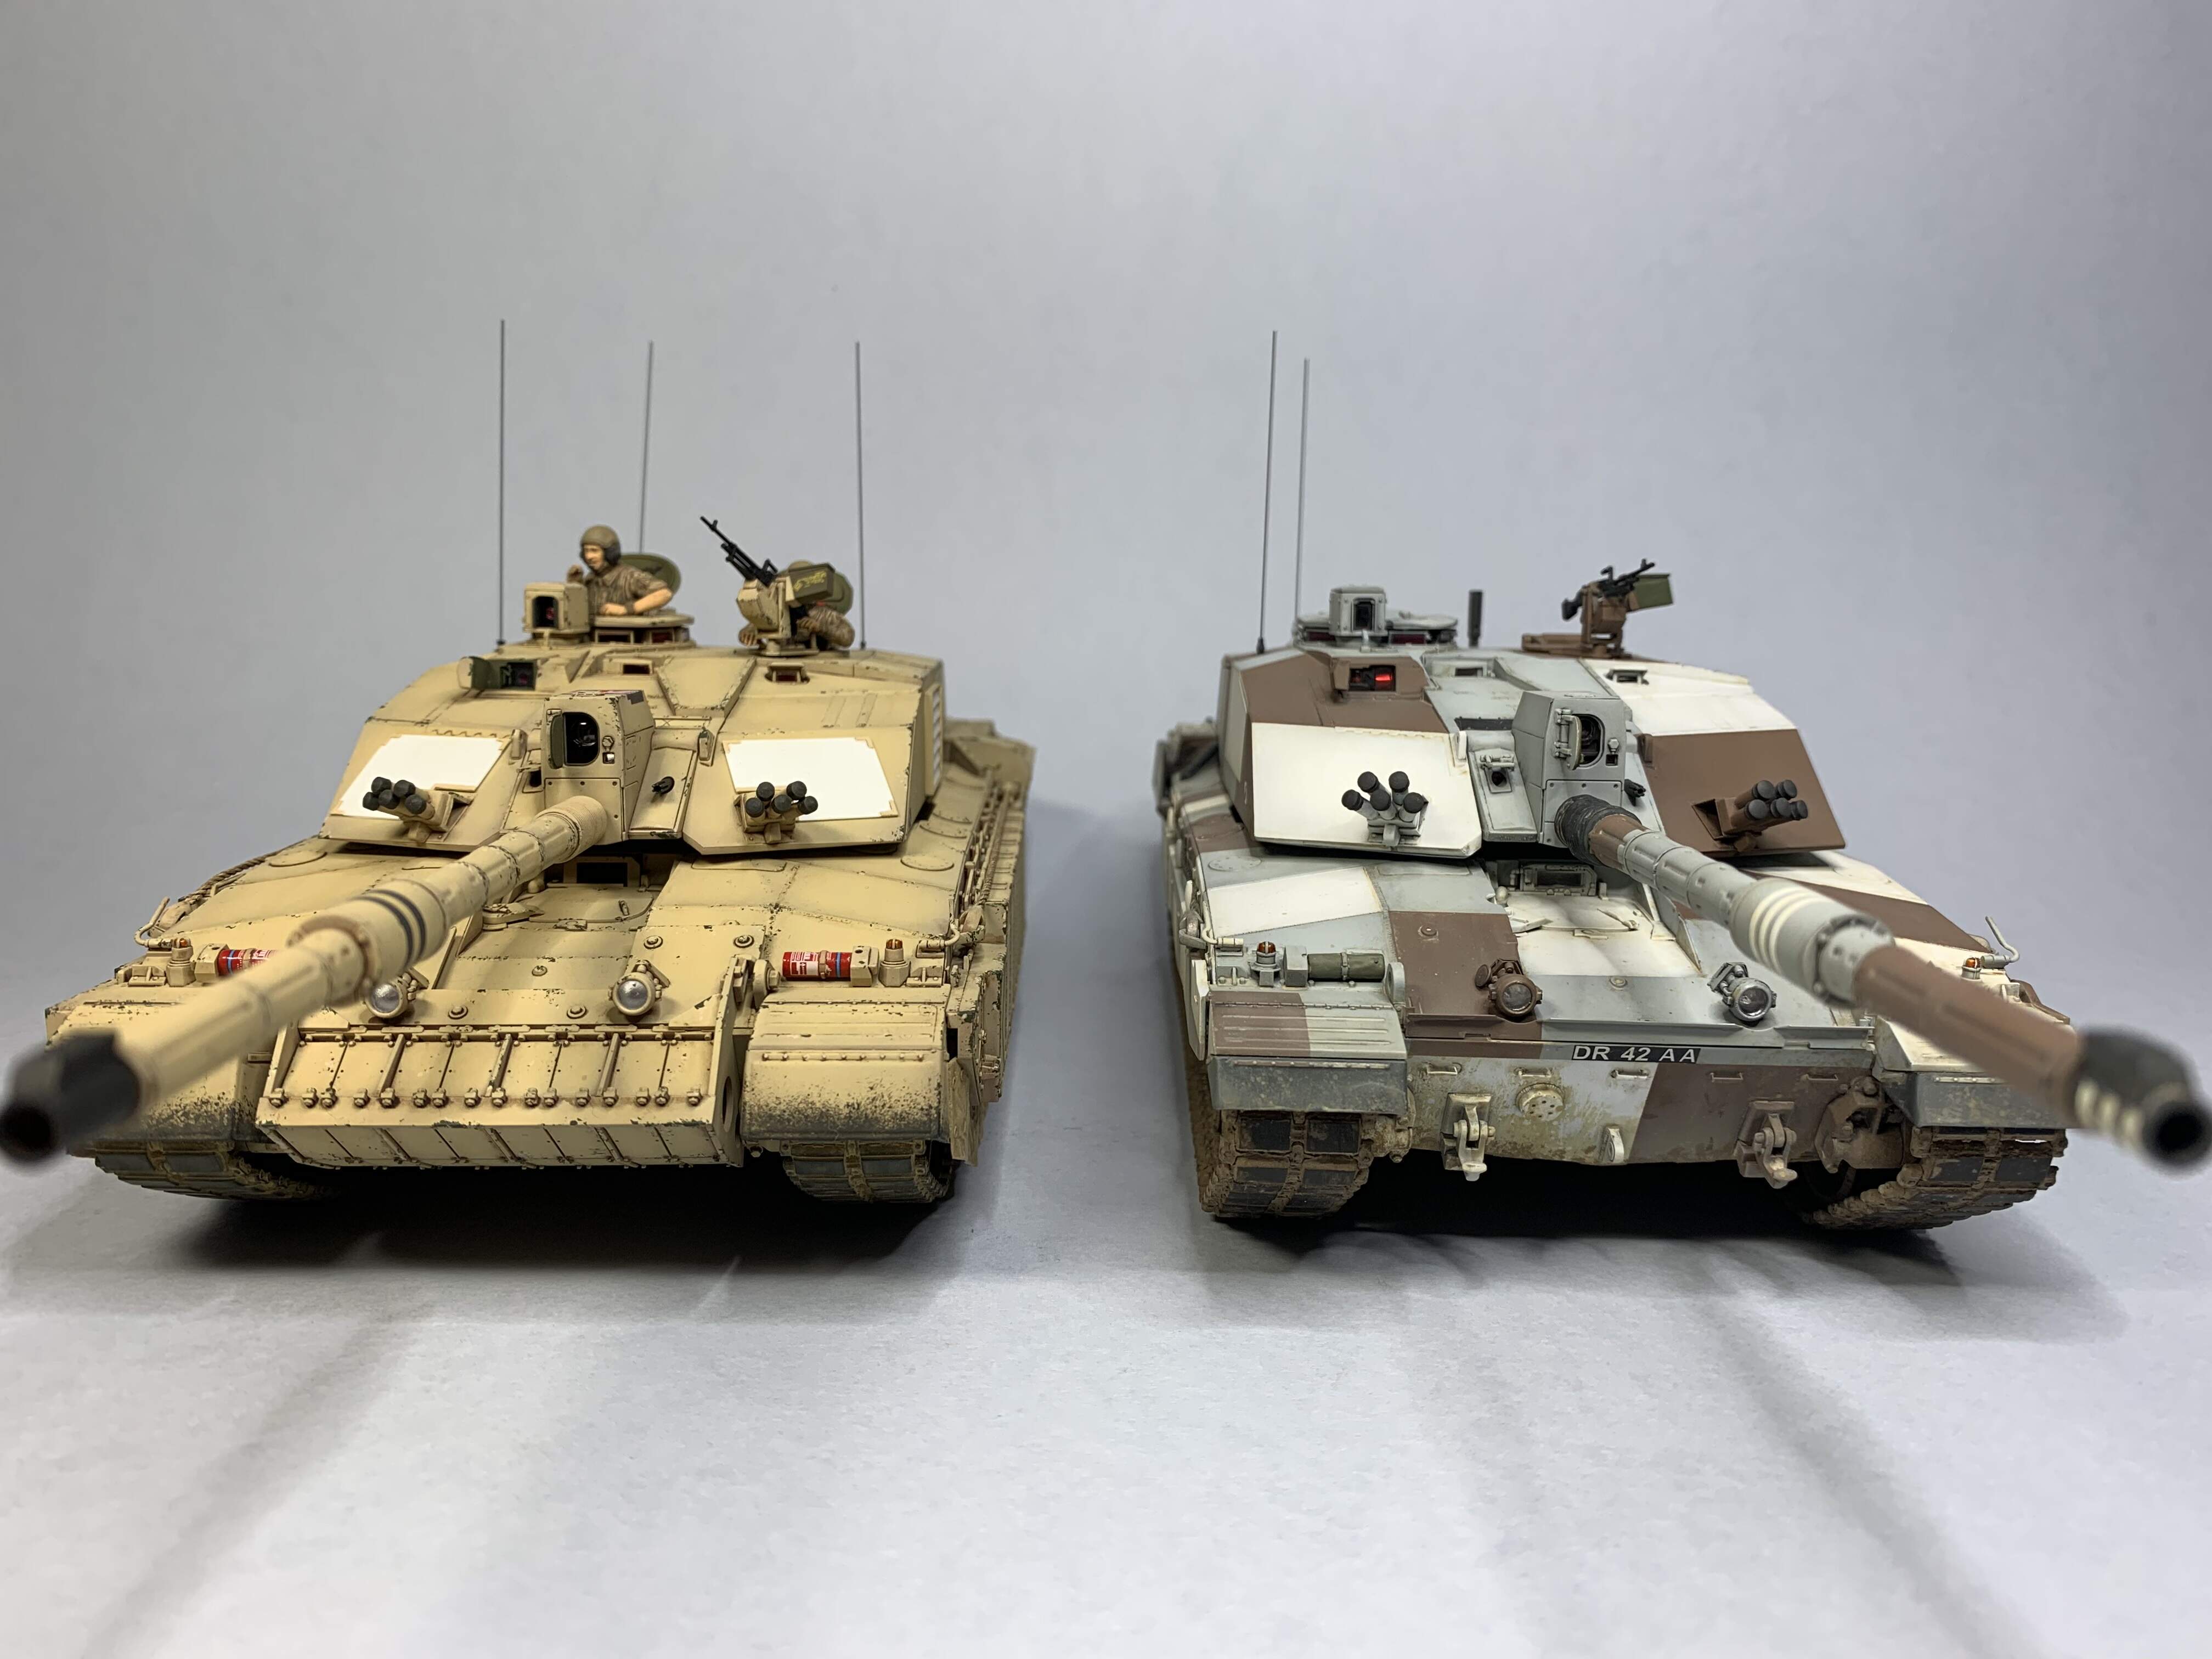
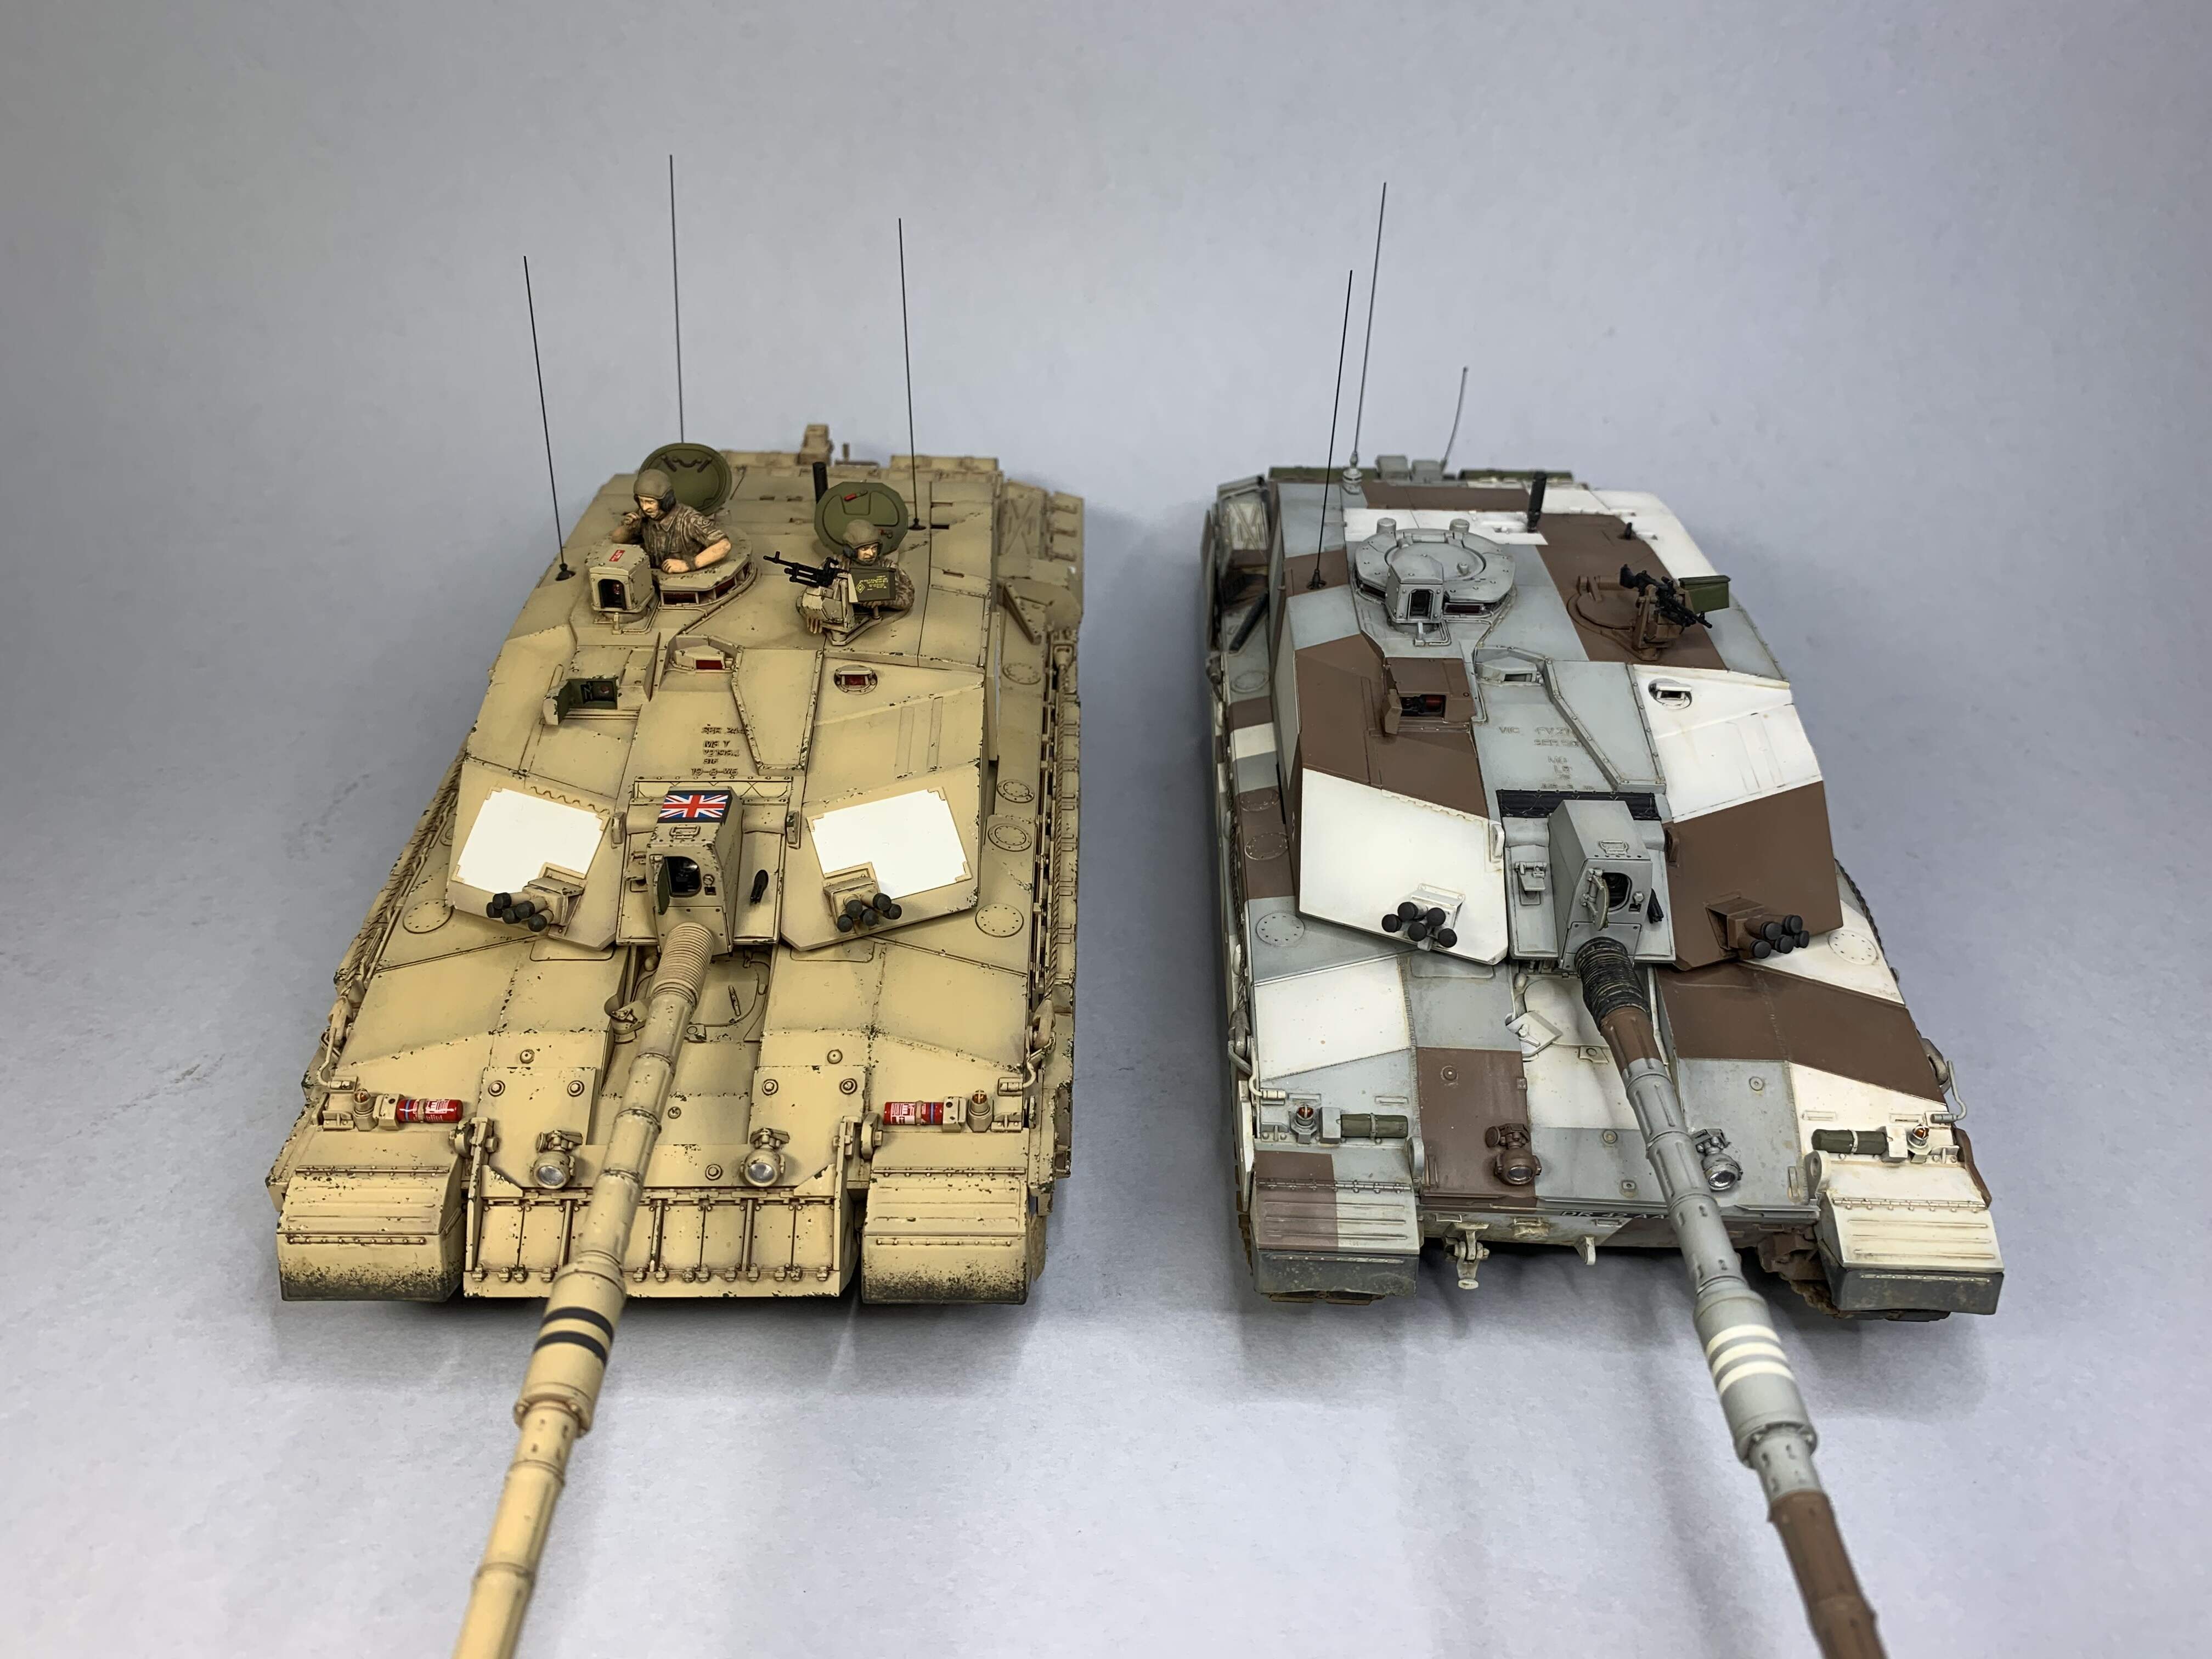
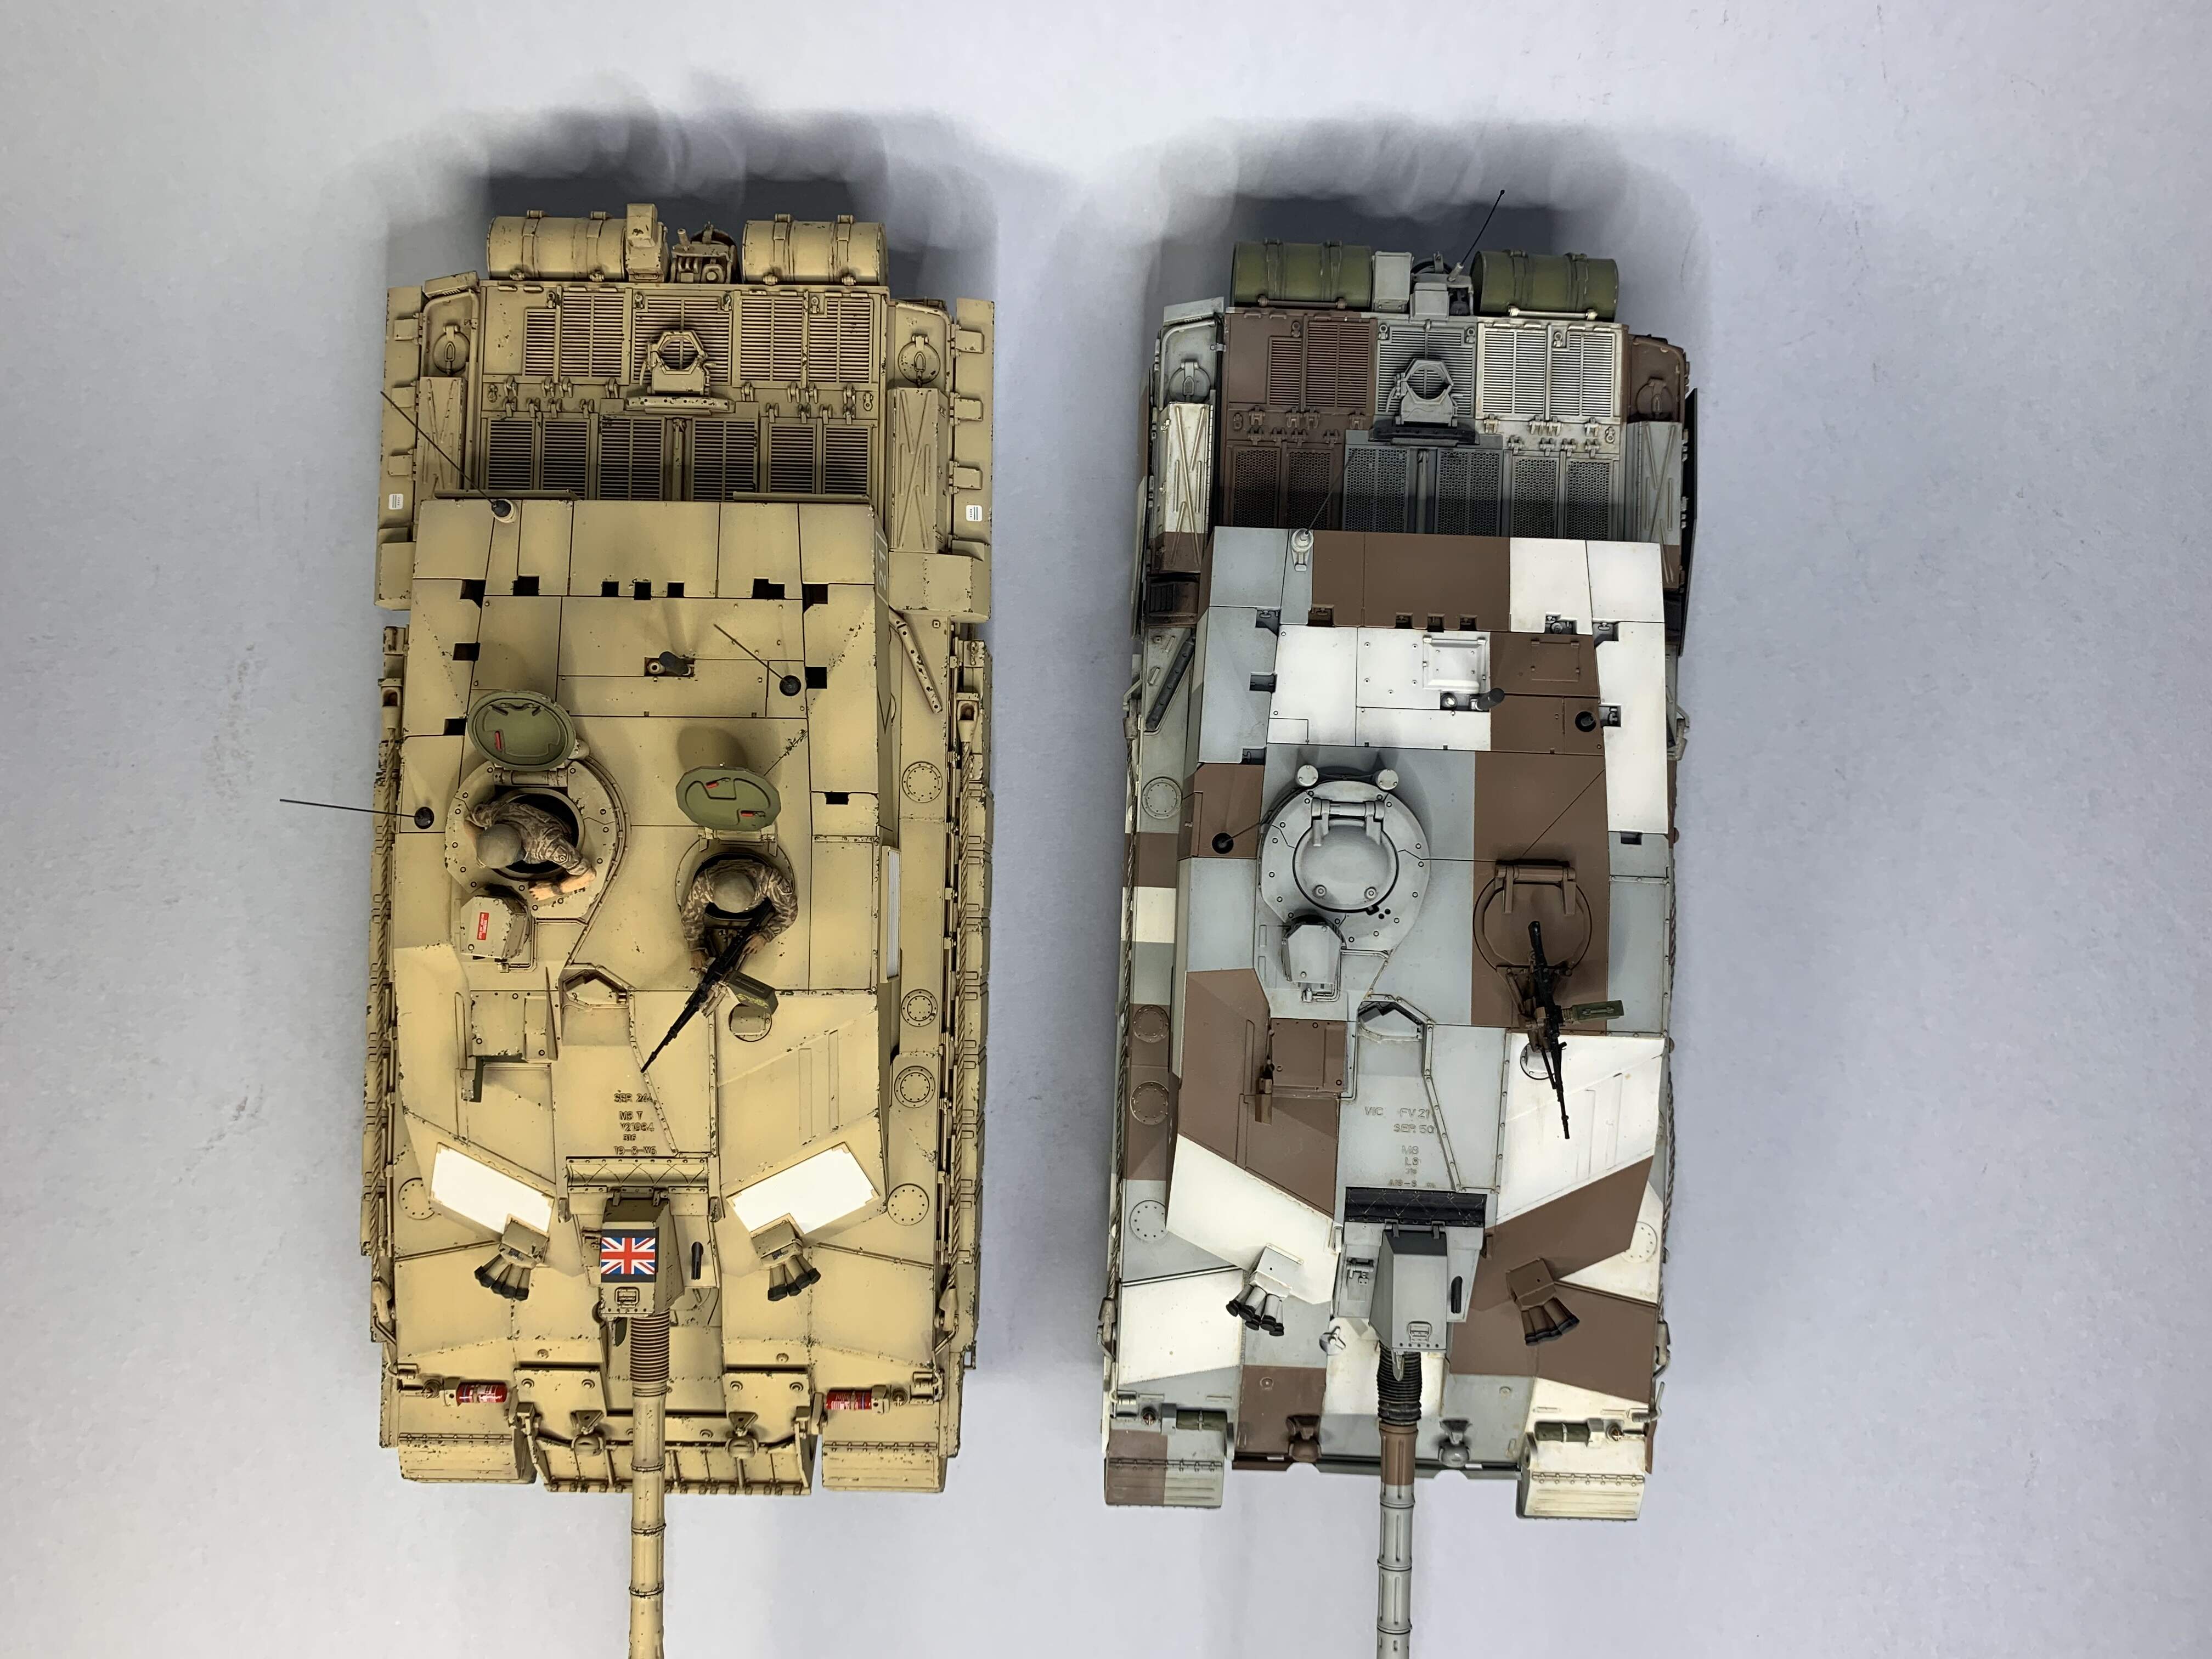
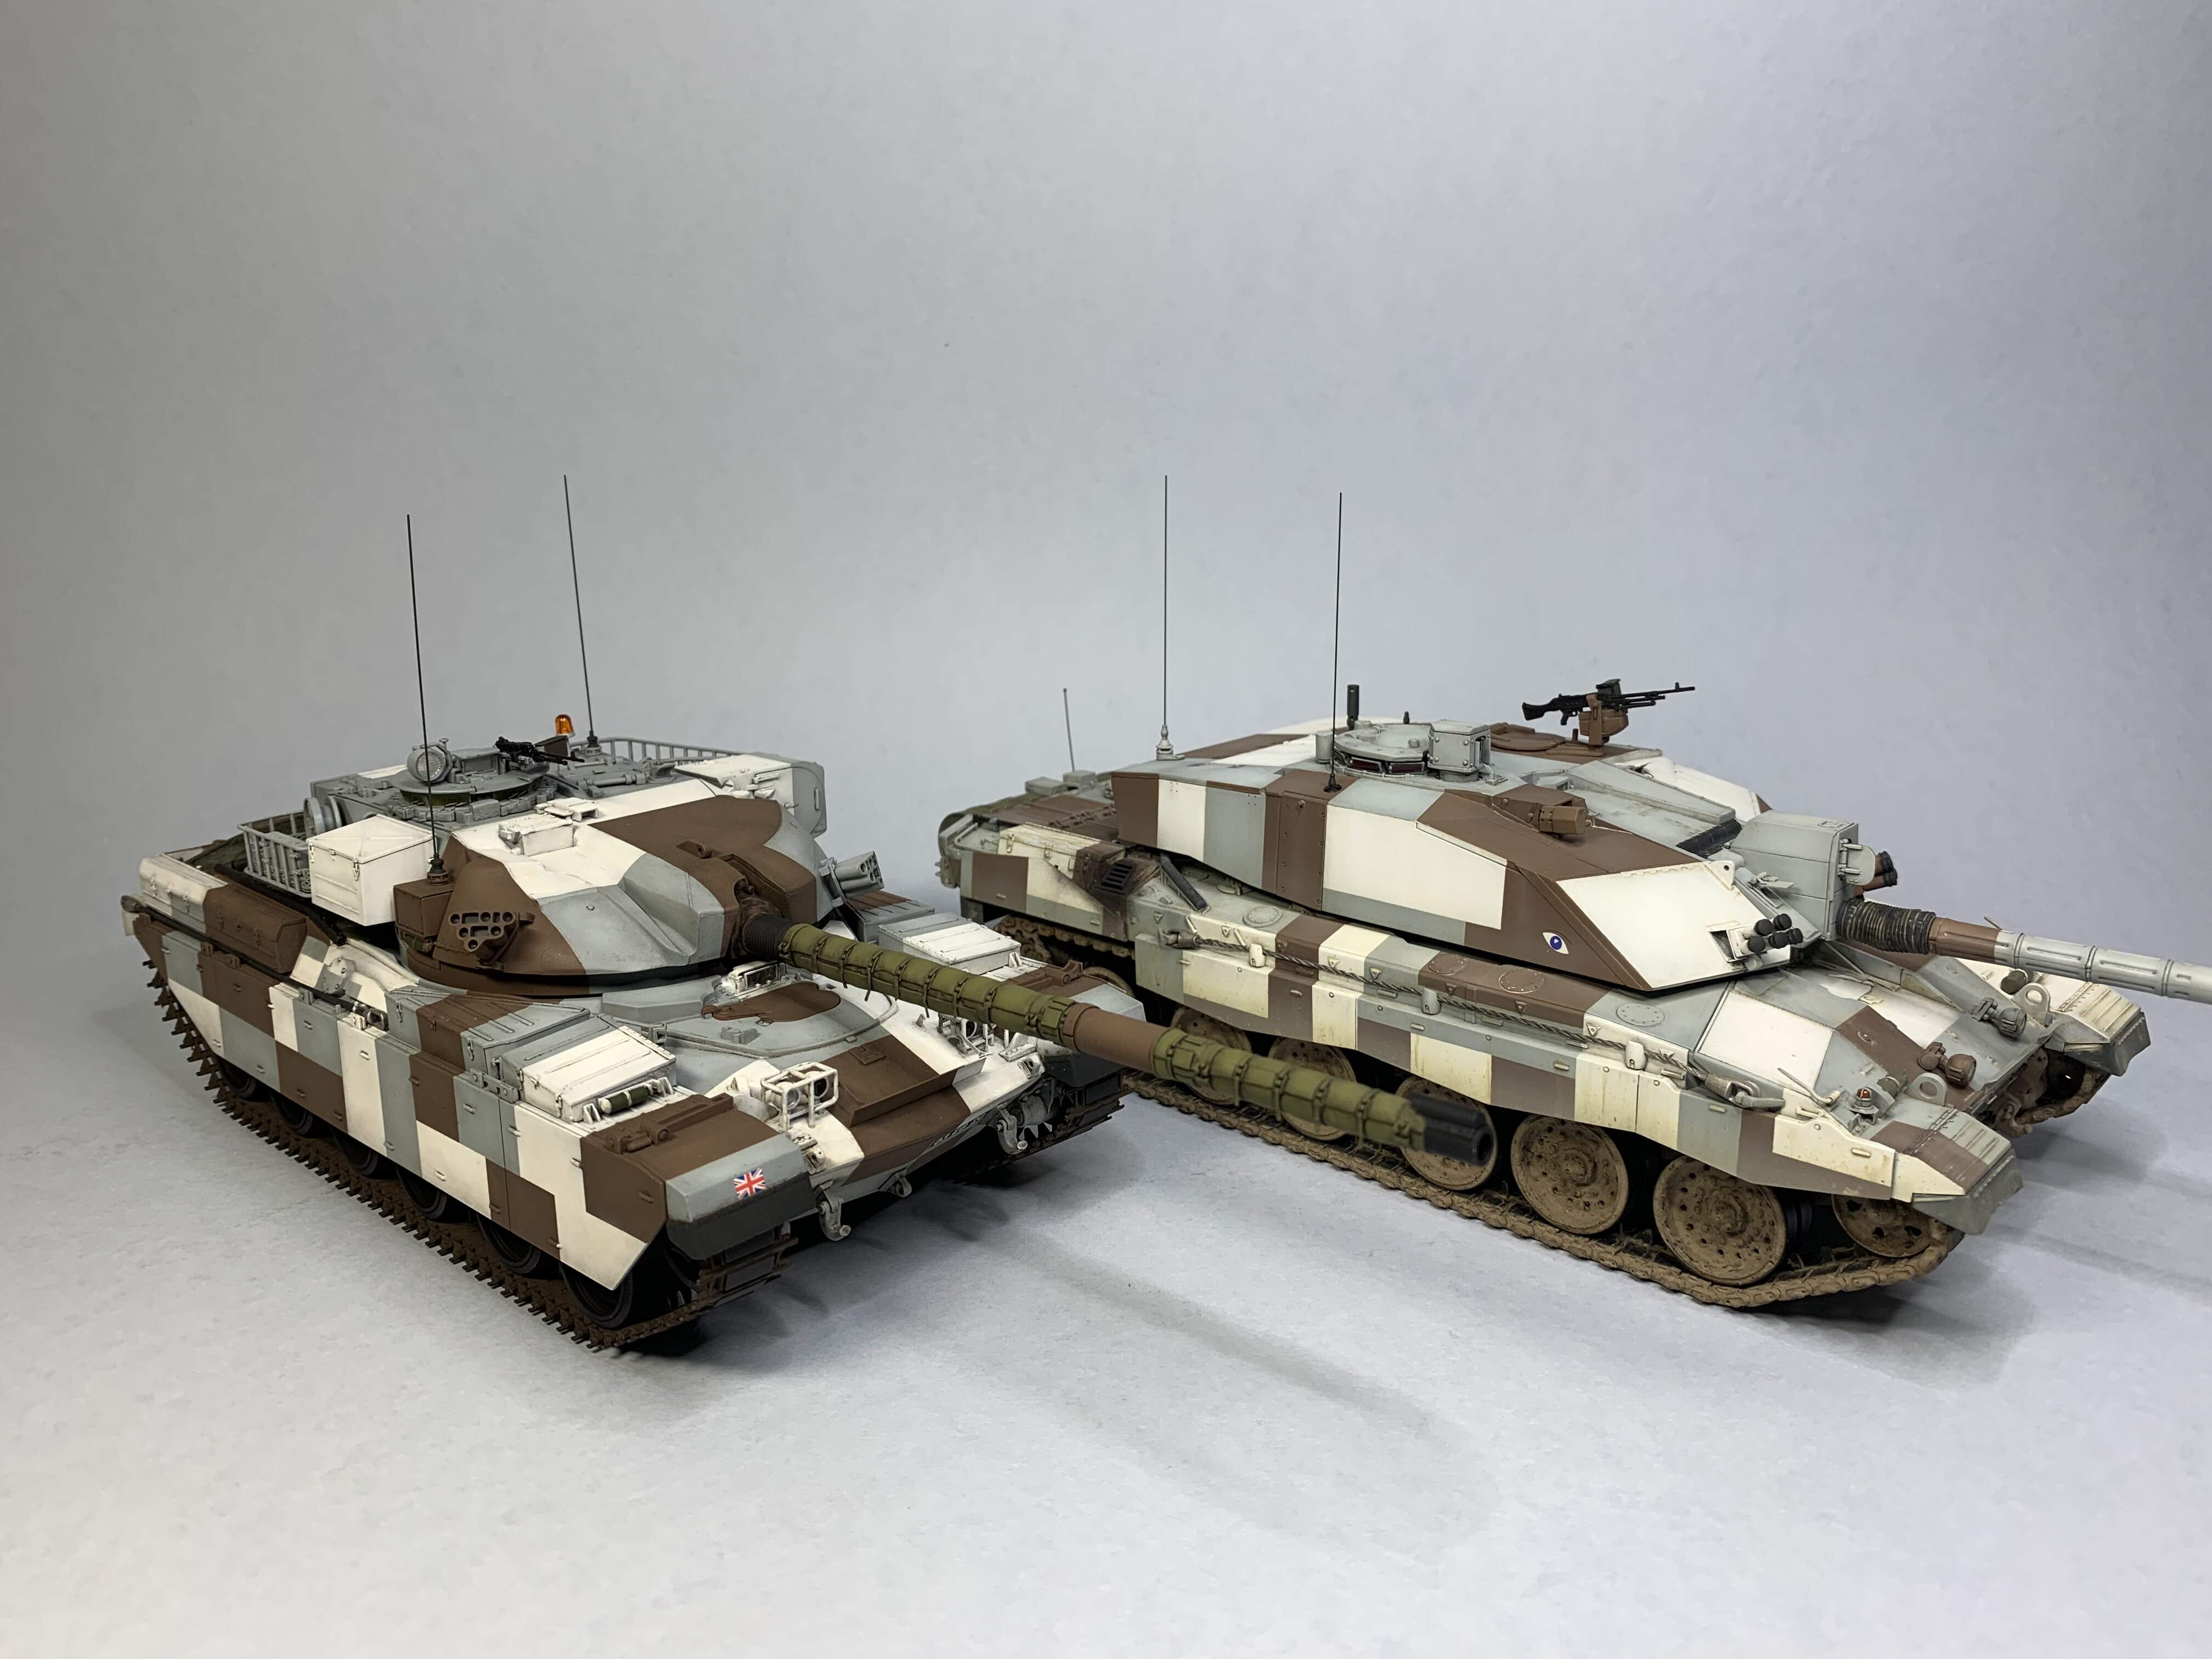
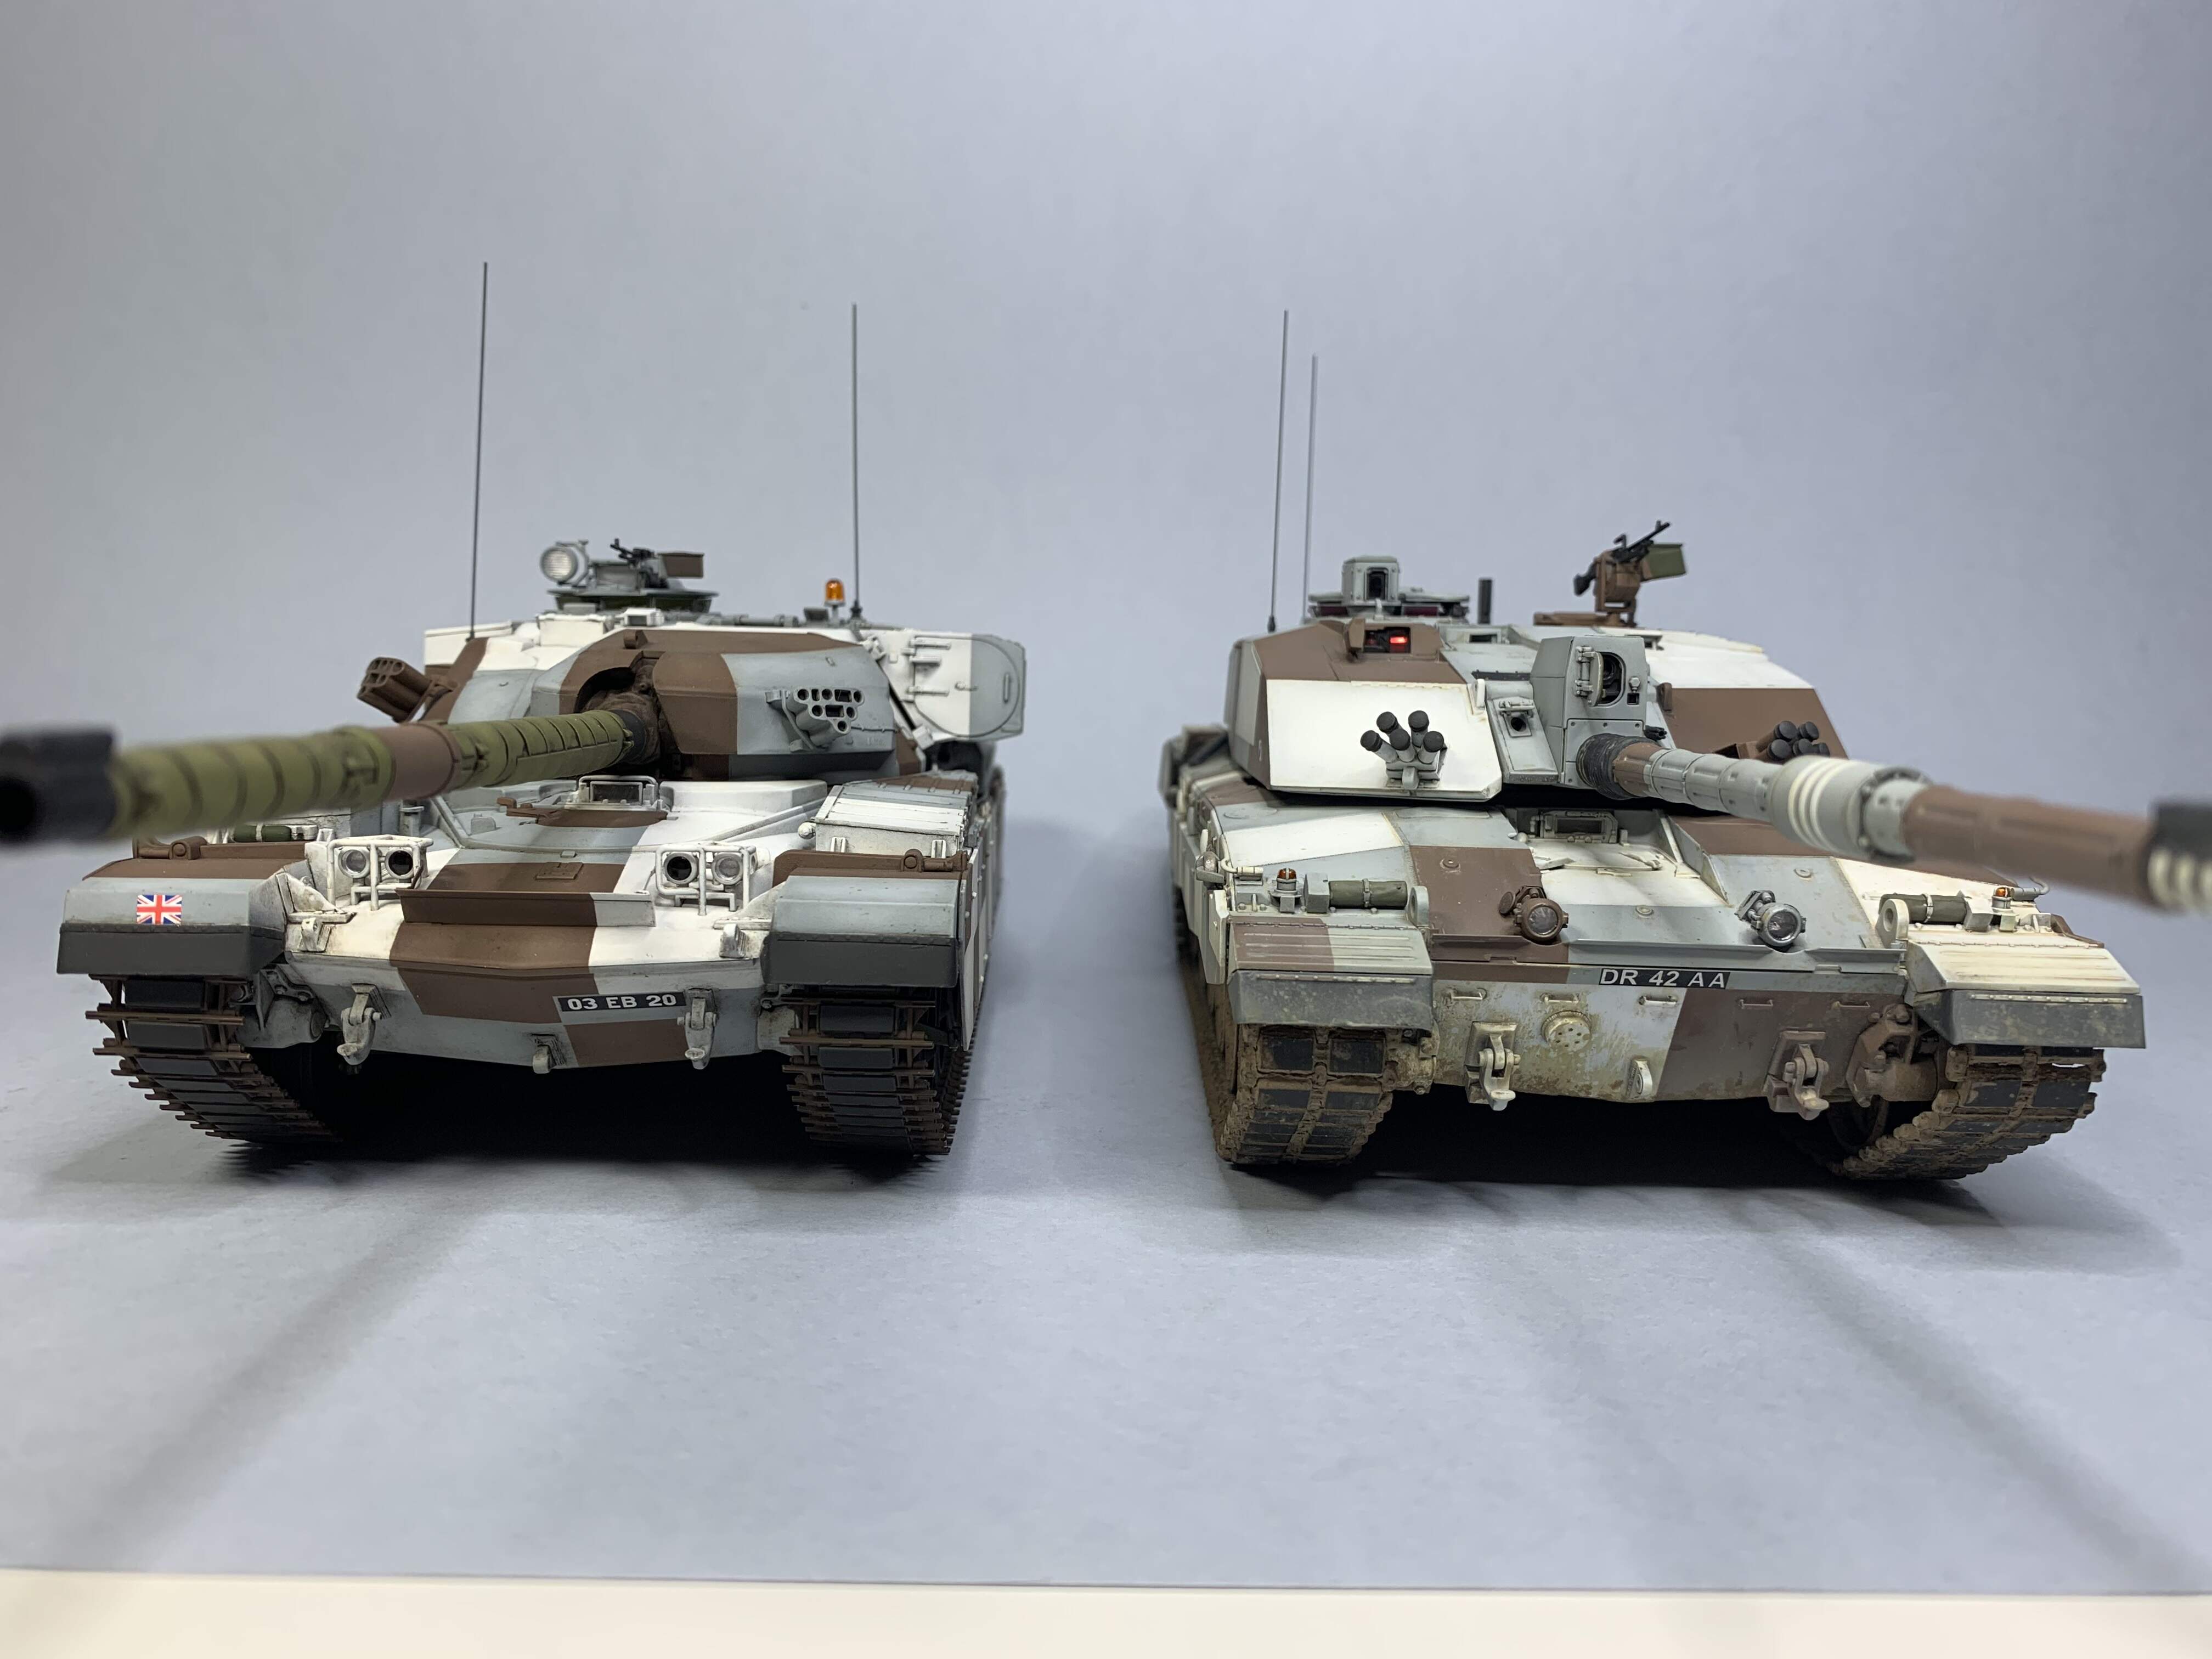
And some side by side pics with the tamiya Chally 2 desertized, and, of course, with the chieftain.
I hope you all have enjoyed this build, I certainly have!
Thanks, Jim.


18 Likes