Thank’s to all for having a look! I had a feeling you guys would get a chuckle outa’ the ‘KLAW.’ ![]()
—mike …![]()
Thank’s to all for having a look! I had a feeling you guys would get a chuckle outa’ the ‘KLAW.’ ![]()
—mike …![]()
Come along now, Inspector… ![]()
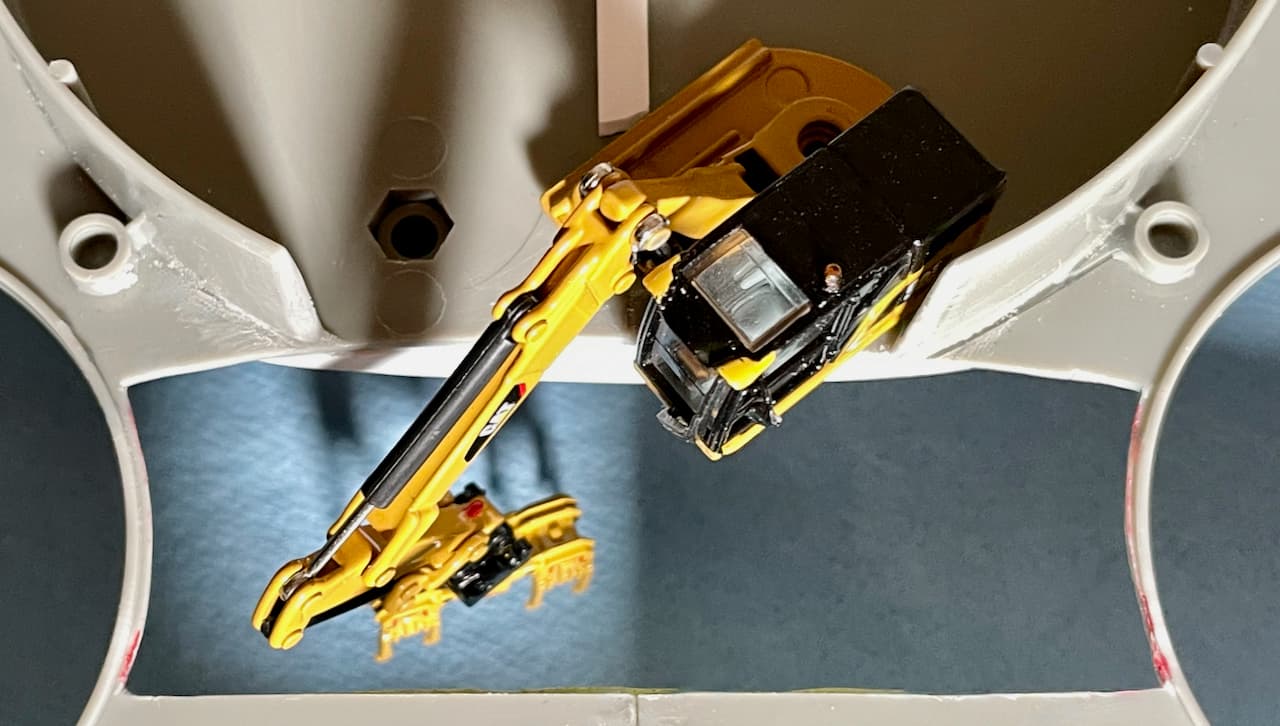
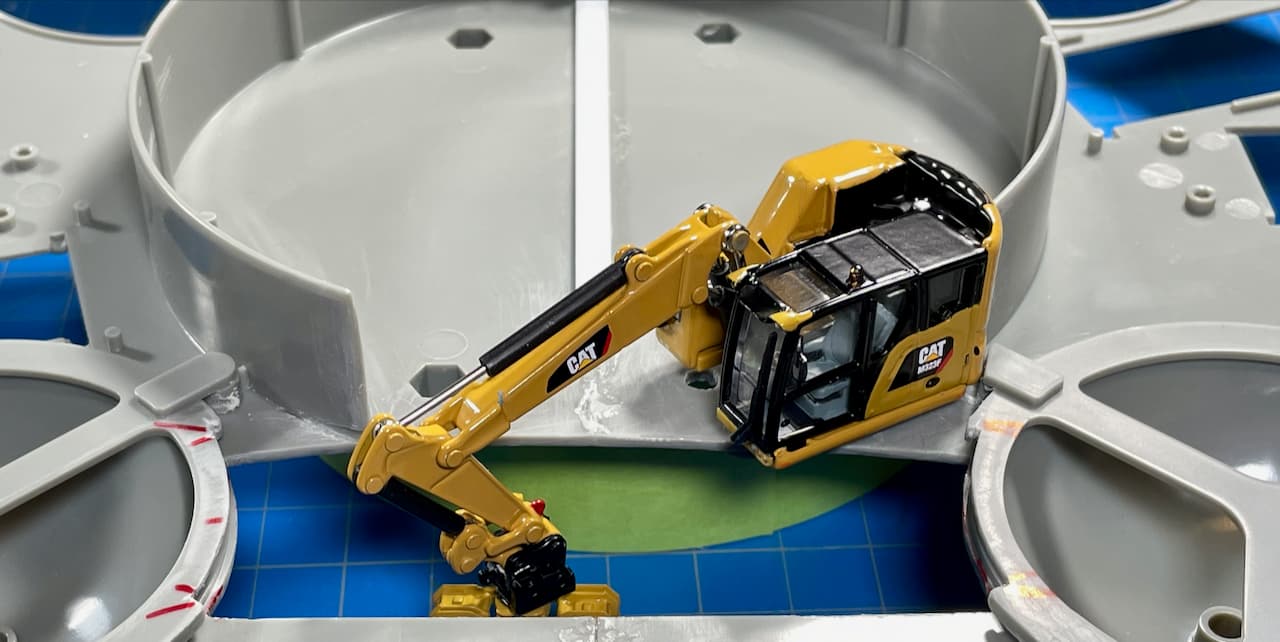
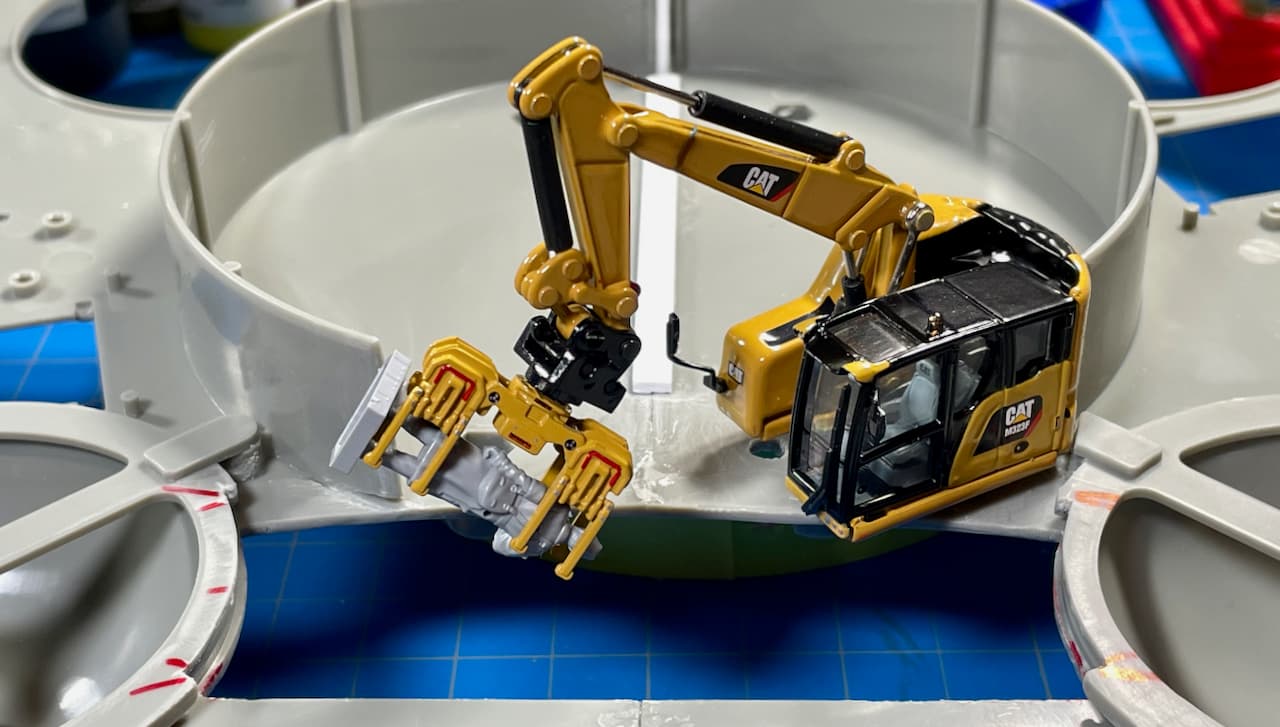
Got quite a bit of bomb bay action done today…
• Drilled and moved the “X” Excavator’s pivot-point to the right.
• Performed major demolition to interior drywall section (right side). Machinery is now able to pivot freely, articulate, plunge, scoop, etc. Note: No belly turrets were harmed during these procedures — only their mounting rings. ![]()
![]()
![]()
![]()
![]()
![]()
Allow me to demonstrate…
“Put me down, you imbecile!” ![]()
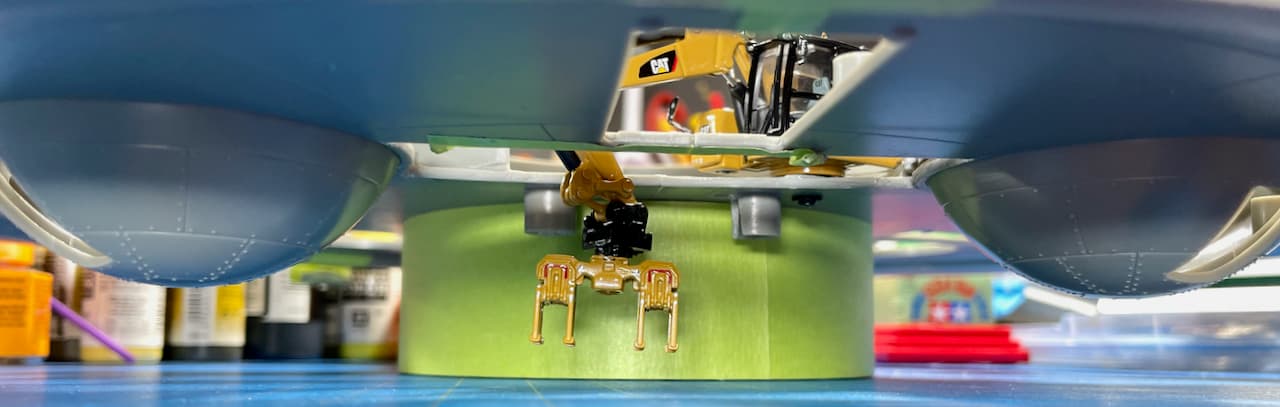
Here’s another look from the underbelly.
Spent a good half hour looking for a small black rubber washer which fell from my apron’s crease with one final shake!
Next in line will be the addition of a monstrous ‘KLAW’ mechanism.
—mike …![]()
Ingenious Mike … this was really a great idea having that there …
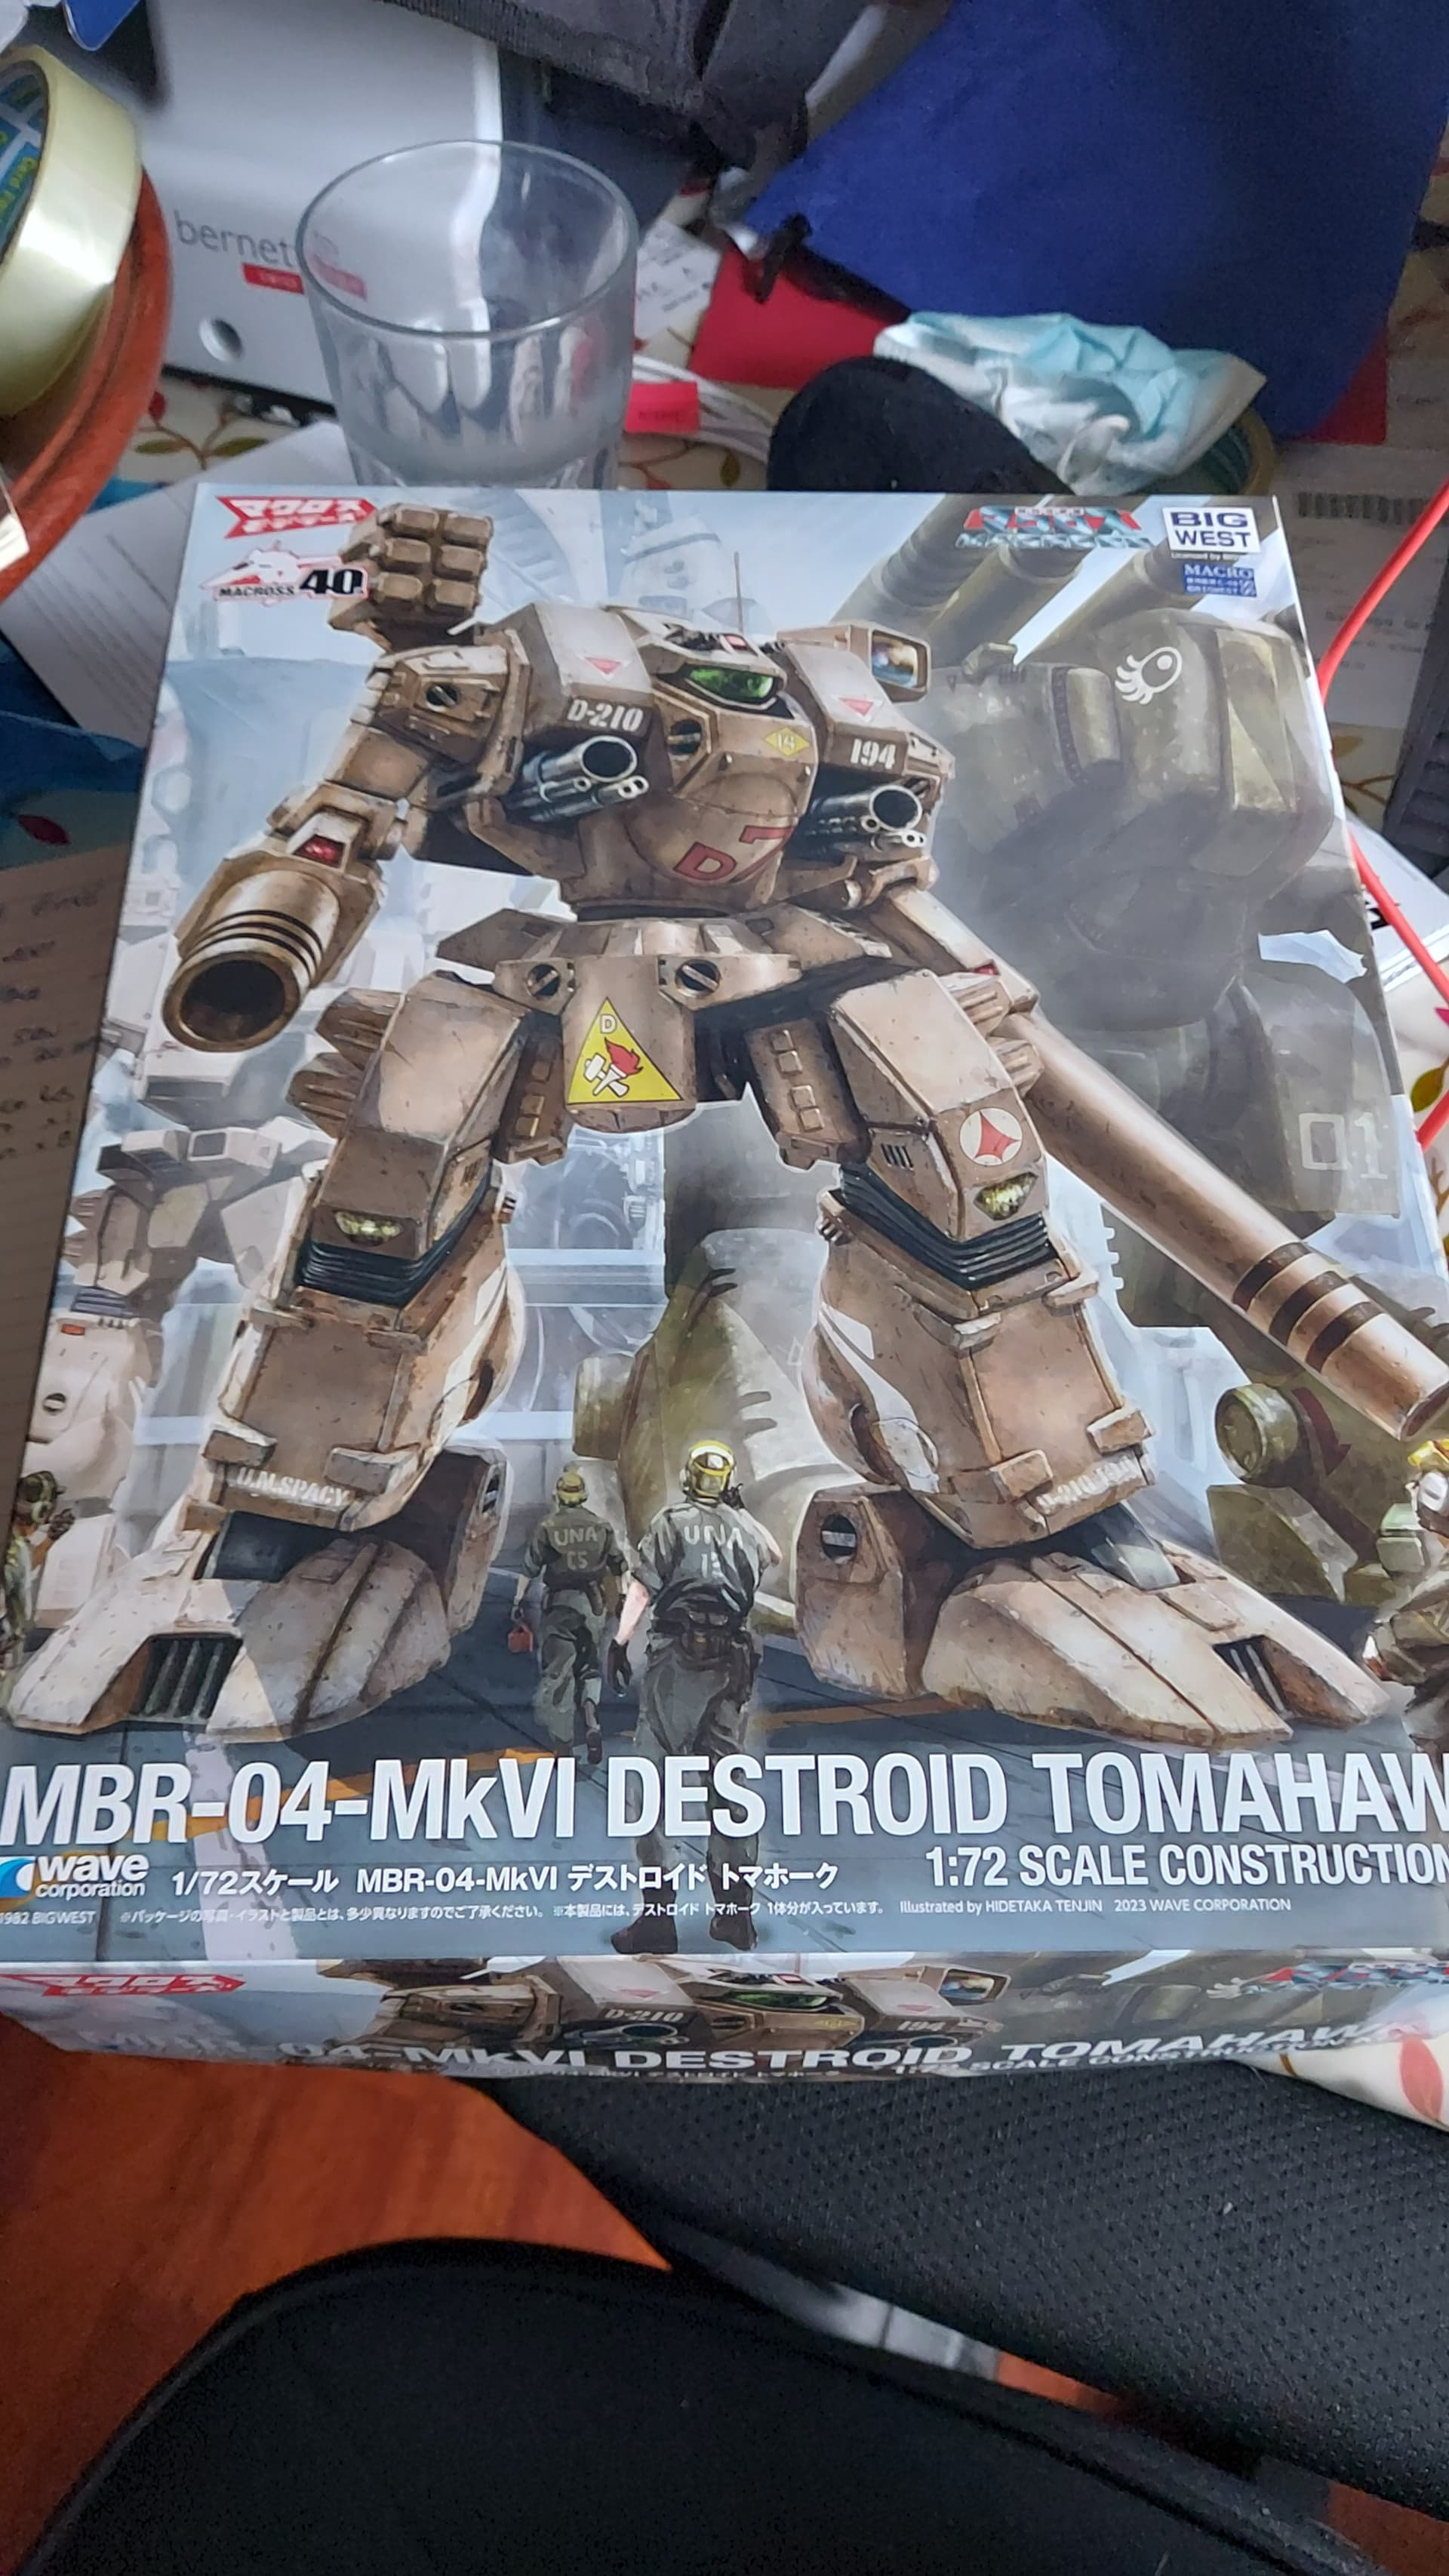
Just taken possession of a late arrival that could be a contender, superceding the Valkyrie Battleroid.
The late arrival is the impressive Tomahawk Destroid.
This was no longer available through my normal channels, so I’m mega pleased I managed to find it. Still outstanding on my wish list is the Phalanx Destroid.
Mike, I like the loading KLAW. Are you going to alter the cab in anyway or just repaint it?
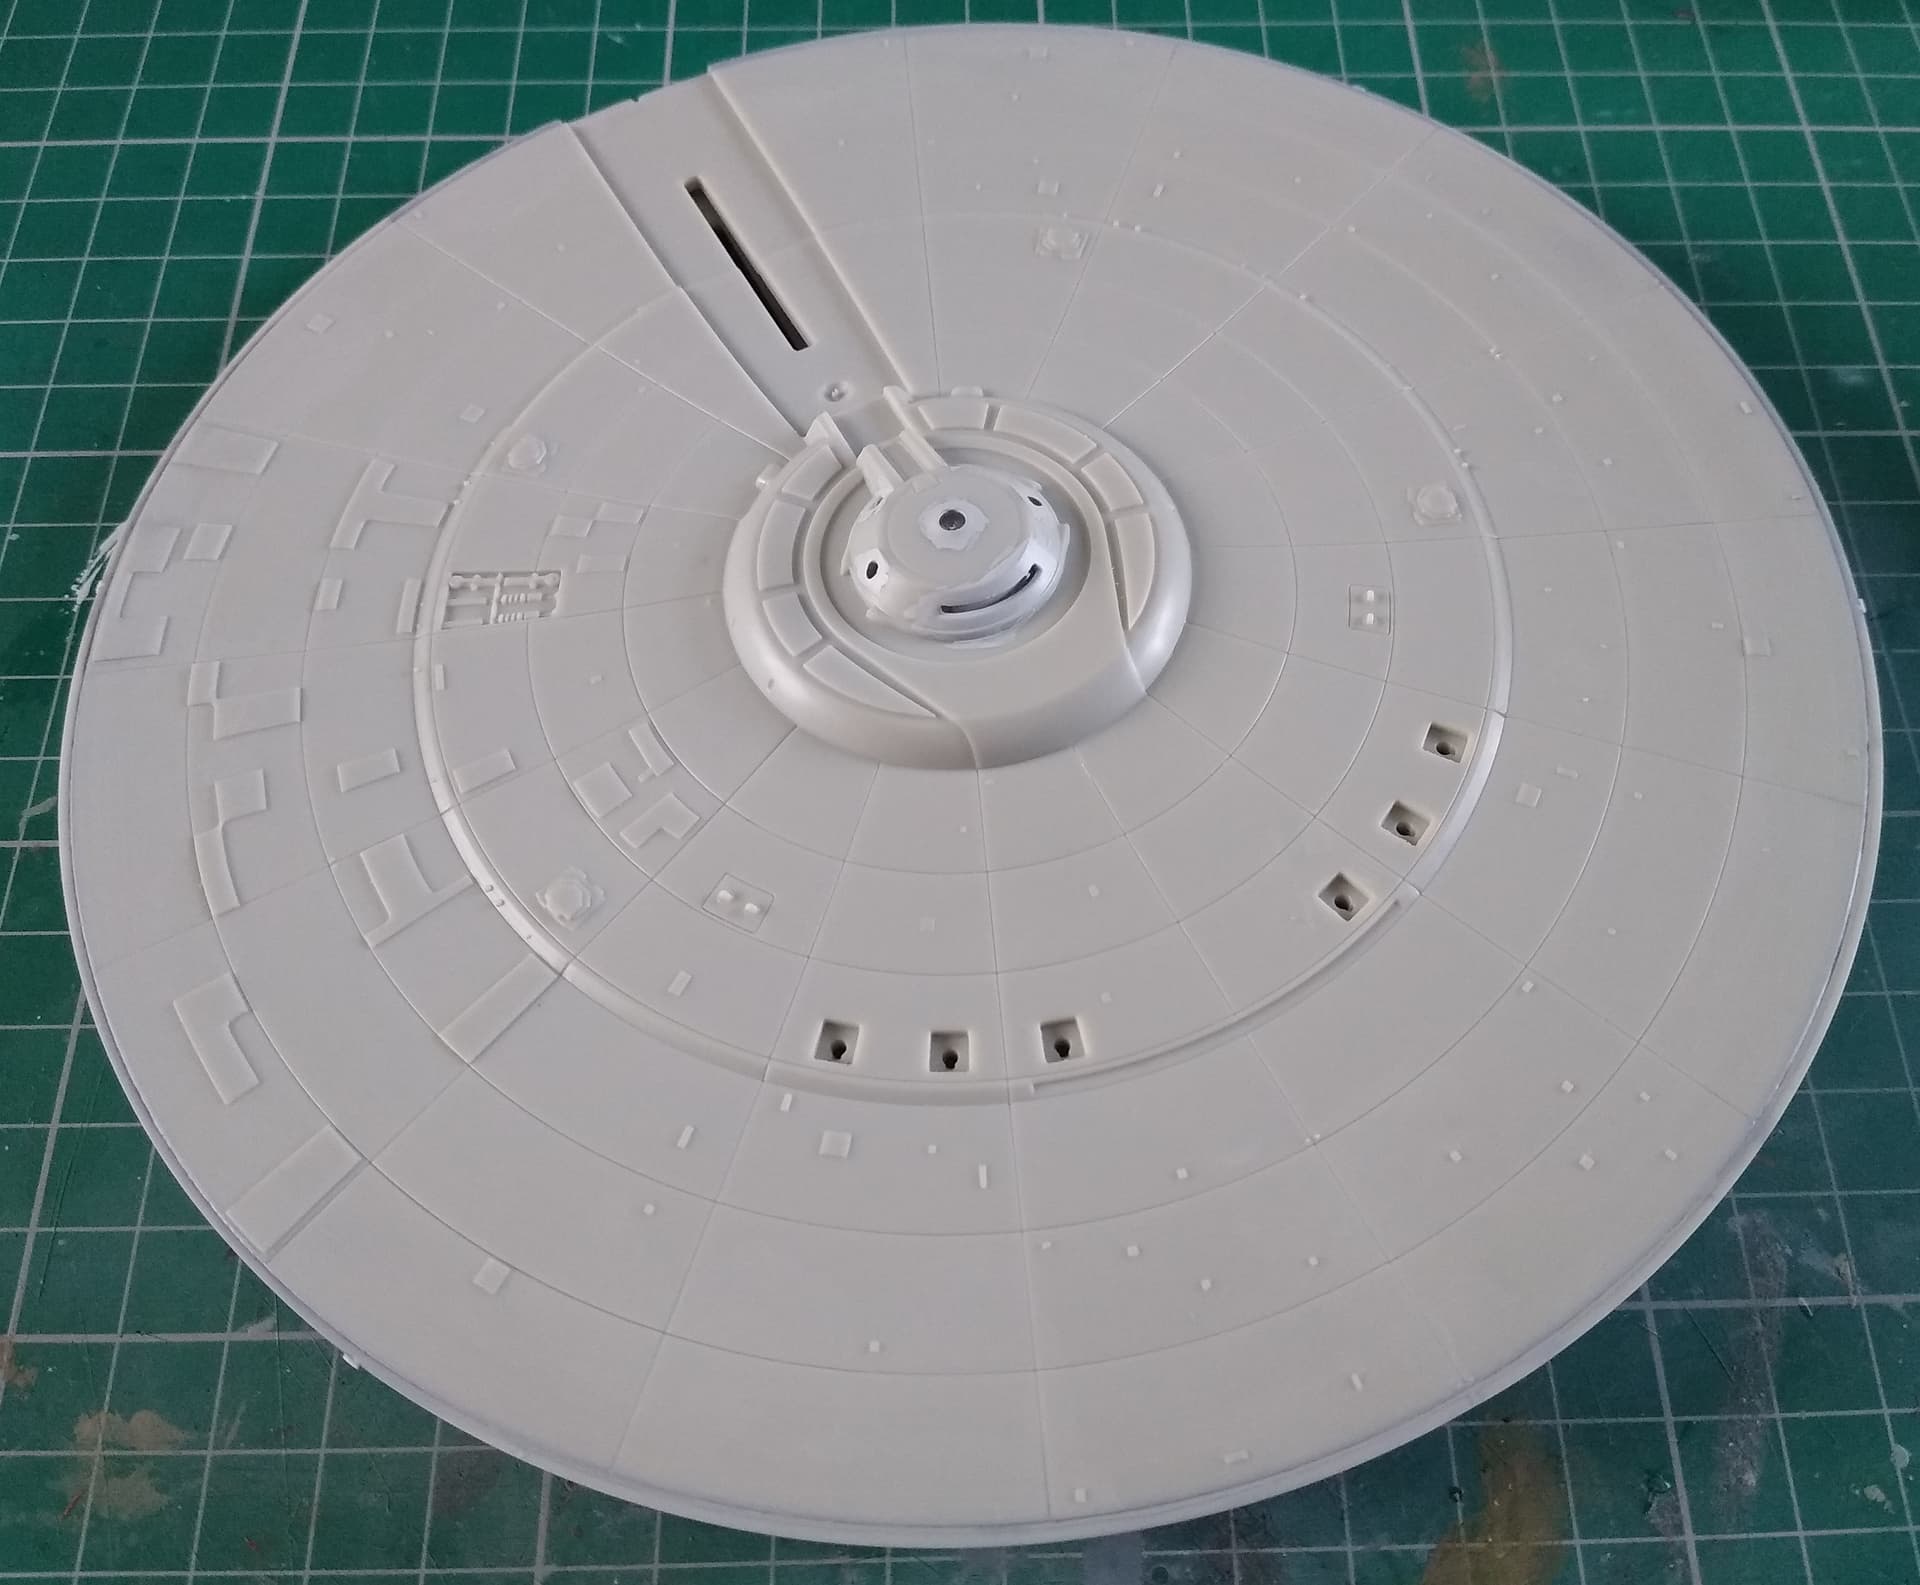
Little update on the Kelvin. There was a slight gap around rim between the upper half and sides. I think I might have avoided this if I’d glued the top and bottom first, then the sides. You live and learn. I used thick Mr Surfacer, left overnight and then wiped over with a rag soaked with Gunze thinner. Quick and easy and avoids any sanding.
The fit of the engineering hull in comparison is flawless. Just a light sanding is all that’s needed here.
Thanks for the Mr. Surfacer 500 & Gunze thinner trick. I’ve used denatured alcohol with some success but the native thinner might be a better solution. ![]()
I think I found that tip on a YouTube video. Just got to be careful not to use too much of the thinner, or you can soften it and remove too much!
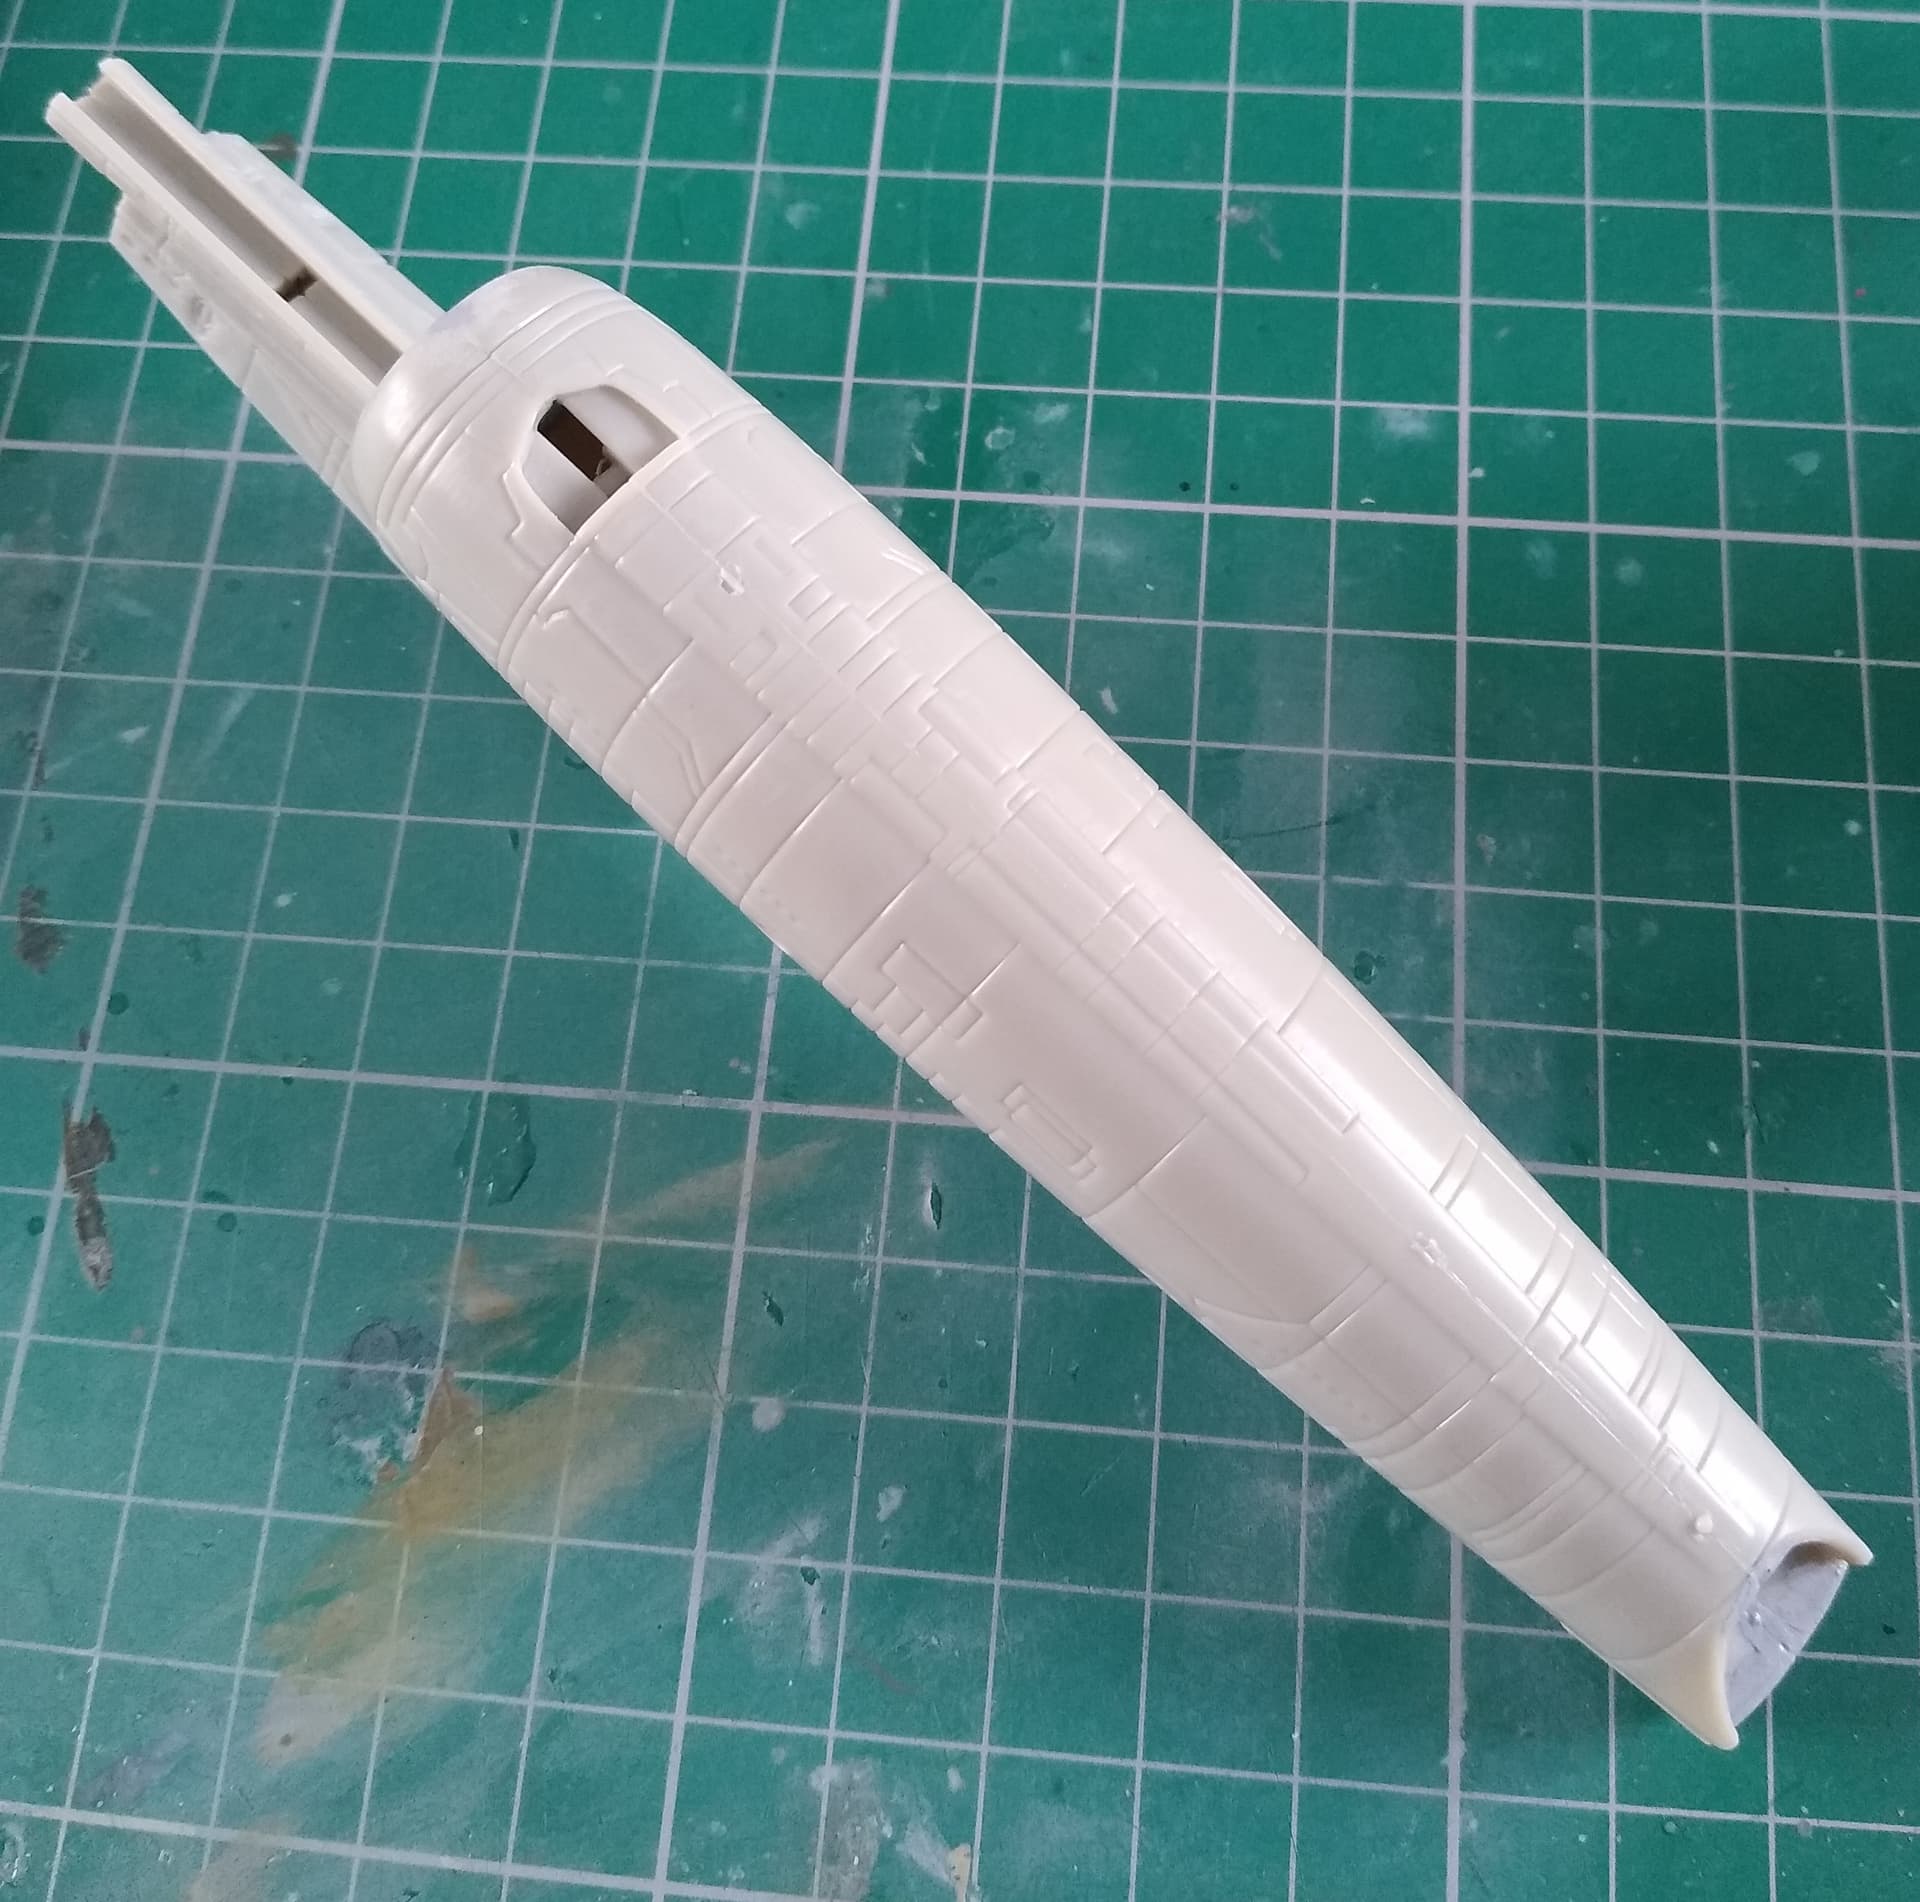
Next up, got the warp nacelle together. Again a really good fit.
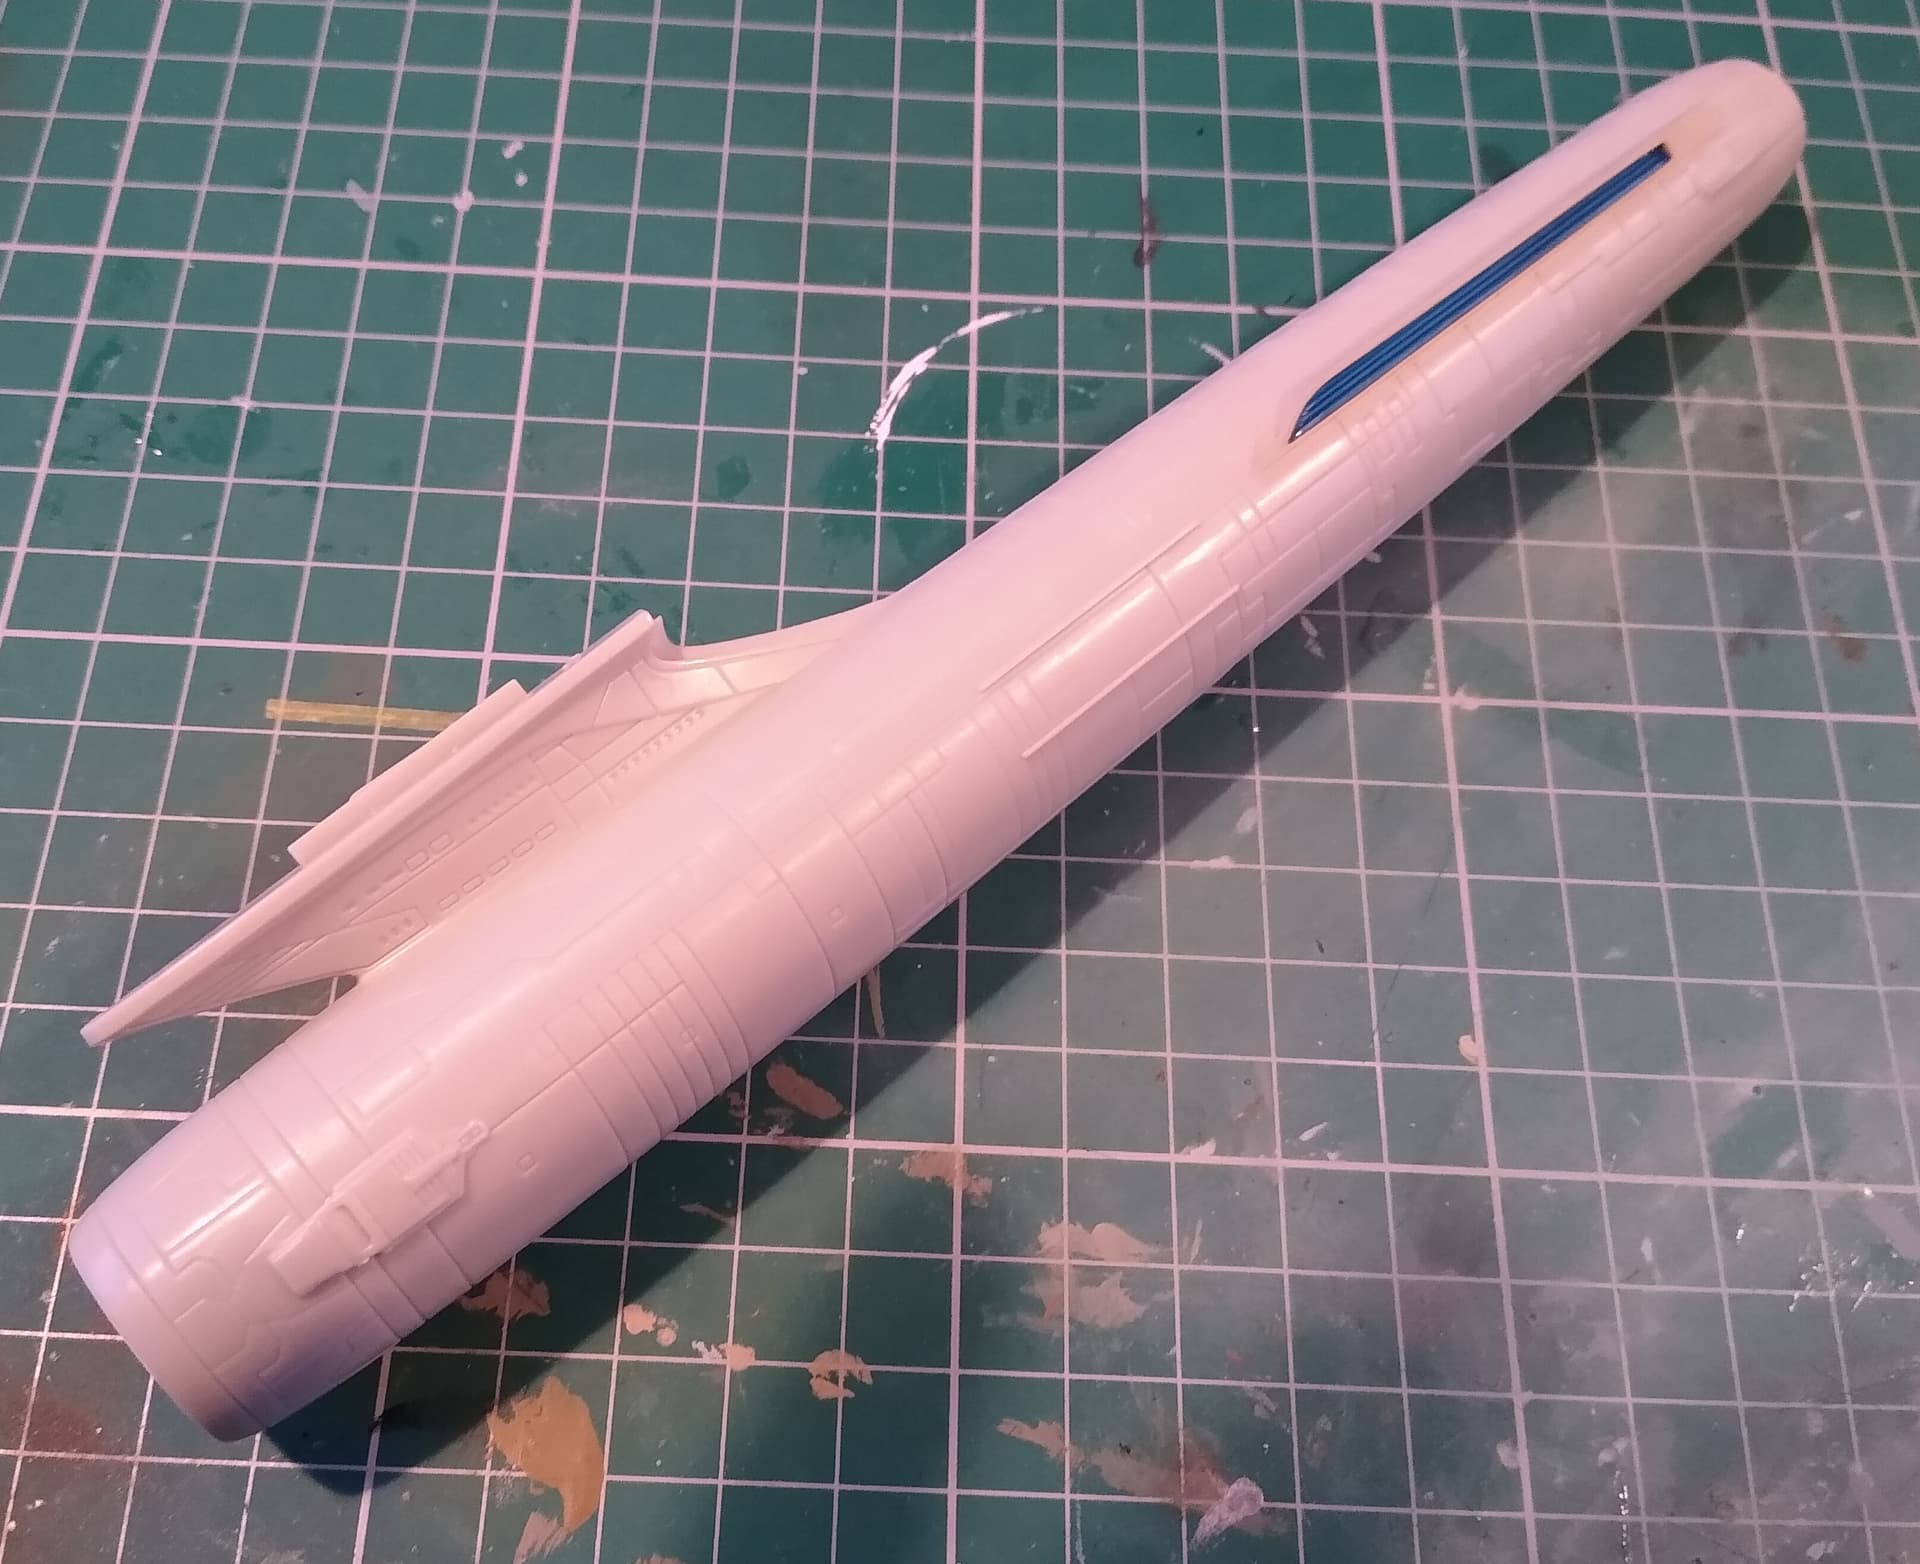
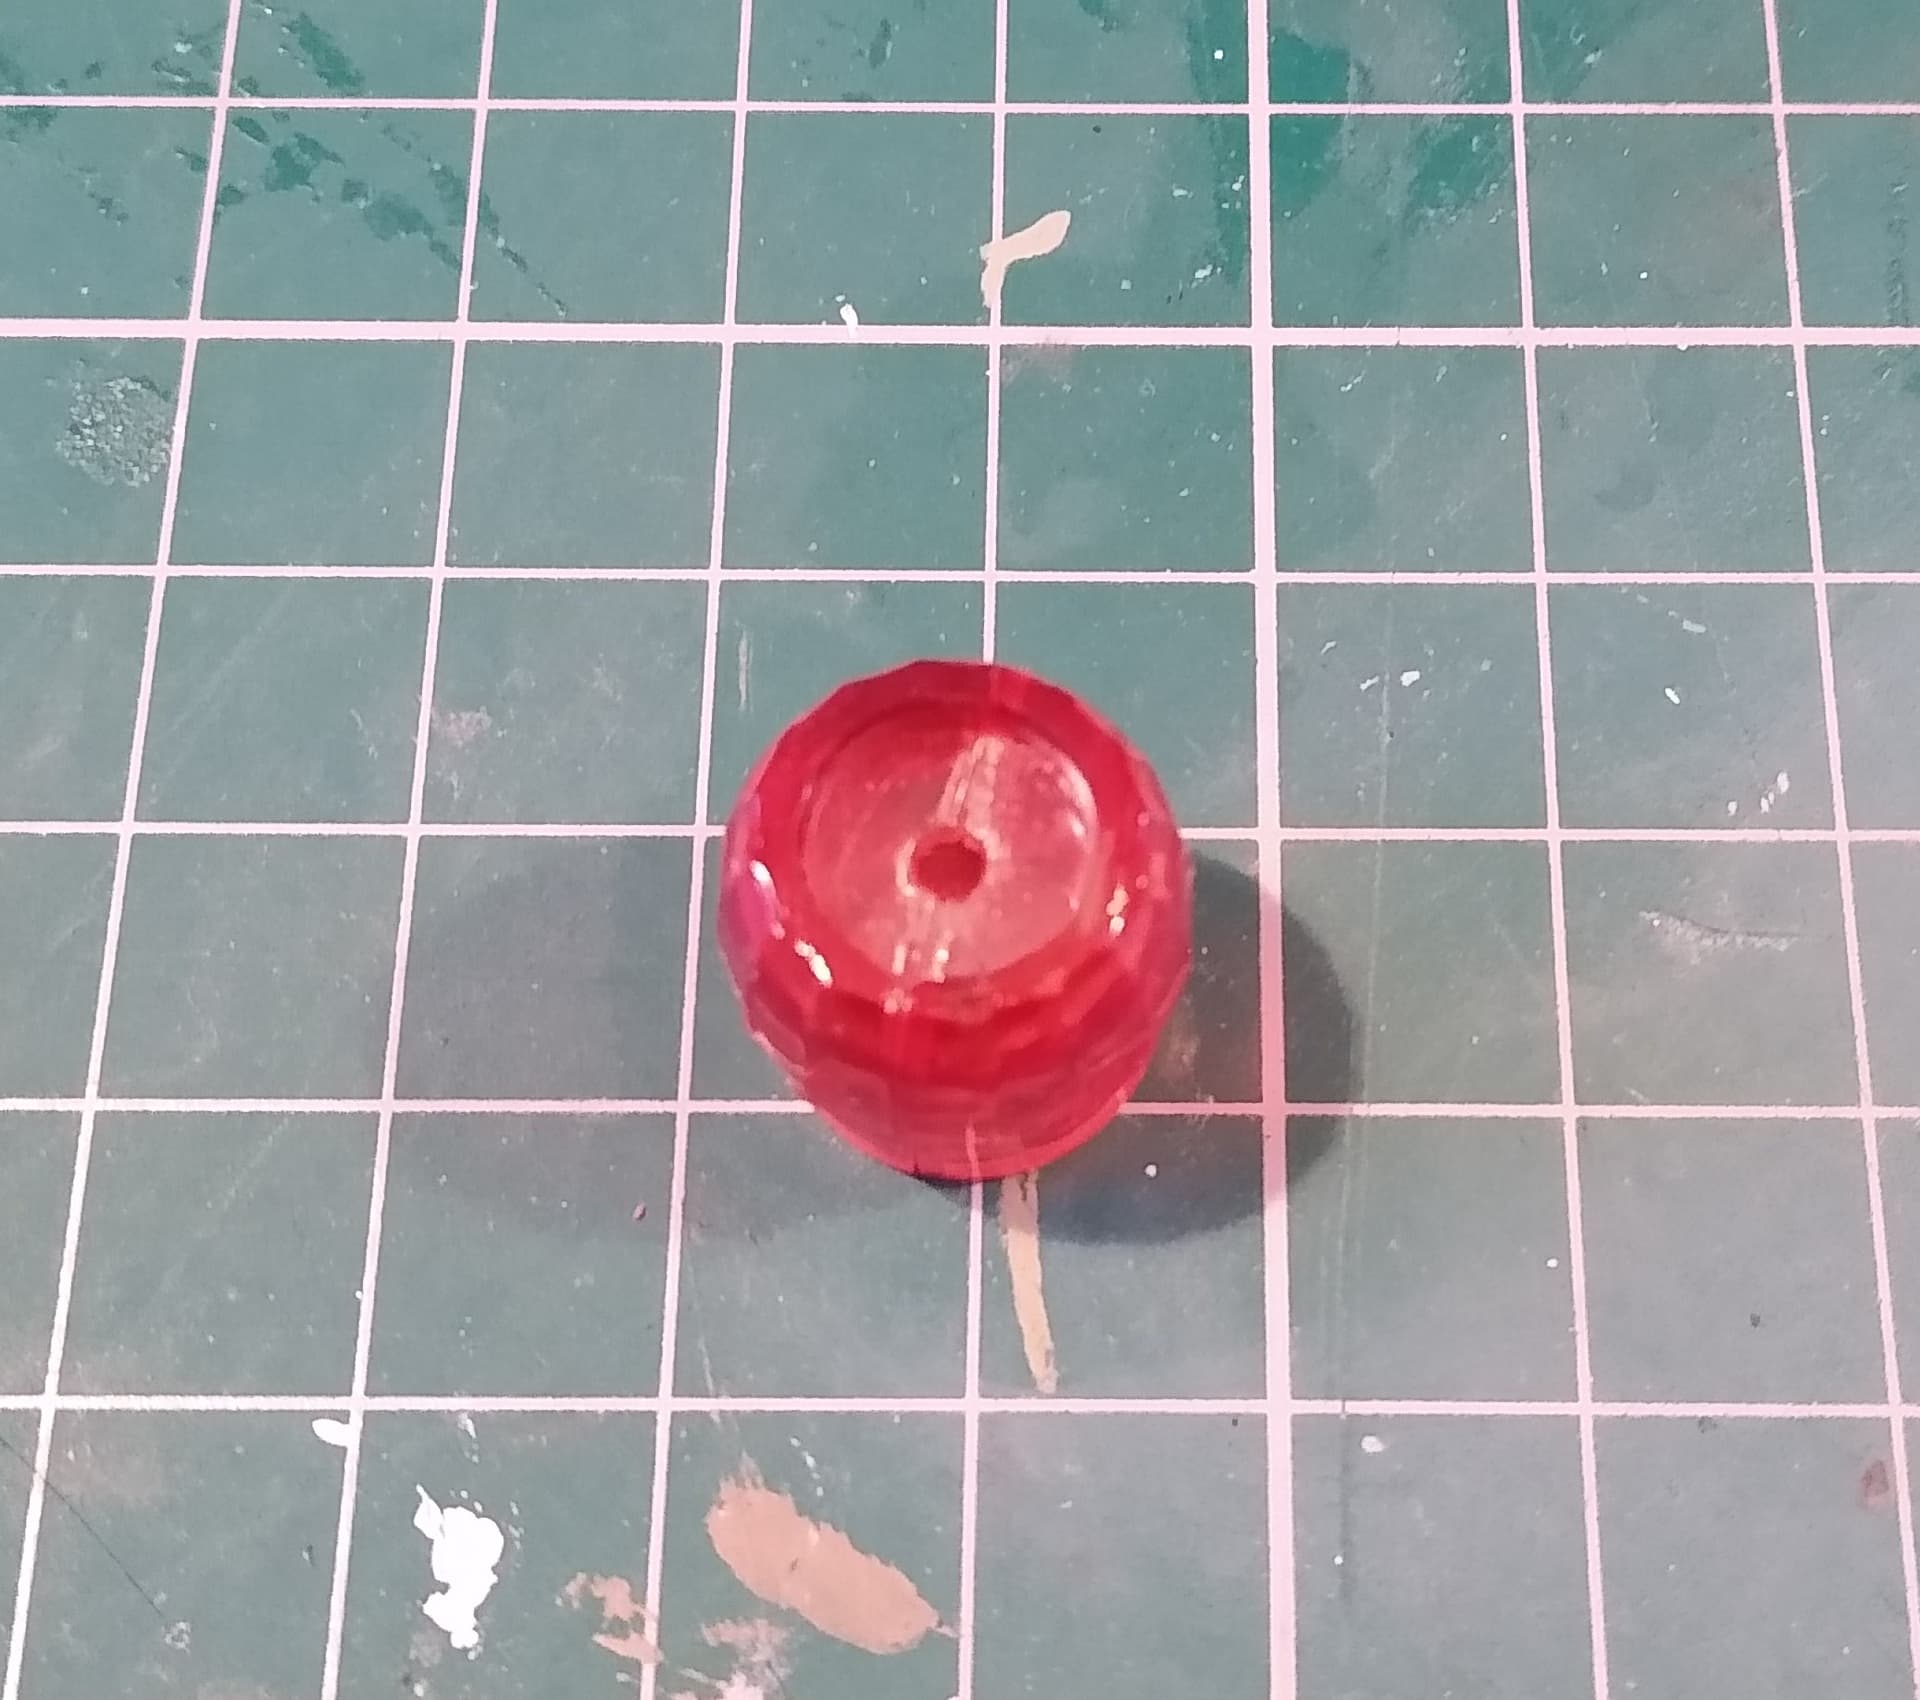
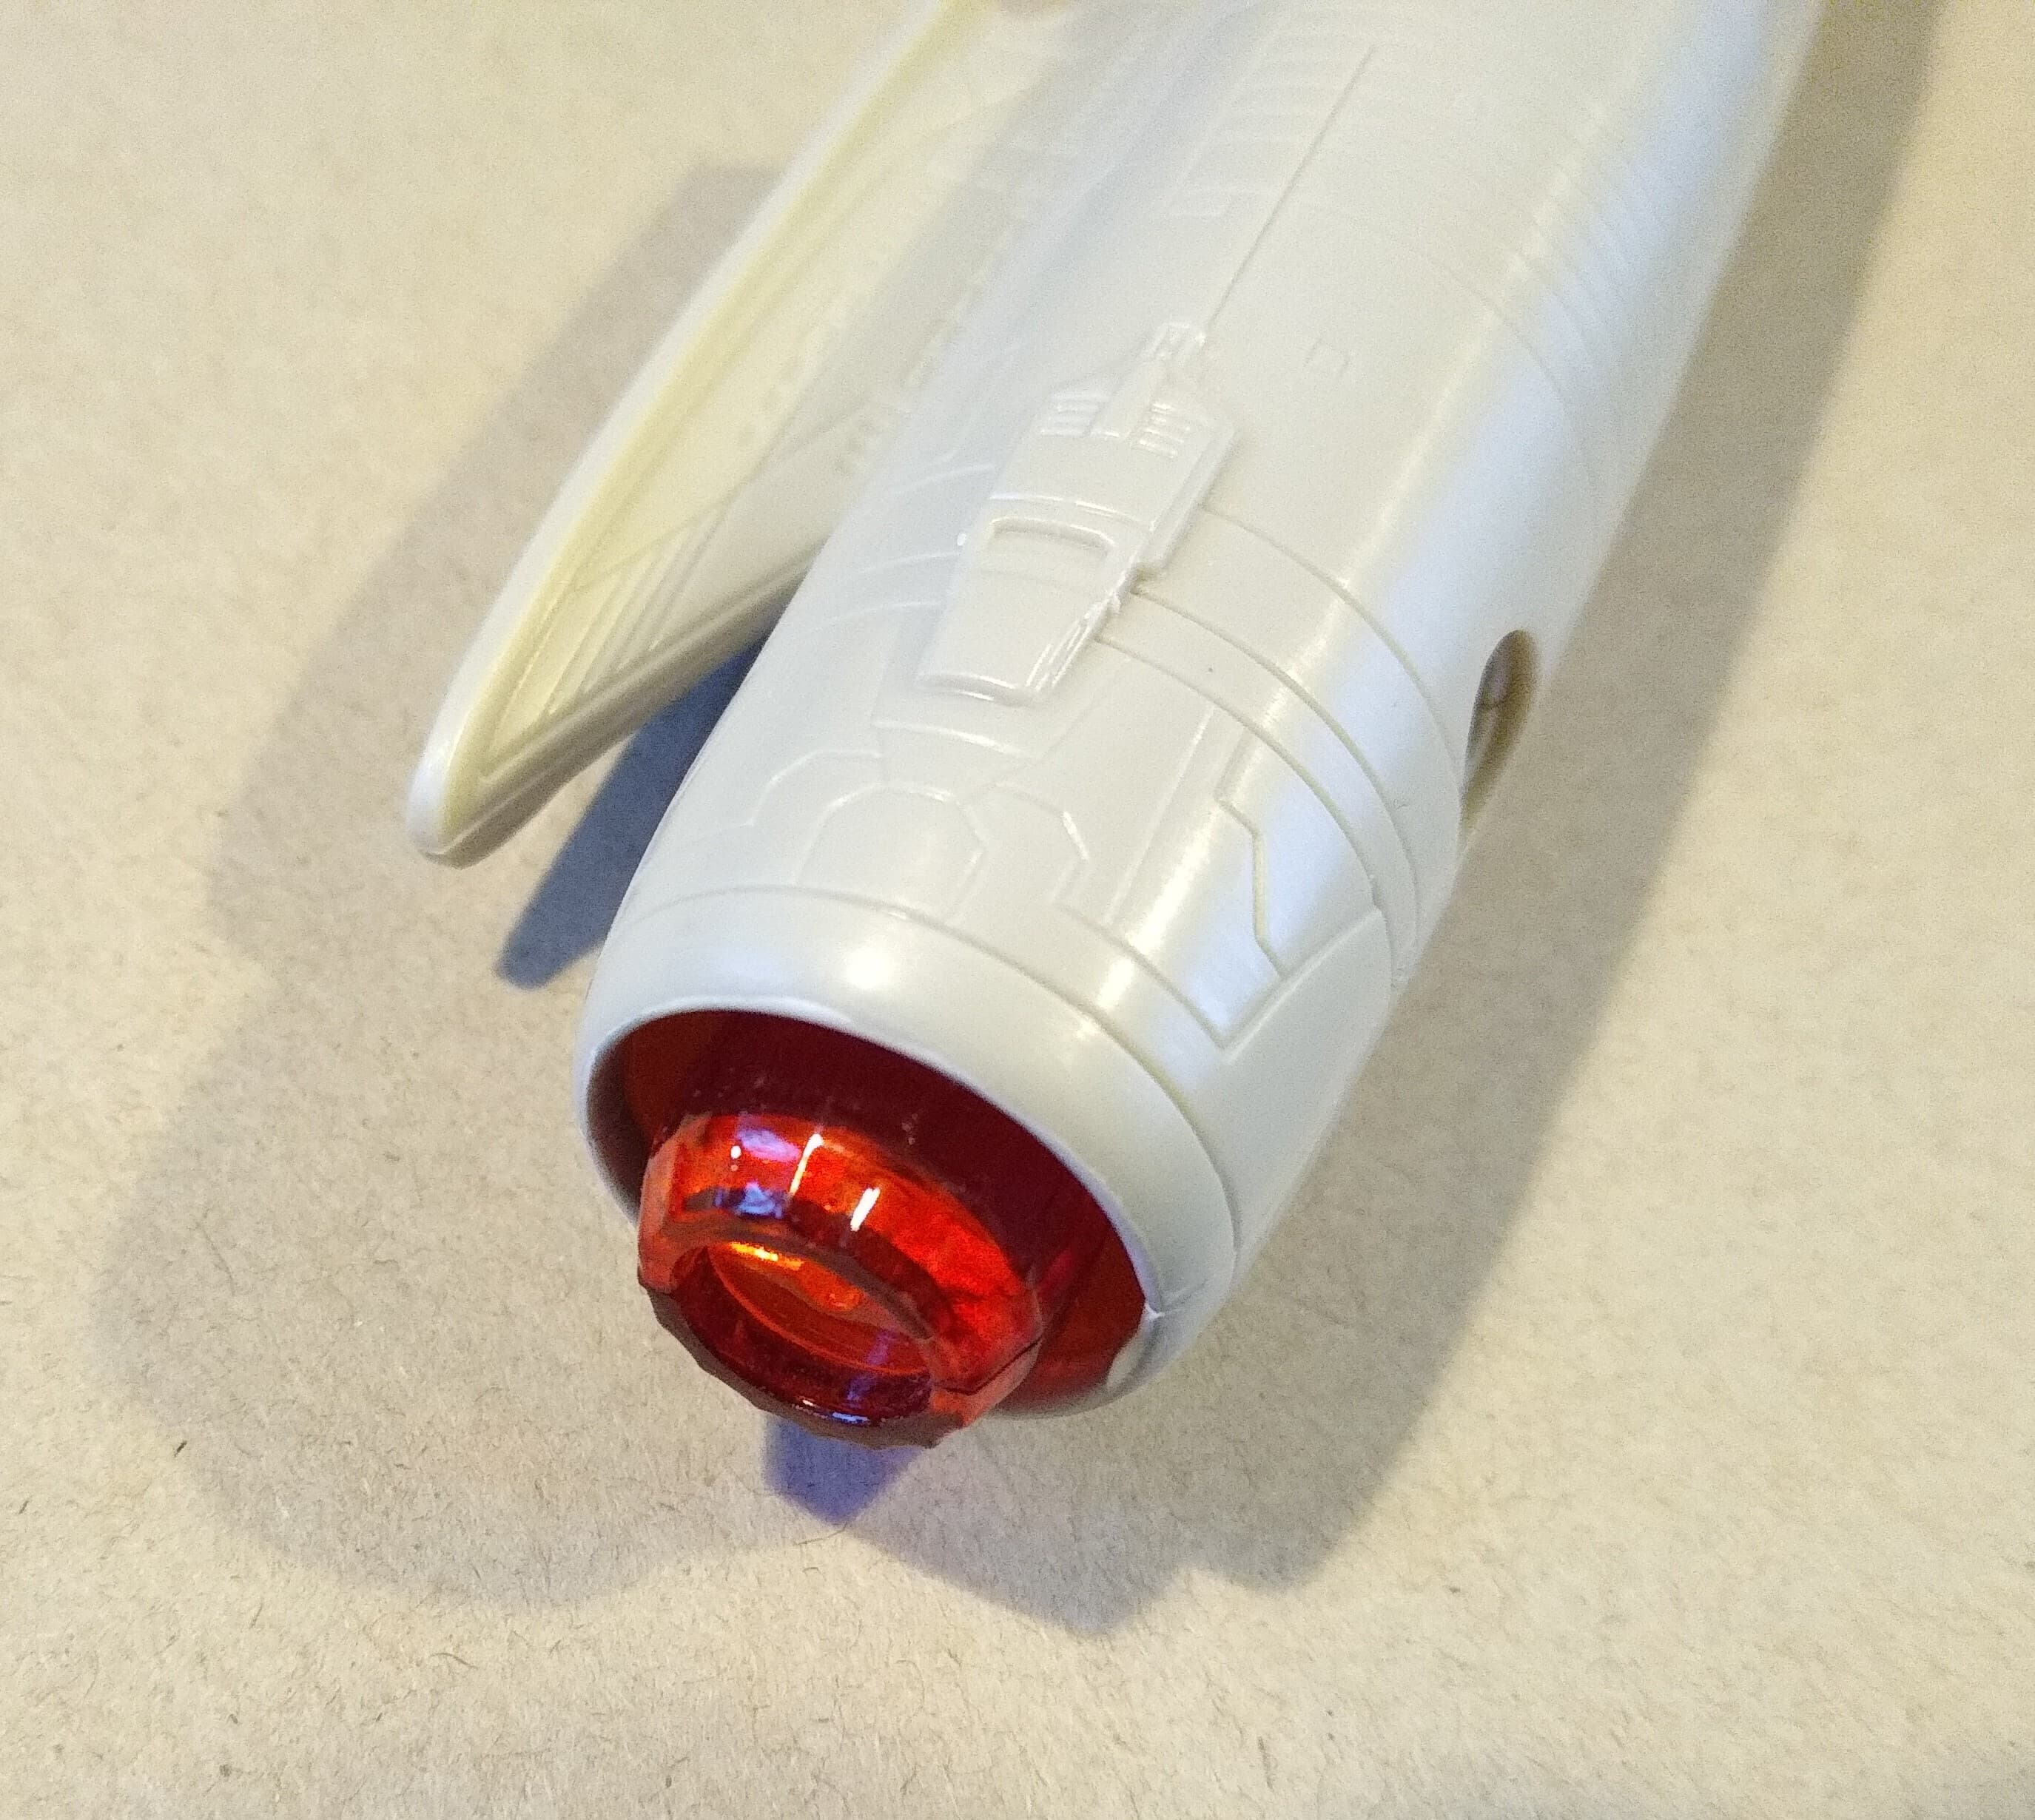
And the insert for the bussard collector. Painted each half with Tamiya clear red (their clears are wonderful paints. Rich colours and dry quickly with a nice gloss finish) and stuck with Glue’N’Glaze.
And how it looks dyrfitted. It has some raised lines which will need some careful masking and painting. Not sure yet whether to go with the hull light grey or copper like on on the deflector. Again it’s an area you don’t see very well in the film, so maybe a little artistic licence is called for.
That really is it for assembly. Couple of little things, but she’s about ready for some paint. I’ve been so used to building AMT Trek kits, with all their associated crude parts and fit challenges, the rapidity and ease of the Kelvin is a really nice change. Moebius did a great job with this kit!
Thanks for the warning, I’ll still try it on some current projects, but I’m not getting rid of the DNA yet. ![]()
Thank’s guys!
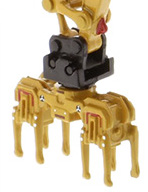
@ Stephen! I was going to, but the diecast model is just too nifty to destroy like when I was a kid, so I’ve decided not to paint it. There is a bright side… I was thinking of yellow anyway. However, I plan to overlay the ‘Cat’ logo with a printed paper ‘KLAW’ one. I may add some hoses as well. ![]()
Certain elements in the saucer preparation area will be ‘CAUTION’ yellow, i.e. striped “ACHTUNG” signs. ![]() One of the bomb trollies will be yellow, the other orange. I hope to convey a feeling of surrounding hazards!
One of the bomb trollies will be yellow, the other orange. I hope to convey a feeling of surrounding hazards! ![]()
BTW: Thank’s for the Mr. Surfacer tip!
—mike …![]()
PS: Here’s a reference image I found on the web. Kinda’ has a similar look to it:
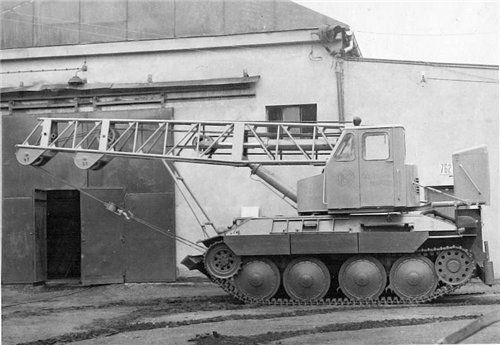
Caption: A Jagdpanzer 38(t) transformed into a crane after WW2, Czechoslovakia 1950’s. Its ST-I, a Czech variant of the Hetzer built after WW2, and was built by a factory that produced those tanks after they were taken out of service for use in said factory.
That sounds like a good idea. Be interesting to see how it all comes together at the end.
It’s all very Wolfenstein if you’ve ever played any of those games!
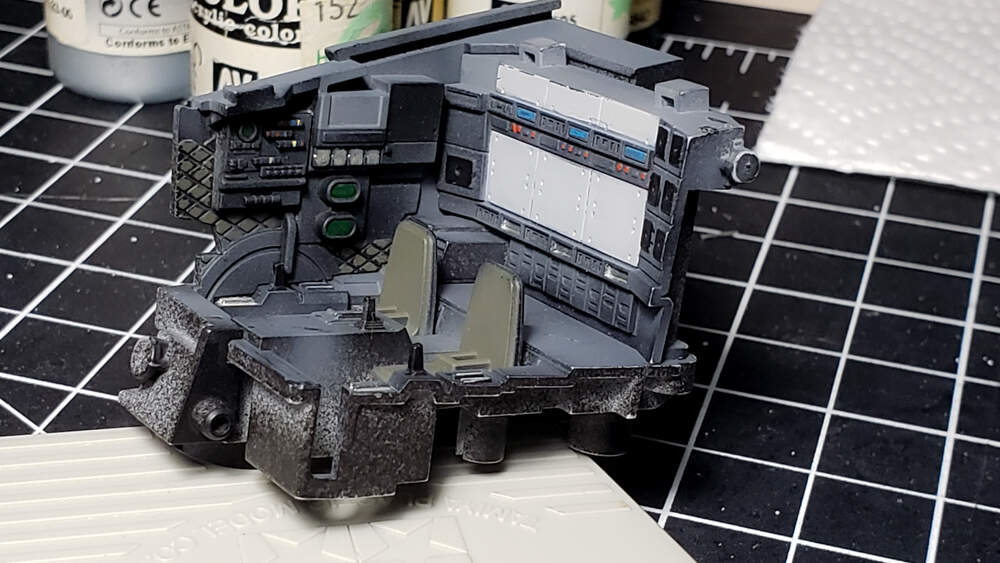
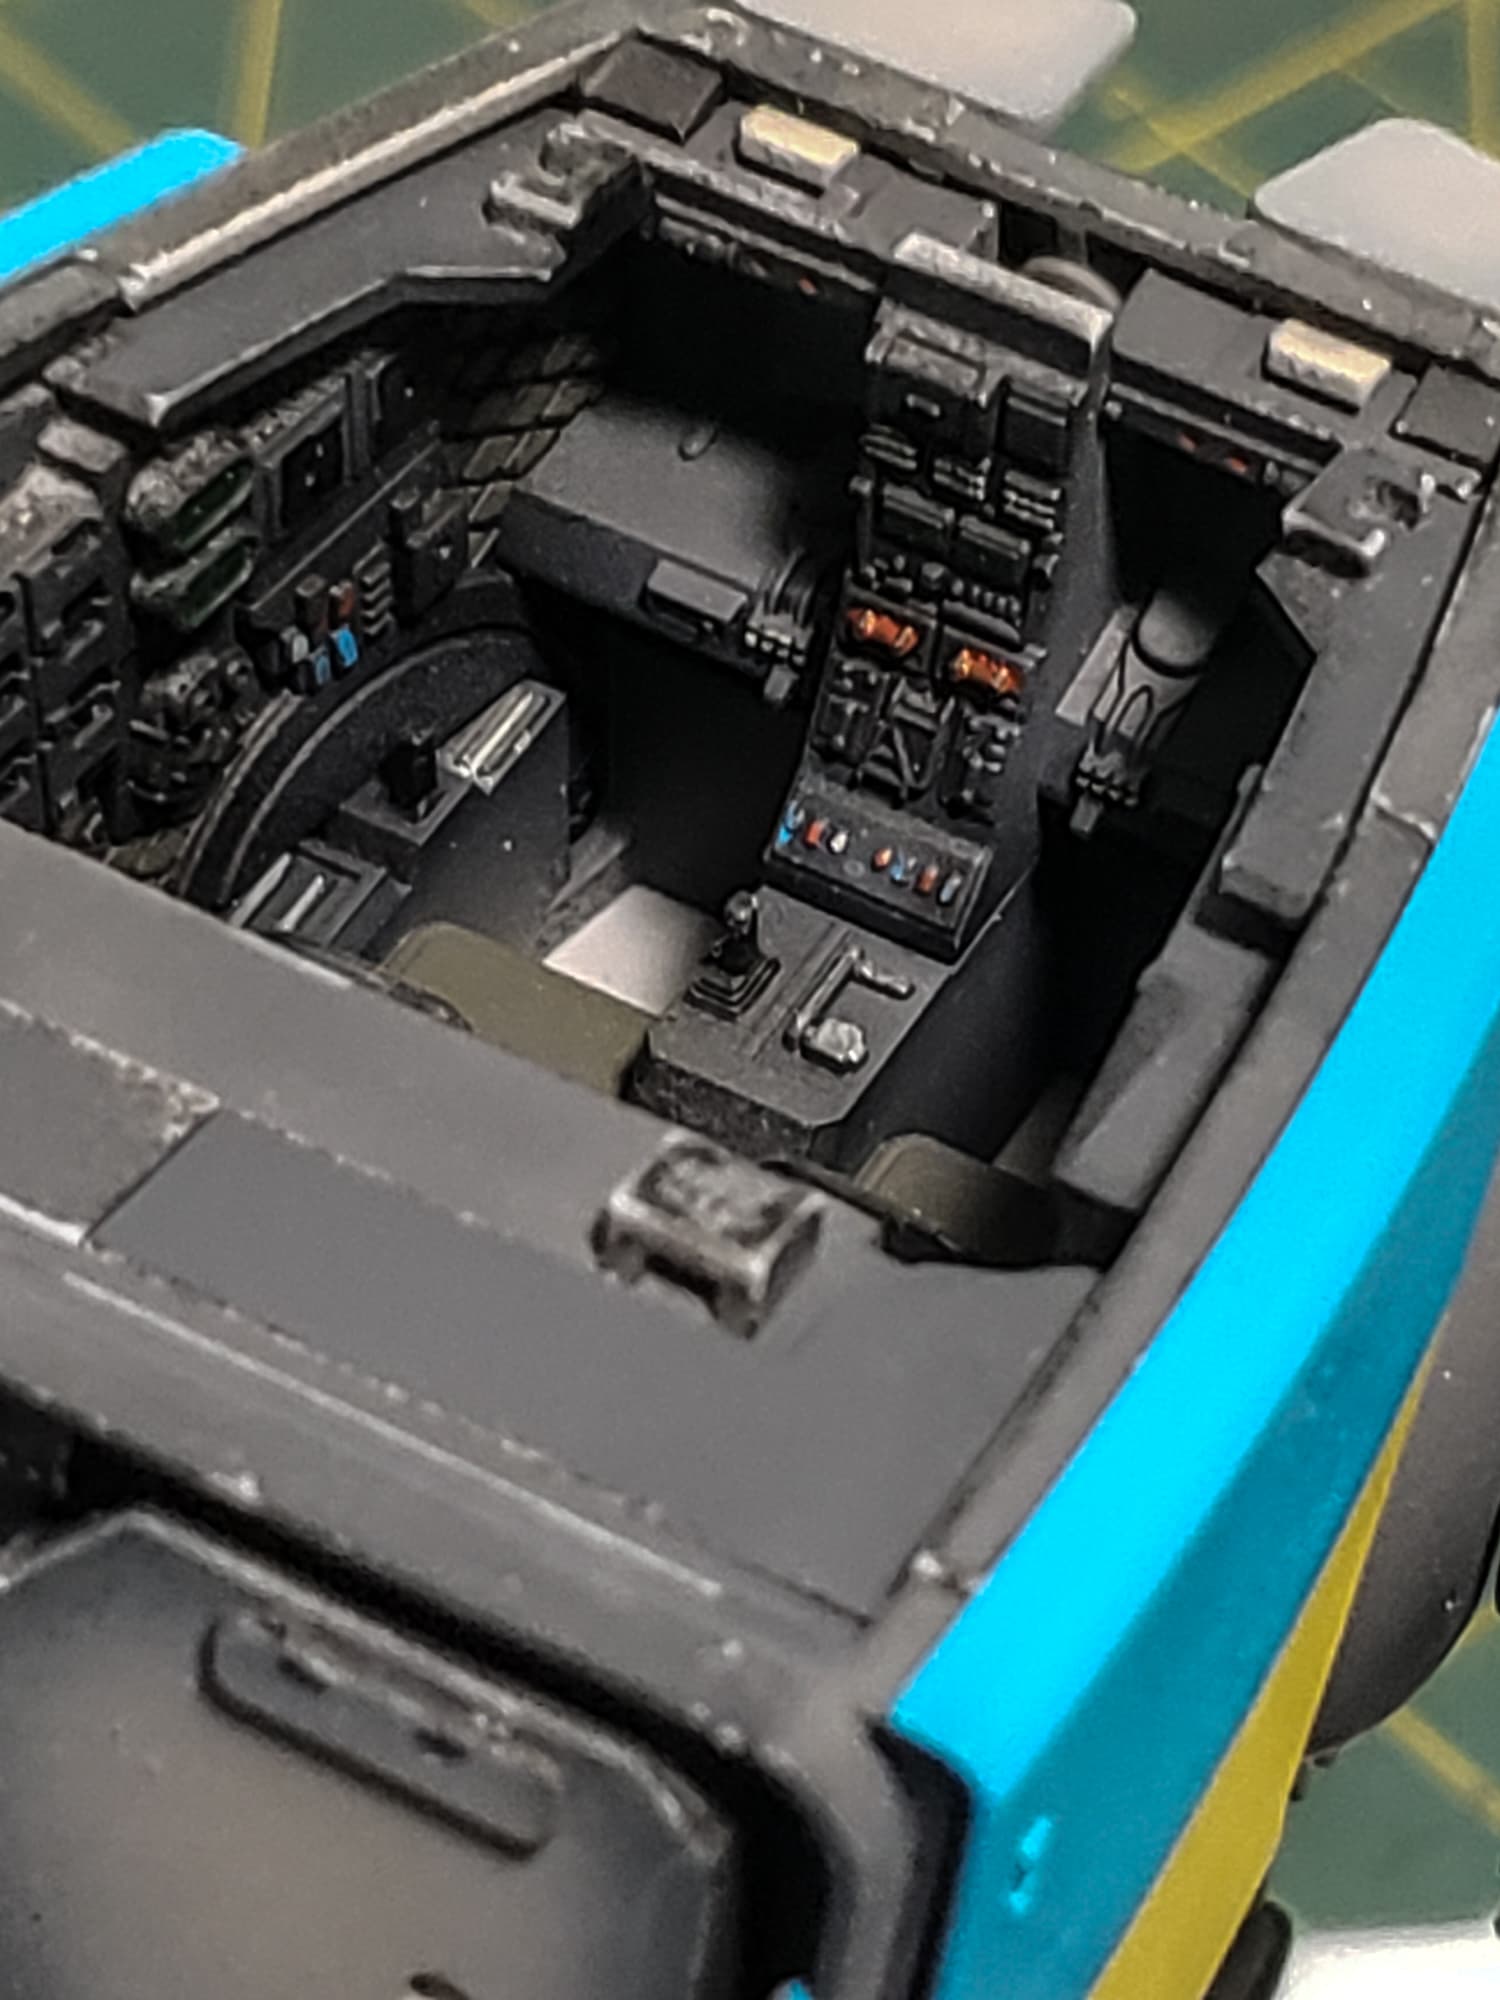
A follow up to the interior. It was already done but couldnt find the pre painting until now. And then assembled with look in view.
Trying to decide if i want to do more exterior weathering or not.
That is a smart looking interior- you’ve certainly brought out all the detail in it.
Nice work. The interior looks great!
—mike …![]()
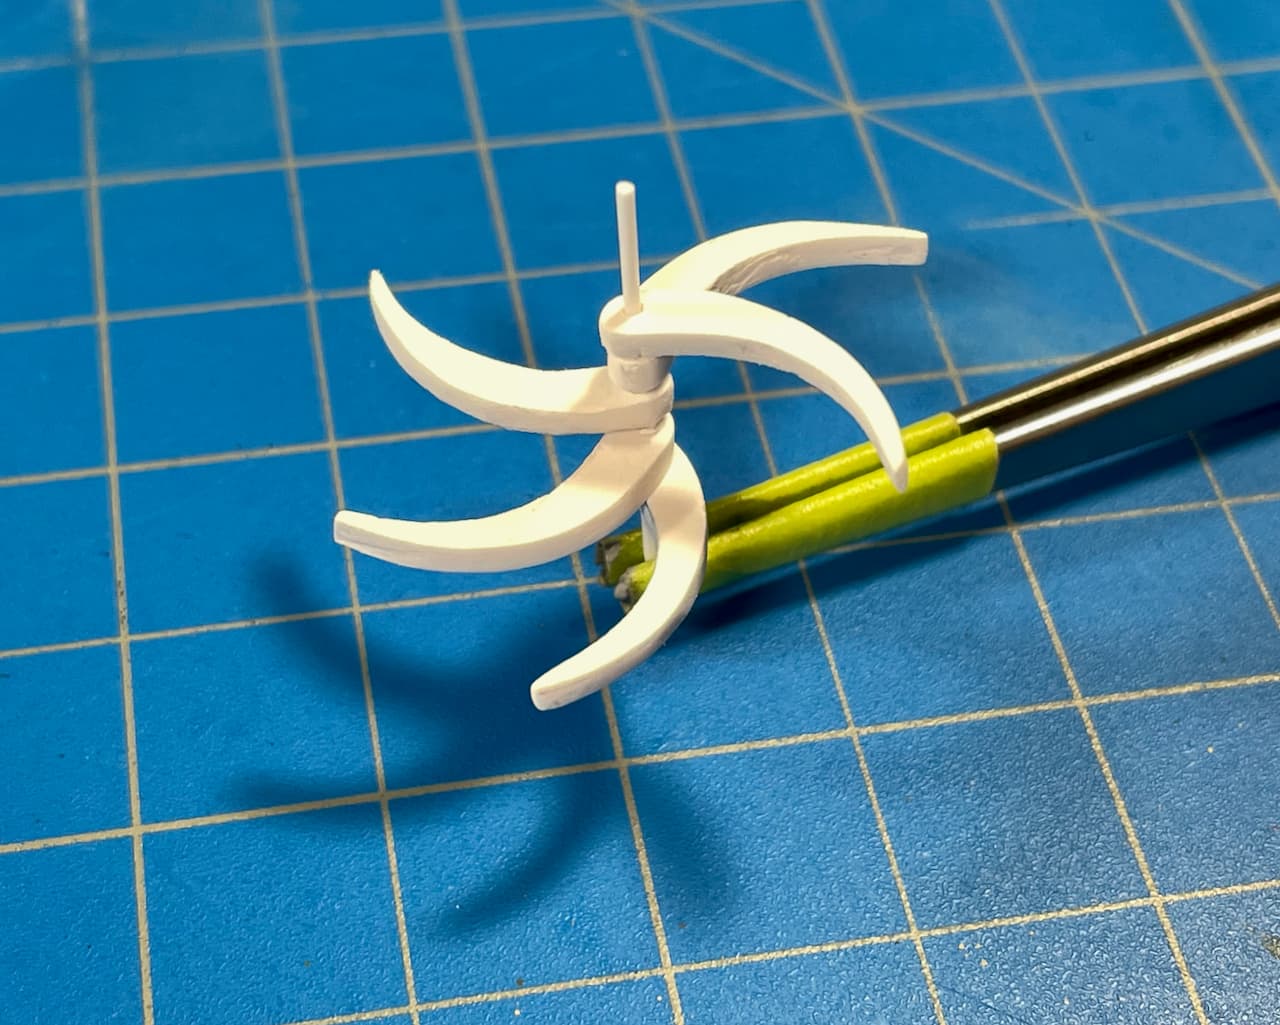
What is this Ninja Throwing Star nonsense? …
Have no idea what material this is made of — looks like Styrene. ![]() I tested it with Tamiya Extra Thin Cement… nope, not Styrene. I scraped, stabbed at it, tried to twist and tear it… nope, not cardboard. However, it did cut, sand and grind with a Dremel Tool. Possibly a piece of packing material of some sort that got mixed-in with my Evergreen years ago. … Or perhaps, could it be some sort of Alien substance? Hmmm.
I tested it with Tamiya Extra Thin Cement… nope, not Styrene. I scraped, stabbed at it, tried to twist and tear it… nope, not cardboard. However, it did cut, sand and grind with a Dremel Tool. Possibly a piece of packing material of some sort that got mixed-in with my Evergreen years ago. … Or perhaps, could it be some sort of Alien substance? Hmmm. ![]()
“So… everything is just lying there in pieces.”
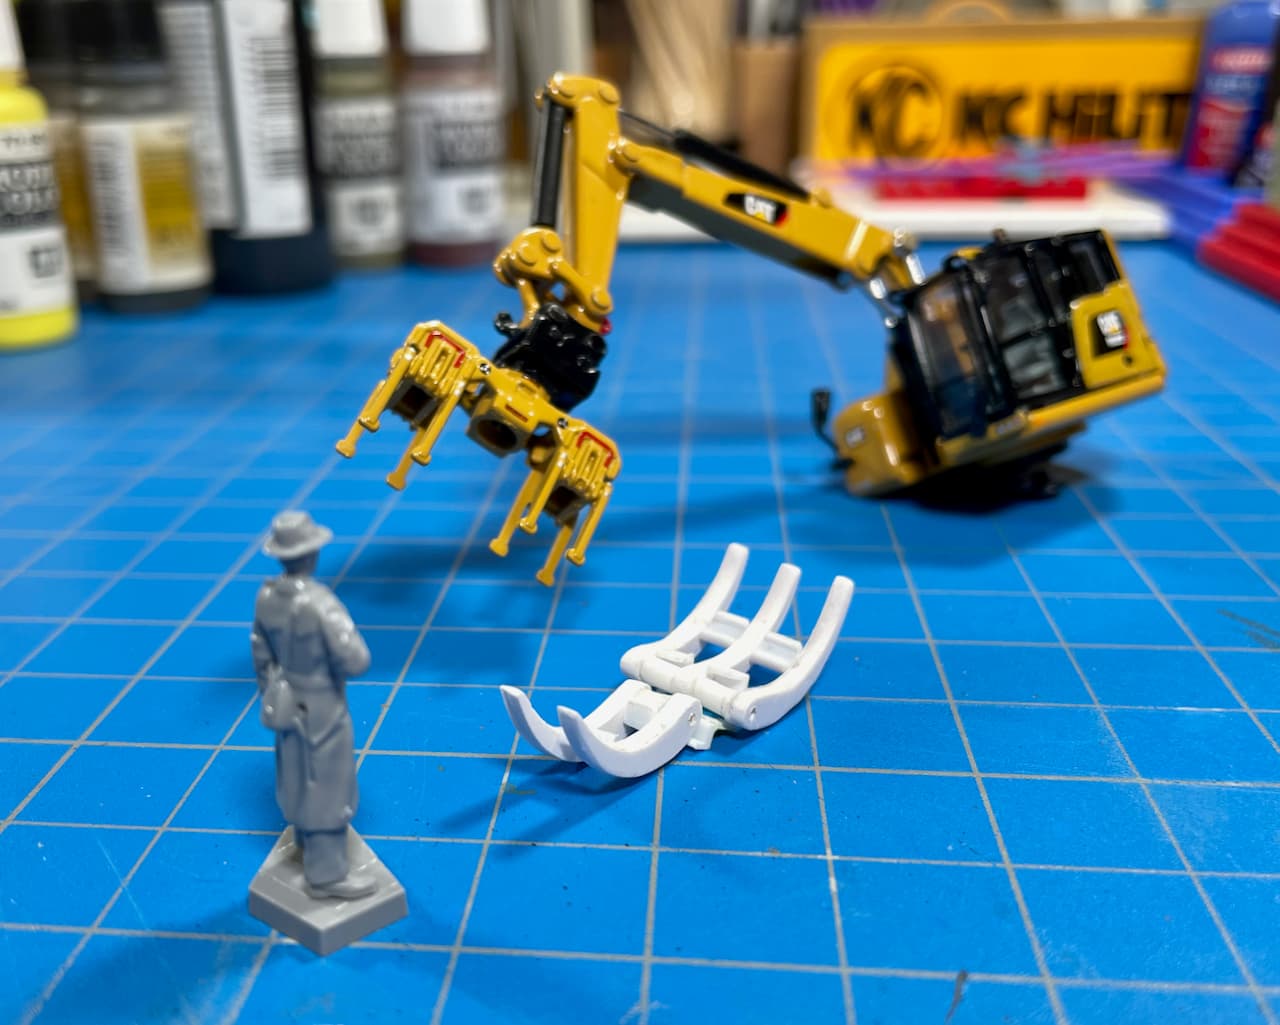
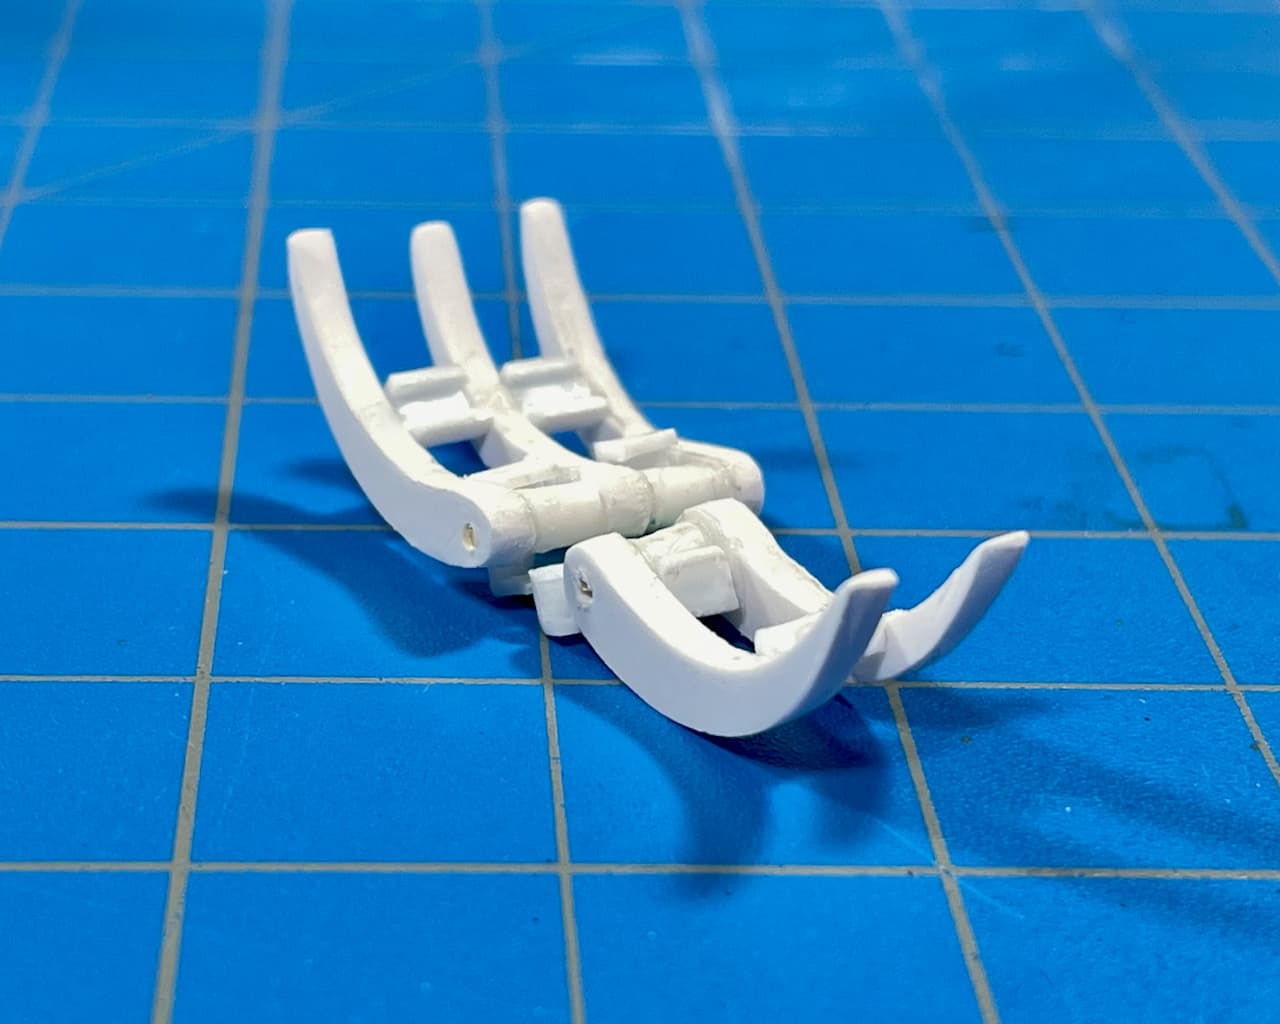
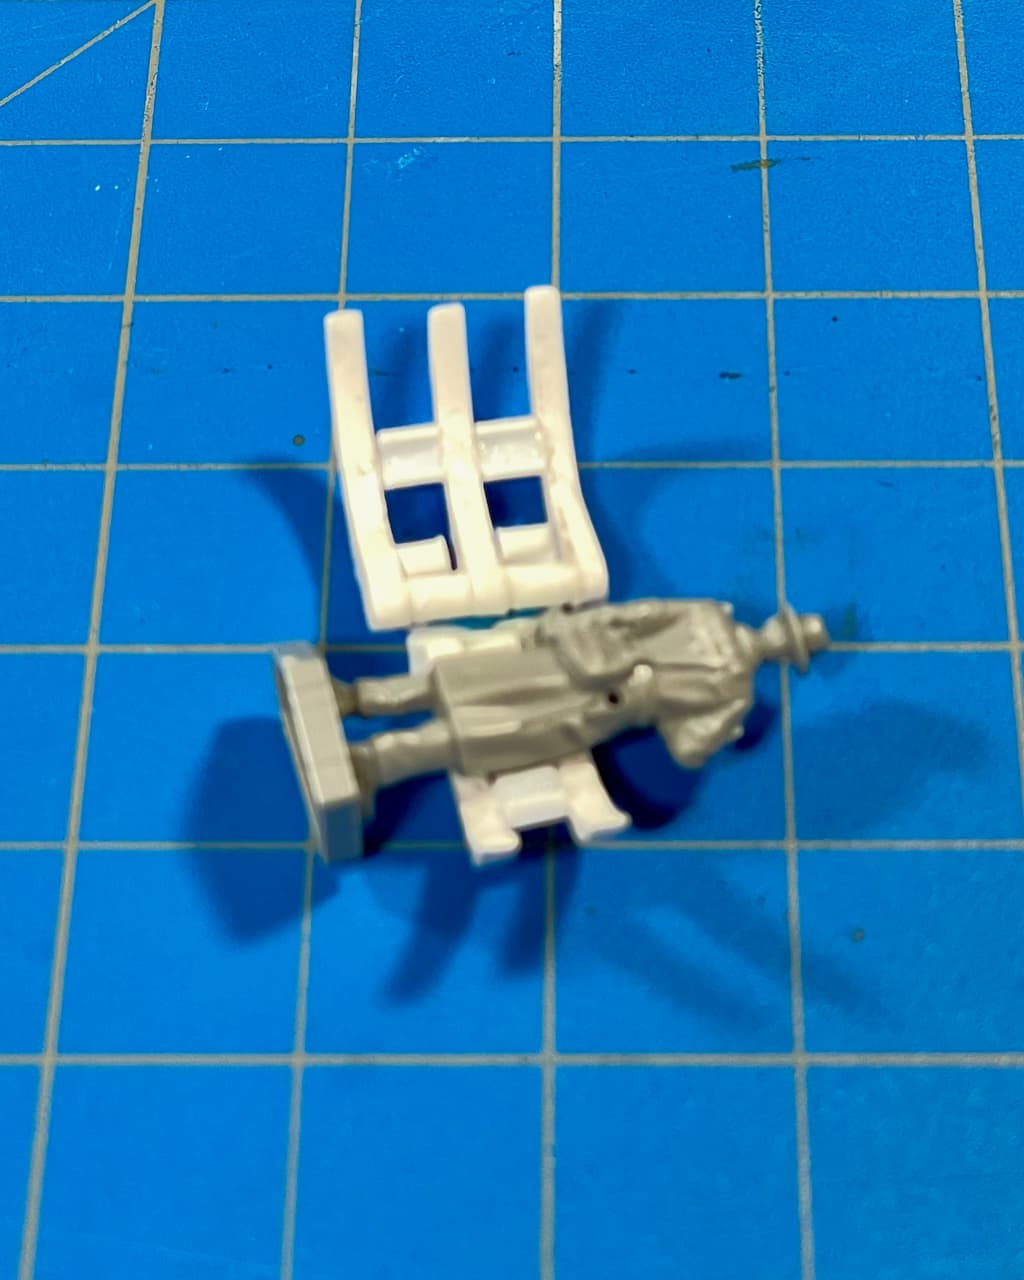
Creation of ‘KLAW.’
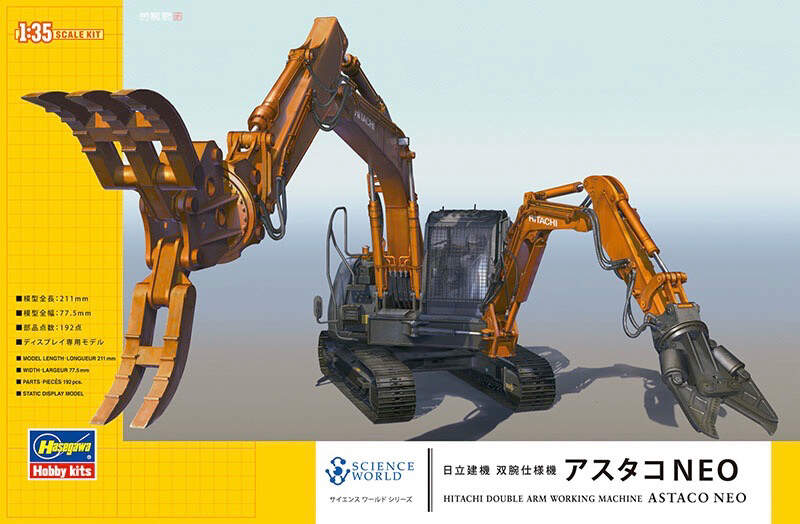
Alien material, Evergreen Styrene, K&S brass rod all glued together with CA. Everything is a little rough right now, but I think you get the gist. Inspired by the following Hasegawa box art image. ![]()
“I don’t see what all the fuss is about. As you can see, nothing is working.” … “Oh, SHNAP!” ![]()
“Let me up… NOW!”
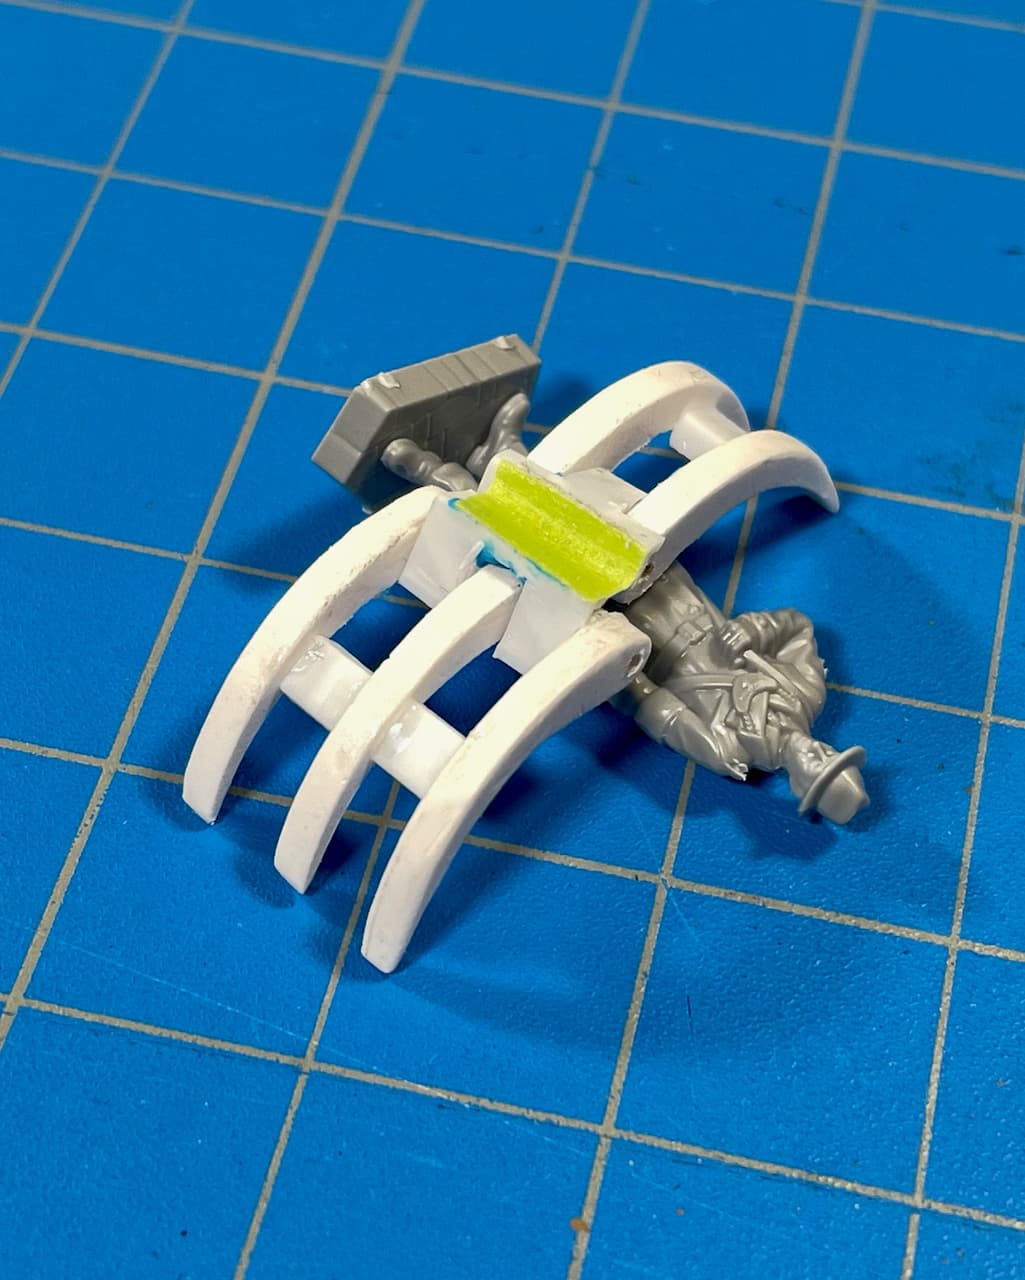
I’m happy to report that the ‘KLAW’ actually works to some degree! ![]()
—mike …![]()
Excellent
Damn Mike you really got the hang of this scratchbuilding thing!
Thank’s Mathew, nice of you to say! ![]()
—mike
Stephen, With your kind words of encouragement came today’s inspirational moment!![]()
Well, there was finally a little creative destruction — nothing too serious though. Here’s the original ‘Ballast Tamper’ accessory for reference…
… and after I went at it with cutters and Tungsten Micro Drills. Bye, bye masking tape and Blu-Tak clump! This turned out even better than expected. I did manage to break two of the tabs, but I’ll just reinforce the assembly with an outer plate. ![]()
![]()
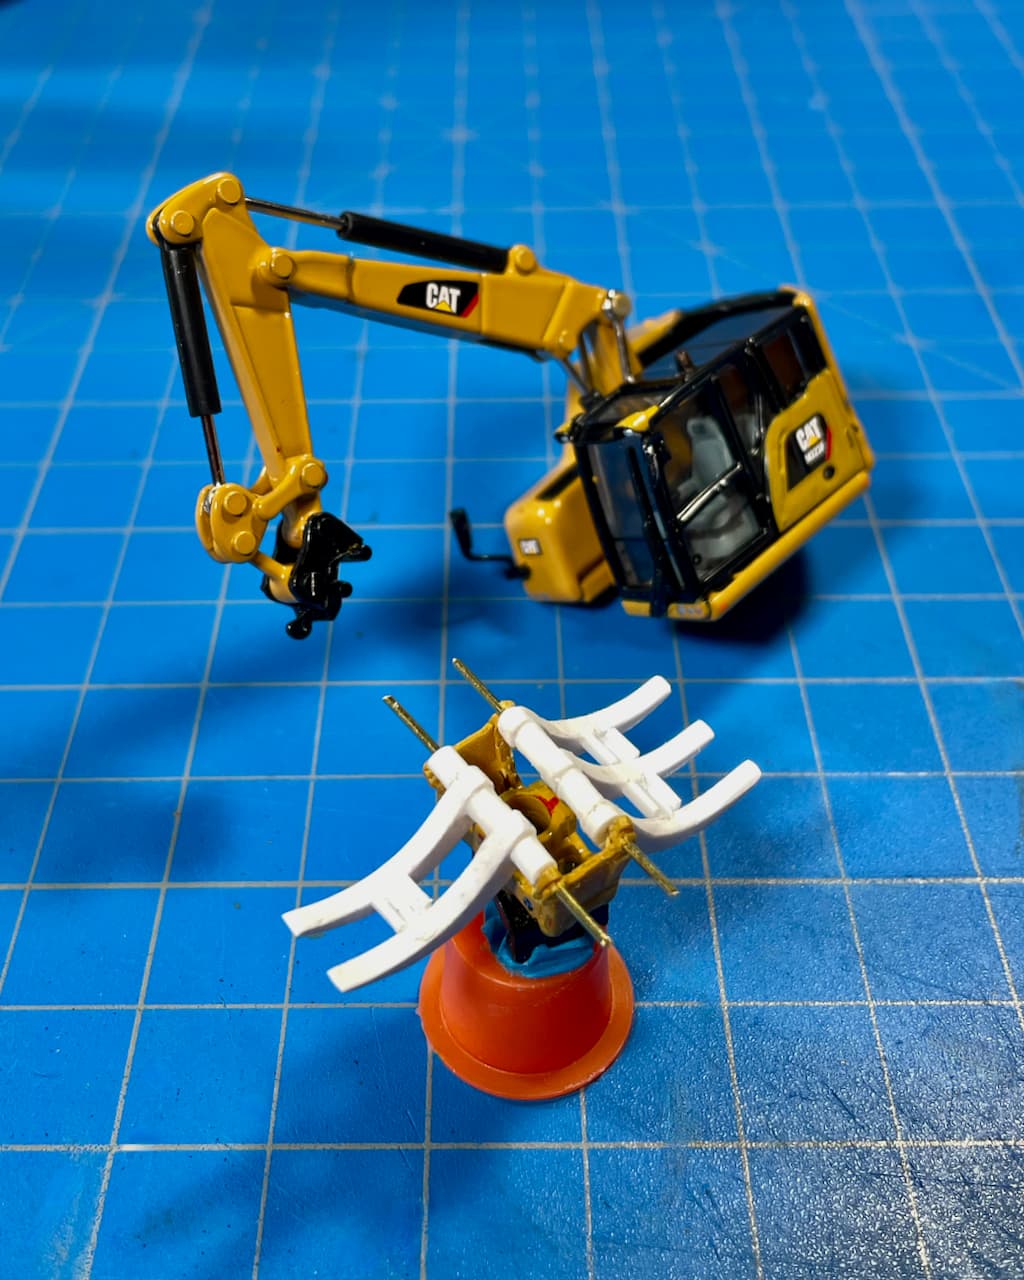
Time to clean everything up and refit the KLAW to its arm.
—mike …![]()
They made a game on Wolfenstein a few years back. Some quite decent hard plastic figures. Just in case somebody want to go full Wolfenstein ![]()
![]()
Don’t think I saw that. The computer games were a lot of fun though.