That looks so cool!
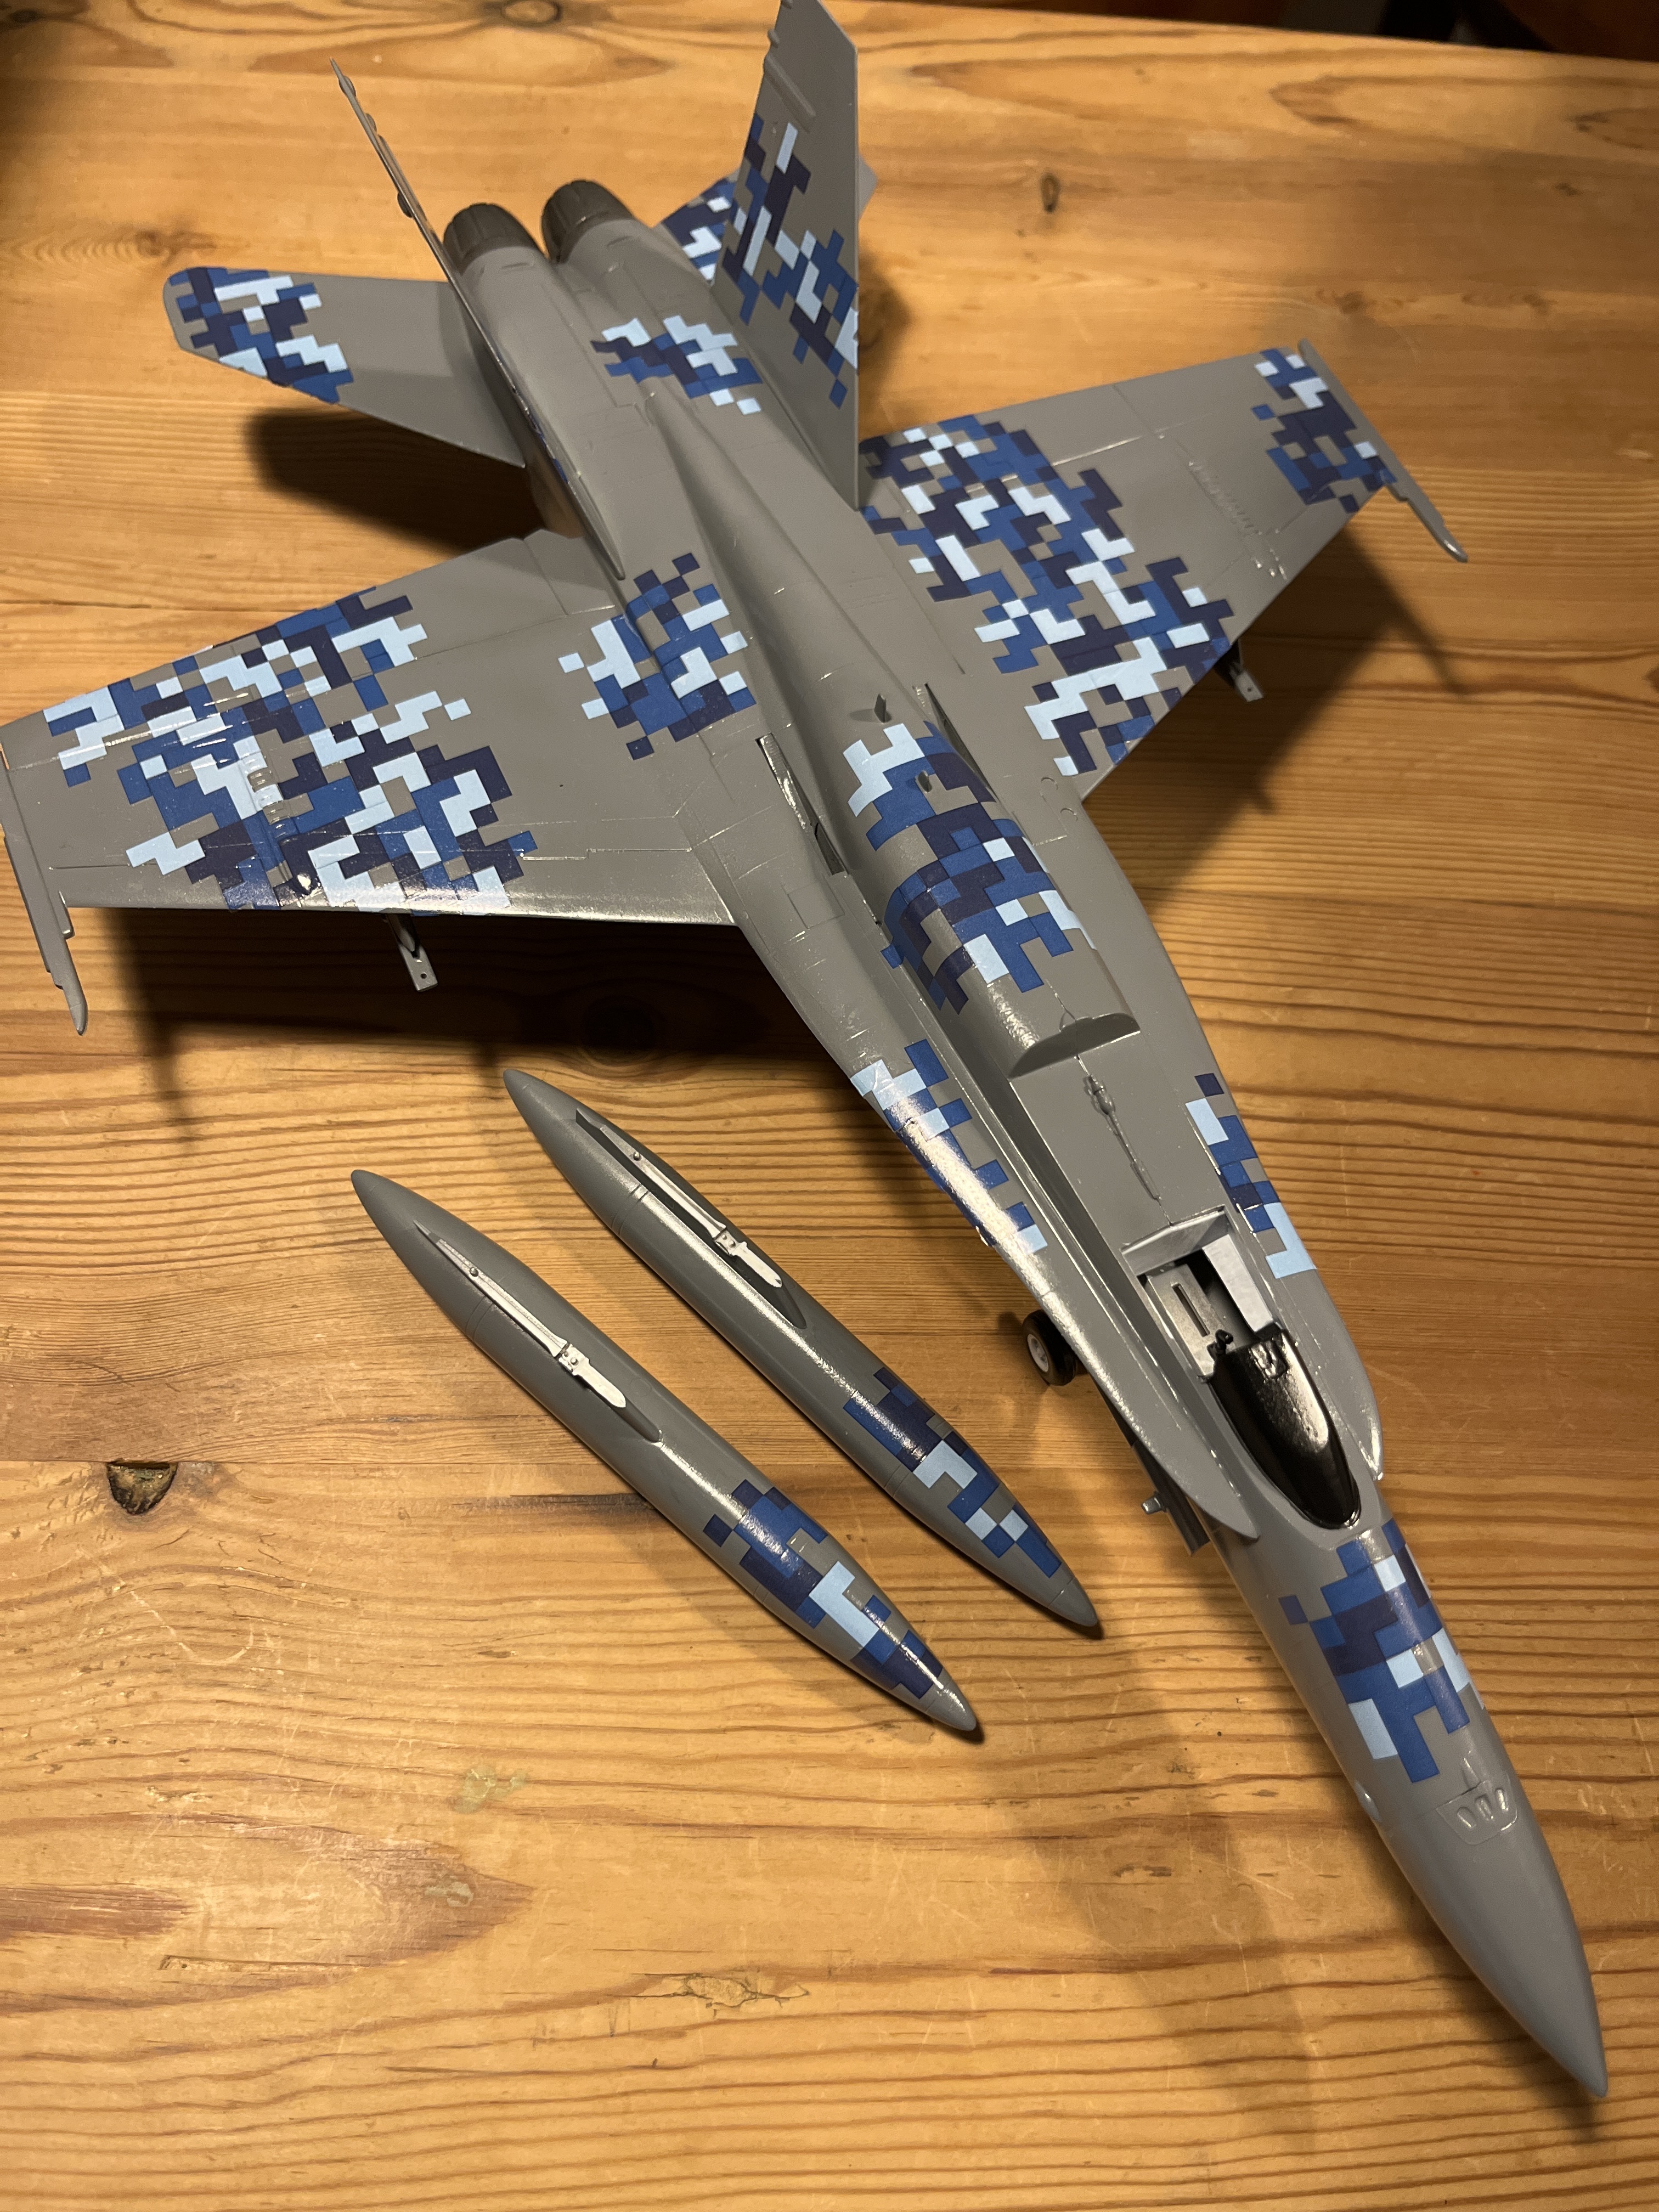
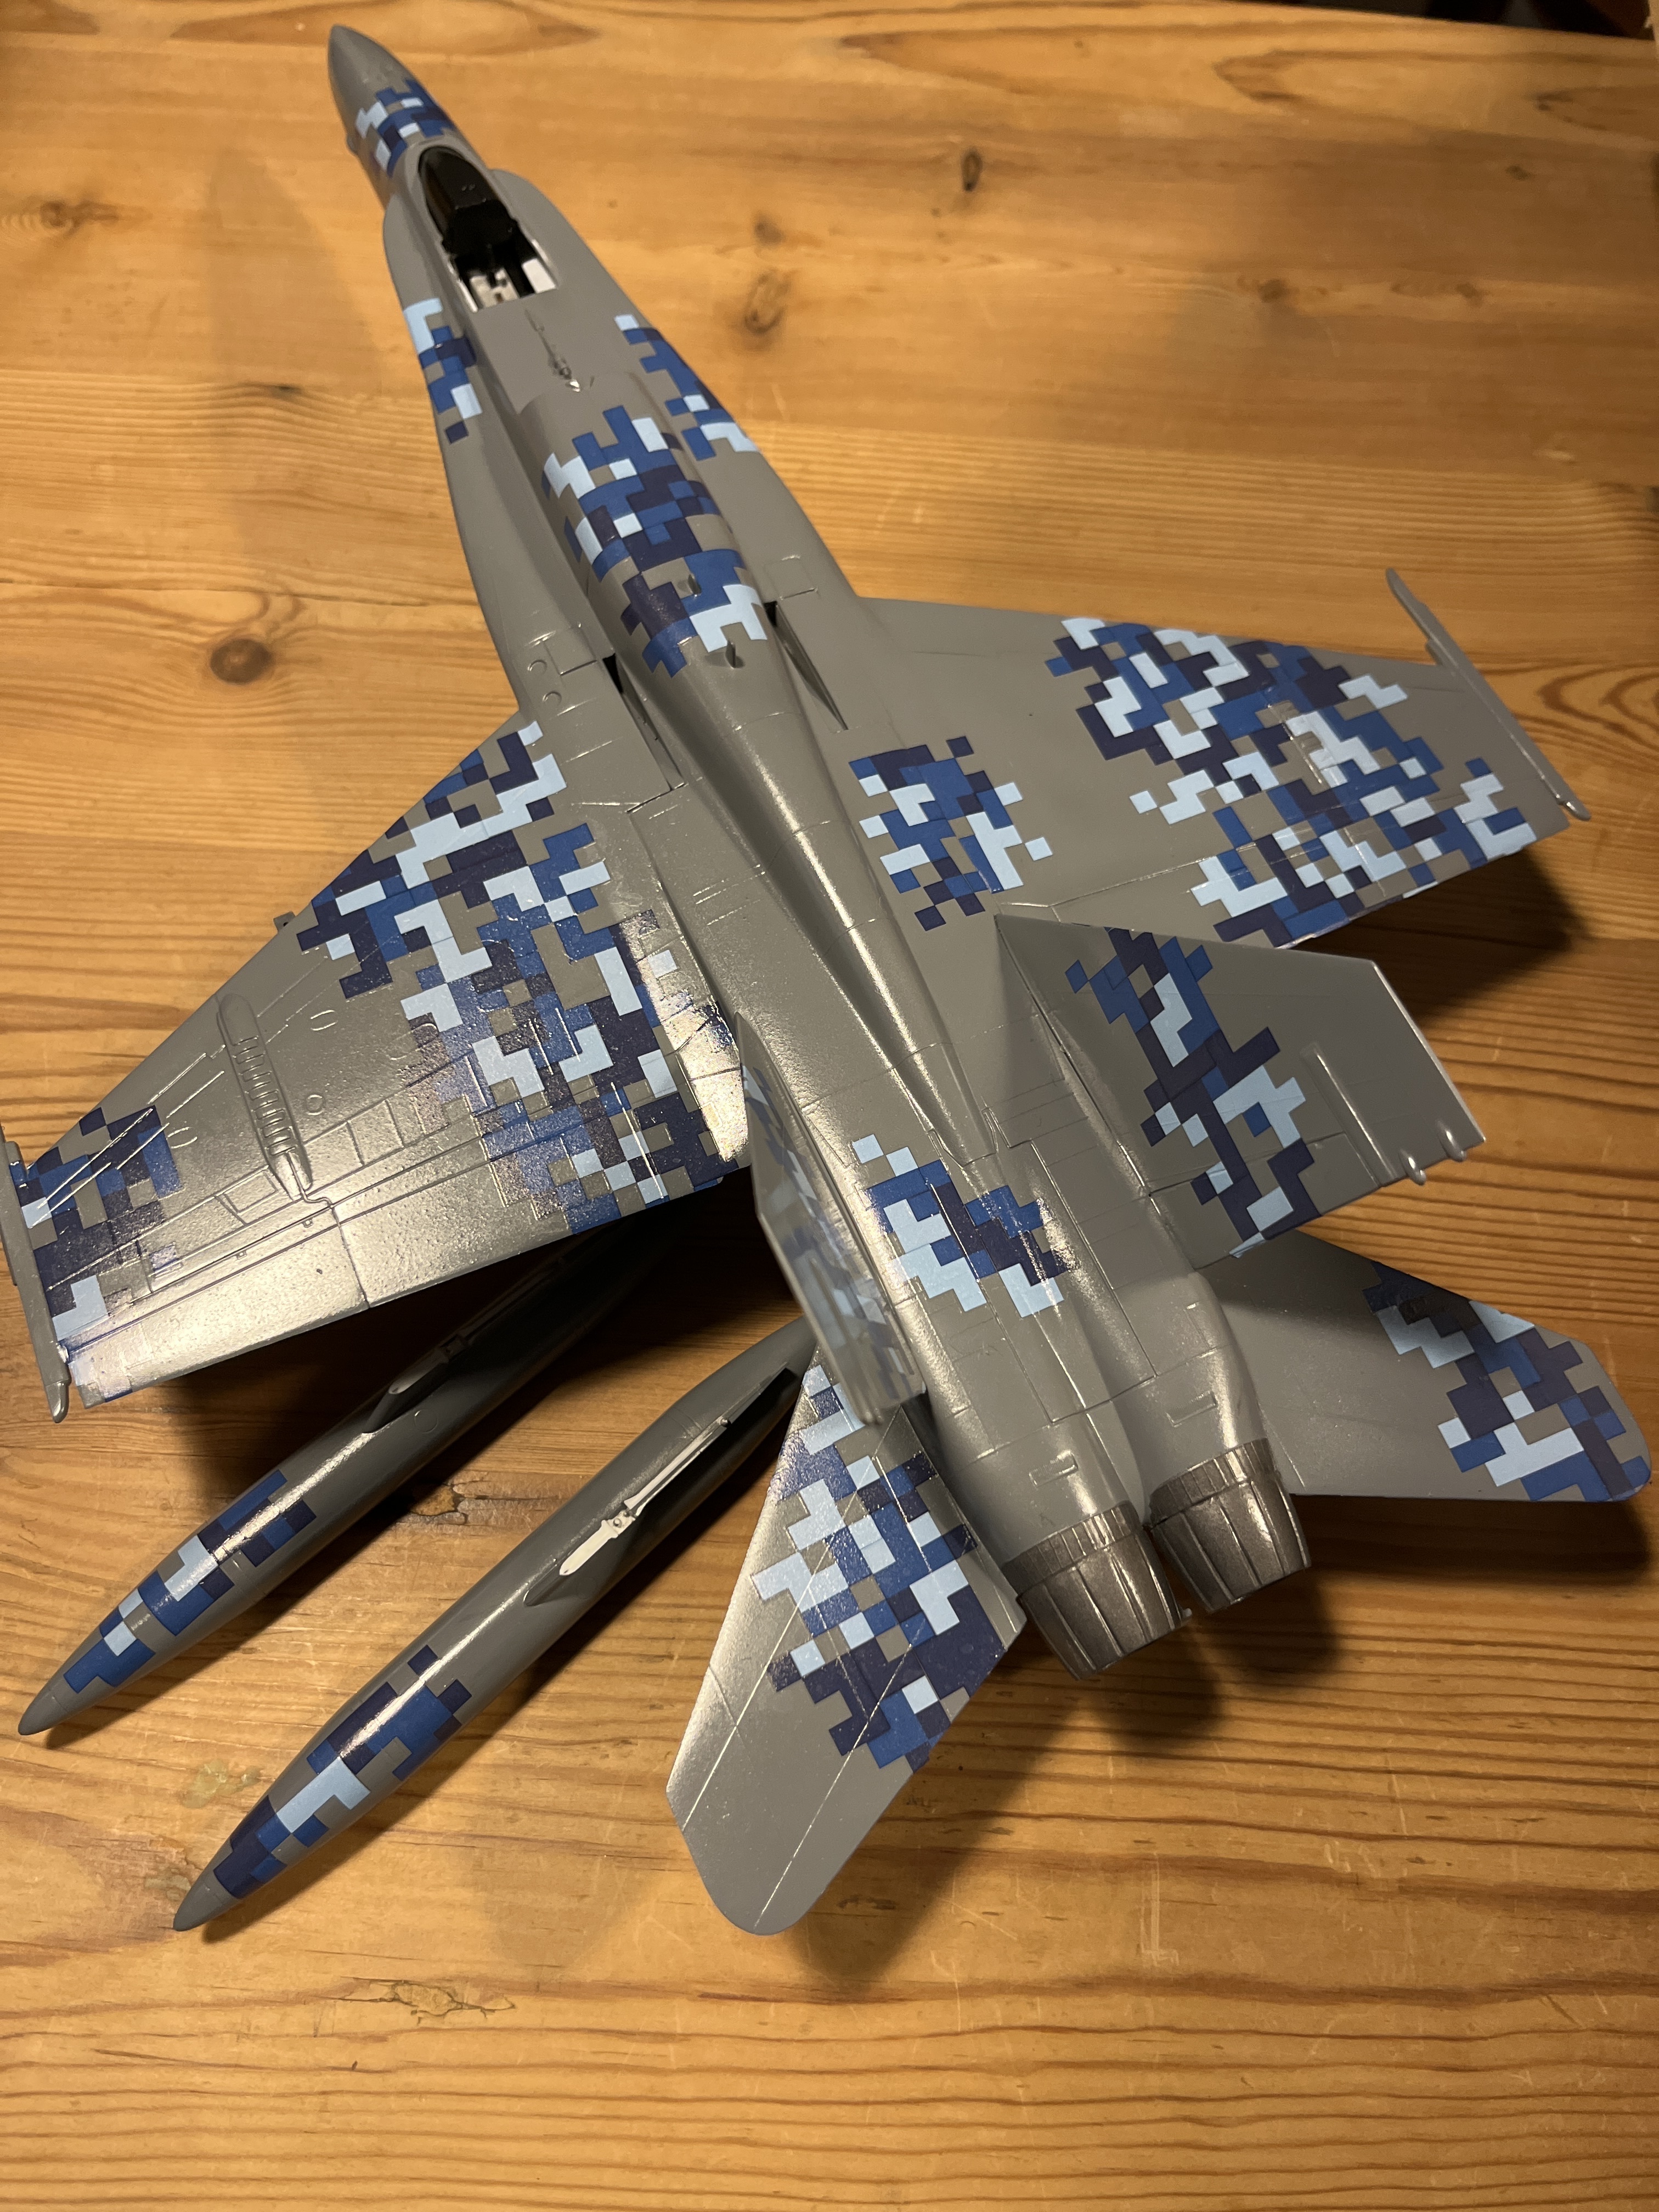
After 3-4 hours of decalling the main camouflage is on. Next are the Ukrainian Air Force markings.
More to follow ![]()
8 Likes
That looks pretty cool. The digital cammo does suit the Hornet.
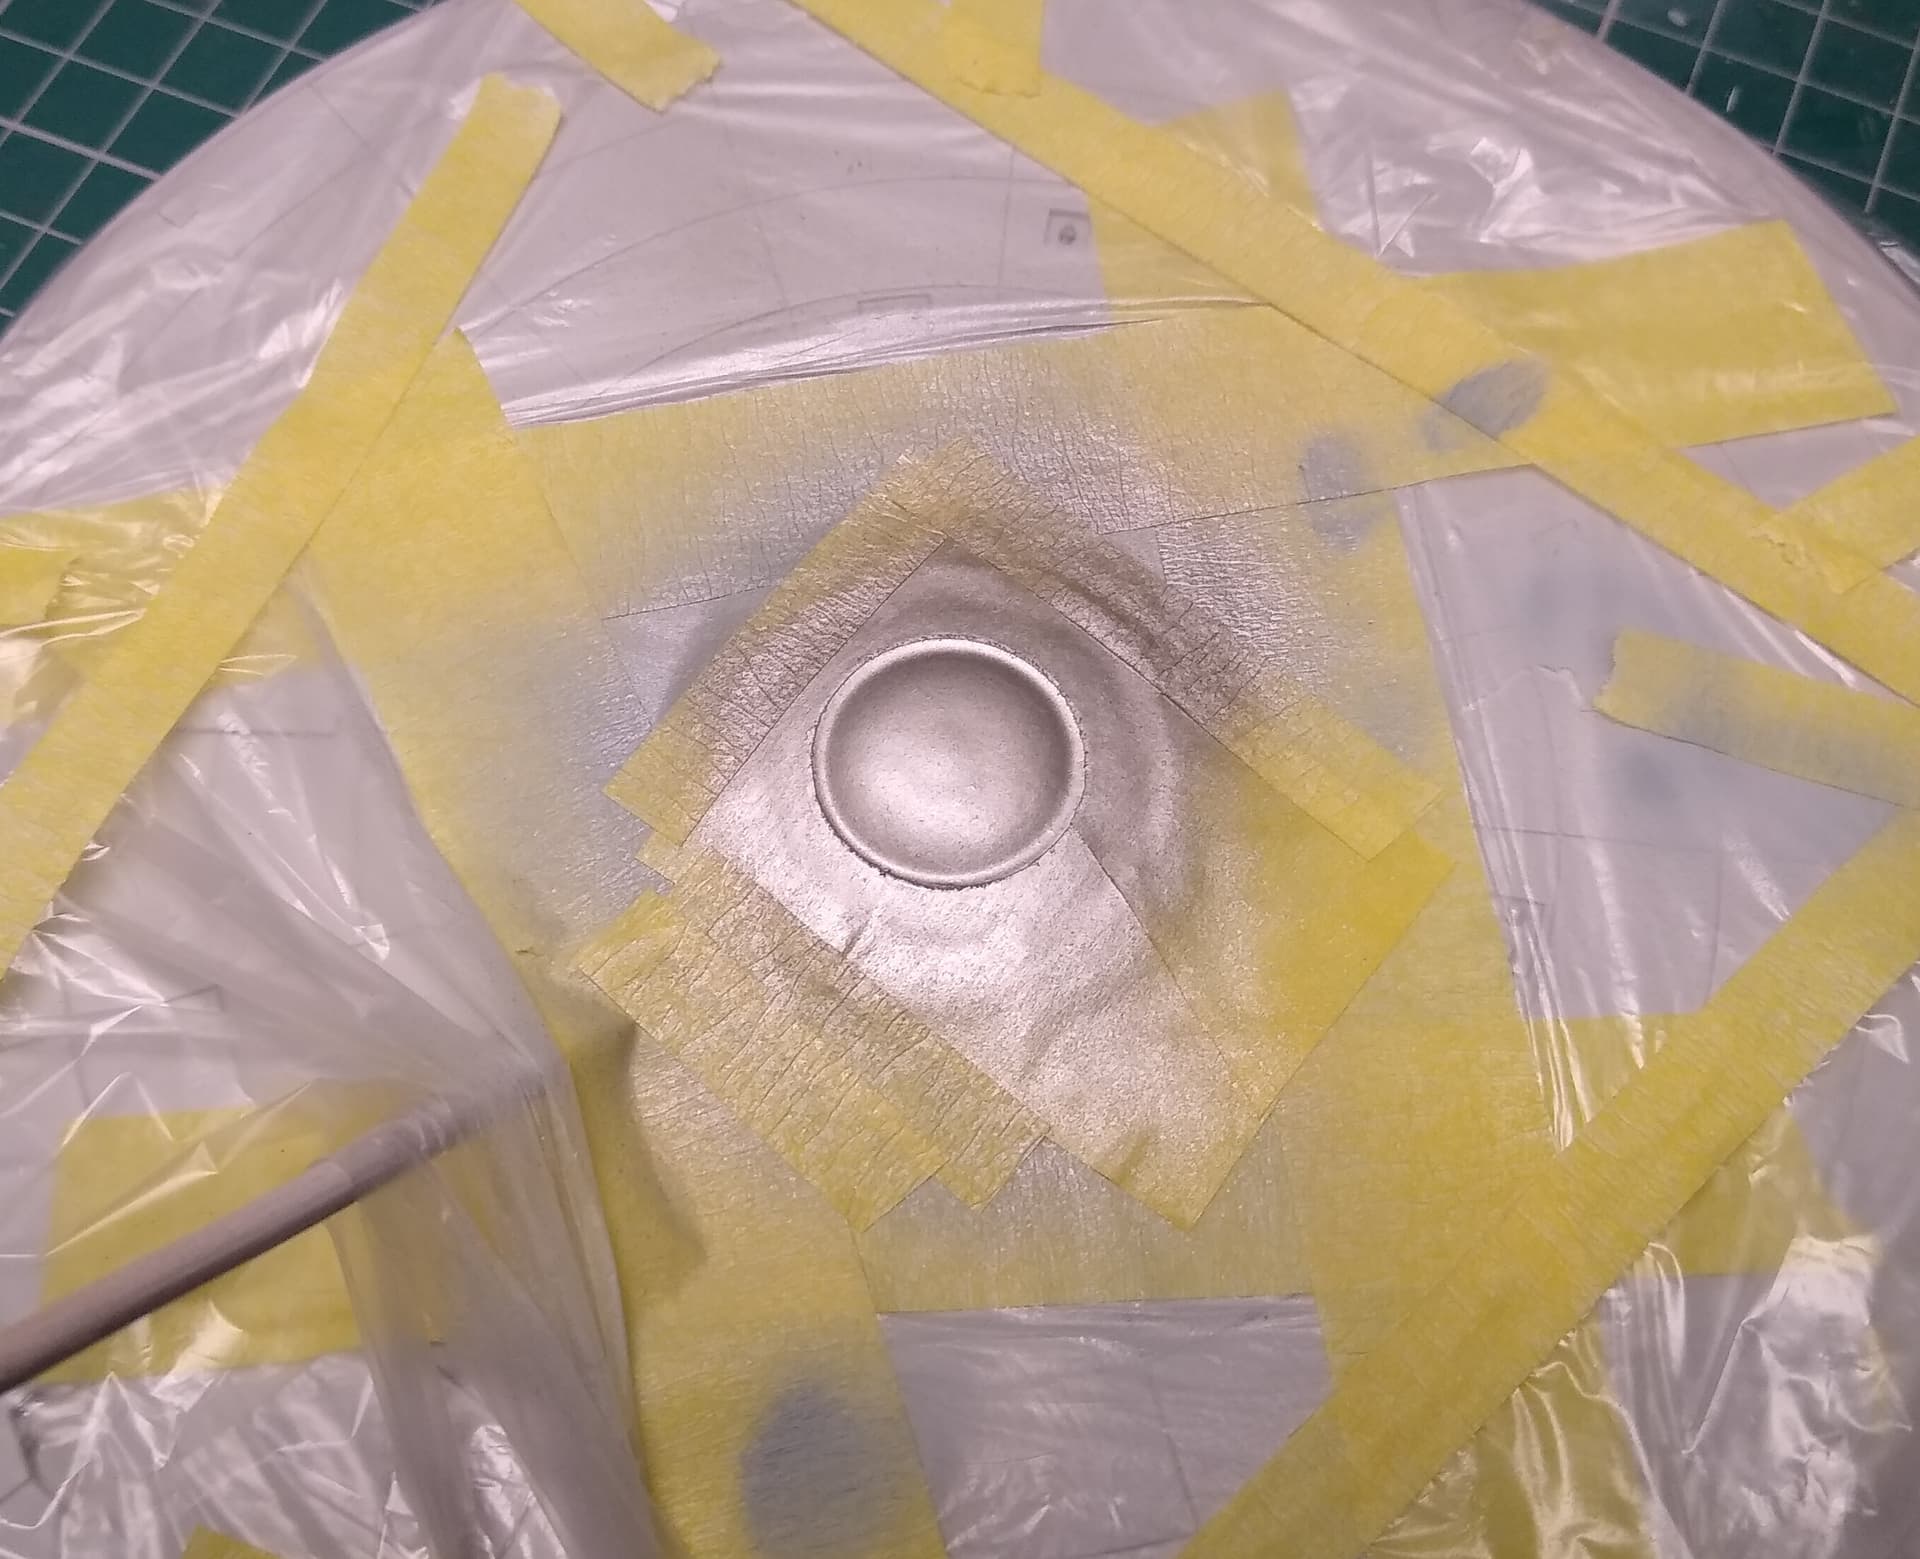
Little more work today. Masked out and sprayed the lower sensor dome with some Tamiya Titanium Silver. Think I’m finally getting to grips with working with their paints. I used Gunze’s thinner which seems to work a little better than Tamiya’s. Always found their own made paints dry too quickly and clogged up my airbrush. But, then again this was just a small amount of paint on a small part that took seconds to do. Will have to try on something larger. The smell is very different too, so maybe Gunze is made of something else? Tamiya’s always smelled strongly to me of Iso alcohol, whereas the Gunze was more like cellulose thinner. Anyway, I’m rambling. The results though are good.
To add a bit more visual interest, I’ve also picked out a few panels in different shades of greys. It’s subtle, but I think will give the effect seen on screen.
5 Likes

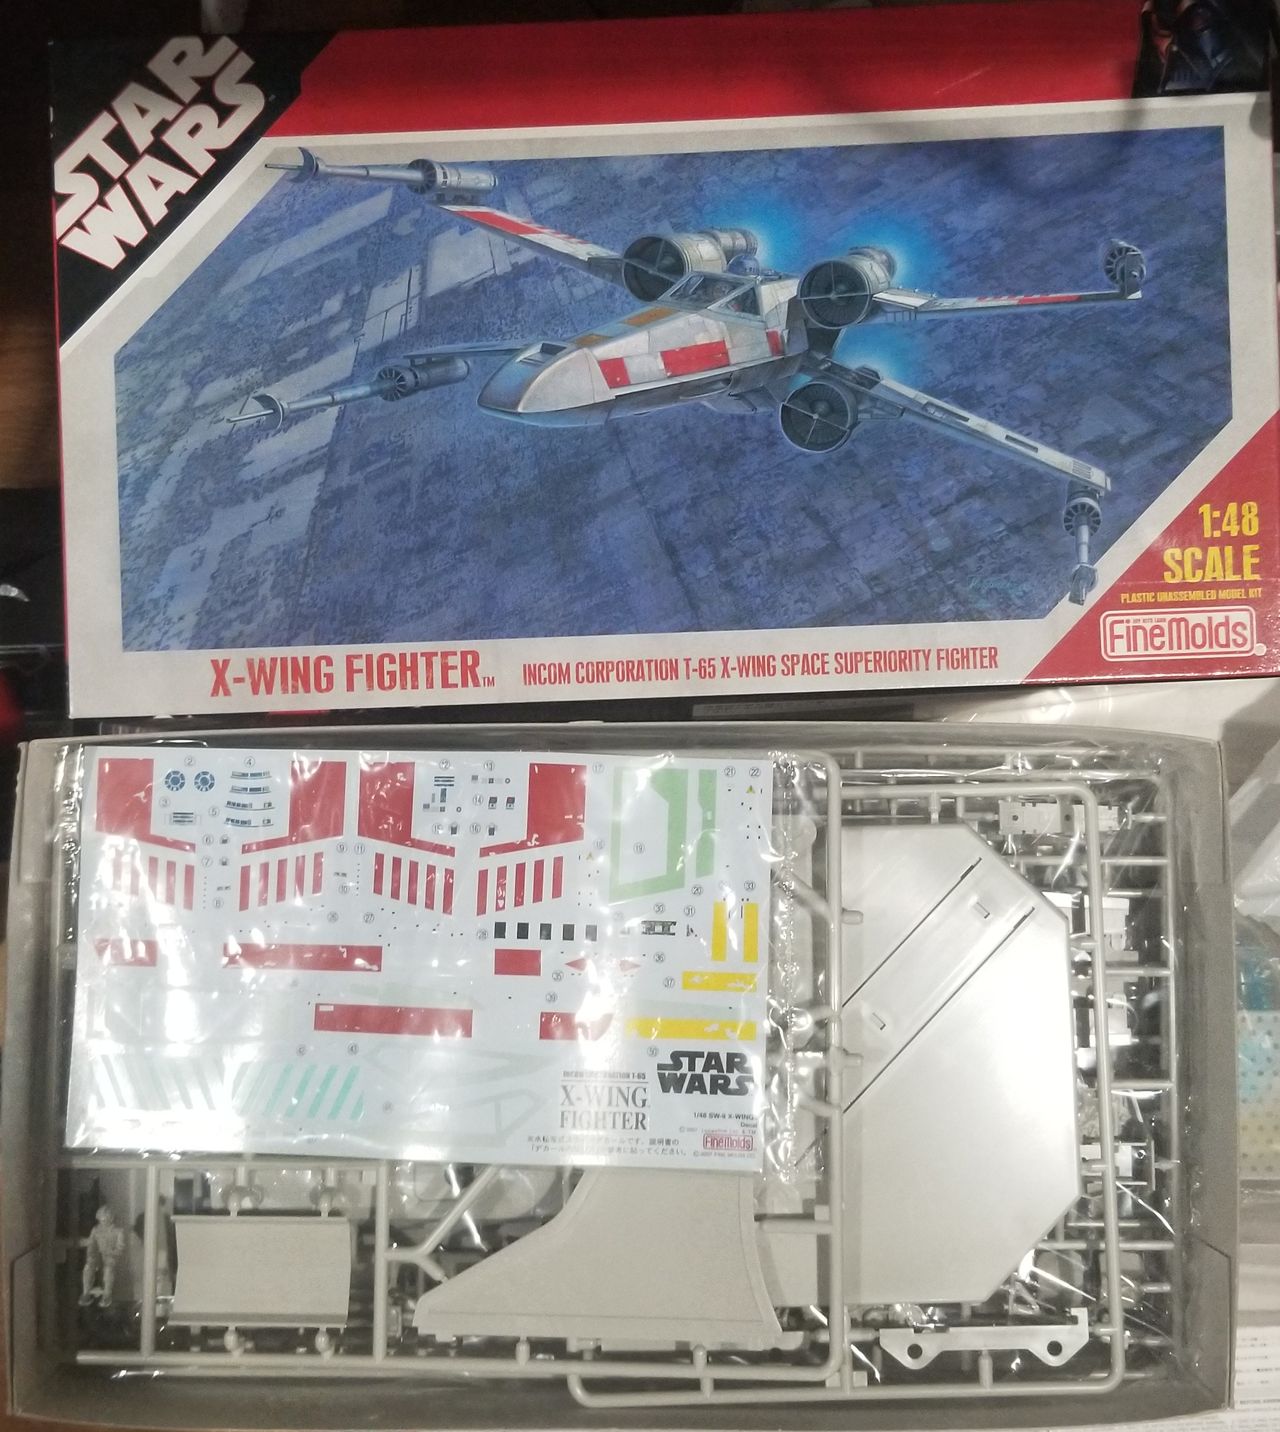
So I am late to this party but figured since I have a week between jobs soon, I might as well see if I can pull this kit from the stash and get it done.
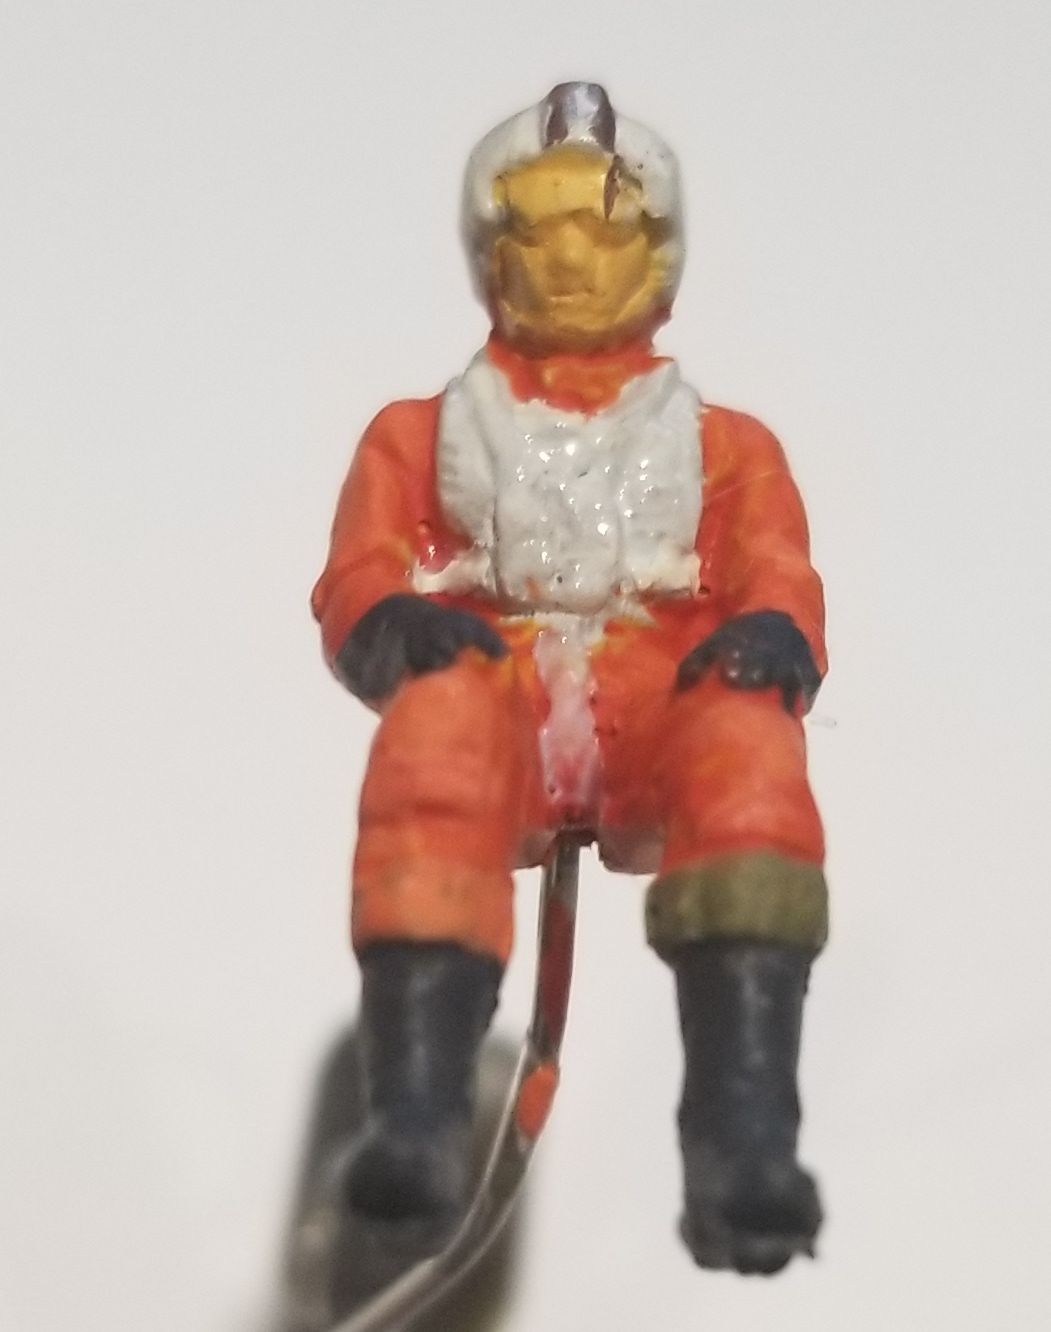
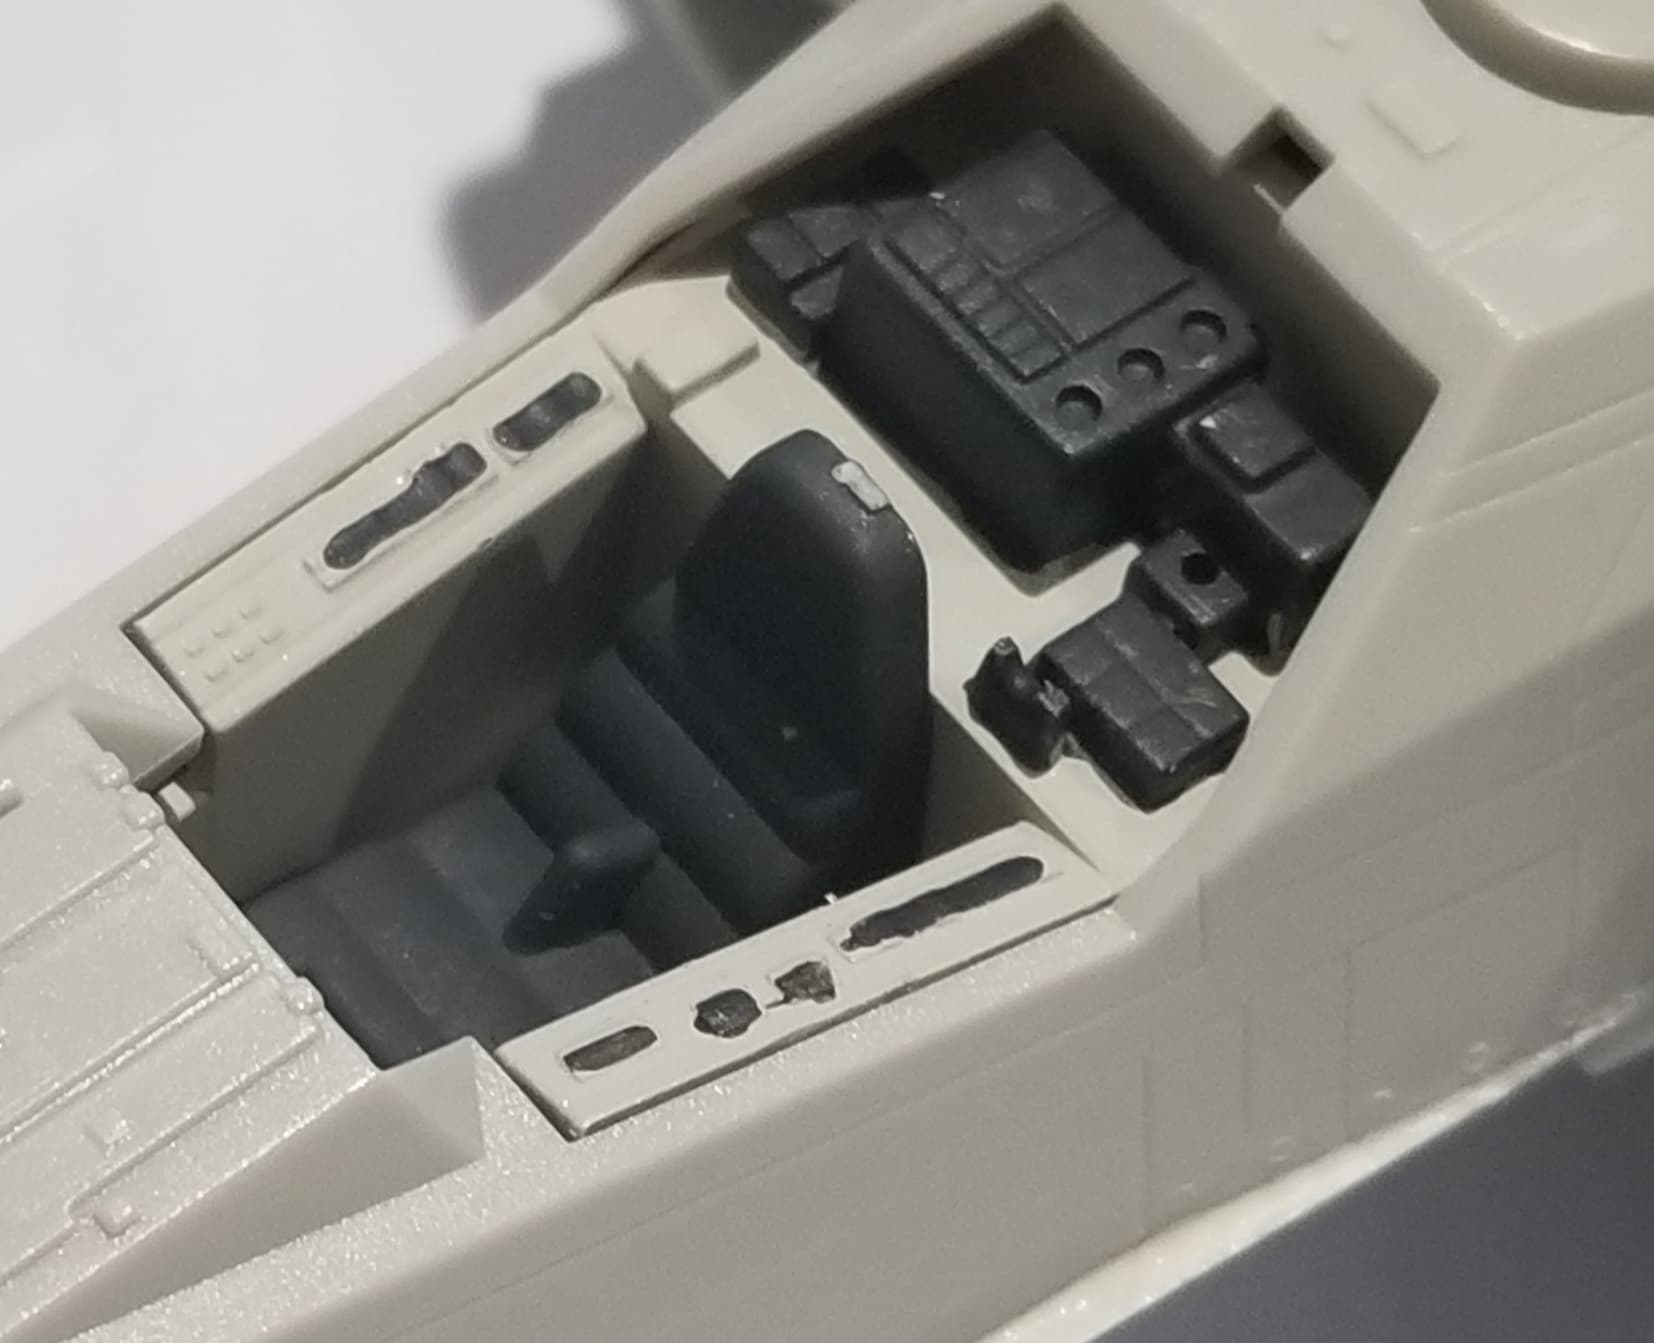
I figured I would start near the end with the pilot figure.
8 Likes
Magnesium Upside-down Cake
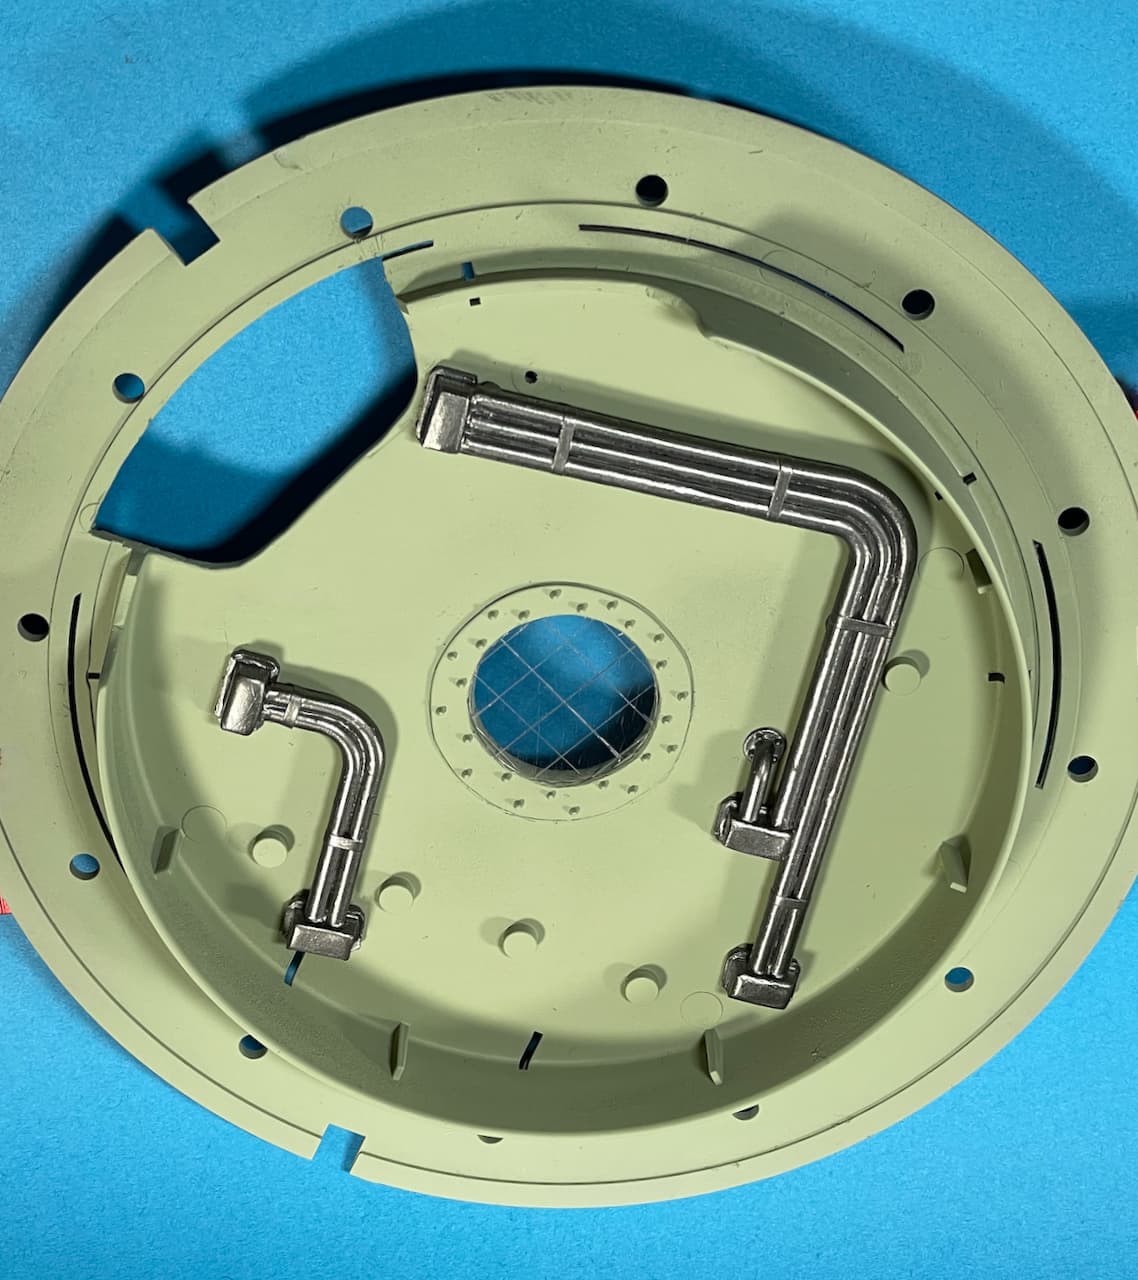
Small update to the Bomb Room ceiling…
Added Tamiya Masking tape bands and primed the pipes with Tamiya Fine Grey Surface Primer (87064).
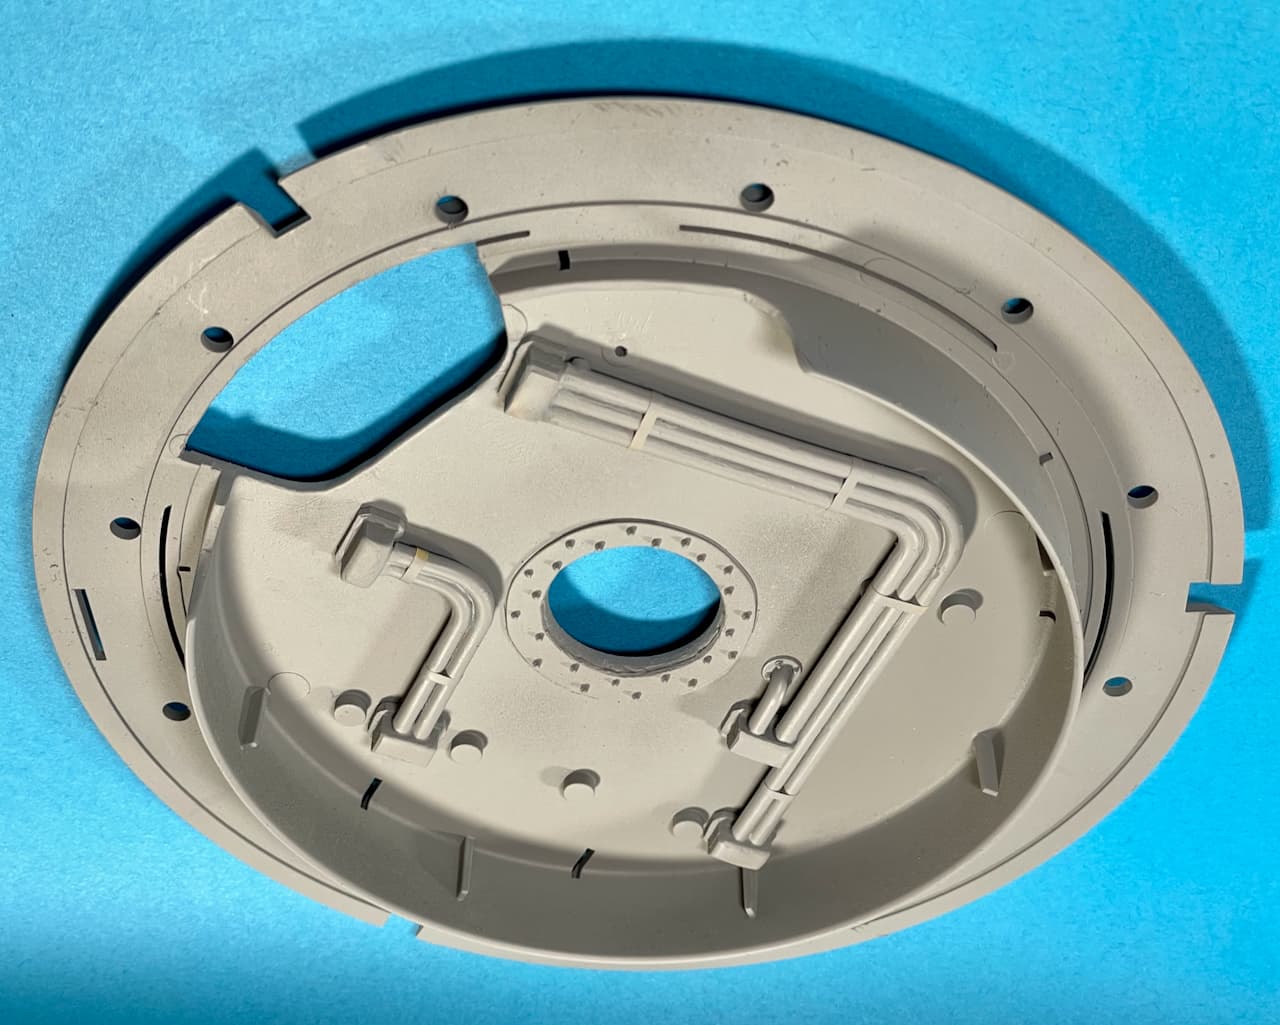
Painted the ceiling with Vallejo Interior Grey Green (71.305). For the pipes, I went with Vallejo Magnesium Metal Color (77.711) — went-down nicely strait out of the bottle (make sure to shake well). 🫨
That’s all for now. Thank’s for having a look.
—mike …![]()
10 Likes
Great to see further progress, Mike!
Iain, great choice! I have the revell reboxing of this kit and look forward to follow your build!
2 Likes
Smashed out a good pottion of this build over the weekend.
The fit is pretty good. It mostly goes together almost like a snap fit kit, and it looks like it’s designed to be able to swap the landing gear bays out between gear down and gear up so you can change how it’s displayed. I chose just to mount the bays permanently open and glued in.
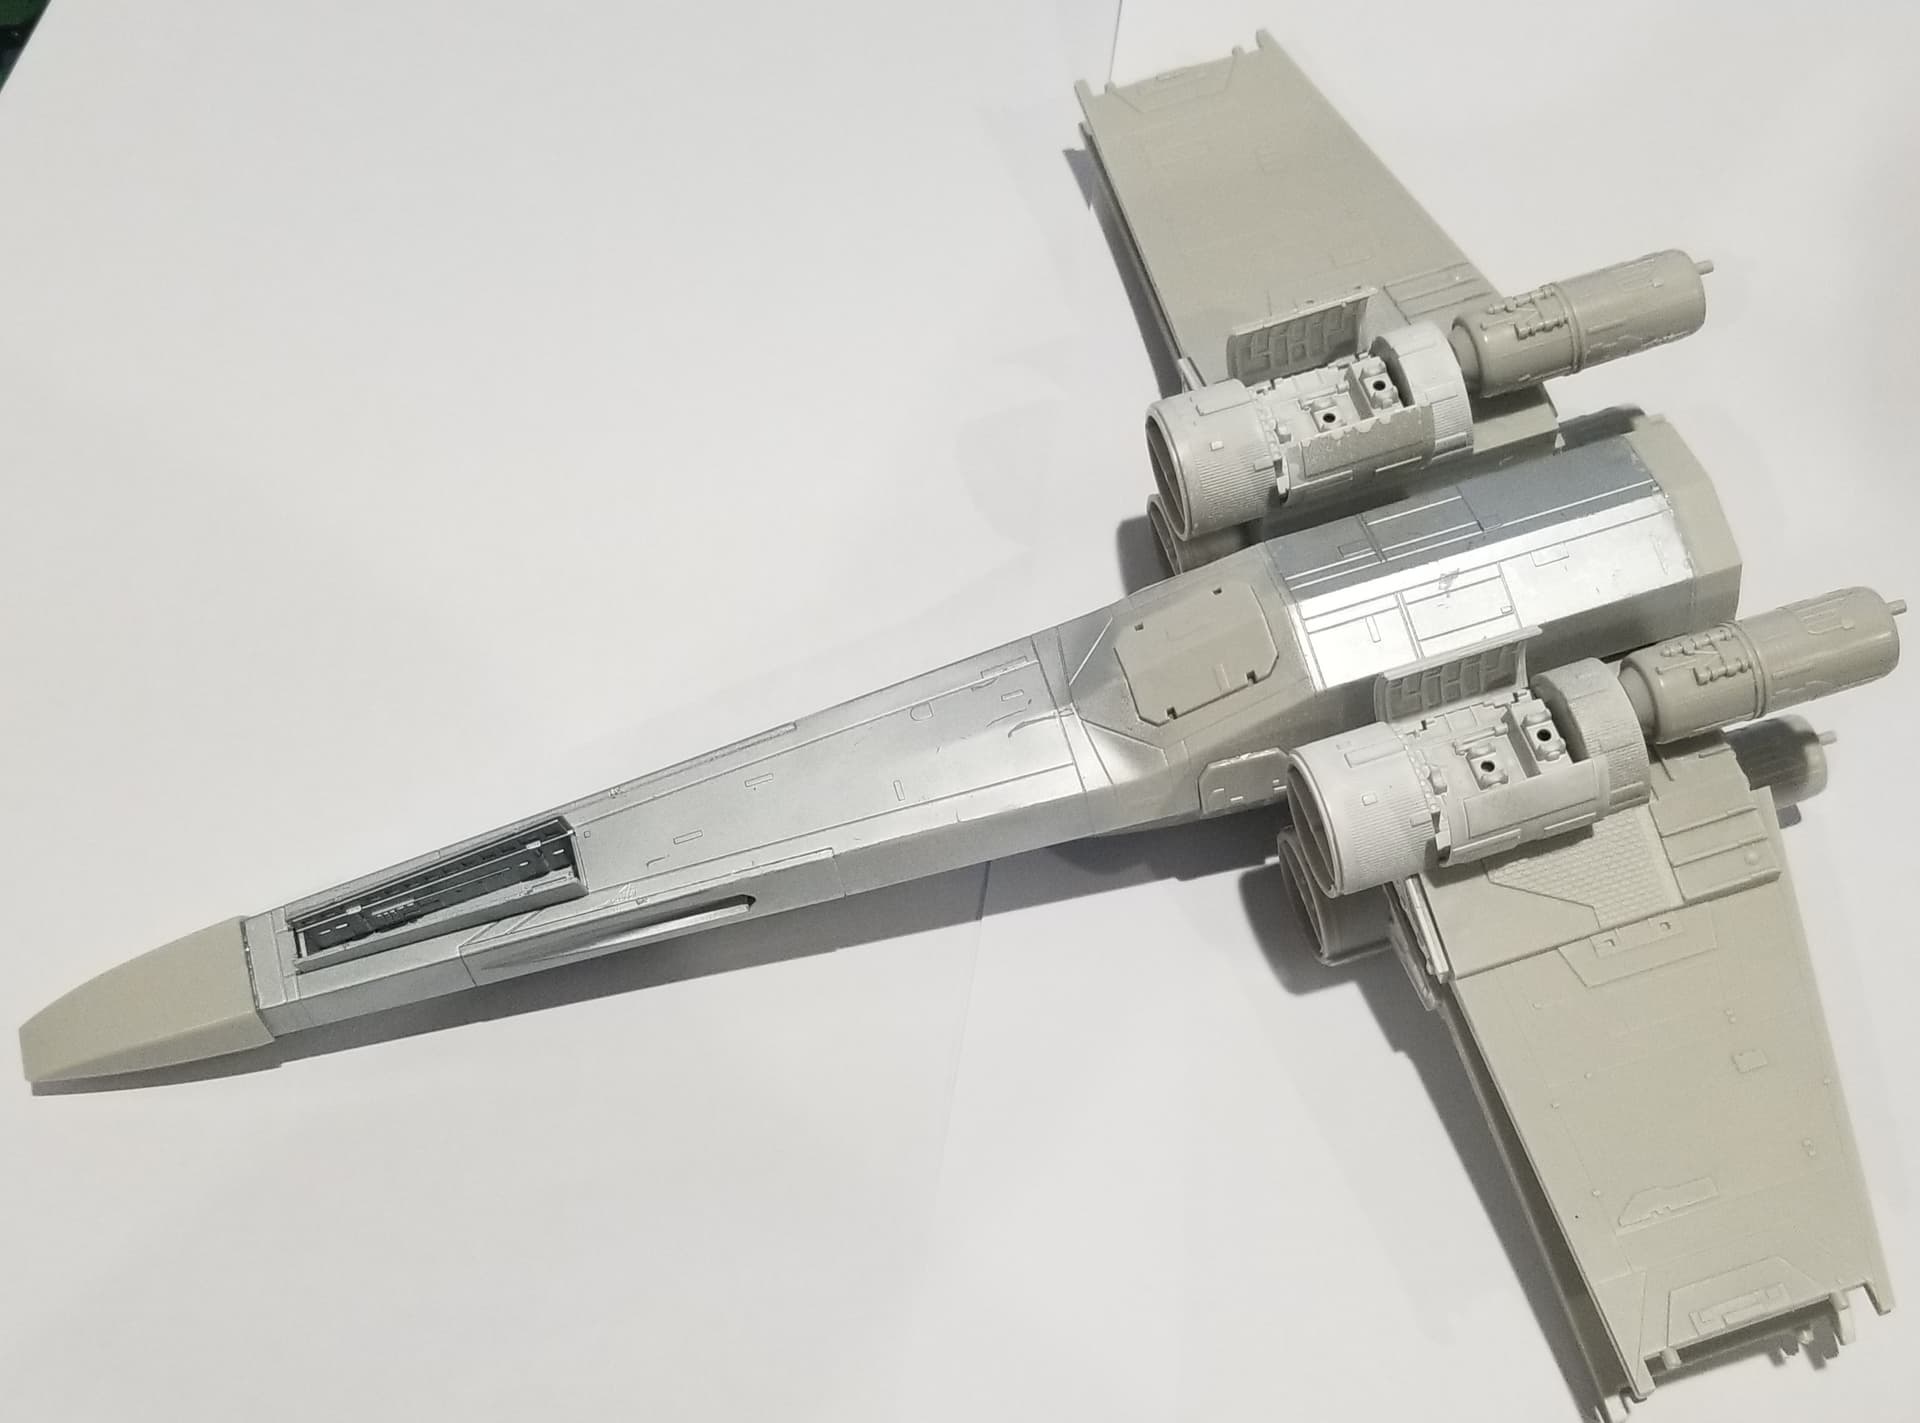

I will need to hit a few seams with a little sandpaper to clean them up, but so far there is only one spot that needs a little filler, and it’s almost hidden behind the rear of the wings so i could easily get away with ignoring it if i want.
One gripe is the sprue attachment points. Some of them are quite large and extend onto the mating surfaces so careful clean up is required.
7 Likes
Got jiggy with it…
Back in the Bomb Room, things are moving along again… ![]()
![]()
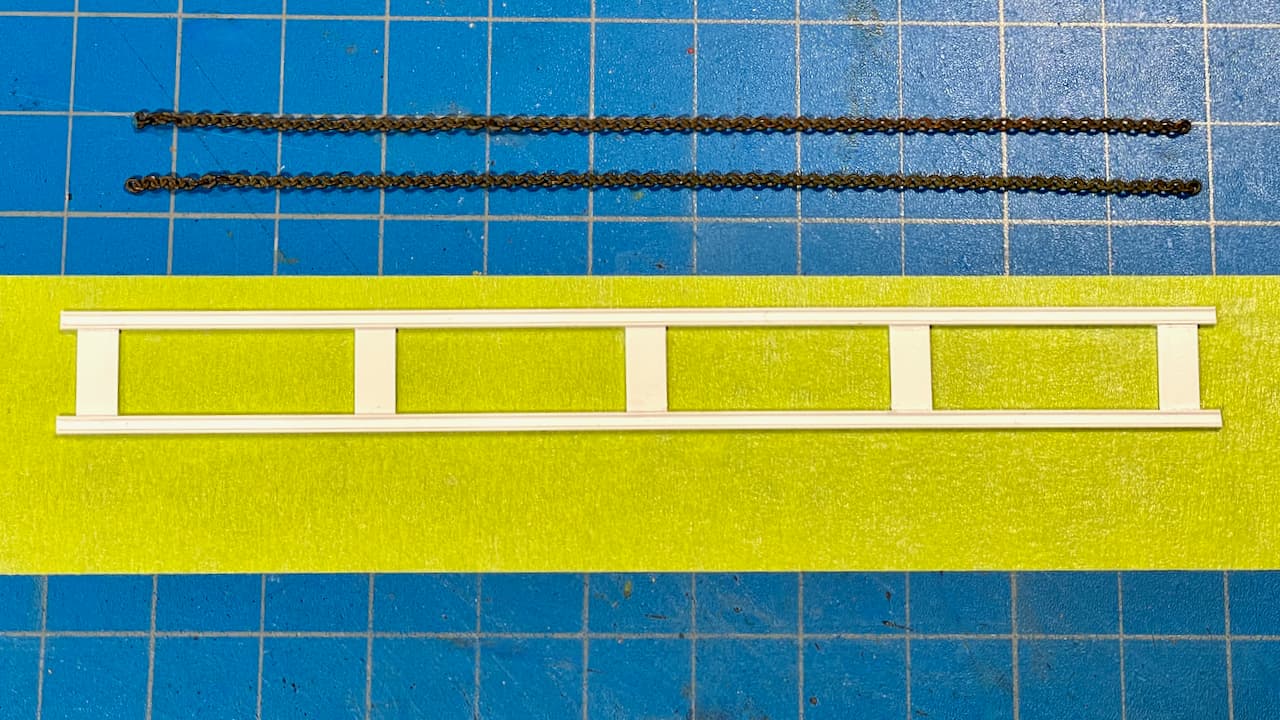
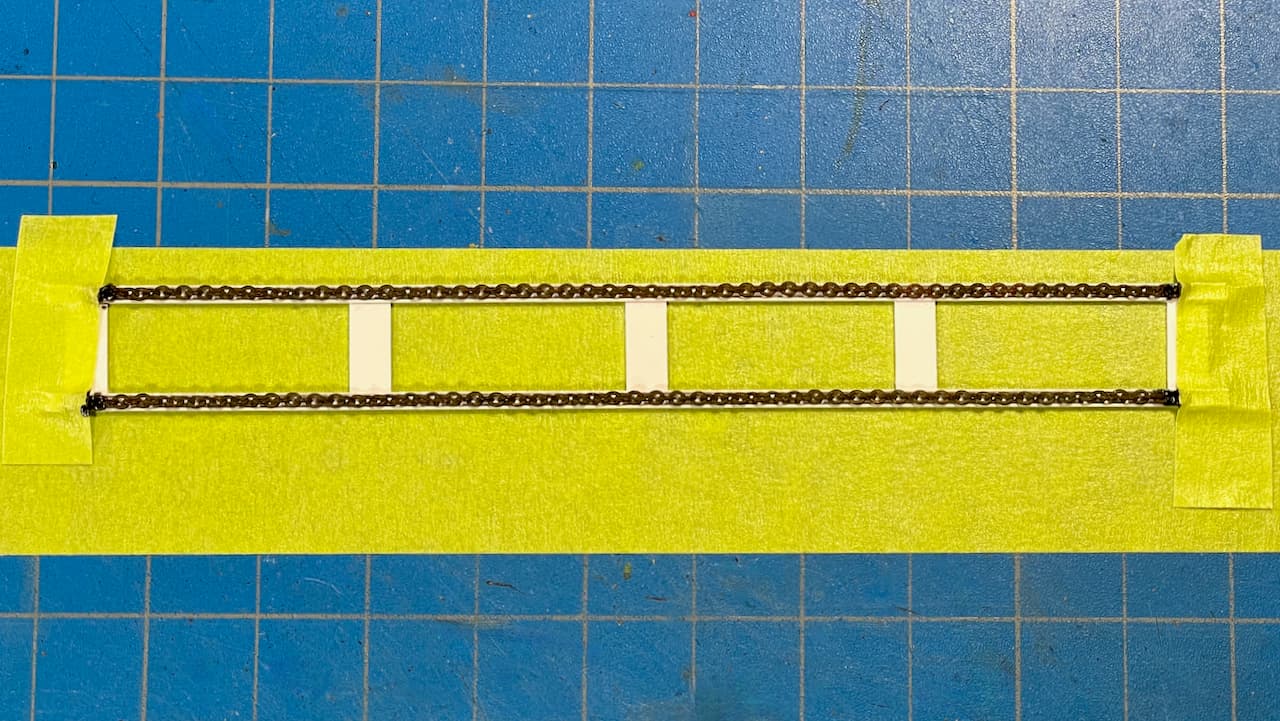
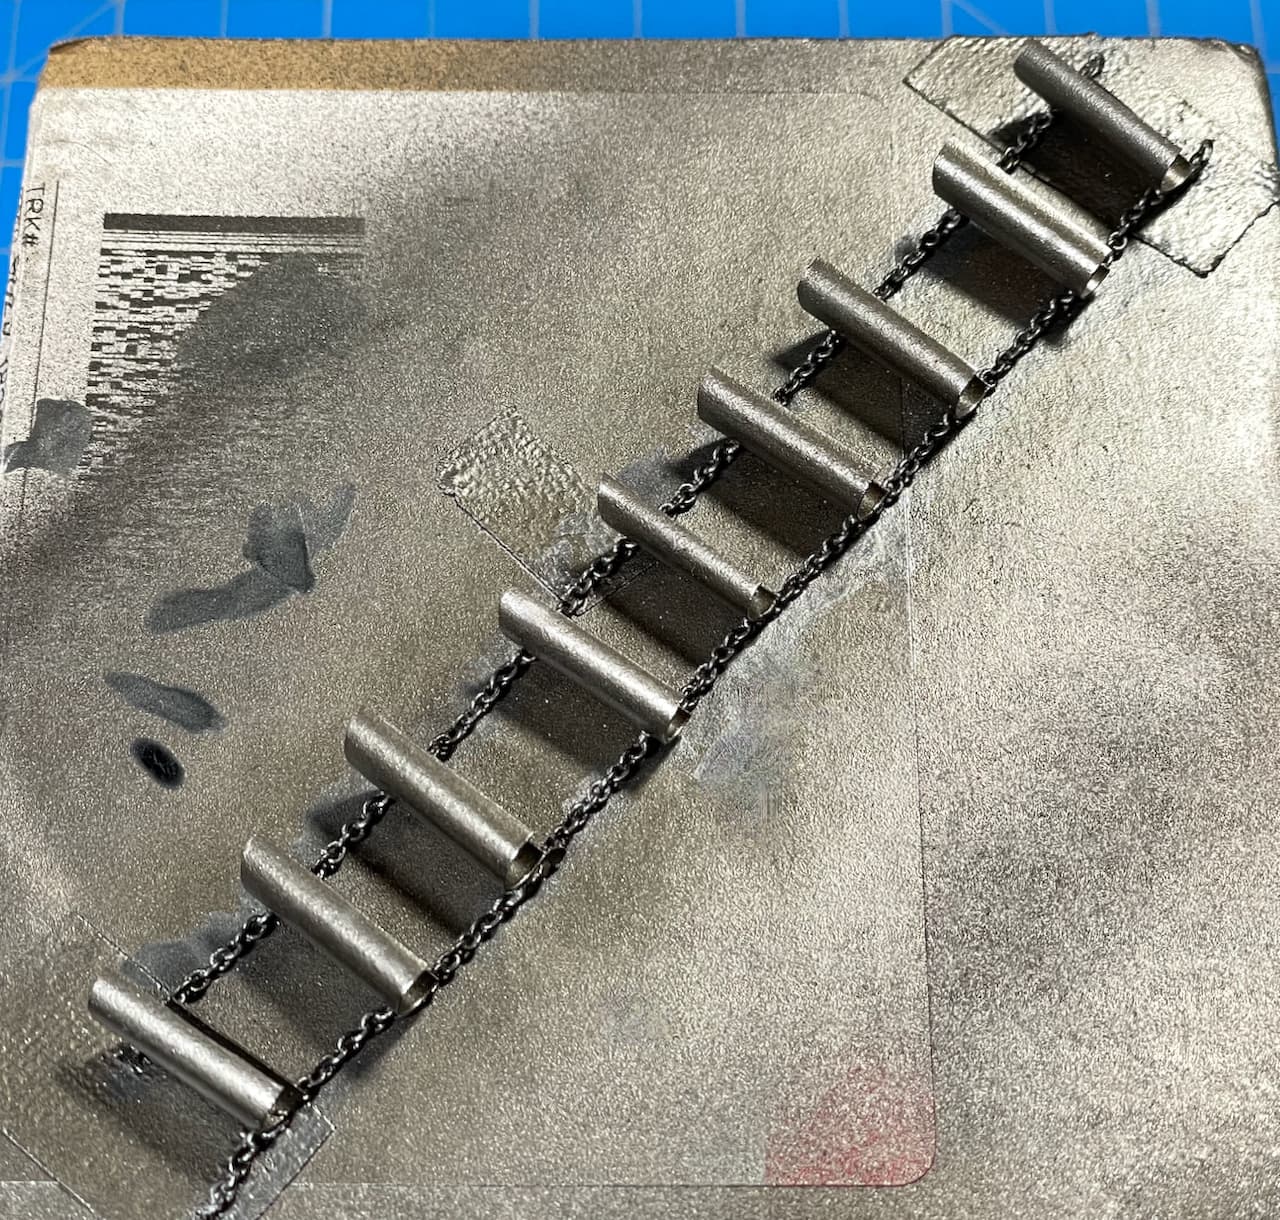
Chain Drive assembly jig. ![]()
![]()
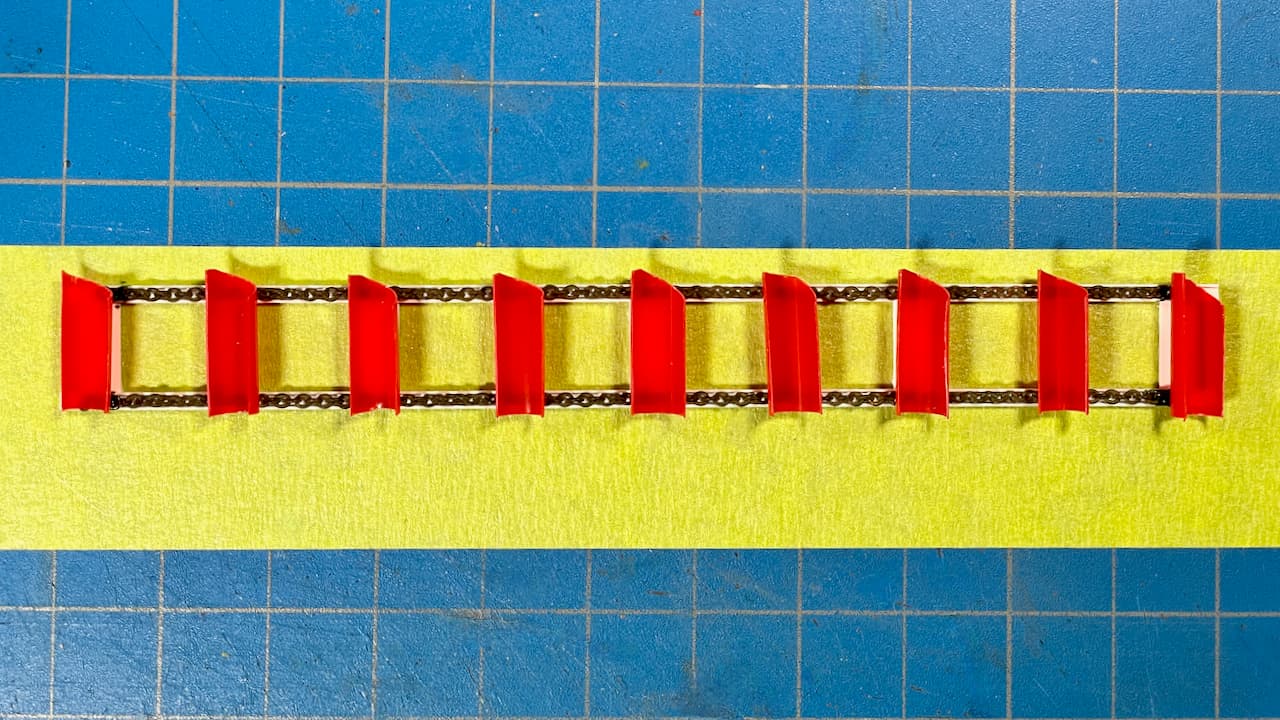
Barely holding together! … Plastic straws DO NOT play nice with CA! But then again, I already knew that from building the Carousel. … And you thought building track-links was hard! ![]()
Here’s a quick wonky dry-fit for the camera. 🫨 ![]() It’ll get stronger once I apply some paint to the bucket/drive assembly.
It’ll get stronger once I apply some paint to the bucket/drive assembly. ![]()


“You know what they say… if the bomb fits, drop it.” ![]()
![]()
Thank’s for having a look!
—mike ![]()
10 Likes
as long as there is a window to open… maybe two windows… opposites sides to get a cross draft… ![]()
2 Likes
![]()
![]()
![]()
And that reminds me… portholes! ![]()
![]()
![]() Last night, I did a clear window test by building-up the following products (left to right). …
Last night, I did a clear window test by building-up the following products (left to right). …![]()
- Microscale Micro Krystal Klear (MI-9)
- Microscale MicroMask (MI-7)
- Mr Masking Sol R (GSI M133)

—mike ![]()
6 Likes
Interesting. How did you build these up?
2 Likes
Krystal Klear is already designed for attaching canopies and forming ‘windows’ across small openings so it is just doing what it does. It is clear but you could likely add a little color to tint it.
The other two are viscous enough that they can be worked around the opening to form a film like that, as they are masking agents. Not all masks are translucent though so if you go that route make sure the mask you choose doesn’t dry opaque.
3 Likes
Awesome work! Loving the invention!
2 Likes
That’s a little work of art all on its own Mike!
2 Likes
Thank’s guys! Glad you like it!
@ KS: I used a plastic applicator tip similar to a toothpick and twirled each solution around the 5mm portholes. ![]() …
…![]()
- The ‘Microscale Micro Krystal Klear (MI-9)’ remained foggy after two days, most likely due to my ham-fisted application. I’ll go with a lighter touch next time around. Worth noting: it had very solid adhesion.
- The ‘Microscale MicroMask (MI-7)’ masked well… and for my purposes, it remained blue. Removal was fair.
- The ‘Mr Masking Sol R (GSI M133)’ masked well and again, it retained its green color. Removal was easiest of the three.
Hope that was helpful.
—mike …![]()
3 Likes
yes, it was. Thanks for the detailed explanation.
One more question, Was the part with the port holes in that pictured position during application and curing?
2 Likes
@ KS: Yes, which accounts for the gravity-induced drooping, if that’s what you’re wondering.
—mike
2 Likes
Yes, Sir. That was exactly what I was asking ![]()
2 Likes
Still a bit wonky, but stronger after paint. 
Vallejo Black Primer (73.602), then Vallejo Exhaust Manifold Metal Color (77.723).
.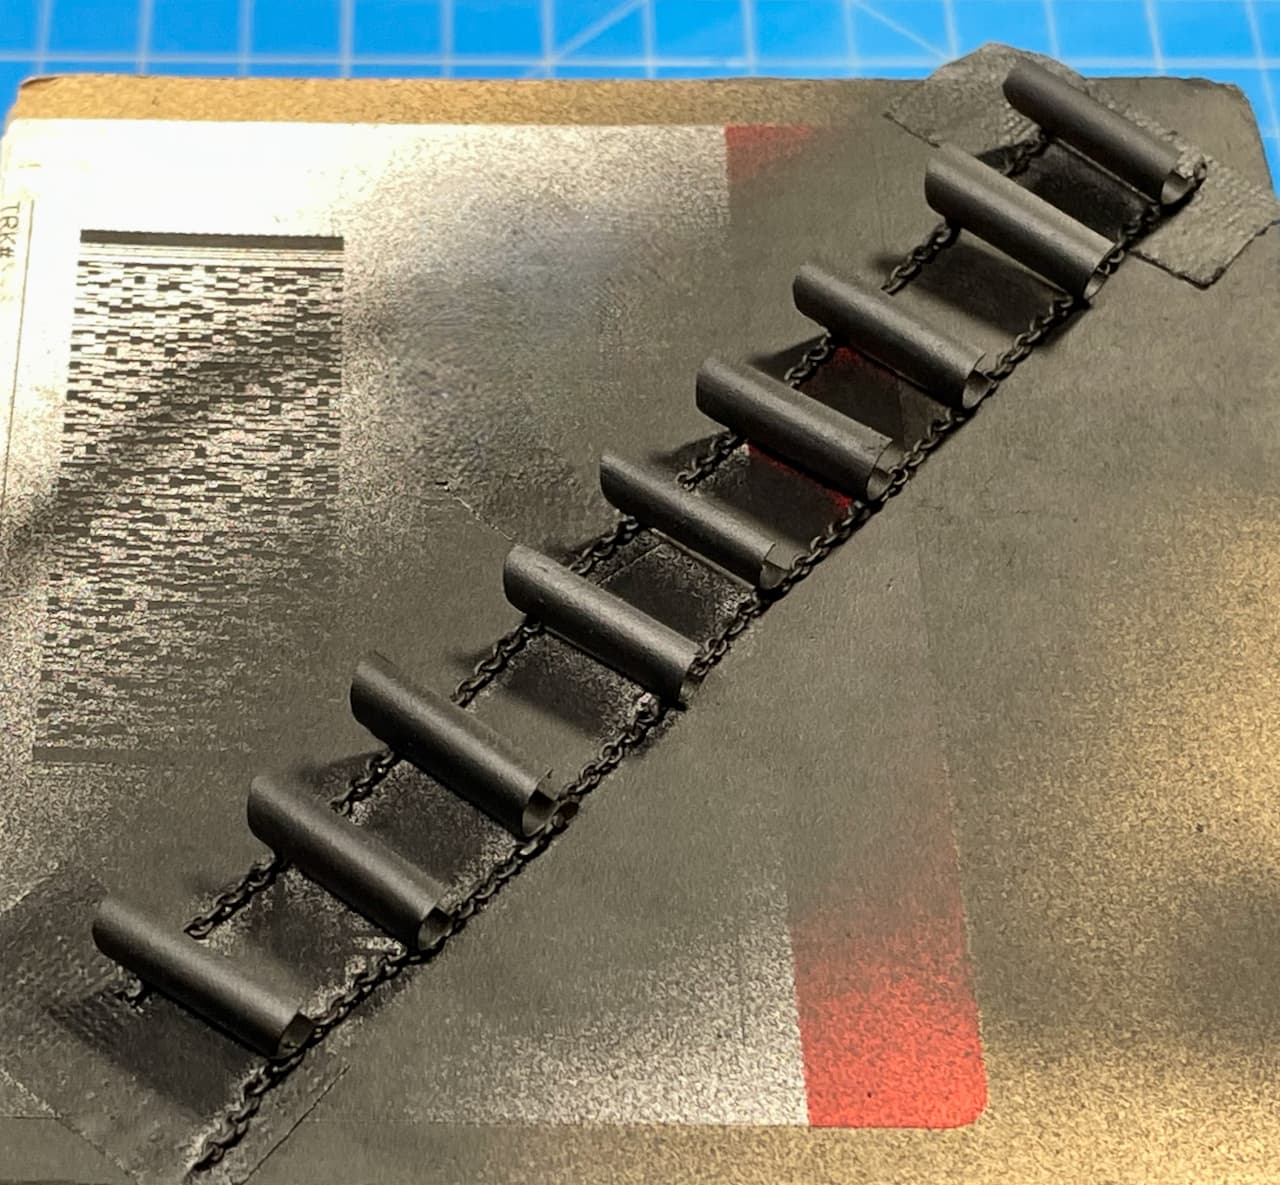

Finally, I used the hairy-stick to detail the chains with Vallejo Magnesium Metal Color (77.711) for a bit of contrast.

“Schnell! Get the gloo, you nincompoop!” ![]()

![]()
![]()
![]()
![]()
—mike
10 Likes