Hah, the audio is perfect!
2 Likes
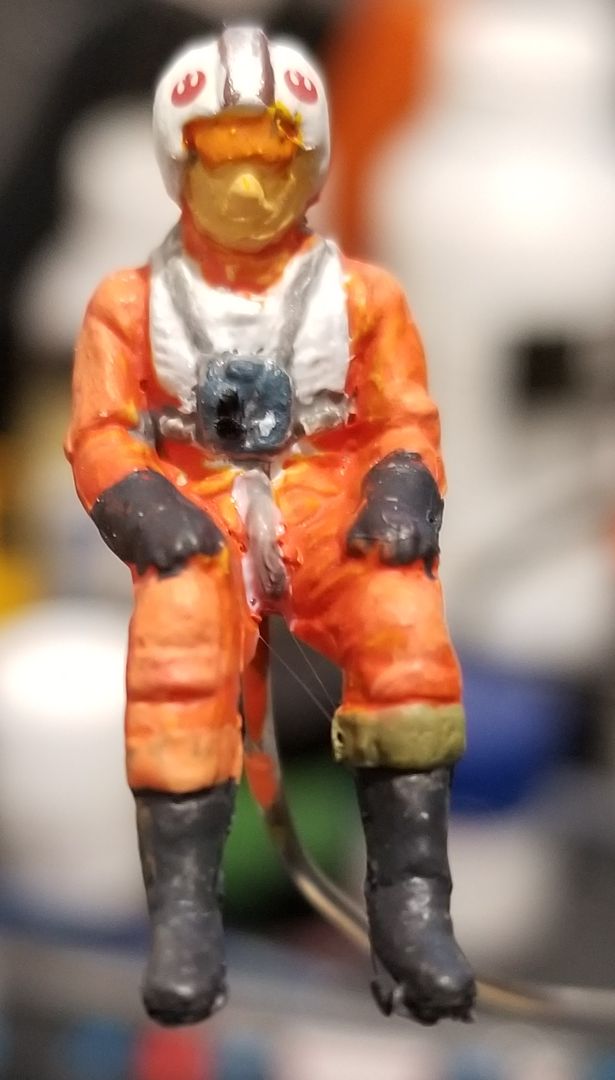
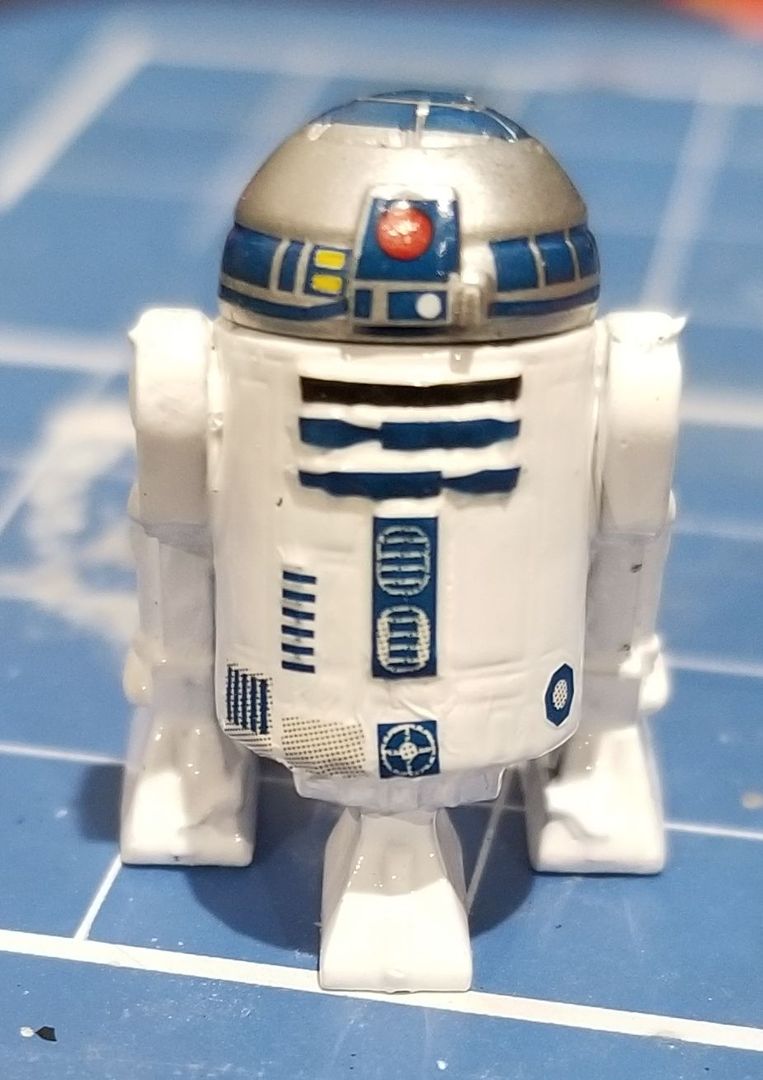
X-Wing is gloss coated and drying, so I finished up my pilot, and did some work on the R2-D2. R2 still needs his rear and leg decals added.
8 Likes
Coming along nicely Iain.
2 Likes
This was meant to go into the ‘The Big 3 Universes’ group build.
4 Likes
Whoops wrong group build…
2 Likes
Hahahahaha! Lost in space! ![]()
—mike …![]()
4 Likes
‘Safety Last’ 

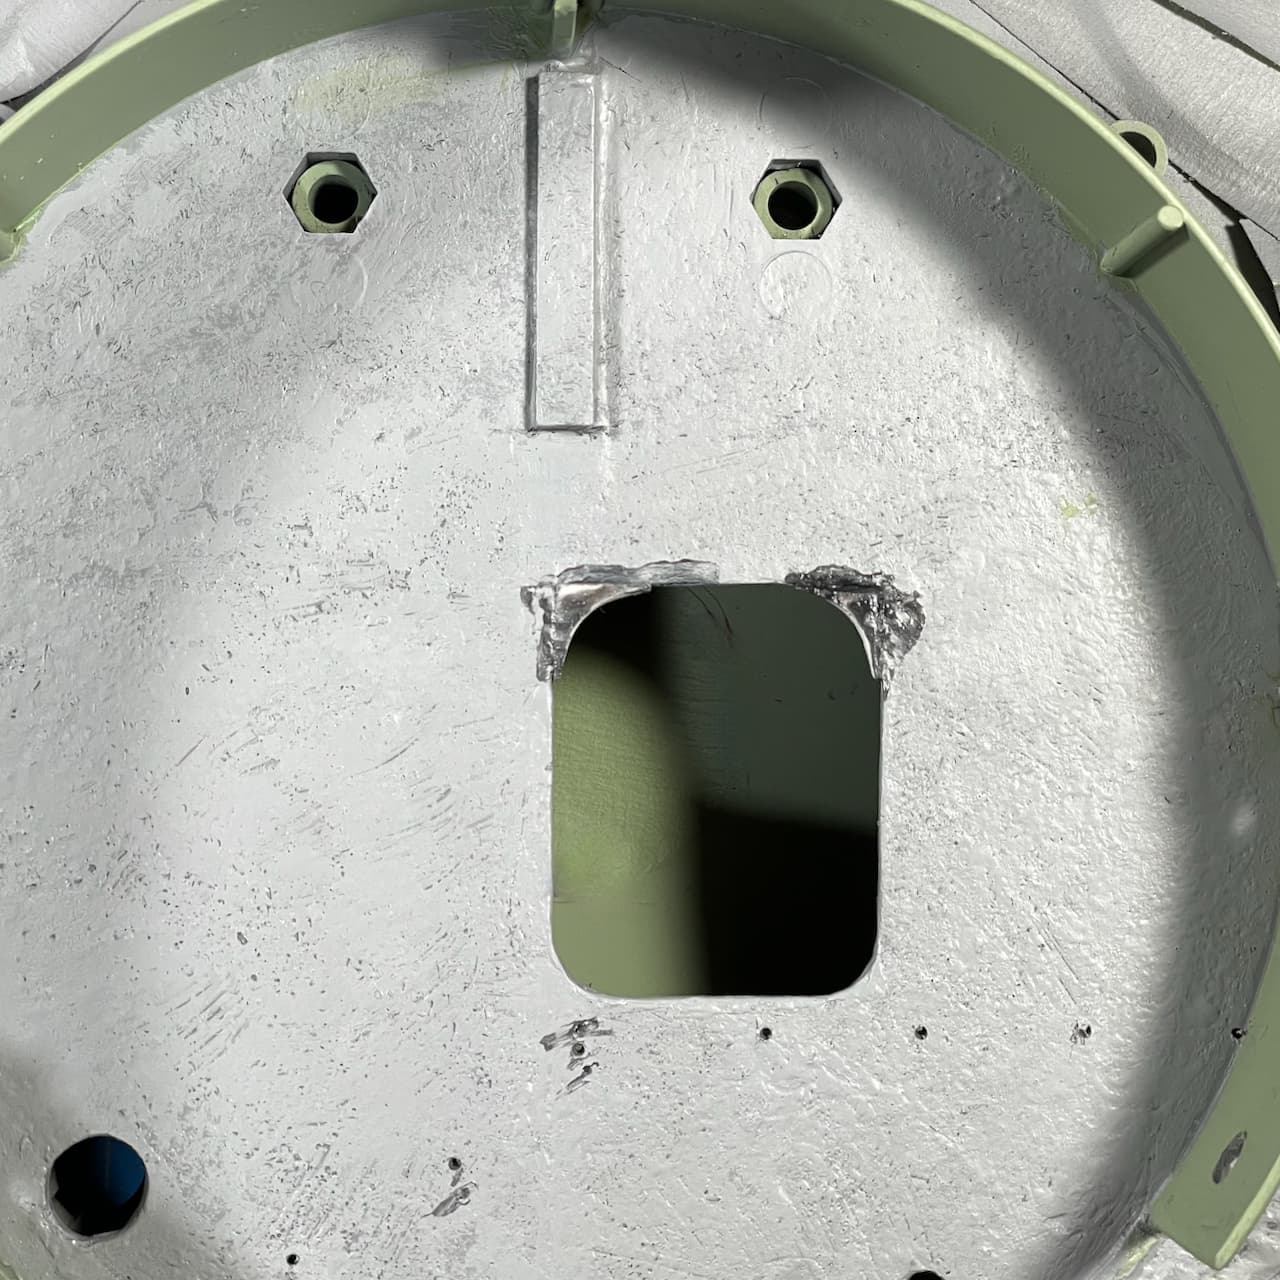
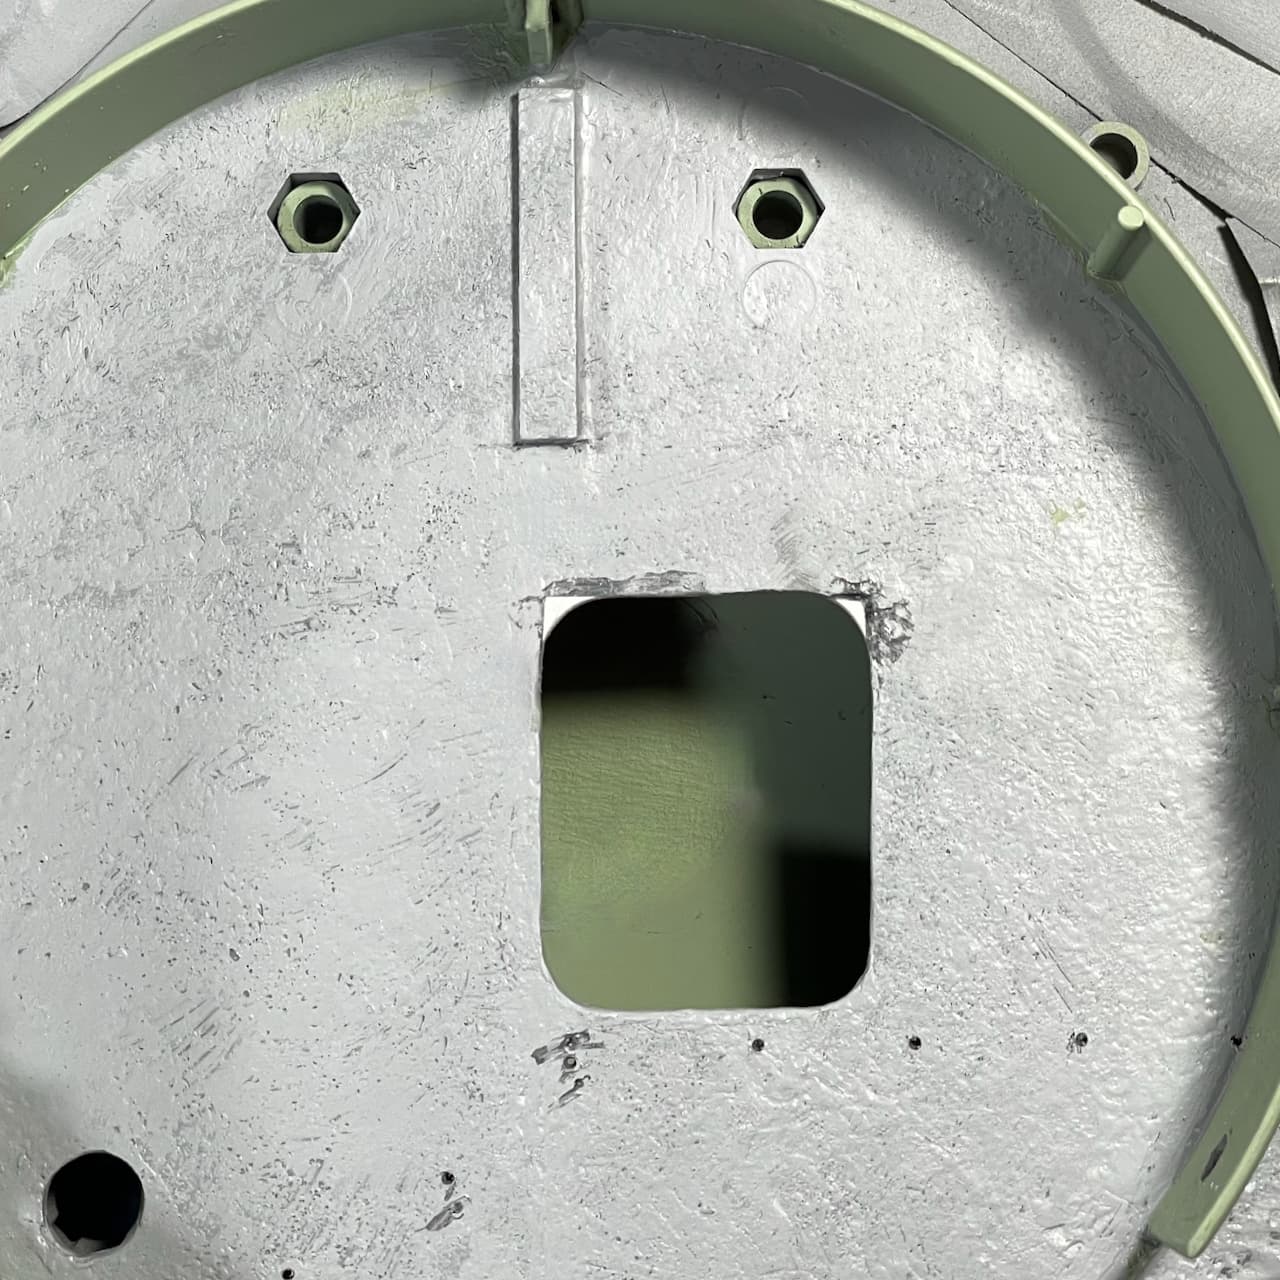
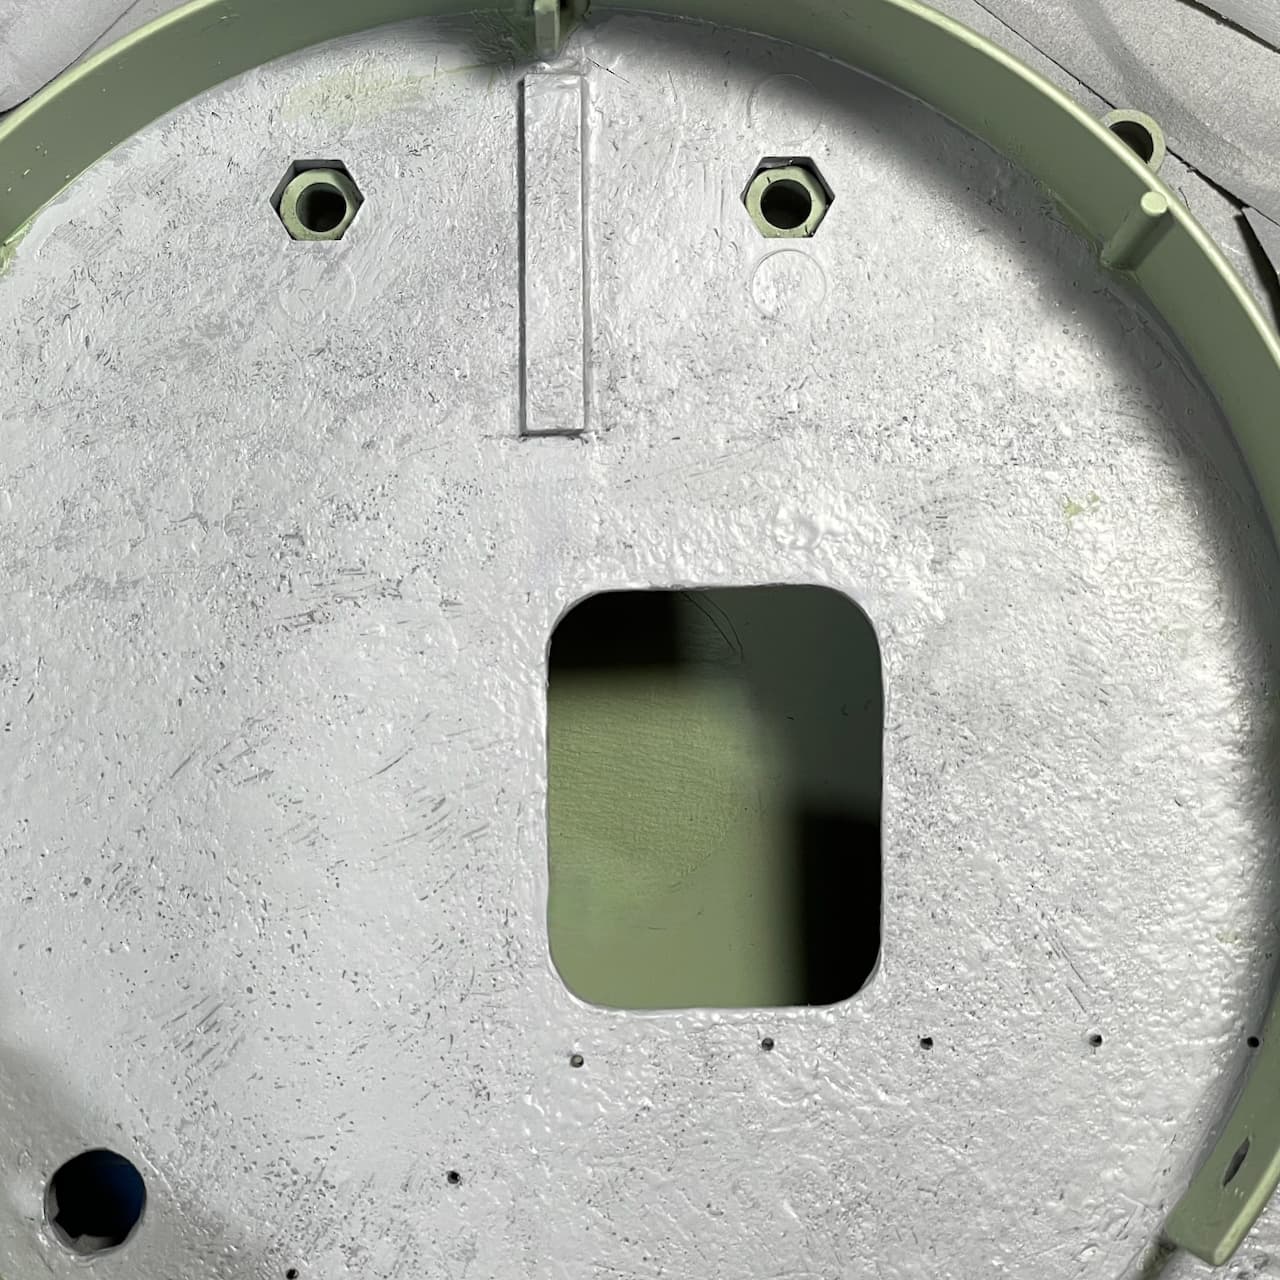
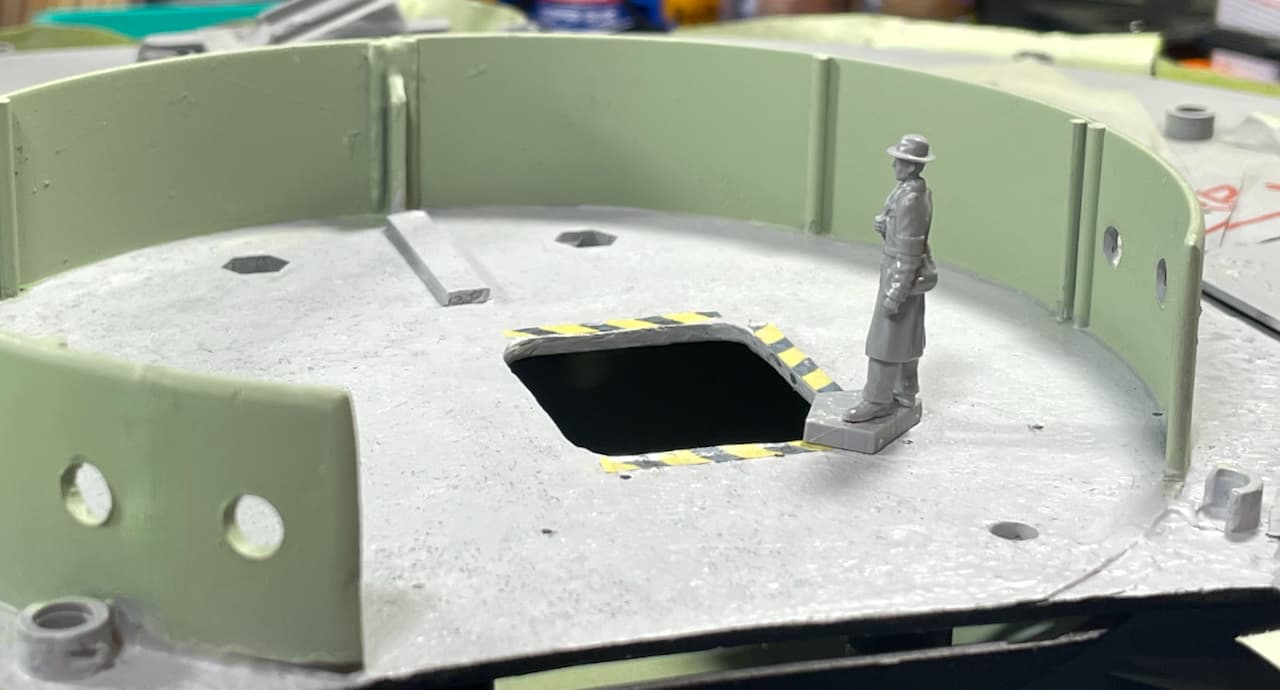
I finally got around to drilling into the Bomb Room floor in order to install the Safety Railing. It still needs a little tweaking, but I’m pretty happy with the overall fit. ![]()

I also enlarged the pit for better loader clearance. Though not really necessary, I might still round-off the two back corners to match the front. ![]()

“With all these crazy things spinning-about, I feel so much safer now!” ![]()

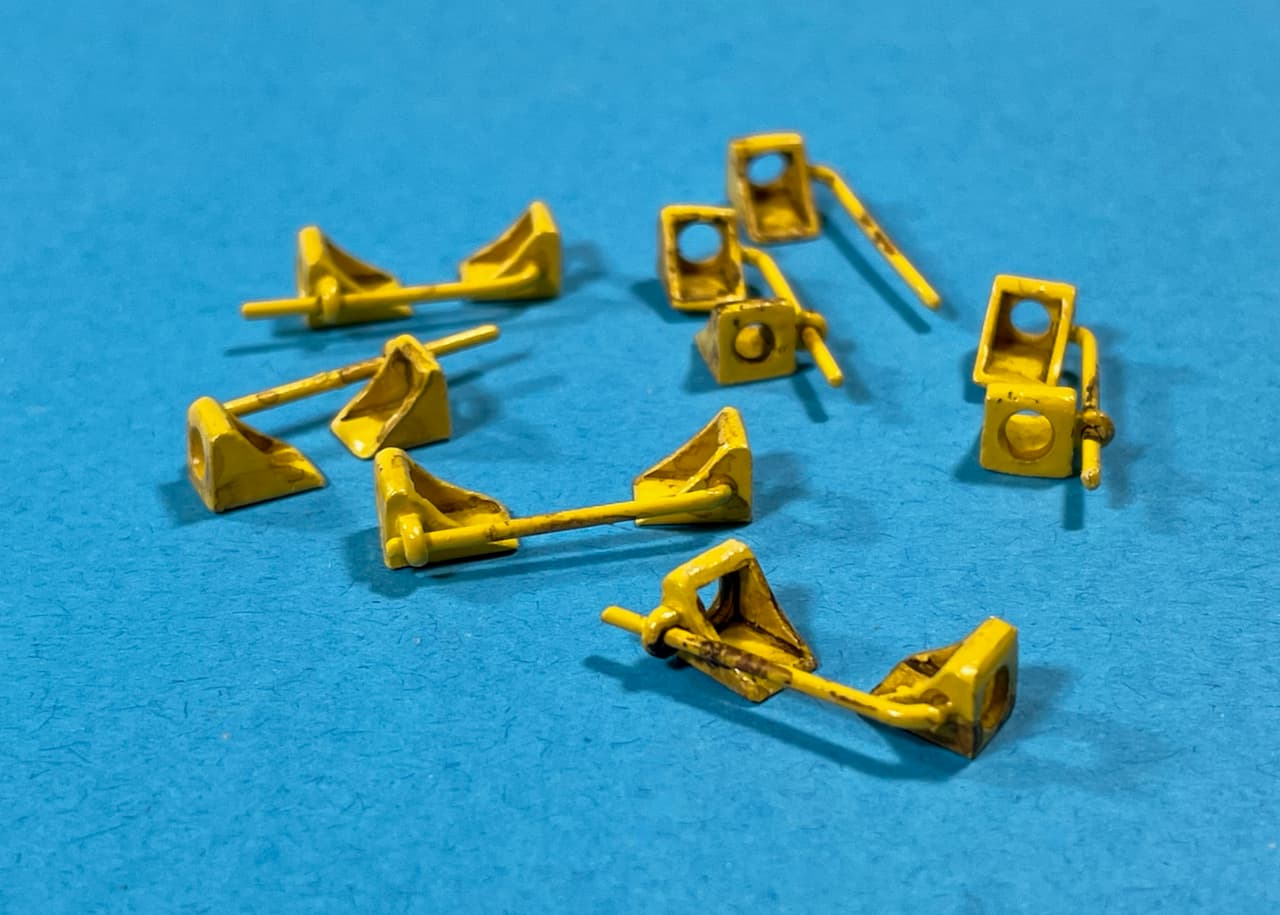
In addition, I gave the Wheel Chocks a bit of weathering. Now they can go back to their duties of preventing the Haunebu IIb from rolling off the workbench. … “Safety Last.”
Thank’s for having a look!
—mike …![]()
13 Likes
So much going into this … I may of missed this from earlier posts Mike, will the top half of the saucer be removable to see all this once complete ??
2 Likes
Excellent work, Mike! Great to see everything come together.
2 Likes
Thank’s Jesper! Feels like I’ve made some progress by getting past scratch-building and committing to paint. …![]() Now I can say, the room is beginning to spin in the same direction as the saucer.
Now I can say, the room is beginning to spin in the same direction as the saucer. ![]() 🫨
🫨
—mike …![]()
4 Likes
Either that or toss it across the lawn like a Frisbee! …![]()
Kidding aside,… The two hull segments, Bridge section and the Main Gun Turret all separate very nicely for internal viewing. The saucer in general is easy to handle due to its large parts and big alignment lugs — practically snaps together itself. ![]()
![]() Worth mentioning: The Styrene in this kit does not react very well with Tamiya Extra Thin or even Tamiya Regular Cement, making for weak load-bearing joints — passable with careful handling. Since the saucer is so massive, I opted to use ‘Bob Smith Quik-cure 5min Epoxy’ for the landing strut-to-hull connections — Solid!
Worth mentioning: The Styrene in this kit does not react very well with Tamiya Extra Thin or even Tamiya Regular Cement, making for weak load-bearing joints — passable with careful handling. Since the saucer is so massive, I opted to use ‘Bob Smith Quik-cure 5min Epoxy’ for the landing strut-to-hull connections — Solid! ![]() Definitely keeps the ship from imploding!
Definitely keeps the ship from imploding! ![]()
Glad you guys like the build thus far!
—mike …![]()
2 Likes
Jeez Mike , just got done scrolling this whole build of yours and it reminds me of what my Mom and Dad used to always say to me , … " WTF is wrong with you " …
That’s some brilliant , innovative , logical more or less , scratch building , … funny thing is it makes a lot of sense .
Love what you’re doing man , … Beautiful !!!
3 Likes
@ Glenn (Cheyenne). True wisdom from your Mom and Dad! If you scrolled-through all the way from the top, there’s definitely something wrong with you! ![]()
![]() Thank’s and welcome to the asylum!
Thank’s and welcome to the asylum! ![]()
————————————————————————————————————————————
Today’s update…
Don’t fall in! … 
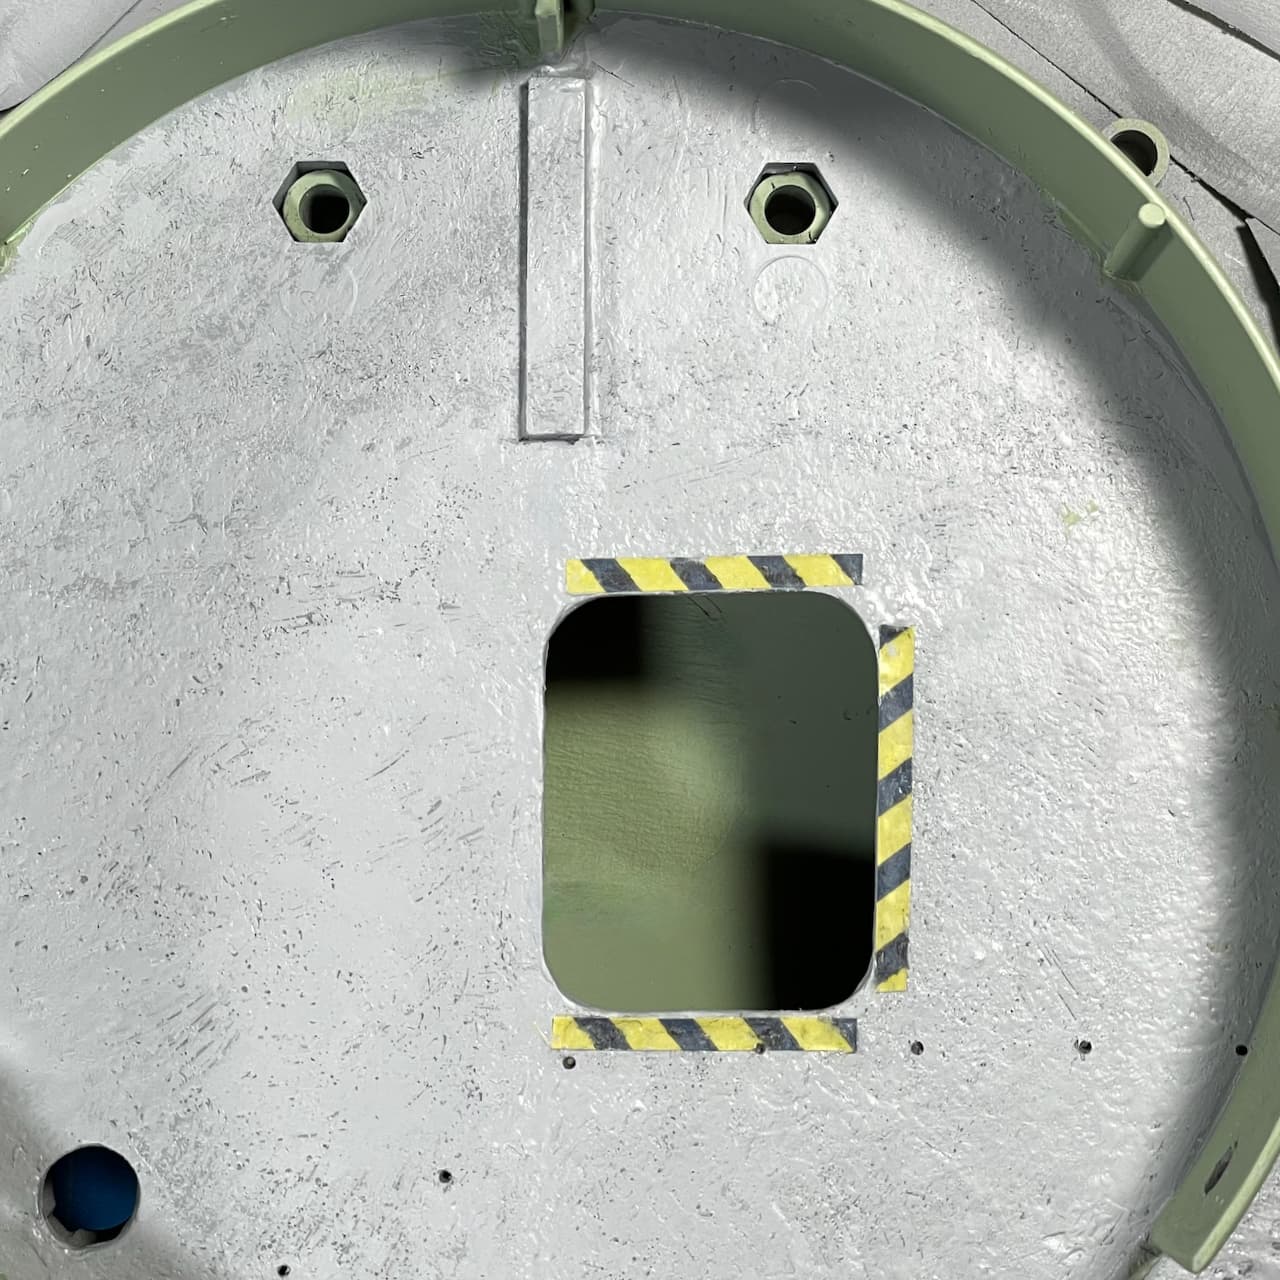
Earlier-on, I mentioned something about rounding the two back corners… well, I decided to go for it. So here’s what I did…
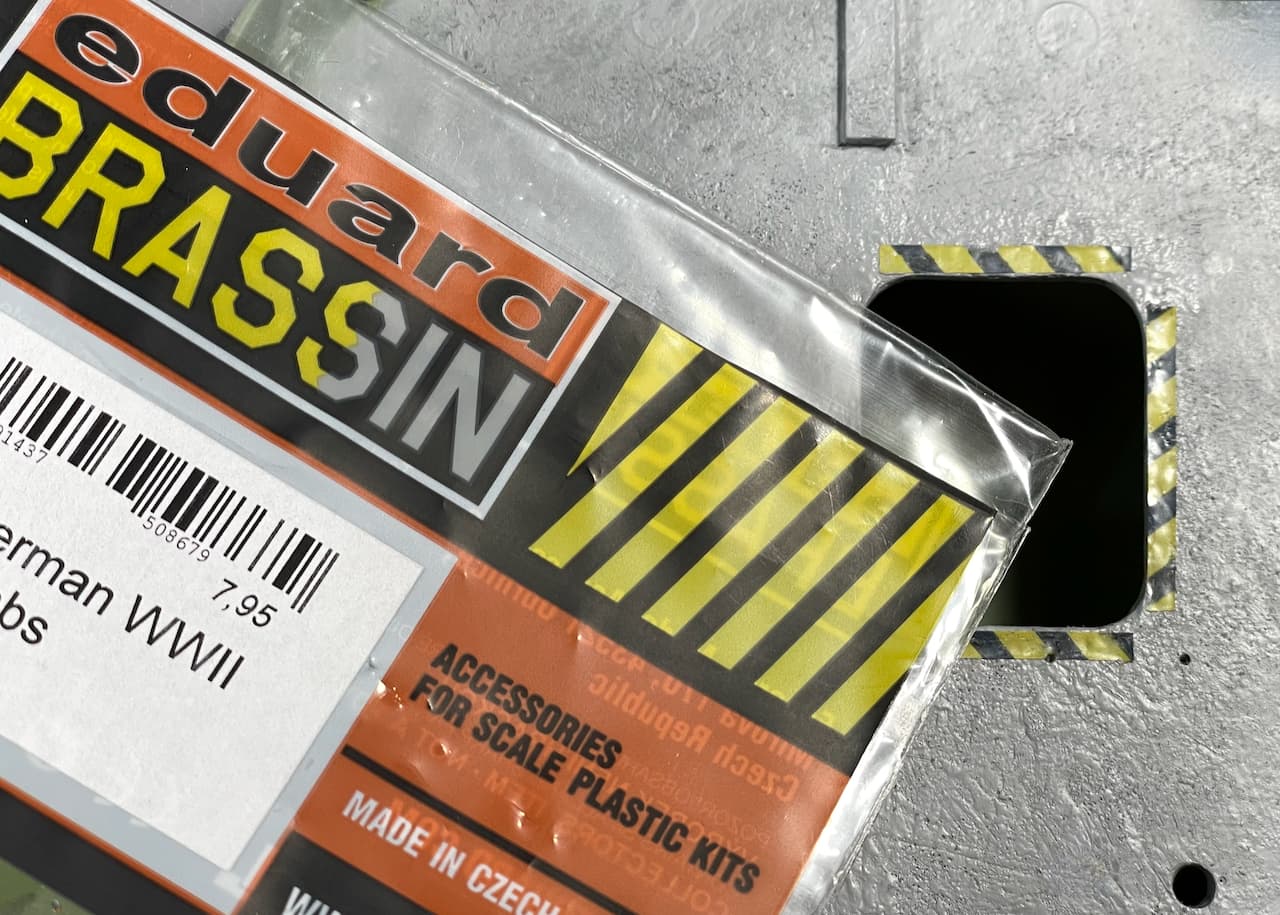
Non-Decal Dumpster-Dive Caution Stripes ![]()
![]()
- Cut-up some rough scrap material, attach and fill-in with VMS Flexy 5K Black CA (VMS.CM09).
- Grind with a Dremel Tool and sand the corners to achieve a proper radius.
- Dab-on Mr Surfacer 1500 to match the surrounding floor texture.
- Locate Eduard packaging scraps I’ve been hoarding all this time. Trim stripes from said packaging scraps and glue into position with Tamiya Extra Thin Cement.
Not as pretty as decals, but I think it came out okay.
“Oh yes, this makes me feel sooooo much safer. … What happened to the Safety Railing, you nincompoop?!” ![]()
Thank’s for having a look!
—mike …![]()
8 Likes

3 Likes
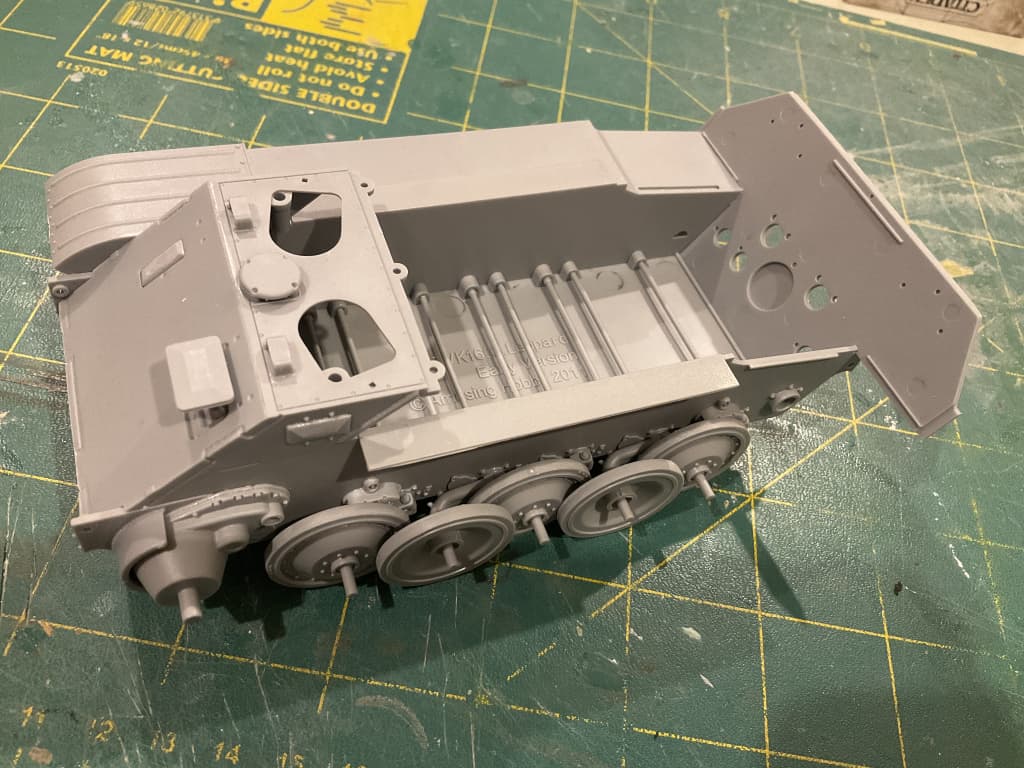
Made a start on the VK1602 Leopard from Amusing Hobby whilst I waited for paint to dry on my other builds. Alternate History build - what it if went into production.
5 Likes
Welcome back Peter! ![]()
—mike …![]()
2 Likes
And whose bright idea was this one?
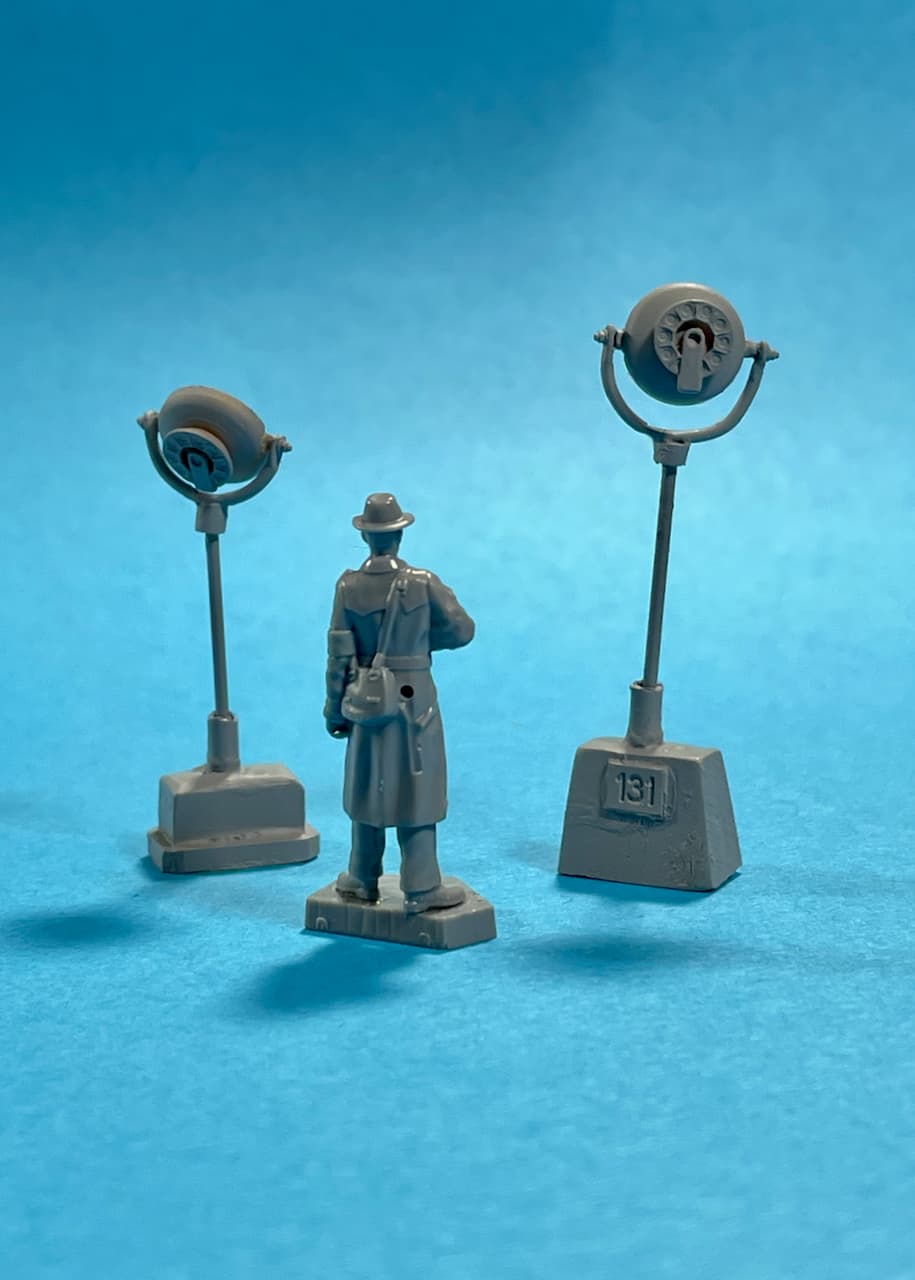
Another deep dumpster-dive for Floor Lamps. ![]()
![]()
• Hubcaps & spare parts from Bronco Horch kit.
• Resin connector block scraps.
• Evergreen Styrene Rod (220) .035” 0.88mm).
• Canned-Air straw tube.
• MENG Resin Nuts and Bolts Set A (Small 0.8mm).
• VMS Flexy 5K Black CA (VMS.CM09).
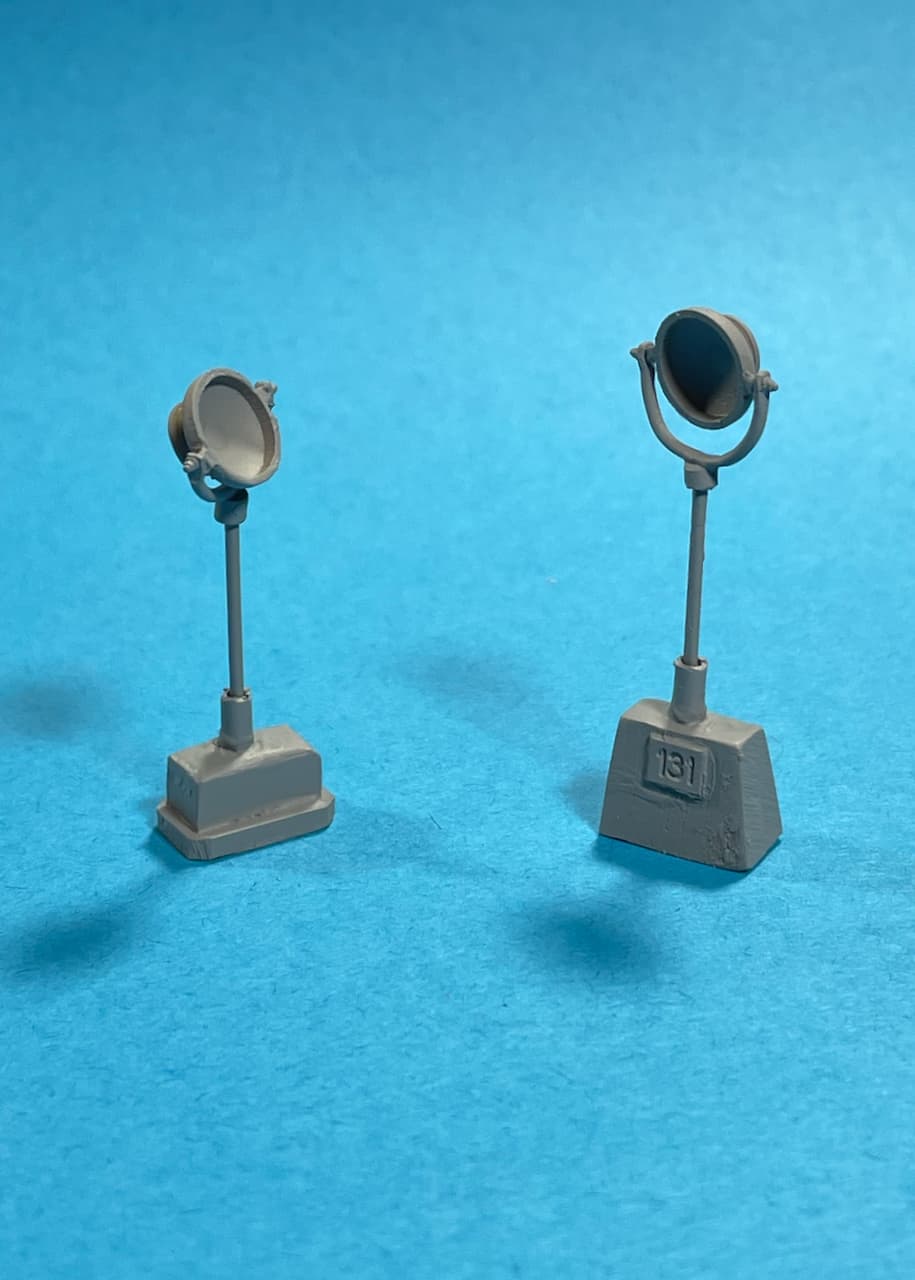
Primed with Tamiya Fine Grey Surface Primer (87064).
No lenses just yet. Still thinking on that. ![]()

“Well, let’s turn these things ON. Schnelle!” ![]()
“Und where ist mien Horch?” ![]()
HONK! ![]() …
…![]()
—mike ![]()
9 Likes
How about cutting circles from the side of a clear plastic fruit container like I’m doing the apocalypse landrover windscreen with and Molotov chrome pen for the inside of the hubs ?
4 Likes
@ John. That’s kinda’ what I had in mind, but my first attempt was crap. ![]()
![]() I need to revisit the lenses when the planets realign.
I need to revisit the lenses when the planets realign. ![]()
![]()
![]()
—mike …![]()
2 Likes
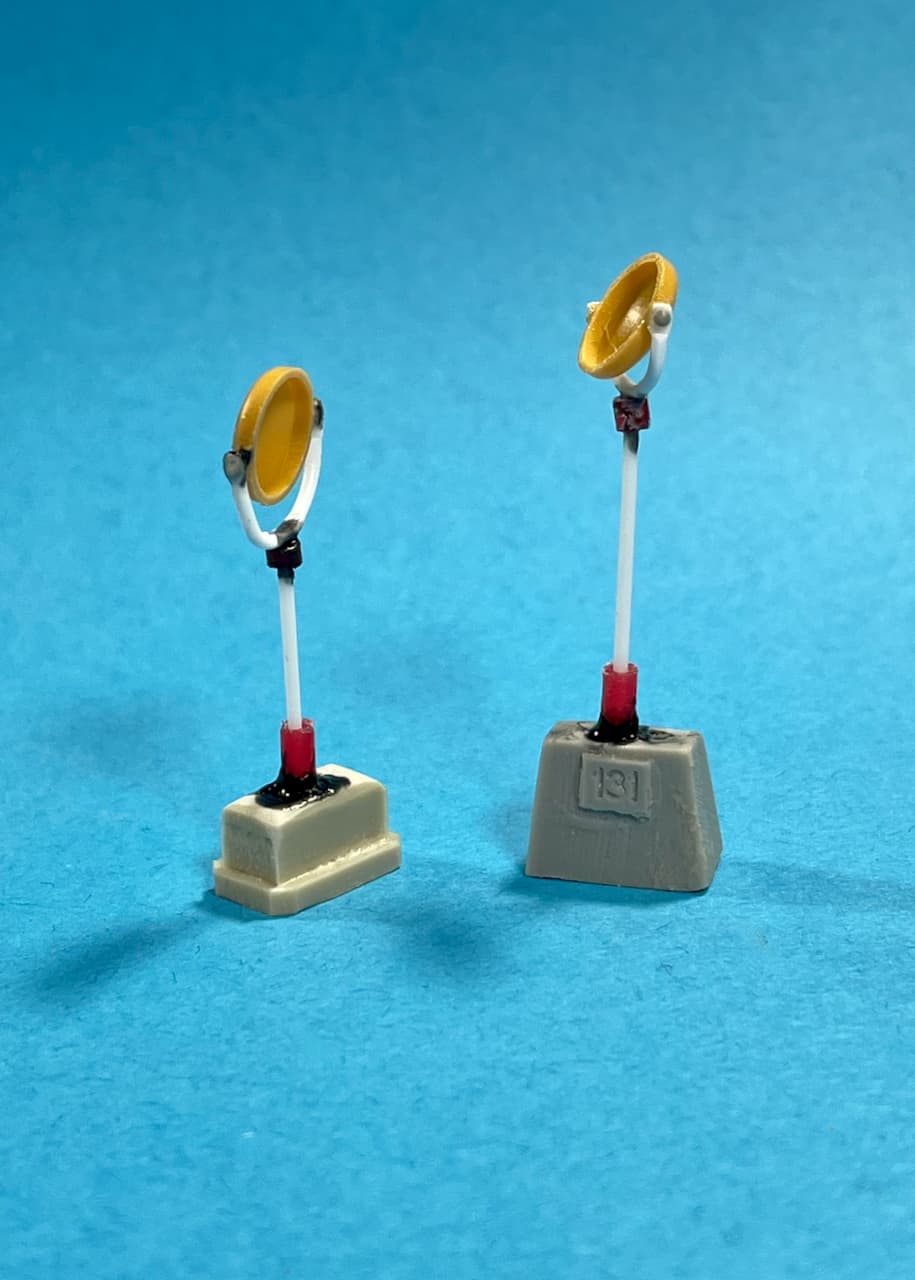
LIGHTS! ACTION! … bzzzzttt! 
Here you go, guys. Waddya think?
Lenses: Cut and scribed clear scrap material.
Paint Specs
• Vallejo Deep Yellow (70.915).
• Vallejo Magnesium Metal Color (77.711).
• Mr Top Coat Semi Gloss (GSI B502).

Bulbs: Clear straw segments attached with Microscale (MI-9) Micro Krystal Klear.
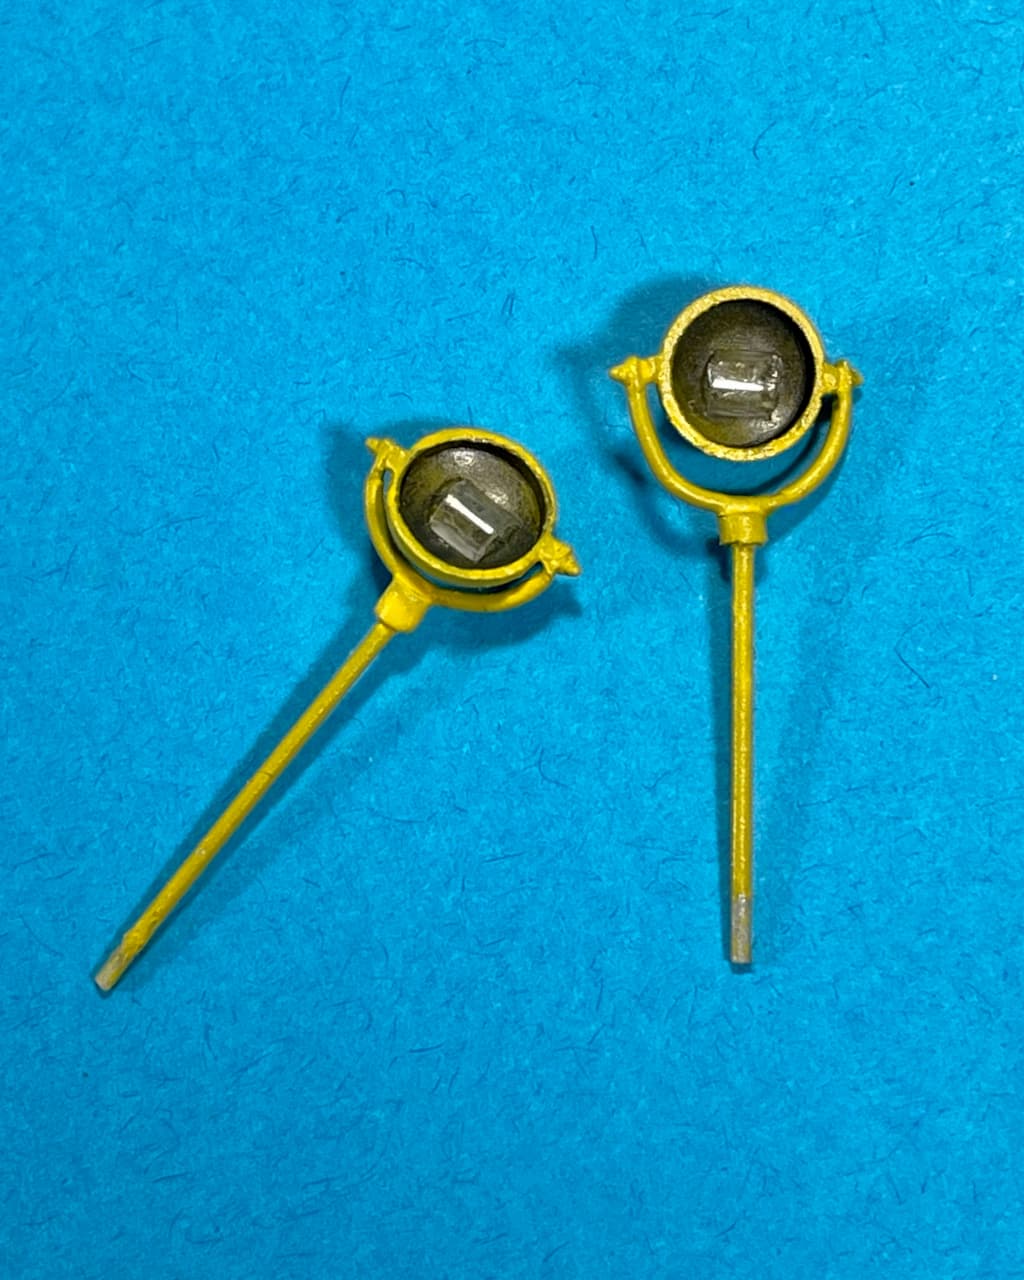
Lenses are temporarily attached with a spit of water. ![]()

Had just enough Vallejo Deep Yellow to finish the job… cough… sputter… spray & pray!
Final Floor Lamp assemblies. ![]()
![]()
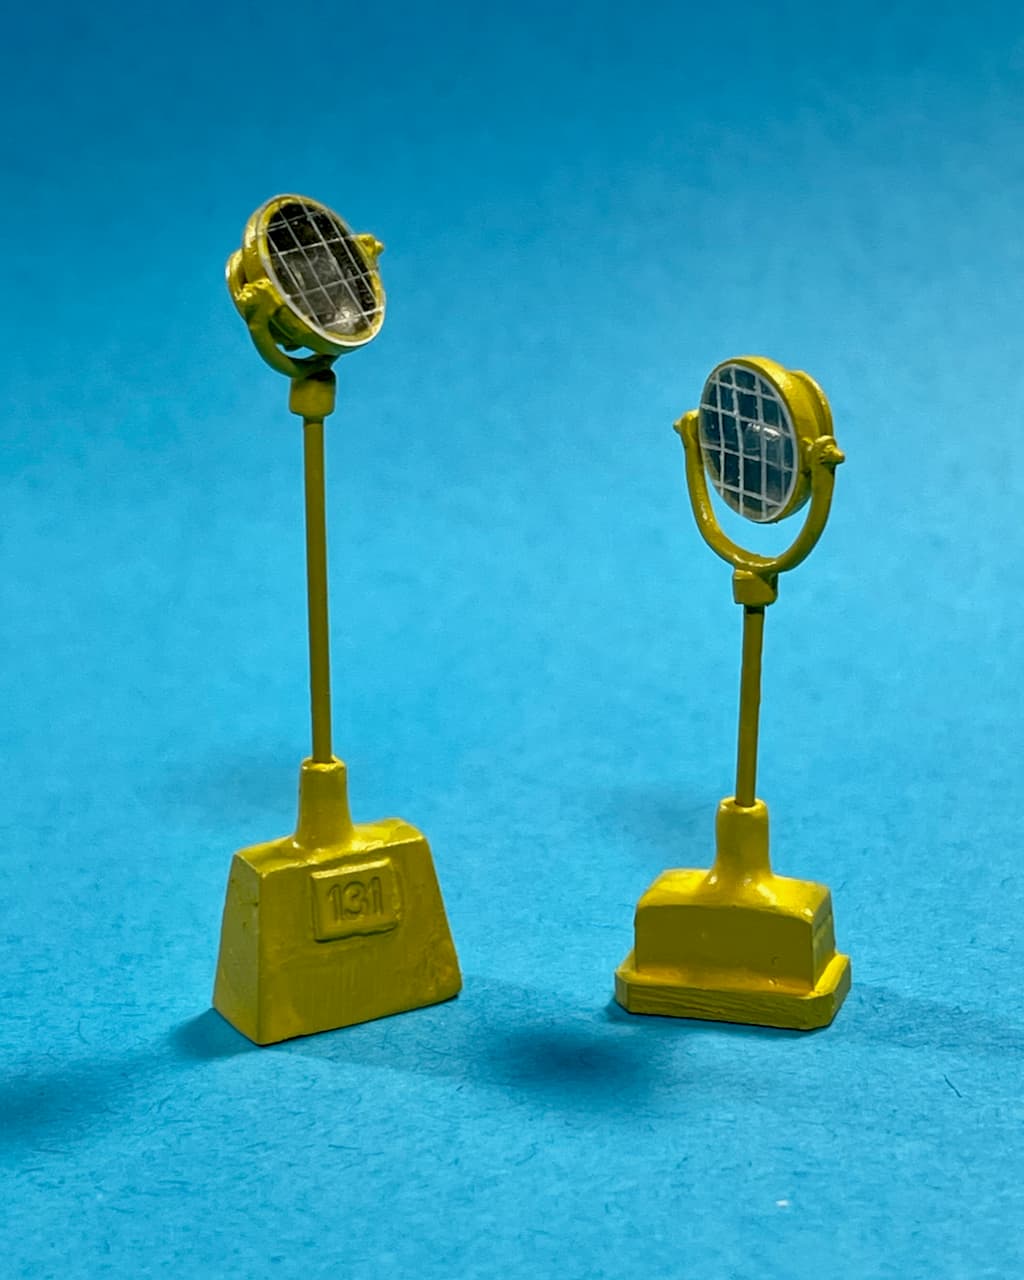
Thank’s again for having a look see! ![]()
—mike …![]()
15 Likes