I’m starting my 88mm. Colour question. Box art is both grey and yellow versions. I like the idea of a unit in Nth Africa. So the question is - did many 88mm units get back to Europe from Nth Africa and would they have been repainted or remain in their Nth Africa colours? It’s my war but I don’t want to stretch the credibility too far.
No Afrika Corp equipment went back to Europe. Getting enough equipment from Germany was always an issue, and they needed everything they had. They were still fighting with everything they had available up to their surrender to the Allies in May 1943.
Basically you have the base colours of Dunkel Grau or Dunkel Gelb for this project. Most photos show the tractor and guns single colour, but there are some with camo.
Camo would have been red-brown or green. Hard to tell from black and white photos, if the gray ones had camo but If you go the gray, you could consider a whitewash winter finish on it.
Whilst tanks had up to the three colours of gelb, brown & green on them, the common opinions I have read seem to suggest the artillery tractors and pieces where usually painted one camo over base for the most part, when actually camouflaged. That is open for debate. Foliage was used a lot on the field pieces.
Thanks petbat. After looking at 3.87 zillion images on the web I’ve come to the conclusion that no 2 guns are the same!!!
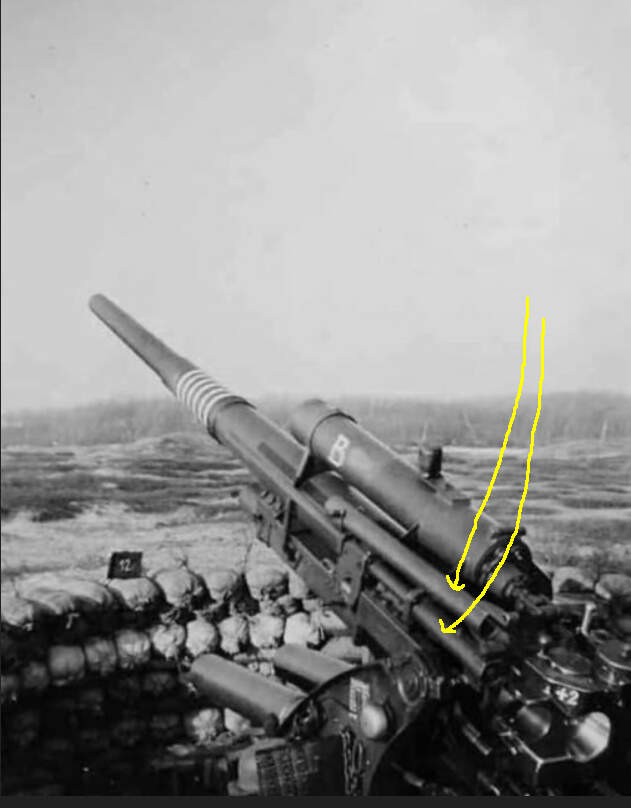
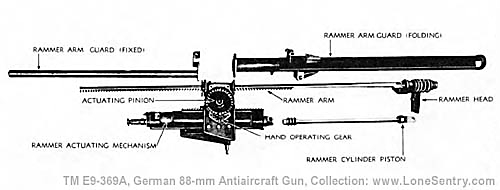
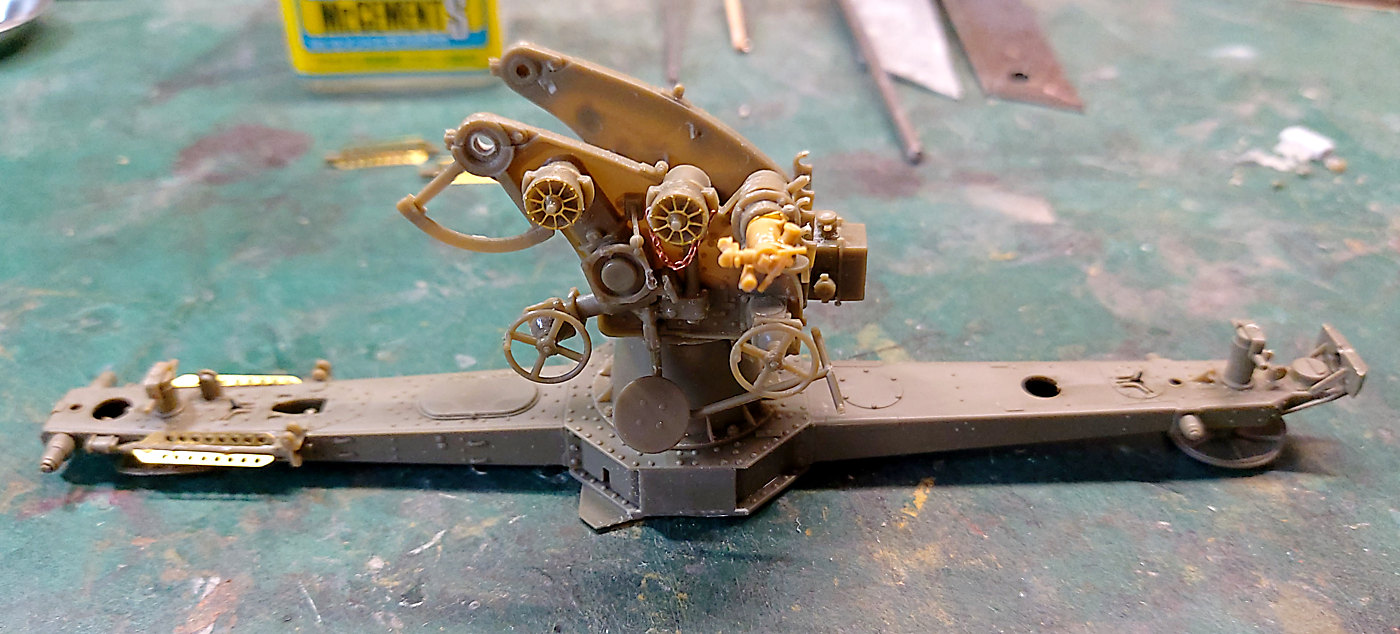
Can anyone tell me what the two yellow arrows are pointing at. It’s in AFV Clubs kit. It can be extended or folded. But I only see it in a few images. My 88mm will be behind my Sd.kfz.6 so it will be in transport mode.
The upper part on the kit is hollow. ie only 2/3 of a tube. So nothing could be stored in it while in transport mode. So a guard would make sense.
Nutha question. Nothing to do with the kit but just my curiosity!! Did they ever consider muzzle brakes on the 88mm? I understand why they were in the tanks but getting hit in the teeth by the recoil would tend to make ones eyes water.
Muzzle brakes tend to kick up dust and mess up the local surroundings.
Not ideal when firing lots of rounds at aircraft …
The gun crew would also be exposed to the blast from the muzzle brakes.
Firing high altitude angles directs the recoil into the ground, in a tank firing horizontally it would overload the chassis and suspension.
No need for muzzle brakes so why bother?
Thanks for the feedback. It, as always, is a learning curve. I enjoy the research as much as the build.
The kit has some issues so far. Lots and lots of large push pin plastic to remove, Some as large as the part itself. Must be very worn tooling. I’ve broken more parts so far than any other kit. Lots of naughty words along the way. Oh and that’s not counting the 2 parts the carpet monster ate.
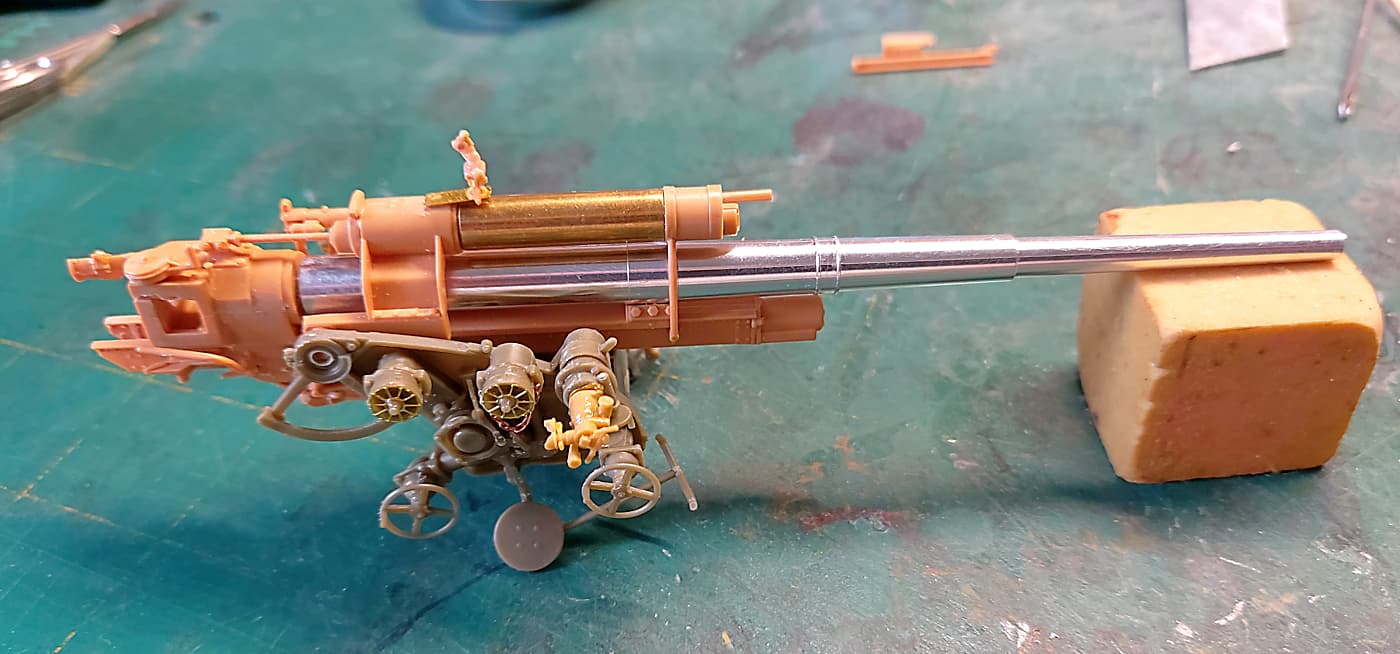
Some progress. I’m pondering at what stage to prime. It will be hard to get in and around all the details if I keep going. Then again I don’t want to fight with my air brush more than necessary. Cos it wins.
This is just a dry fit with the barrel. Should it be etched at all before painting?
An update. Not much happening due to health issues.
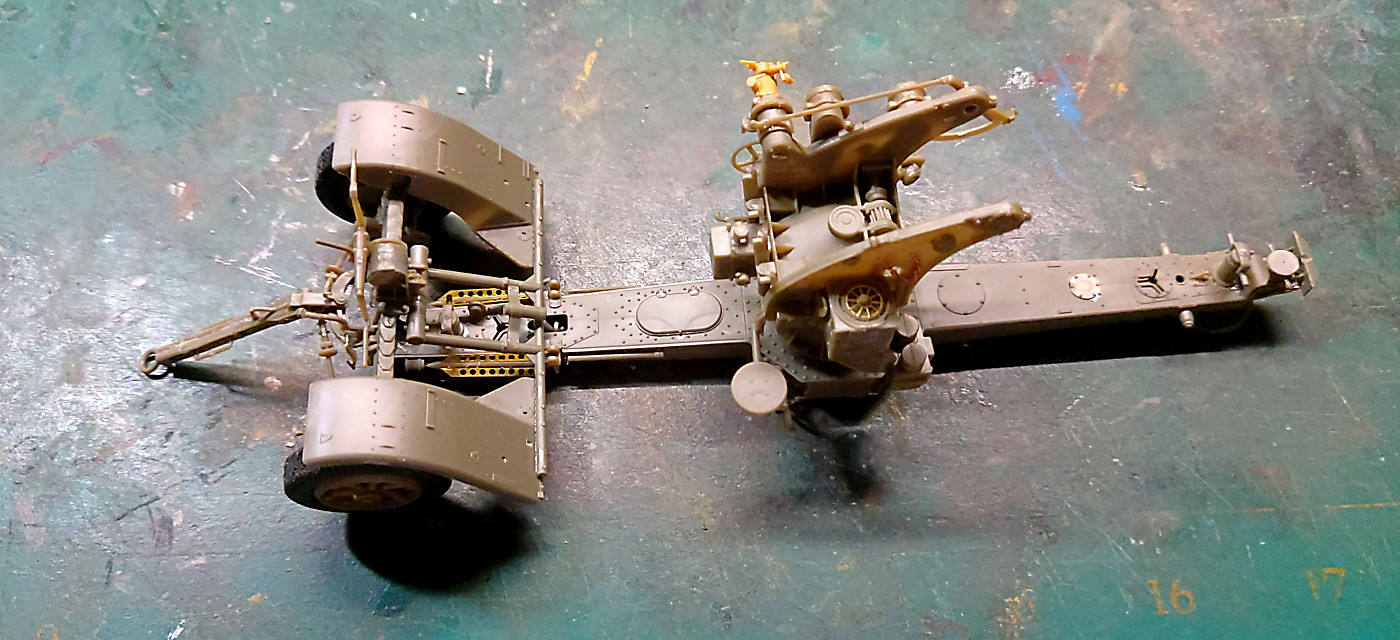
I’m trying to build in sub assemblies so that I can break it down for painting. Maybe a bit tricky. We will see.
The biggest issue are the vague instructions. Options for firing or travel mode seem to be the one and the same at times. Google has lots of images. The trouble is every image has a variation.
It’s also ‘delicate’. All those bits don’t leave much room for 1/1 scale hands.
I’ve figured AFV are just as sadistic as other kit makers. Hooks inside the base. Yeah great. Then you put covers over them and they are lost forever.
So be it.
Note - if building this kit do yourself a favour and ensure the top of part B45 is sanded down to as thin as you dare. It needs to clip into the top and allow everything to swivel. Trying to sand it later will end in tears.
No real progress. Health has sidelined me. I tried a few days ago and promptly buried an #11 blade into my thumb. Hard to hold small parts with half a bale of cotton wool on it!!
AFV Club instruction can be very vague. Some guessing with so parts.
Another few bits done. Again READ ahead. I got caught again. Not saying what with but it was pretty dumb.
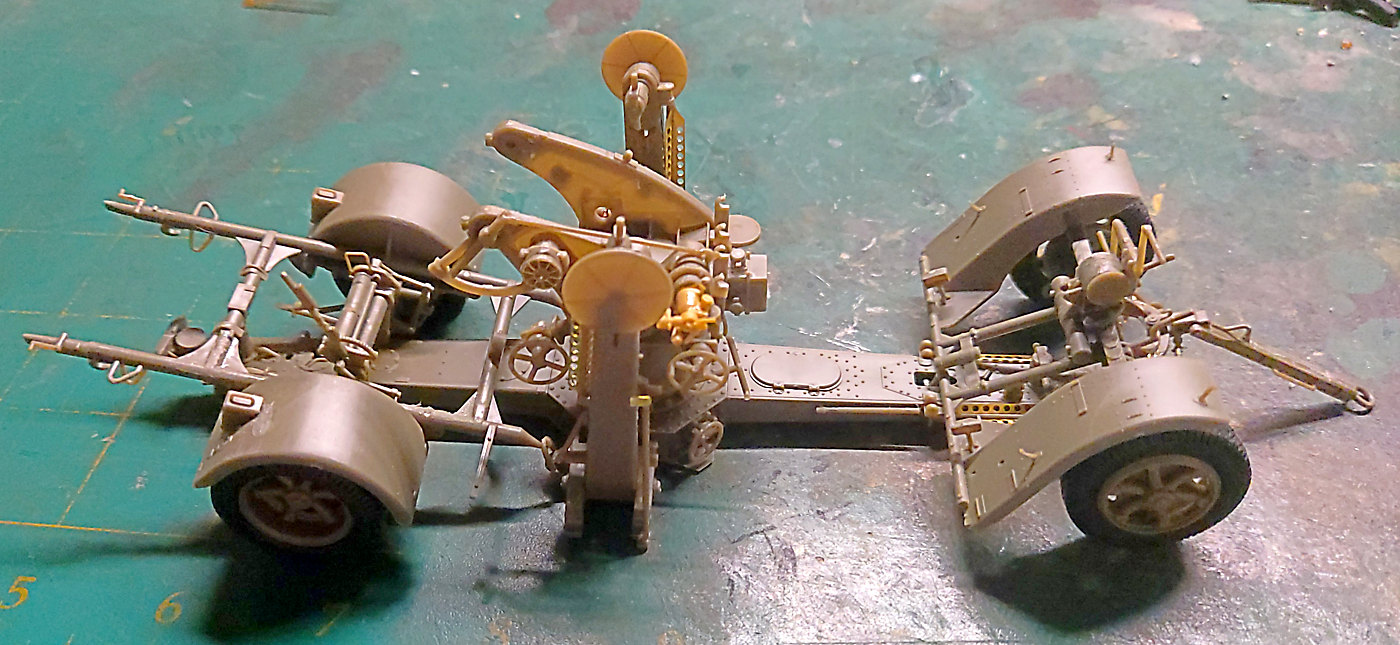
It’s a neat kit. More complex and detailed than I expected.
I’m trying to get enough sub assemblies to start the airbrush up.
Nice progress Bruce. I wish I’d primed and painted the Tamiya 88 in stages as I missed areas or oversprayed in some then like you alluded to… Size large hands does make it hard trying to repaint the inner bits you miss…
Lovely looking kit so far though. Metal barrel and PE does make a big difference as well
The two reels of communications cables on the 88mm. Kit comes with clear ‘fishing’ filament. I’m assuming that the real cables were coated in black rubber/plastic. My only colour images don’t have the reels or cable on them. Fishing filament is a PITA. I would rather find an alternative but want to know what the real things were before I dig myself a deeper hole!