Good shout, in fact, that would be perfect.
I was going to suggest Verlinden ‘flexible hose’ which has a multitude of applications - but might be hard to get hold of nowadays.
Good shout, in fact, that would be perfect.
I was going to suggest Verlinden ‘flexible hose’ which has a multitude of applications - but might be hard to get hold of nowadays.
Yes, solder or lead fly fishing wire of the right diameter. Very easy to paint and spool.
Thanks guys. The filament that come with the kit is a real PITA. It has a mind of its own. Wont take paint.
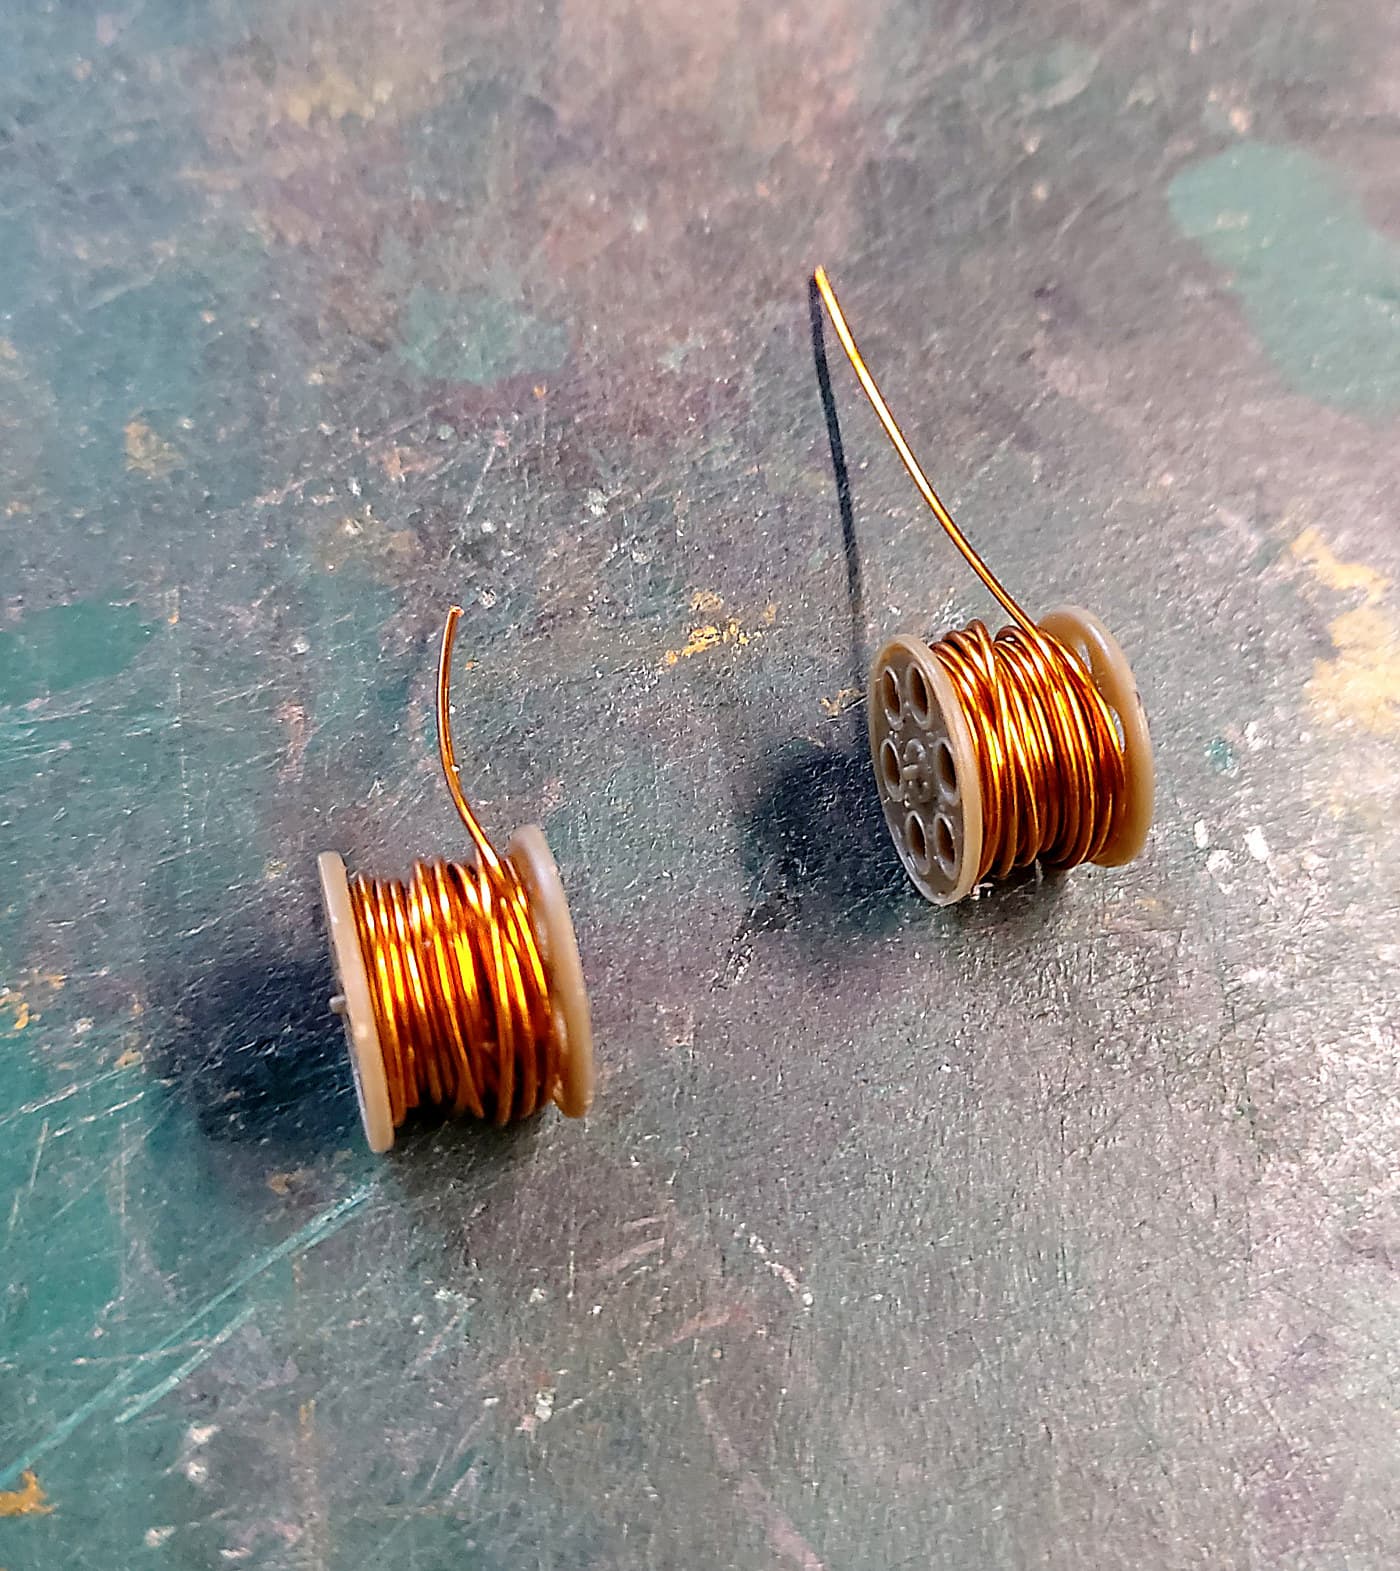
OK some head scratching. I have several reels of copper wire. 24 gauge just about fit the size. The first one I did was as neat as possible. But looking at images on the net none were neat. So back to the drawing board and rewound them as if the crew would have in a hurry.
Supper glued in place. I know this wire will take paint.
bruce
On a roll today. 34c here today and the pool is getting to be a distraction. But the war must go on!
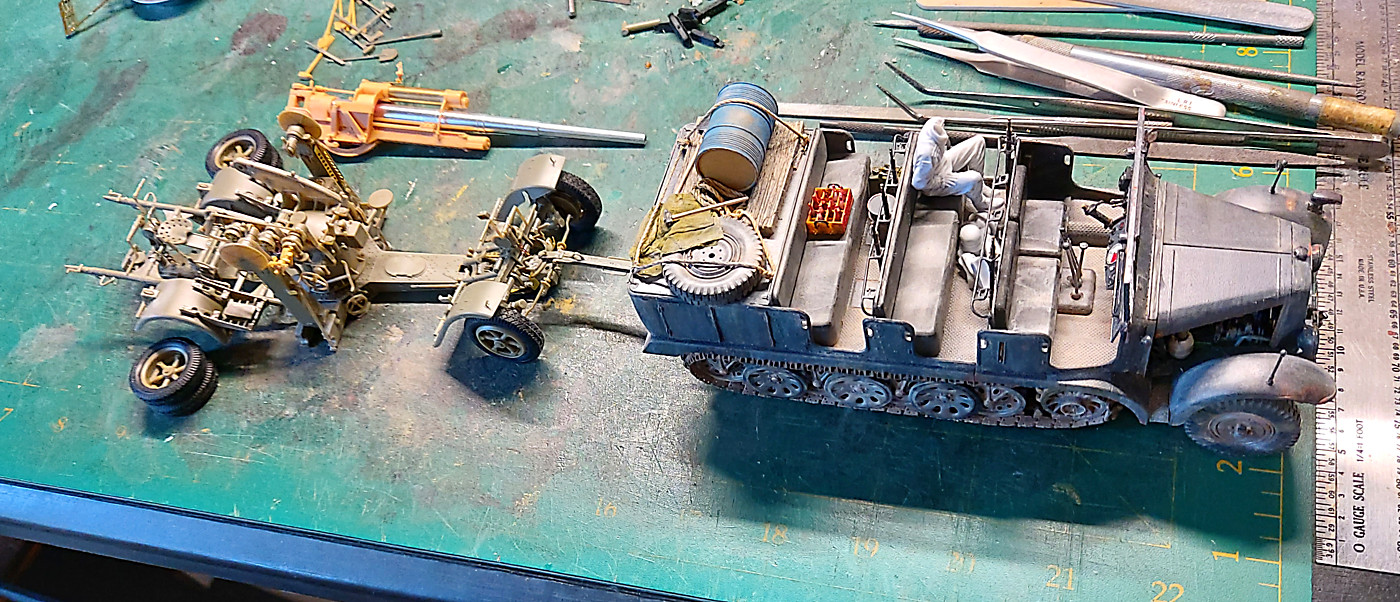
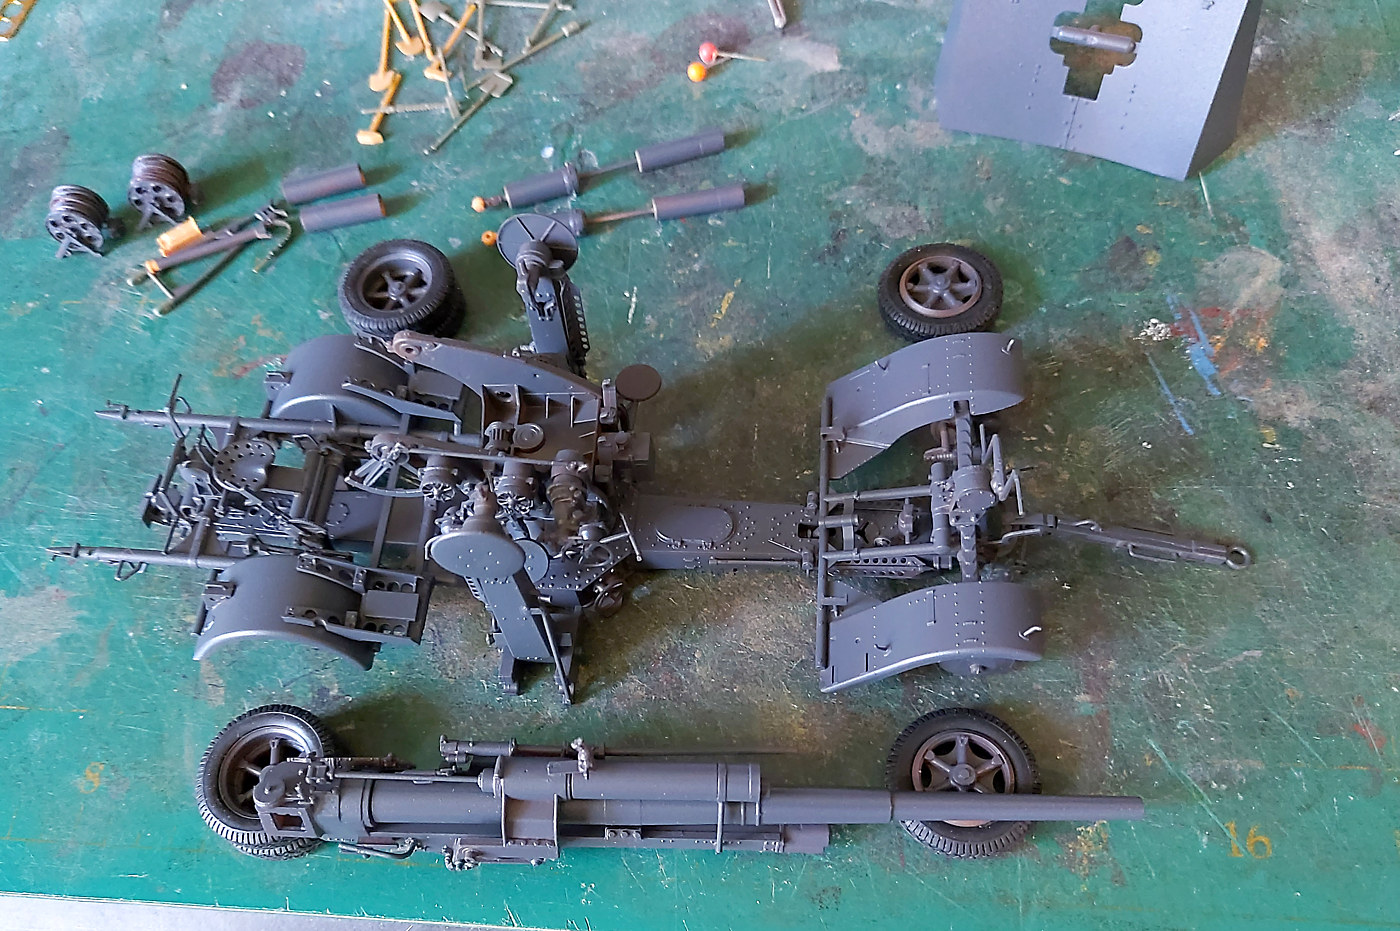
Here’s a quick dry fit. Next step is the get the airbrush out. But with the heat and 95+% humidity I’m reluctant to do much spraying.
It’s a neat kit. Lots of detail that can’t be hidden. So you have to be on your game.
bruce
You and me both. Finally got a regulator for my compressor and the weather is now against me (us). Going to be pretty much the same today.
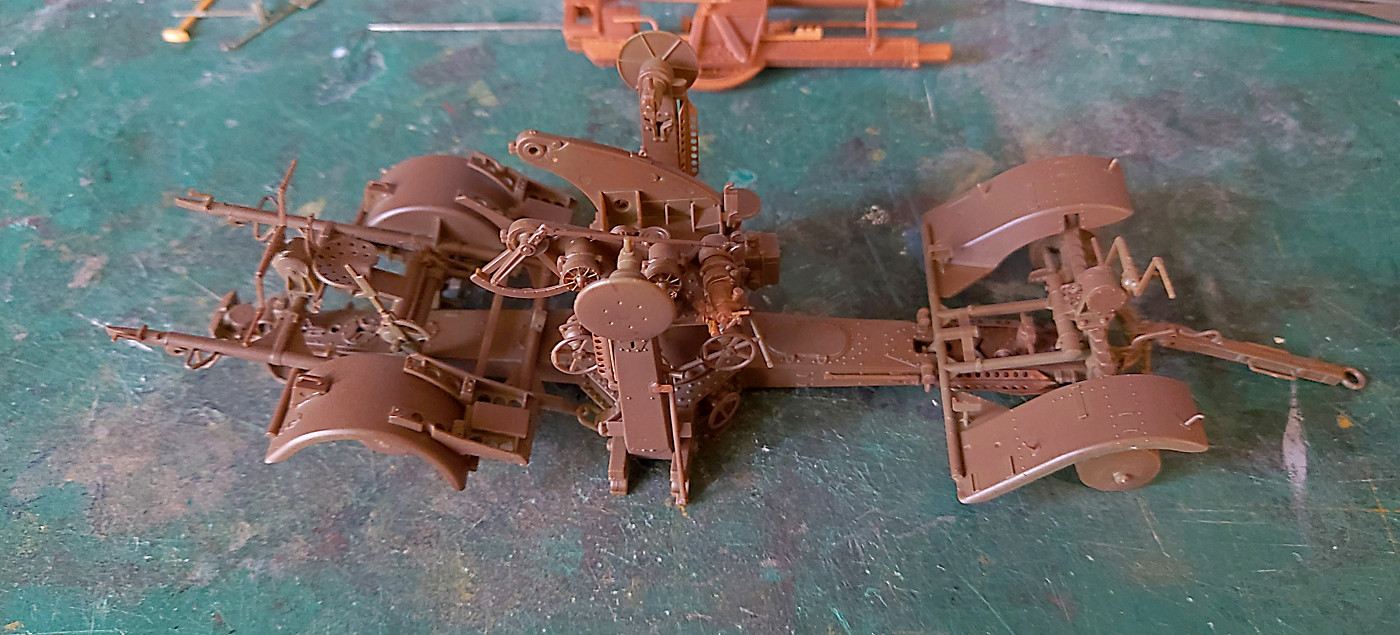
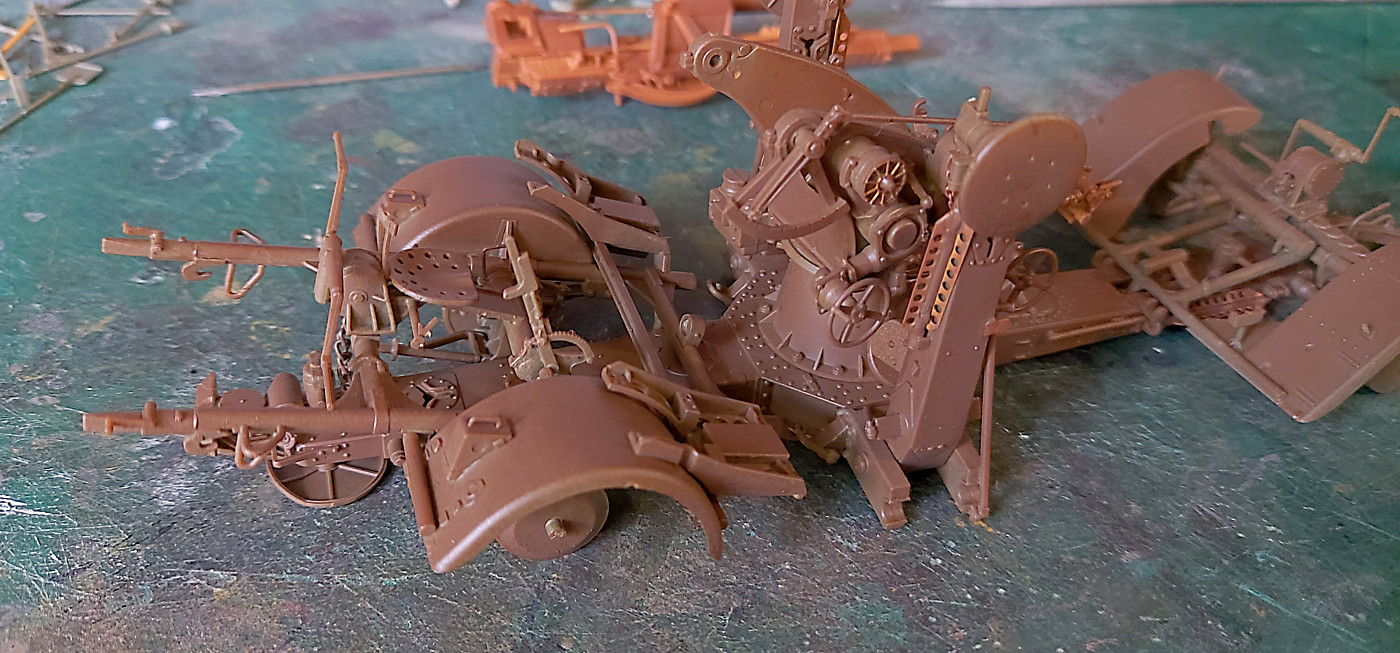
OK a day procrastinating!!  I’ve done as much as I want to before getting the airbrush out.
Maybe tomorrow.
About 6 sub assemblies plus a few bits and pieces.
I’m half tempted to prime the rubber tyres. My theory is that the top coat will stick better to the primer. Good idea or DON’T DO IT.
bruce
Your choice really. I usually get resin replacements, but have used the rubber/vinyl on occasion.
The rubber/vinyl in some kits reacts with the styrene of wheel parts. If nothing else, prime and paint the wheels, even the hidden parts, before adding the tyres.
Also, thoroughly scuff the tyres with a Nylon scourer as well. Make sure you take off all the shine. That way Primer or Pigments will adhere better.
So after I had a serious discussion with my airgun I managed to prime most of the 88mm.
“Most” because I ran out of patience after miss judging the amount of primer twice. So there’s a few semi opaque spots. I found the metal barrel a right proper PITA to cover. Same with the PE. I had to thin the primer. Too thin and it wouldn’t cover any metal parts. Too thick and it would clog the gun/needle point. But the finish is AAA+. So that’s good. Just not the metal parts.
I use Mig Ammo and their primer gives me ulcers. I purchased some Mr Primer Surfacer but the smell was enough to kill off most of the neighbours cats. The lids back on the bottle and will stay there. So keeping Mig Ammo as my preferred choice what primer does everyone use?
I hate air brushing. Just as an aside I clean my airgun in an ultrasonic cleaner. Well a while back the trigger mech and spring fell out. I put it back together as per the parts diagram that came with the gun. No go. It would spray but the action wasn’t good. Well today the trigger was stuck before I even started. I stripped it and cleaned it and put it all back together again. Trigger and all. Still no go. I pulled the trigger mech out and restarted. A small O ring fell out. ??? Where the heck did that come from? Not on the diagram. Now I put the gun back together. Still no go. Did I say I hate air guns? Well I tried again. And bingo it worked. No O ring. But the gun worked flawlessly. When finished I stripped it again to clean it. Errr I had put the trigger mech in upside down. But it worked. So why the O ring? And why are the drawings wrong? No idea but it works. I hate air guns. FWIW it’s an elcheapo Hseng gun.
bruce
Er… ergo, it will be pants…
I also use an ultrasonic cleaner on my Iwata - periodically. I’ve only ever ‘field stripped’ it, after direction from the manufacturer themselves, and that works a treat.
I use Mig Ammo primer all the time, and never had a problem with it, including on metal parts. Sure, i have to thin it, but otherwise, its pain and fault free.
What pressure and needle size do you use with the Mig Ammo primer? Thinning?
Bruce
Looks very nice all hooked up. The 88 looks really well detailed. Its almost a shame to paint it.
I use about 15-17psi through a 0.35mm nozzle. I just use regular Tamiya X-20A thinner, about 25%.
Thanks Khouli. Mig Ammo say 20-30 psi and I found too much tip drying and the primer drying before it hit the surface. Today I used a 0.5 needle and 15psi. 50-50 thinner primer. And much closer in. Much better.
bruce
OK a bit of an update. Hot and very humid here but I had to have a crack at painting or it will be on my desk for about 6 months of summer heat.
Very light coat of hairspray.
Mig Ammo. 15 psi. 70% paint. 30% thinners. 0.5 needle. Sprayed like a dream. I’m now certain my bottle of primer has lumps in it to keep it clogging. Well that’s my excuse!
Lots of fun spraying around all the details!!
With the humidity it will take about 48 hours to cure. So off to the pool while it dries.
bruce
Question for the experts.
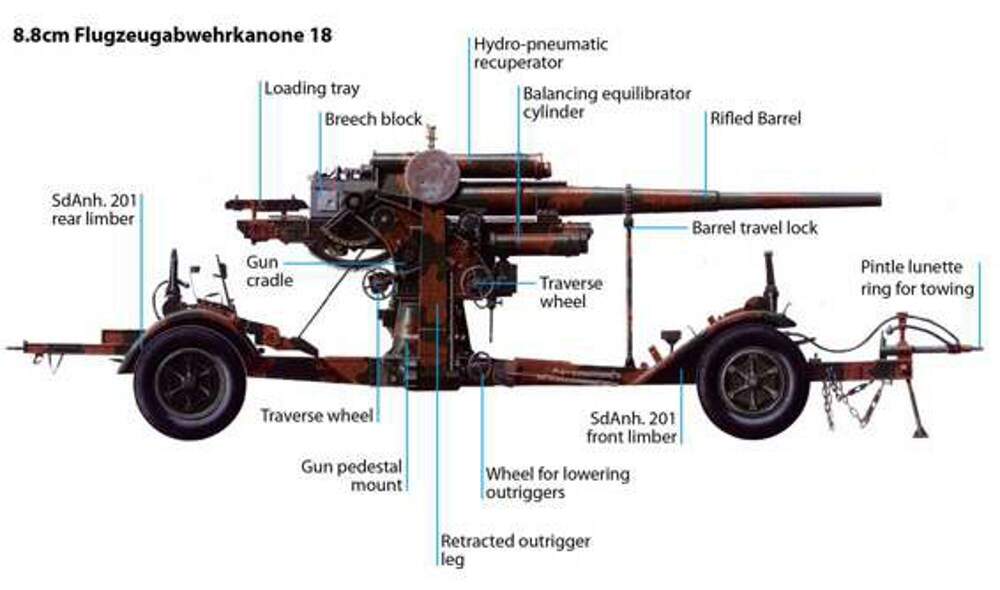
My 88mm will be towed behind the Sd.kfz.6. Now I’ve looked at many 88mm in transport mode and can’t find a good image of where the barrel is. Ie is it way back? Way forward? Or balanced in the middle? I’ve come to the point where I need to glue it in and I don’t wont to poke the crew in the back of the head with the barre being to far forwardl!!!
bruce
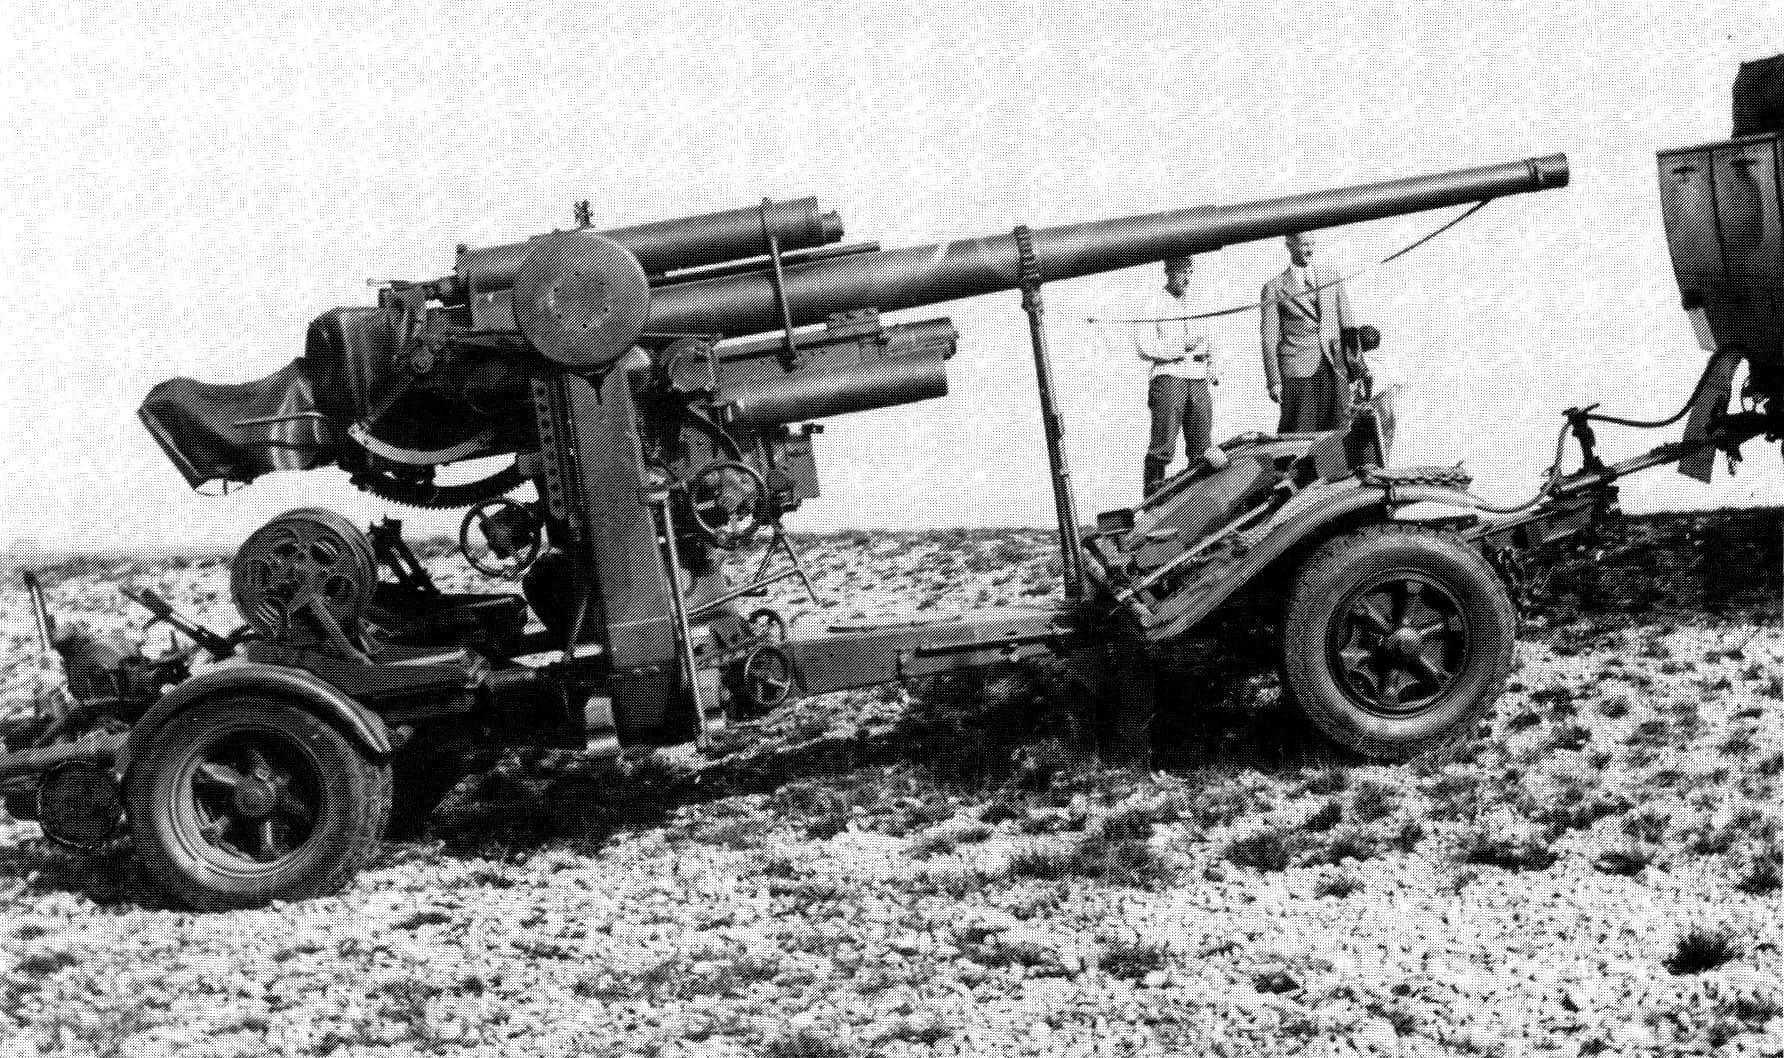
To the best of my knowledge they were not retracted for transport.
Use the barrel support and position of the breech as a guide to position using pics like this:


Thanks petbat. There is actually a ‘band’ around the barrel that must be for the Barrel travel lock. But I goofed with a small part that prevents the barrel going that far forward. Not by much. A few mm. So some thinking to do. Note - I had it right. Super glued the metal barrel on. Went away. Came back and discovered my mistake. Darn. So I’m procrastinating about breaking the barrel off and starting again.
What gets me is all the museum images are different. parts missing etc etc.
thanks
bruce
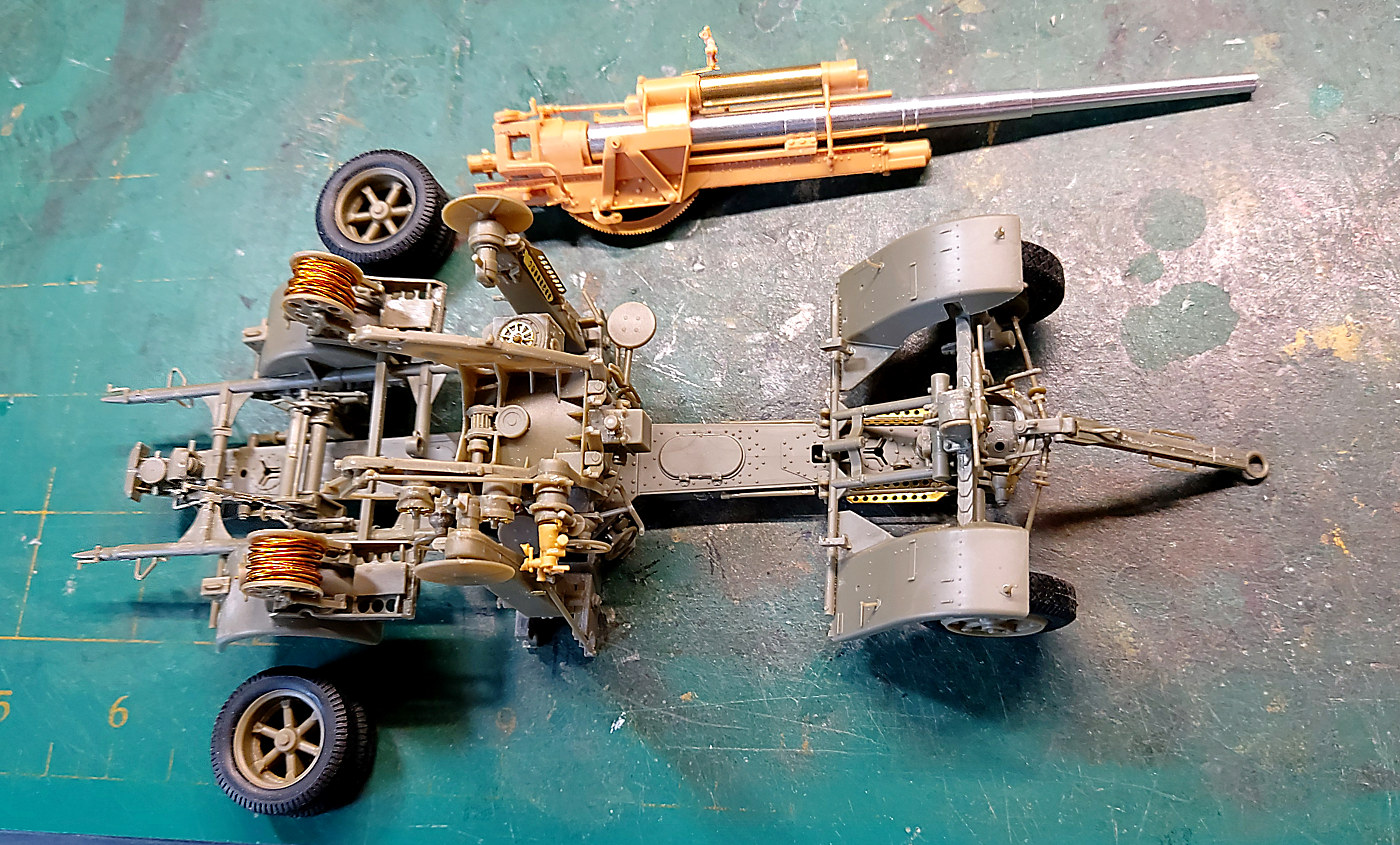
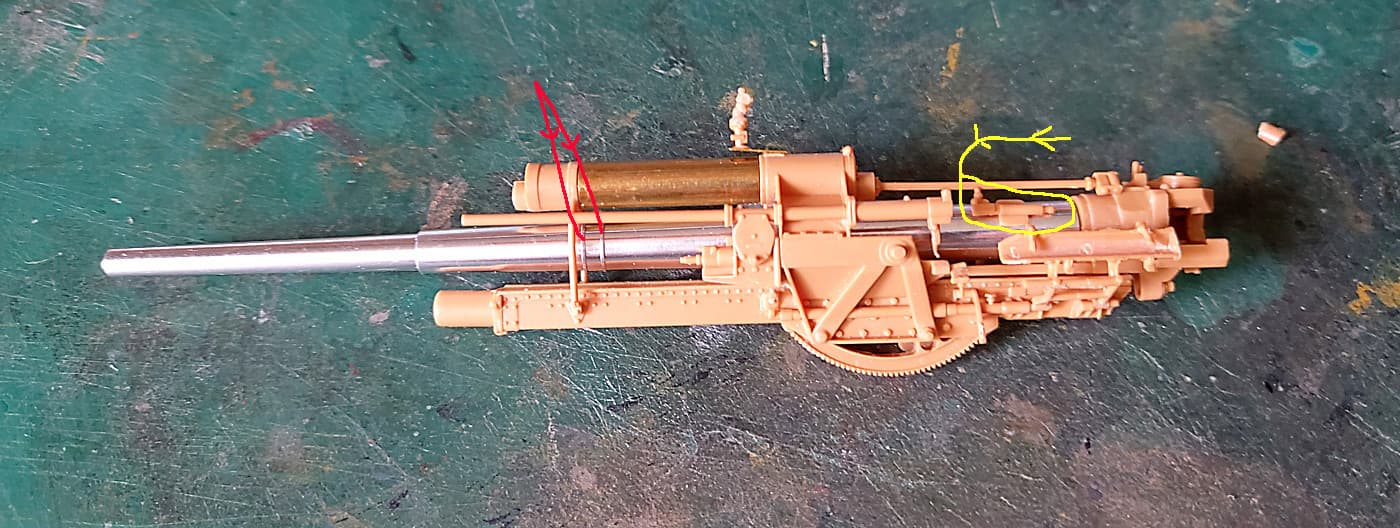
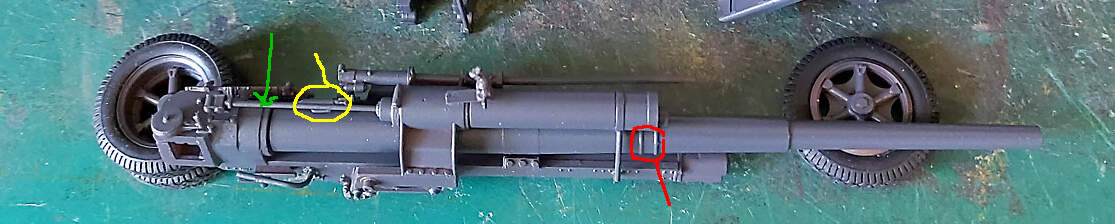
For those following along and thinking of building this kit. See yellow circle. Part A13. This part is superglued to the barrel. There are 2 locating holes. That’s ok. But when you fix the barrel make sure it is rotated in such away that the yellow circled part will move, along with the barrel, all the way forward. You may/will have to grind out some clearance. It’s not obvious until you are past fixing it without the use of the big hammer! 
The red arrows, my guess, are for the barrel travel support.
In the unpainted image my barrel still has to move about another 30% further forward. I’ll try and get an uptodate image.
Dry fitting it all together it looks way to front heavy. But what would I know!
BTW. The green arrow. That plastic rod is a PITA. No idea why. Just is. I did something wrong. I will replace it with a fine metal rod.
bruce
Ok. I’ve answered my own question. I think? The barrel can only be in the forward position while being transported. There’s no ‘recoil’ while being transported. Duh! Sometimes I wonder about my own logic. Read the instruction well ahead and multiple times. Then Google 344566533 images. Museum pieces have bits missing and are painted ‘funny’ colours. WW2 images are mostly white and black! So it’s hard to find just the right images. But they are out there. Just not that easy to find.
The kit calls for some brass painted items. I’m yet to see a single image with any brass depicted. So it’s a case of picking a happy medium and hoping that one of the 18000 88mm built comes close. It’s called imagination.
But even so it’s a great kit with all the detail right in your face. So the effort is worth it. “I hope”!!! 
Bruce
Yep, that is so very true. Even big museums like the Tank Museum in Bovington have that problem. And its even worse with German stuff because so much of it was damaged/destroyed during the war.
Museum pieces by themselves are not reliable references by themselves, but they are better than nothing.
Ken