The pe parts look great over the plastic parts. Congratulations on that much pe turning out looking so great.
Worth the effort, the truss work looks superb 
Hey Thomas
I was using the terms interchangeably,
but technically girders are the main horizontal supports in a structure, whereas truss refers to the lattice arrangement of members in a structure.
I believe the structure on the Langley is made up of column trusses (vertical) and girder trusses (horizontal) if that makes sense.
Marty
1 Like
The lattice work looks amazing, Thomas!
Thank goodness for Airbrushes, hey? 
Hey Thomas,
catching up again, basically what Russ said, but there is a lot more to this than the lattice work, I hope most of the bridge structure and the funnel trunking will be visible when the flight deck is on…
Great stuff.
Cheers
Si
@MINUX: Thank you for clearing this up to me Marty 
@Russelle: Indeed Russell, indeed. Without an airbrush it would be no fun especially when you need to prime the surfaces once before the actual painting 
1 Like
@RedDuster: Hey Simon, yes most of it will be good visible after all when you look from the side into the ship. That´s what made this before unknown ship so interesting to me 
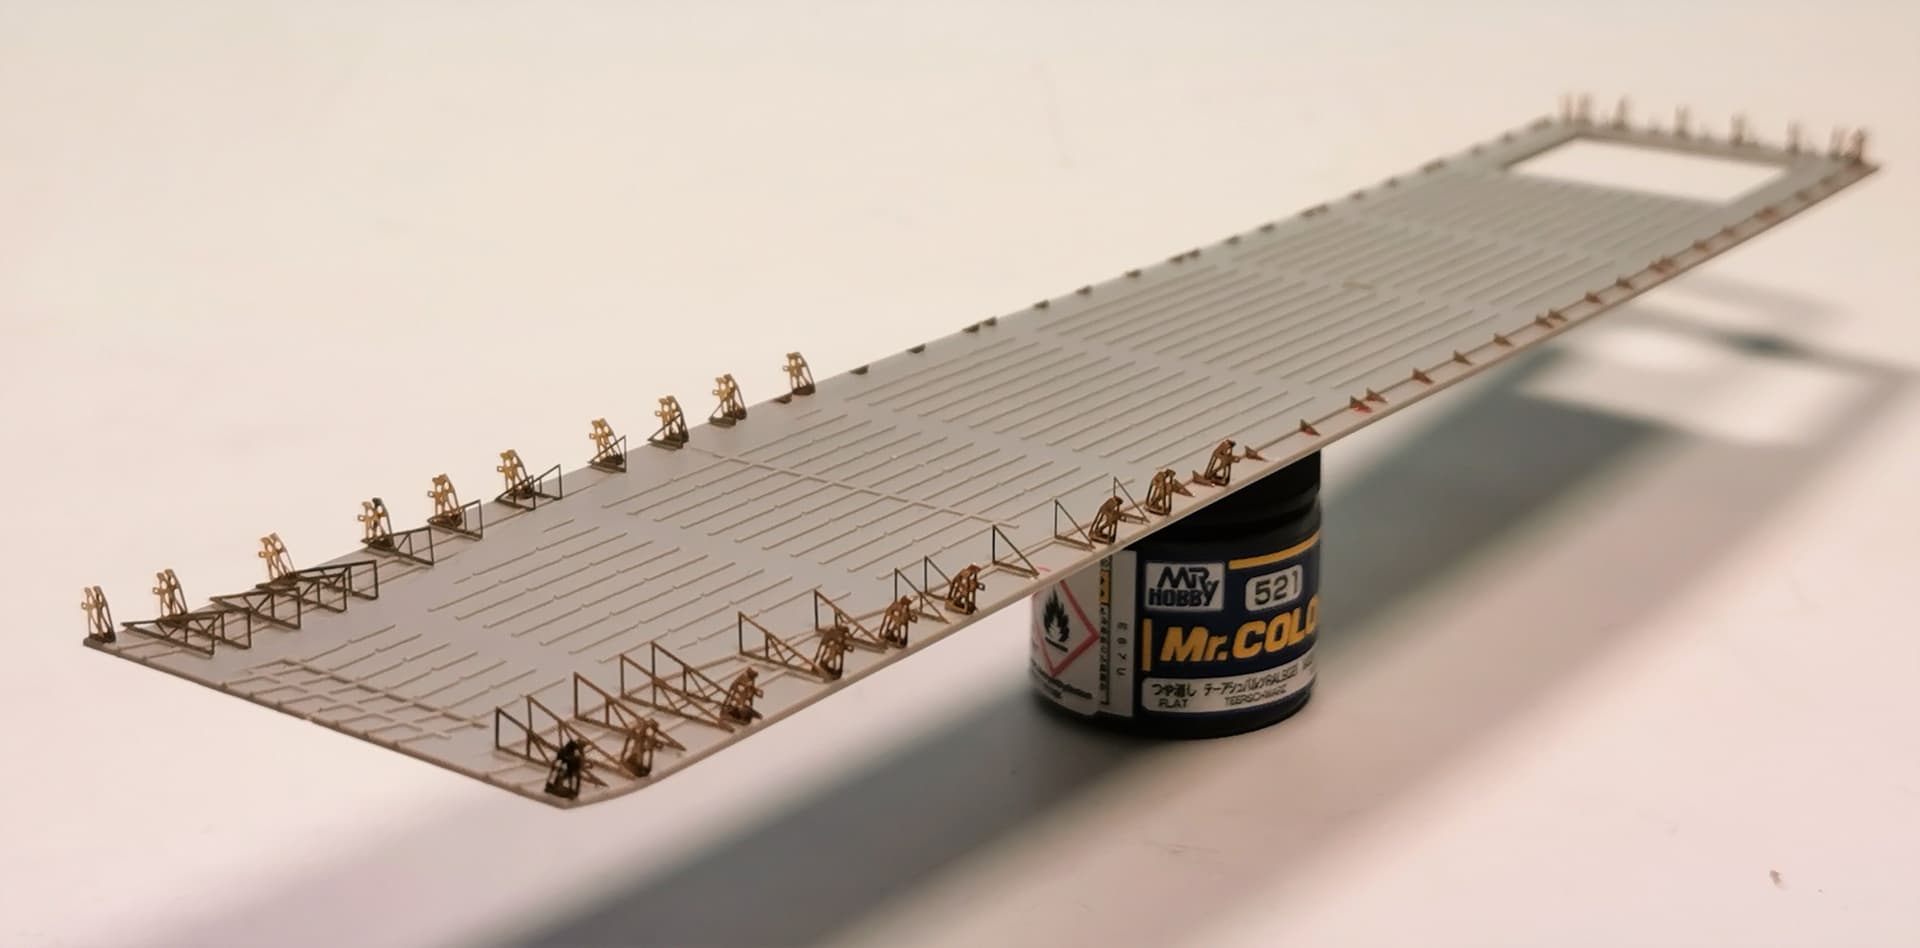
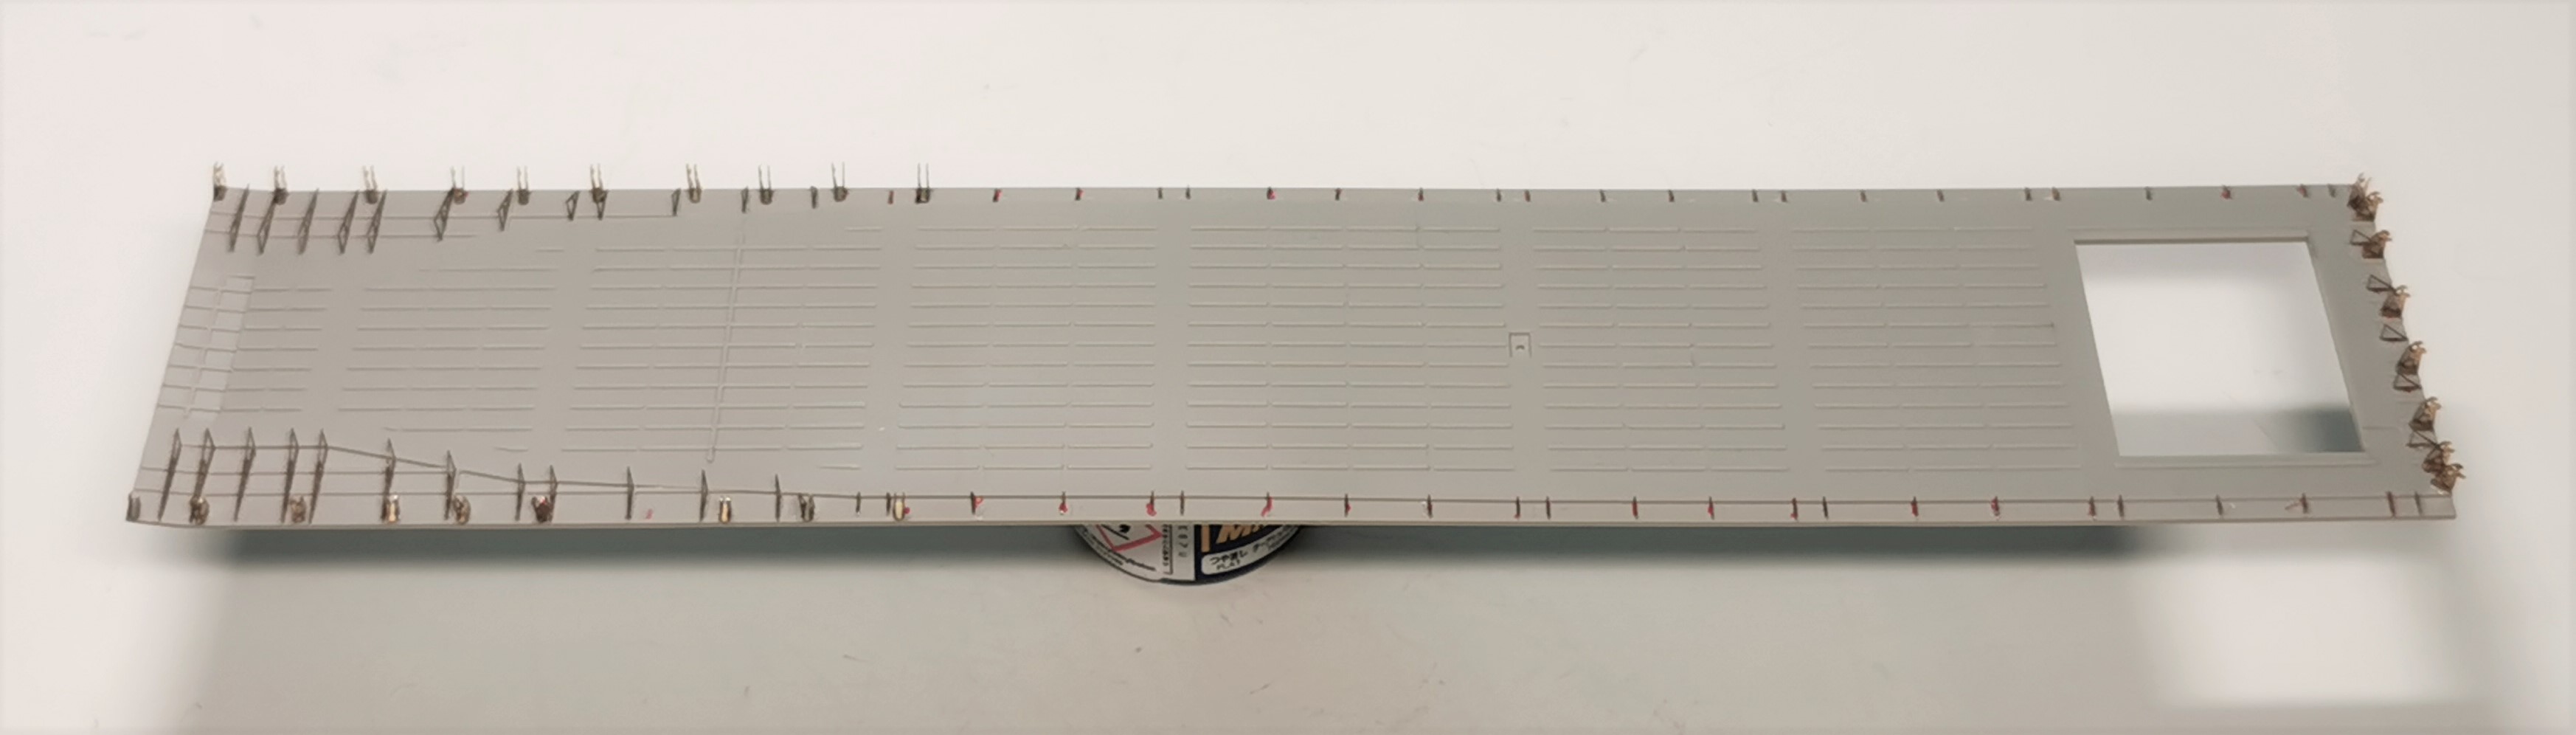
Some small progress last week. I added the etched gantry cranes to the lattice work and fixed some small adapters for the later security net supports.
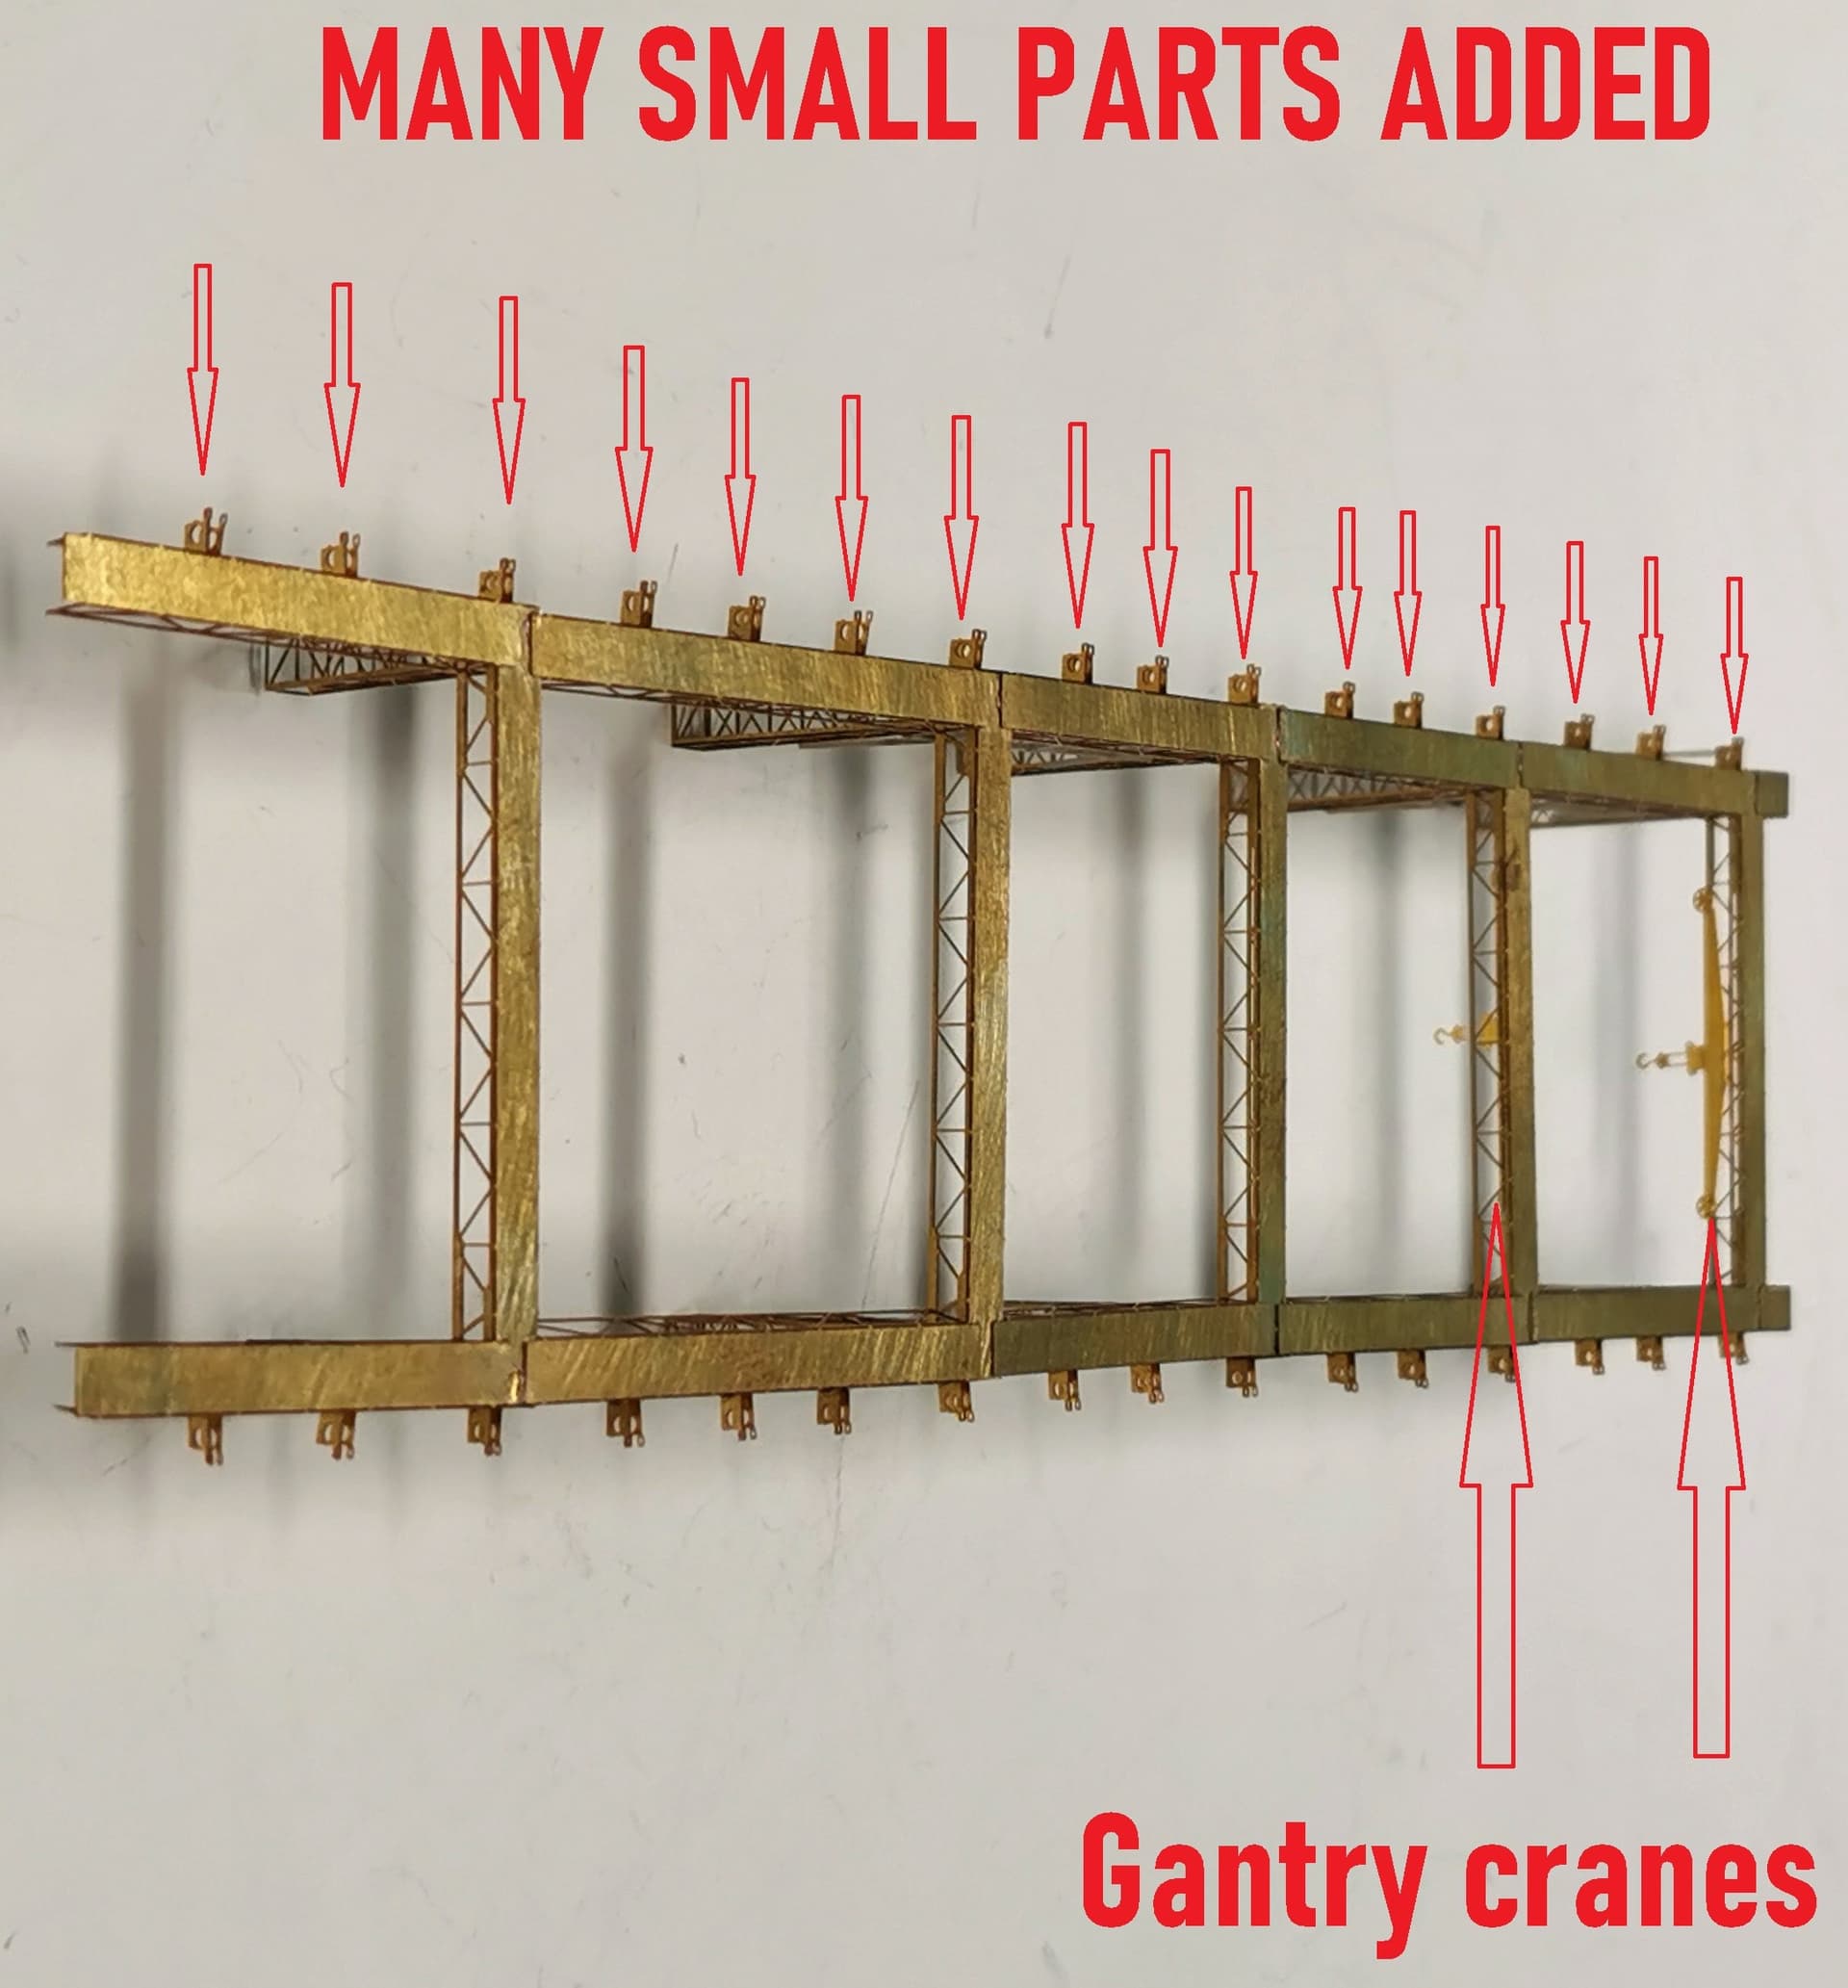
Then there were only the many small parts of the underside of the flight deck remaining, waiting for installation. EDUARD´s installation manual is not too clear here for some parts and you need to look closer before you just glue in some parts. I made markings with a red pen for some parts not to make any annoying mistakes here.

Now its time to decanting some color buckets 
11 Likes
Hi Thomas,
The etched structures look impressive, especially in place. I get what you mean, there is something fascinating about ships of odd design.
Cheers, Si
Ooo! Fragile!! 
1 Like
Great work on the photo-etch! It’s looking great.
1 Like
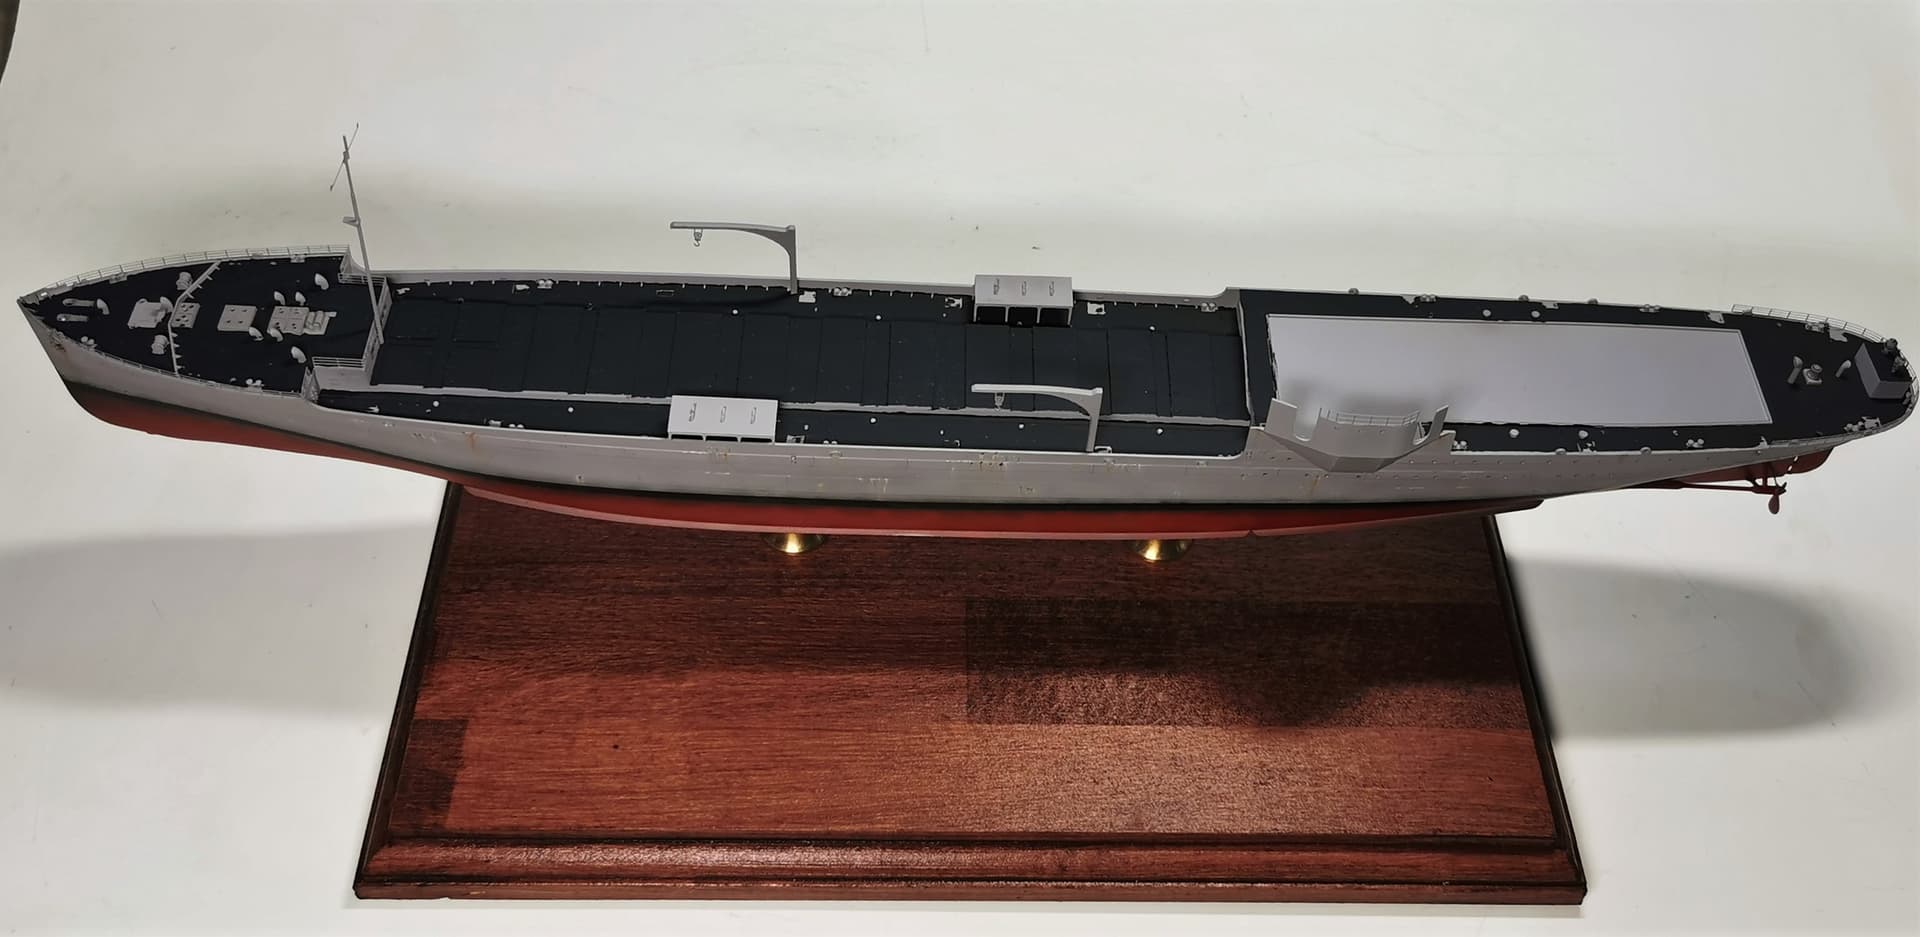
The paintjob started with the hull. I plan to finish the hull and fix it permanently to the socket plinth for a better work afterwards with the superstructures. Therefore I spraypainted everything with gunze Mr. Surfacer 1000 (first time used that color in the glass bottle for airbrush and it worked perfectly!), then Tamiya XF-19 Sky grey (its just a tad lighter than the basecoat…). Then I made the black waterline.
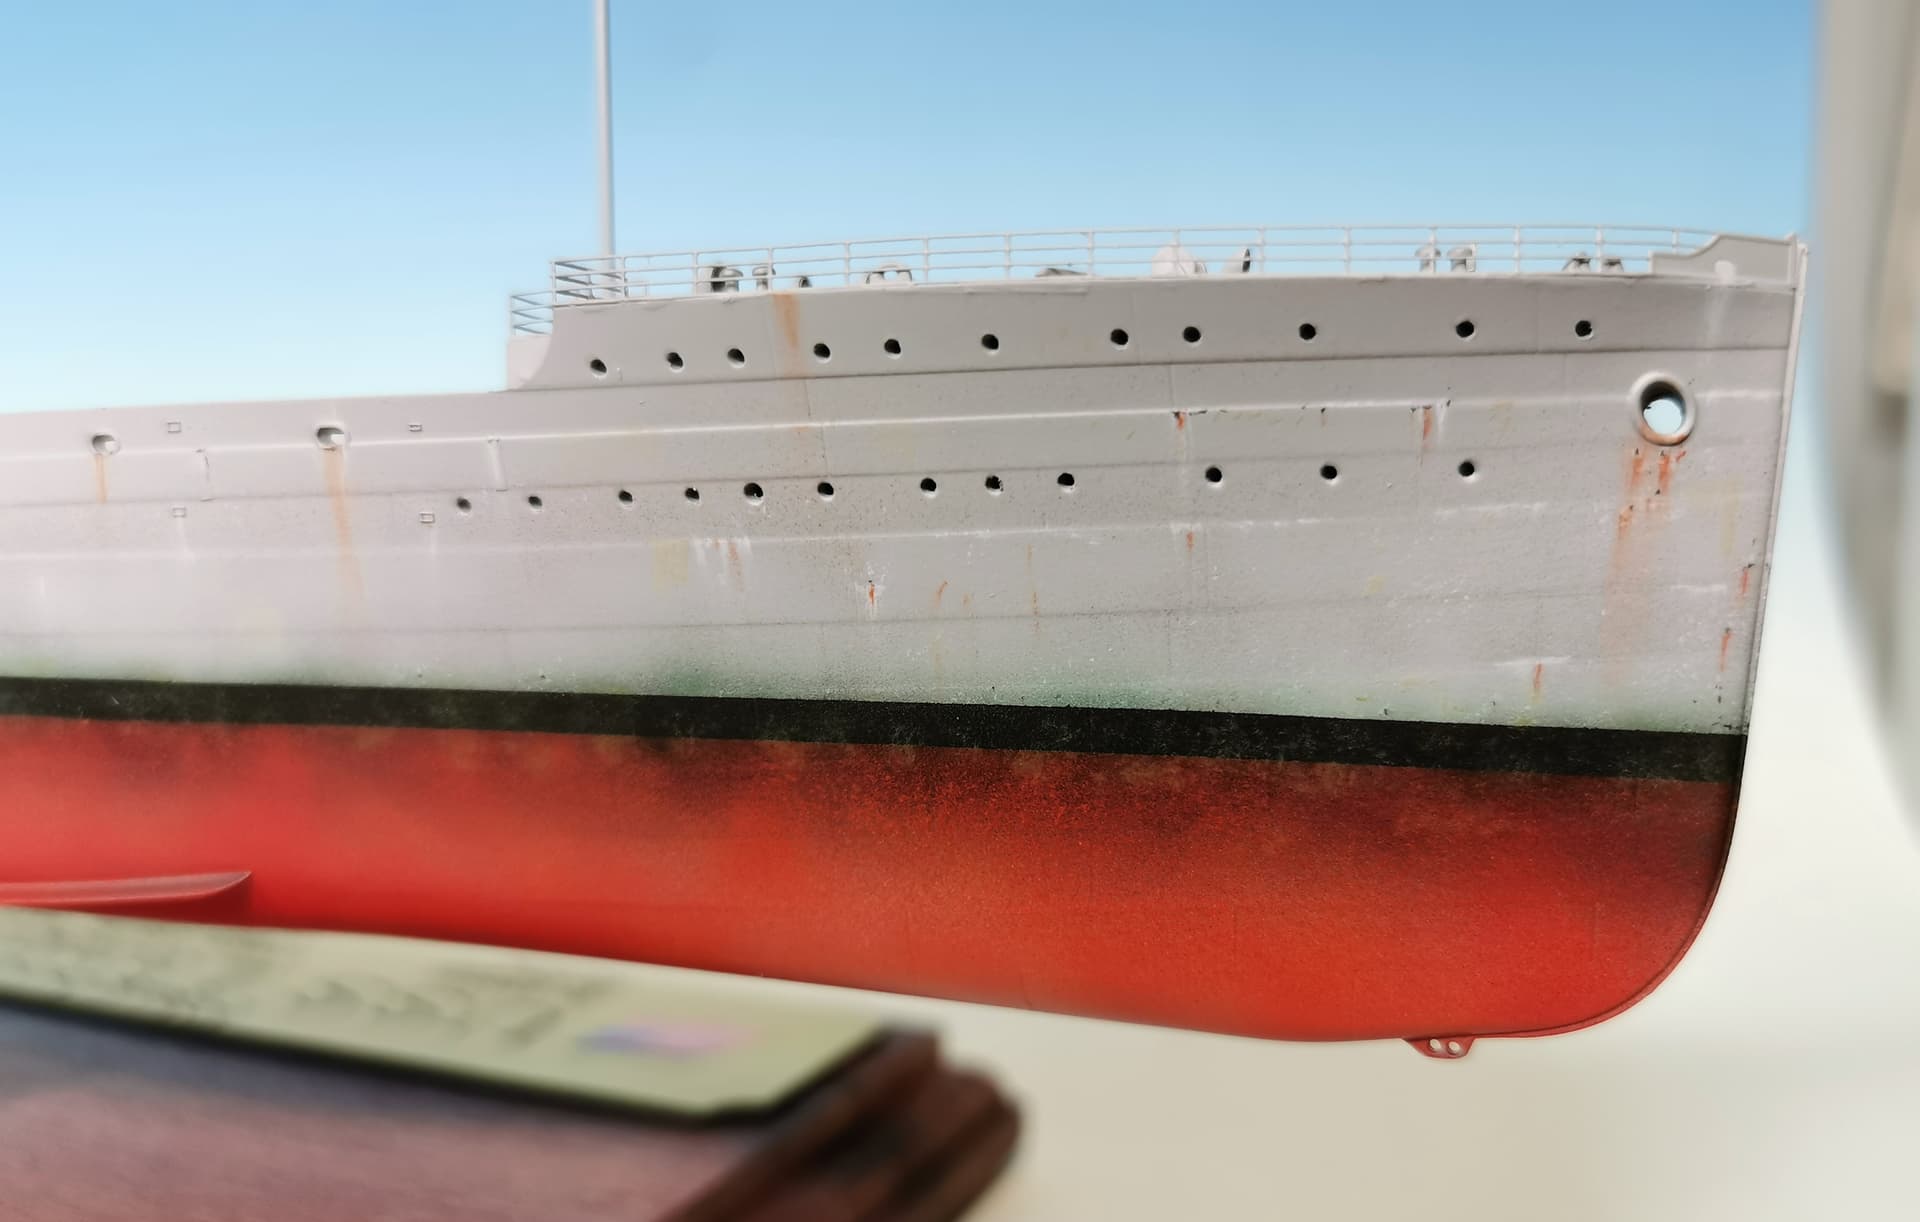
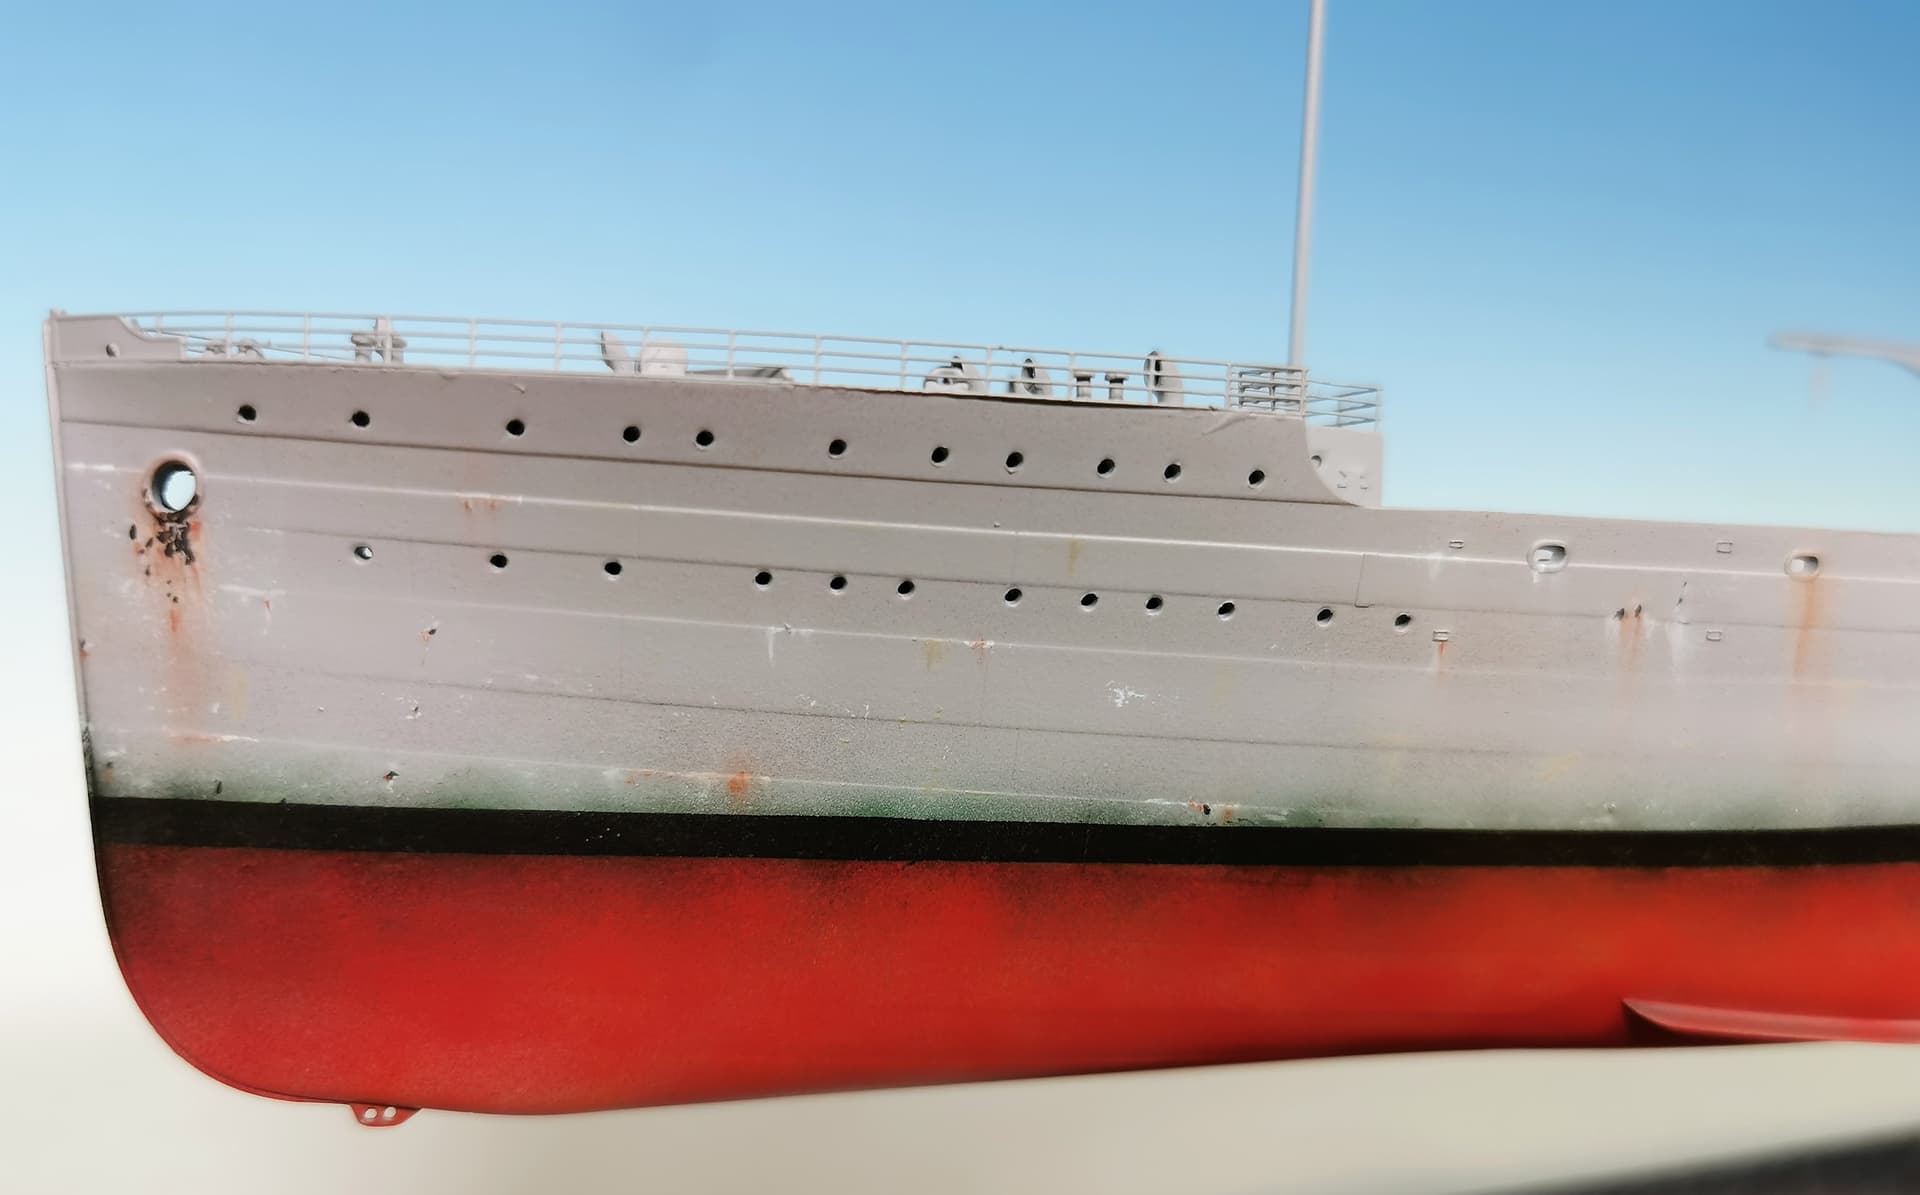
This time I tried to give the ship an used look as the ship was already many years old and converted two times. It was the first try for me not to create an “clean” looking hull. First I spraypainted loosely yellow color in unevenly circles and splotches unter the masked waterpass.

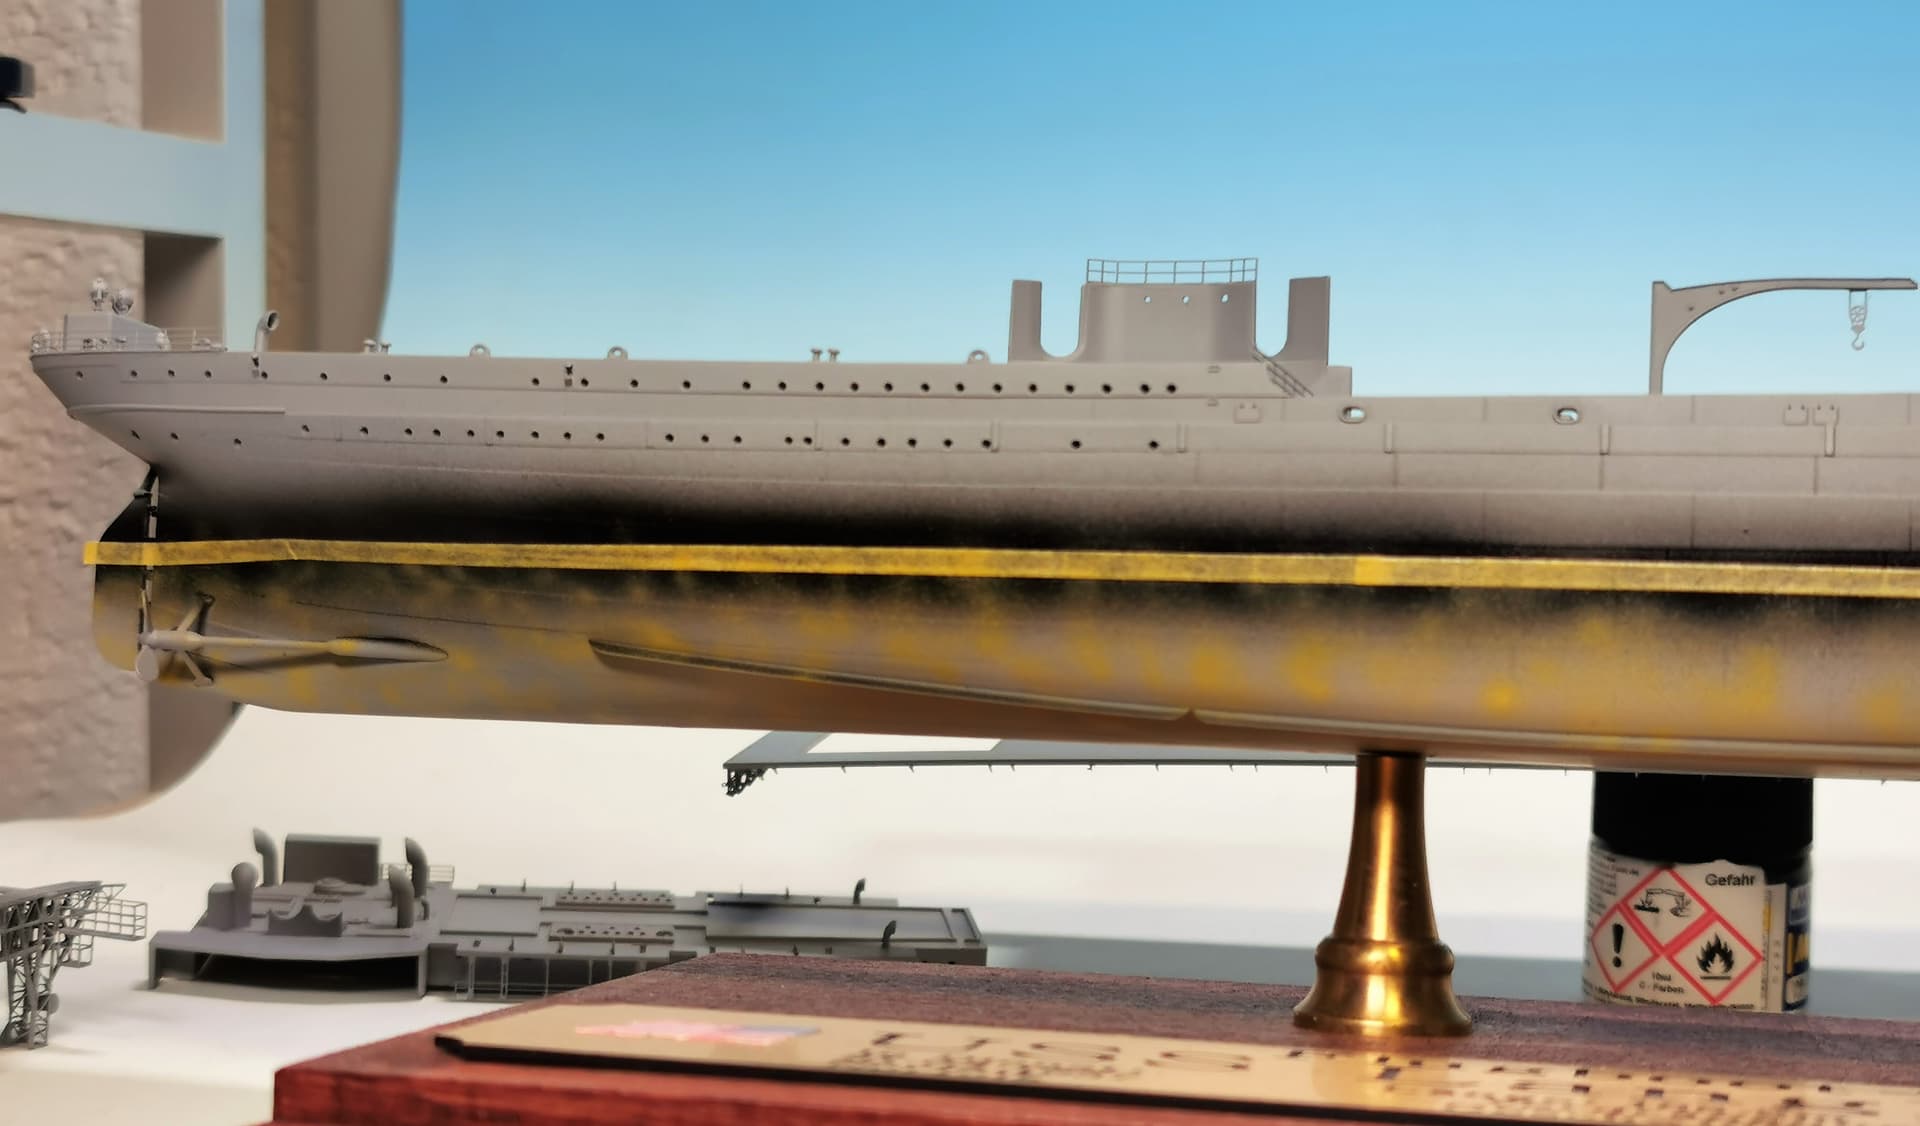
Then I sprayed Gunze H460 Red brown loosely over the prepared surface to get an uneven coat which looks somewhat worn. The pictures dont give the correct impressions as if you would see with the real eyes - the red color dont looks homogenuous which was intended:

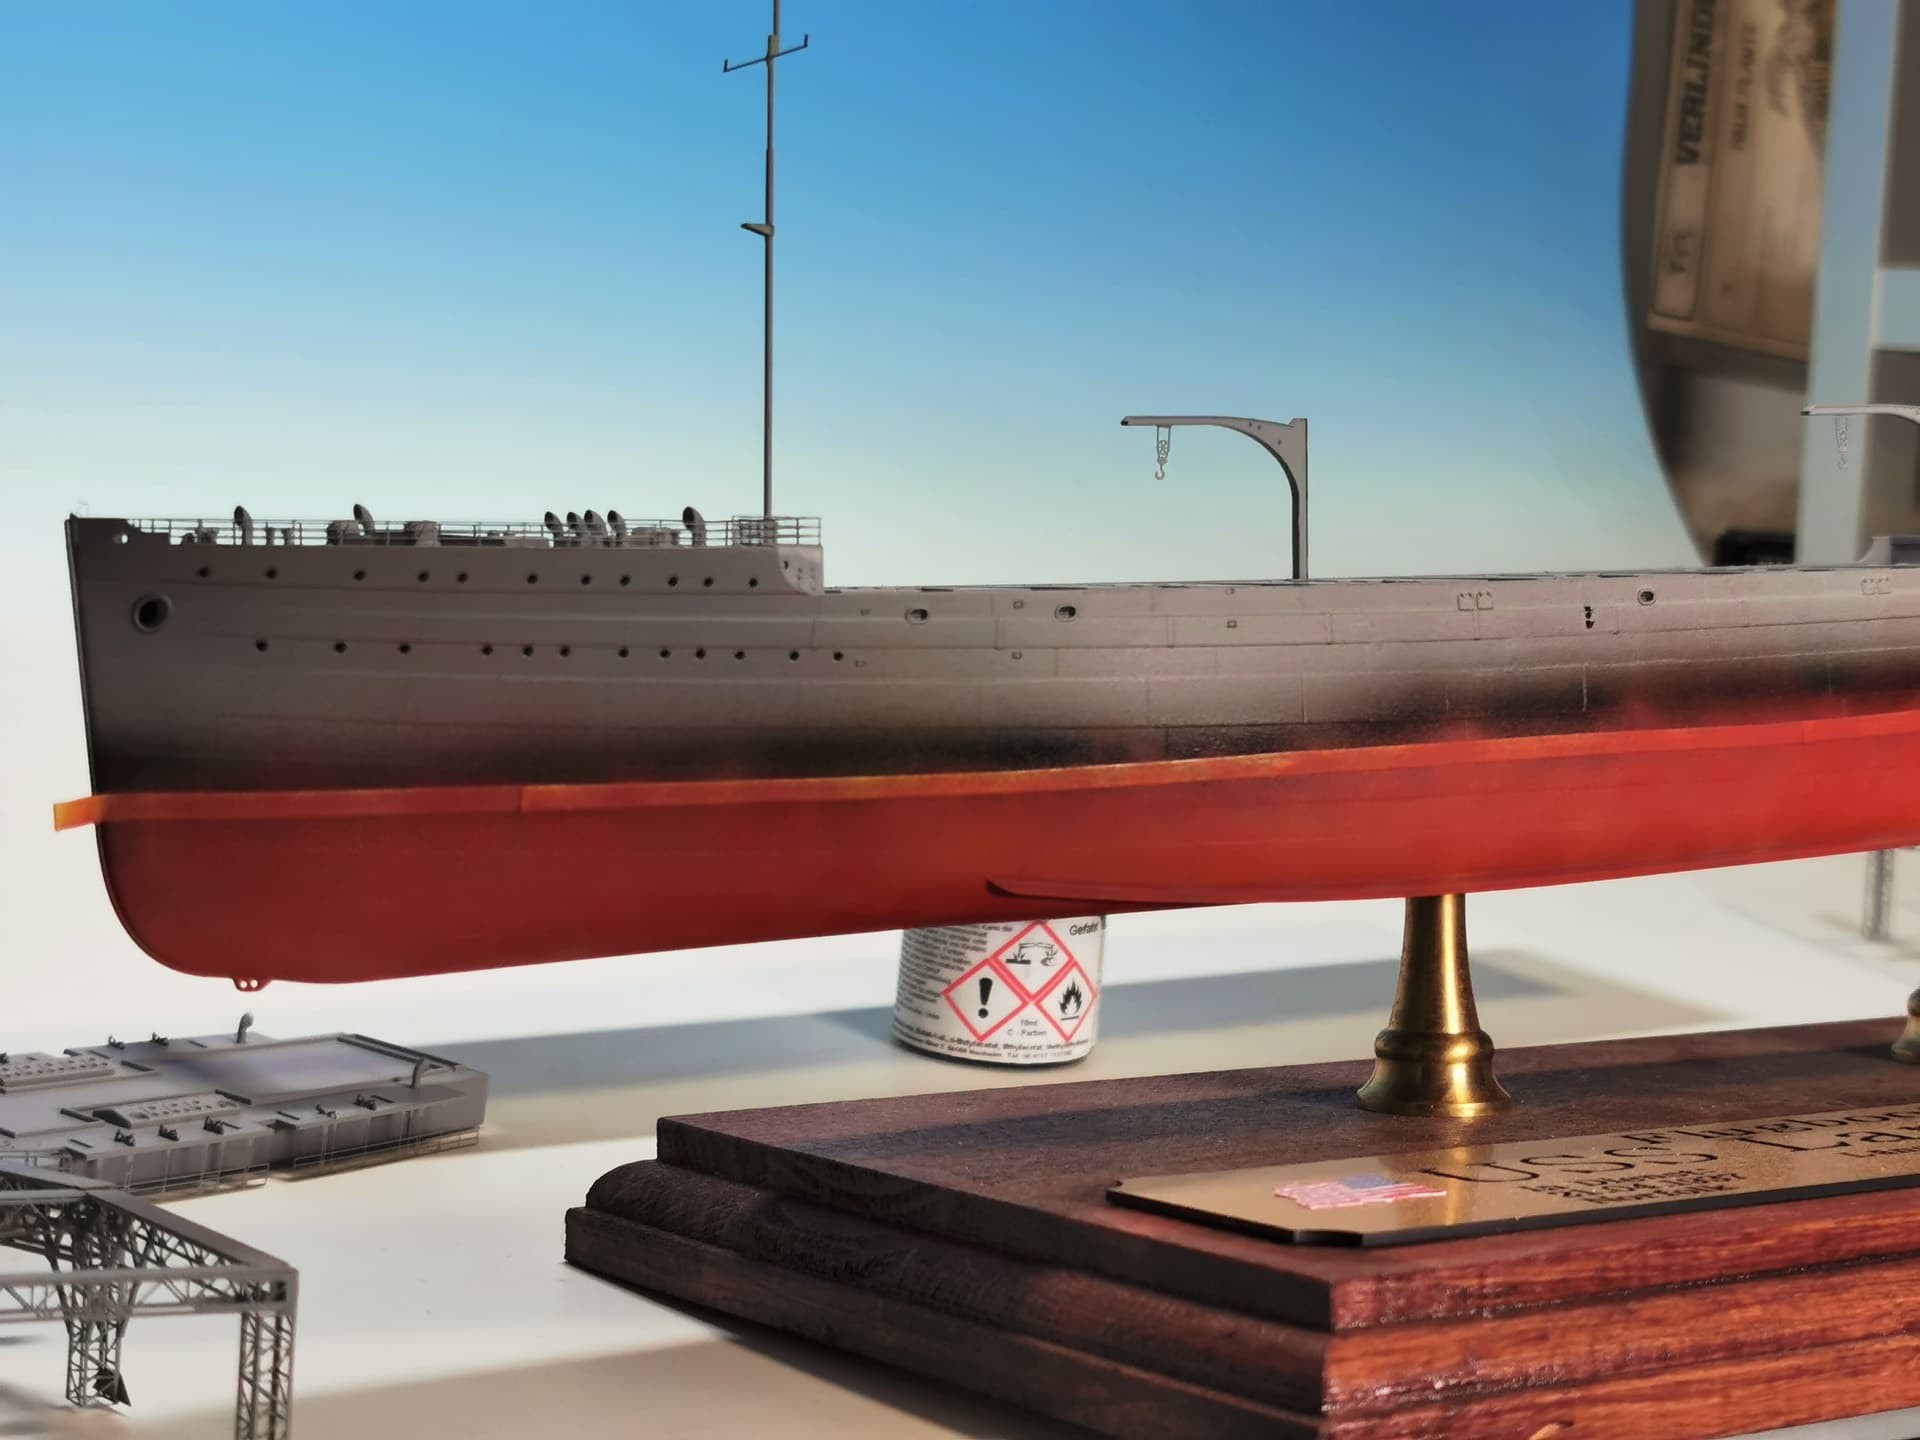
After this I made another highllights with lighten up Skygrey again. Then some smaller imperfections and color chippings, fading and rust stains with Vallejos and Oilcolors. After this the surfaces got sealed with Mr. Color Matt primer. Quite satisfied until now 
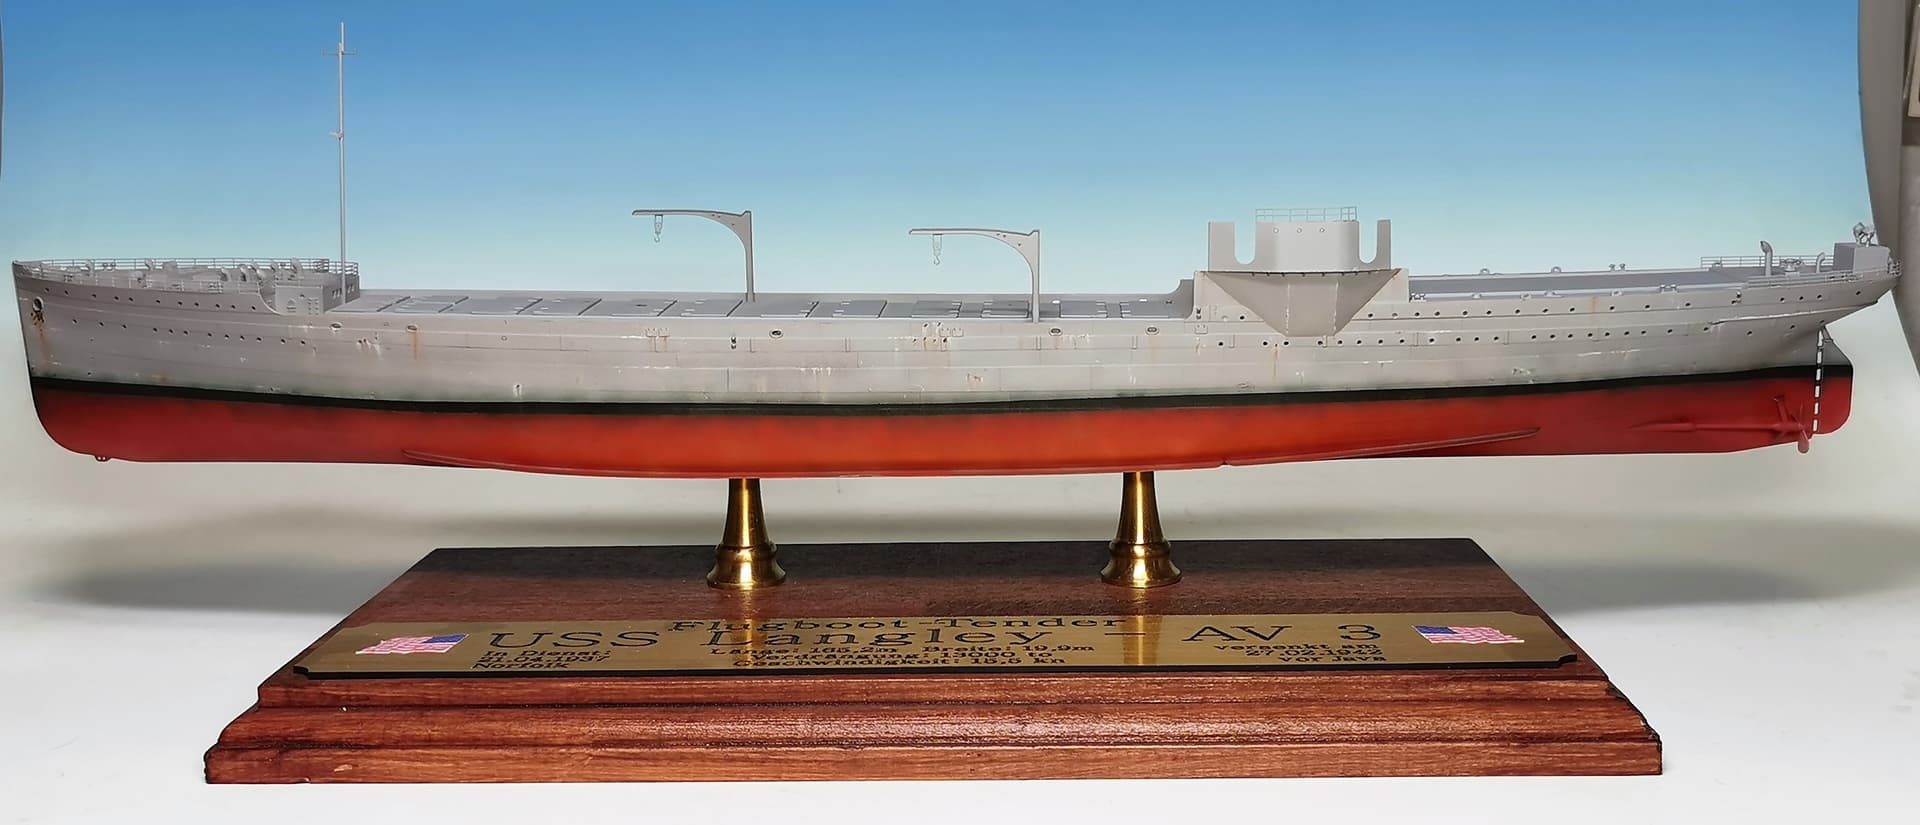


Glueing the ship onto the socket plinth and painting the dark grey deck surfaces follows now 

10 Likes
Gorgeous, clean, and professional work Thomas!
(Yes, I’m describing the chipping and rust streaks as clean. I’ve often seen rust effects being overdone to the point where the whole composition looks a bit messy and unrealistic, but what you have achieved here looks excellent. I’m taking notes.)
Nice of Trumpeter to included molded plating detail on the hull. It sure pops under paint
Marty
2 Likes
Thank you Marty for the good words, I`m glad you like my efforts. You can ruin a great build with the paintjob. Thats why I am always careful at the paint stage
1 Like
Very Nice paint job Thomas,
The subtlety of the weathering is just right.
Cheers
Si
Thank you Si, I am glad you like it
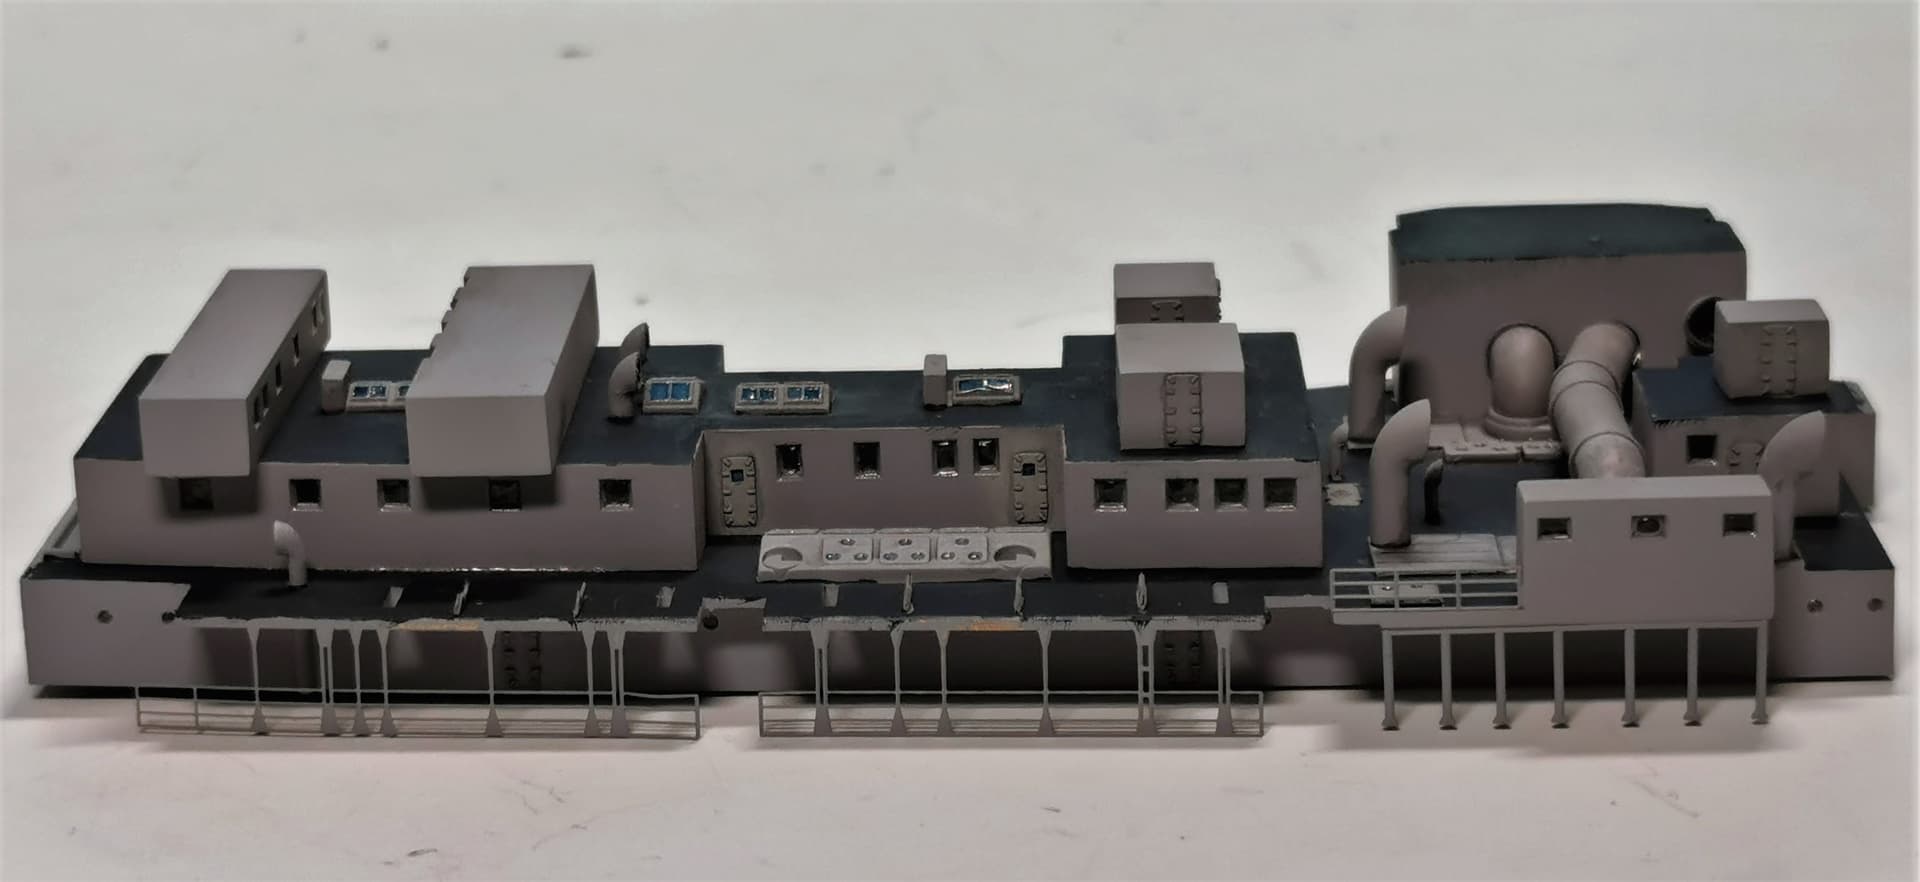
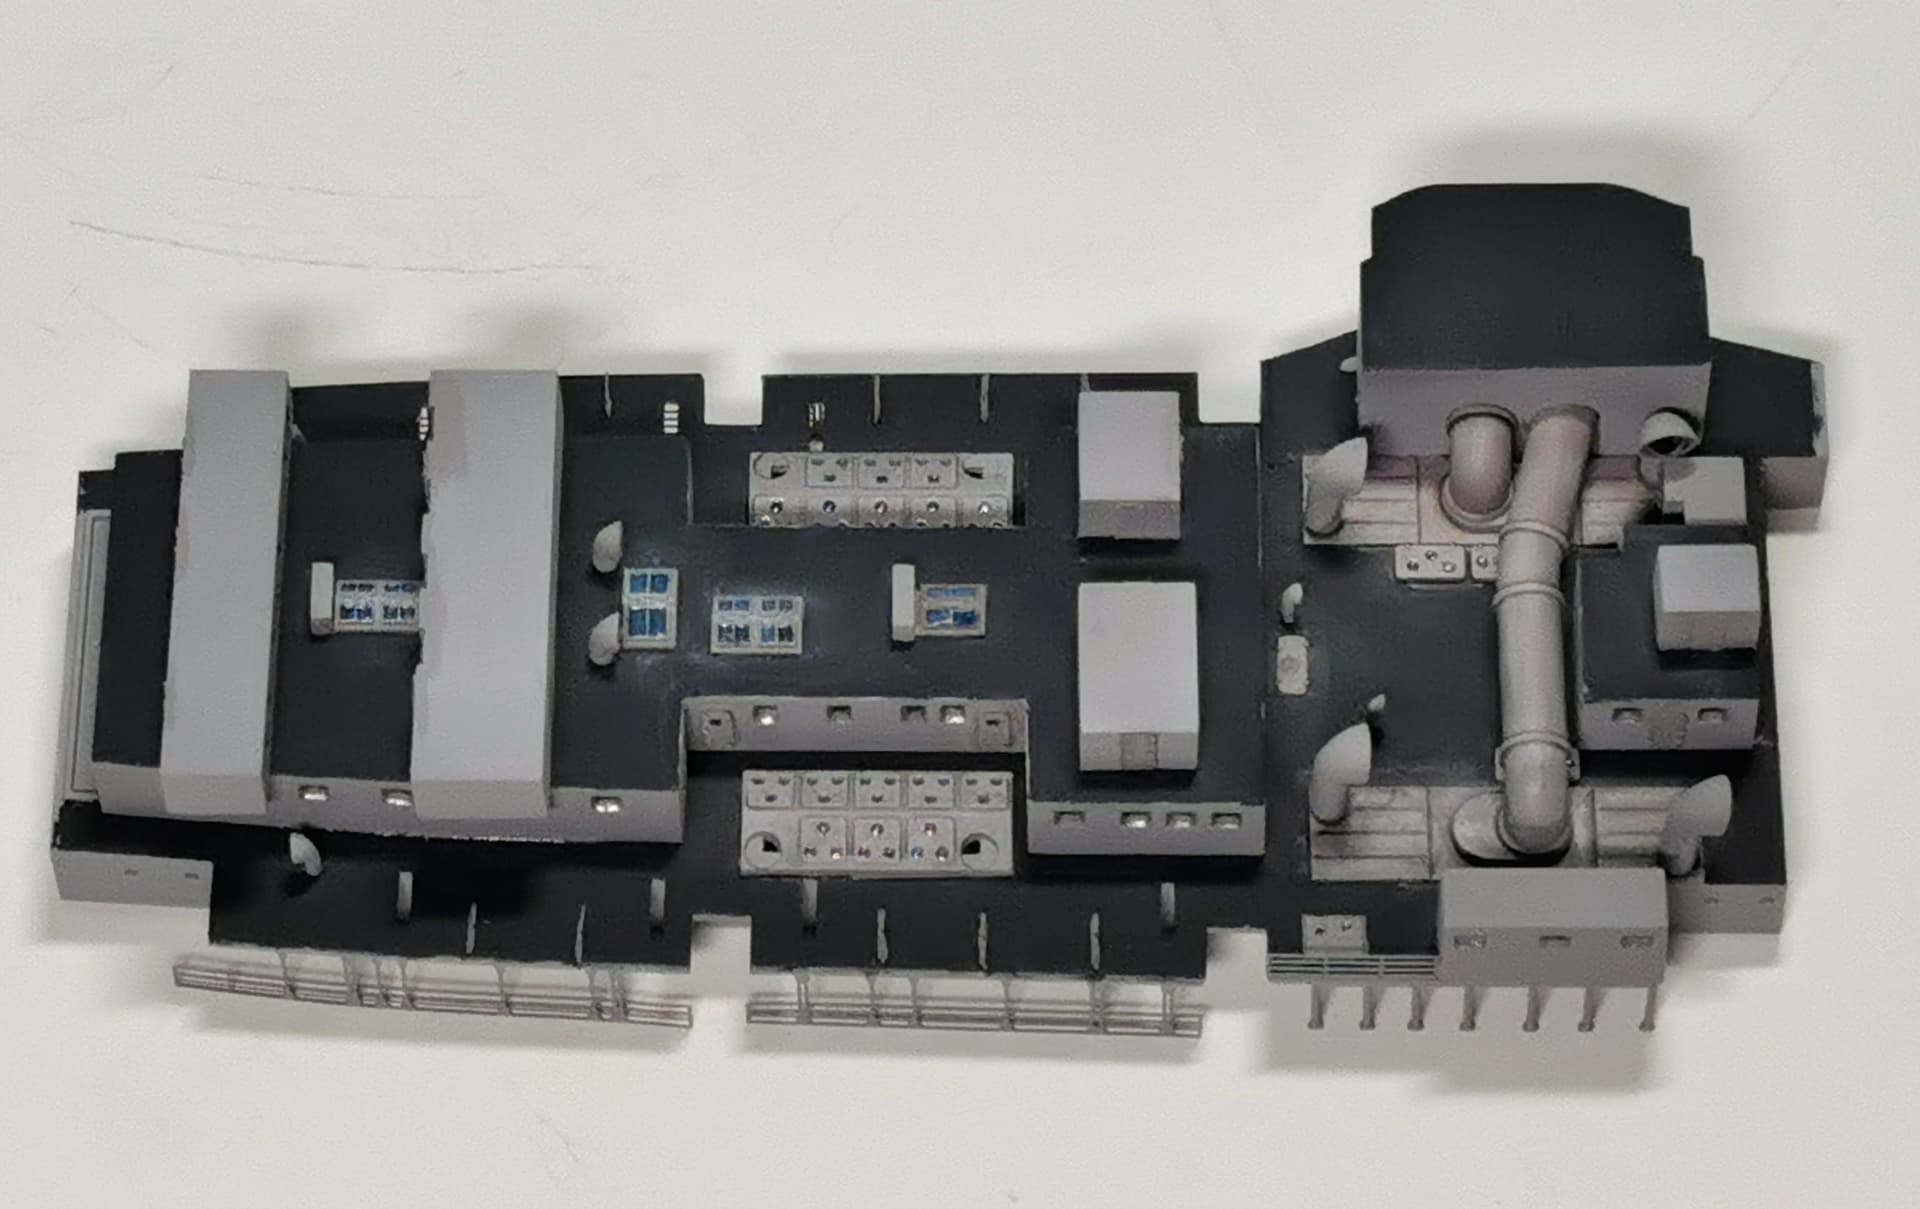
Some more pictures of my work at the Langley during the last week and today:
I painted the upper decks in Vallejo 70867 Dark blue grey. Good color match and easy to apply with the brush. Some small spots need to get worked over but overall its good 
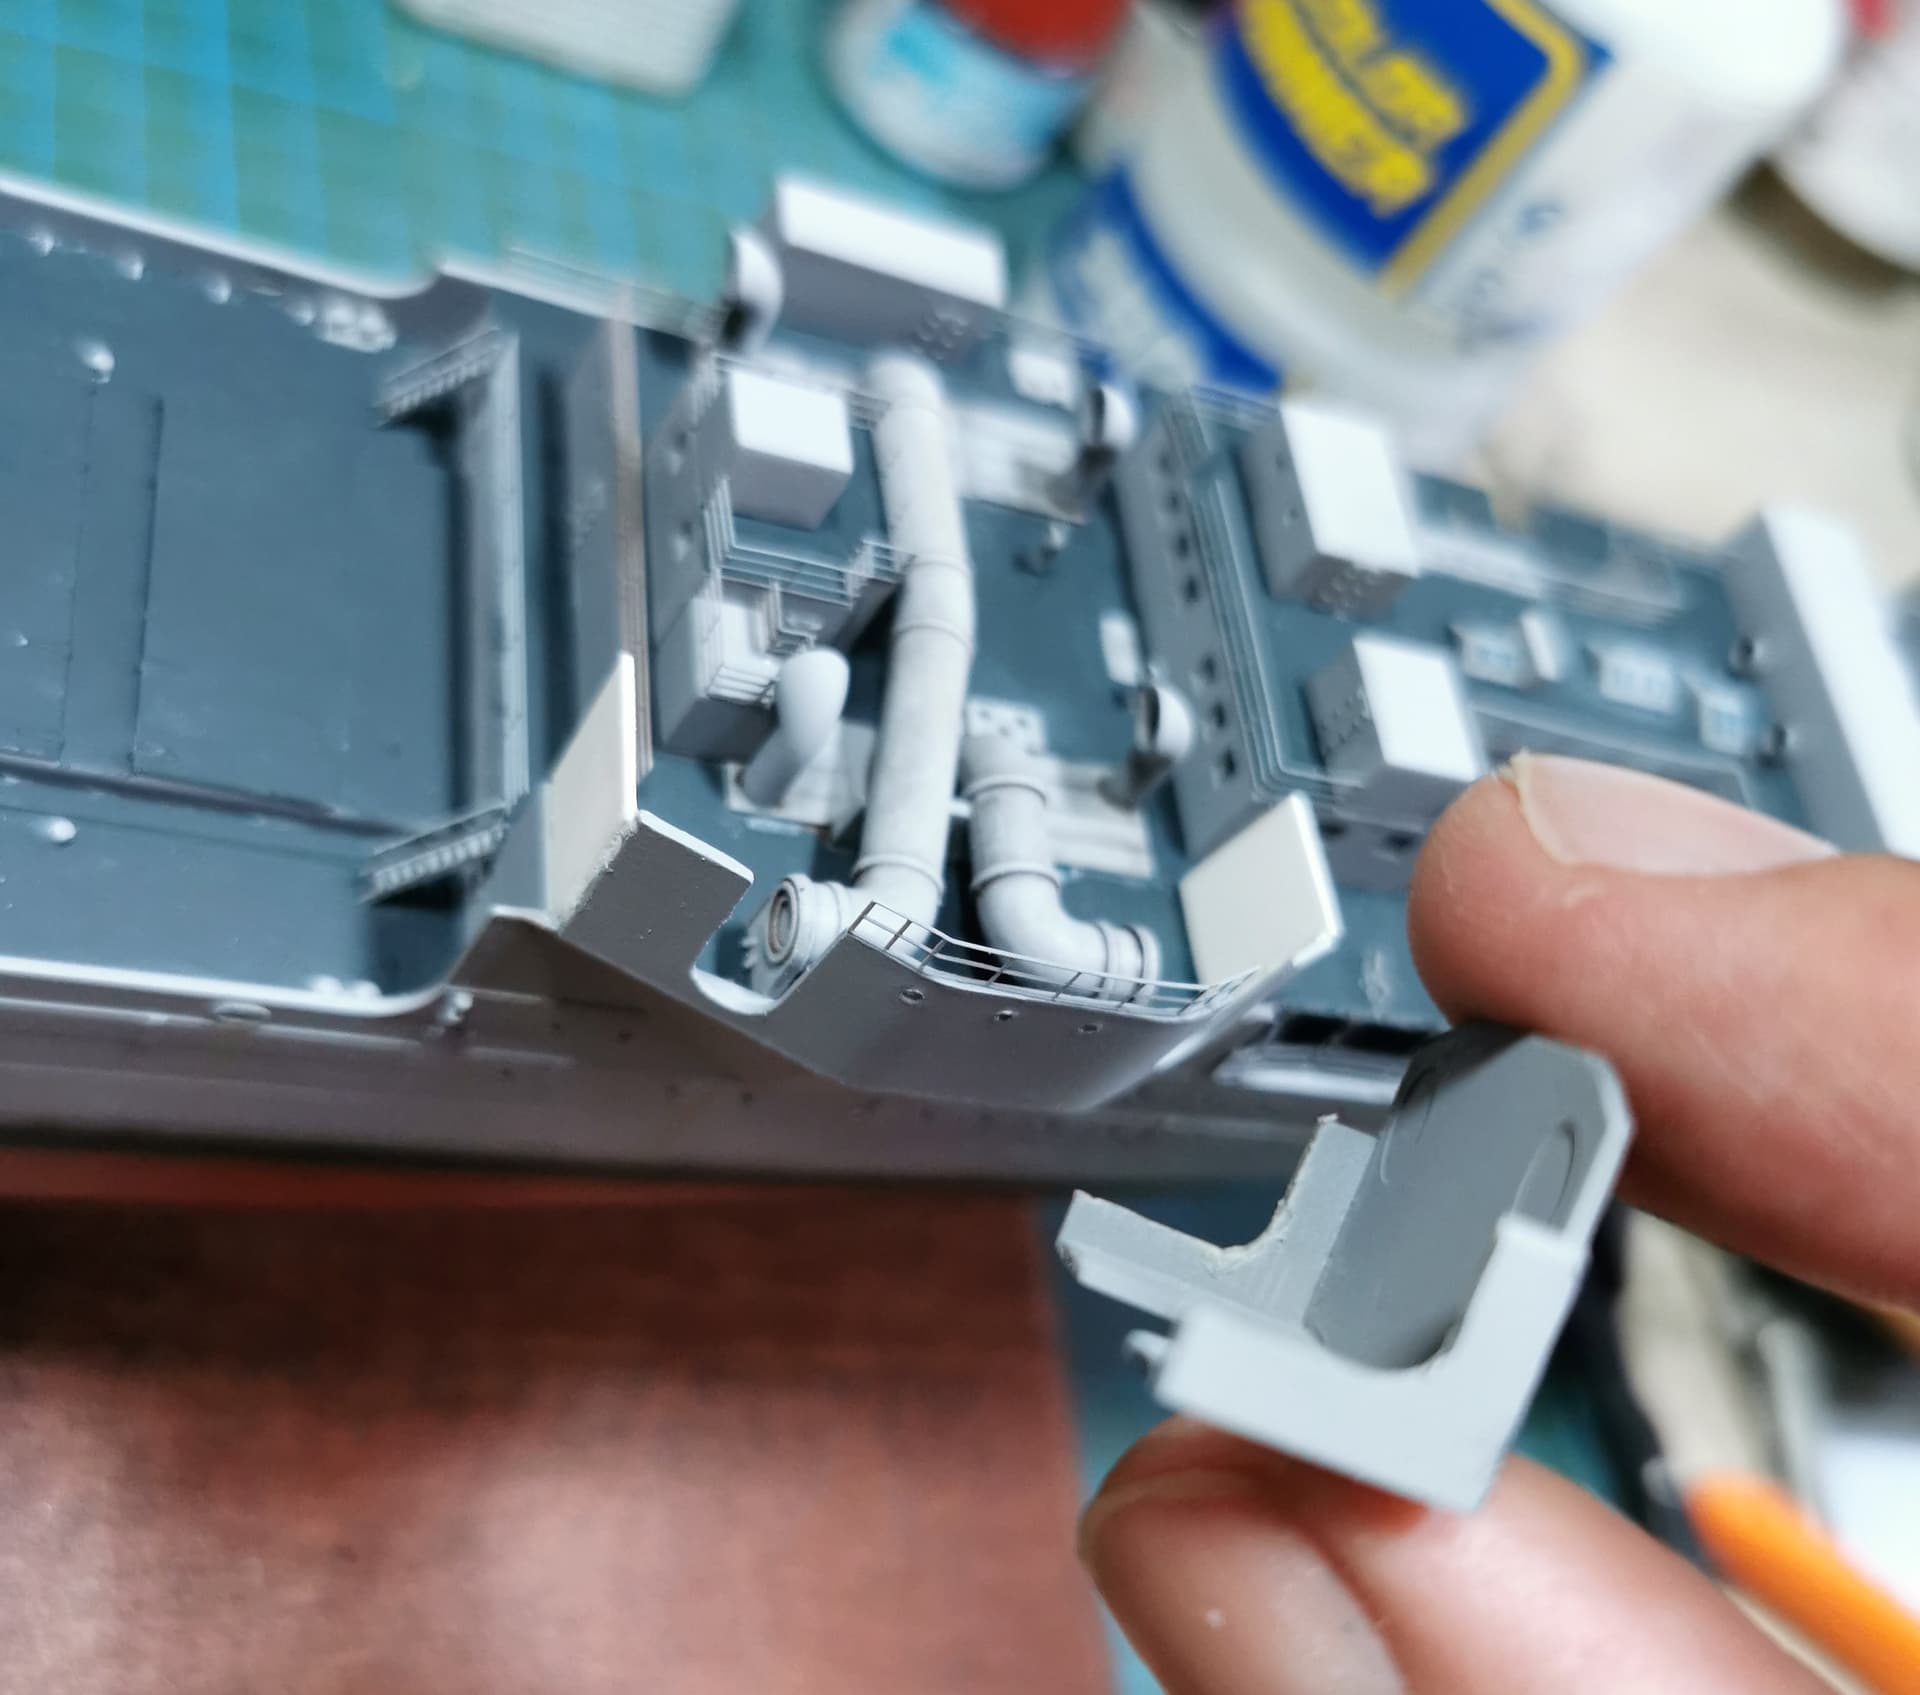
The aft superstructure compartments floor were also done. Careful work is necessary here. I also started to “install” the windows with Kristal Klear:
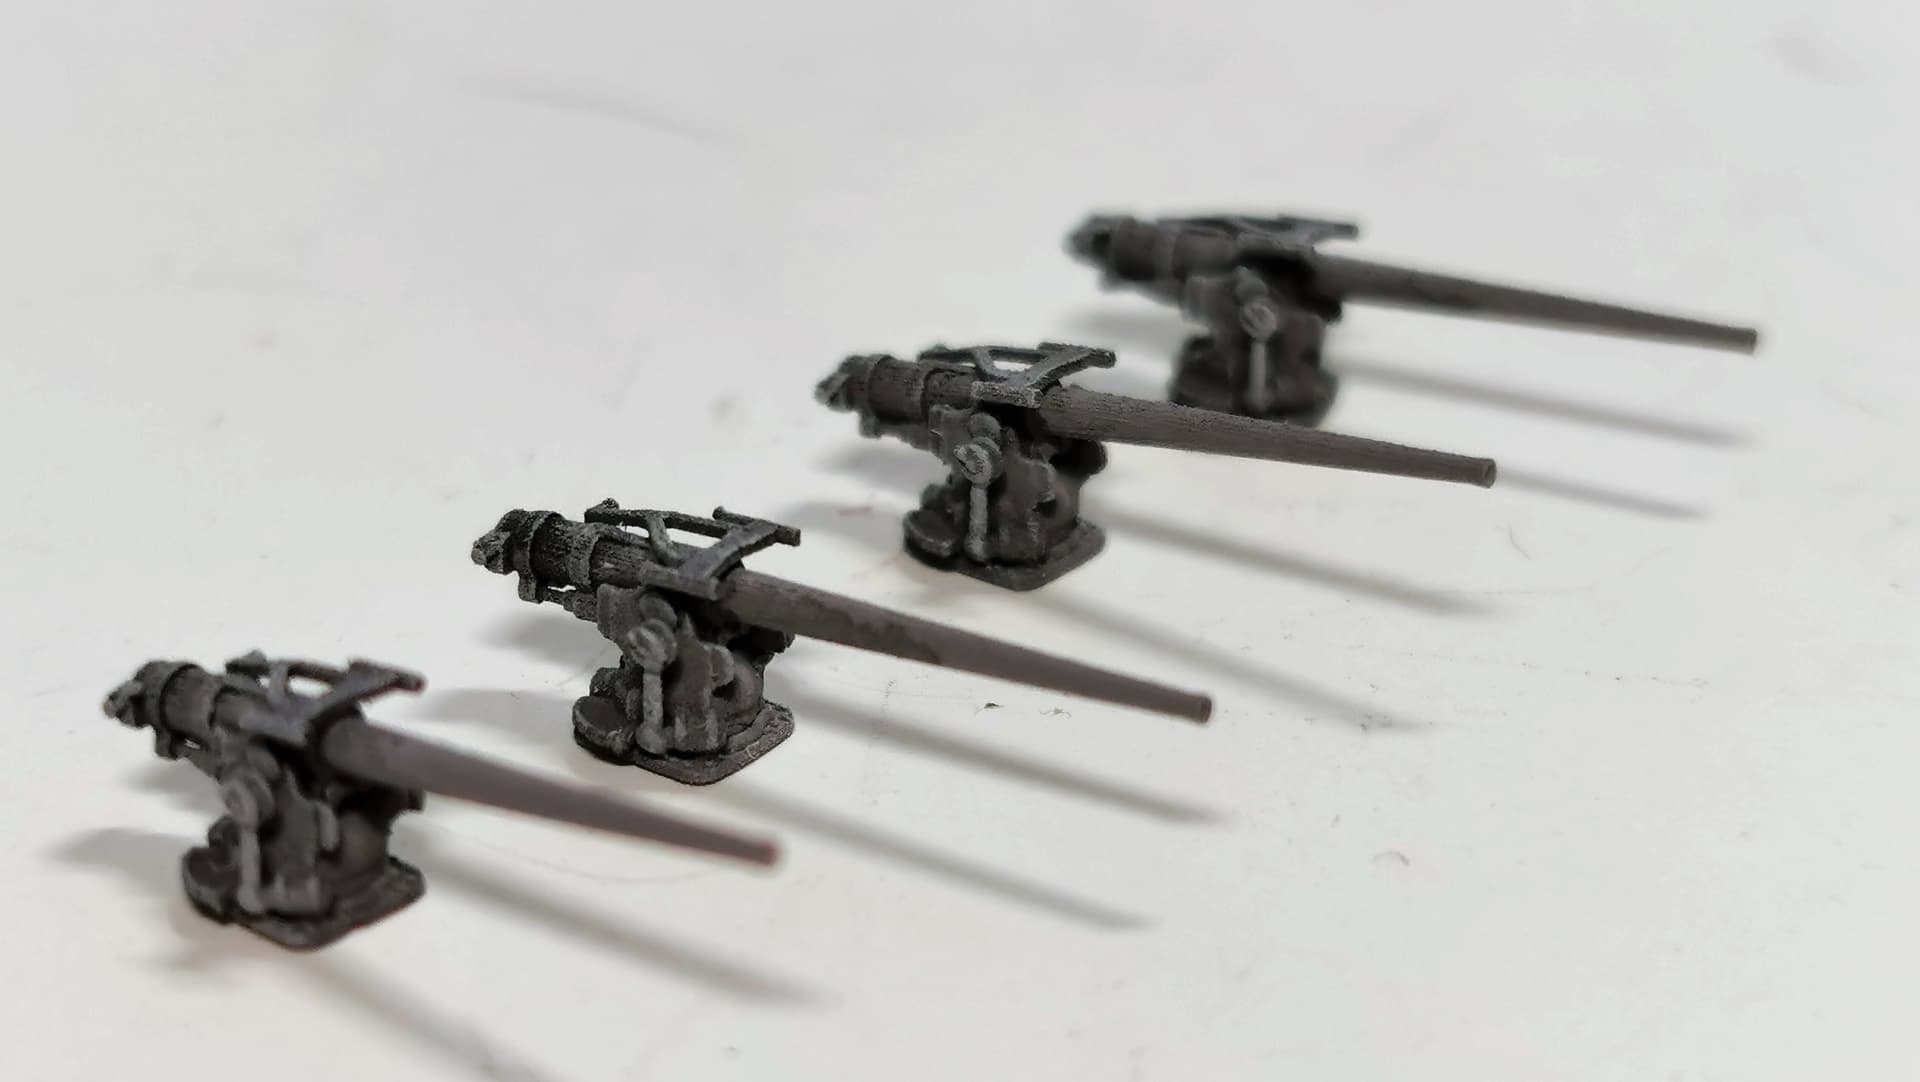
Then I drybrushed the lonely four deck guns from Black Cat Models with white oils to bring out some details
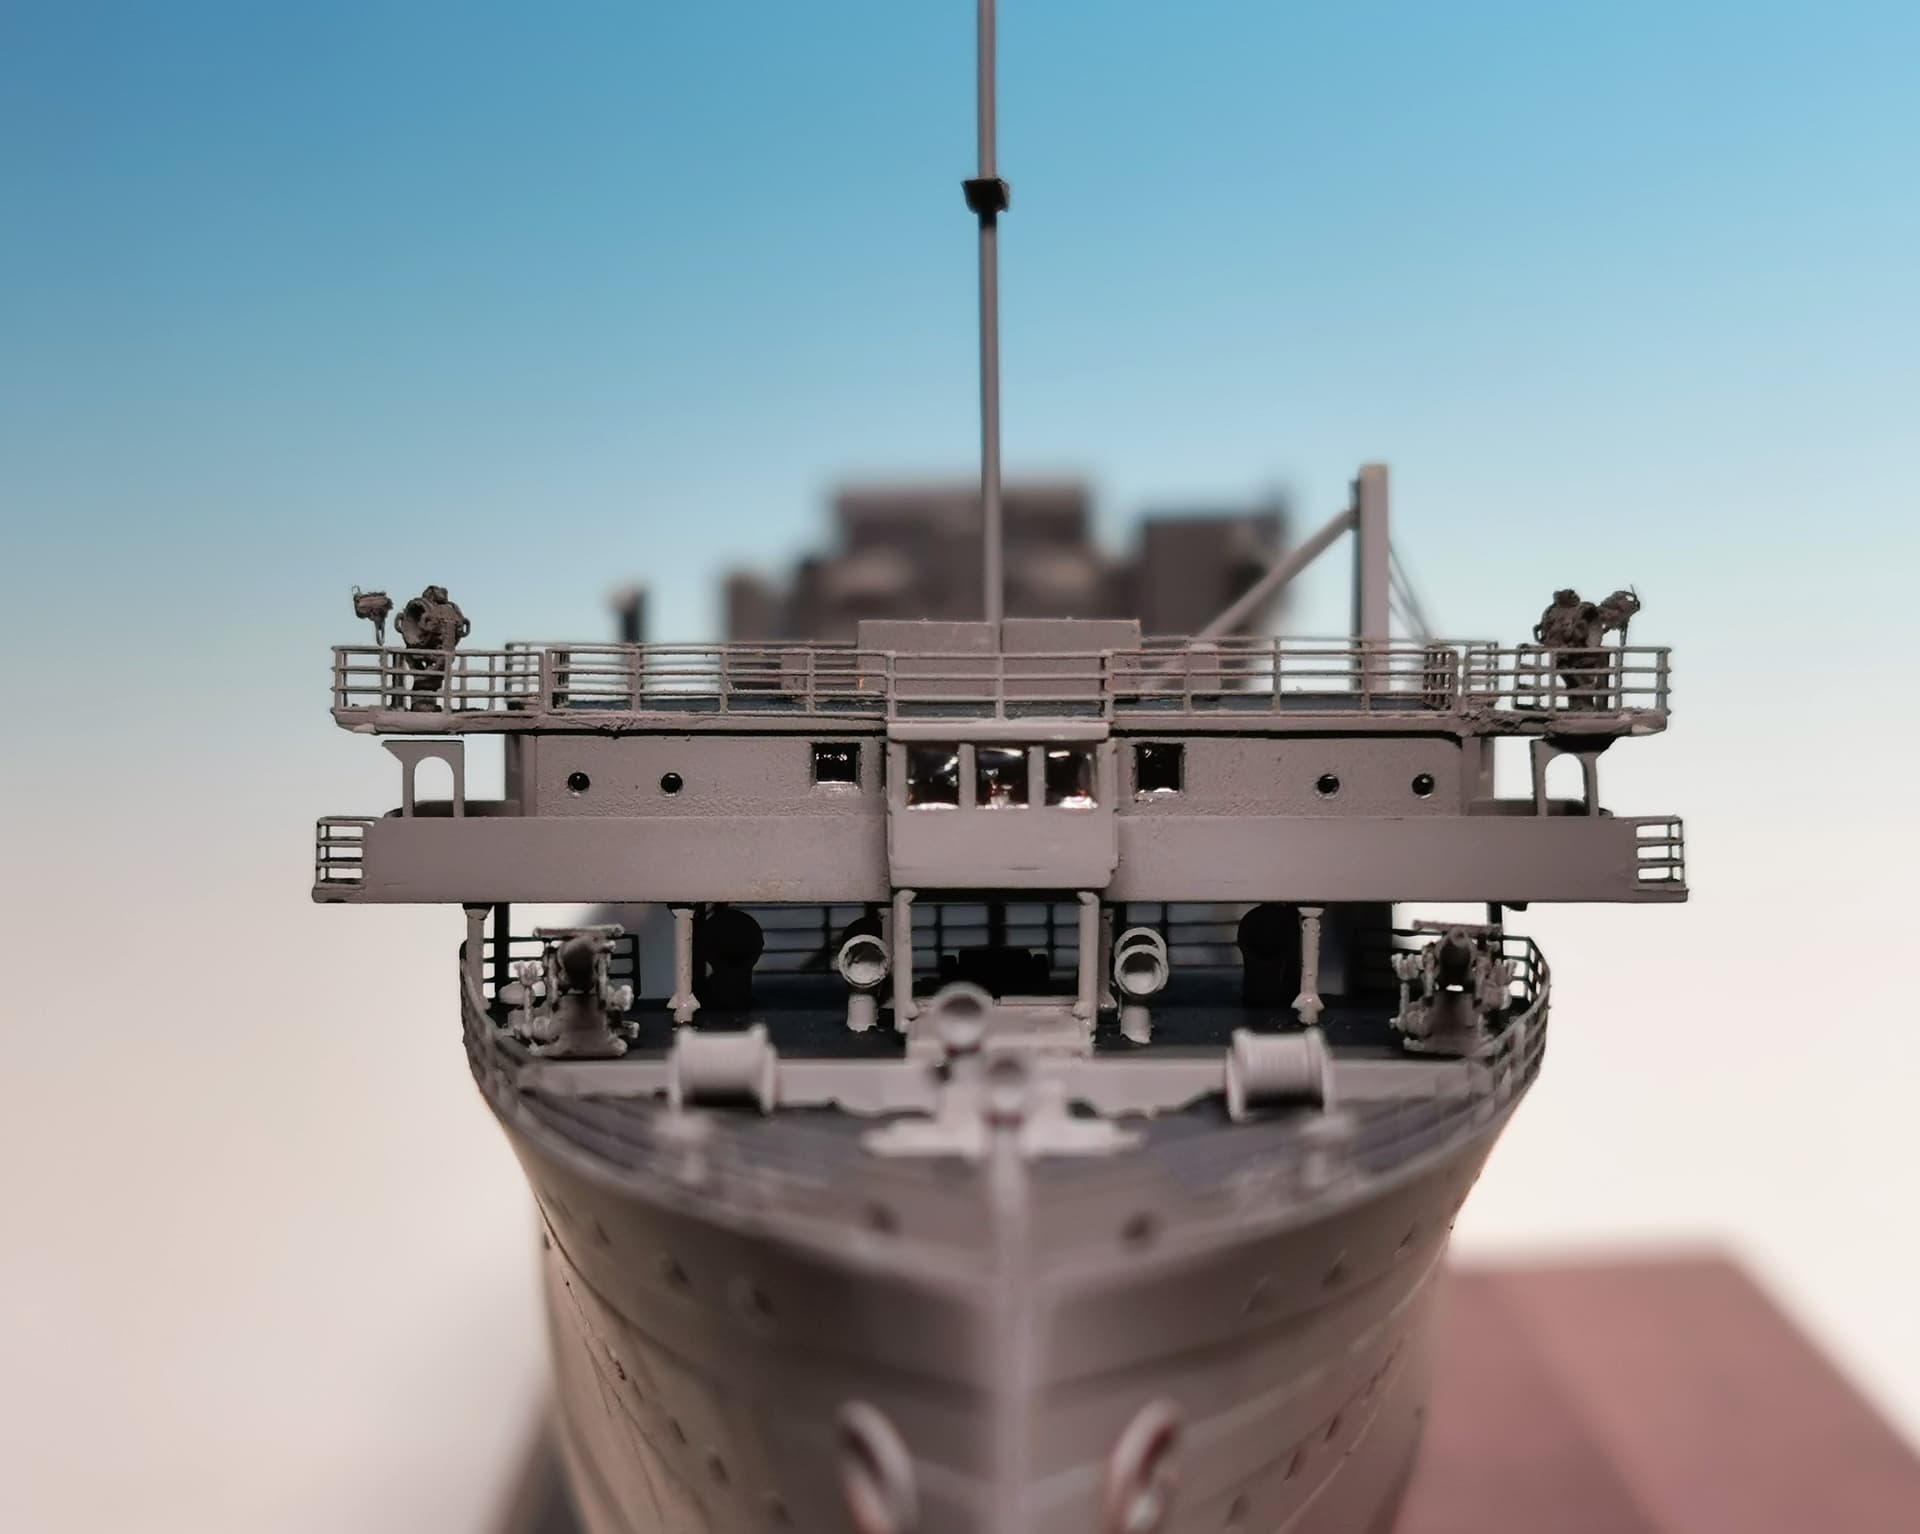
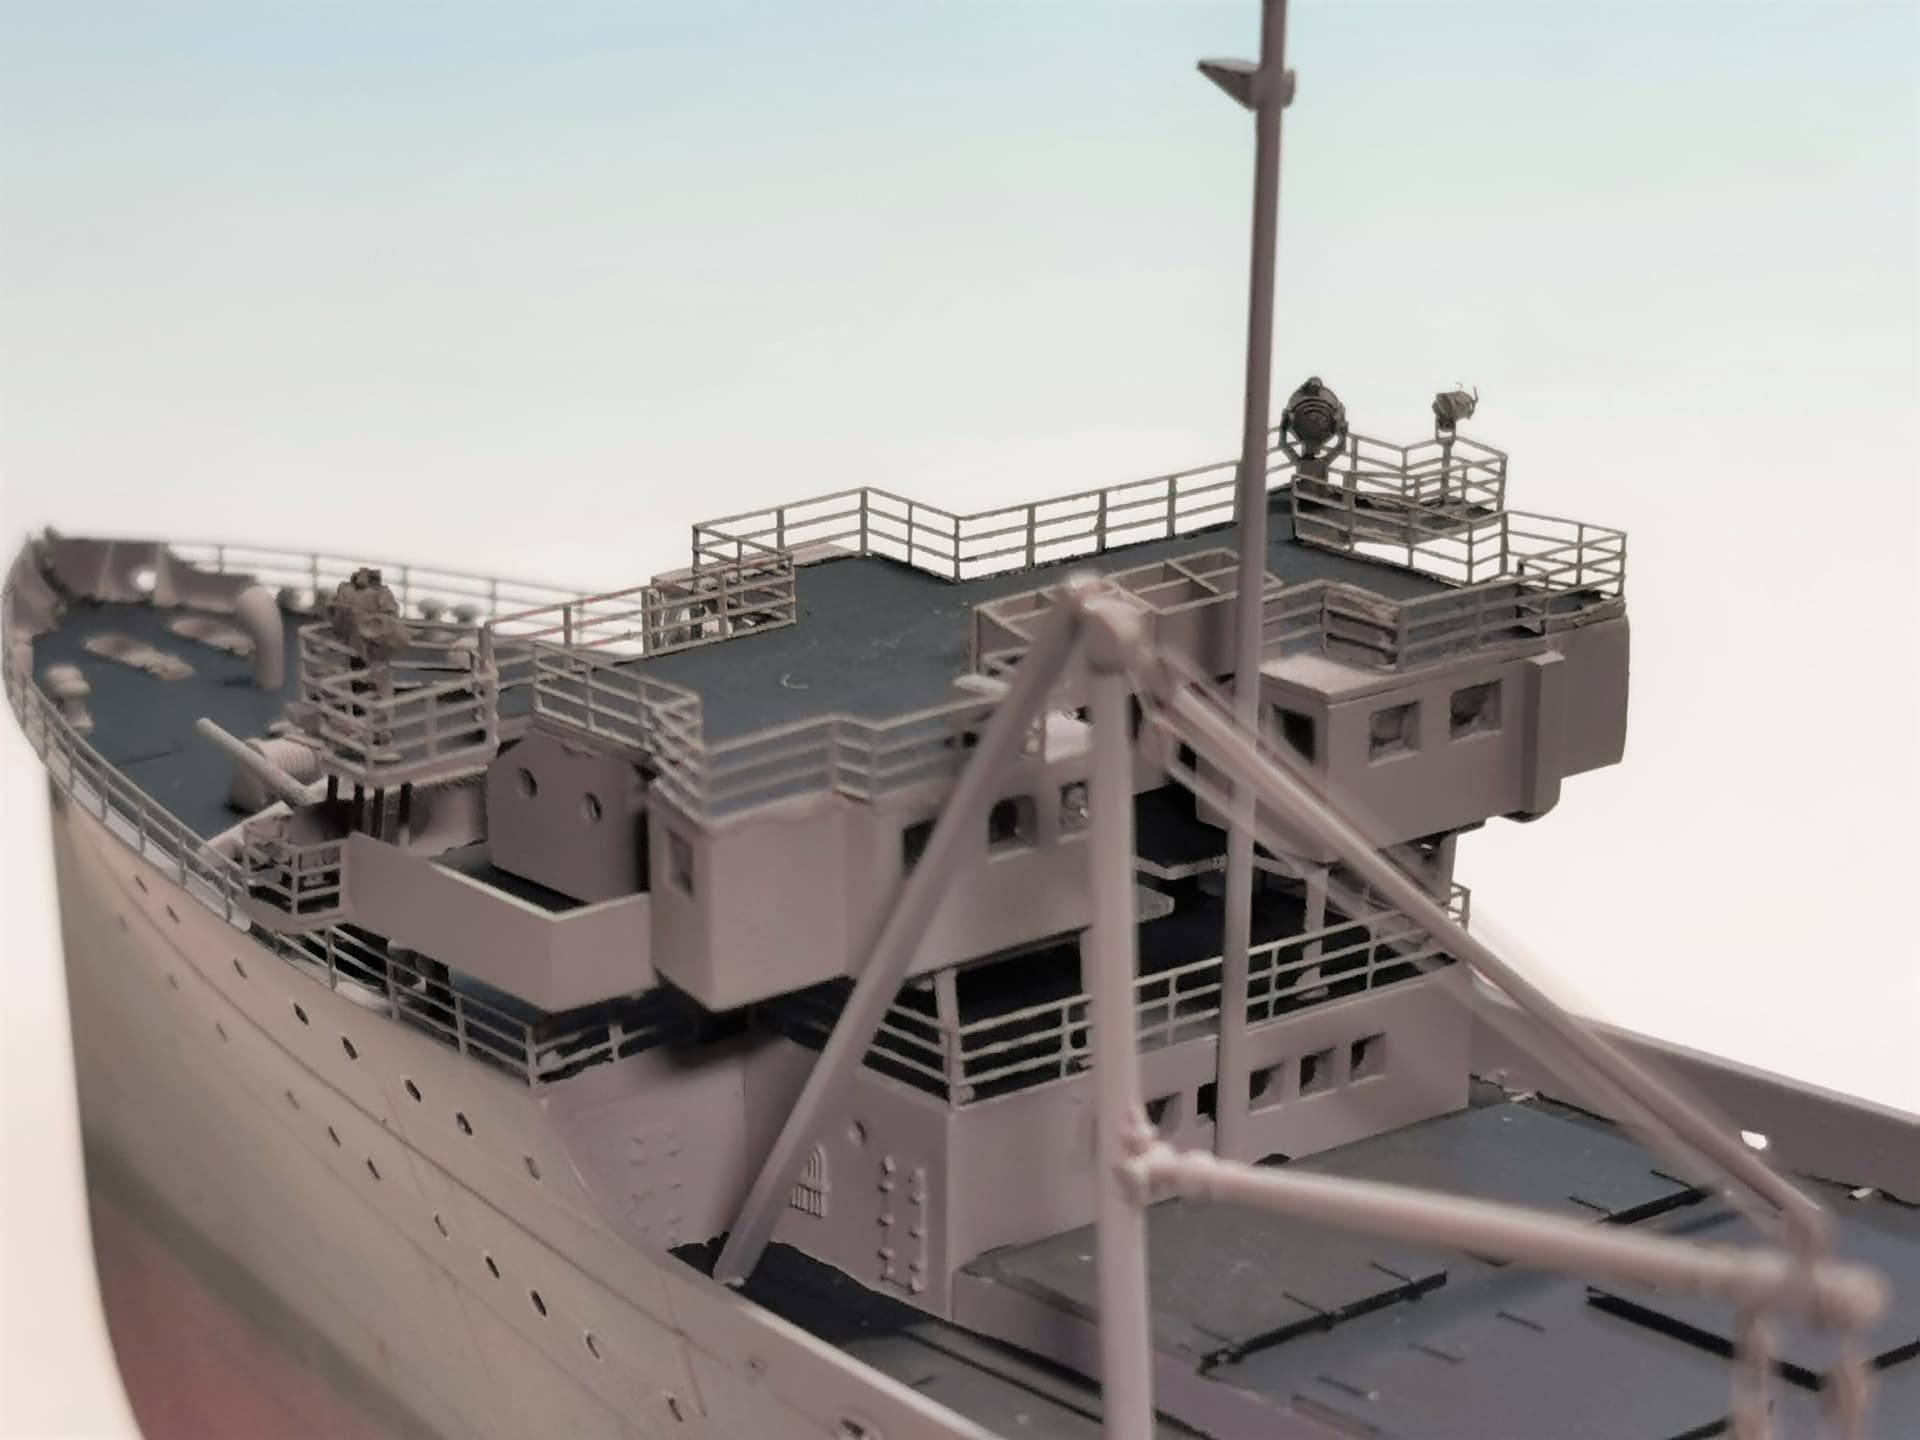
The forward bridge segment was also painted, glued together, windows installed and finally fixed at the bow part of the ship with superglue. Exact positioning of the structure poles and exact positioning into its place is importand here, too!

The big searchlights (Black Cat Models) and the small ones (Northstarmodels) also have been installed. I like them very much, they look very crisp and real
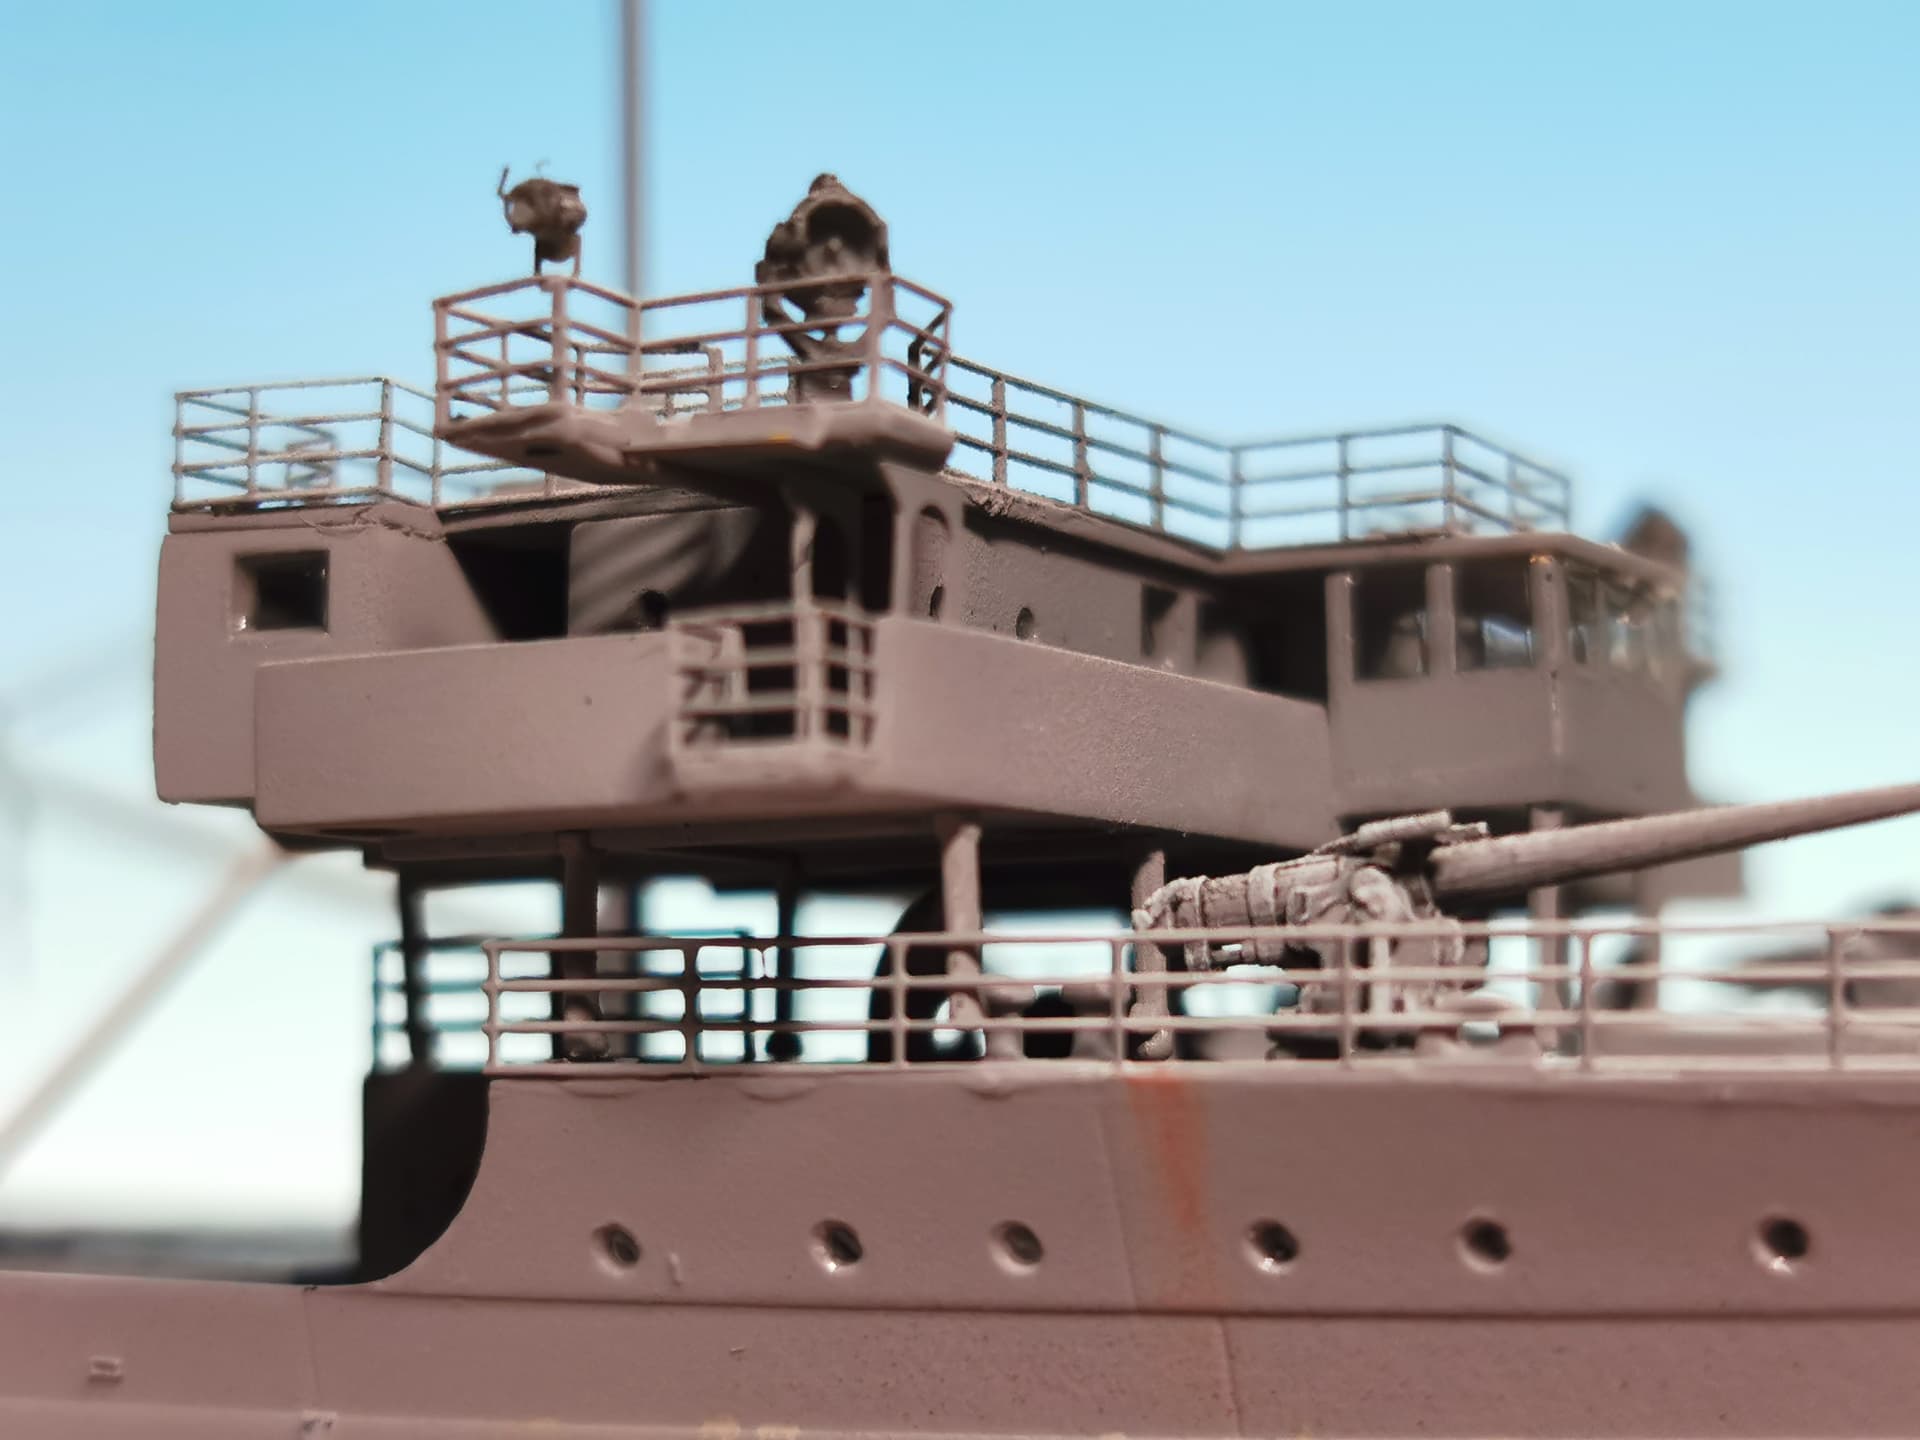
And finally the aft superstructure compartments, deck guns, crane and lifeboat supports have been glued onto the ship´s hull

It is beginning to look like a seaplane tender 
Next will be finishing the railings for the aft superstructures and some lifeboats
9 Likes
Finished all the railings and stairways at the stern compartments. After this I wanted to finish the funnels and discovered I made a mistake: The sidewalls (G48 and G49) of the compartment of the foldable funnel exhausts should not be glued directly with the ceiling part (G9) - I made exactly this  . The only solution was to scratchbuild new sidewalls from Evergreen

and cut off some part of the old sidewalls to let the funnel exhausts get connected with the funnel pipes
In the end it looks this way and no one will know the difference 

Another look over the finished stern compartments with all its railings and ladders


Then I made the canvas dodgers for the bridge upper railings as you can see in most pictures. It was done the usual way with Kristal Klear first and then with Vallejo 70.884 Stone grey. I like it 

Well thats it for this weekend 
10 Likes
Magnificent work, Thomas! It is a pleasure watching this odd little pseudo-bird farm come together. 