Excellent work on a unique subject. Well done! 
Cheers,
Chris
Excellent work on a unique subject. Well done!
Cheers,
Chris
Thomas,
just catching up with your magnificent build, you’re doing a simply marvelous job all the way! Your LANGLEY looks fantastic!
Cheers
Jan
@tim: “everything you do seems to work perfectly” - hehe indeed but no one should look behind the curtain 
@JJ1973: Hallo Jan, nachträglich noch Glückwunsch zum neuen Hafen Berlin. Thank you for your comment, I do my best and this ship ask for doing your best as some areas are really demanding 
Hi Thomas,
Looking great, love the work on the.boats, stuff like that really adds depth to the build. Nice too see her with the deck down.
Really enjoying following this build.
Cheers
Si
@RedDuster: Simon I also felt better boats were necessary and I really became a fan of Black Cat Models. Their stuff is simply amazing. Have fun, watching your build with interest also 

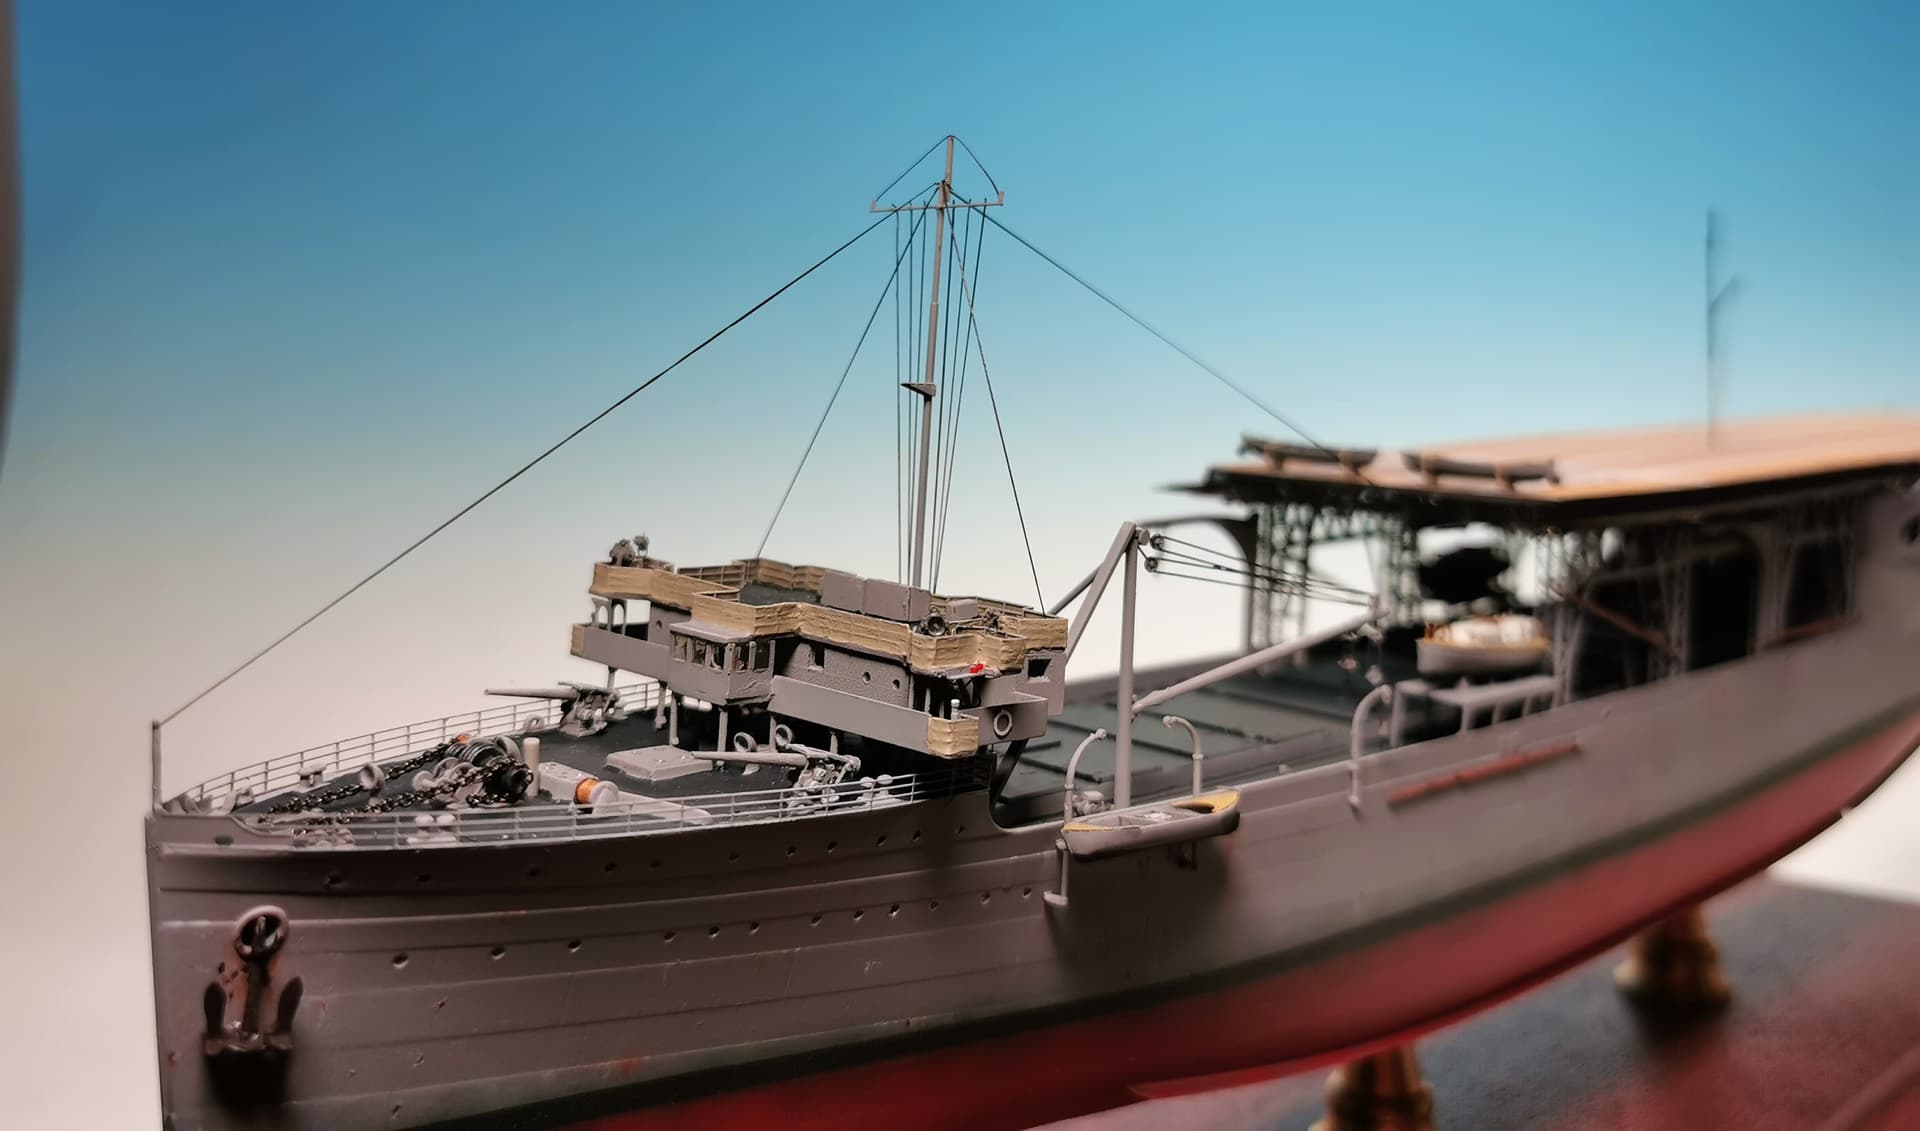
Gentlemen it is done: I finished the Langley today 
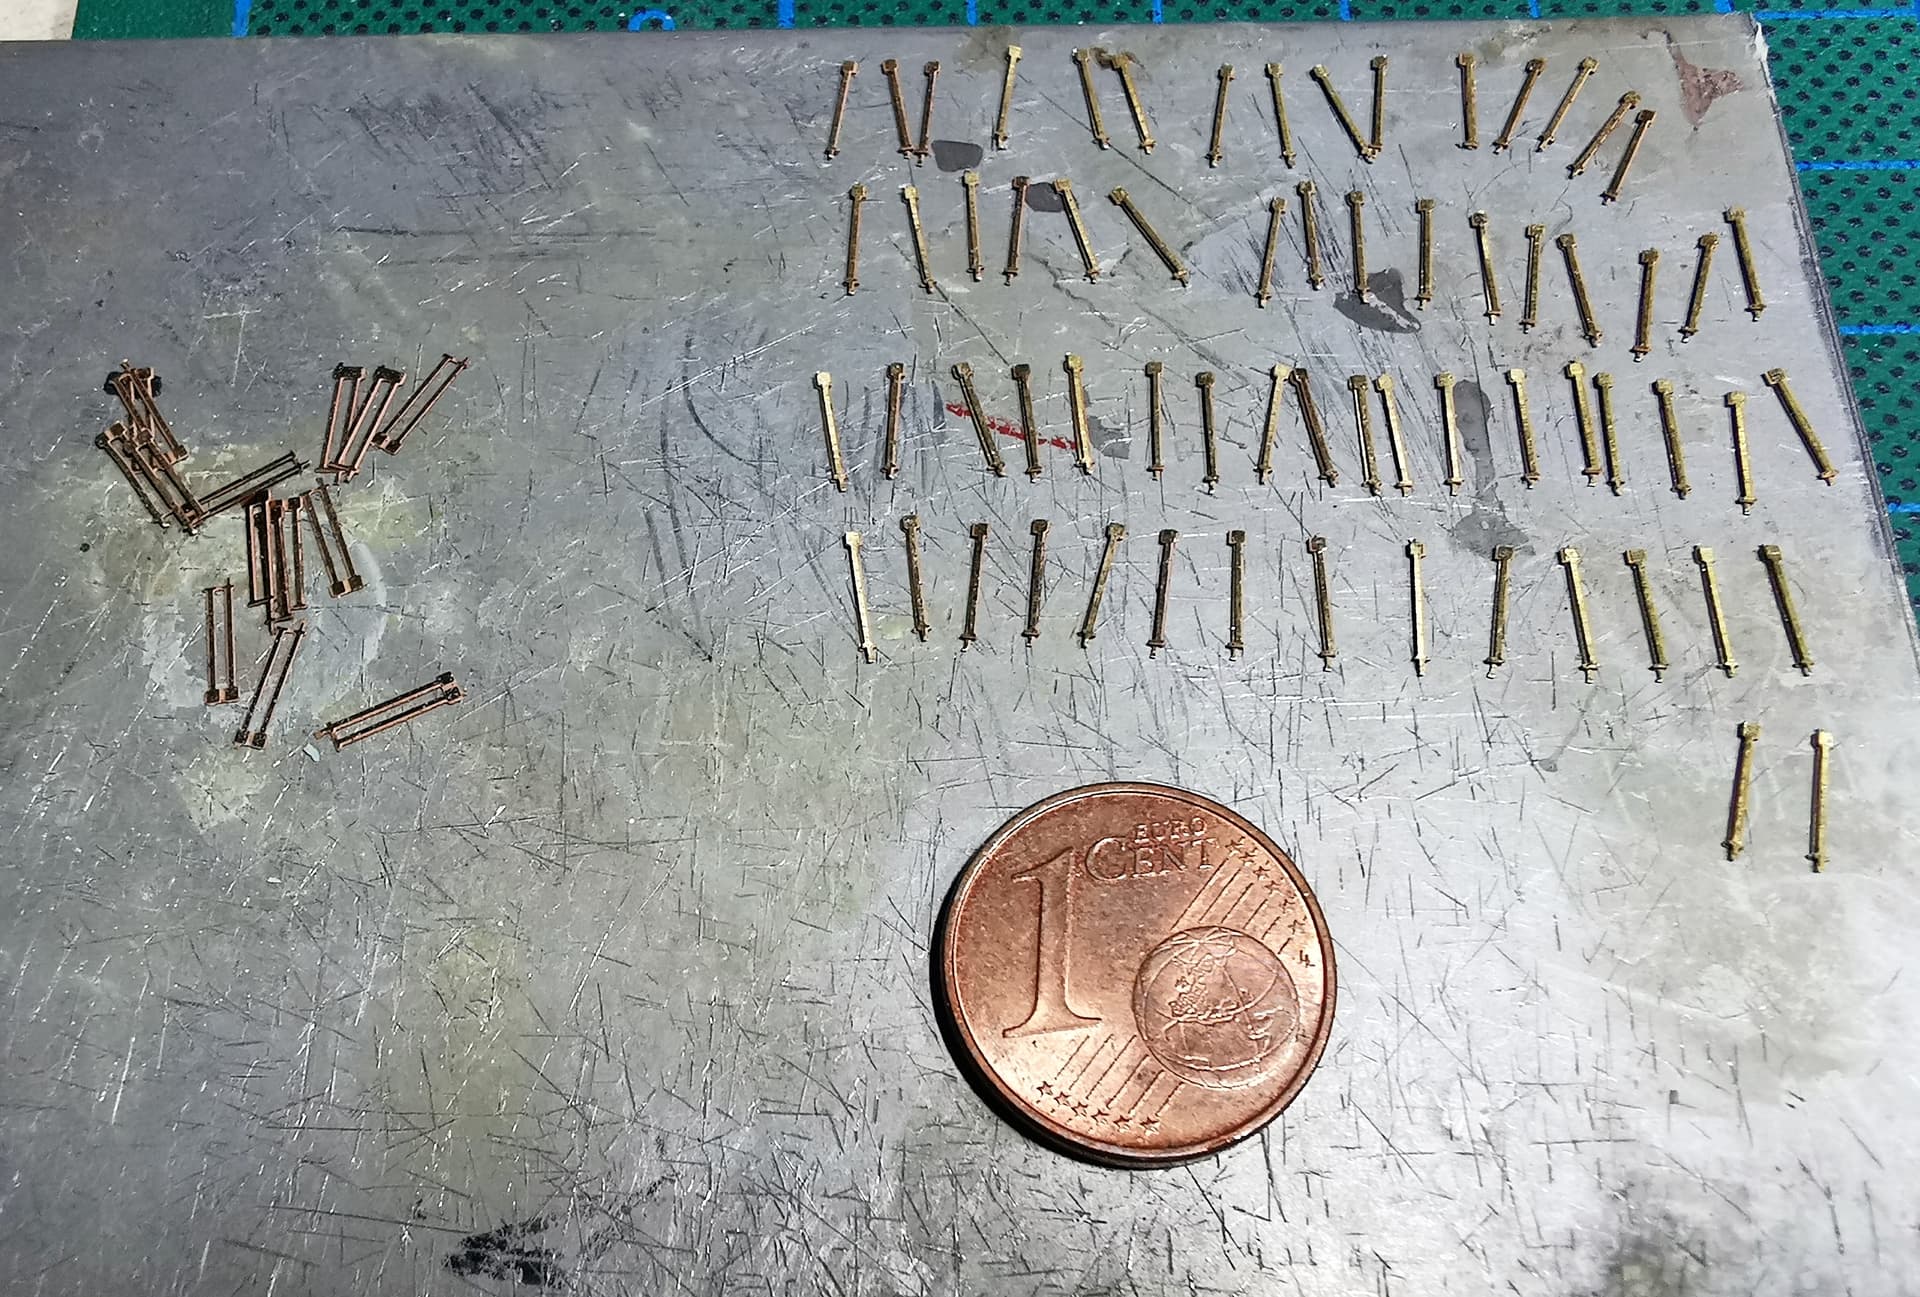
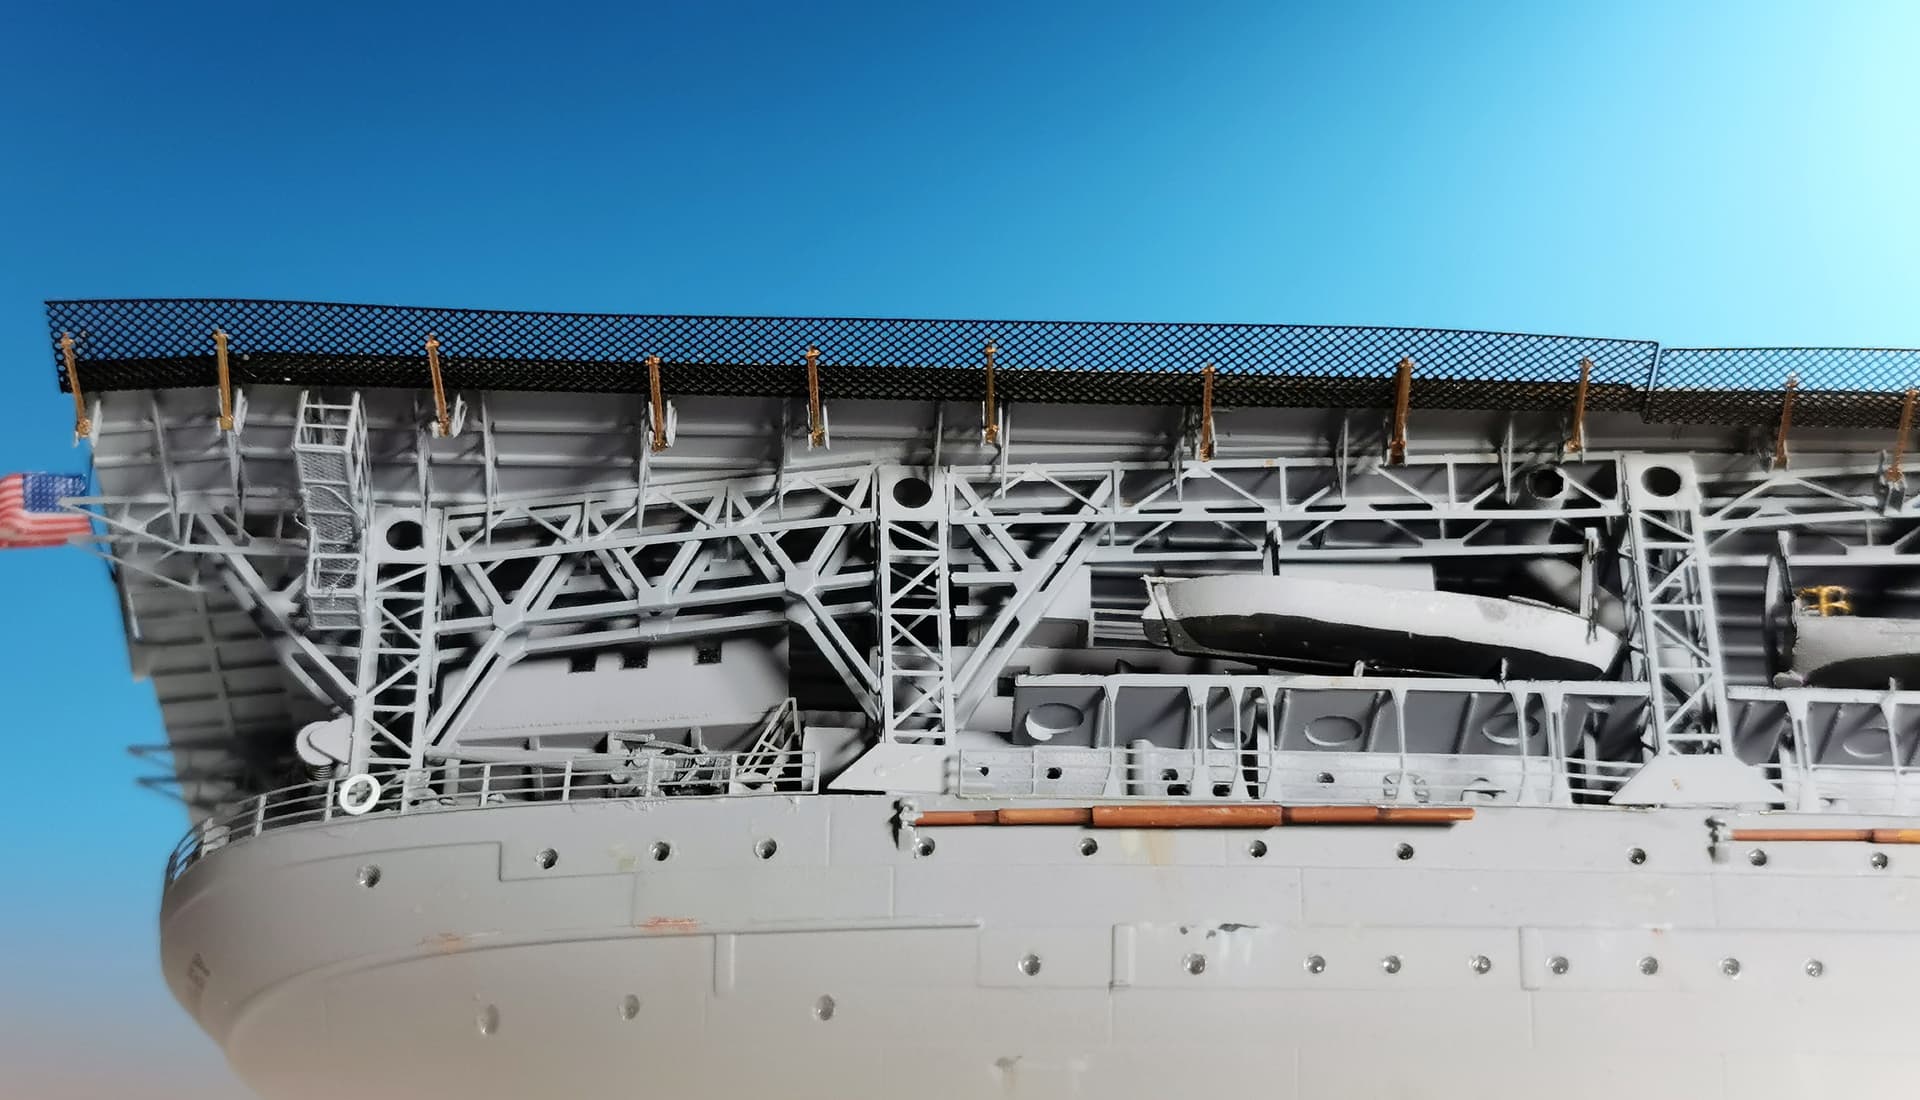
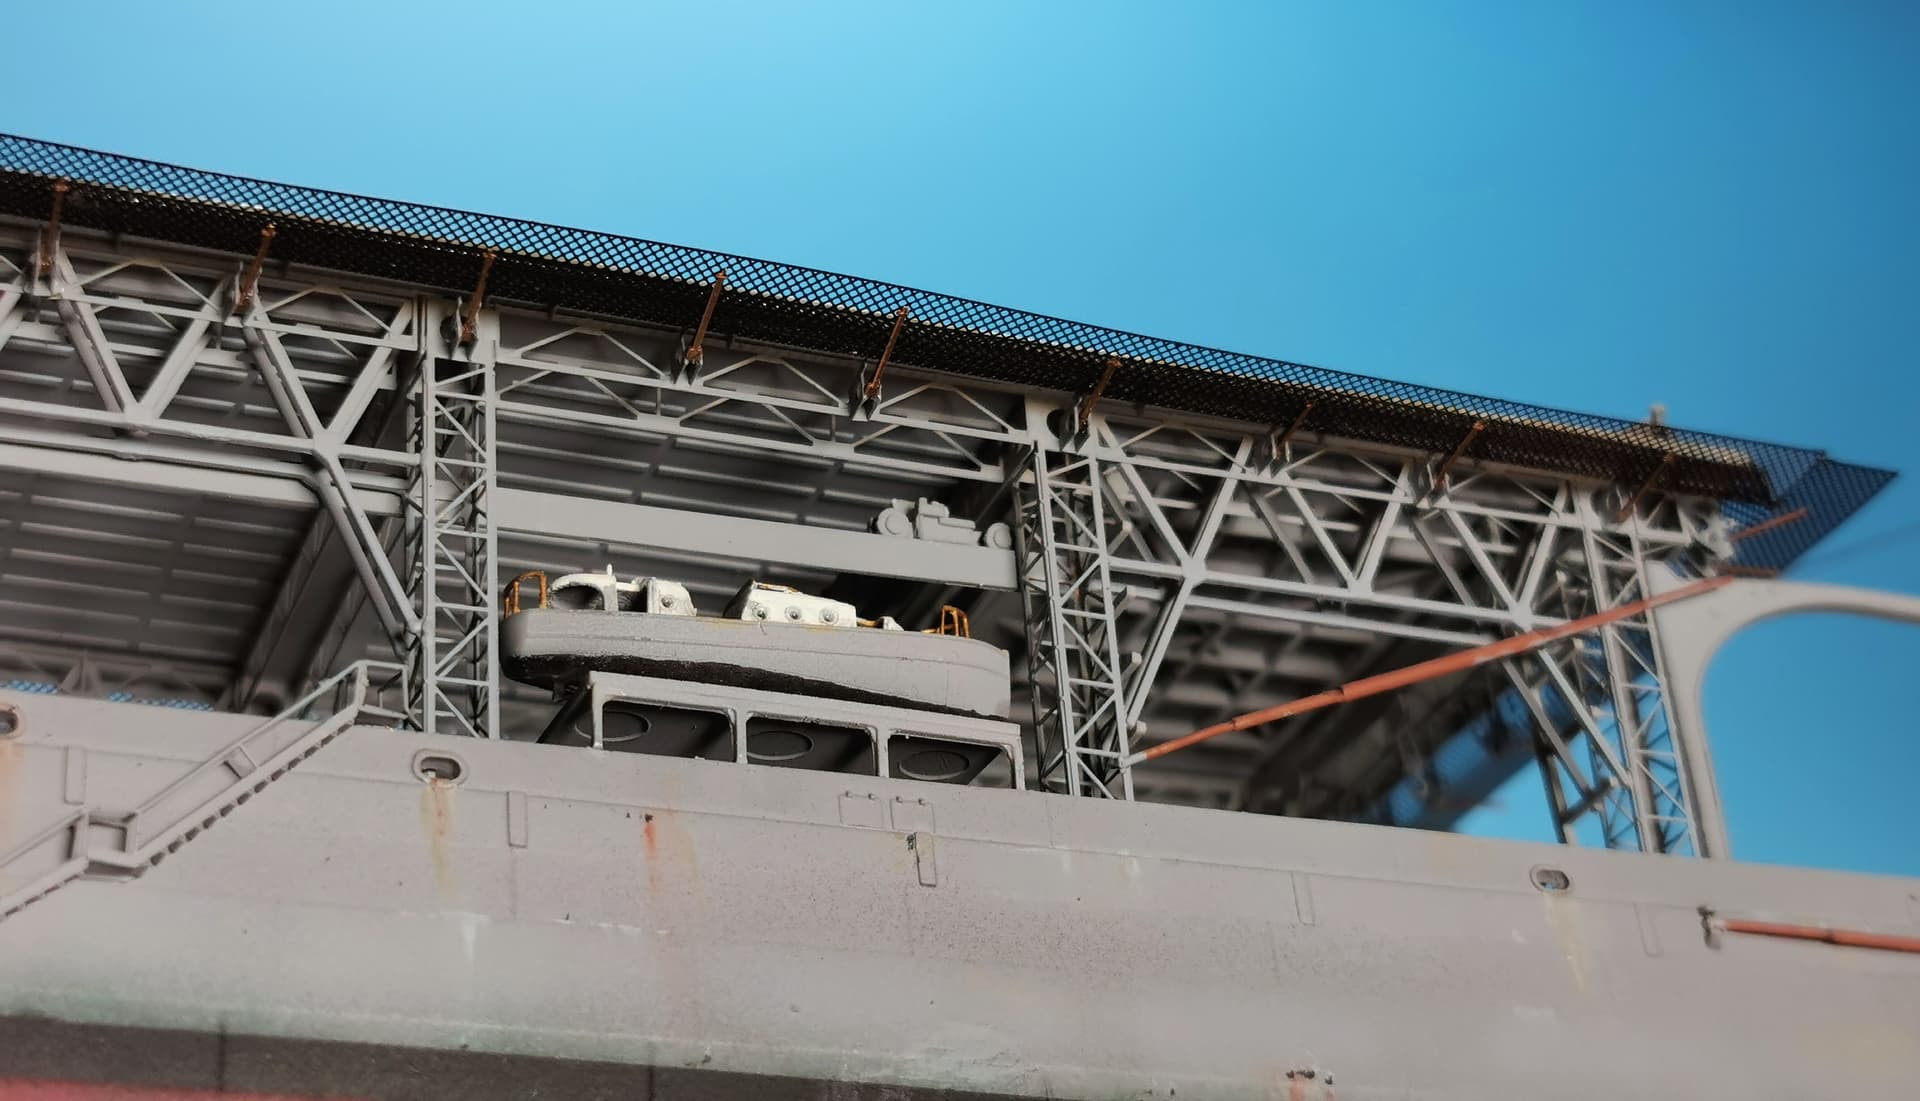
 . As expected the security nets were the most demanding job of this build. Eduard gives you some parts of the nets and you have to measure and cutting the lenght parts at your own risk. There is no second chance as you just get the set for one complete try. First you have to release all these small support arms for the nets. These are tiny and need to get bended
  . Happily they provided you here more than needed so there is no catastrophy when the carpet monster will get its fair share…
The nets were sanded at their fret and spraypainted with tamiya Black. I was lucky to have a wide bending tool to be able to bend the longest parts. In the end after very careful and quick work with superglue everything fitted. I oversprayed the support arms after they were glued, I just need to overpaint them at the underside just in case some spectators bend down and watch in the overhead position
Then it was time for the rigging. It was no timeconsuming task at this vessel at there was very sparse rigging. Just the front main mast got some (oriented me at the photos I had in hand from the donated pictures here)
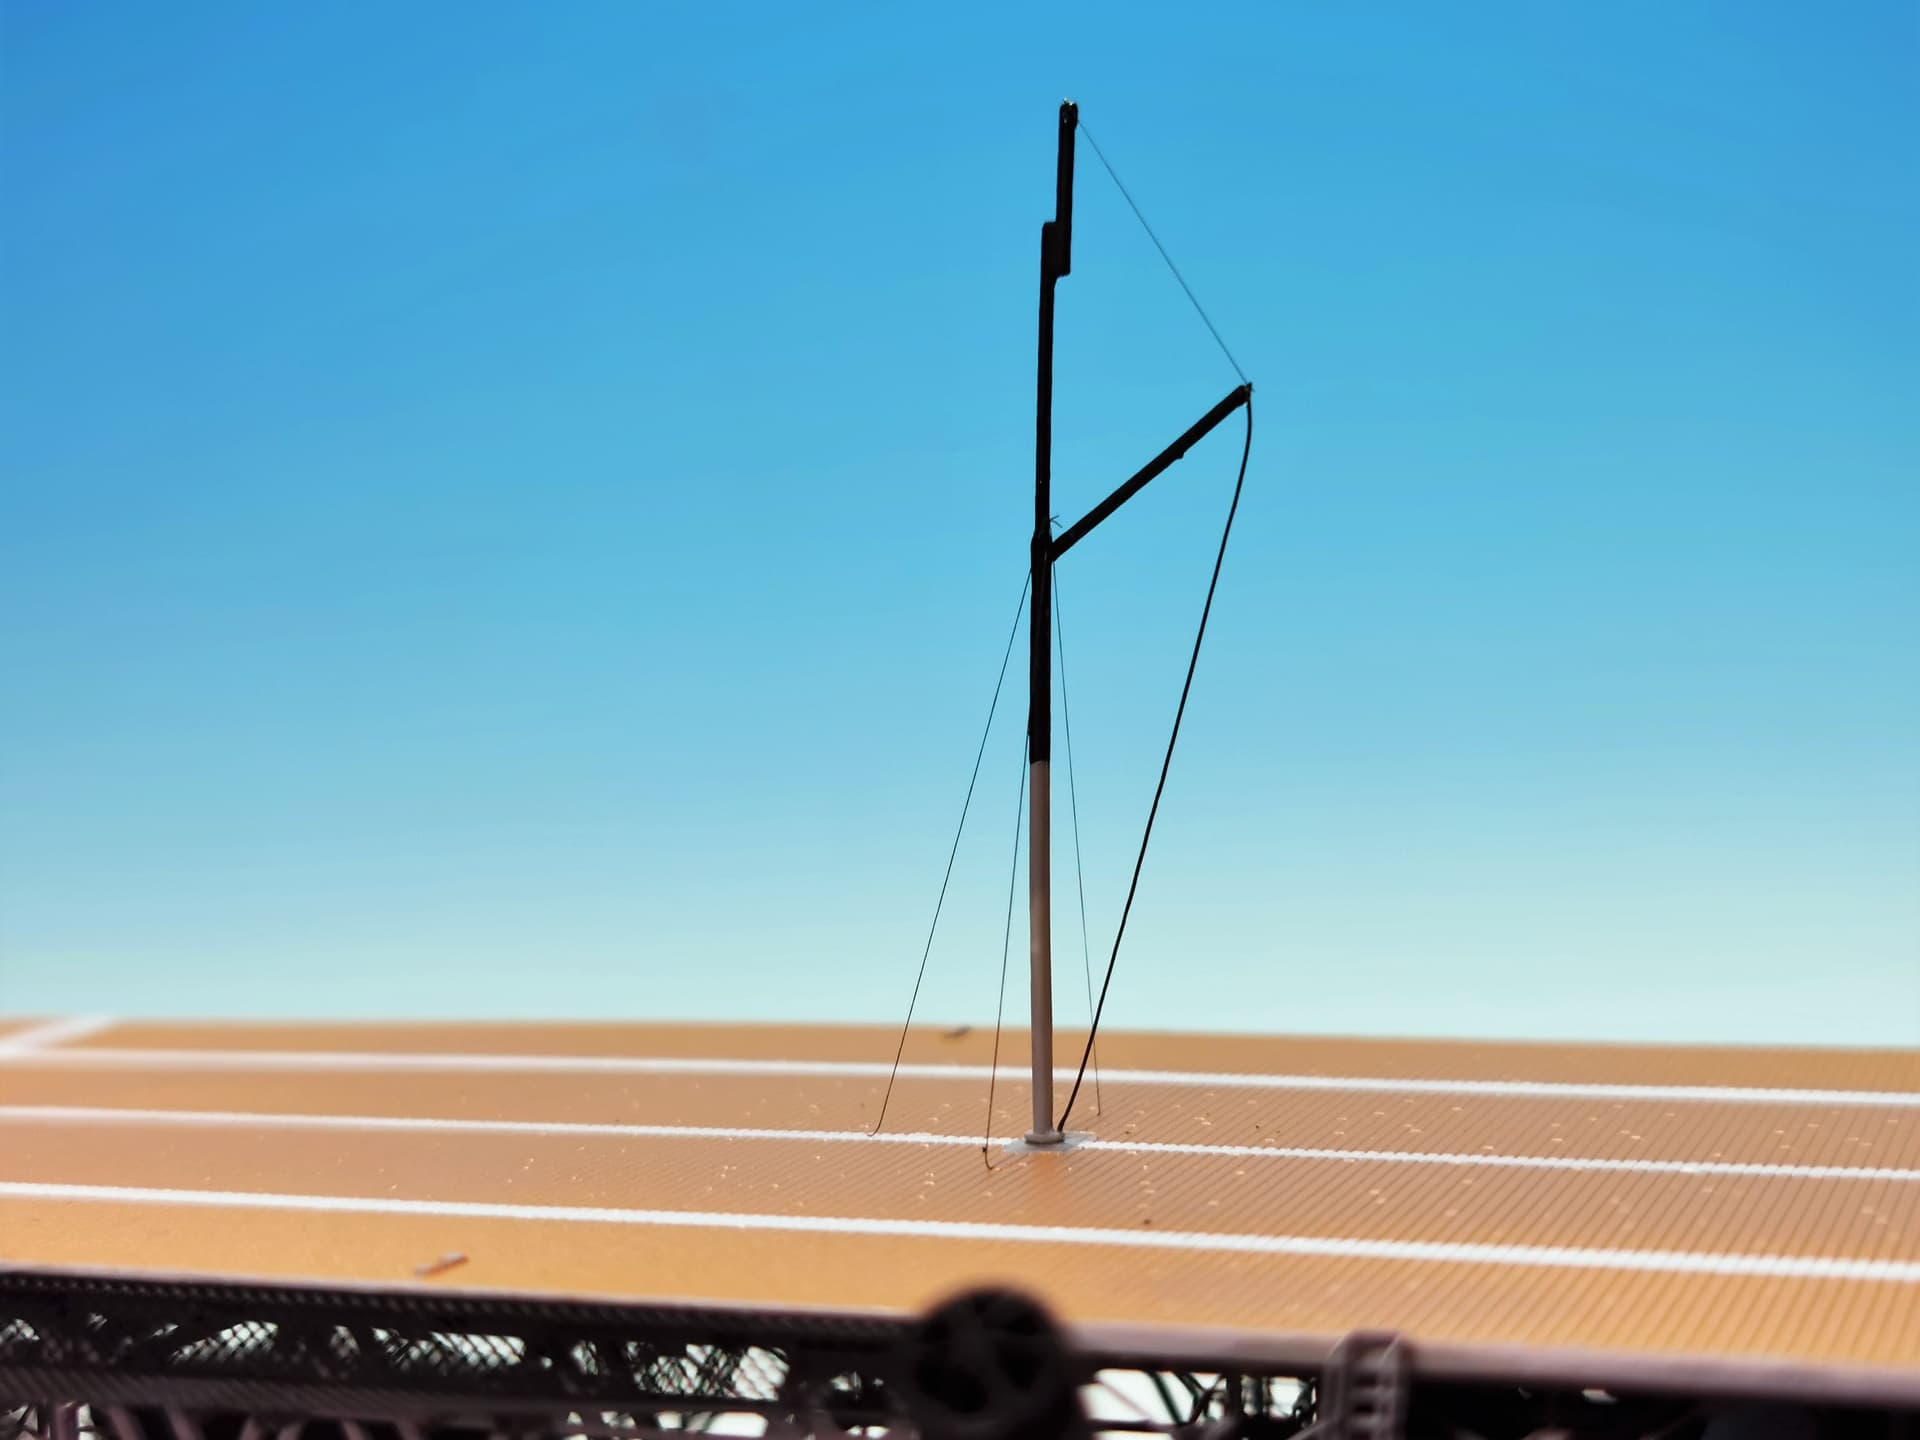
and the rear mast at the flight deck. As this one was obviously also to disassemble I used very fine rigging wire here for the holding ropes
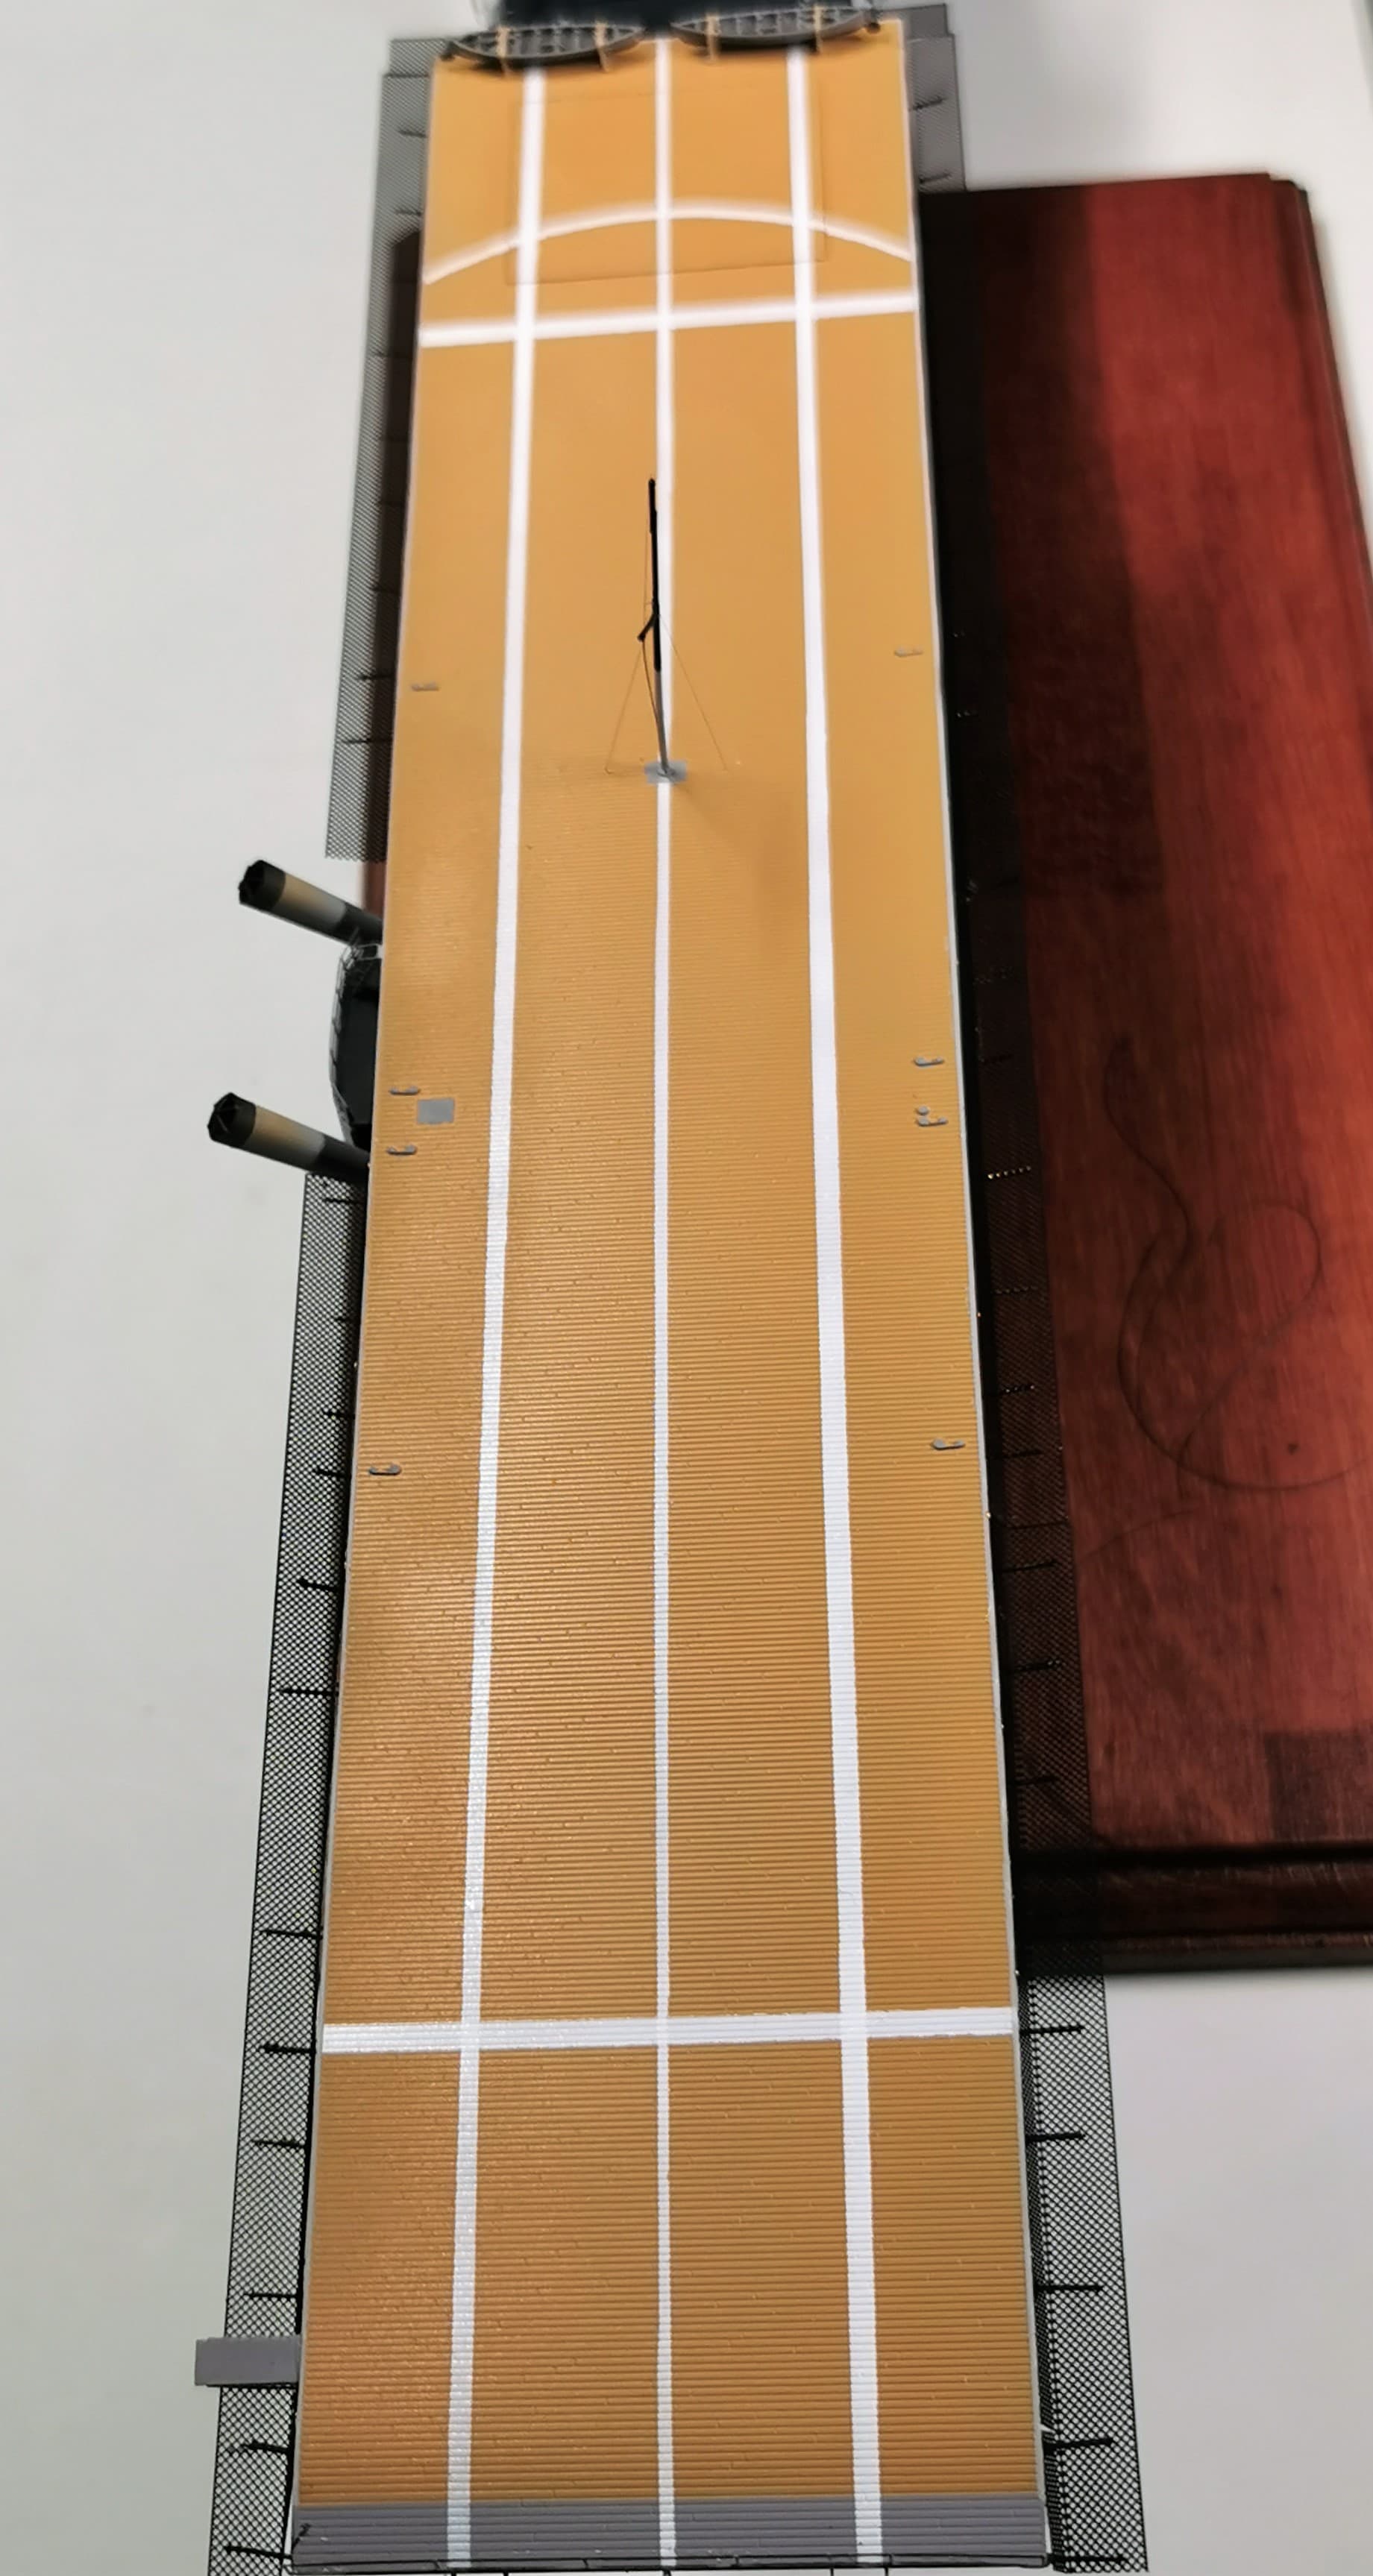
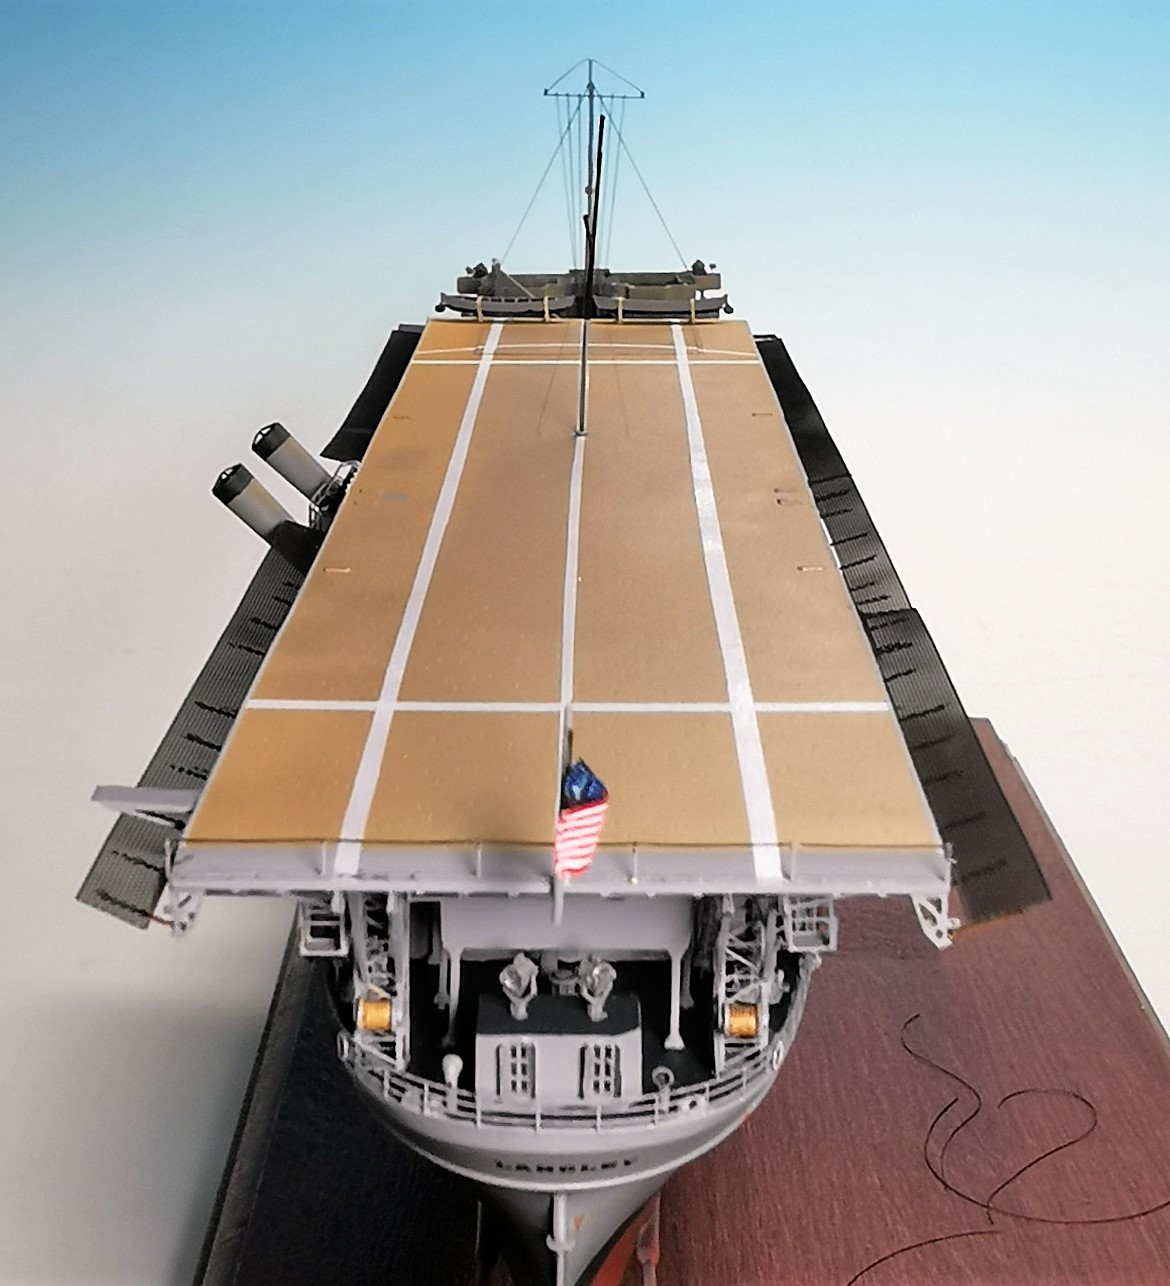
a last view from the stern to the bow of the flight deck
So there was just the hoising of the stars and stripes to do to get this ship commissioned 
I am glad to get this far. It was not the easiest build for me due to the lots of fragile etched parts and the necessity to work very clean.
Now its time to get her aircrews busy 

Congratulations on your commissioning, Thomas! A fine build indeed!
Bring on the airwing! 
That PE work is absolutely amazing… Fantastic work and a brilliant build so far
Wonderful build.
So… how did they get aircraft on or off the upper deck?
Congratulations! 
Outstanding work, Thomas! Its been great watching the ship come alive, now I can’t wait to see what you do with the airgroup. 
Thomas,
I echo what everyone else has said - amazing work!! Look forward to seeing her with her airwing loaded.
David
Thank you all so much for all these positive feedback
@TopSmith: Greg I also asked this question myselft. I think they have had trolleys to move the planes to the elevator.
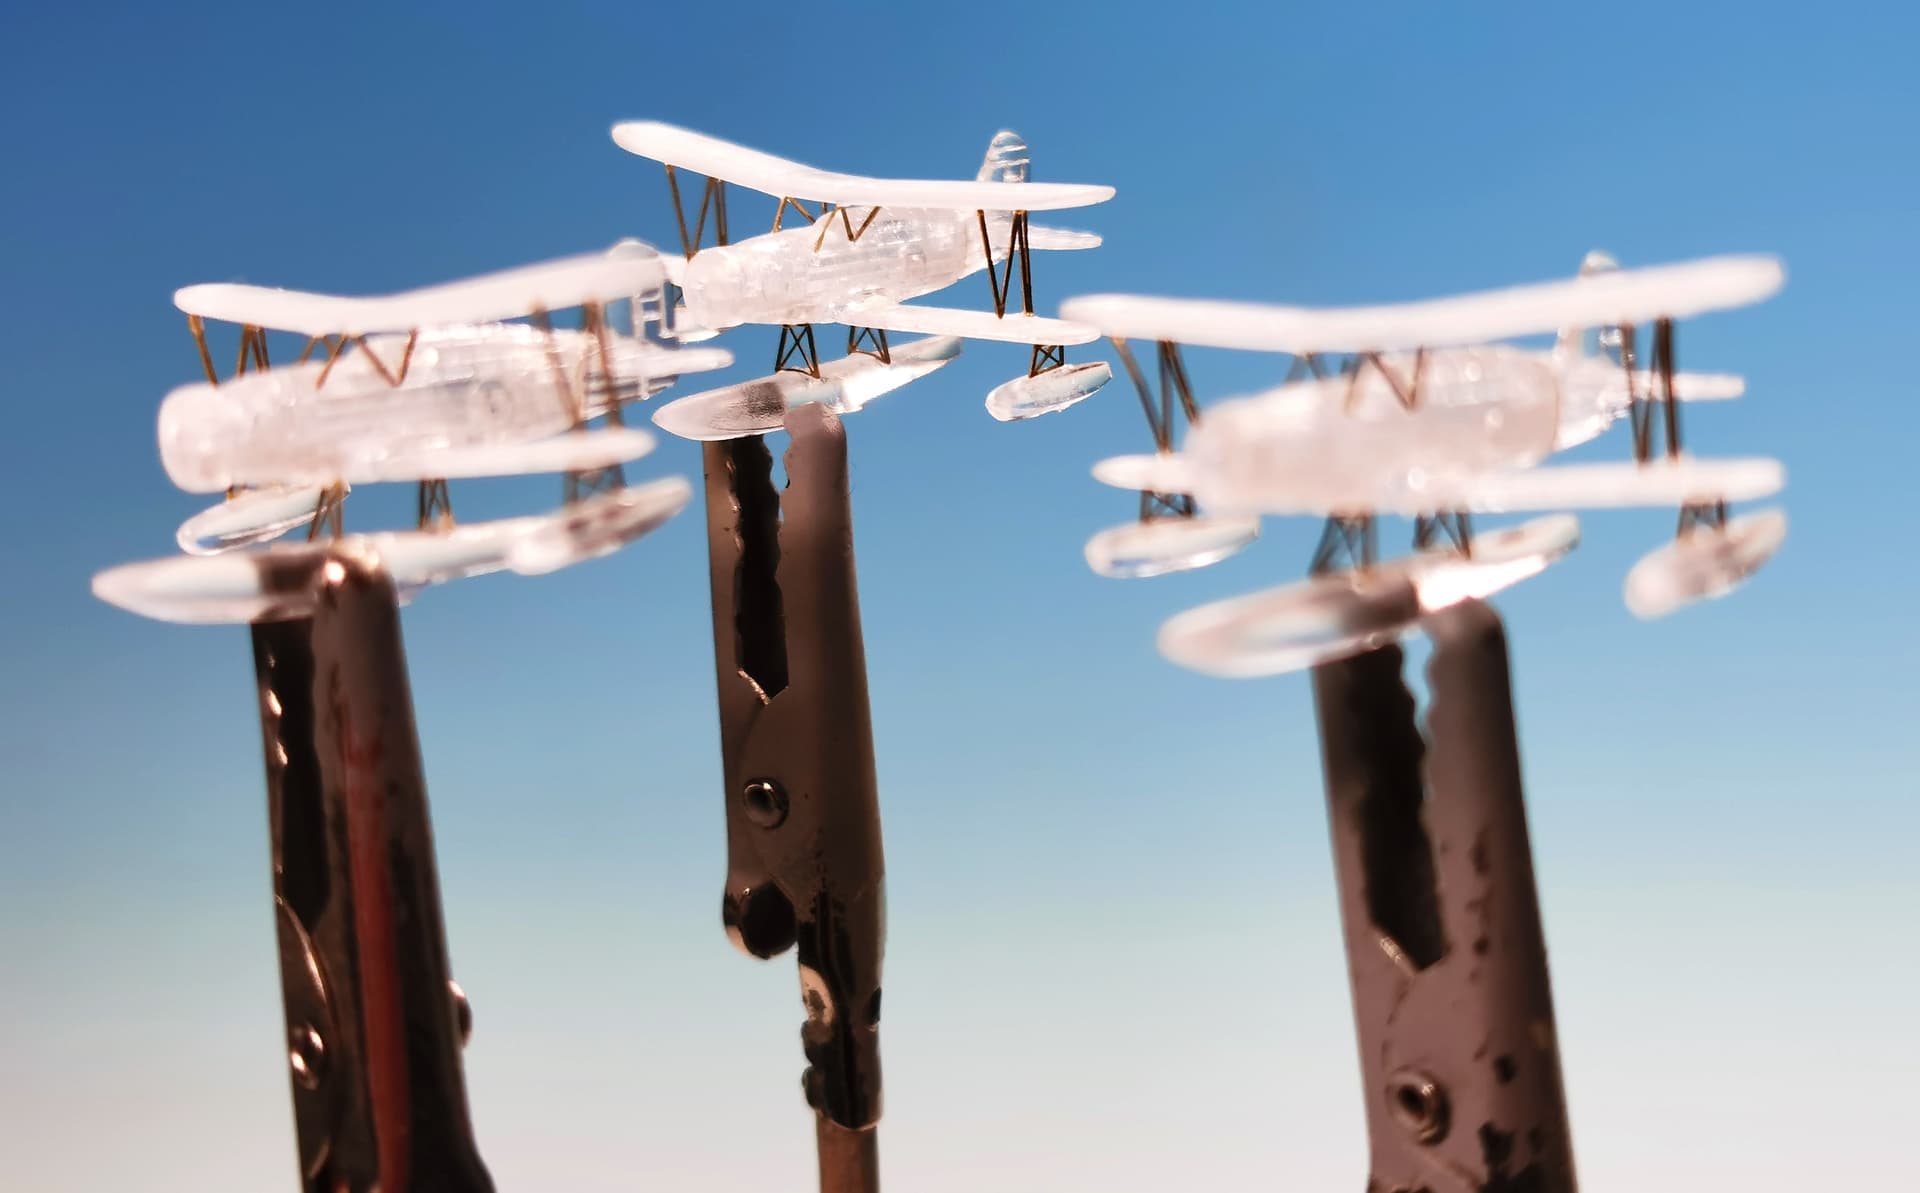
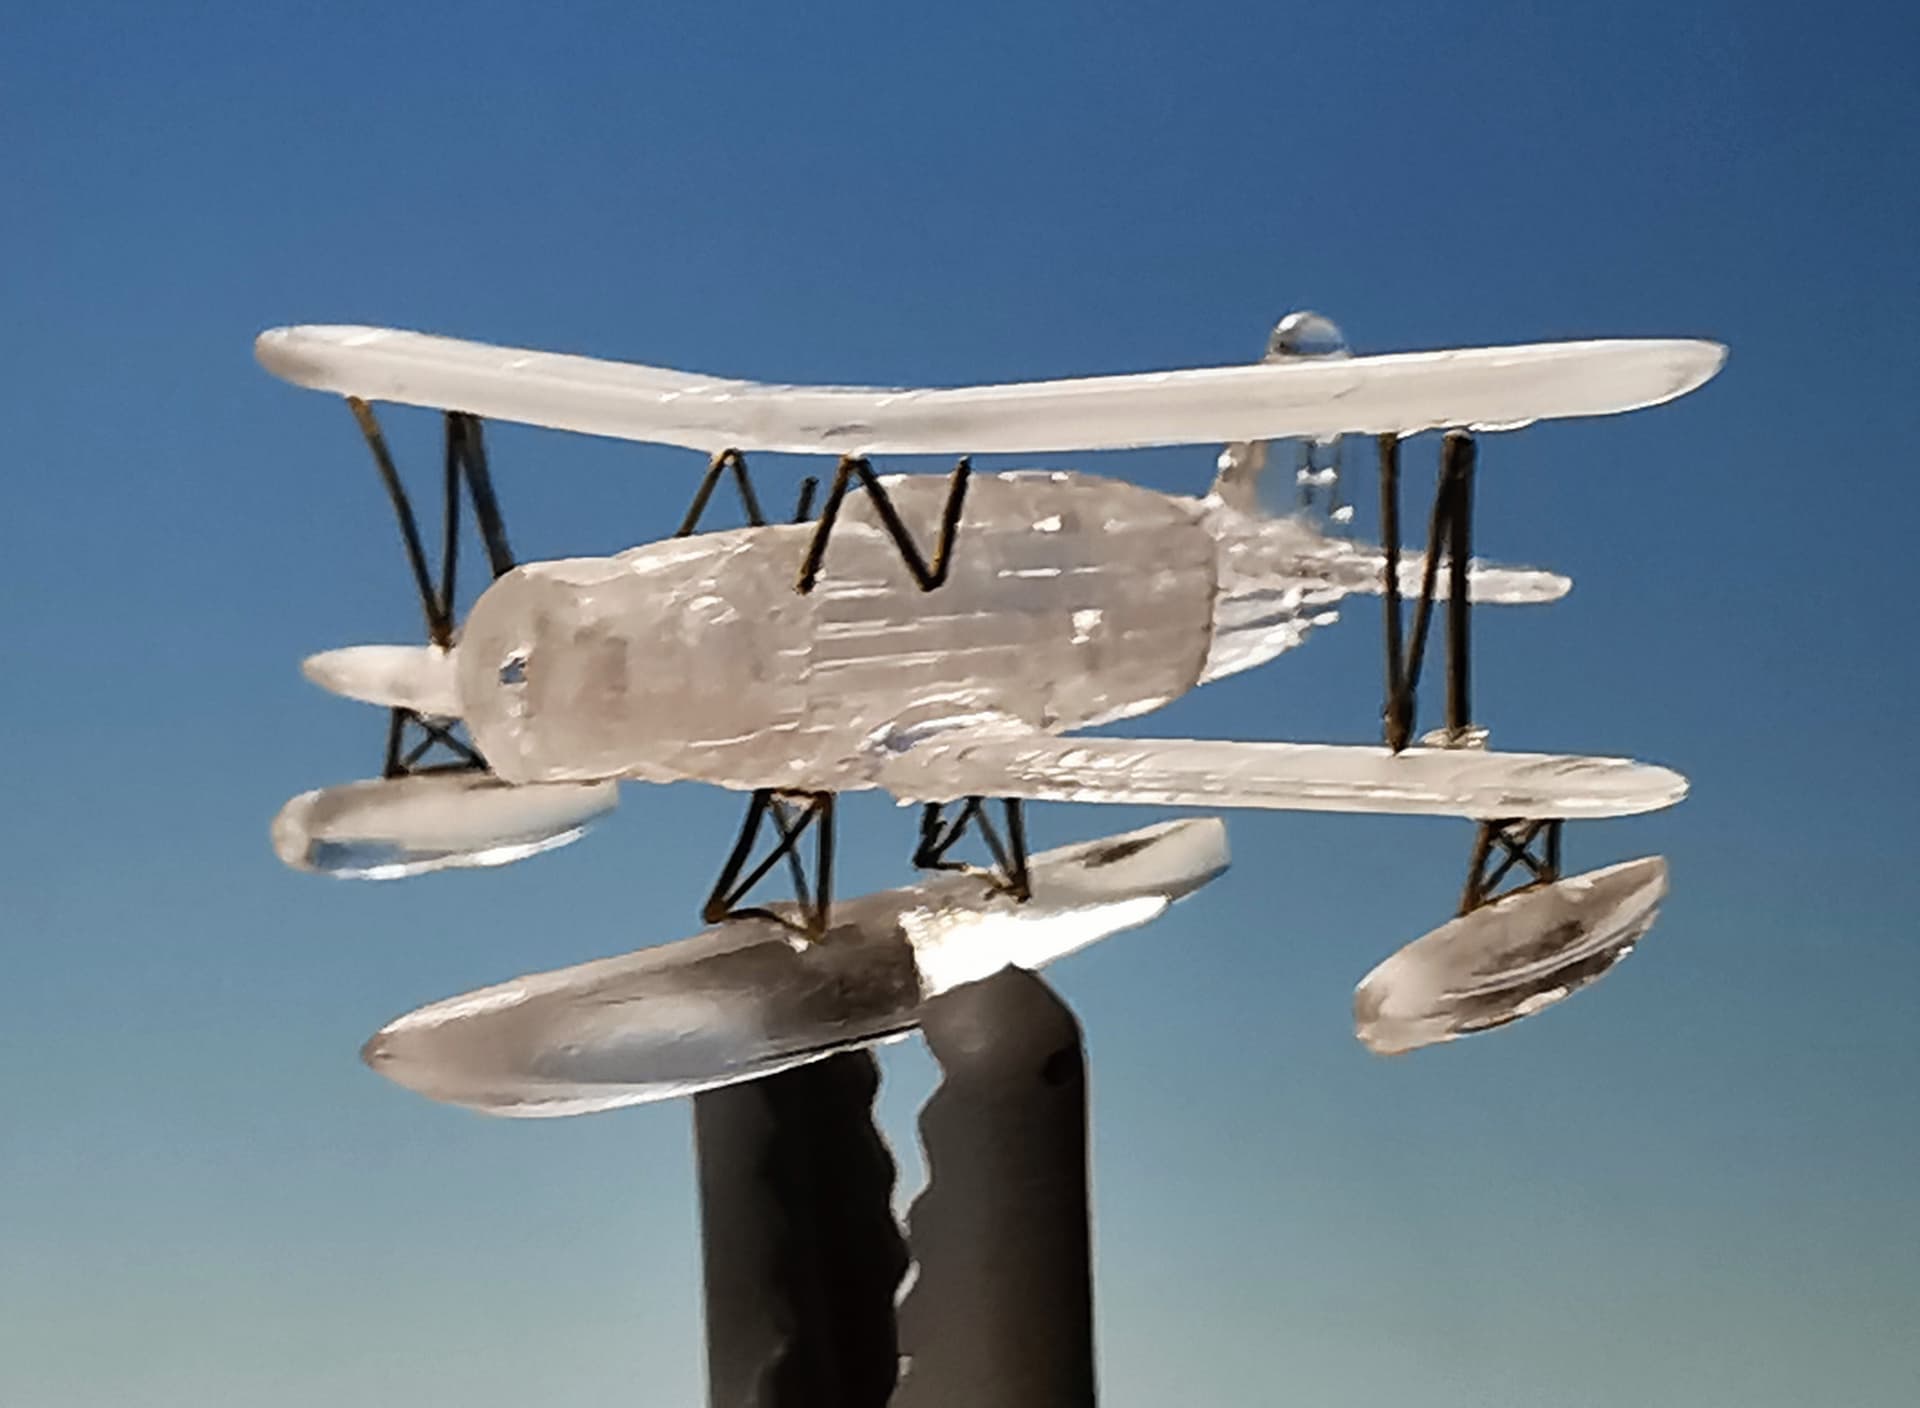
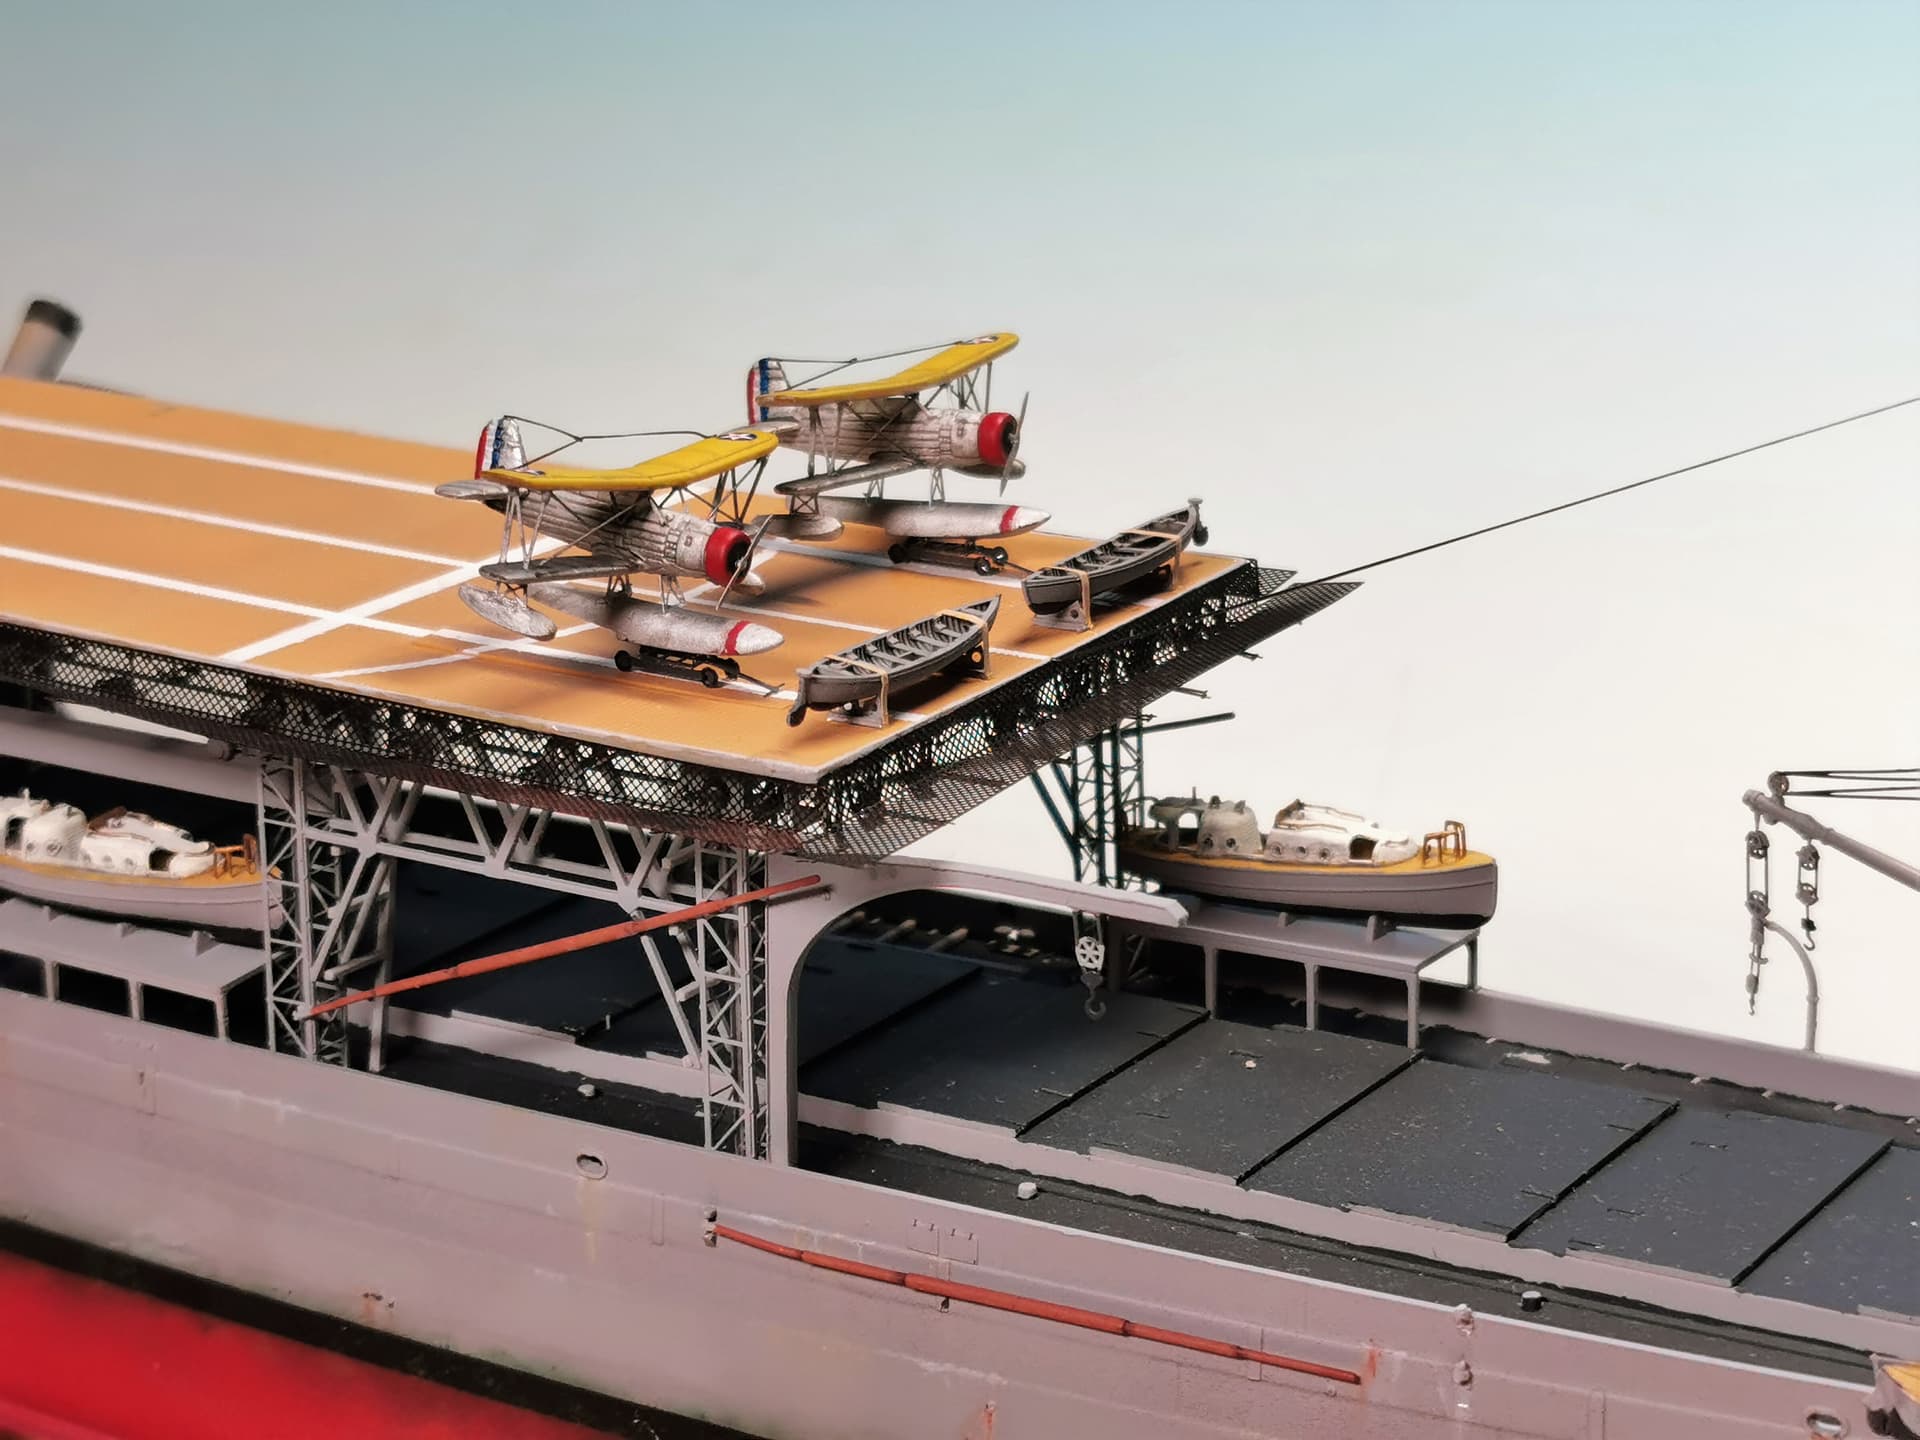
Today I spend time on and off to assemble the first aircraft. I will start with the Curtiss Seagulls. I´ve made three of them and used WEM etched parts for them. Small as hell but will look nice in the end and painted
zoomed in pic
Propellers are still off for an easier painting which will follow tomorrow 

Good god man. My eyes hurt just thinking about that etch. My hat is off to you sir!
Thomas, catching up and WoW what a gorgeous ship you have built, and now onto the air wing. I do hope you are proud of this build as it is a beauty.
@Canmedic; Hey Don thank you, my eyes also did hurting but with a good magnifier visor and steady hands it can be done 
@Littorio: Hello Luciano, great you are with us  . Yes I really like the ship (it is my second biggest so far aside from the heavy cruiser Zara) and I am also curious how it will looks like when all aircraft are placed on the tender as planned
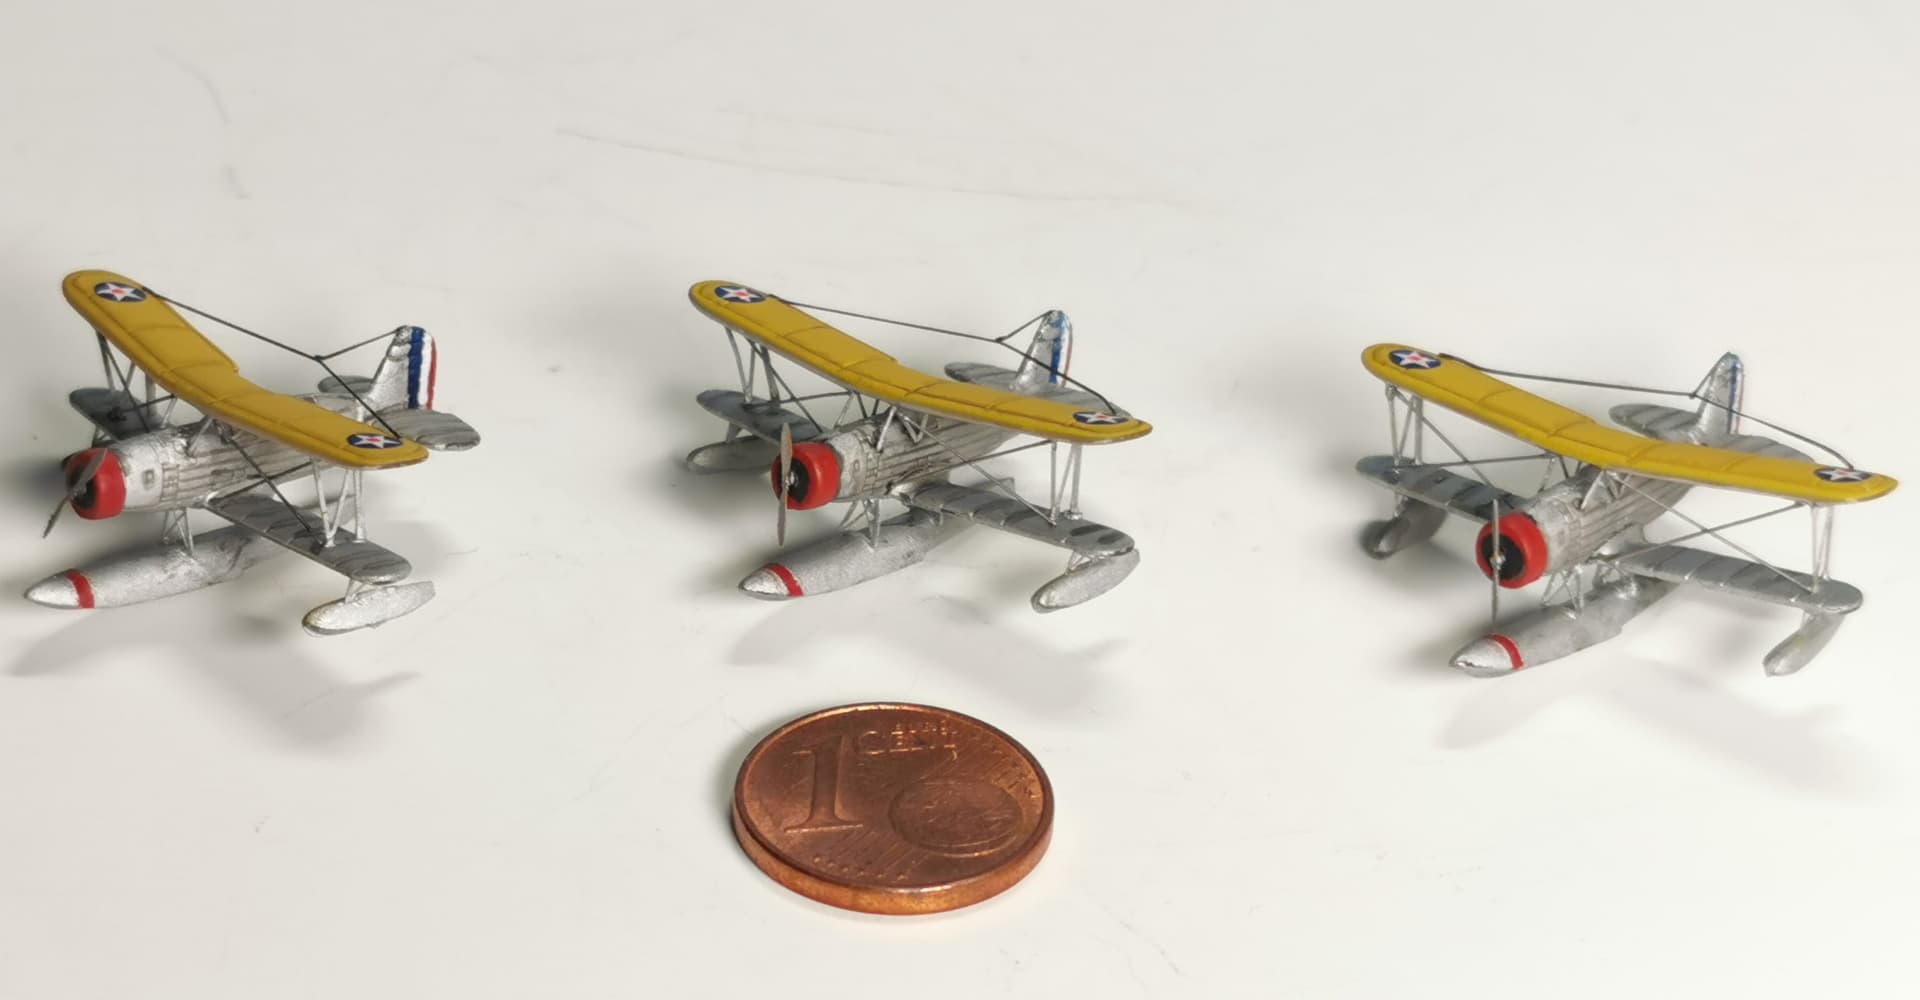
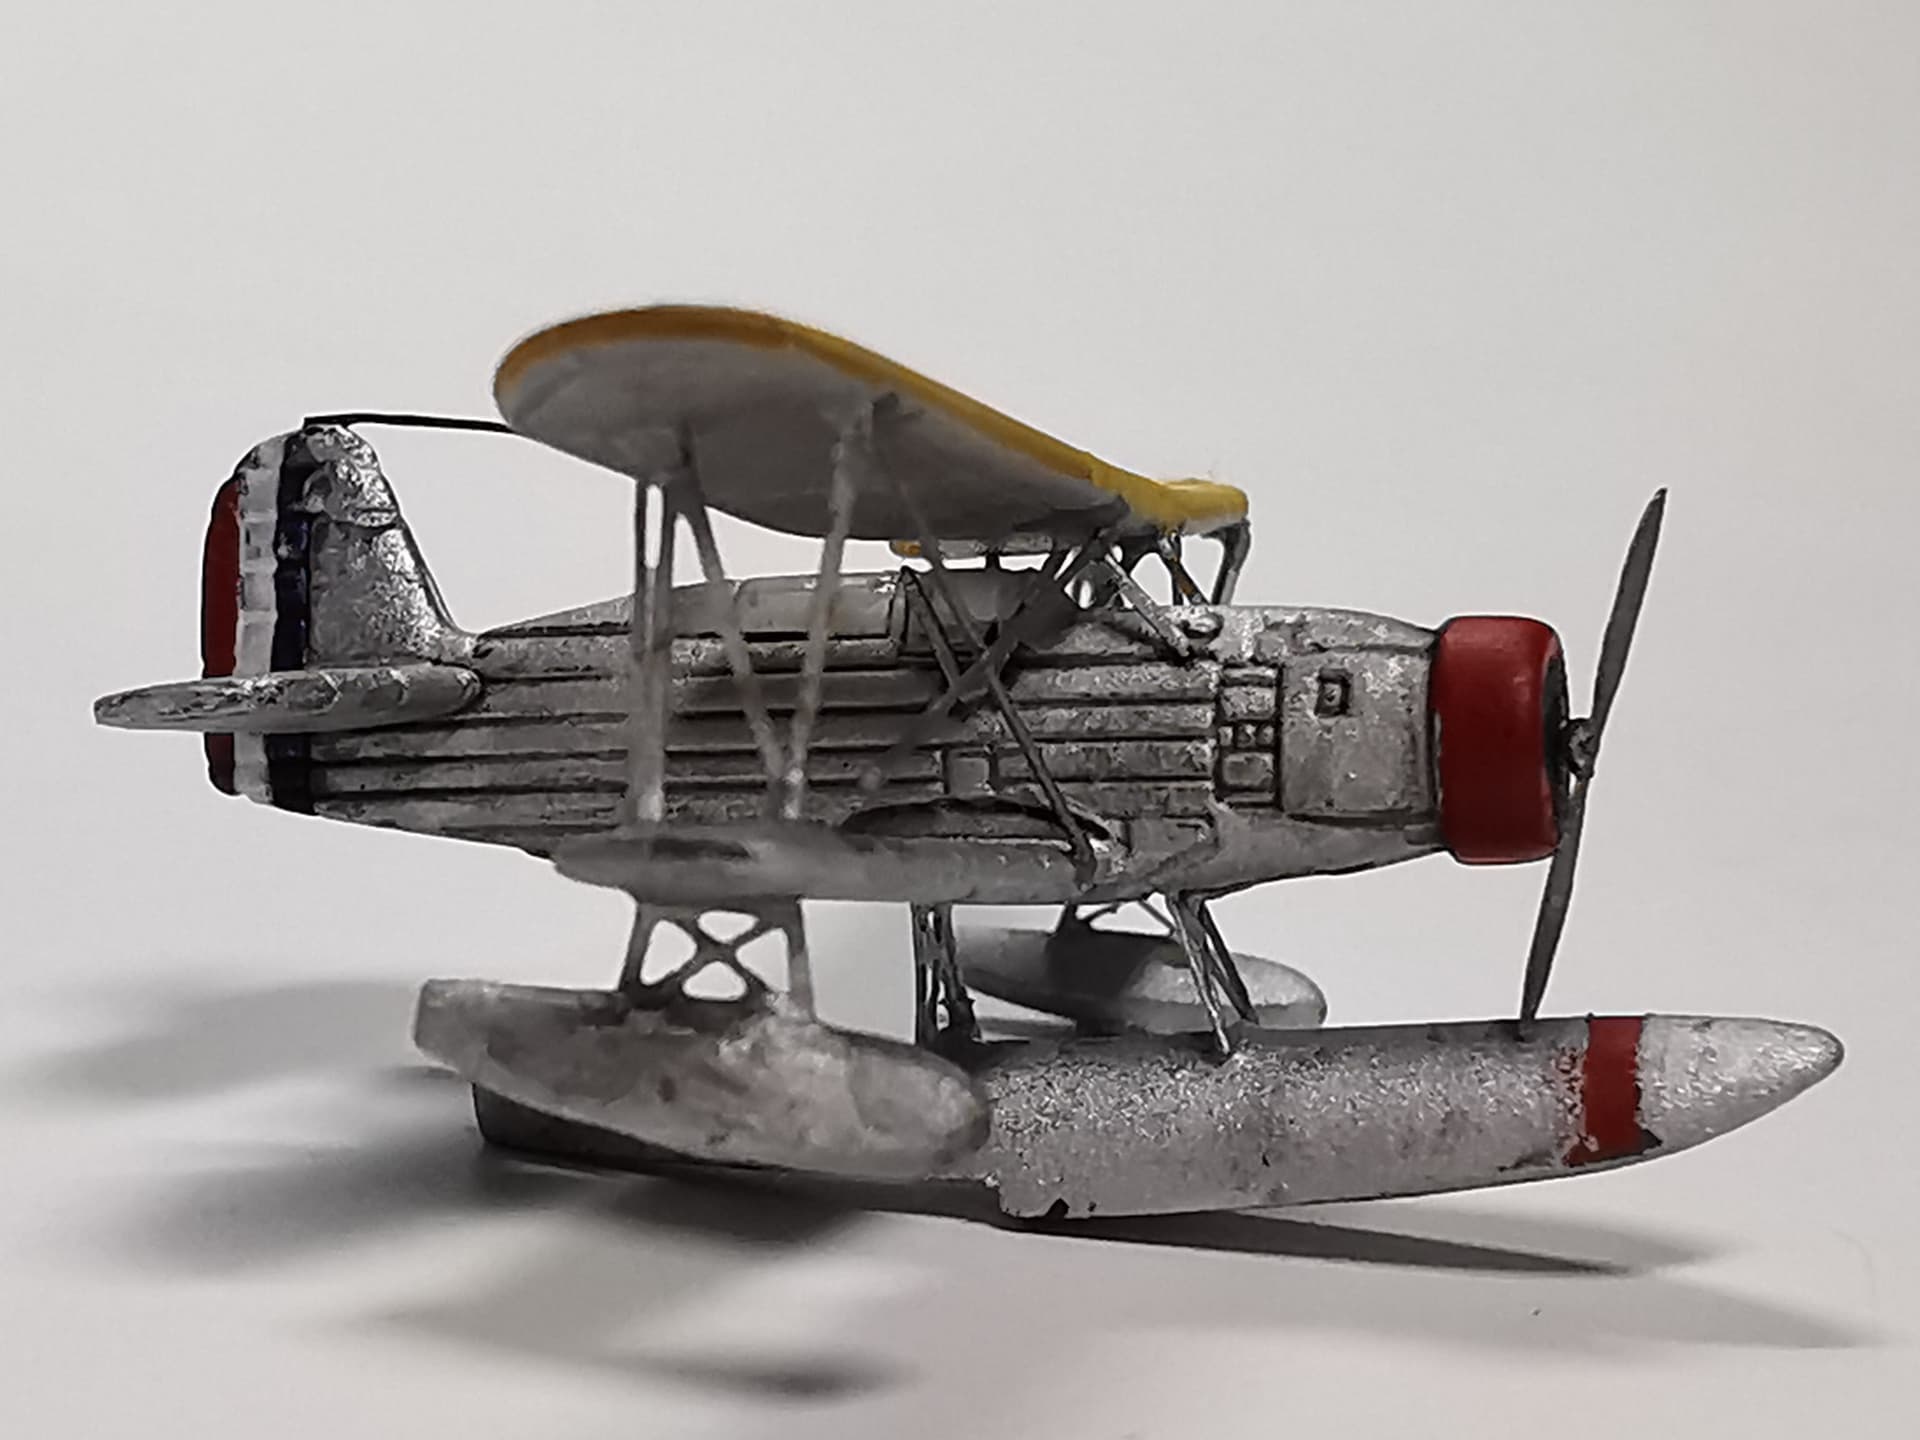
Ok here we have the first inhabitants of the seaplane tender: My three Curtiss Seahawks are finished. I got lost a bit in detailing as it was fun and a challenge in this scale but I feel it was worth it as most of the observers later will have a closer look at the airplanes. The rigging wires were made out of thinnest telephone wire (learned from RedDuster ) and the wireless cord was done with ultrafine black lycra thread. The stars of Trumpeters Seahawk kit does had stars but not with red point as necessary for the planned timescale. I painted the red points with a 0,3 mm red pigment liner pen before sealing everything with a matte cote. The Washing was done with Vallejo black glaze
Not sure were I will place the third one, but I have an idea already…
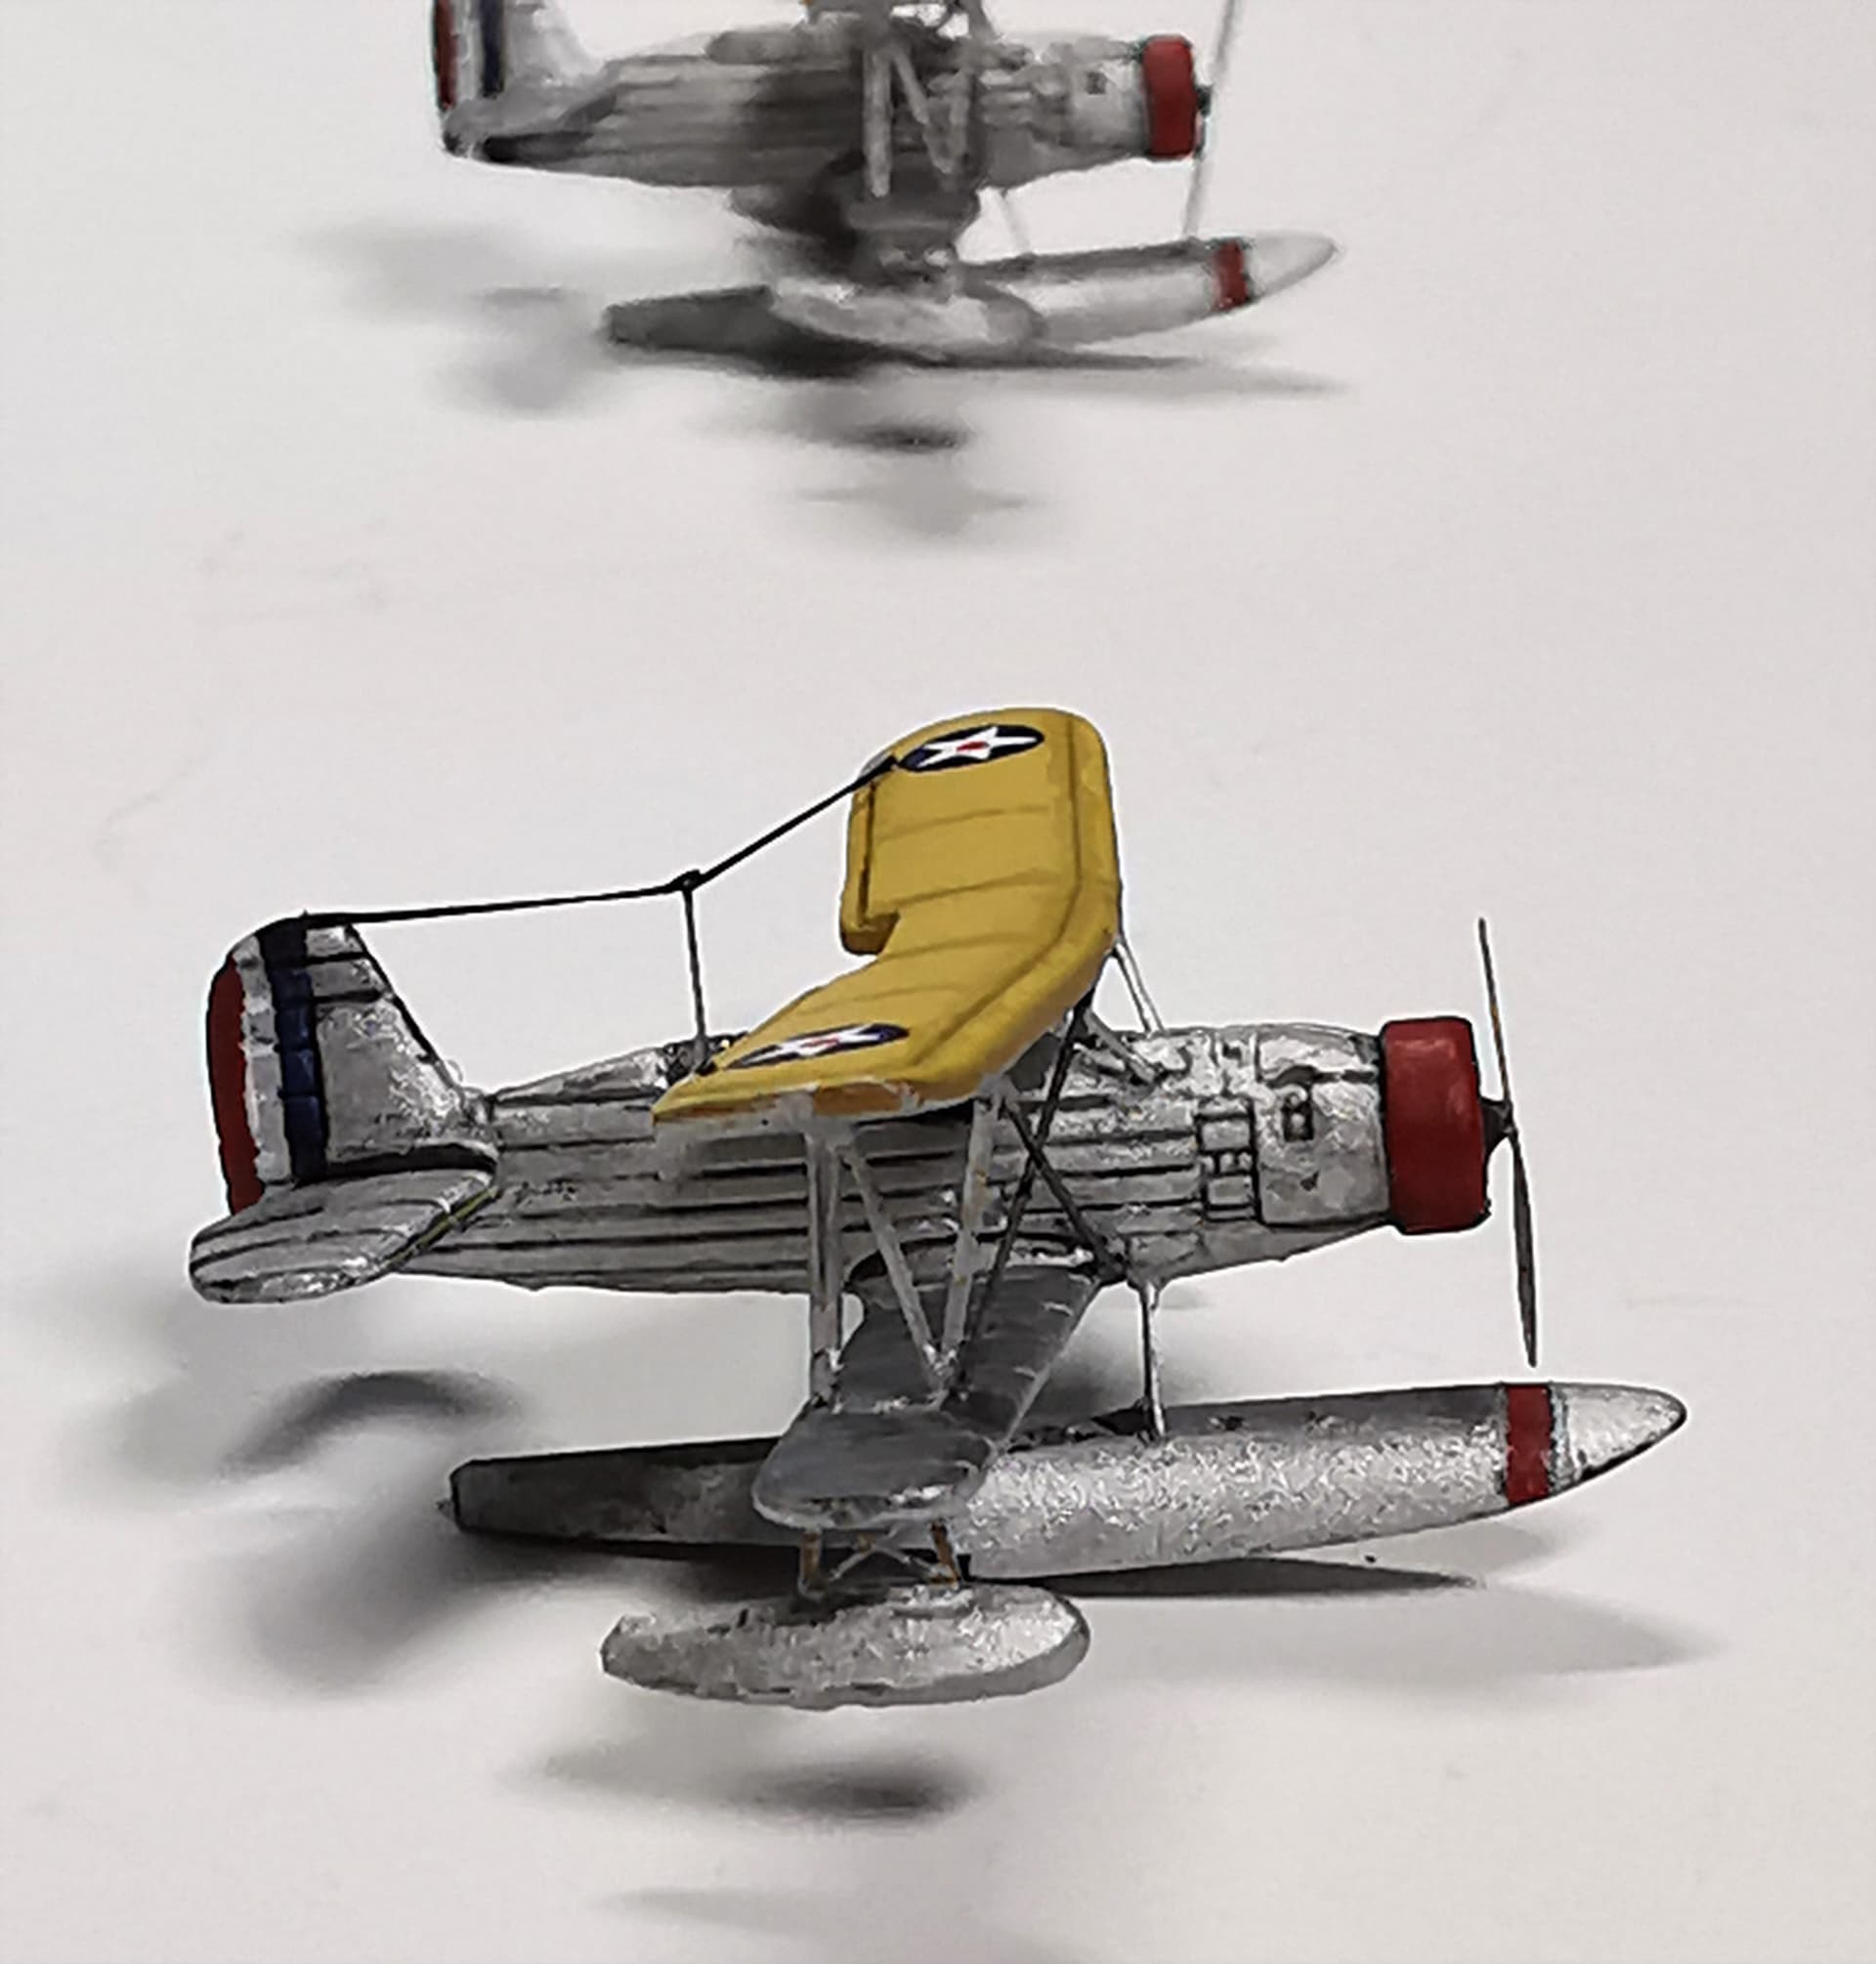
Super-Zoom (looks quirky in this way but overall look better with normal eyes)
And two of them already installed on their trolleys (spares from a White Ensign set for my sole other aircraft carrier in the stash, Gambier Bay)
Just in time arrived my ordered extra set of Consolidated P2Y Ranger from TRUMPETER to display a fully loaden ship as intended in one above mentioned picture of the real ship. So lets start to assemble another 12 seaplanes…