Thanks Robin!
Thank you really, not the first time you come to rescue. Sorry for this, though I am not a big one on informatics I do really like to share on this community…
1 Like
I have been given the access rights and the ability to do things most others can not do,
the “price” for this “privilege” is that it is part of my “job” around here to provide that service.
![]()
![]()
5 Likes
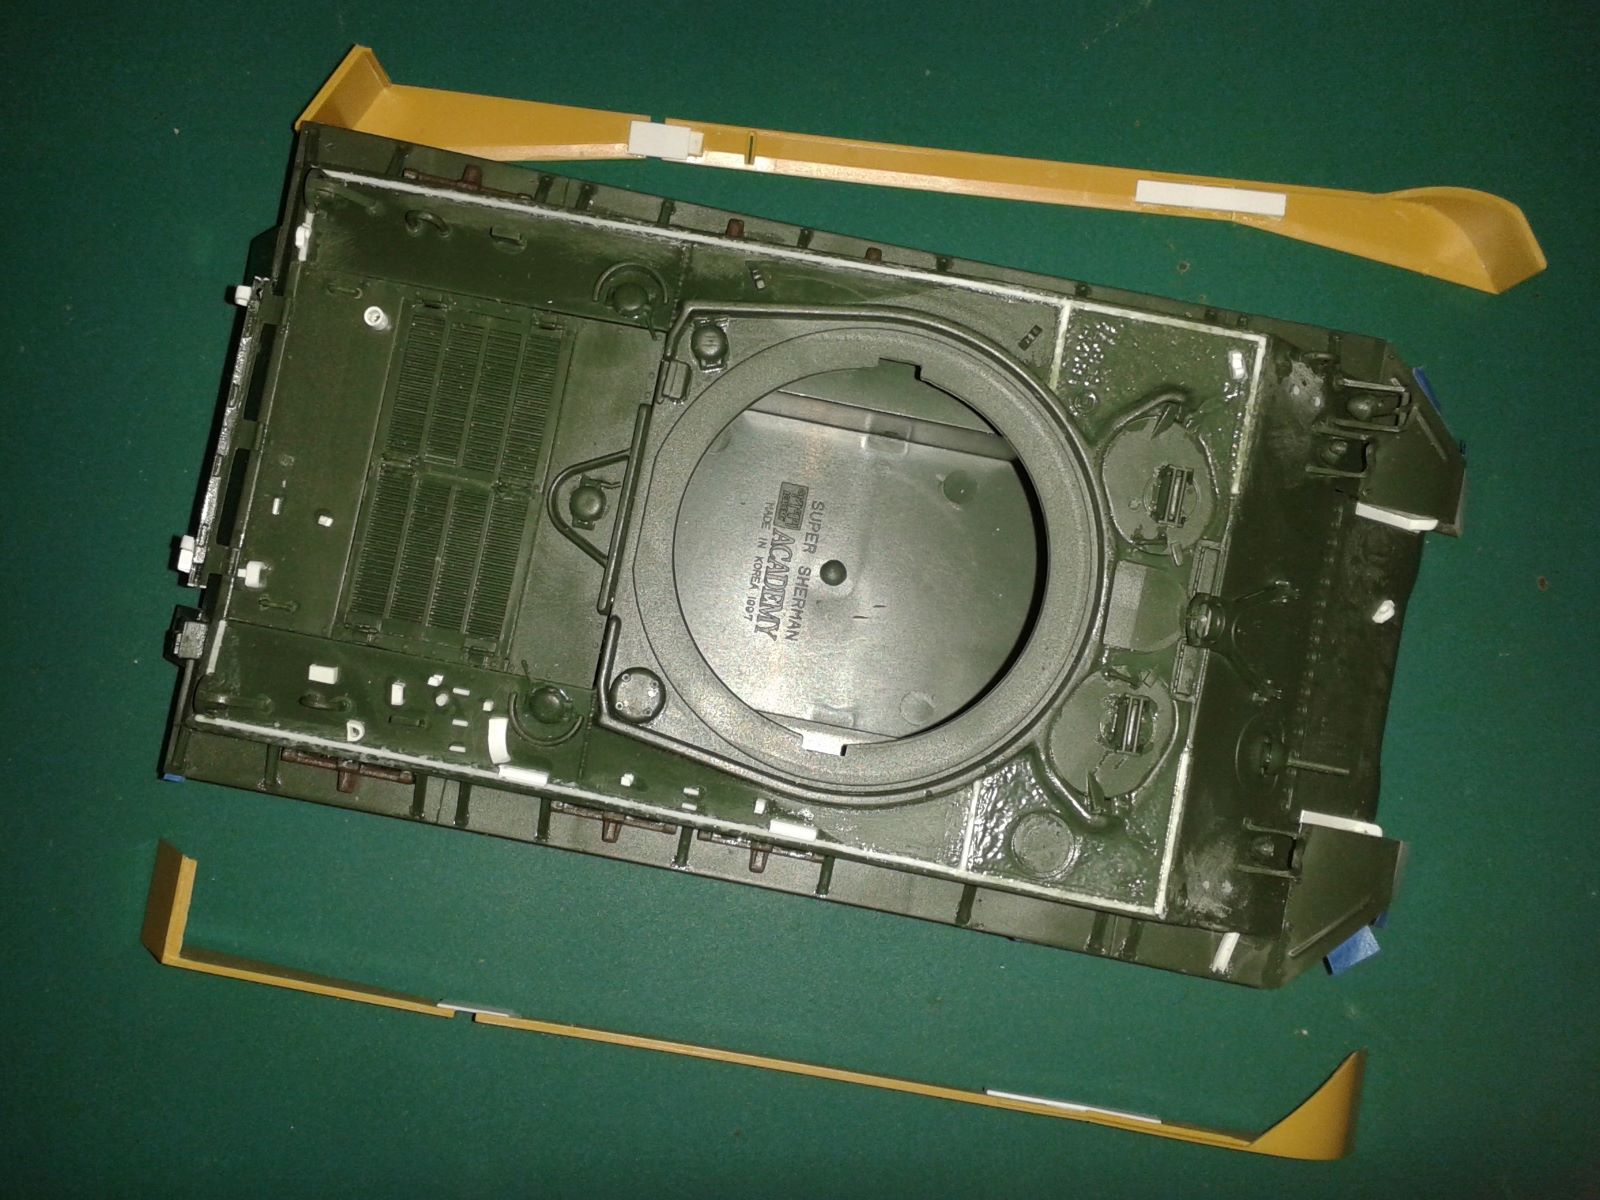
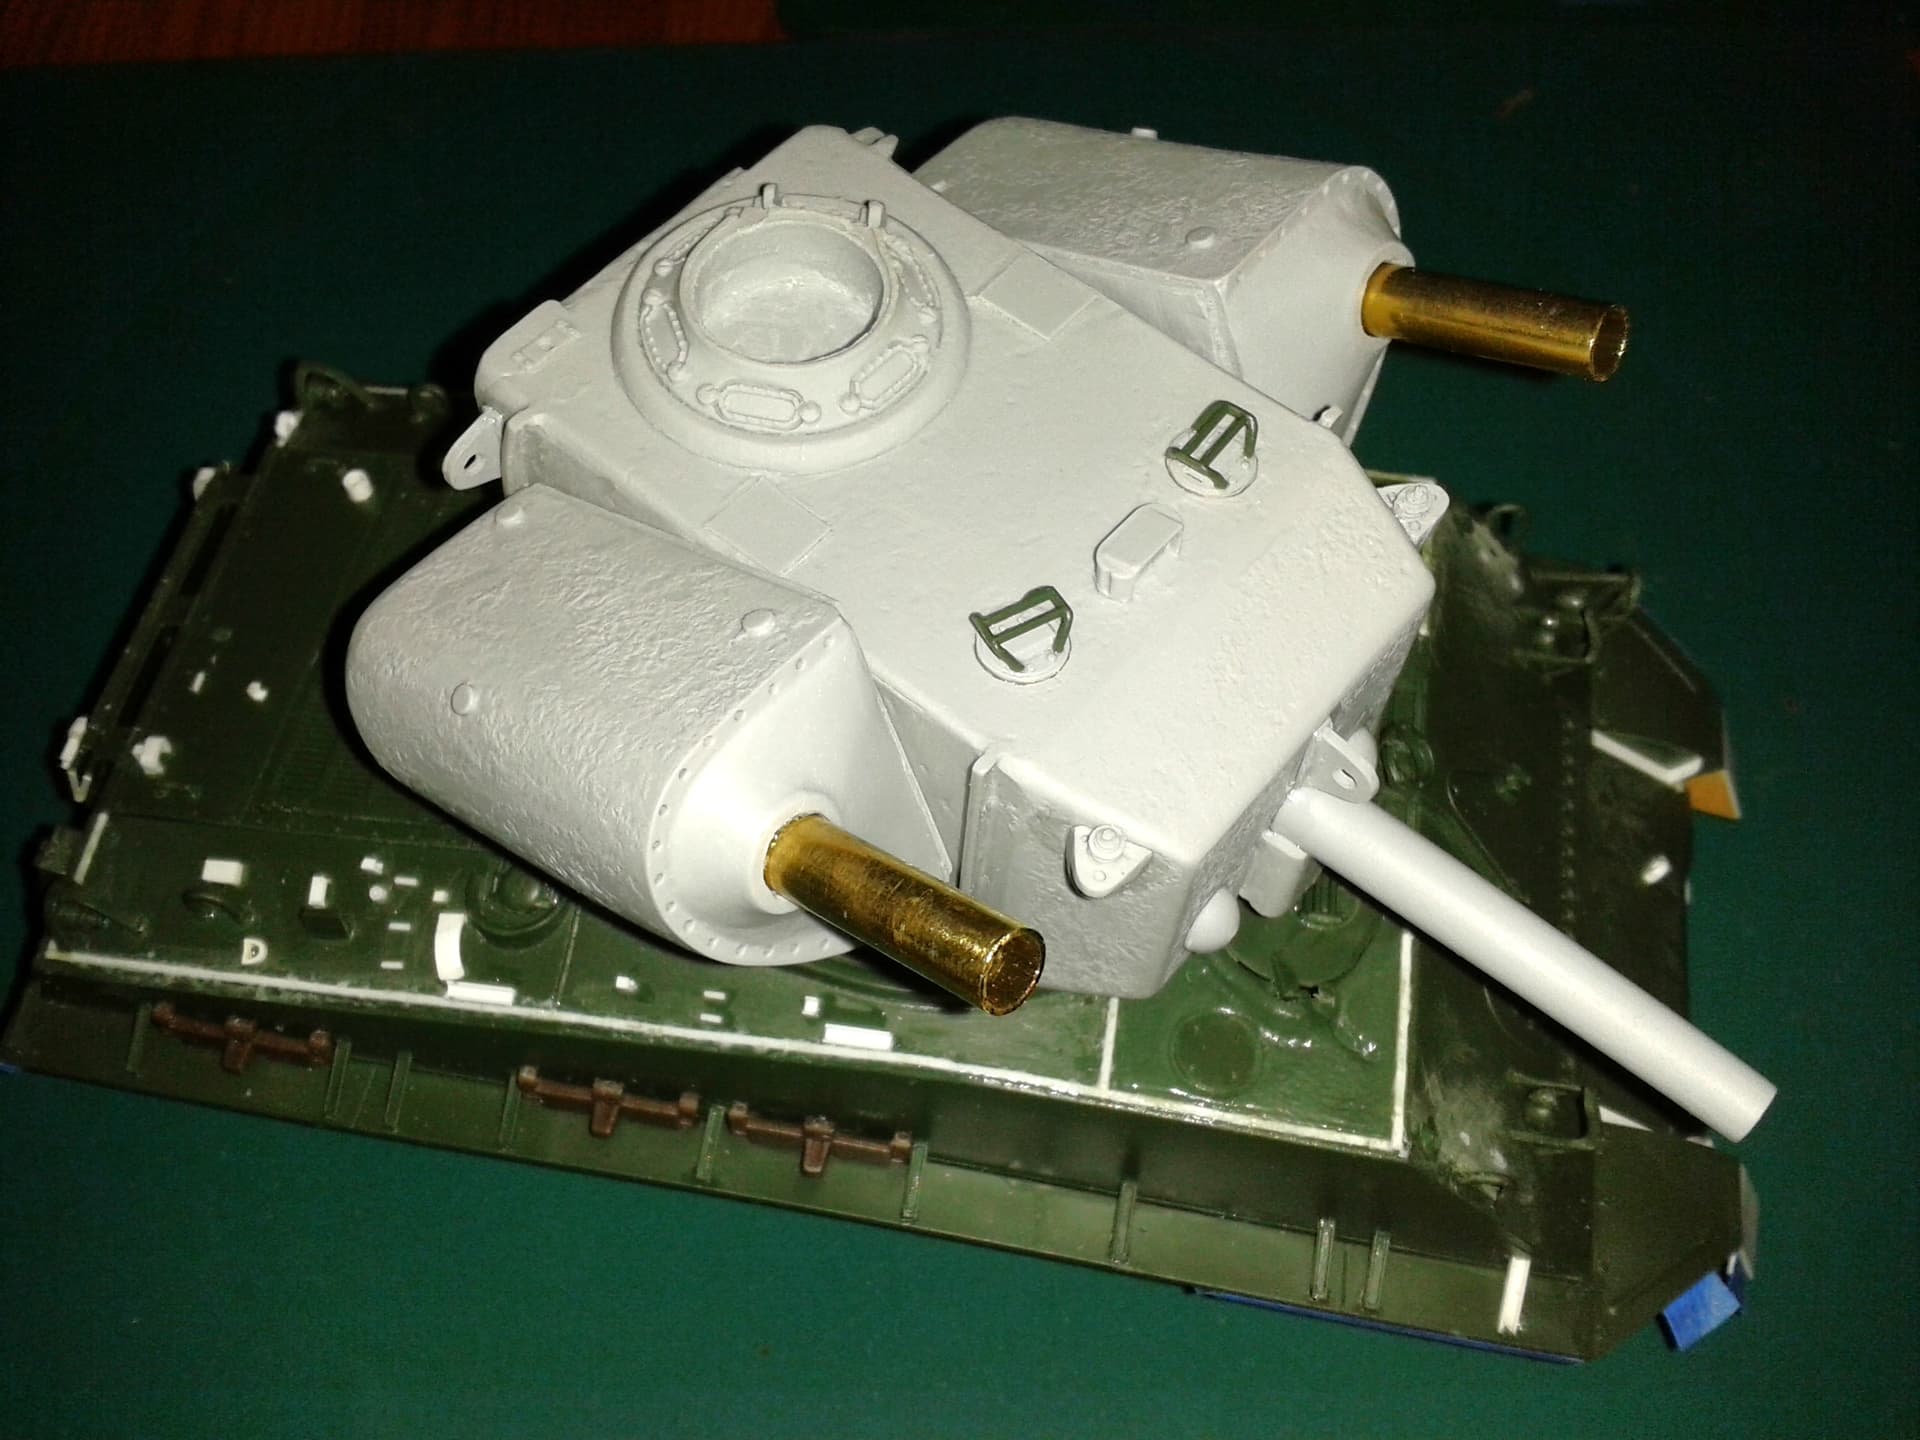
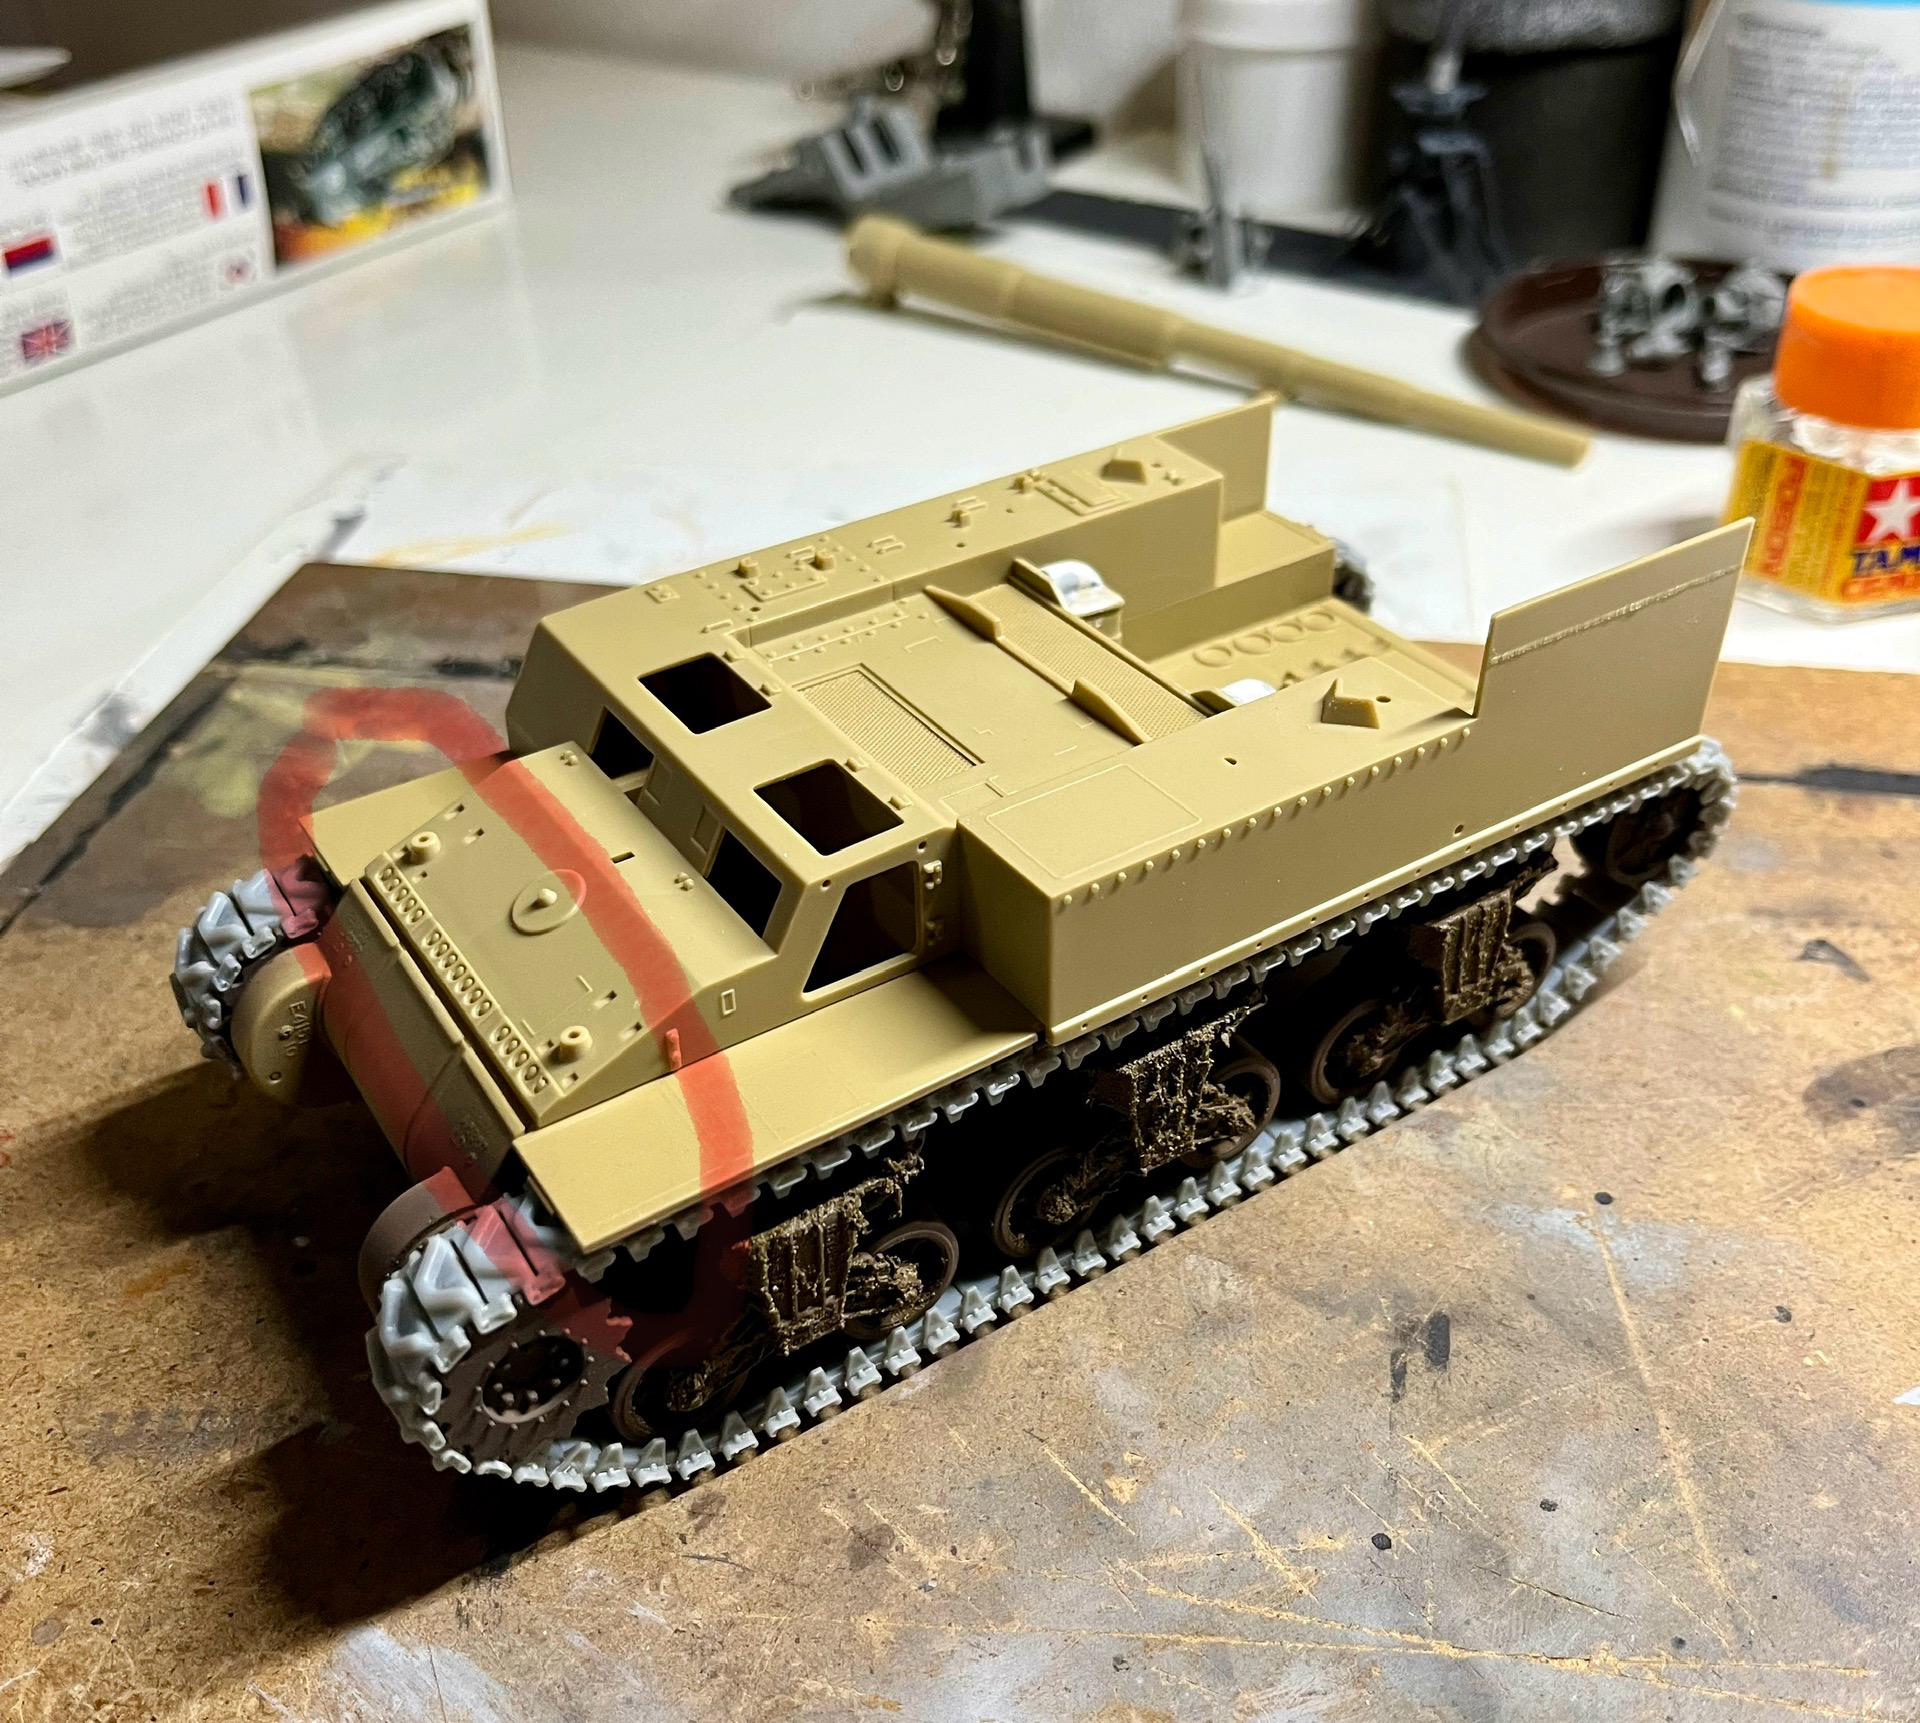
The very first coat of paint. Ammo Mig-132 IDF Sand Grey over a black primer with white highlights. The picture is a tad darker than in real light and the color does not look so bad when compared to the real thing. And I liked how the PE and Evergreen styrene blended in. The hull is not glued together yet since I want to finish tracks and bogies first.
12 Likes
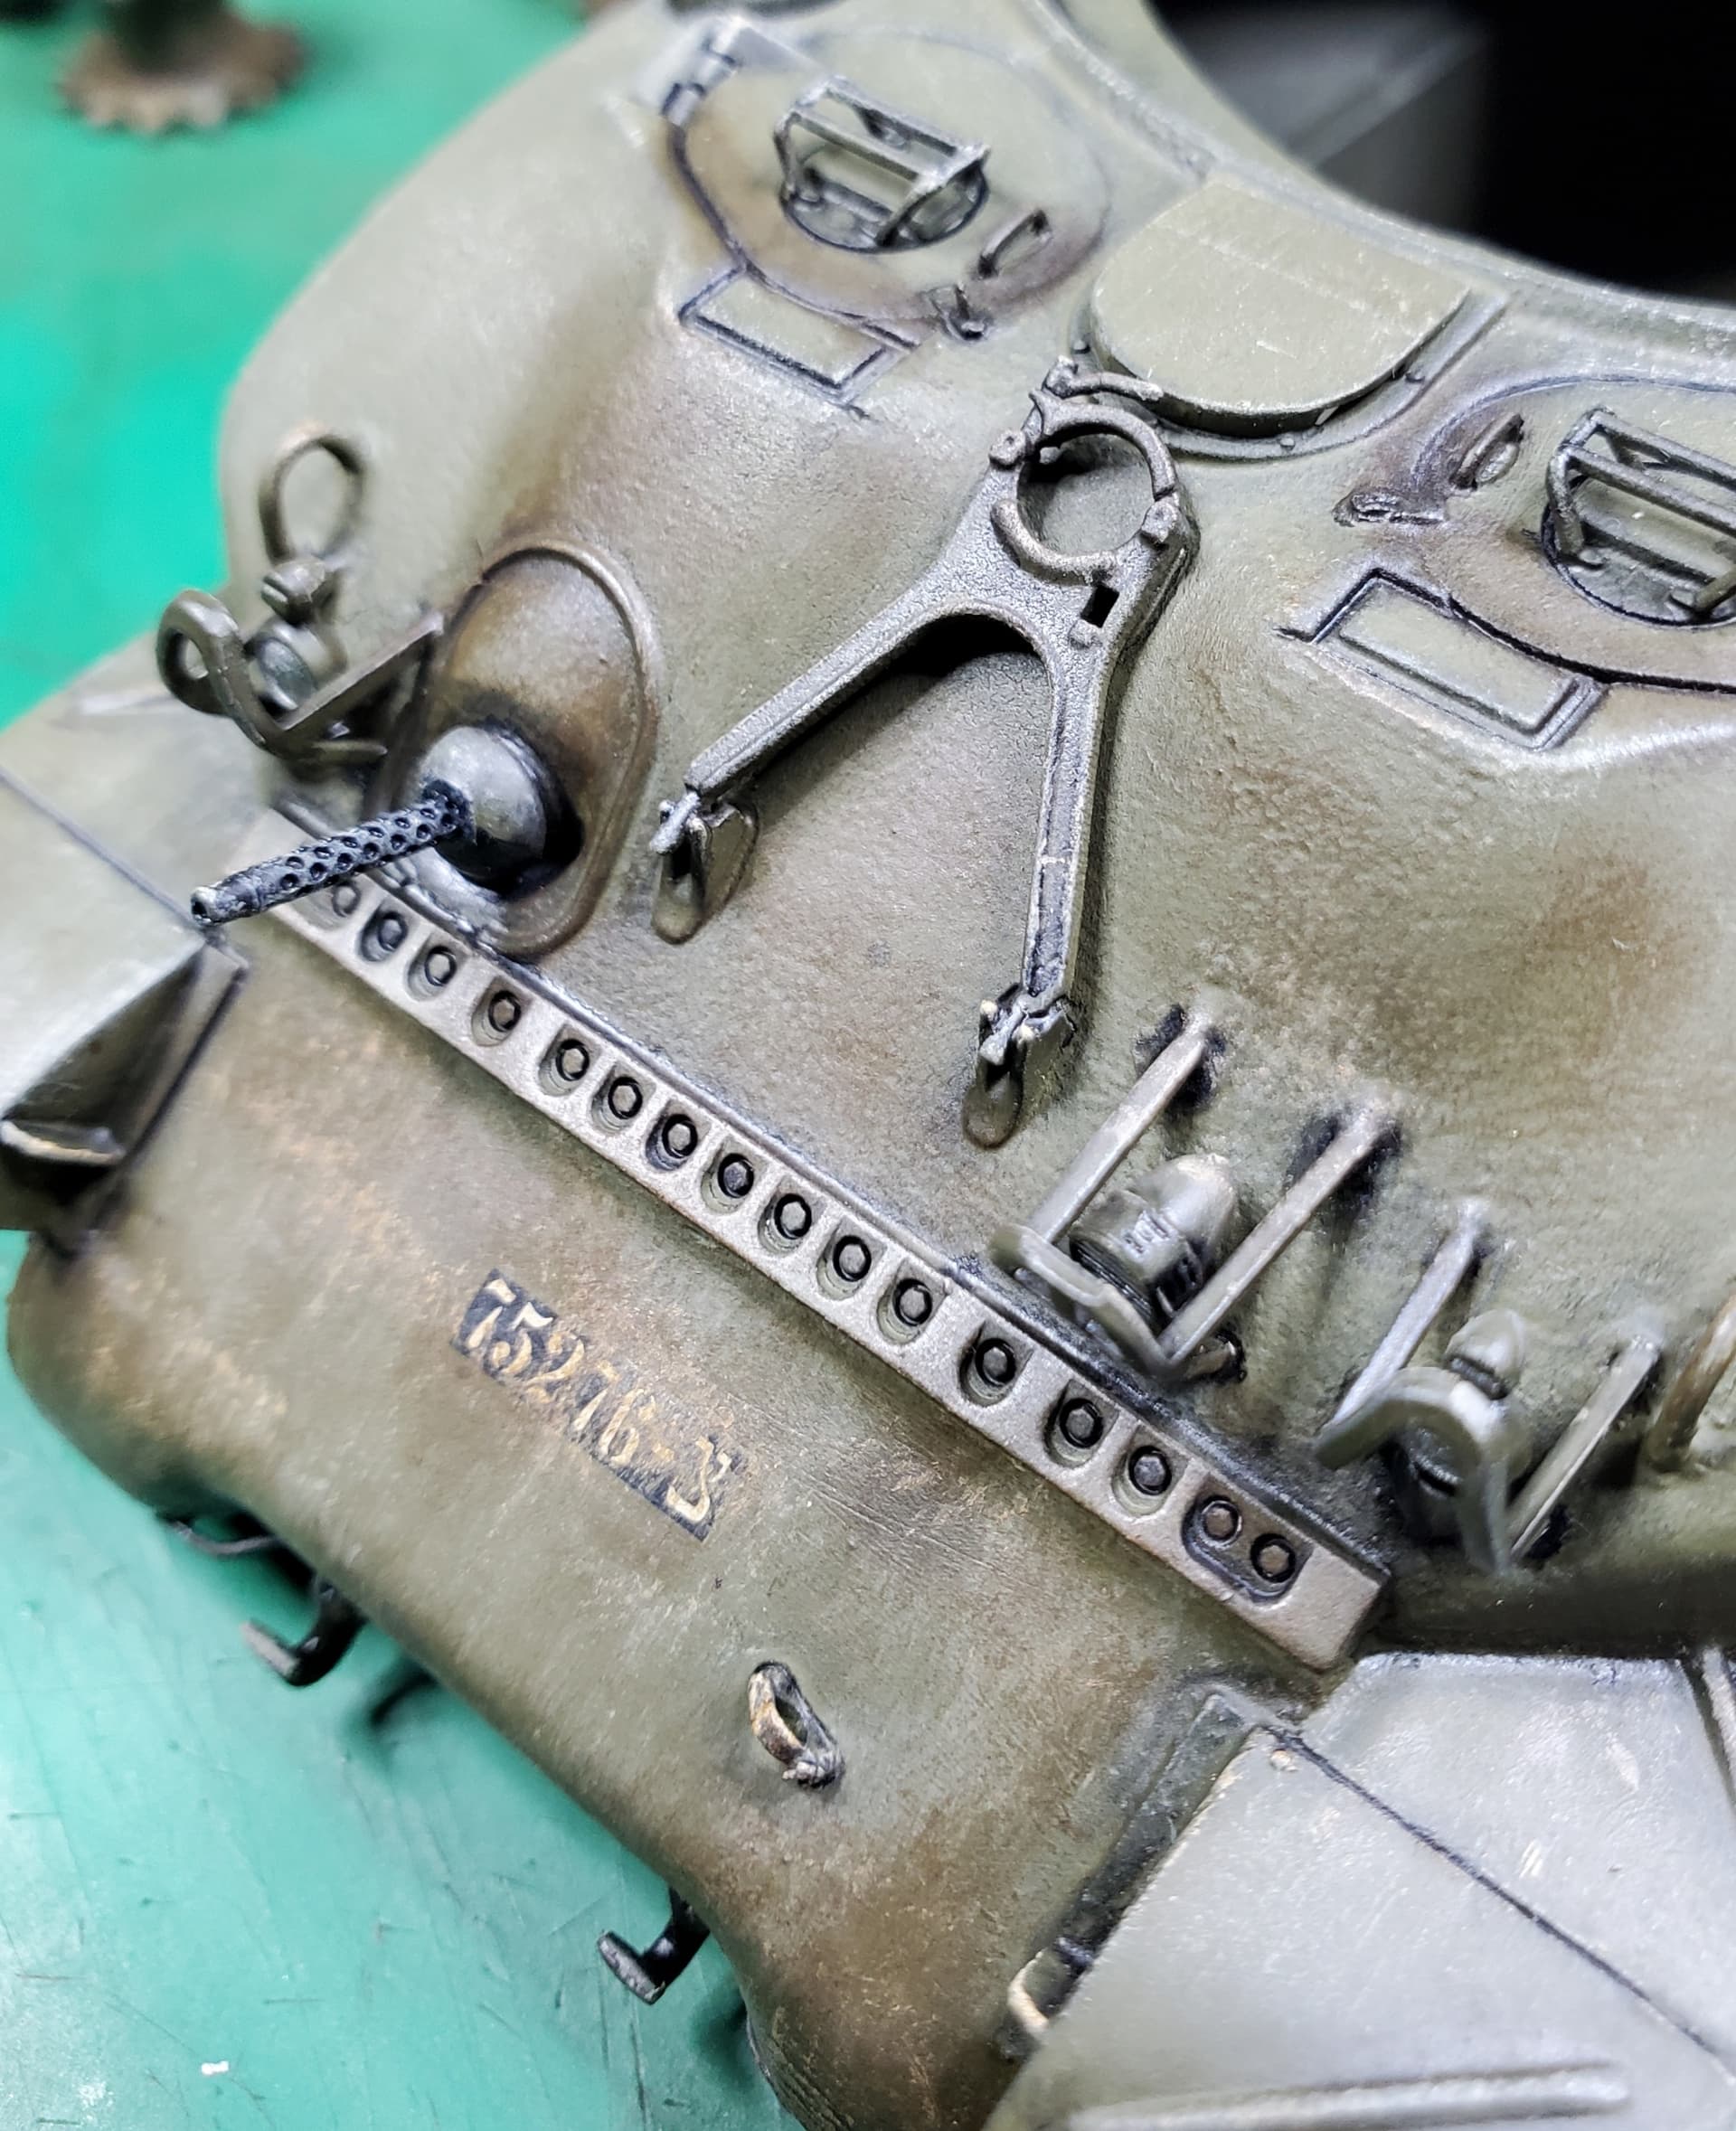
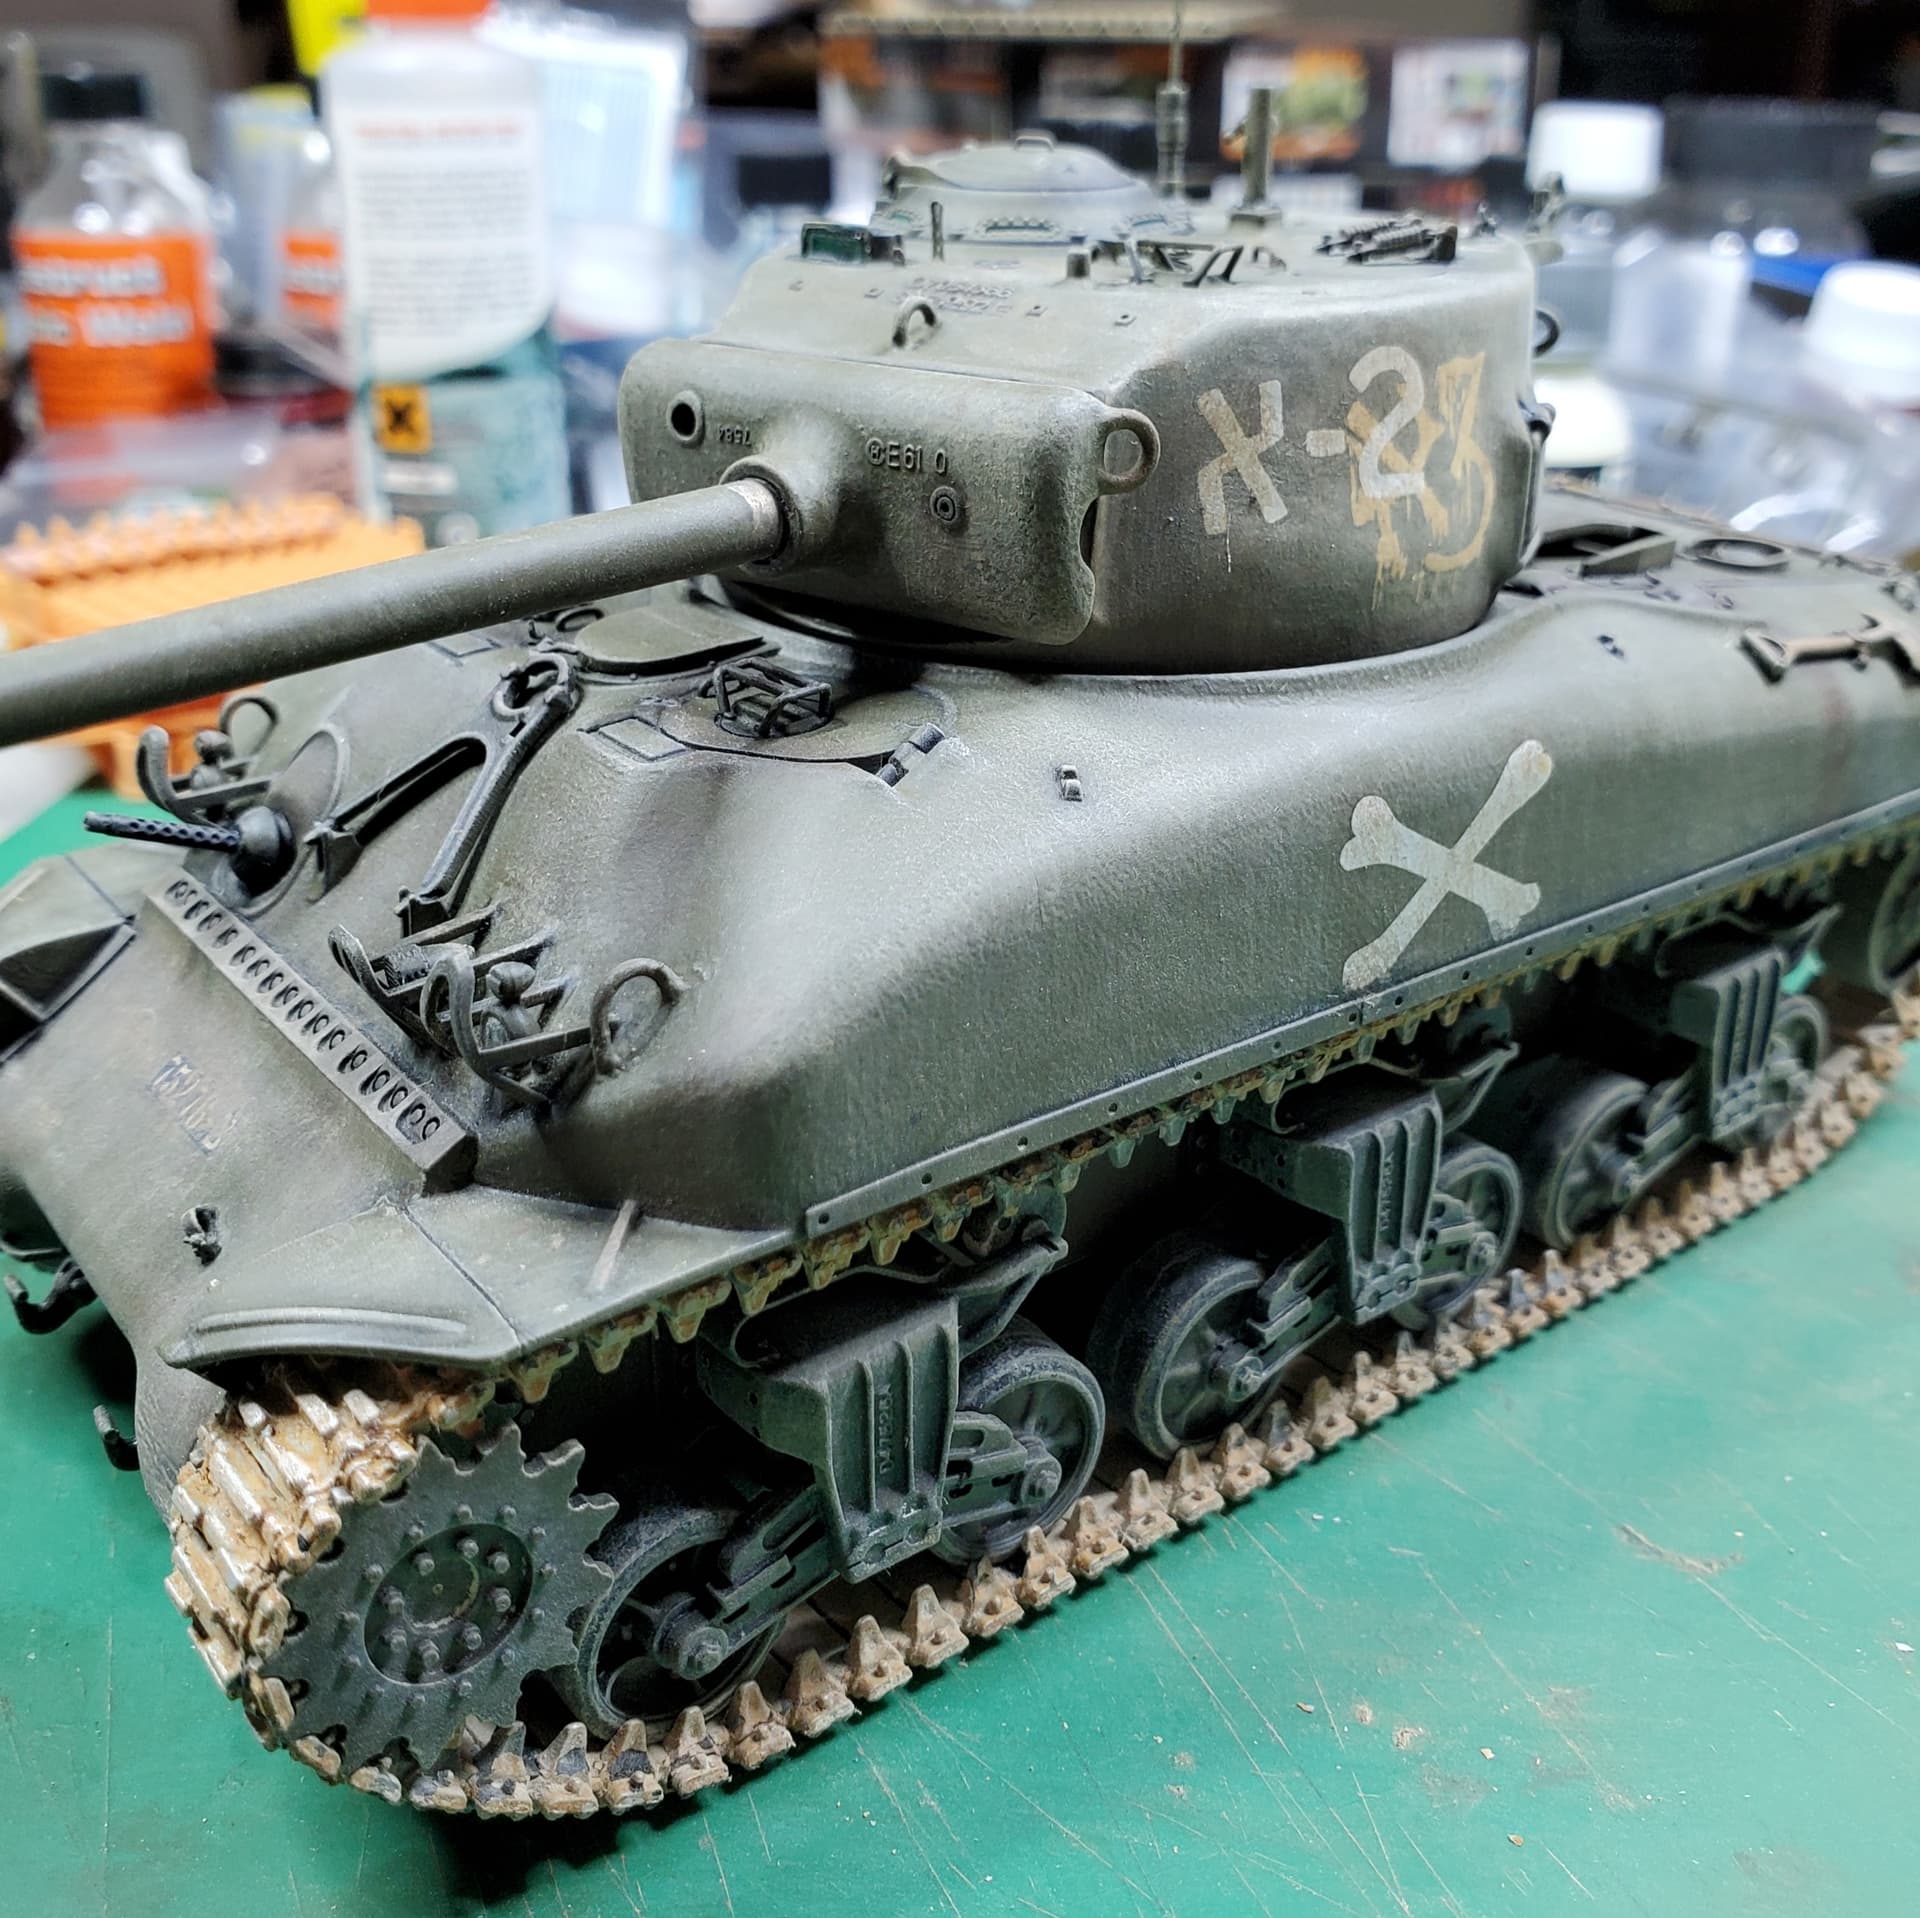
Strategically adding a little bit of grime around crew hatches, fuel stains, and maintenance panels…all done in artist oils. Not quite finished with these applications. Tracks yet to be treated along with applications of pigments and pastels yet to be applied.


14 Likes
Only thirty minutes at the bench this evening, but i managed to slap on the first coat of paint on the commanders .50 cal.
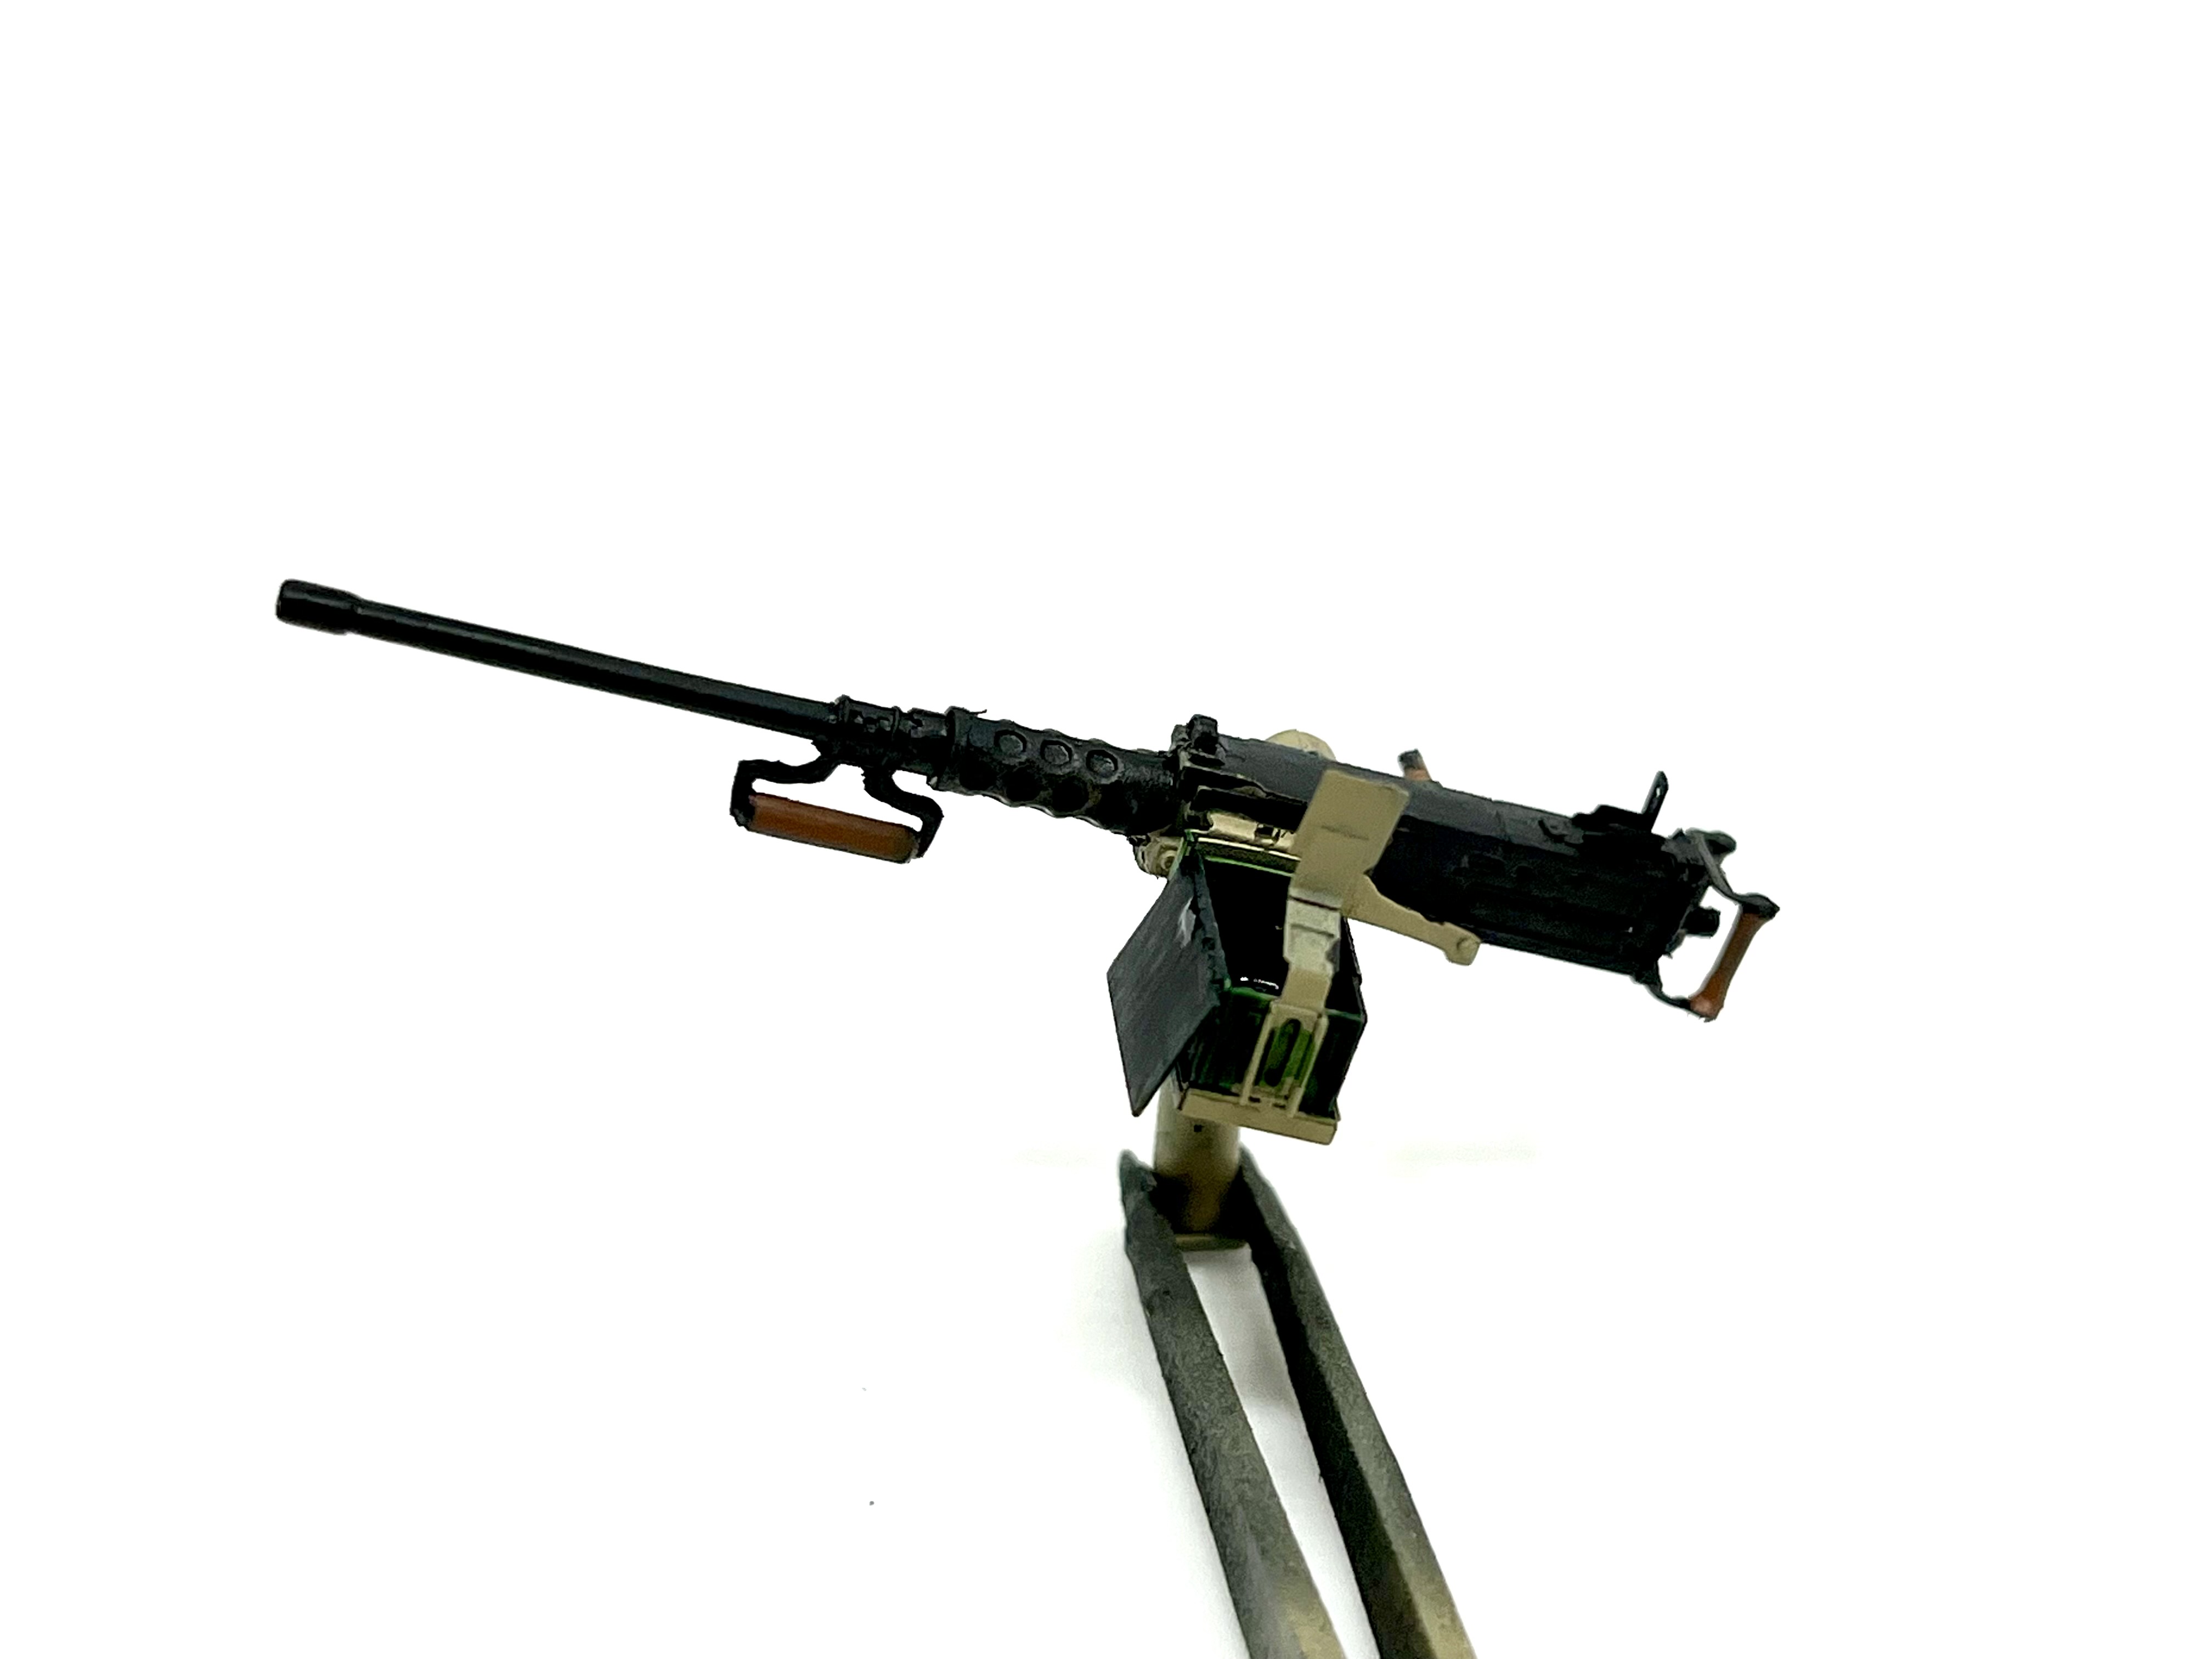
10 Likes
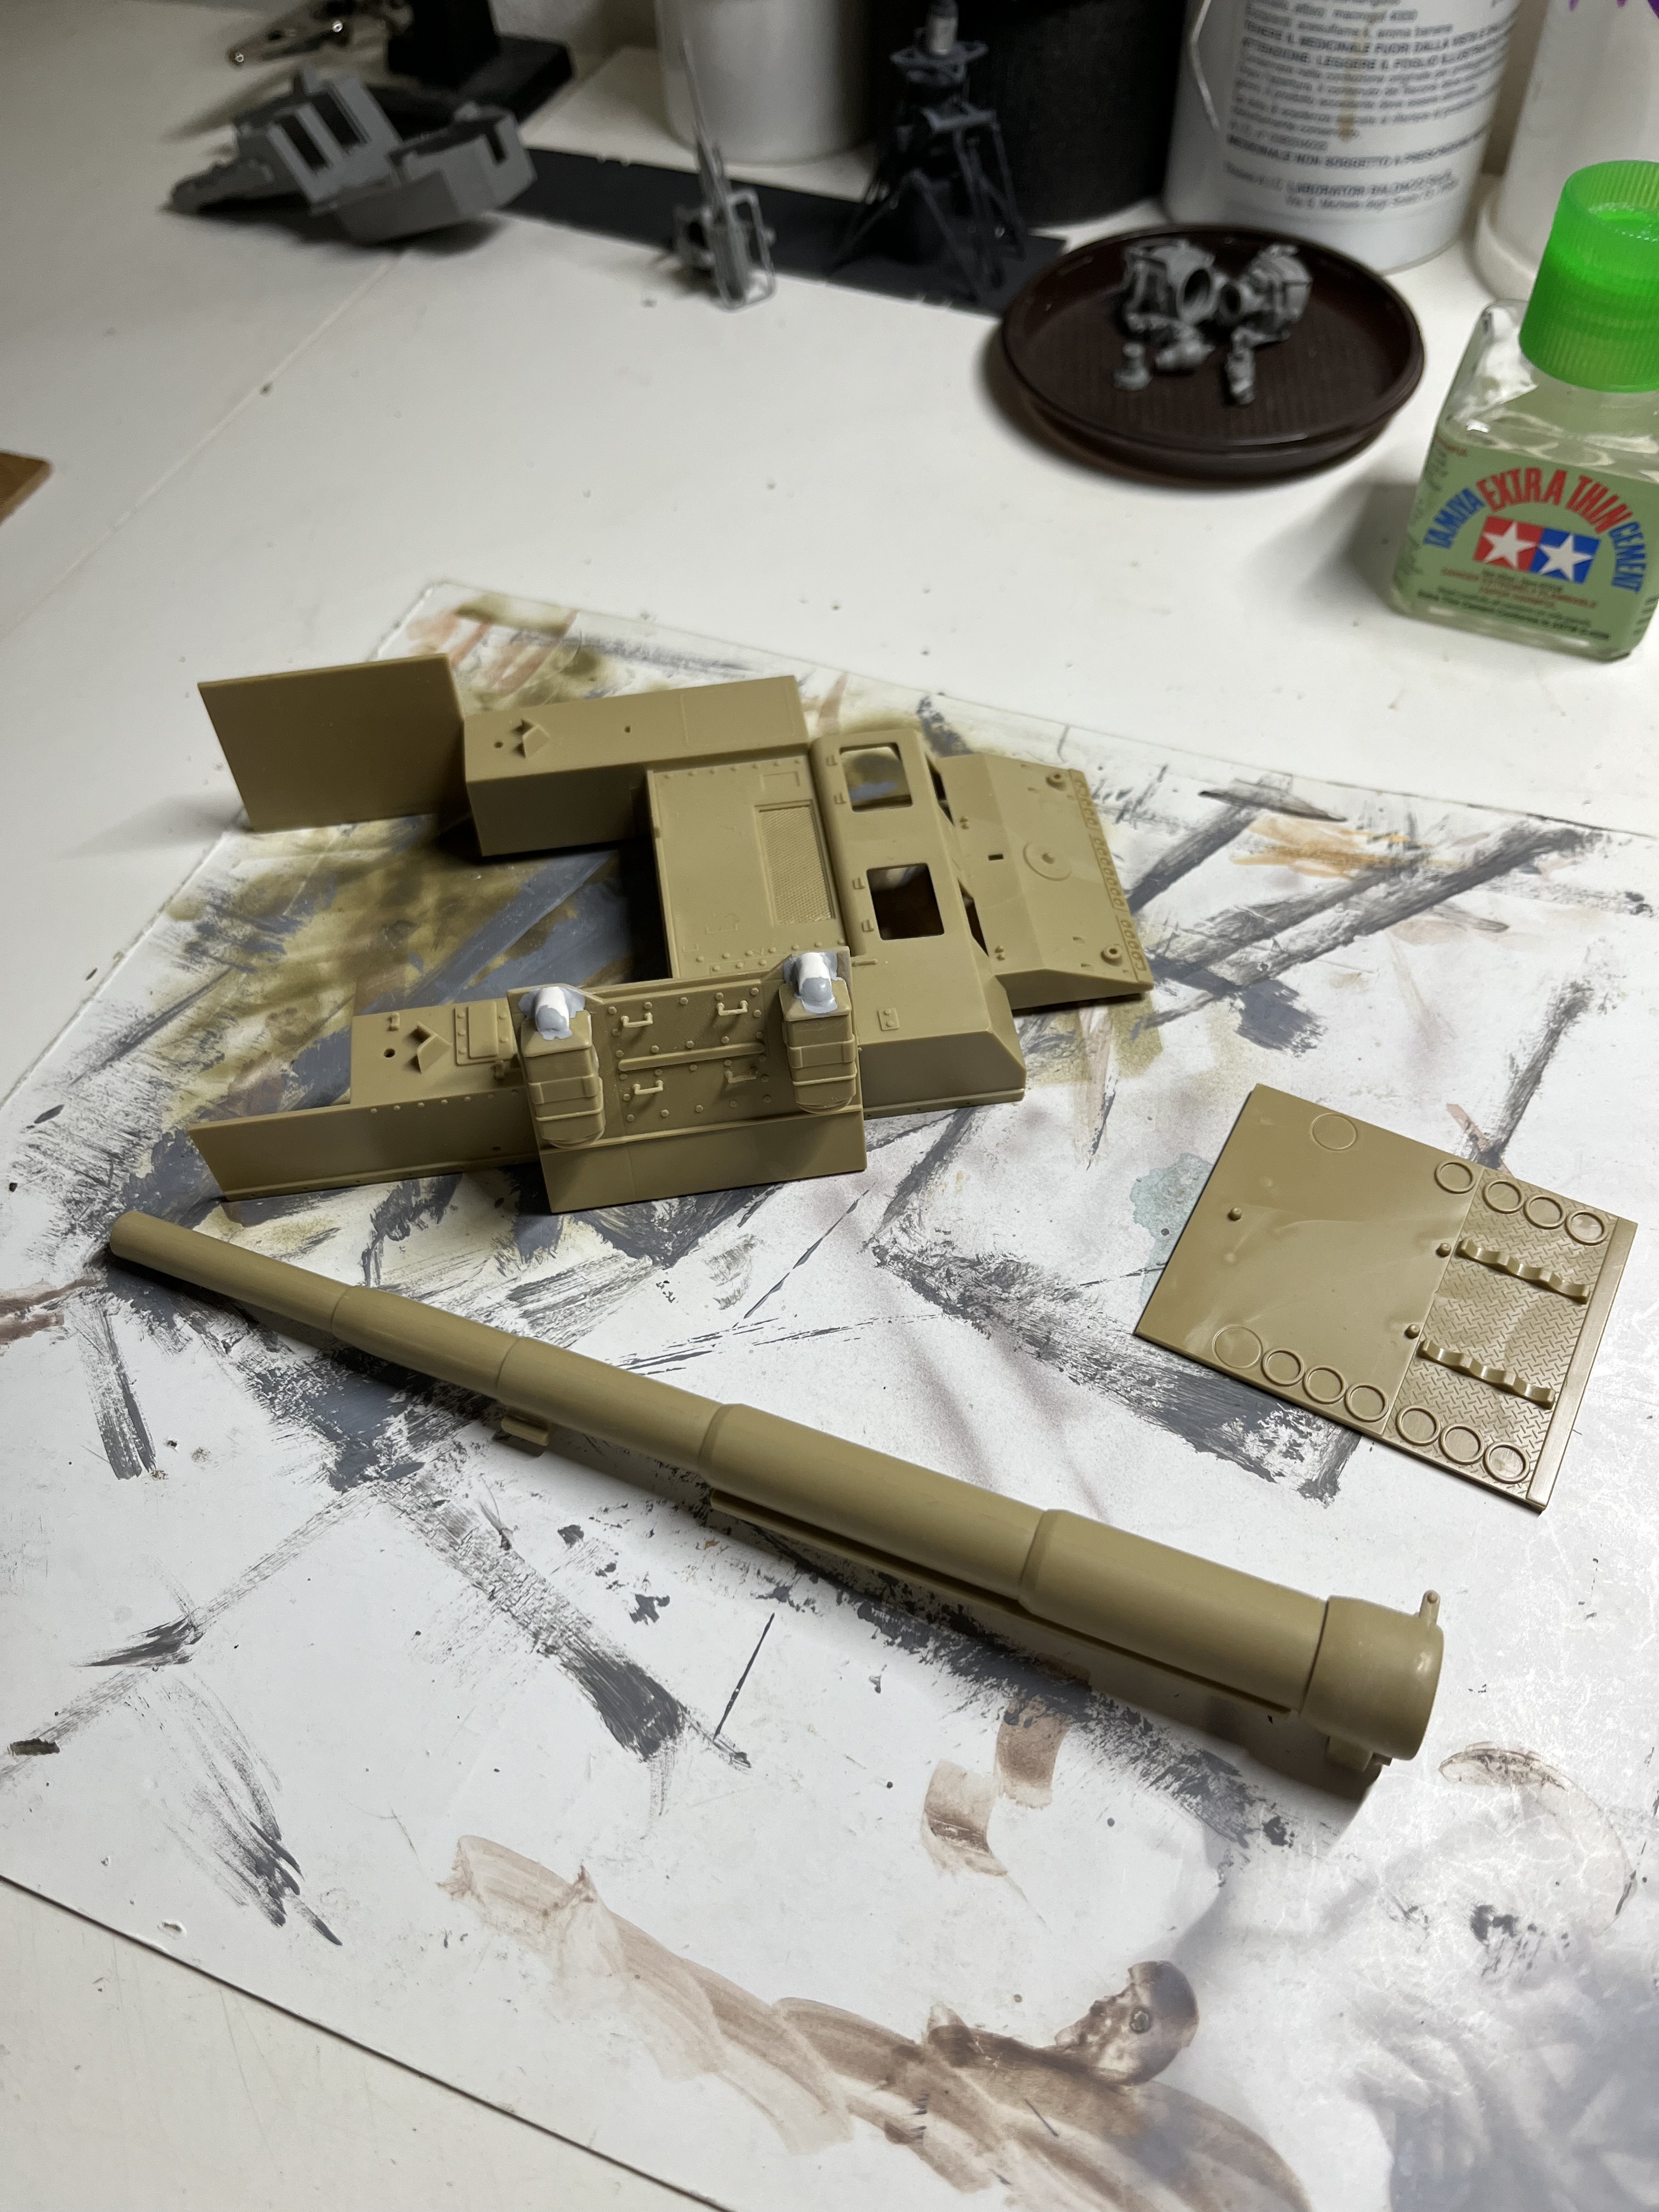
I’ve managed a surprising amount of progress recently! The hull was the usual fight against Academy’s sloppy engineering, but this ain’t my first Sherman rodeo. I used the trials photos to detail it up, adding empty tool brackets from plastic strip and sand shields from a Tasca sprue. The spare tracks are from Armour Track - I could use the rest for the tracks but they are daunting and I do have a set of Italeri T66 tracks, but it’s too early to decide. I had to bush the holes in the idlers and drill them out to get a tight fit on the mounting pegs, and the sprockets were a real feat of modification…
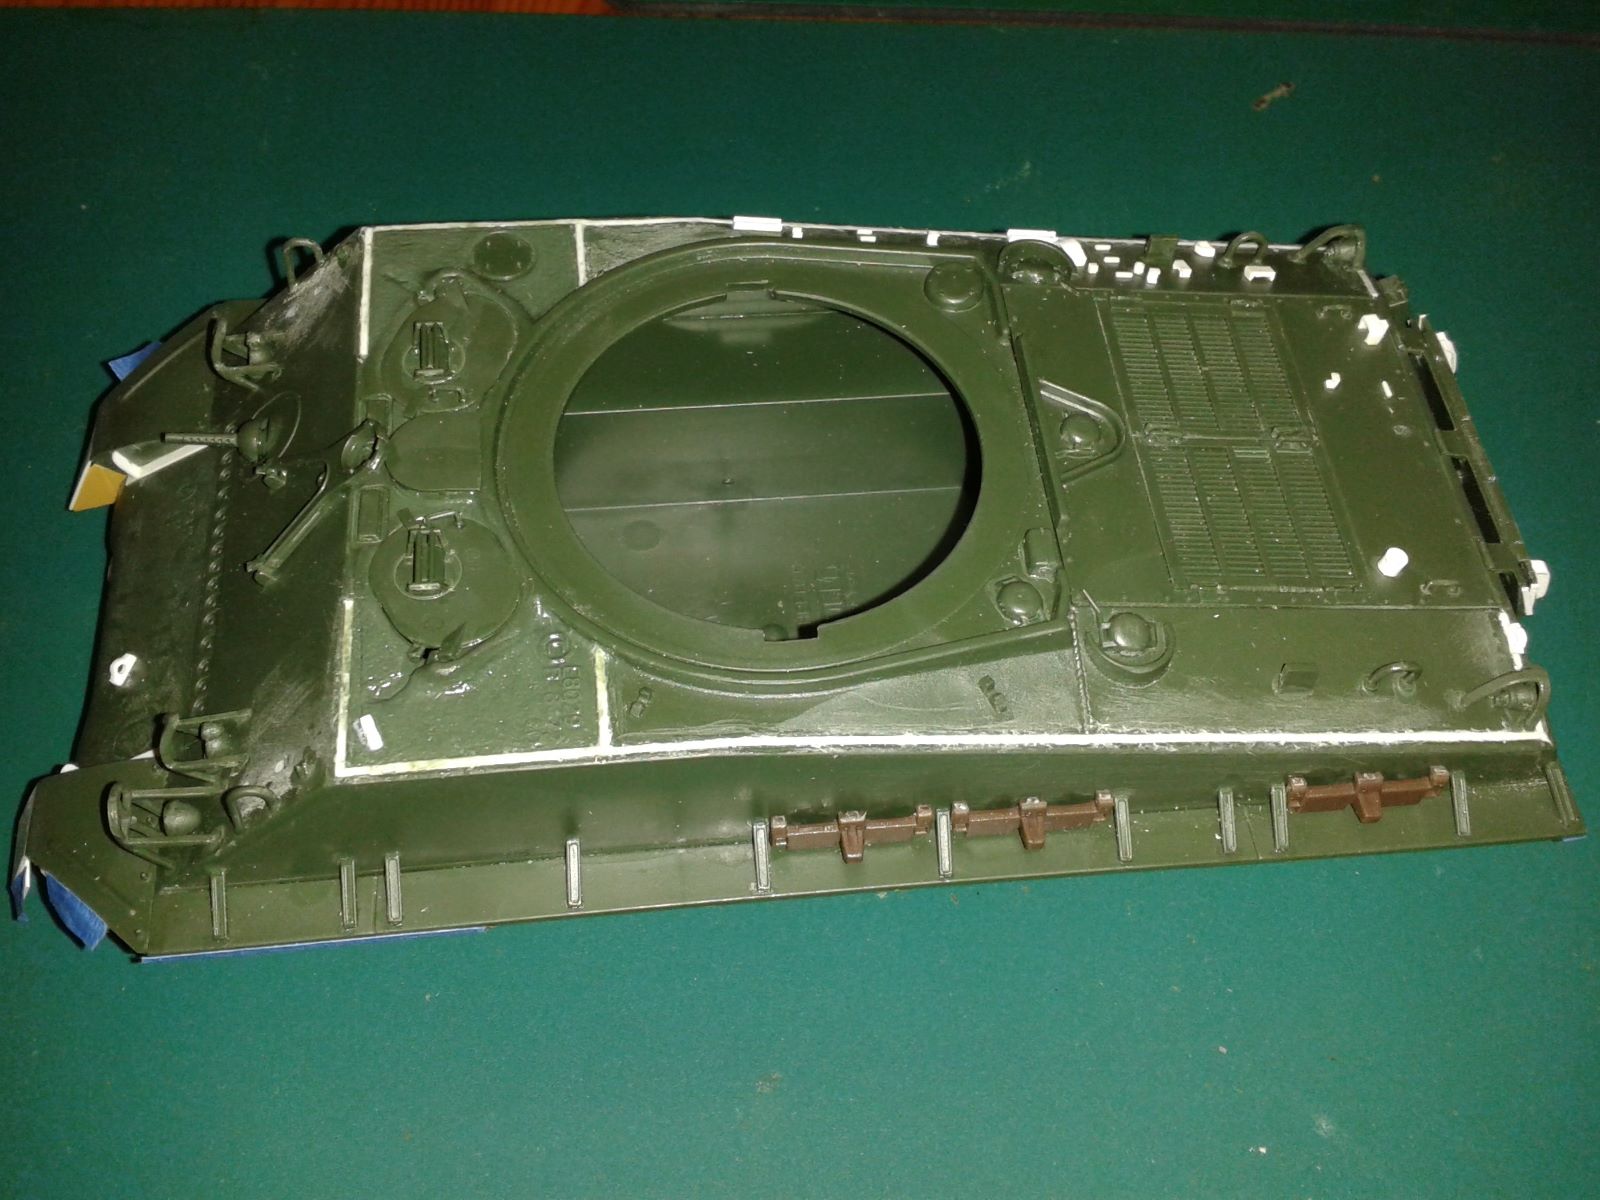
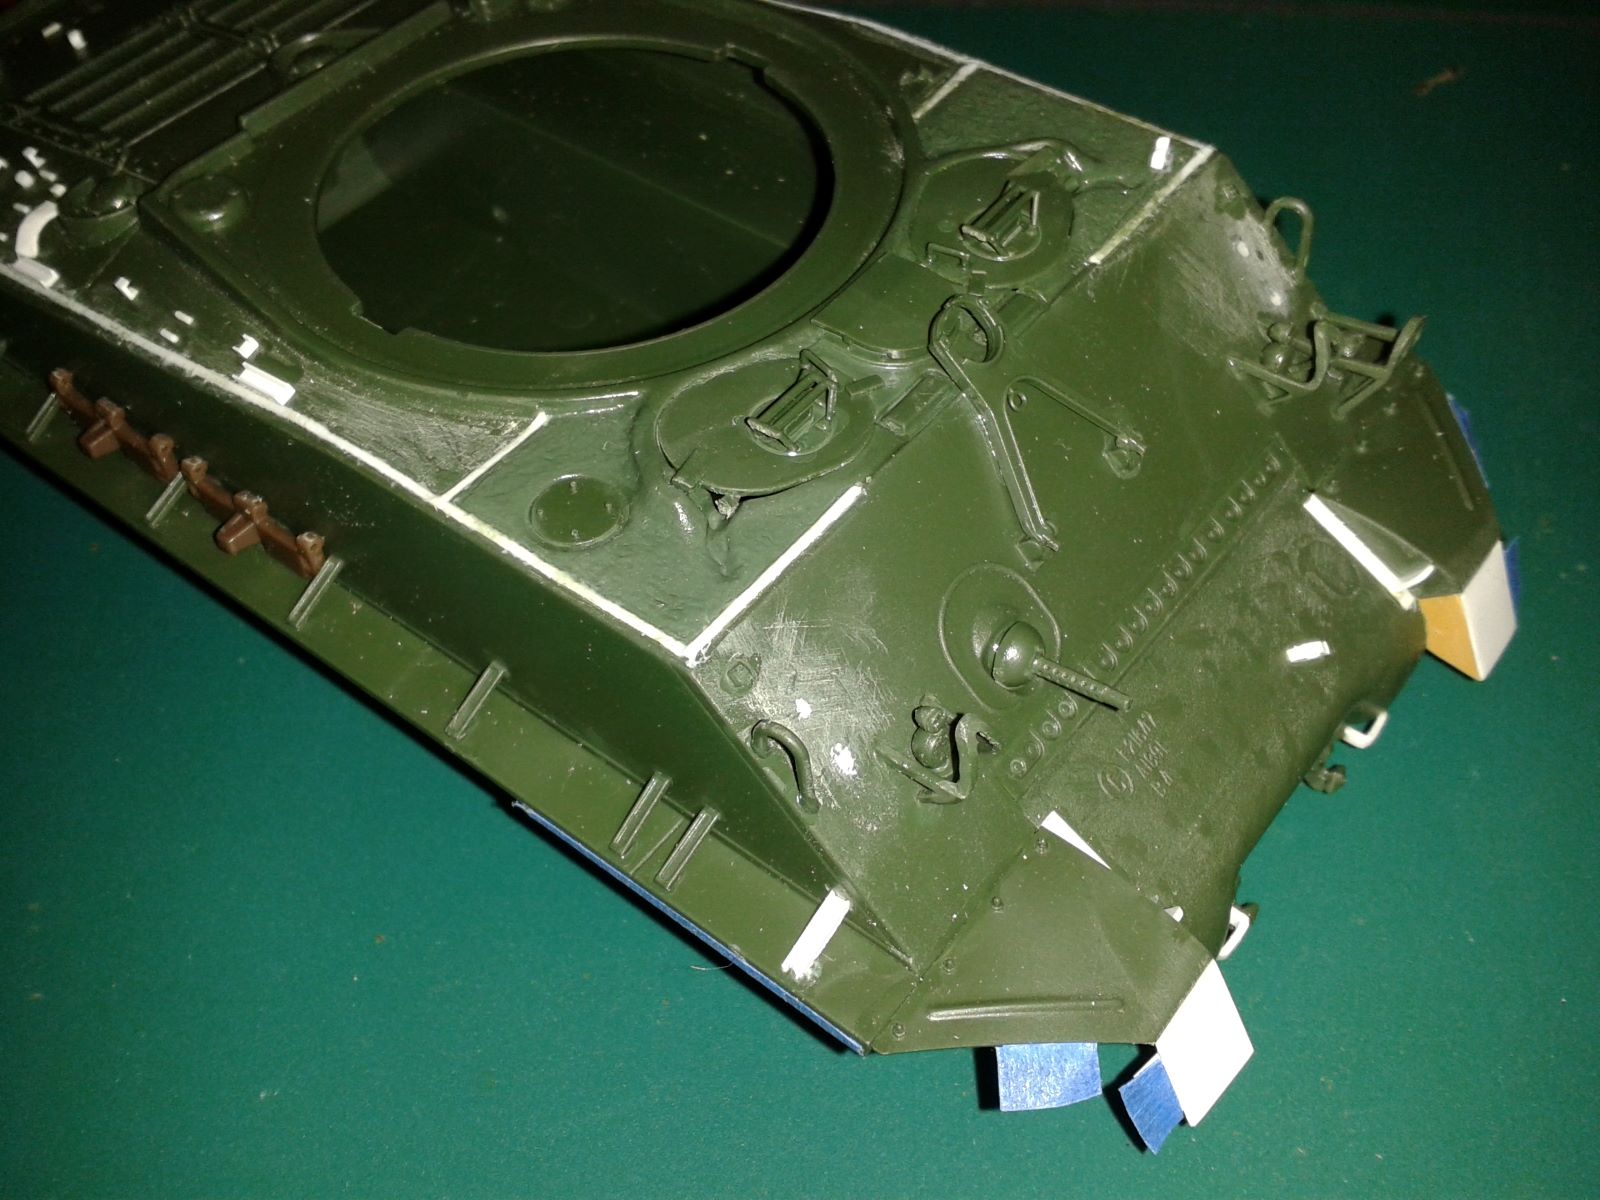
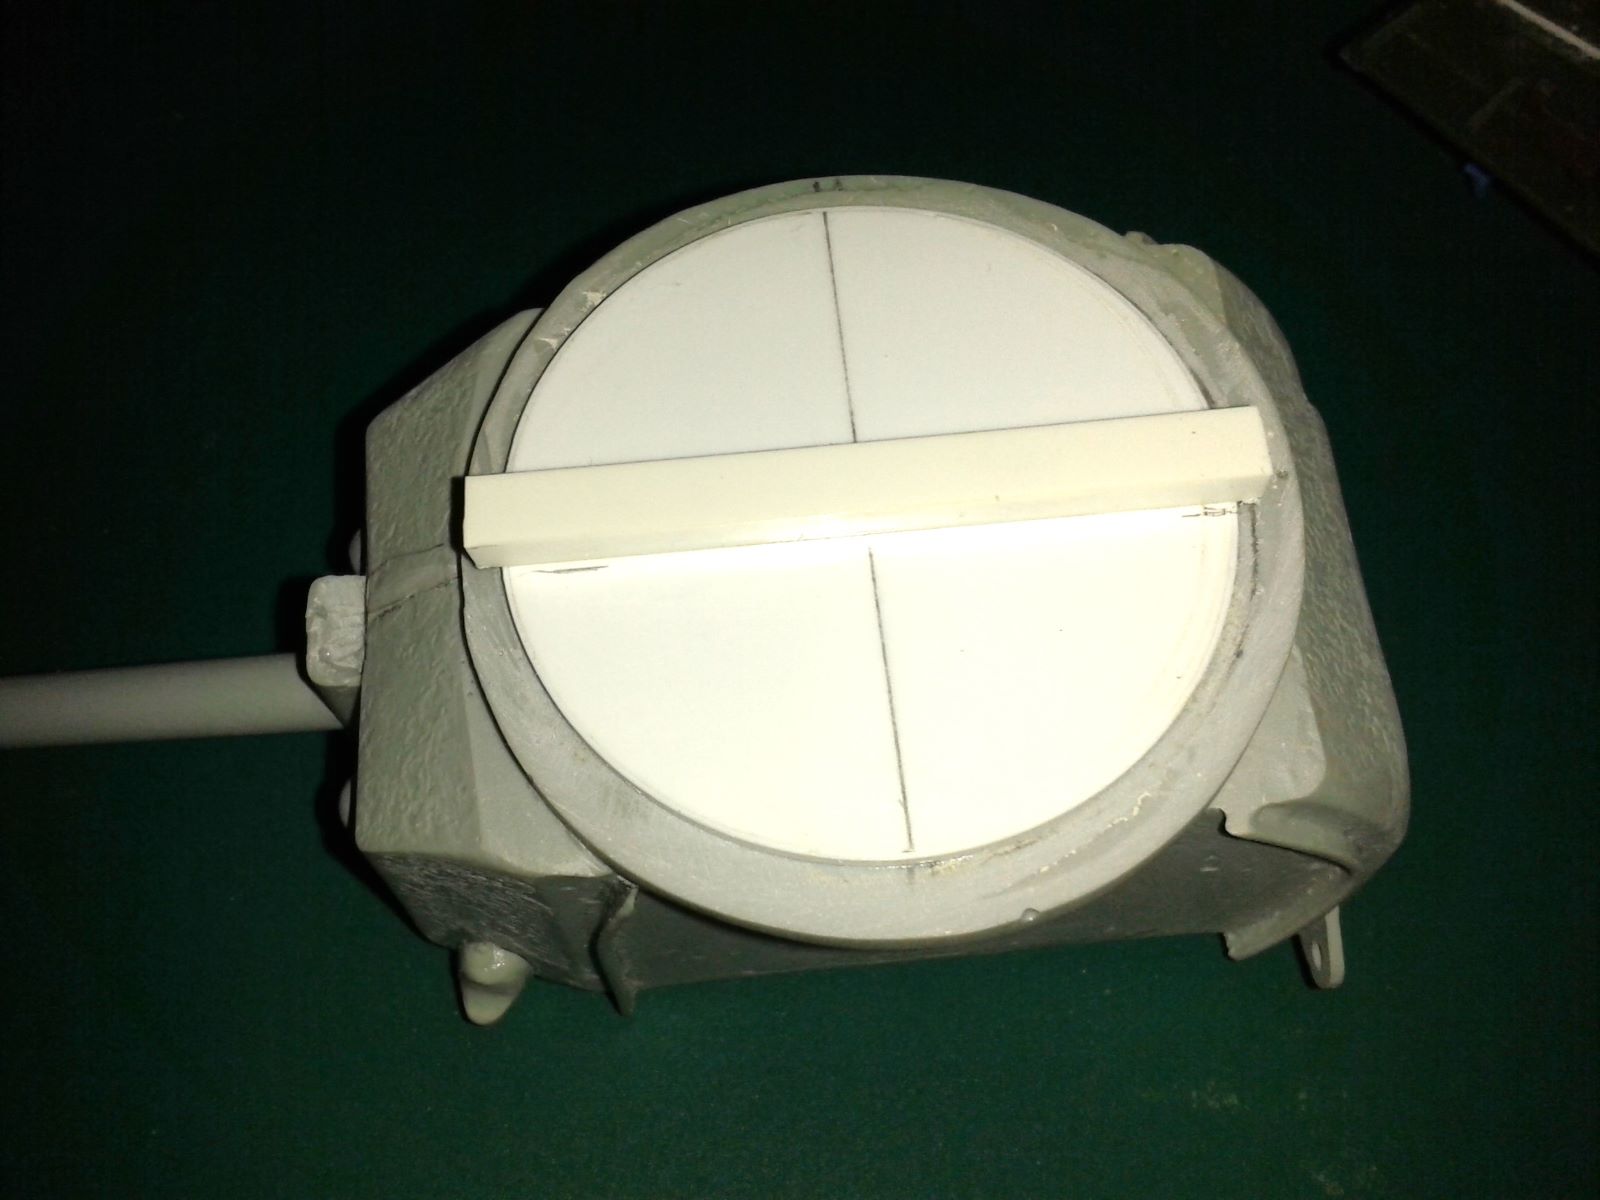
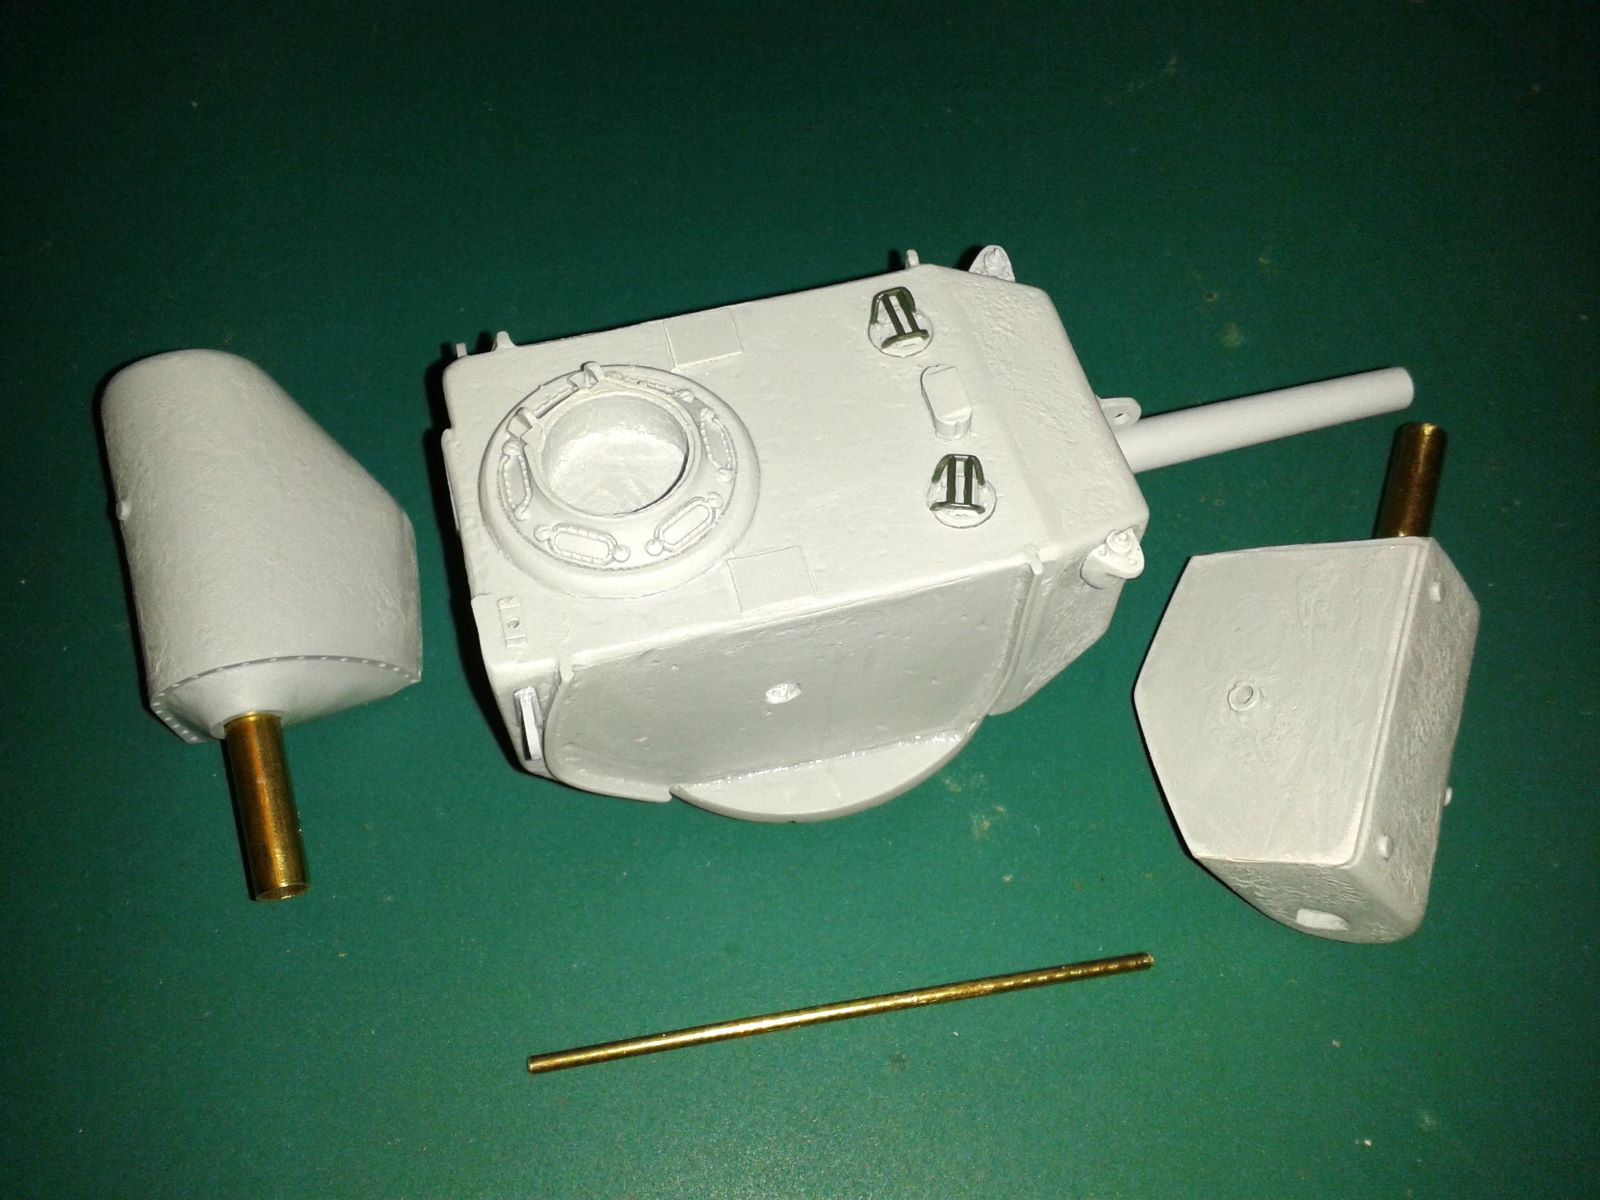
Moving up to the turret, the Bold Division main block had its pur plug cut off and a disk of 0.060" plastic added to fit the hole in the hull. Then a strip of plastic was added to create the locking tabs. (I took this procedure from PanzerSerra’s excellent build article!) Then I drilled a hole through the turret to insert a 2mm-diameter brass rod to act as a pivot for the rocket pods - again inspired by PanzerSerra. My one uncertainty is whether to close the hatch…

Next step is to throw some paint…
13 Likes
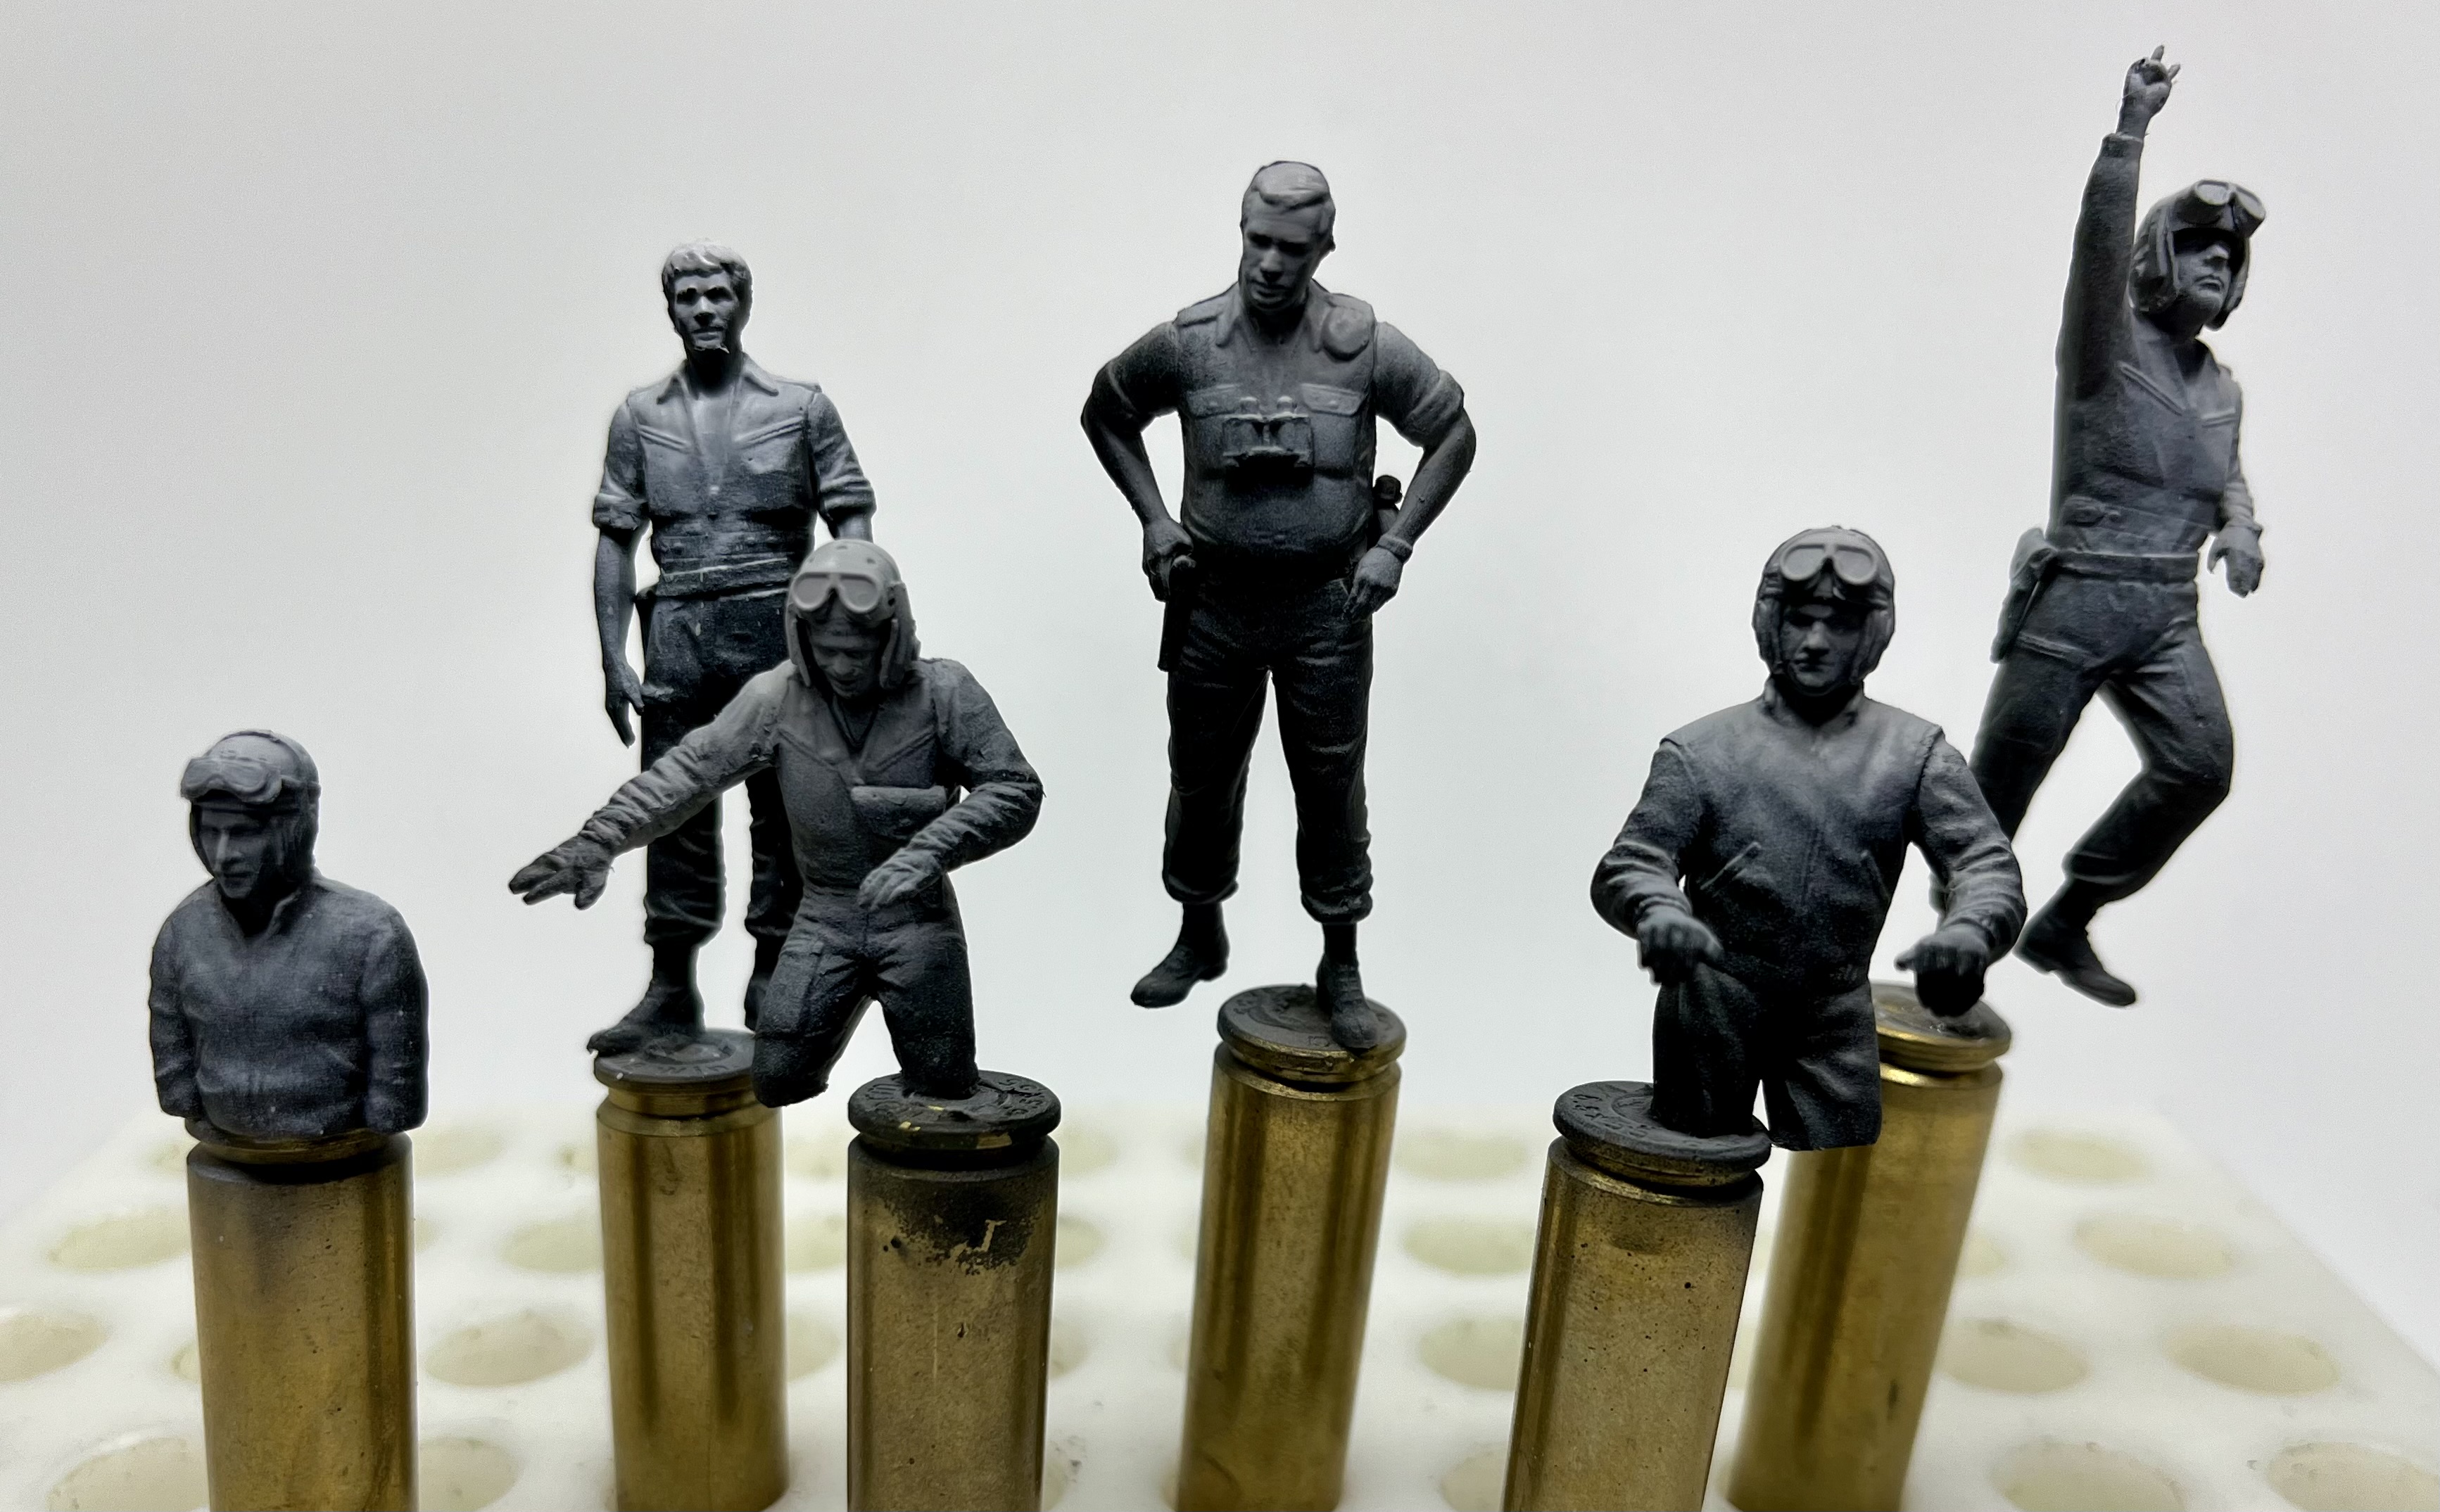
Looks like the Village People really let themselves go! ![]()
On a more serious note, how do you stick them to the brass casings? Certainly a clever idea - I use empty Tamiya paint jars for mine.
2 Likes
I use super glue. When finished the figures are easily removed with a razor blade.
And the Village People comment was good ![]()
3 Likes
Great job, I really like the Shermans from the early IDF years. If I am not mistaken by my researches, these rough markings should belong to the period following operation Kadesh (or Muskeetier for UK and France). M1 like yours were basically without markings during operation actions and some case of friendly-fire prompted the IDF to rethink the matter. At least 25 very early M50 should have taken part to Kadesh, but I only find pics of M4A1 with the first model of the M50 turret. Have you ever seen a M4A4, maybe Transformé, as one those bunch of 25?
More IDF Shermans for us to see whenever you feel ![]()
3 Likes
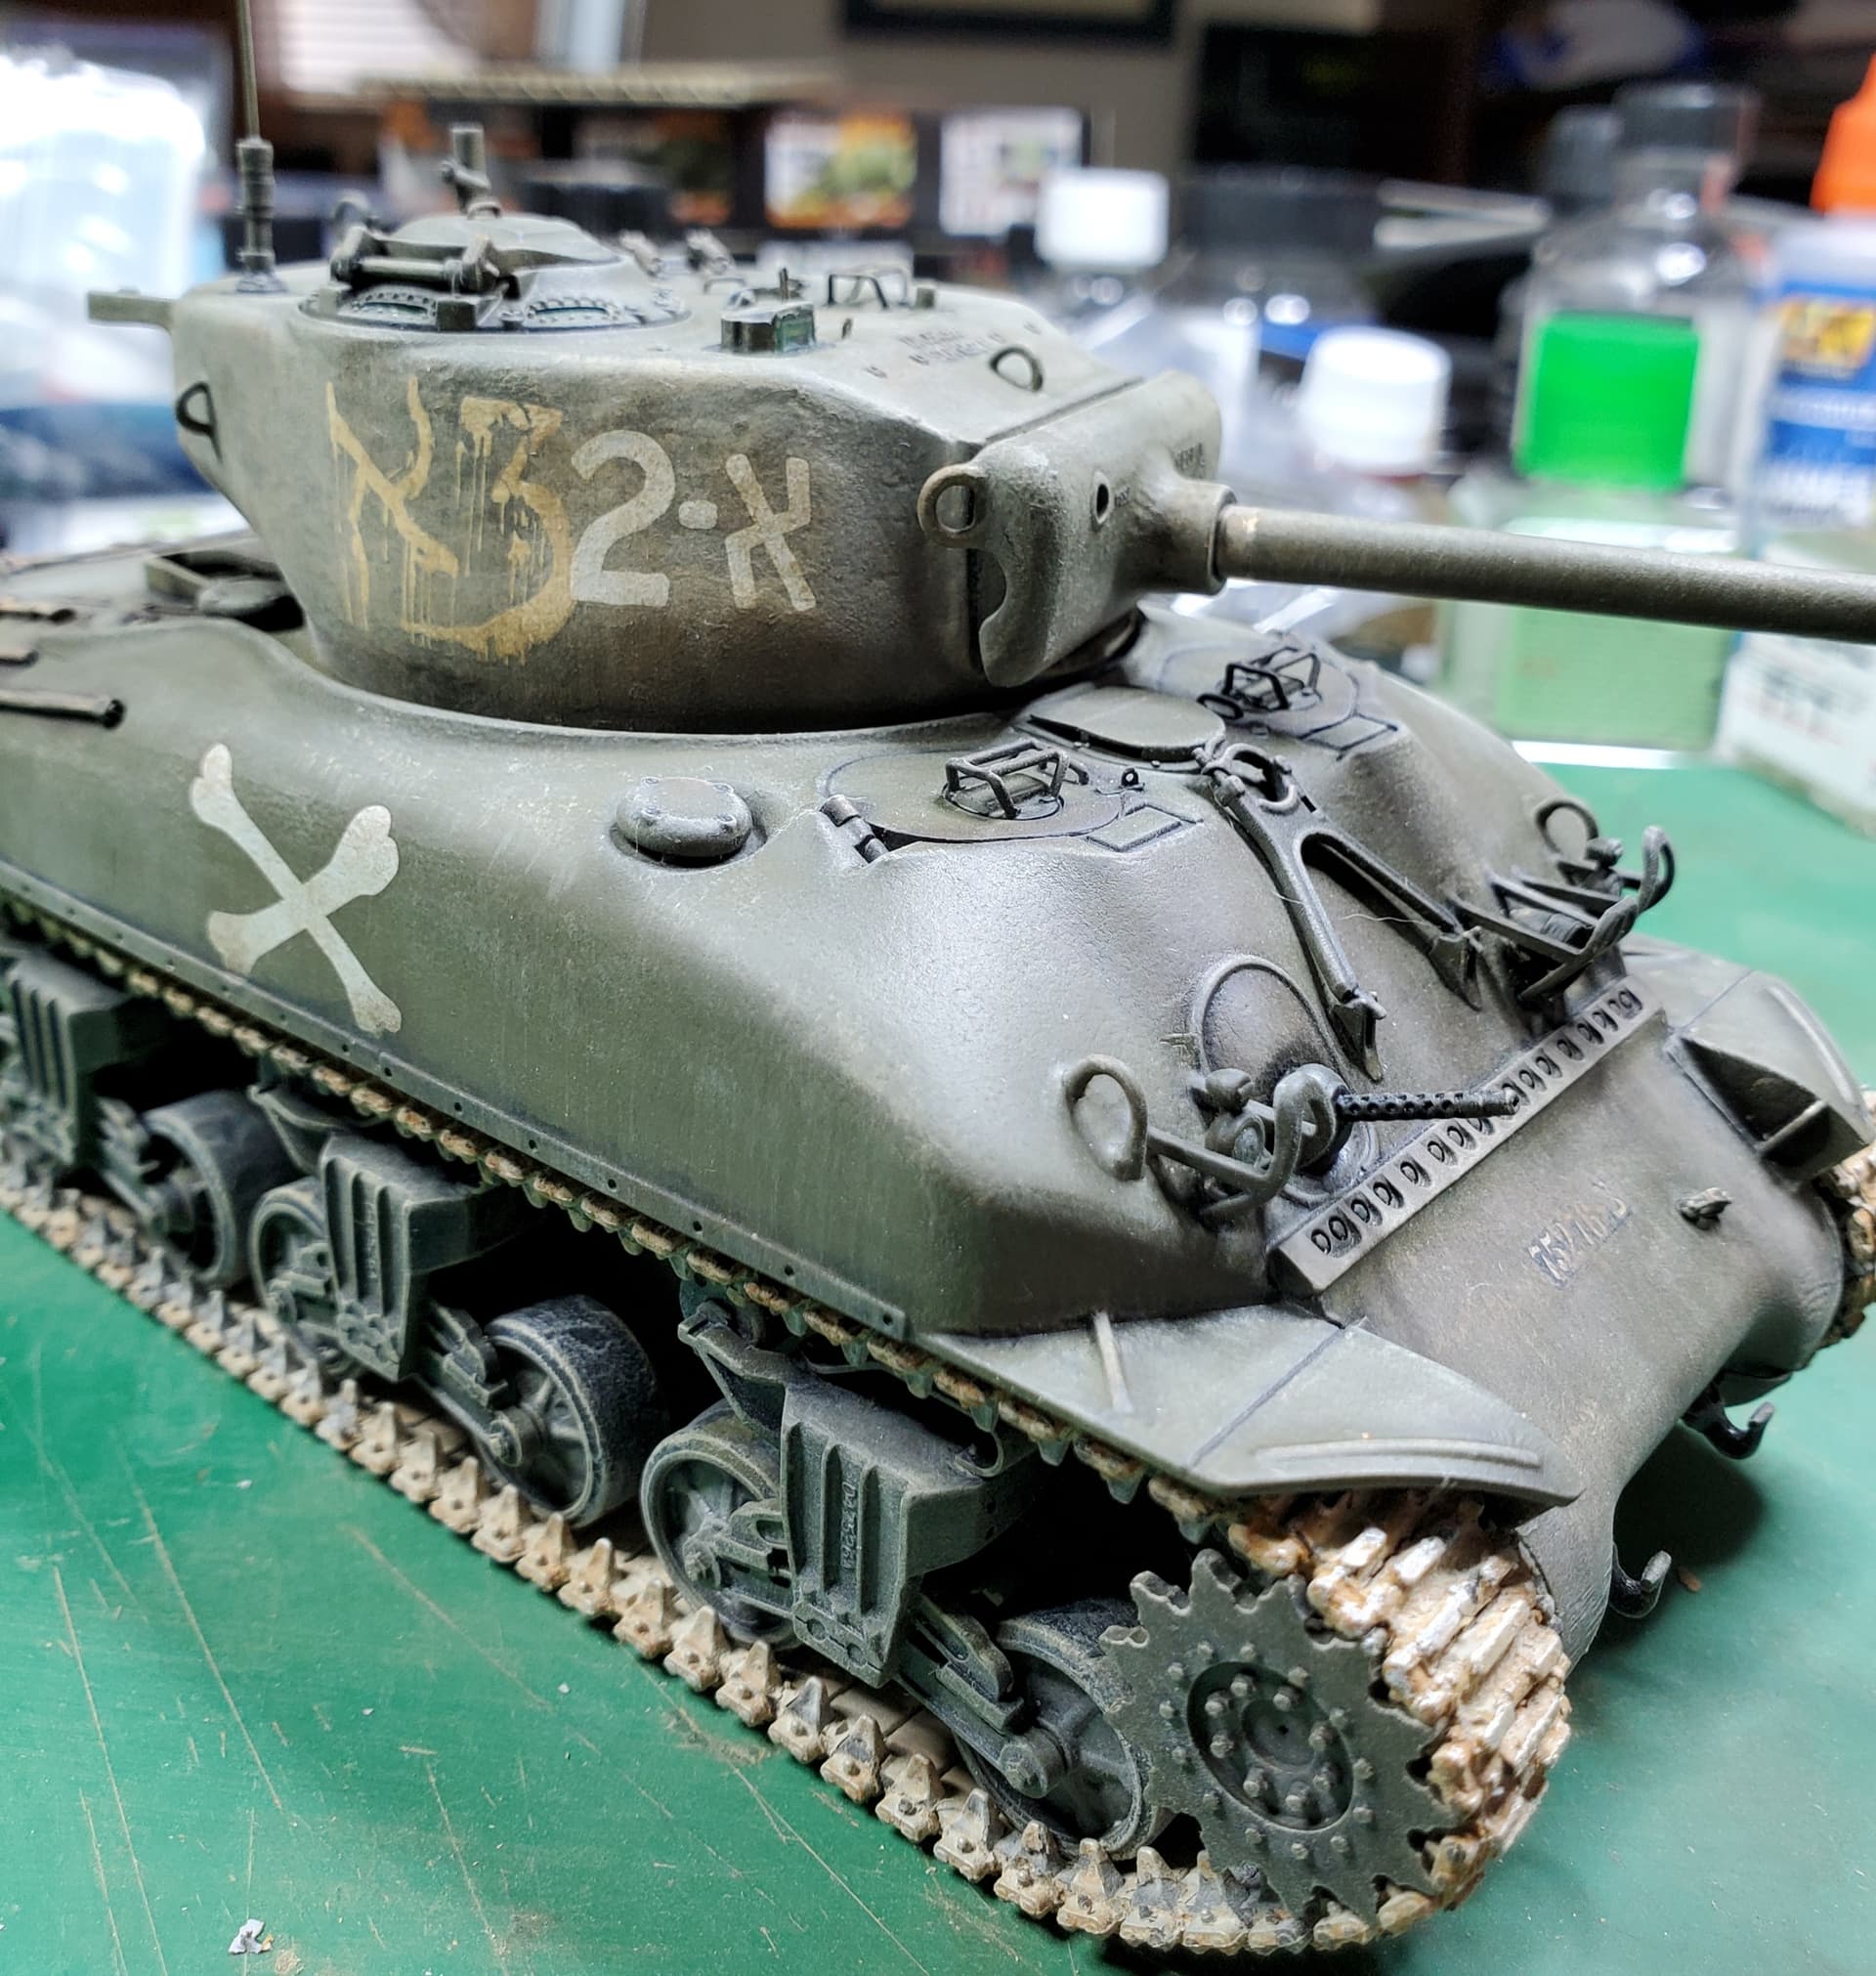
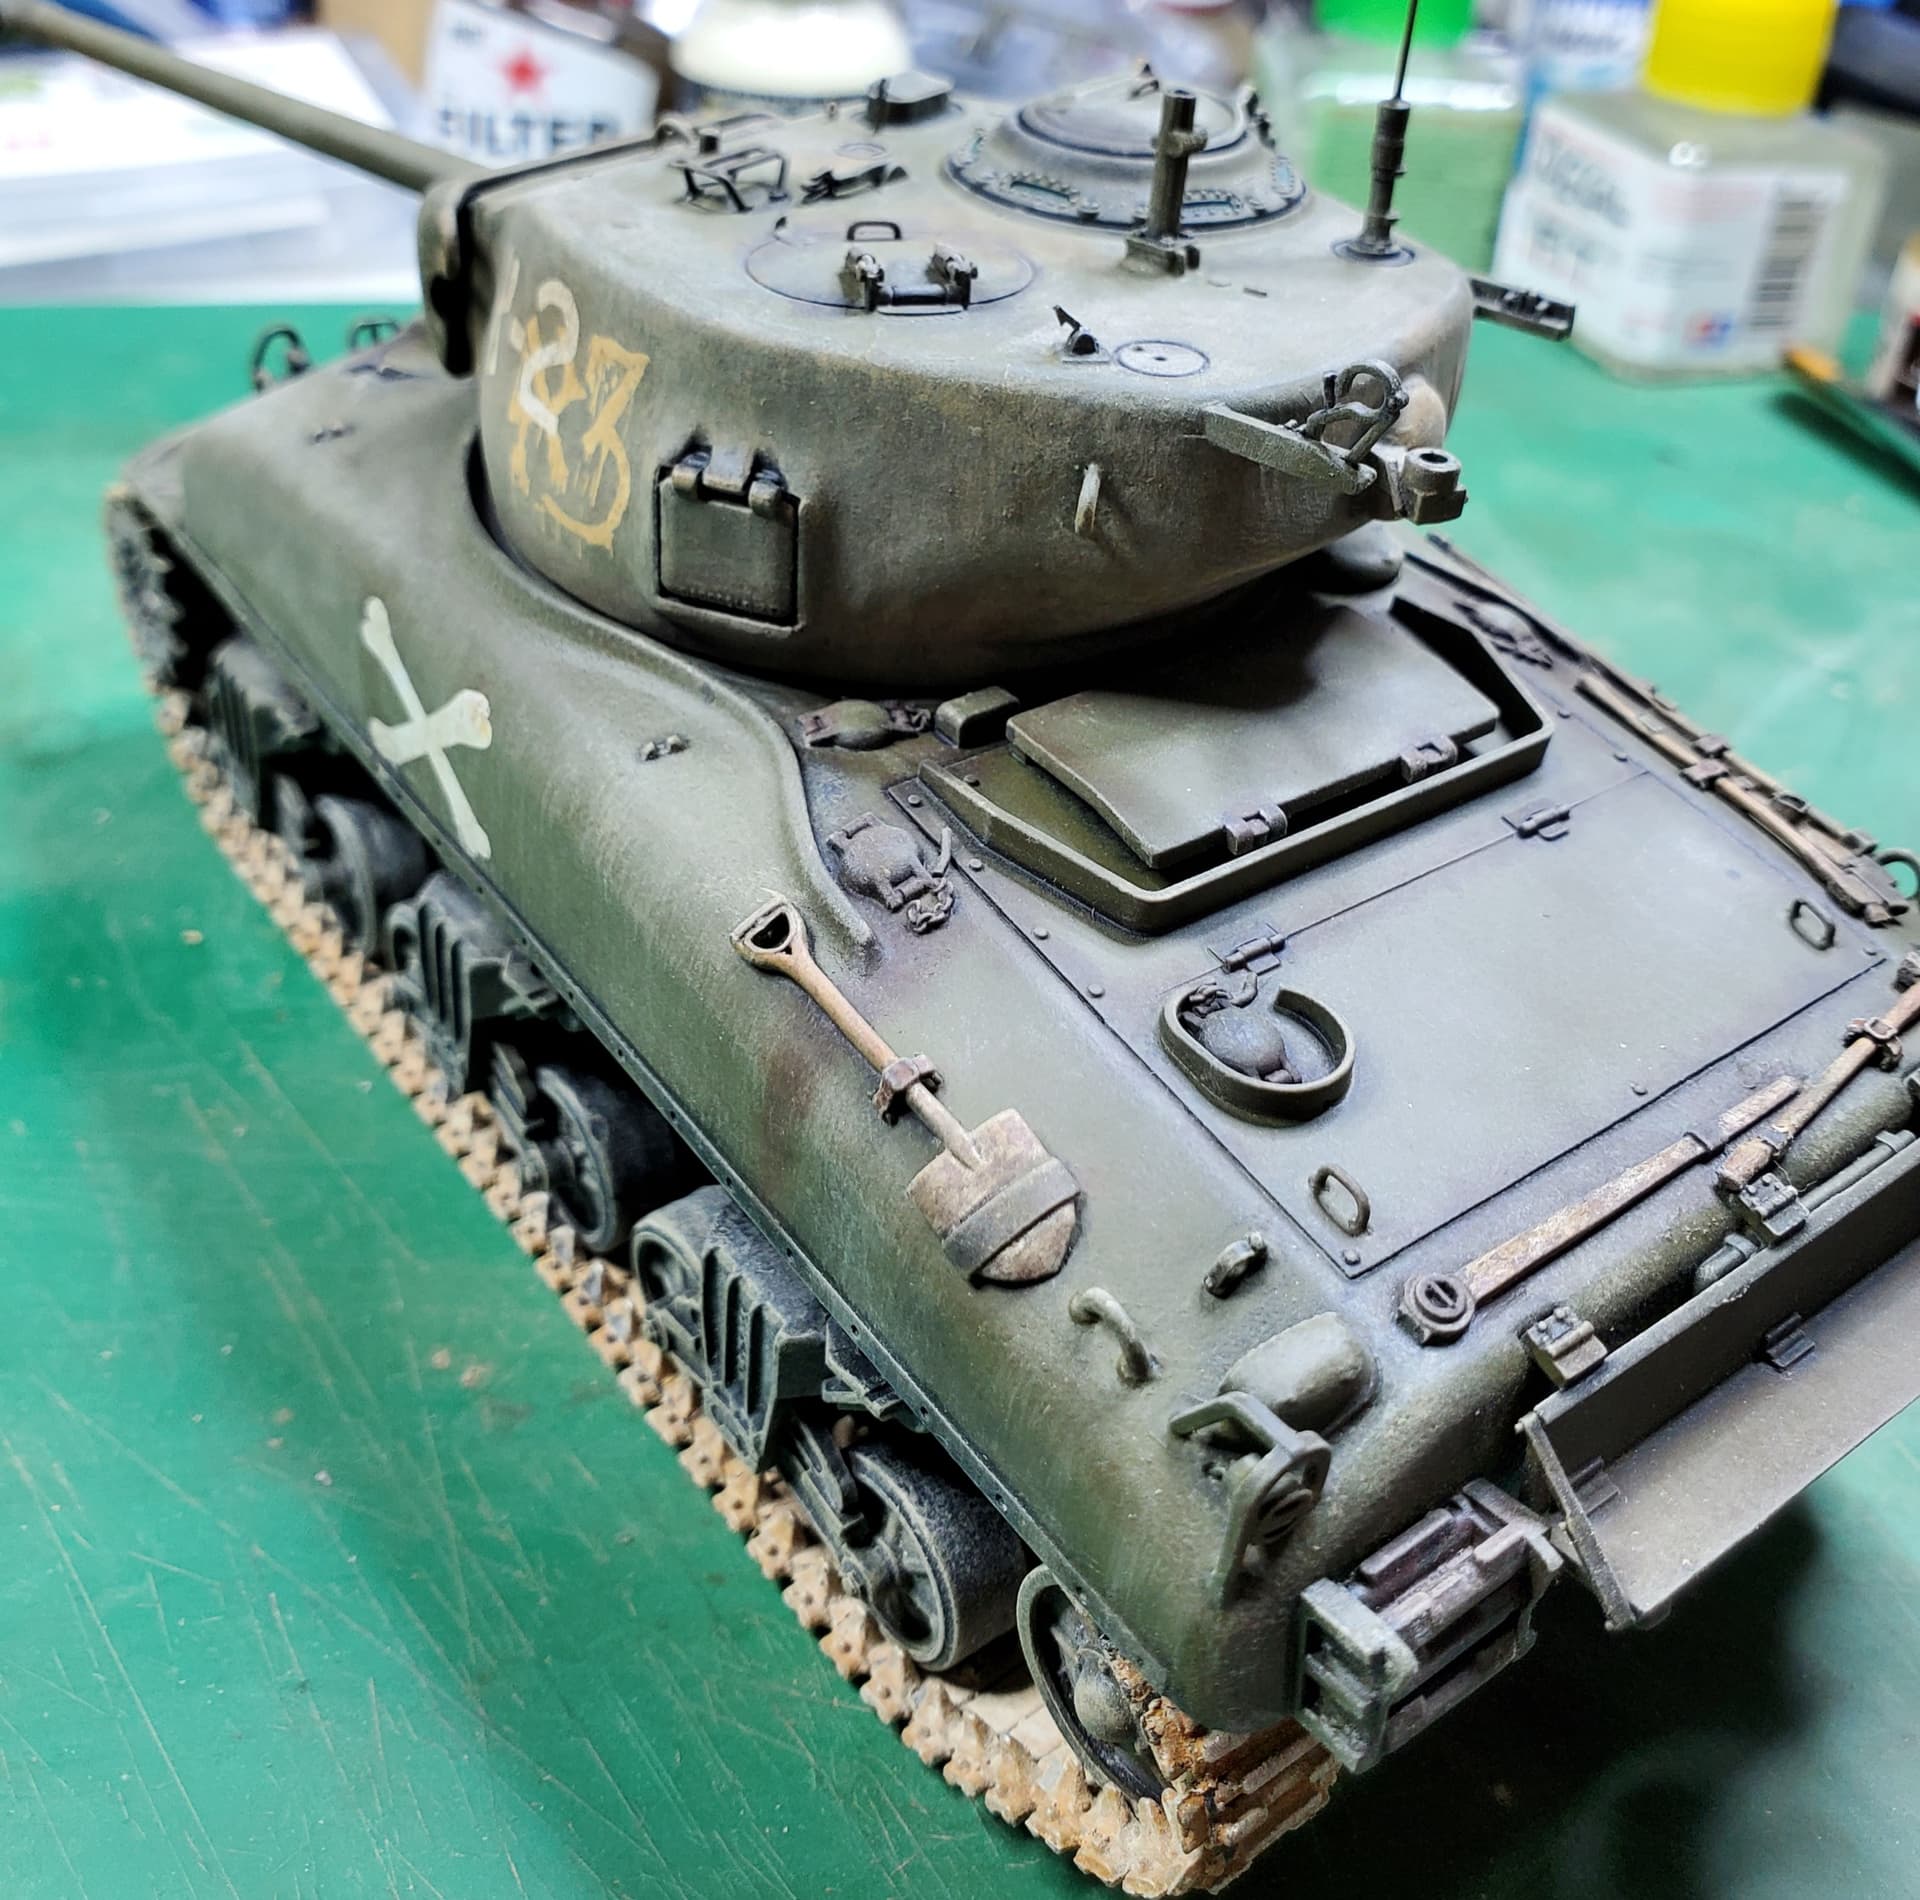
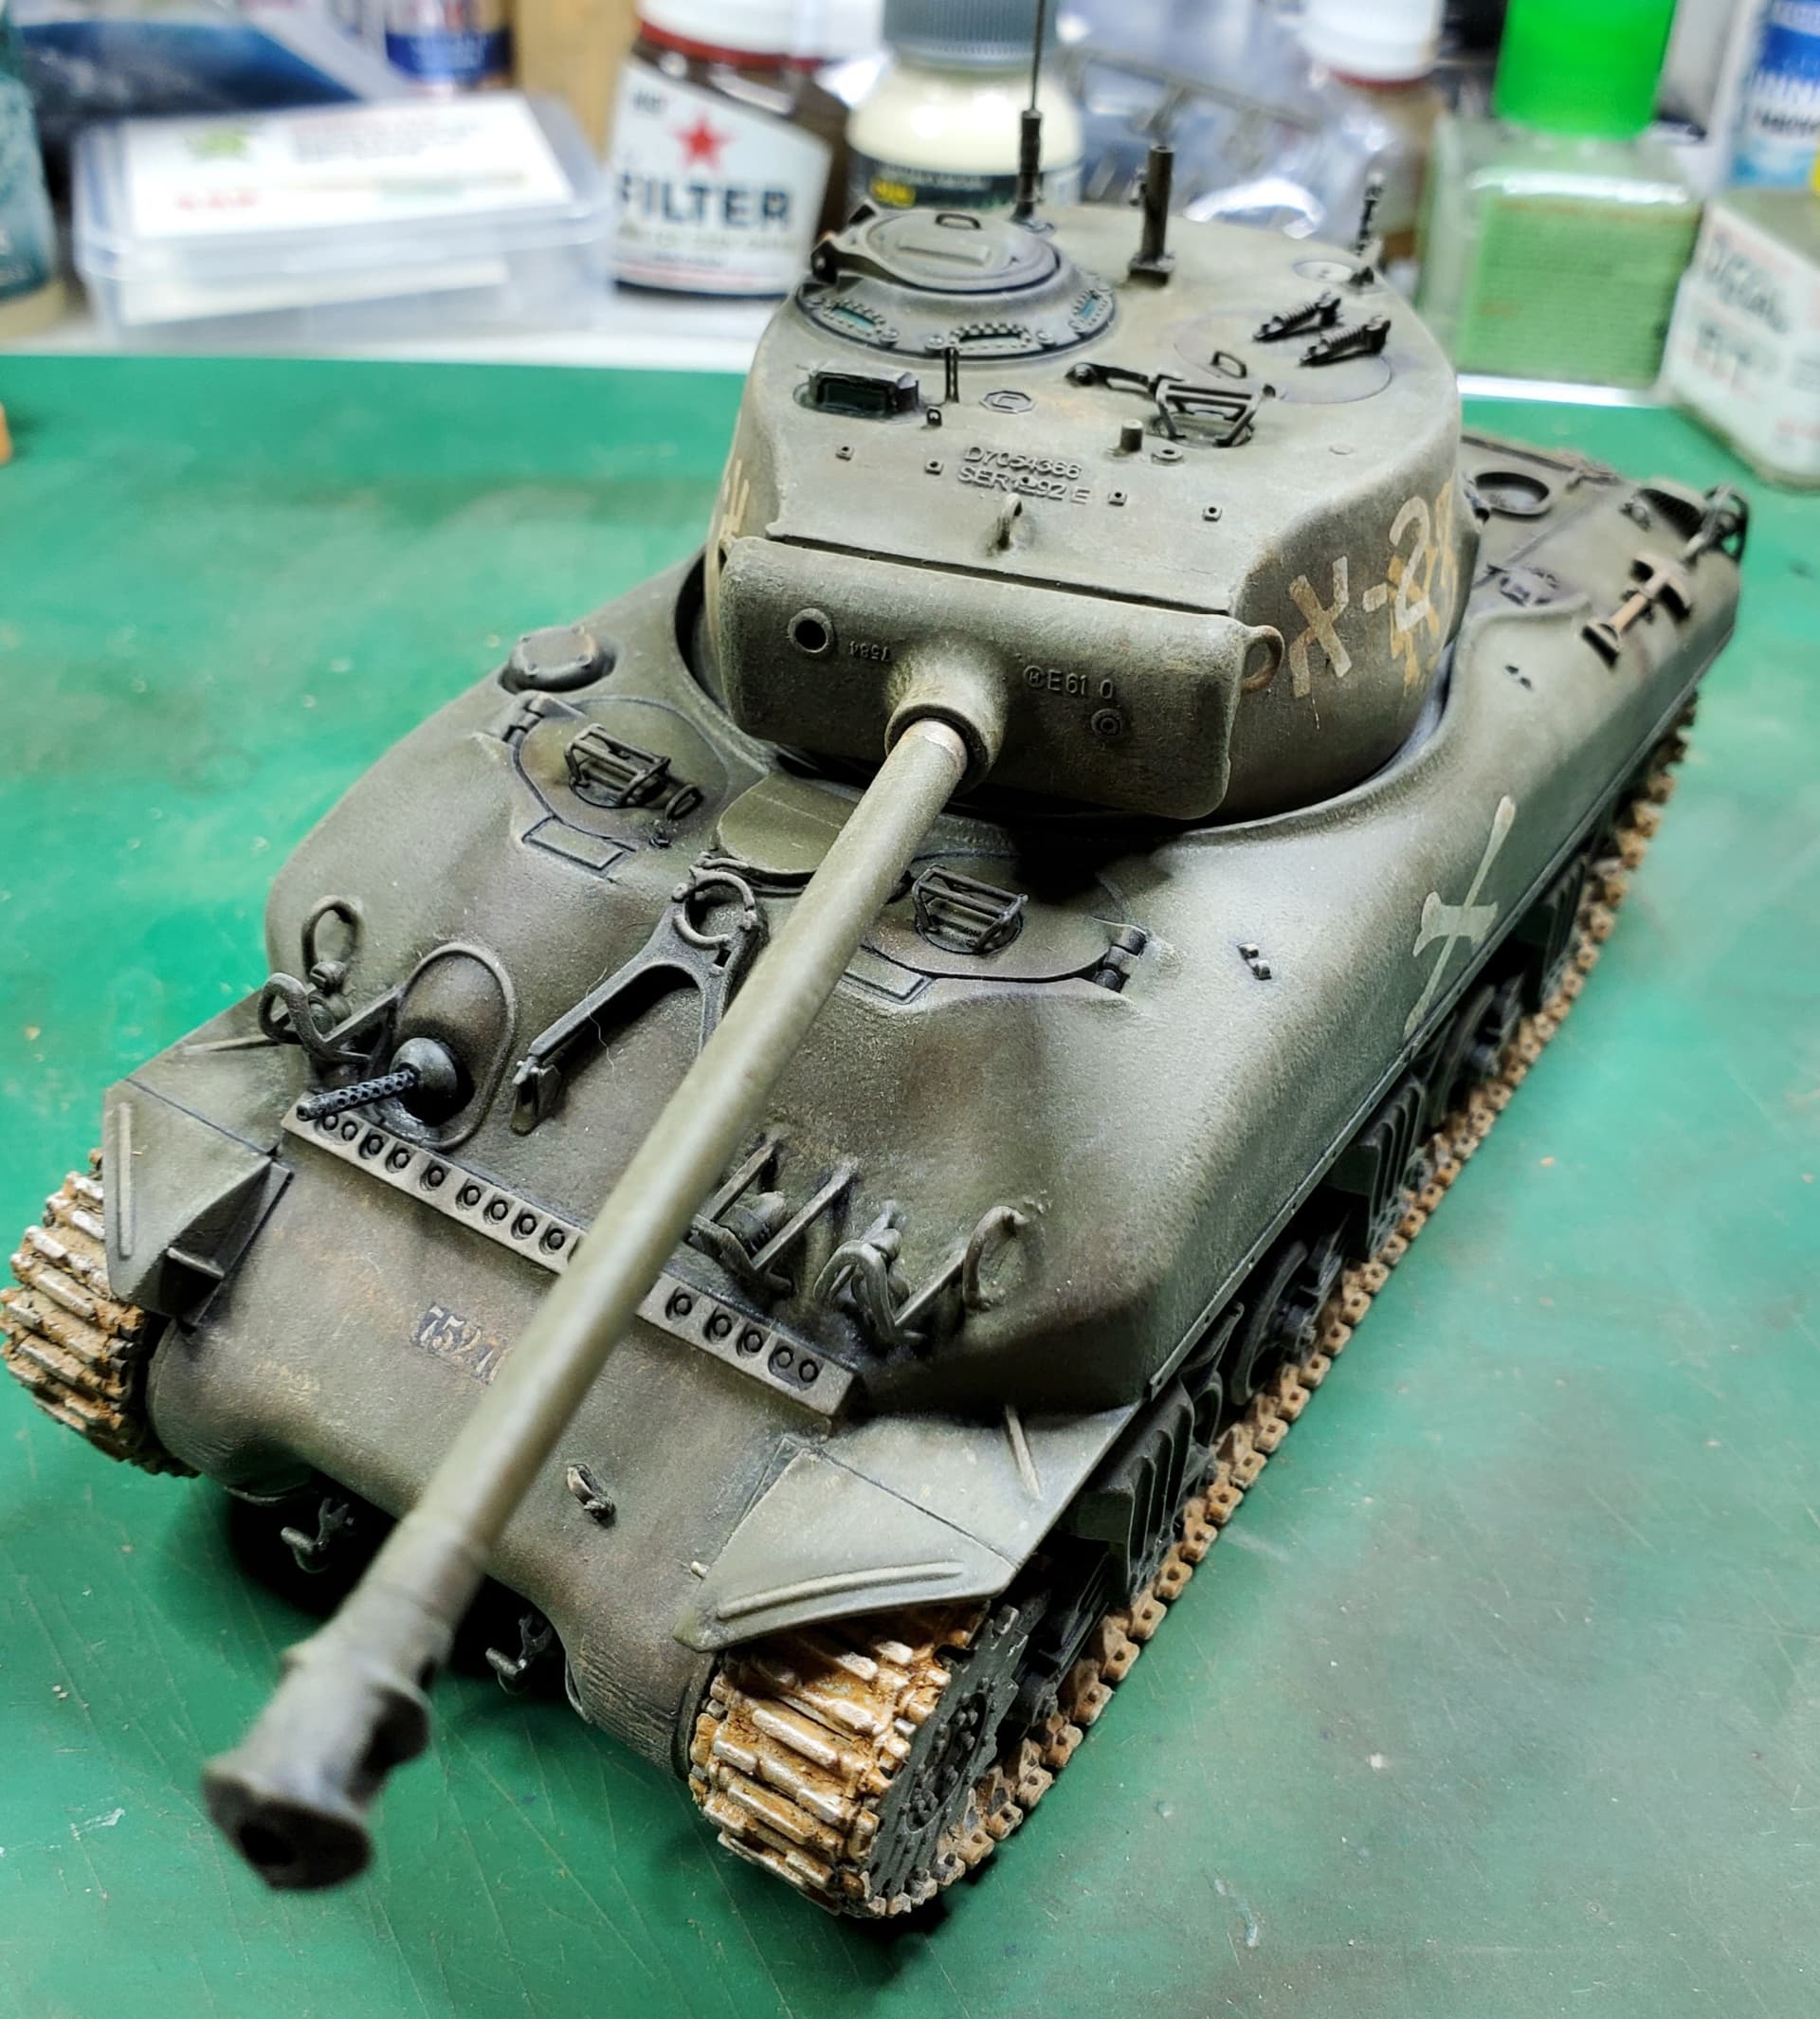
My M1 represents the 7th Brigade, 1st Company, 52nd Battalion, vehicle number 2 Alef, somewhere in the pre/mid/post Sinai War, between the 29th of Oct thru the 5th of Nov, 1956, in the Negev Desert.
3 Likes
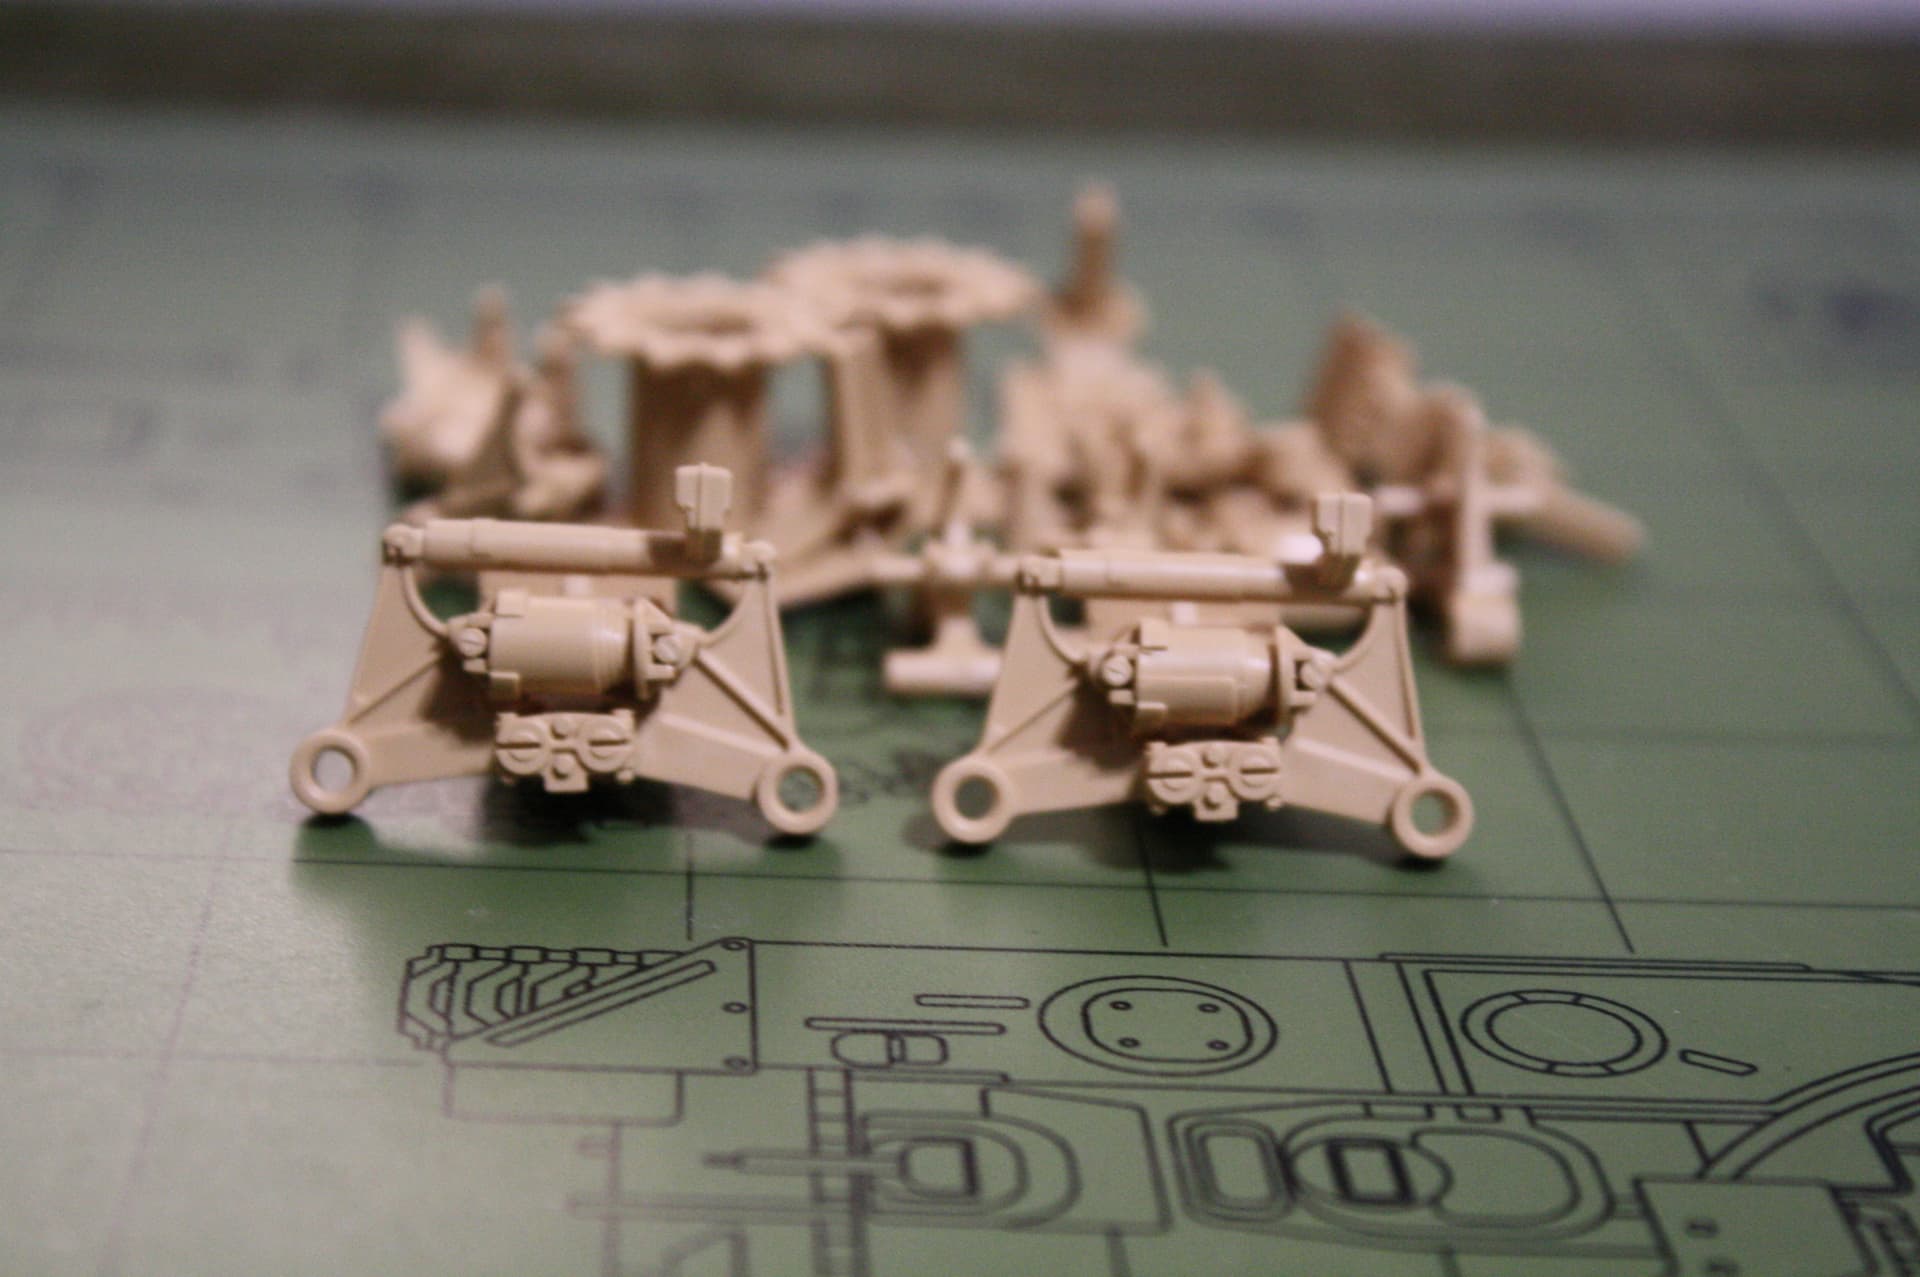
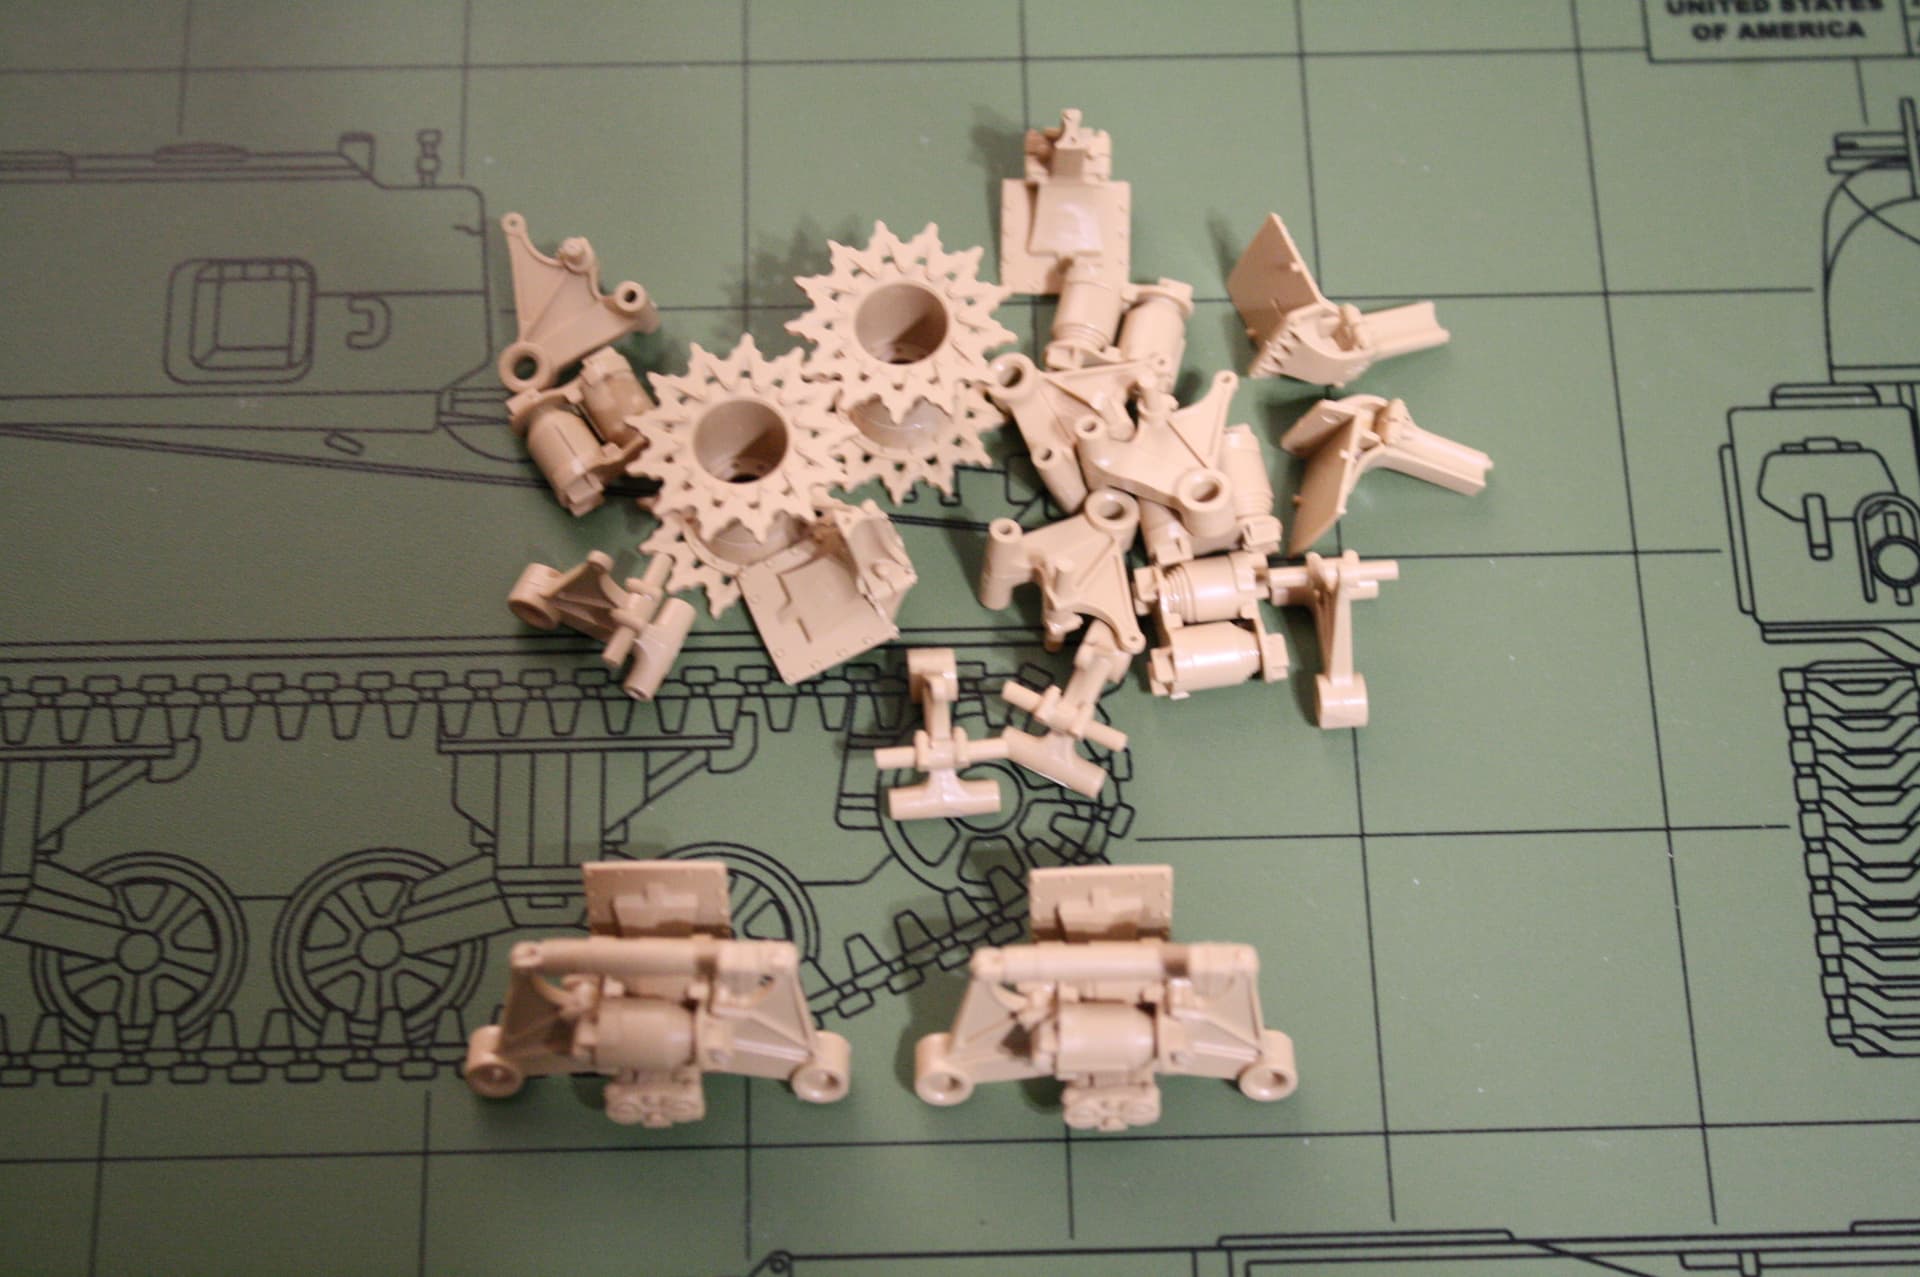
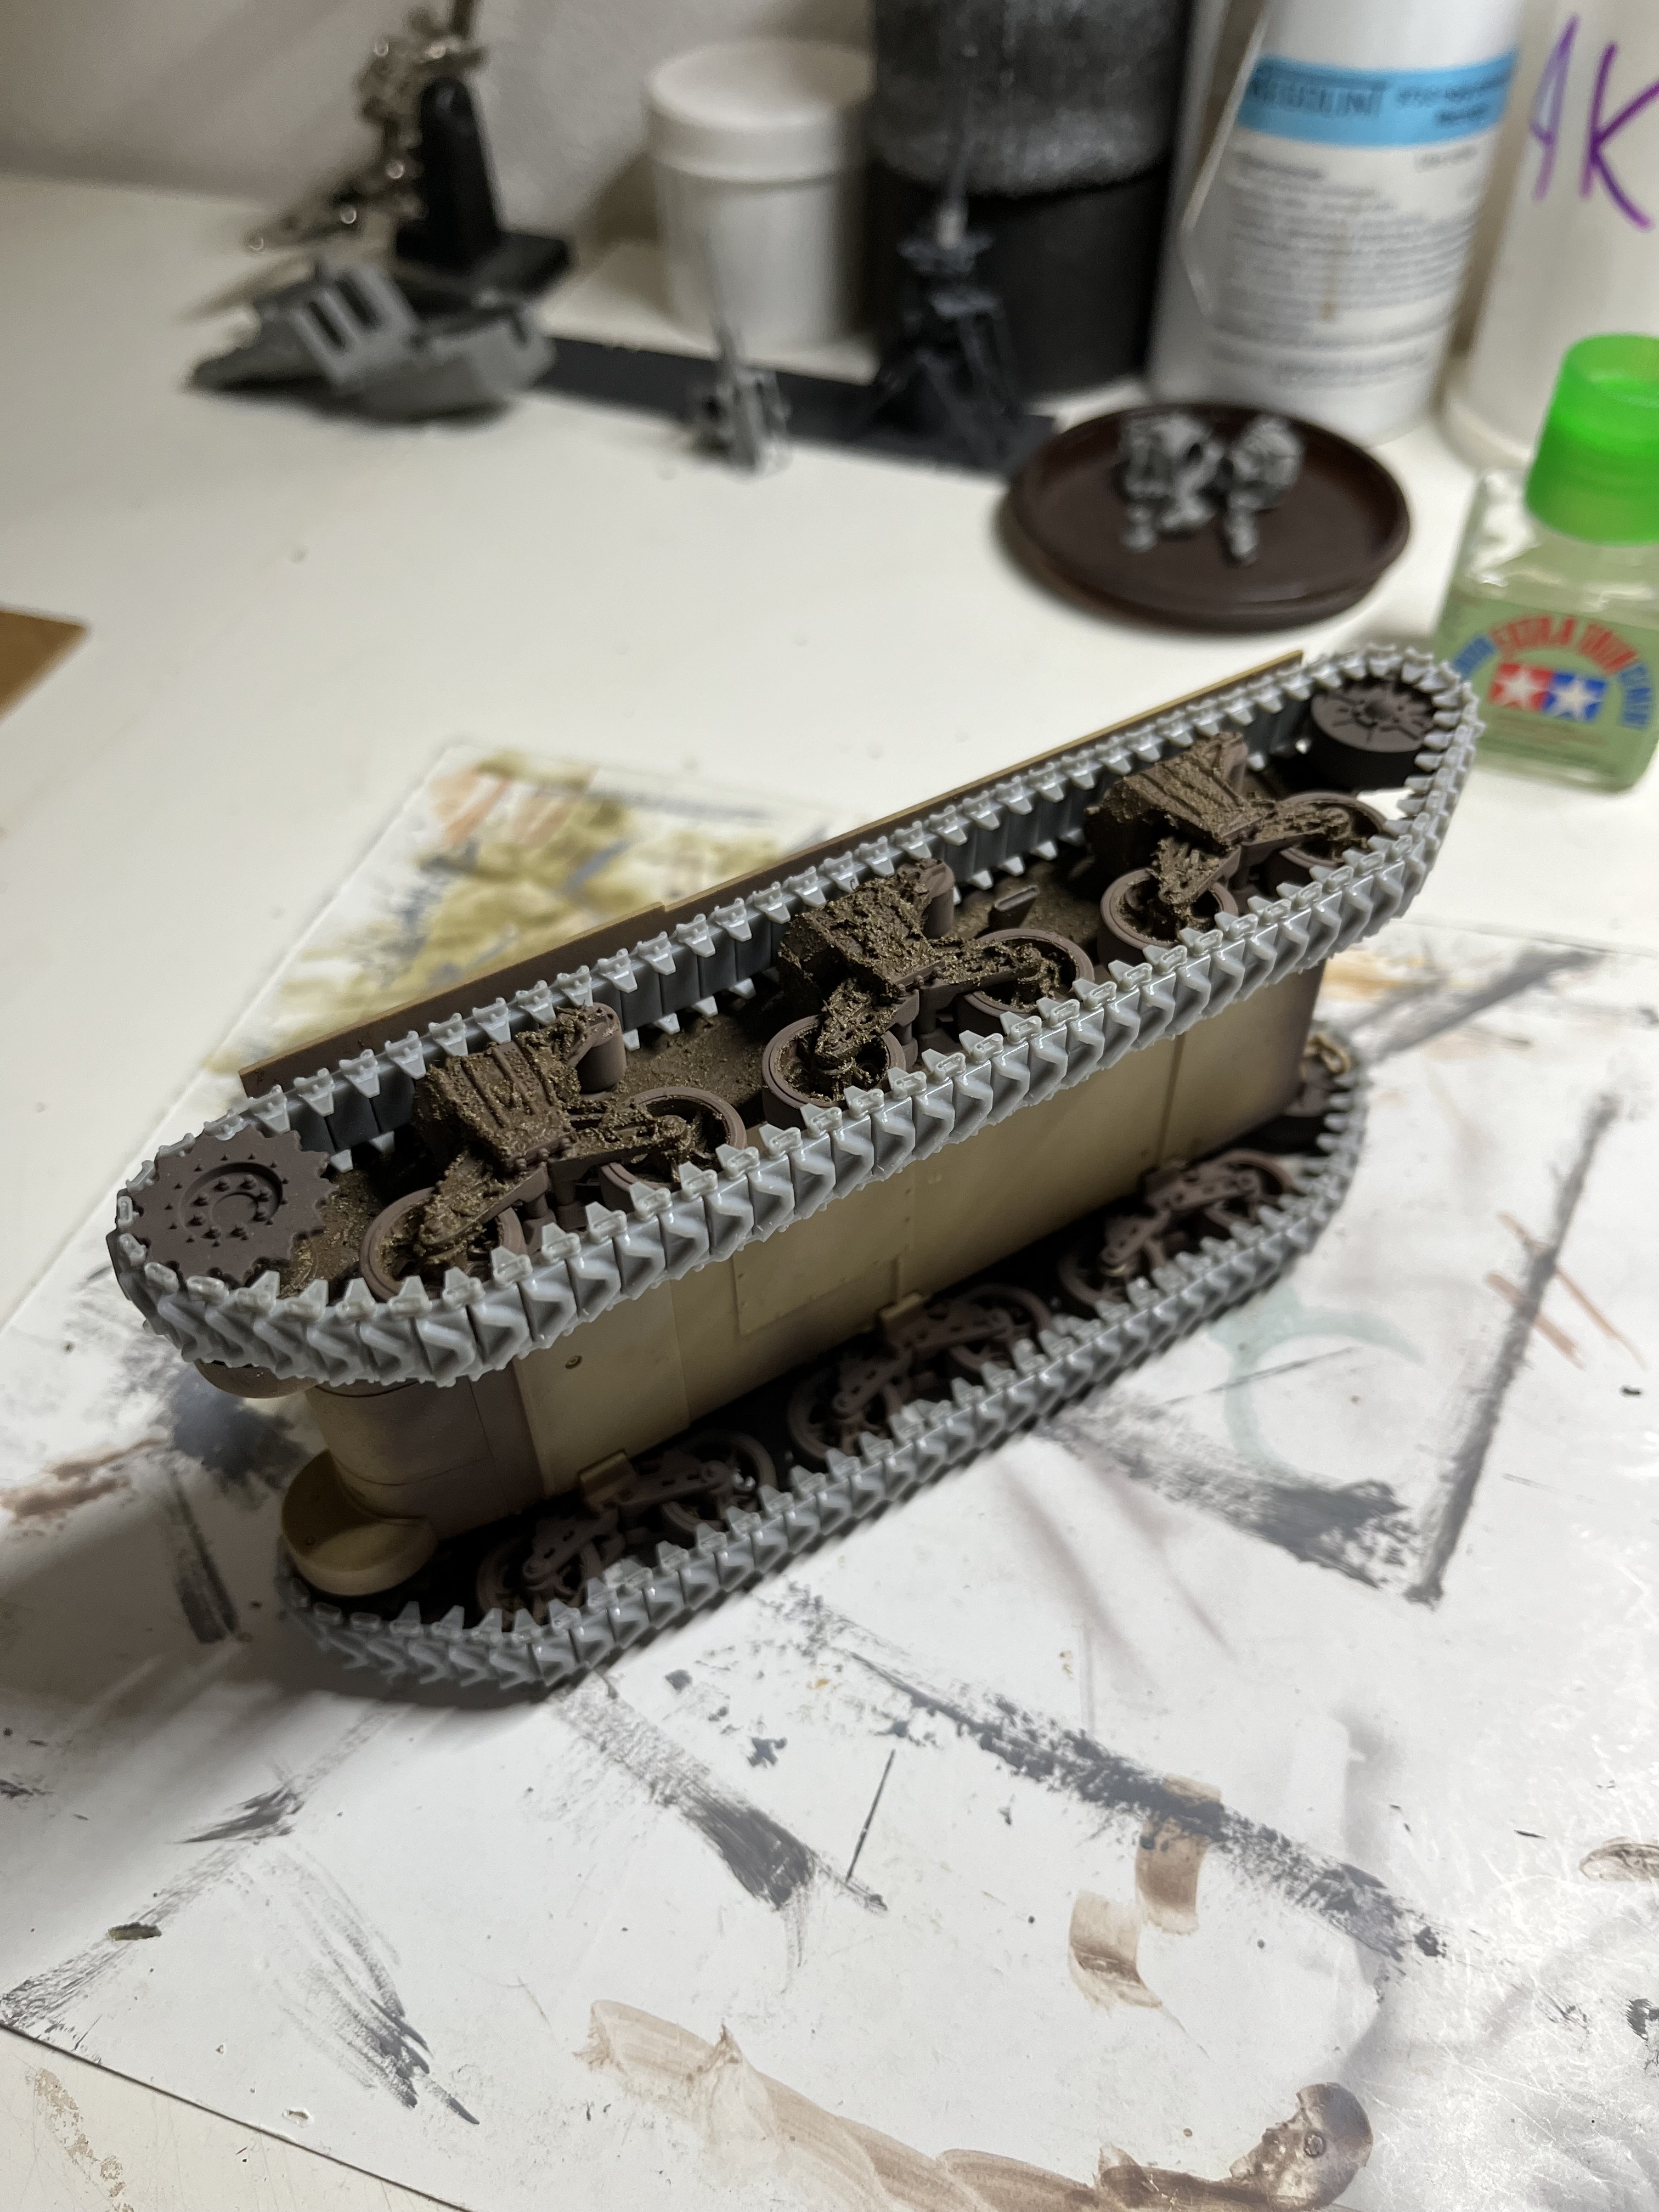
Got all these suspension parts cleaned up and glued together. The Meng M4A3E8 is very detailed - there are 12 parts in each suspension unit - 16 if you count the wheels. They are made to be workable but that just leads to a big, wobbly mess. You have to level them off by eye, then with your third hand hit it with Tamiya Extra Thin Quick Setting to freeze it all in place. I suppose I could have used CA easier. Oh well. In addition to all the parts, I managed to get two - yes two - HVSS suspension units assembled in one day. I will now paint The Last Supper on the head of a pin to recover.
14 Likes
Nicely done mate ![]()
3 Likes
![]()
On the old Usenet Rec.Games.Miniatures.Warhammer. group killer lines like this were saved to an archive for posterity…
Cheers,
M
3 Likes
Chassis and tracks finished
And some of the upper parts
I didn’t remember that the tube was so nice. The two halves fit almost flush, minimal fine sanding required…
9 Likes
And some dutiful dry-fit of the wedding:
The gap between the bolt line and the nose is notorious; the one I want to depict is covered with sandbags, so I won’t waste my time in the chop’n’channel art…
8 Likes
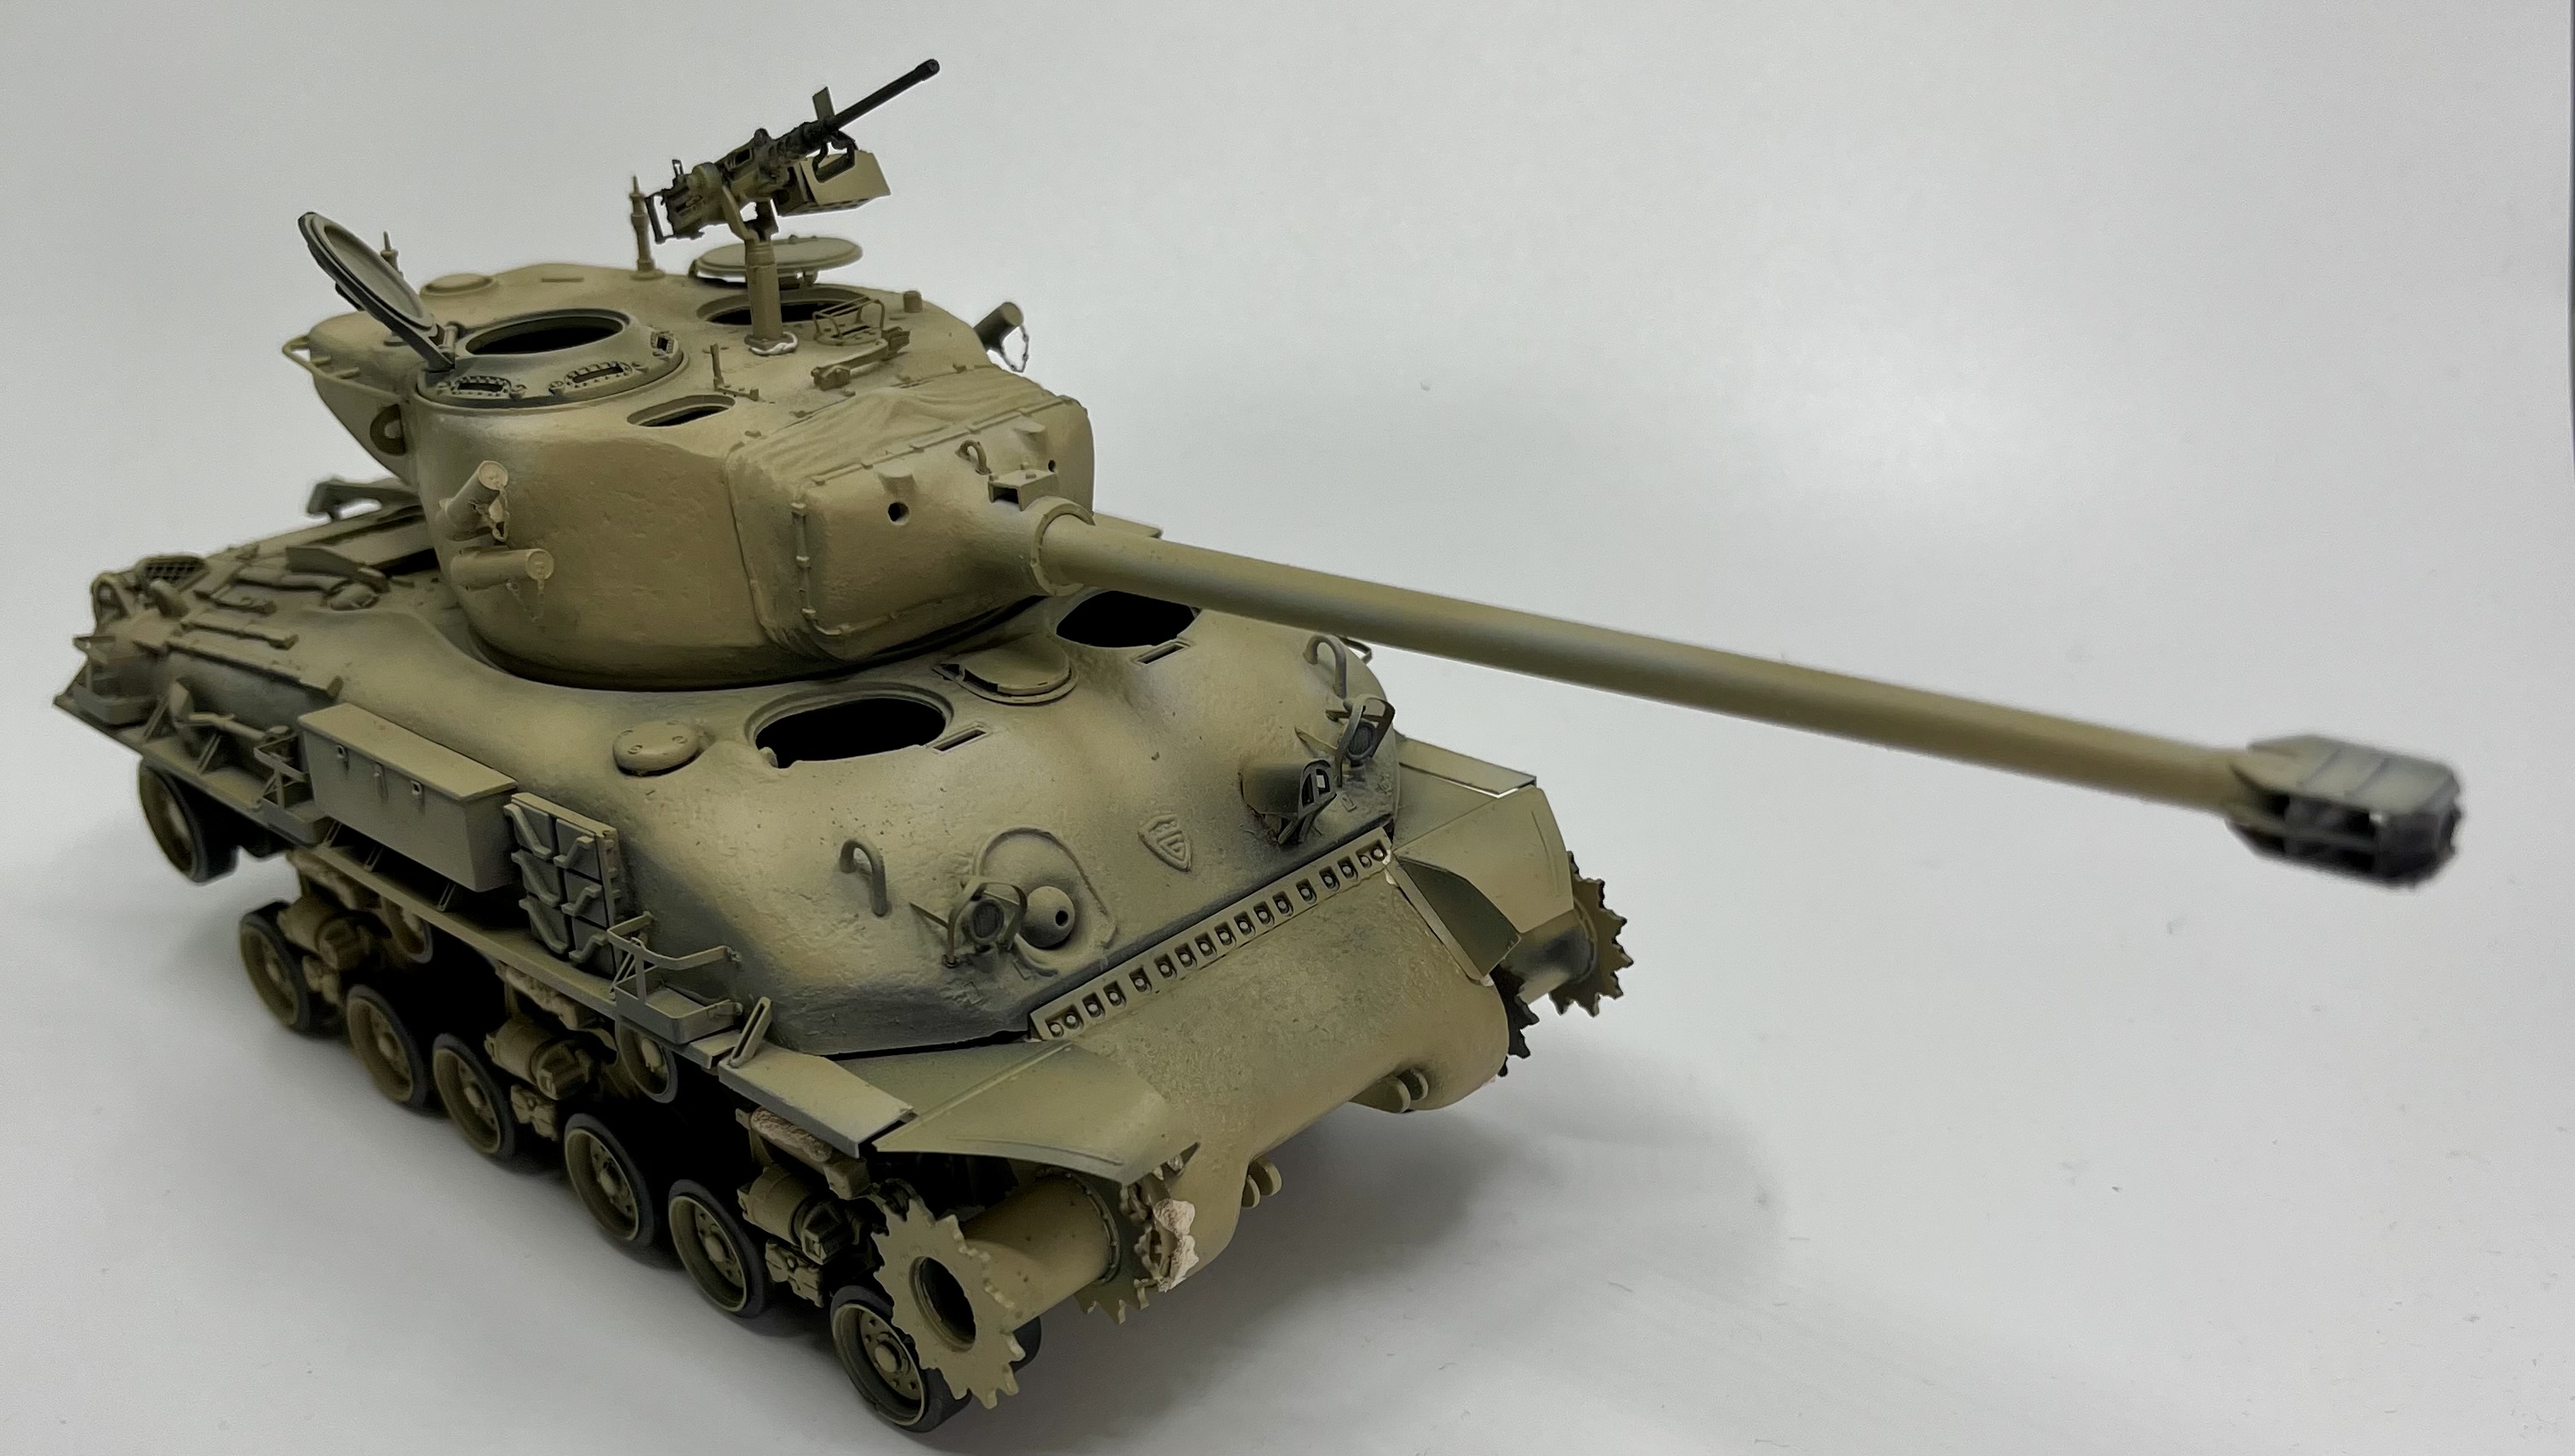
Calling my IDF M1 Super Sherman, complete. With one caveat: I’m not satisfied with the tracks since Tamiya does not have T49 tracks…I used Asuka. Later I will look for an adequate aftermarket that hopefully fits properly. As a side note, the vehicle is contest worthy, but for the tracks. It will never see a contest until other tracks are worthy.
15 Likes
What’s the issue with the Asuka track? The pics look pretty good on my screen…
2 Likes
Wrong size from my perspective…the tracks act like there is 83-85 links instead of 79…not sitting on the return rollers properly. The paints/oils/pastel are flaking off, as well. I’m just not satisfied. ![]()
2 Likes