Thanks for the advice, Tom.
4 Likes
Hope you can get it sorted Matt, you have put a lot of great work into it already …
3 Likes
Matt, that’s a great looking Sherman with lots of hard work. Hopefully it can be sorted before the deadline.
Based on what Tom said, would building up just the areas between the front & rear turret overhangs on each side make it easier to sort vs the entire turret base?

@CKPlasticModels Colon, your Sherman is looking fantastic! Looking forward to seeing more. The MMP chipping looks very trick to me. A++
3 Likes
Nope. I have to build up the outside of that entire round area until it sits outside the hole. Then feather in the additional sheet with putty, and add texture. Not looking forward to it, but it IS do-able.
4 Likes
Looking good on the hull. The turret will be sorted out in no time, keep at it.
3 Likes
Thanks John, thanks Ryan.
3 Likes
The nuclear option would be to saw off the entire base and replace it with a disk of 0.080" evergreen of the correct diameter. It sounds drastic but may actually prove easier to do…
5 Likes
Good shout !
1 Like
Where? All the gaps I can see on it, are panel lines that are supposed to be there.
BTW, did you add that right-to-left weld line under the crowbar? On a Sherman as early as this one, that wasn’t there ![]() Only the later tanks with the single-piece glacis plate and large drivers’ hatches had a weld there because the sponson roof was constructed in two sections instead of one. Talking of which: periscope guards (as you have on the turret) would also be unlikely on a small-hatch M4, unless it also has appliqué armour on hull and turret.
Only the later tanks with the single-piece glacis plate and large drivers’ hatches had a weld there because the sponson roof was constructed in two sections instead of one. Talking of which: periscope guards (as you have on the turret) would also be unlikely on a small-hatch M4, unless it also has appliqué armour on hull and turret.
2 Likes
Looks like I’m not the only one who is less than impressed with this company’s products. OK, it’s a sample of two (people and kits) but still. (For the record: if you build their T1E1 mine roller from the box it will look like the real thing to someone who doesn’t know much about it, but that’s as far as it goes where accuracy is concerned.)
Anyway, I would go for the solution @barkingdigger recommends: glue plastic strip around it.
FWIW, the M4’s turret ring should be almost exactly 50 mm diameter in 1:35 scale, so you could measure the kit to see if it’s too big, and/or if the BD part is clearly too small.
1 Like
I meant the gaps that are too deep ![]()
I’m not going to fill them all the way, just make them shallower so they don’t look like build flaws and instead look like panel lines. Mainly the one on the right side of the engine deck.
Can you post pictures? And can I just remove the weld?
In that case, can I just remove the guards and it’ll be fine?
(I feel like I’ve got a lot of removing to do ![]() )
)
1 Like
The recessed weld lines? Ah, yes, they need filling. On the real tank the weld beads were on top of the armour, not below it. That’s a fault that apparently goes back to Tamiya’s M4A3 of the early 1980s, that other manufacturers just copied until about 25 years ago.
Not offhand, but if you remove the weld so that the front and rear sections look like one plate, you’re good.
Yes, take the guards off and it’s much more accurate. Either that, or add the additional armour plates on the hull and turret to represent a remanufactured vehicle.
3 Likes
Yep, wrap the puppy in some styrene sheet. It’s too cool a conversion to toss. More work for sure, but it’ll be a really nice oddity for the shelf.
Keep at it.
Mike
4 Likes
FWIW - Spruebrothers.com has 10% to 25% off on all model kits. The Meng & RFM Shermans have a pretty good discount.

4 Likes
Where I am at the moment with this model:
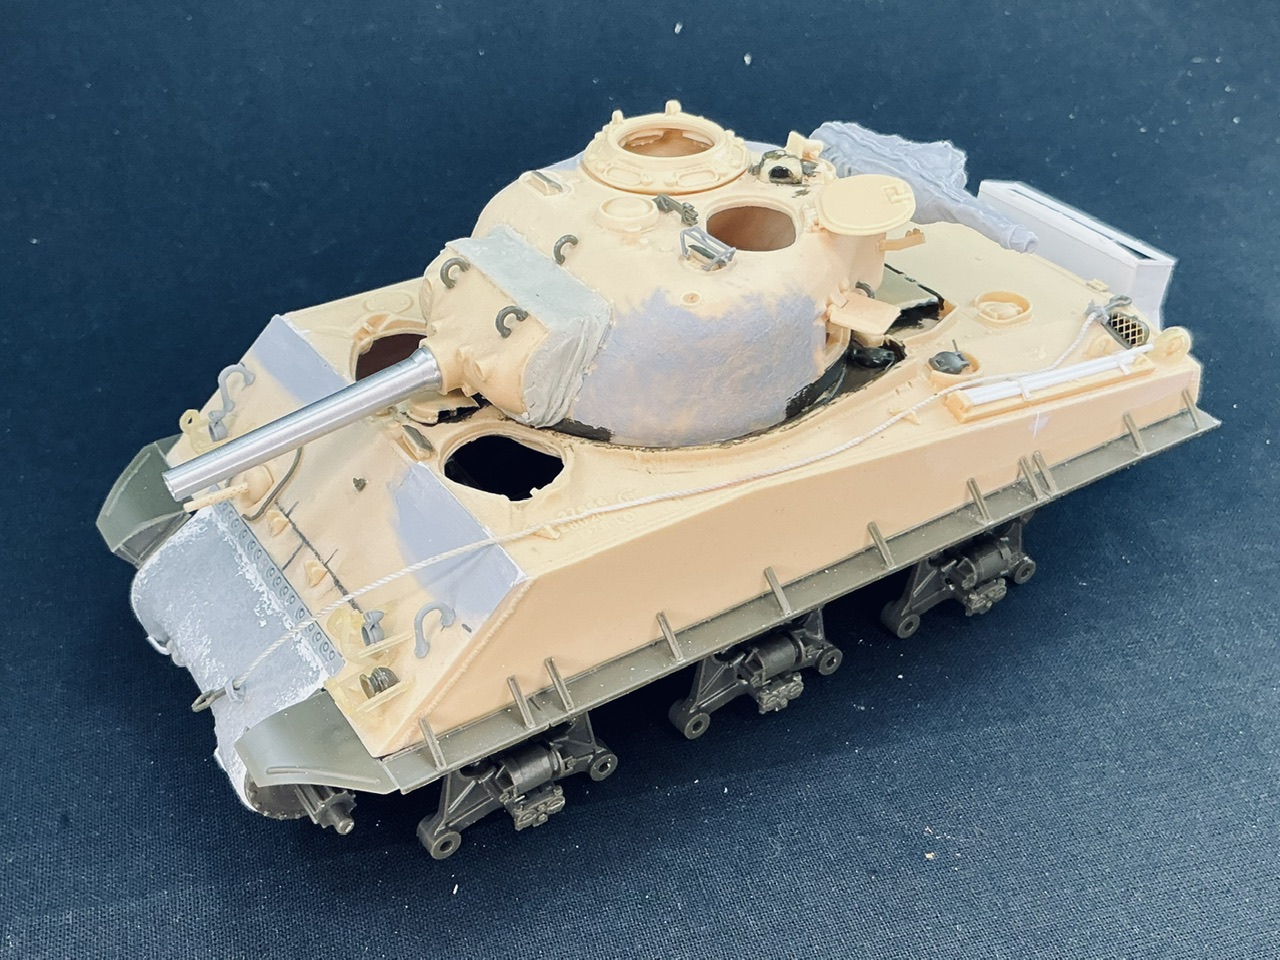
11 Likes
Well, good news and bad news. The good news is my varnish came in. The bad news is, the eBay seller (Michigan Toy Soldier, only using their name because they are a credible seller) used a different picture to advertise their VMS Gloss varnish. This just comes down to my obliviousness; I should’ve looked at the title as well as the picture. The picture is of the matt varnish bottle, but the title clearly says “GLOSS TYPE”. That one’s on me. Just your friendly reminder to pay attention to all the details of what you’re buying ![]()
![]()
Anyways, I sent it back on the matt varnish is arriving today (hopefully!). I went ahead and attached one of the fenders and the fender mounts (?) on the sides and rear of the tank and shallowed out those gaps. I just have a few more small details to add and then I can slap some paint on it. Christmas break is in about a week and a half, so I will definitely have time to work on this project a lot more than recently. Not sure how everything will look once I prime it, but I do expect some sanding involved.

(Also, yes, I see that the right fender mount (?) is crooked; it fell off shortly after taking this photo)
@Armor_Buff , thanks! I look forward to spraying the tan camo layer and seeing how it will chip. The plus side is if I don’t like the final result I can just remove the camo and start again!
9 Likes
It’s an attachment strip for the sand shields that crews almost universally removed ASAP, other than in the desert.
2 Likes
@Jakko Ahh, thanks!
My matt varnish came in yesterday late, so I will prolly get back to the turret either later today or this weekend ![]()
2 Likes
Well, I had issues with both the decals and the varnish; I didn’t get enough varnish apparently (even though the surface was visibly wet) and the paint reactivated and got messed up; simultaneously, both star decals on either side of the turret cracked and I almost lost them, killing the momentum of this project. However, I will continue to work on it in the New Year, and I will probably create a new thread. Thanks for a great campaign; even though I didn’t finish, I still learned a heck ton of new stuff about the Sherman. Have a Merry Christmas y’all!
Colin ![]()
2 Likes
I will also bail out since I have to paint outside. I have to wait until the kids around here are back in school as I am using Tamiya Lacquer spray paint.
4 Likes