They call that modelling!
8 Likes
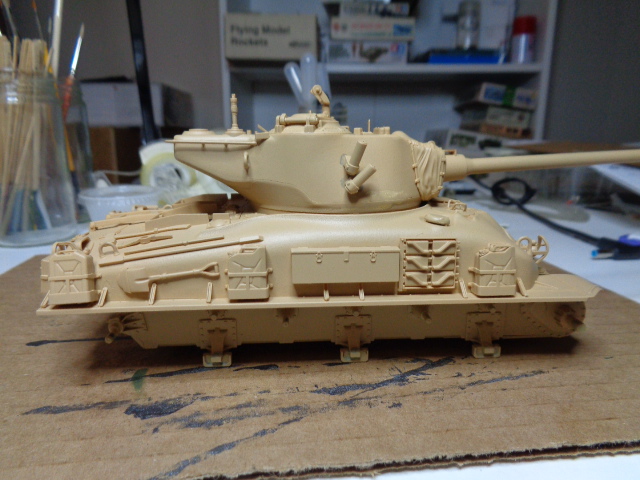
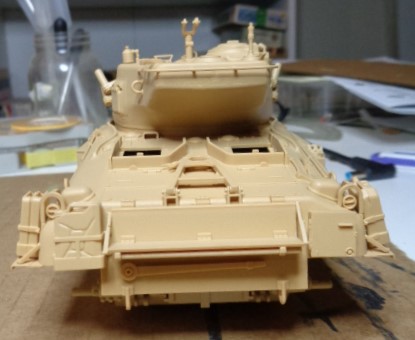
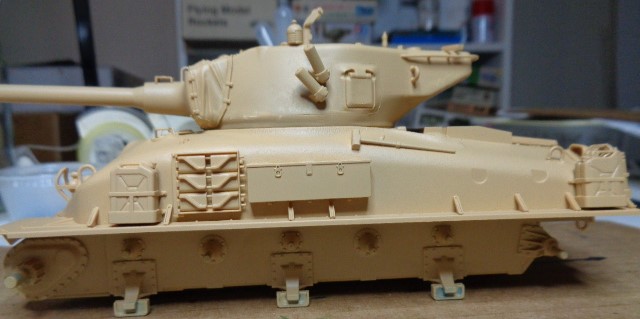
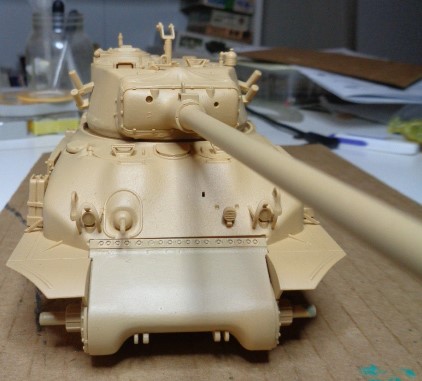
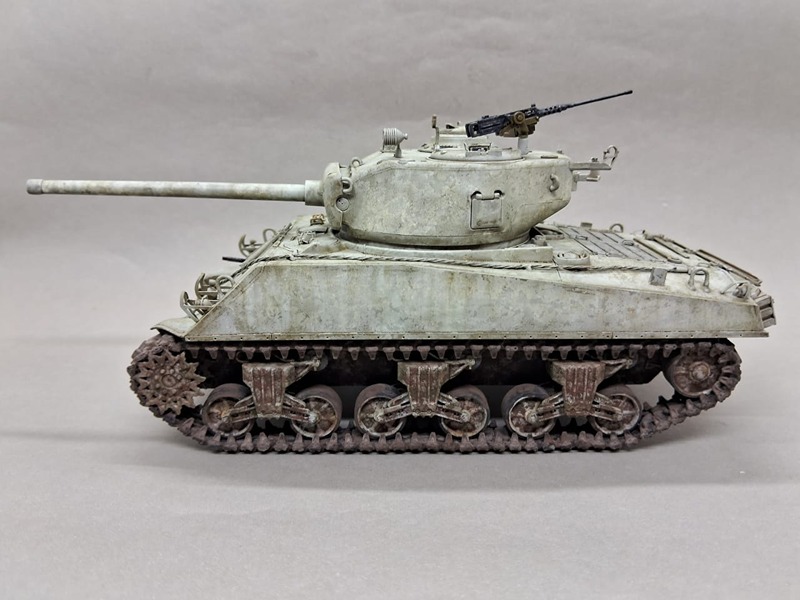
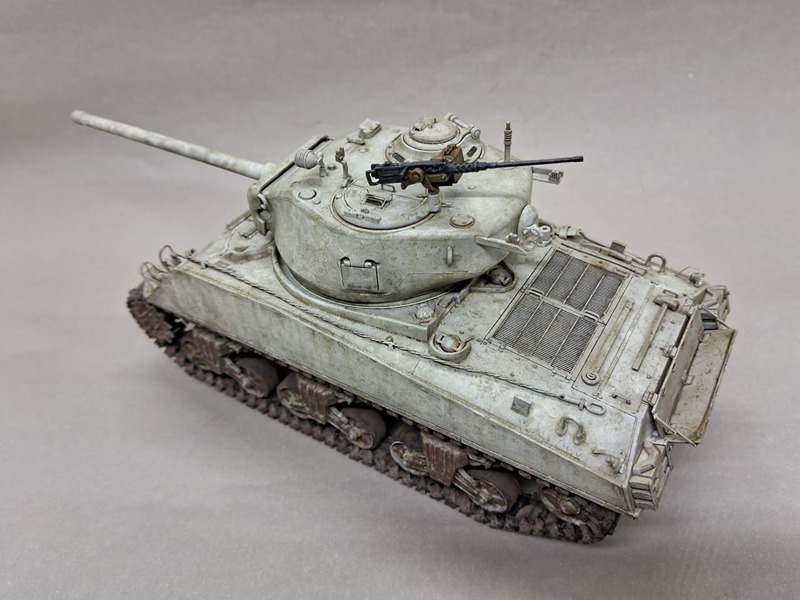
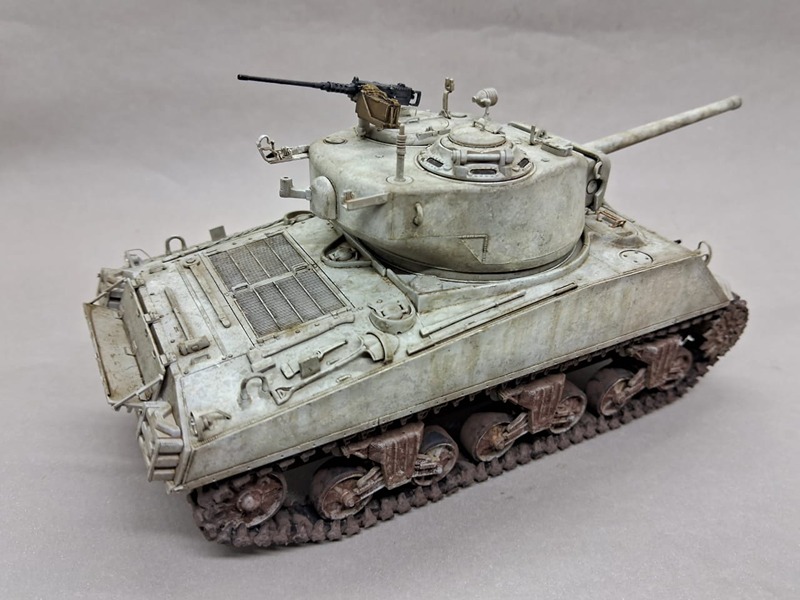
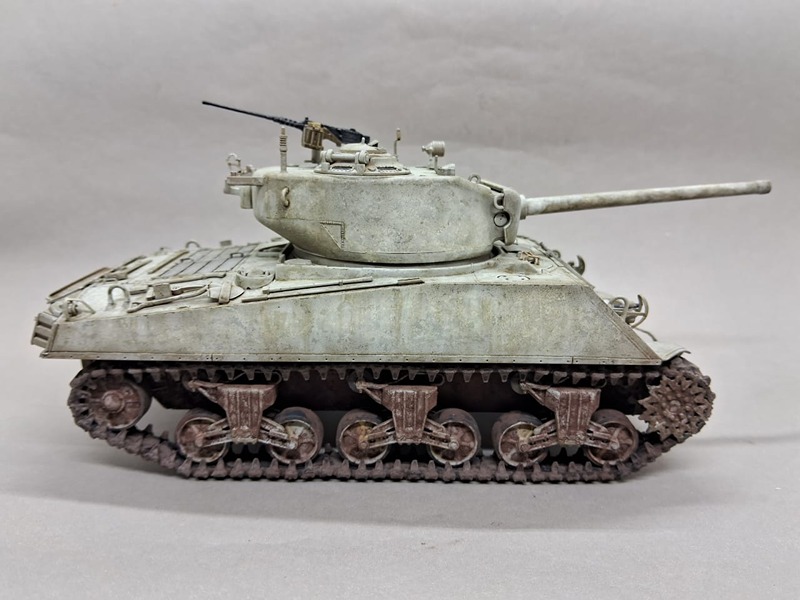
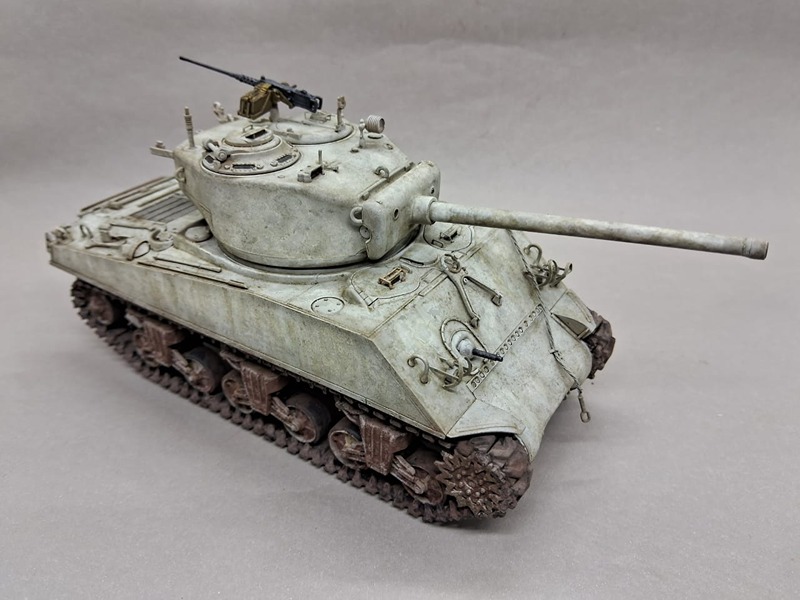
I’m trying to spray paint my M51 but it’s going slow. This is the second time spaying the lower hull and the first on the upper hull and turret.
6 Likes
let me follow with my winter Sherman


17 Likes
Marko, that Cold Steel is looking great!
5 Likes
Really liking the camp on your Sherman.![]()
![]()
3 Likes
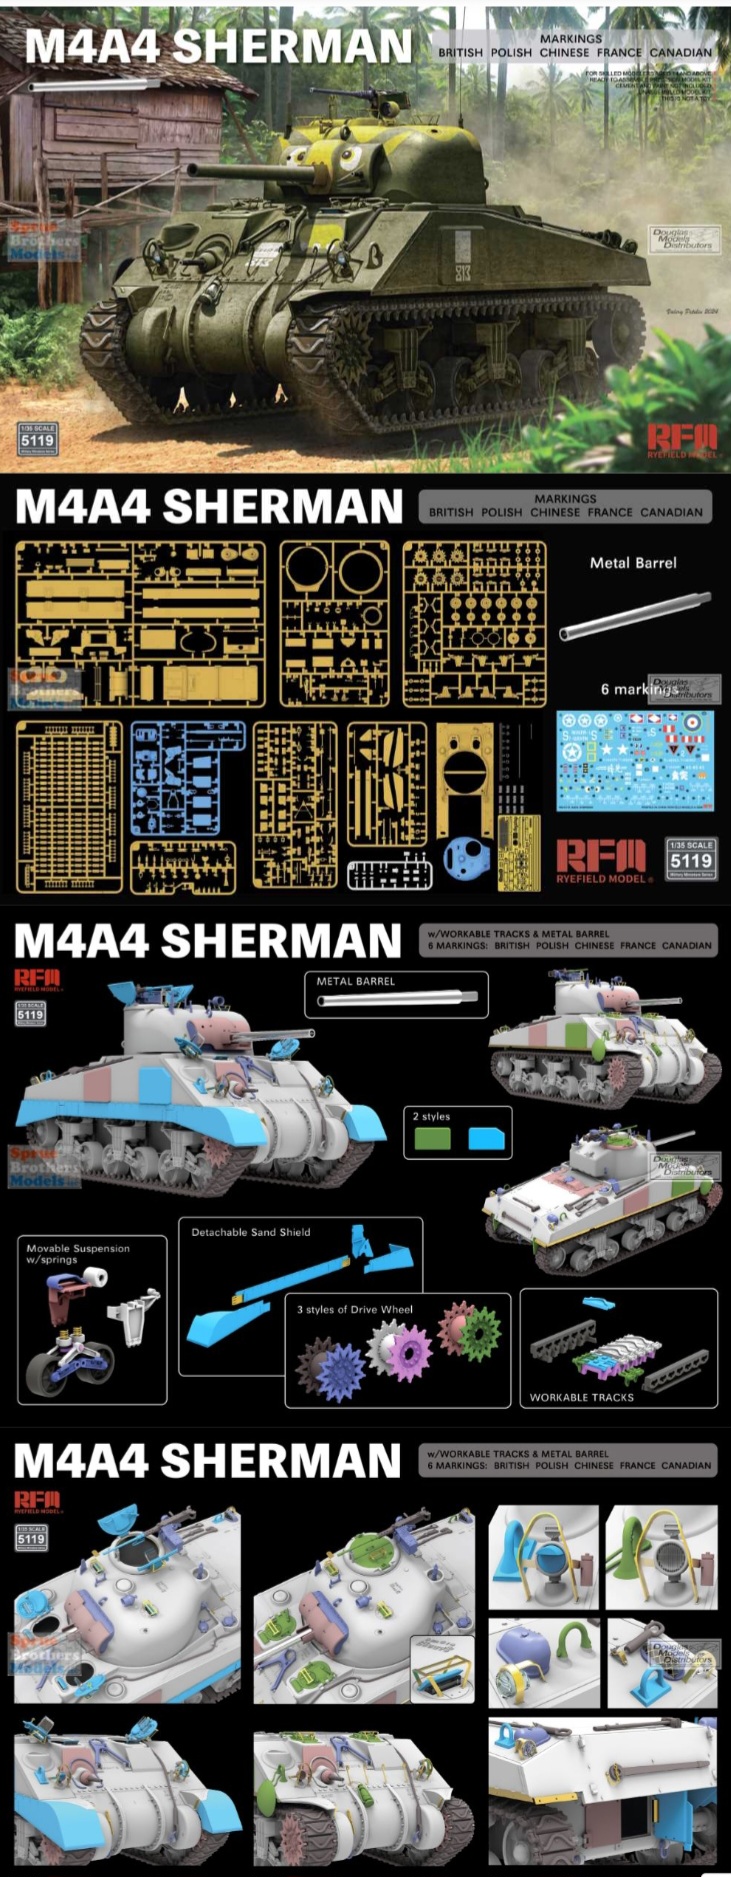
Sherm-aholics, Sherm-i-nators, & Sherman-meisters, in very simple layman’s terms what specifically looks different between say Tamiya Sherman M4 & RFM’s new M4A4?
Both have short gun, applique armor, VVSS suspension, similar or same turret?
Engine deck? What looks different?
This kit being new RFM seems very appealing but seems like a M4A4 looks a lot like an early M4?
Thanks, the Panzer Polize ![]()
2 Likes
Hi Wade, they may look the same to a Pz IV fan, but they are two totally different beasts. The M4A4 has a longer hull and different engine. Thus, different engine deck, too. The M4 was powered by a Wright radial engine, while the M4A4 was powered by a Chrysler multi-bank engine. To get the horsepower, Chrysler combined 5 straight-6 cylinder auto engines together on a common crankshaft! This required a longer hull. Google it - the engine is a sight to behold.
I daresay that the RFM kit will be a much more satisfying build for someone of your skill than the Tamiya M4 kit, too.
3 Likes
Thanks Matt,
One RFM M4A4, will be reporting to the shopping cart.
4 Likes
Pretty much as @SSGToms explained: the M4A4 has a longer hull than the M4, and a different engine deck and hull rear. The longer hull is the most obvious difference from the side, because the greater wheel spacing is very noticeable (at least if you’re aware of it ![]() ). Directly from the front, an M4A4 can be very hard to tell apart from a M4, M4A2 or M4A3, though, unless you really know what to look for. But that’s not layman’s terms so I’ll spare you those details
). Directly from the front, an M4A4 can be very hard to tell apart from a M4, M4A2 or M4A3, though, unless you really know what to look for. But that’s not layman’s terms so I’ll spare you those details ![]()
The RFM kit is probably quite good. I’ve built their Sherman VC — well, backdated it to a standard Sherman V, which is what this kit represents straight from the box — and was pretty happy with it. If I was shopping for one, I would probably pick this or the Asuka one based on whichever is cheaper.
3 Likes
Thank you, Jakko.
The Asuka M4A4 is less expensive but it’s out of stock at Spruebrothers.com so it’s the RFM M4A4.
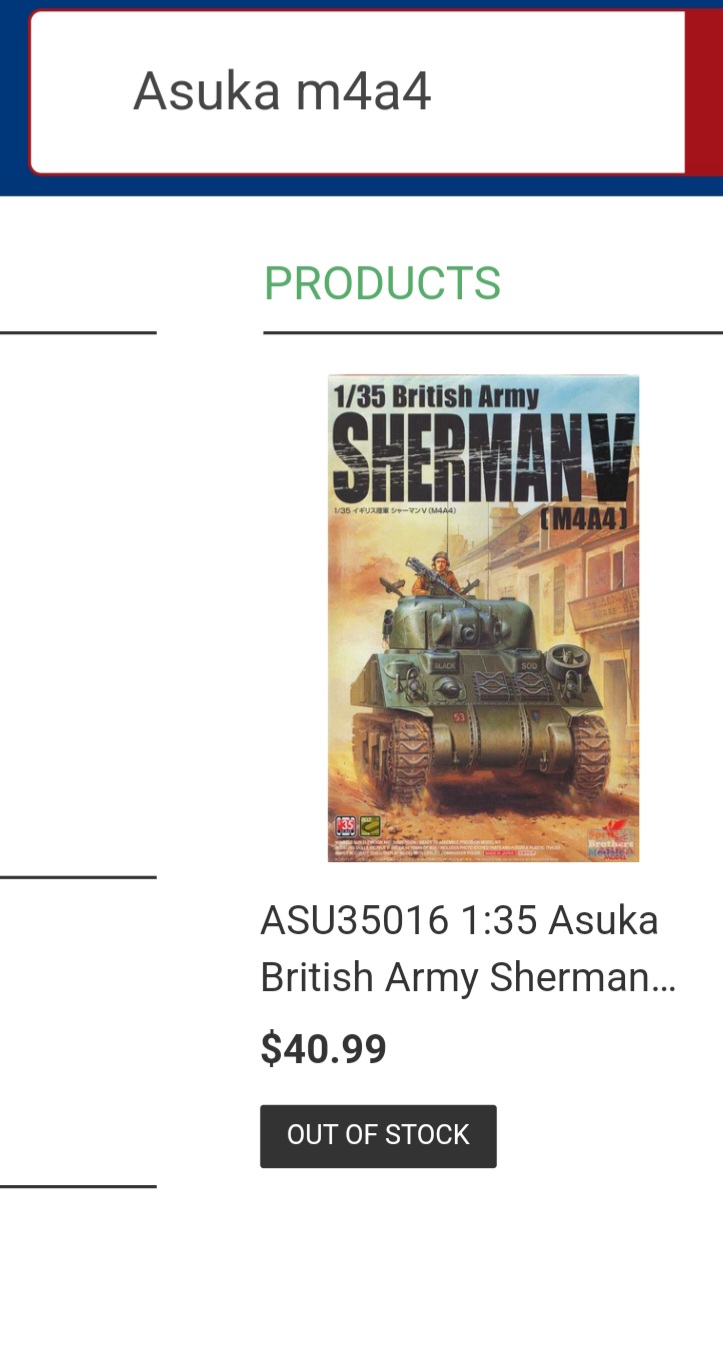
Looks like there’s several interesting paint schemes for the M4A4 so I’ll keep Asuka in mind when visiting model shows etc
2 Likes
The Chinese paint tigers on the front in WW2 in Burma.
3 Likes
That was basically the reason I backdated the RFM VC to a V some years ago: the Asuka kit was impossible to find at the time.
BTW, if the RFM M4A4 kit has real springs for the bogies, and you just want them fixed, be sure to check the thread I linked to above for a quick and easy solution to the problem.
2 Likes
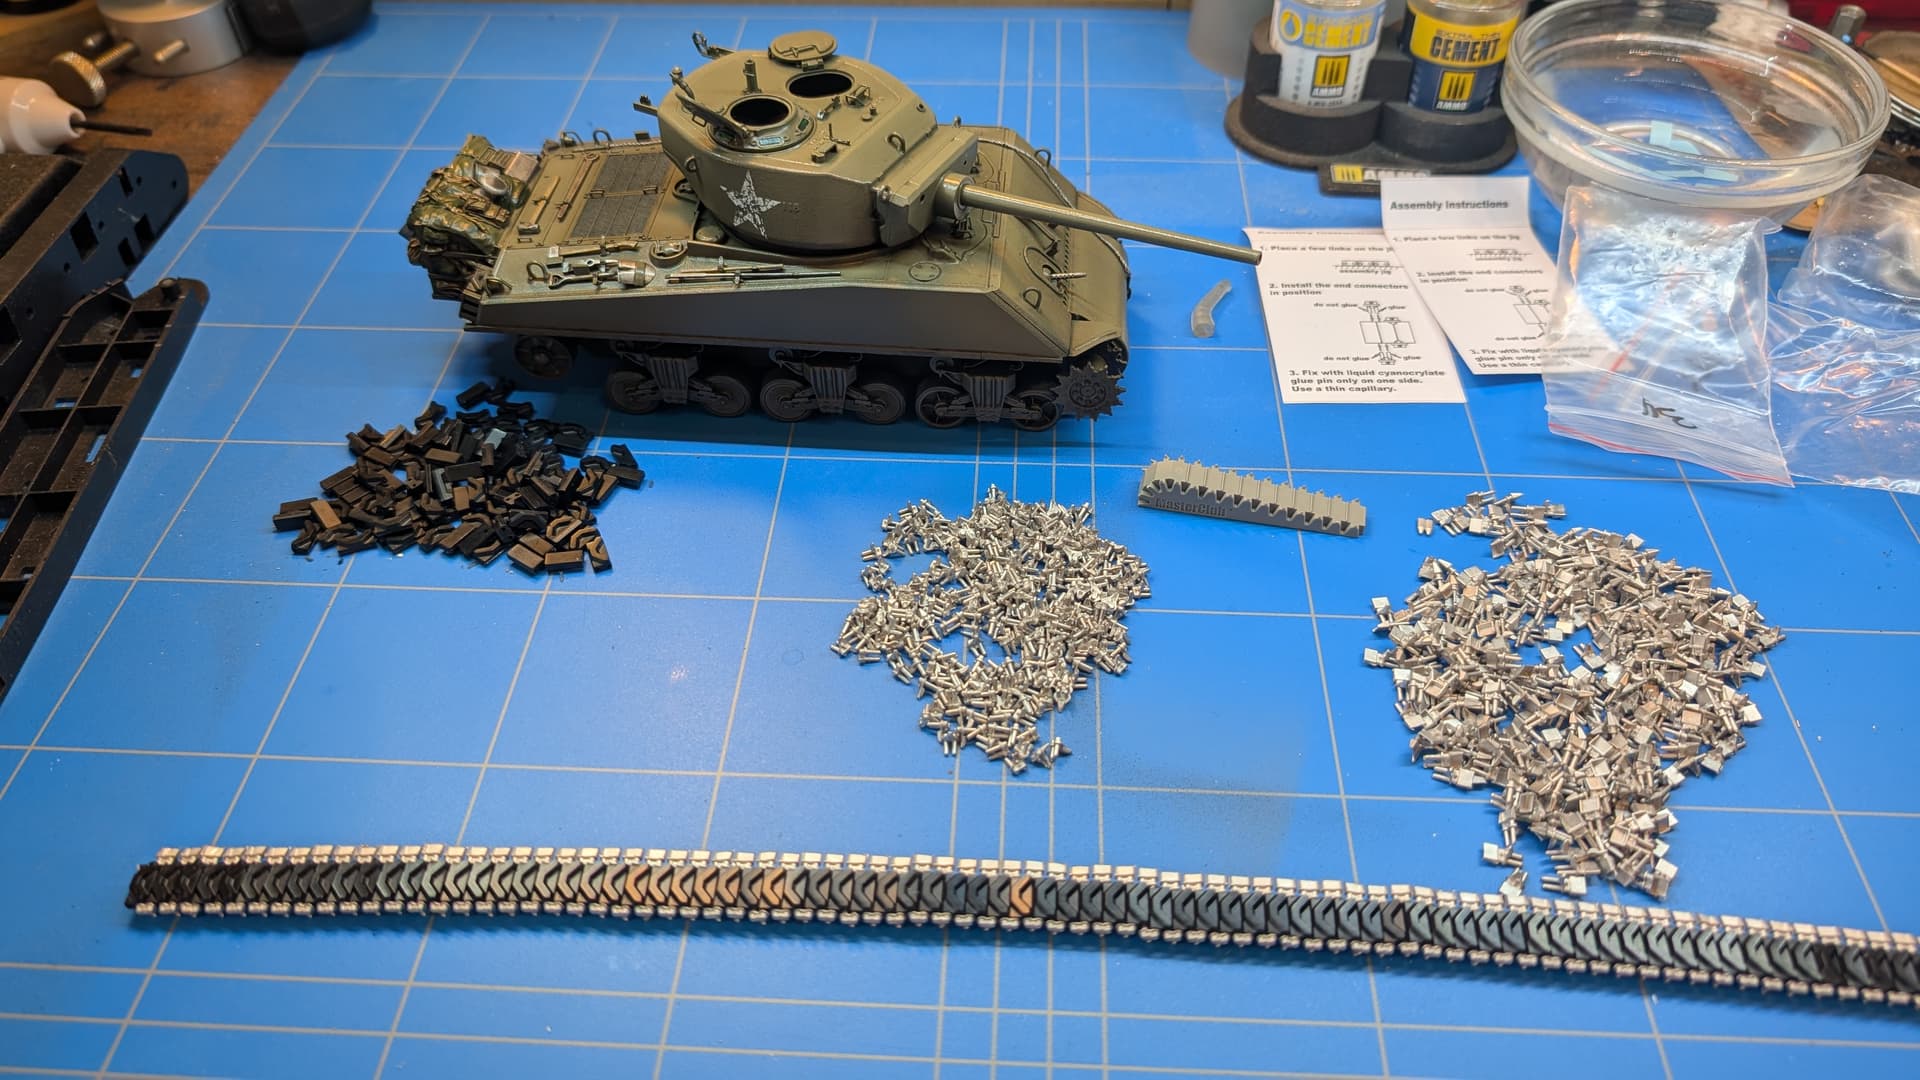
Moving forward on the M4A3E2, I started making the tracks. I’m using the Master club T-48 tracks and duckbills. Easy to use, one run made in about 30 minutes.
11 Likes
I’ve been building the lower part of the deep-wading gear for my M4 (105 mm) HVSS today:
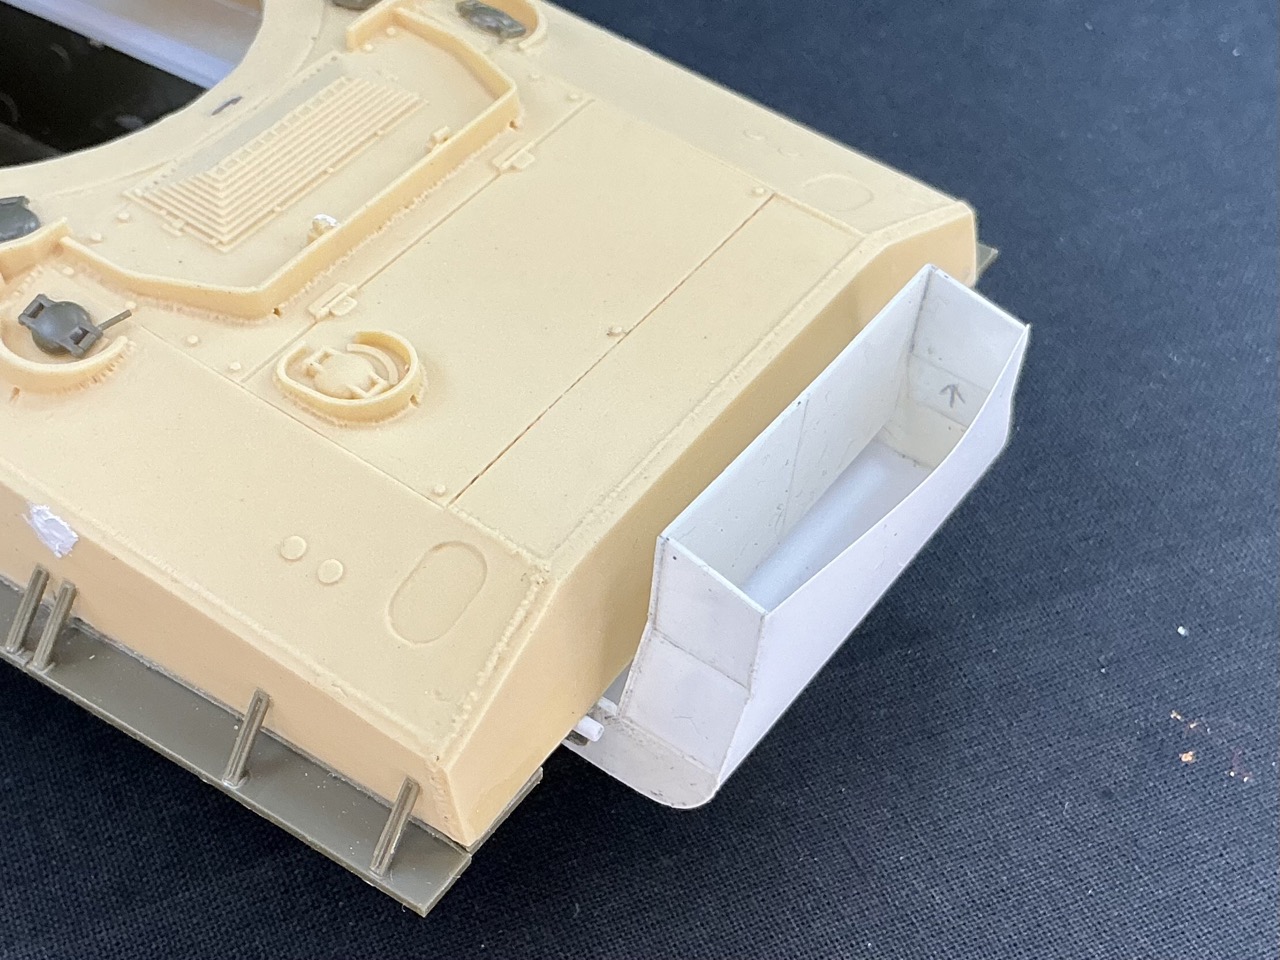
12 Likes
I´m calling my Meng Sherman done.
Don’t tell anyone, but this is my first Sherman in the display case…
Beautiful kit, but the tracks take too much work.
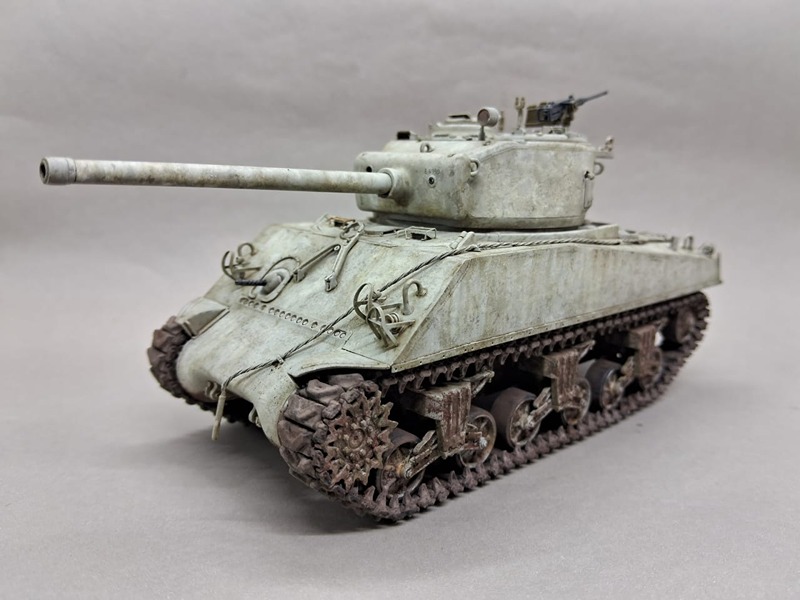

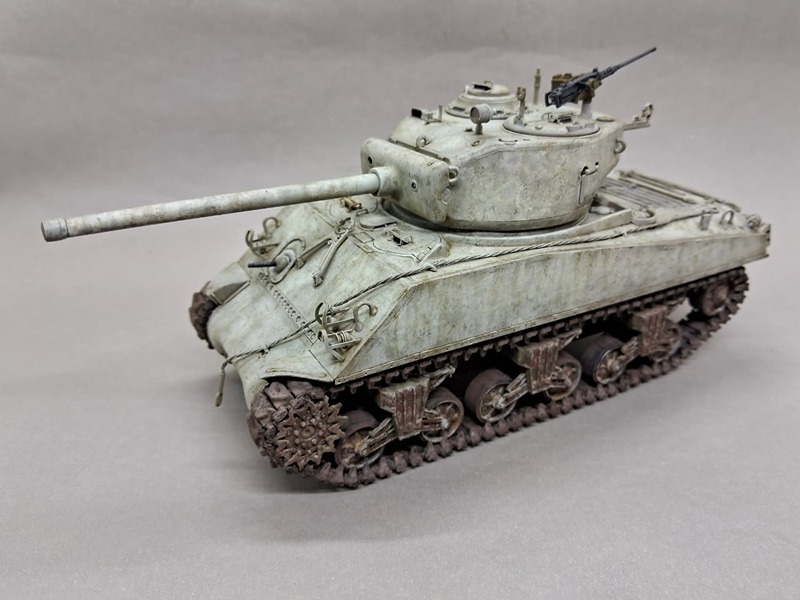
Thanks for this great campaign!
15 Likes
It’s a good looking build for the display case Tomás. ![]()
3 Likes
It’s been more than two months since I last posted anything related to my work… ![]()
However, I have been keeping an eye on this thread, and I wanted to say awesome job to @iguanac , @Armor_Buff , @Gary_Kato , @Jakko , @RonW , @barkingdigger , @Tom2022 , and @JayJHCruz (and anyone else I missed) on y’all’s Shermans! They’ve all turned out (and are turning out for those of you who aren’t finished) amazing!
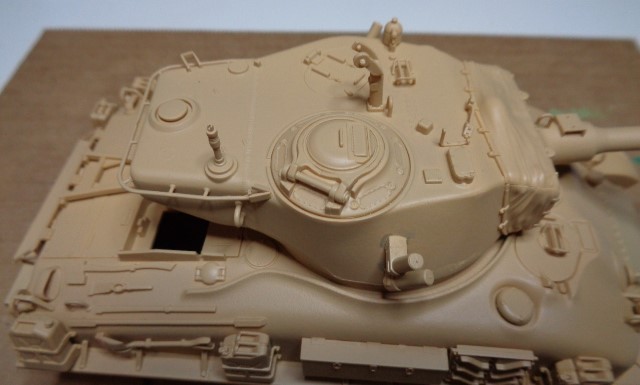
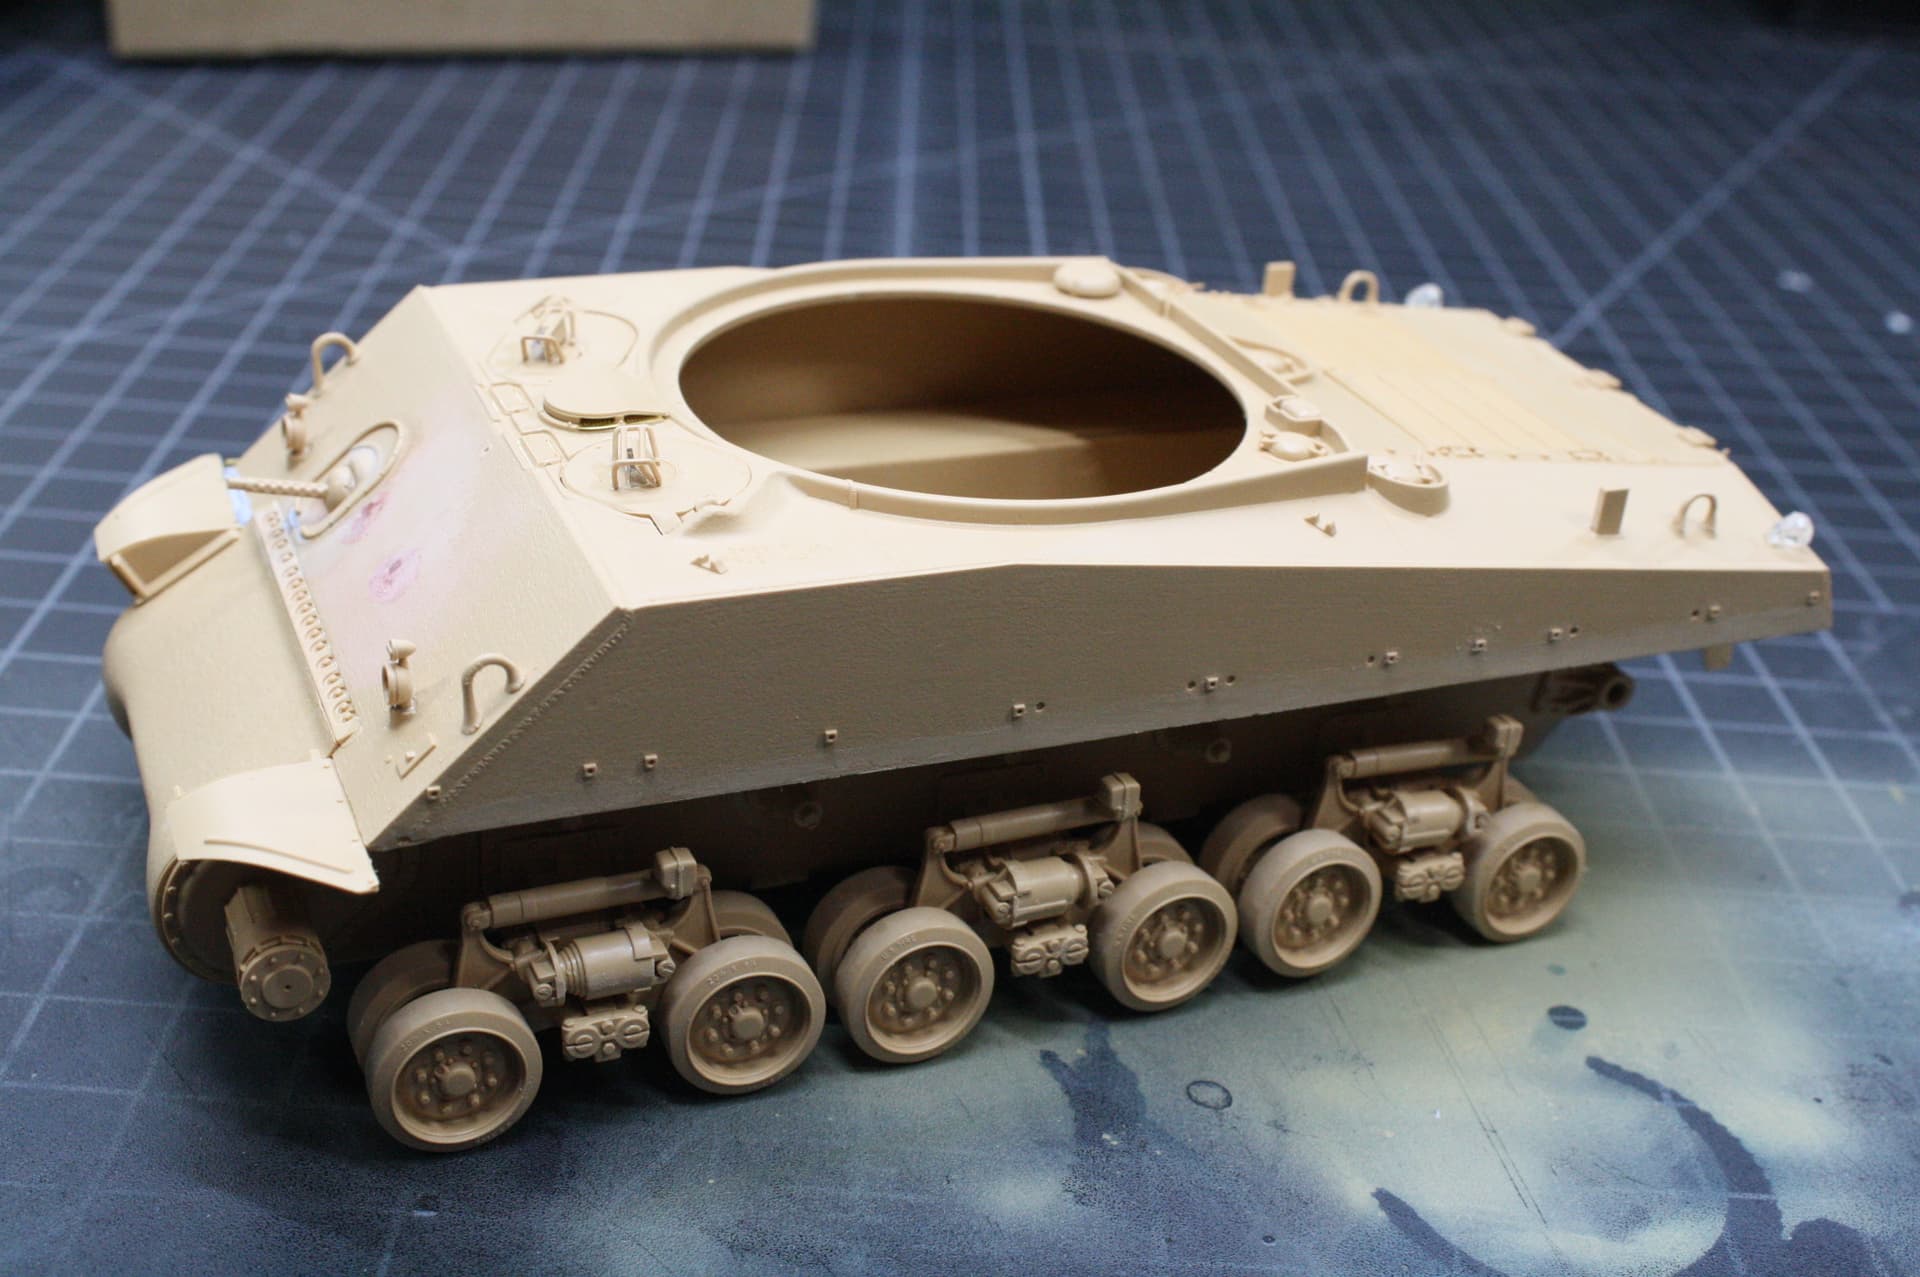
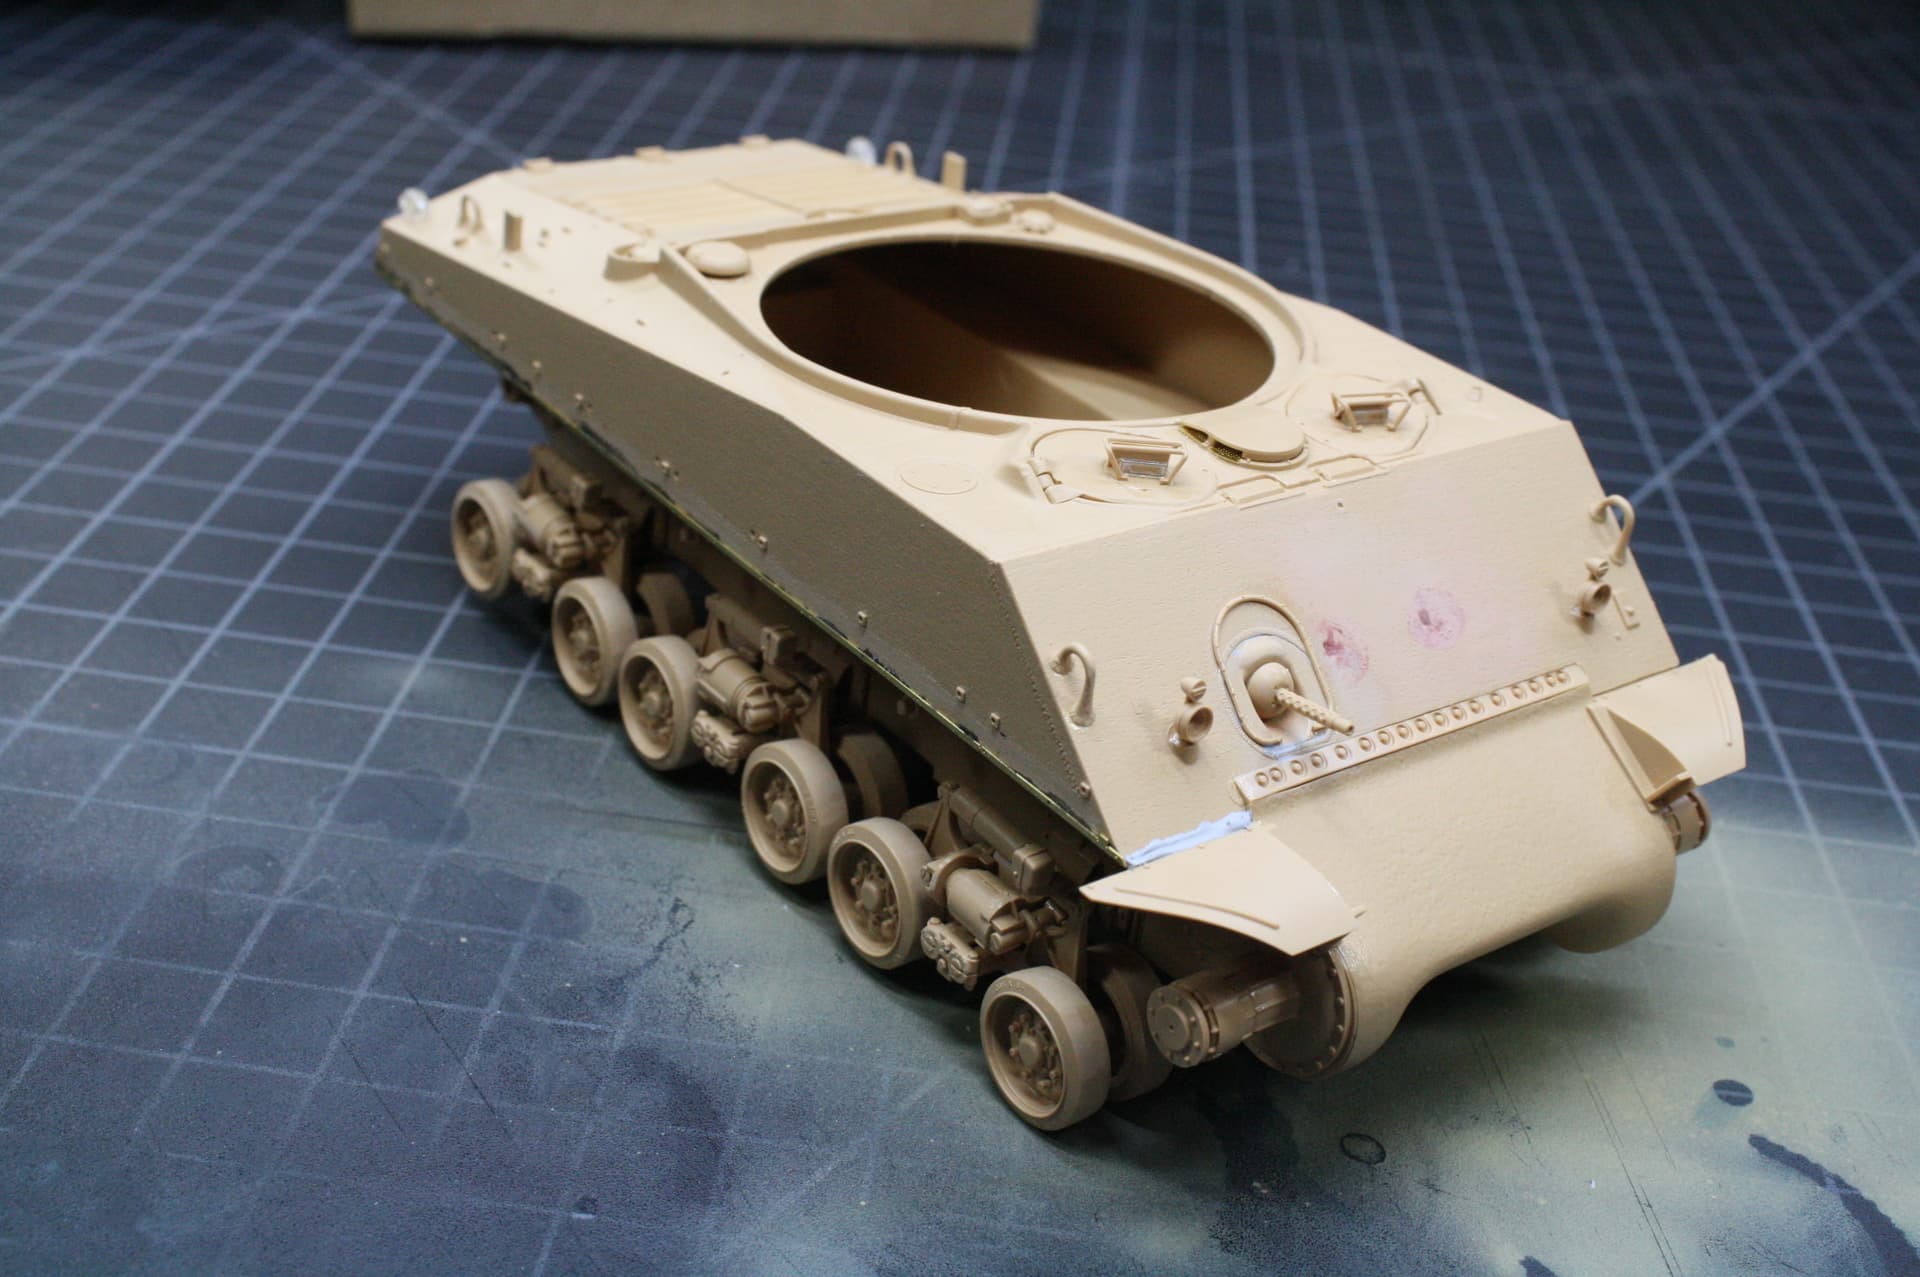
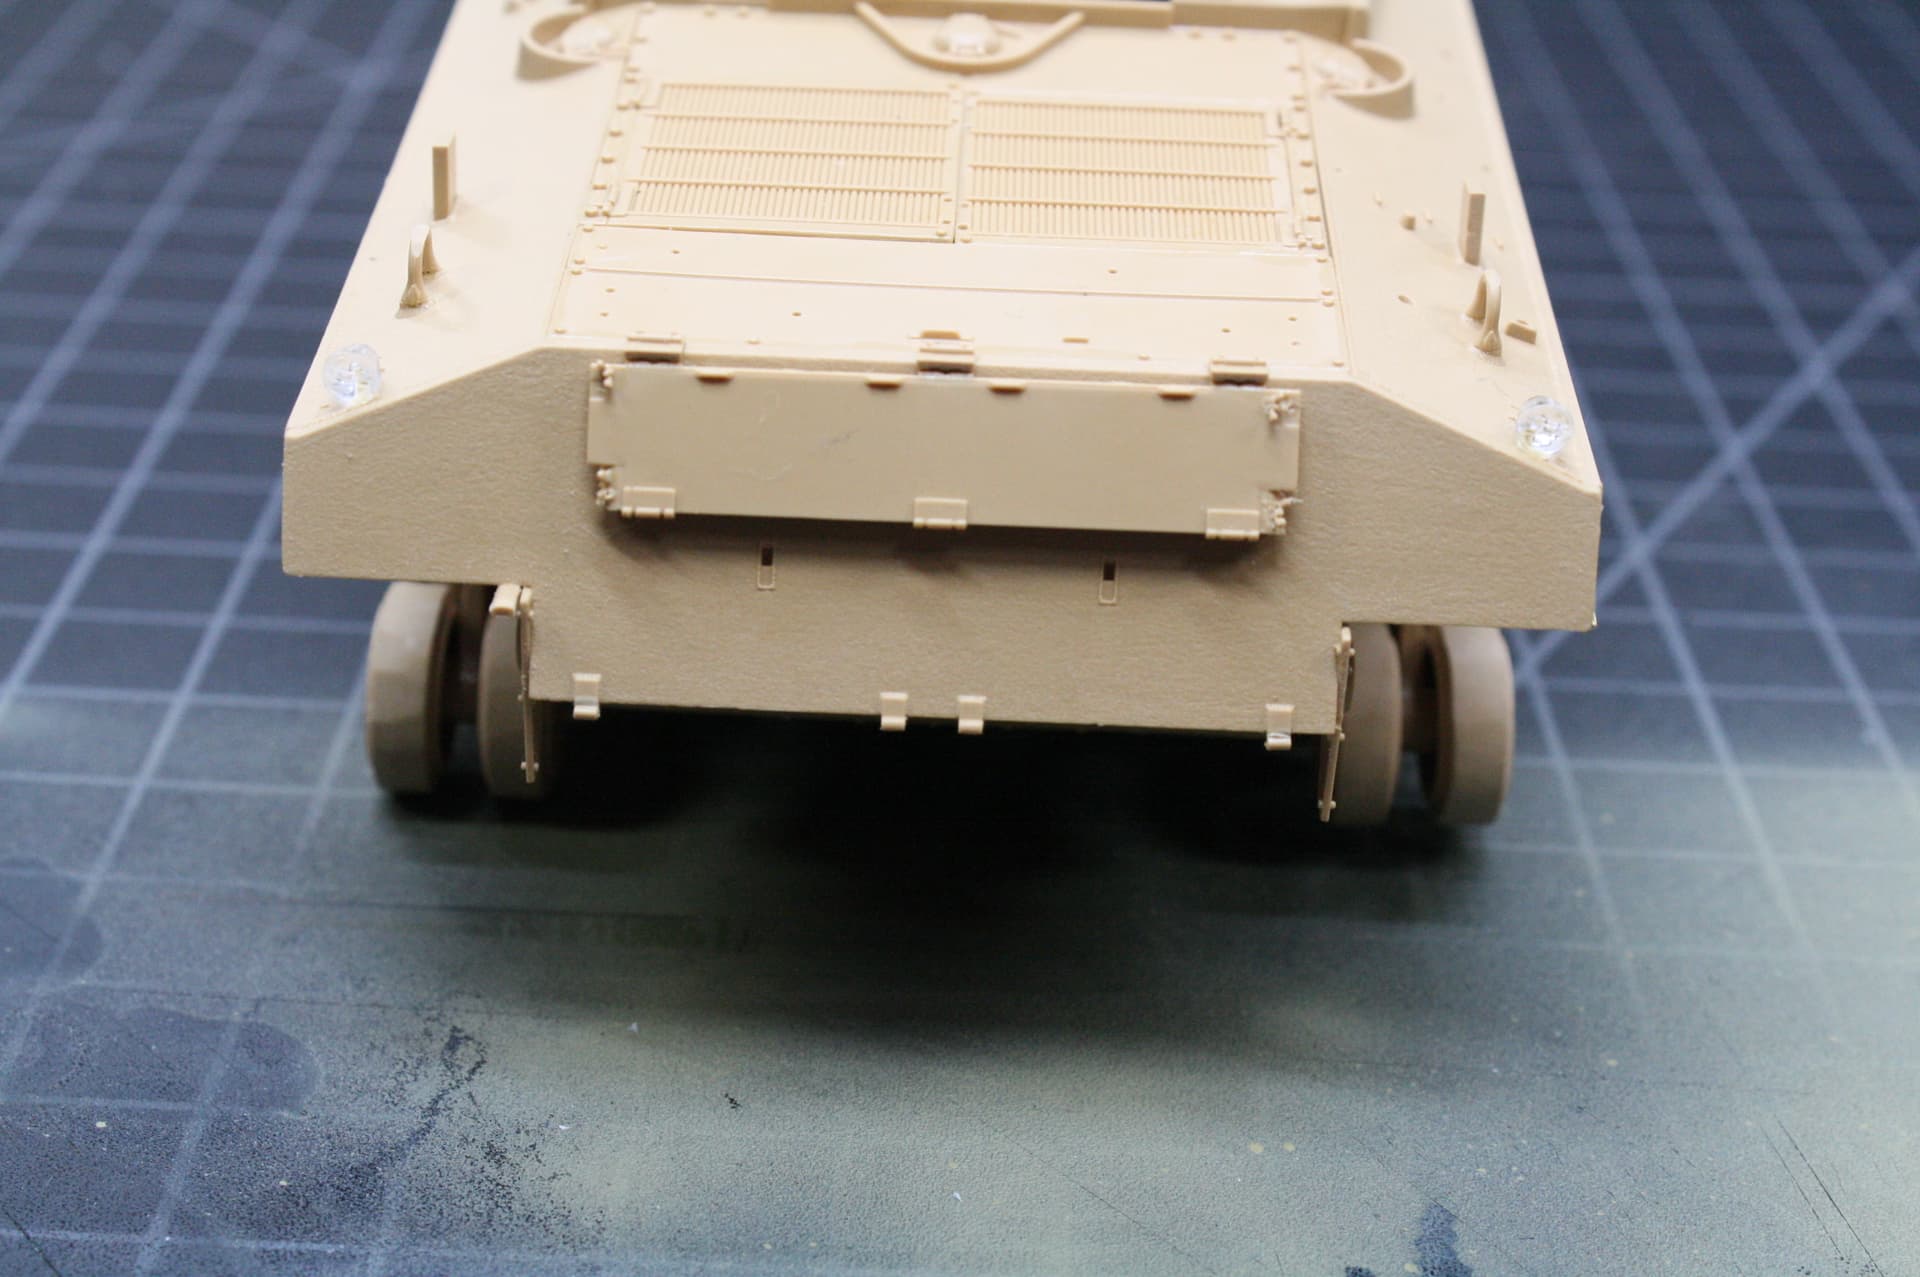
Well, I haven’t posted anything substantial lately because nothing really substantial has happened. Mojo and time have been a bit of a problem lately, but I’m pulling out the stops to try and finish my Sherman before the deadline. I’ve pretty much finished the build, with only a few more hulls details to add and some gaps to fill. I’ve been testing a new painting style over the past few months, though, that is based entirely on oil paints. Due to this, I work in sections, rather than doing one whole thing over the model at one time (i.e., a pinwash). I grabbed some MMP for this build and slapped some paint on the turret so I can get started on that. I’ve laid down the OD basecoat, but I’m waiting on a new bottle of matt varnish before I move on. Since MMP is reactivated by water, I’m waiting to add the sand camo color until I’ve sealed the OD so I can chip the sand.
Because of the properties of MMP, I was able to achieve some interesting chipping effects on the turret.
Here you can see the chipping on the commander’s hatch:
And here’s what I’ve gotten finished on the hull:
As you can see, I still have a lot of gaps to fill on the engine deck. My Tamiya Putty has gone AWOL, so hopefully I can find it without having to purchase another one.
14 Likes
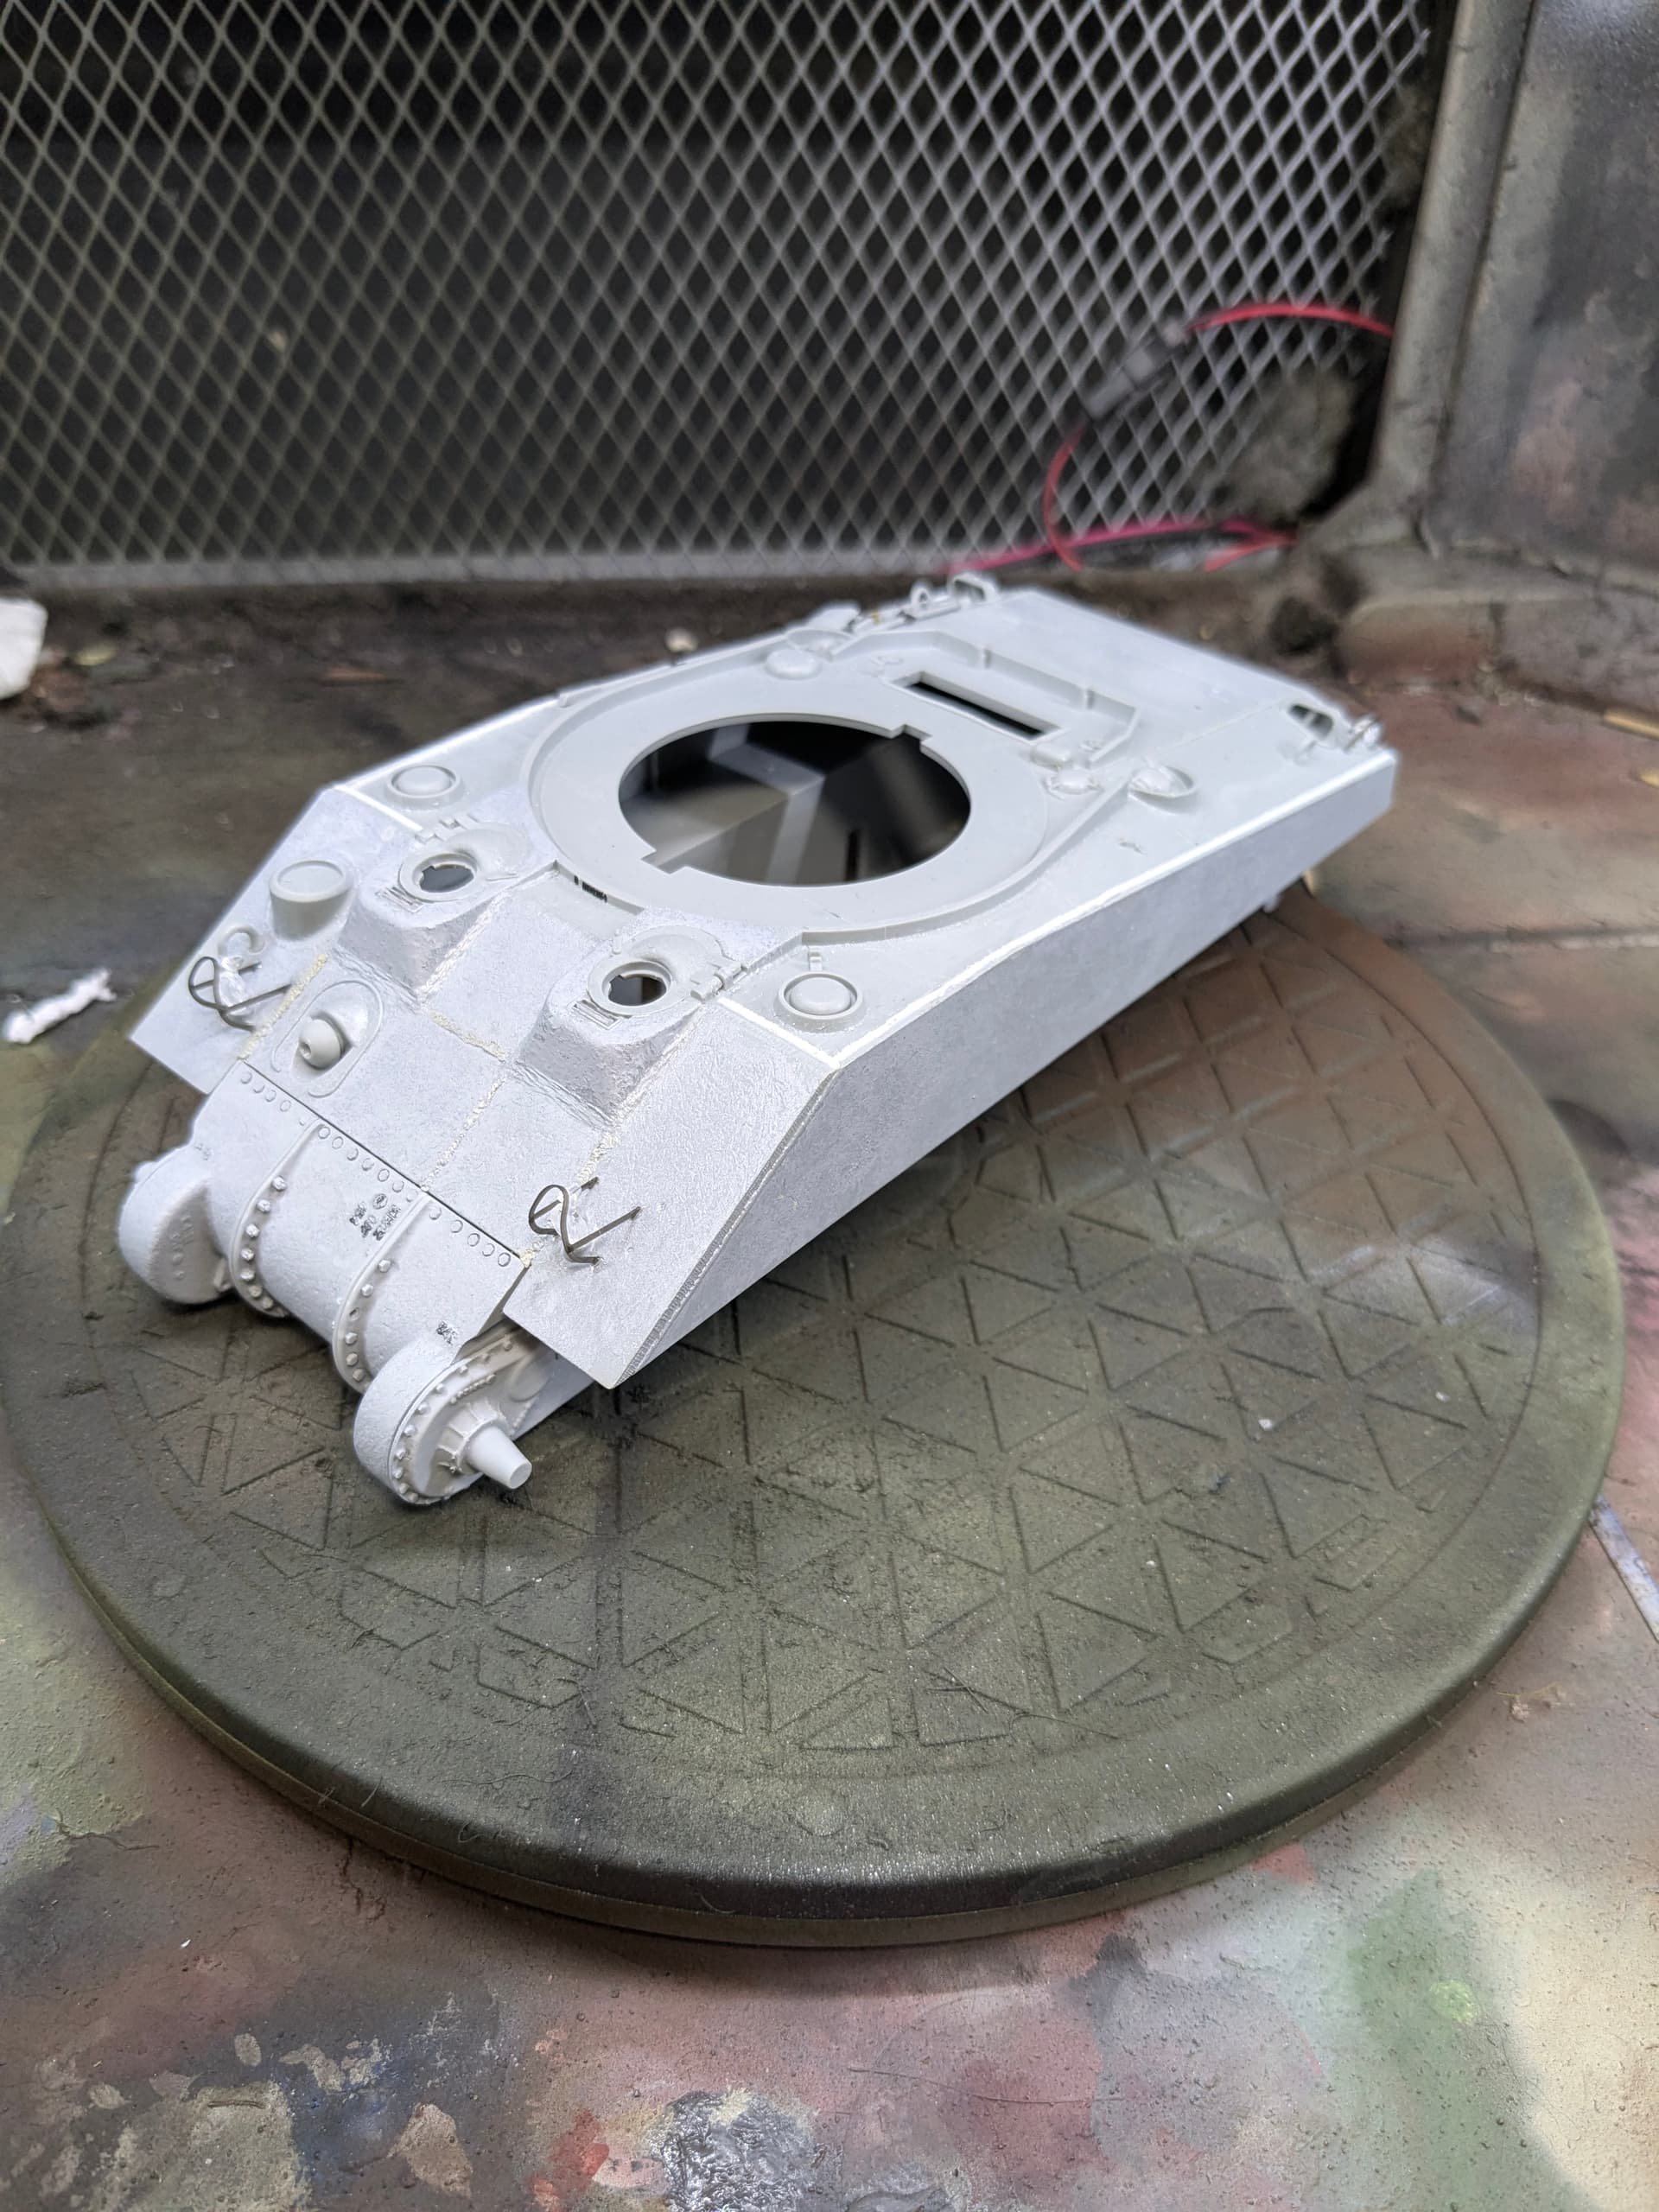
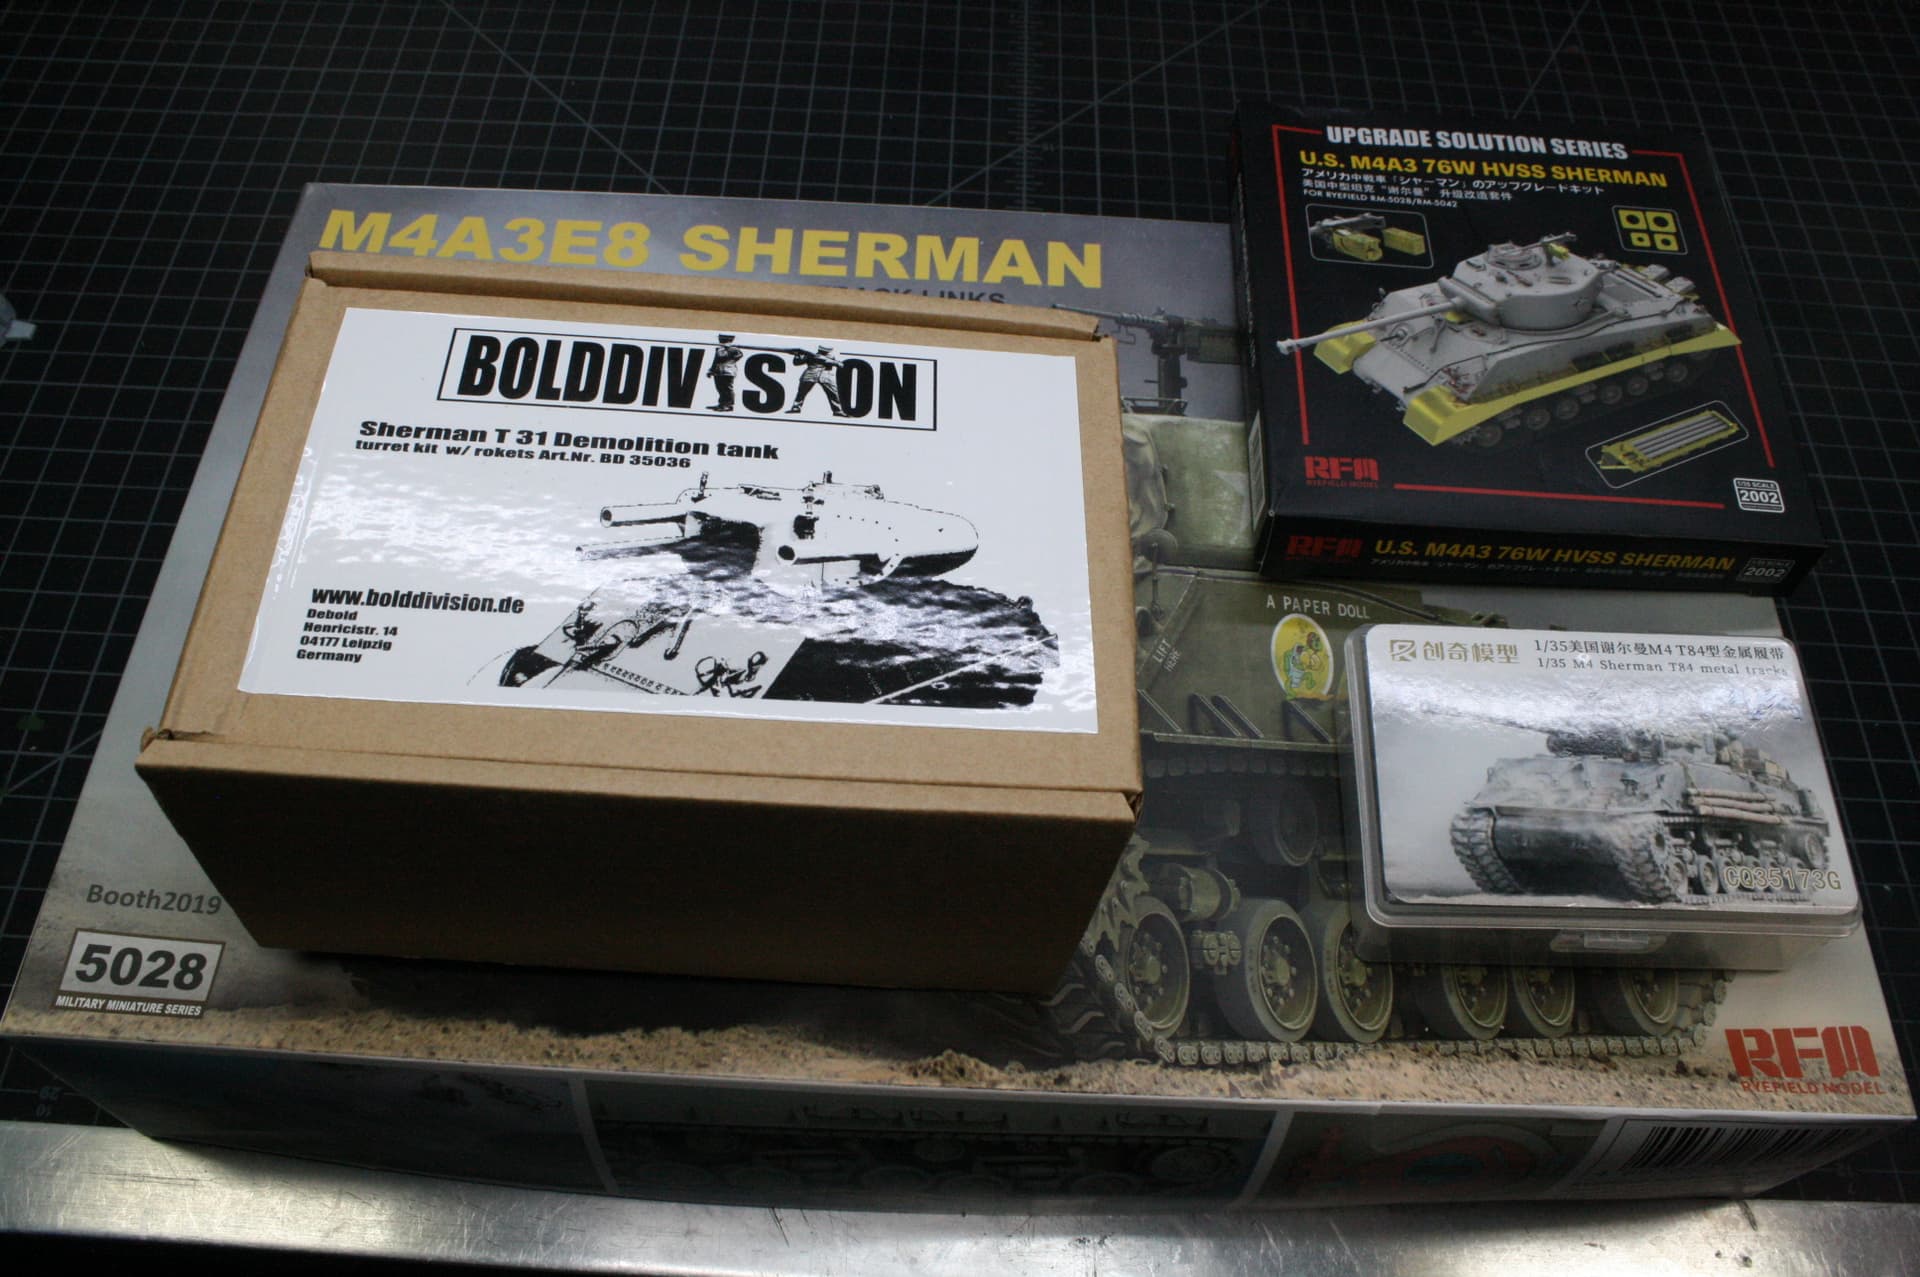
Well, I don’t think that my T-31 Demolition Tank Sherman is going to make to to the deadline. I started out with the RFM M4A3E8, an outstanding kit, and got the hull built. Just have to add small details and that’s done.
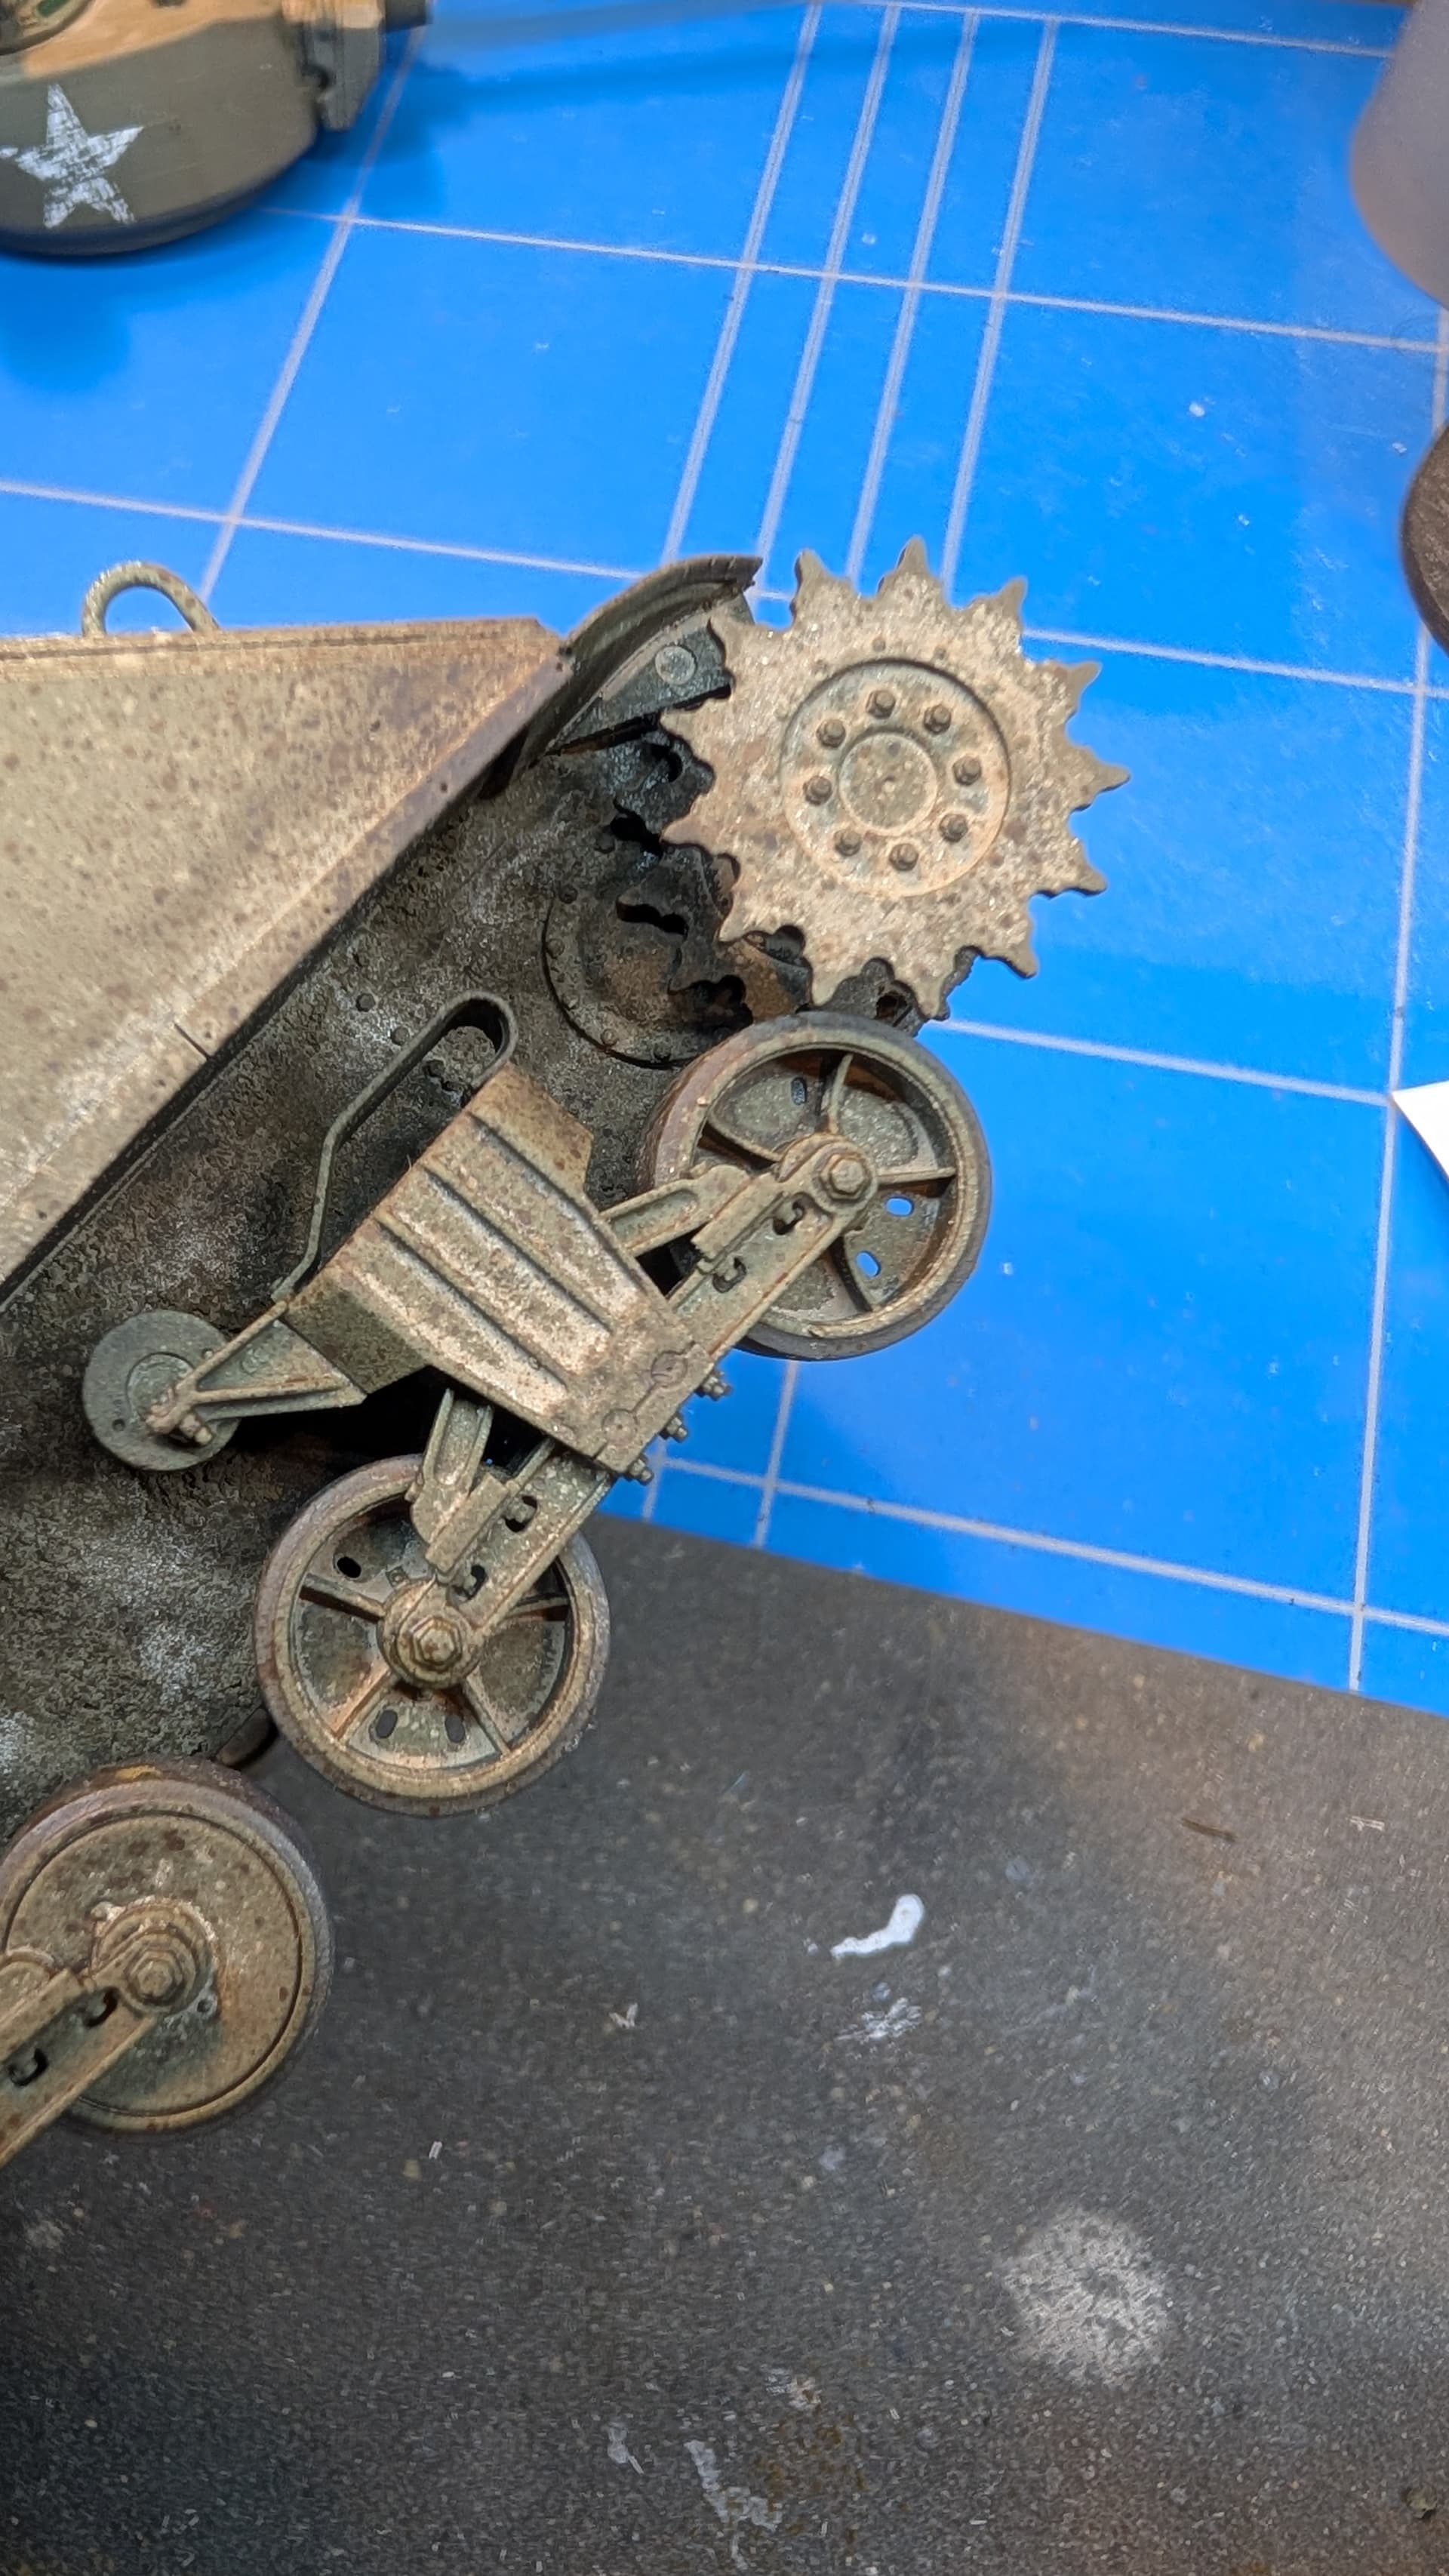
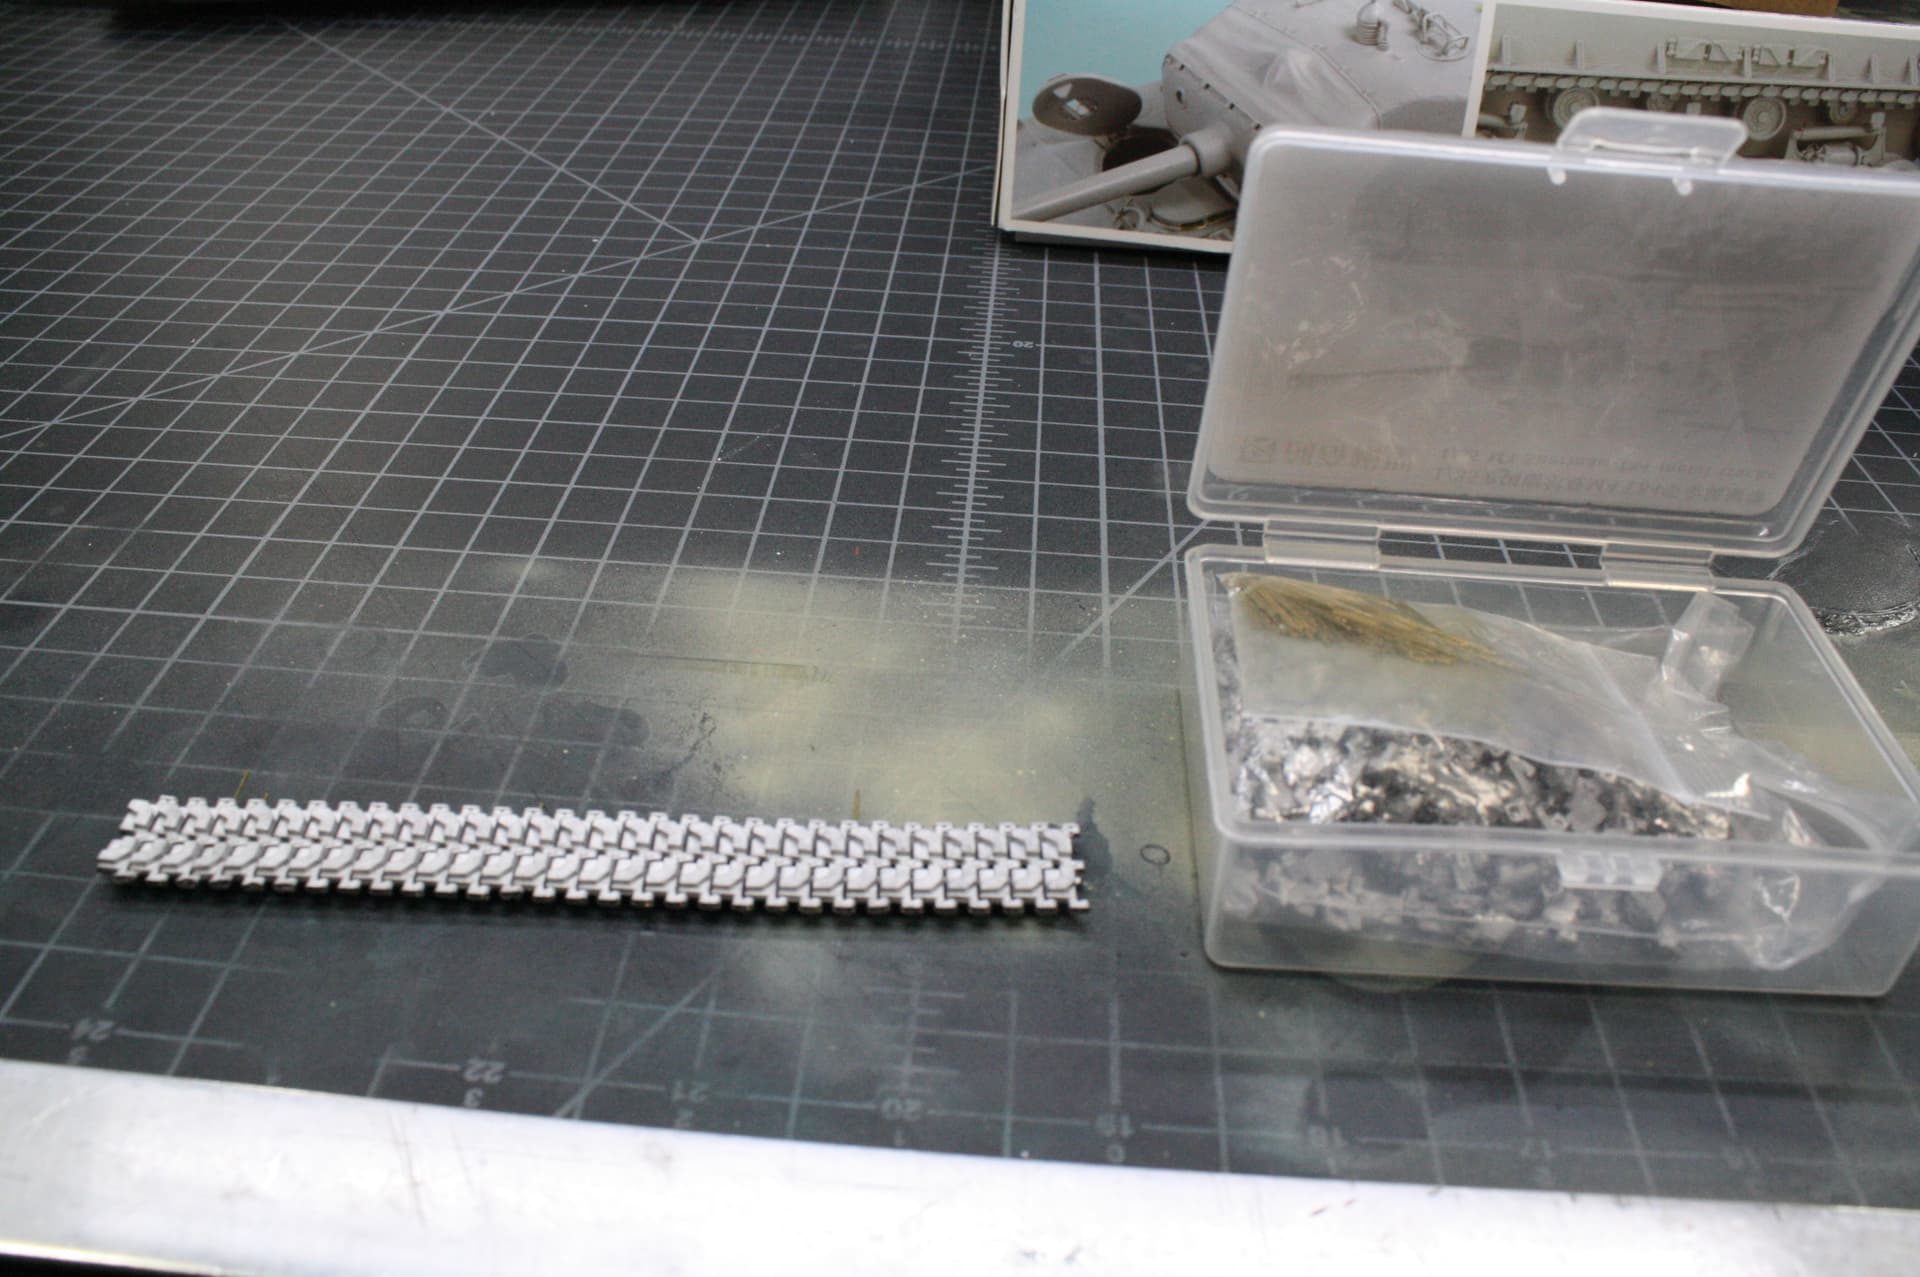
Started on the R-Models T-84 tracks. Very nice and easy to assemble.
I could definitely finish and paint this model in a month and make the deadline.
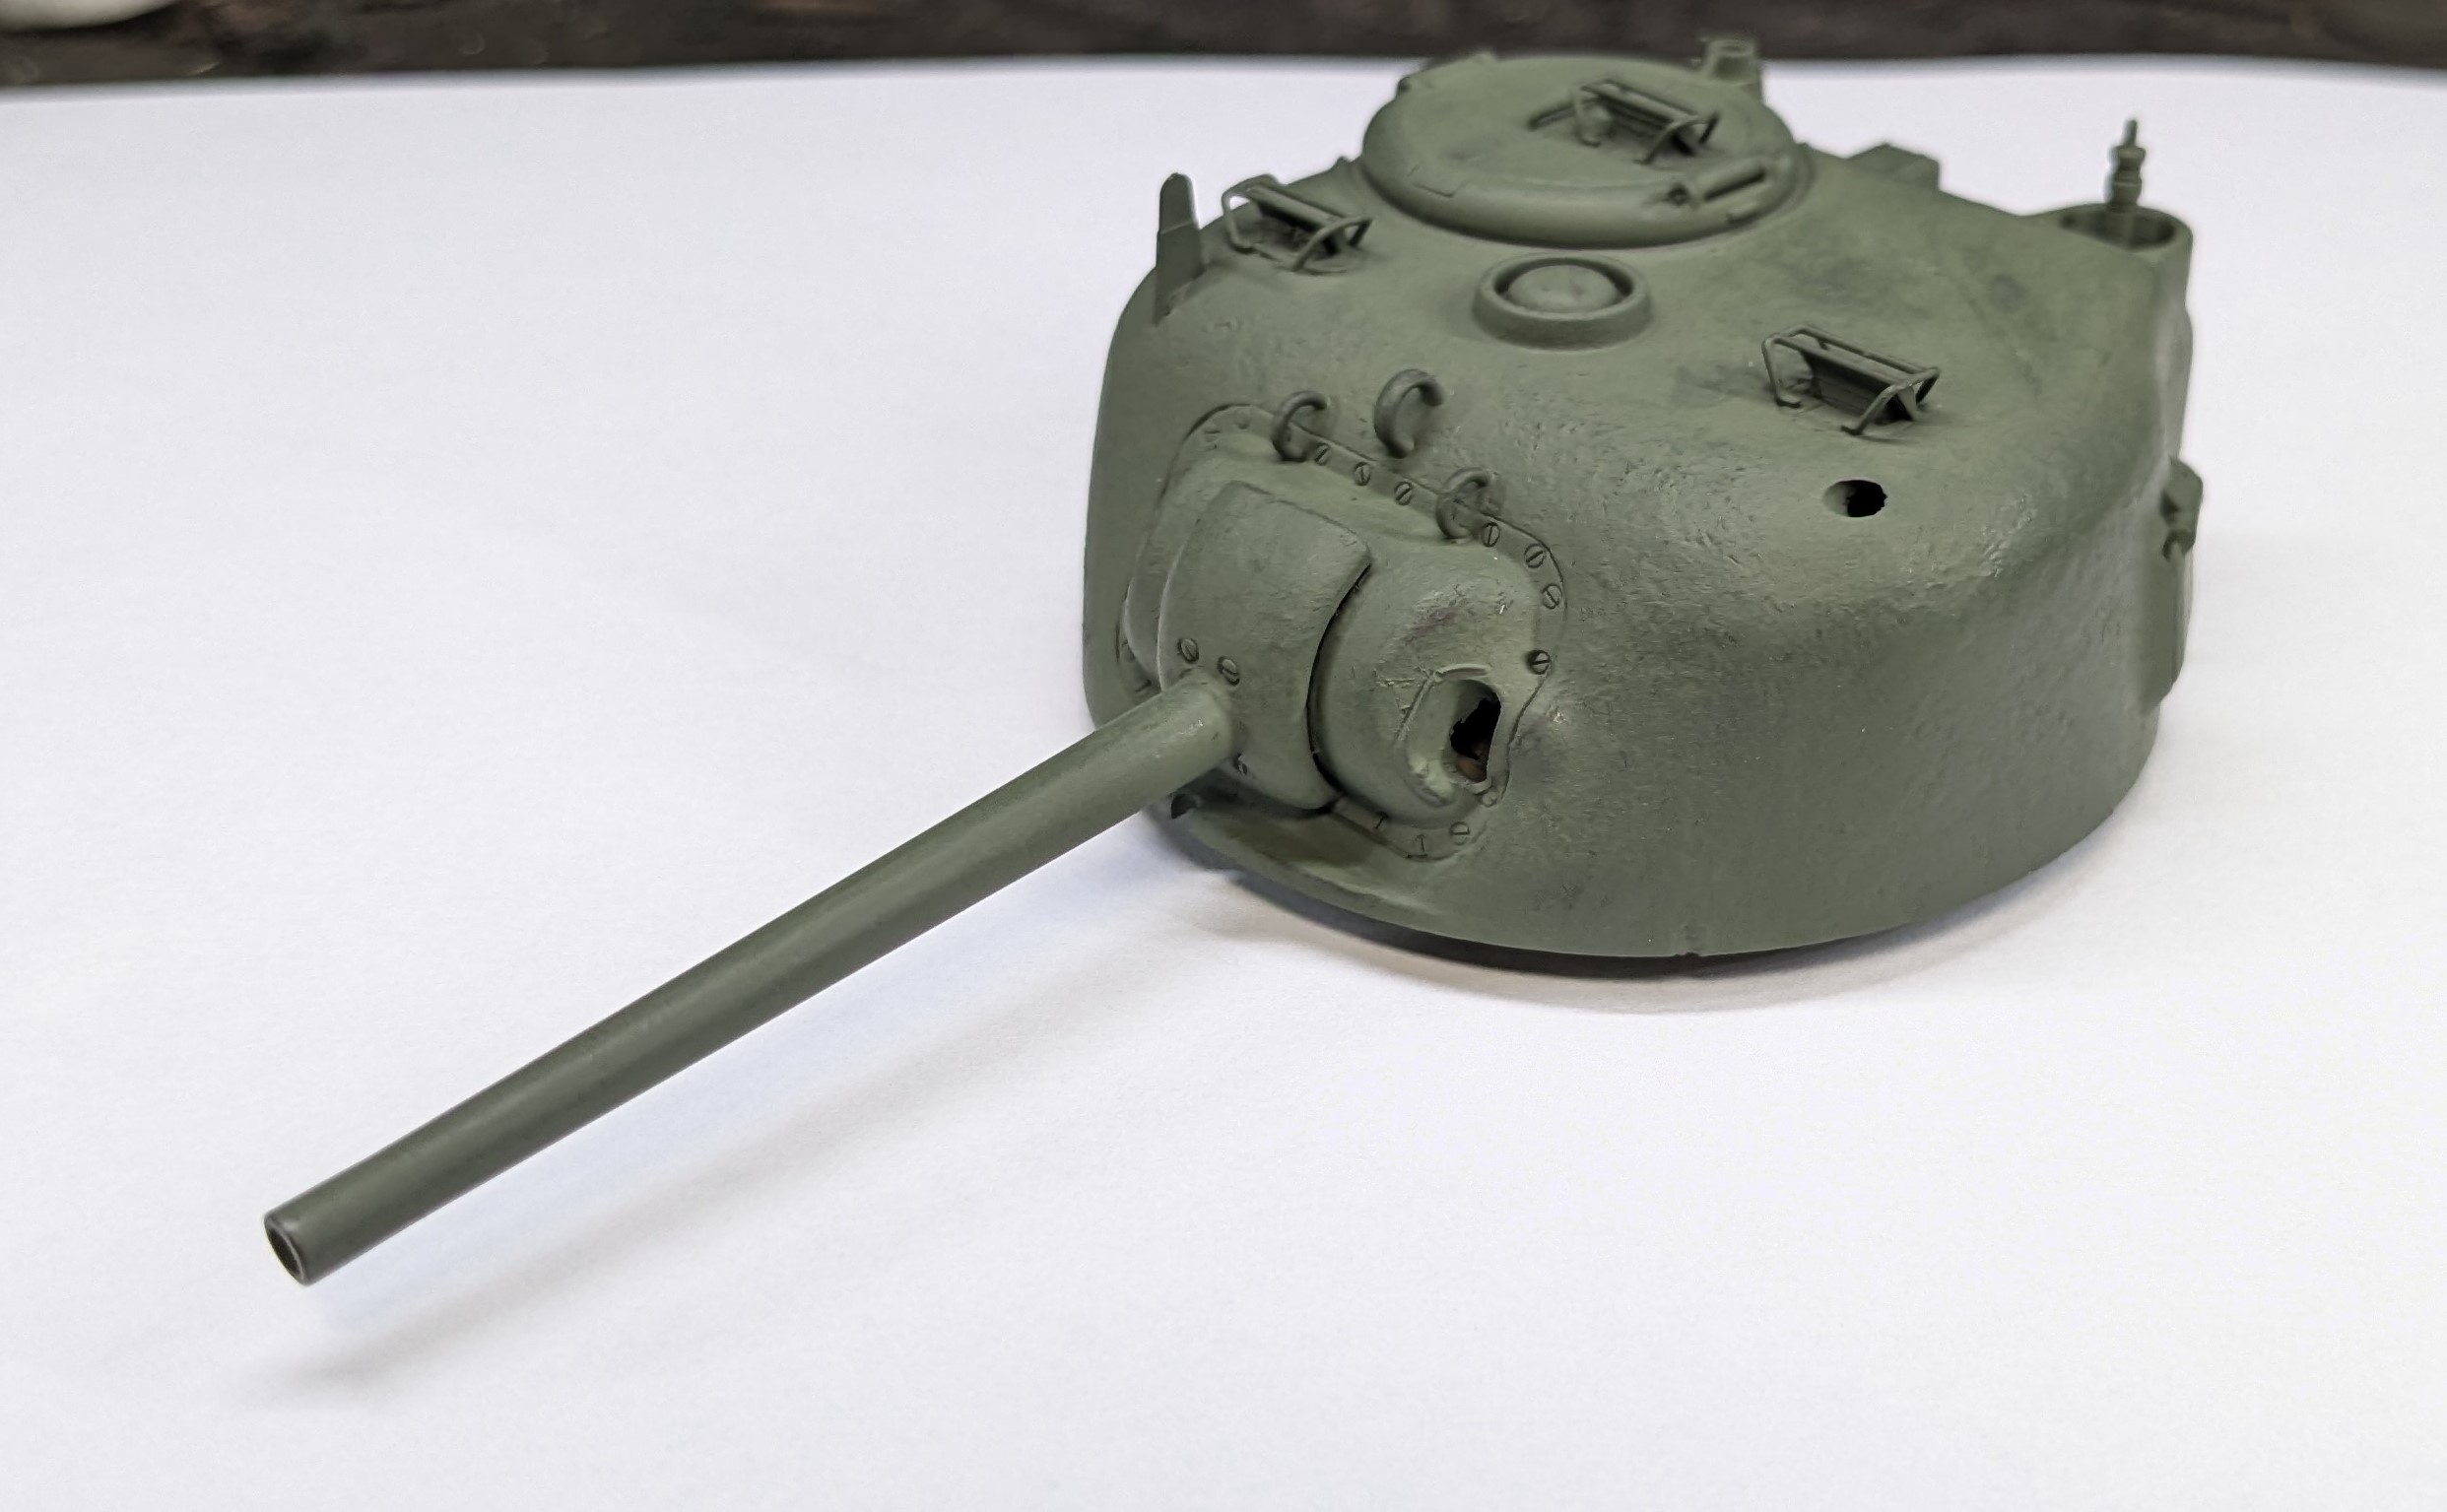
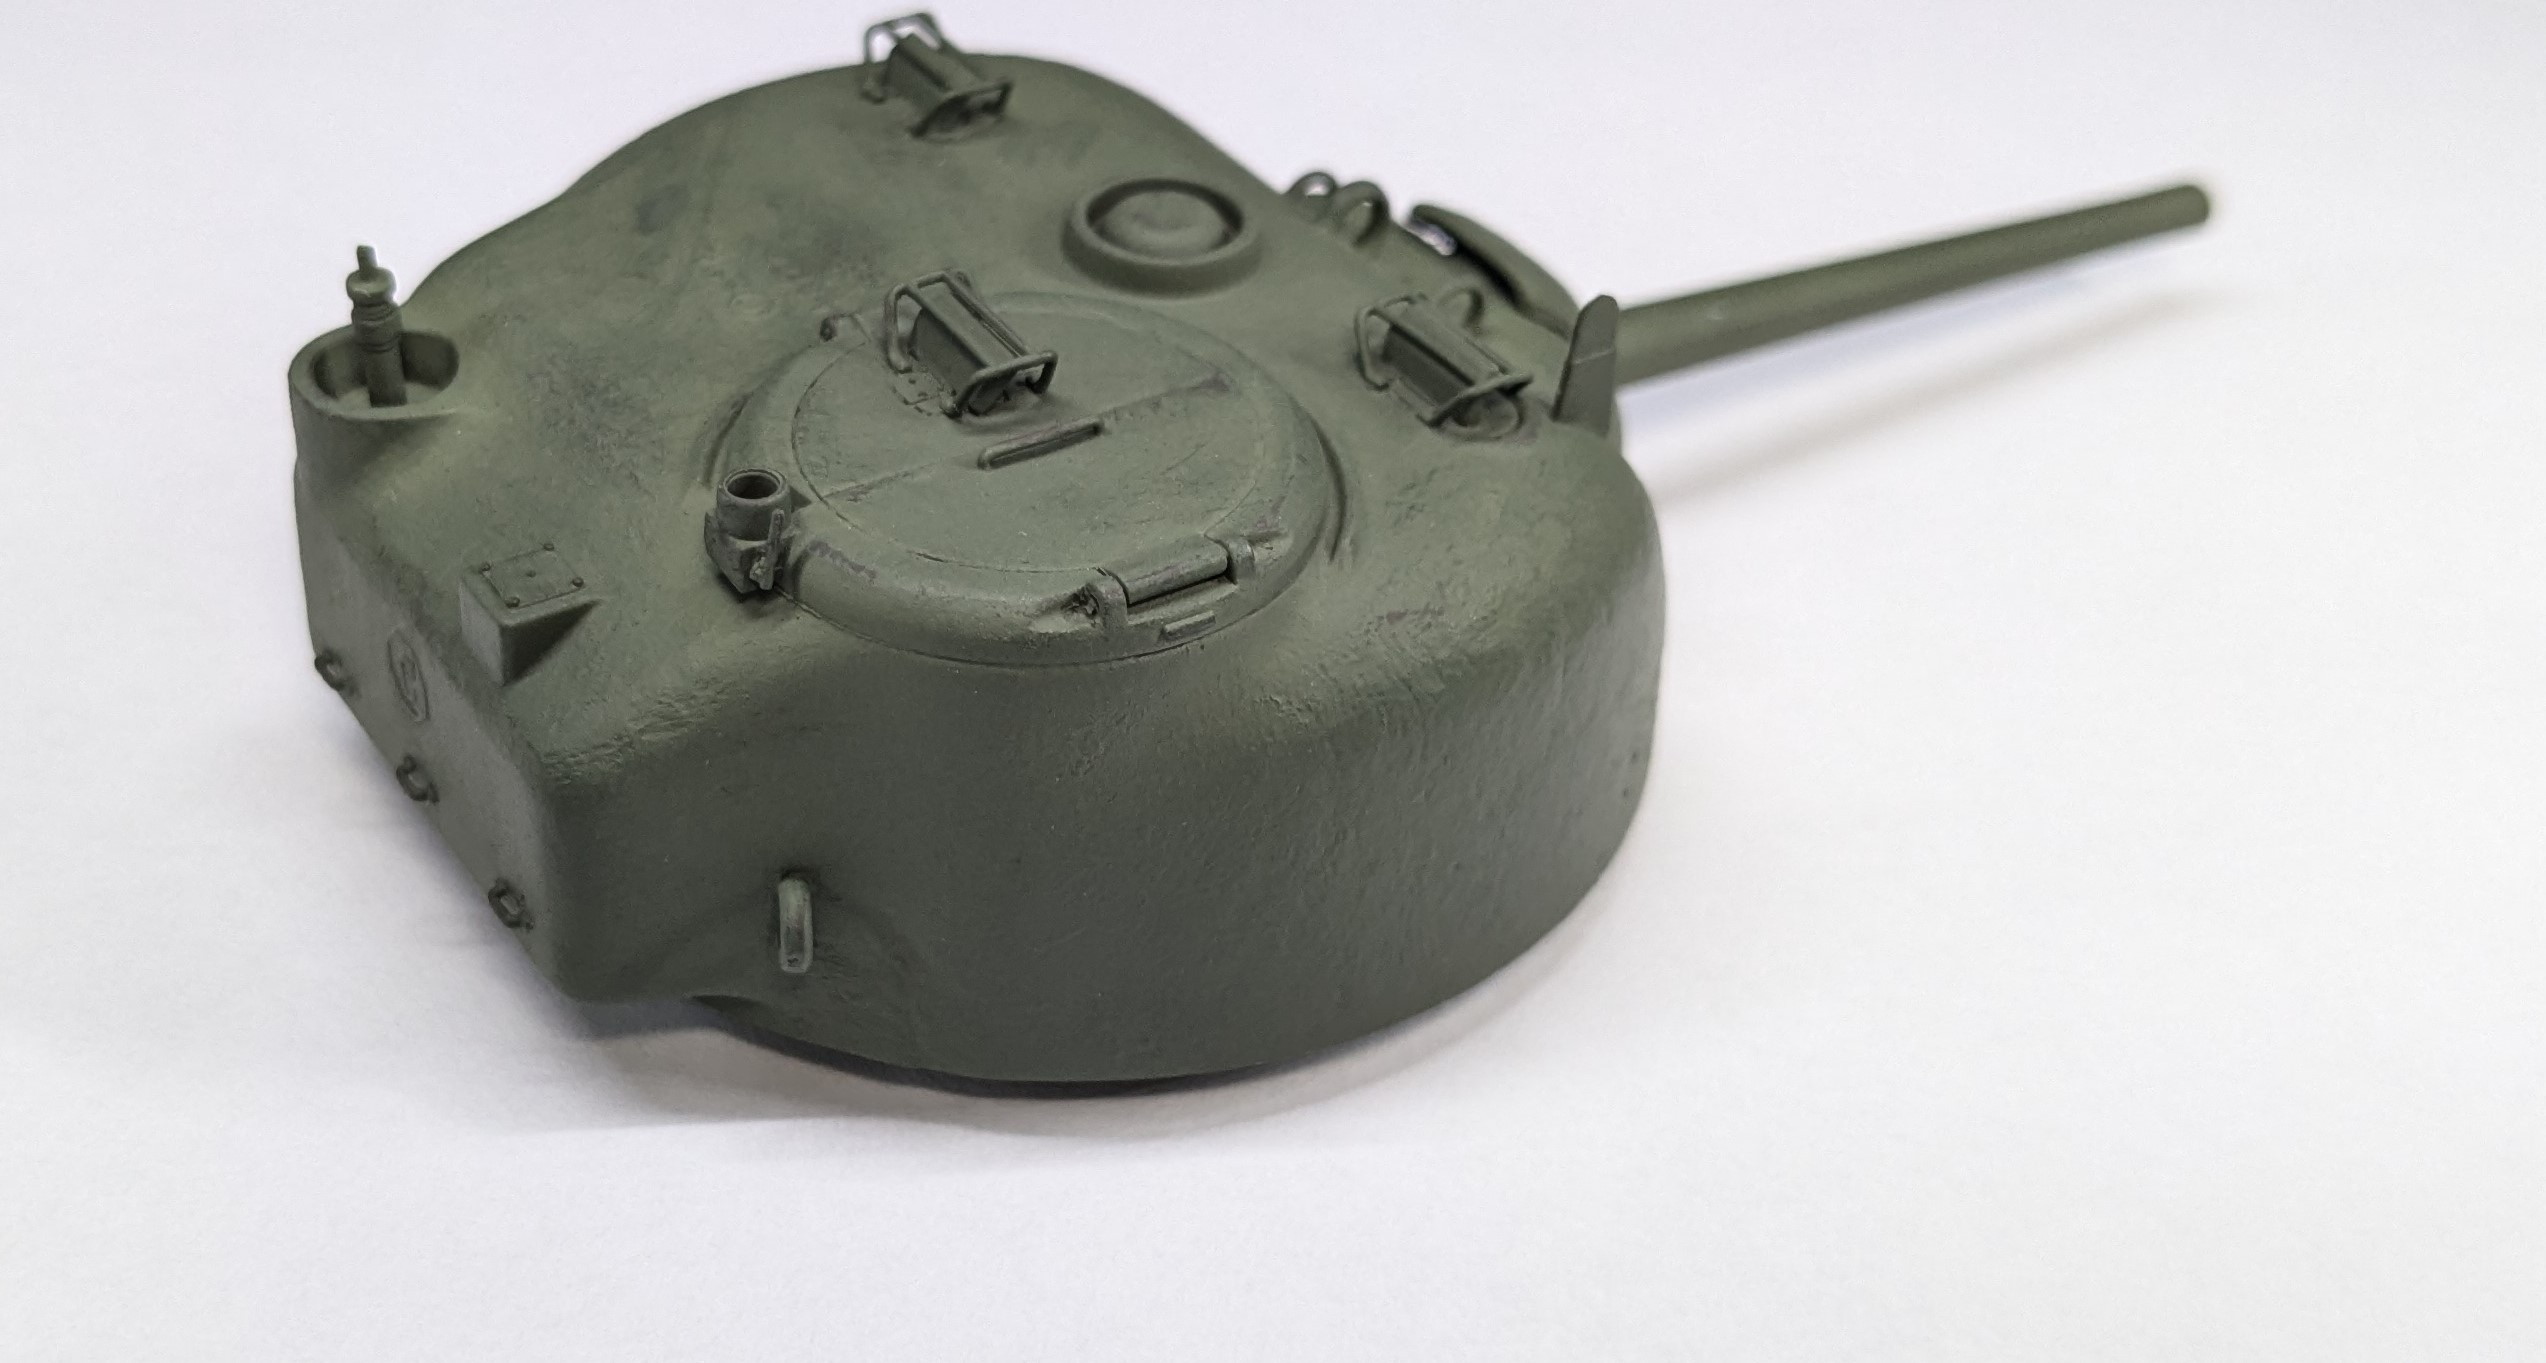
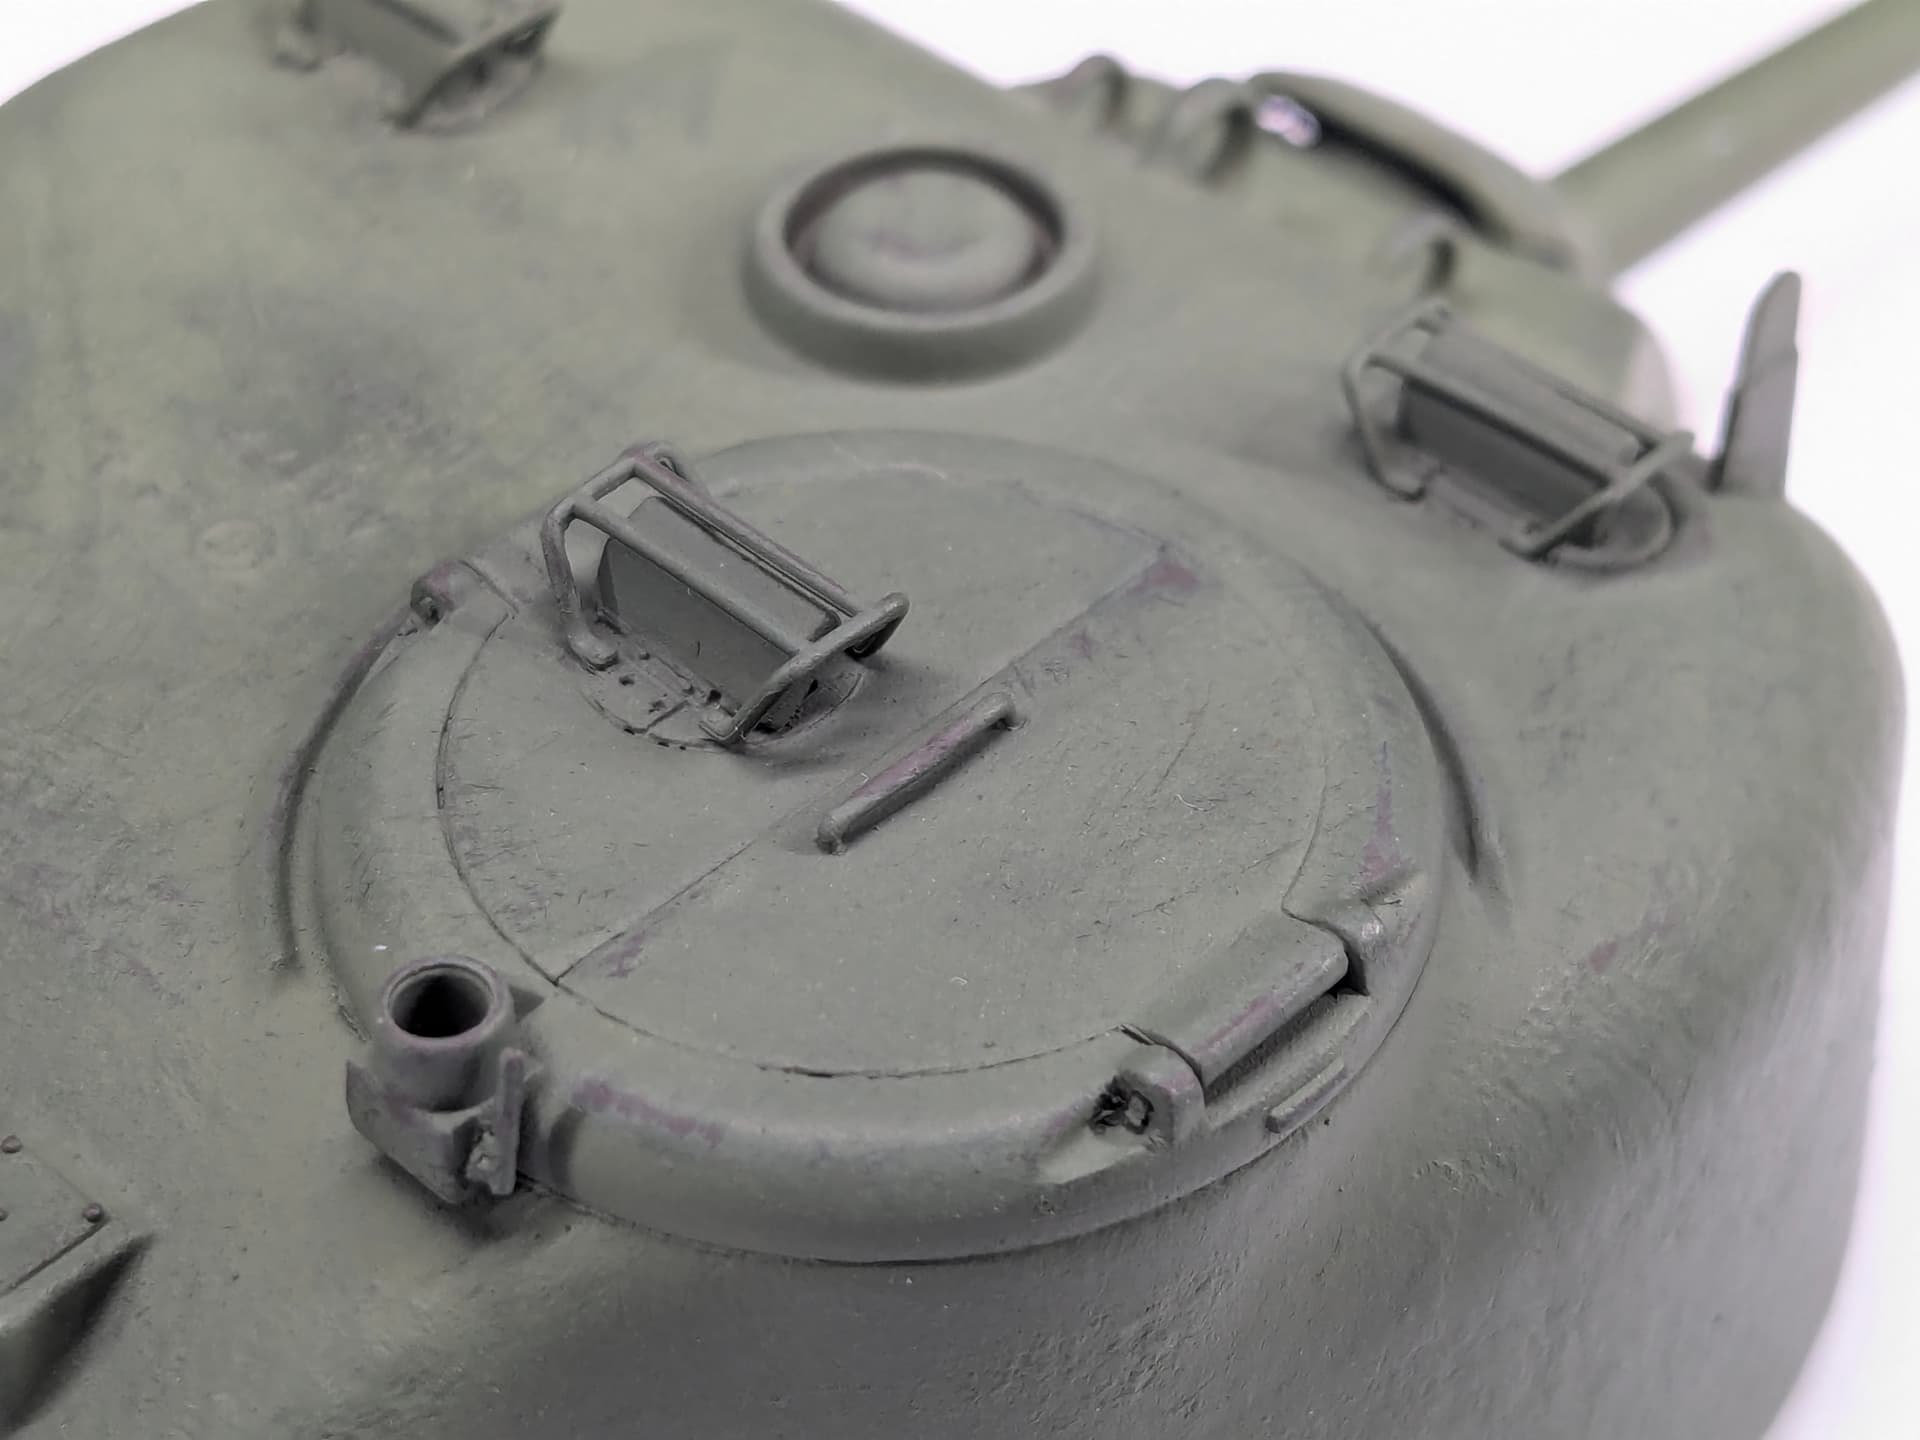
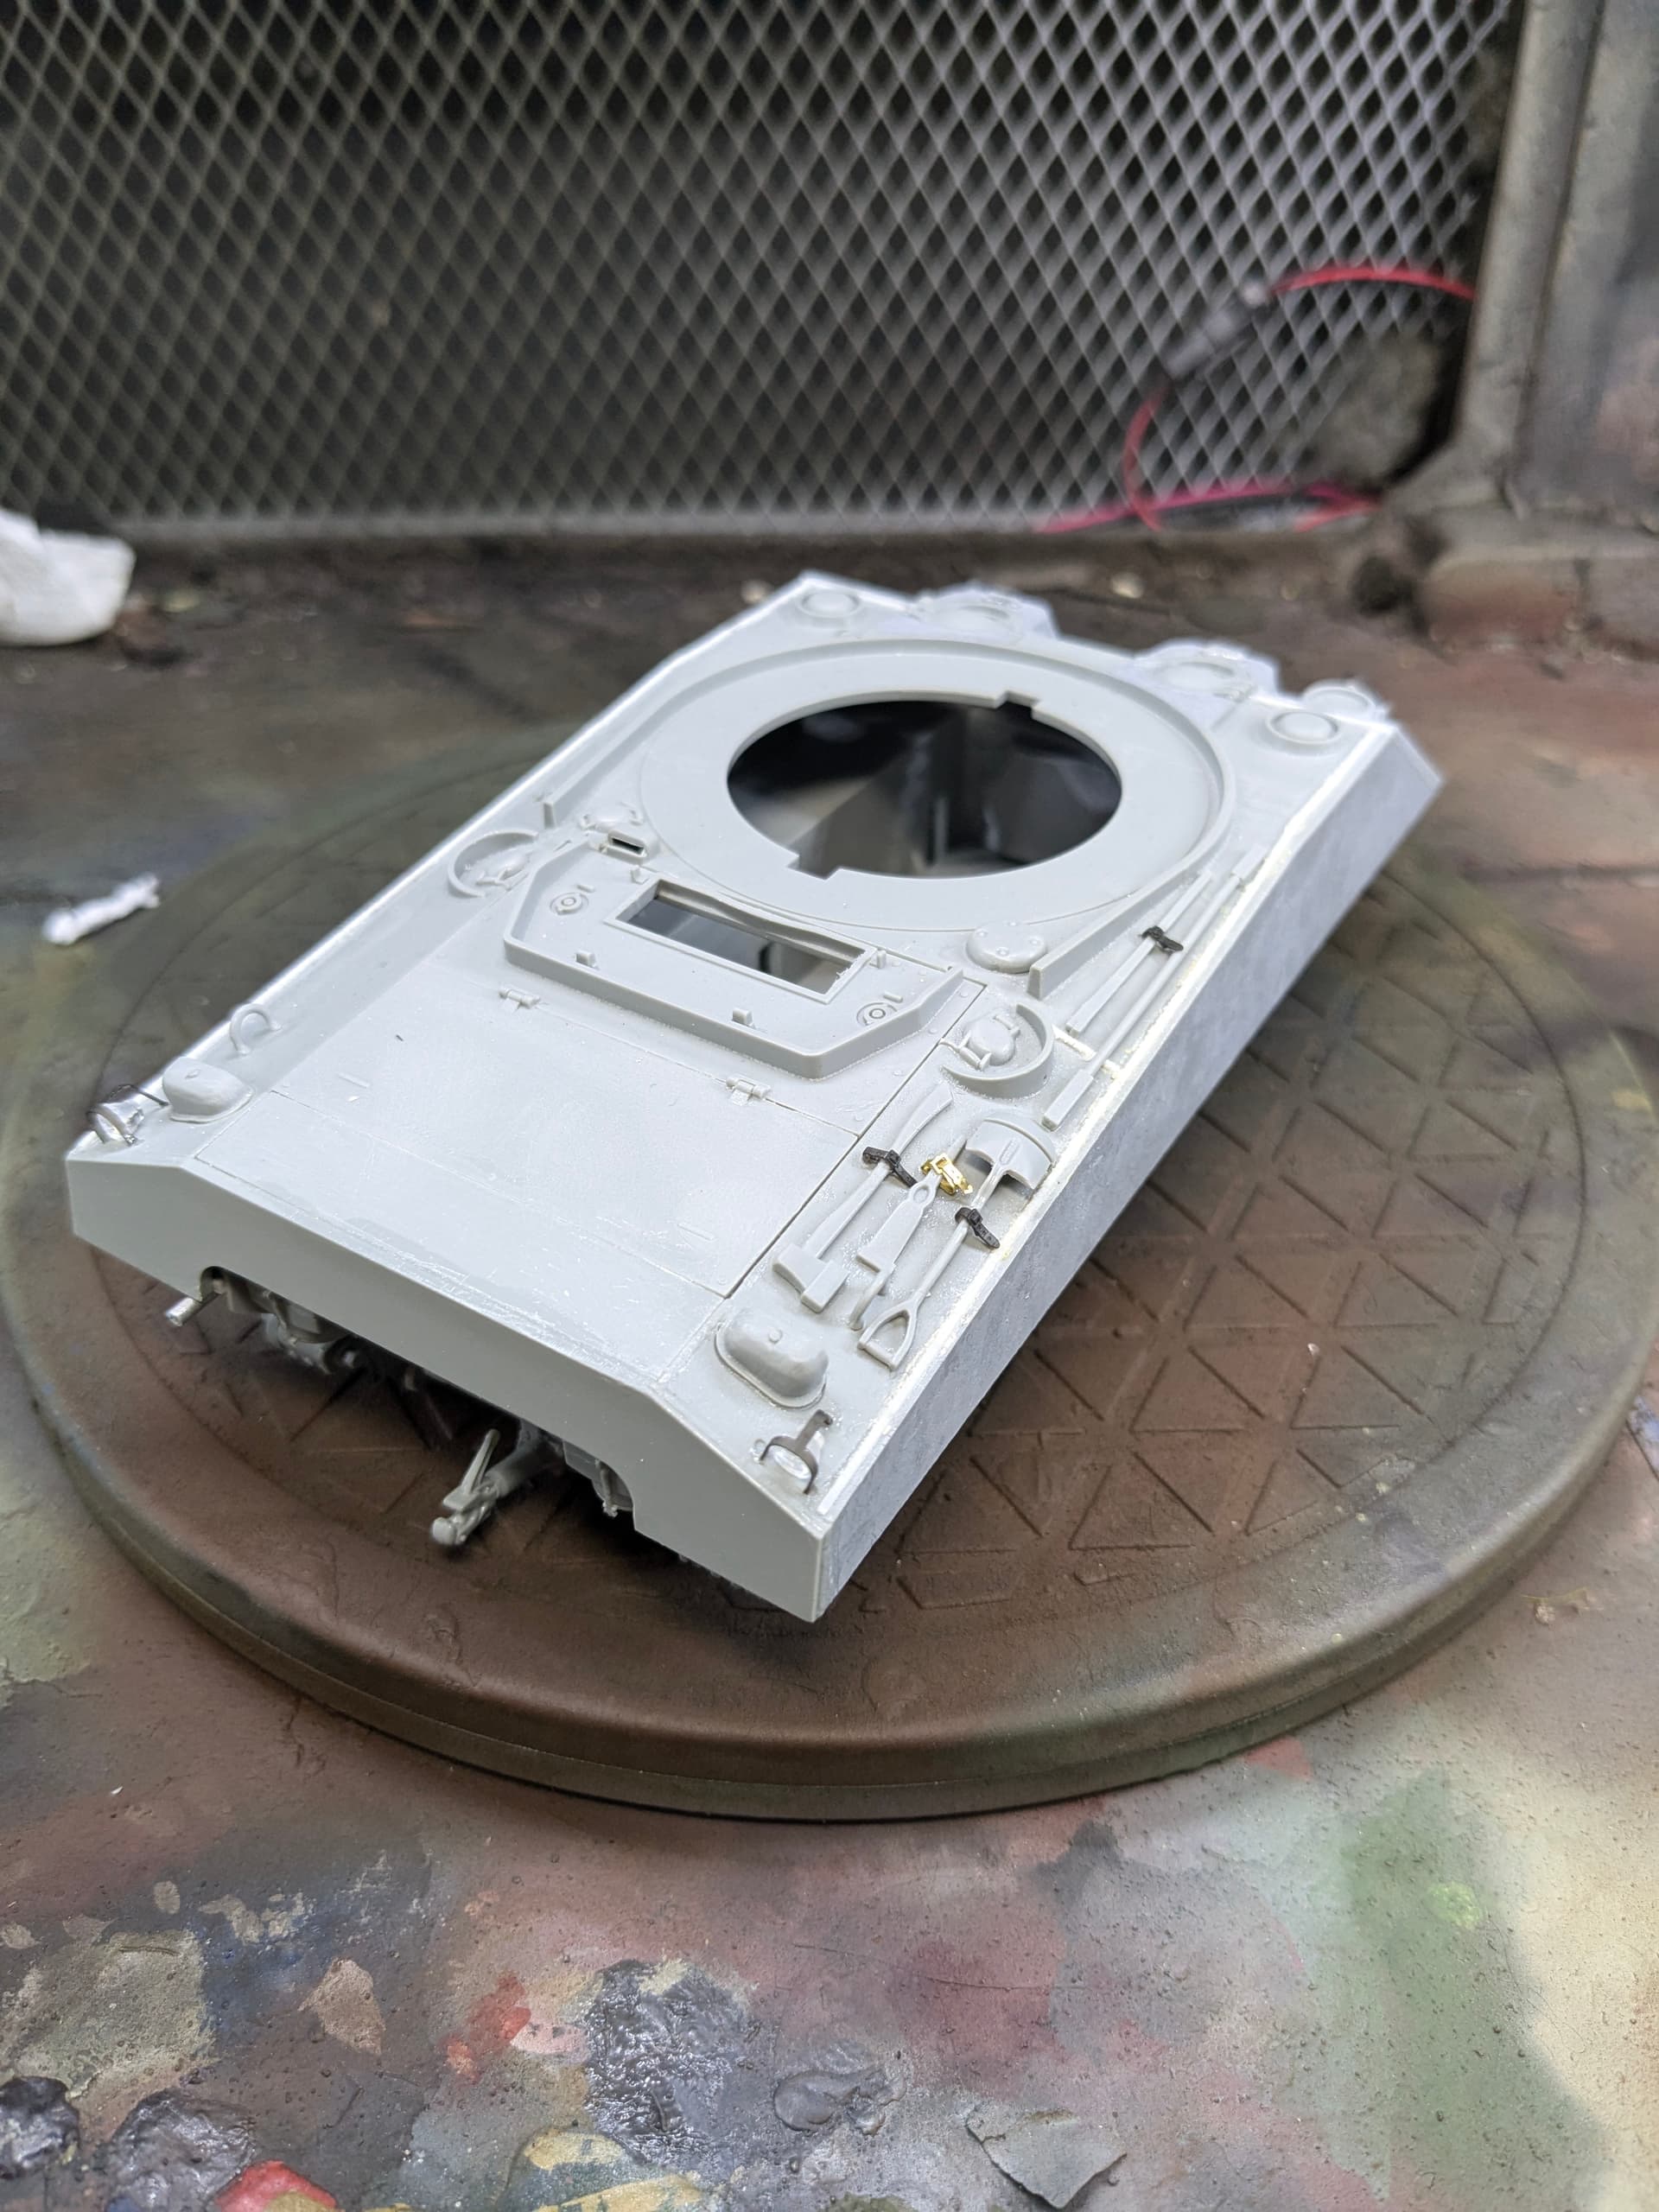
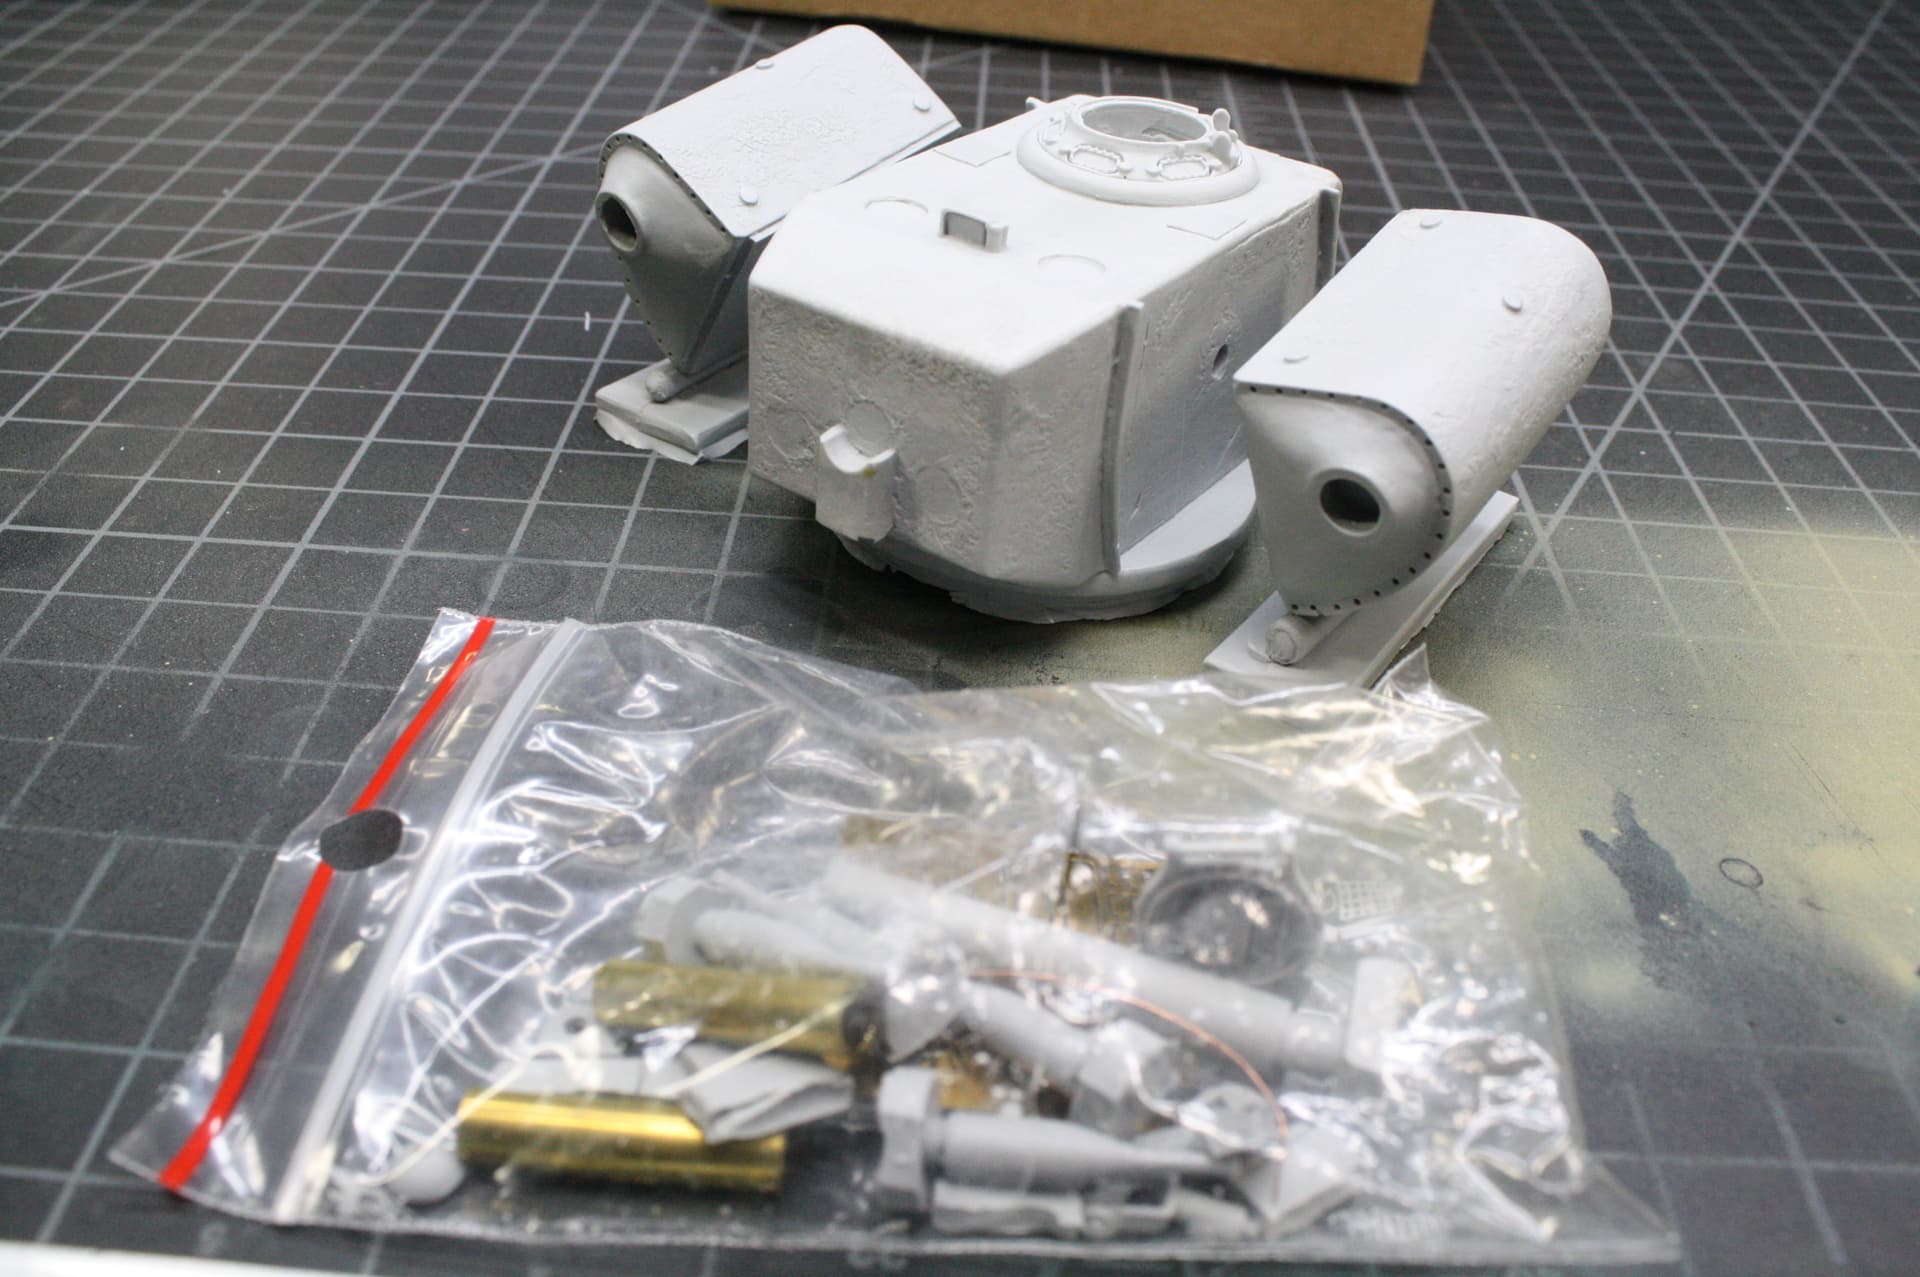
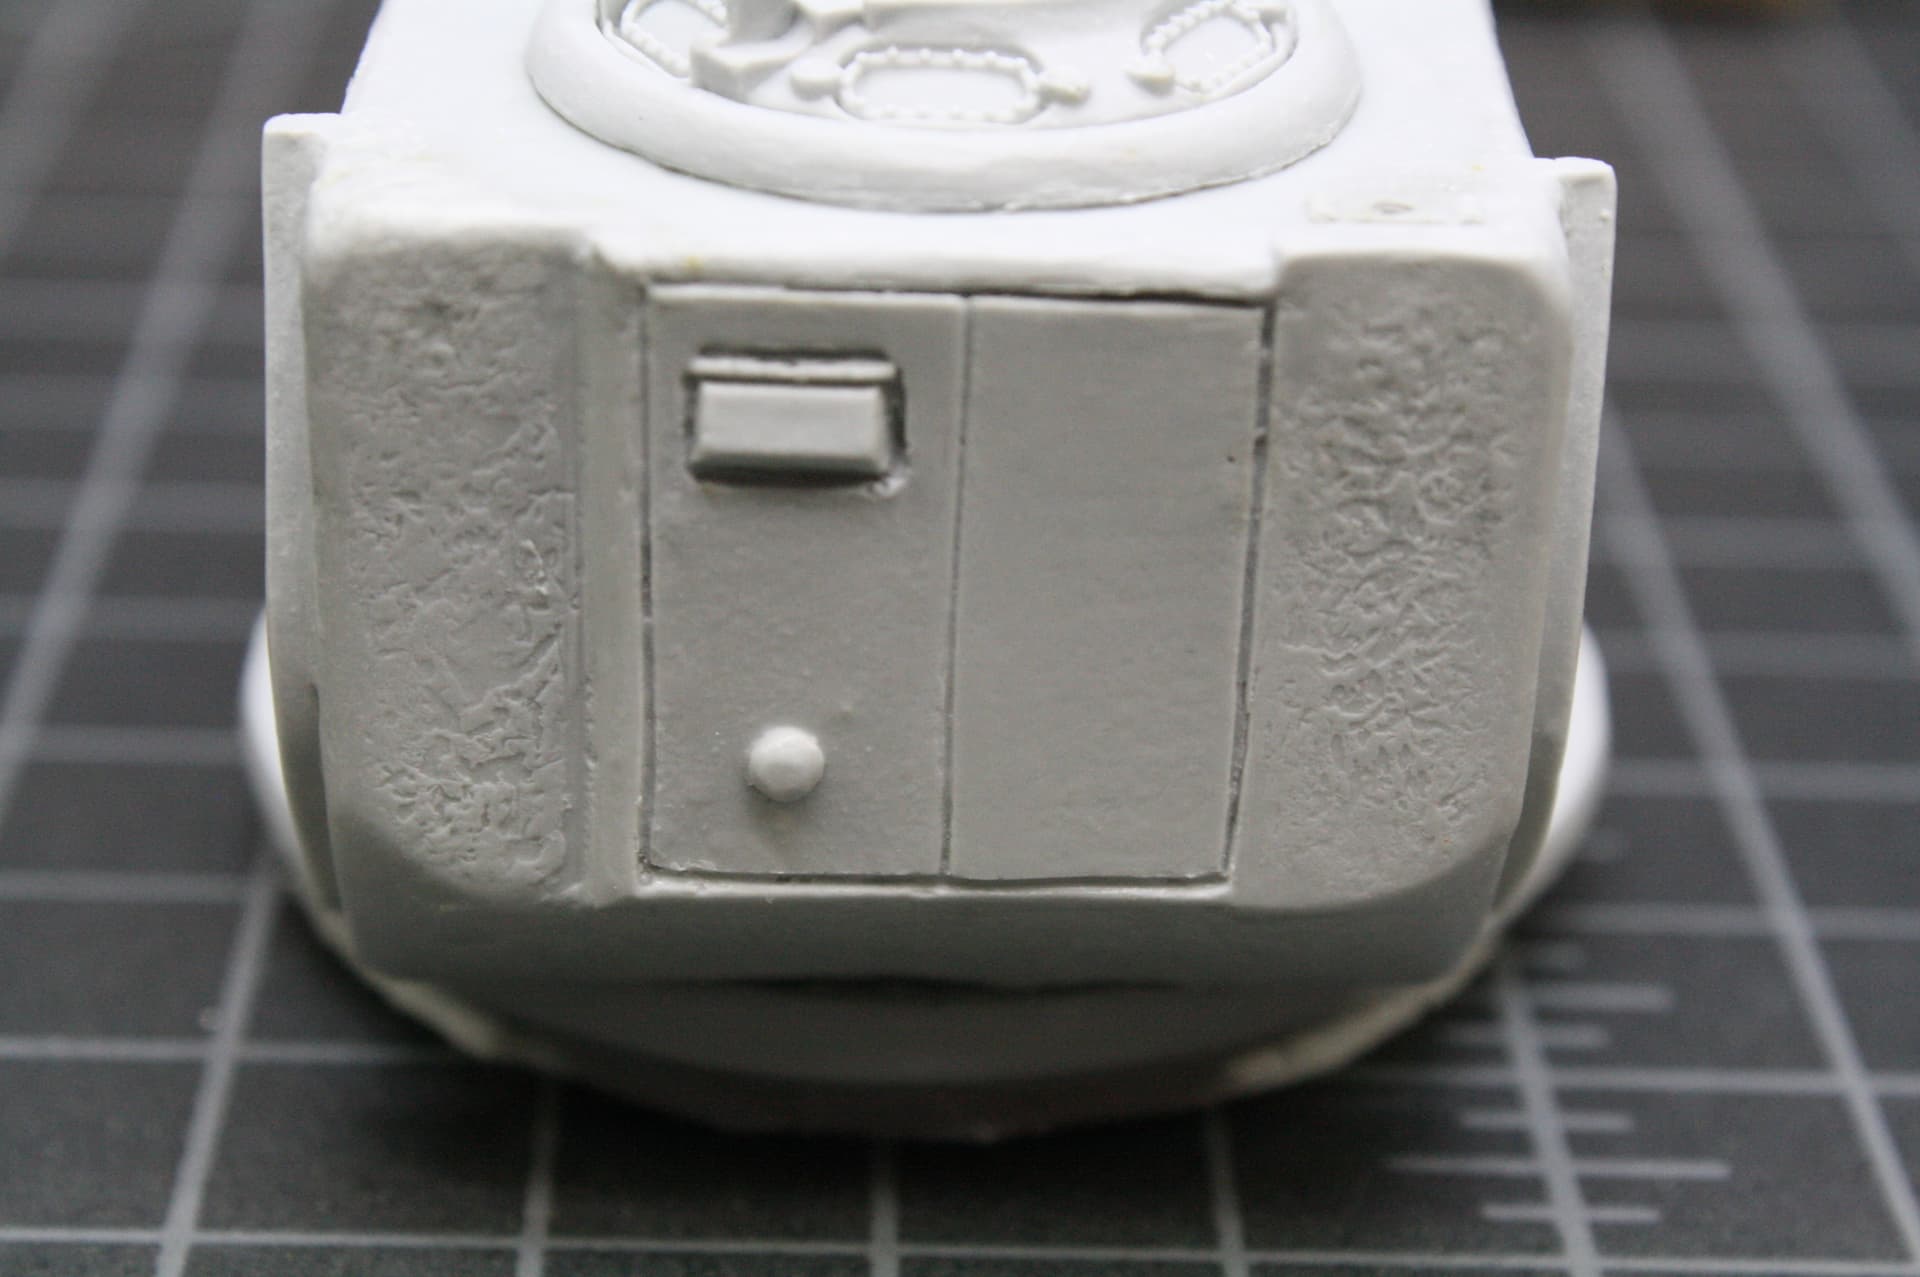
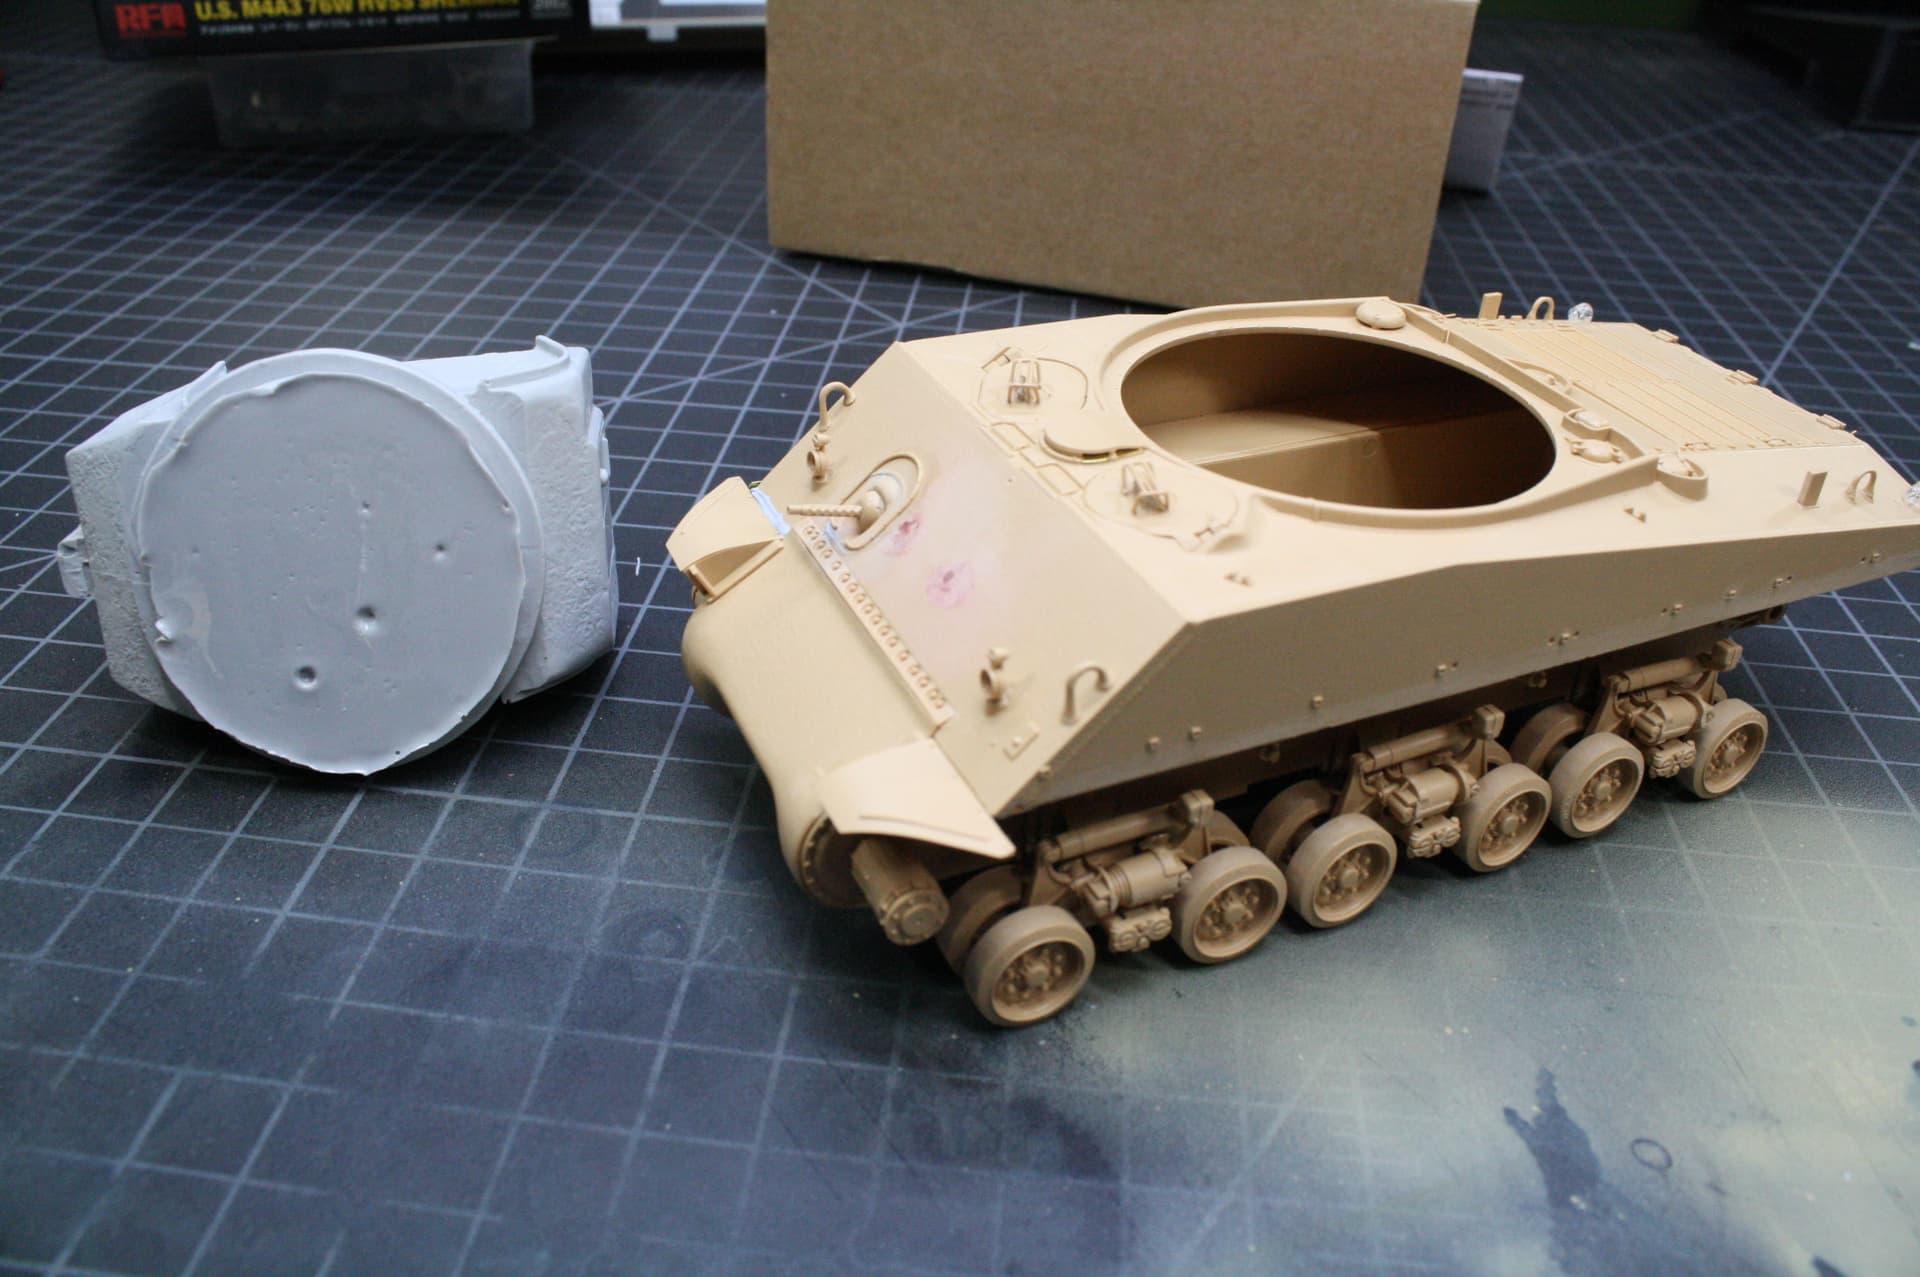
However, I’ve run into a BIG problem with the Bold Division T-31 turret. The rear door is, as you can see in the photo, horribly rendered. That pissed me off, but sanding it off and rebuilding it with Evergreen is pretty basic. The real problem is that, possibly due to resin shrinkage but not this much, the turret’s ring is too small of diameter for the hull. There is no recommended kit for the turret, so I surmised that it would fit any standard Sherman M4A3E8 model. I was wrong, and I didn’t check it until now, when I was starting on the turret. It’s a huge gap, 10mm on the diameter, and I’m not sure how to go about patching/fixing it, if it can be fixed. That flange at the bottom of the turret is supposed to overlay the turret ring in the hull. I’m sick at heart and ready to pitch the whole thing in the bin…
Bold Division T-31 resin turret set overwhelmingly NOT recommended…


11 Likes
Hi Matt, looks like you need to wrap the base in several strips of Evergreen to increase its diameter! The RFM hole does not seem to have a flange for the turret race, so in reality should be slightly smaller.
With mine (finished but not yet photographed) on the old Academy hull I found the big issue was that turret base was anything but round! I had to do a fair amount of corrective sanding before adding plastic strip…
Good luck on the deadline!
4 Likes