For things like those stowage rails you added to the turret, I would likely as not just use copper wire. They don’t need to be strong — as long as you’re not in the habit of lifting the model by gripping it just there, anyway ![]()
1 Like
You may need to look at online ordering - Walthers usually carries brass rod.
1 Like
@Jakko, I haven’t had much success in getting salvaged copper wire straight after stripping off the insulation. It always tends to retain some wave afterwards.
@barkingdigger, I am not too keen on online ordering, compared to hitting a local shop/store. Last time I was down at the local hardware store, they carried a good supply of K&S products. It’s just been awhile since I have been there. Don’t care for how crowded that center can get, or have much call to go down there.
2 Likes
Have you rolled it under a heavy block?
.")
2 Likes
Hello Everyone
I will be building Polish M4A1"WIR" from CARPATHIAN LANCER REGIMENT. The model is ILK 1/16 M4A1 with tracks, whole boogies with wheels from AHHQ Achilles kit.
[ M4A1 WIR by Mateusz Kałuża, on Flickr].
5 Likes
Welcome aboard Raven1.
2 Likes
And this is work done so far
[url=Zdjęcie WhatsApp 2025-08-13 o 21.15.52_cee83eec | Mateusz Kałuża | Flickr]
[url=Zdjęcie WhatsApp 2025-08-13 o 21.15.52_45758a86 | Mateusz Kałuża | Flickr]
[url=Zdjęcie WhatsApp 2025-08-13 o 21.15.52_9af30635 | Mateusz Kałuża | Flickr]
3 Likes
No worries Carlos - I would love to be able to shop bricks&mortar myself, but as all the shops around here have dried up I find myself with little choice. If you can support an actual shop that’s always worth the effort!
3 Likes
Or even between a ruler and a hard surface.
For Churchill, with the Sunshield rails attached to the sides, I moved on to the stowage on the front plate:
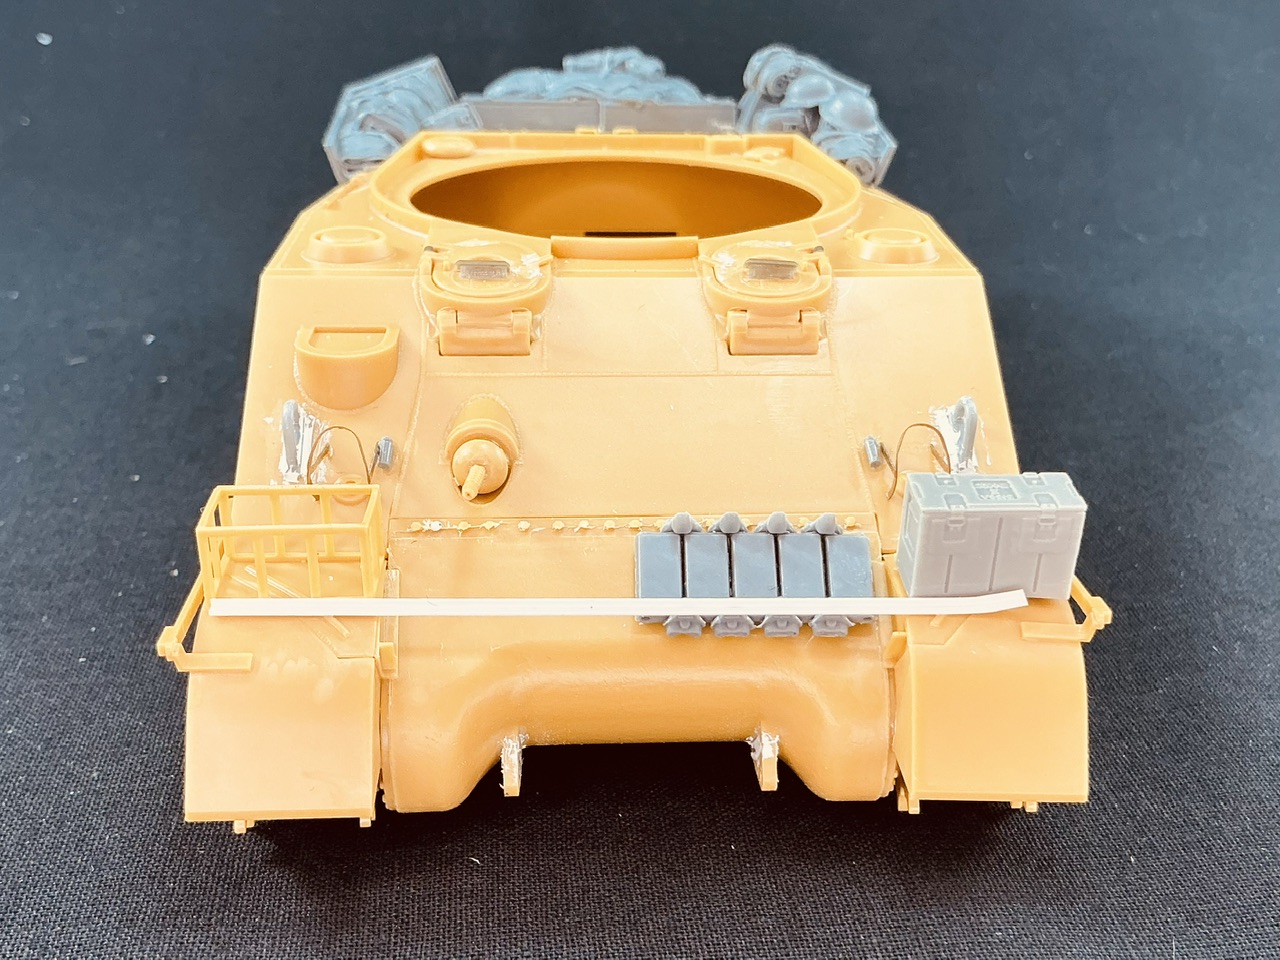
The rack comes with the kit, but I didn’t fit the three 2-gallon cans in it, because this is where the spare wheel will go. The B166 ammunition box comes from Panzer Art, with a few bits of plastic card underneath so I could glue it to the mudguard despite the strengthening rib in that. The angle iron is two pieces of plastic strip glued together, 0.75 mm and 1 mm wide and both 0.25 mm thick. The track links are MiniArt, but not glued down yet. I wonder what the square objects are that are next to them on the real tank.
And the back:
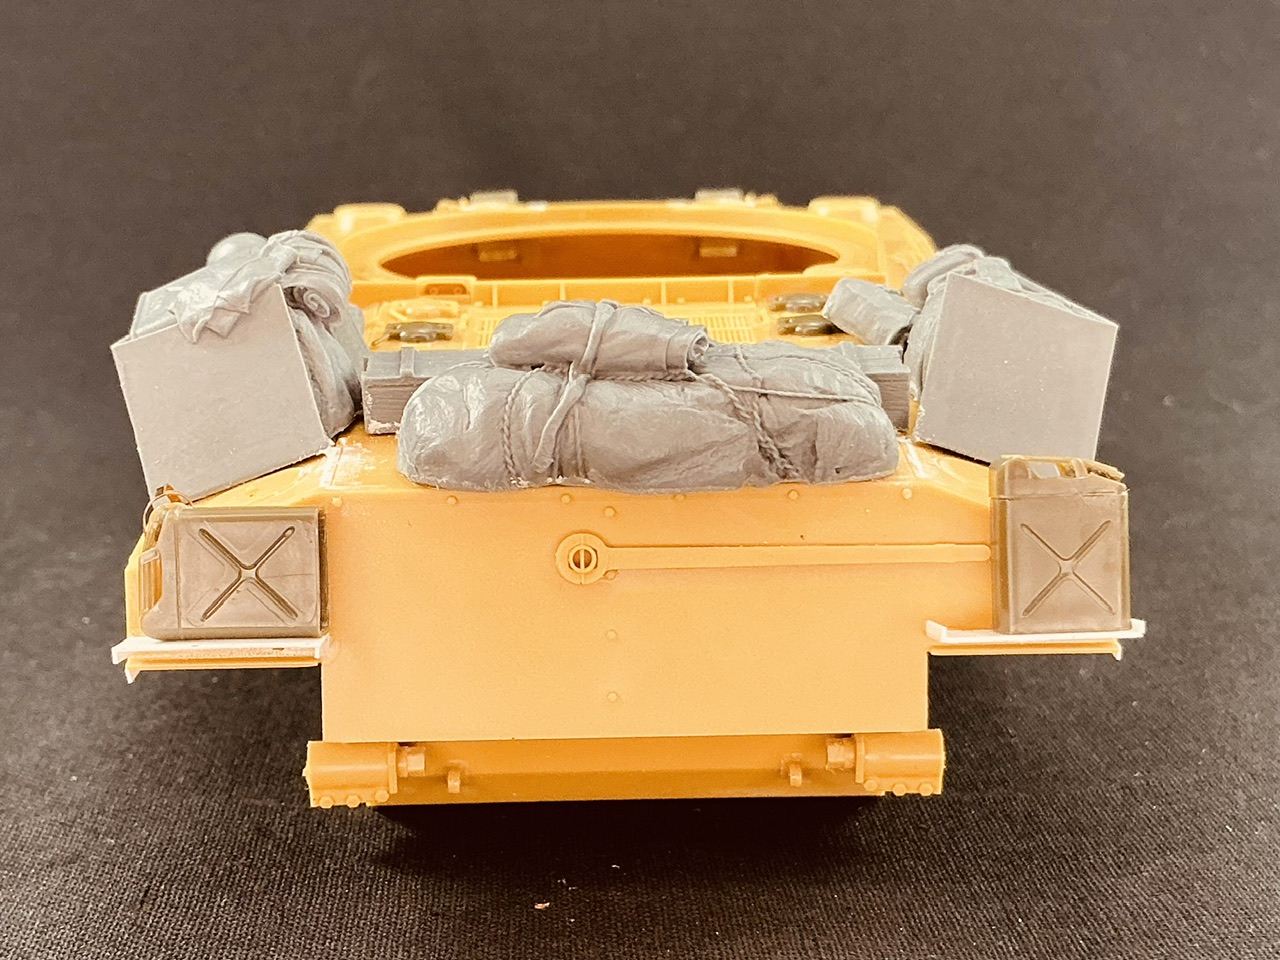
Both photos of Churchill show a jerrycan on the back, and I think they’re both for water and not for fuel. I used some from Asuka, with a little shelf under both. Oddly enough, it looks like there’s an upward edge on the one on the right, but the one on the left seems to be very thick. I interpreted that as two similar shelves from steel plate, but one installed upside-down for some unexplained reason. They’re simply made from 0.25 mm plastic card and a couple of bits of strip.
4 Likes
No I have not. So that then begs the question as to how much does the heavy block cost as opposed to stocking up on K&S brass rod?
2 Likes
The bald guy sells its for $22. Look for steel bench block.
This is where I got mine, listed as a machinist block.
Another option for wire. A mom and pop shop in NC. I know they make their own plastic train items, probably the same for the wire.
https://www.tichytraingroup.com/Shop/tabid/91/c/ho_wire/Default.aspx
1 Like
I’m sure you already have a ruler in your house, though ![]()
2 Likes
Yup - mine’s called the wife… ![]()
5 Likes
Help me out here. I always get confused painting the rear taillights on a Sherman. Pretty sure the half round part was red and the straight slot underneath was black. Is that correct?
1 Like
Yes, for the one on the left (as viewed from behind the tank) - the one on the right had black top & bottom.
2 Likes
Thanks.![]()
![]()
1 Like
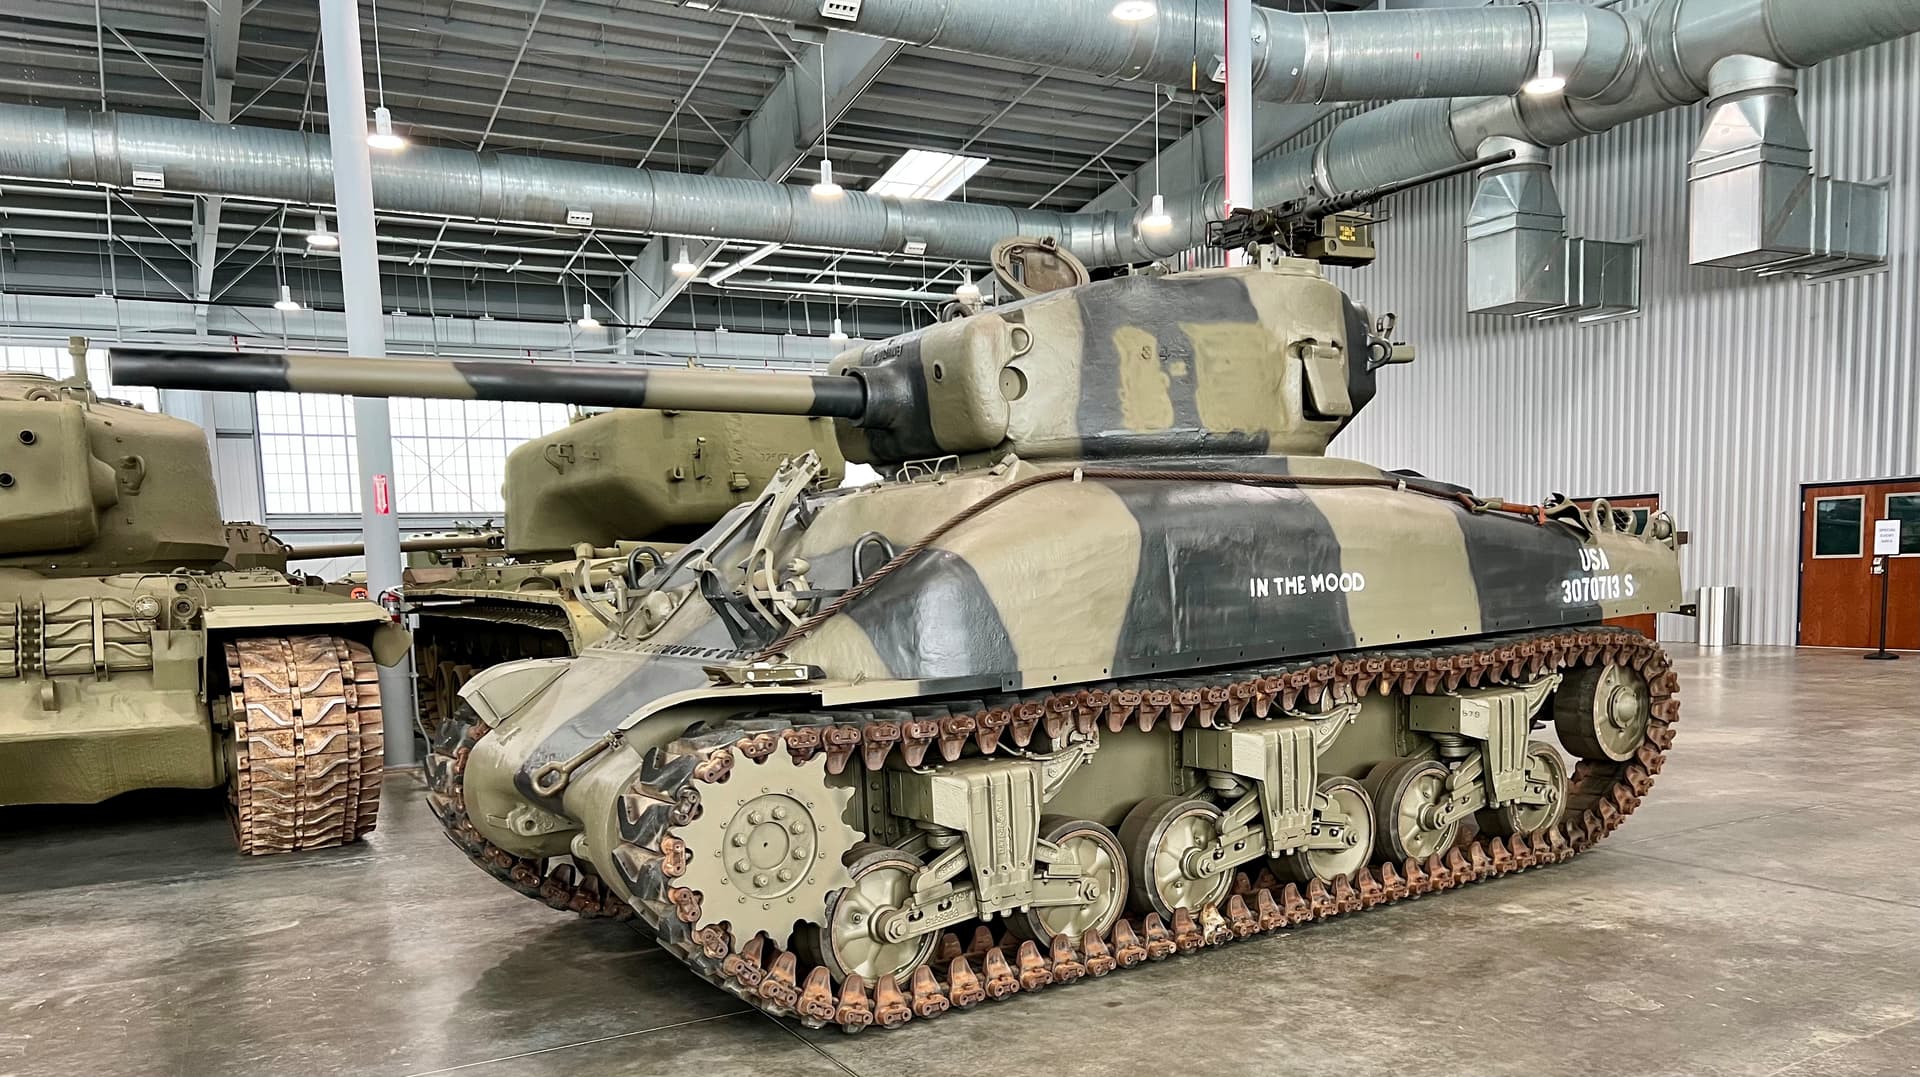
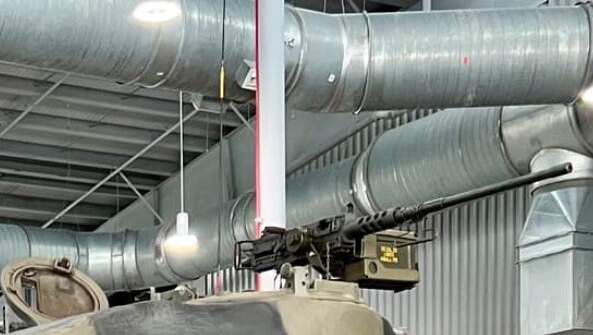
An interesting bit of trivia I found yesterday while working on In The Mood (IV)
The antennae are 3-part (no surprise there). However, they are painted at the joints to ensure that the two pieces are matched. In addition, since there were NO matching units, crews carried a set (or sets) for the frequencies used: as FM radios needed an antenna matched to the range of the frequency specified by the CEOI (communications electronics operating instructions).
If you zoom in, you might actually see this on the aerial mounted now to ITM(IV). Such a detail would be good to have on our scale models! The yellow bit you see (in front of the a/c ductwork) is that joint.
3 Likes
Upper rear of the hull
Assembly stages 15 to 18.


Be careful in step 18 because the manual instructs to leave the steel cable at 123 mm, when in fact this measurement is short. The correct value would be 147 to 148 mm, this difference is small, but enough to cause fitting issues in the final attachment of the cable support (beginning or end).
Tower Assembly
Assembly stages between 19 and 21


One of the conveyor belts finished… ![]()

8 Likes
There is also a chapter about that in the second edition of Son of Sherman, but I realise most readers probably won’t have that.
3 Likes