Shermania 2025

That really needs probably two, maybe even three links removed, if I’m any judge. Did you use the number the kit recommends? Because if so, then I know I should put in fewer when I get round to building this kit.

As an aside, do you use something like Google Translate for posting here, by any chance? :slight_smile:

1 Like

@Thomcat
The germans built a couple what ifs during the war, LOL! tanks that were totally impractical and unusable…

I have the regular M4A3 sherman 75mm fully loaded combat weight at 32 tons

I don’t have a weight for the M4A3 76mm but it had to be something between 32 tons and 37 tons.

I have the M4A3E8 at 37 tons fully loaded…so the combination of the T23 turret and the HVSS upped the weight by 5 tons?

I also have the M4A3E2 at 42 tons and this minus the HVSS, so what would the combination of HVSS, the M4A3E2 body, and the T26 turret weigh? My guess is that it would’ve weighed around 45 tons, comparable to a Panther…The Jumbo already featured a reduced gearing final drive to eliminate failures and reduce the strain on the transmission and the engine. Cross country it probably would’ve done a lot better than the lighter Jumbo with the HVSS suspension even 3 tons heavier it would’ve had better flotation with lower PSI. I would still have to research the weight difference of the uparmored turret on the jumbo and the T26 turret but I don’t think it would’ve been that big of a difference.

The Pershing had some issues that the M4A3 didn’t have but were all of them attributed to the added weight? I mean, it was a whole different tank with a different set up, everything was pushed to the rear and bunched up together, the engine, transmission, and the final drive. How much did that play into some of the mechanical issues that it had? Mechanical issues that the Sherman didn’t have.

As a means to understanding if it was plausible to field an HVSS M4A3E2 with T26 turret, the IDF was still using the less powerful radial engine on their initial version of the 40 ton M51 and they never upgraded the final drive with more powerful gearing like had been done on the Jumbo, it had HVSS and the 105mm and modified turret upped the combat weight from the original M4A1 76mm HVSS 35 tons to 40 tons.

I think a HVSS Jumbo with T26 turret at 45 tons with the modified gearing on the final drive would have been comparable to a regular jumbo in terms of power but it would’ve also had a more stout suspension less prone to failure and better cross country performance.

As far as what ifs go, all the parts were available at the time, it could’ve happened, especially if the war had lasted longer like the 46’ folks like to fantasize about…as for advantages of fielding an HVSS Jumbo T26 over the Pershing? Outside of the Turret parts all the parts to maintain the tank in the field were already shipped and available in theater so you didn’t need to send out entire new stocks of replacement parts for an entirely new tank…there were events that led to a T26 turreted M4 almost happening so I think it’s a fun “what if” to toy around with…

3 Likes

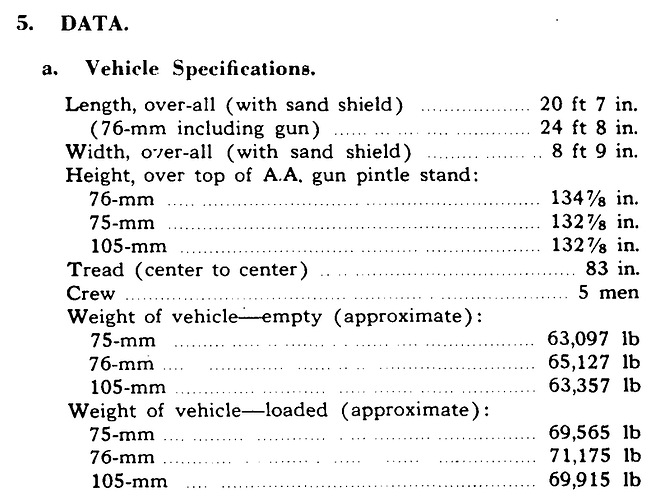
They’re in TM 9-759 Medium Tank M4A3 of September 1944:

The weights you quote seem to be for the loaded tank, and converting the units above to real-world ones, the M4A3 (75 mm) weighed about 31.6 tonnes and the M4A3 (76 mm), 32.3 tonnes.

1 Like

The British Sherman wight 33 ton UK

Title amendment

3 Likes

That would depend on the base tank: a VC would weigh more than a IC. Also, the tank in the photo is just a regular Sherman V (albeit a command tank), not a VC :slight_smile:

1 Like

The Tank still has a 33 ton bridge marking

Sherman Firefly Specifications
Designed: 1943
No. built: 2,100-2,200
Weight: 34.75 long tons (35.3 tonnes
Info
From UK Defence Forum

1 Like

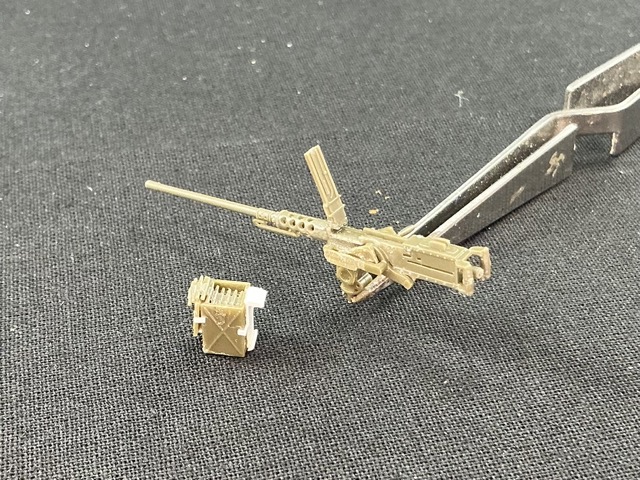
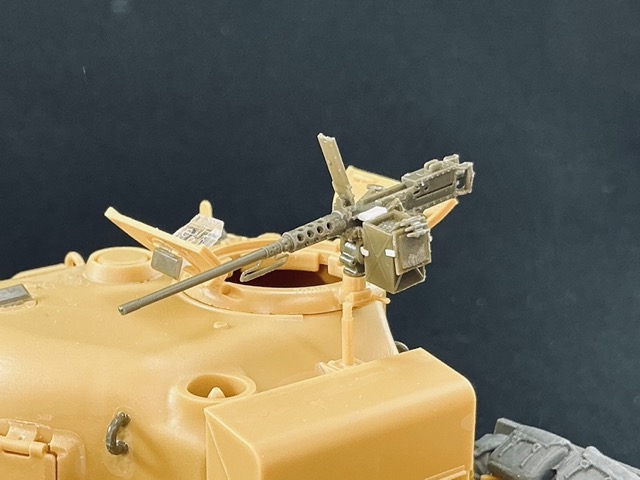
The sprue with the .50-calibre machine gun was also missing in my kit … I almost feel cheated, if I’m honest, but I’ve got something like five of those sprues lying around so it’s not as if I can’t put a machine gun on this tank :slight_smile: On the real Churchill, there was a cover over the machine gun when it came ashore, but I don’t want to build it as it was at that particular time, so I’ll add the machine gun as ready for use. And because the top cover is a separate part, I thought it’ll be nice to show it open for once:

I added some details to the ammo box, as well as a correct holder for it, which it clipped into to fix it to the mounting. That is to say: all the white stuff on the right side of the ammo box is actually part of the mounting, but was easier to build onto the box, while I filed off the holder for the later (larger) type of ammo box from the mounting. All these details come from a thread on the Maple Leaf Up forum.

Annoyingly, I broke the spade grips in half when I was cleaning it up, and glueing it back on was not easy. And then it broke off again the next day when I was filing the ammo box holder off the mounting :frowning:

On the tank (but still loose):

9 Likes

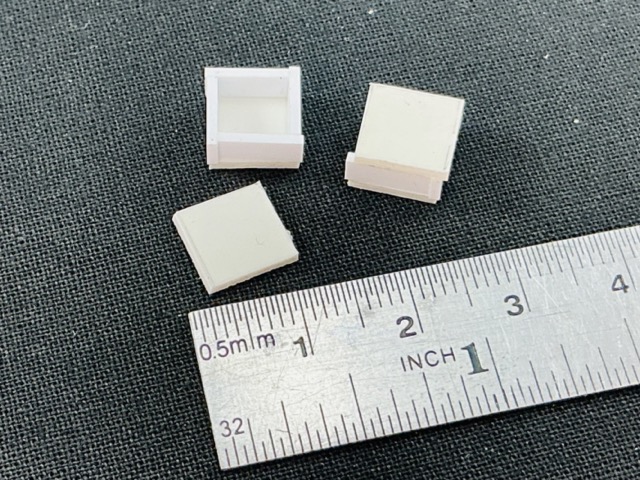
Now the cans to go on the front. On the glacis, next to the spare track links, are four-gallon water cans — which I didn’t know even existed until someone told me that’s what the things in the photos of the real tank are. I made them from plastic card and strip after he supplied measurements from 3D-printed ones he has:

It’s four squares of 1 mm plastic card, 8.5 mm on a side, and eight pieces of 1.0 × 3.2 mm strip. As a modeller, you don’t need to be a joiner: by glueing those pieces of strip as in the photo, you can avoid having to make neatly bevelled corners :slight_smile: Once the glue is properly dry, it’s just a matter of cutting off the protruding bits and then filing everything flat, possibly applying a little putty as well. Then I’ll still need to round all of the corners for the shape of the can.

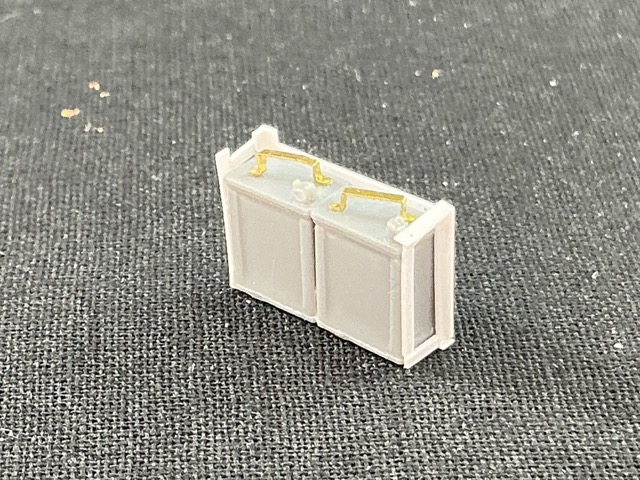
On the right mudguard was an odd rack hold two, two-gallon POL cans (Petrol, Oil, Lubricants). That rack looks like it was cut from another one, which happened to hold two cans nicely. The front/top is open, as if this is really only half of a larger rack. I made it by first making two Bronco cans and glueing them together, then adding the rack from plastic strip around them:

Those Bronco cans are very good for this, because the bottom is also replicated faithfully, with corrugations rather than flat like most of these cans in plastic or resin. After taking the photo, I did discover that I had missed a small piece of strip that should stick out from the one that’s frontmost in the picture.

6 Likes

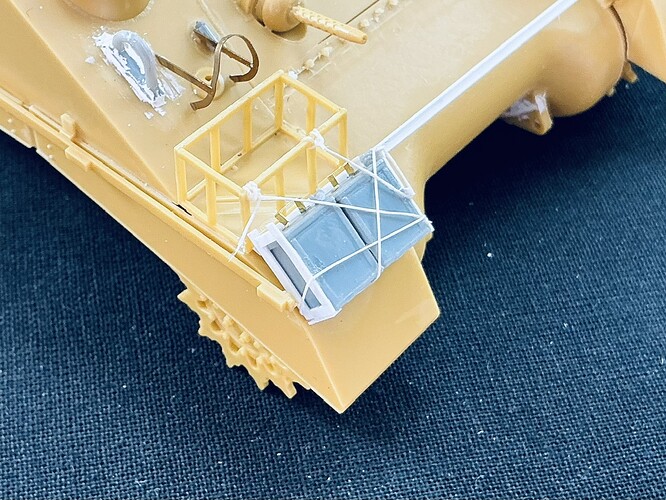
The 2-gallon POL cans on the tank:

That rope was fun, I had to do it in a few stages to let the glue dry where it goes around corners. I have the strong impression that nobody in Churchill’s crew was a sailor or a boy scout :slight_smile:

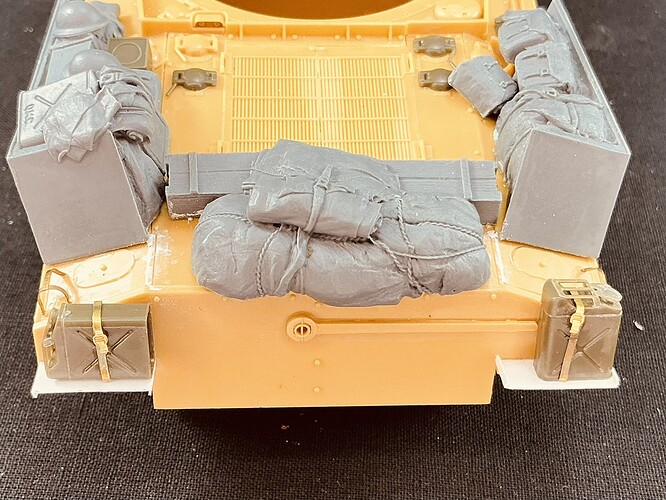
On the back, I added straps to the jerrycans:

These are from an ancient Accurate Armour set of American jerrycan holders.

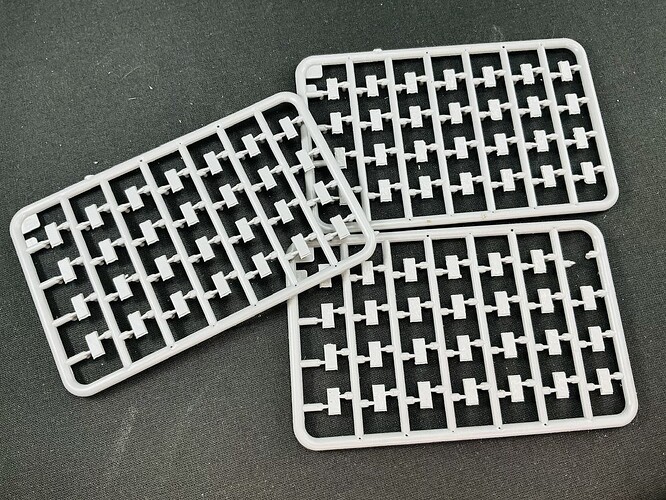
Using a motor tool, I distressed two sprues worth of track blocks:

First, I went over them with one of those ceramic sanding drum type bits, then with two different routing bits. The important thing is not to make the effect this too regular, so for instance, don’t be tempted to add more texture only in places where there isn’t any yet. Once I was done, I scrubbed all the loose material off with a fine steel-wire brush, and then I could cut them out and put them in a storage box.

I don’t think I’ll need to do more than two sprues. I counted how many outer blocks will be visible on another model, and got to under thirty per side. Since there are 28 block halves in a sprue, two should be enough. However, one is missing because I slipped and cut through the hole for the end connector, so I took that block out of the sprue immediately to avoid coming across it later when I’m building the tracks.

8 Likes

One thing I forgot to mention is that I removed the taillights. When figuring out the jerrycans on the back I was already wondering whether they were still there, but decided to leave them on as I wasn’t sure. However, photos of other 3 CLY Shermans usually show them without, so I pried off the guards (easy to do accidentally, but oddly difficult on purpose) and removed the lights.

3 Likes

Continued excellent work here. Makes me nervous to try to actually do anything myself. However:

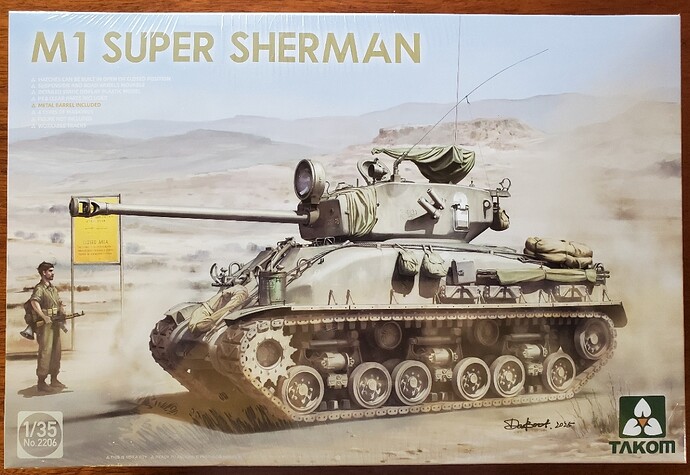
Yeah baby! I’ve been waiting a long time to do one of these from Jerusalem in '67. My feeble attempts to convert one using a Dragon M4A1(76) and an original Dragon M51 kept bogging down. But now that I have this beauty, I’ve run right out of excuses.

I don’t pretend to be any kind of Sheman expert or even a true armor builder, but I’m going to give this one my best shot. Expect a lot of questions.

Michael :israel: :face_with_tongue:

8 Likes

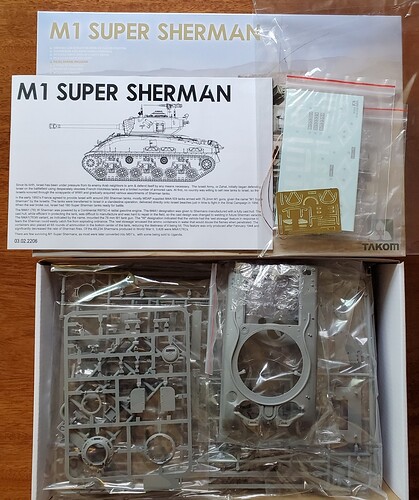
Upon first examination, it looks like a very nicely detailed kit, a fully modern tooling. But as has become normal for Takom (at least based on reviews of other kits I’ve read) the instructions are a big let down. As you can see, they’re quite small, and I can already see that some of the drawings are a bit confusing.

But the big thing that jumped out at me is the lack of color callouts. Anywhere. There are simply no painting instructions at all, either detail or overall. There are four views for each decal option, but no notes about what paints to use or even what color the vehicle was. And there are no top views to show whether a specific tank had the white/black aerial recognition stripes or where they would go if they did. I know they didn’t all have these.

Happily, I years ago downloaded the instructions for the Star Decals M1 sheet and three of these tanks are on there, and I think I know enough about Shermans to fill in the detail blanks, so I’m covered. But it seems like a big omission.

Michael :israel: :face_with_tongue:

3 Likes

And, upon further review, the decals are, shall we say, an issue. I actually have some pictures of at least one of the vehicles and the serial number decals are wrong. They only have one large serial block for each option where there should be 3, and the ones for the gun mantlet have an incorrect red digit. The Star Decals show one in red as well, but that just means that they aren’t sure what it was. Sigh. Star Decals sheet now on order.

Also, all the marking options show the .50 cal. behind the commander’s hatch. But the one I have photos of (command tank of the 29th Tank Battalion) clearly has the gun in front. The base for the gun is molded onto the roof of the turret, so if that’s the one you want to do (and it was the one I wanted), you’d have to shave it off where it is and relocate it. Not entirely sure I’m up for that. Deep sigh.

Michael :israel: :unamused_face:

1 Like

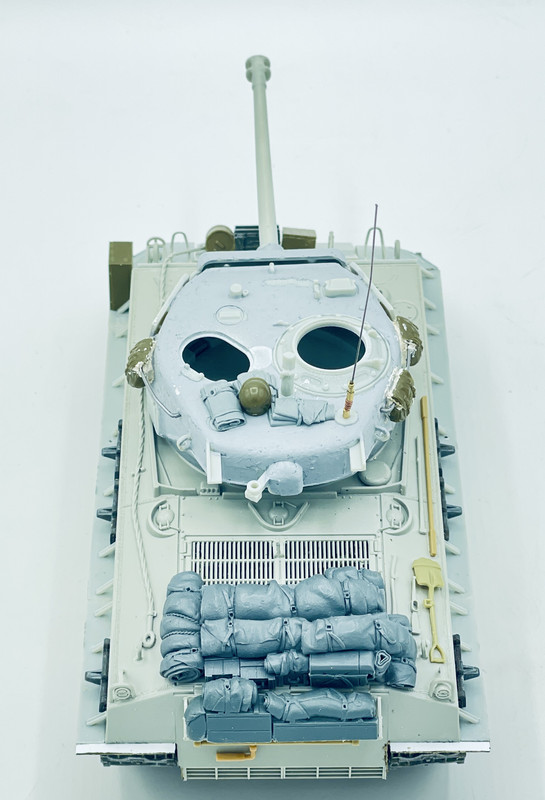
Yesterday I added the final bits of stowage to the turret

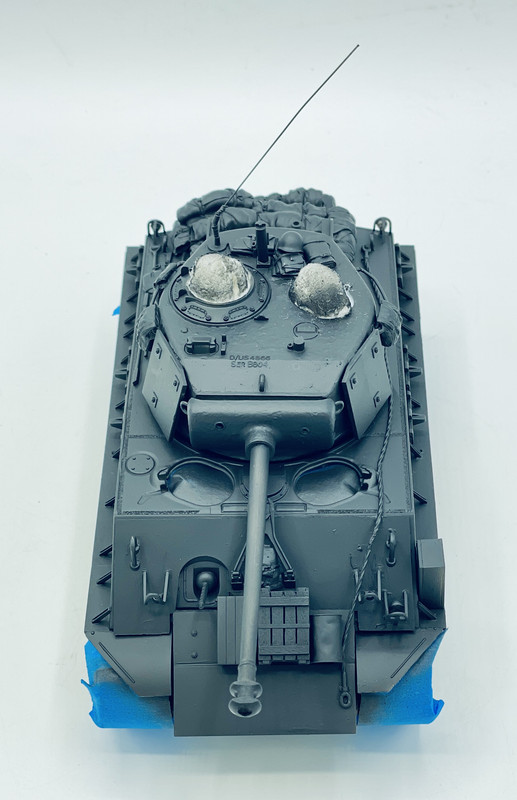
and today was a coat of primer using Mig Ammo One Shot… I also bent the antenna mount to represent the antenna being tied down. I’ll add a tie down coord after painting…

Monday I should be able to get a coat of OD applied…

5 Likes

I am very glad you gave this kit a go, I am waiting for it from one local shop and it’s gonna be a much appreciated anticipation from you!

1 Like

A vitaminised easy-8 is always great to watch at.
:clap:

3 Likes

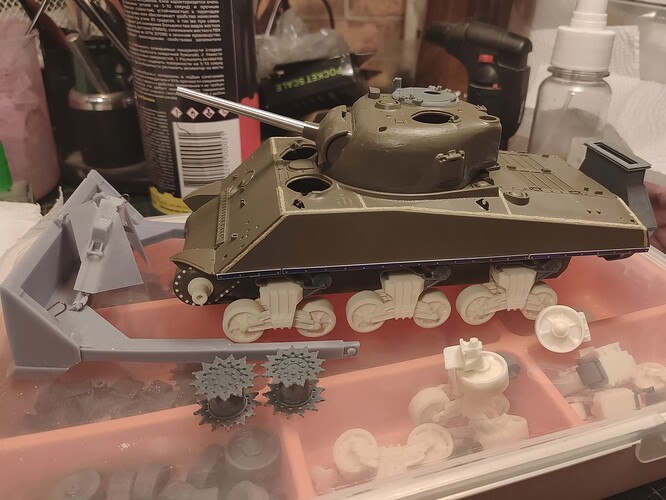
Maybe someone has scheme of deep wading for M4A3 Sherman. I don’t know how it should be implemented.

4 Likes

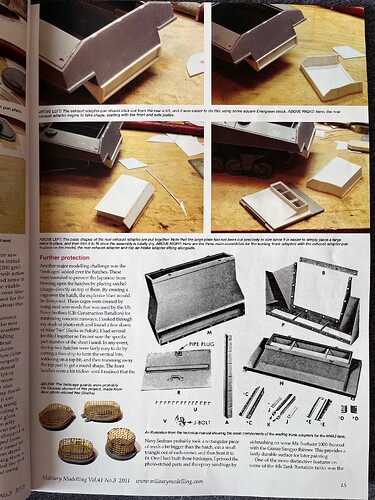
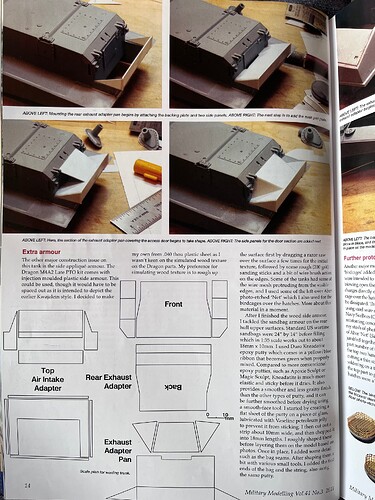
Hi, I have this pages taken from a Mil.Mod. (2011); it refers to M4A3 used at Iwo Jima modelled by Zaloga.
Hope they can help.


5 Likes

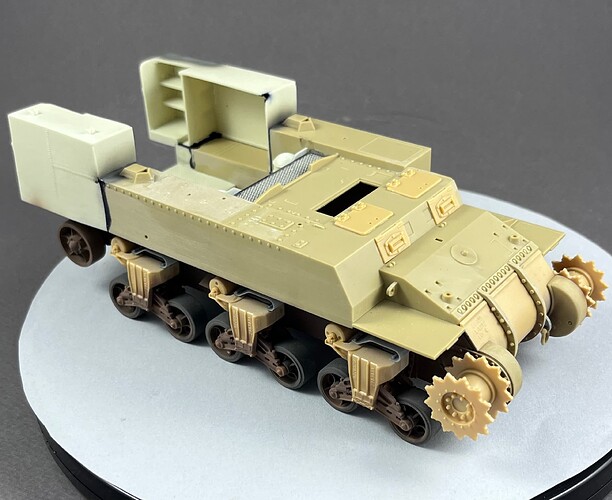
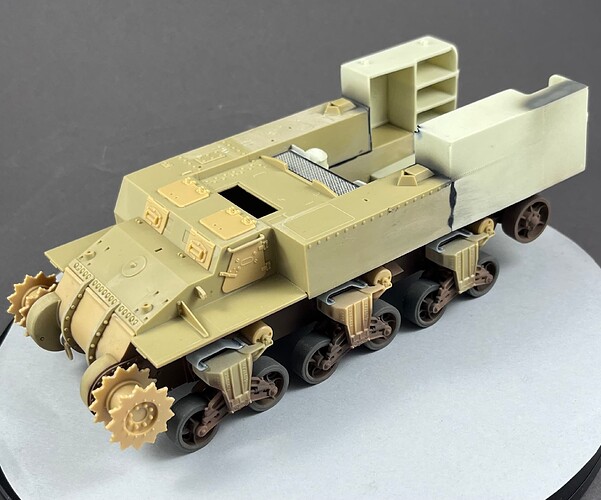
And I get the chance to put out a couple of pics of a small (slow) leap forward of my M30.
The Commander parts need a bit of care to fit the hull and some fill-sand-paint tries to blend them decently.
I will have to scratch some details missing from the bag of M12 pieces I started from so that the suspension were completed with home printed skids.
I will not tackle some inaccuracies because I plan to depict a stowage covered M30 as seen on war time.


8 Likes

The article that @Steo77 shows is exactly what you need: it shows the M4A3 parts, and with a bit of measuring on the model and in the picture of the real wading gear, it’s not difficult to get the necessary dimensions. Not sure how accurate the templates are — I tried using them for an M4, but they seemed to be off for that tank at least. Still, you can probably use them.

In any case, the gear that’s on your model right now doesn’t look overly accurate to me.

1 Like