Yes!
Haha, totally man ![]()
Yes, do it! That would be Rad!
Yes!
Haha, totally man ![]()
Yes, do it! That would be Rad!
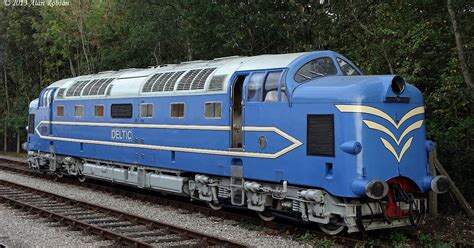
Deltics are perfect for converting in to something sci-fi. I never fact-checked it but a British railfan friend told me that a Deltic’s initial acceleration 0-50mph is faster than an E.E. Lightning - and just as loud!
So, if a Deltic could hit mach 2, would it still be able to out accelerate a Lightning? ![]()
So, a cross-kit? Divide the Deltic at mid-point, add a bulkhead to the back of the front (either!) half, split the Lightning vertically just forward of the fin and attach rear fuselage to bulkhead and add wings to Deltic body? No, that is SO not going to happen…
![]()
Cheers,
M
IDK, i think i saw such a prototype at Farnbourough.
@JPTRR and @MoramarthT, I’m Rail-ly liking your Train of thought! ![]()
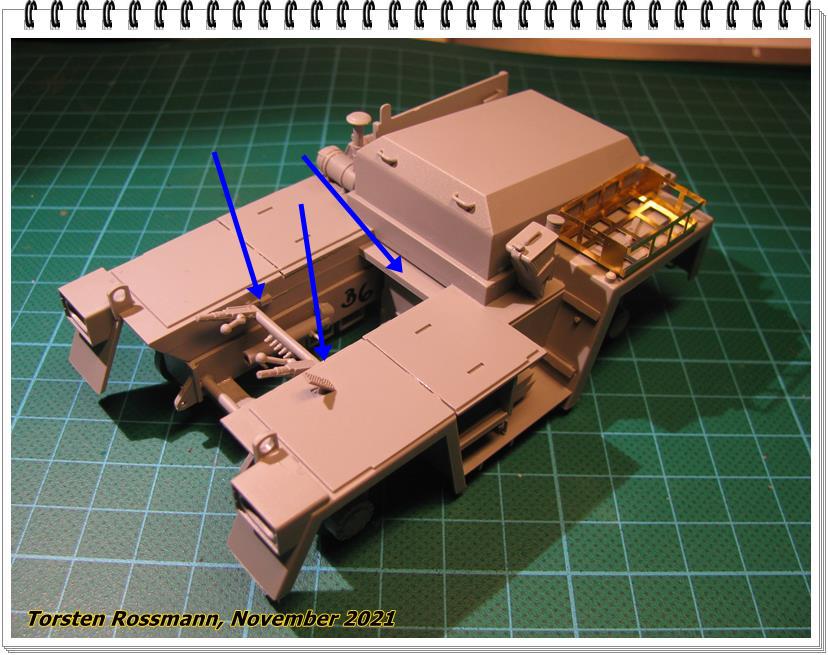
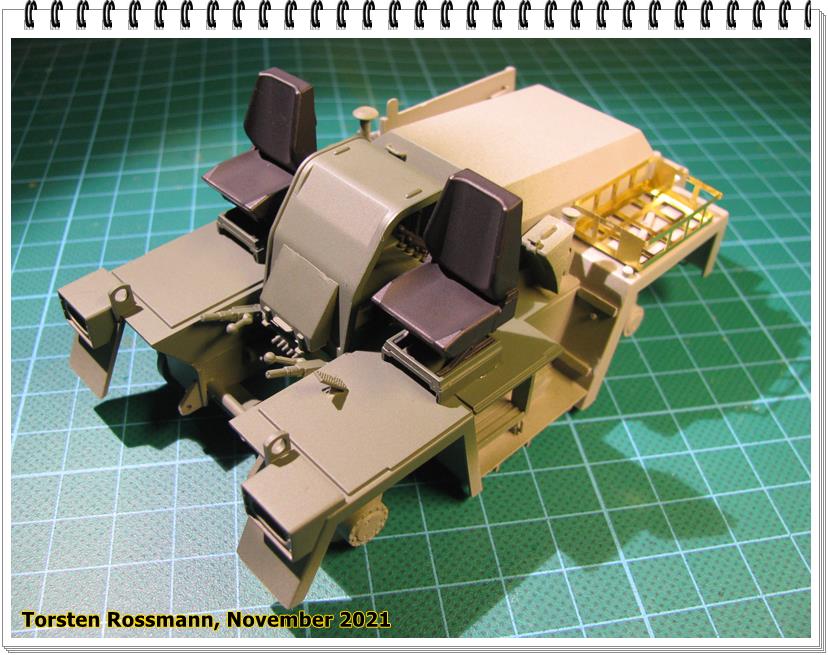
@BlackWidow, How does this subassembly fit? The I-Sheets describe setting the ‘tang’ of this #16 subassembly inside the engine compartment (pic 1). Does it actually set on the shelf outside the engine compartment (pic 2)?
(pic 1)
(pic 2)
Thanks, if you got time to take a look
Hi KSO!
Sorry for the late reply. Saw you question this morning when I was at work. I have looked at my photos and I think this one shows it best where this “compartment” is placed. See the blue arrows. It sits in front of the engine hood and between the cabins. Note the 2 fixation points at the inner sides of the fenders. I know the instruction plan is crappy but I hope this helps.
Great progress so far!
Torsten ![]()
![]()
No worries with the delay. I know this is an international time zone forums. Thanks for gettin back!
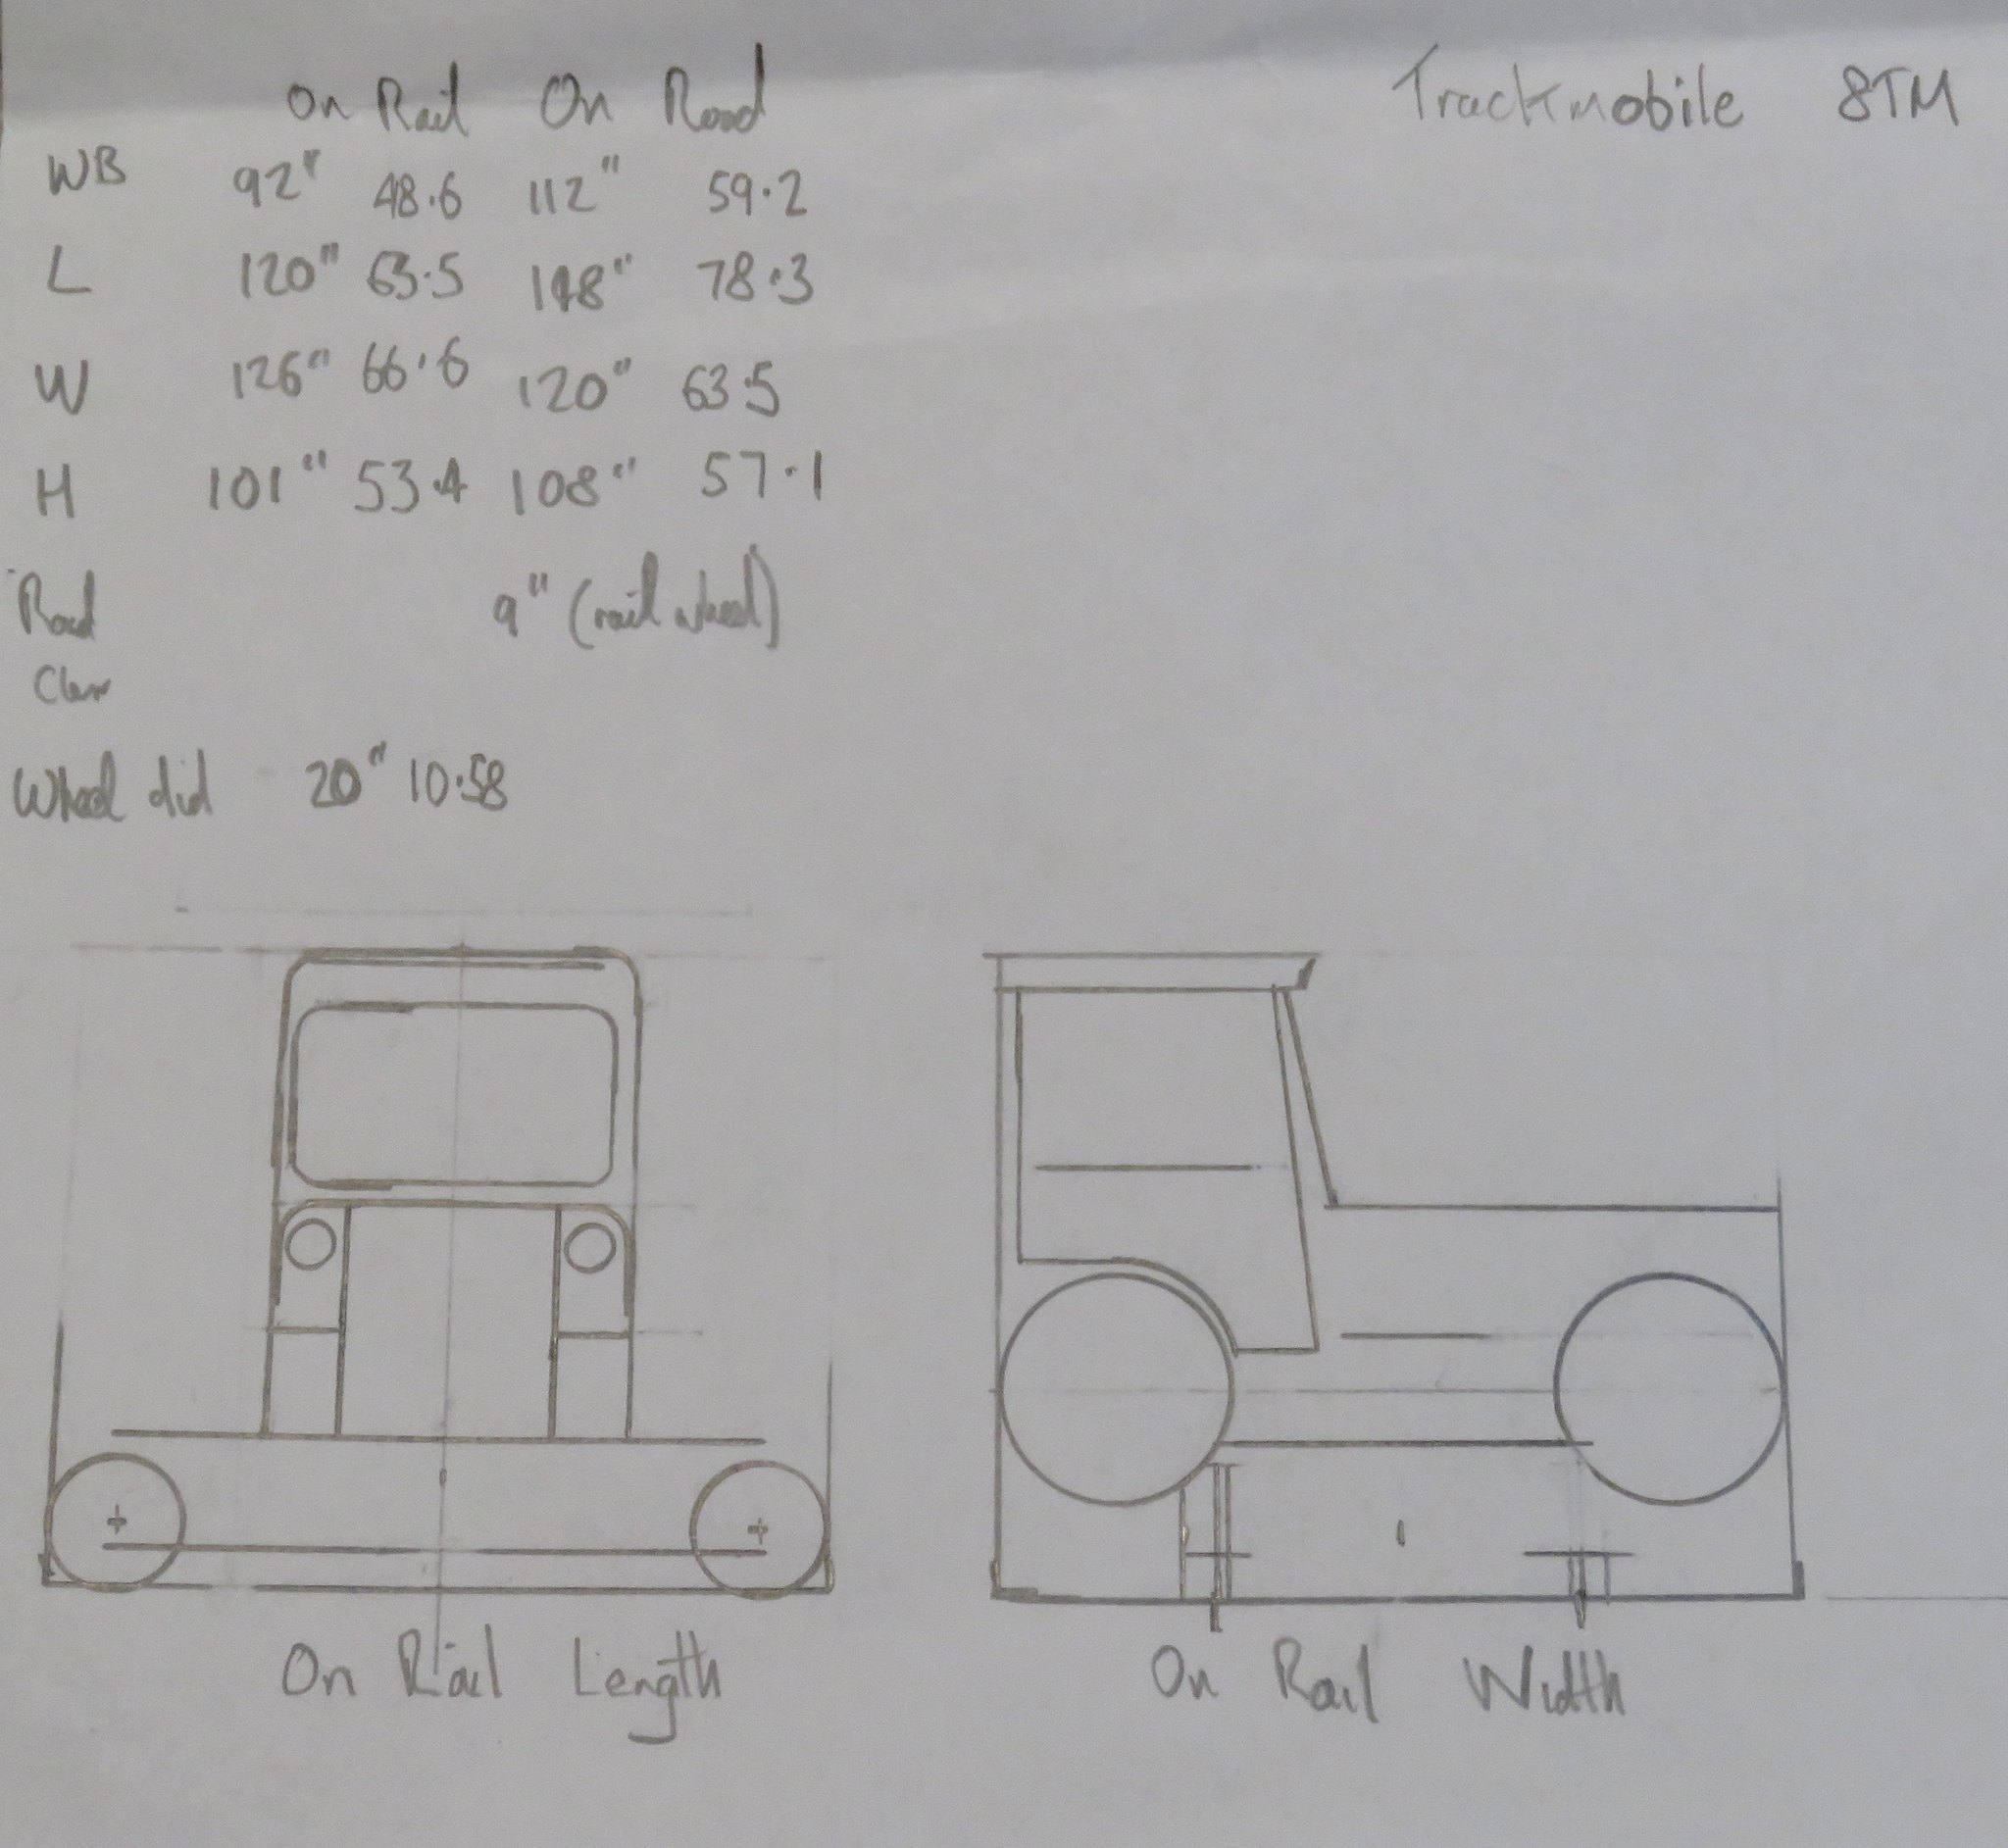
I won’t highjack your thread but just to say I have been following it with interest and I has stirred me to start a lineside model of one of the small early Trackmobiles in 1/48th scale. No plans available just photos and a few basic dimensions. Thanks for the inspiration.
 9D792E04-A635-4AA2-8F1E-A197484367FF by tankienz, on Flickr]
 08B4C49B-8CB4-40D8-8C15-A82C4866096C_1_201_a by tankienz, on Flickr
Super cool project you have there, @dcrfan. Please post your blog here in RXR Modeling. I’d like to check it out for sure.
Thank you for showing interest in my build thread. Some important things happened away from the bench so that’s why not much has been updated here lately.
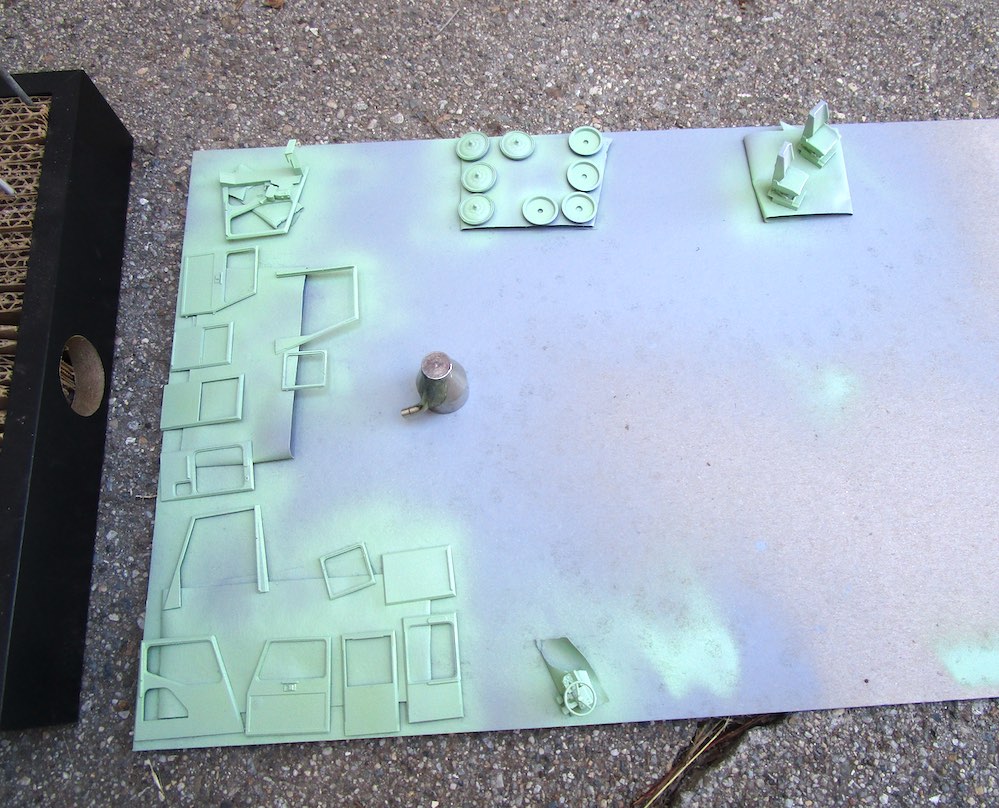
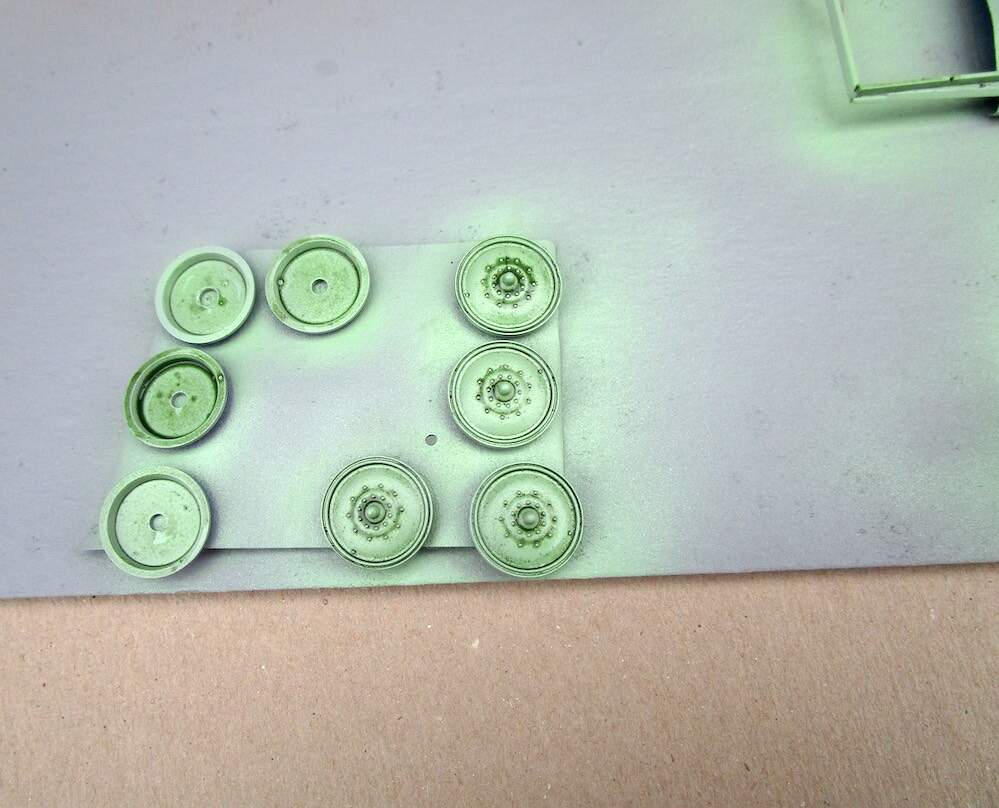
OK, back at the bench. Base coat color applied over aerosol primer. Next time I’ll AB the primer as well.
thanks for looking …
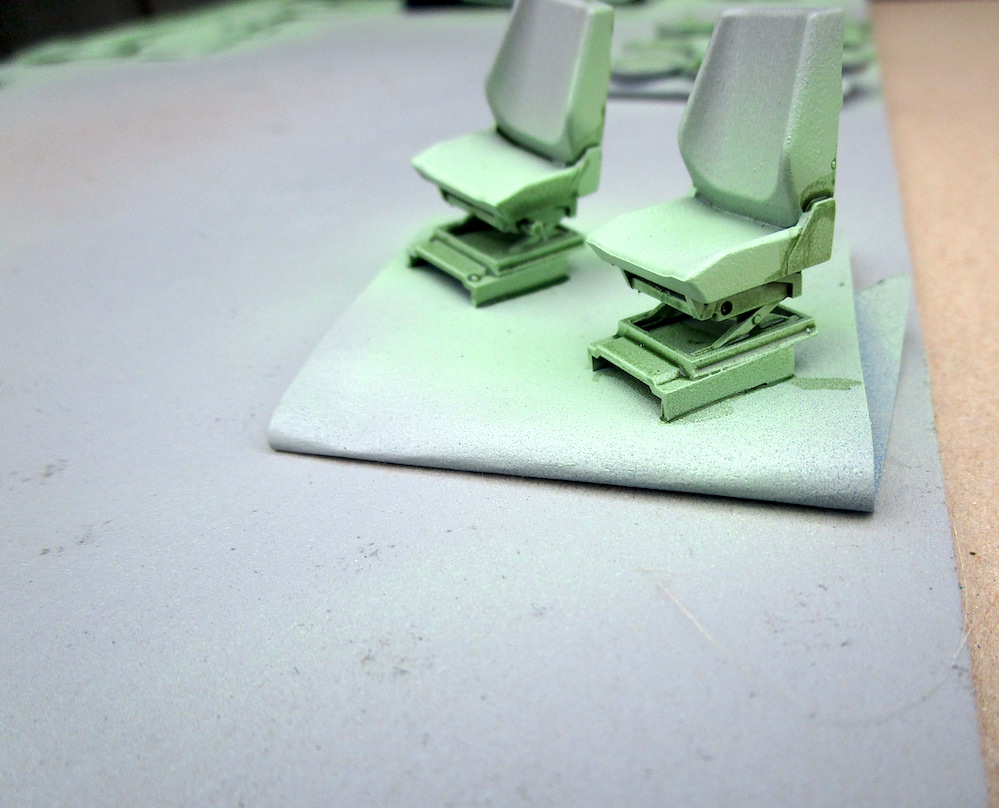
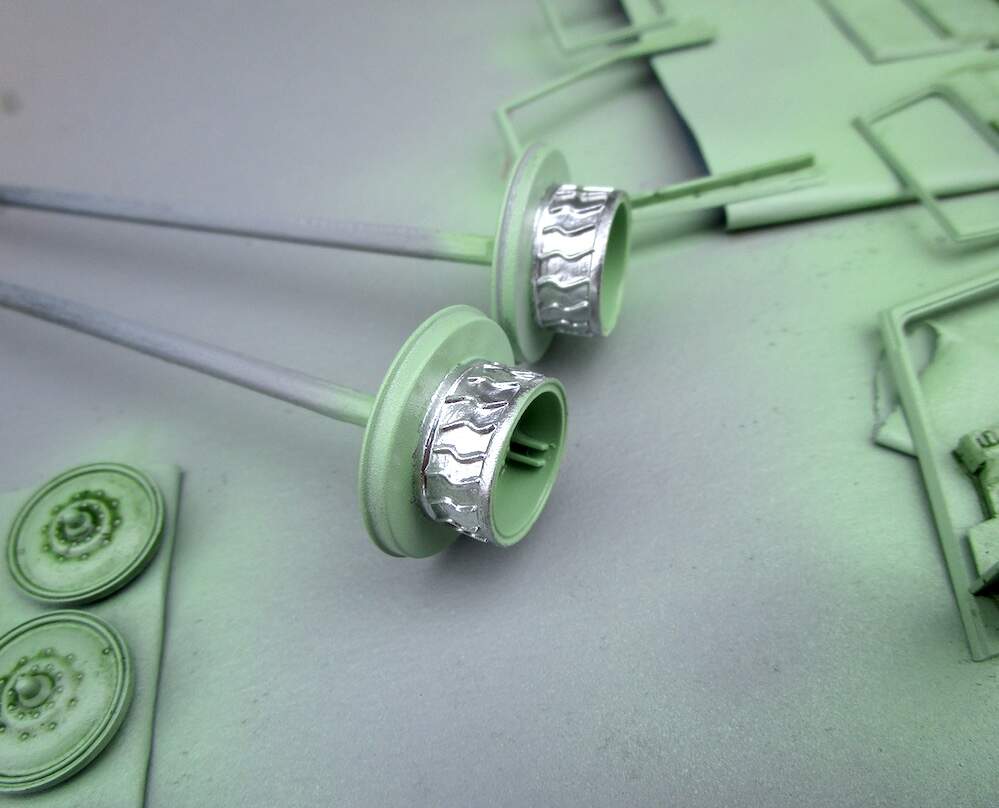
Washed in some dark green to compliment details on the inside of the cabs. A little on the wheel hubs and seat mechanisms as well. Then masked and sprayed the drive cones ‘chrome’ to simulate polished wear. These will receive a pin wash of bronze and black later.
Aw, shunt… that’s looking mighty good KSone!
Thank you Sir.
The only way I’m thinking of assembling the cabs is to paint and detail the insides. Then assemble, mask the windows from the inside to paint and detail the outside. Then glue in the ‘glass’ ![]()
Wow, thanks for showing this. I look forward to your progress pictures. An amazing little critter there. It looks like the caboose is giving it a ride on the coupler.
K.s.1, really cool progress. What color are you painting it? On my screen at the primer looks kind of like a mint green. That on the wheels really looks good.
About building the interior, assembling, then painting. I am getting so that models with a lot of glass and detailed interior are frustrating me. I don’t know if it’ll work on your models but what I did on my flying banana helicopter with all of its windows is this:
I painted the exterior of the fuselage along the window openings. Then I finished the interior and installed the windows from the inside. Assembled the fuselage together. That way I was able to mask the pre-painted areas along the windows to paint the rest of the airframe. Fortunately there weren’t a lot of decals that needed to go up into the area with the windows, and the couple of places that did have a decal, I glossed it with a brush and then put flat on after the decal dried.
Those early Trackmobiles were like that. They would drive onto the track like it was going to drive over a crossing. It would stop there then lower the traction gear onto the rails. Then it would travel in what looks like, sideways.
@dcrfan can probably elaborate in a lot more in detail
I have some vintage OSH aerosol paint that I decanted. The green is close to U.S. Forest Service Green and that is what I was looking for. Since the model is not a replica of an actual Trackmobile, I didn’t want to paint it, UP Yellow.
Yup, this will be challenging
This video shows it all. Trackmobile Re-Railing at Leetsdale Industrial Park - 5/26/2020 - YouTube
As the driver looks down as he lowers the vehicle onto the track I assume there are clear panels in the cab floor over the rails. Anyone know?