Impressiv - really shaping up .
1 Like
KSO, this is looking great! a minty treat!! ![]()
1 Like
@Dioramartin
@RDT1953
@Stickframe
Gentlemen, Thank you for checking in and for your compliments.
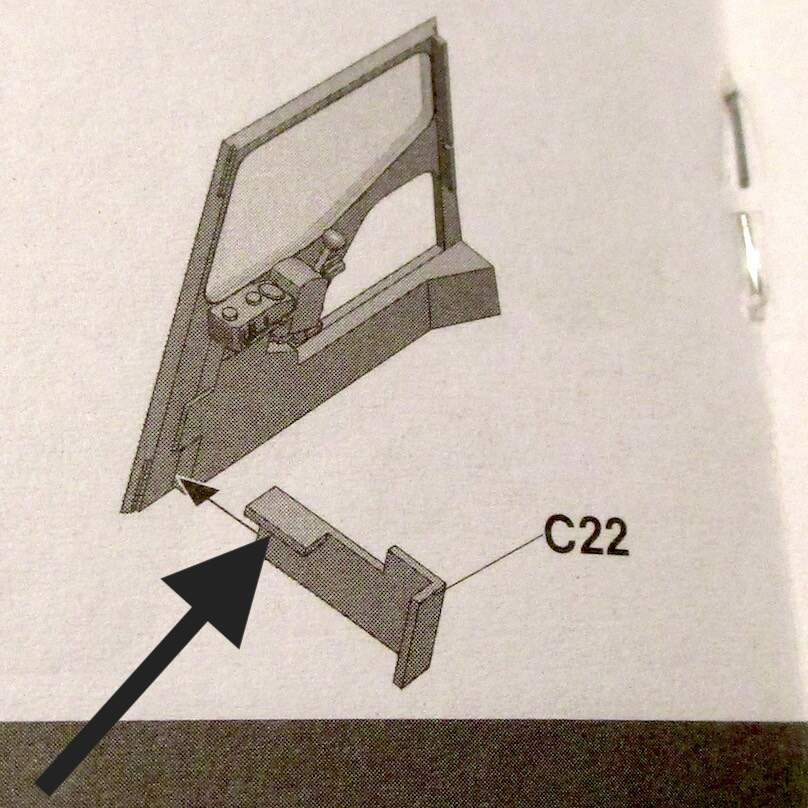
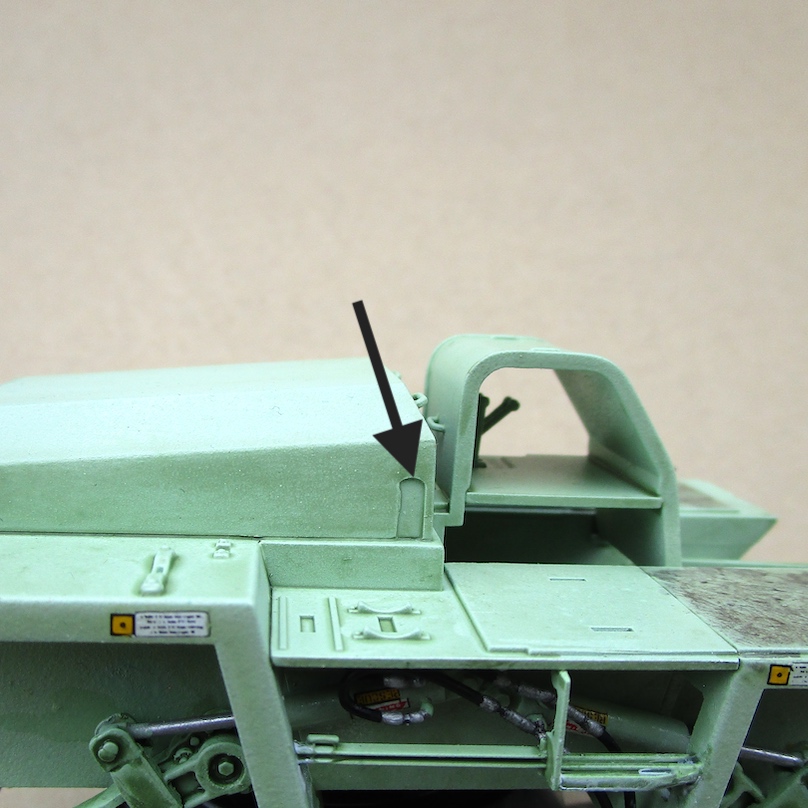
‘Glass’ part D6 didn’t fit because of part C22. I pulled part C22 out and shaved down the material at the arrow (see arrow) for clearance. D6 should slide right in now.

3 Likes
Just to clarify, if I had installed D6 as the instructions describe during assembly then it would fit perfectly. However, I am installing all of the ‘glass’ after the cabs are assembled. This is why I had to pull C22 out, shave off material, repaint it, then install it back into the cab.
3 Likes
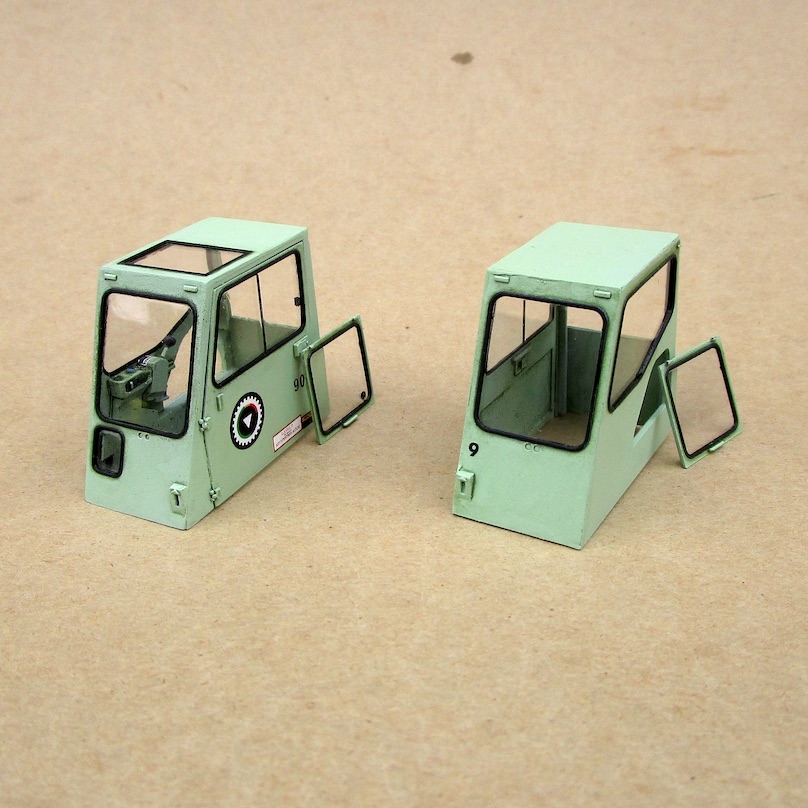
All of the glass for the cabs are installed and each piece will get a coat of Future today. I’ll glue part C22 back in as well as the other detail parts such as rear view mirror and HVAC systems.
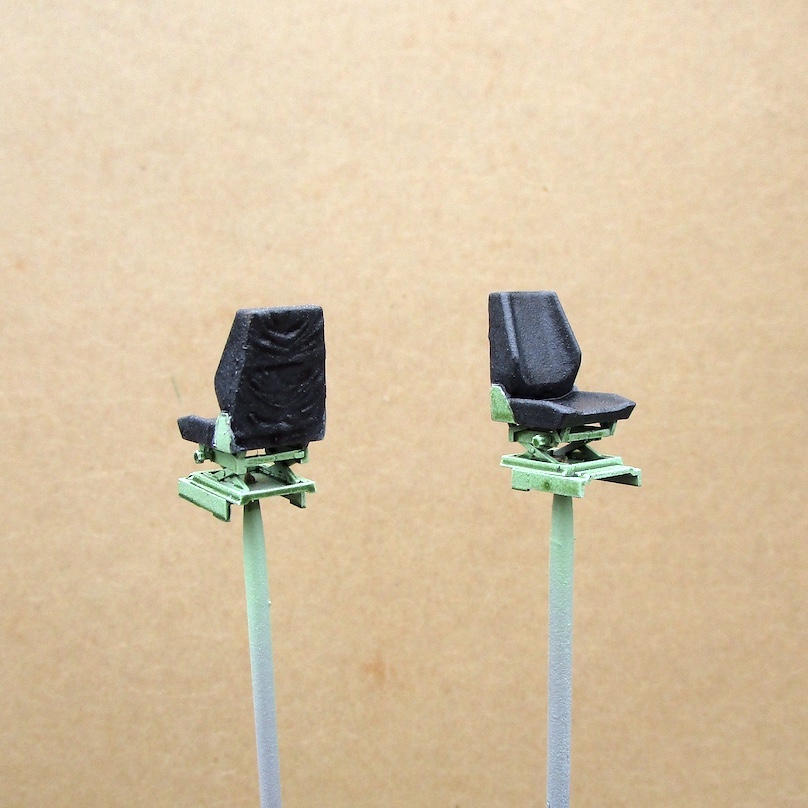
Seats are done. I had to repaint them several times because I kept screwing up the vinyl sheen that I wanted. That’s why they have slightly ‘crusty’ surface. I’m hoping they will look fine behind the glass of the cabs.
8 Likes
Hi KSO,
I enjoy seeing each update on this project. As always, your eye for the right detail at the right time shows. I’m not sure about the texture on the seats, it might look like some commercial grade of material which once fully assembled fades back - leading the viewer to think it sure looks good, without precisely knowing why -
Cheers
Nick
1 Like
Thanks for looking in and your comments. You sure know about details ![]() I hope they’ll look ok. Painting and repainting the seats just got to the point where it just had to be satisfactory and move on
I hope they’ll look ok. Painting and repainting the seats just got to the point where it just had to be satisfactory and move on ![]()
2 Likes
I agree with your approach! there comes a time when it should be called done! ![]()
2 Likes
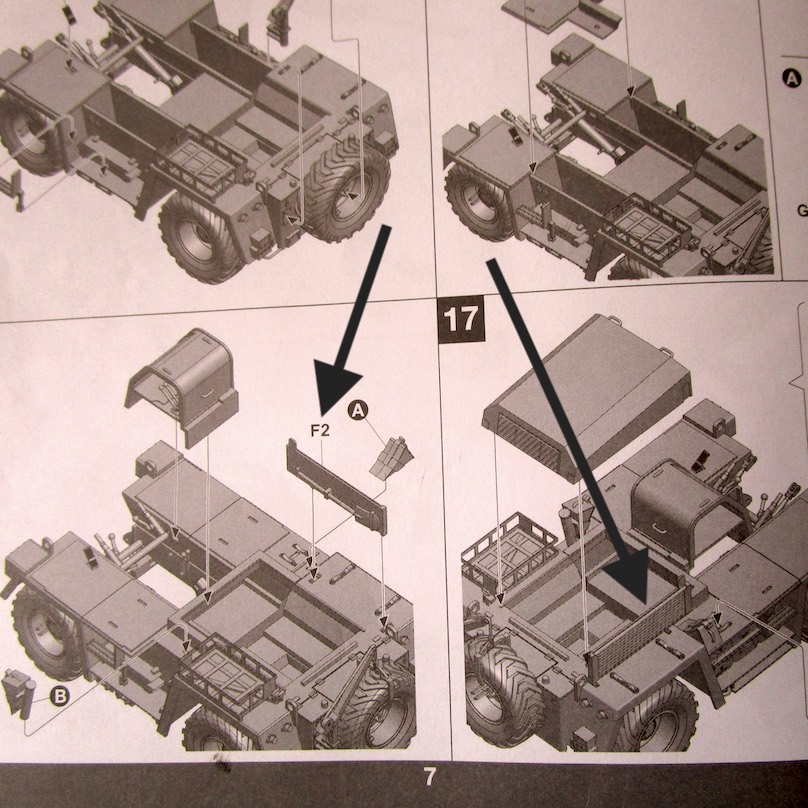
Hi, @HermannB @BlackWidow Does anyone know what part #F2 is? Trying to determine if I’m going to include this on my model.


2 Likes
Since we’re in this area of the model…
I noticed that the molded in cavity needed to be cut out before assembly. I’ll now just paint it black
5 Likes

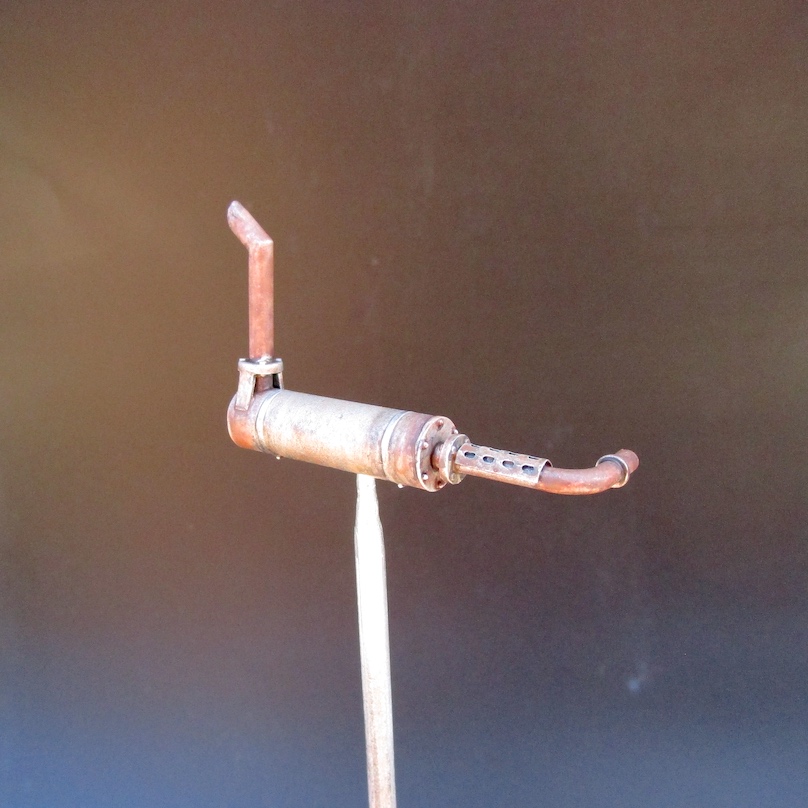
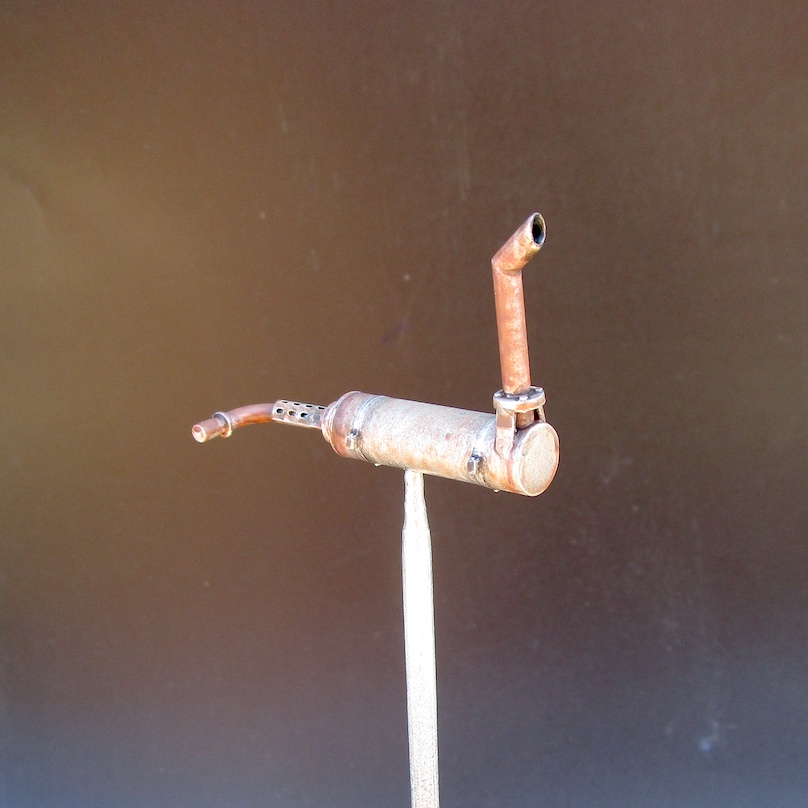
Air Brake couplers made from IM plastic sprue bits and disposable lighter springs
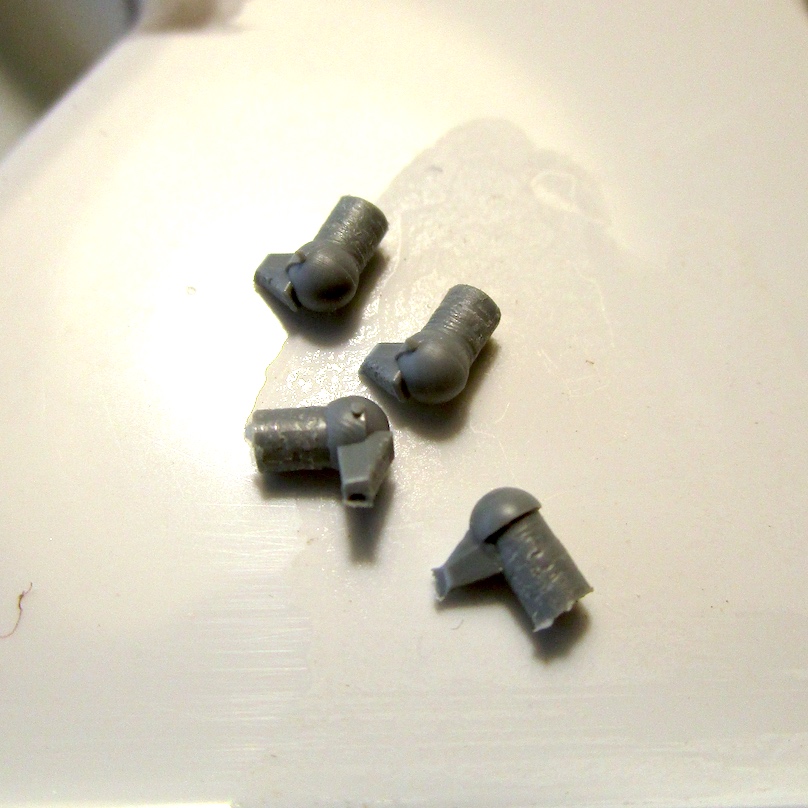

thanks for looking
7 Likes
wow - those fittings and hoses look great!
2 Likes
Nice couplers! ![]()
![]()
![]()
—mike
2 Likes
Thank you for checking in and your compliments.
Thanks fellas!
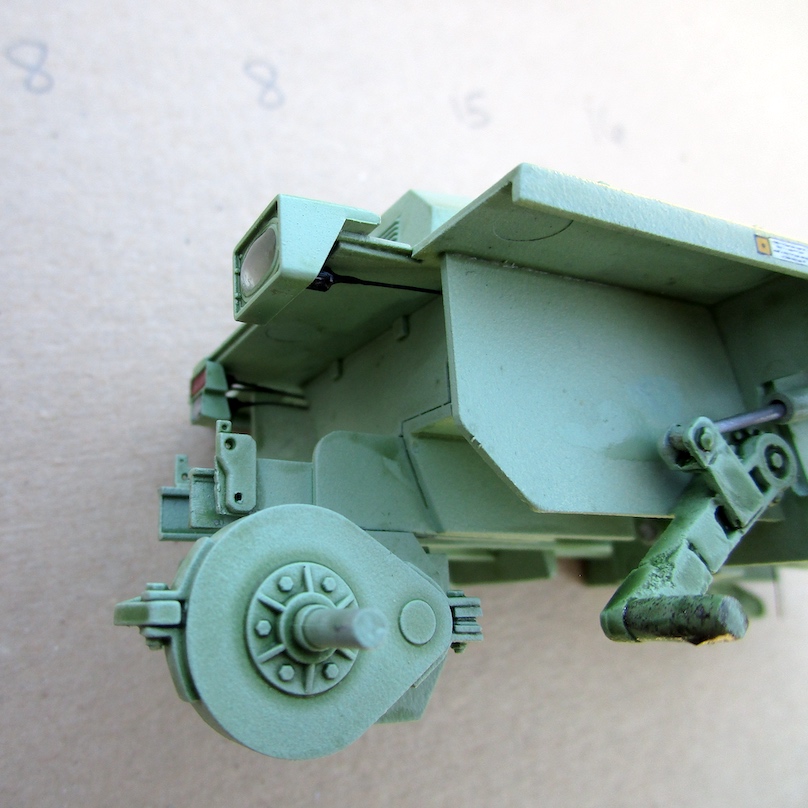
Installed into the pilots now. Disposable lighter parts and sprue bits. Painting and weathering next


thanks for looking
6 Likes
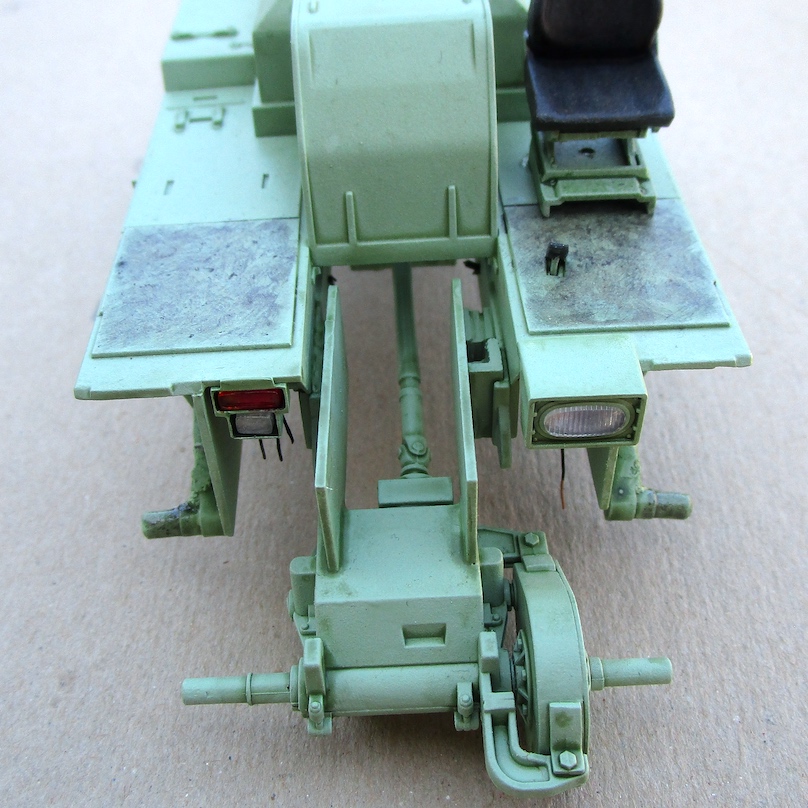
Some dark metallic wash on the metal parts of the coupling system. Also, wiring the head lights, tail lights, marker lights set

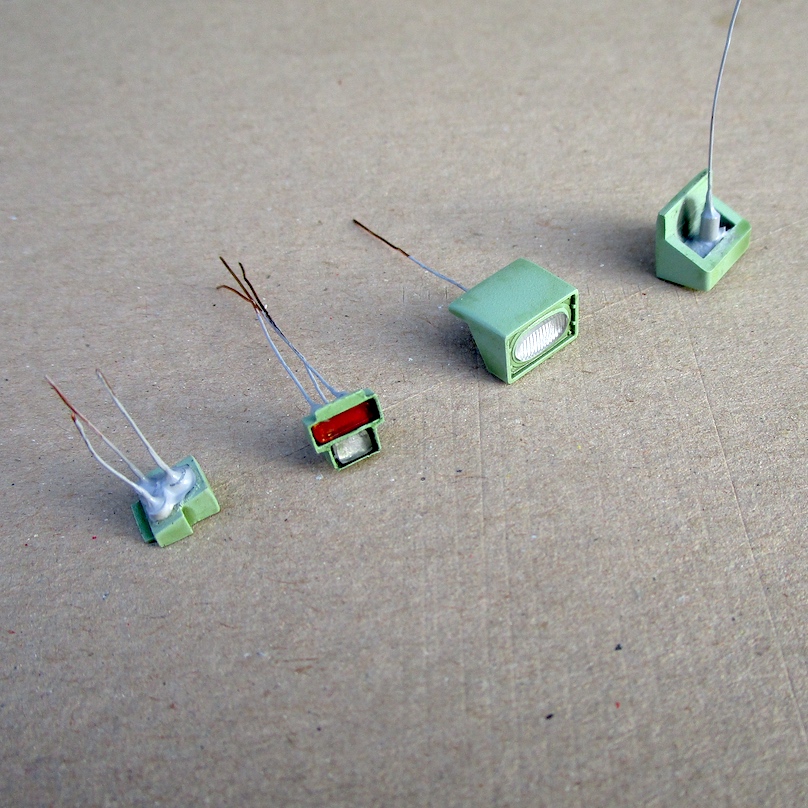
thanks for looking
7 Likes
wow - these look really nice! ![]()
Cheers
Nick
2 Likes
@Stickframe, Appreciate the compliment ![]()
Lights installed. I’ll route the wiring a little more realistically.


6 Likes
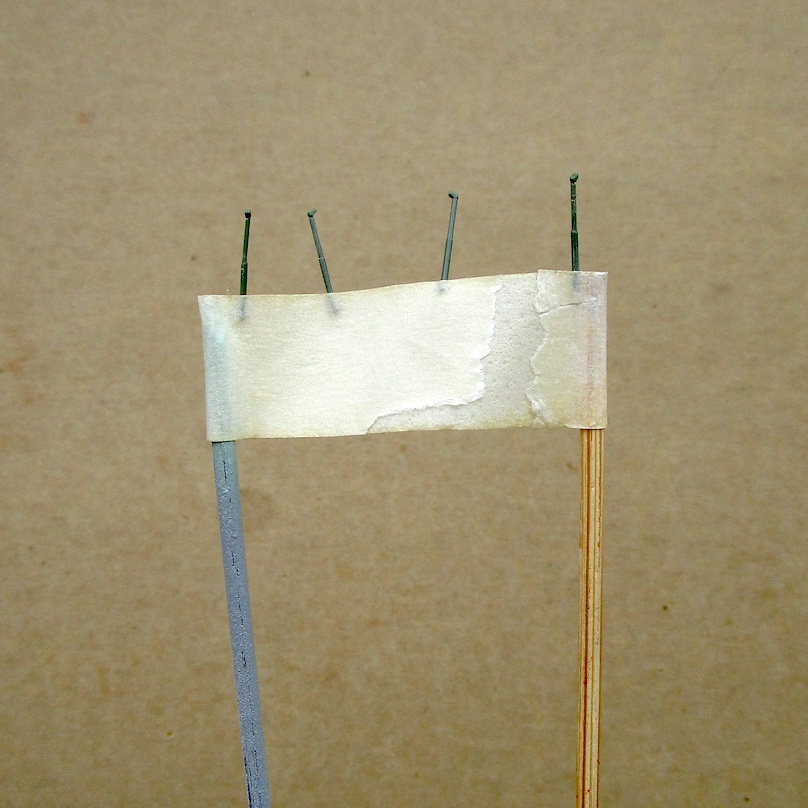
Painting the tiny G43 parts was going to be challenging. Cleaning them was actually more challenging ![]()
I’ll touch up the ends that are under the tape with the outer strut color by horse hair.


3 Likes