Very cool stuff, guys. They recently opened the nuclear bunker in Denmark as well. I have not had the chance to visit yet, but it is on the list.
A place I have visited is the nuclear bunker with old German WWII gniesenau gun turrets. I can highly recommend it if you are ever in the greater Copenhagen area.
Thanks, I’ll add that to my list of must visit places.
It’s not a part of the world I’ve visited yet.
Unfortunately, the shop I saw that Academy Liberator was shut on the day I went down. But considering how tight the case was when we were packing, it may not have fit anyway!
I’m still hopeful we’ll see a new tool by someone in the next couple of years. In the meantime, I have plenty of other things to occupy me.
On the plus side, I have come back home with quite a few books to add to the ever growing reference library.
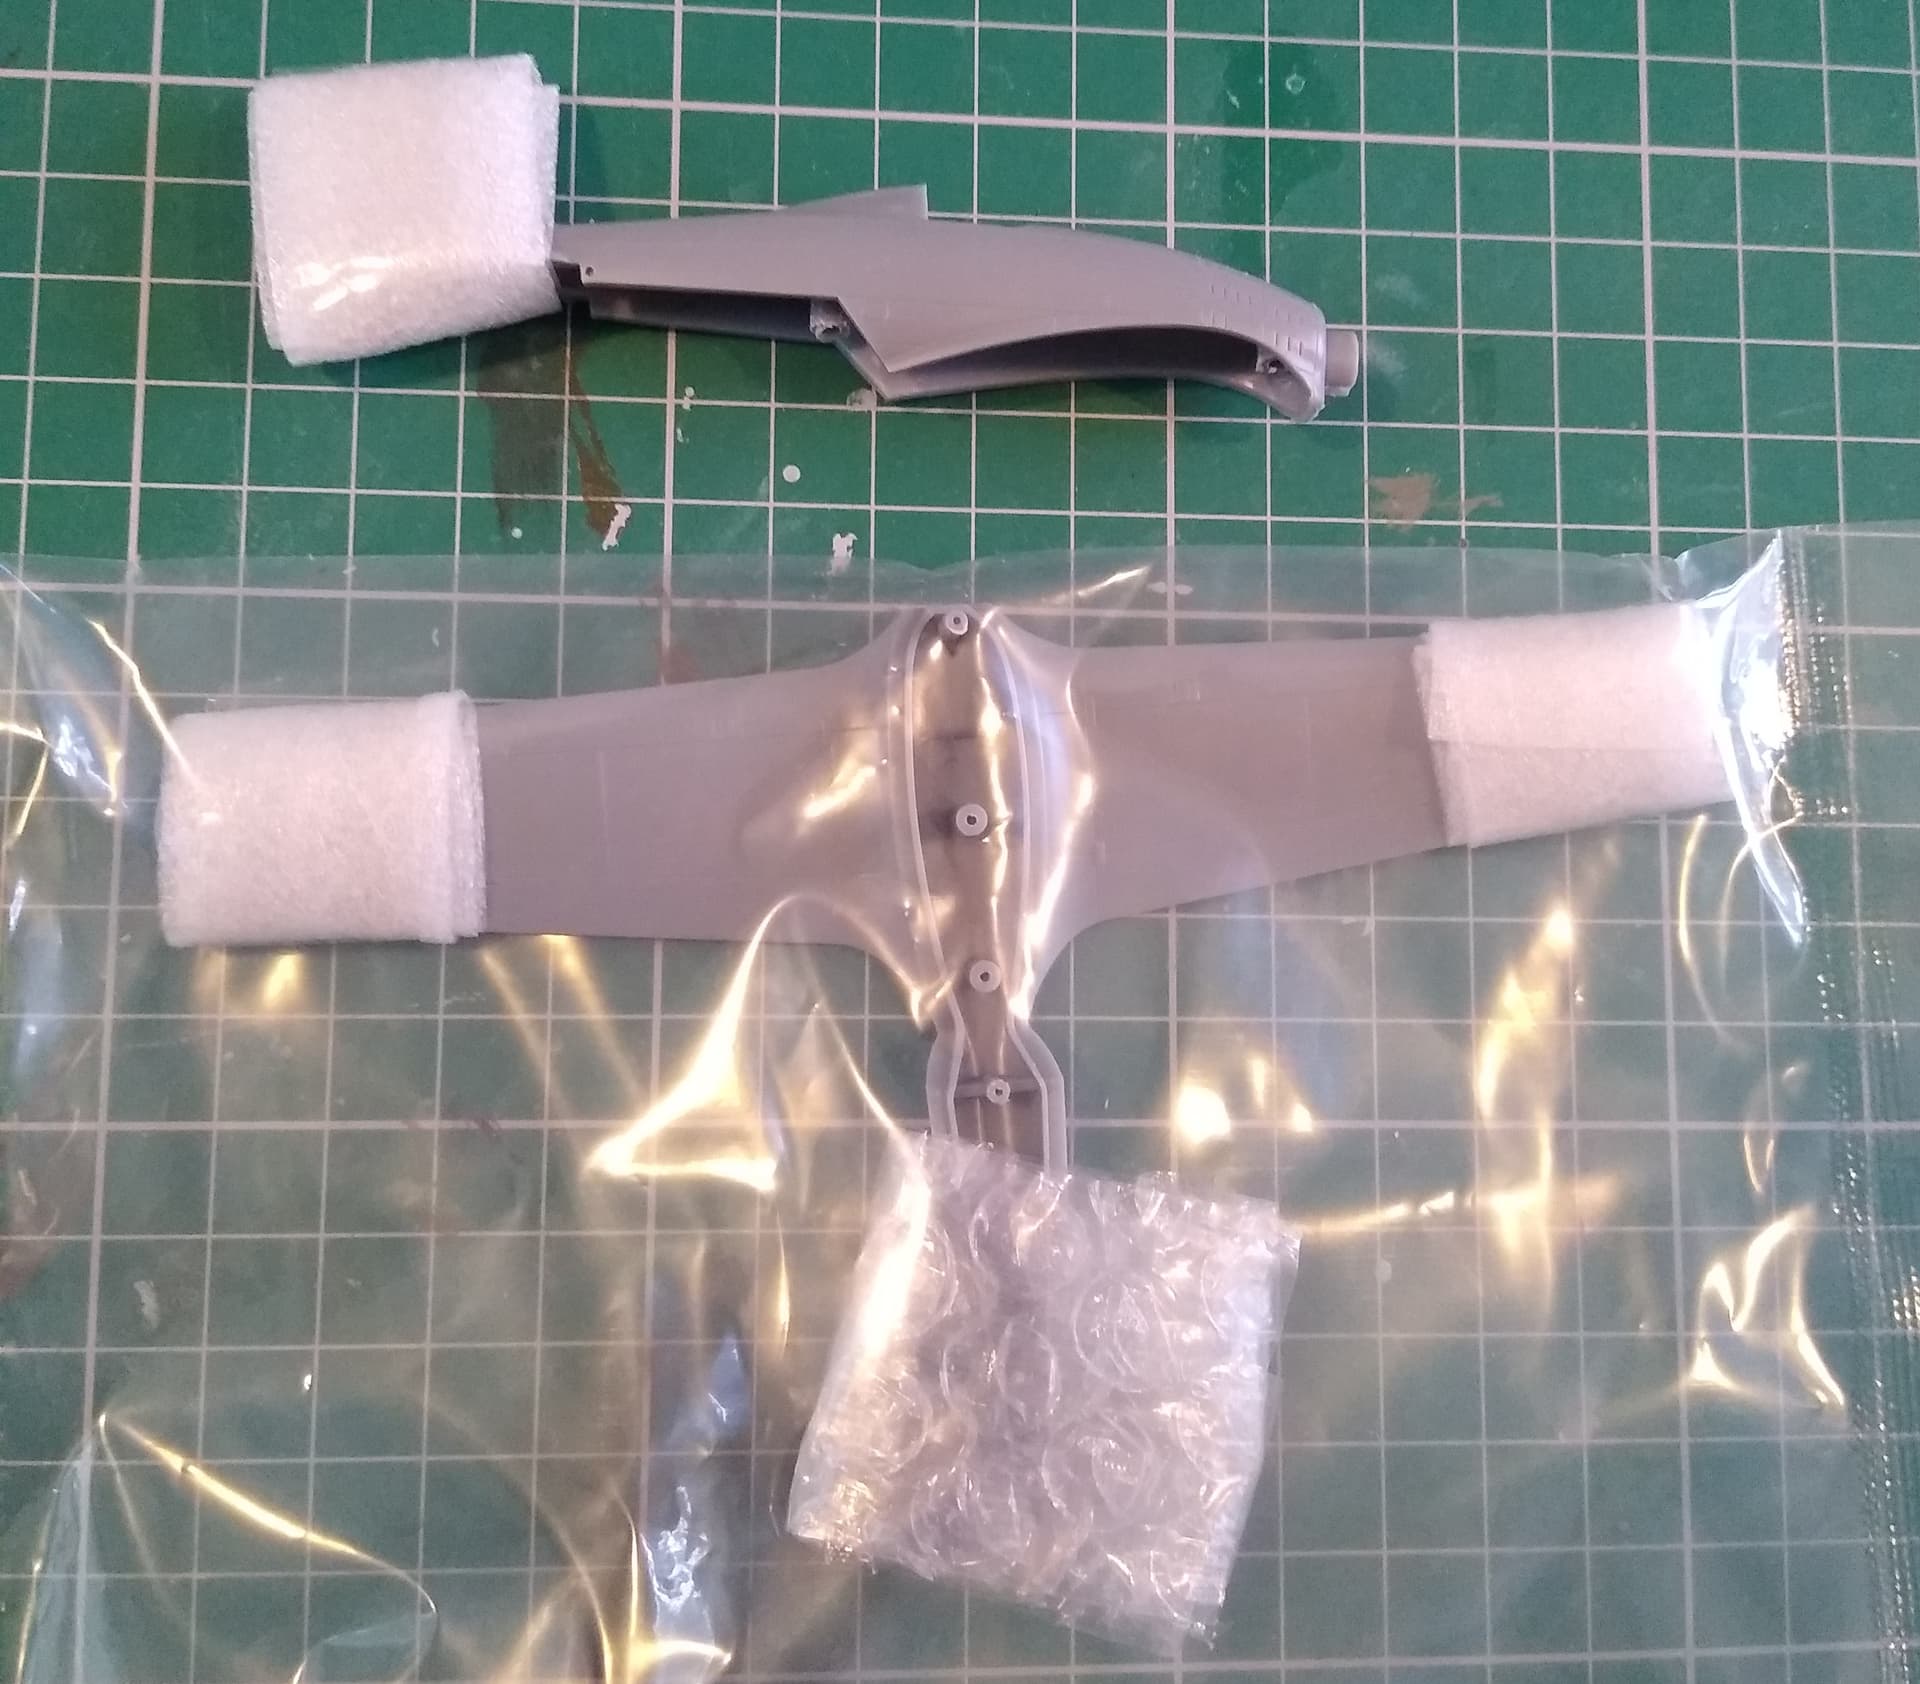
I think there are a few things like the undernose oil cooler and pitot tubes, that Hobbyboss missed, but it’s much nicer than Revell’s. I think I have one of those somewhere. If I find it, I should be able to use it to make copies of the oil cooler intake. One thing I do like though is how Hobbyboss have protected some parts with foam and bubble wrap. A really nice touch.
That’s what I tossed in at the top of the thread - not my entry, just a thing to get things moving. I was fairly impressed with the kit for what it was. And I love those paint schemes!
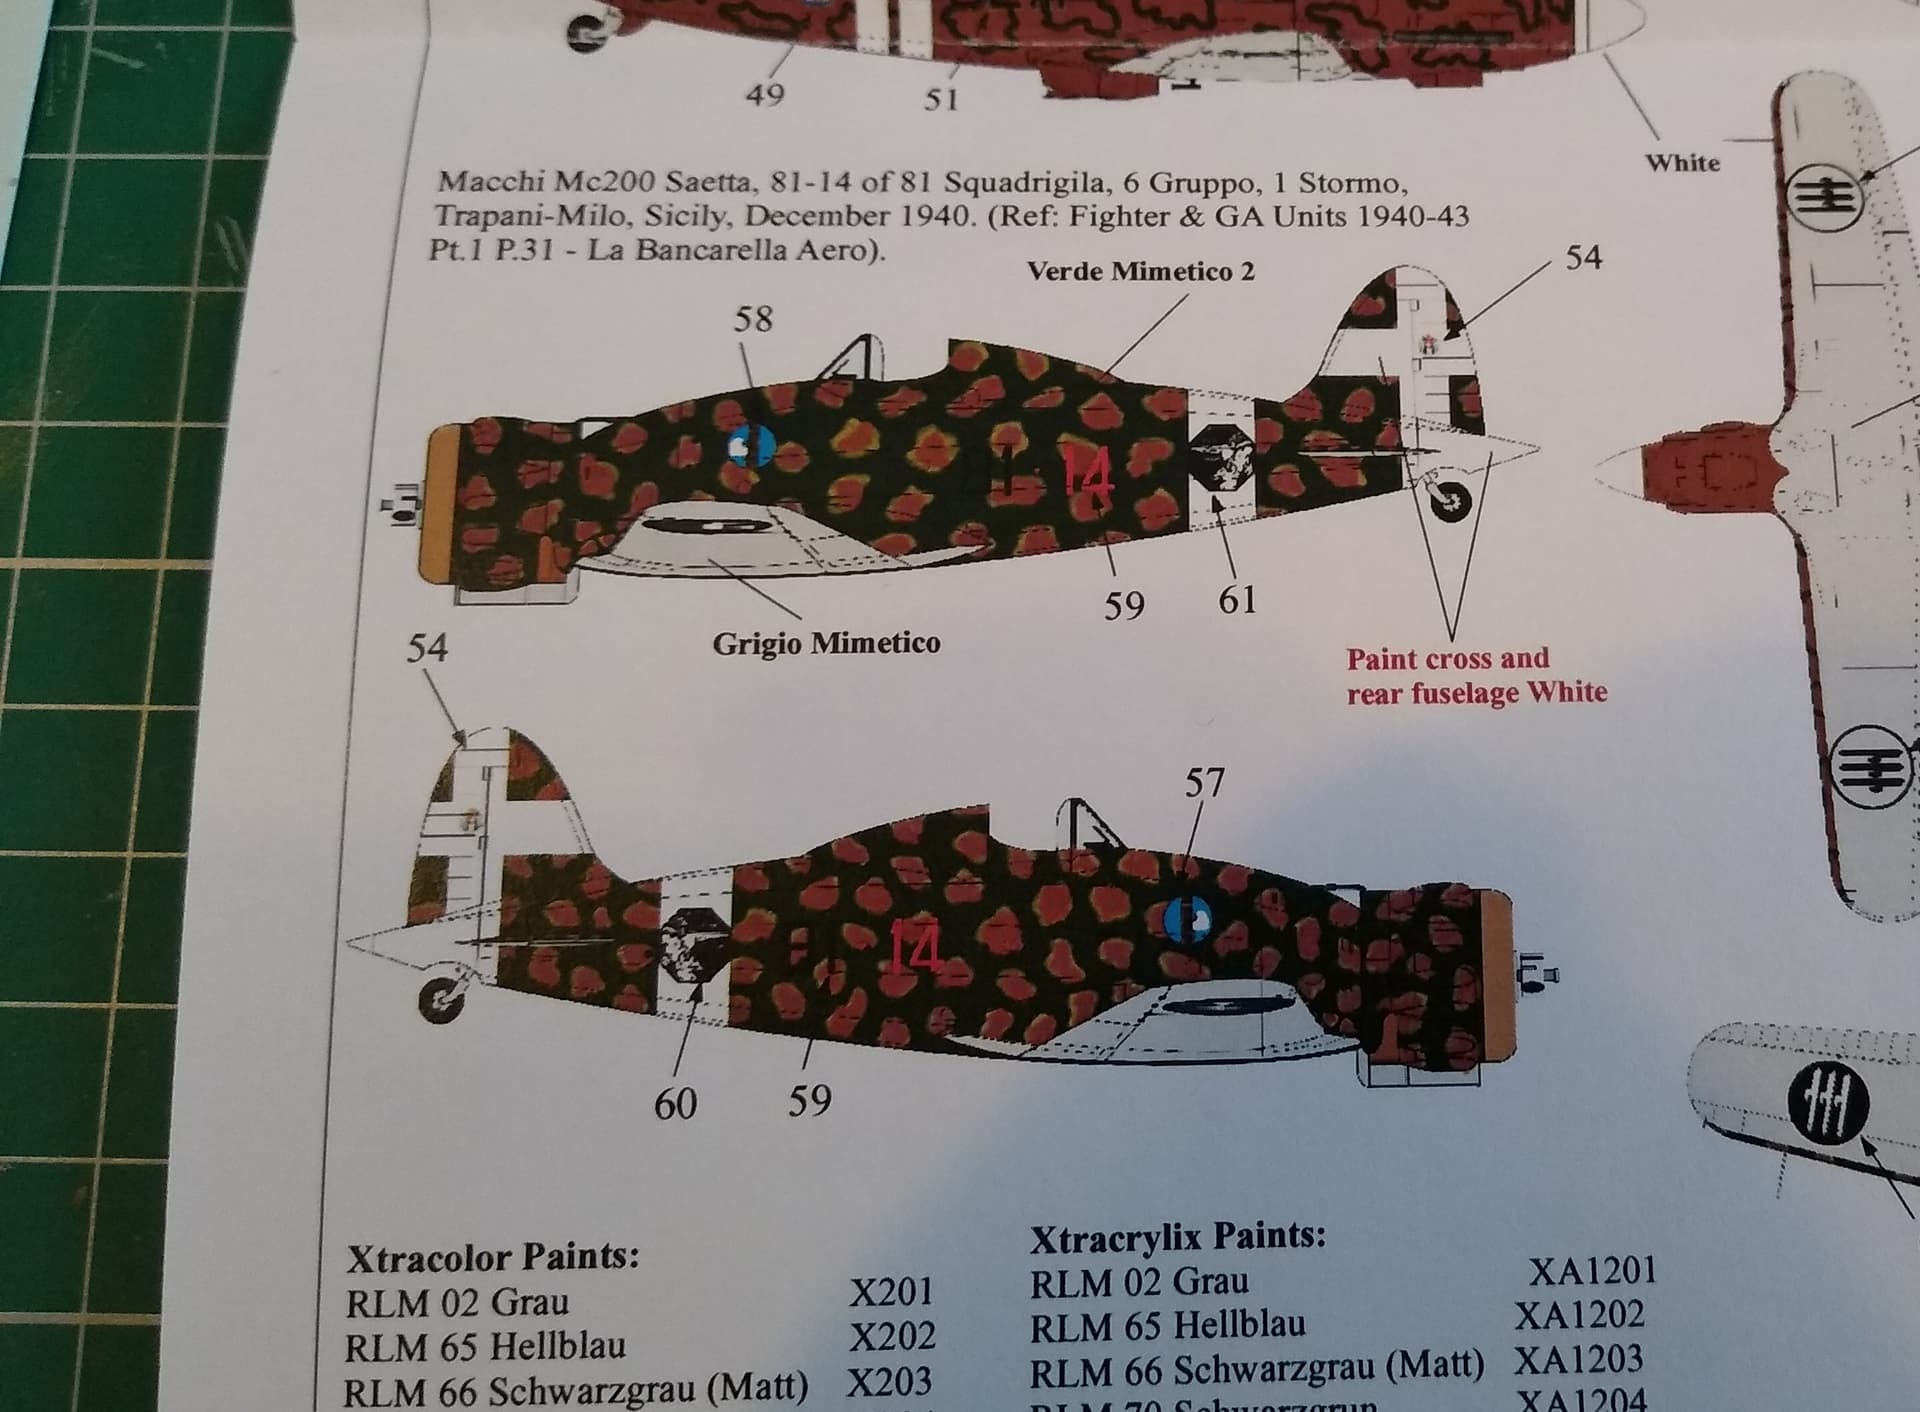
I have got a soft spot for these Hobbyboss quick builds. Simple, cheap, look like what they’re meant to be and a great way to use decal sheets. I think the scheme for this one is the so called poached egg scheme. Got to figure out how I’m going to approach it. Might go with the yellow base, mask them out with white tack blobs, then over with the green and finally hand paint the red-brown. At least that’s the plan.
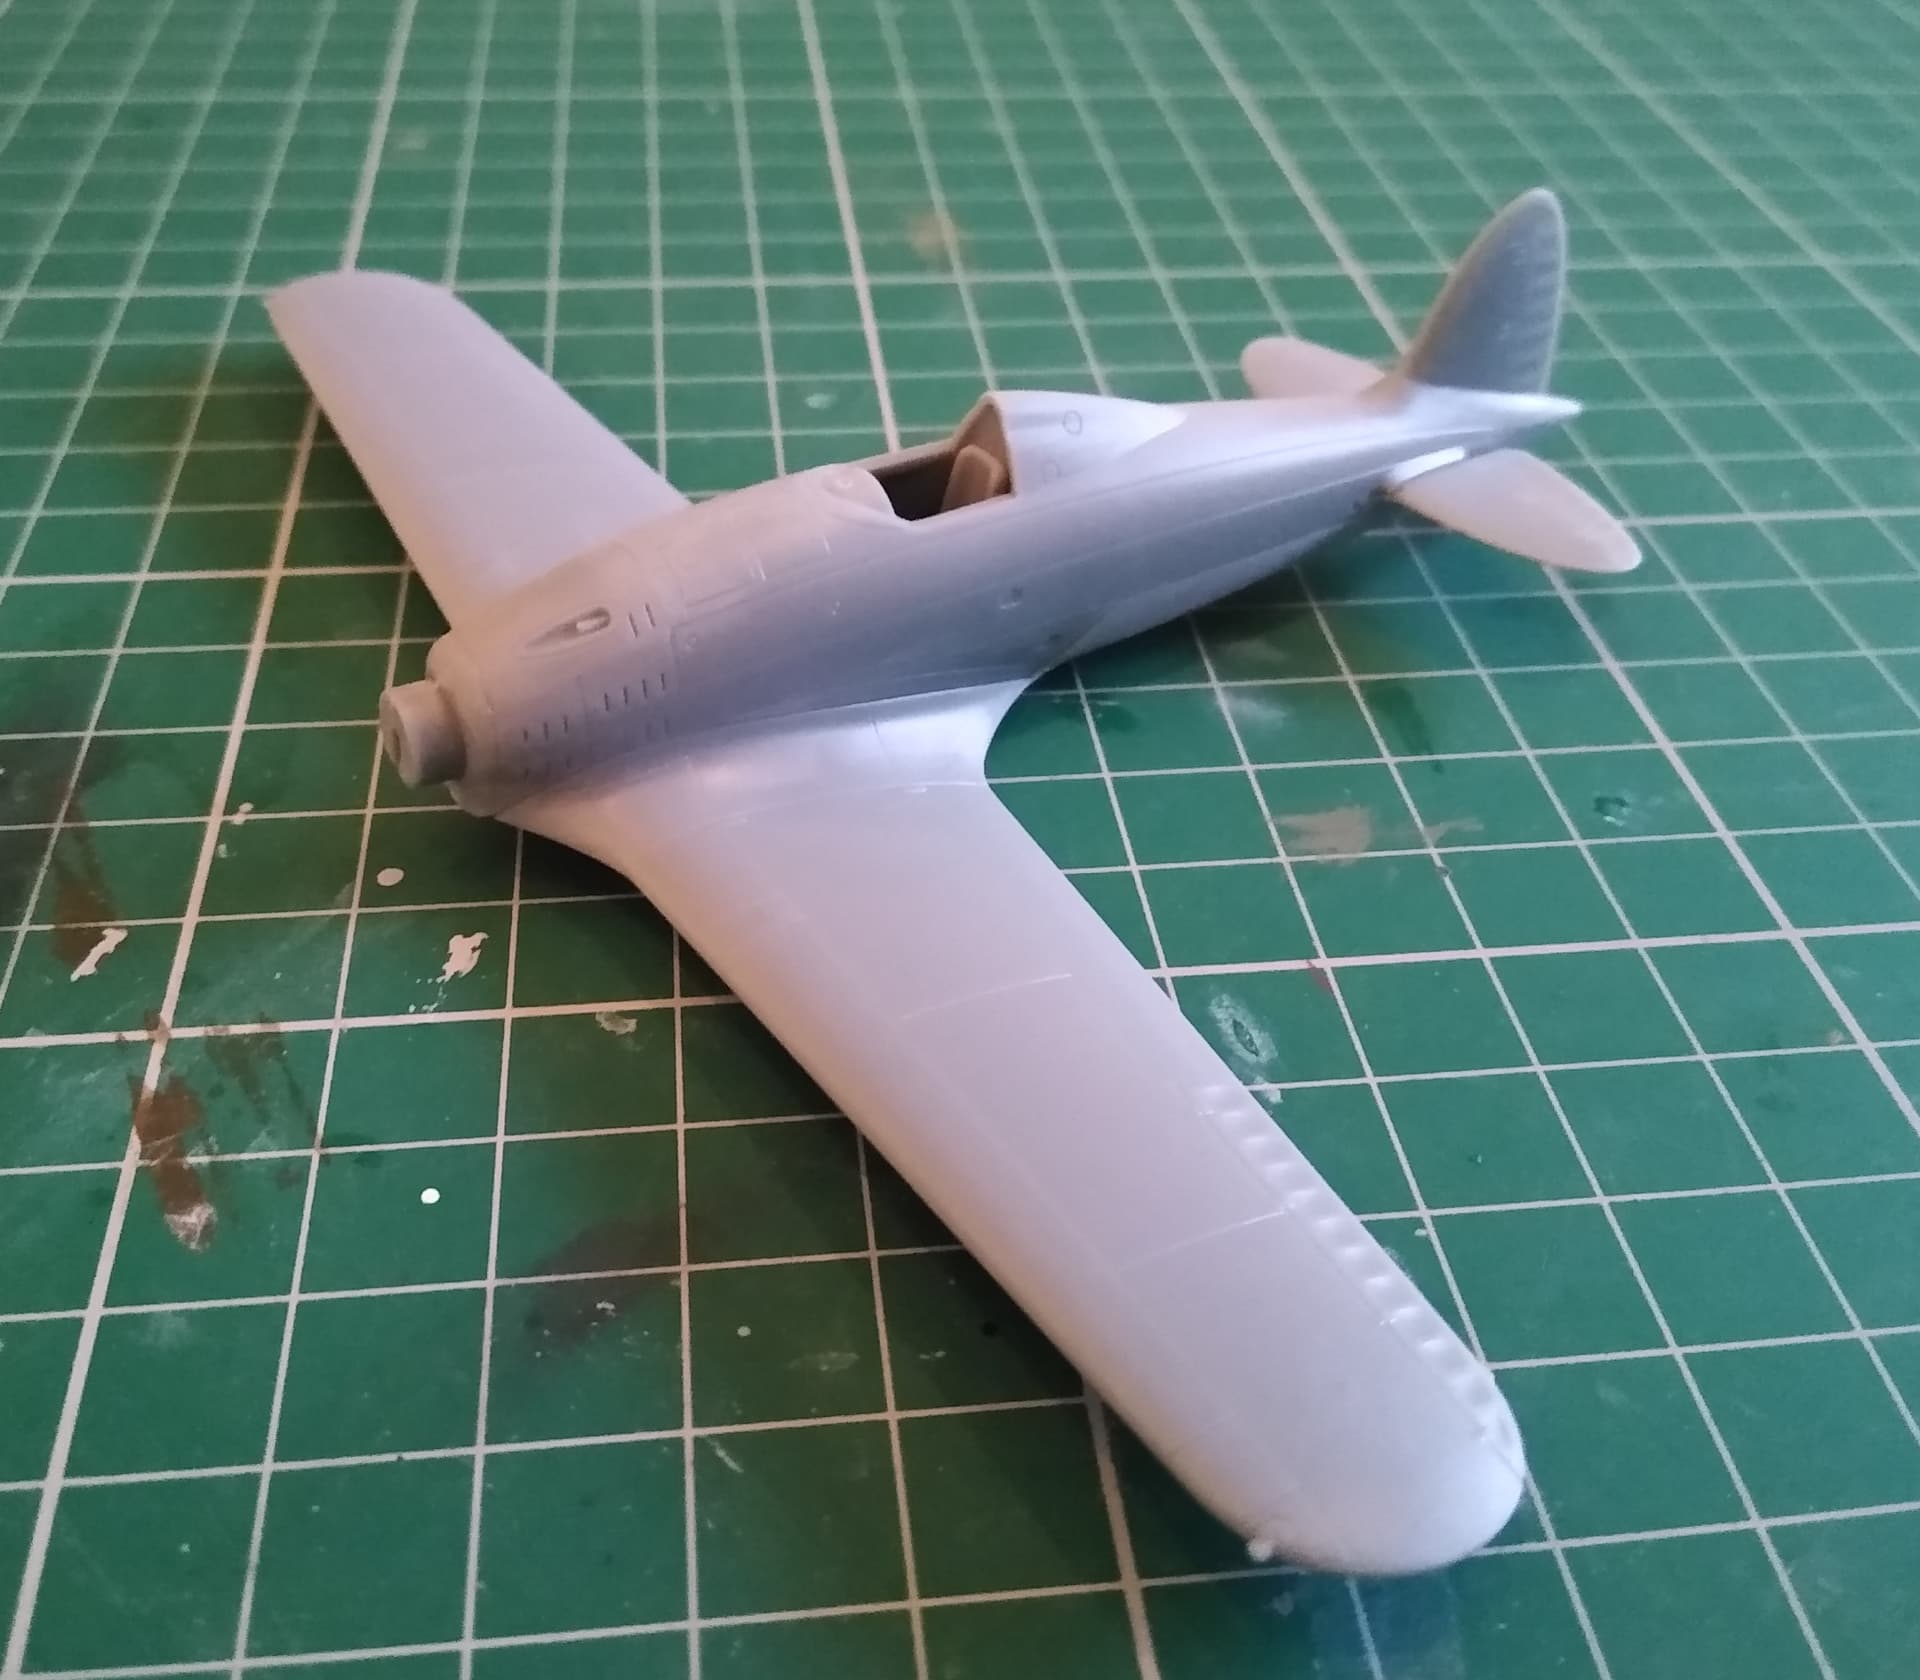
The 200 is not the most attractive aeroplane I’ve ever built. Not as nice looking as the 202 Folgore, but it might grow on me as it progresses.
For my Valentine I used blobs of Blu-tack over the stone colour to make the stone pattern, then sprayed the green between the blobs. I have Blu-tack that I have used many times as a masking agent it it does not leave a residue at all.
Maybe you could think about this method. Spray your red brown. Add Blu-tack where you want the brown covered and spray the yellow. When dry, gently push the Blu-tack down and out past the brown over the yellow. Then spray your green over that. Trick is very light coats to prevent a step between colours. If you keep the green fine and spray more to the middle between the blue tack and less up to the Blu-tack it will feather the coat up to the edge of the blue-tack.
It might work. Would have to keep the blobs small as it’s not a very big model at all in 1/72.
I’m going to try thinned splotches of yellow over green on some scrap and see how it looks first. If it were bigger, say 1/32, I could probably airbrush the individual blobs. But I don’t think my brush will spray fine enough at 1/72! One of the reasons why I usually avoid Luftwaffe mottle like the plague!
The cammo and scratch building that the CANT I first proposed is why that project was shelved for another day.
An old trick that I have not tried myself is a piece of card with a hole in it. Make the edges a bit ragged, then spray through the hole. Turning the card to vary the shapes. You spray through the hole at a distance and you get a larger blurry edged mottle. Spray the centre colour with the card a bit closer and it confines the spray within the area. Avoids overspray and heavy hand large blobs - just make sure the paint does not drip off the card onto the model!
I think that might be way to do it. You’ve just reminded me that I do have a set of etch mottle masks that are exactly like that in different shapes and sizes. Just got to remember where I put them. If I can find them, they might be what I need.
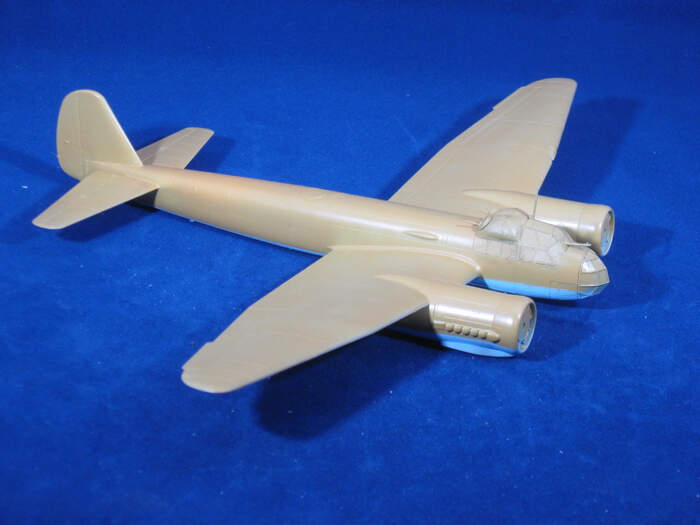
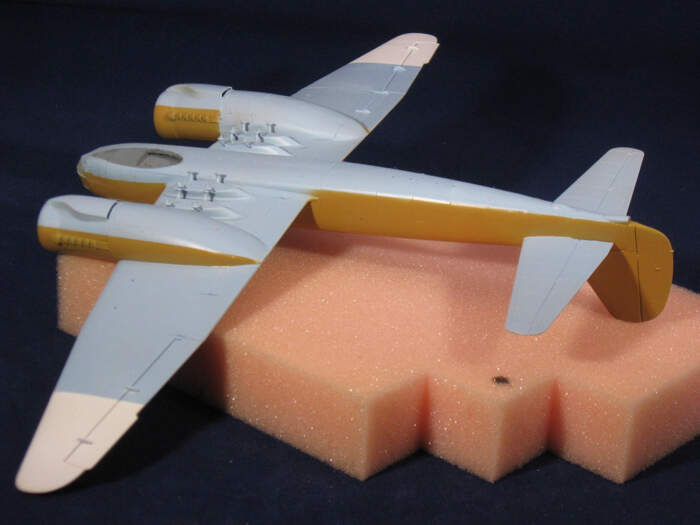
I have most of the main painting done on the JU88 now. I finished this much this AM. Will let it dry overnight and then mask it to lay down the white fuselage band. My first experience with MRP paints. They are pretty dreamy!
I’m not sure how to go about weathering it. I’d like to do panel line washes but am not sure what to do with this interesting color combination. I imagine dark brown on the top. I really have no idea what to do on the bottom. Some fading on the top and a lot of dust on the bottom I guess?
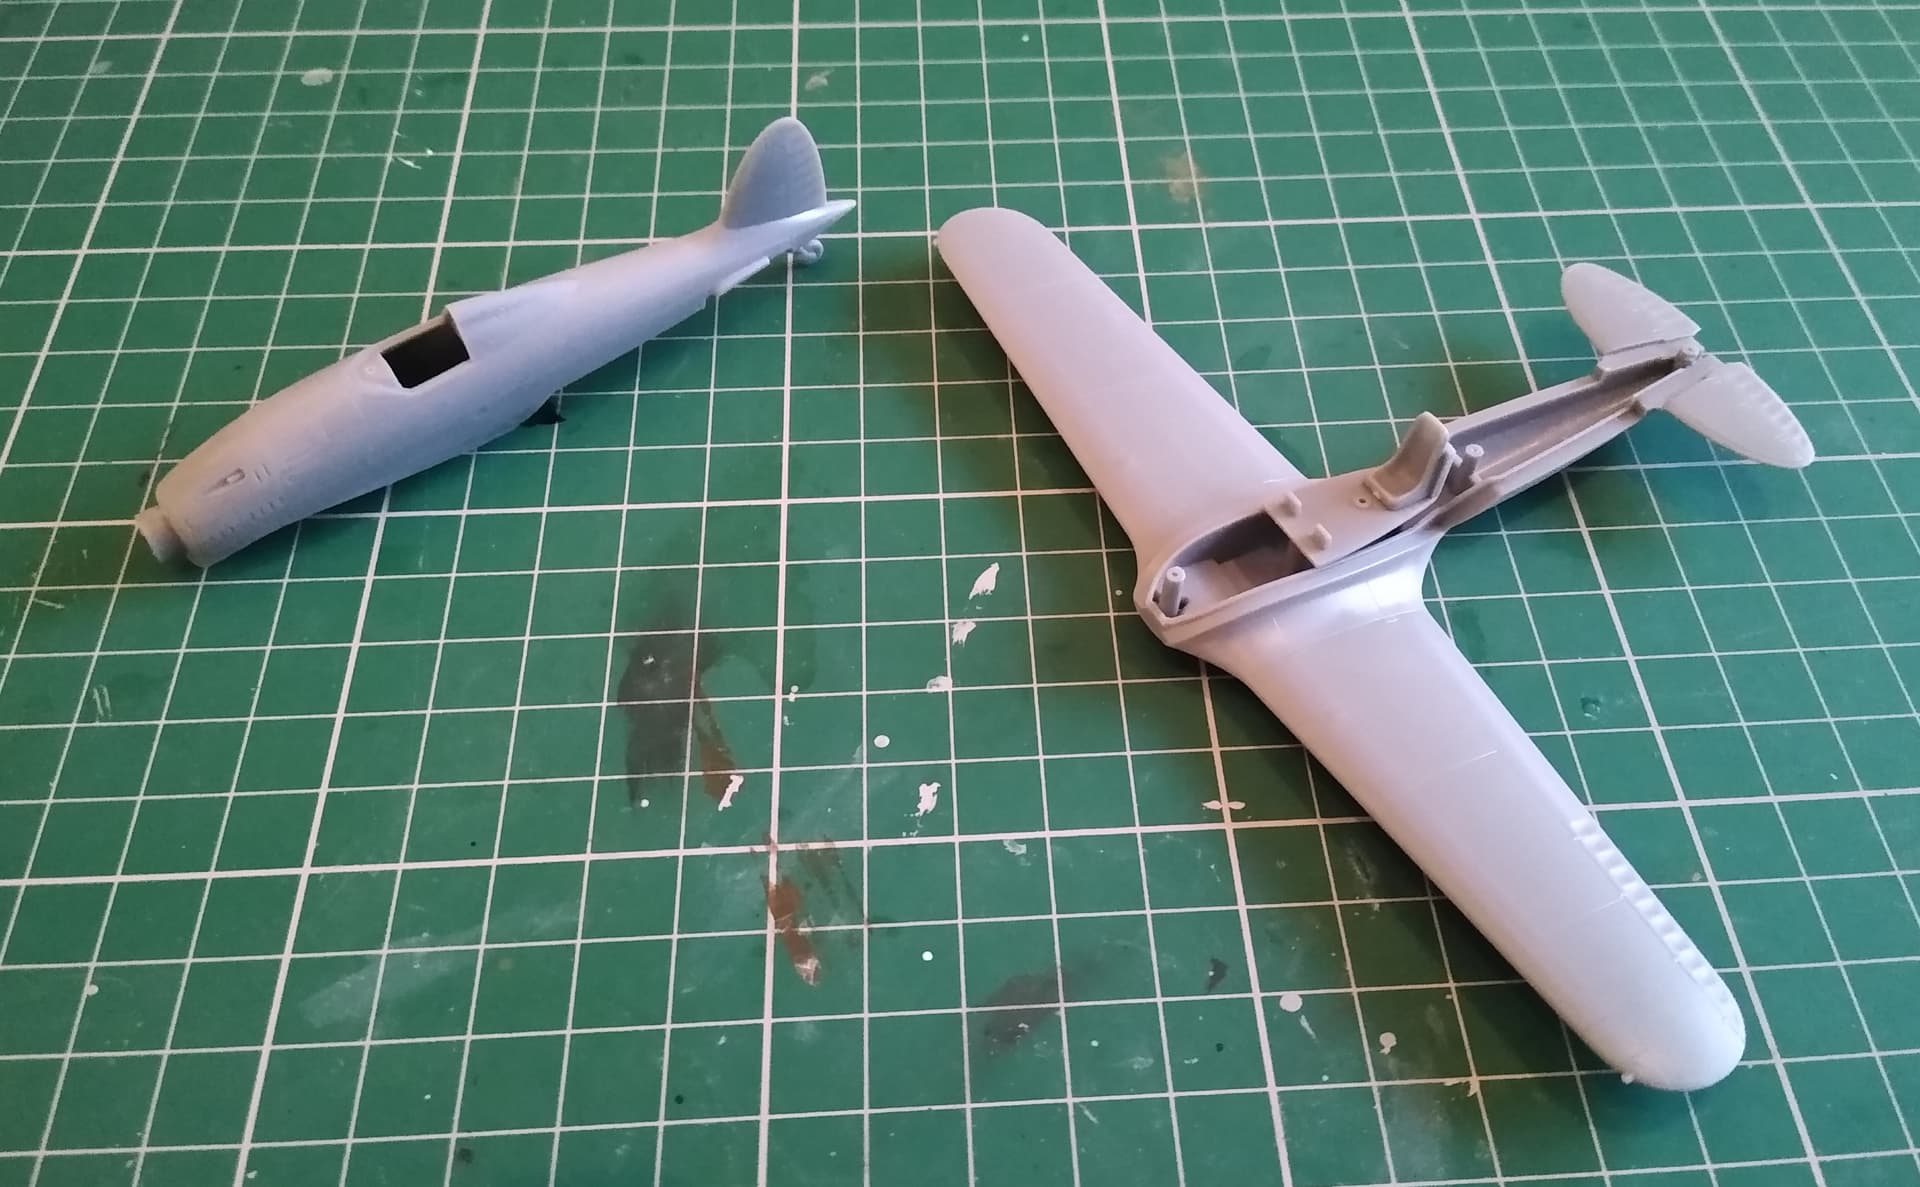
Had some time tonight to make a start on the Macchi.
Light sanding of the seams on the fuselage and wings, cockpit tub.
Dry fitted the parts and it looks like it should fit nicely.
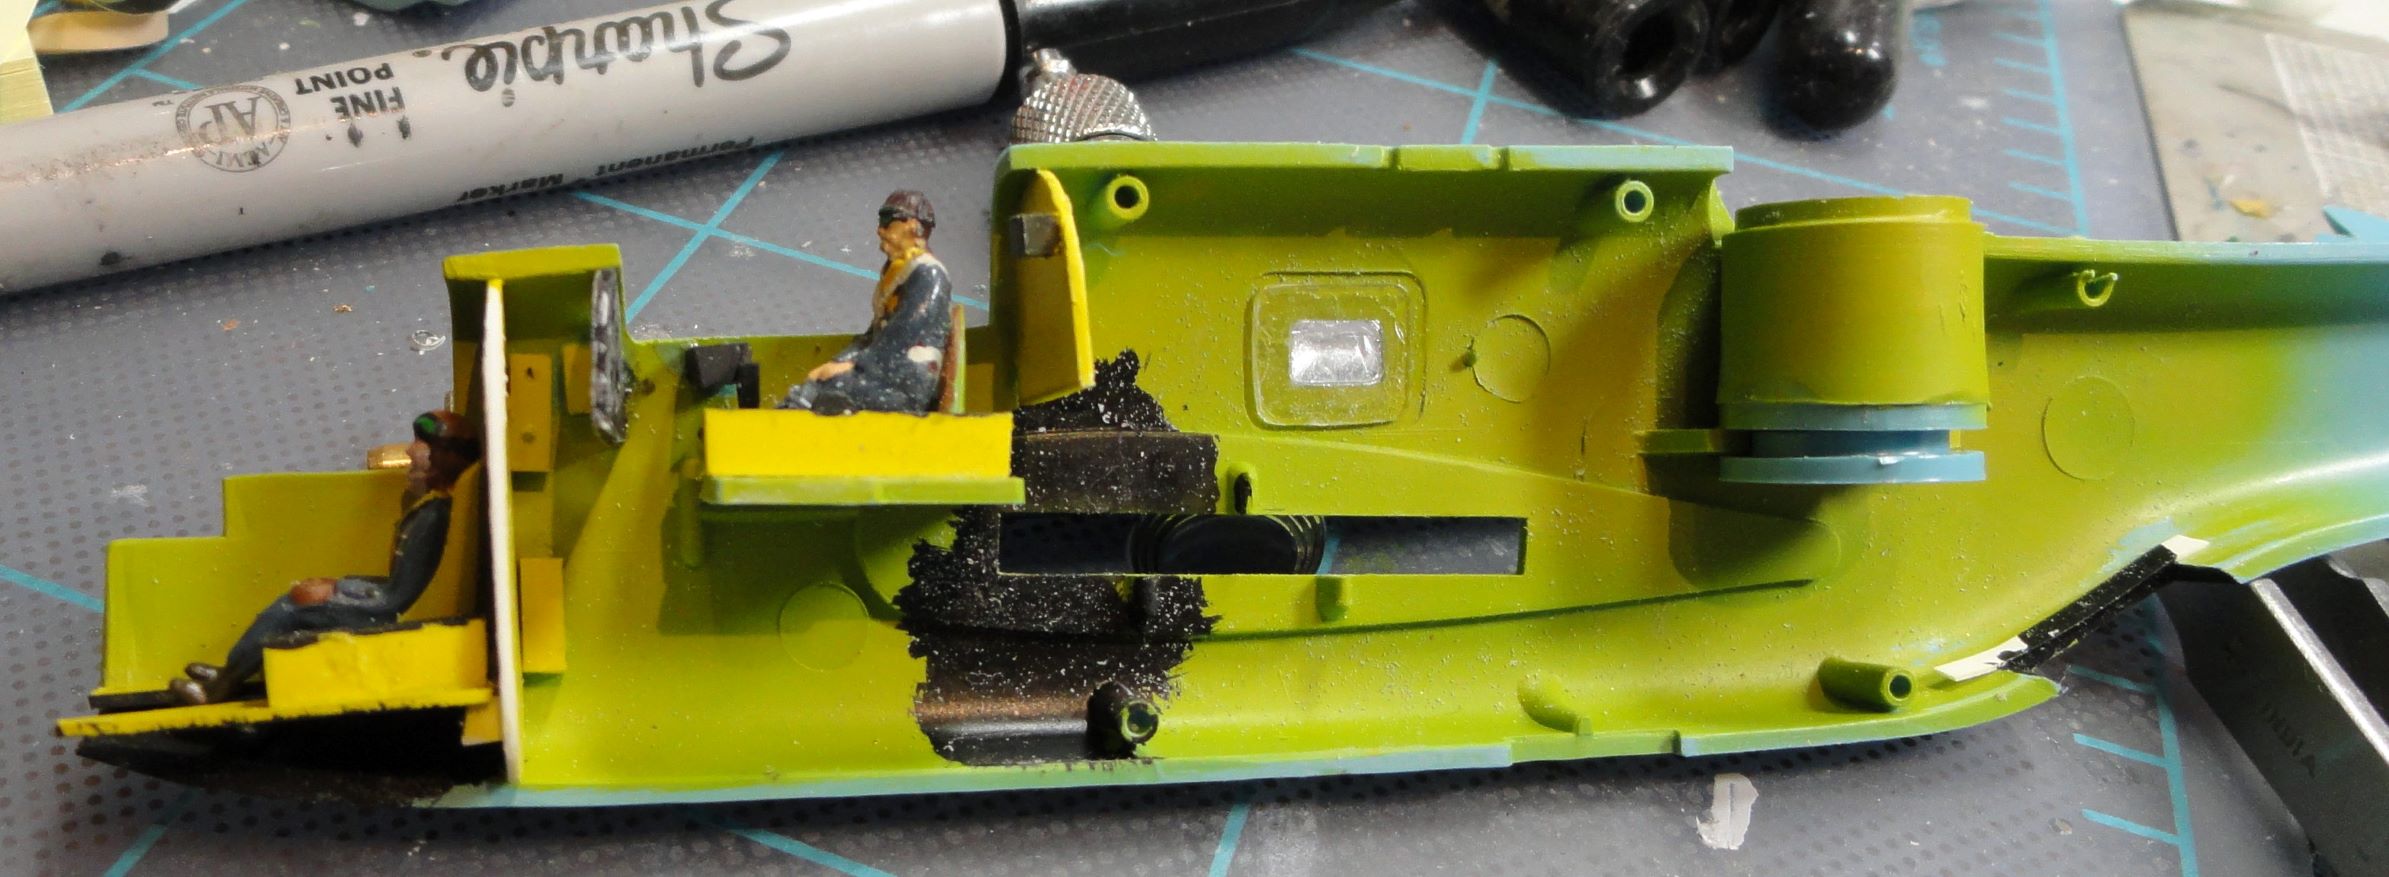
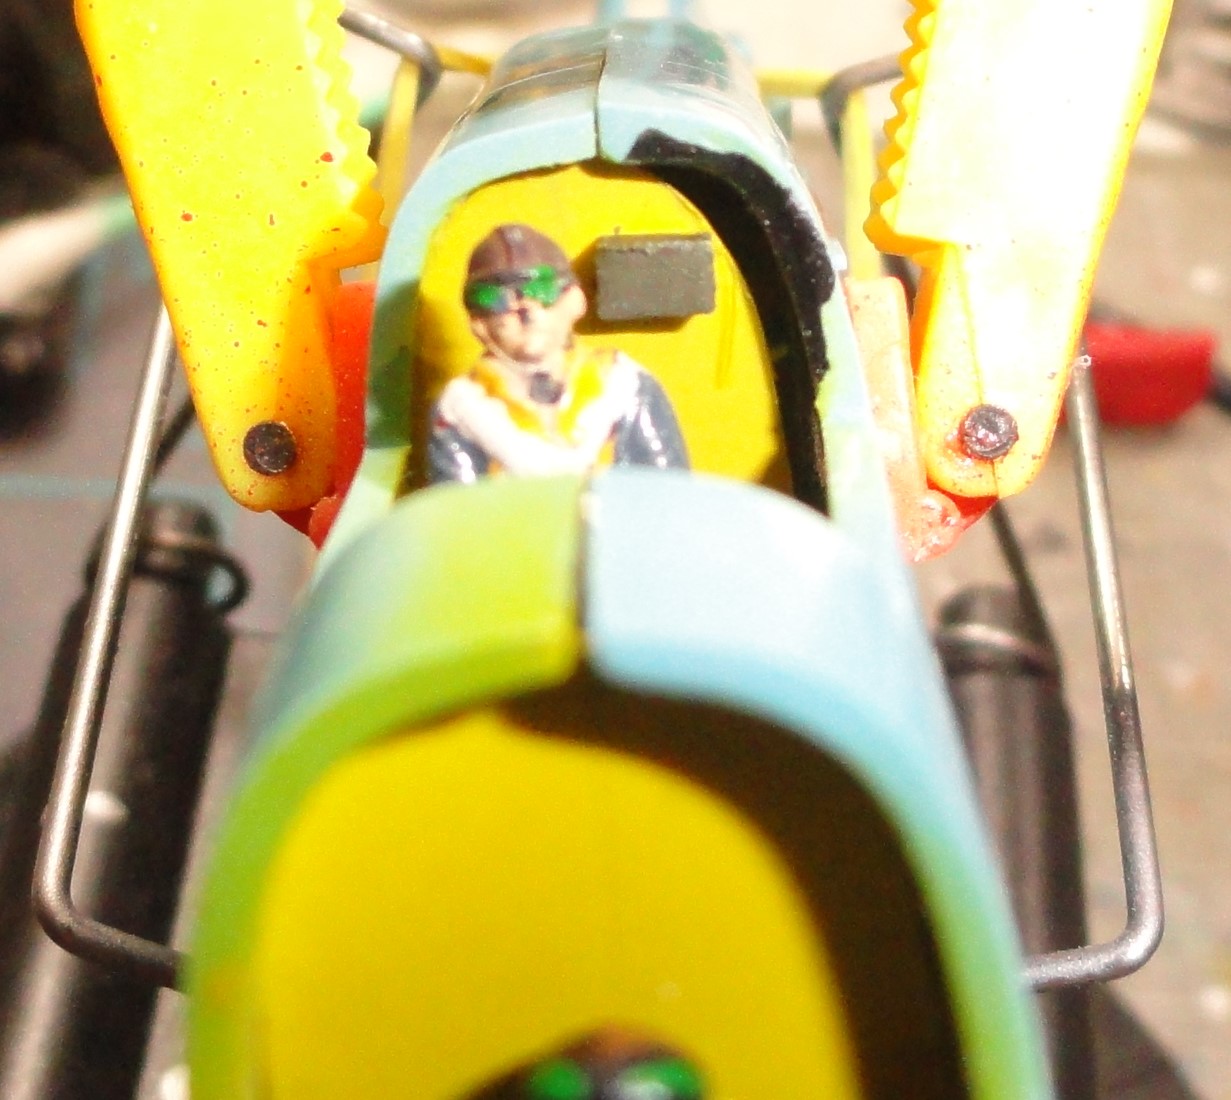
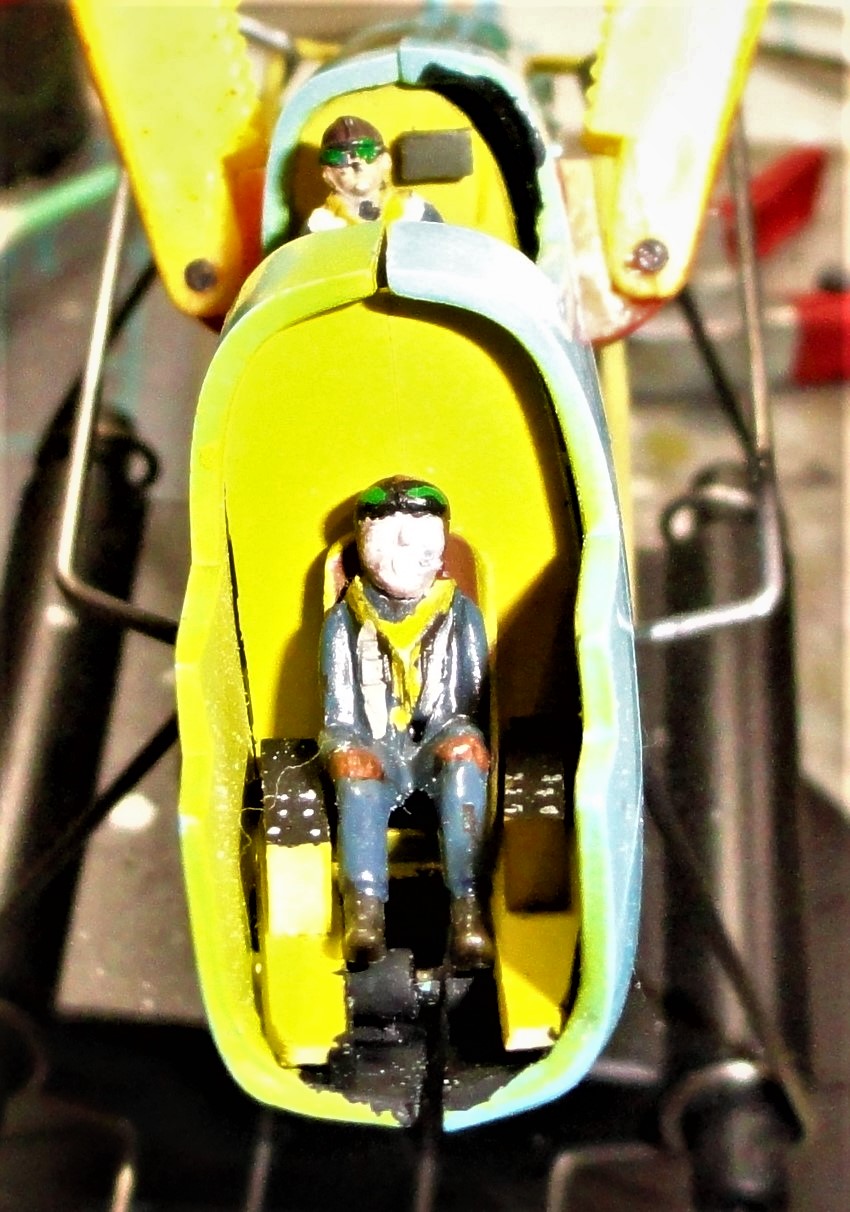
Feels like progress. Normally this is the the point in the program where we say good by to our intrepid aircrew as they prepare to be sealed into the fuselage under sheets of kabuki tape. Not quite so this time. Just the pilot will be covered under dark tape, but the observer will be hidden behind layers of transparent tape and the gunner will probably wait until after painting to board the aircraft. Had to go to the transparent tape because all the panel lines for the nose glass are on the inside@#$%^&* And it looks like I can trap the turret in place with out adding the glass.
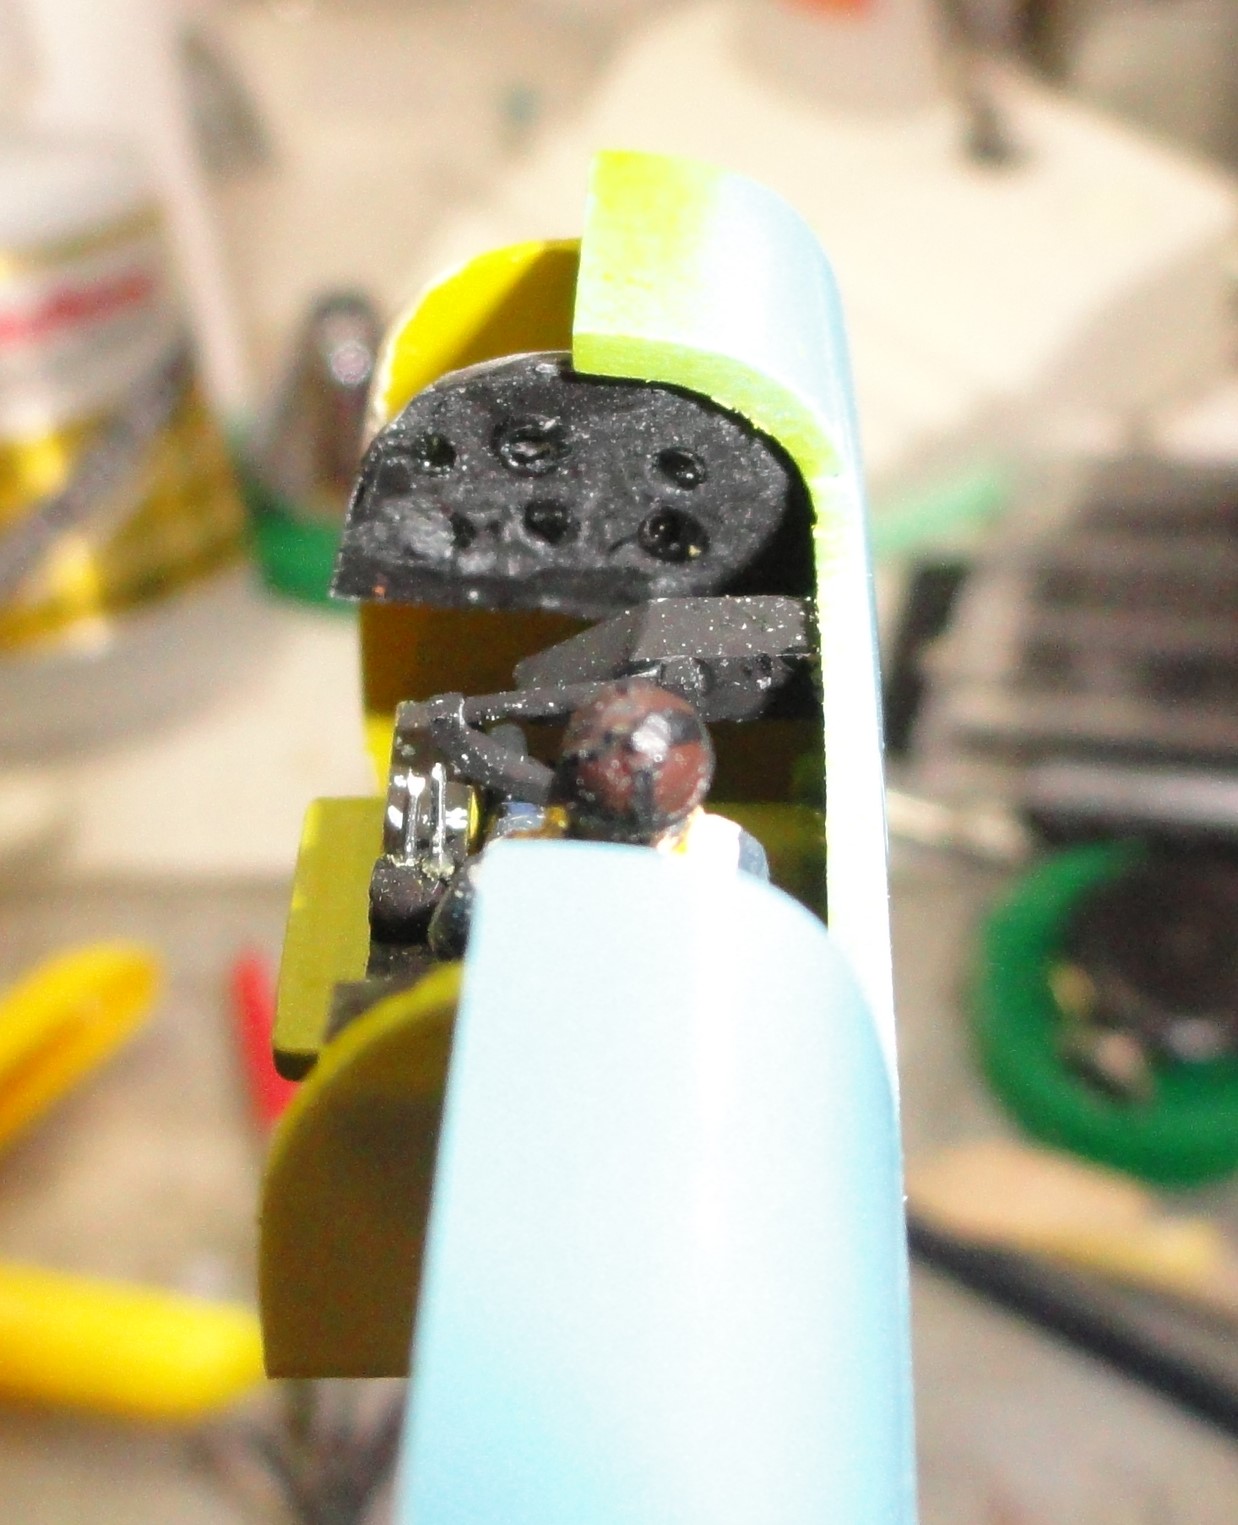
As delivered, Frog only had a deck, seat and pilot for the cockpit and the front of the fuselage just had the nose glass over the gaping chasm that was the fuselage. I tried to add an instrument panel and rear wall for the cockpit.(too narrow and too short) and completely faked an observers position in the front.
The pilot and observer are both volunteers from the spares box as the original pilot went AWOL and there wasn’t a bombardier or an observer in the original kit. The gunner stayed behind, but that might be because his legs had been cut off at the knees.
Looking really good Mark. It’ll be worth all the extra work.
I just had a look at clear parts on mine. I had never noticed that they moulded the frame on the nose on the inside. I’m at a loss as to why, other than to intentionally make life difficult for the tool maker back in the day!
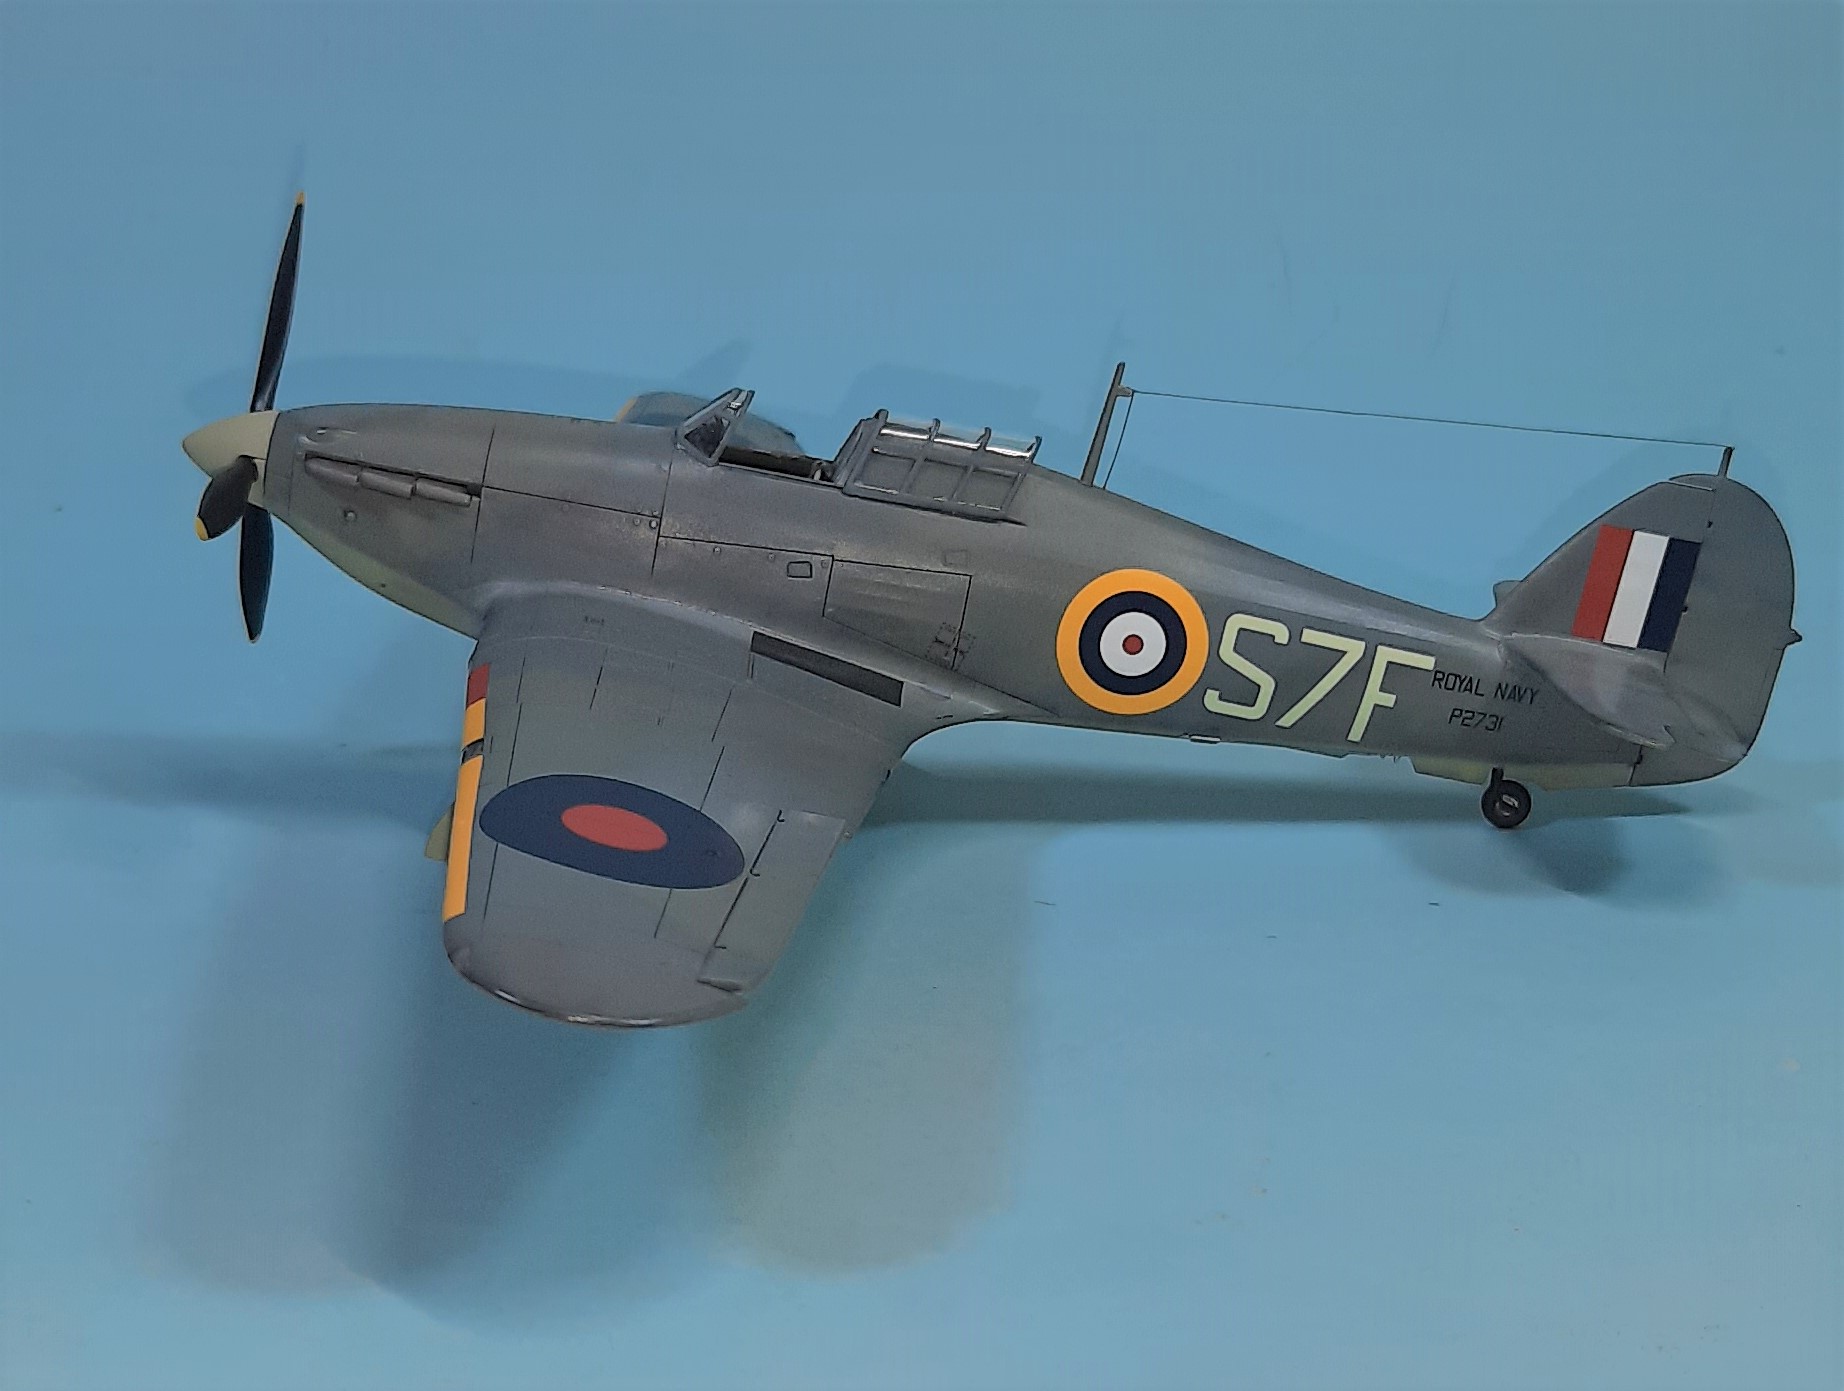
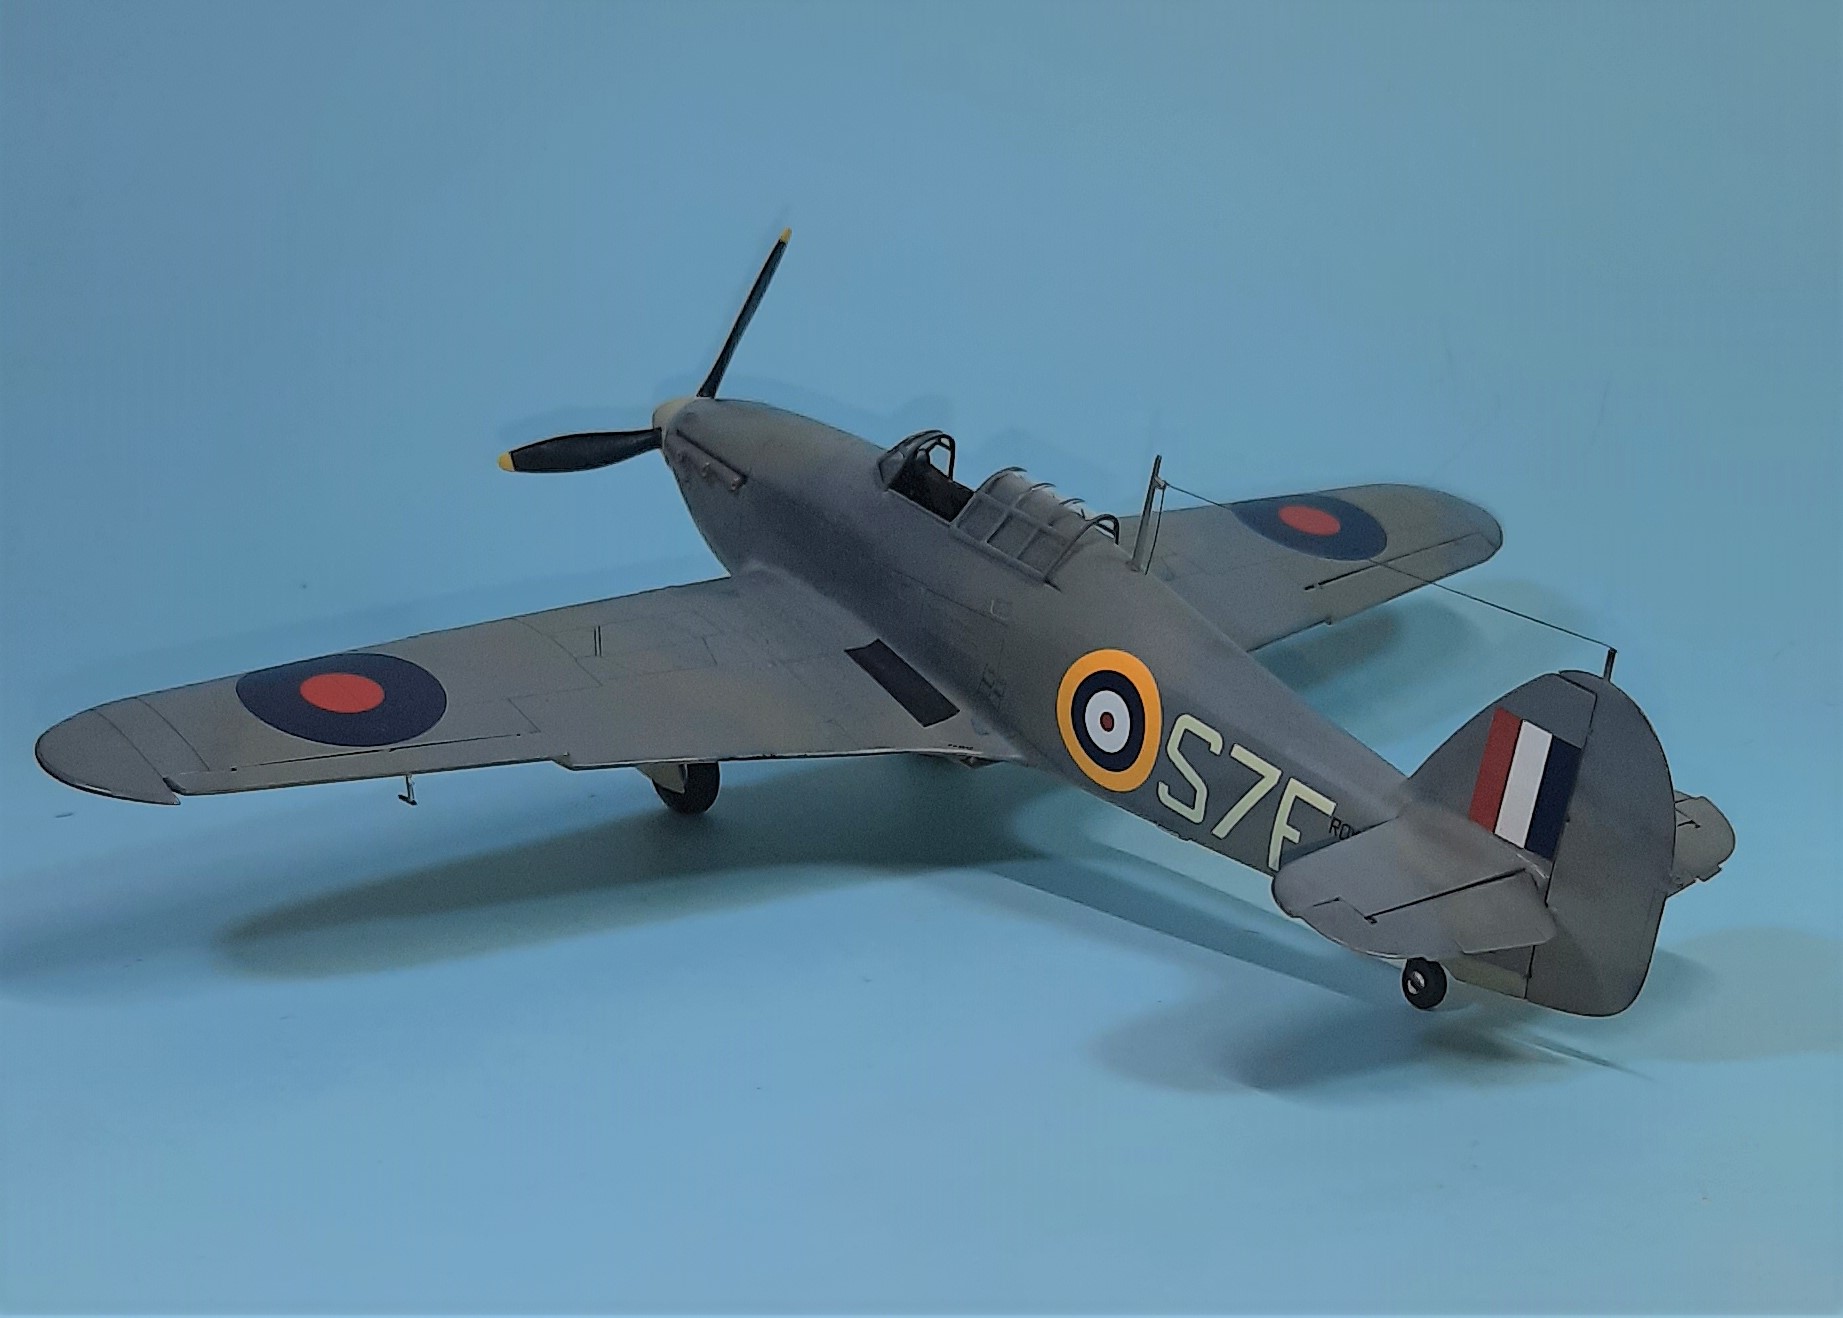
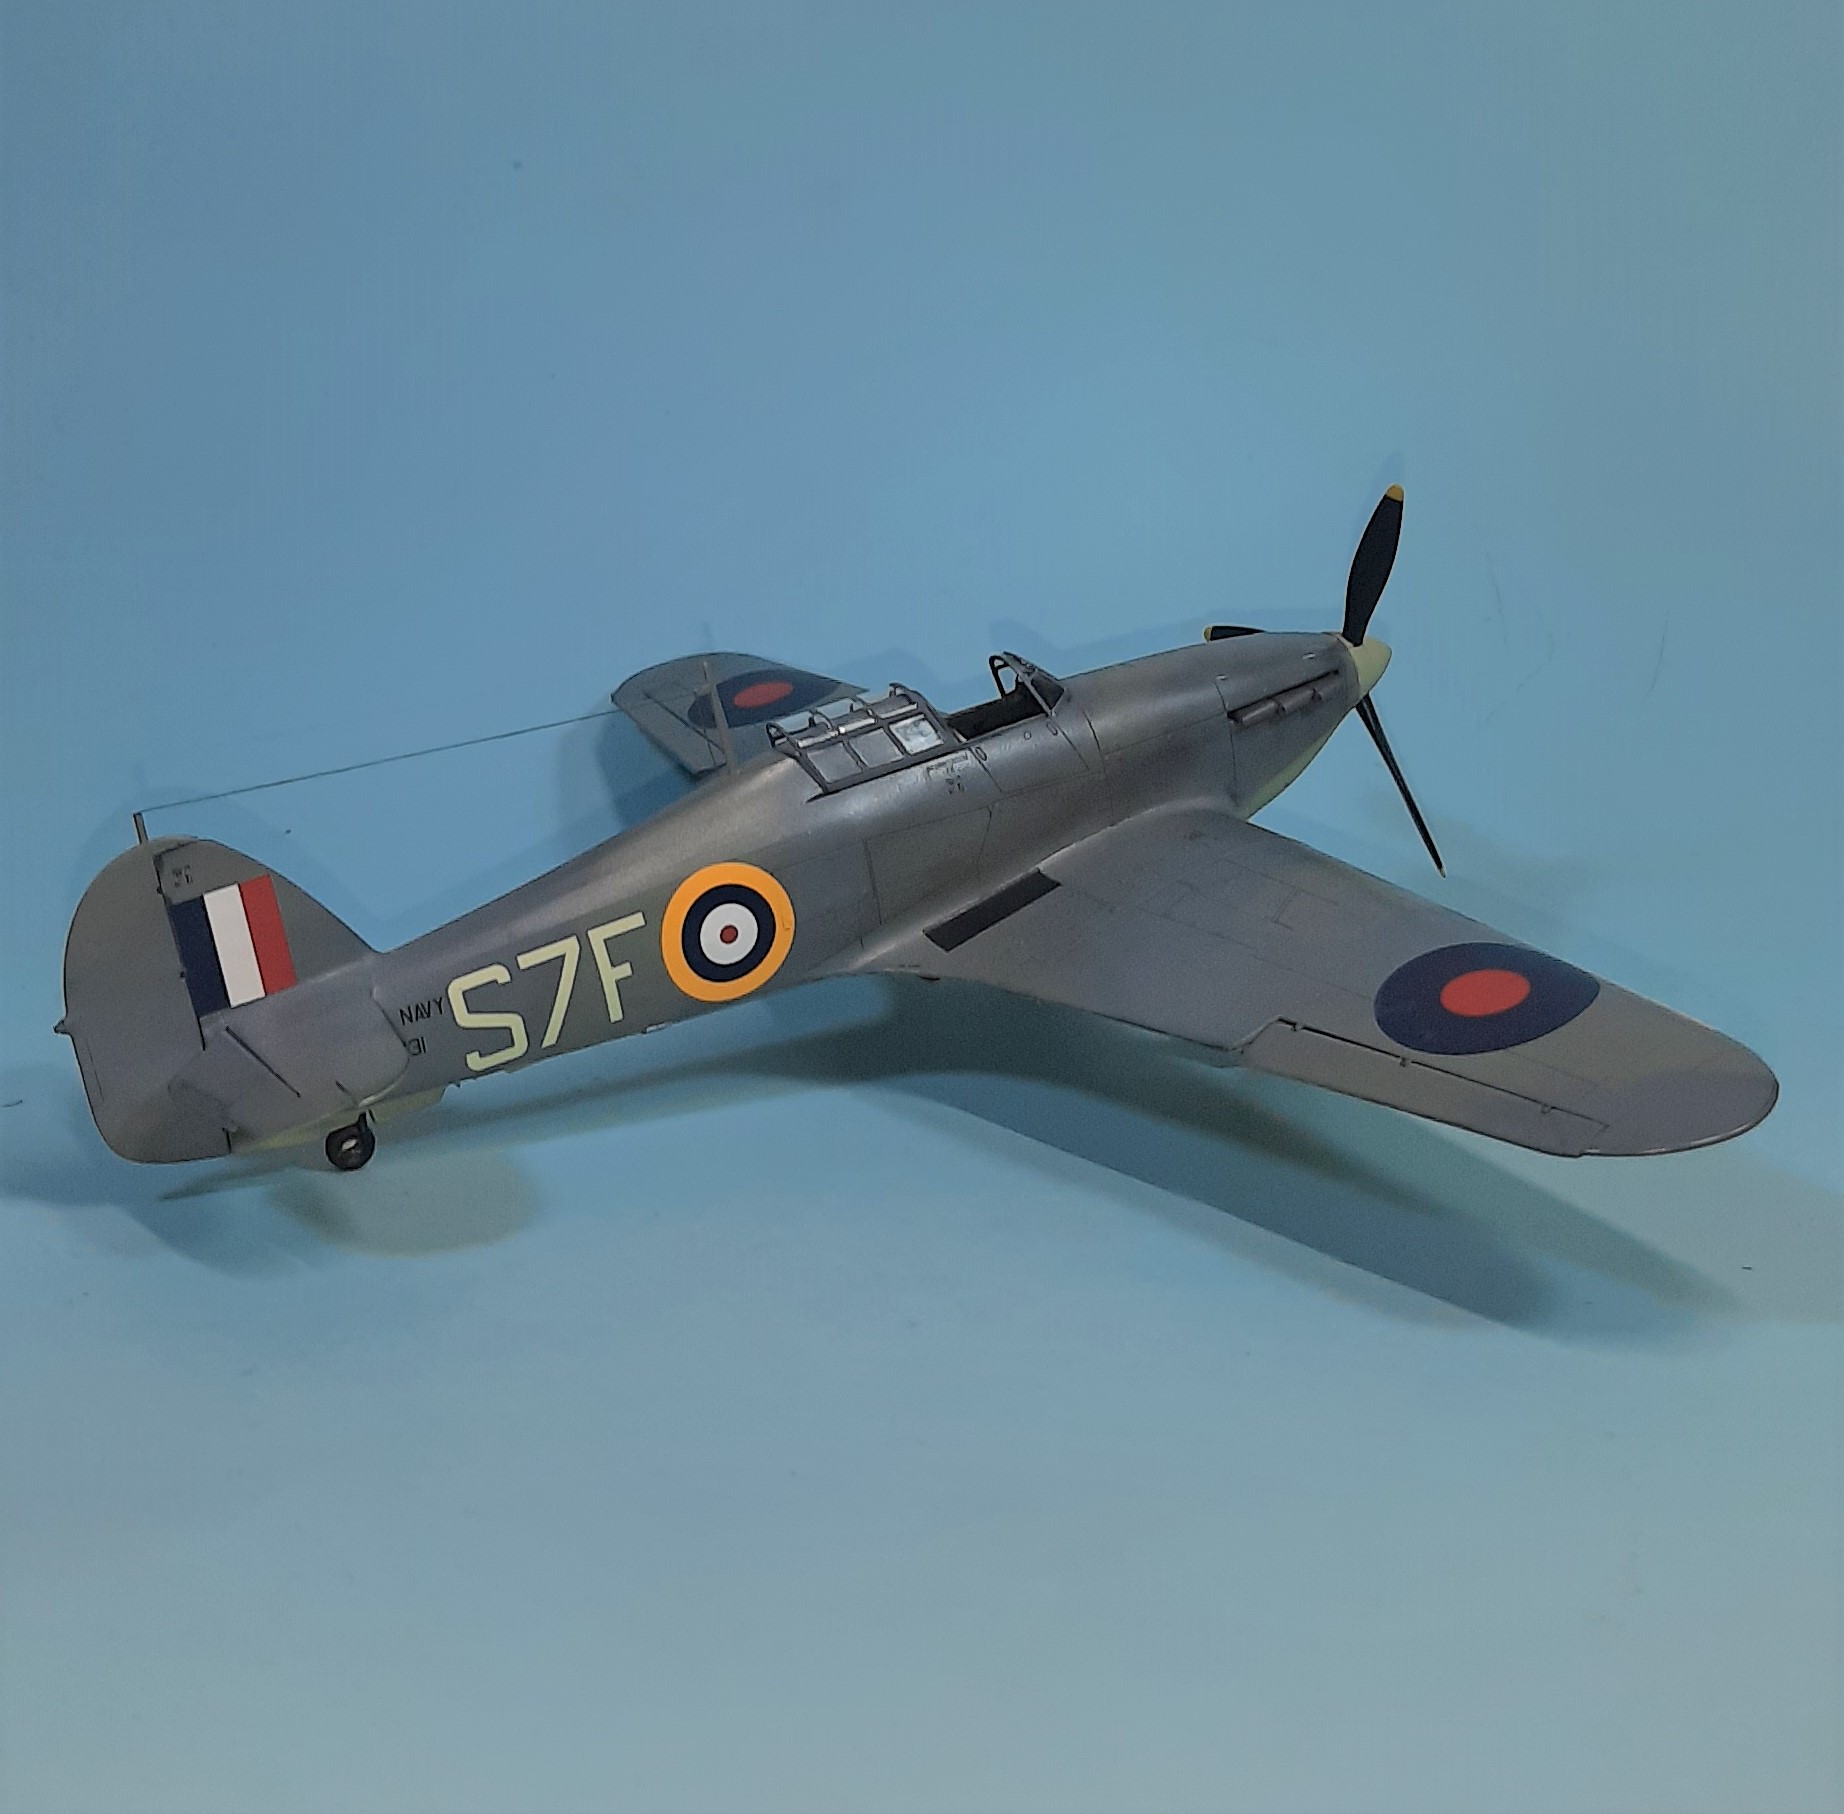
This was a fun build, and a nice addition to the collection. In hindsight, I think I under did the exhaust streaking, still I like it. I can recommend the Airfix kit to anyone looking for a bit of plastic fun!