I doubt anyone working on a Jake ever had air conditioner assist. Just sayin’…
2 Likes
Hi mates,
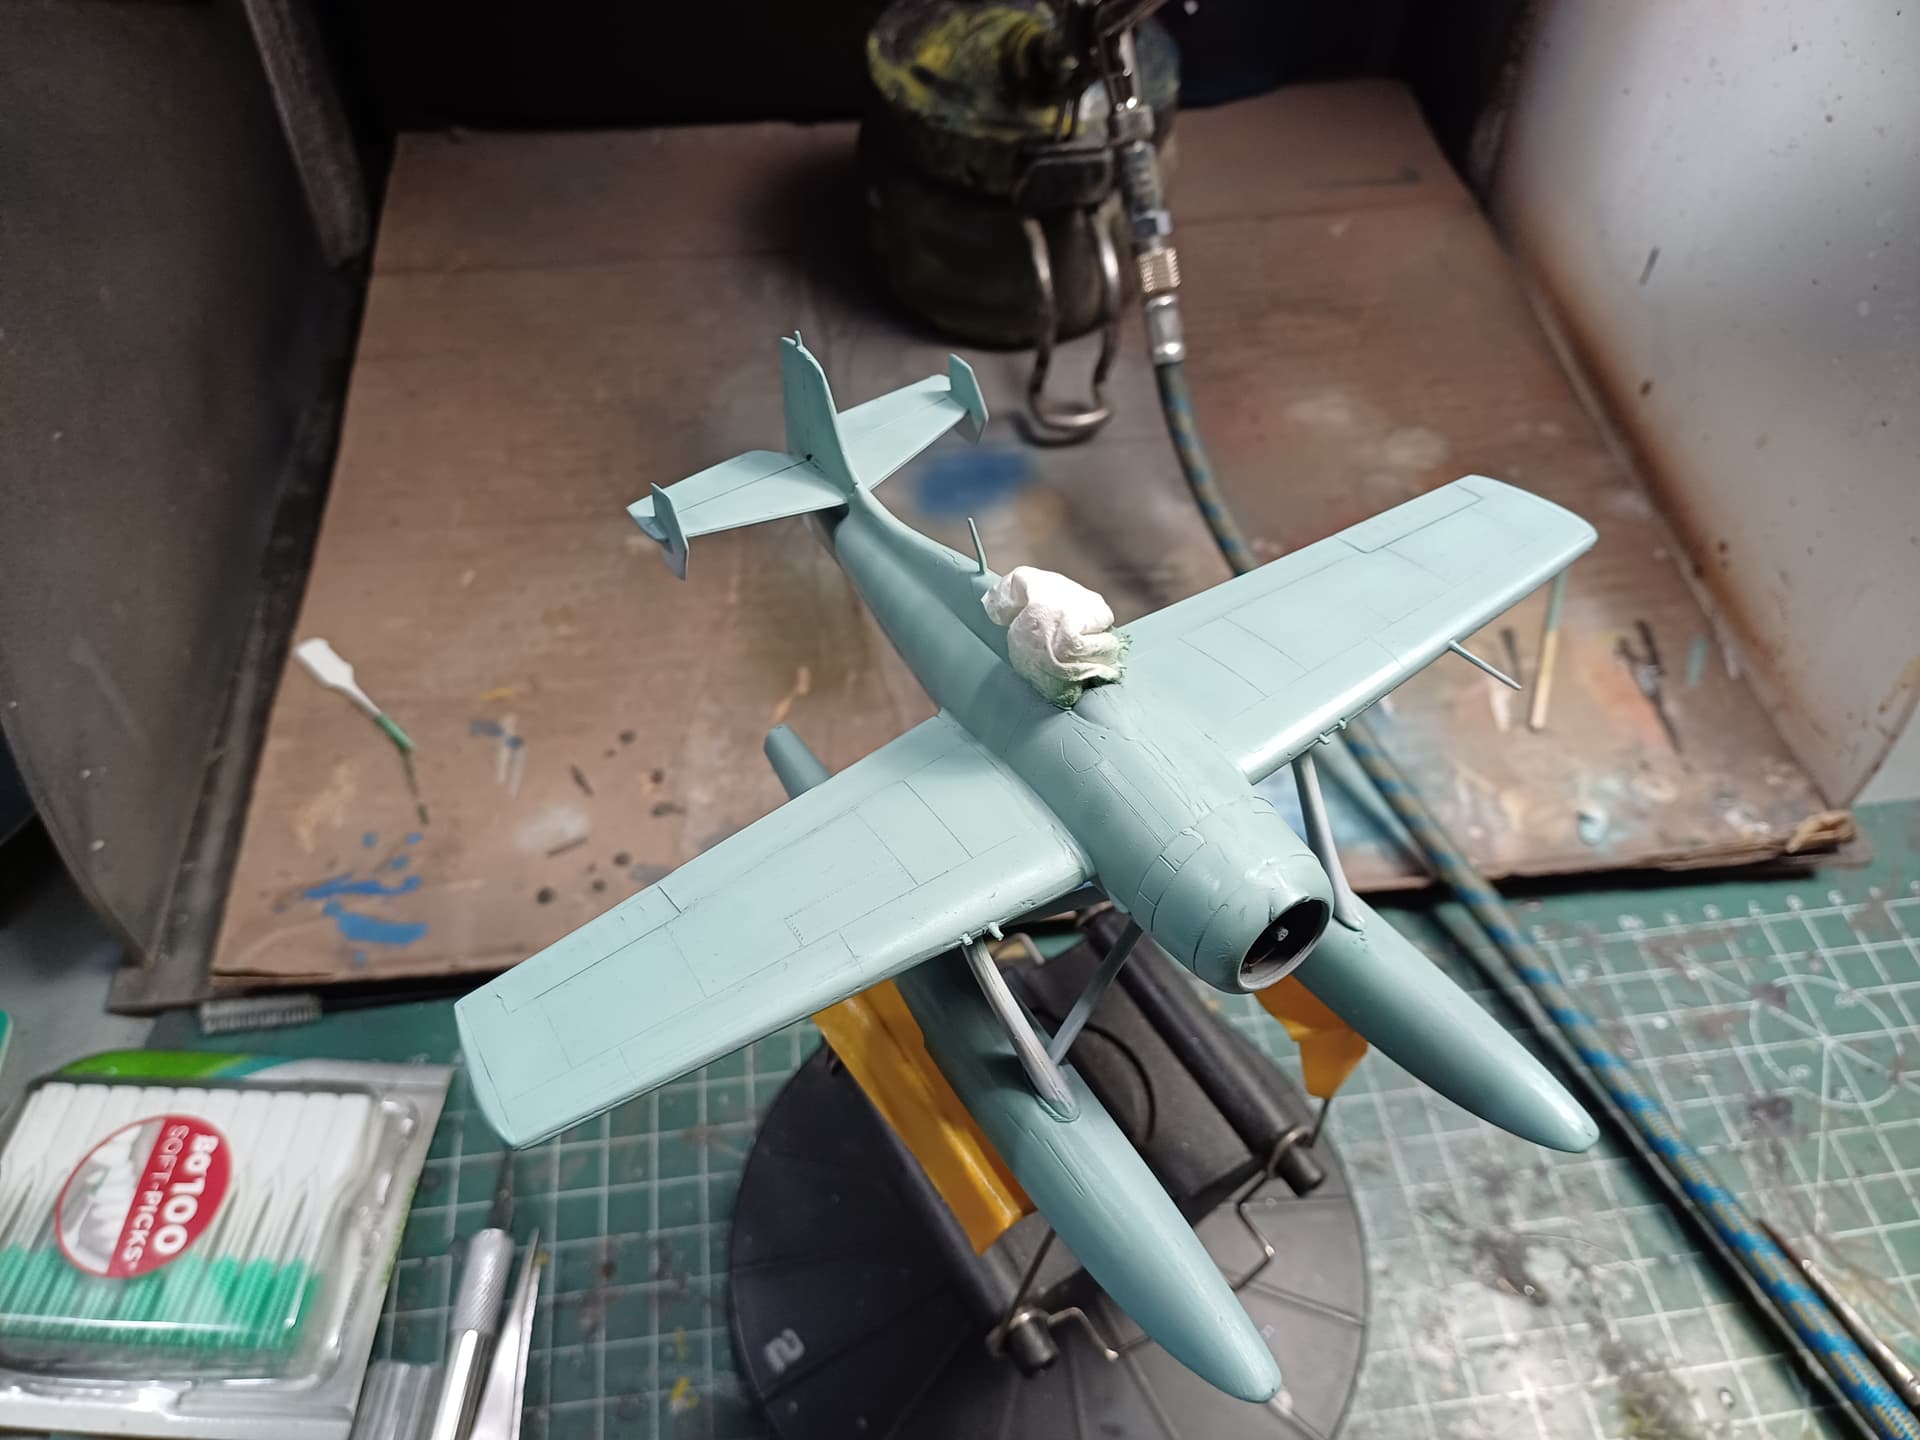
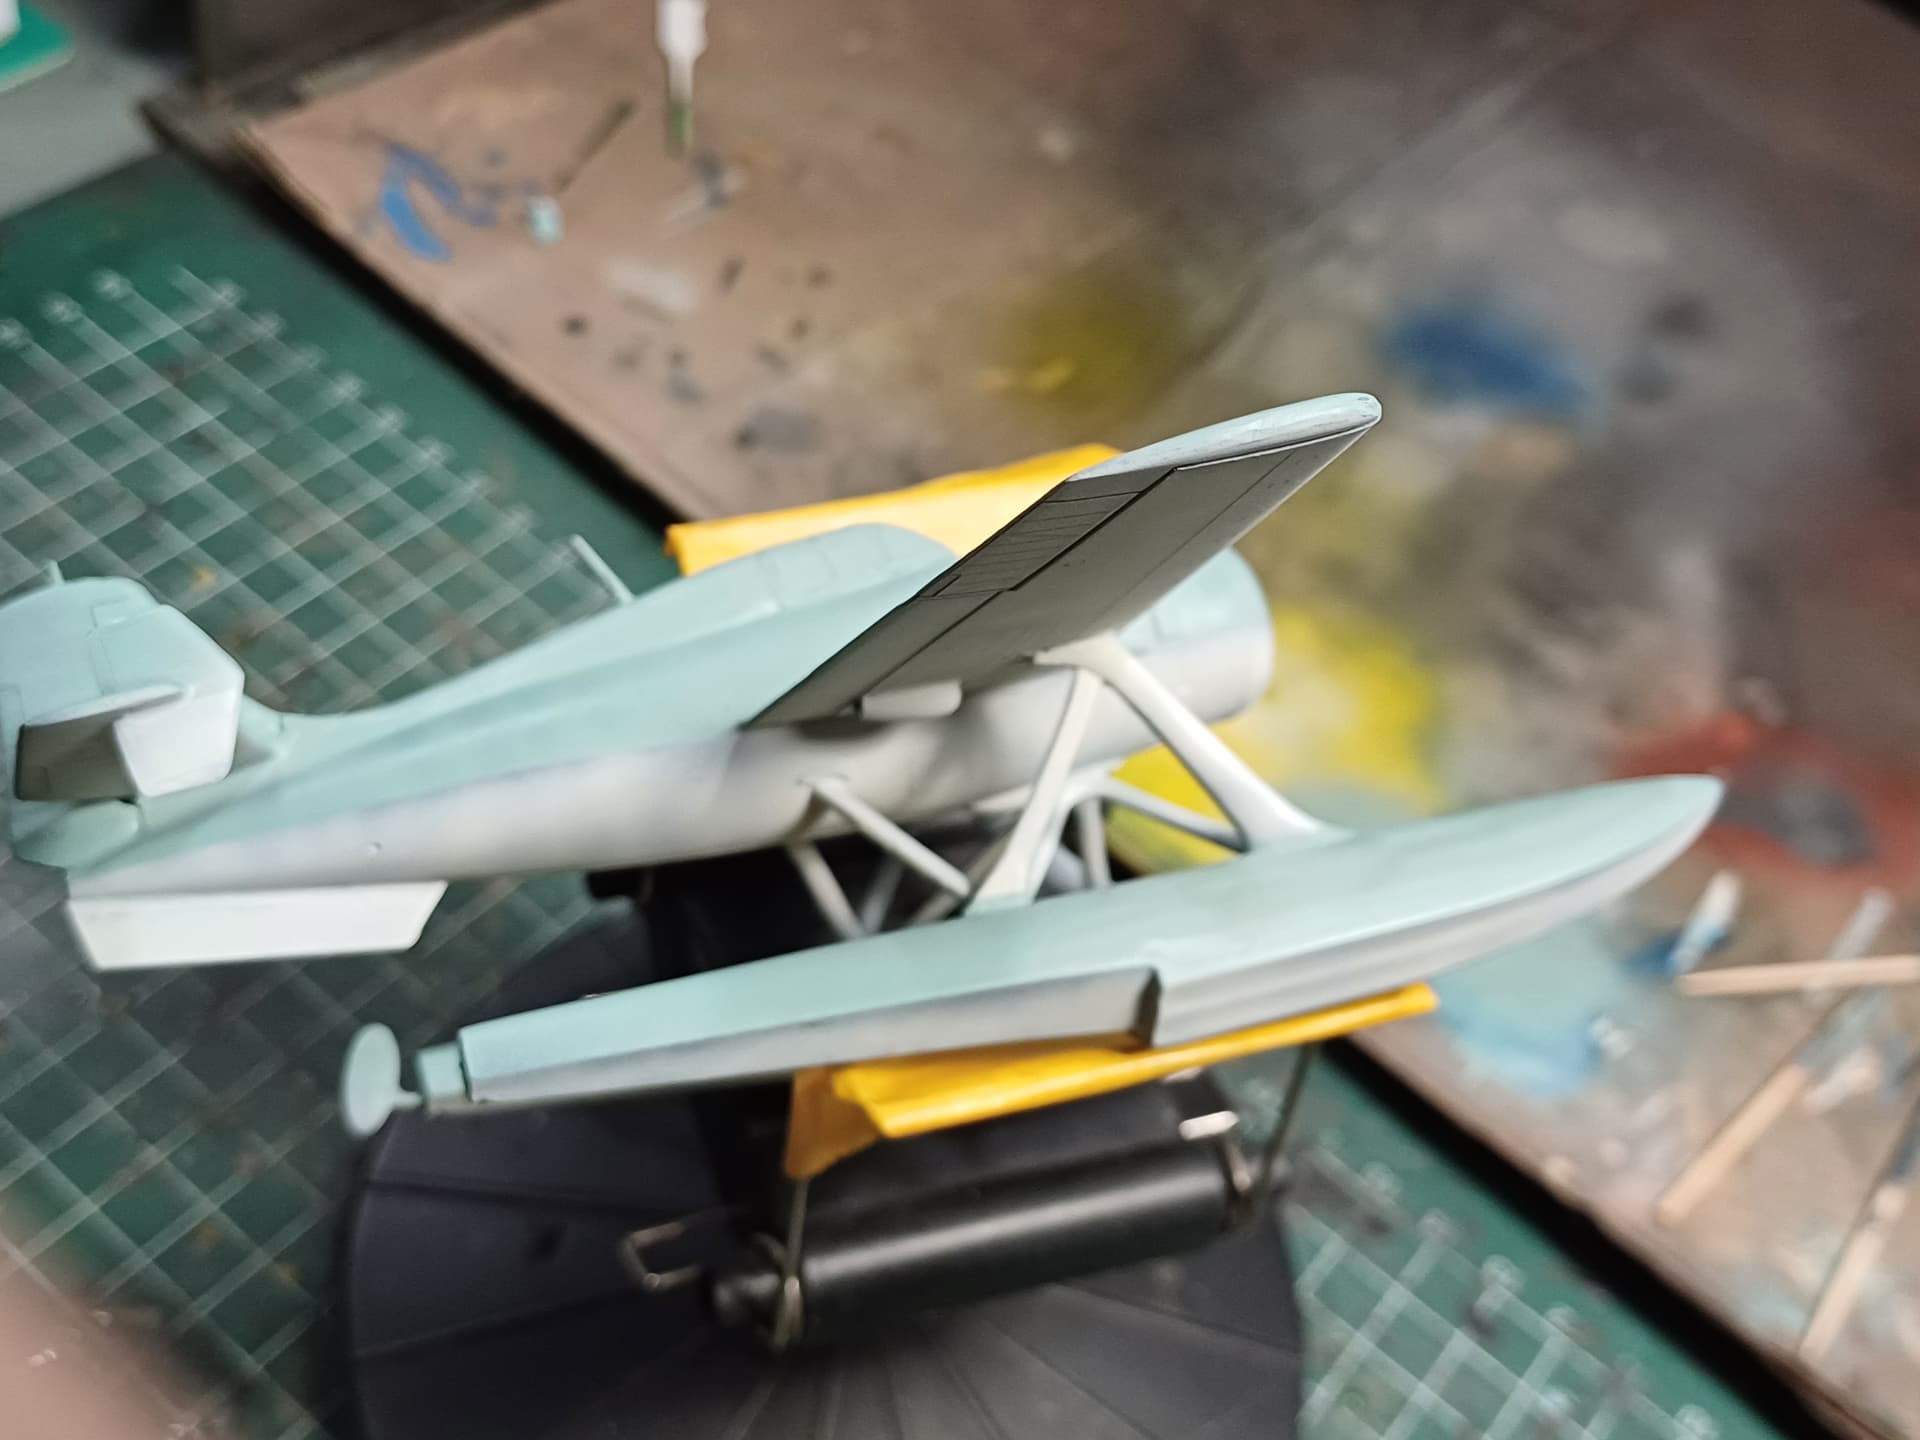
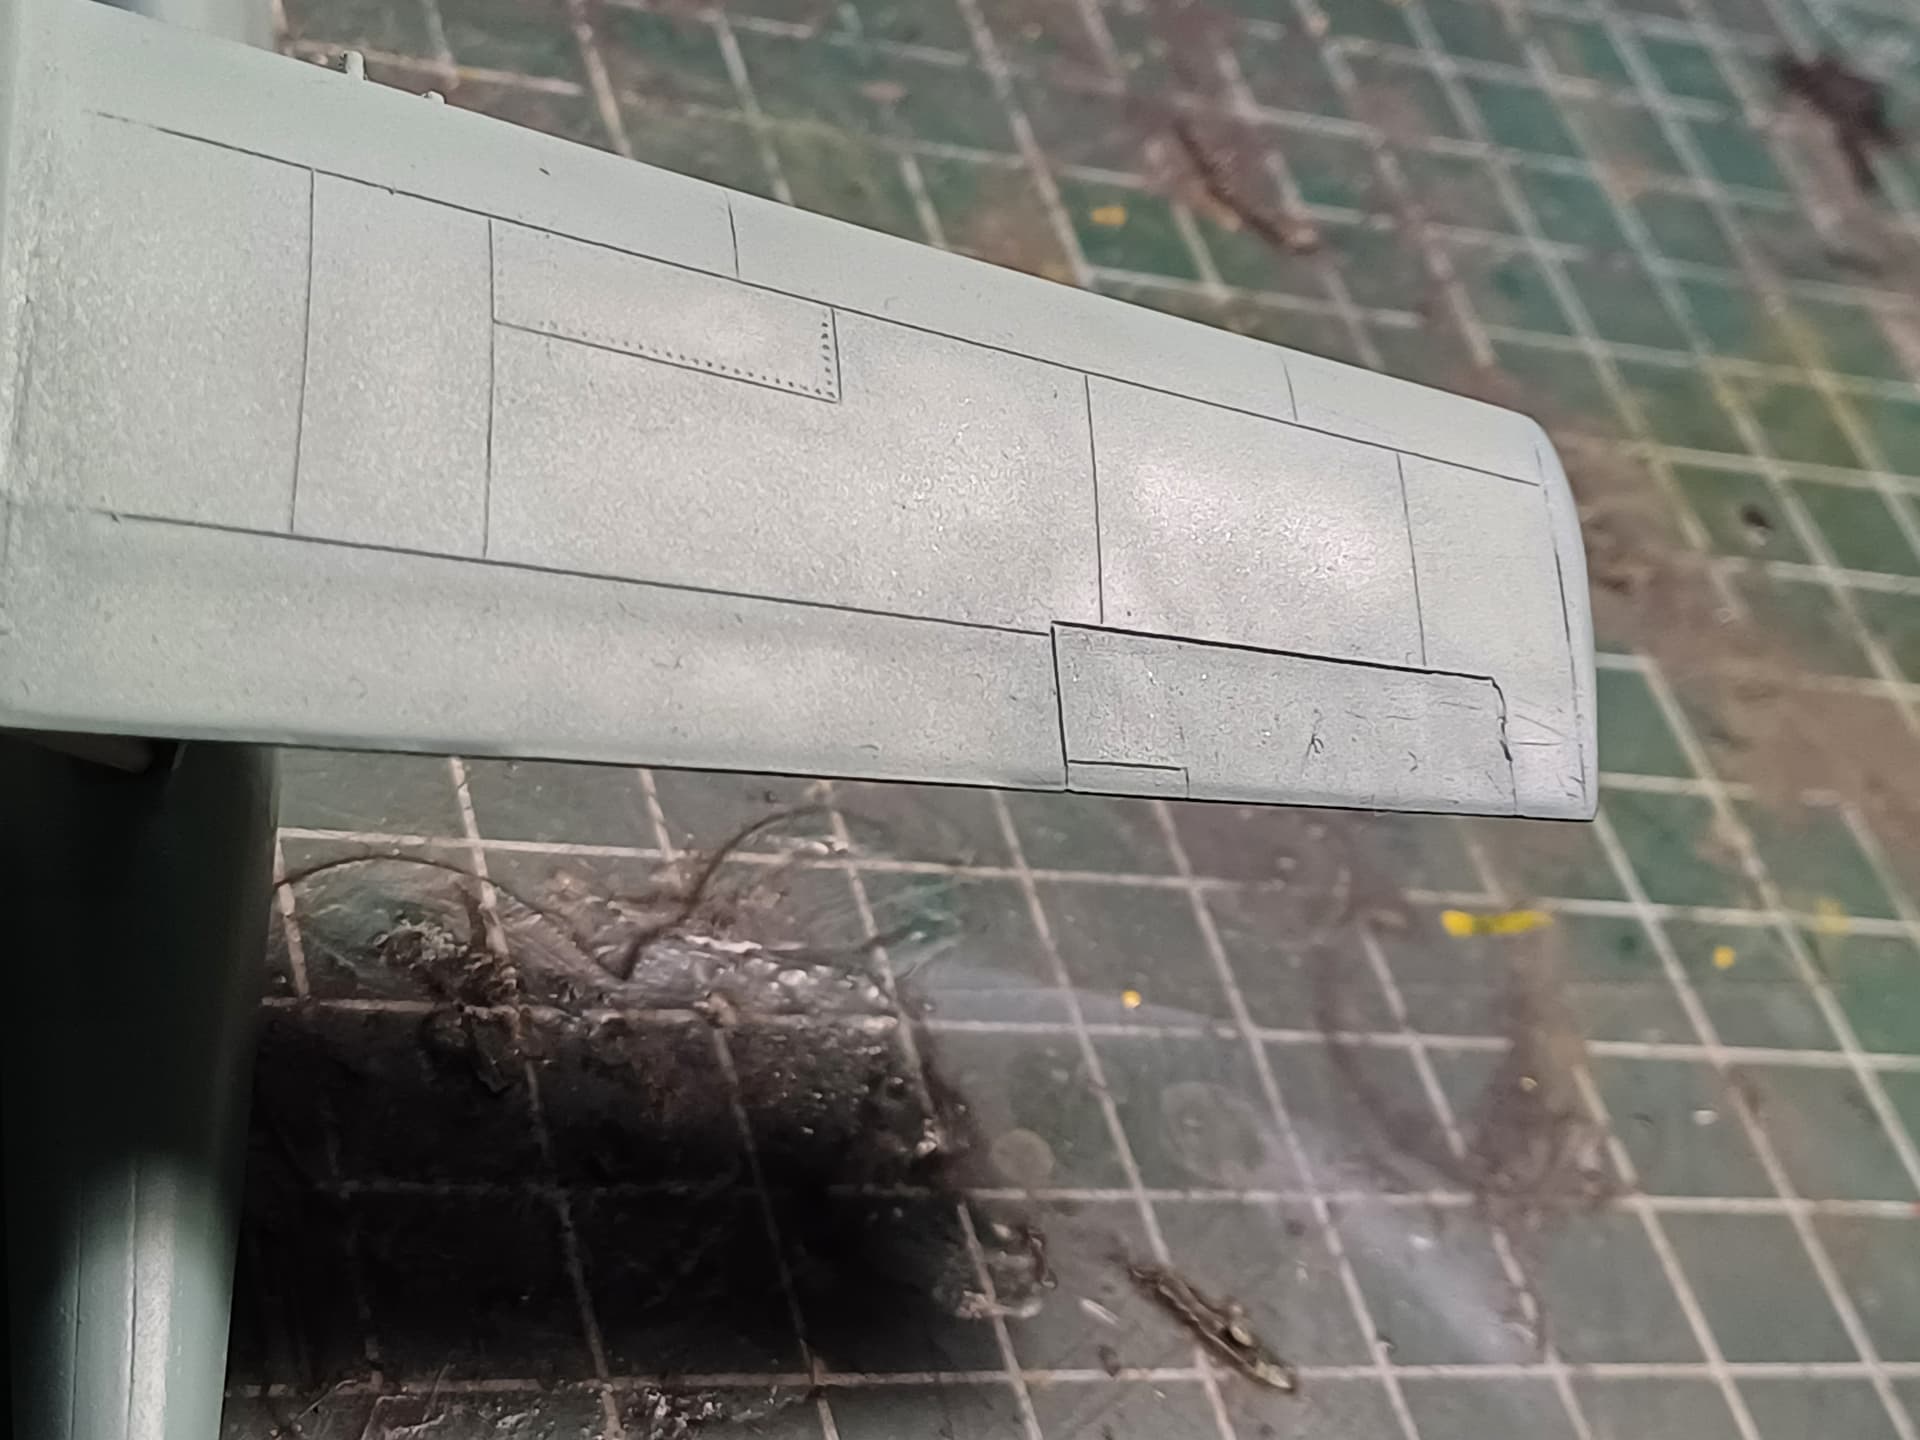
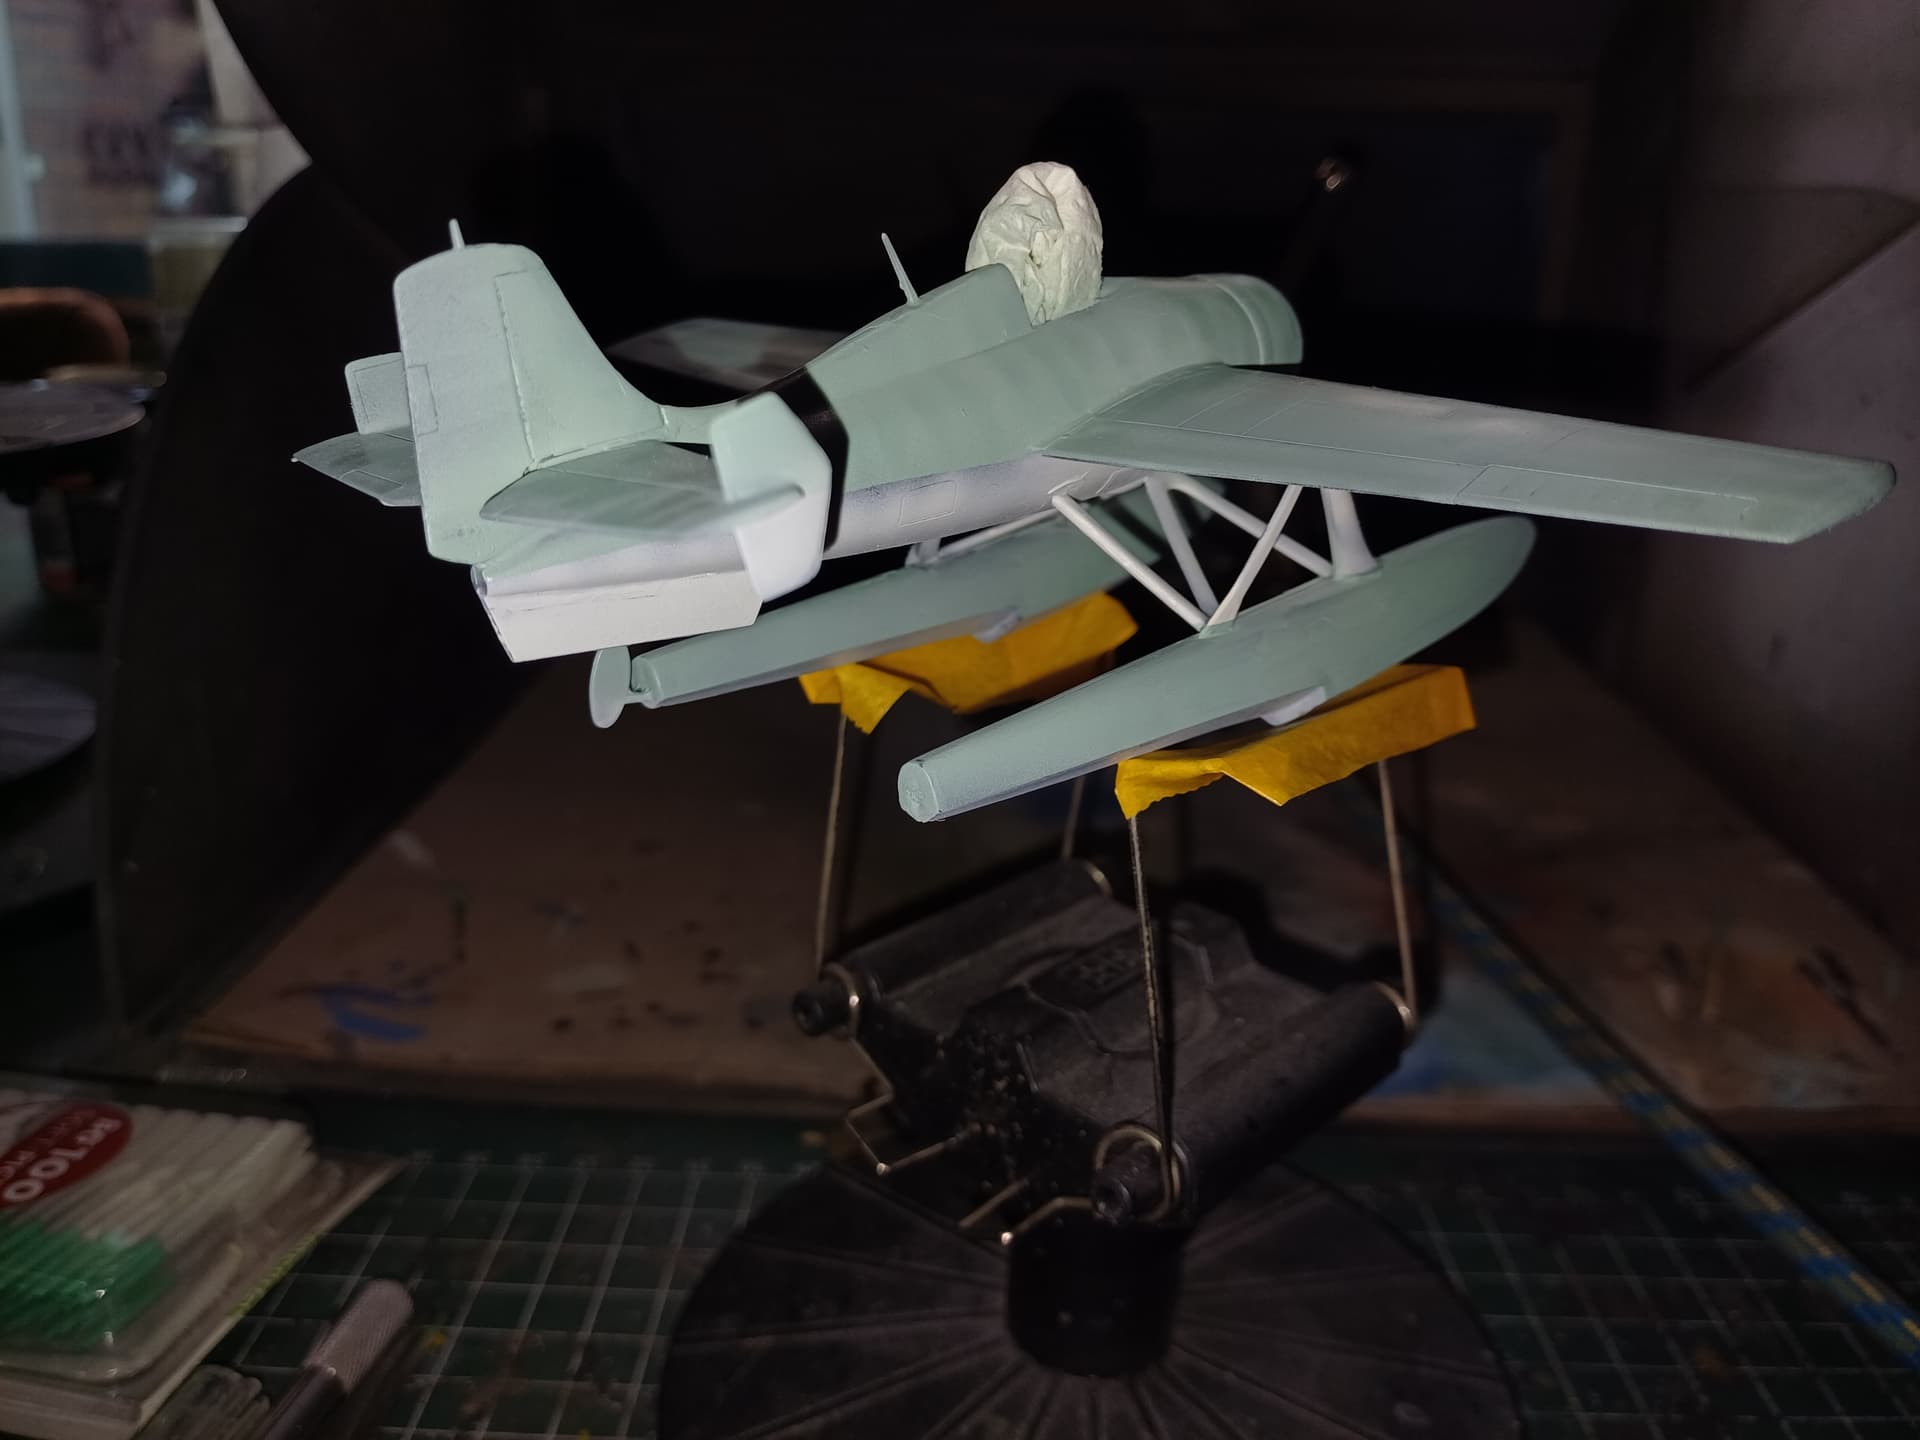
I finally got there…found my building mojo again and here it is:

…caught by satellite…
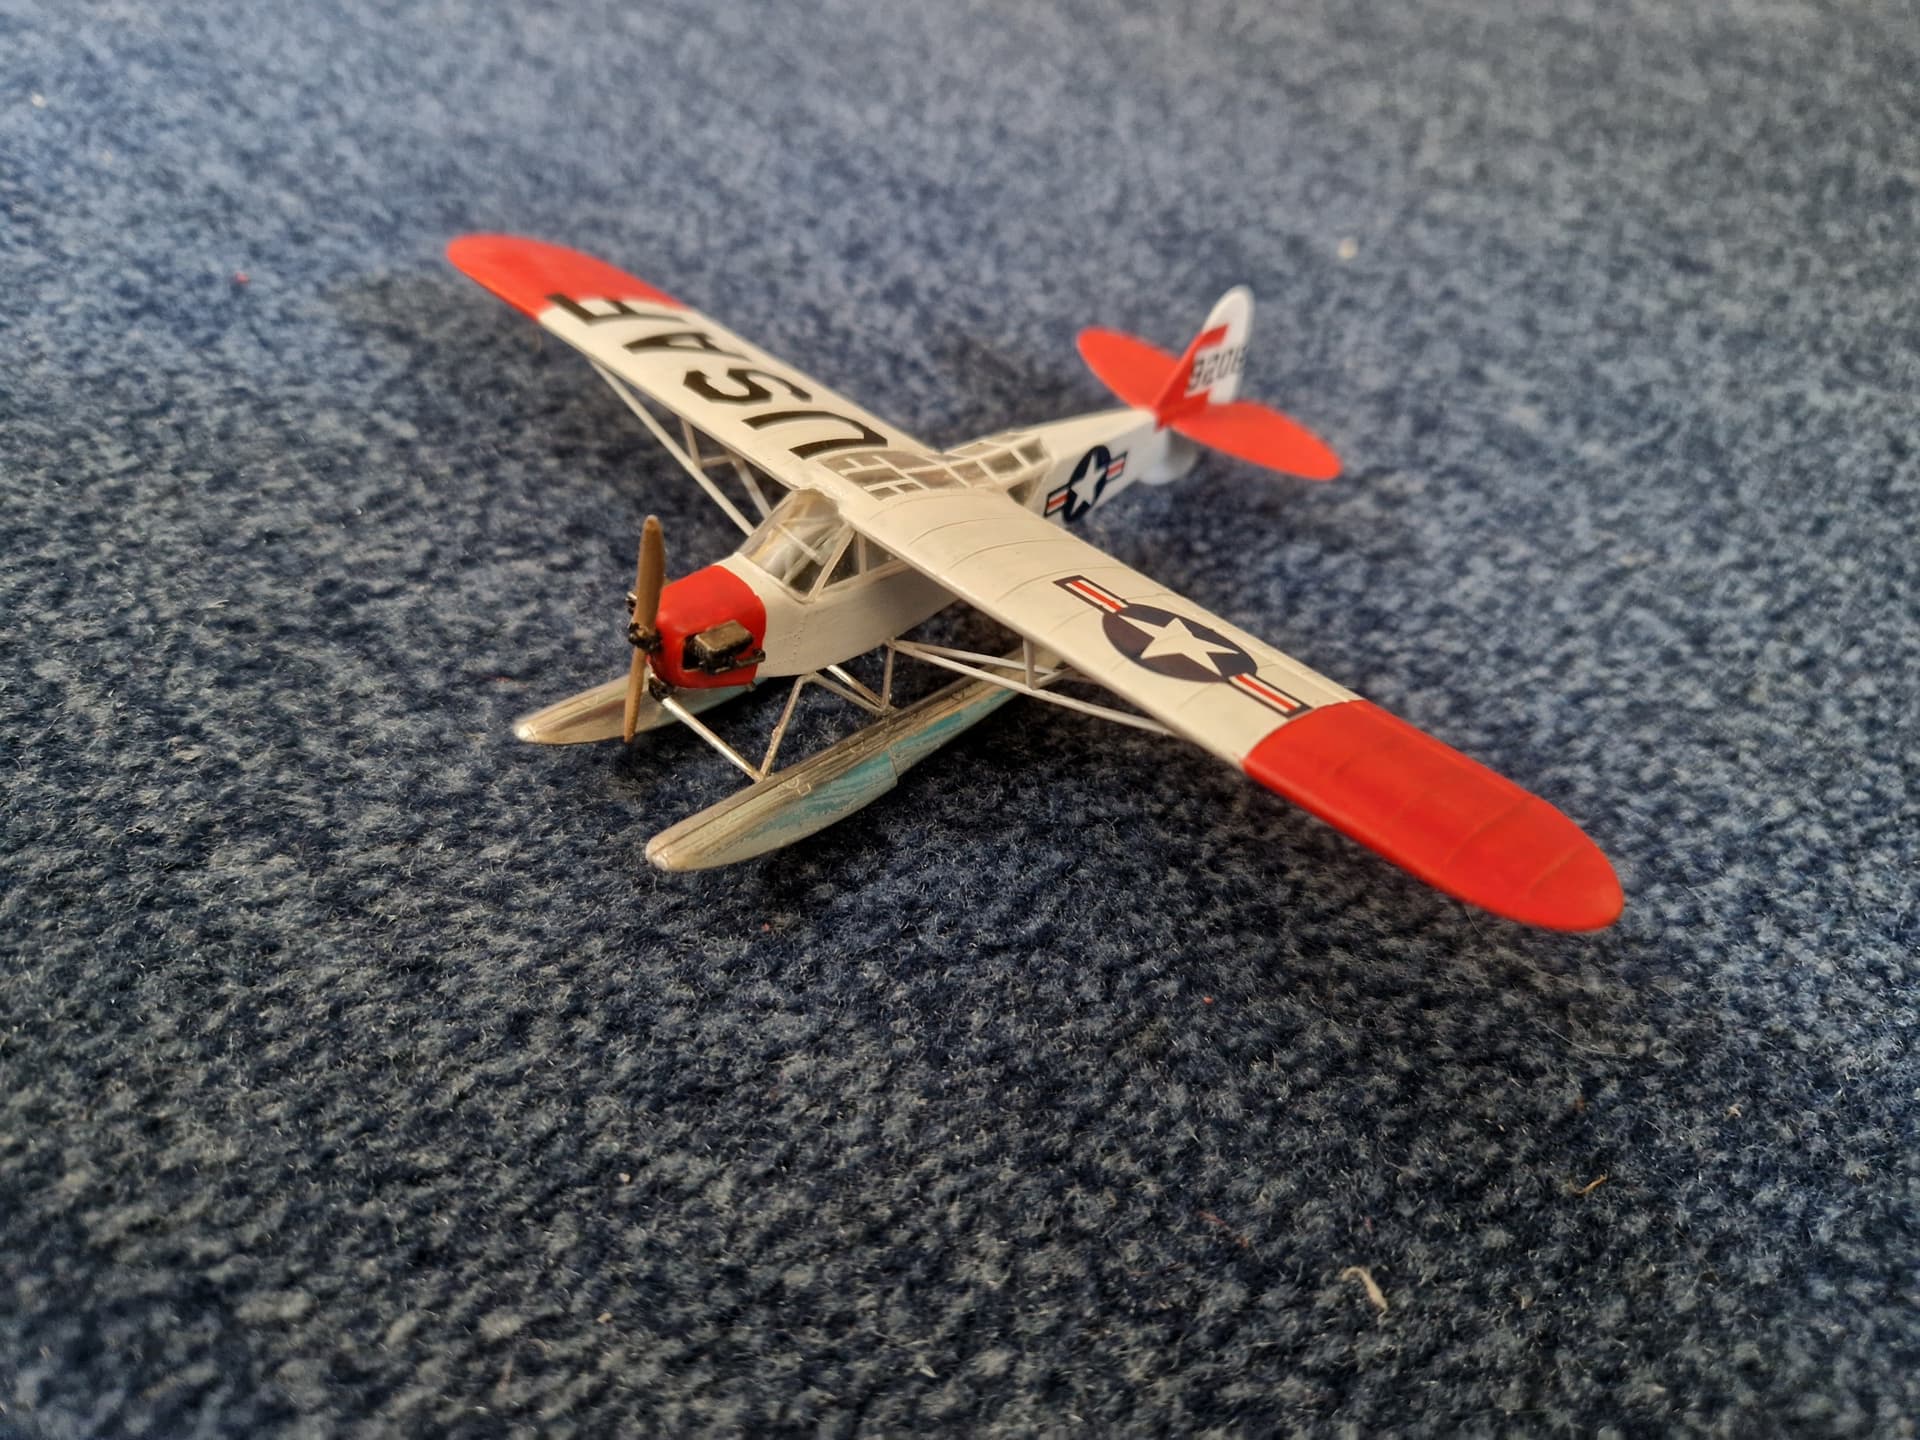
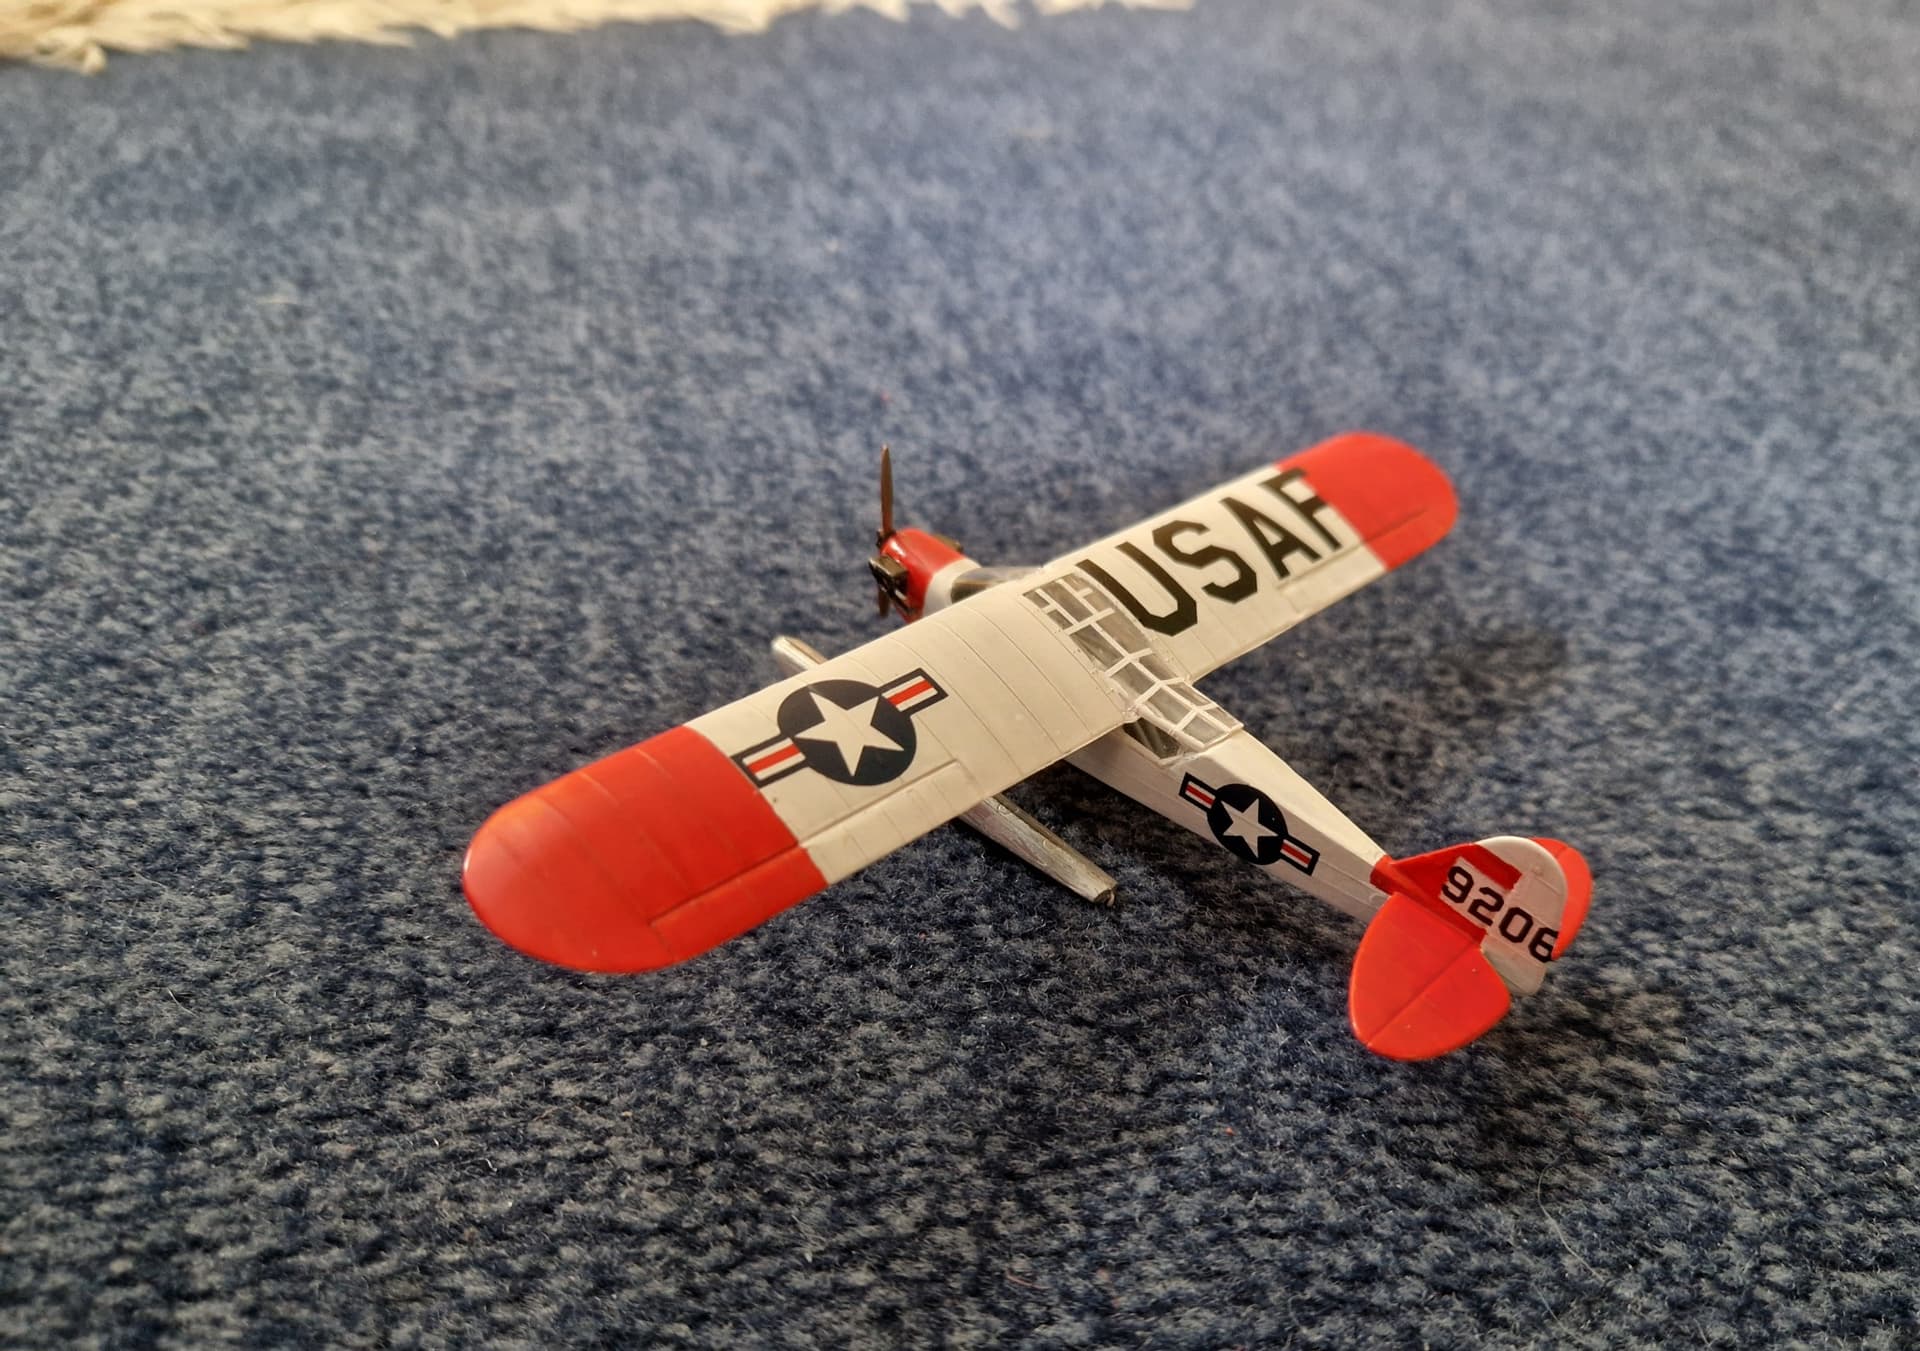
Beach ahead!
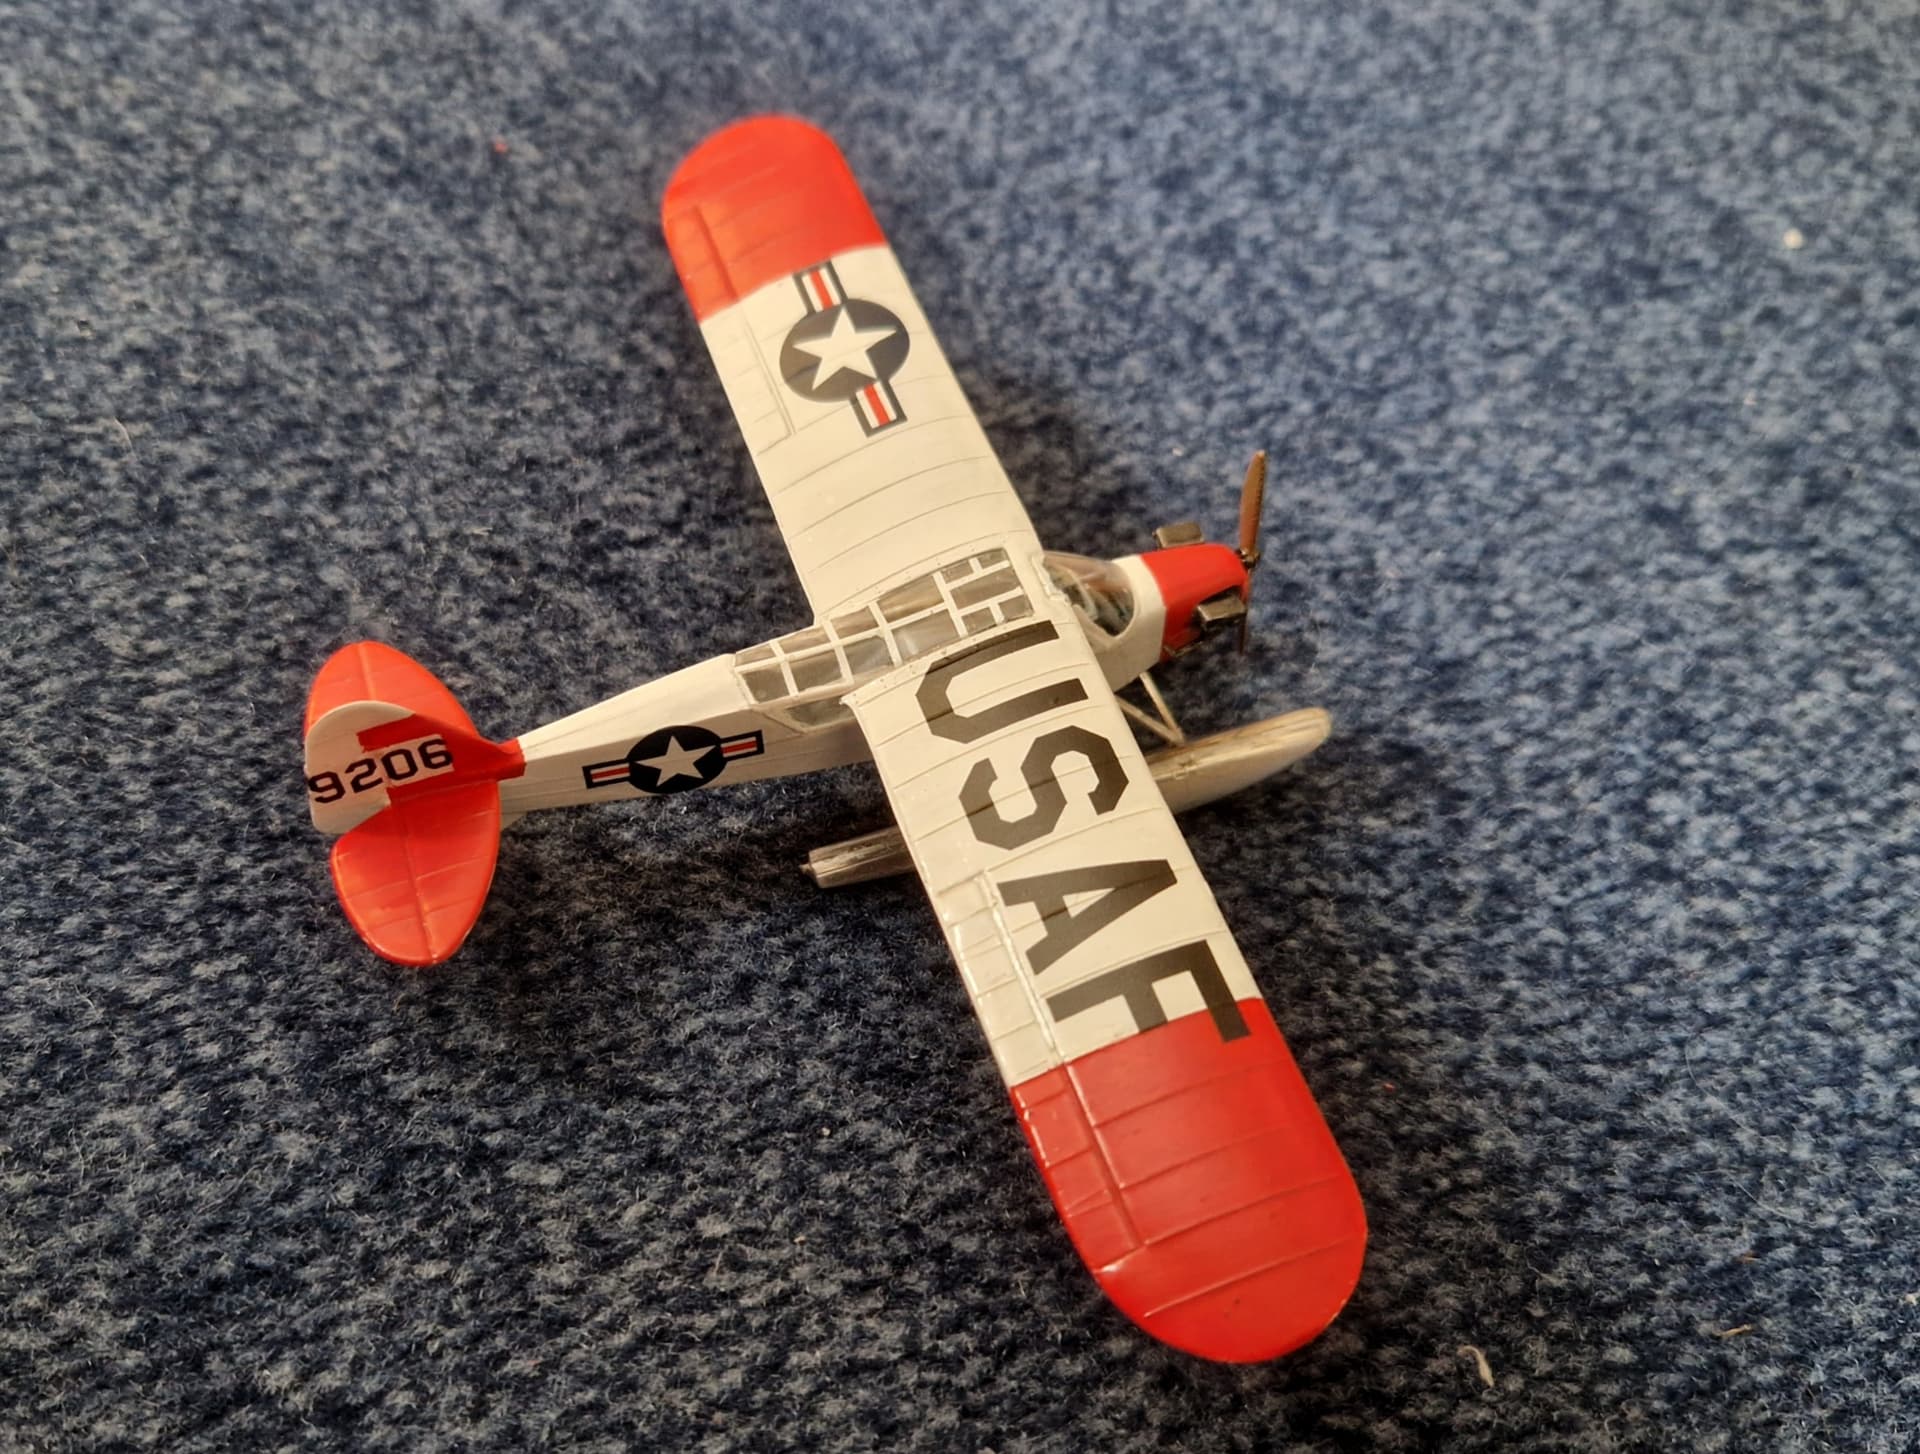

It’s certainly not one of my best builds, but I’m ok with it and call it done!
Good luck for your builds!
See you
Peter
P.S. I’ll try to fix a little base in the near future with sort of water surface to put it on, because it has a little tailsitting behaviour.
11 Likes
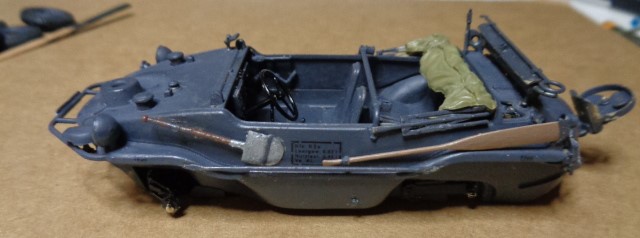
No pics, but I finally got the tire pressure decals on the Schwimmwagen. These are tiny things. I managed to knock the oar off putting the rear ones on and the exhaust shield putting the front ones on. I had a lot of trouble getting them off the paper and onto the model. The last one was floating in the container of water I used and also managed to stick to my finger.
I can’t imagine doing all the stenciling on something like an F-4 Phantom.
4 Likes
In general but especially for small decals, I will use tweezers gripping extra decal paper to stick in water to prevent run away decals.
2 Likes
I actually used tweezers. I used a cross-action Tweezer to hold onto the paper and a normal one to push the decal. For some reason, the decal refused to leave the paper. I would get to the edge but the decal would turn in another direction. I thought maybe more water was needed so I dipped it again and that is when it decided to leave the paper and go for a swim. After chasing it with my tweezer, I used my finger. Fortunately, it didn’t fold up on itself and I was able to get it on the model that way.
I do not look forward to the same decals on my Kubelwagen.
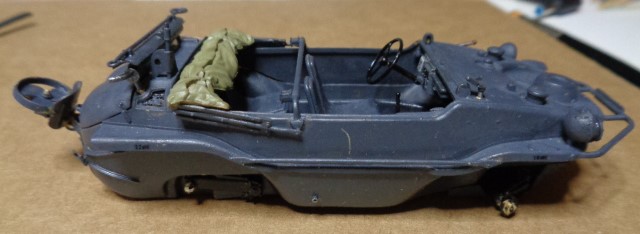
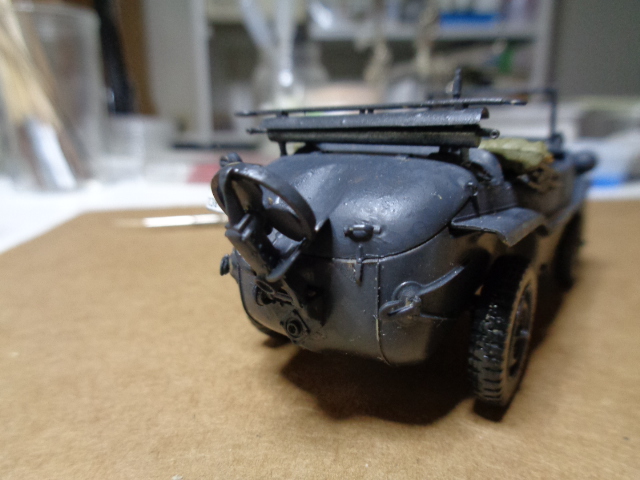
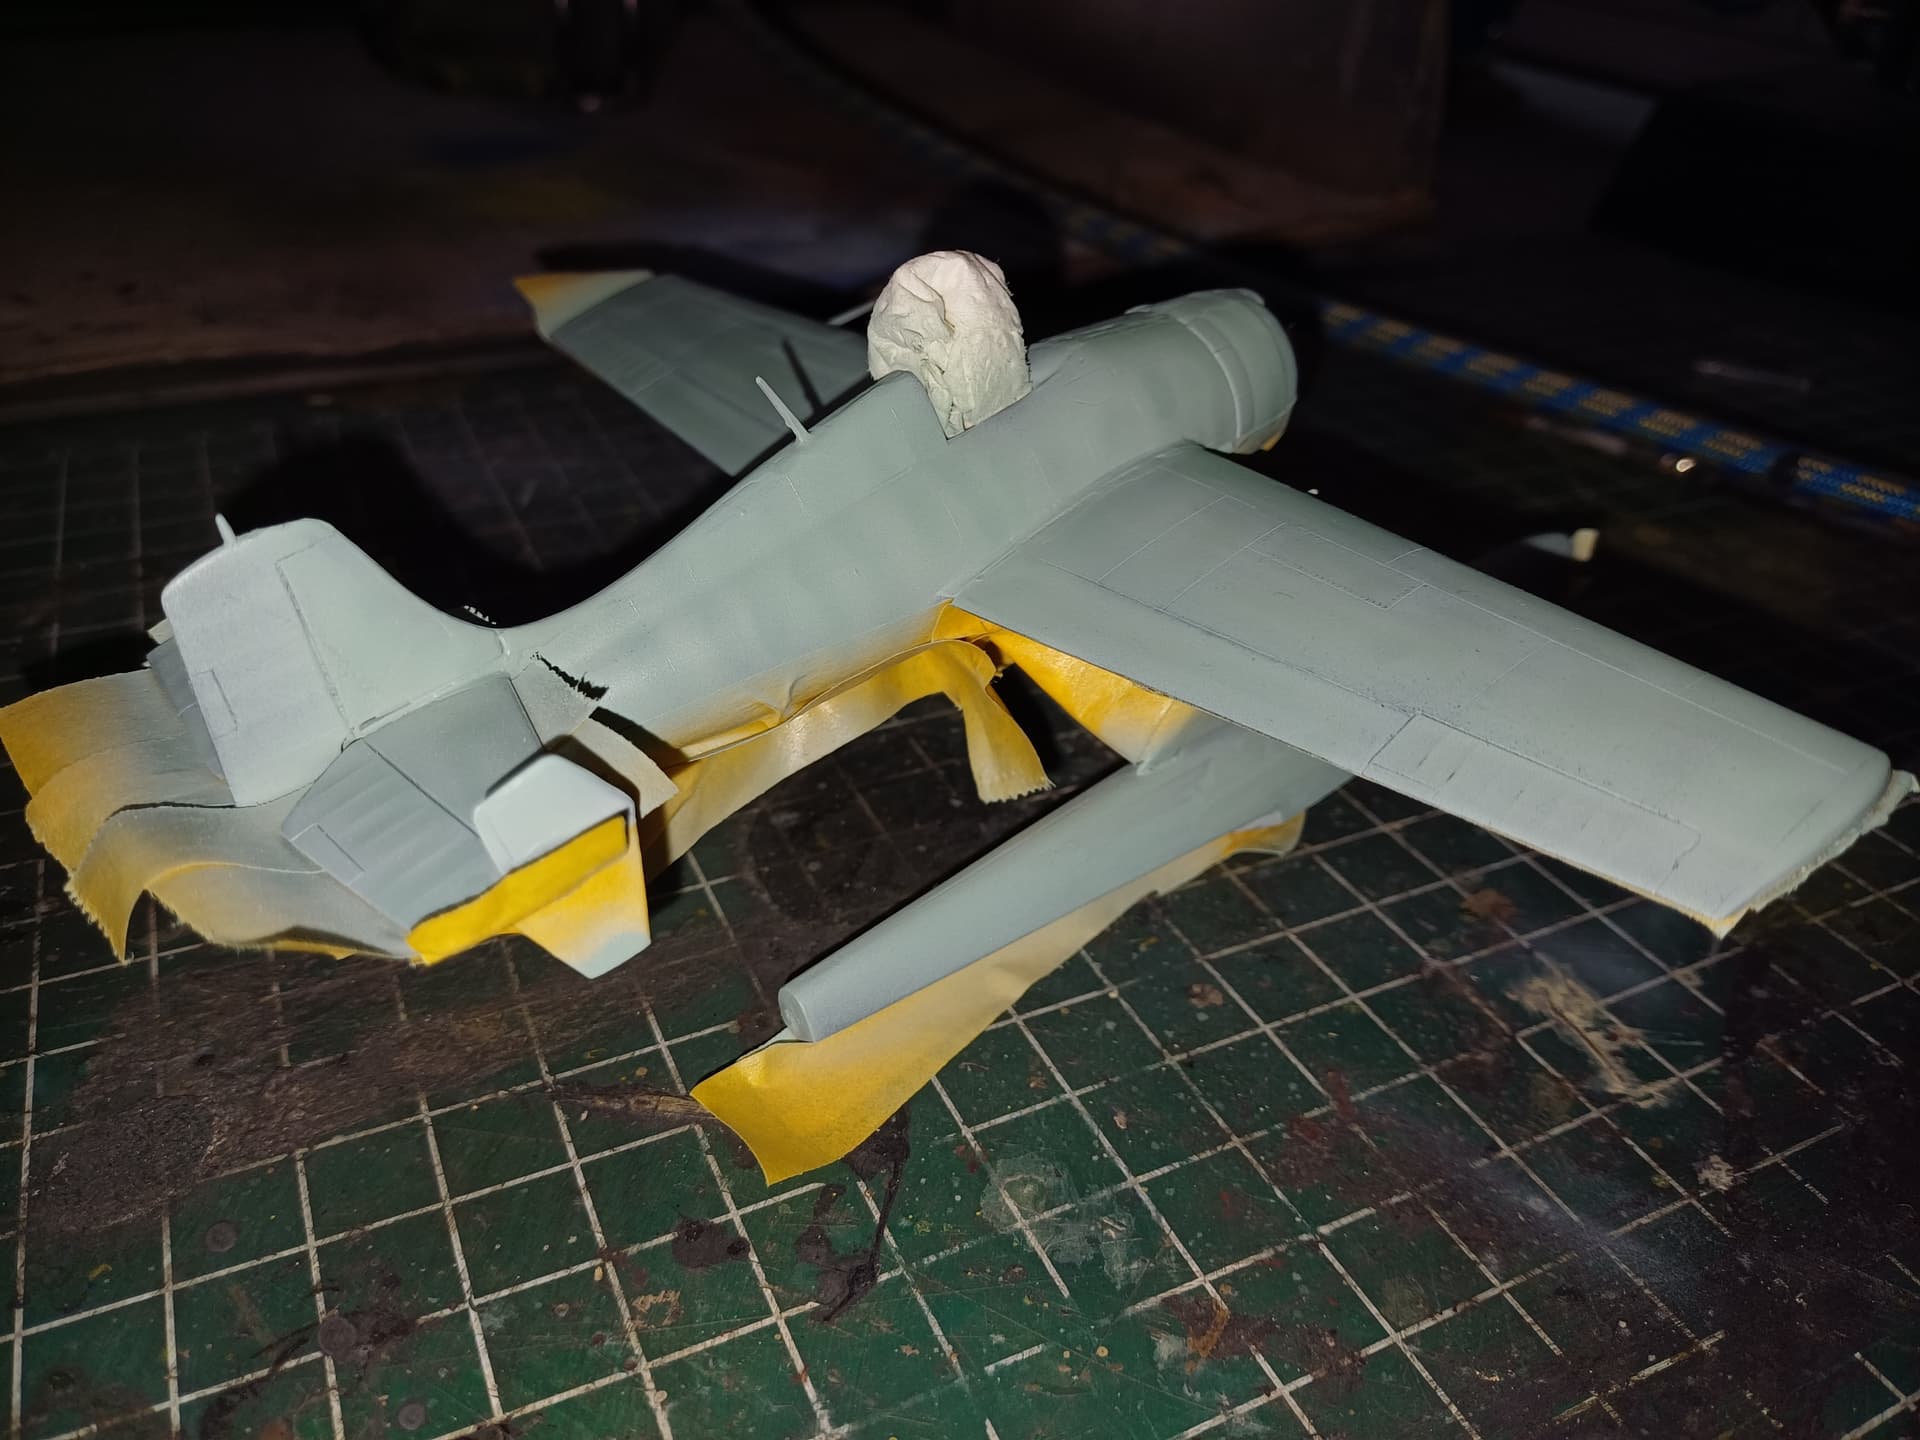
Anyways, the Schwimmwagen is 98% done. The remaining parts to be repainted and glued are the wheels and windshield. Also various touch ups of German Grey.
7 Likes
Next time that happens, rather than dip the decal and paper back in the water, put a drop or two of water on the decal carefully so it doesn’t wash off the edge. That eliminates going fishing for minnows.
2 Likes
Doh!! I will try to remember that next time.
Should have mentioned I usually take a short brush that has a decent point, dip it in the water, and then gently press it against the decal’s backing paper so the water squeezes out towards the decal itself. Then I can usually pick up the decal with the point of that same brush and transfer it to the model.
That works for teeny guys like pressure ratings; for larger decals I use fine tip tweezers if the brush can’t lift it.
2 Likes
I am declaring this model as finished.
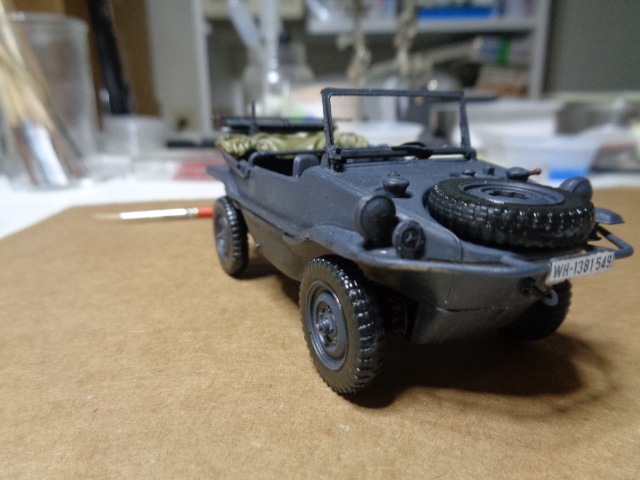
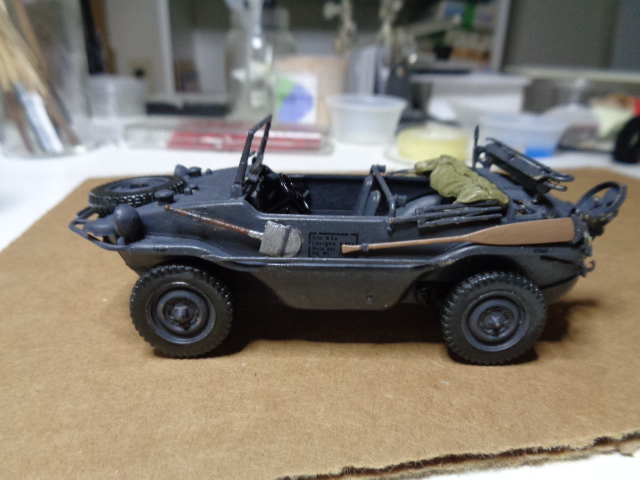
Hopefully, this won’t be the only campaign I will finish this year! It has been fun, a learning experience, and pure agony!
Actually the clear piece popped off as I was putting the windshield in. Will glue that later. Also I seem to have lot the sideview mirror to the Carpet Monster.
9 Likes
I had the same issue. I was wondering whether I was doing something wrong, glad to hear I’m not alone on this.
Congrats Gary! Looks good.
1 Like
“It has been fun, a learning experience, and pure agony!”
Ah the joys of scale modeling! I feel your pain Gary, I know you’re glad to get this one off the bench, it’s a cute little guy, nice job!
Cajun ![]()
2 Likes
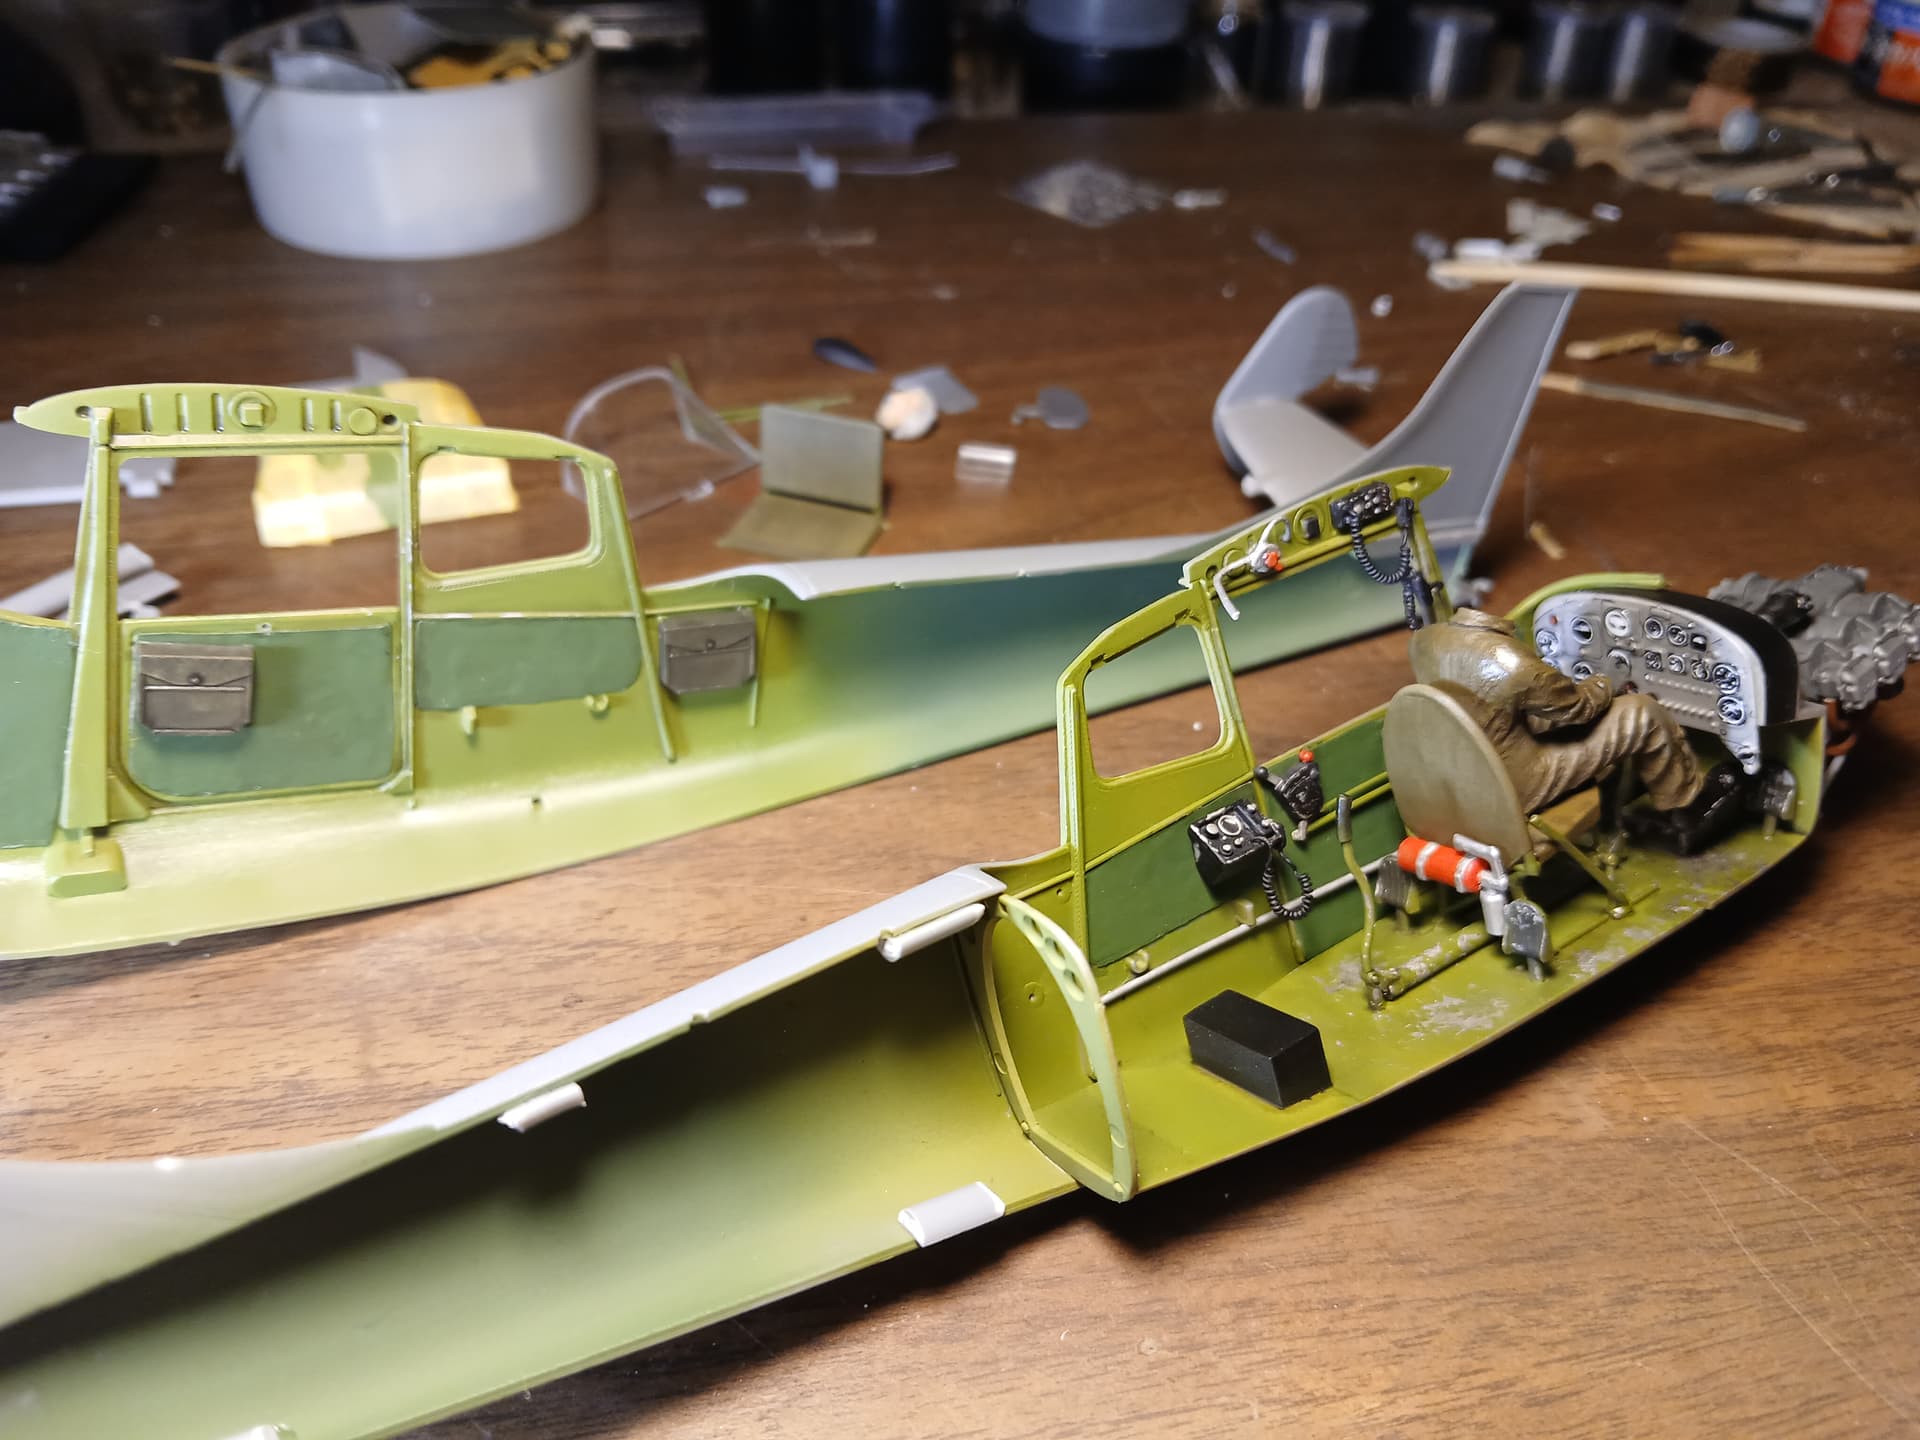
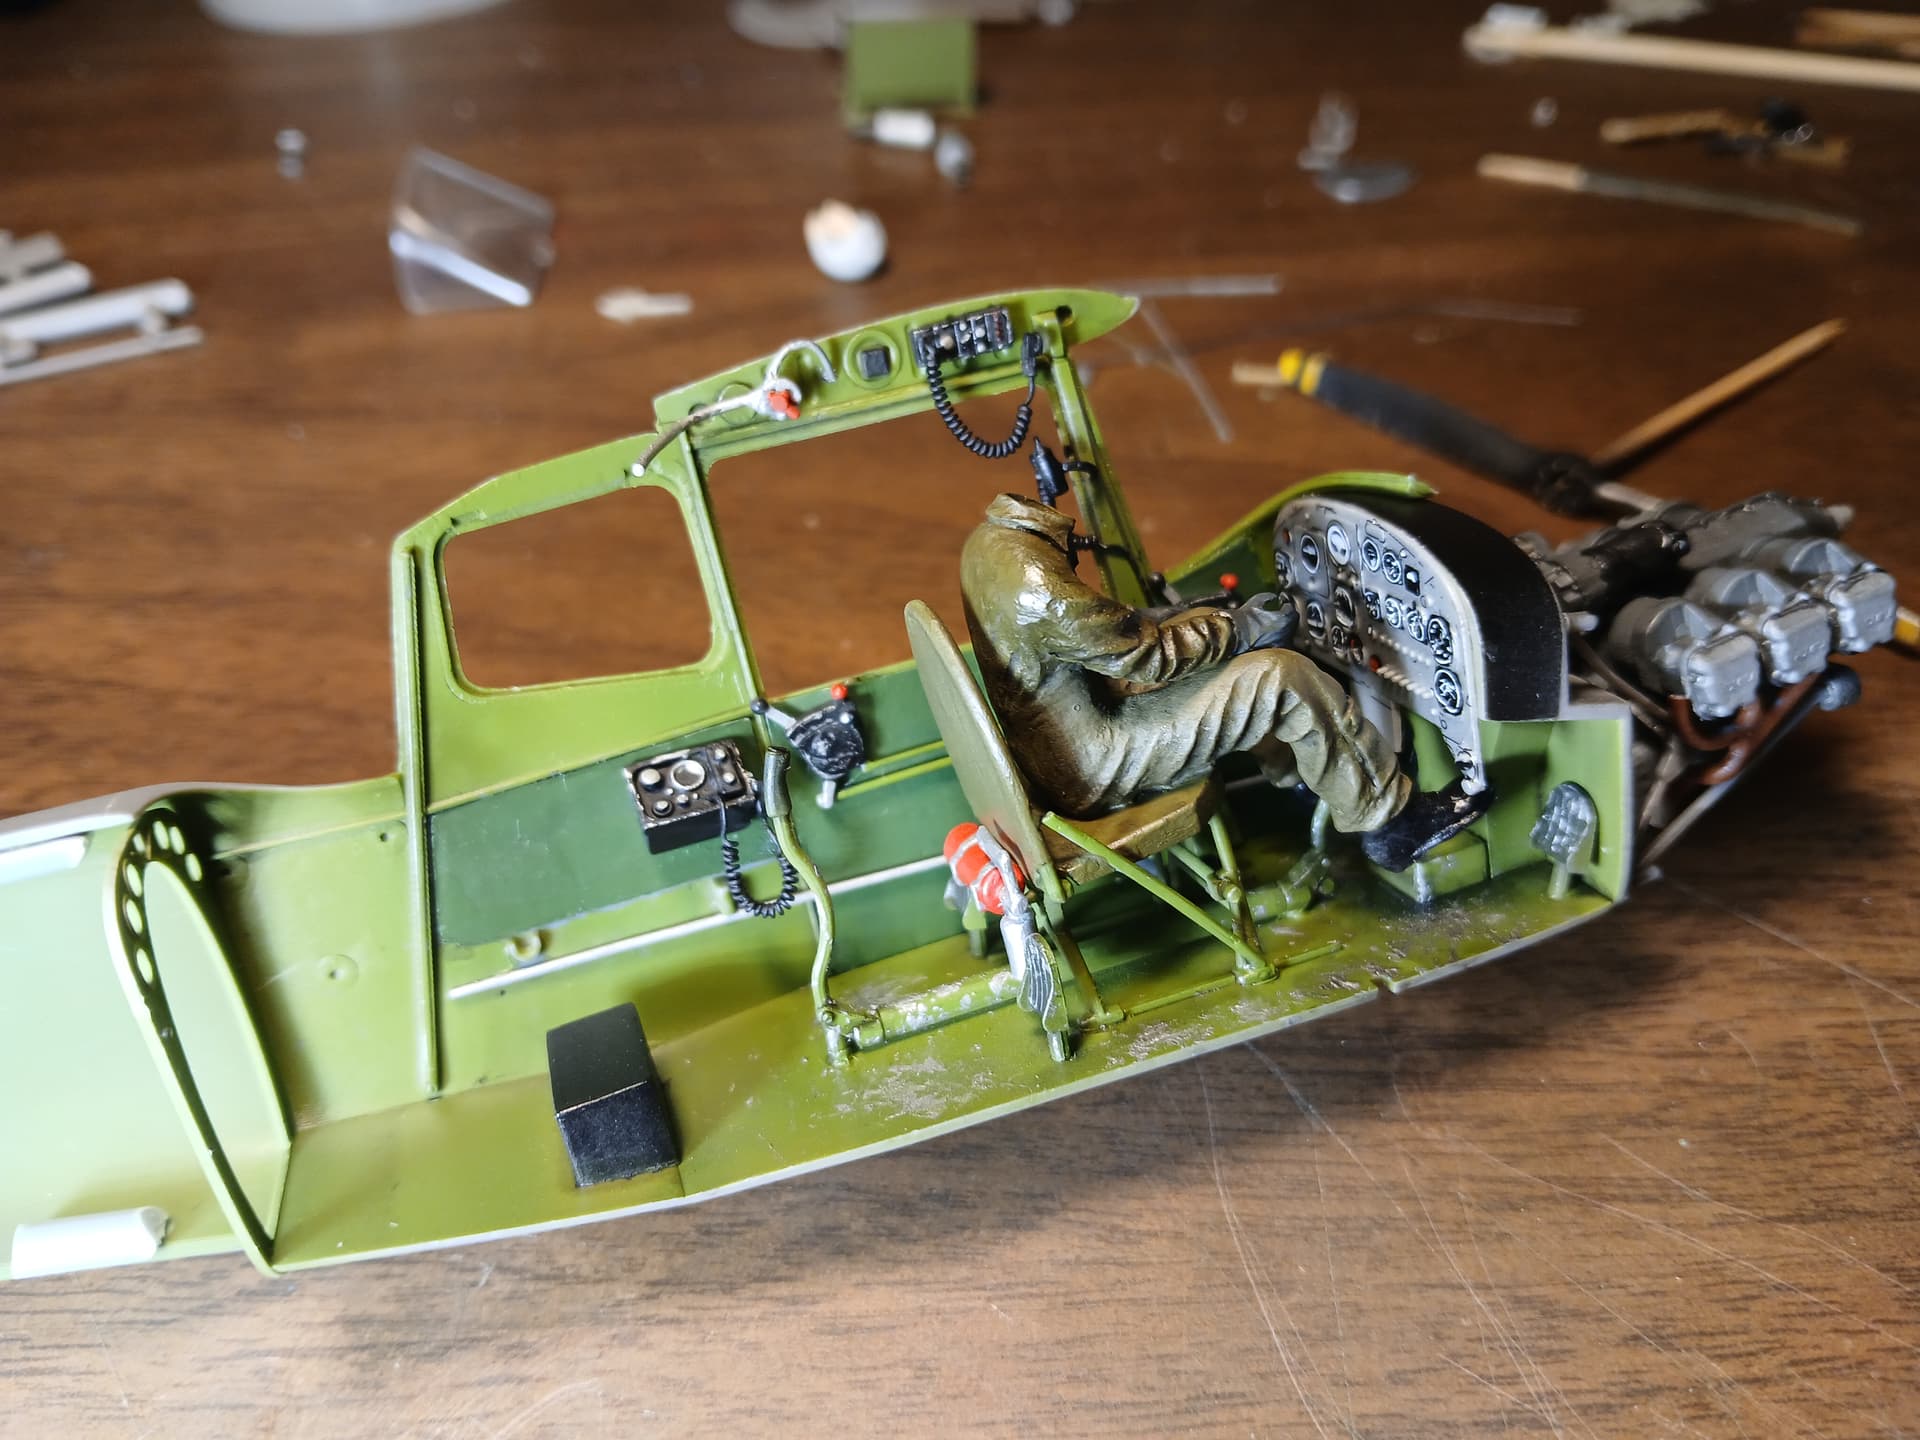
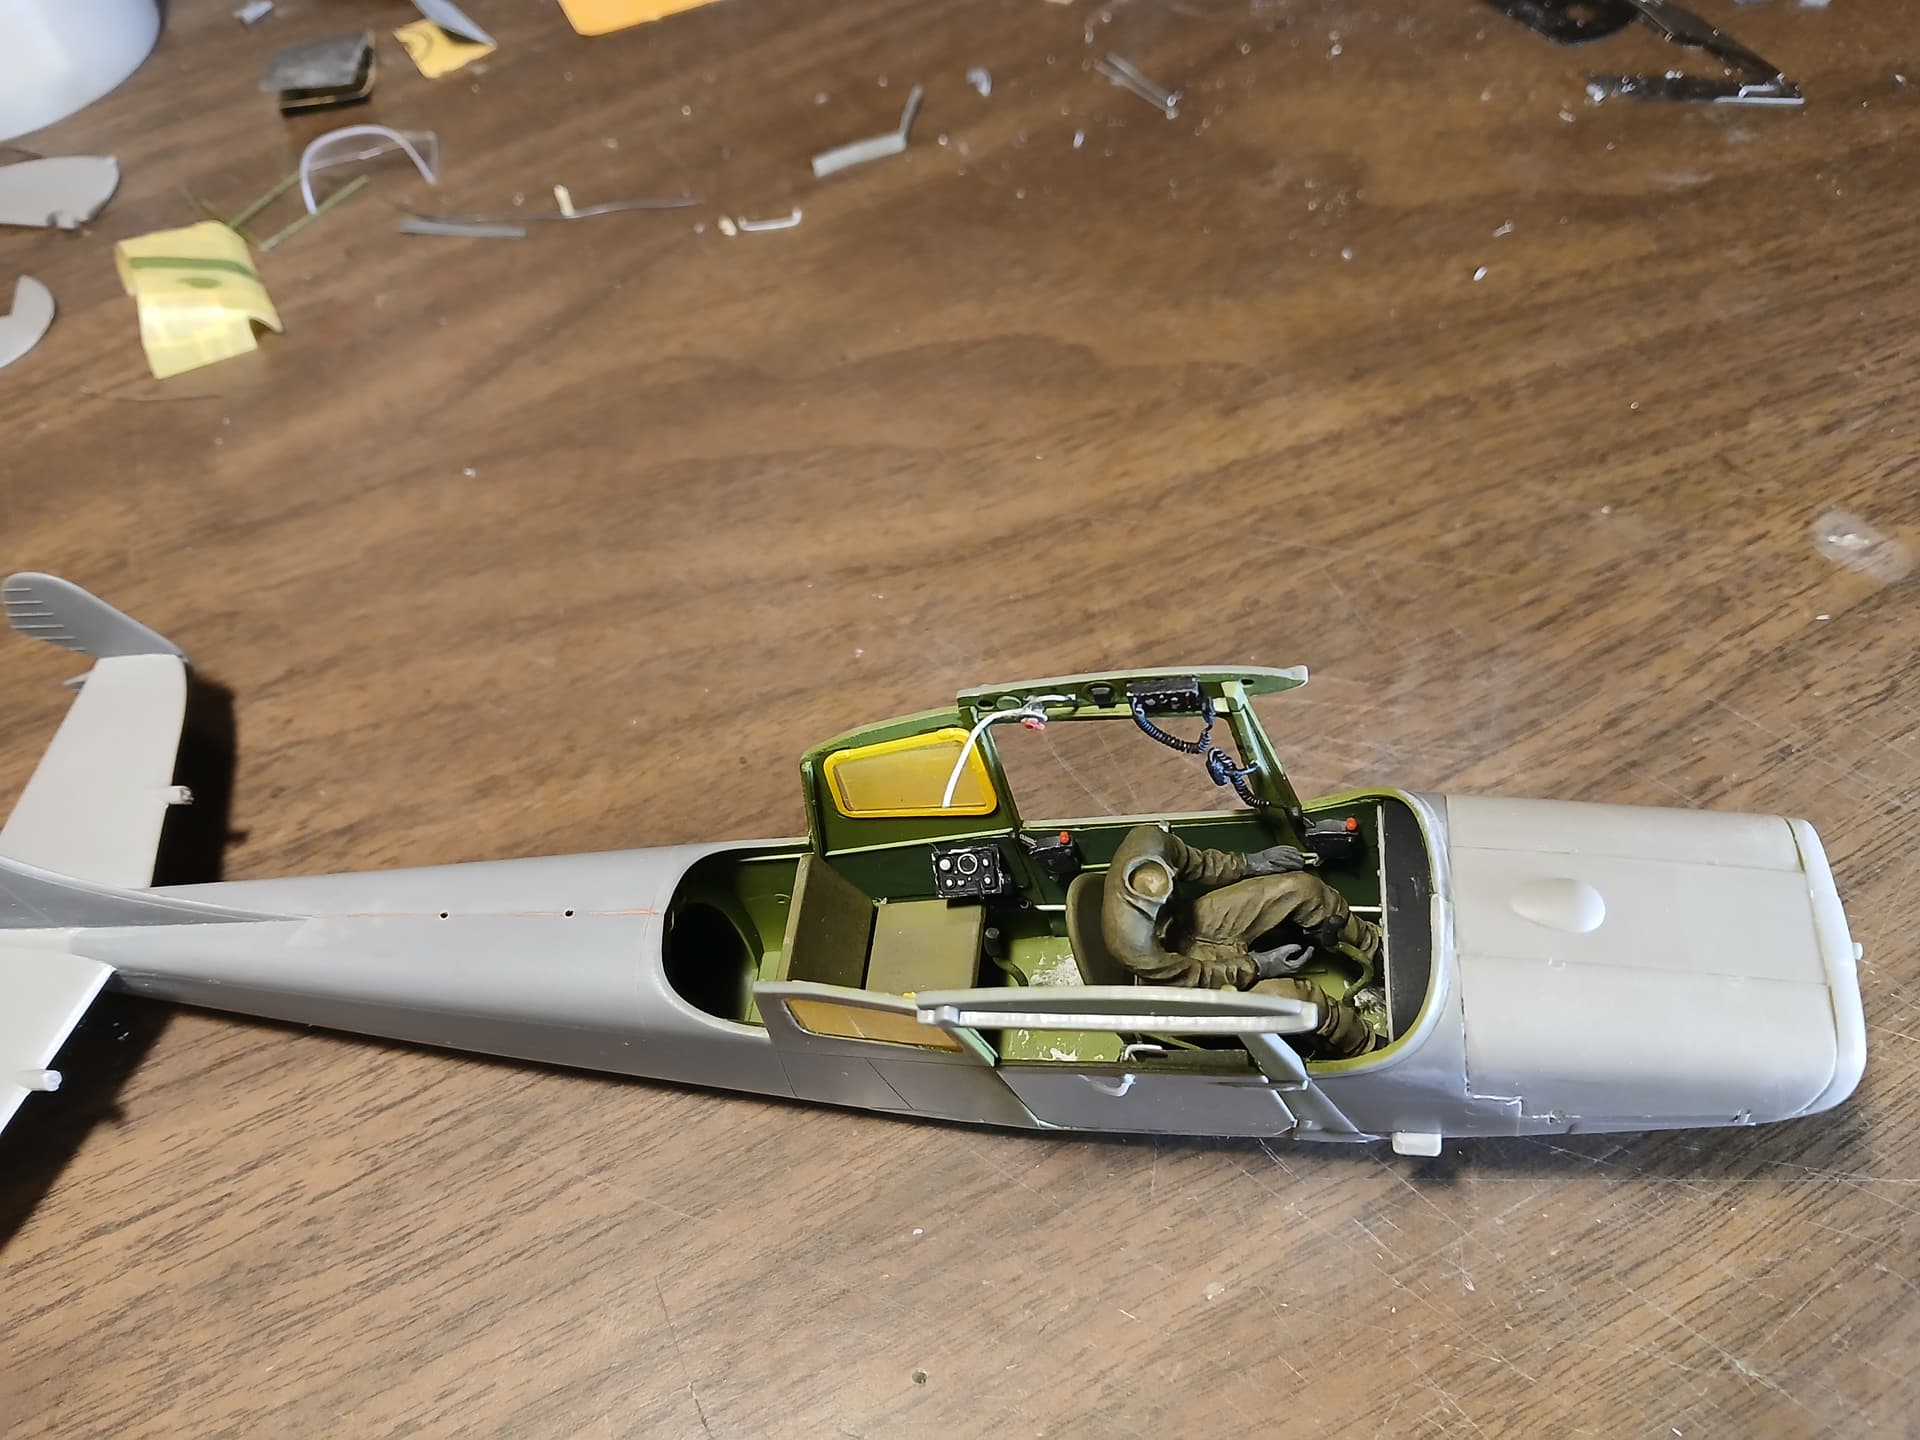
Getting dangerously close to closeing up the fuselage, added some detail such as fuel tank selector, map light and a couple of scratched radios, I added the linkage for the forward and aft throttle controls. The gloss coat doesn’t help the image quality but its about time to dull coat everything and snap it together . . .
Cajun ![]()
13 Likes
Looks great! The details are fantastic!
Good luck
Peter ![]()
2 Likes
Finally got the fuselage joined up, the engine firewall was warped causing the instrument panel and dashboard to be cock-eyed, took some persuasive clamping to finesse it into place. There’s a lot of resistant tension between the body halves but patience and persistence brought them together. I have to say, Tamiya’s liquid cement really proved it’s mettle here, I usually lay in a generous bead of Testors cement on one half of the fuselage before joining but this time I put my faith in the Tamiya liquid and it impressed.
Getting the nose cowling on went much smoother than I expected but fit and finish is a little less than desired. The propeller shaft though came out center of it’s pass-through which I was skeptical of happening considering the engines positioning.
Got some fiddling to do in the cockpit cabin and then add the wings and struts to get get this bird painted.
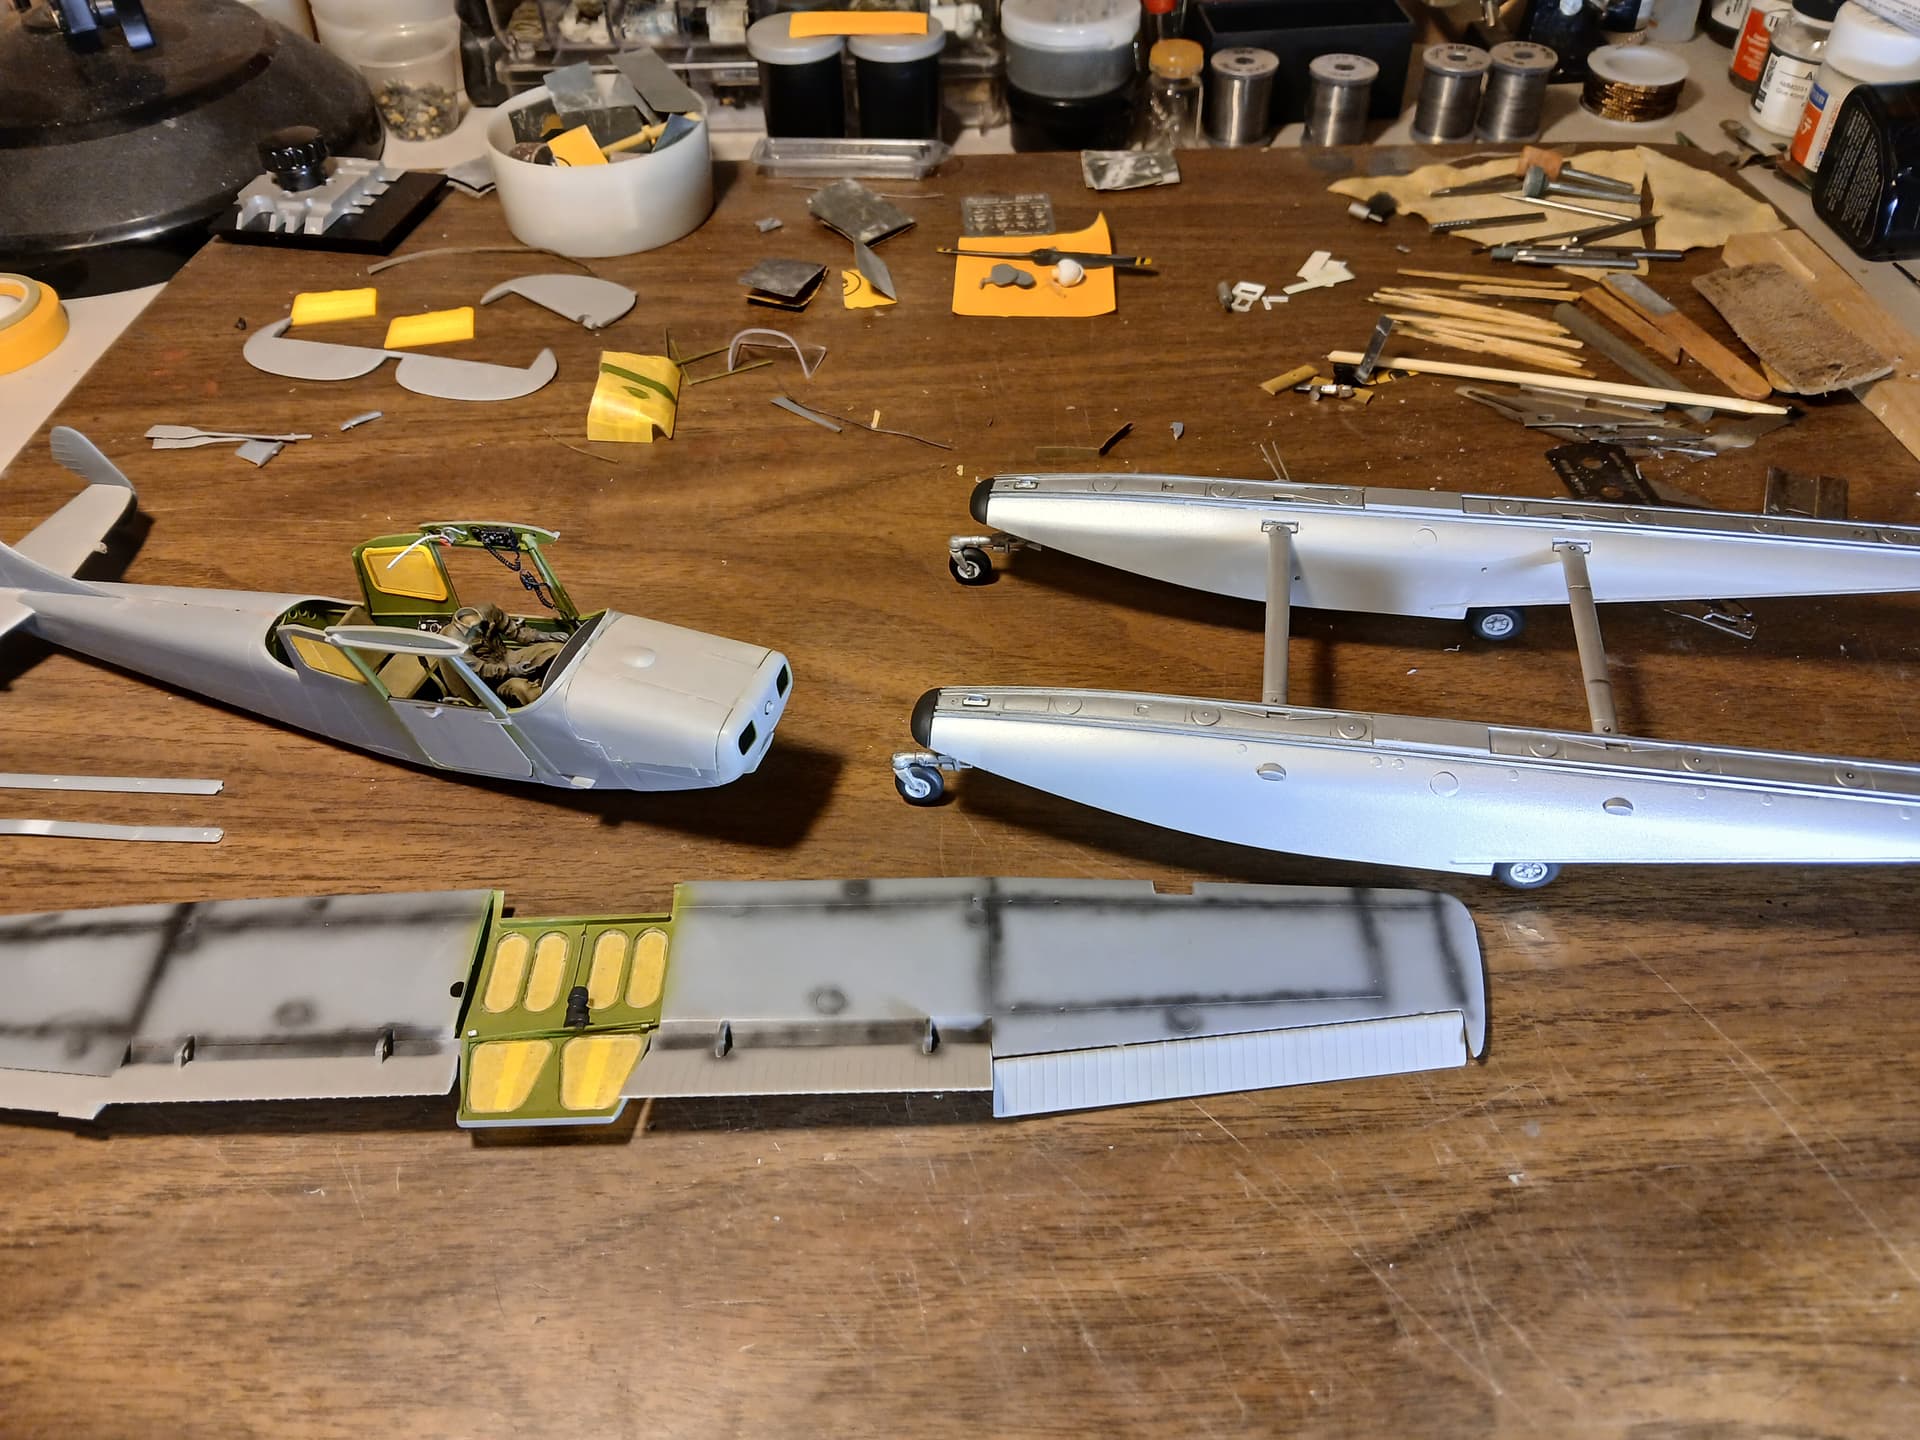
Did some carpet crawling yesterday trying to find one of the rudder steering yokes with no luck so I’ll be scratching one of those, eventually I’ll get the pilot’s head stuck on, we both seem to be having trouble getting our head into this build lol.
Until next time . . .
Cajun ![]()
11 Likes


Nice! I’m not far behind, the clock is ticking ![]()
Cajun ![]()
2 Likes
My schwimmwagen is very close. Maybe I’ll have some pics later today. I have to add the wheels and the little bits that stick out. I put oil on the shovel and the paddle (I think that’s what that is) so they will need a few days to dry before I handle them.
But I liked the kit so much I got another one. A few things to note. I tried matching the top and bottom hull without anything else added and the fit is almost perfect. So I added something that made that difficult - I’ll have to be more careful on the second build. And this one does indeed come with a nice large sheet of mesh that is very visible. So I guess my first one was actually missing that. I can’t imagine how I wouldn’t have seen it.
4 Likes