Jim,
Somehow, I’ve missed this build. Your scratch building with brass and custom PE is just amazing. I’m going to use this as a reference.
Rick
Jim,
Somehow, I’ve missed this build. Your scratch building with brass and custom PE is just amazing. I’m going to use this as a reference.
Rick
Thanks Rick. I make mistakes so you don’t have to
You know how you keep putting something off, and the longer you put it off the more daunting it becomes?
Yesiree I do!! First off I’ve gotta say that the work that is going into this build is nothing short of phenomenal!! From the construction to the paint to the weathering. All of it man…really…a true masterpiece so far.
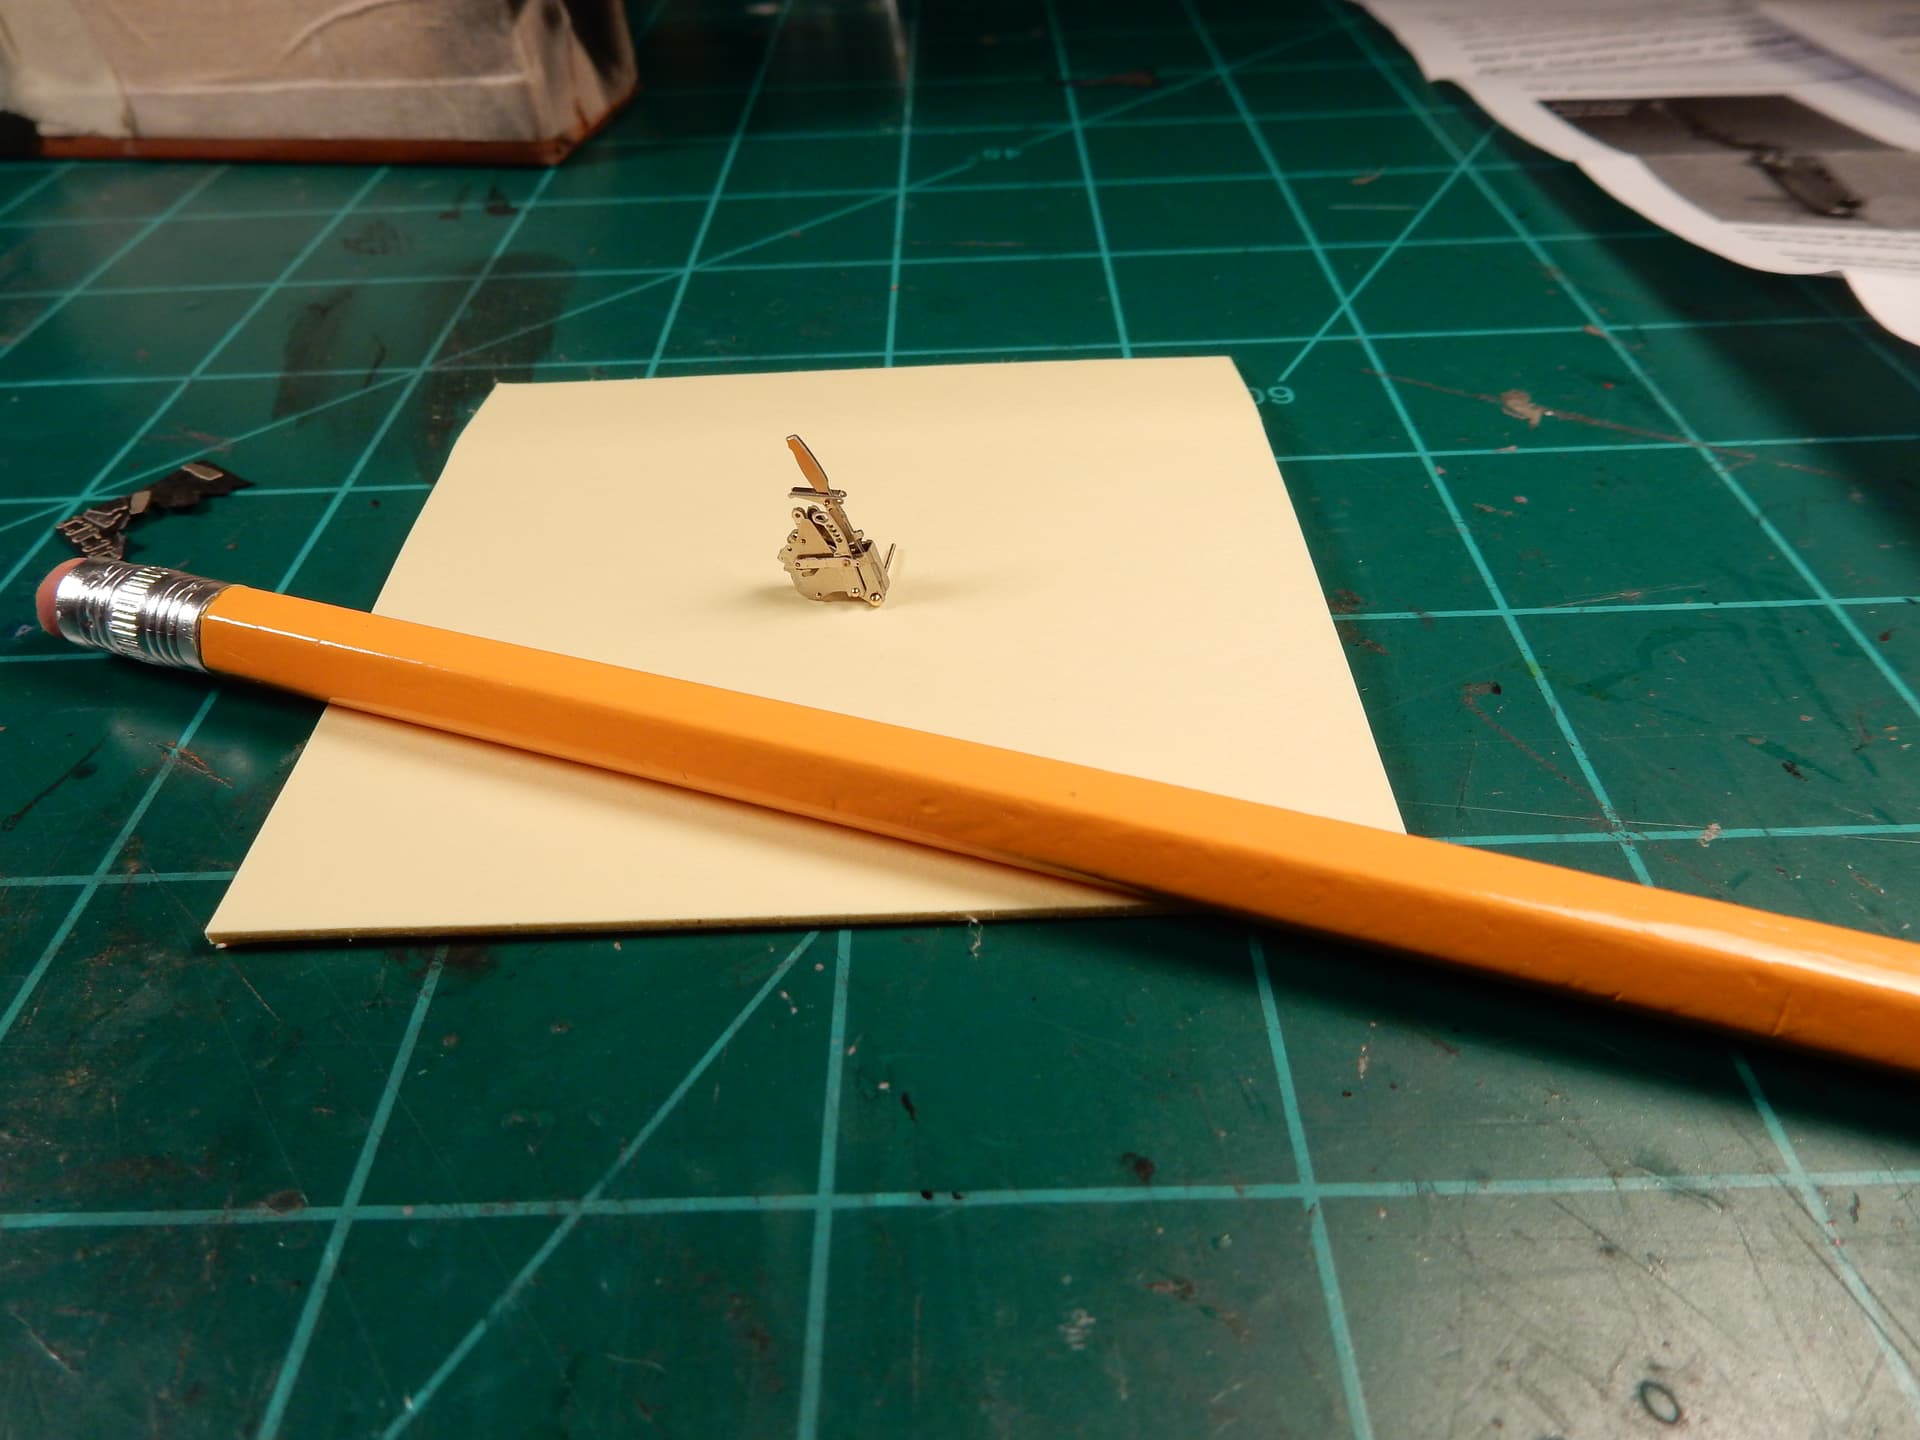
Secondly…on the putting things off and how daunting it becomes. When I did finally decide to build my shifter for my 1/25 Ford Maverick it took every bit of seven frickin’ hours to get it completed. Unbelievable!!! I took a two month break from it after finishing it. I show this only to illustrate the amount of work that went into building all 26 pieces of it.
Thanks Joe.
The only difference is that, once I got started I realized it wasn’t so bad. A 26 piece PE assembly like that is the stuff of nightmares for me. You managed a good job on it though, I’ve tossed kits for less, specifically Riich’s Universal Carrier. How the hell those seat supports were supposed to work is beyond me.
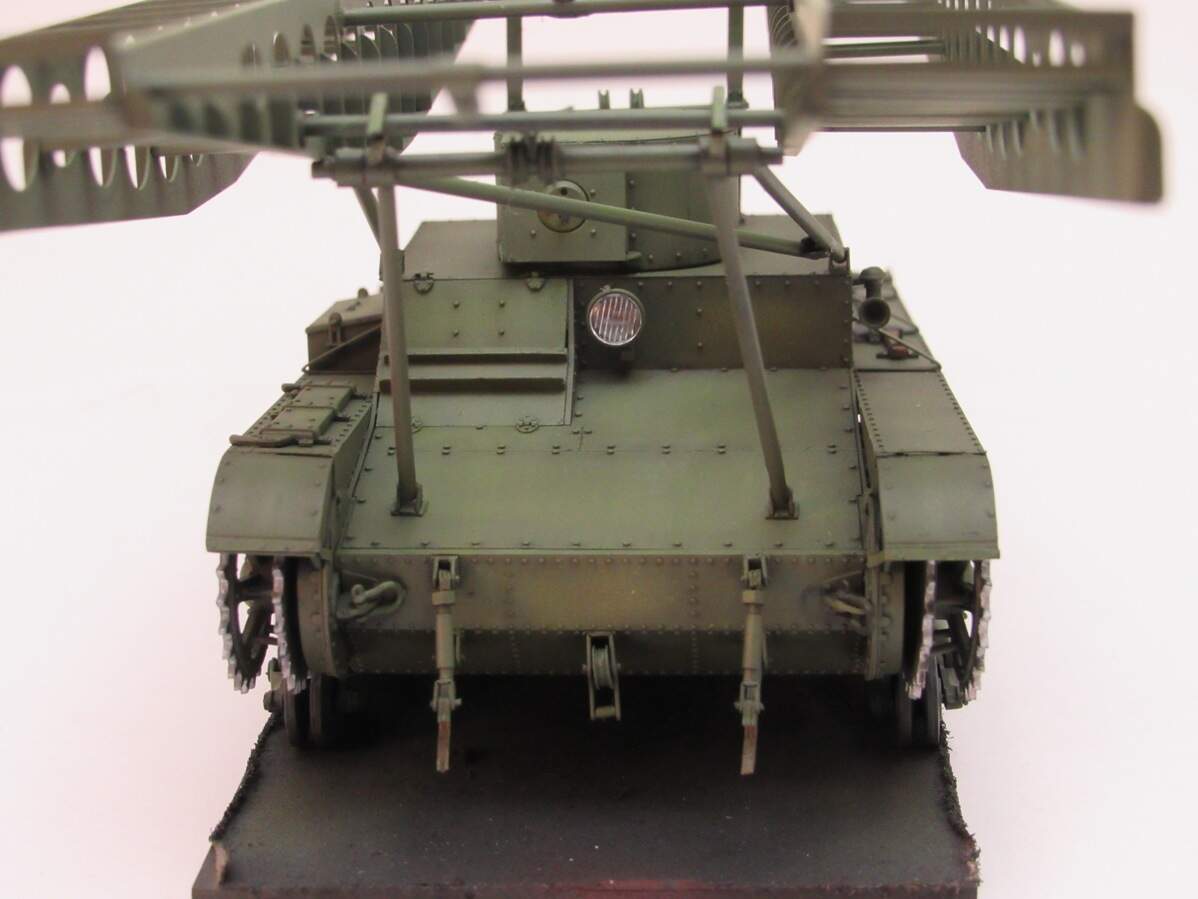
Anyway, back home and played with the exhaust tonight,
Still drying, need better pics and maybe some more rust, the black tip is a little overpowering. Pin washes and filters soon
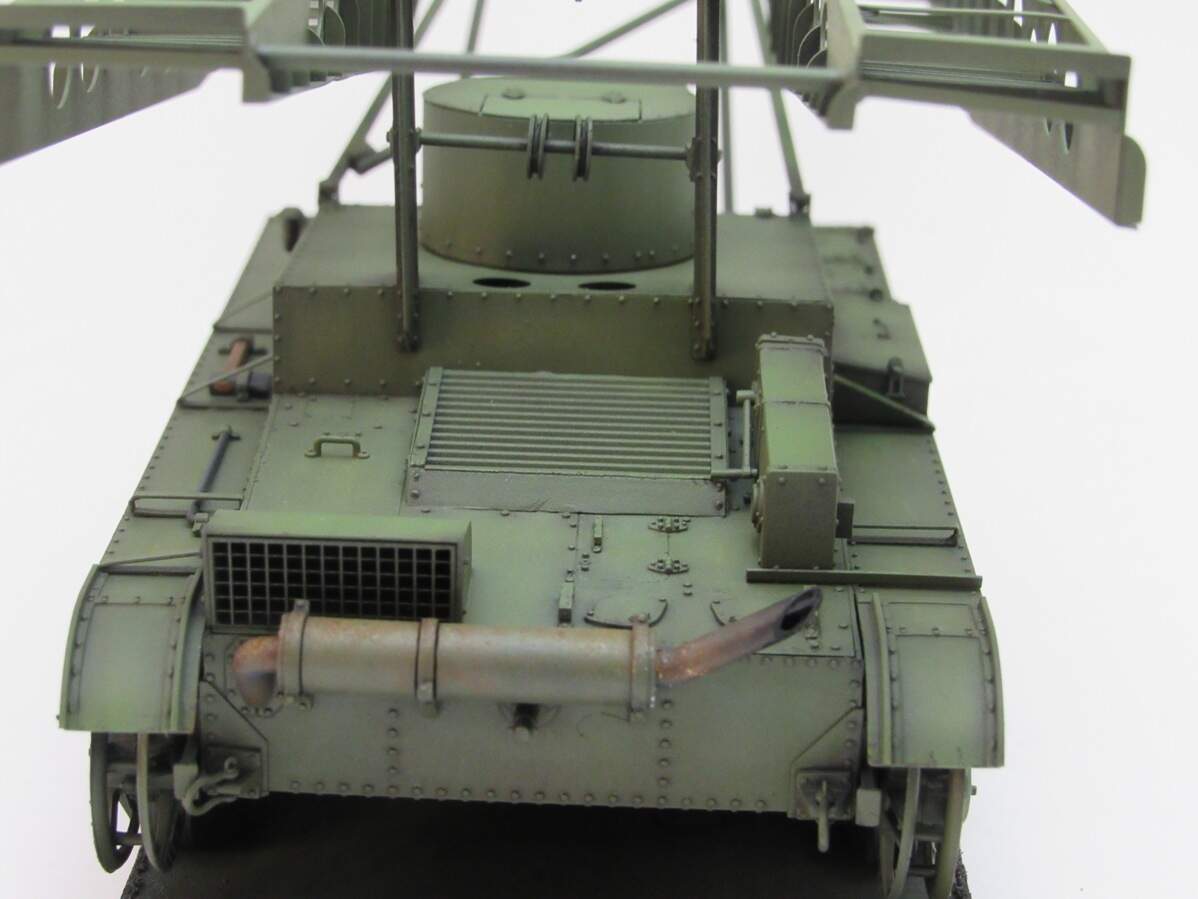
Some more progress from the past couple nights. Got a pin wash done, and my first ever successful dot filter. It used to be that every time I tried, the dots would not blend well and stain, but a coat of satin varnish underneath solved that.
Again, pictures aren’t great and don’t show the variation to well. I’m going to have to play around with my camera and lighting setup for the final round.
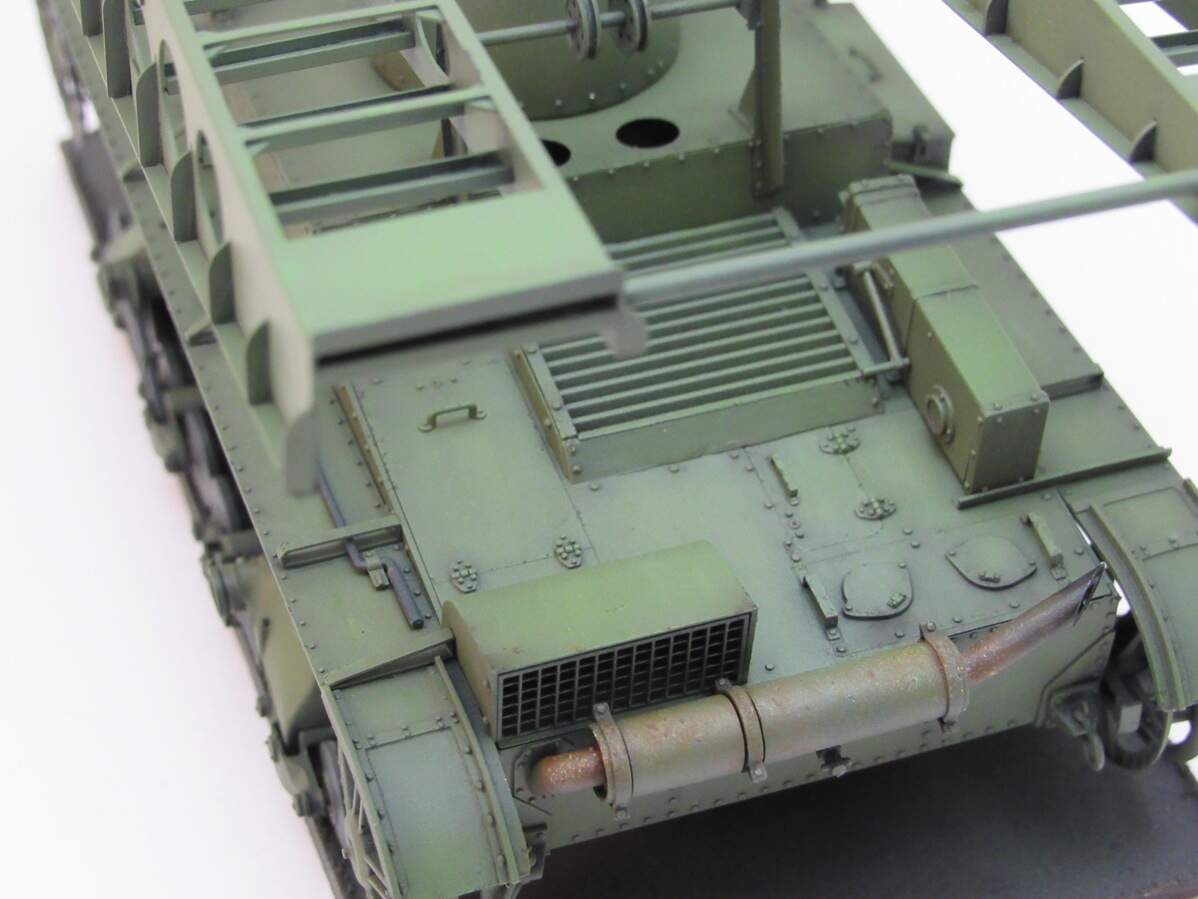
Now onto the lower hull. Think I might do a little mud

Lol, thanks Joe.
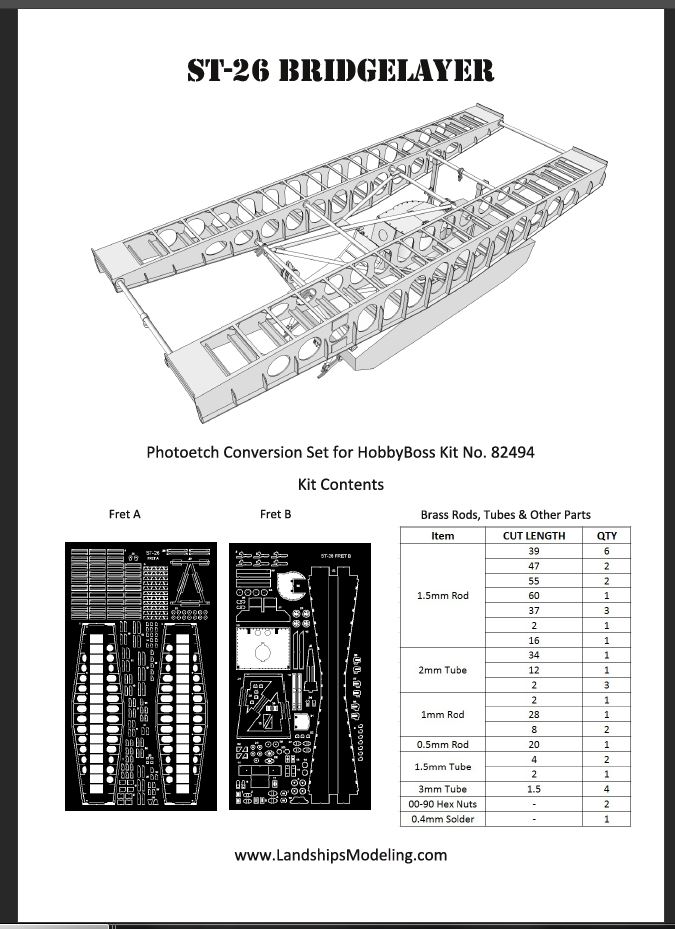
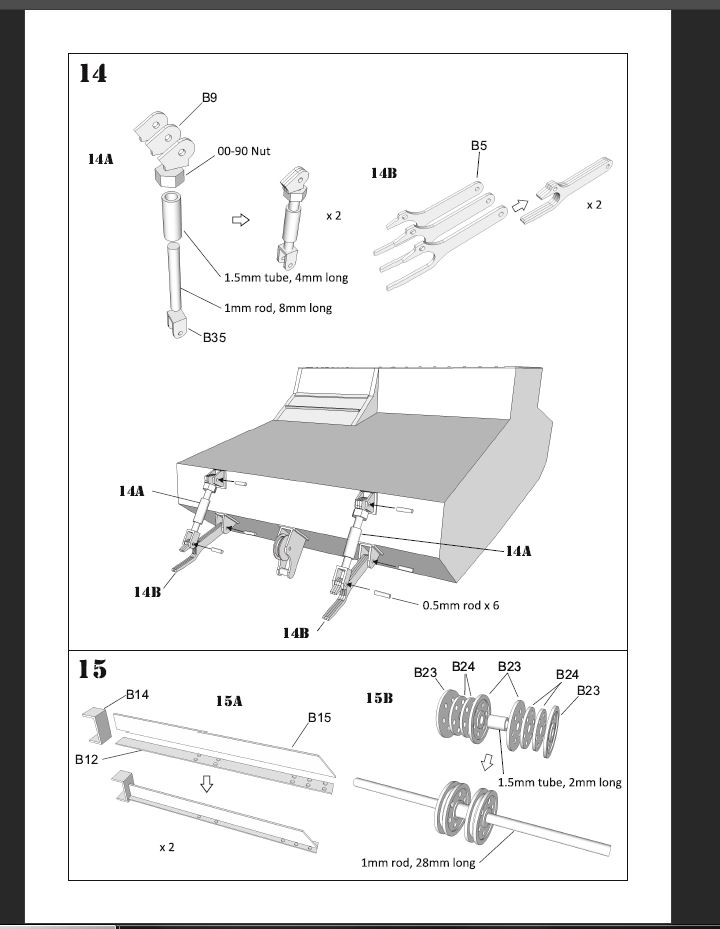
Well with this whole hurricane thing for New England, figured I should get some design work done before the power goes out. Finished the instructions today, 12 pages, 23 steps. Was hoping I could fit it in 8 pages, turns out this kit is gonna be a bear.
Hope they’re better than Dragon’s!
On the modeling front I’ve started to ruin the running gear with mud. Will save pics for when I’m done, as looking at it right is anxiety inducing.
Looking forward to it.
We love bears 

You’d have to try pretty hard to make them worse than Dragon’s! 

Bet I could, I’d just need x 8
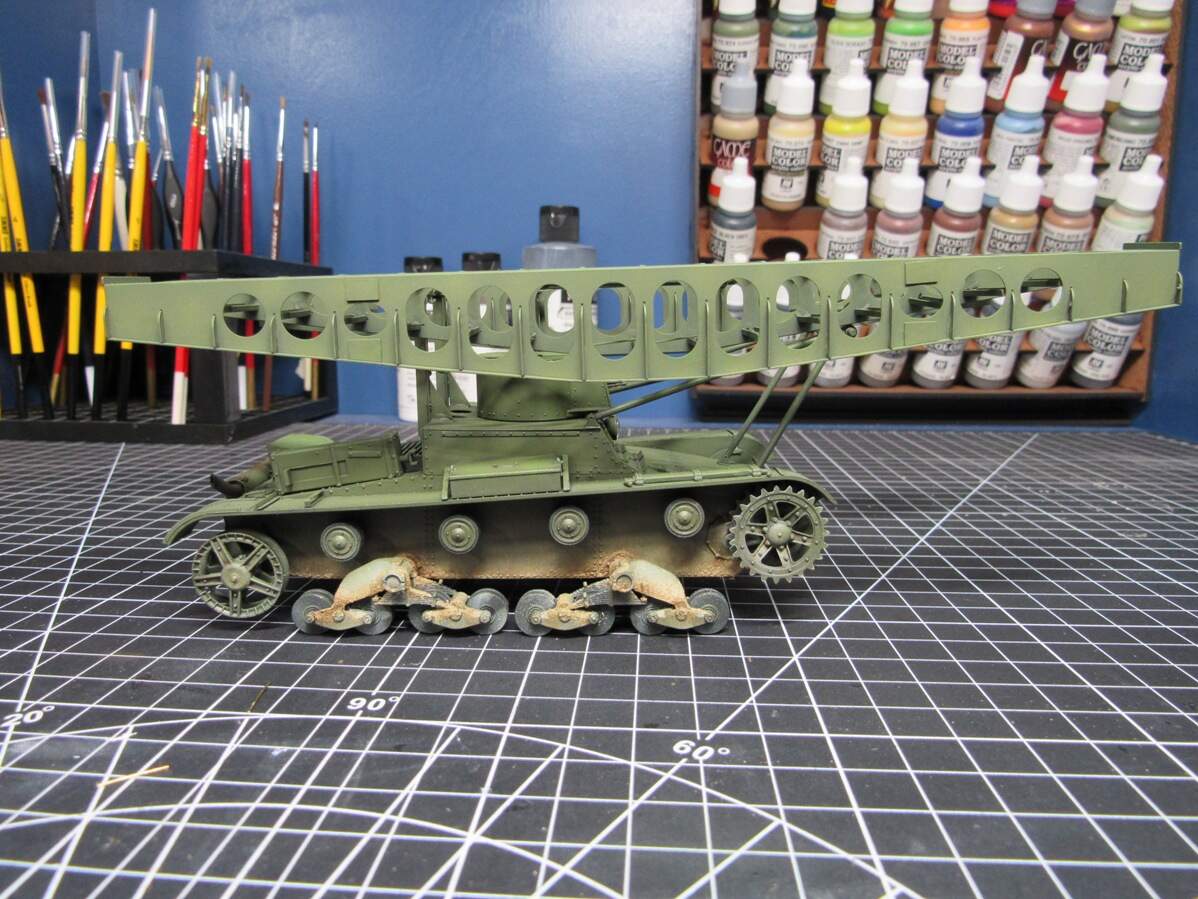
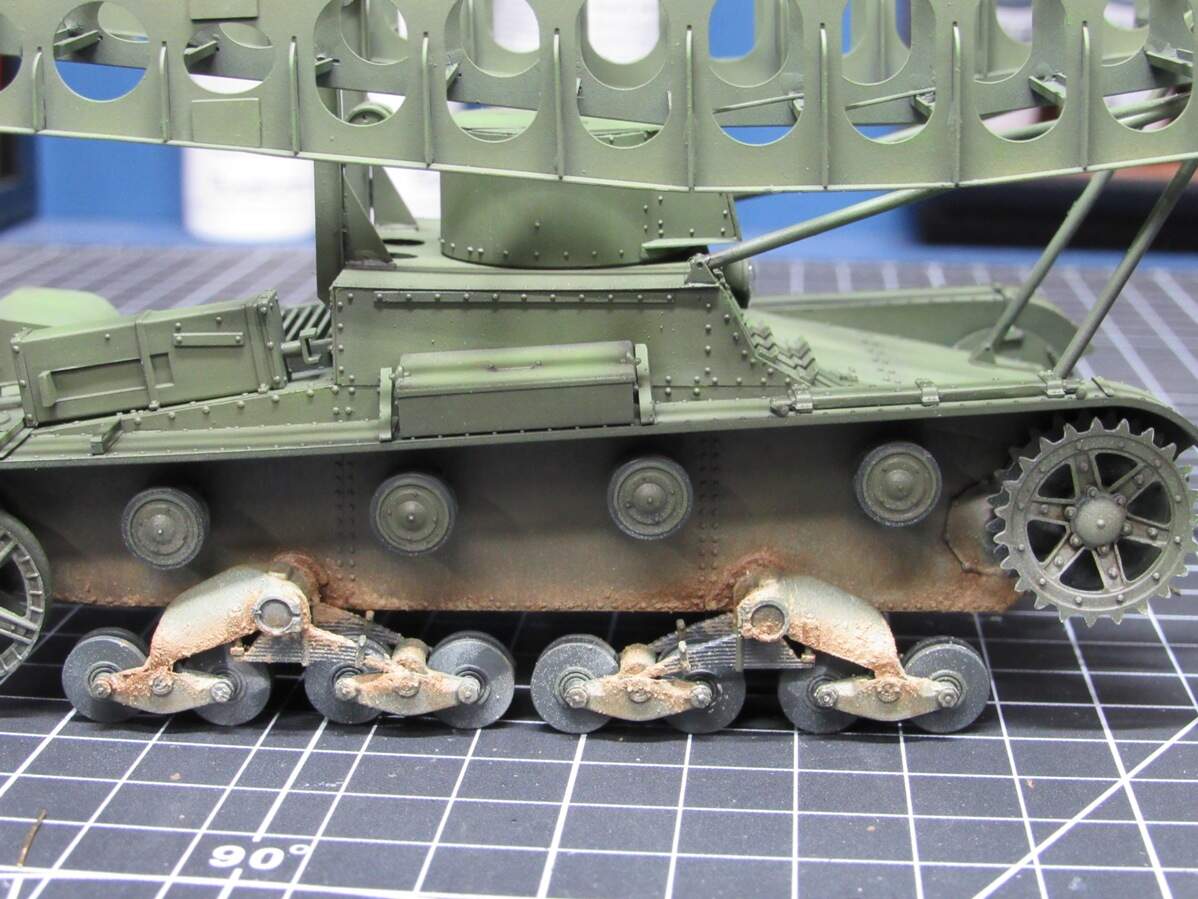
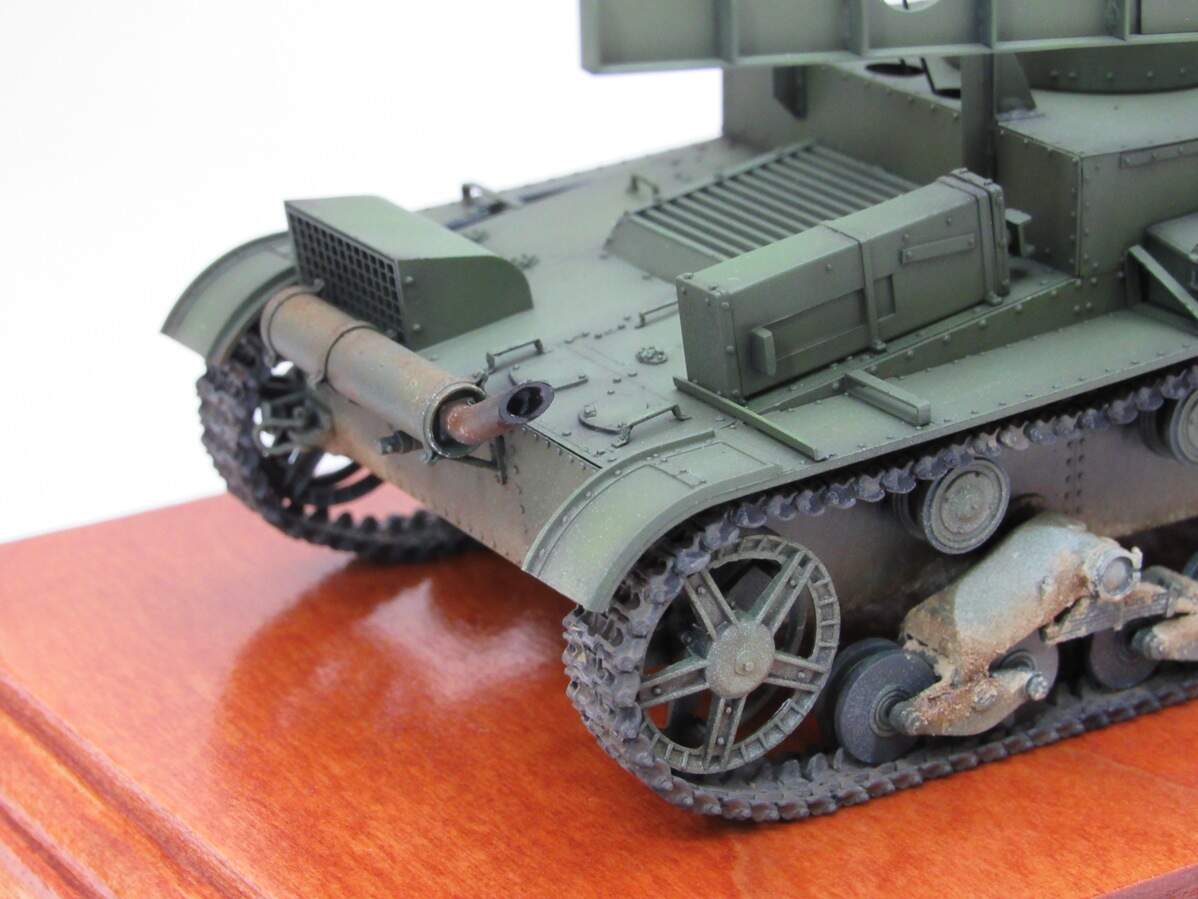
Some more progress over the past few days. Wanted a little mud, as I’d seen in some reference pics, so I went ahead and ruined everything,
It’s my homebrew mix of plaster, Vallejo’s matt varnish and Vallejo’s IDF sand grey. A light mist coat of some more IDF sand grey followed by some AK earth and mud effects helped blend it all in to something more presentable.
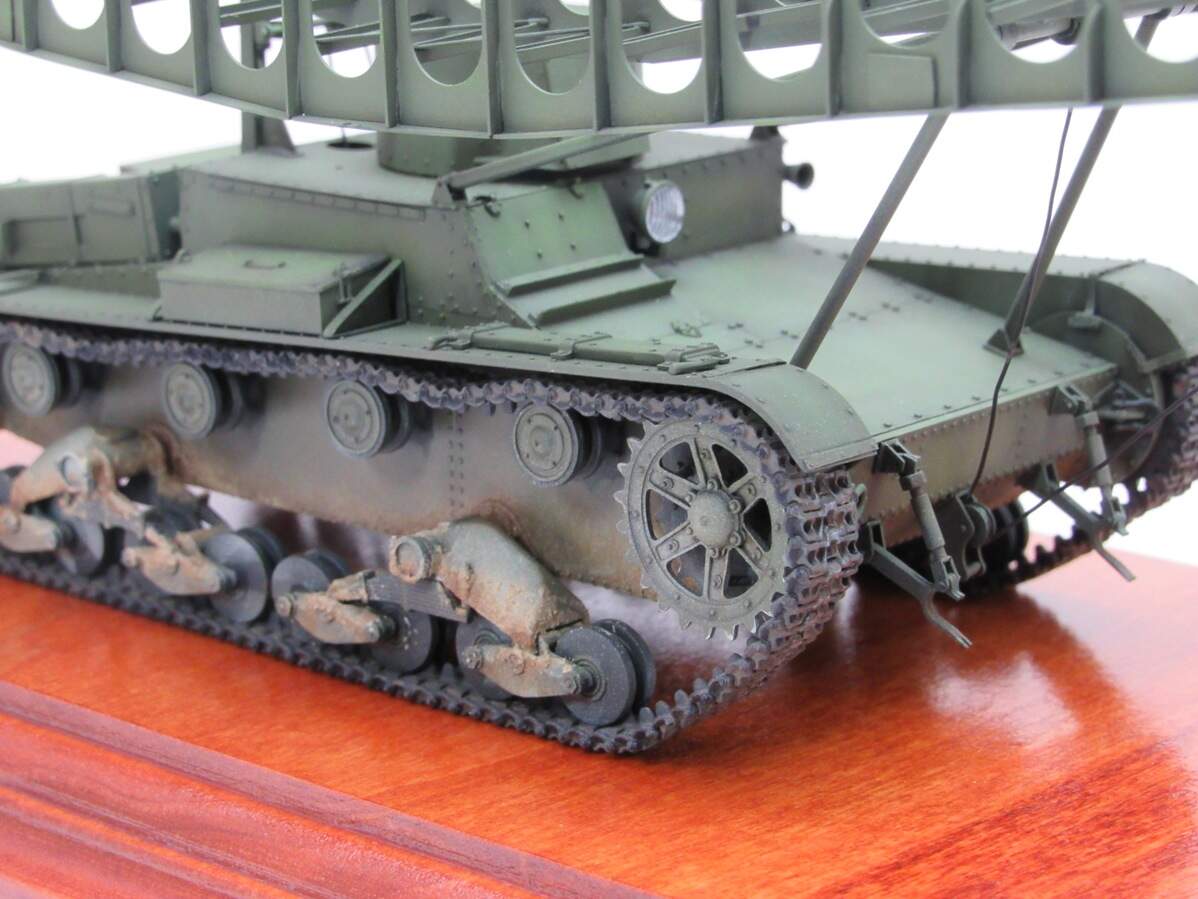
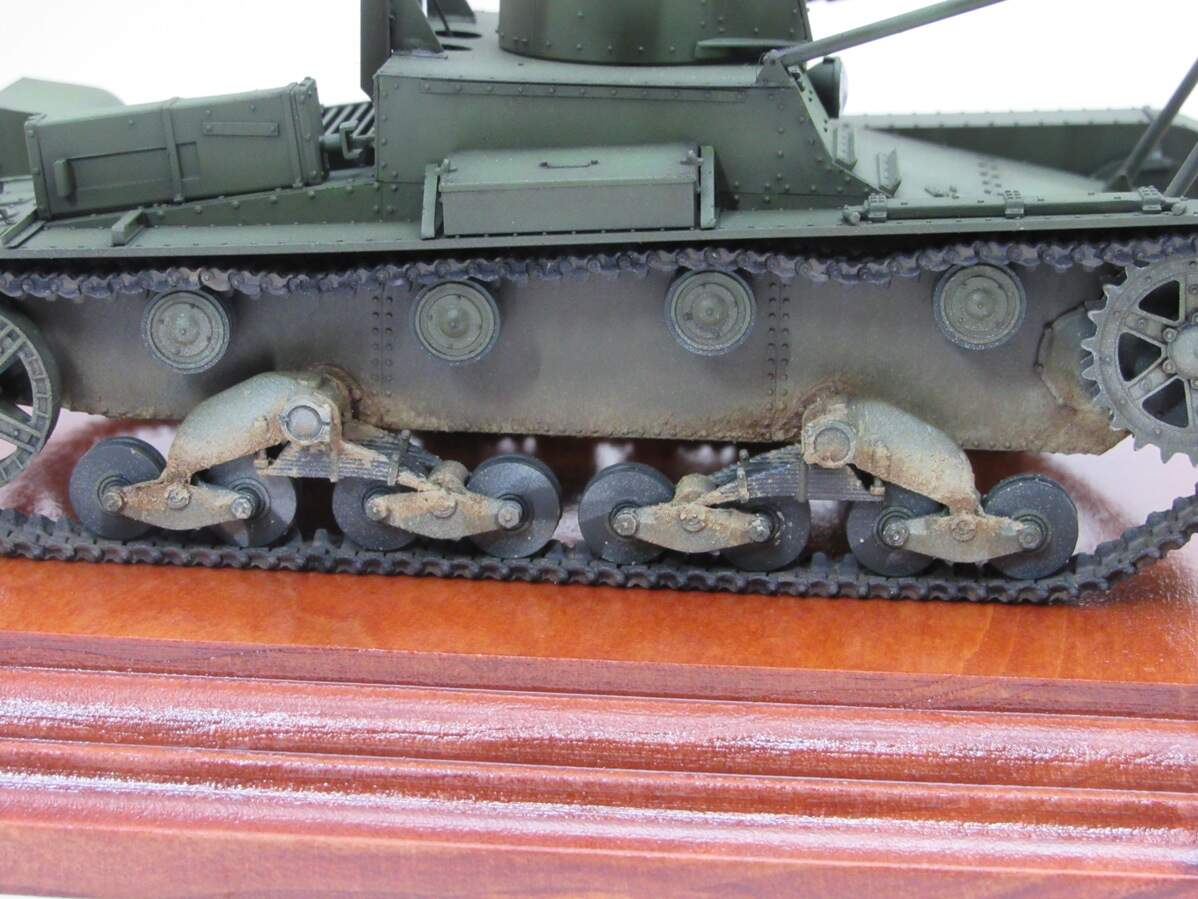
Tracks are in the midst of getting redone. I had tried some balckening fluid for the first time. Made them look pretty rusty, weathered them some more and mounted them up… really just didn’t match the weathering on the tank, so they’re getting redone. But that should be soon, then I just need to mount them up and get the rigging in place and painted.
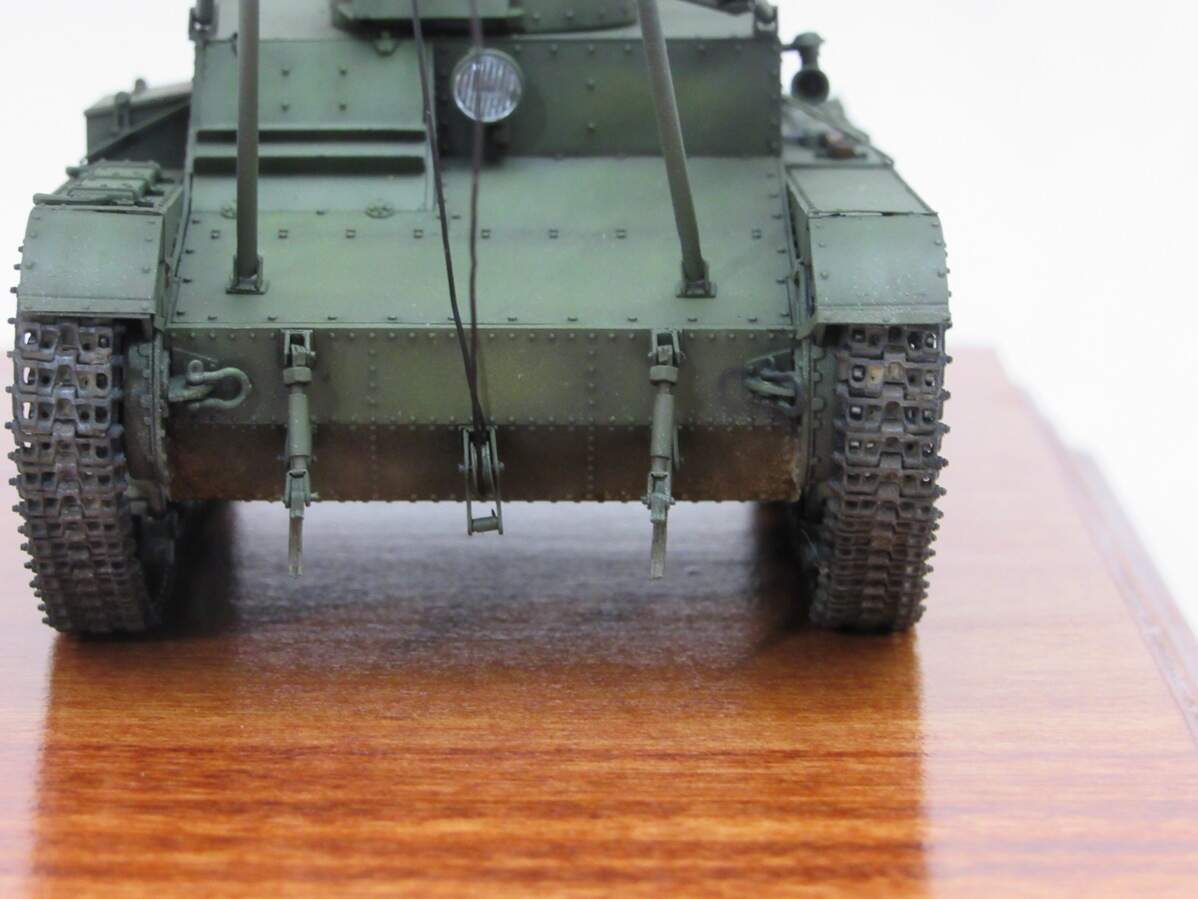
Also made a base for this one, I feel it’s worth it. Scrap poplar, gunstock stain and some left over floor poly,
I thought I had seen the ultimate scratch build on this site allready , but yours is just as unbelievable … FANTASTIC!!
Thanks Bert!
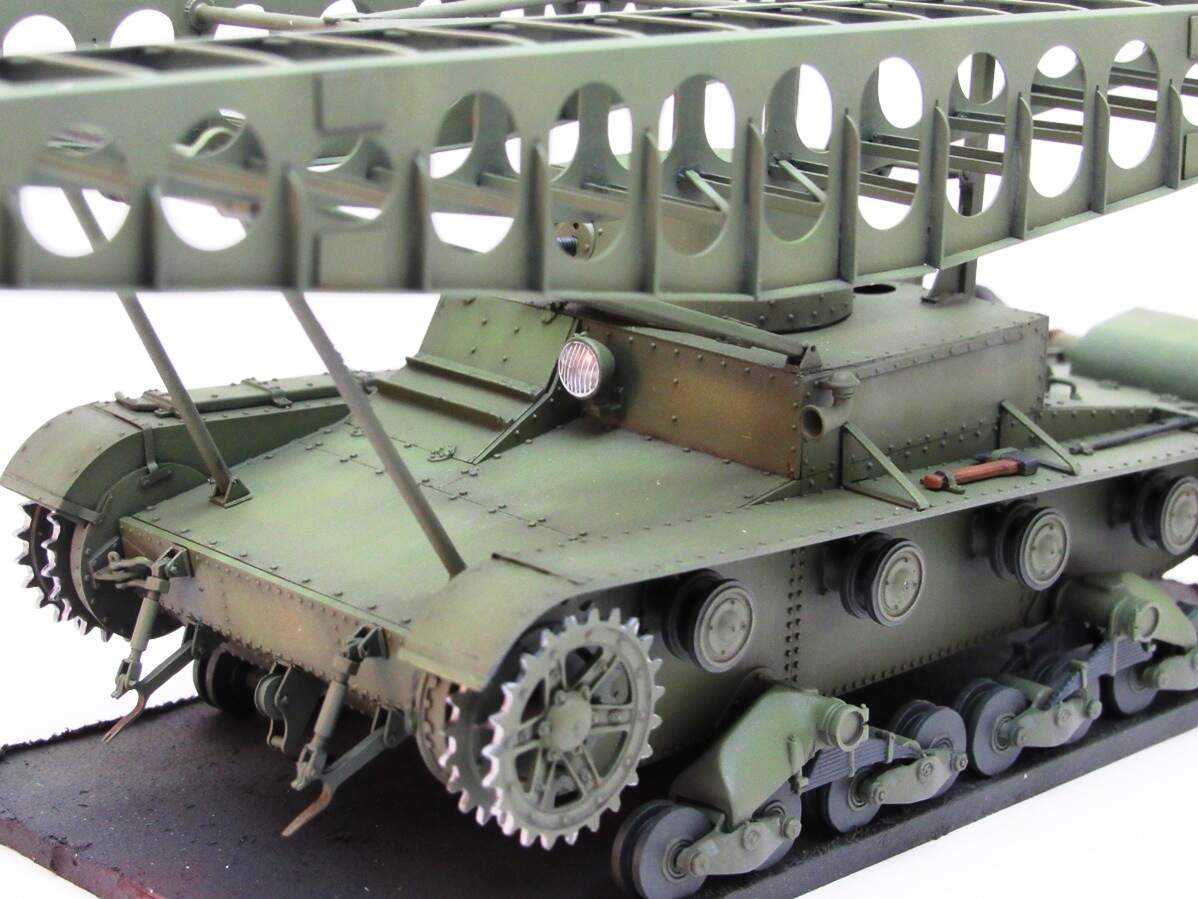
Added the treads then the cabling, plus a little details painting, and I’m calling this one done.
Thanks everyone for the kind comments and hep along the way. Definitely been an interesting project. For those interested, I’ll post here when the conversion kits are available, should be ready sometime in October.
I’ve gotta say that this has been one fun act to follow. I am truly impressed by the level of patience and skill that I’ve seen on display here in this thread. Job well done James!! ![]()
This was one hell of a thread to follow. Amazing work with good photos to help in following the progress of the build.
As a side note, I would like to mention that there is a very large community of smaller scale builders (I should know, being one) who I would venture to say that would love to build this gem in 1/72 scale.
Great looking build, design and SBS. 
Very much thinking about getting this conversion, what price range are you thinking about, subject to change of course?
Jim,
This was a unique and absolutely incredible build. I have never seen anyone do anything like this before. Designing your own photoetch was intricate, brilliant, and masterful. Watching you assemble it was fascinating. Your skills improved before our eyes! Your model construction is just as excellent, and your painting and weathering are subtle and tastefully done. There is not a thing out of place on this model. Everything is perfect. You have truly completed a masterpiece.
Hi James… What a fantastic build you did from drawings to the finish.
Cheers,
Ralph
Wow! Totally awesome build! I’m definitely interested in getting your conversion kit when it’s ready.
~ Eddy 
Well thank you everyone, was not expecting this much support and kind words. It’s been the most involved build I’ve done so far, but it all worked out in the end.
As for price, it’s looking like it’ll be in the 50’s. Pricey I know. Won’t have a definite until I get the volume quote back for the PE frets. But considering $40 for after market tracks where you have to drill out each hole, I think this will provide much more modeling enjoyment than that for a bit more.
Excellent work!