Getting back to your diorama… Your research effort and attention to detail is simply amazing!
—mike
Getting back to your diorama… Your research effort and attention to detail is simply amazing!
—mike
I completely agree. You already have your own team of fans. Don’t fail us! We will be happy to help and advise and point out shortcomings with no less pleasure. ![]()
Tried the airbrush on some test pieces today. I have a few question to ask. I have a double action paintbrush. Sometimes it feels like there are different amount of paint coming out with the same pressure and pull of the lever - I am painting with a constant pressure and pull of the lever, I stop and when I resume with the same pressure and pull of the lever there is different amount of paint. I cleaned everything thorougly after every use so there is no dry paint blocking the nozzle. Maybe the paint has dried during the 5 second period I was not using it? Am I doing something wrong or it just ‘seems’ that there is a different amount but in reality it is the same.
What do I do if I sprayed a little too much of the paint? There is not a pool of it but it’s another shade of the colour. Do I just put another layers on it till it dissapears?
And the aluminium grill trays were an amazing idea. Thank you!
What compressor do you have? Maybe a pulsation from him, if he is without a receiver. But this is unlikely.
At the same time show the airbrush. There may be specifics to the model.
My opinion: before starting the next painting session, you should blow hard to the side.
If the paint is thick, then it can also affect.
There’s a whole world out there! We call it “shaman dances with tambourines” - it seems that he did the wrong thing, but it turns out the right thing. Or vice versa.
The compressor has a reciever and it maintaines the same pressure the whole time.
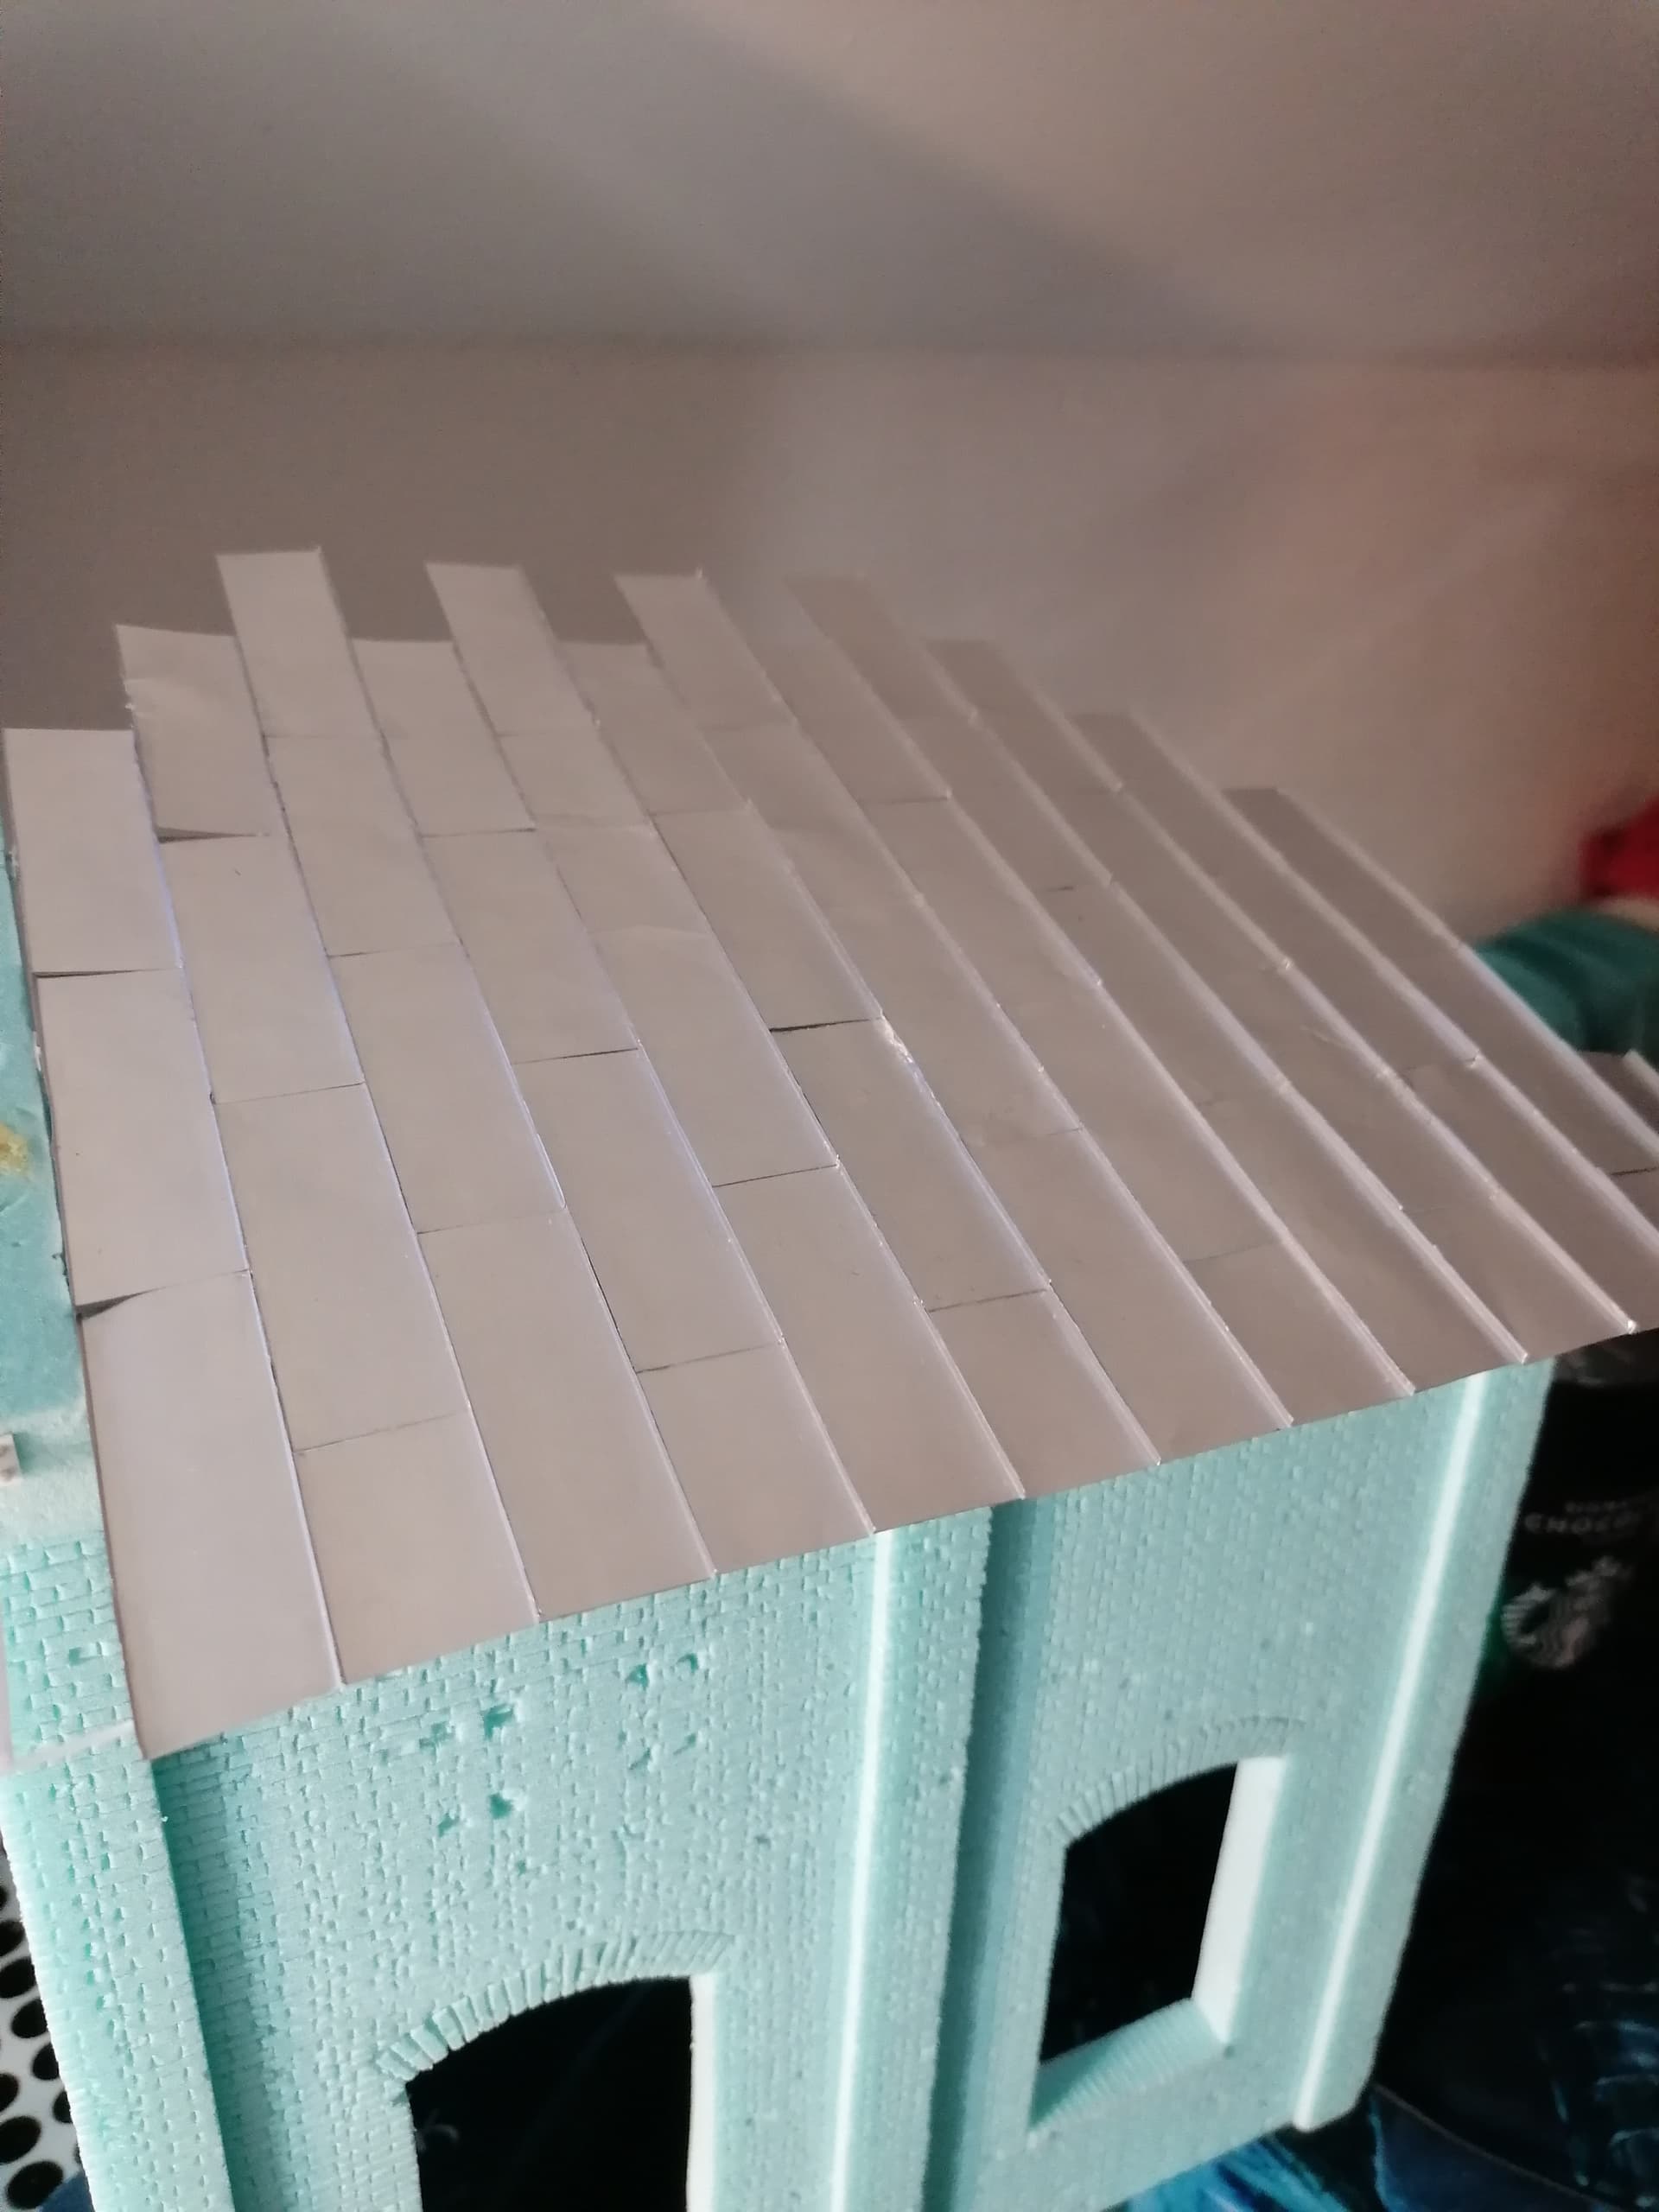
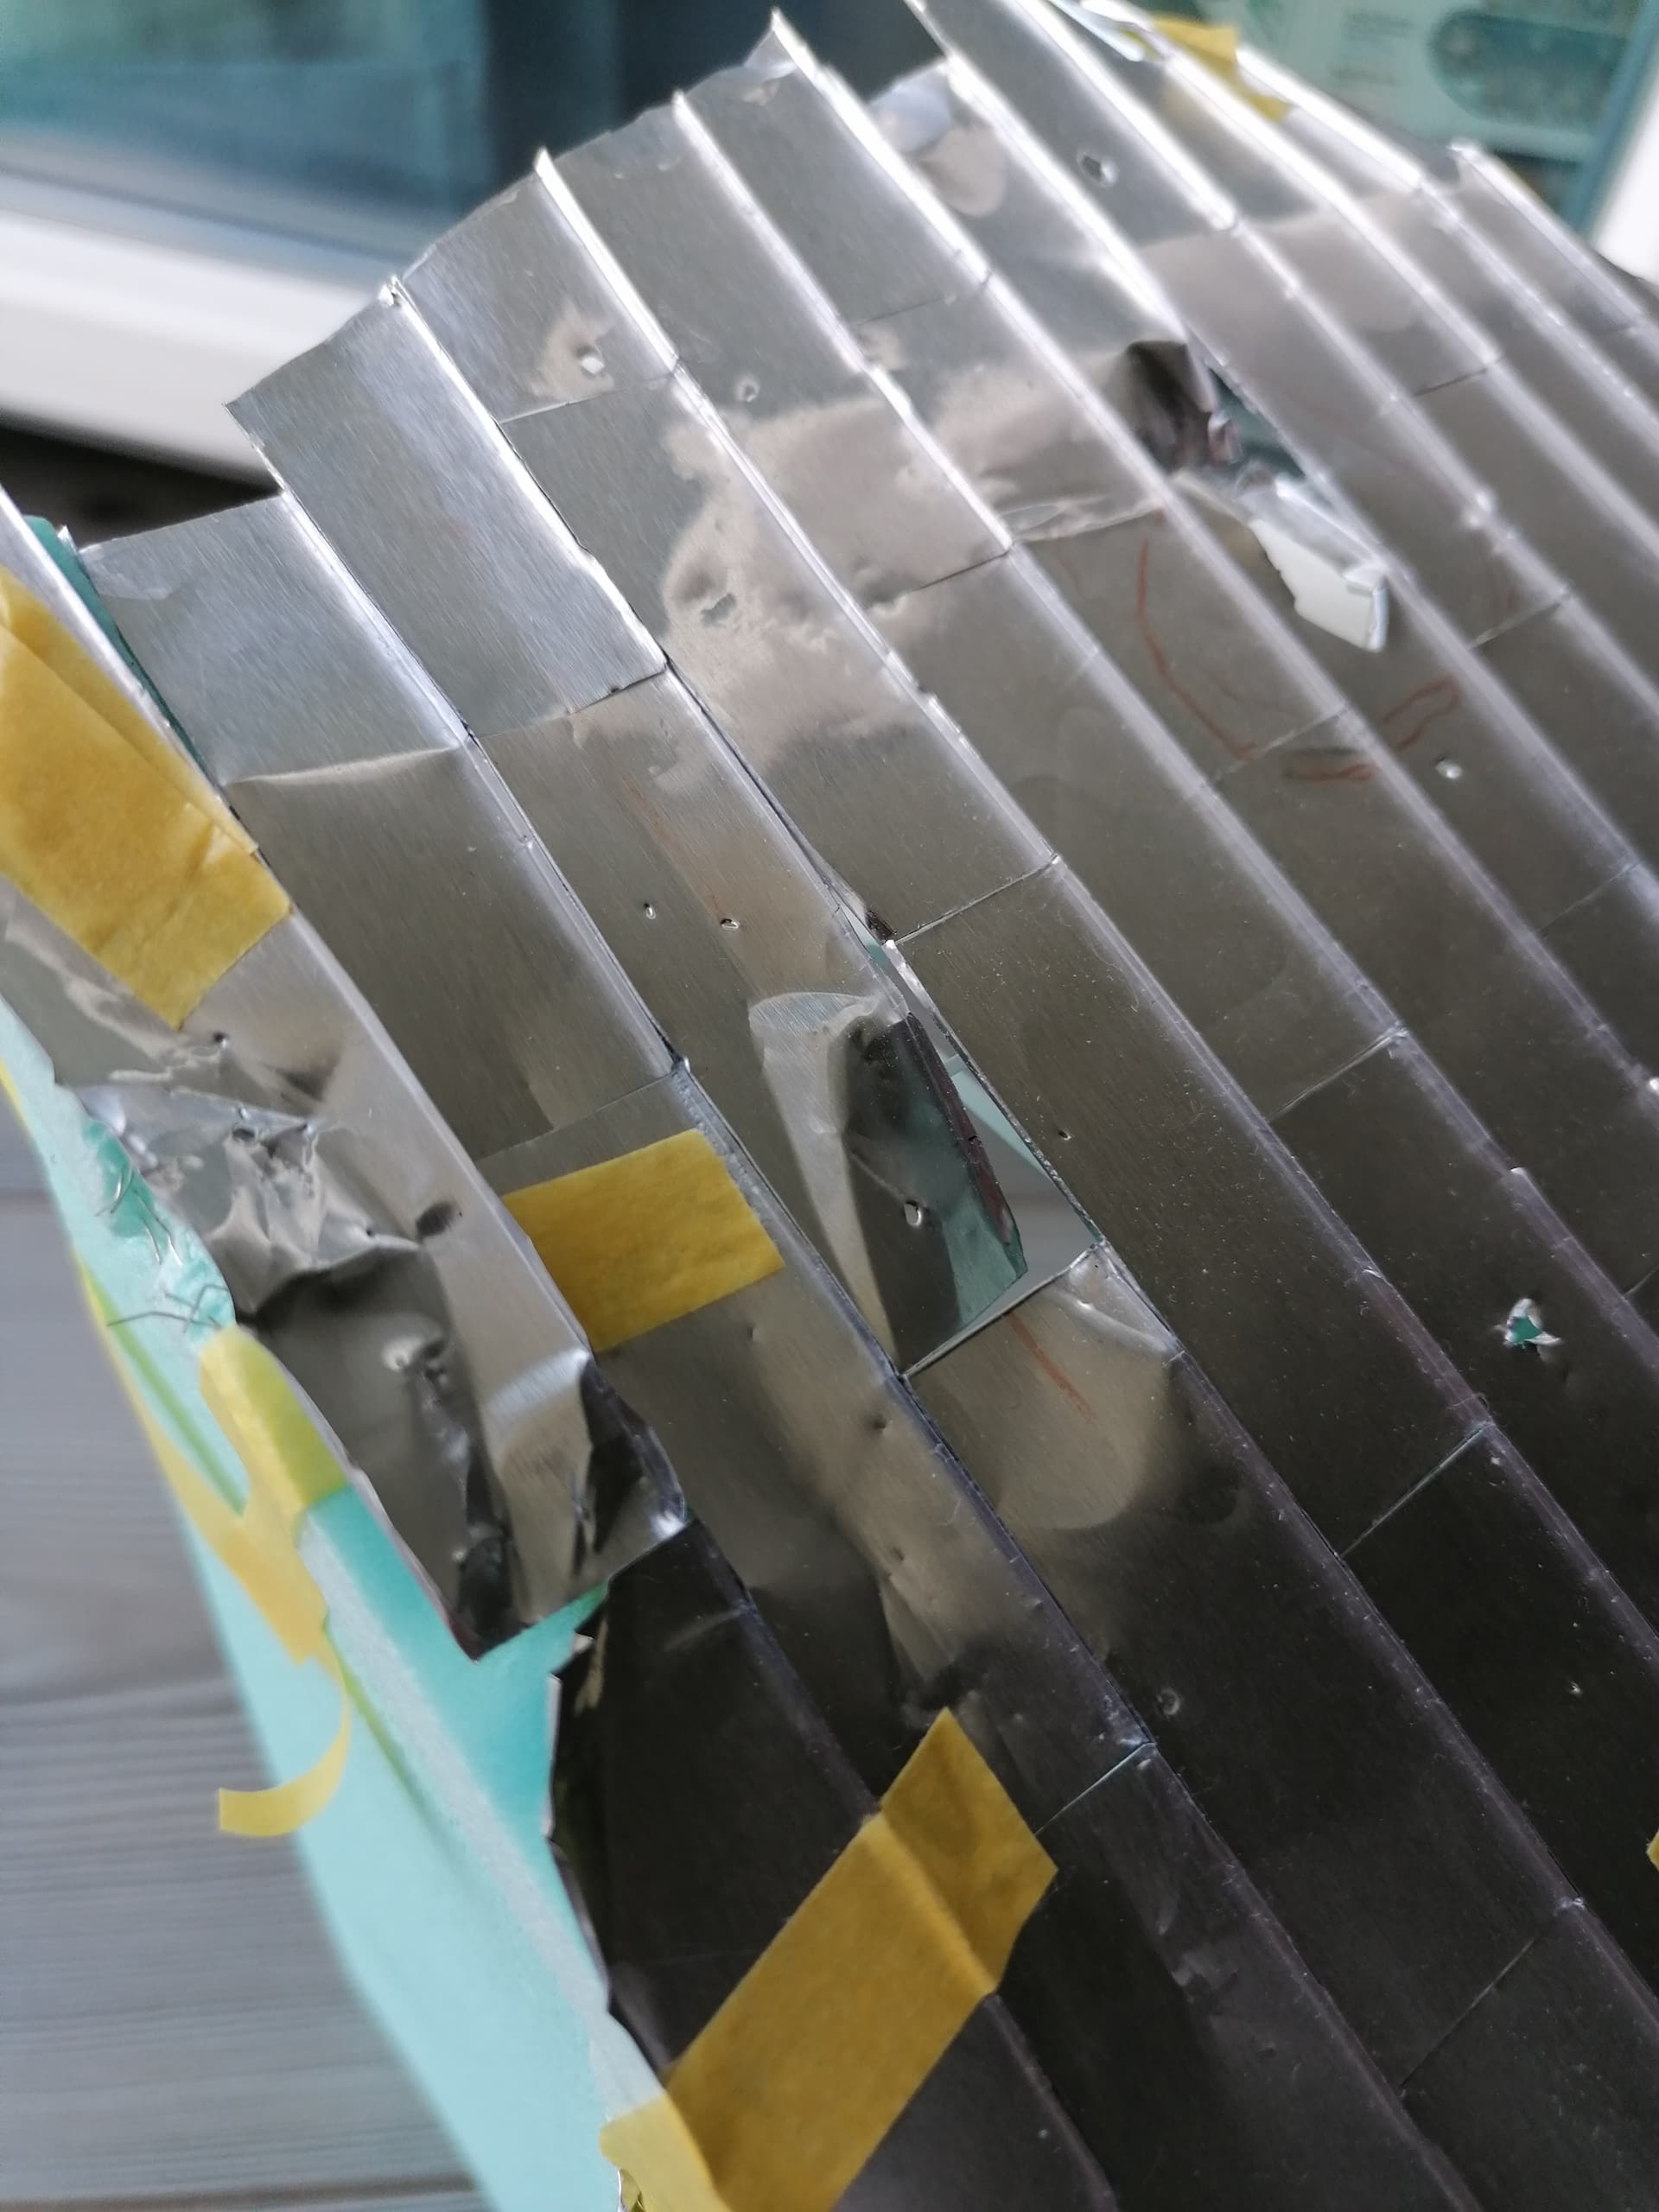
A little sneak peak:
With this result, you can already make roofs for real houses.
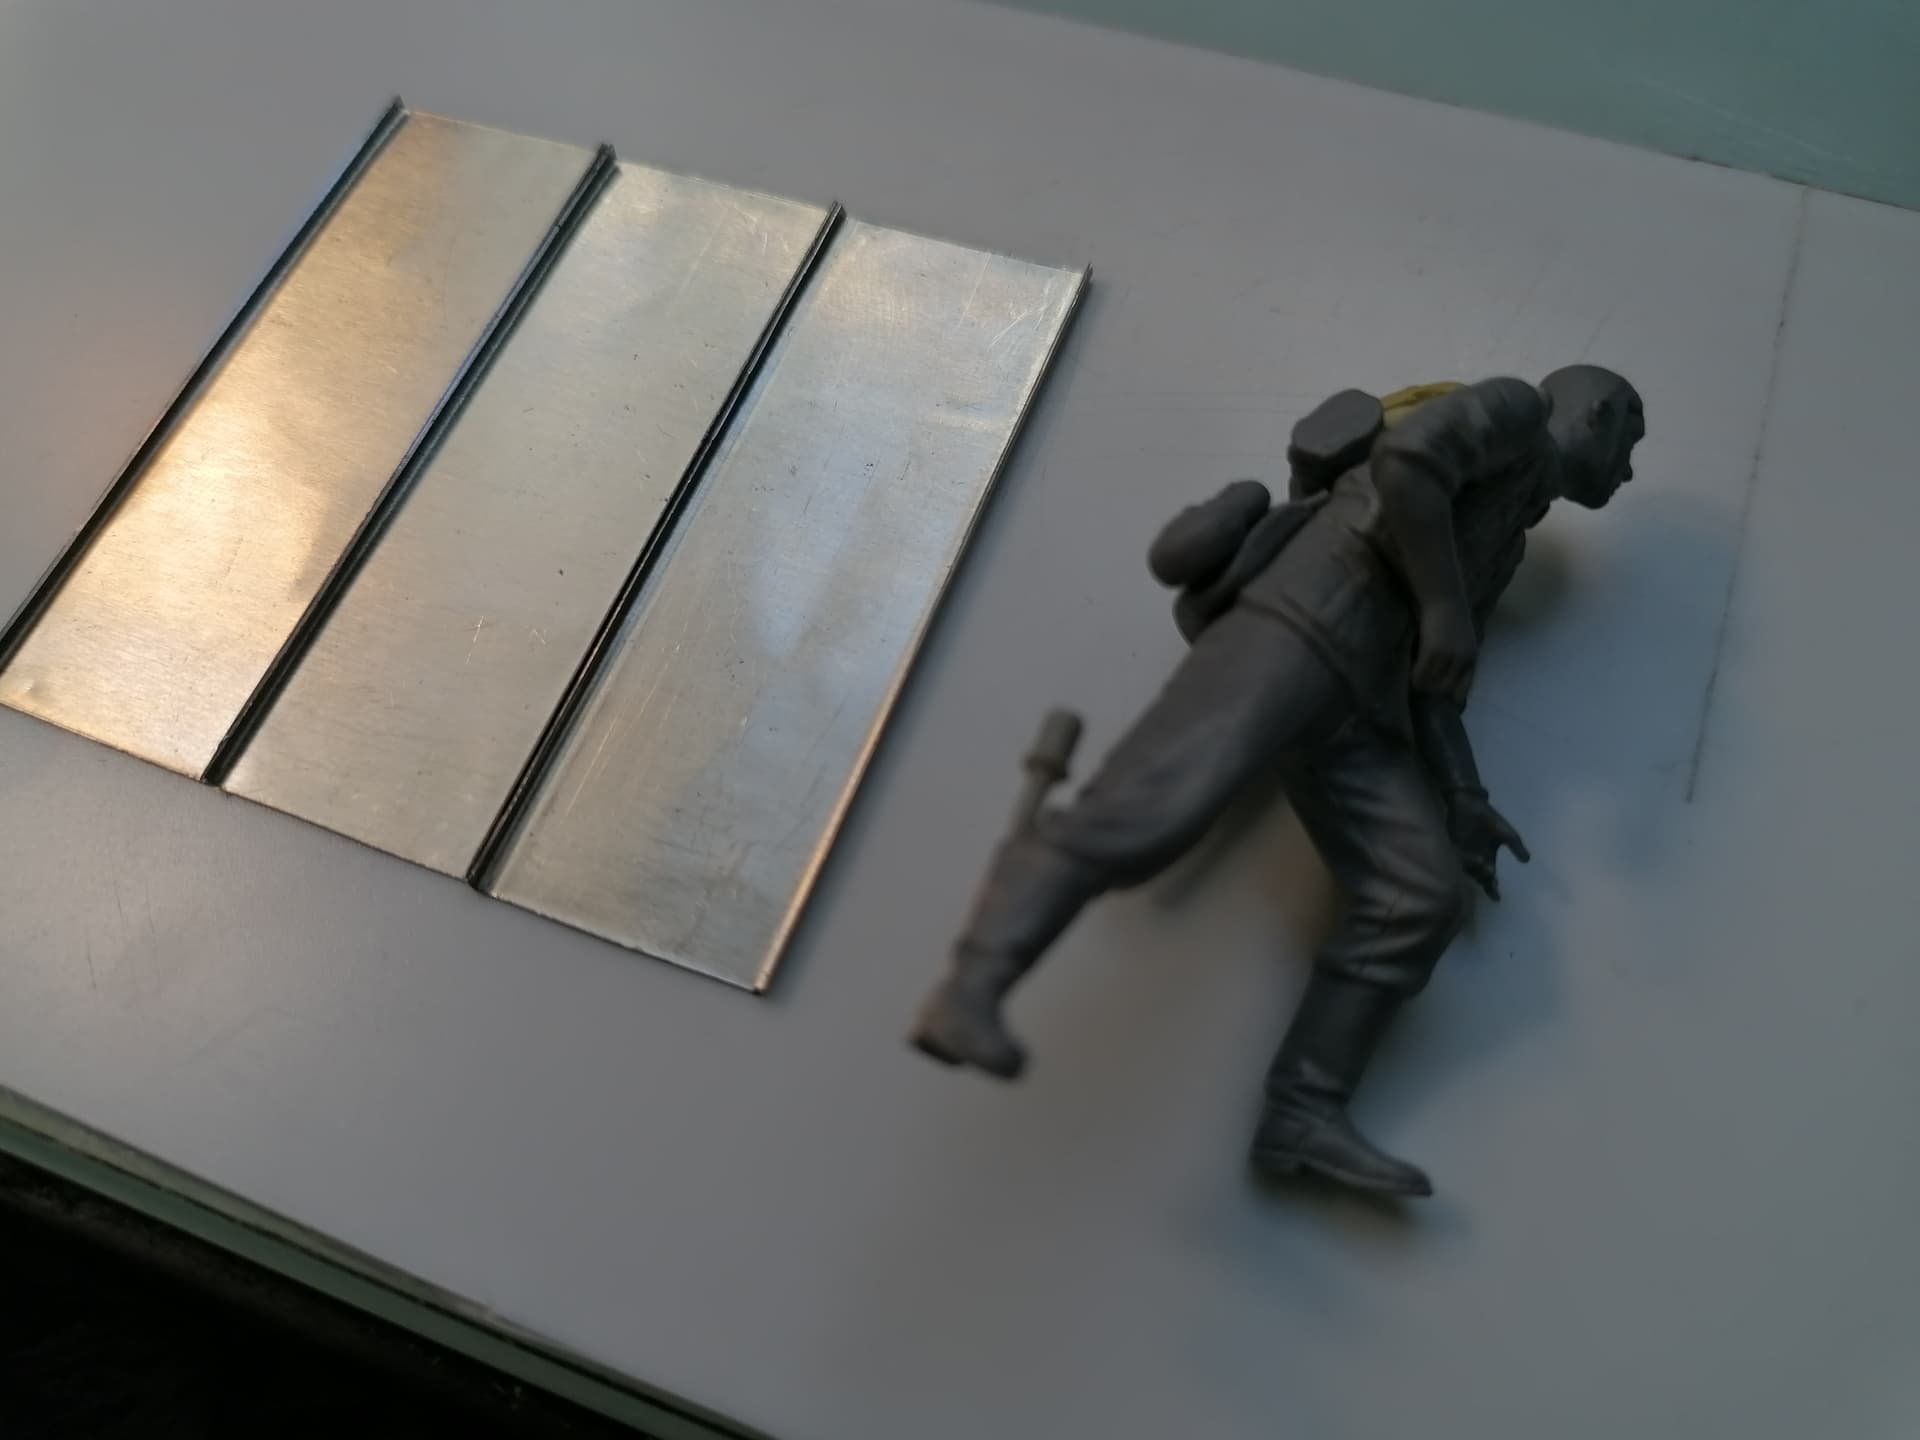
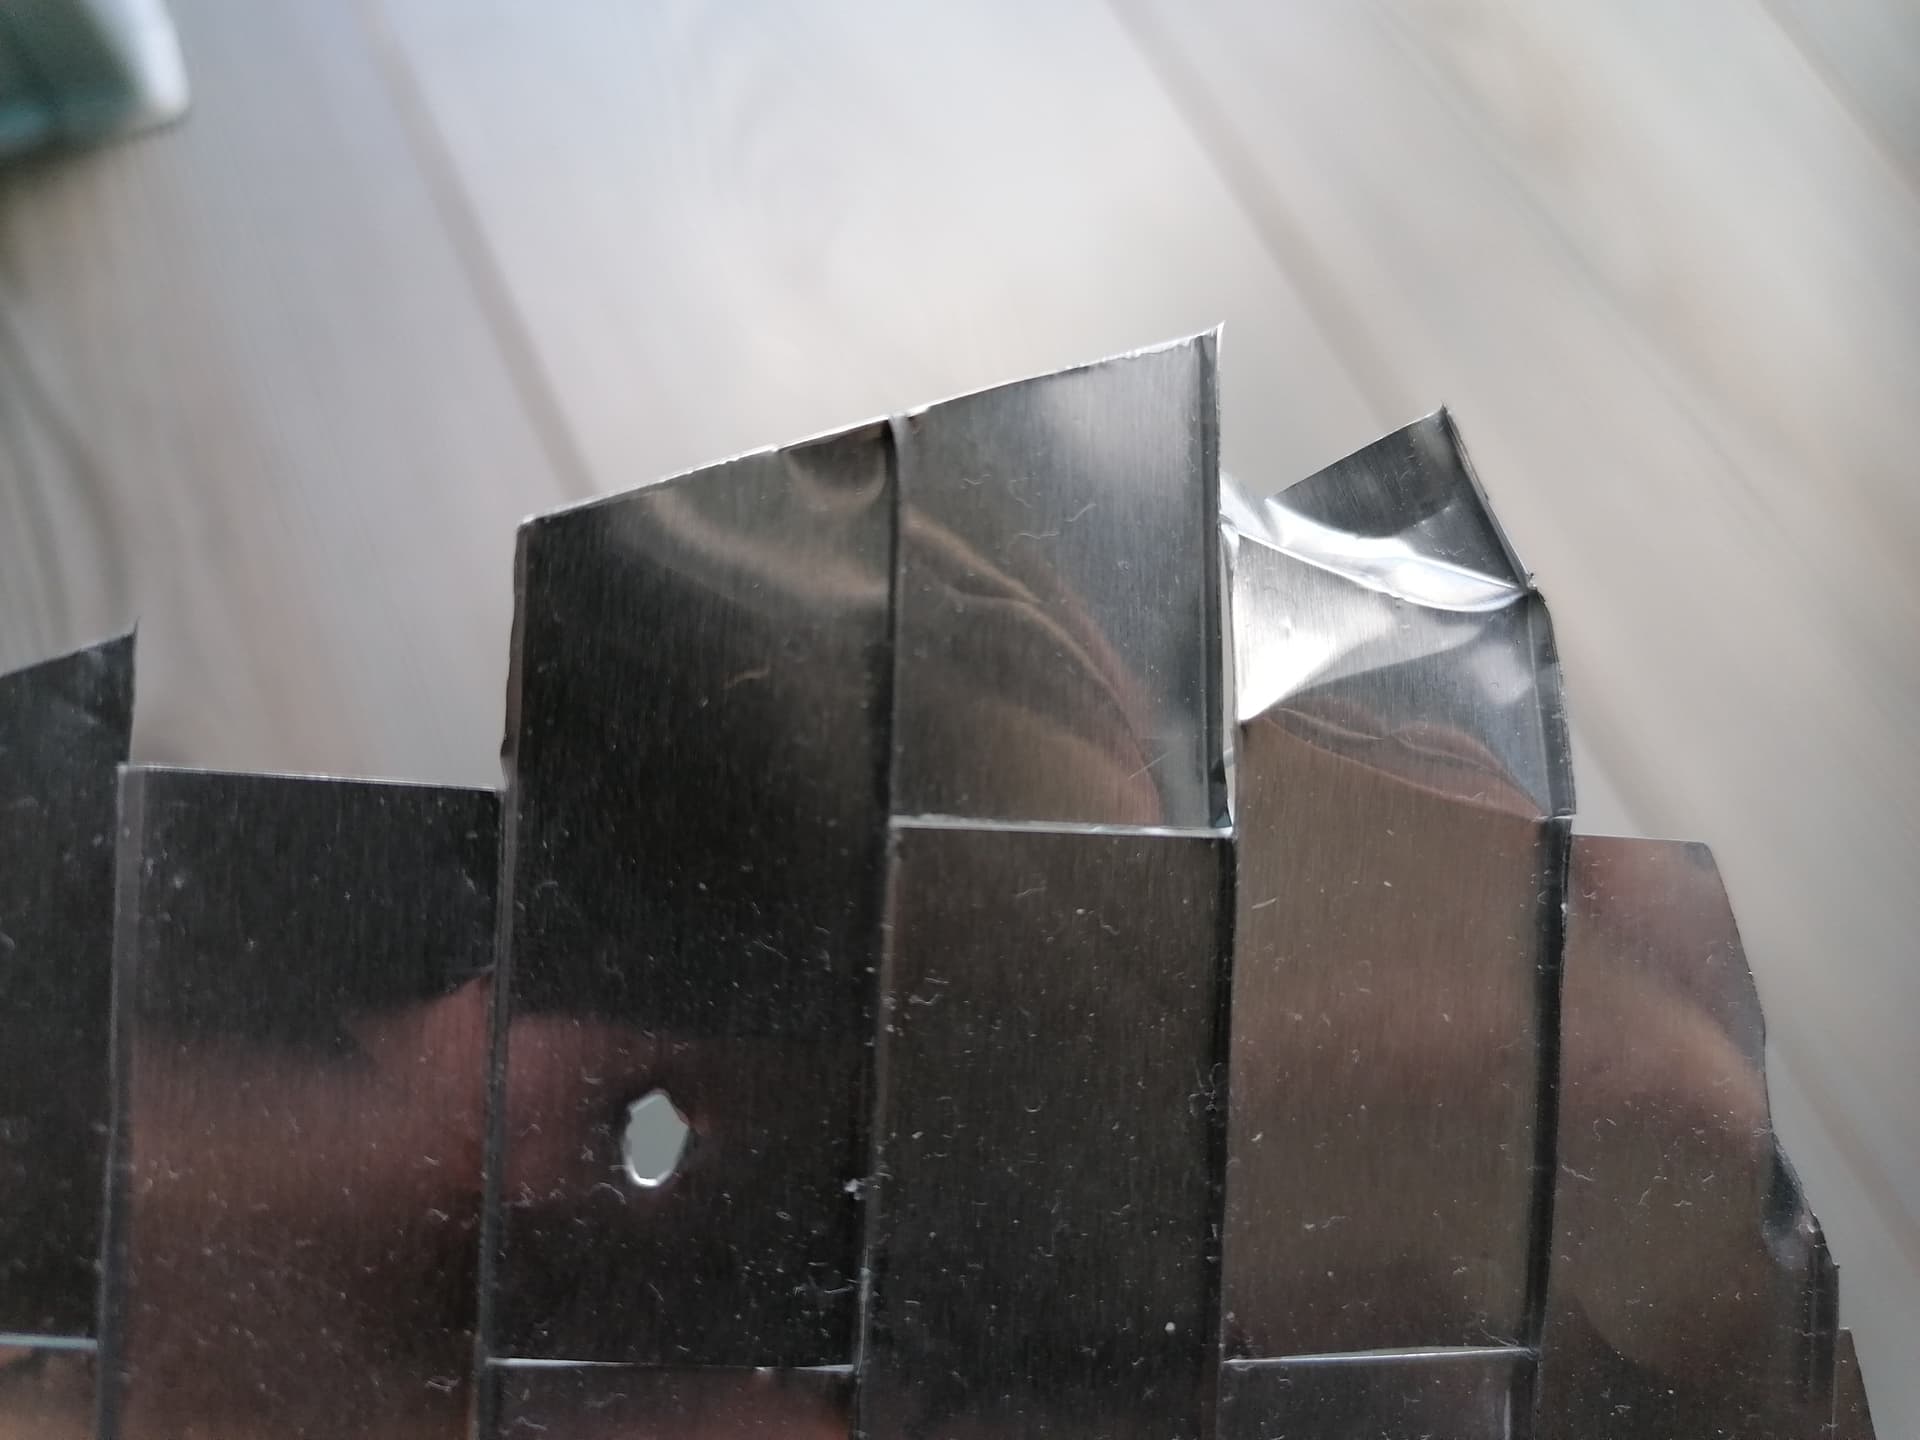
How did you put the ridge on the edge of each to sheet piece?
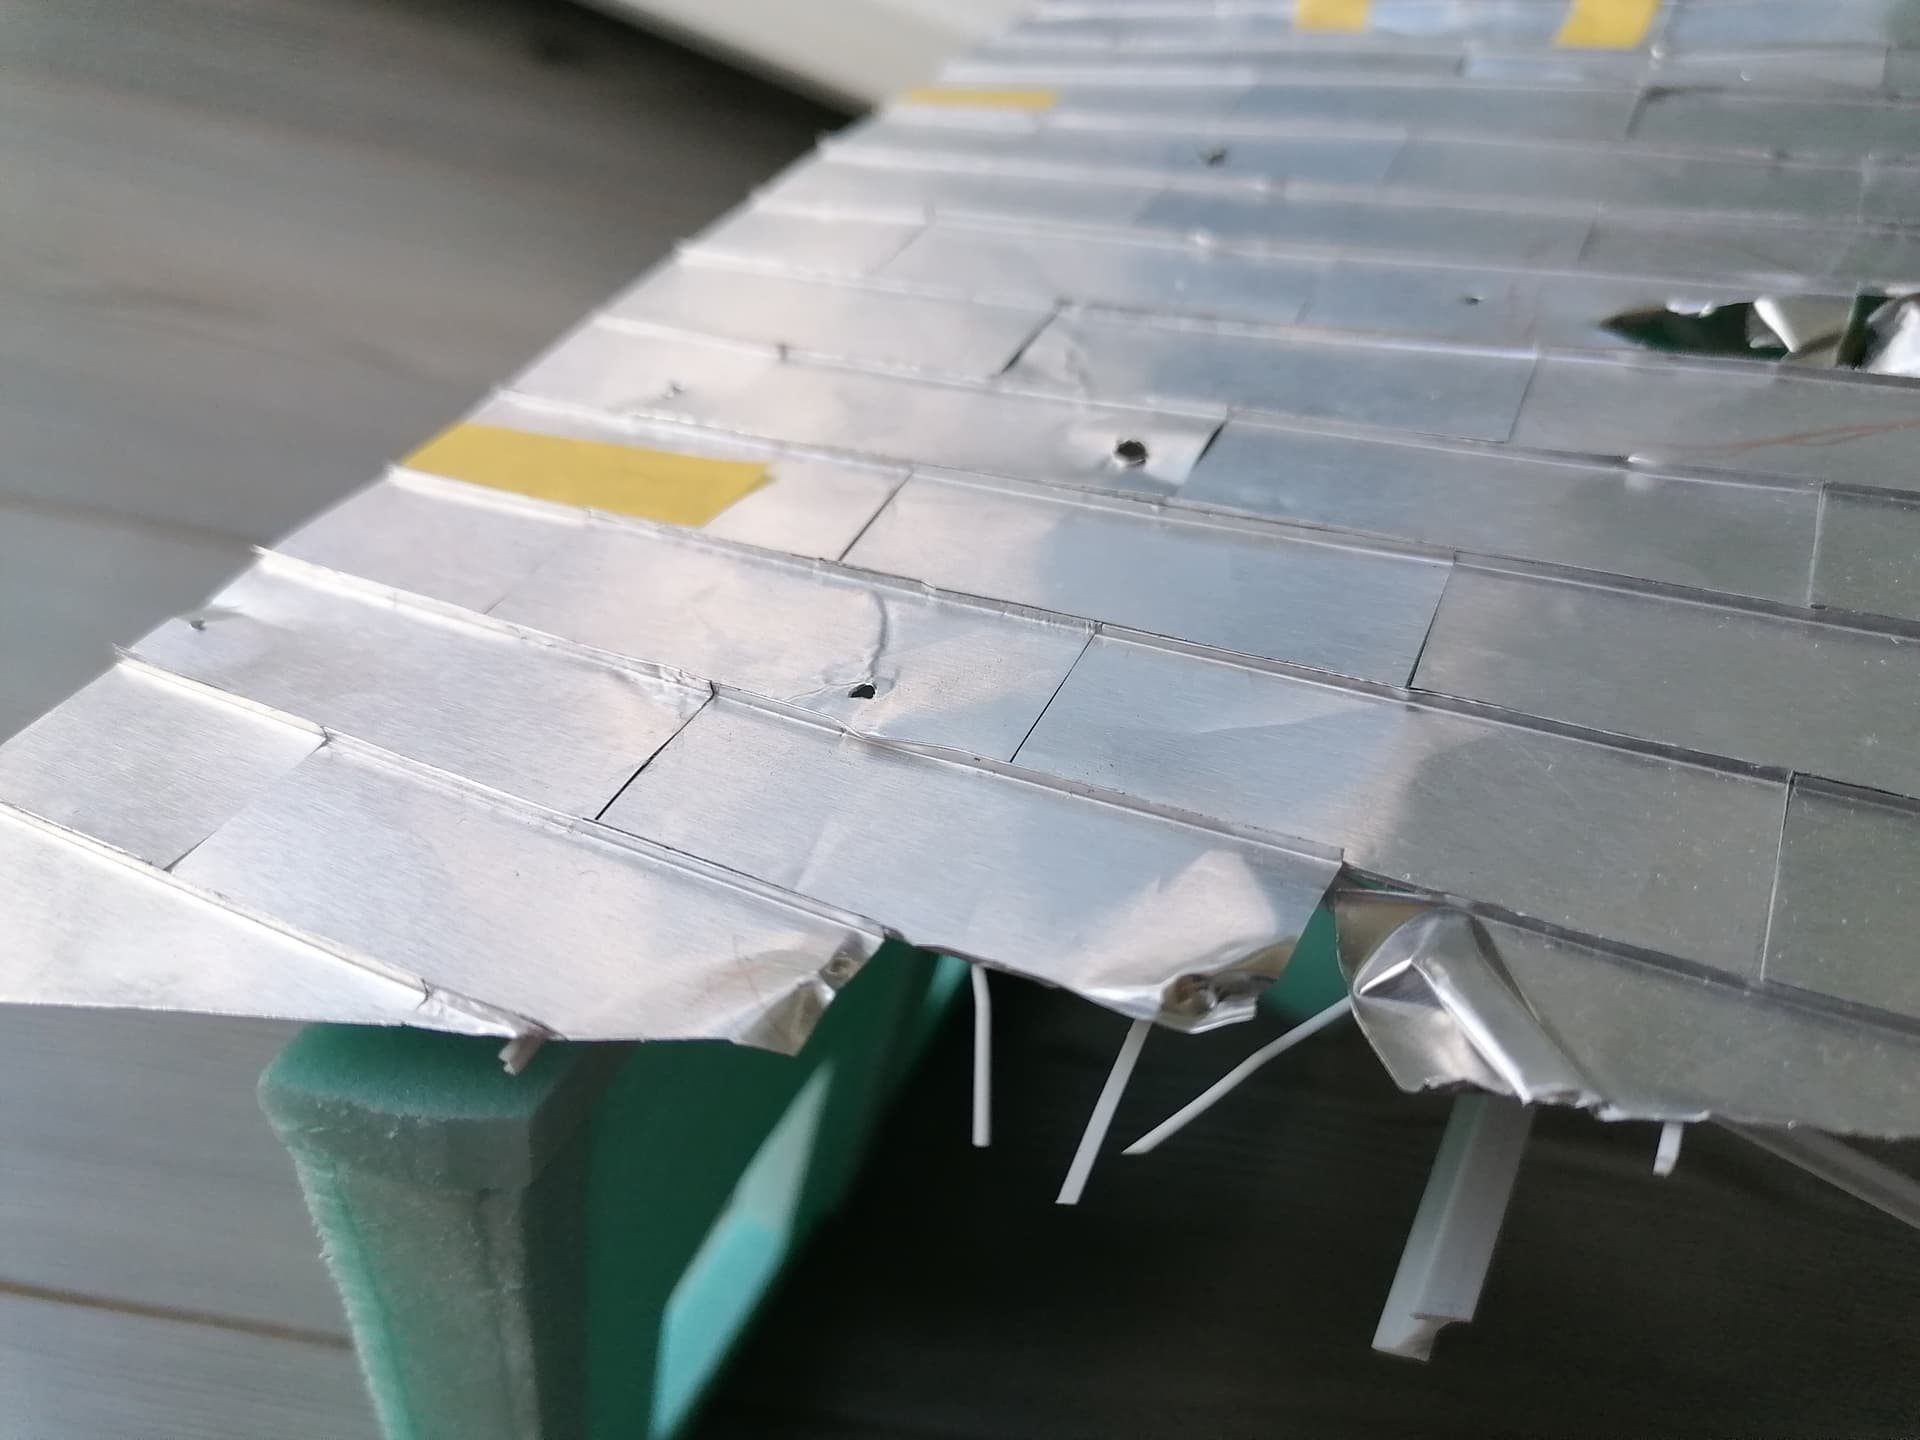
I cut the small pieces and then I bend the edges as seen in this picture:
Then I just glue together the small pieces on the bend edges.
Hope I understood the question ![]()
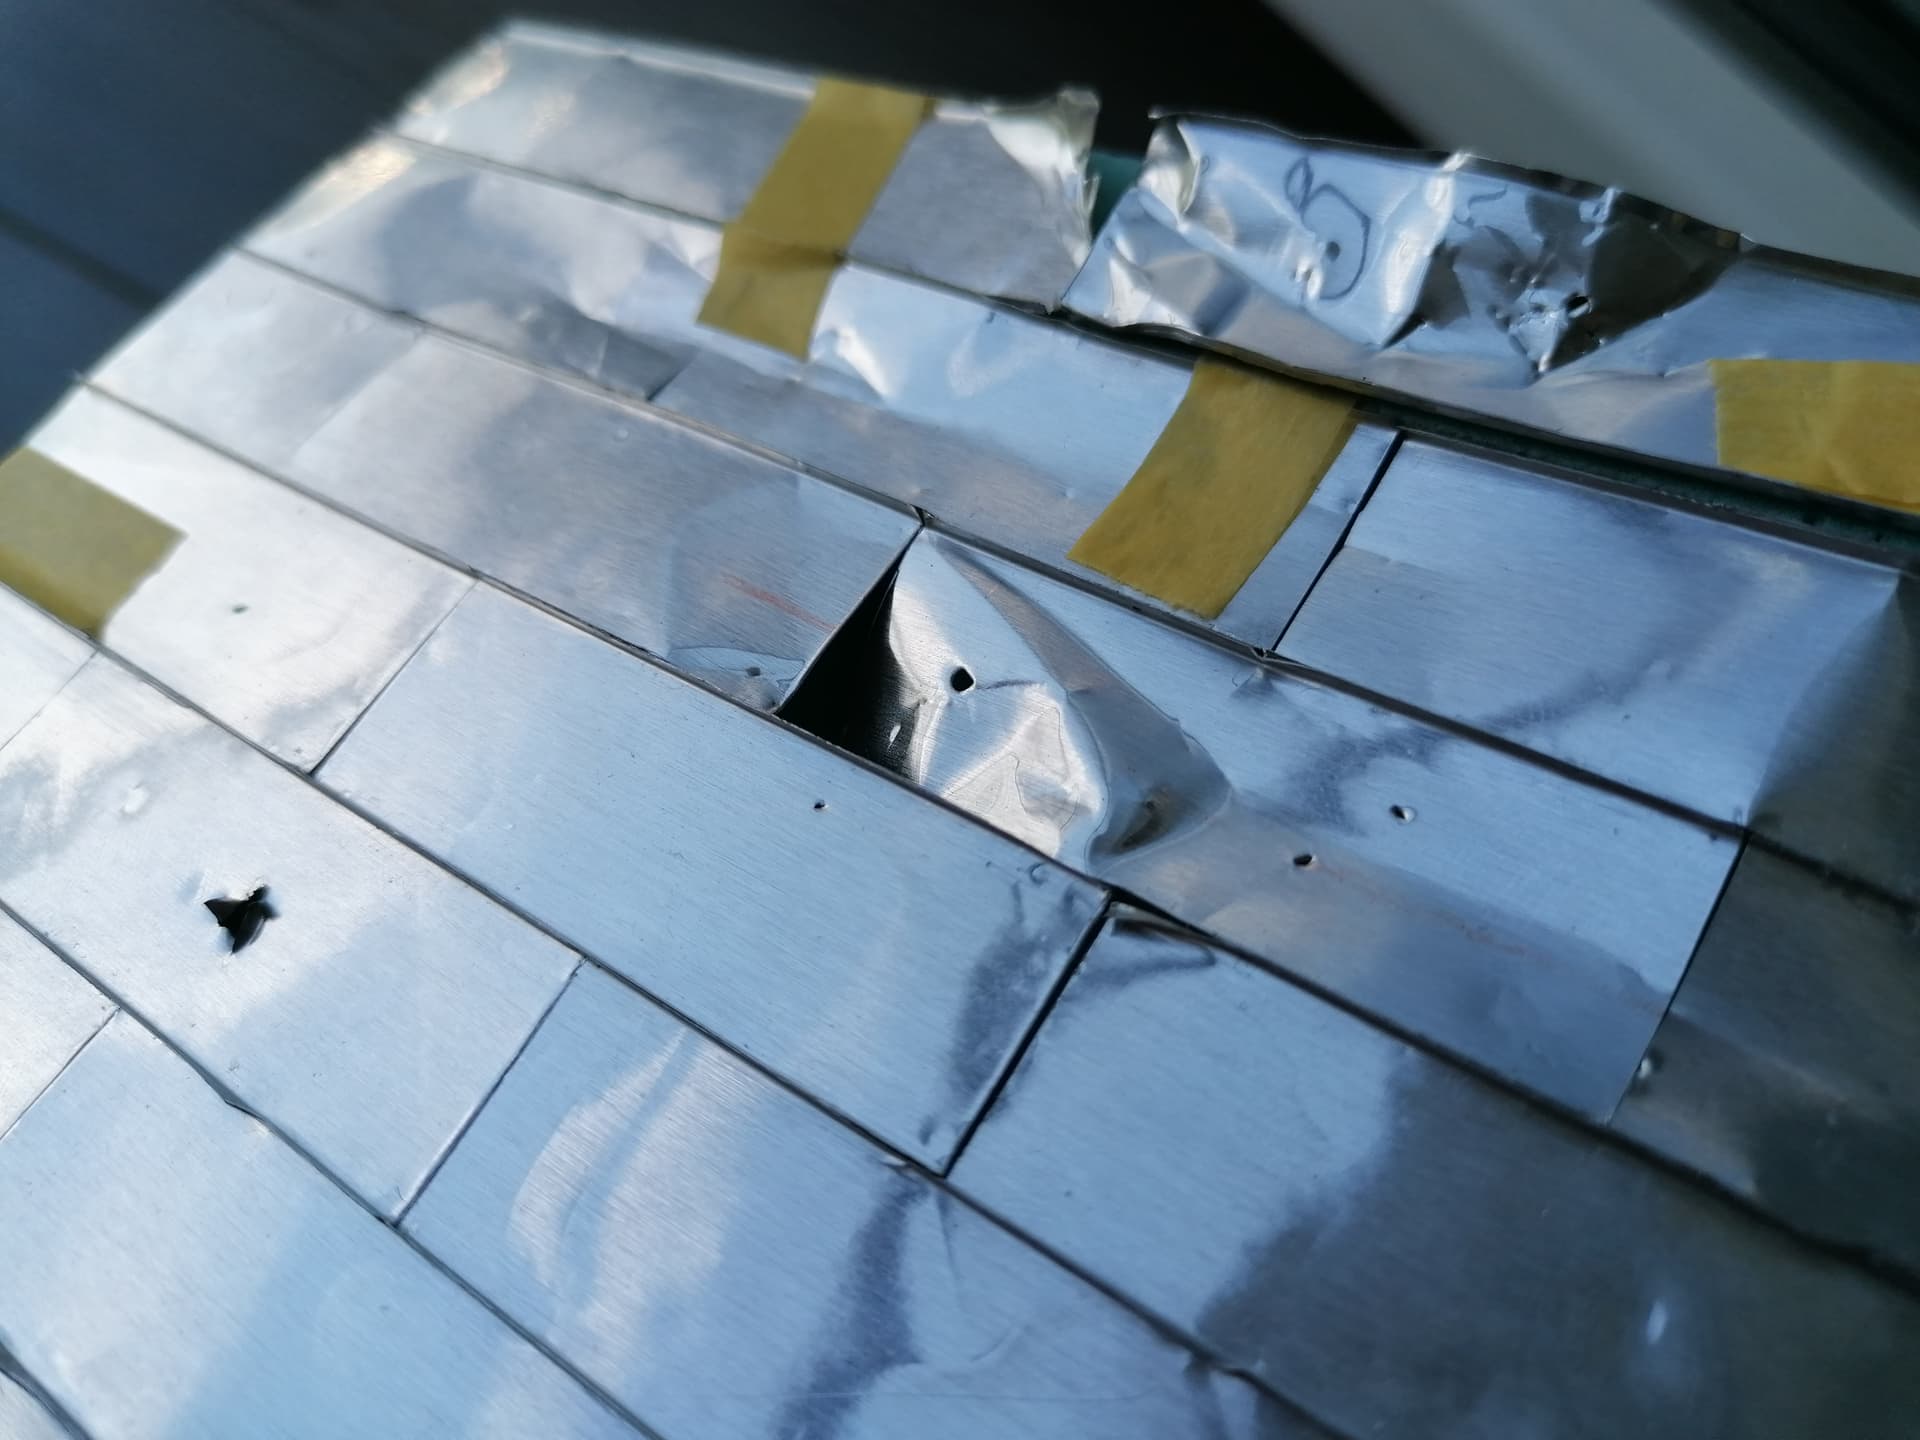
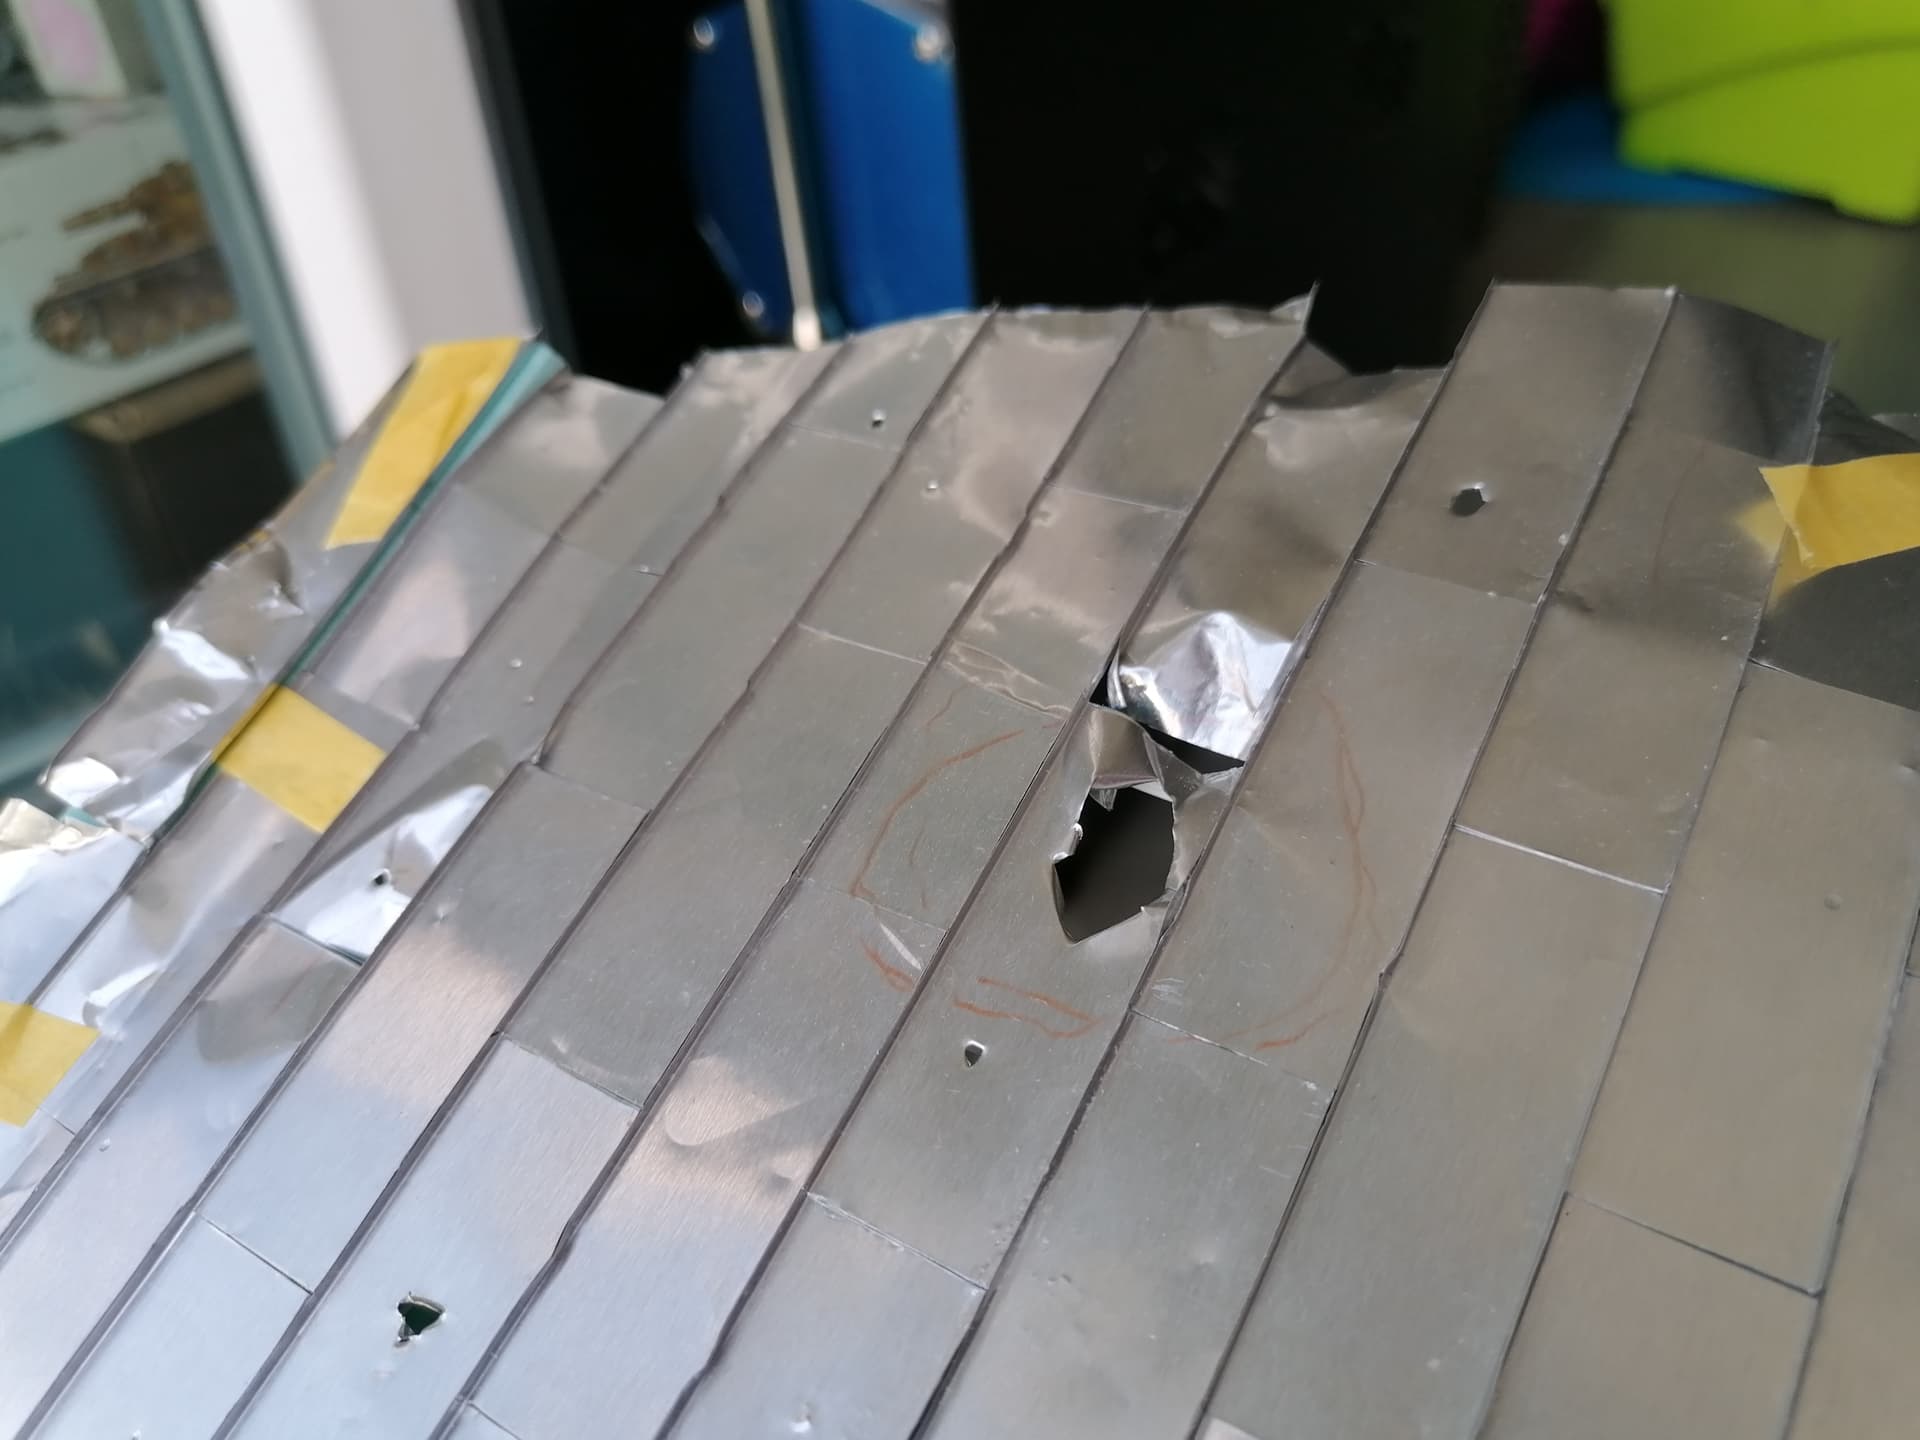
Do I add more of the damage? What do you think?
Don’t mind the dust please, it has beed sitting on the table for a while ![]()
Currently I am making the window frames. I have already made 2 of them, but I did not like them. When the windows will be finished I will paint the inside walls and plaster them.
It’s looking really good, excellent results with the foil panels. I’ll bet a few of us have been here – damage? Sure, no problem…and then one begins to over-think everything until it never seems to look right. I believe it was said earlier in this thread that you have to imagine what munitions (and how many) would most likely have caused the damage you’re representing.
The battle of Stalingrad began with a massive and sustained attack by the Luftwaffe, so imagine large blasts with shrapnel & maybe a couple of unexploded bombs poking out of the debris. Once the Germans were well inside the city at close quarters with the Russians I’m not sure heavy artillery was used much for obvious reasons – lesser damage from mortars could be shown maybe.
So I’d suggest the broken edges of the roof should be generally sagging down (from collapse) but with some panel edges significantly torn upwards from blast. More tears & holes in the roof panels from underneath (ground blasts/shrapnel) and lastly flying debris landed on the roof. ![]()
(PS - you might want to consider all or most of the window frames were blown in or out too - could save you some work!)
What he said!! Ditto.
J
Thanks! You are absolutely right! I am just a bit worried that there is not enough place inside for some rubble after explosion therefor I thought that the roof should not be destroyed as much. But maybe I my thinking was wrong all along and the crammed space inside is a perfect place to imitate a destroyed and bombarded factory. But this opens whole another chapter of how to make the piping and the stairs to look like after an explosion. I feel like this is only the beggining ![]()
Also a general update - I am moving abroad in september to study in a university. I will be living in a 25 m2 room together with my girlfriend. I will try to take the most essential things with me. Honestly I am a bit dissapointed because when I resumed the work on this project I thought I will be finished till the university starts. Whatever… I will try to work on it during the school too.
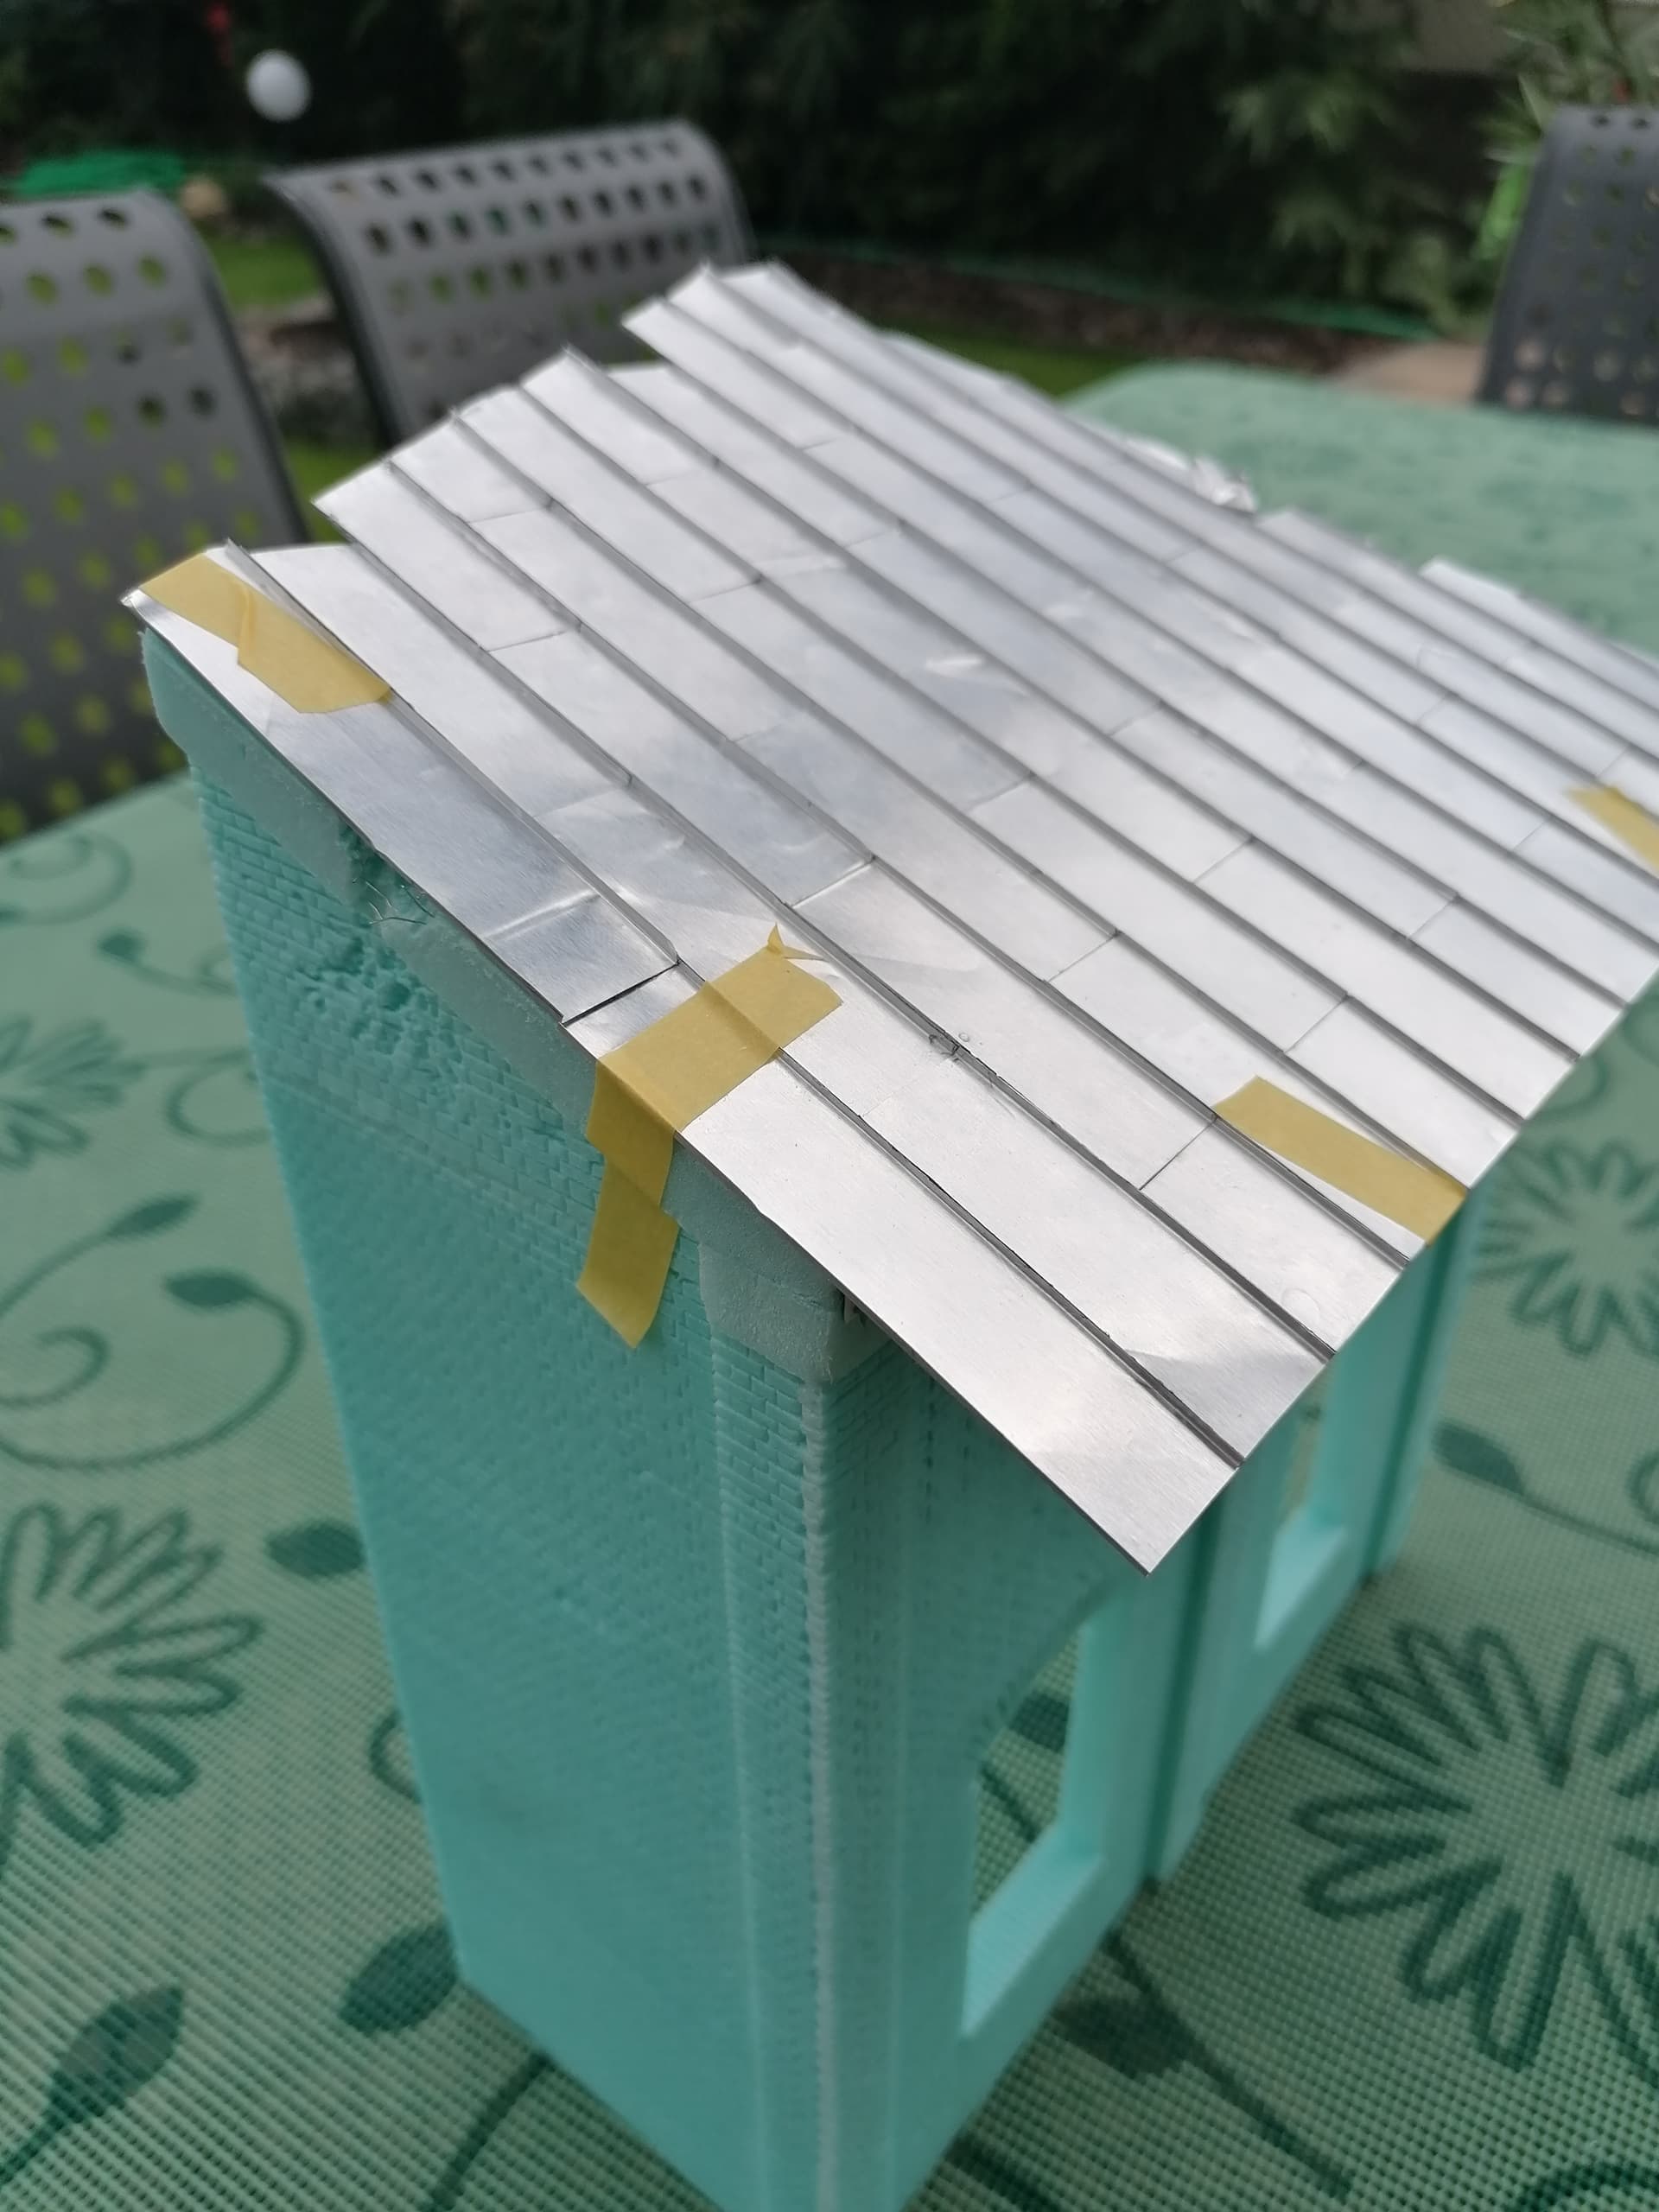
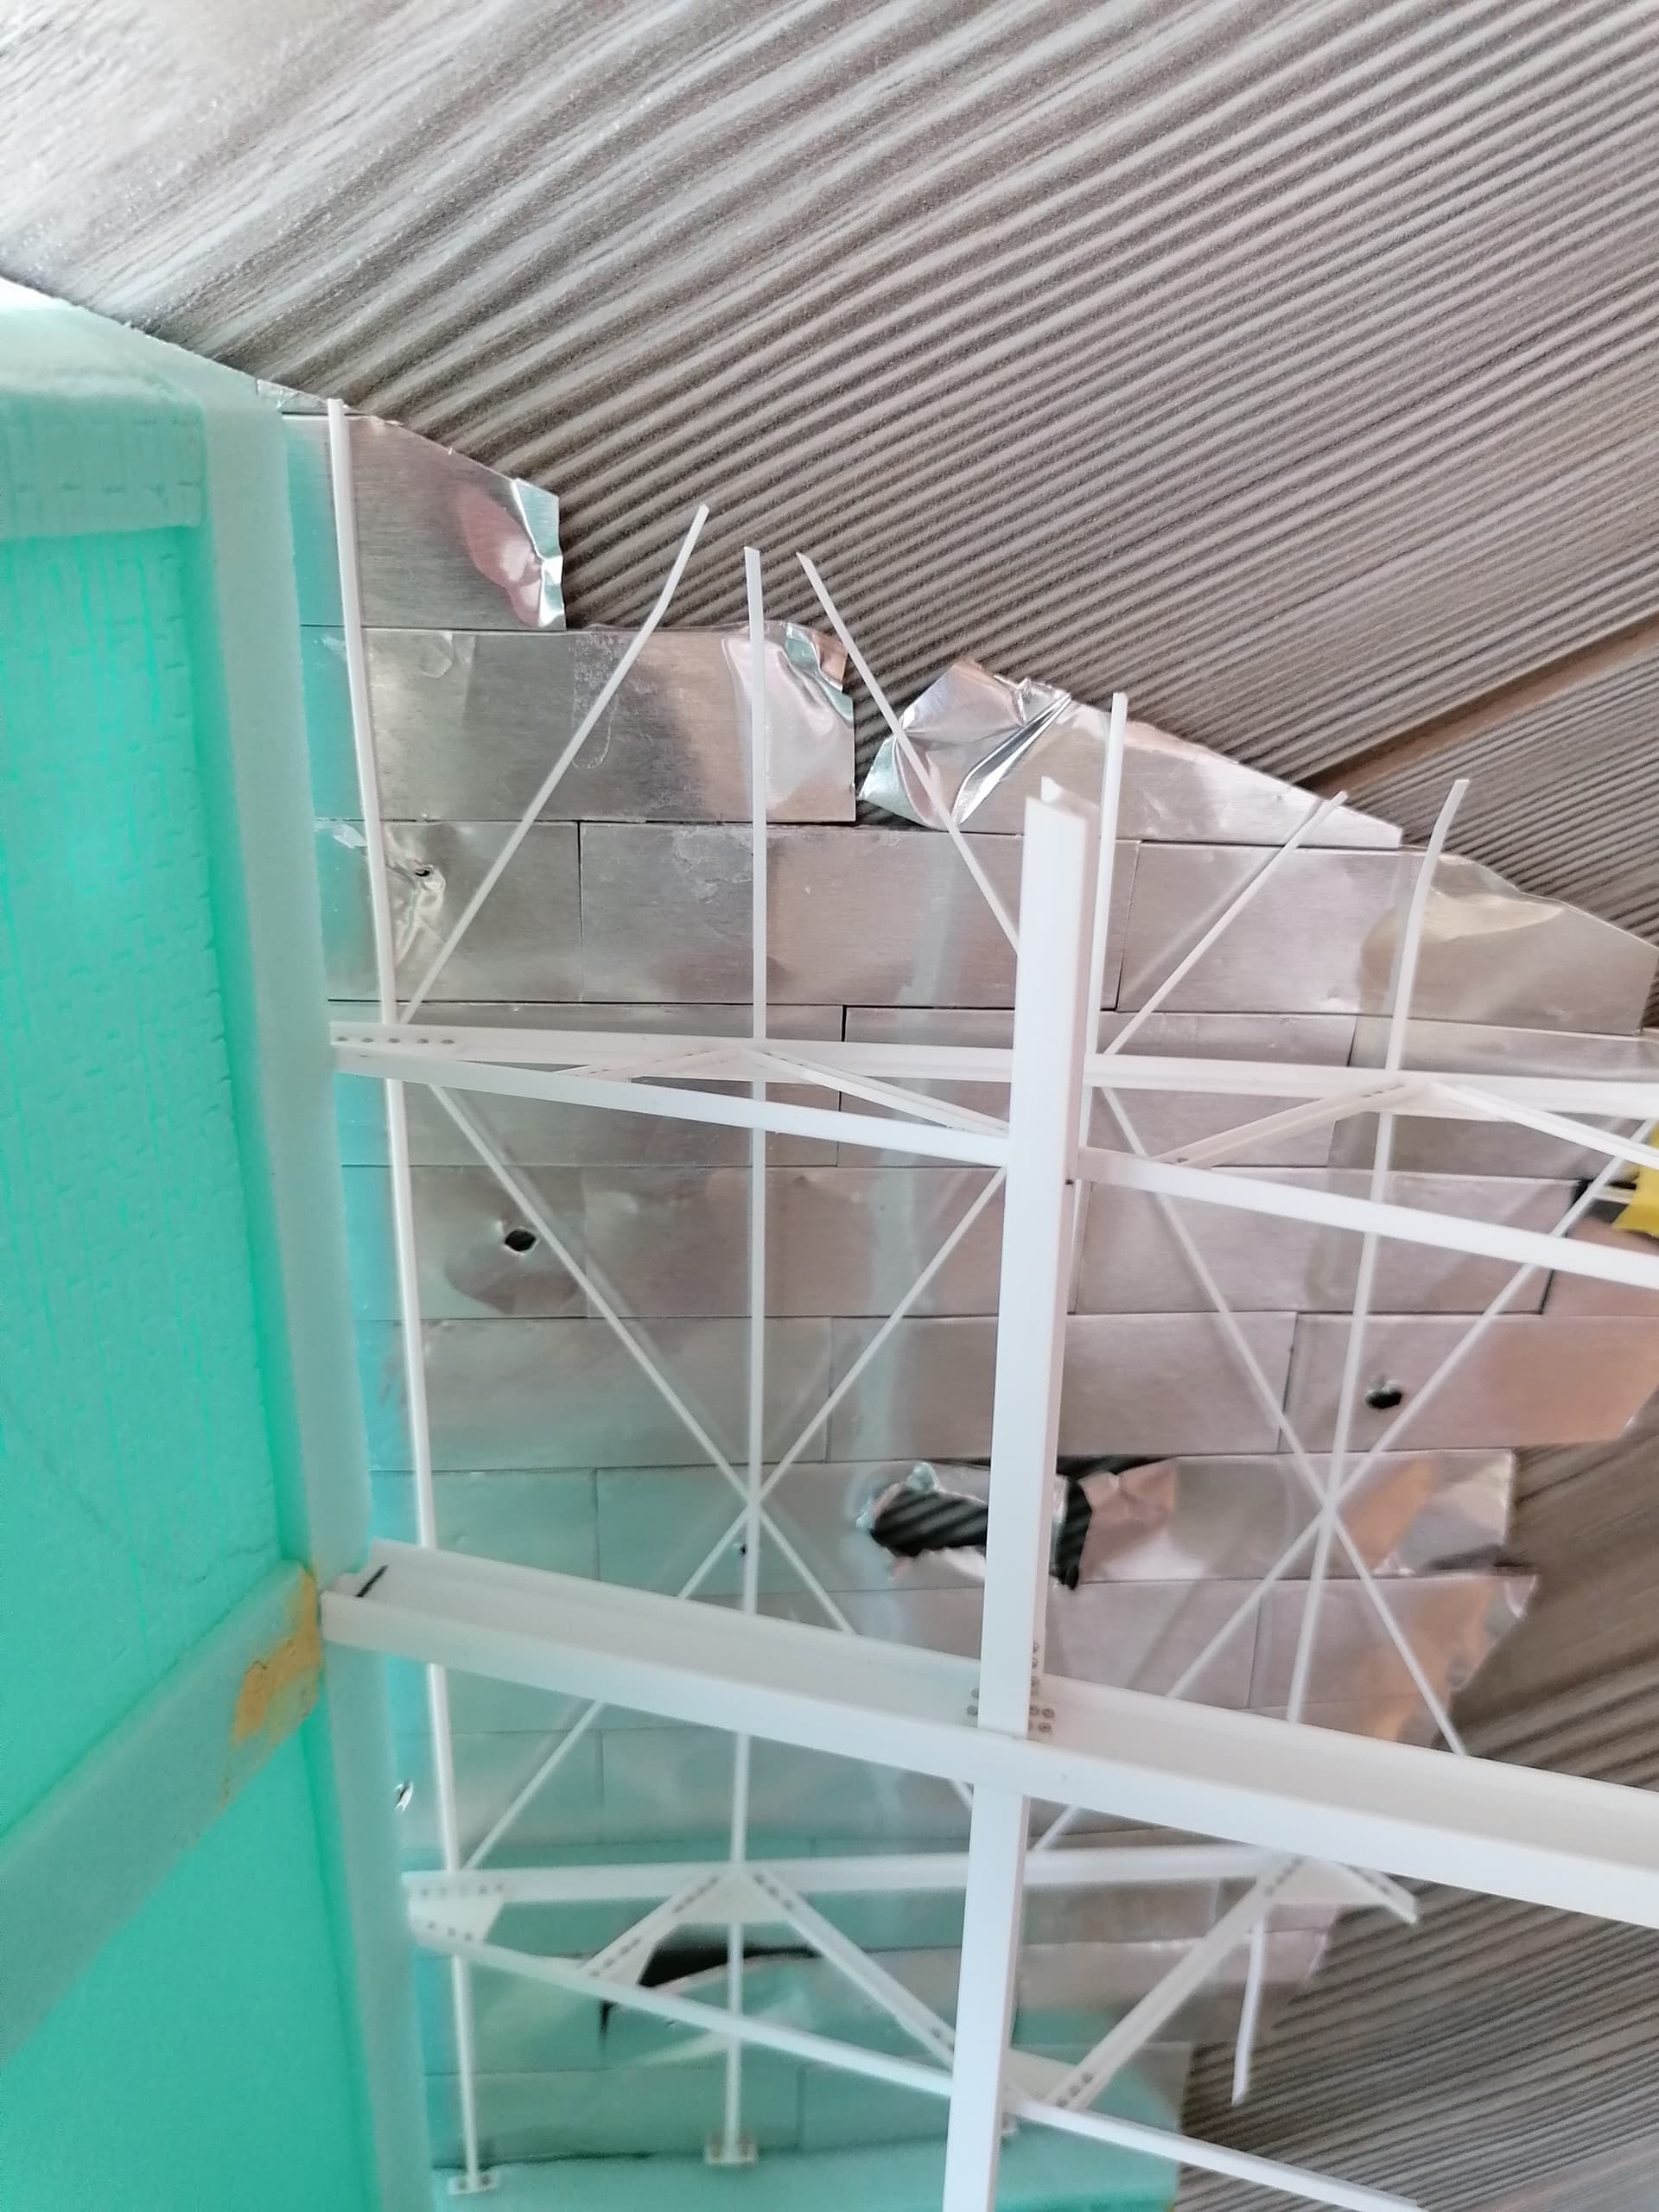
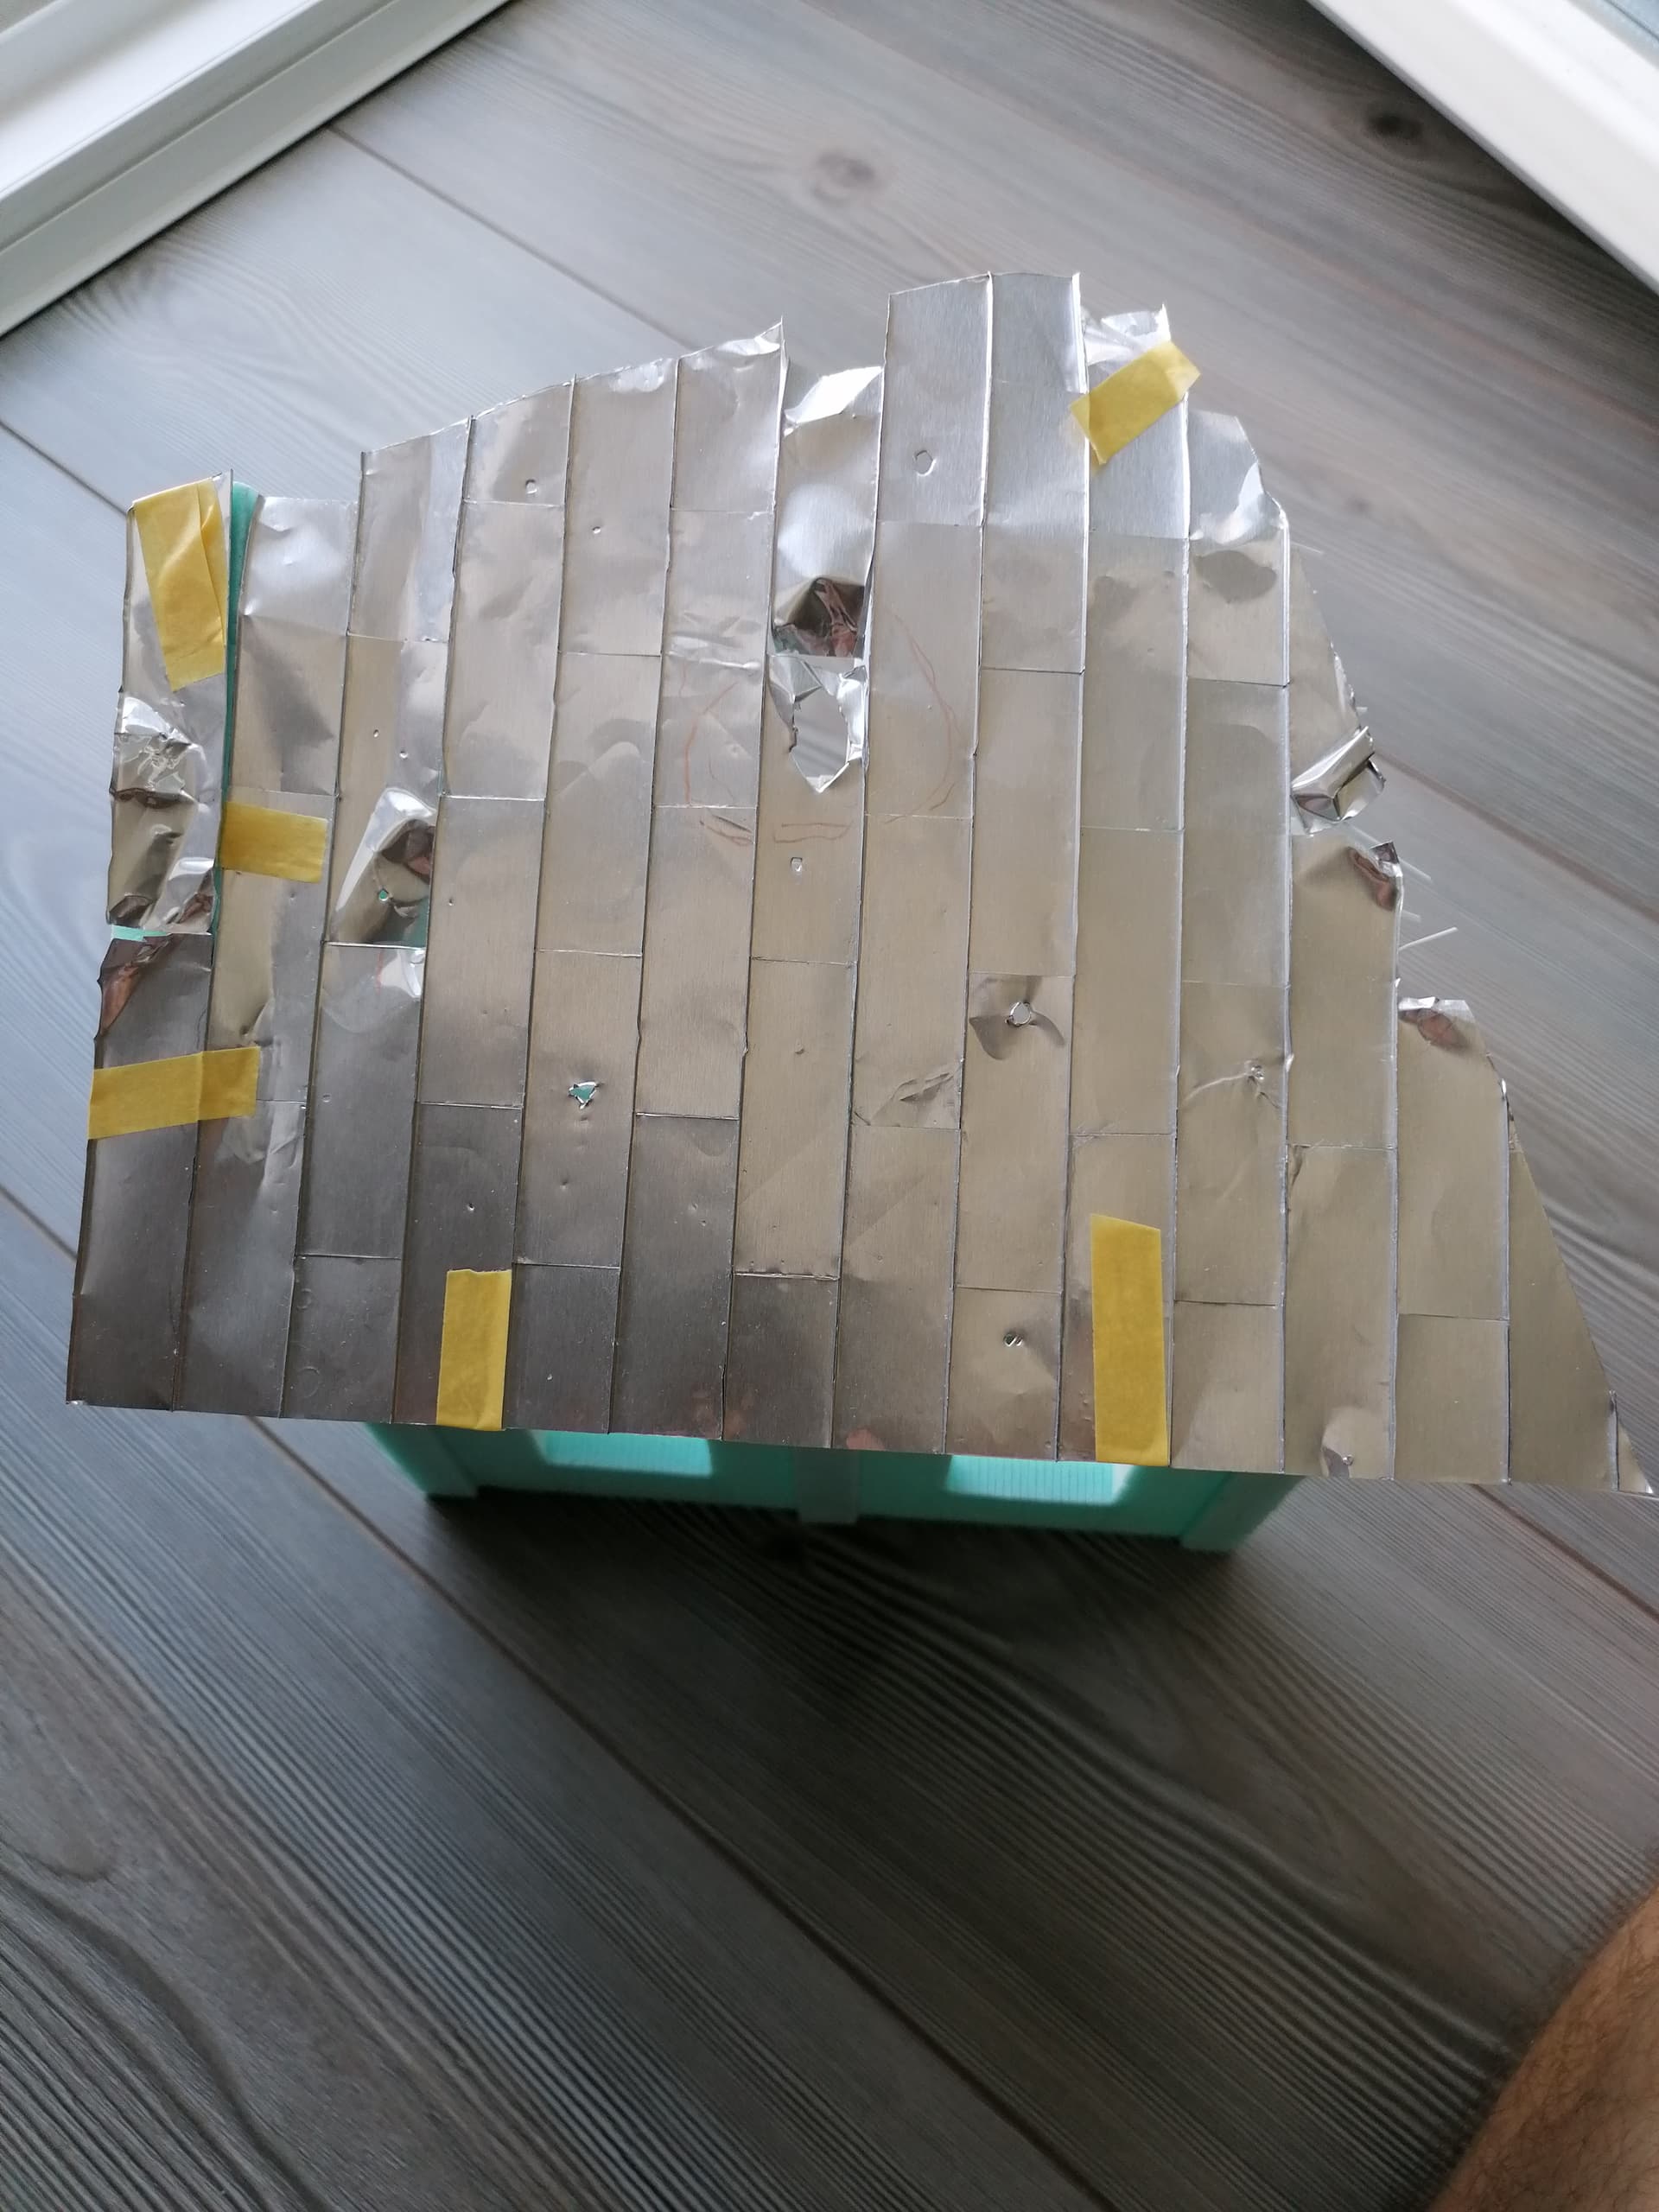
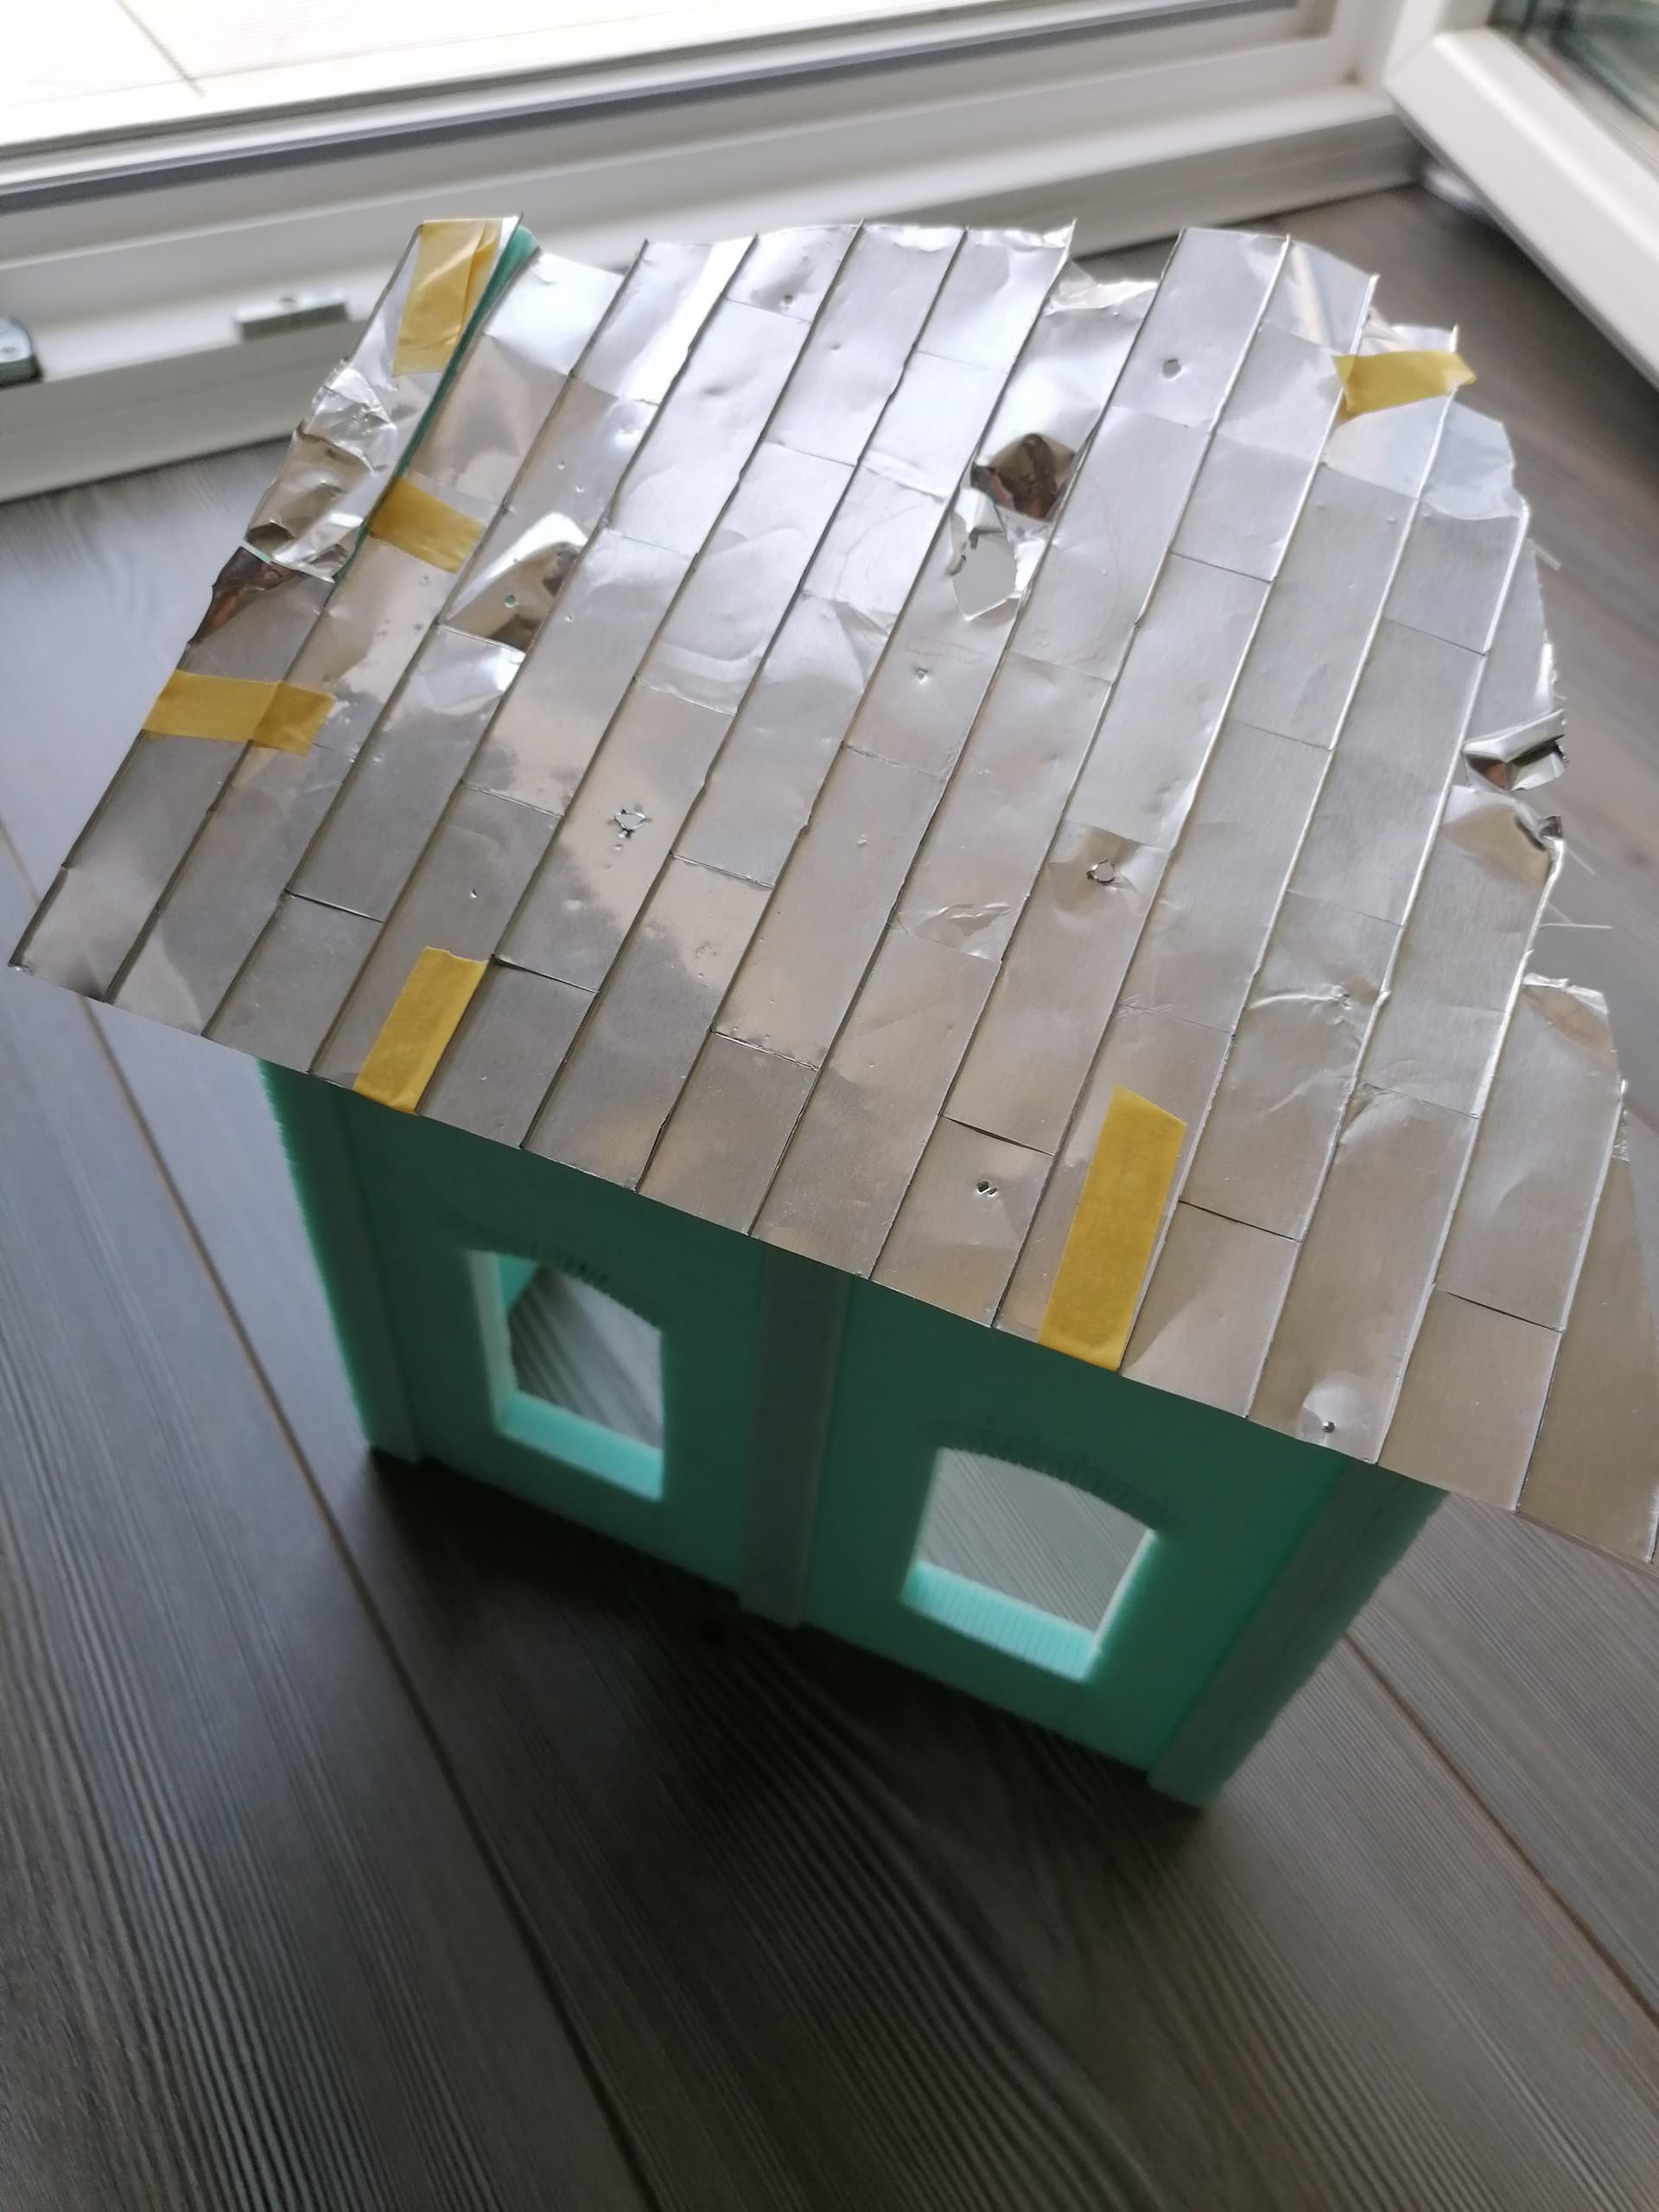
Now I think that it looks a bit more like a factory in Stalingrad. I tried to make the whole roof ‘sag’ to the middle as if there was a huge hole in the middle of the factory. But maybe it could use a little more damage. I will see. What do you think?
Let’s see what others think, you’re certainly getting there. This is probably a case where there can never be too many holes in the roof. Here’s a suggestion to break up the broken roof-line more, removing sections of strips as shown below and bending down the resulting foil edges…
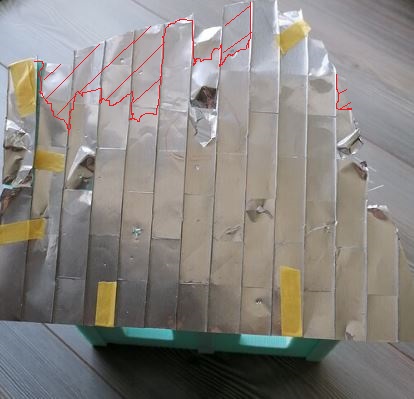
The two big supporting beams are a challenge, I don’t think they’d look realistic if bent or twisted. How about drilling empty bolt holes towards their ends, maybe with joining brackets to the next missing section half hanging off?
To make the edges of the broken roof sag more (without risking breaking it completely) you might want to try using a hair-drier on Hot setting, held close to each beam in turn. Use some pliers to help bend it while it’s soft enough. But experiment with a spare strip of beam first to see what happens, it may take some practice. ![]()
Nice picture! I guess I will add more damage then.
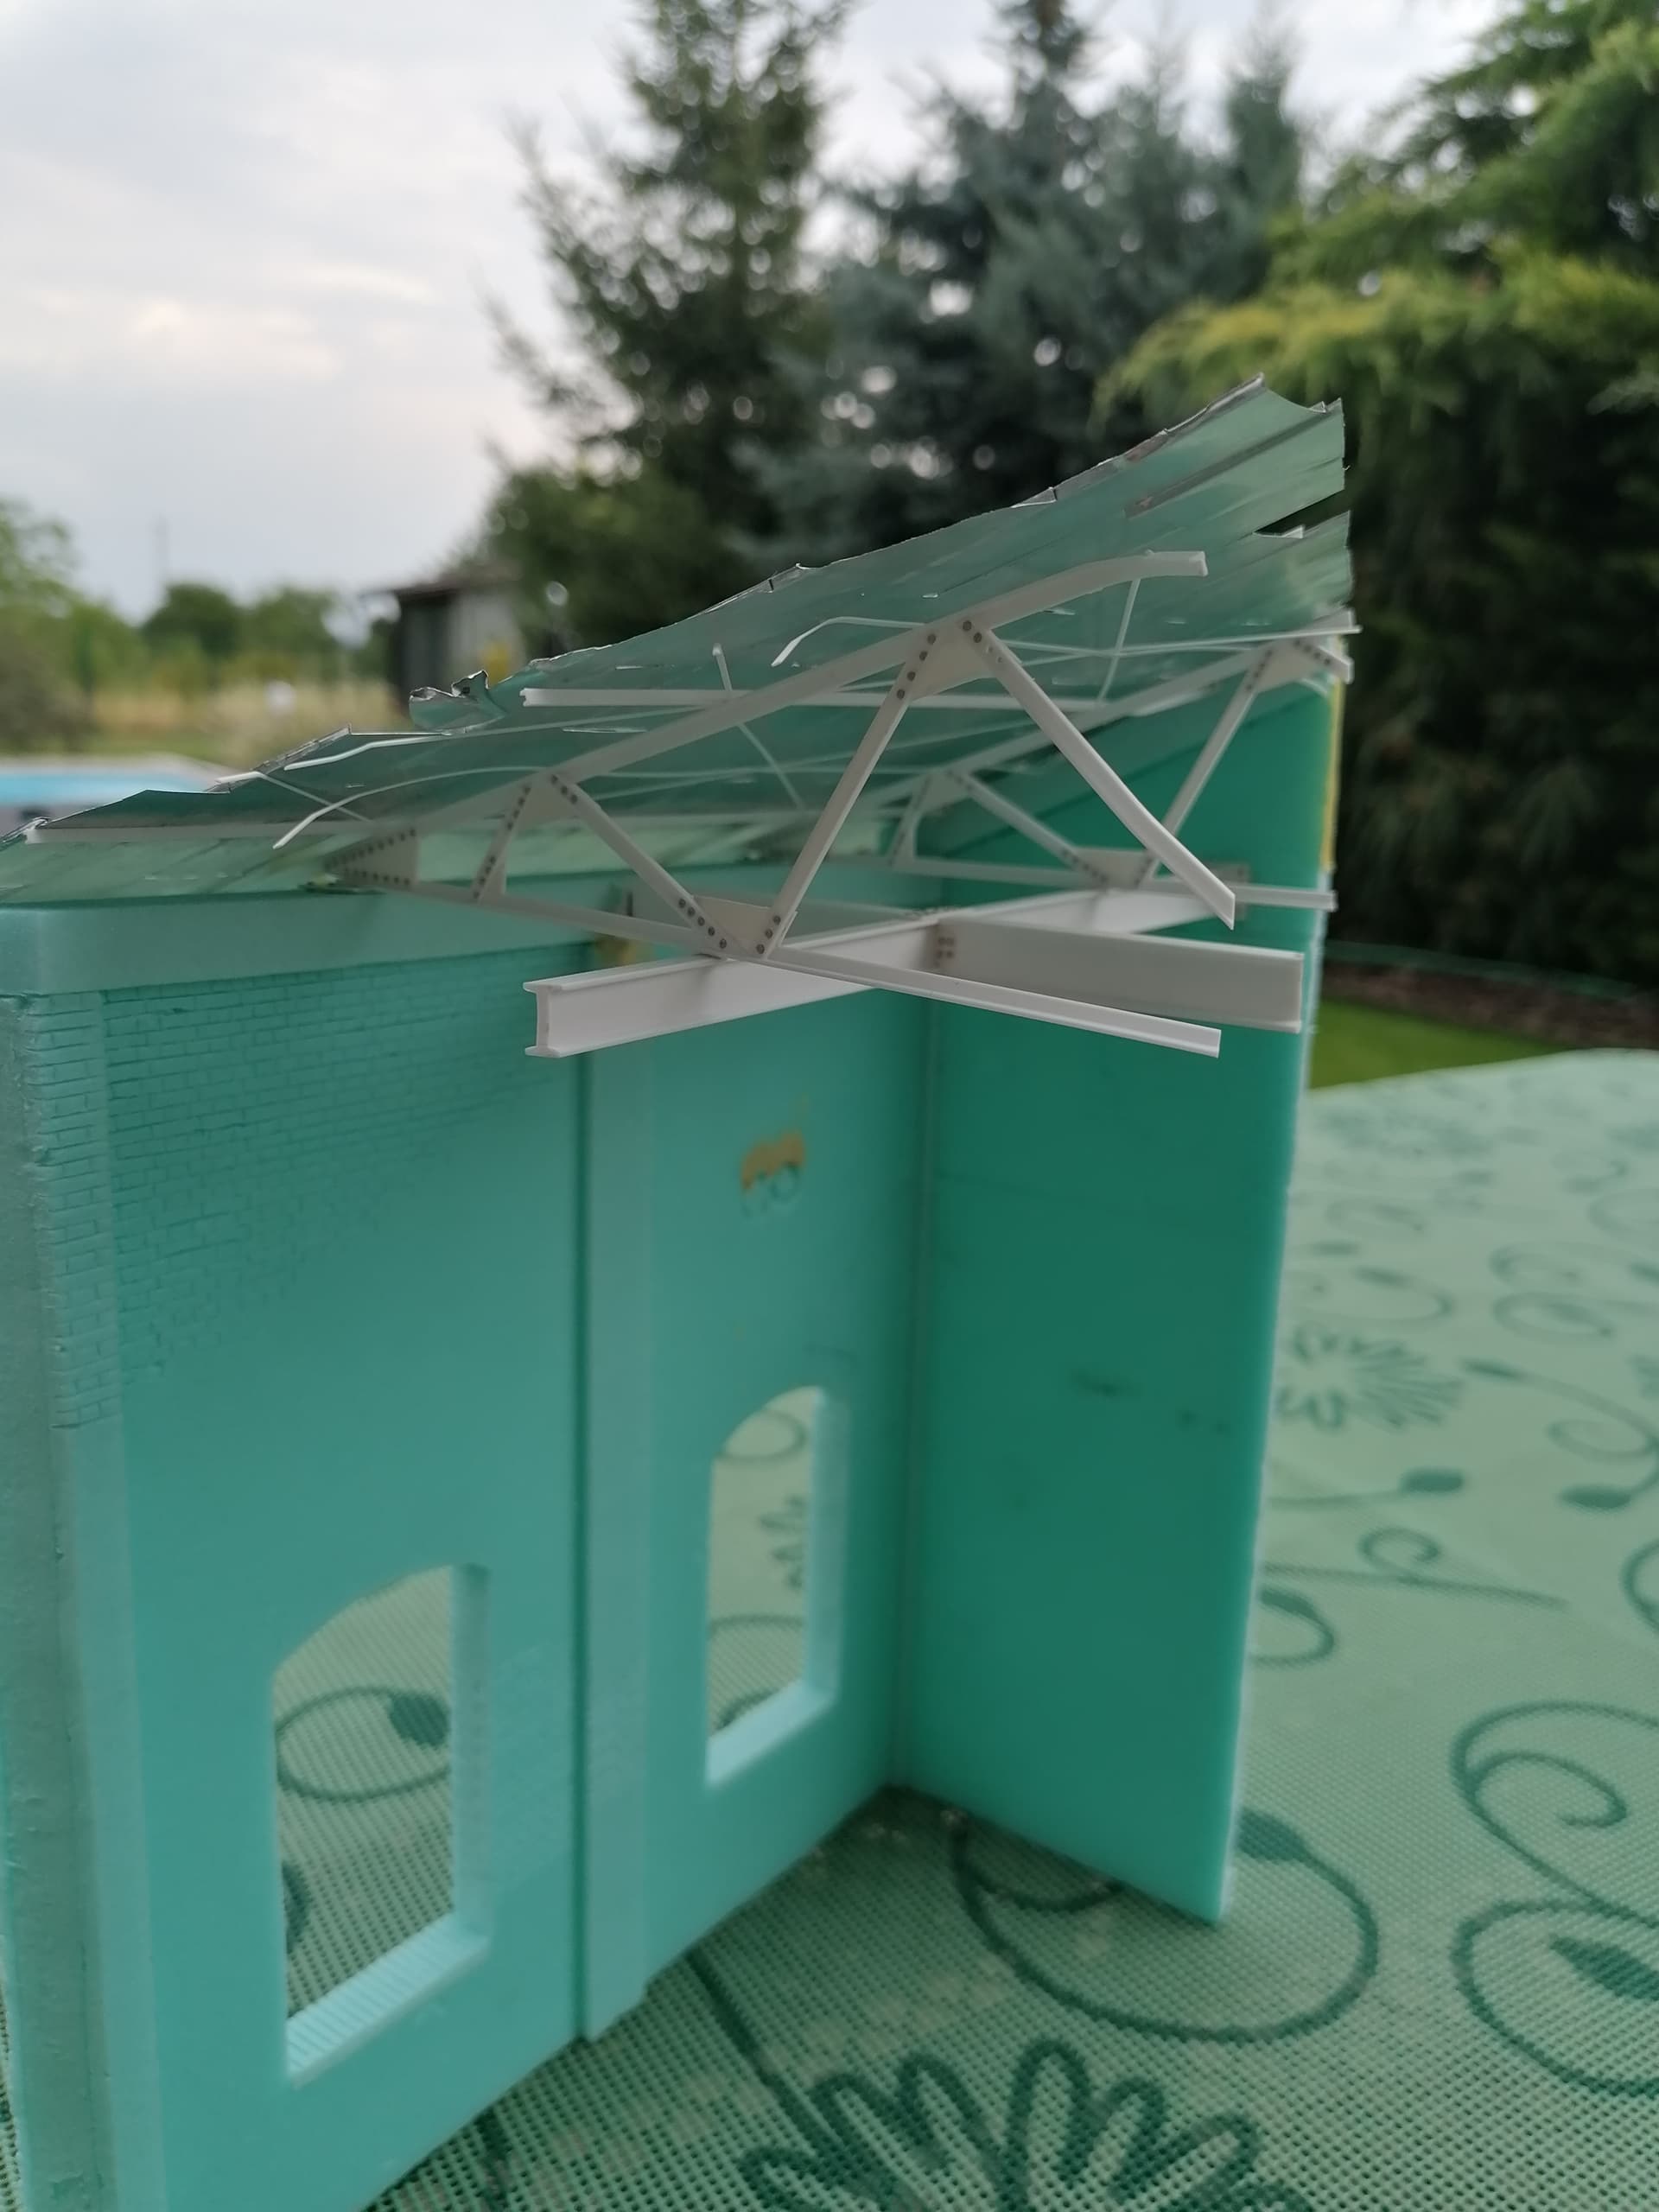
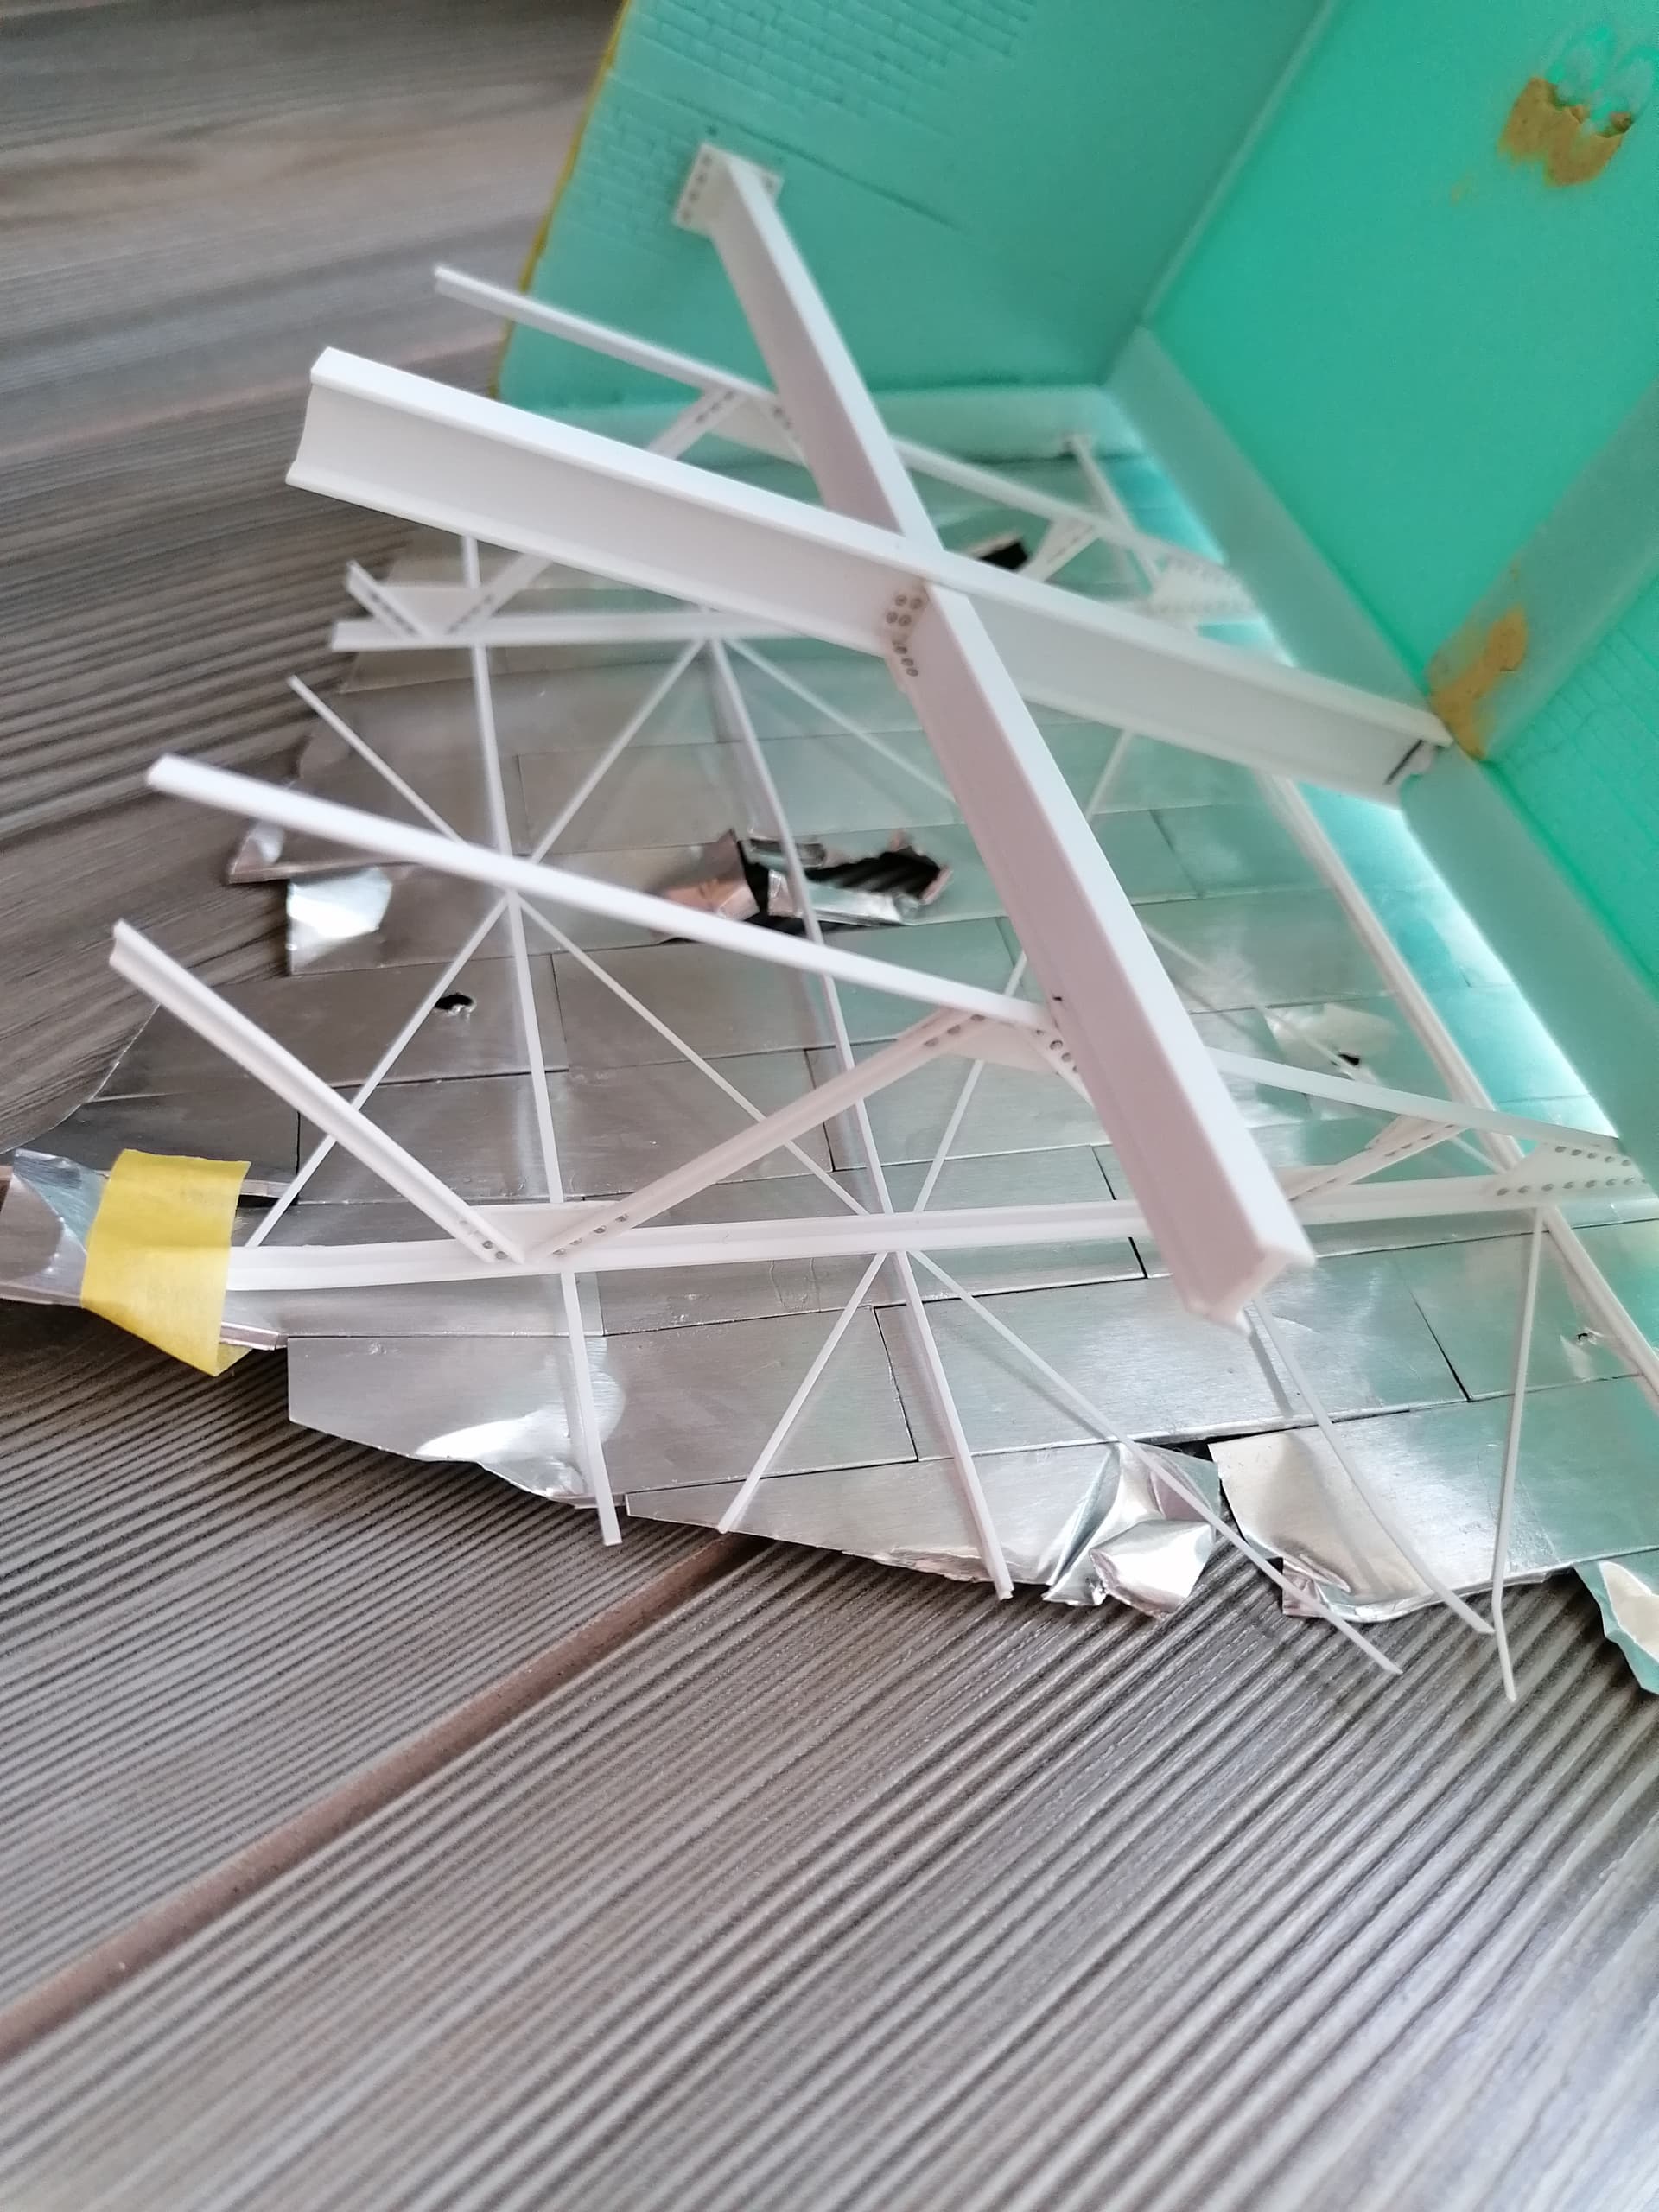
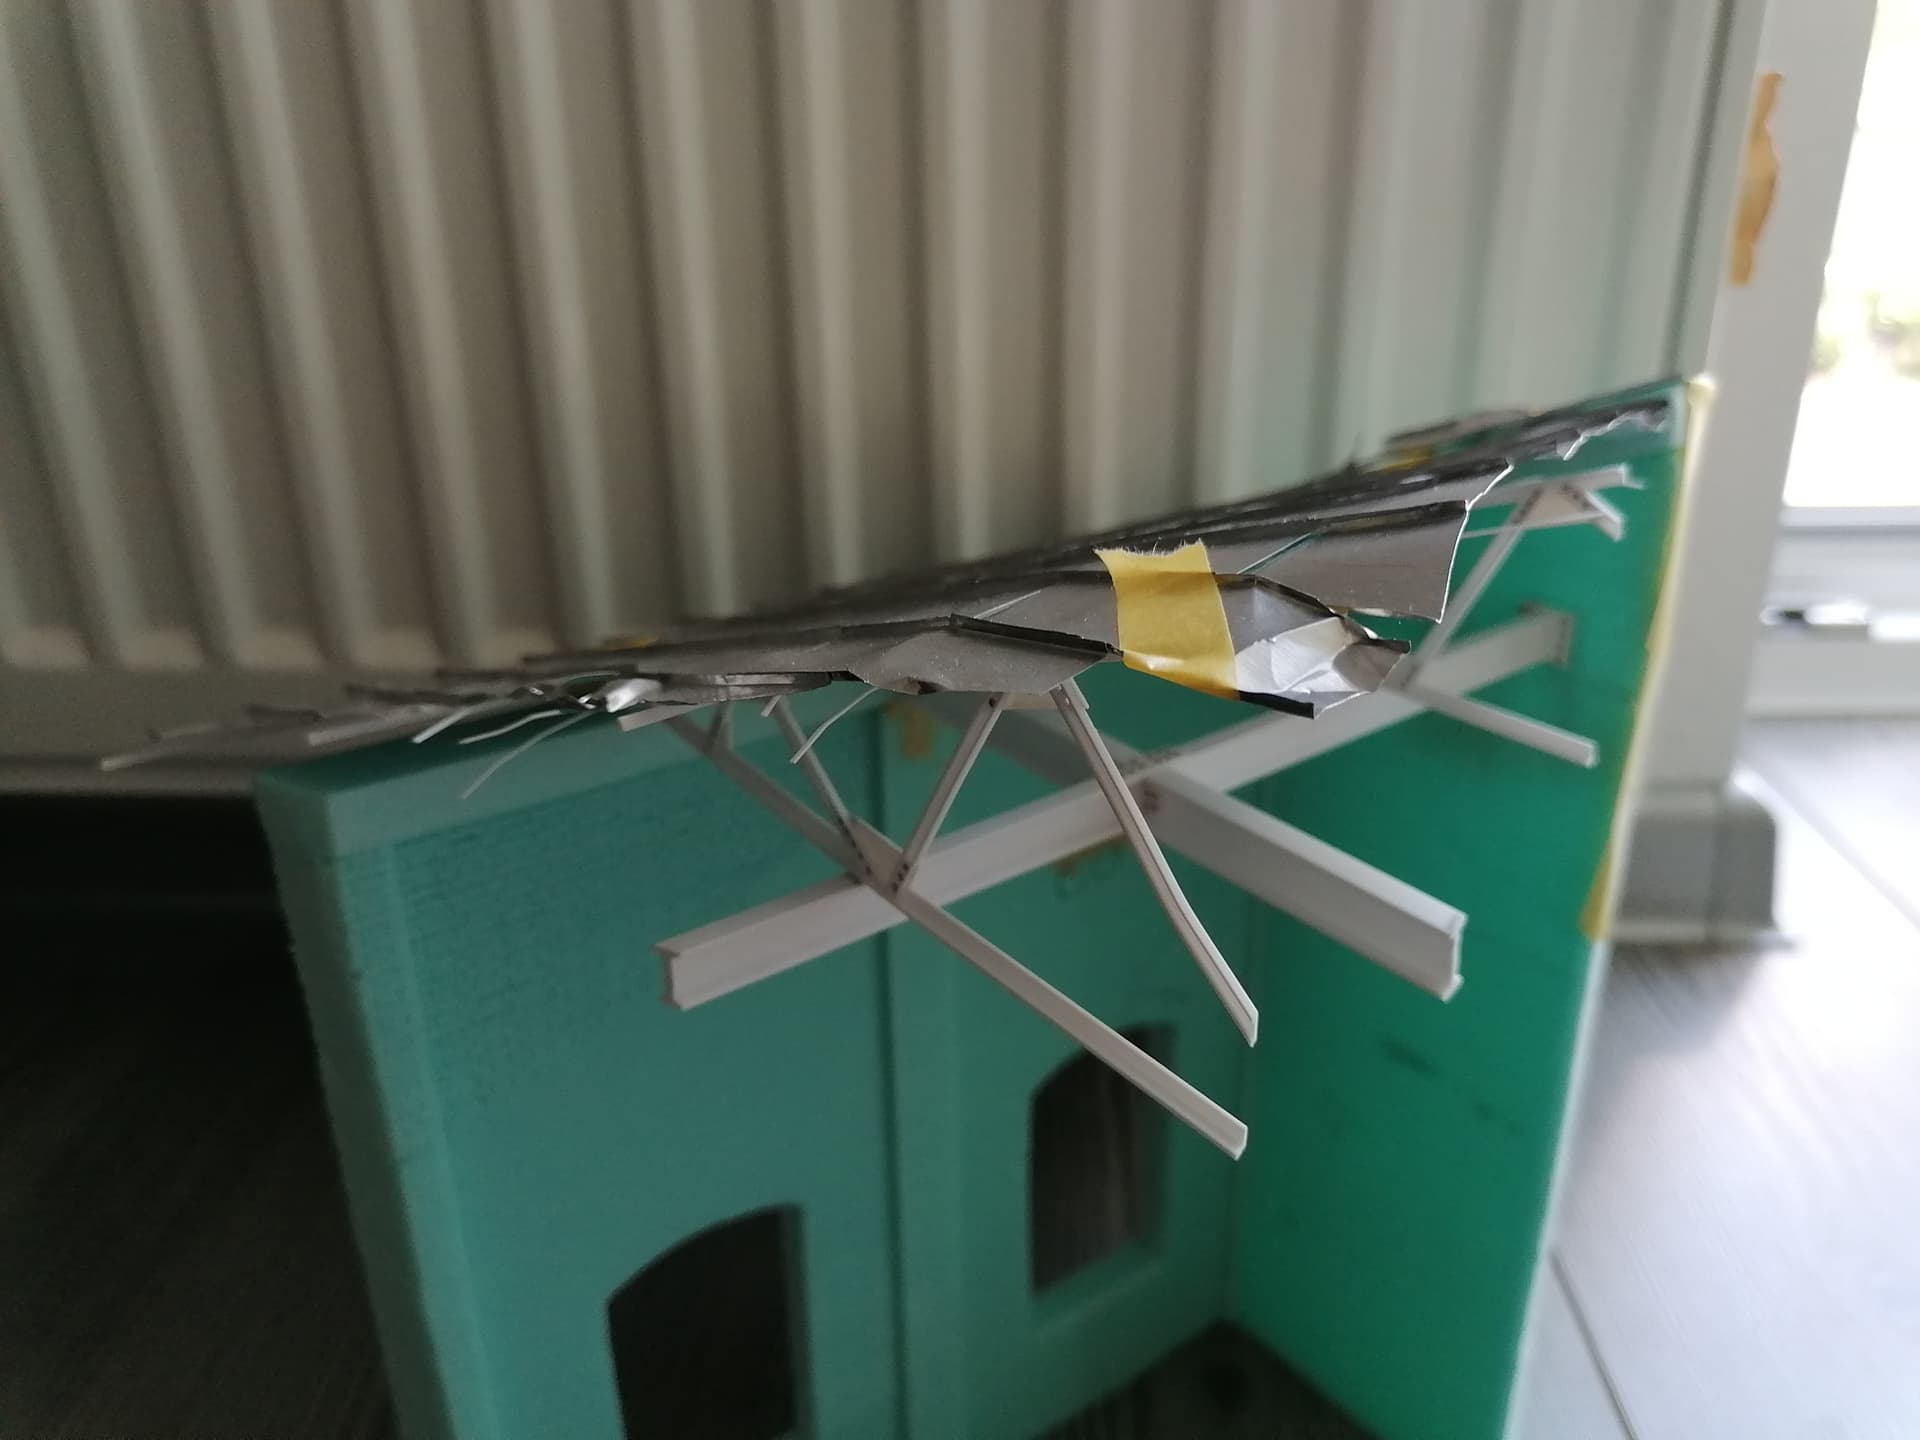
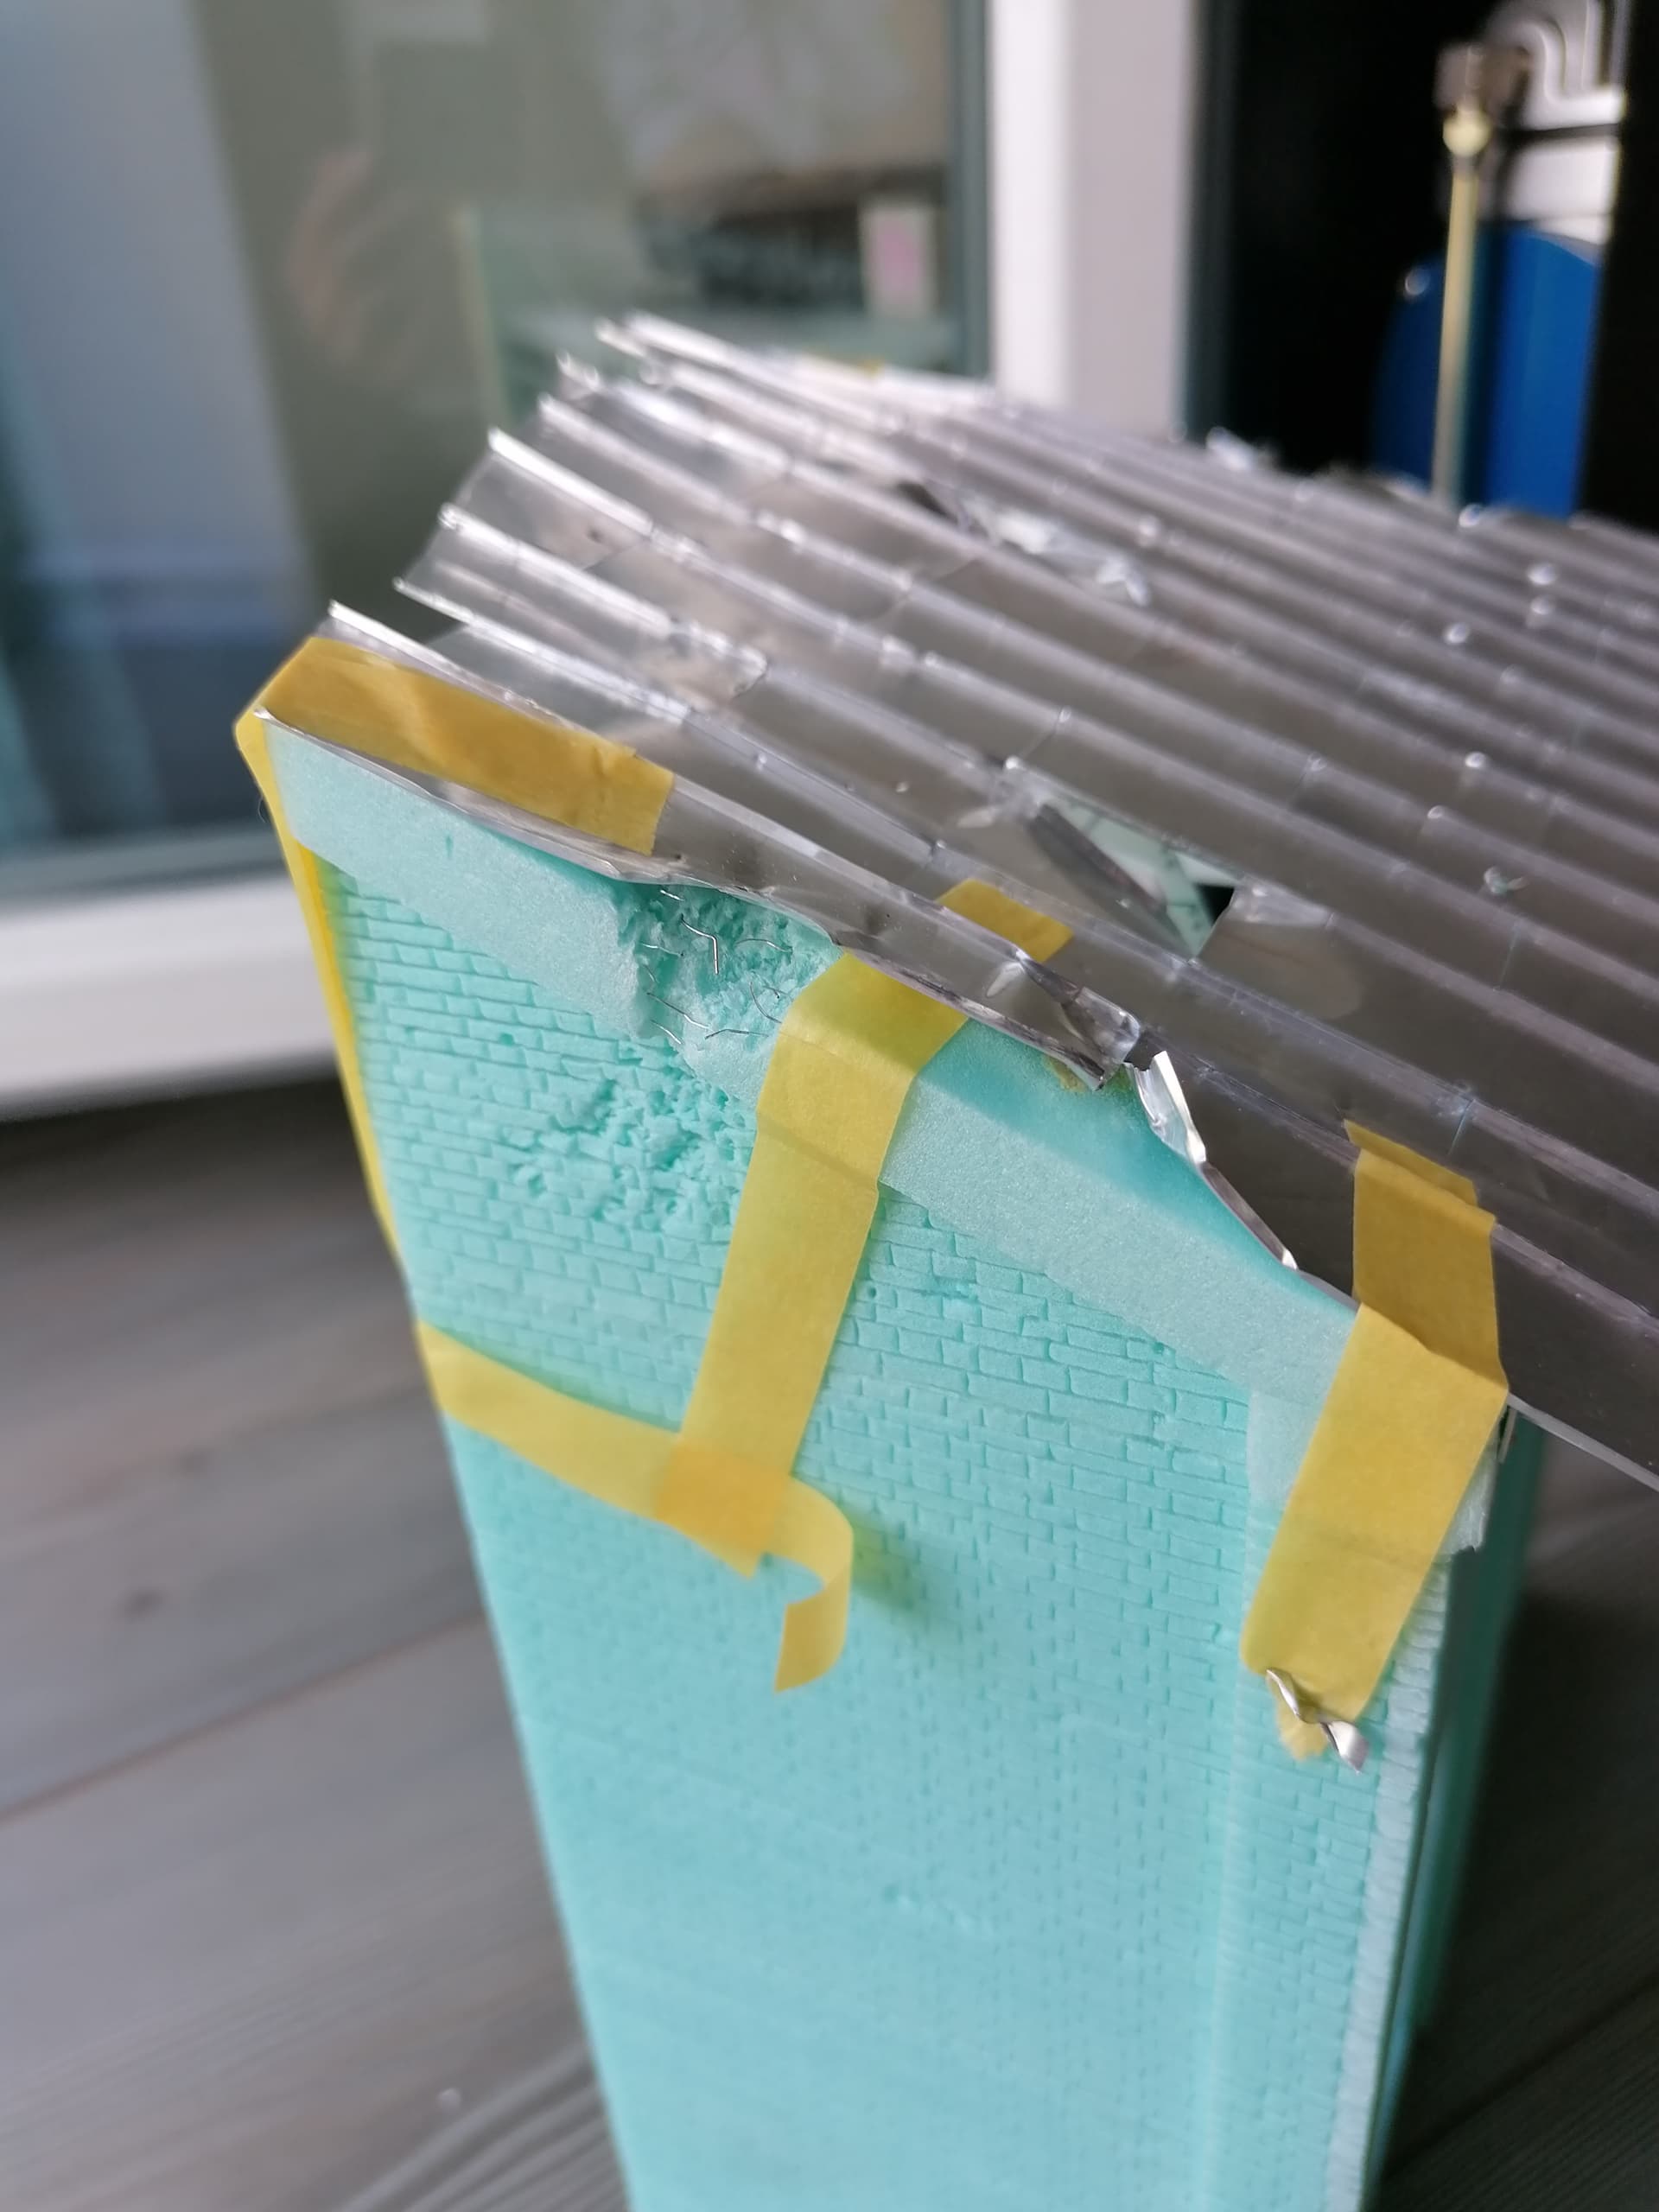
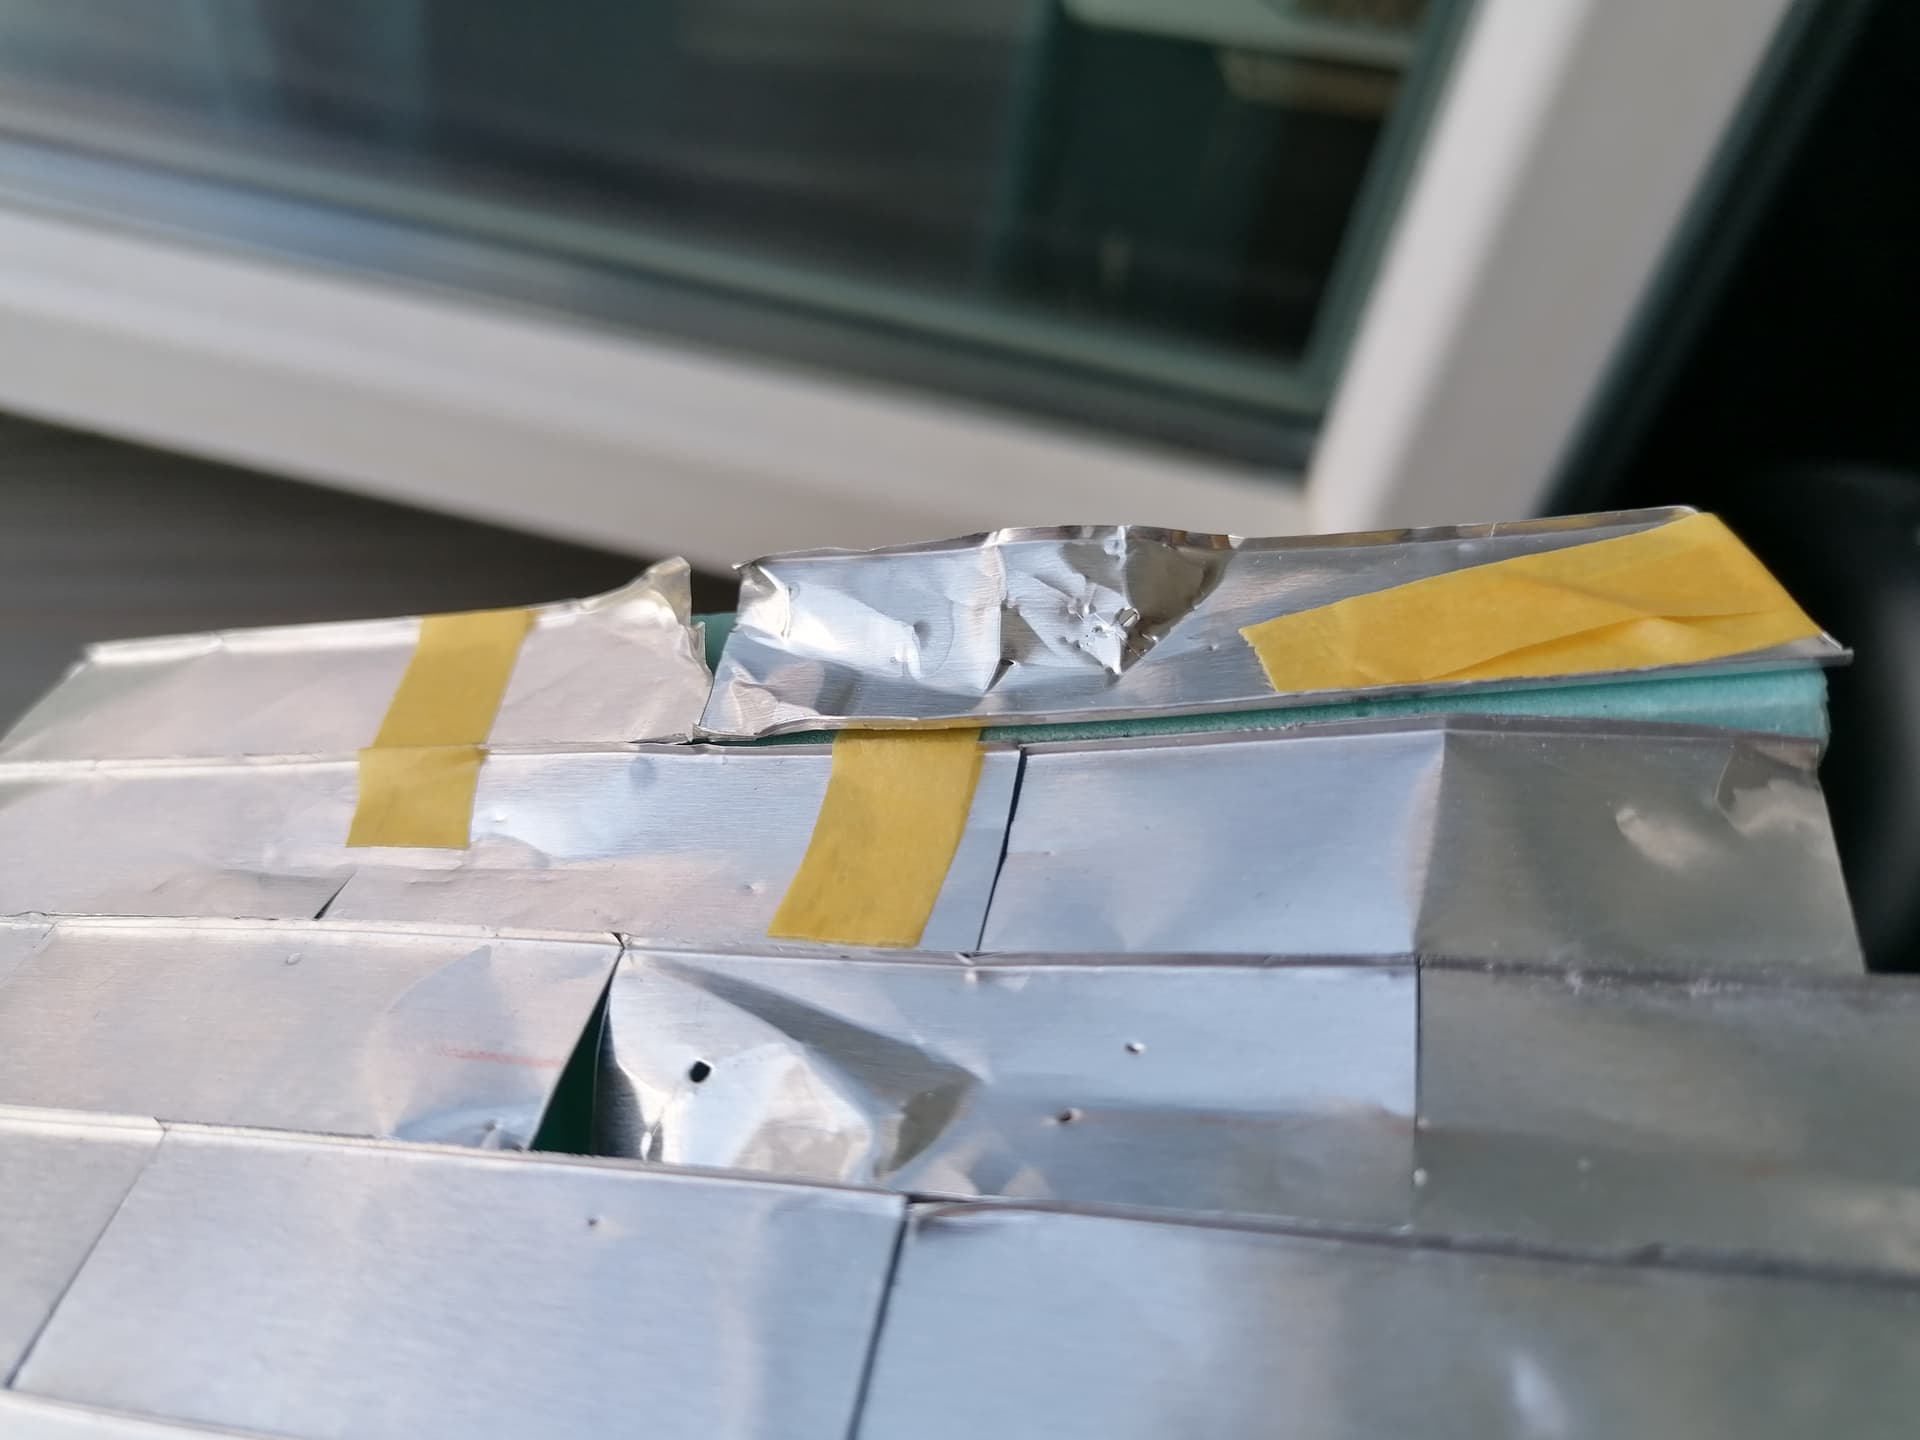
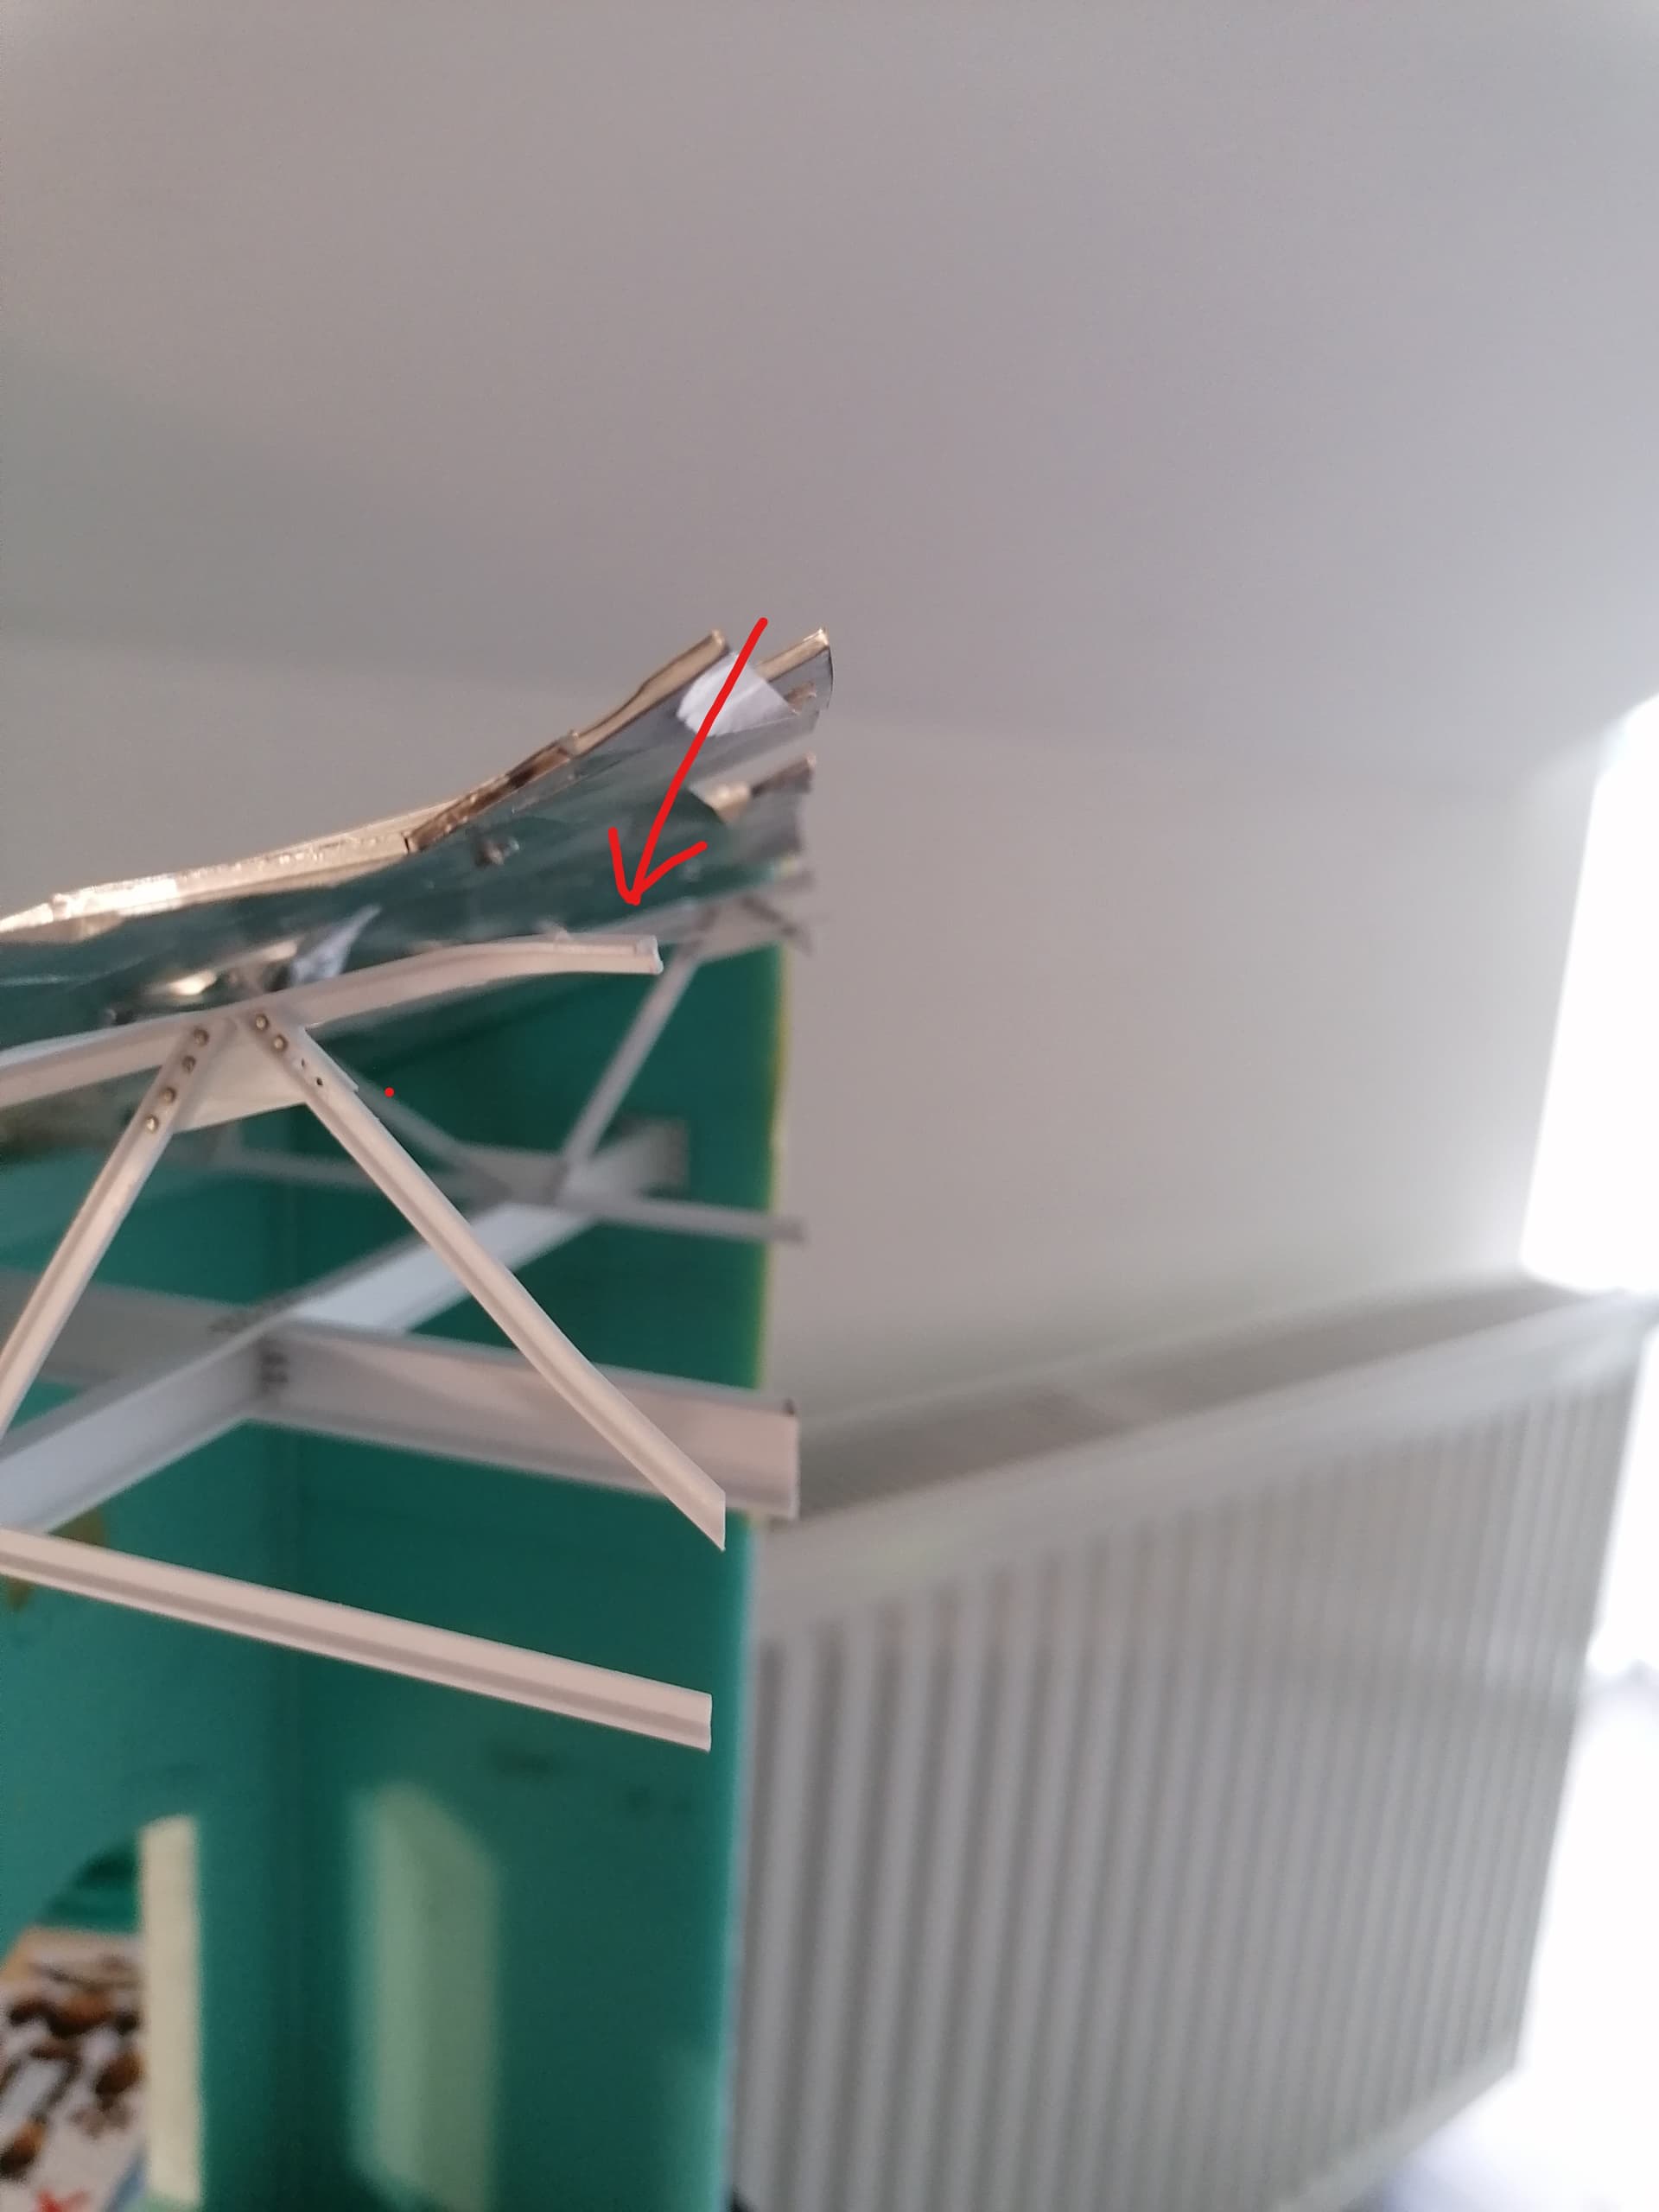
One thing that is bugging me that resulted from my own stupidity. This beam was not long enough to make to the end so I tried to cover it with bending it and pretending like it was torn off. It should be like 1,5 cm longer.
But since I have been looking at the roof so much lately I can’t but notice it everytime. Please tell me real steel beam could be torn off like this because my perfectionistic brain will not let me sleep ![]()
I do not want to remake the roof construction again ![]()
Since you don’t show the roof as a whole, it’s no problem that this beam is a bit shorter, now is it?!
I know it is completely stupid and to the vast majority this would not be a problem. I will just forget about it ![]()
You are doing well. For a first time, it’s just great.
I agree with Dioramartin - remove the straight edges.
Before departure, you need to reach the logical end of the construction. Girls and studies are not the best assistants to modeling. When you return to this diorama after a break, you will be different.