Great choice on the upgraded barrels. Gives it a more aggressive look for sure. The base colour went down well, looks really nice …looking forward to seeing the rest on it ![]()
1 Like
Looks great, Peter. Nice addition with the guns.
Looking forward to see more ![]()
1 Like
Okay, paint is down. Had a mishap with the tape removing paint and primer from one section. The MPC styrene really does not like paint. I’m hoping nothing lifts during weathering:
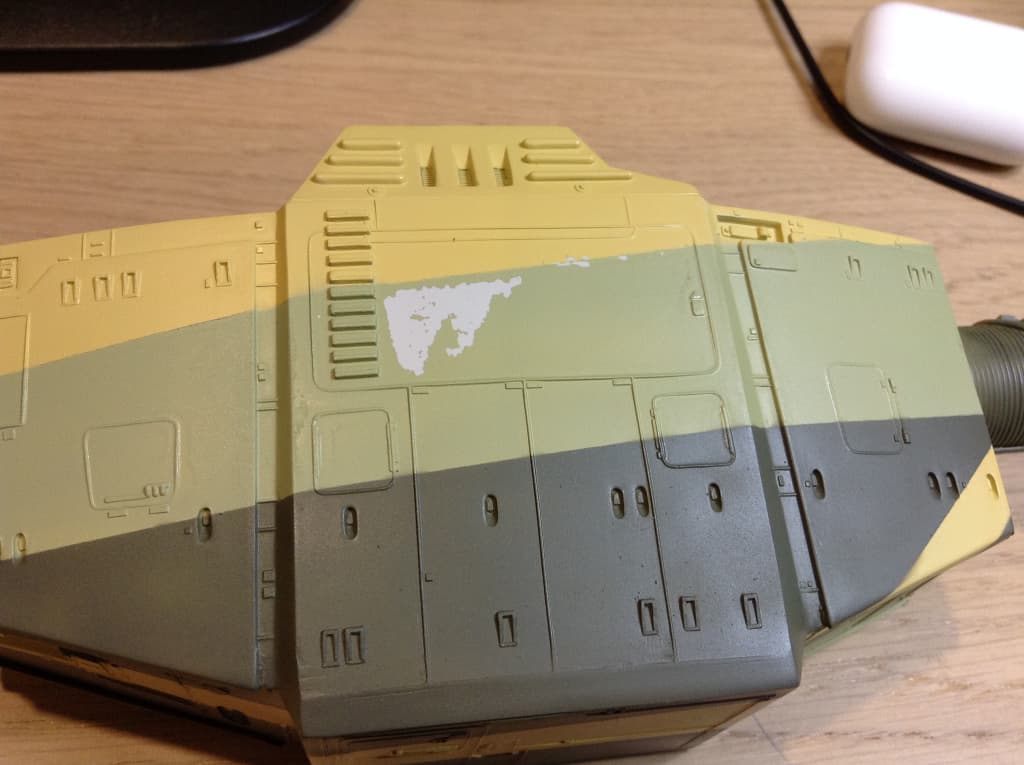
After touch up and Blu-tacked together:
I’m going to give it a couple of days to harden given the tape lift issues… then detail painting and weathering.
10 Likes
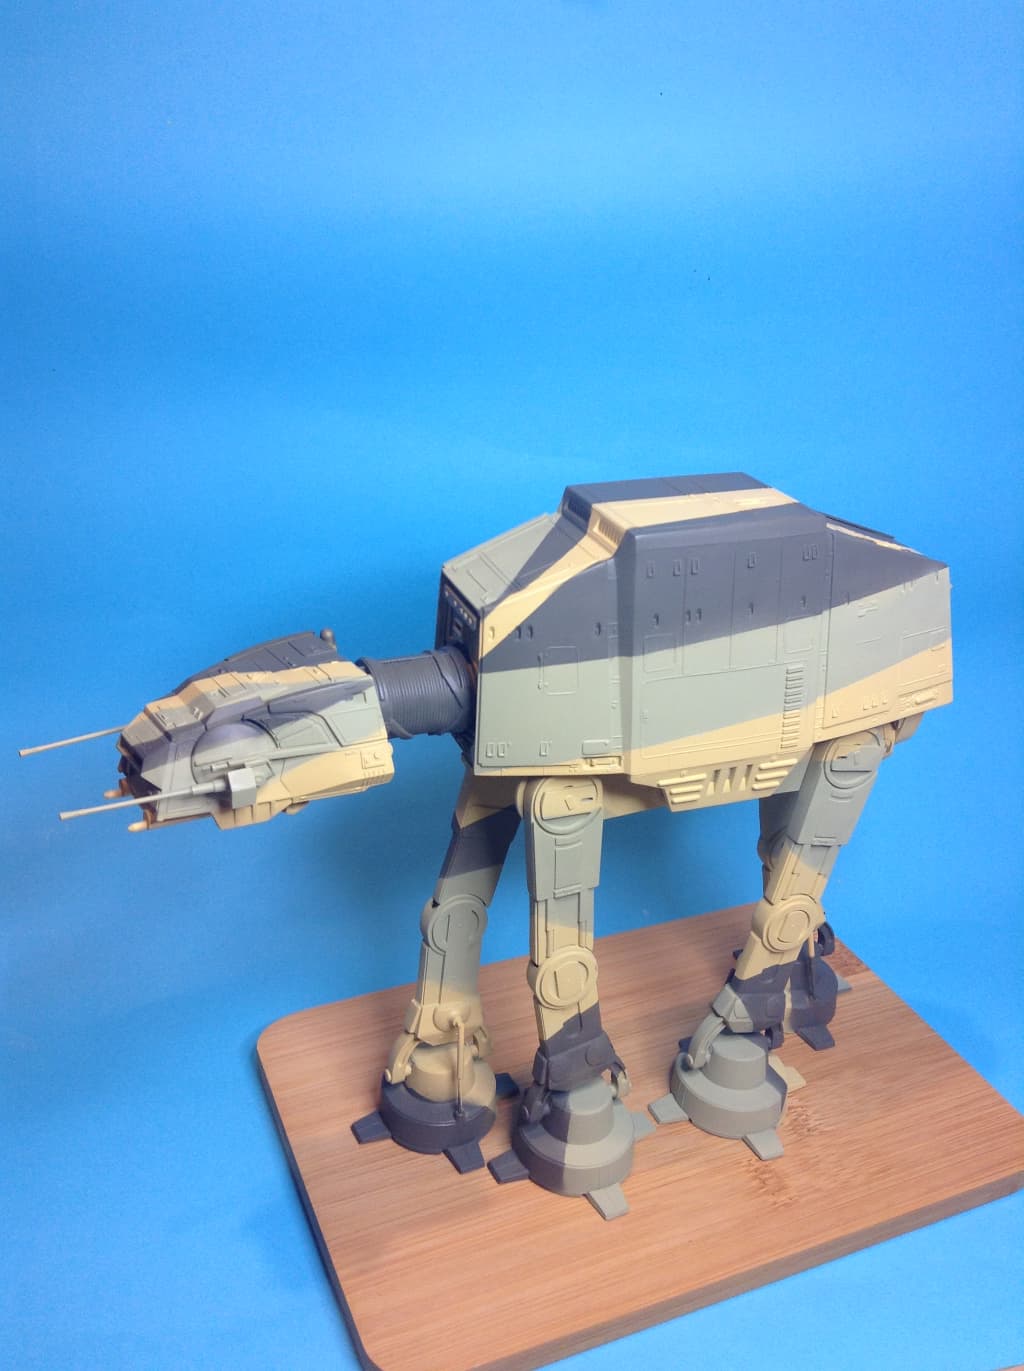
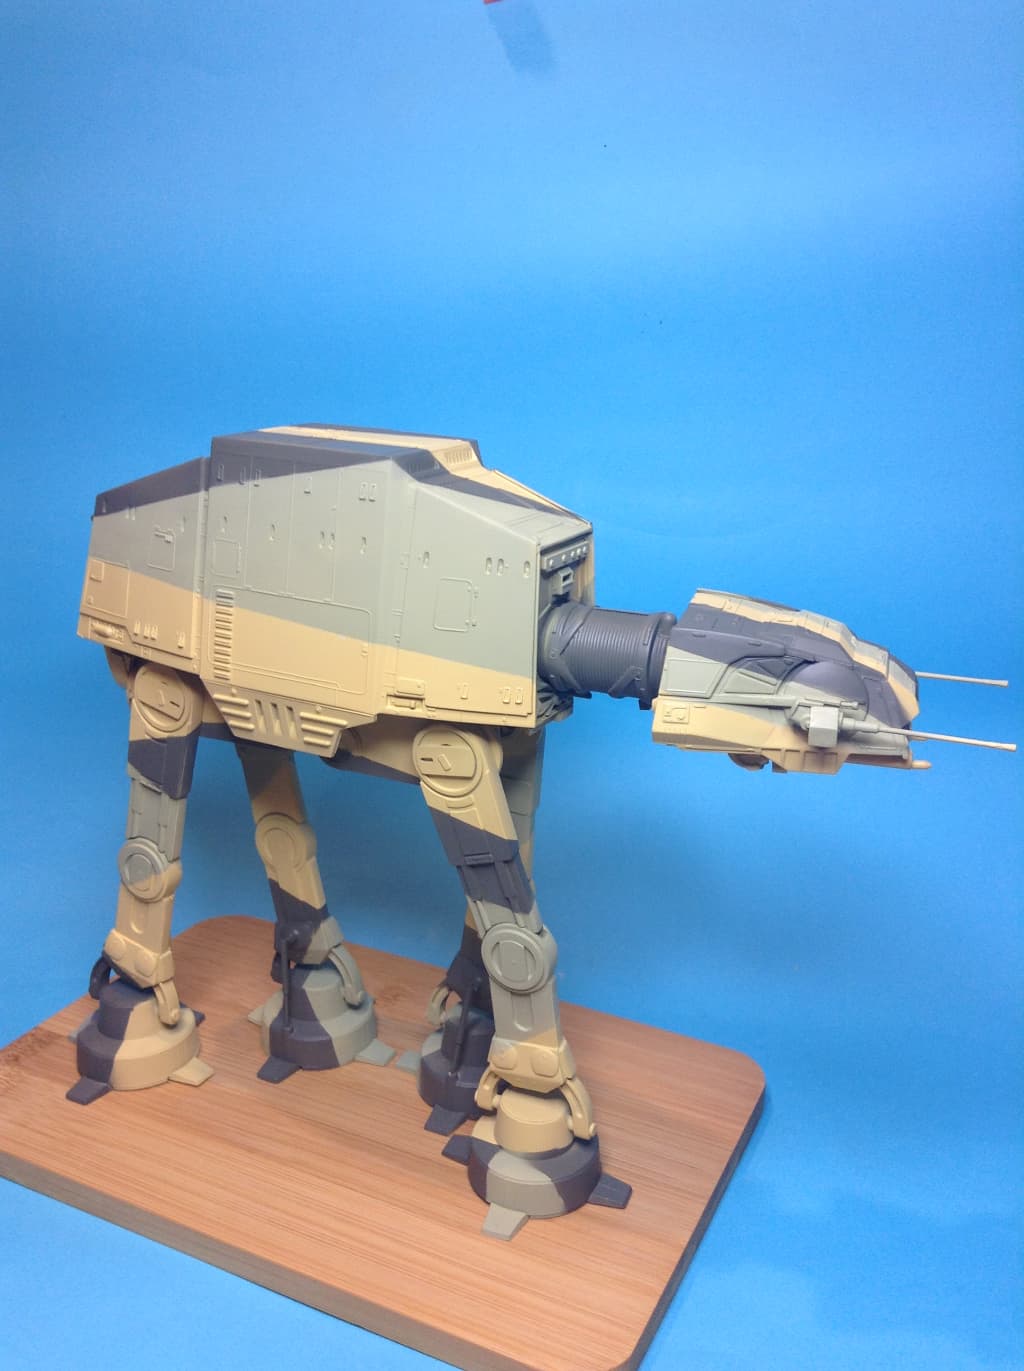
That’s a terrific scheme on the ATAT Pete, you’ve really pulled that off and the actual cam and colours really sit well on it. A great looking kit topped off with a striking and really well executed finish…top marks … And nice repatch on the paint issue ![]()
![]()
1 Like
Looking real good. Mishaps well sorted too.
I must get my finger out and get my At-AT finished.
3 Likes
Super great camo, Peter. The AT-ST is a really big and nice canvas and you did it perfect justice with this camo scheme!
Looking forward to see more ![]()
1 Like
Nicely done Peter! A lovely asymmetric representation of the scheme. Look forward to seeing it weathered.
2 Likes
Feeling kind of done. This is the Bandai First Order TIE kit which I originally built OOB back in 2018, I think. At the campaign start I was thinking of doing a German splinter camo but while looking up something else an image search brought up a sheet of Japanese aircraft decals and I decided on this:


I ran out of Mr Color Orange-Yellow partway through and had to mix up more on the fly using Tamiya yellow and orange. Close enough for the kind of work my government does. A few extra decals from one of my Hasegawa kits and voila! a TIE test platform for Sienar’s R&D facilities.
6 Likes
That is something very different and very striking. Really like it. The black cockpit glass sets the orange off just right and the central red hub on the wings breaks the colour up along with the silver frame. Great repaint on an old model…
Given it a whole new lease of life ![]()
1 Like
“Away from angry Citrus, you must stay, Padawan…Hmmmm”
Very nice choice. Very striking
2 Likes
Very different, I like it. Reminds me of Tony Stuart’s Home Depot car or a F1 McLaren car.
1 Like
2 days to go. Weathering is well under way. I think I will meet the stretched timetable.
2 Likes
Full speed ahead (admittedly not that fast in an ATAT lol). I have faith Peter you will get there… ![]()
![]()
2 Likes
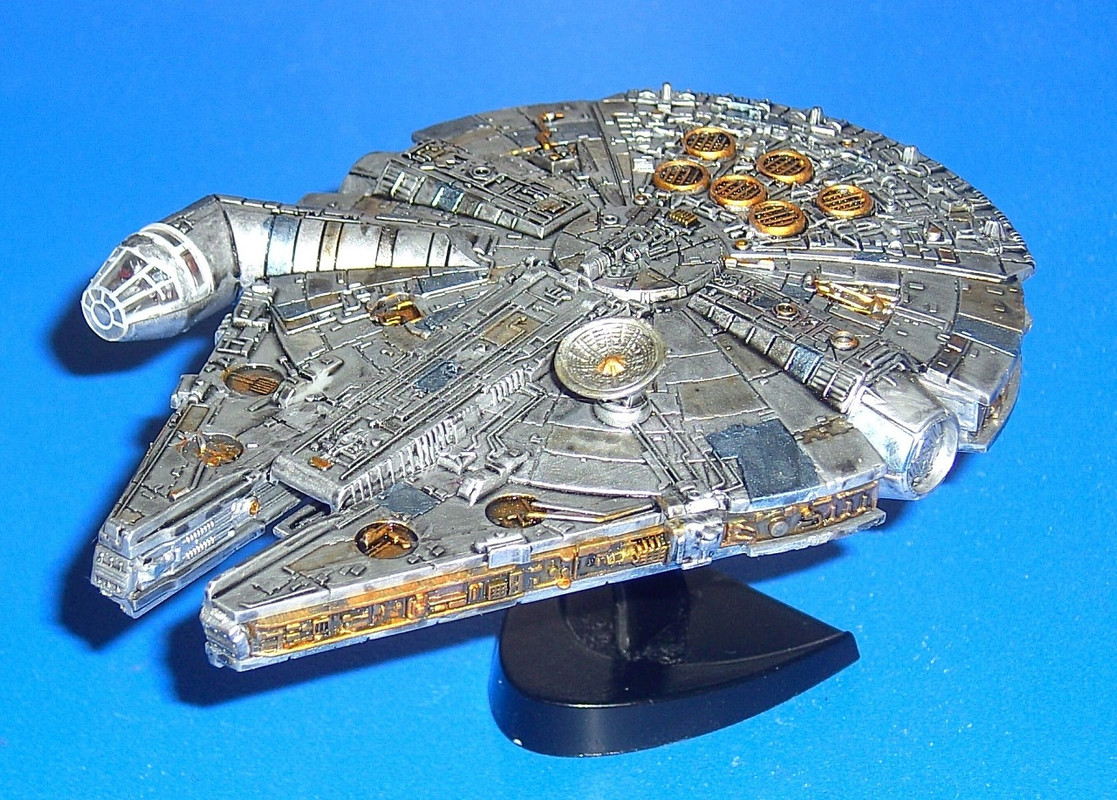
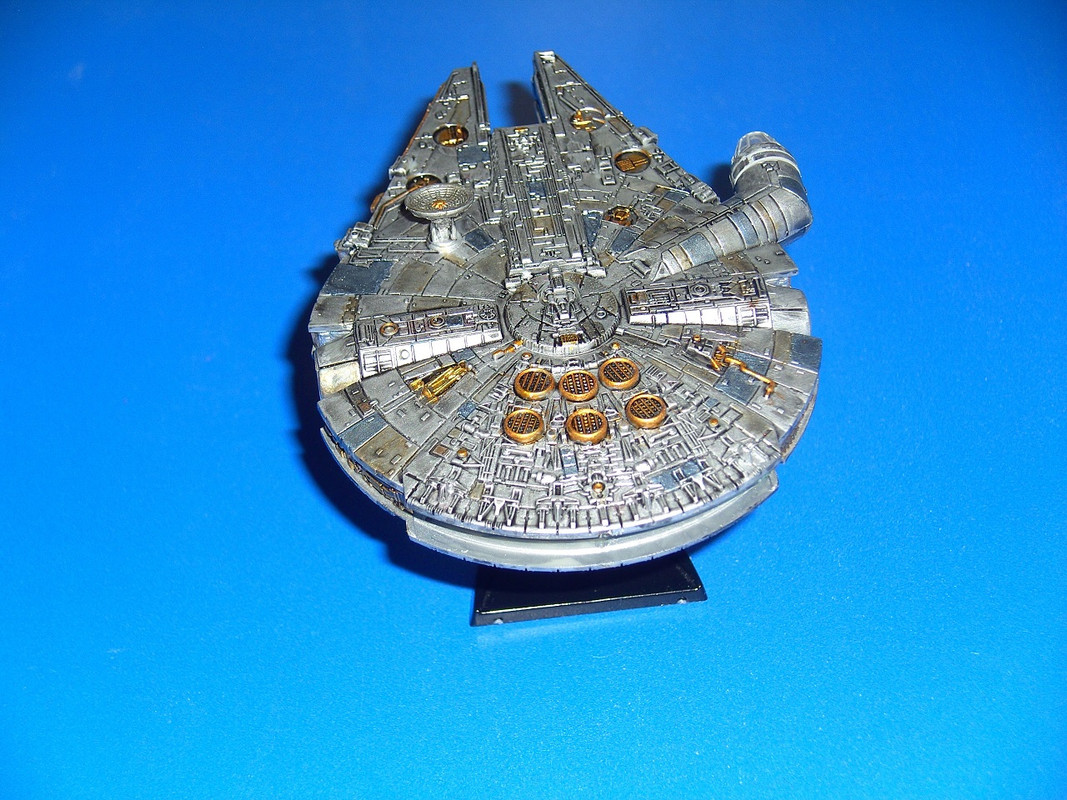
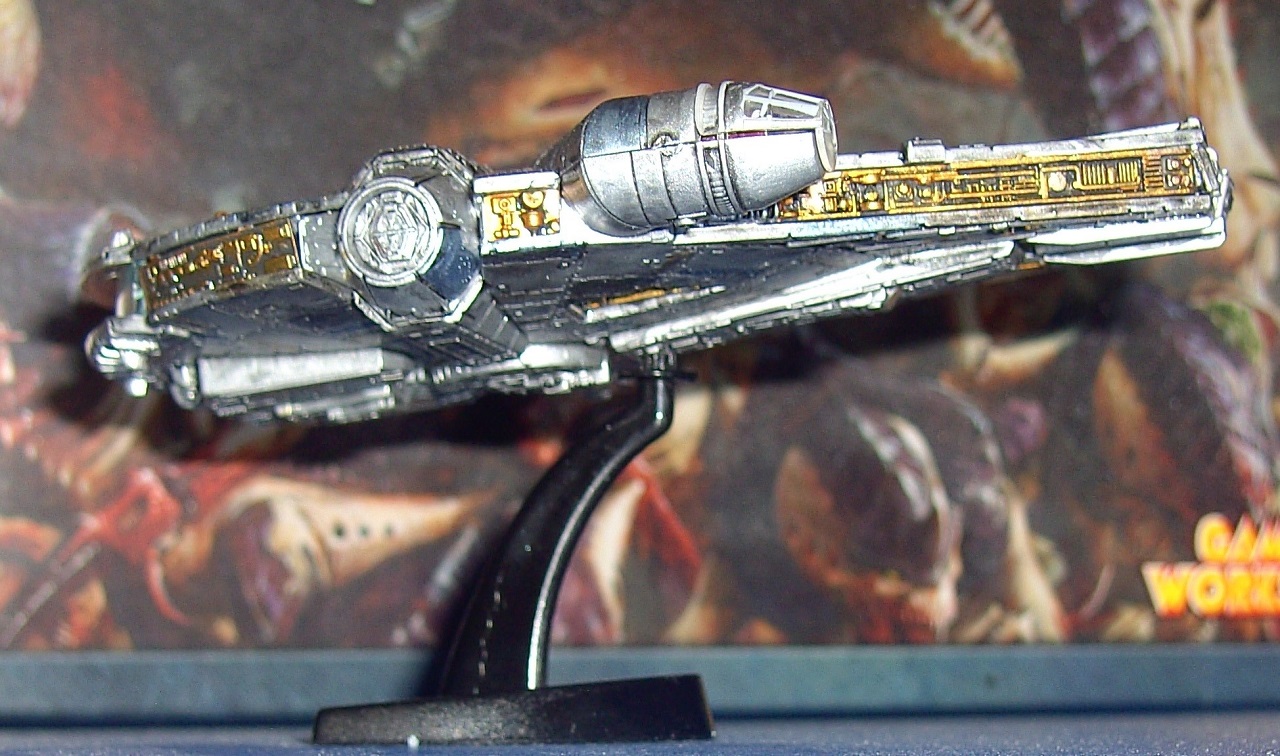
The Falcon Au Naturel
I had given up all hope of being part of this group build; even when the finish date was extended I had nothing even started. As usual, when the theme was announced it gripped my imagination and I was filled with enthusiasm. I posted all sorts of guff about ideas that even then I knew would simply not happen.
Then about a week ago I remembered this.
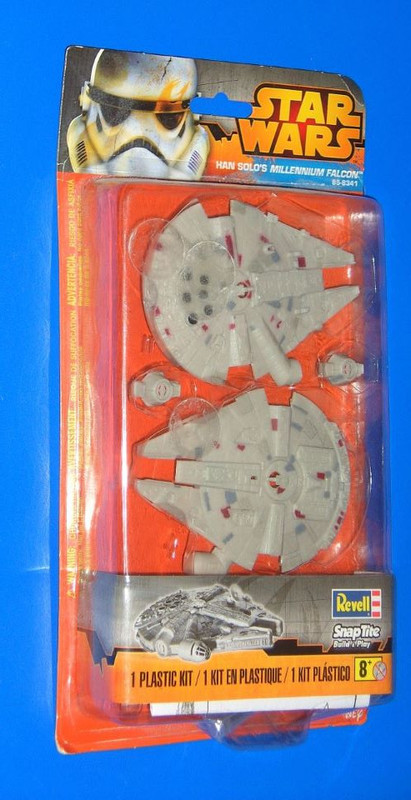
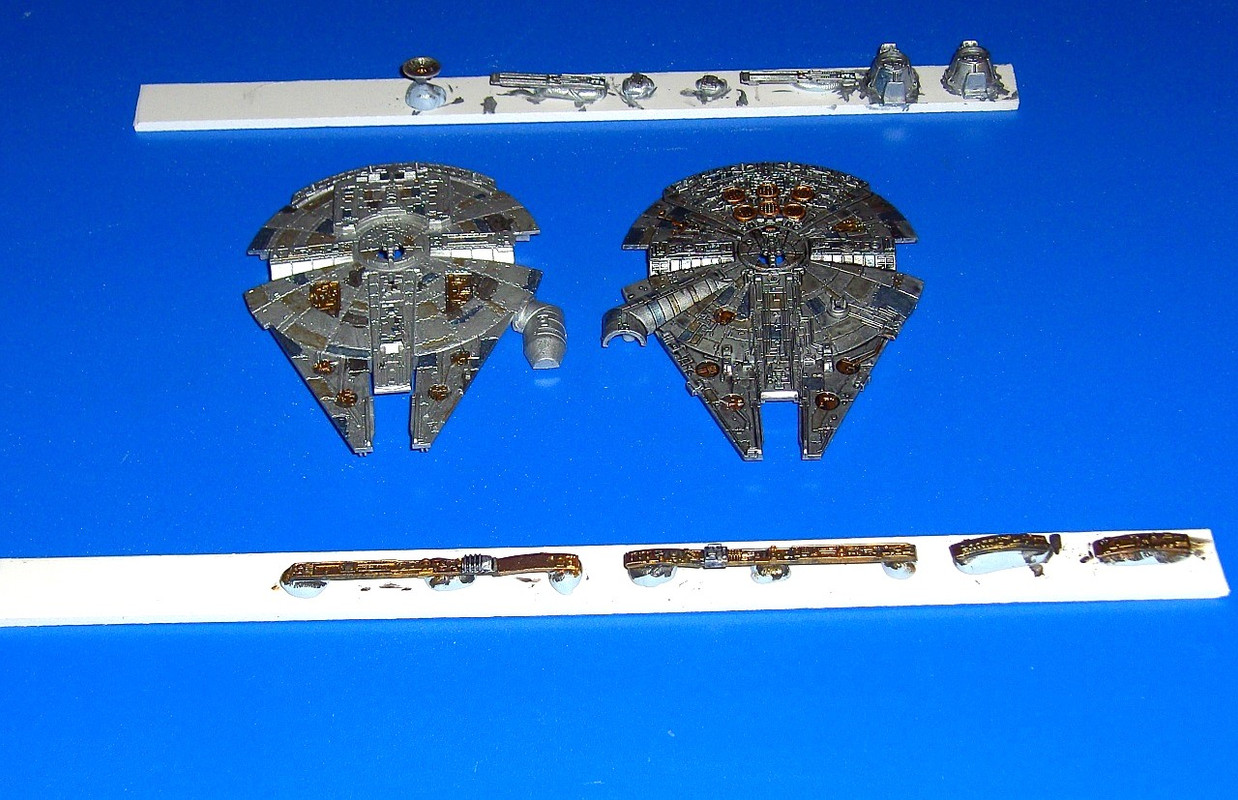
I can’t even think why I bought it, except it was cheap. It was simple, a small snap-together kit with only twenty parts. It was toy-like, moulded in a very pale brownish light grey with small blotches of colour that seemed to have been applied robotically. What could not be readily seen was that it incorporated a wealth of detail: it was discovering this that sparked an idea that I might just manage.
Steampunk Star Wars (and Star Trek) has just about been done to death and I wasn’t going to be adding rivets and cog-wheels in this small scale, but a steampunk-inspired palette of colours was a different matter. A variety of metallics and plenty of brass might be fun. Even so my reluctance to do anything meant I didn’t get started until mid-afternoon on Monday 18th July, just as the heat was building. It was the temperature that decided me against a rattle-can base layer, that and not wanting to clog the fine detail now I’d found it. The base coat was Revell Aqua Color Aluminium, even with some dilution it still provided a uniform opaque base layer with only a couple of light coats applied with the traditional hairy stick. This was my first bit of good luck, the other shades I’d bought in proved to have little covering power (these were Citadel “Steel” shades, but even Tamiya’s “Dark Iron” was a disappointment); trying to use one of these as a base would have undoubtedly caused me to abandon the project. As it was these colours were adequate to tint a variety panels on the model, I found my shaky hand was still a considerable problem but managed to work around it with a lot of touching-up. For the same reason a pin-wash was out of the question, the fine detail would need to be brought out with a wash that could simply be brushed on overall. That ruled out my usual go-to, Tamiya “Smoke”, let alone Citadel’s awful “Nuln Oil”. I did recall that years ago I had made a wash by adding a few drops of Rotring ink to an eye-dropper of “Klear” (“Future”) varnish and this had filled panel lines without having much effect on the colour it was washed over. I hastily reproduced this brew but appear to have over-egged it in respect of the ink, it did darken the model on drying and I did allow it to pool a bit. It was part way through doing this I remembered I hadn’t photographed the build process so there’s just the one picture of the parts blu-tacked to sticks but pretty much complete; you might be able to tell the upper hull has received it’s wash at this point but the bottom had not.
The build stalled once the wash was completed to let the paint cure a bit, and assembly (fortunately straightforward) was complete early on the evening of 19th July with the pictures of the finished article taken soon afterwards. I’m oddly satisfied with this item as although it is small I completed it to the limit of my degraded abilities, and most remarkably finished it (and on time!).

[

[
Regards,
M
5 Likes
Well done Tom, for complete last minute .com build, that has turned out great !! you have given it a completely new take and it looks really good … you could even class it as a blinged up ride … the bright brassy /gold colours stand out in just the right way against the silver/steel metallic’s. And although its small, the panel detail painting looks great and gets the hull details to really stand out. You totally pulled it out the bag and finished a great rendition of an iconic ship … great job all round.
2 Likes
So, 2 days to go,and hopefully at least one more will get over the line.
Petbats is close enough to for me to say its done but Im sure the weathering will be done … I was mostly interested in alternate cam… weathering is a bonus … So @petbat - with the main alternate cam scheme down, I am happy ok - Weathering can be done at leisure.
I was going to add Tom @MoramarthT to the finished builds in my post from a while ago, but it says you can only name 10 individuals with the @name method in one post … I never knew that … every day is a school day ![]()
3 Likes
I absolutely love this Tom. Very nicely done and a great choice of colours, the steam punk look is definitely present but it’s also got a flavour of the Razor Crest in there too.
In fact, I think the Razor Crest would actually look good with a scheme based on the Falcon, now if only there was the time, or another campaign to give that a shot!…
Great job @MoramarthT
2 Likes
Happy to run another general Star Wars Universe campaign for all vehicles/figures/platforms from all shows and allow alternate cam schemes etc so its open to OOB builds or artistic licence builds ? ?
5 Likes
That would be absolutely awesome! Count me in!
2 Likes
For those interested in a new Star Wars group build, check it out, and vote if interested.
5 Likes