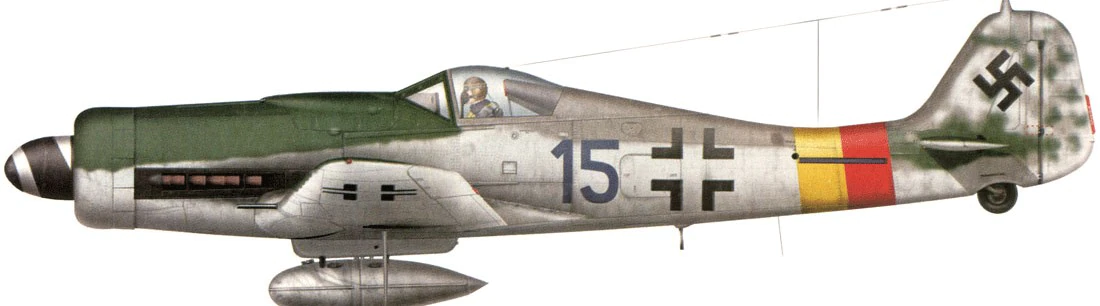
I plan to build it in the same markings as the box art. I wanted to do a RV aircraft and my 3 year old likes the red and yellow bands 
2 Likes
Nice one Raj! Welcome aboard. 
I always think the Dora is one of the best looking '190 variants.
All the best
Rowan
1 Like
@Rowan: you urgently need to progress on your Bf-109. I need the inspiration 
Torsten,
these Hellcats are really two nice beauties. Congratulation for Your builds! I really have to try one of these Eduard Hellcats. The Academy Bearcat has many flaws. I hope I can backdate it to an earlier version.
Oliver
1 Like
Raj,
nice choice. I will follow Your build with interest. I just found the 1/72 scale version fromTamiya on my shelves.
Oliver
Thanks Oliver! Yes, the Hellcats are fun to build and I enjoyed it a lot. As I mentioned before I have another 3 in my stash, plus 3 Hasegawa. So I’m well equipped for the future …  Meanwhile I have become more and more a fan of Eduard kits. I think they are a real good value for money.
Though I have the Academy F8F in my stash somewhere, I have built only the Hobbyboss Bearcat so far - and have another 2 in my stash. Can’t remember any major problems with it, though I’m far from being a Bearcat expert. It was a nice build.
So I can’t say anything about the Aca kit. But maybe next time you’ll the Hobbboss F8F a chance … ?
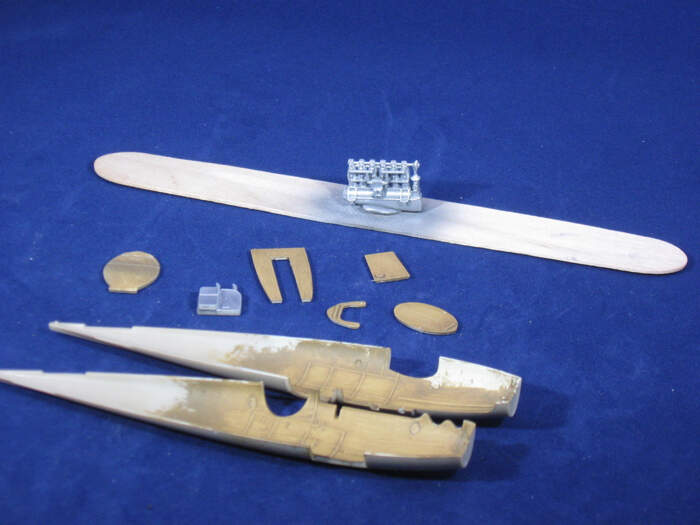
I don’t have a lot of progress to show. I have done the wood texture on all the internal parts that have wood texture. I hope to make some progress this weekend - perhaps I can finish the interior. But I just received a German pilot in resin from Aerobonus. I need to figure out whether he will fit and if so, get him painted before putting it all together. The engine needs some more painting, but the base metallic coat is down.
Hi Drabslab
Going back to work has made my build grind to a standstill.  I’ve put in way more hours than I’m paid for this week to get things up and running again at my shop as we come out of lockdown in the UK, but I hope to make some more progress on Sunday. Hopefully, once things settle down, I’ll be able to balance work and modelling better…
All the best
Rowan
Nice choice, Raj! A little color always adds nice contrast to the camouflage.
1 Like
Time for a build update.
I got the basic assembly done and hit the paint booth. I’m trying a modular painting approach with this build. Normally I would have attached the nose cowl and the tail planes before painting, but this time I left them off like some of the experten here do. Only time will tell if this will come back to bite me in my 
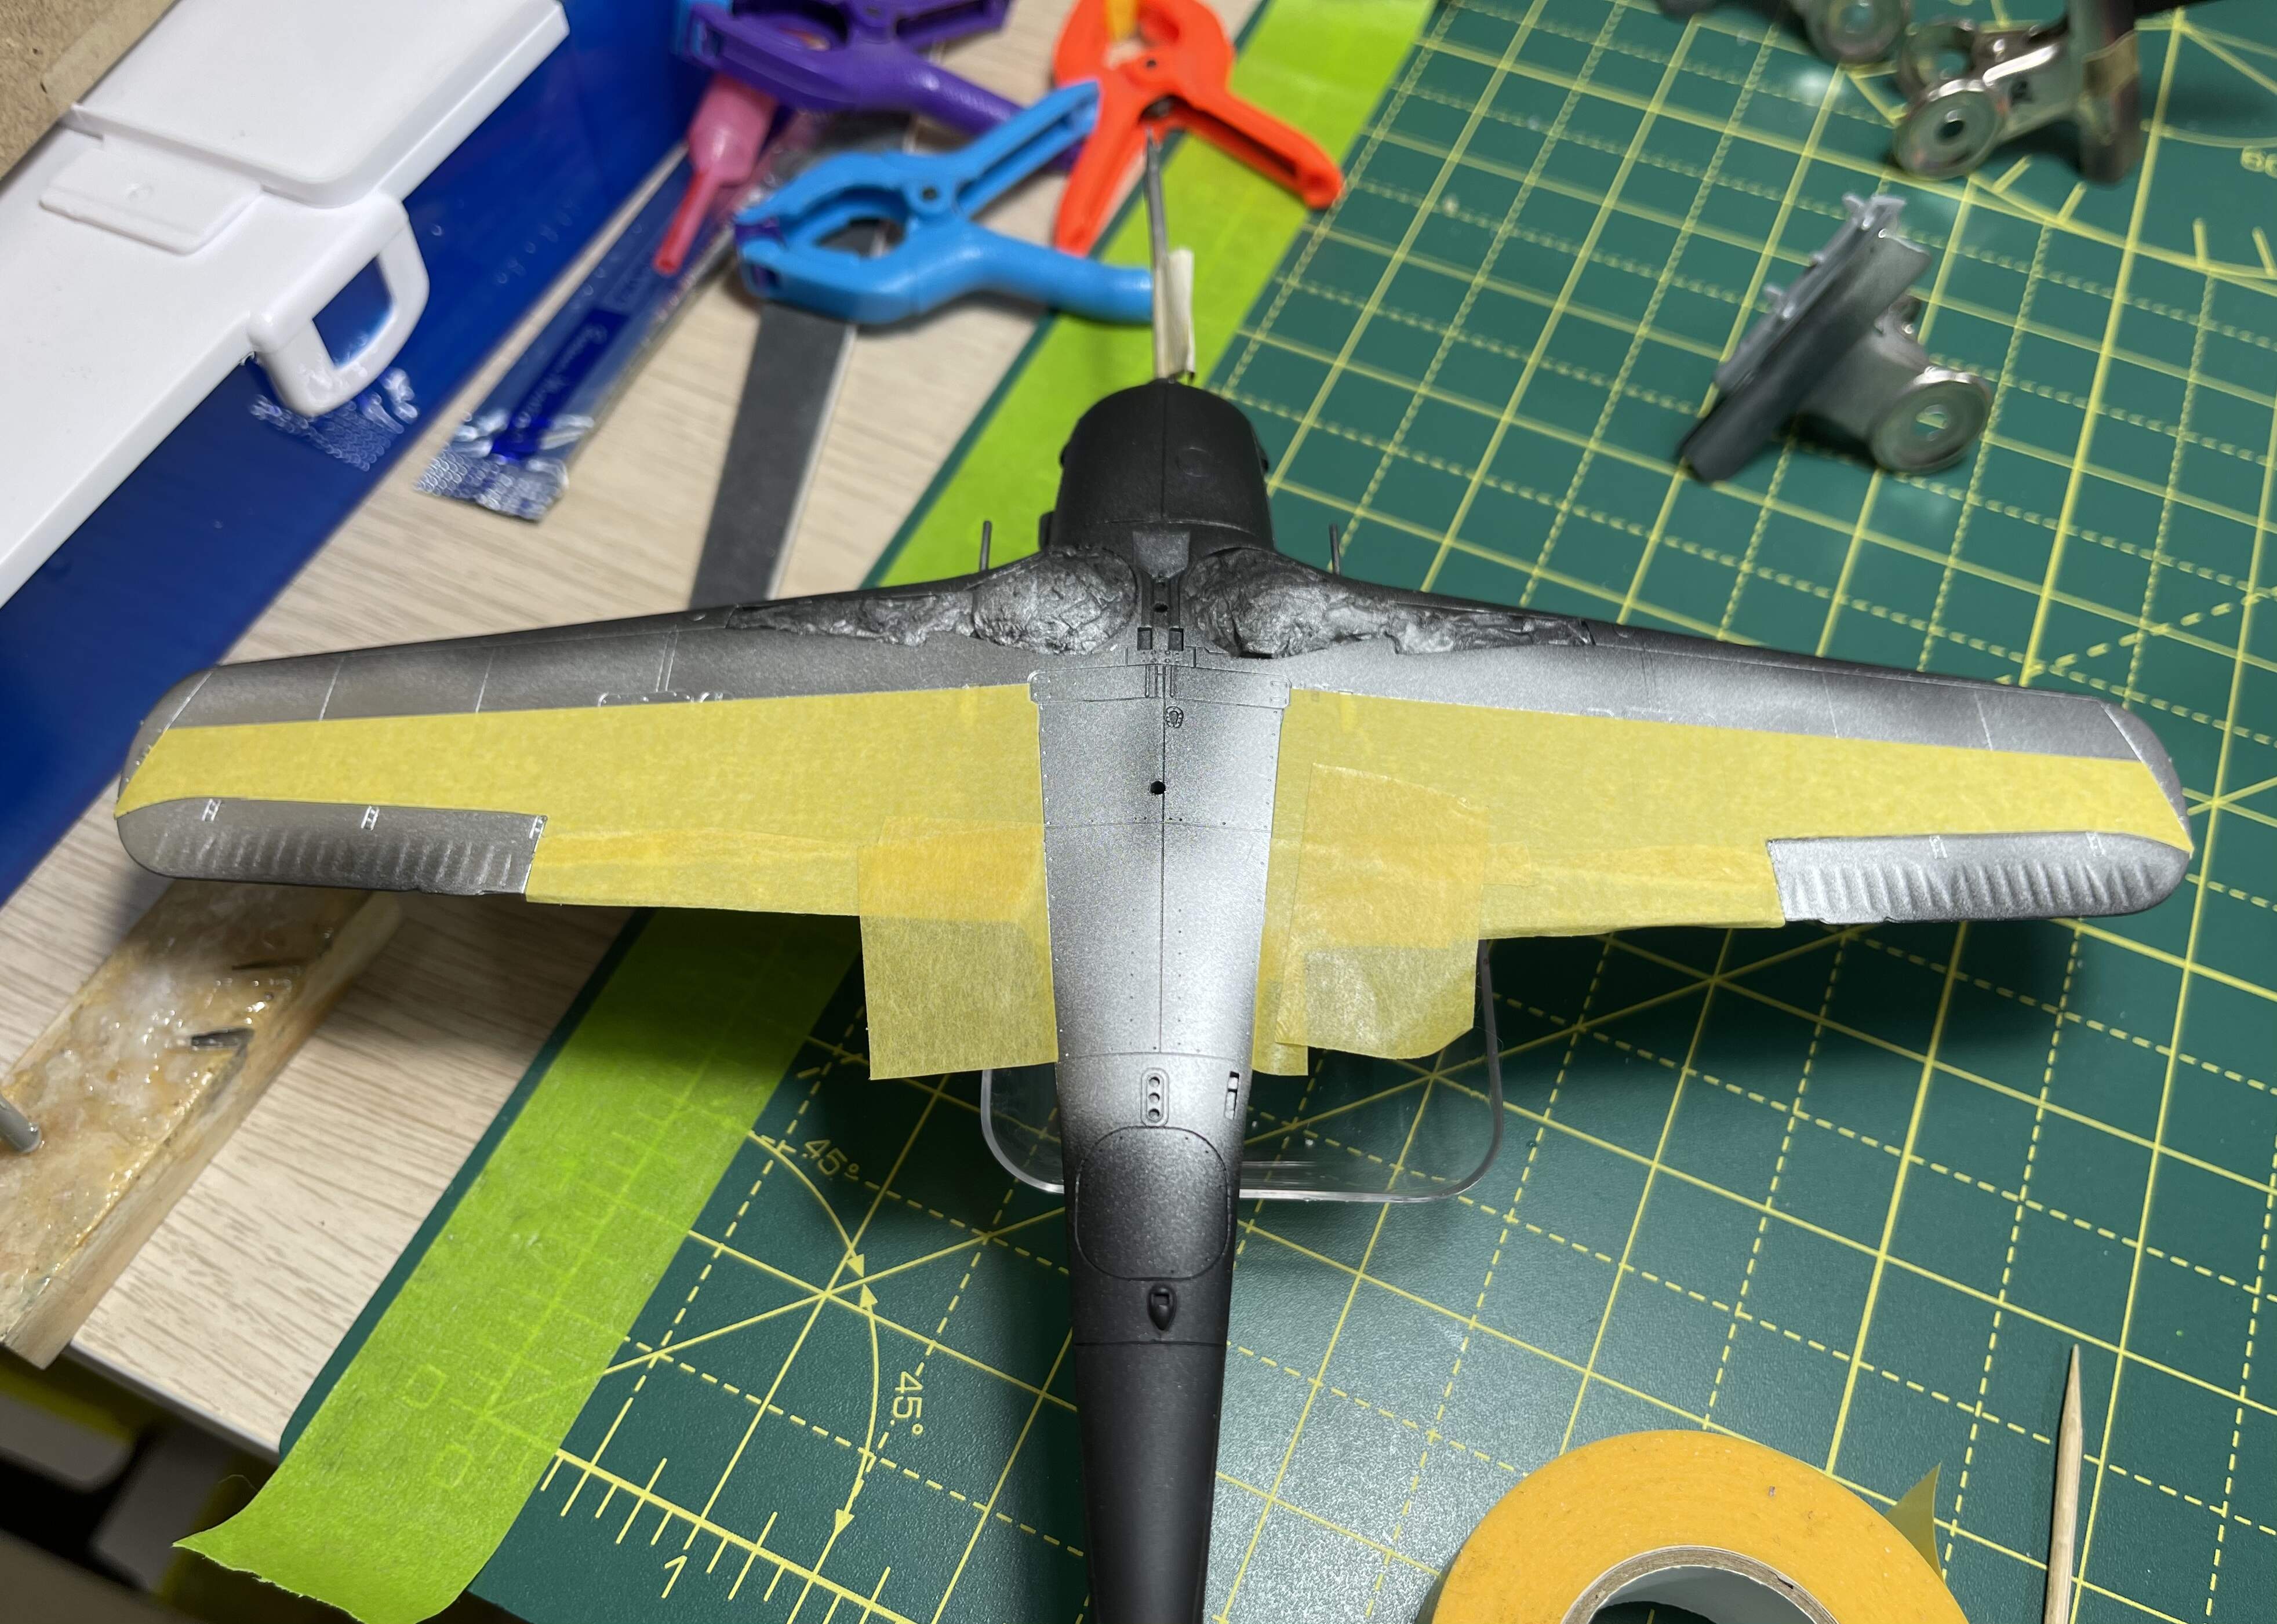
I’m going for a half NMF lower wings with RLM75 and 76. So I sprayed AK Extreme Aluminium before masking if for the rest of the colours.
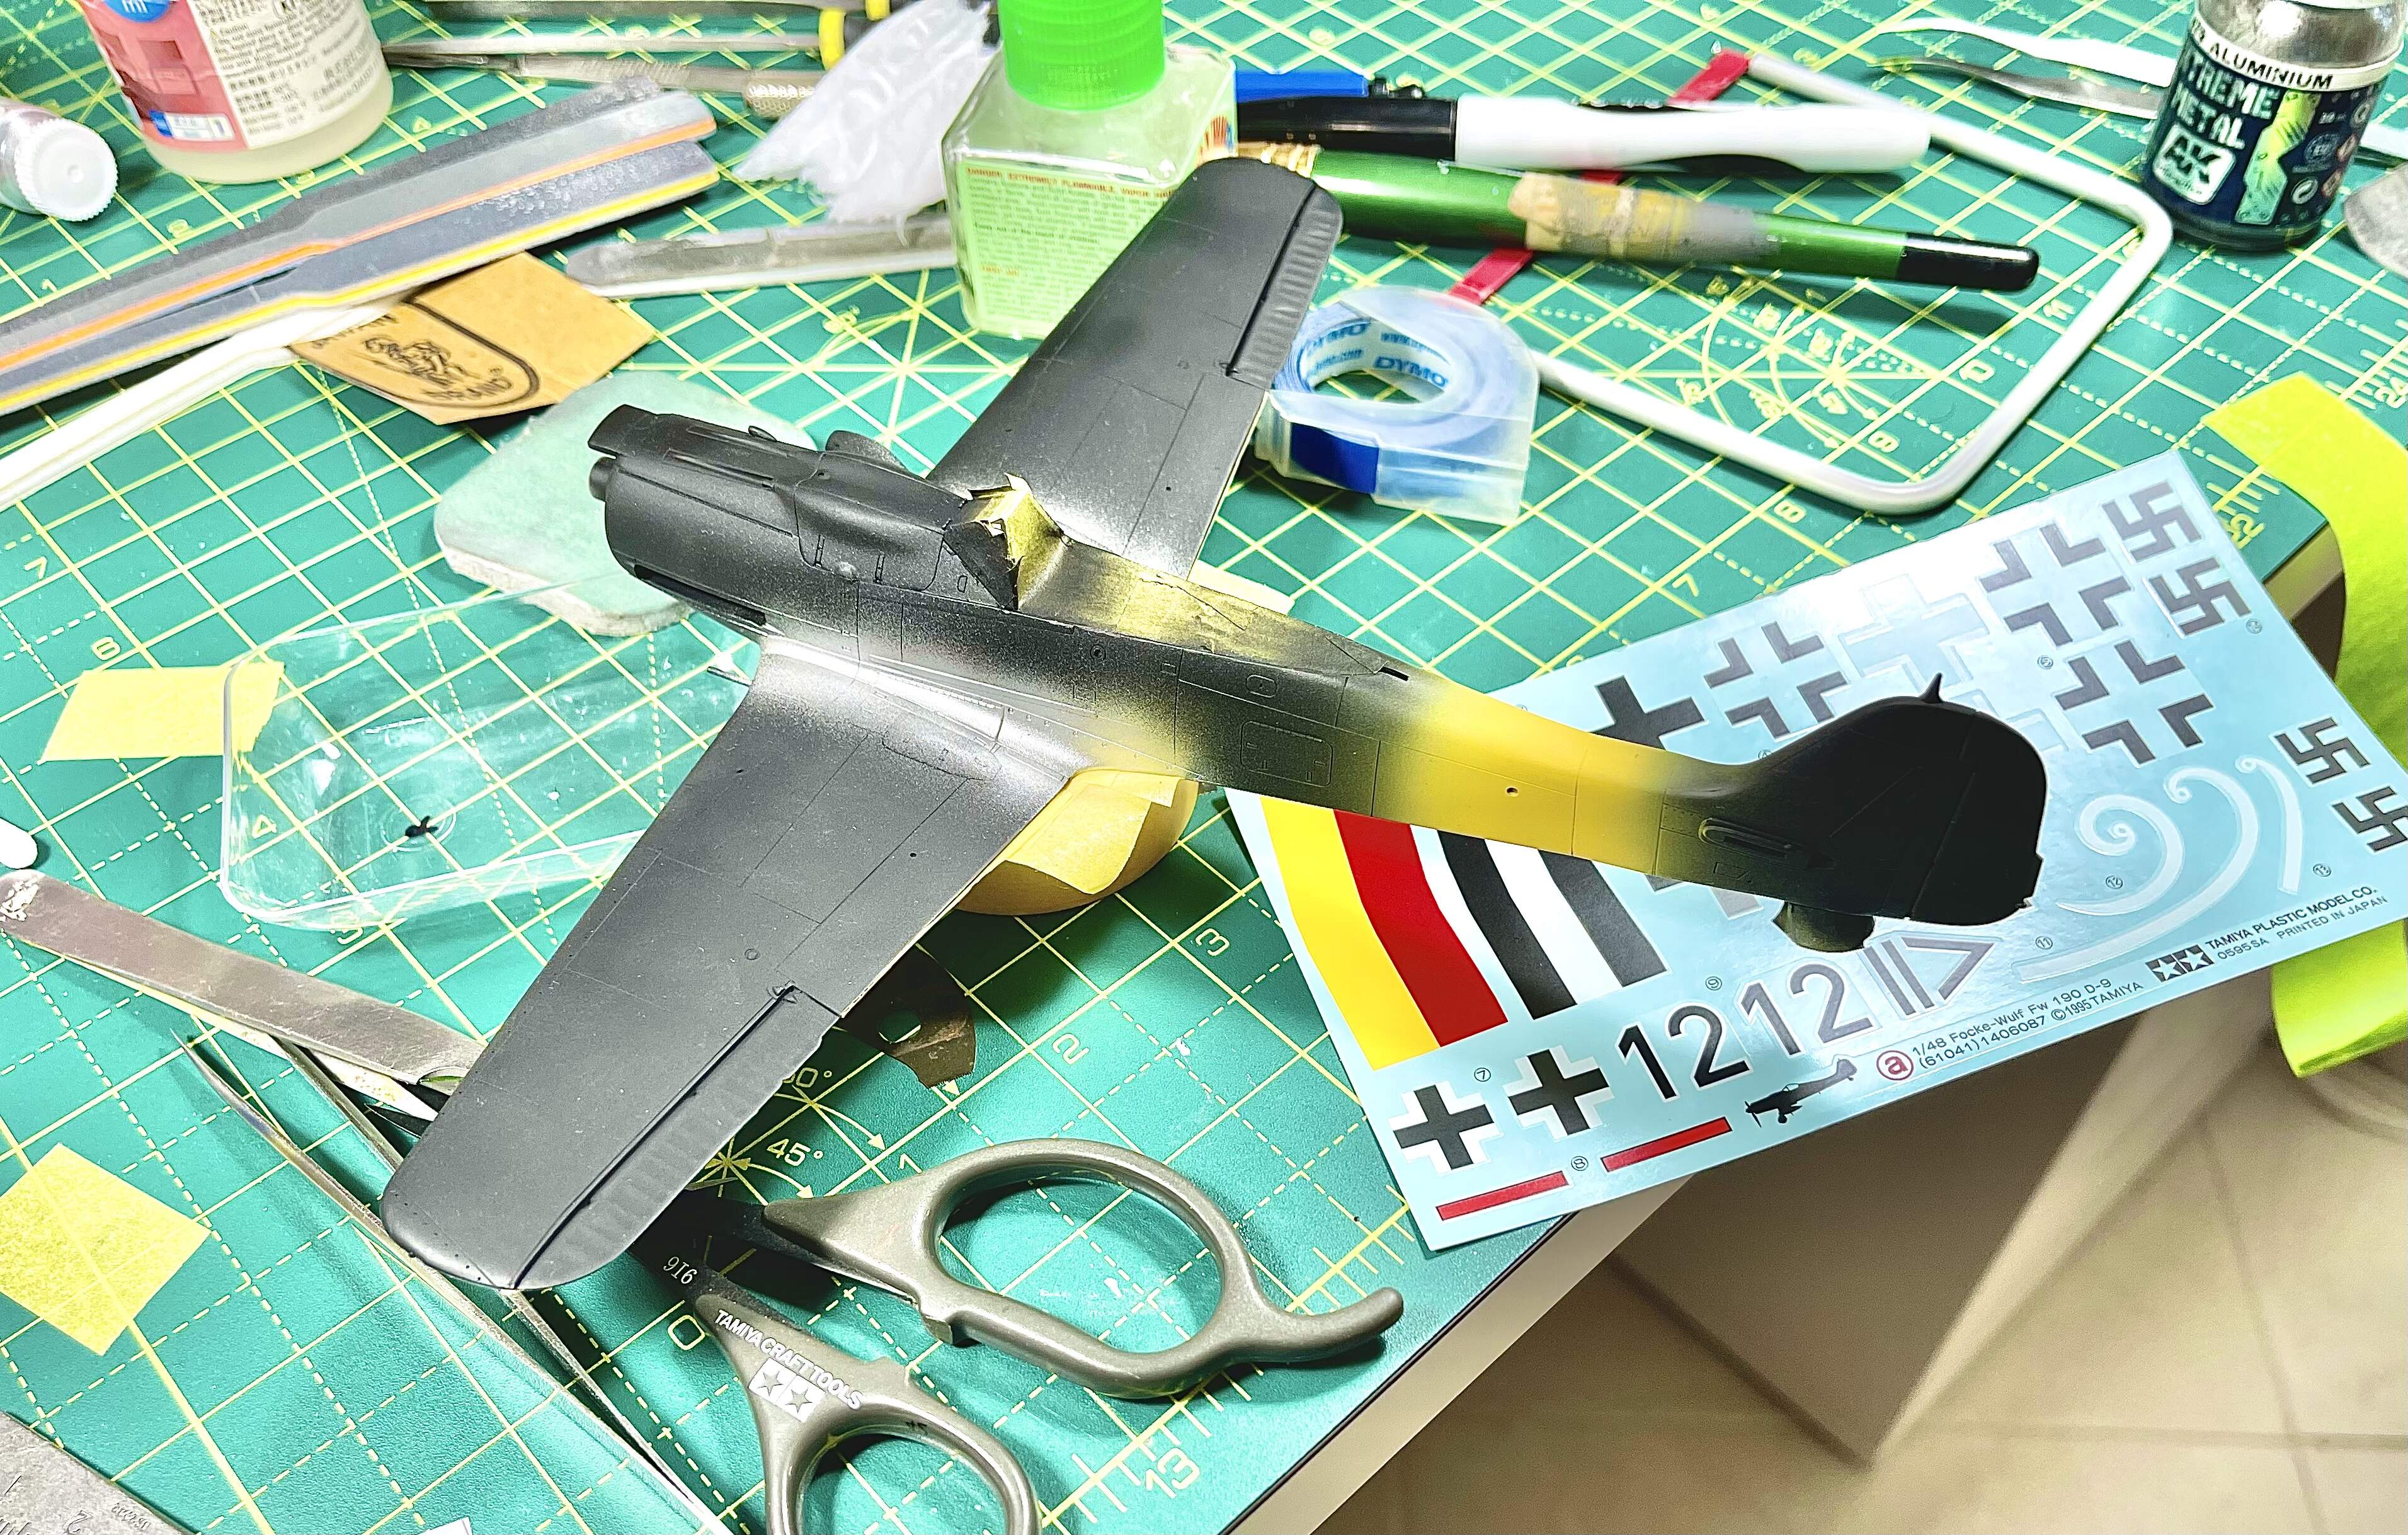
Another thing I’m trying for the first time is painted on markings. I plan to mask and paint the wing and fuselage crosses as well.
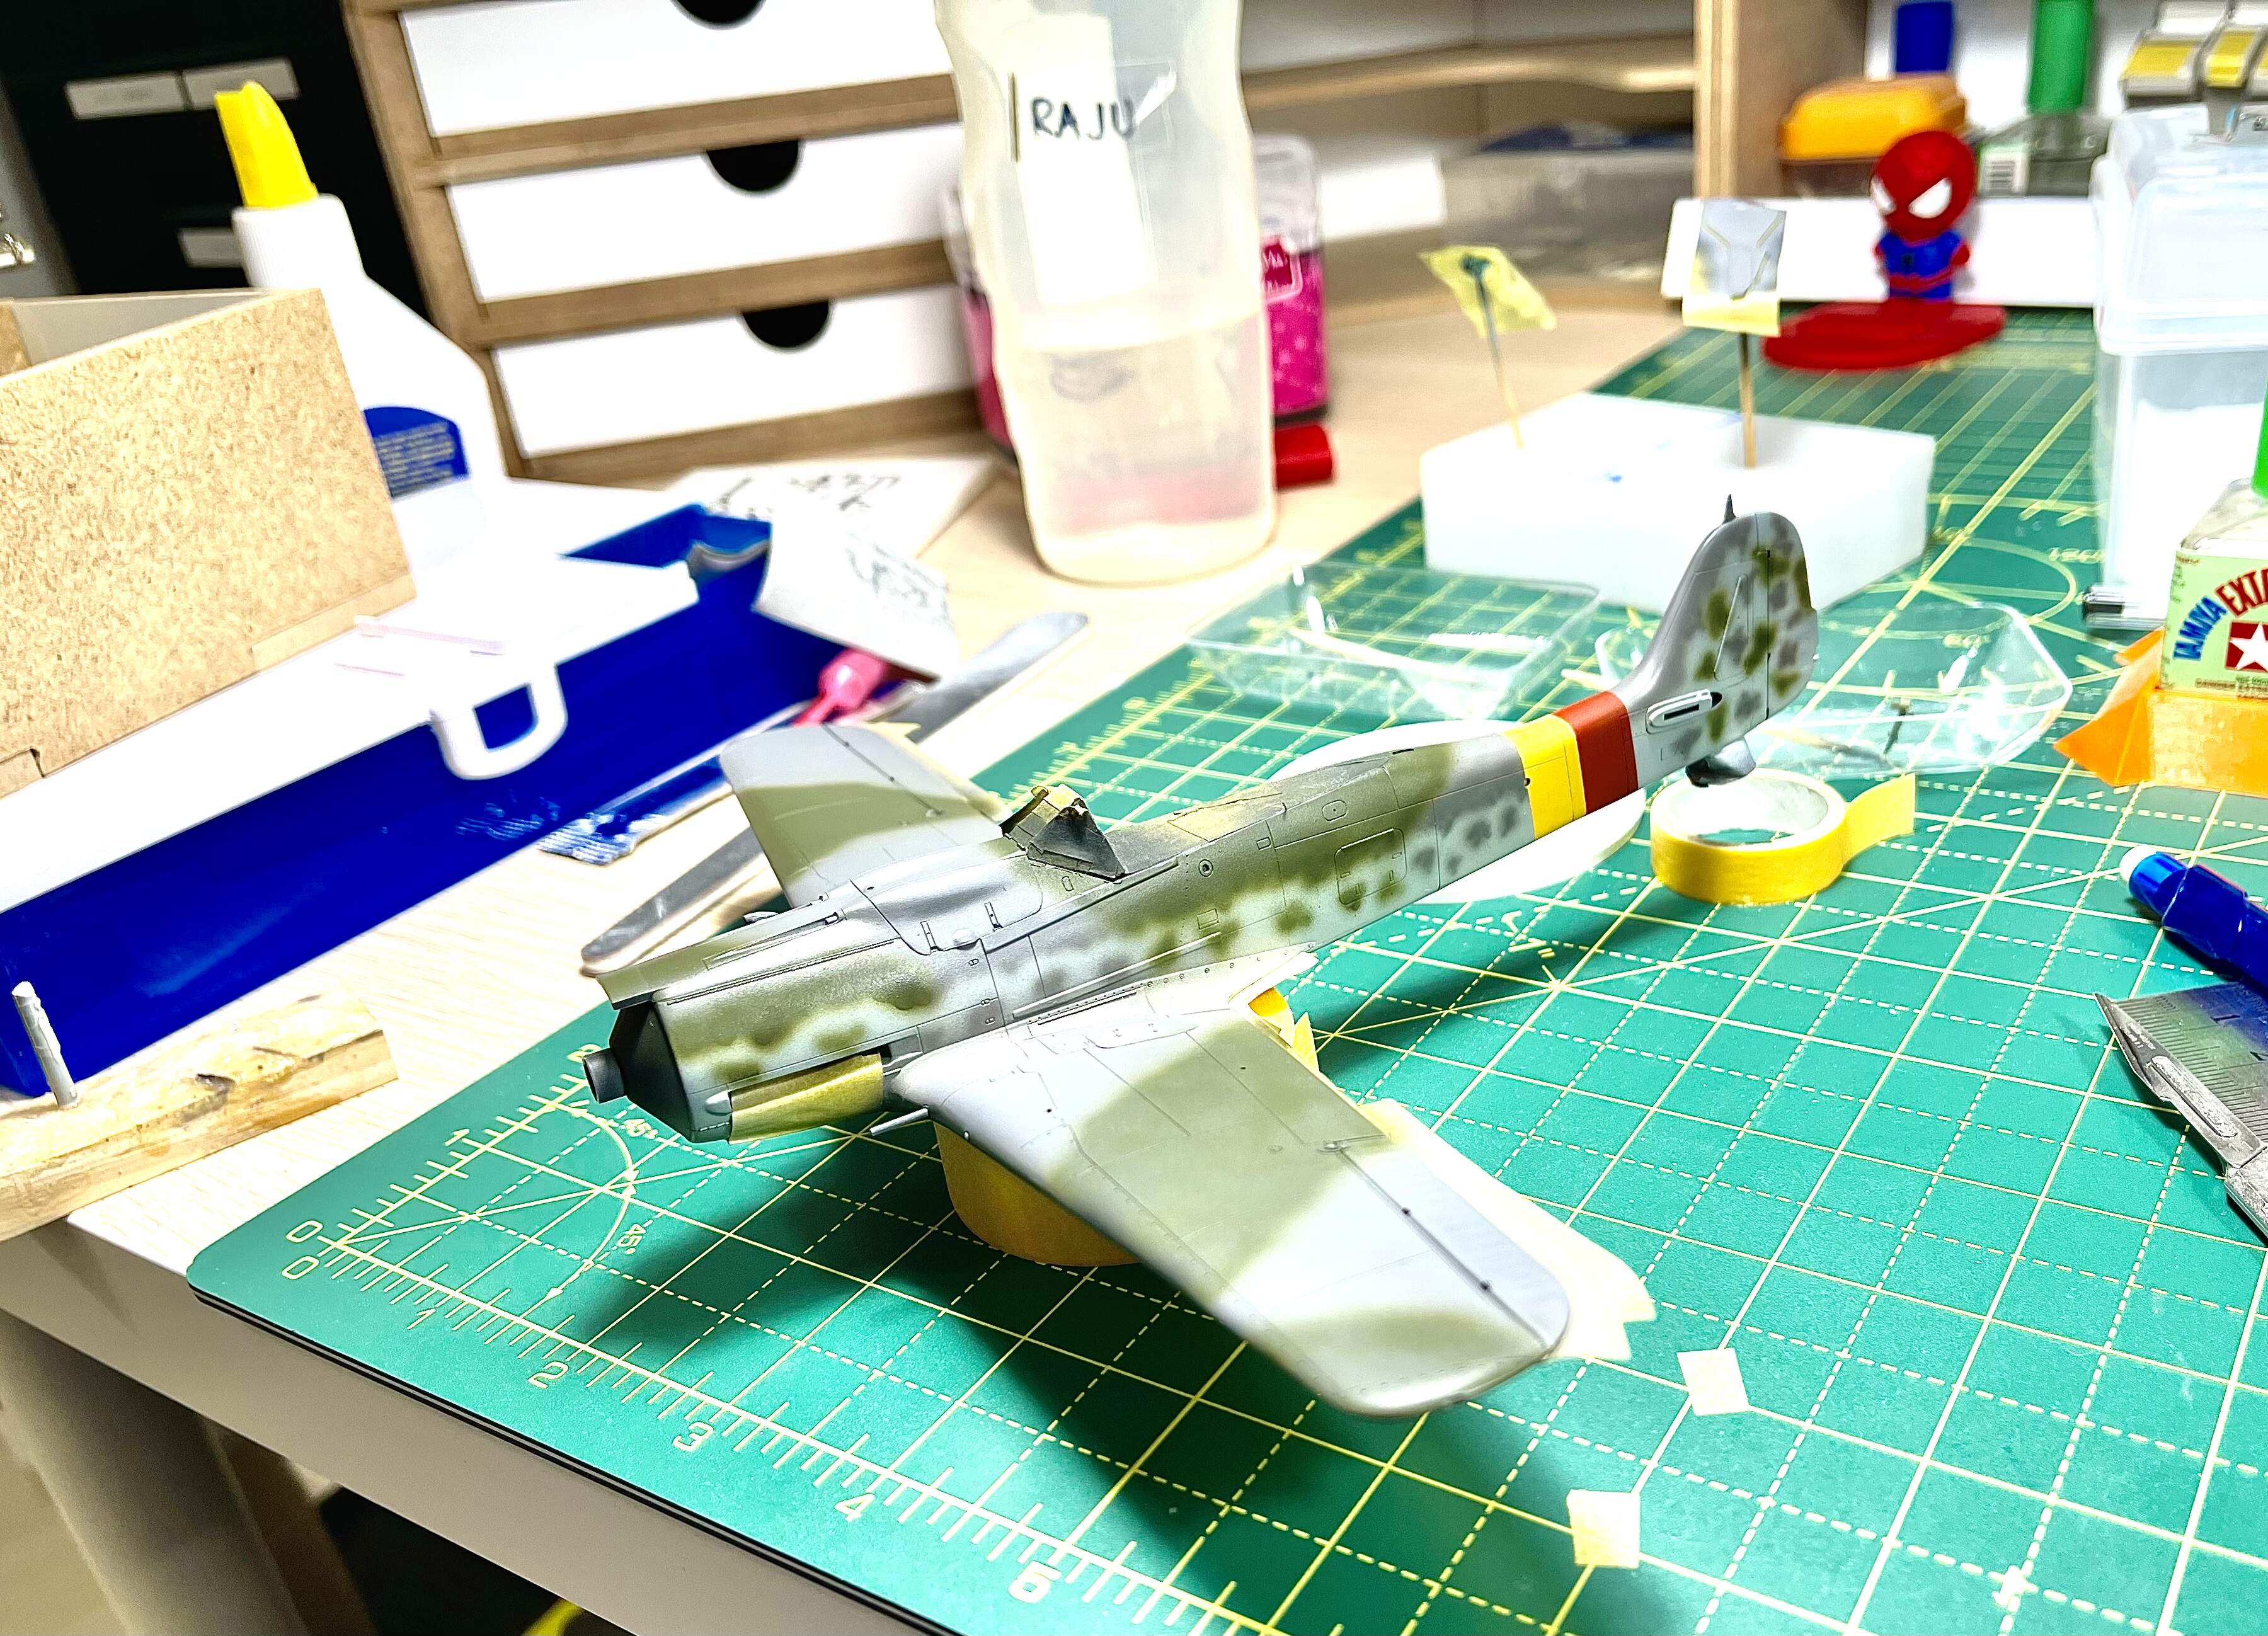
And this is where the build stands as of now. I plan to spray future and then leave it aside for a day before I tackle the crosses.
Thanks for looking
Cheers 
2 Likes
Super fast progress, Raj. Looks great so far. Nice job on the camouflage!
Looking forward to see more 
1 Like
I may have bitten off more than I can chew. Also, I didn’t know when to leave things alone.
After getting home from work, I had this bright idea of masking the various markings. I had just finished a 14 hour work day and was a bit tired. But I was too tired to think straight. So at 1am I set about masking the wings for the walkway markings.
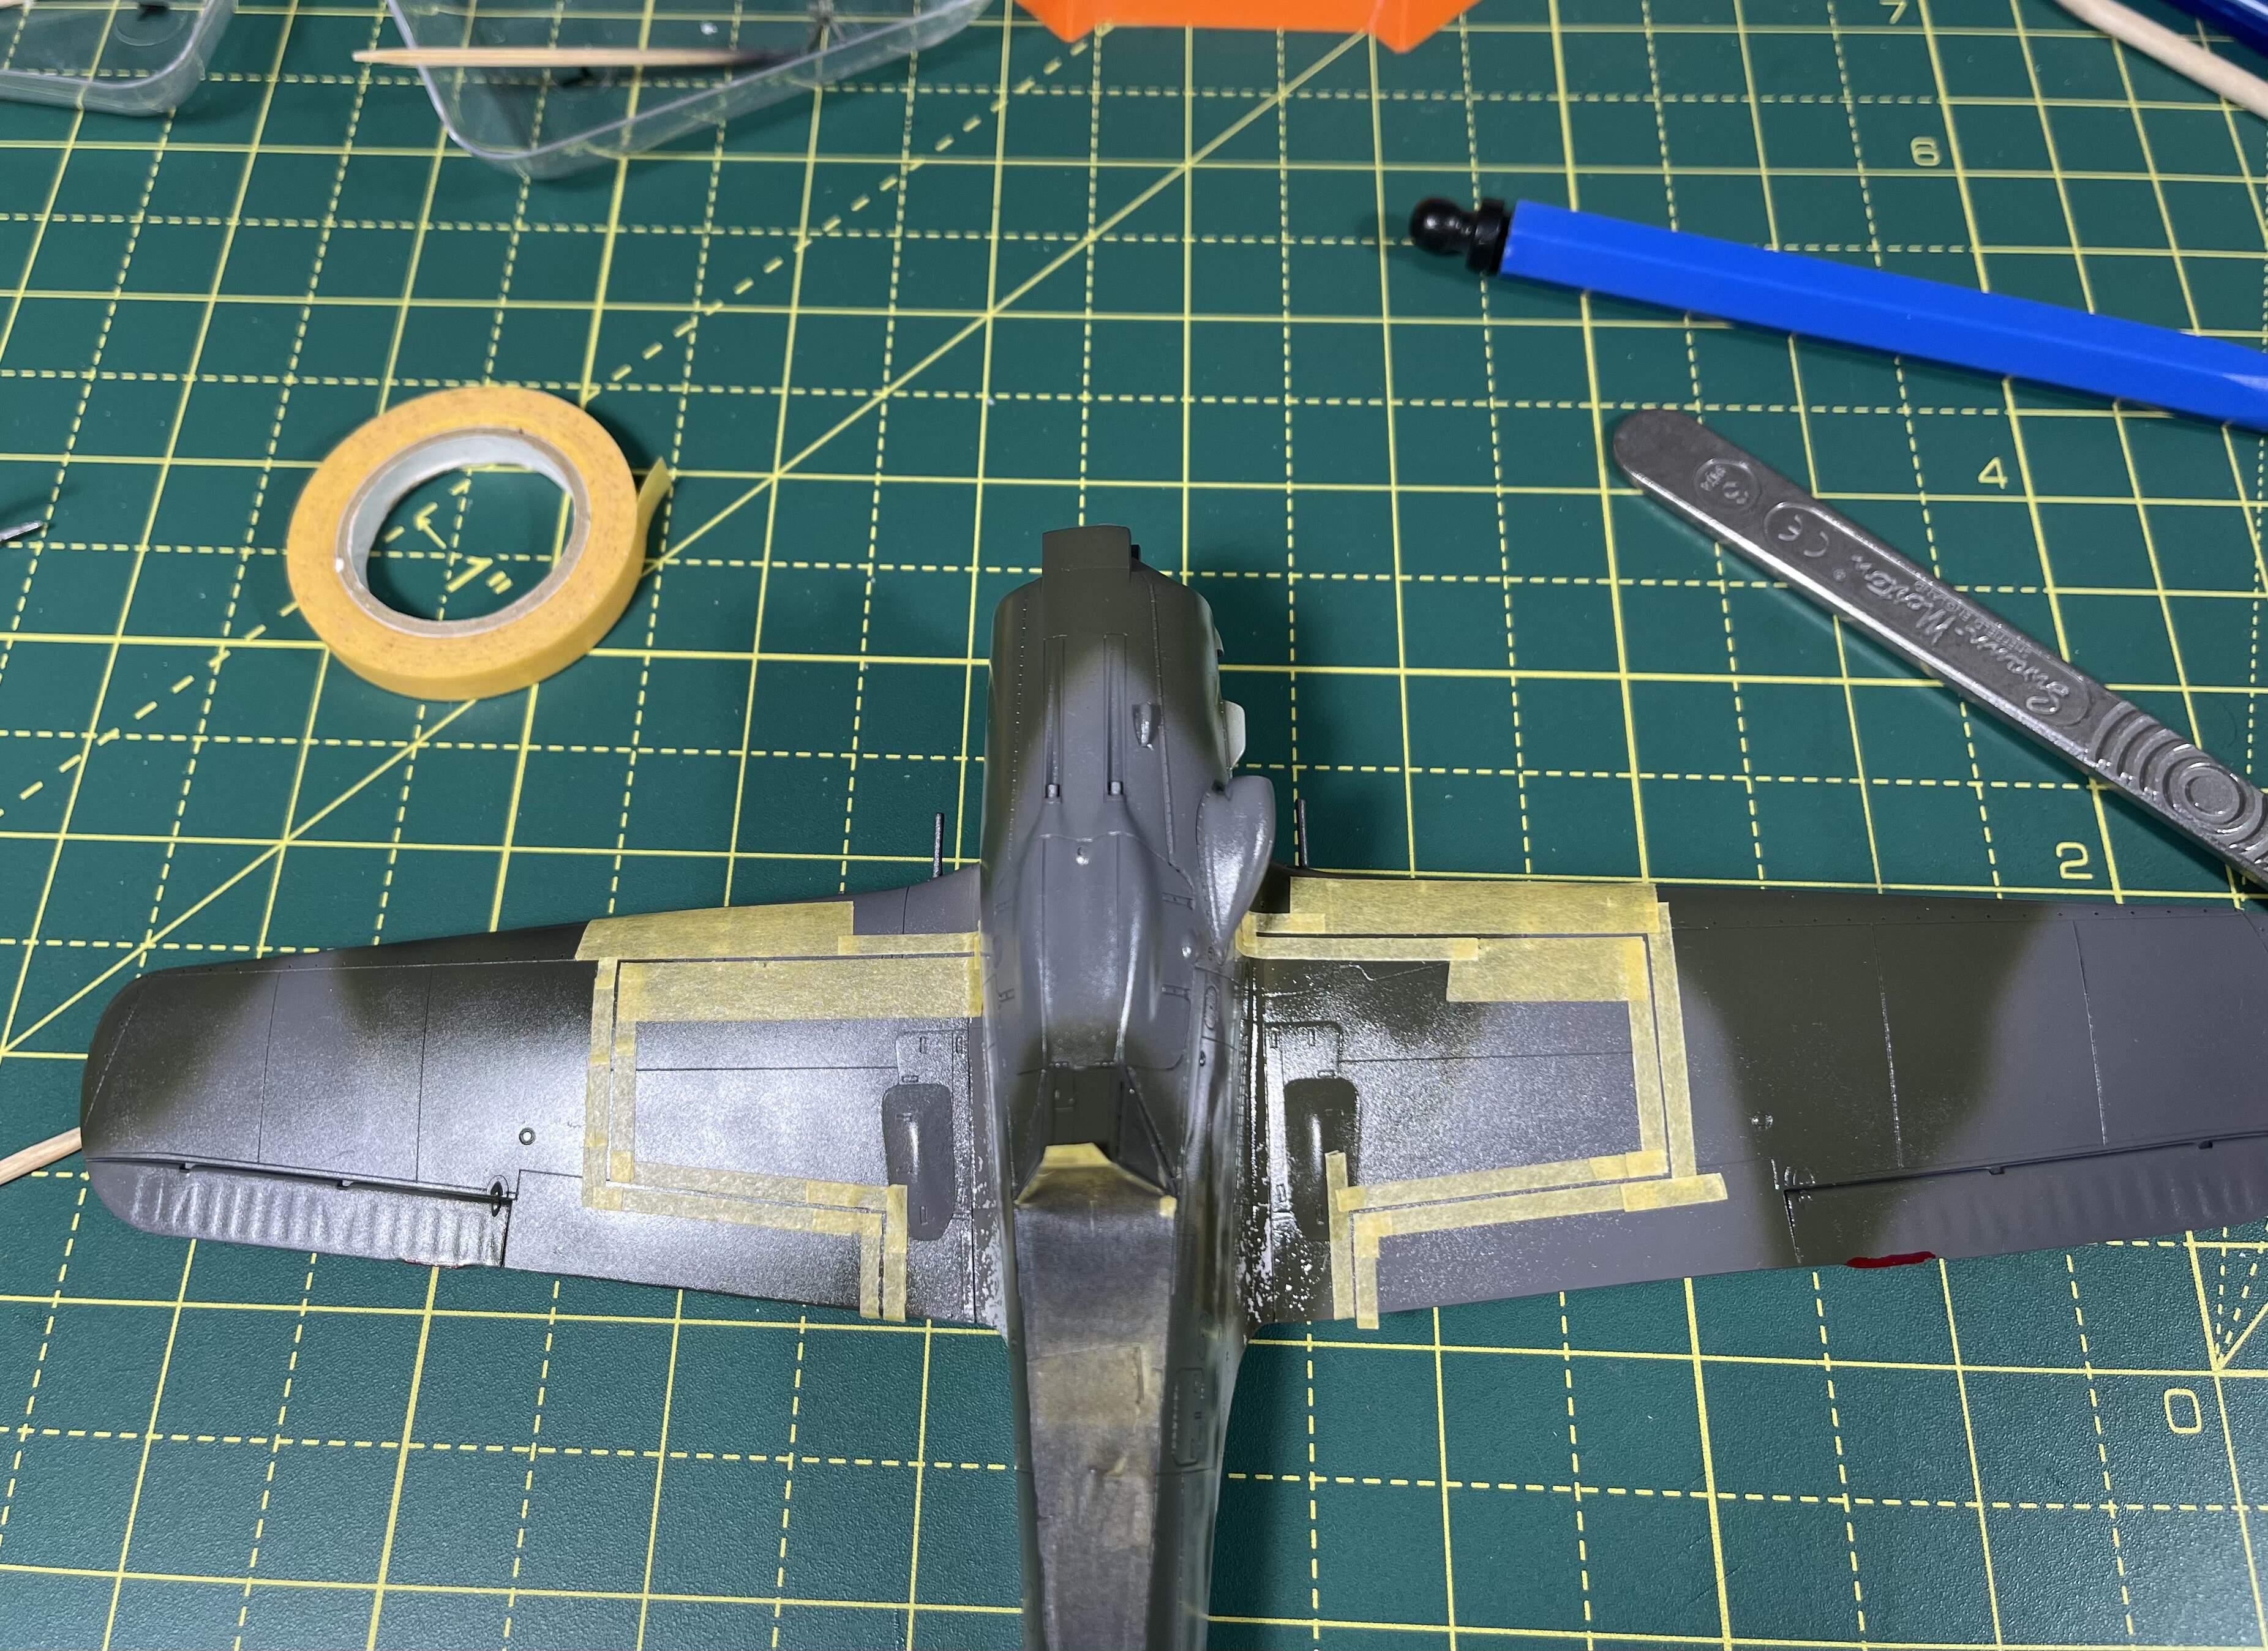
Then I masked it to get the dashed pattern. So far so good.
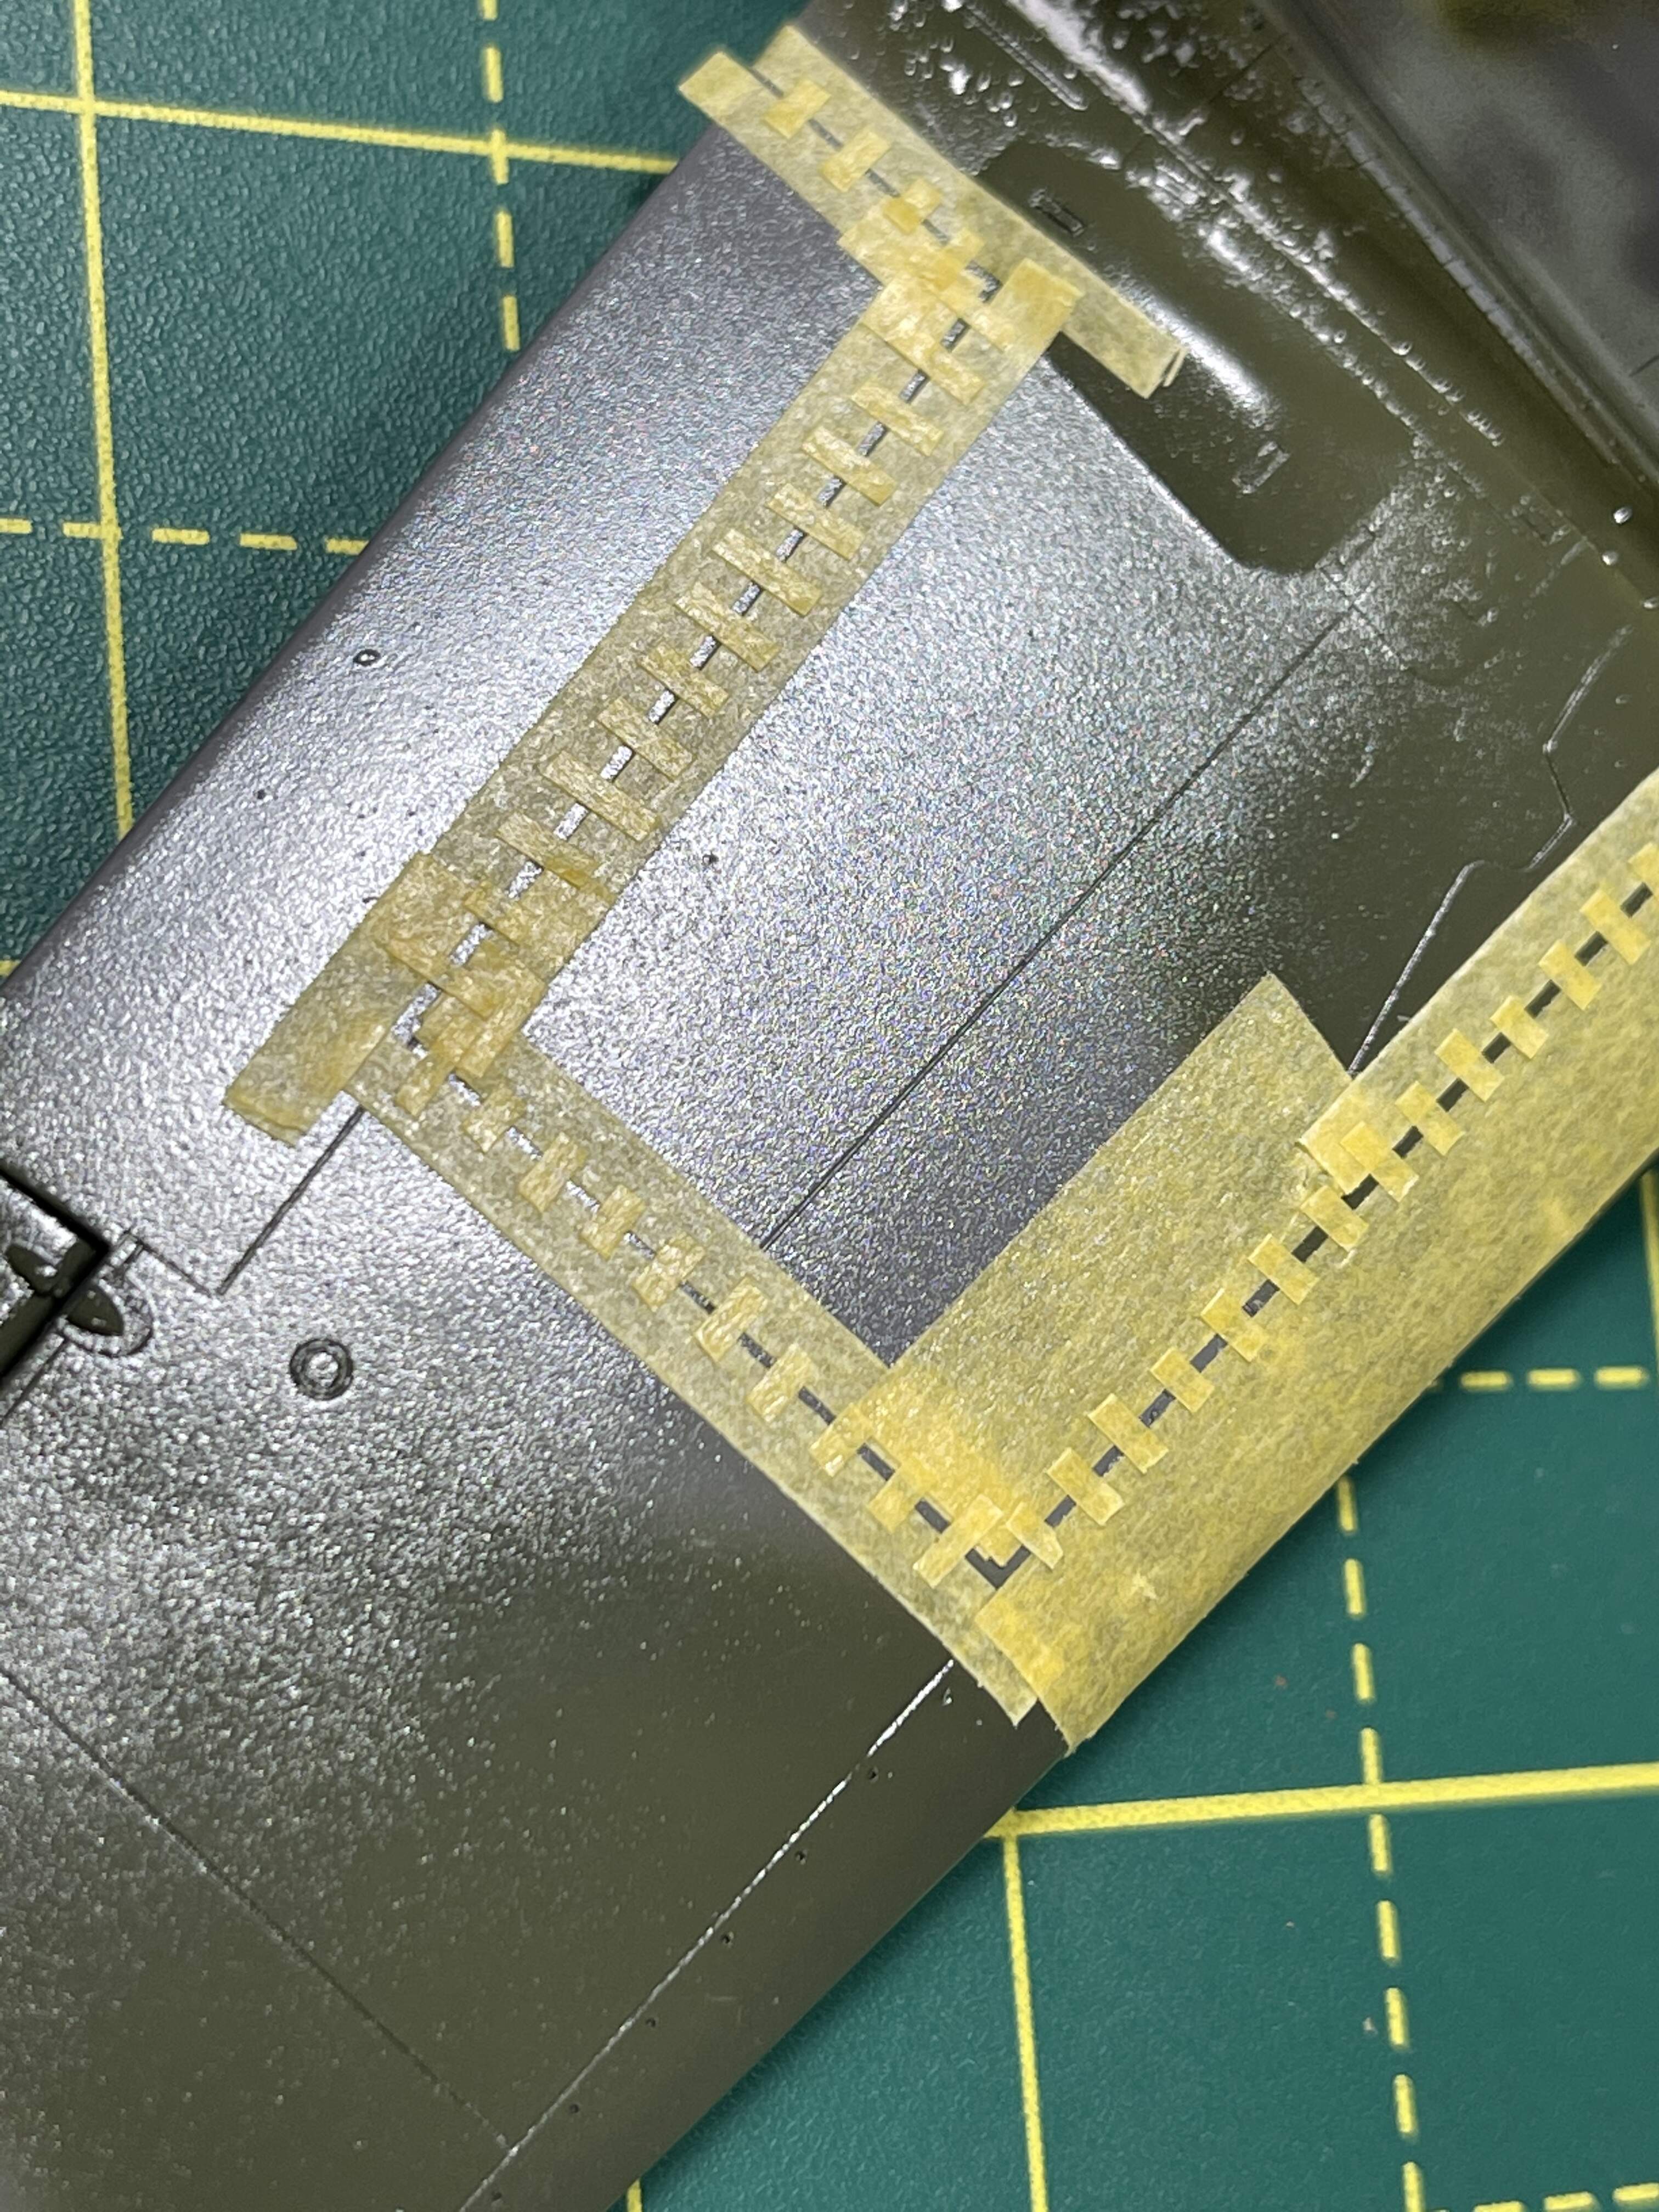
Then I had a brainwave. Since the walkway markings are white, why don’t I mask the upper wing crosses as well. 2 birds with one stone etc etc
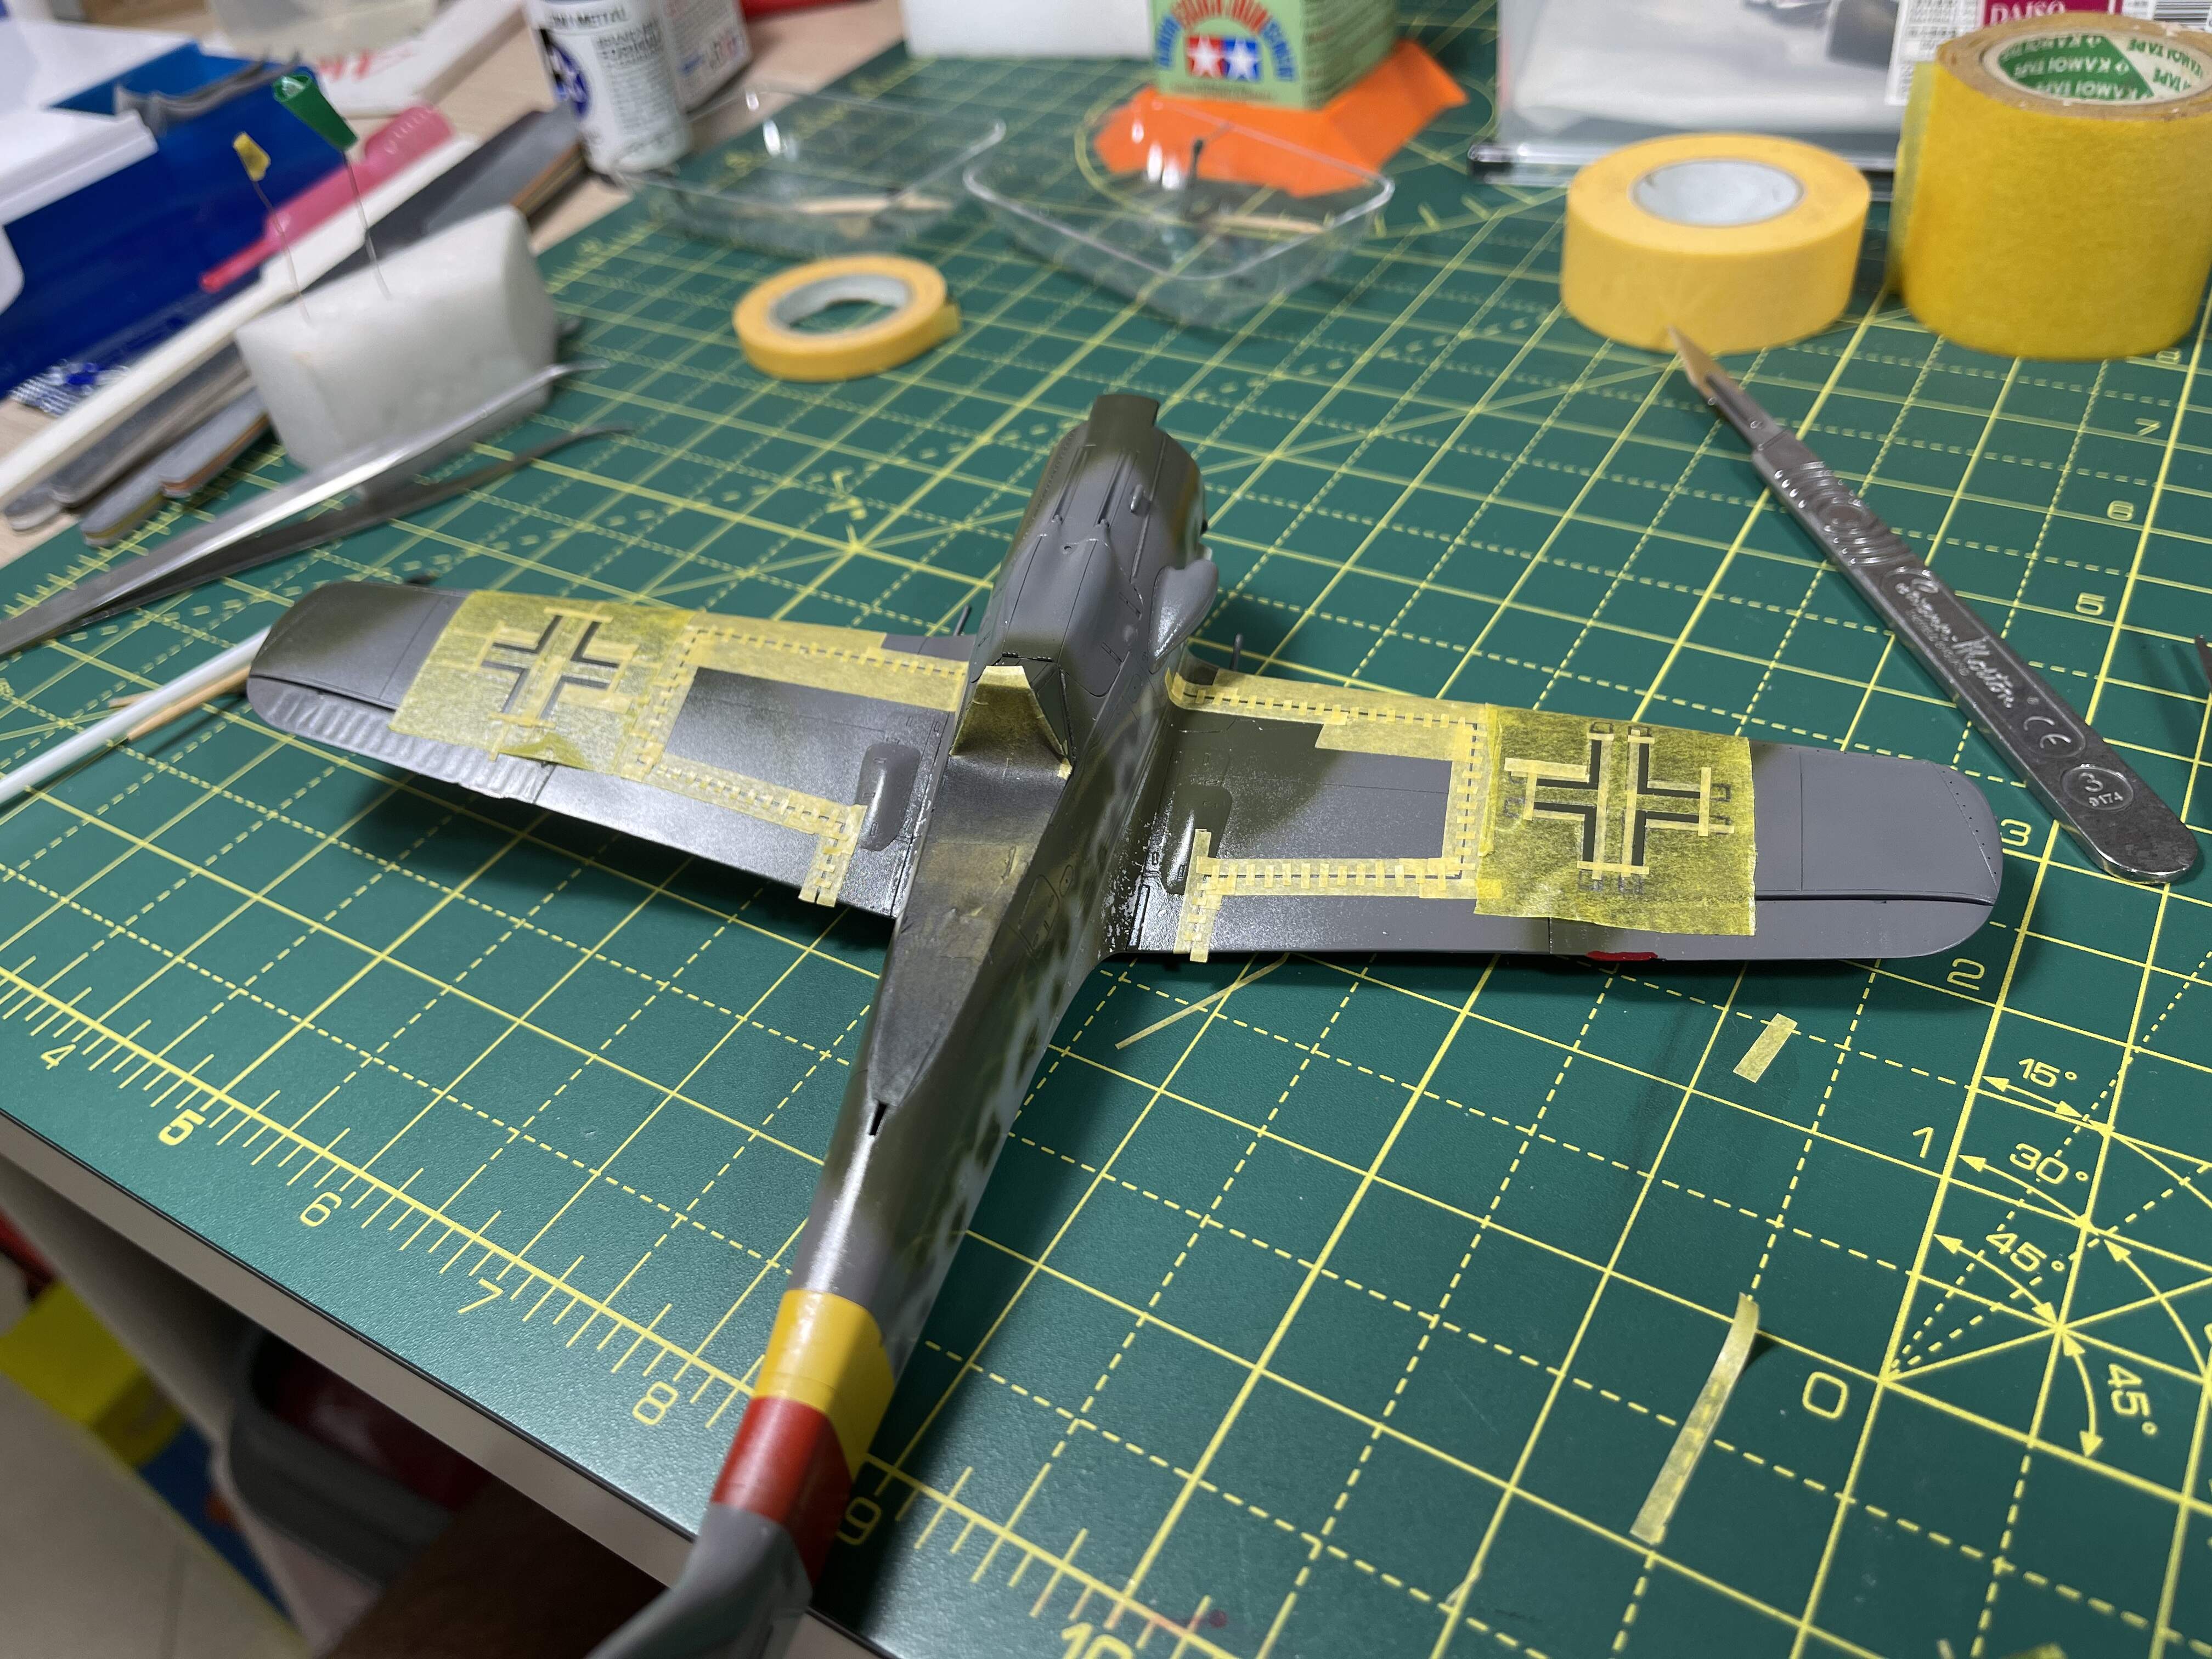
And then it was straight to the paint booth
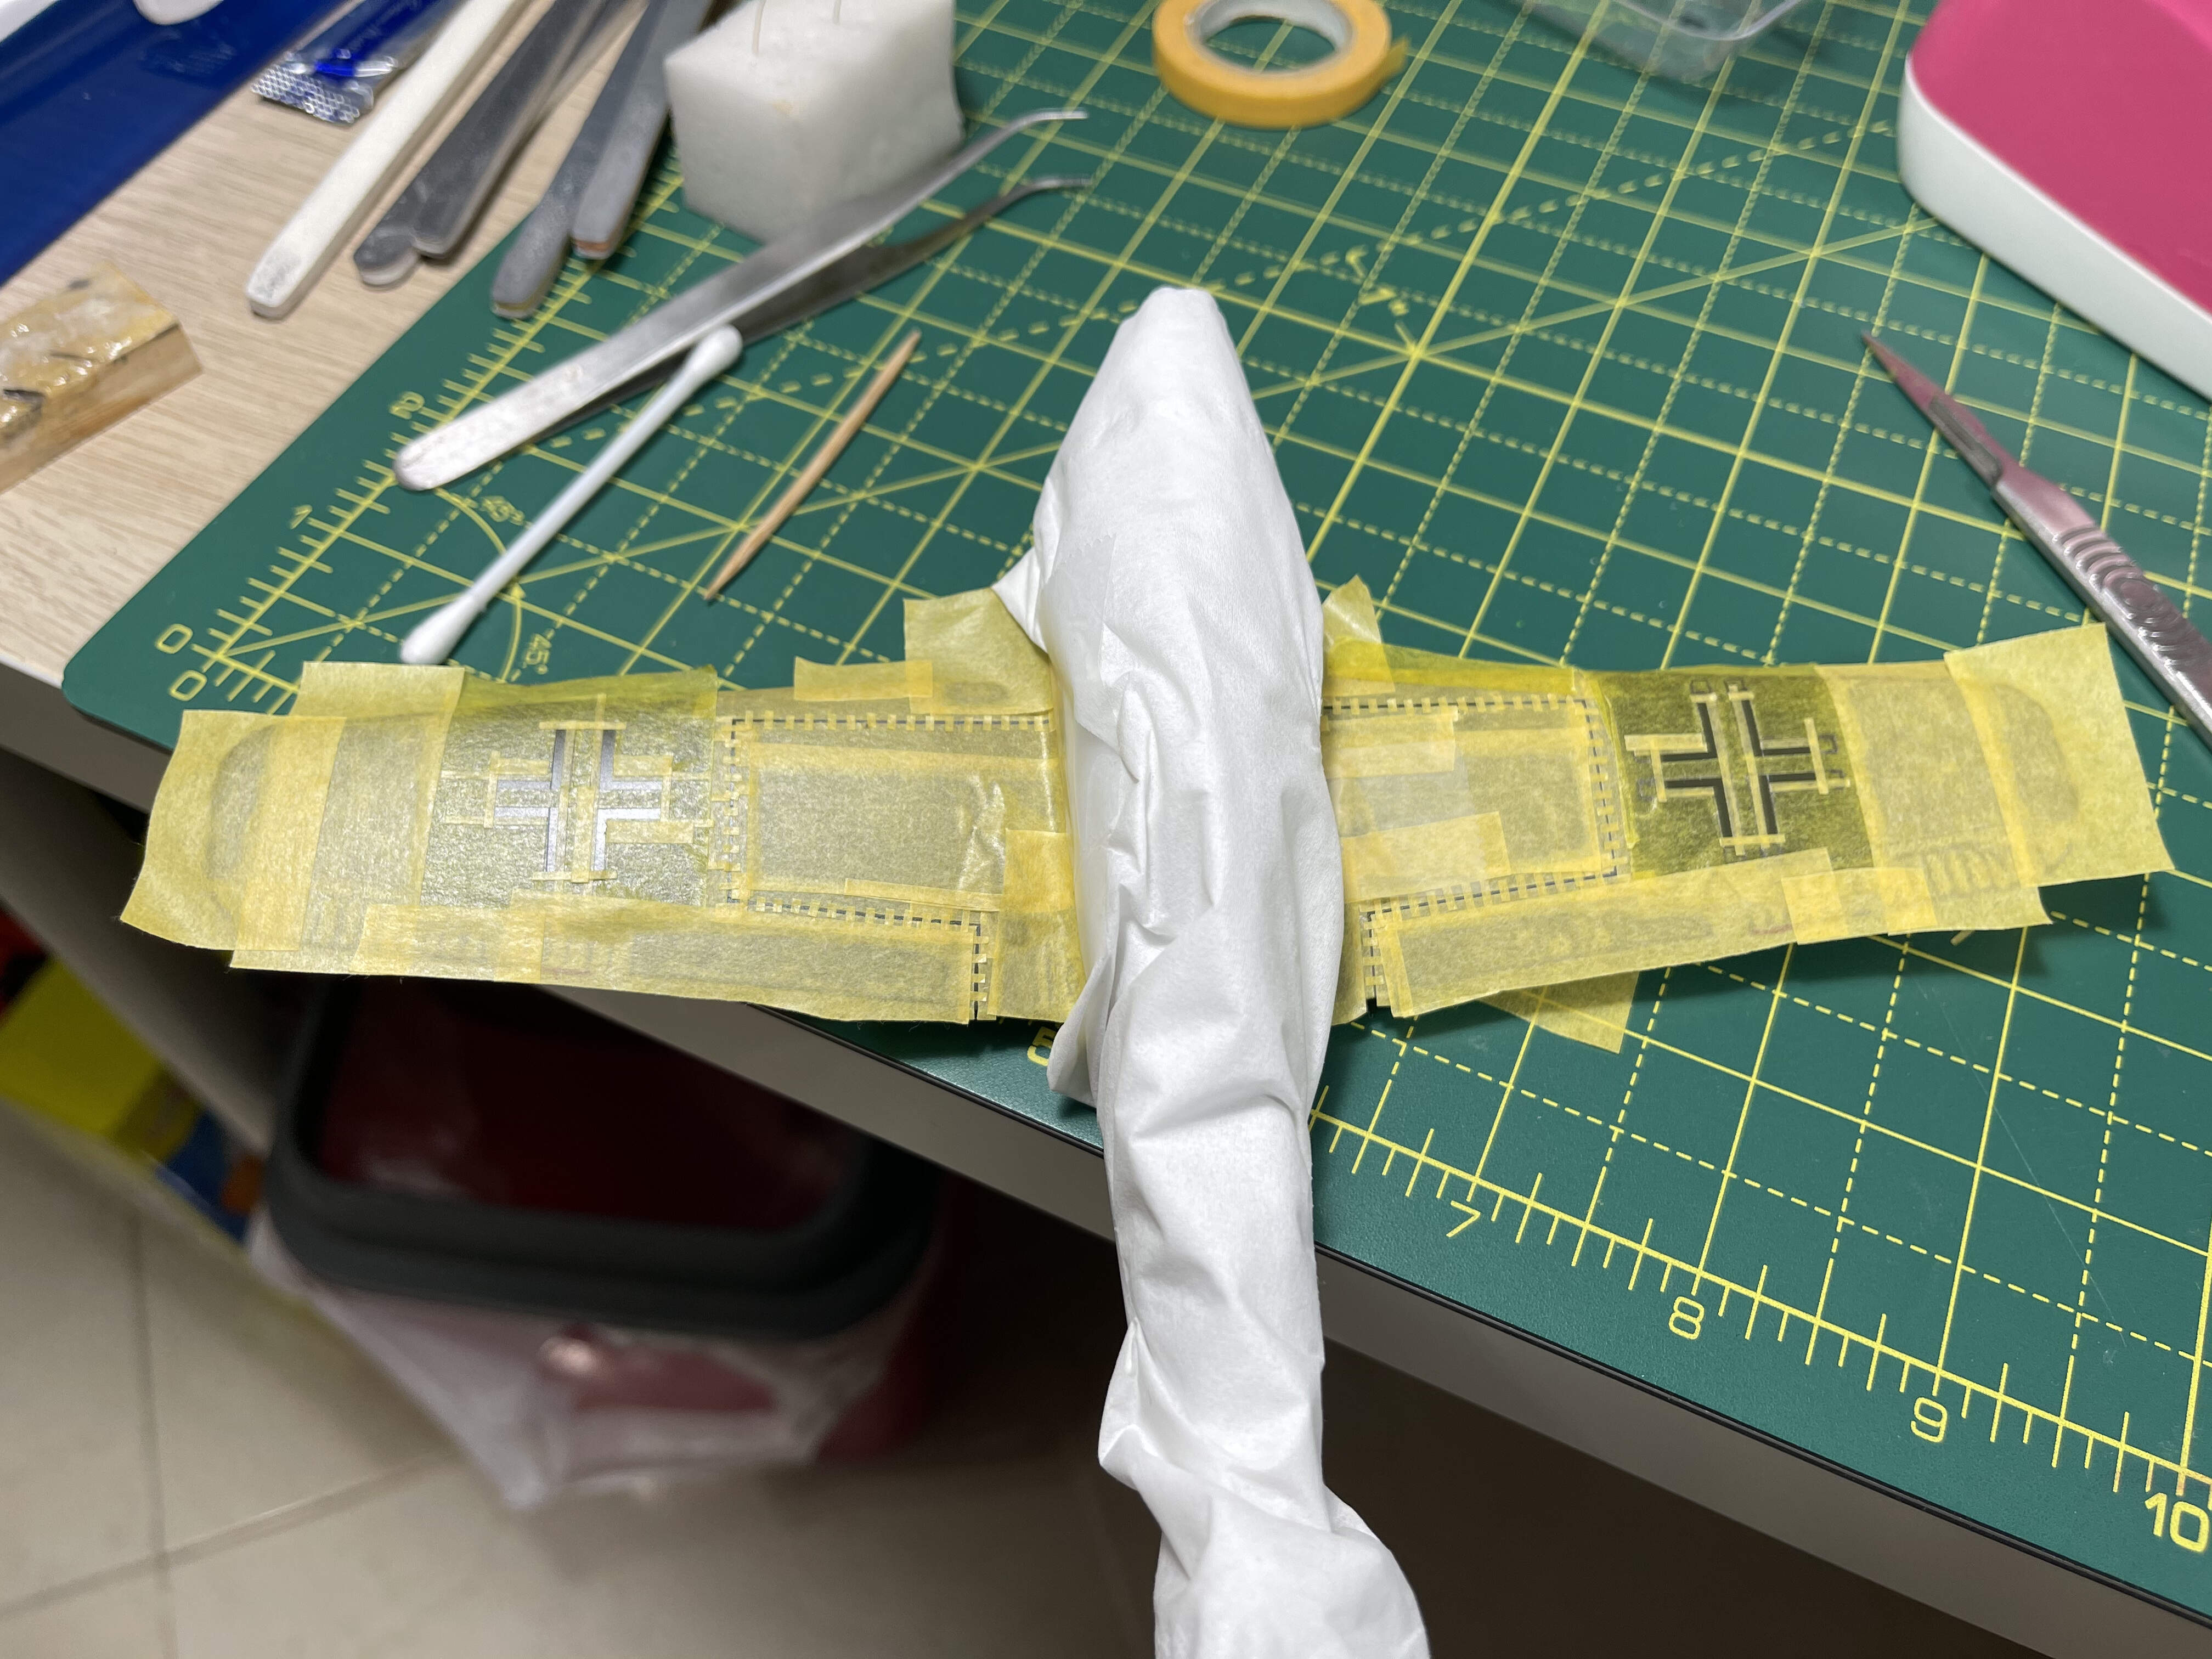
Only when I removed the masks did I see my mega goof up
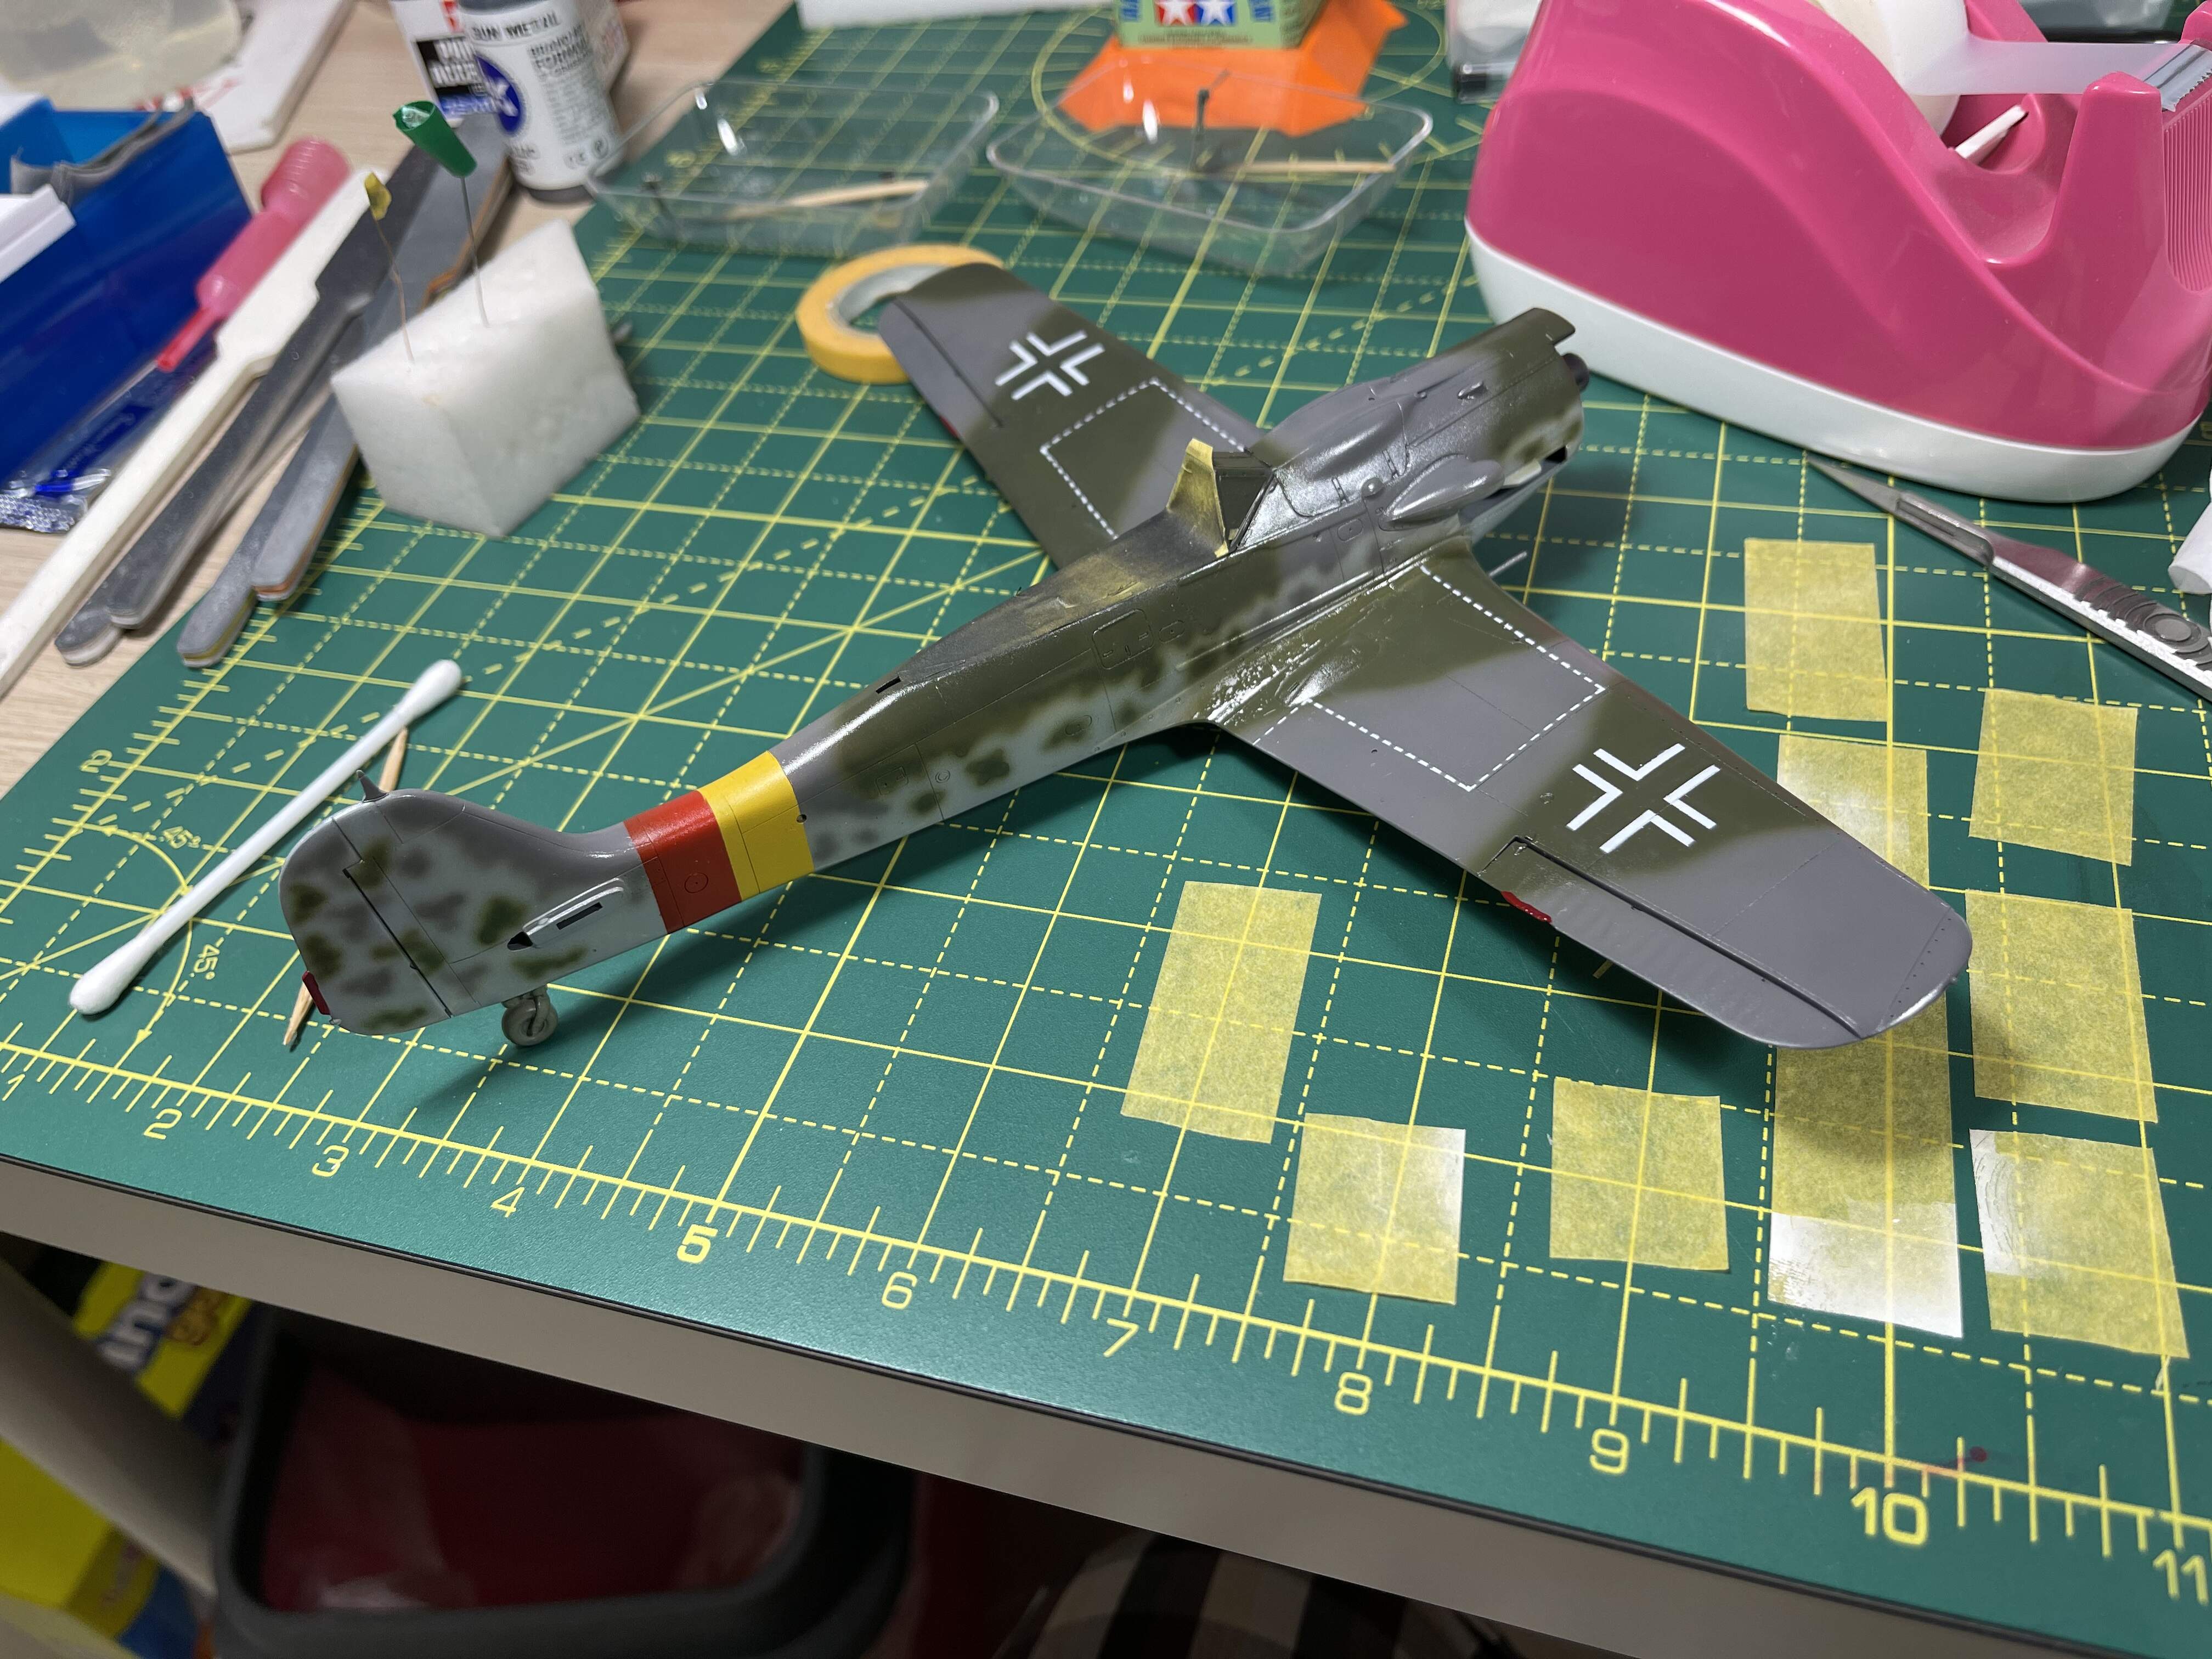
I had masked the wing crosses the wrong way 
Once I’ve kicked myself enough, I plan to repaint the camo and then the crosses. More importantly, I’ve learnt a very valuable lesson - don’t push your luck.
I’ll need a day or two to cool off before I tackle this again. So if you need me, I’ll be in the corner sulking. 
Thanks for looking
Cheers
2 Likes
Raj, can you help me, please? I don’t see what you did wrong … 
I have built exactly the same version many years ago and just double checked it with what I can see from your build. There’s nothing wrong from my side of the monitor. AllI see is some great work.
Stay safe!
Torsten
Oliver,
Looking forward to your build. I have the Academy and Hobbyboss kits. I want to do a Tokyo 1946 WIF. I’ll watch your build for ideas.
Take care and stay safe,
Don “Lakota”
Hey Torsten
I messed up the wing crosses. The vertical spacing is half of the horizontal spacing. I thought I could ignore it but my own OCD got the better of me
Regards
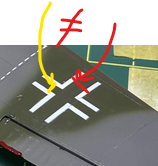
That’s not OCD, nobody can ignore it.
I would go crazy if I could not fix it
1 Like
Operation Salvage
That’s what I’m calling my attempts to fix my botched work. I measured the correct dimensions and masked the crosses again.
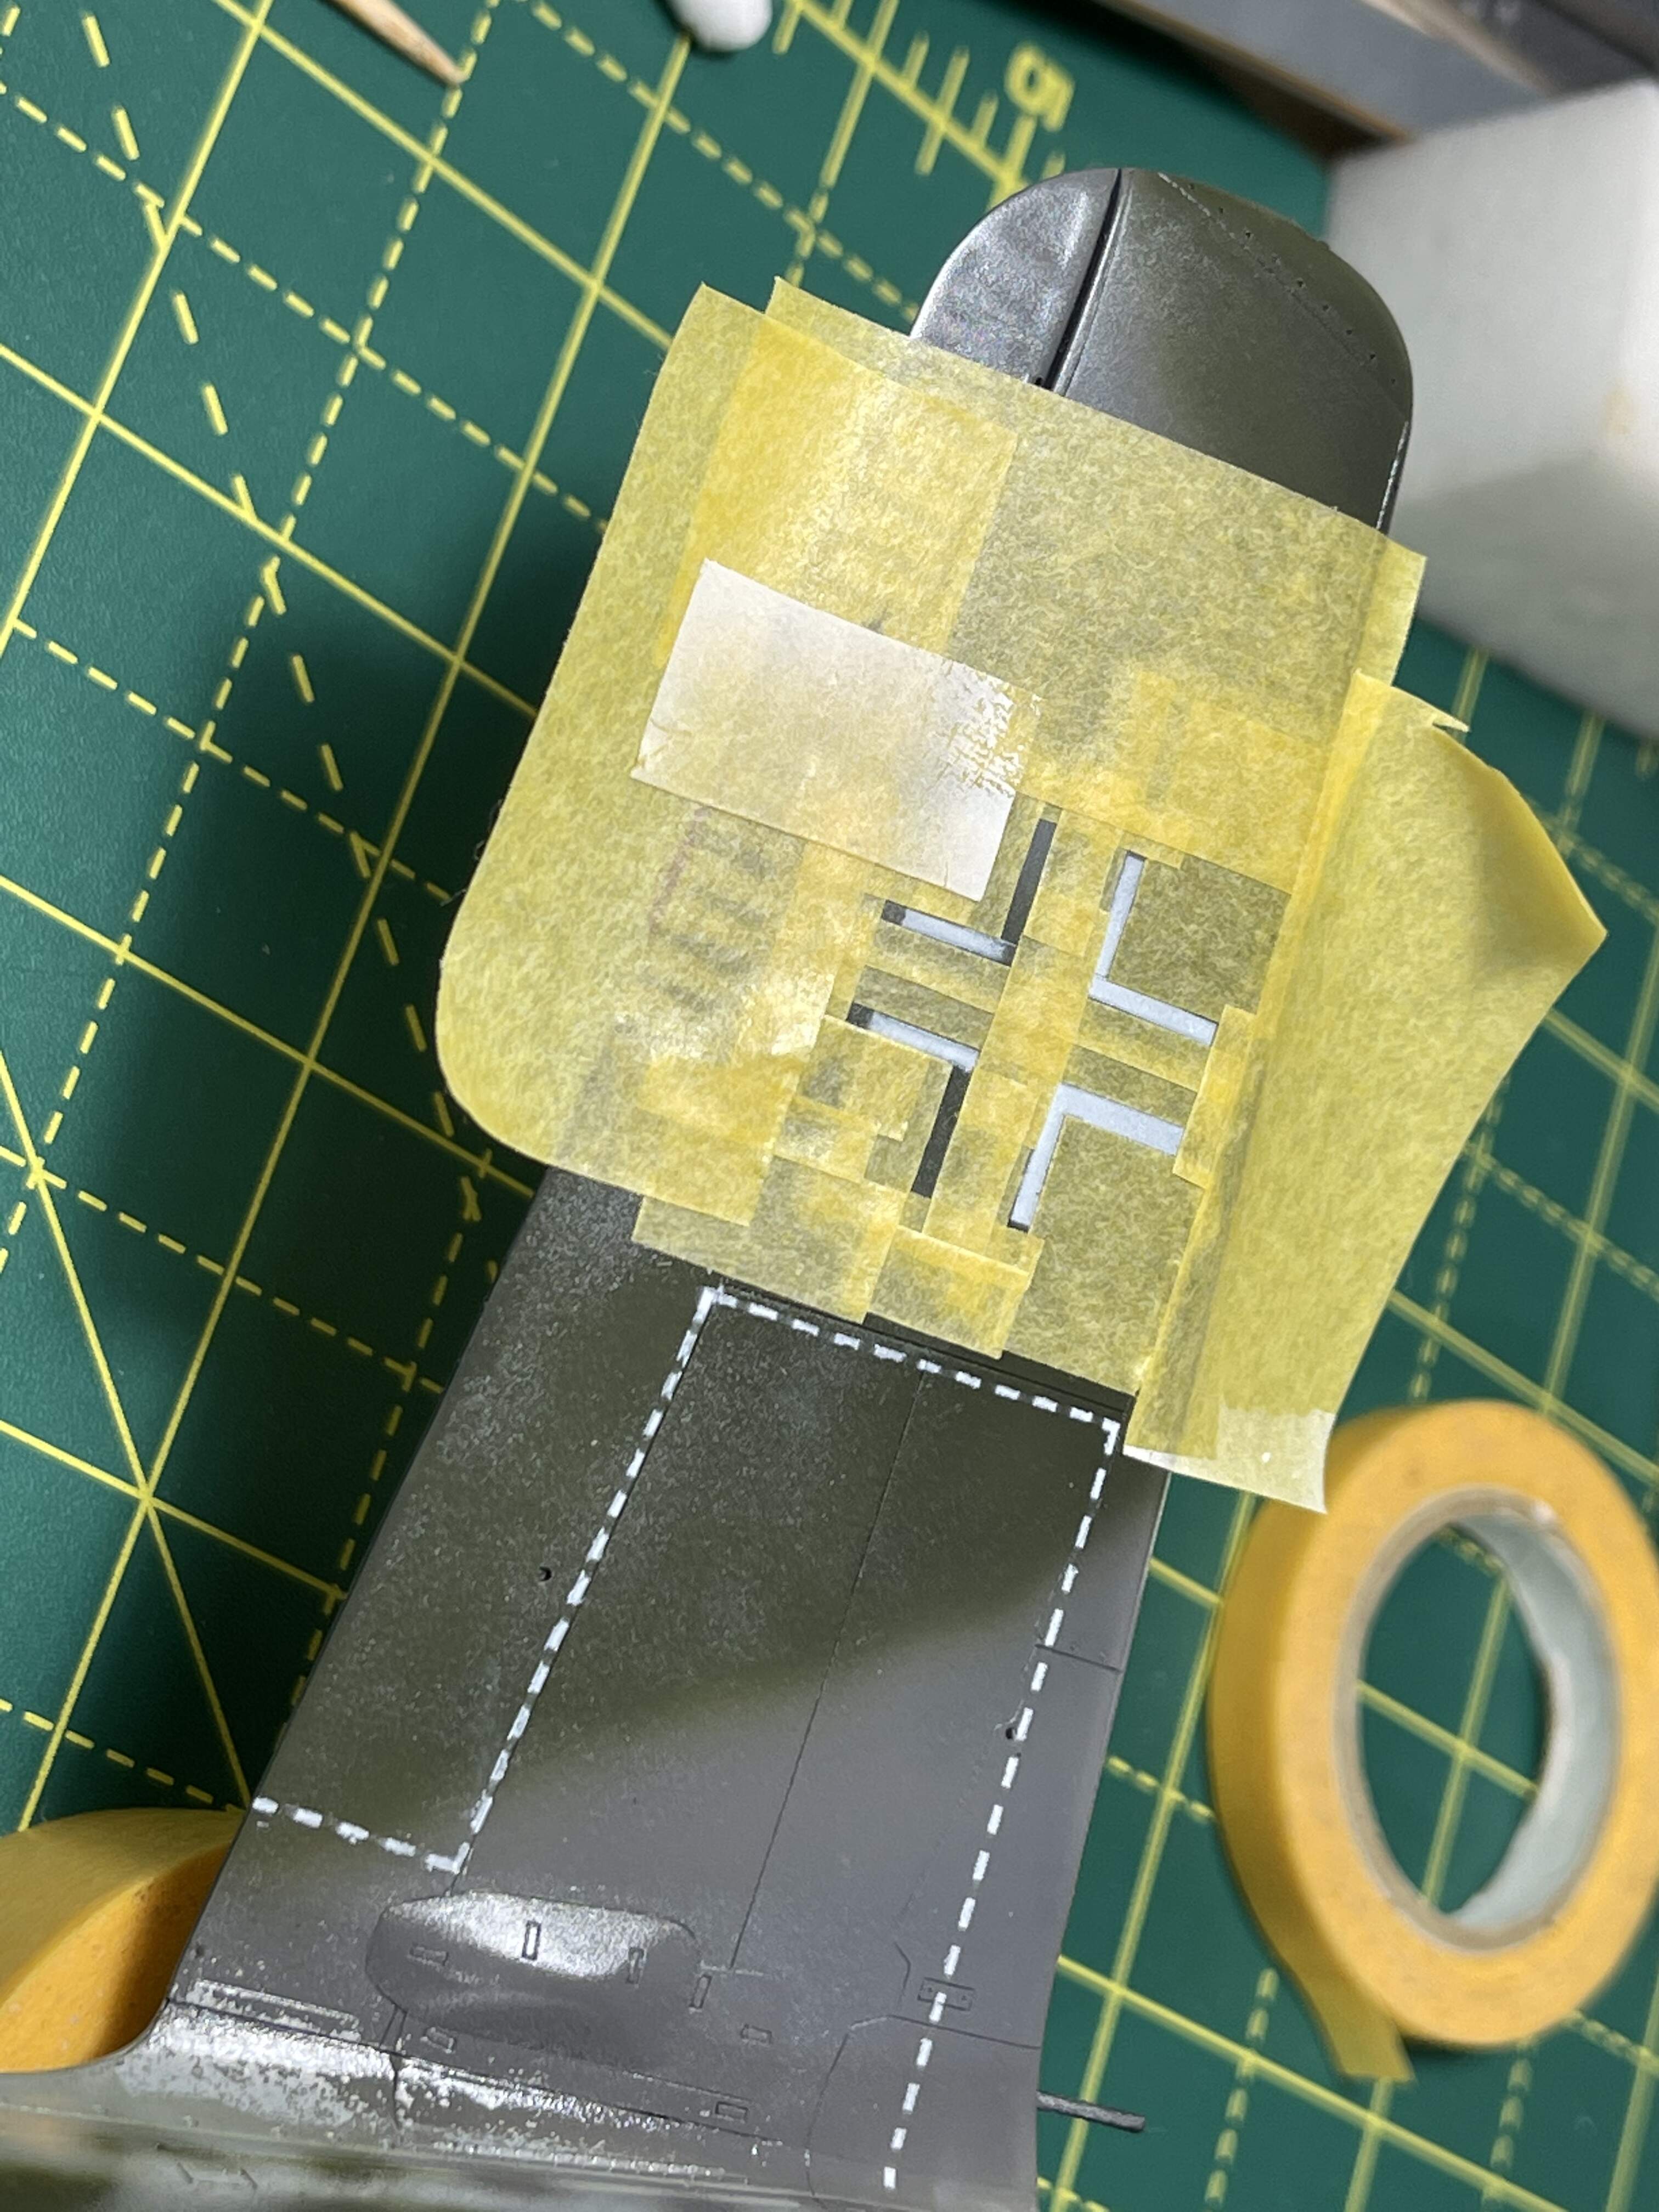
And it came out acceptable. Need more practice making custom masks.
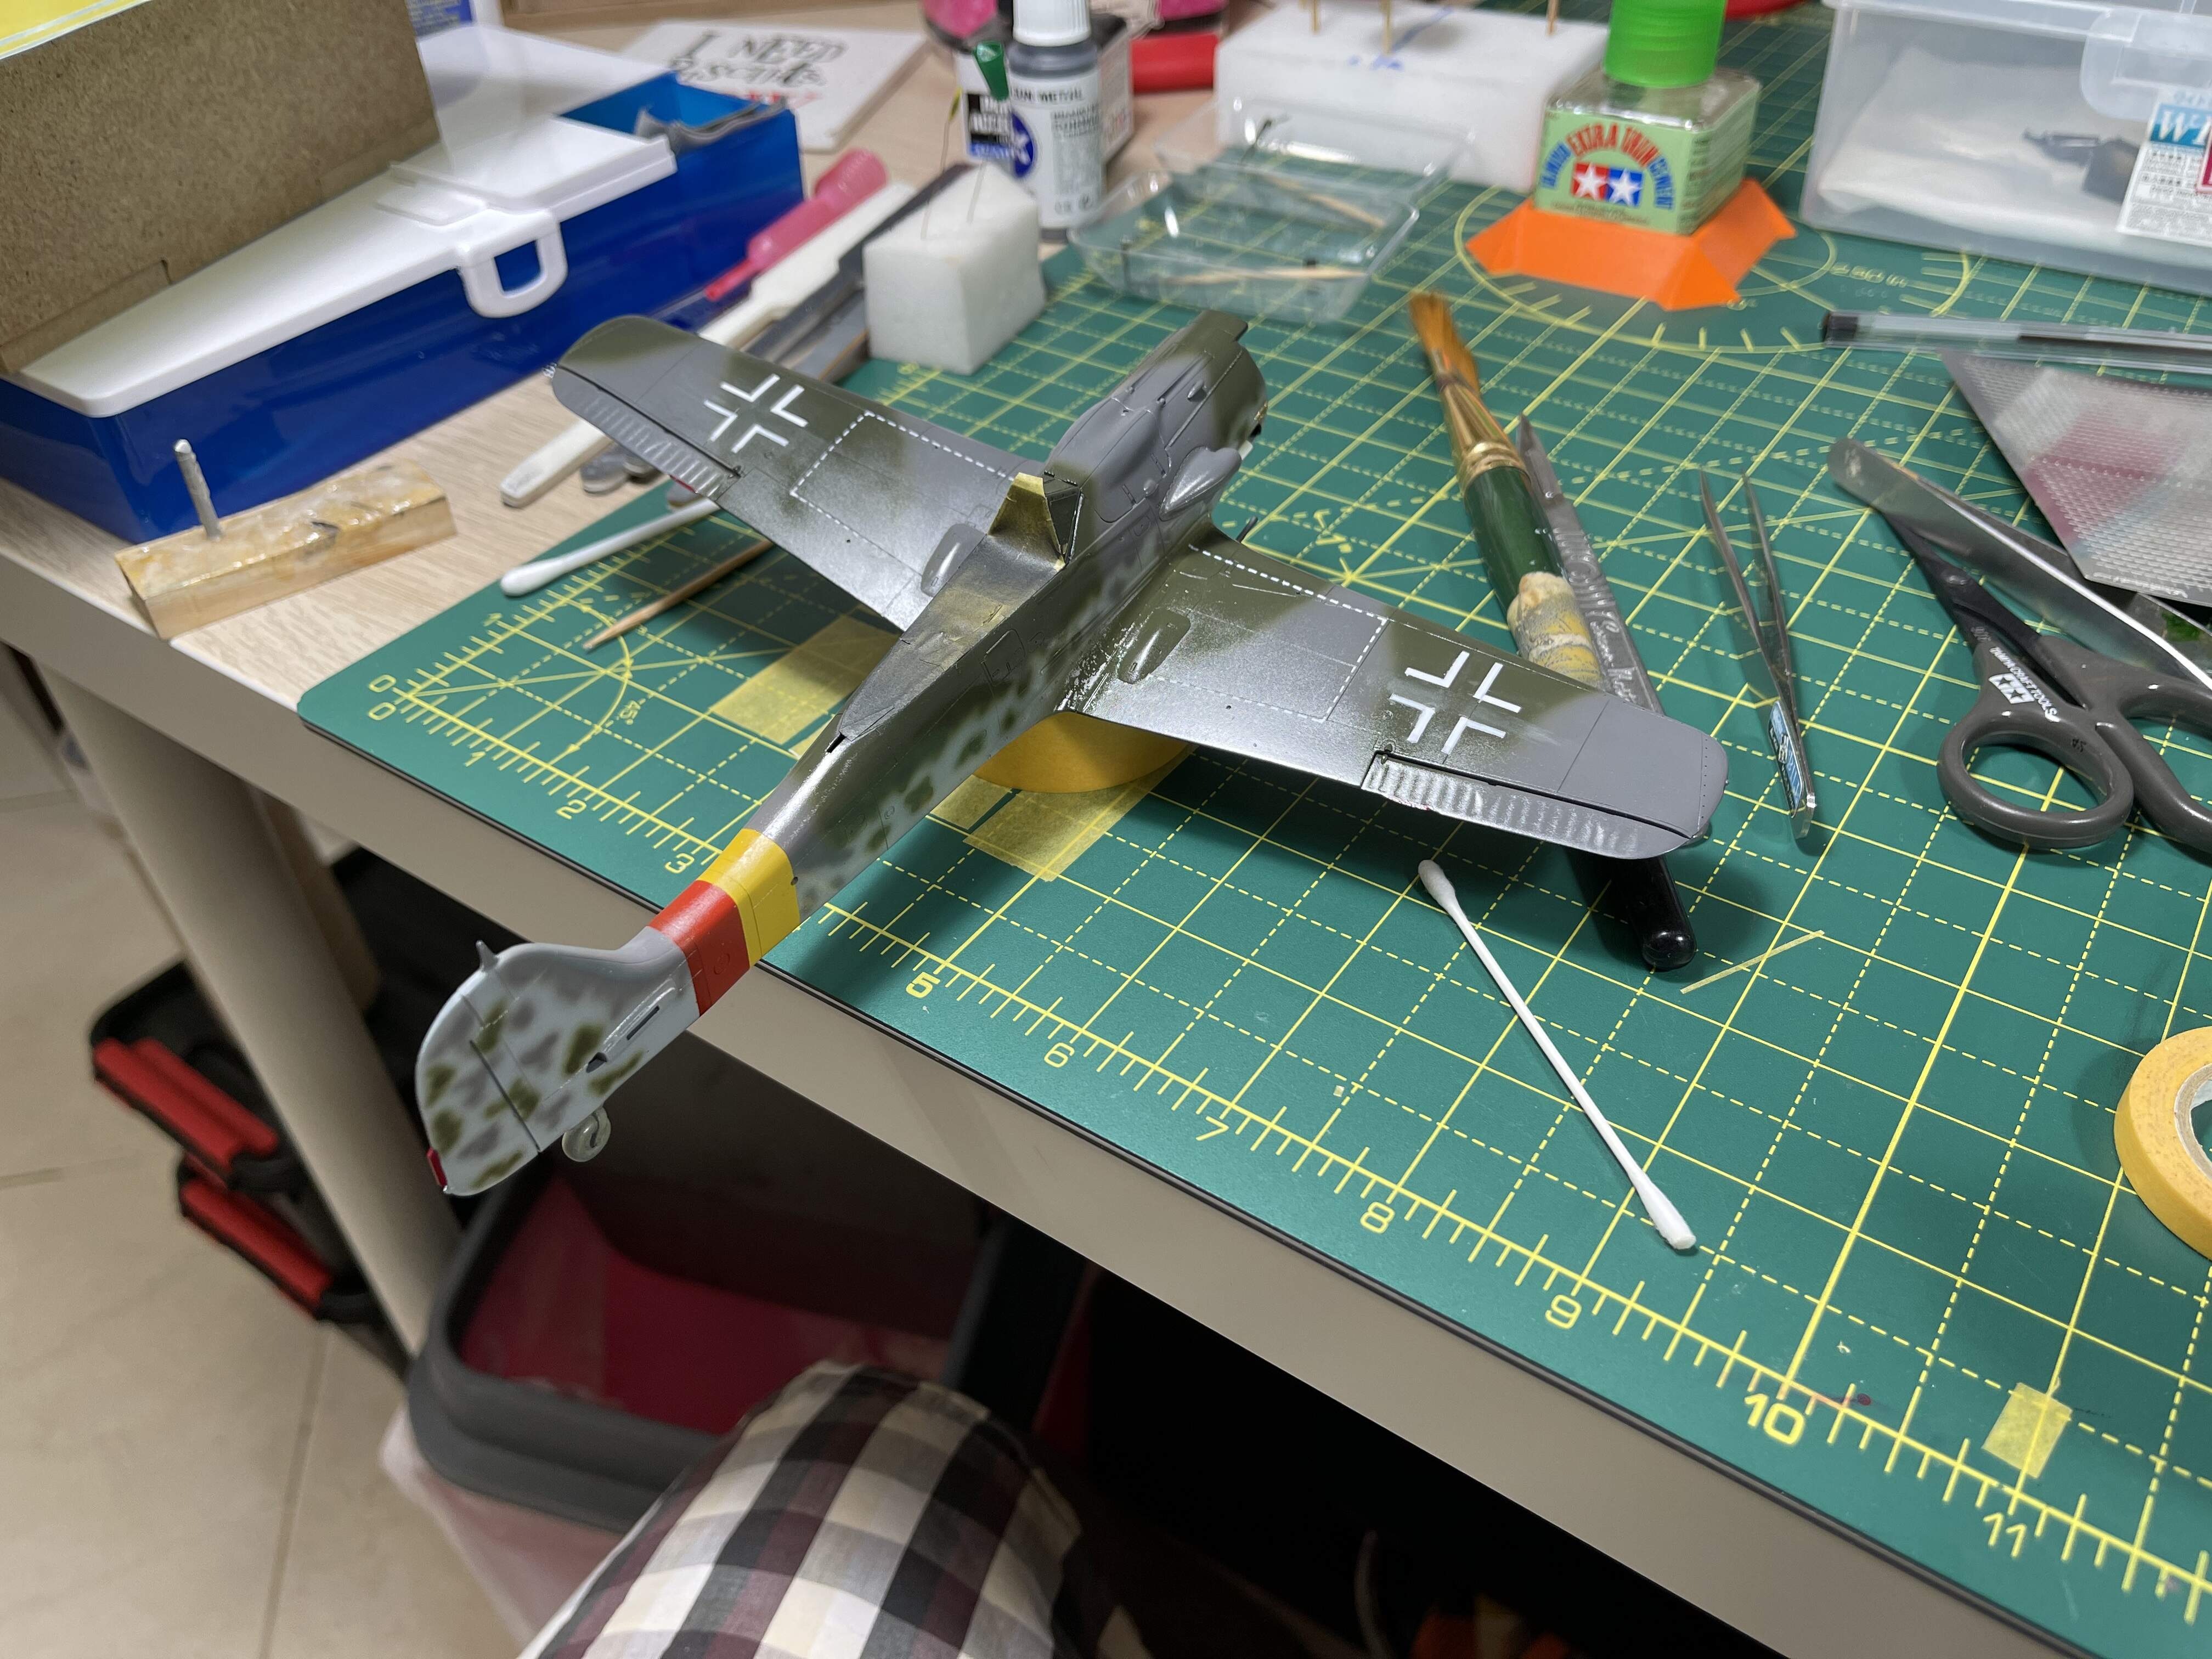
And while I was at it, I went ahead and masked the fuselage and lower wing crosses as well.
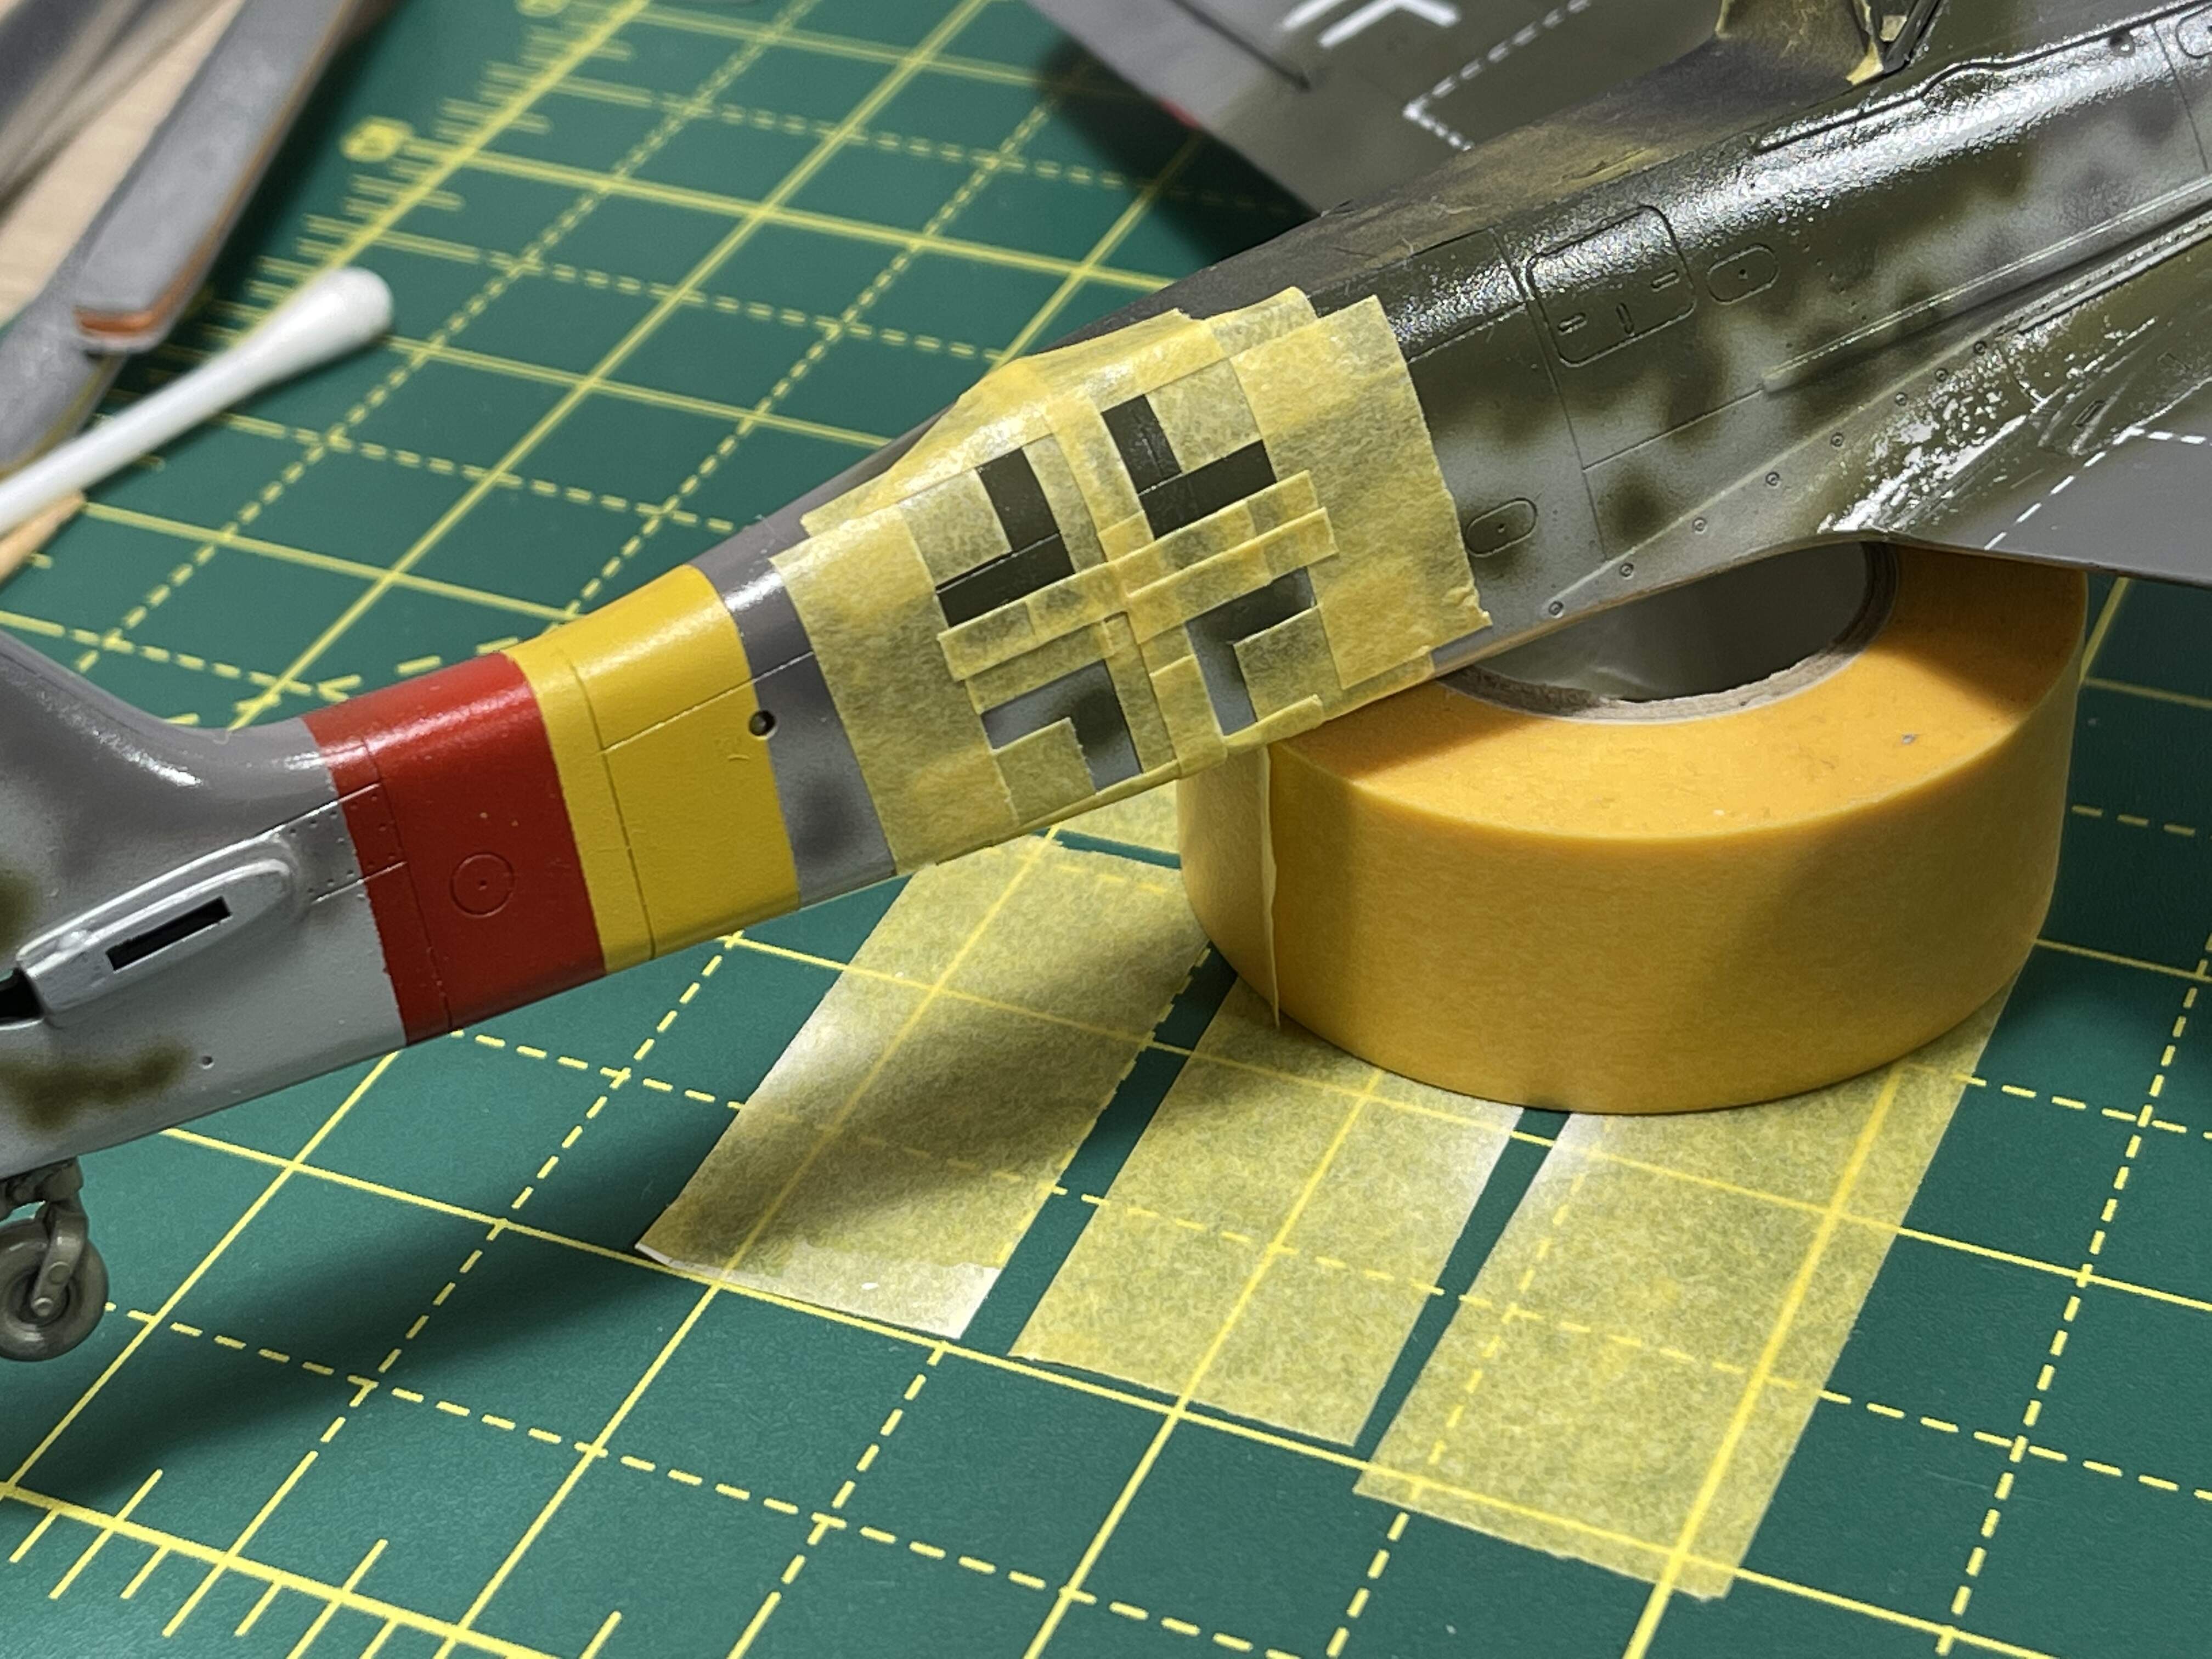
End result
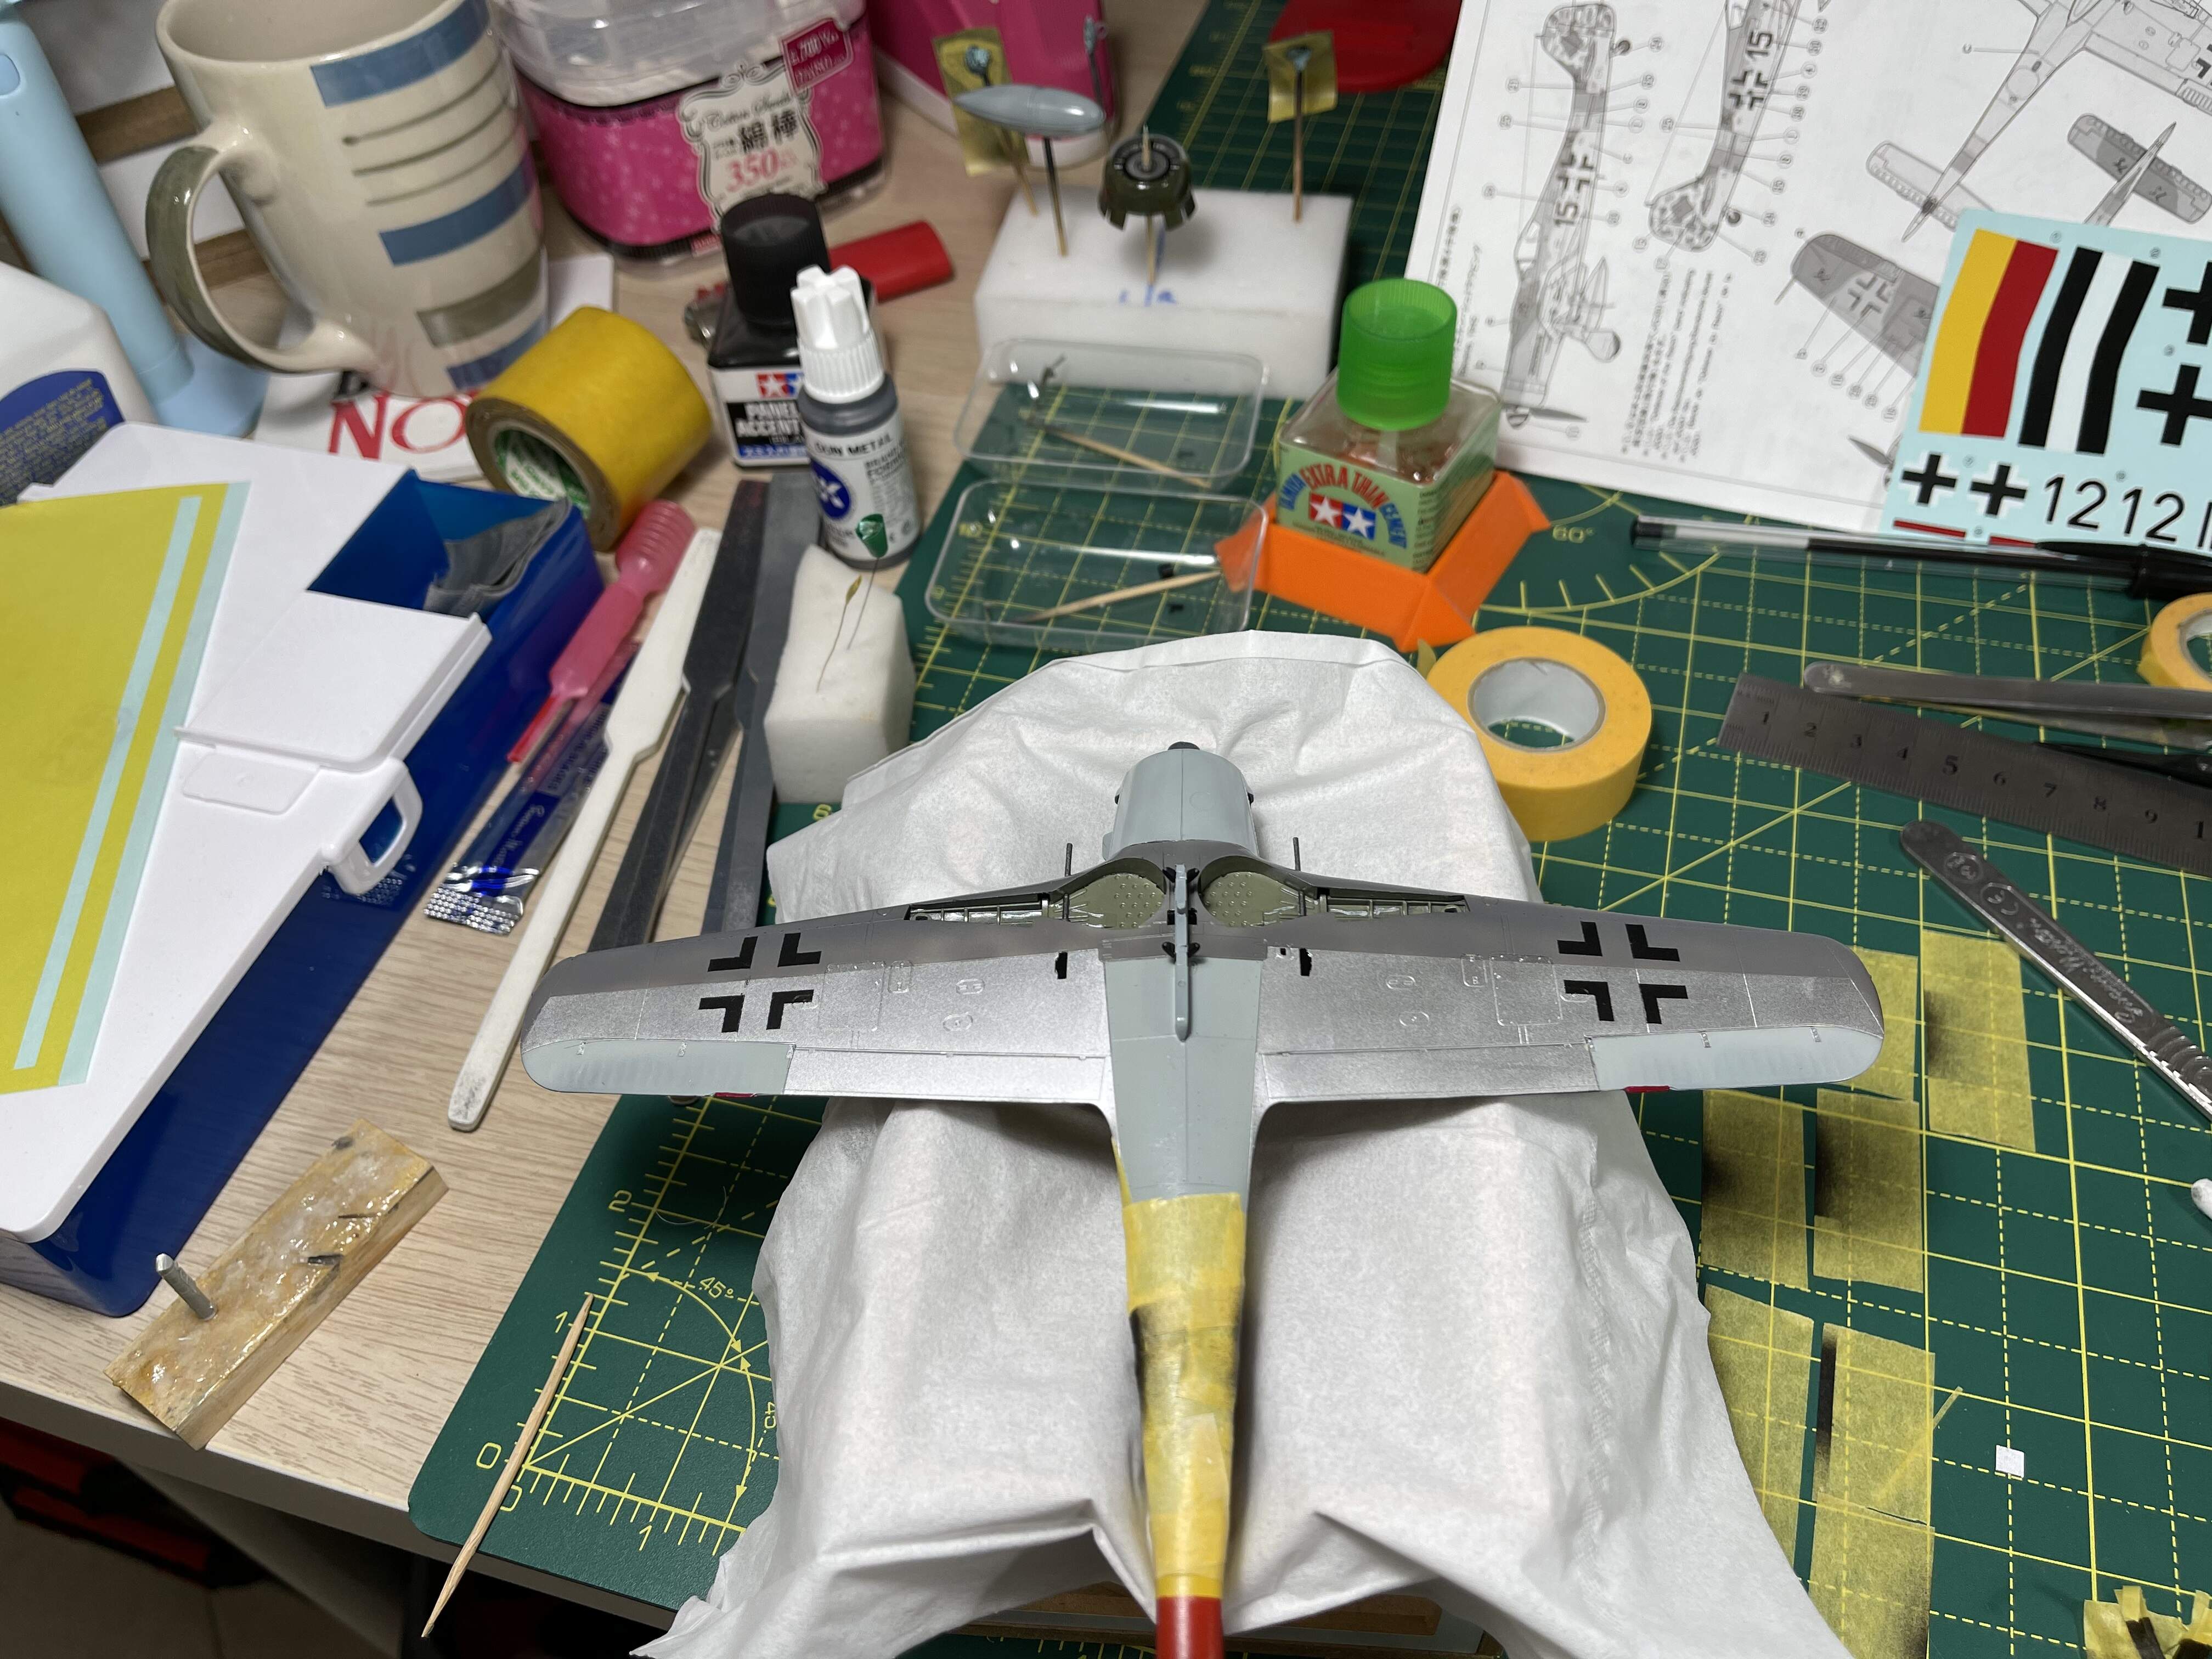
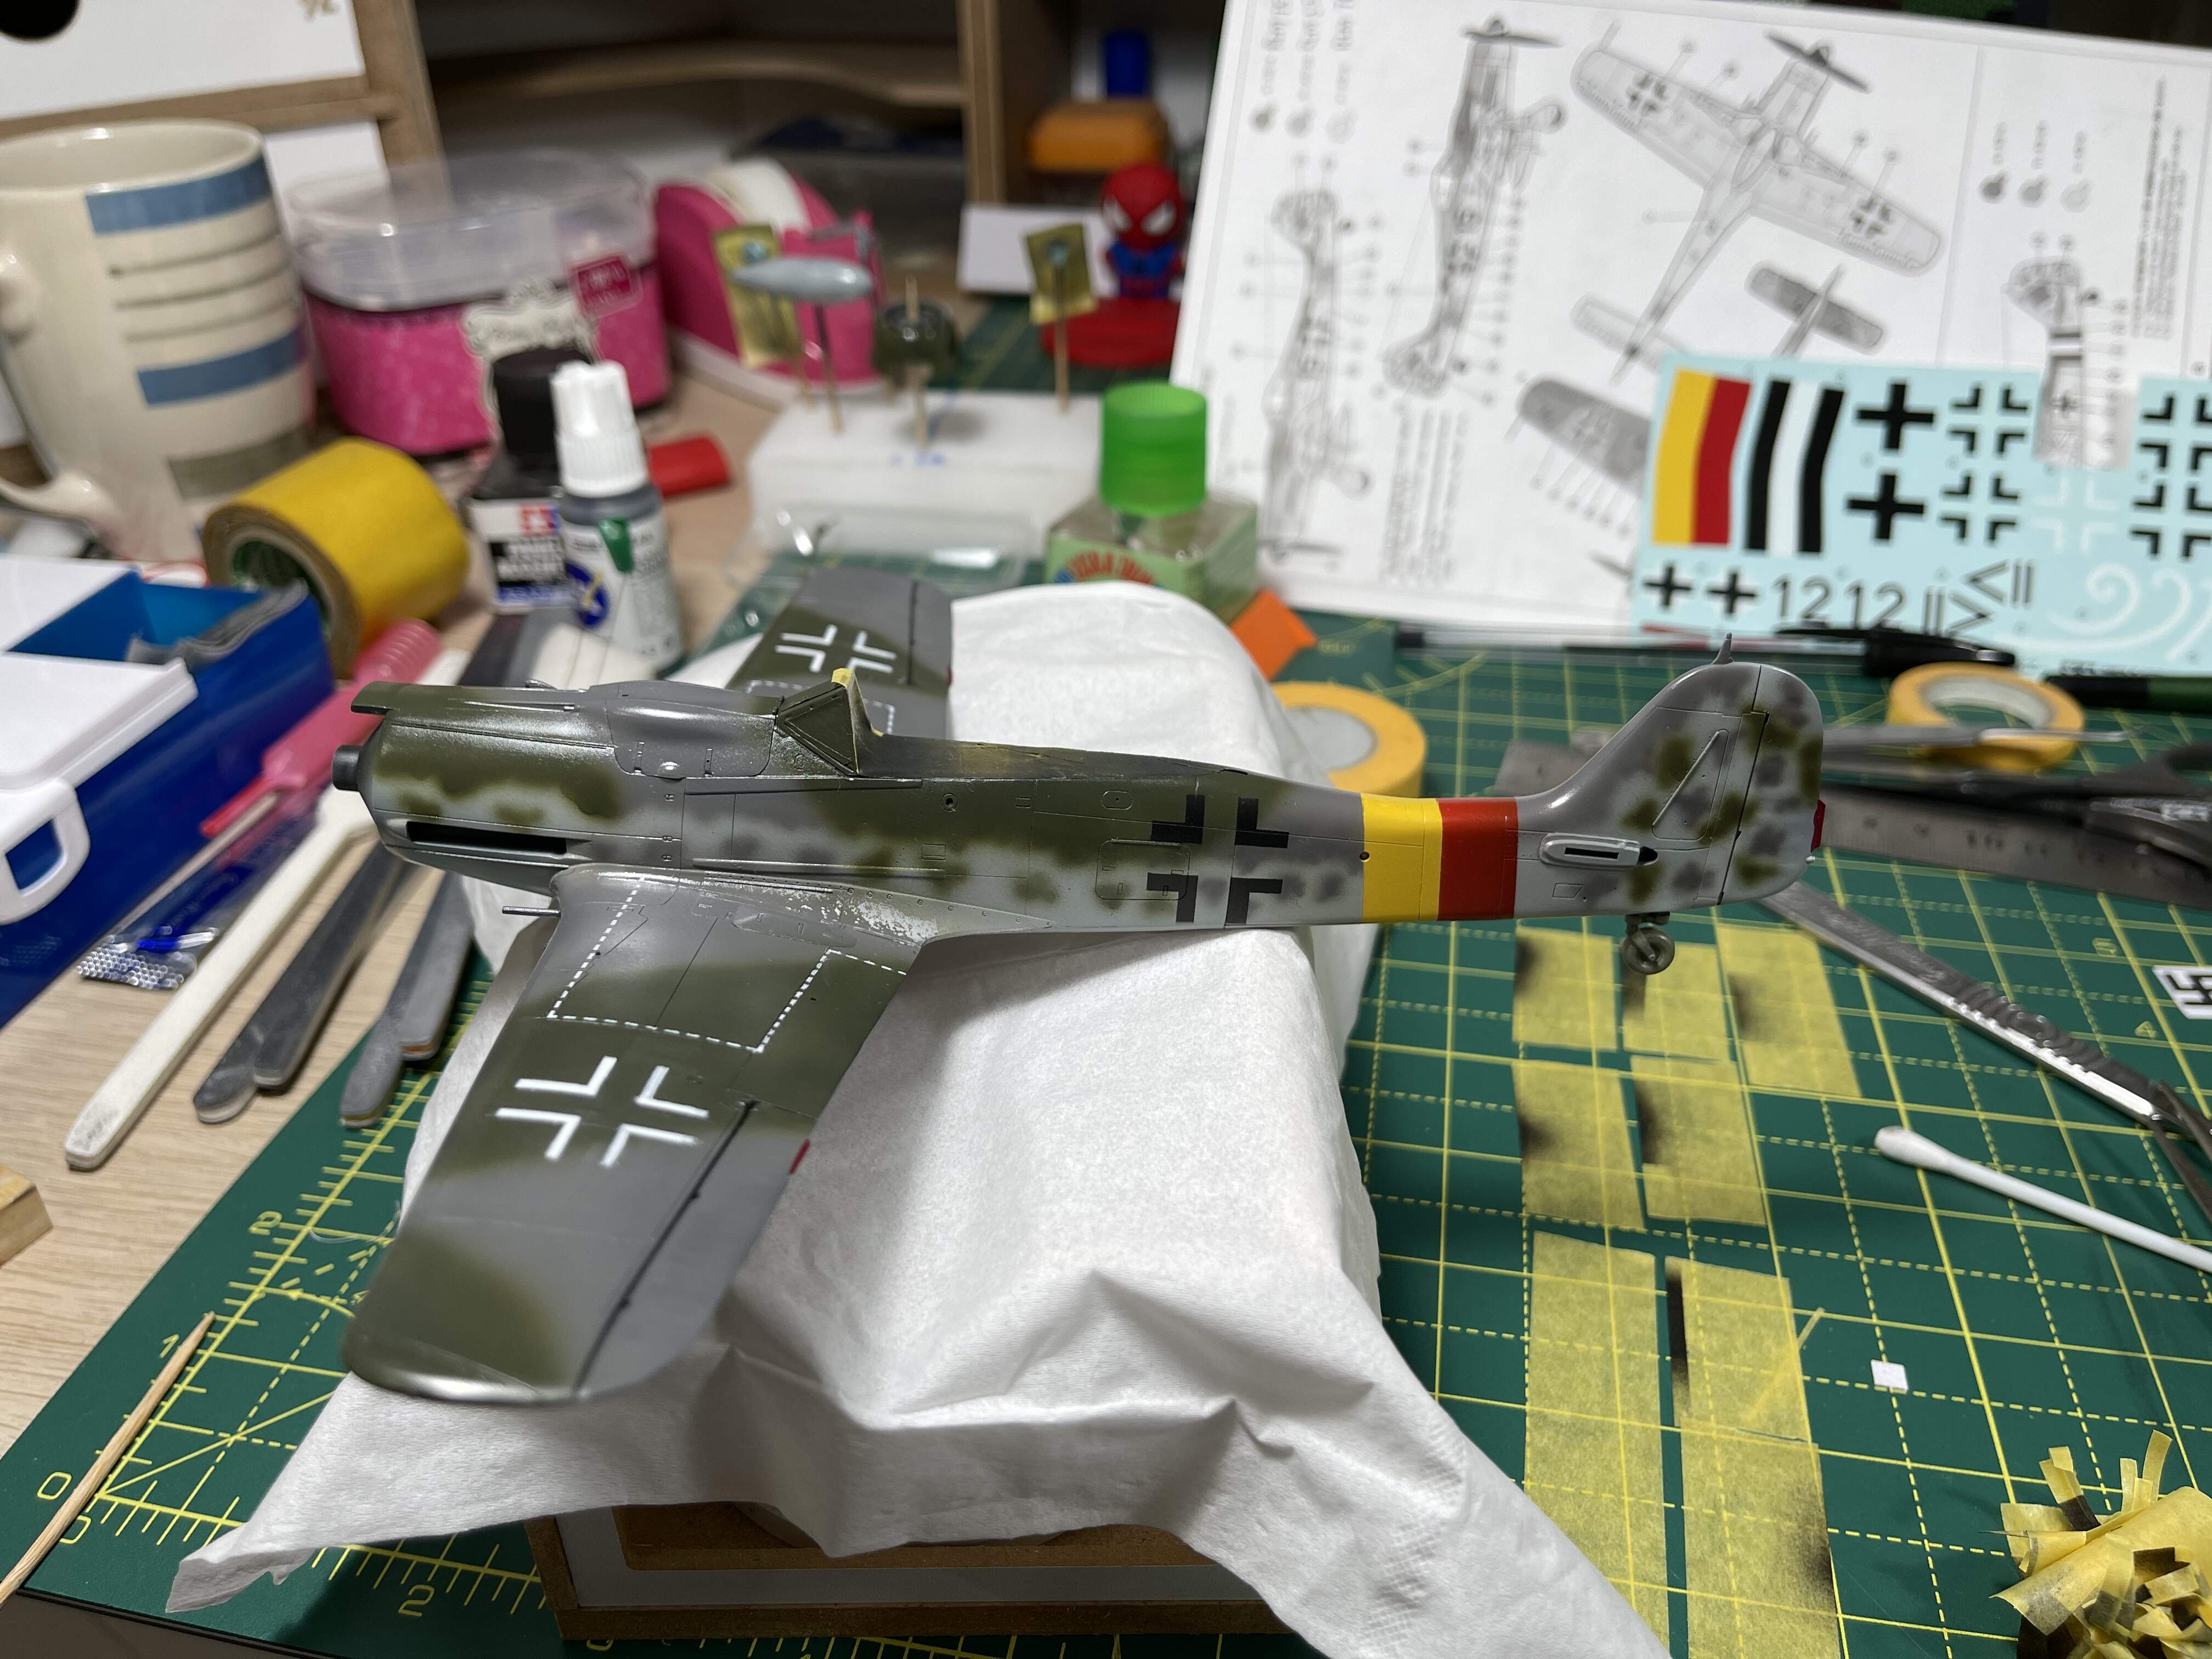
Hope to finish the rest of the decals tomorrow before I tackle the weathering bit.
Thanks for looking
Cheers
7 Likes
Impressive stuff, Raj! I would also redo the crosses if it was me. However, it would never be me as my skills are not good enough the mask correctly.
Looking good now after the remake!
1 Like
Raj,
great recover operation! The camo looks spot on and I love the lower metal shining finish!
Oliver
1 Like
Hi Don,
if You want to build the F8F-2 from Academy look out for the bulges of the cannons.
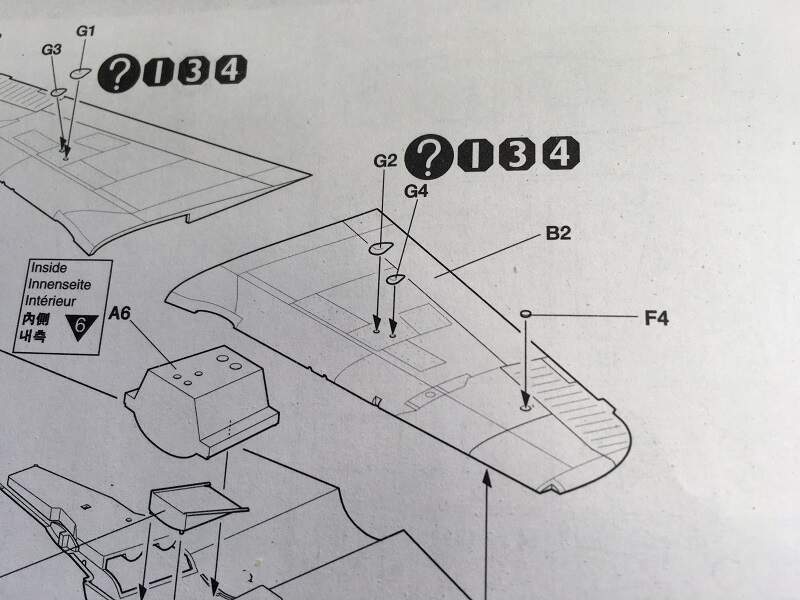
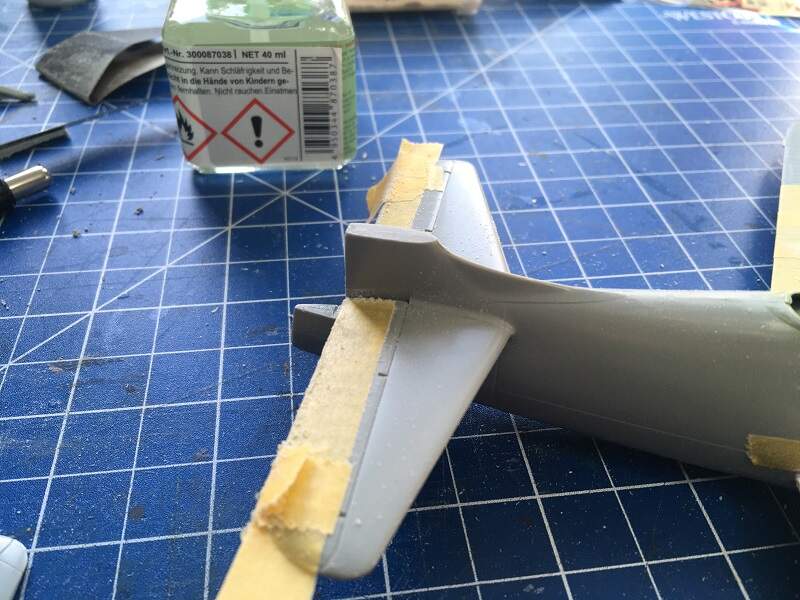
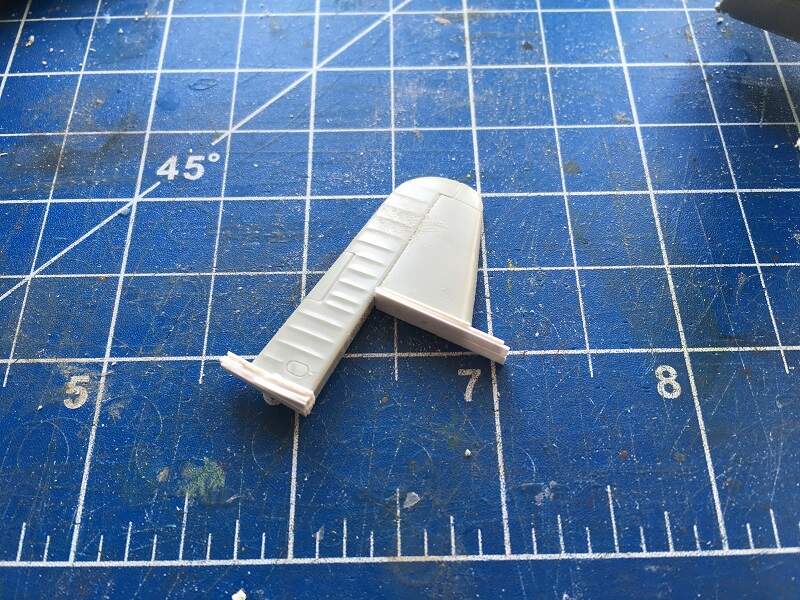
The bigger bulges are drawn to the inner wing root but my reference show them to the outer wing. Additionally, the shape of the bulges seems to be too big. Hence, I dropped my plan to build the F8F-2 version and backdated my kit. This is possible from the beginning, but I had already fixed the F-2 tail. So, I cut out the tail and tried to fix the older version tail with some styrene.
The kit´s plates for the exhaust seem to be the plates for the nightfighter.
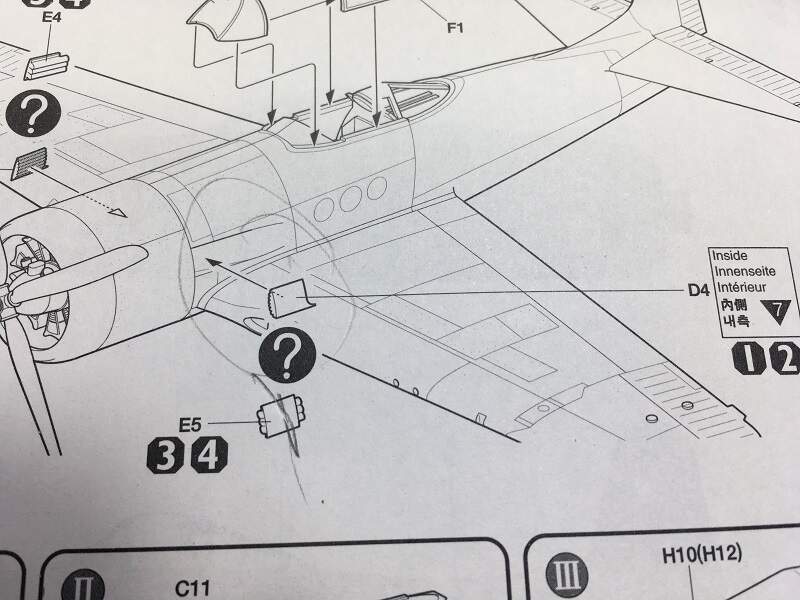
I think, the plates should run straight. But, I am not sure here.
Most flaws are corrected now and the Bearcat is ready to get some paint.
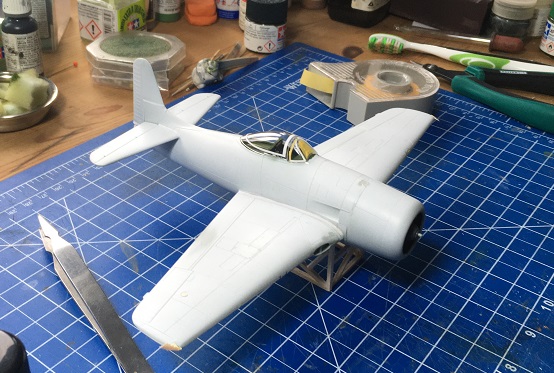
Oliver
2 Likes