With recent discussion of Stinger missiles in action I decided to put together a little scene of a Stinger crew.

With recent discussion of Stinger missiles in action I decided to put together a little scene of a Stinger crew.
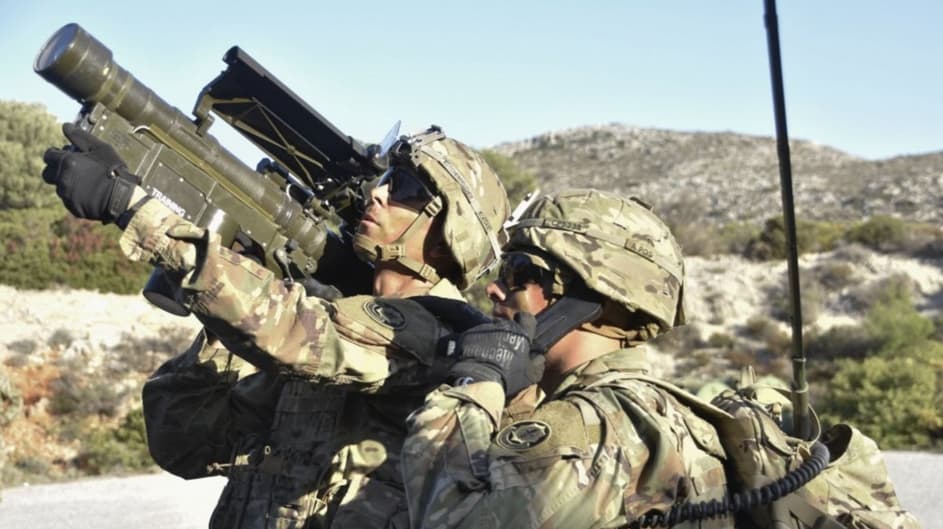
I found photos of US Army Stinger training. My goal is to modify a two man crew into a live fire combat status.
There was a lot of information on USMC training shots, but I would rather to include recent Army gear with Multicam
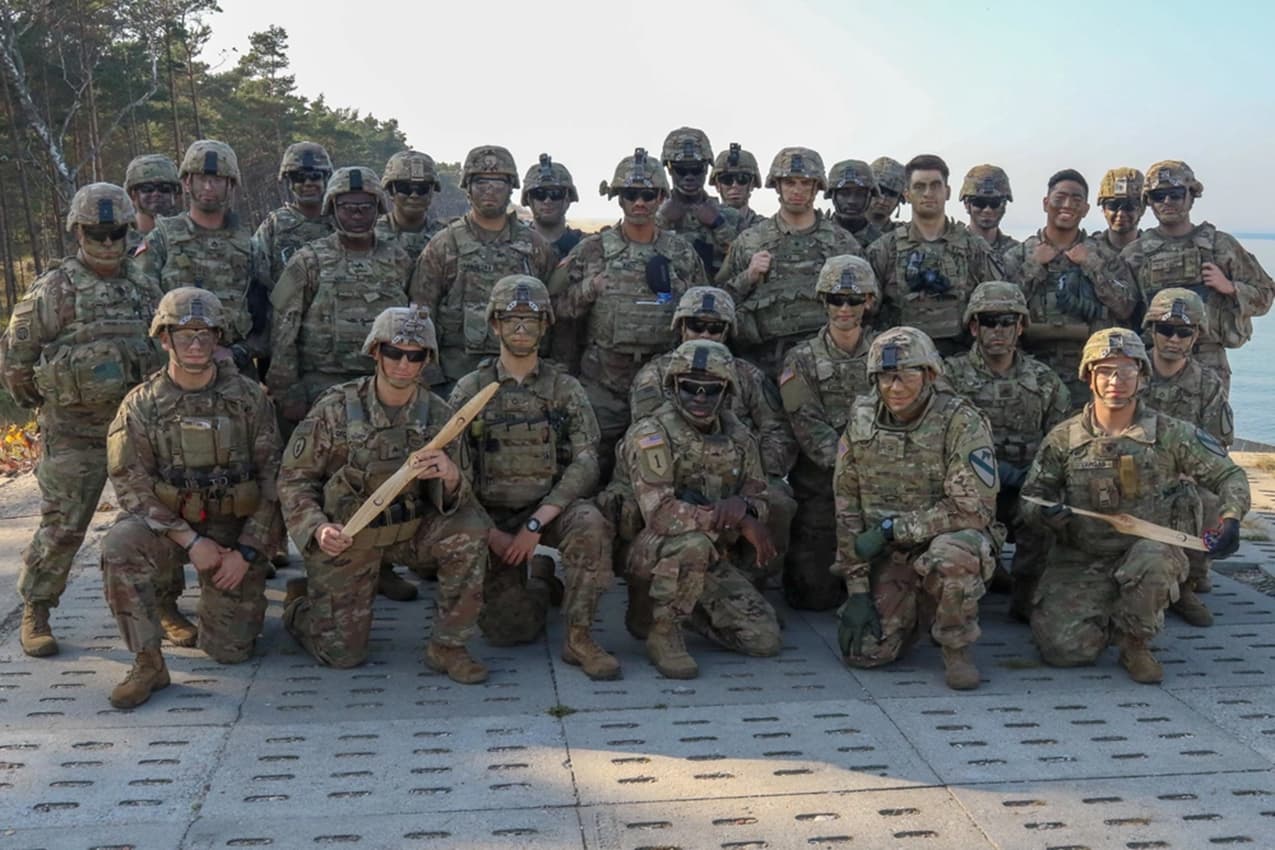
Here is a photo from a stinger training exercise with 1st Cav in 2018. Note a couple of the guys in the front row were holding target drone propellers.
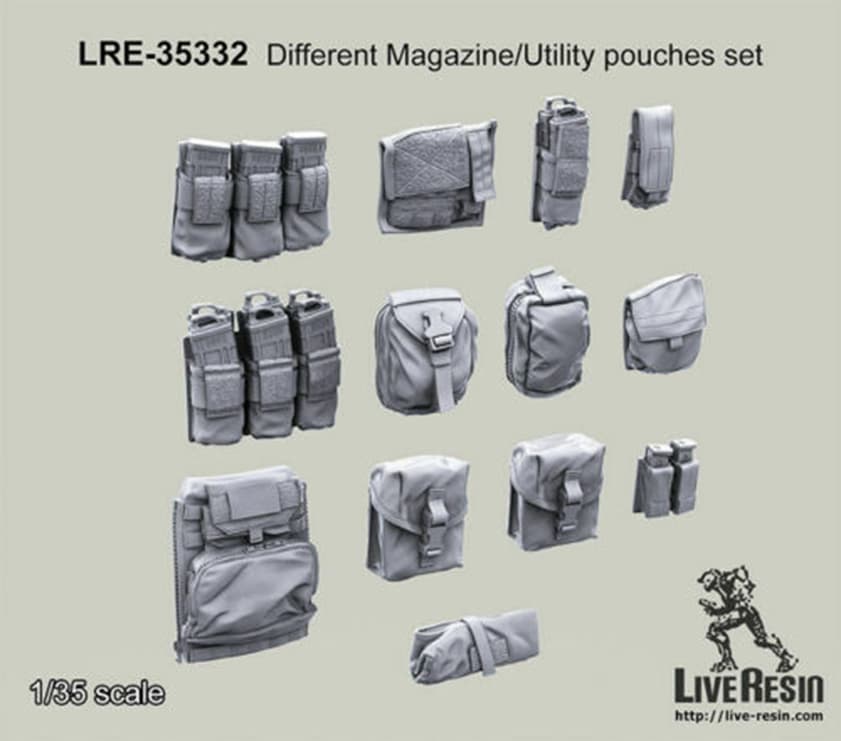
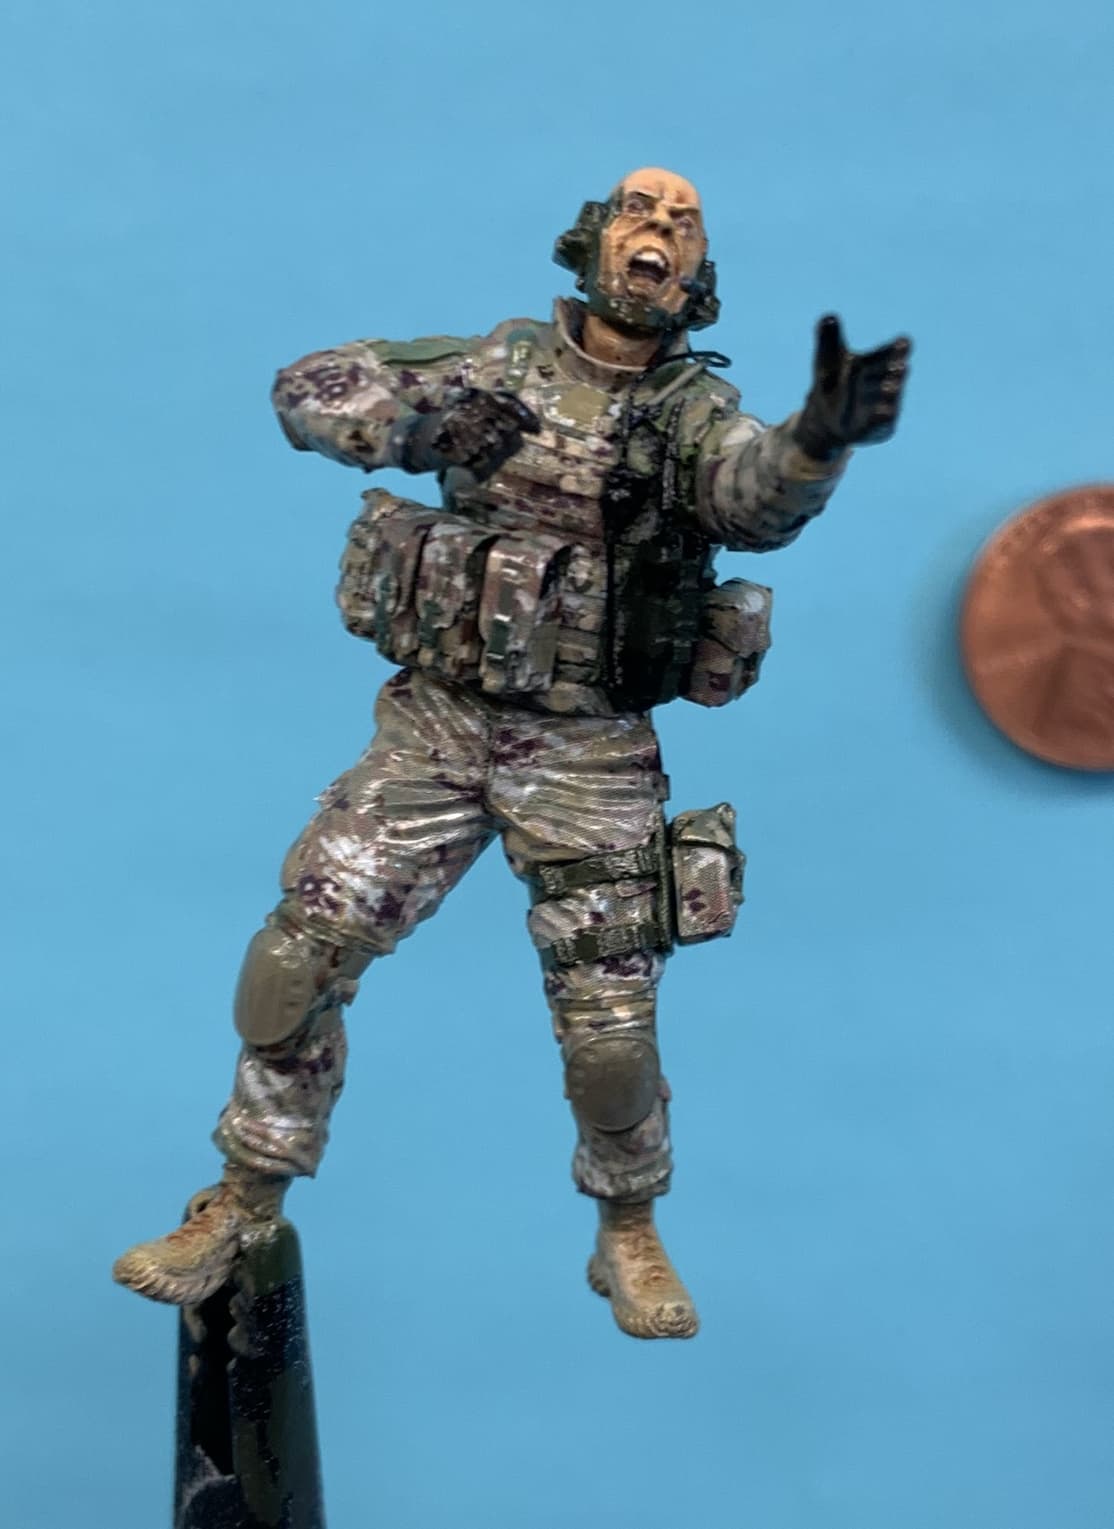
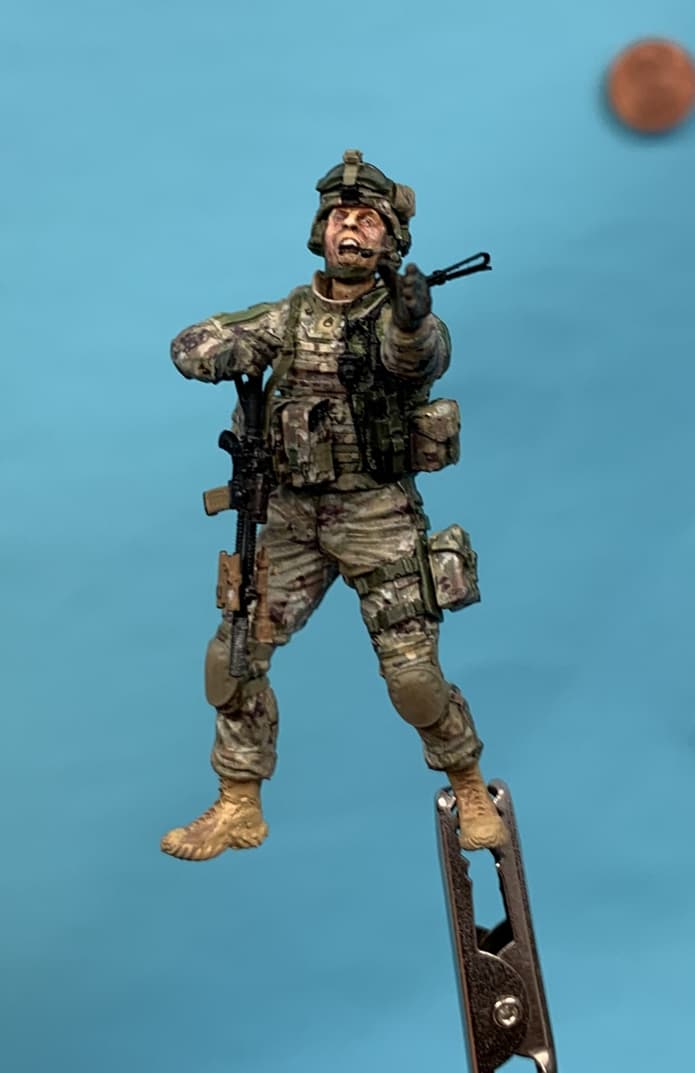
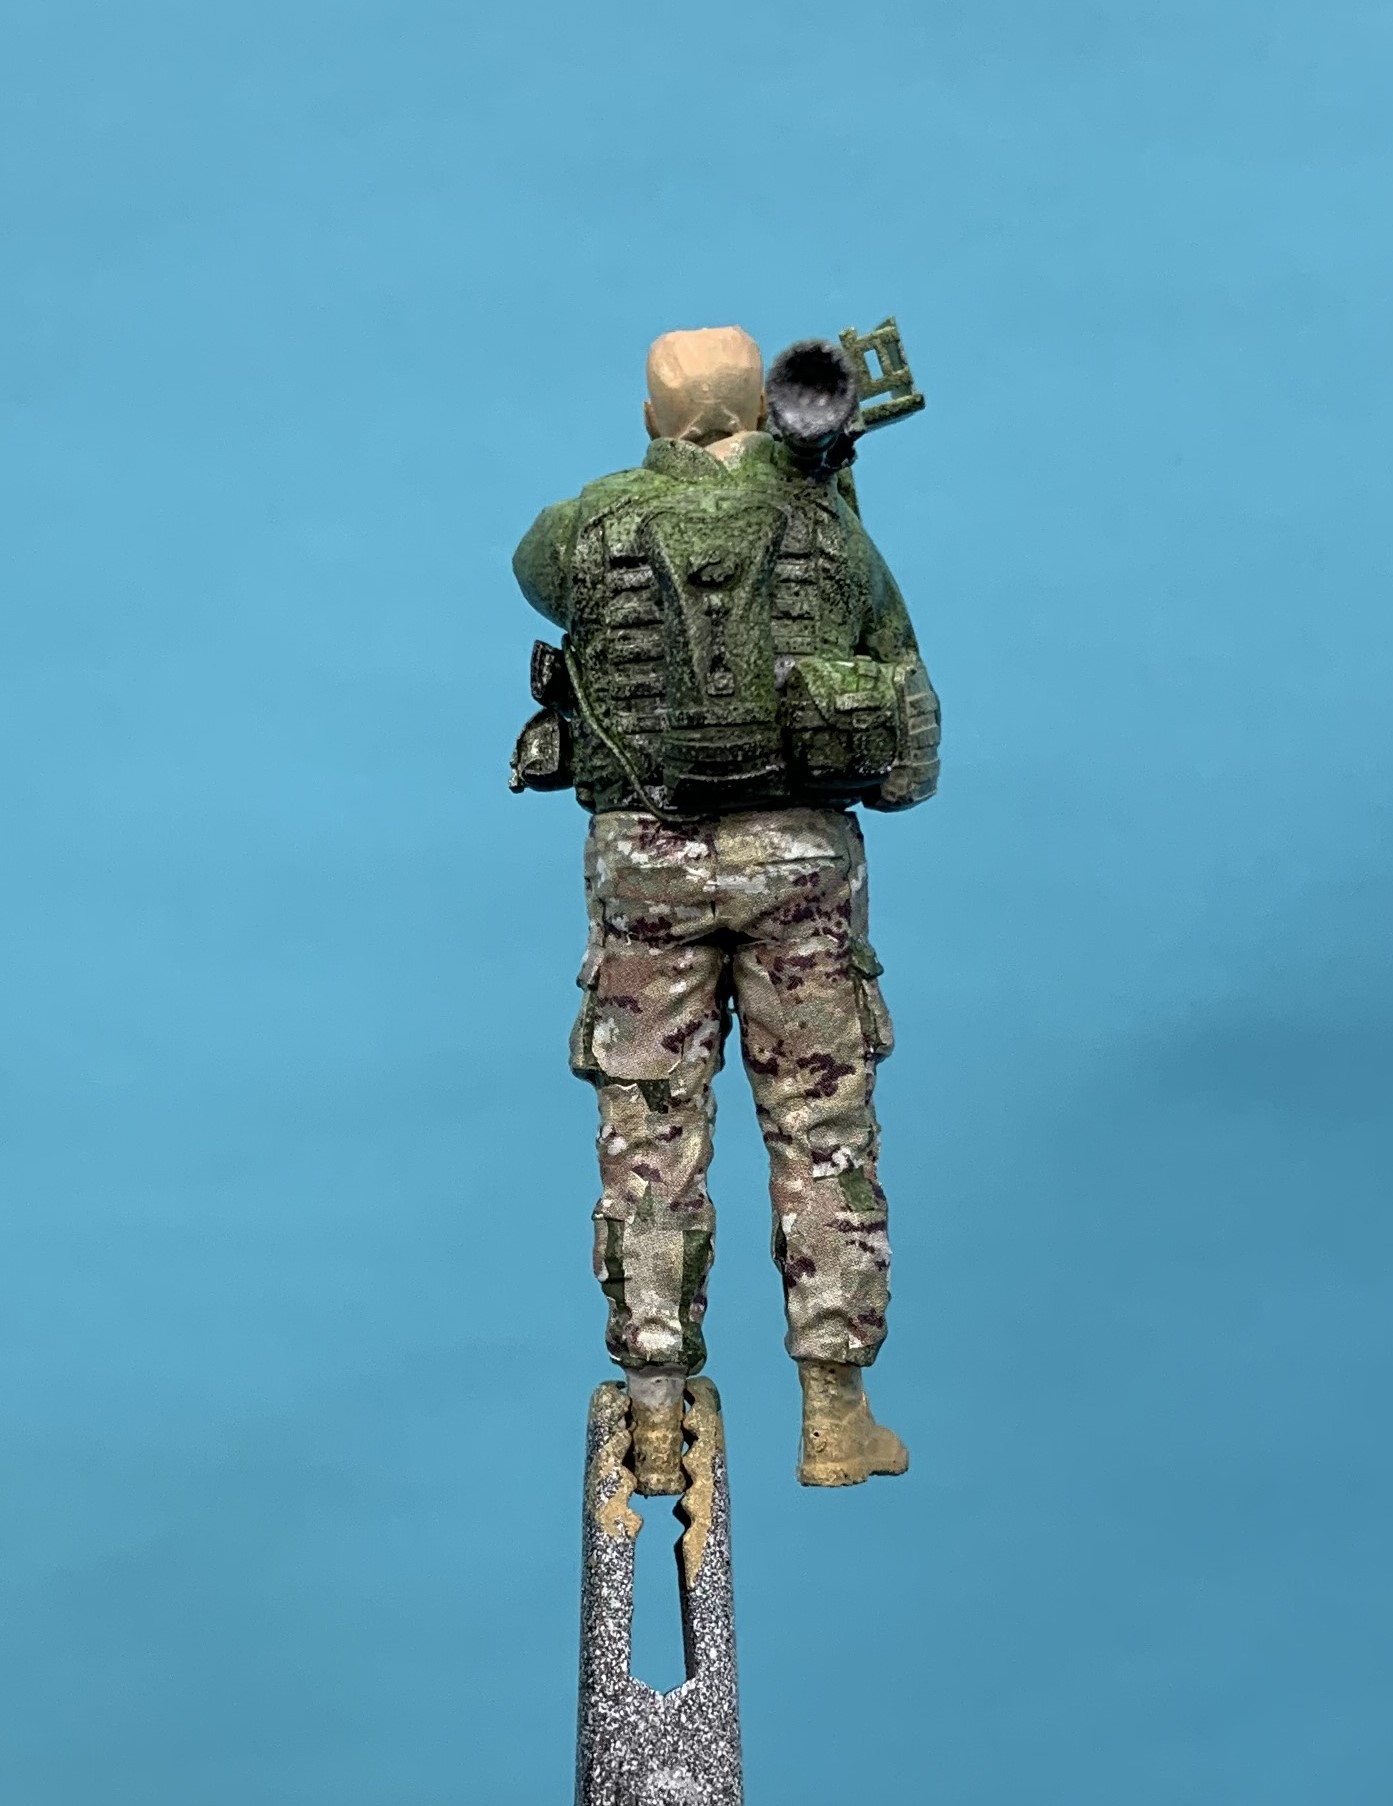
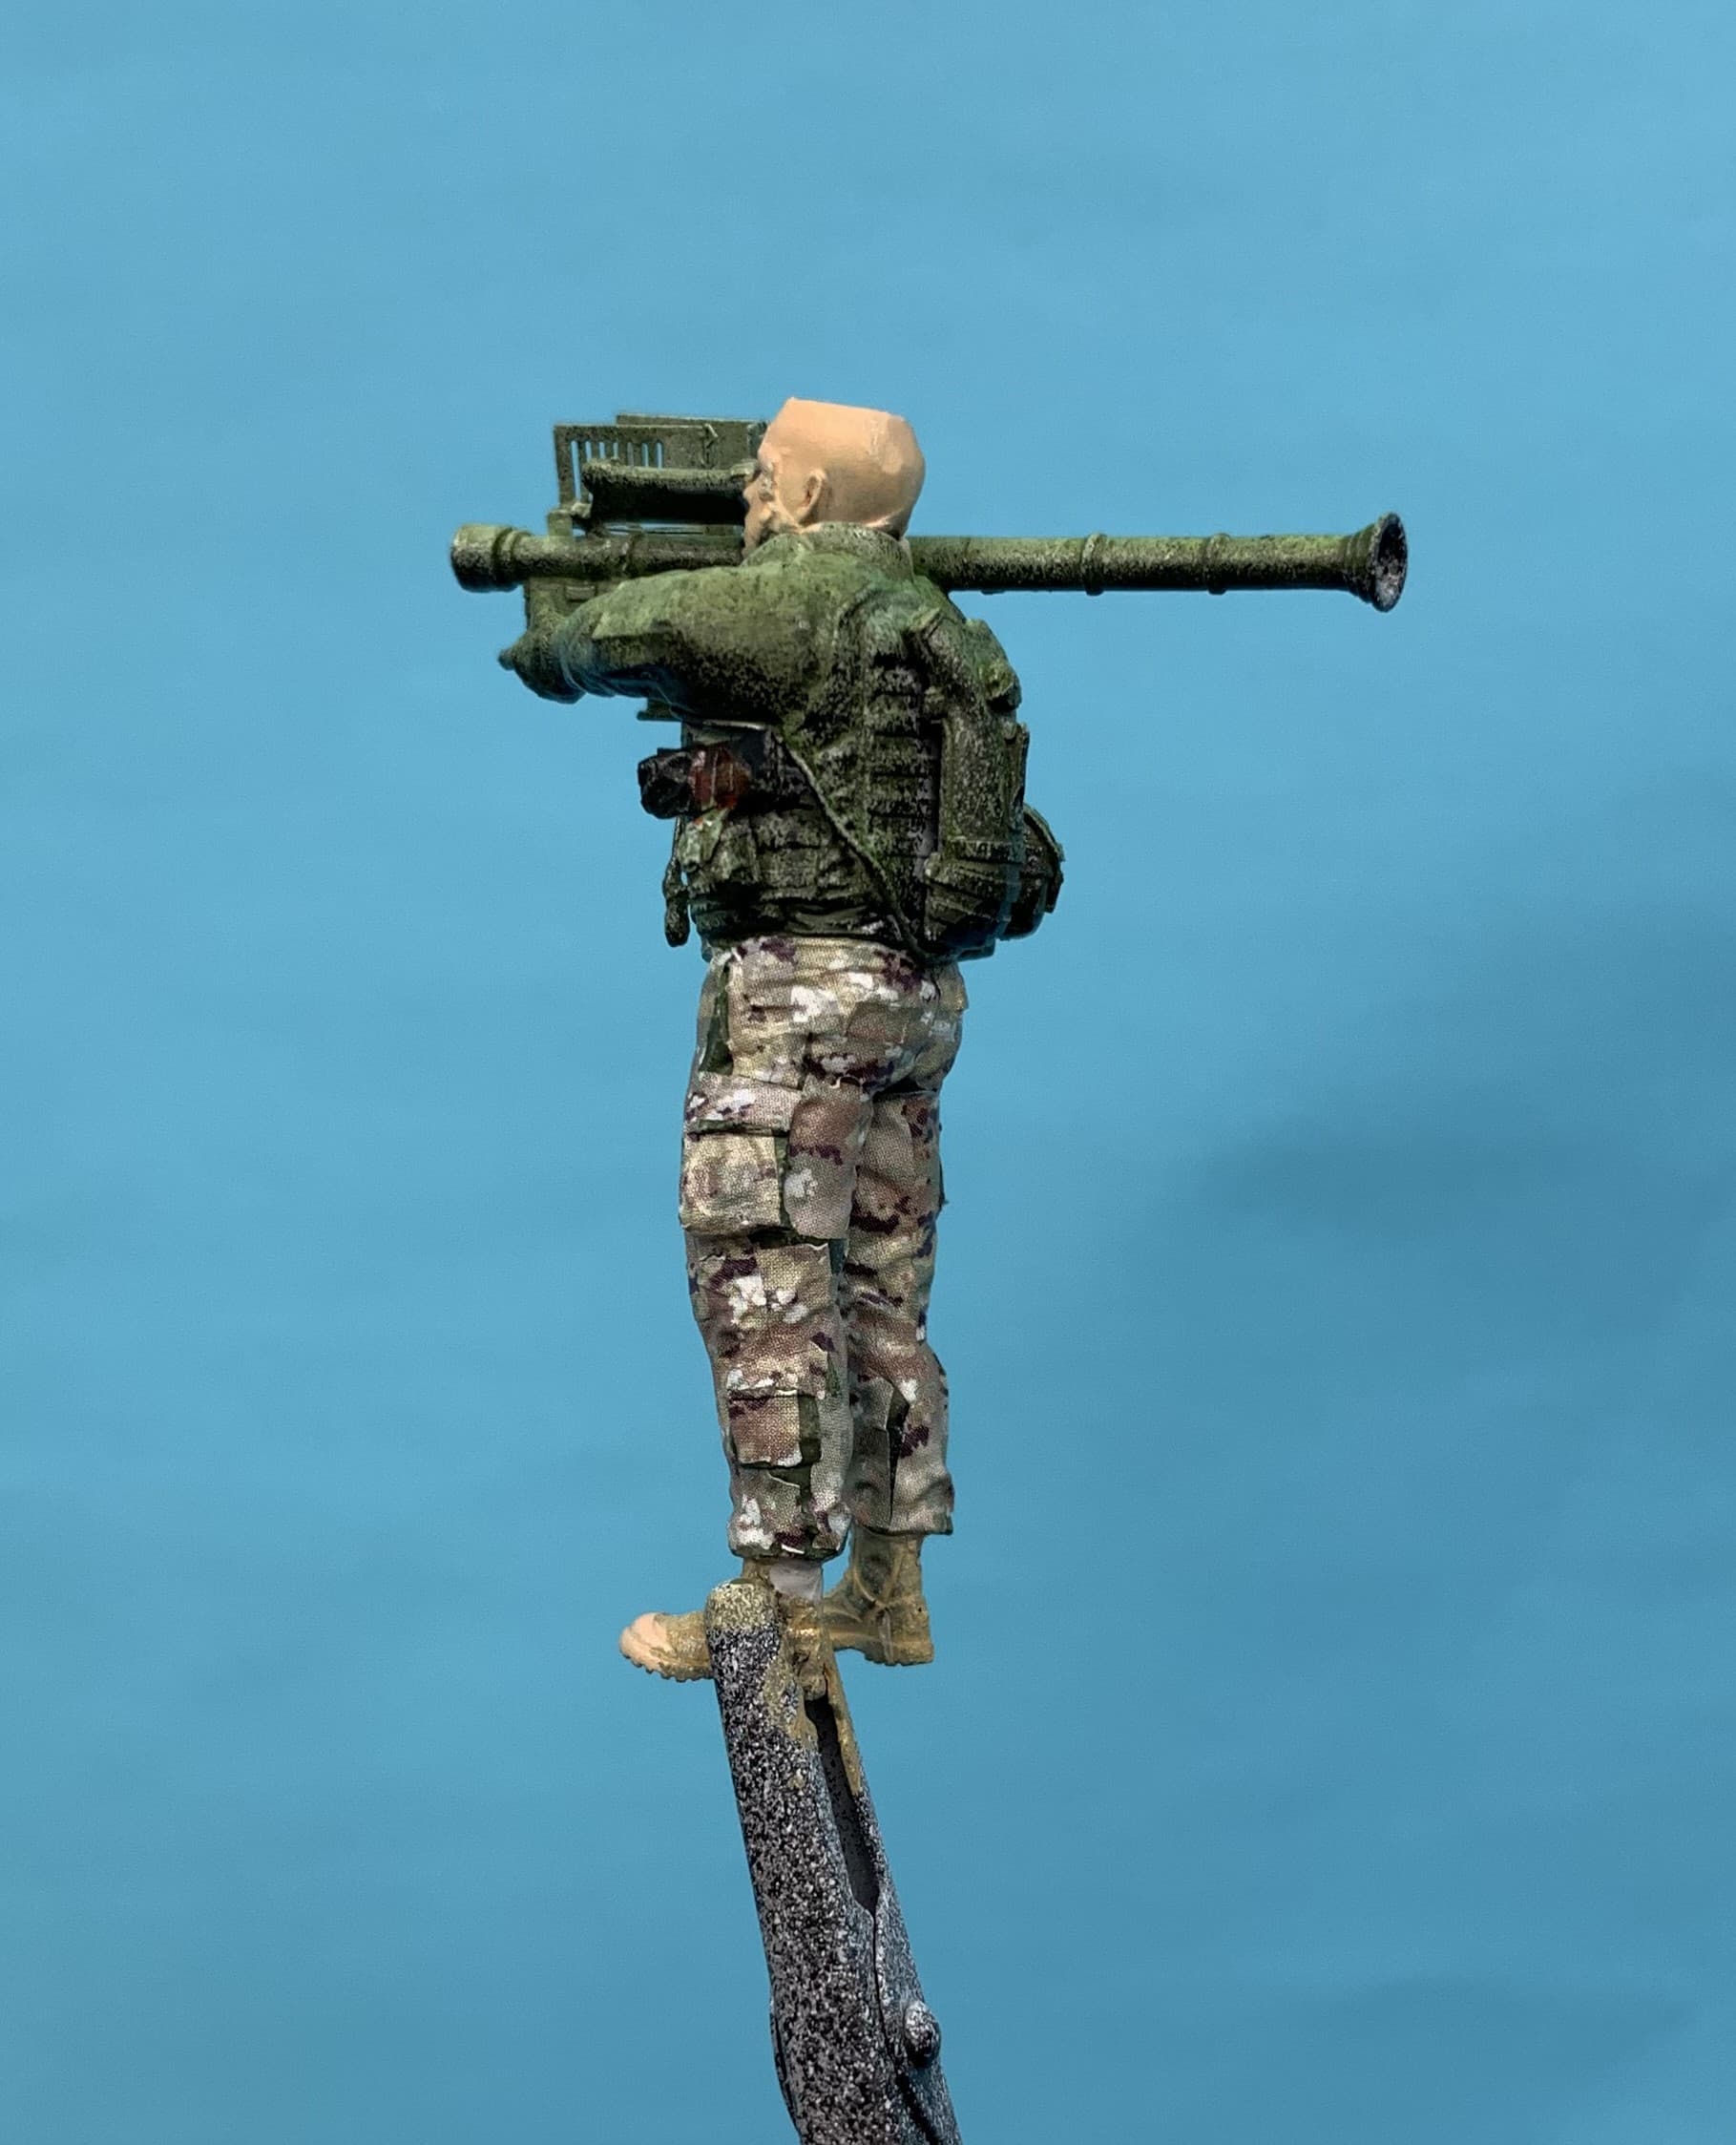
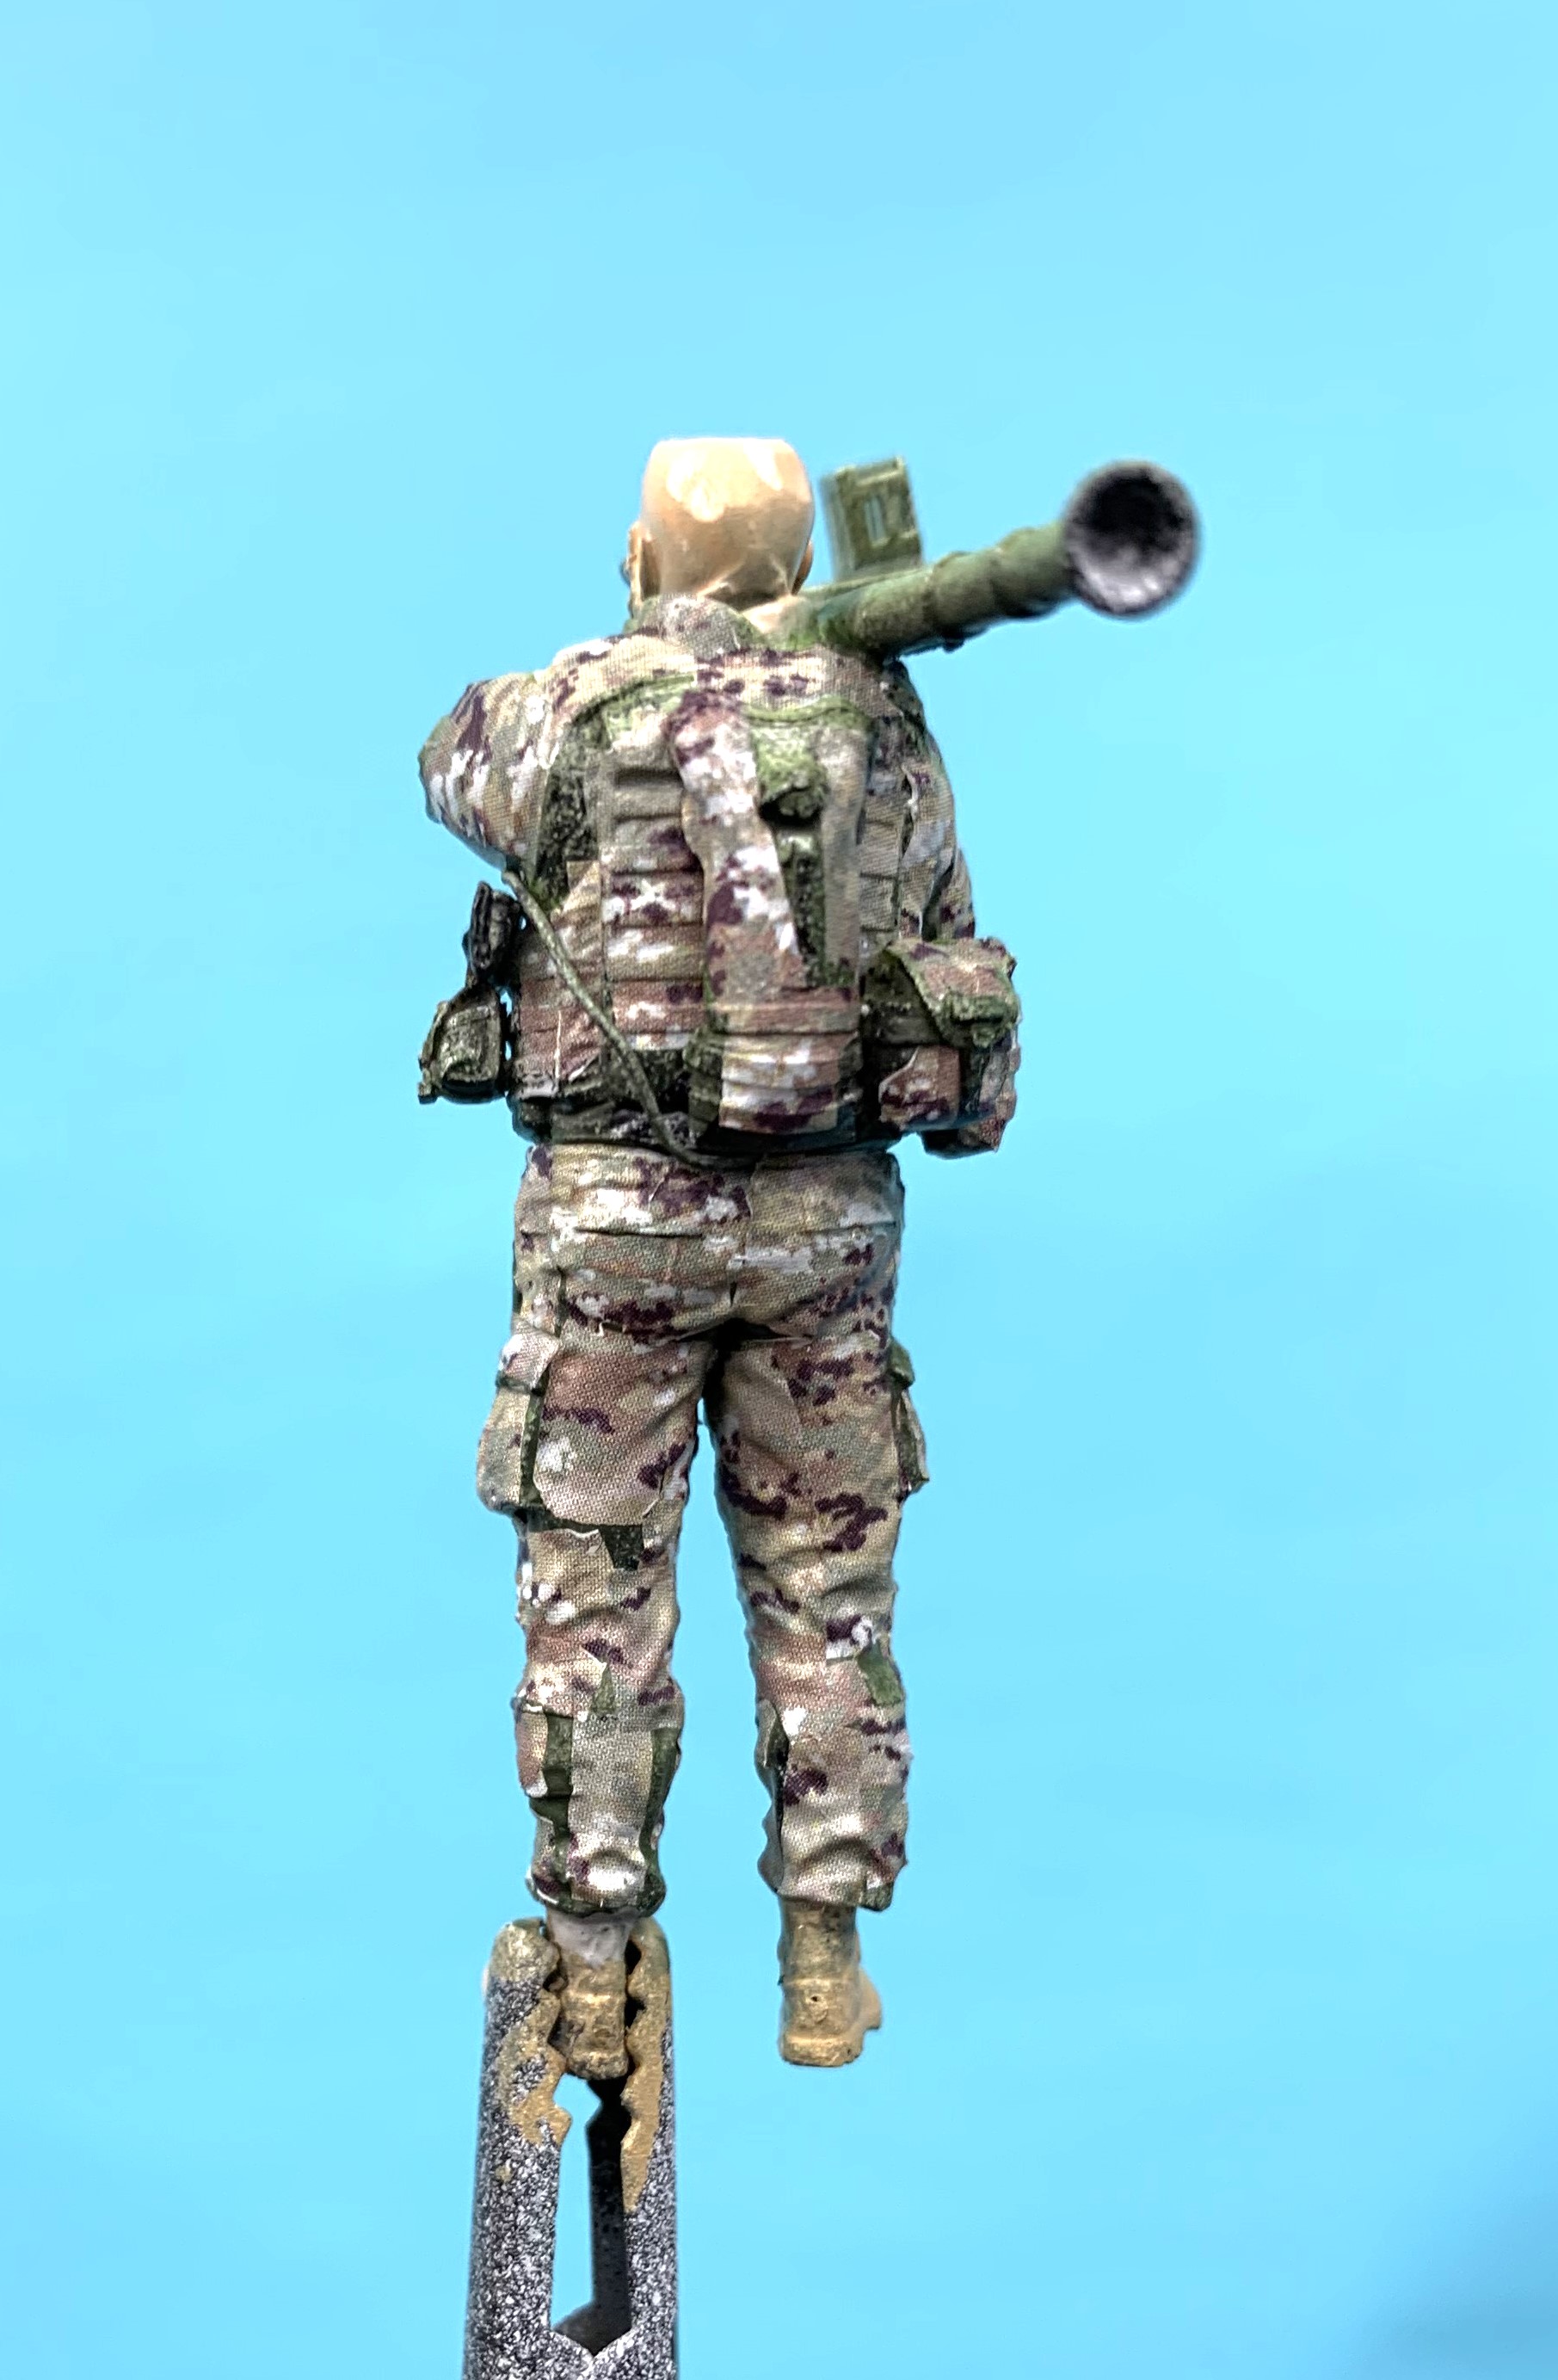
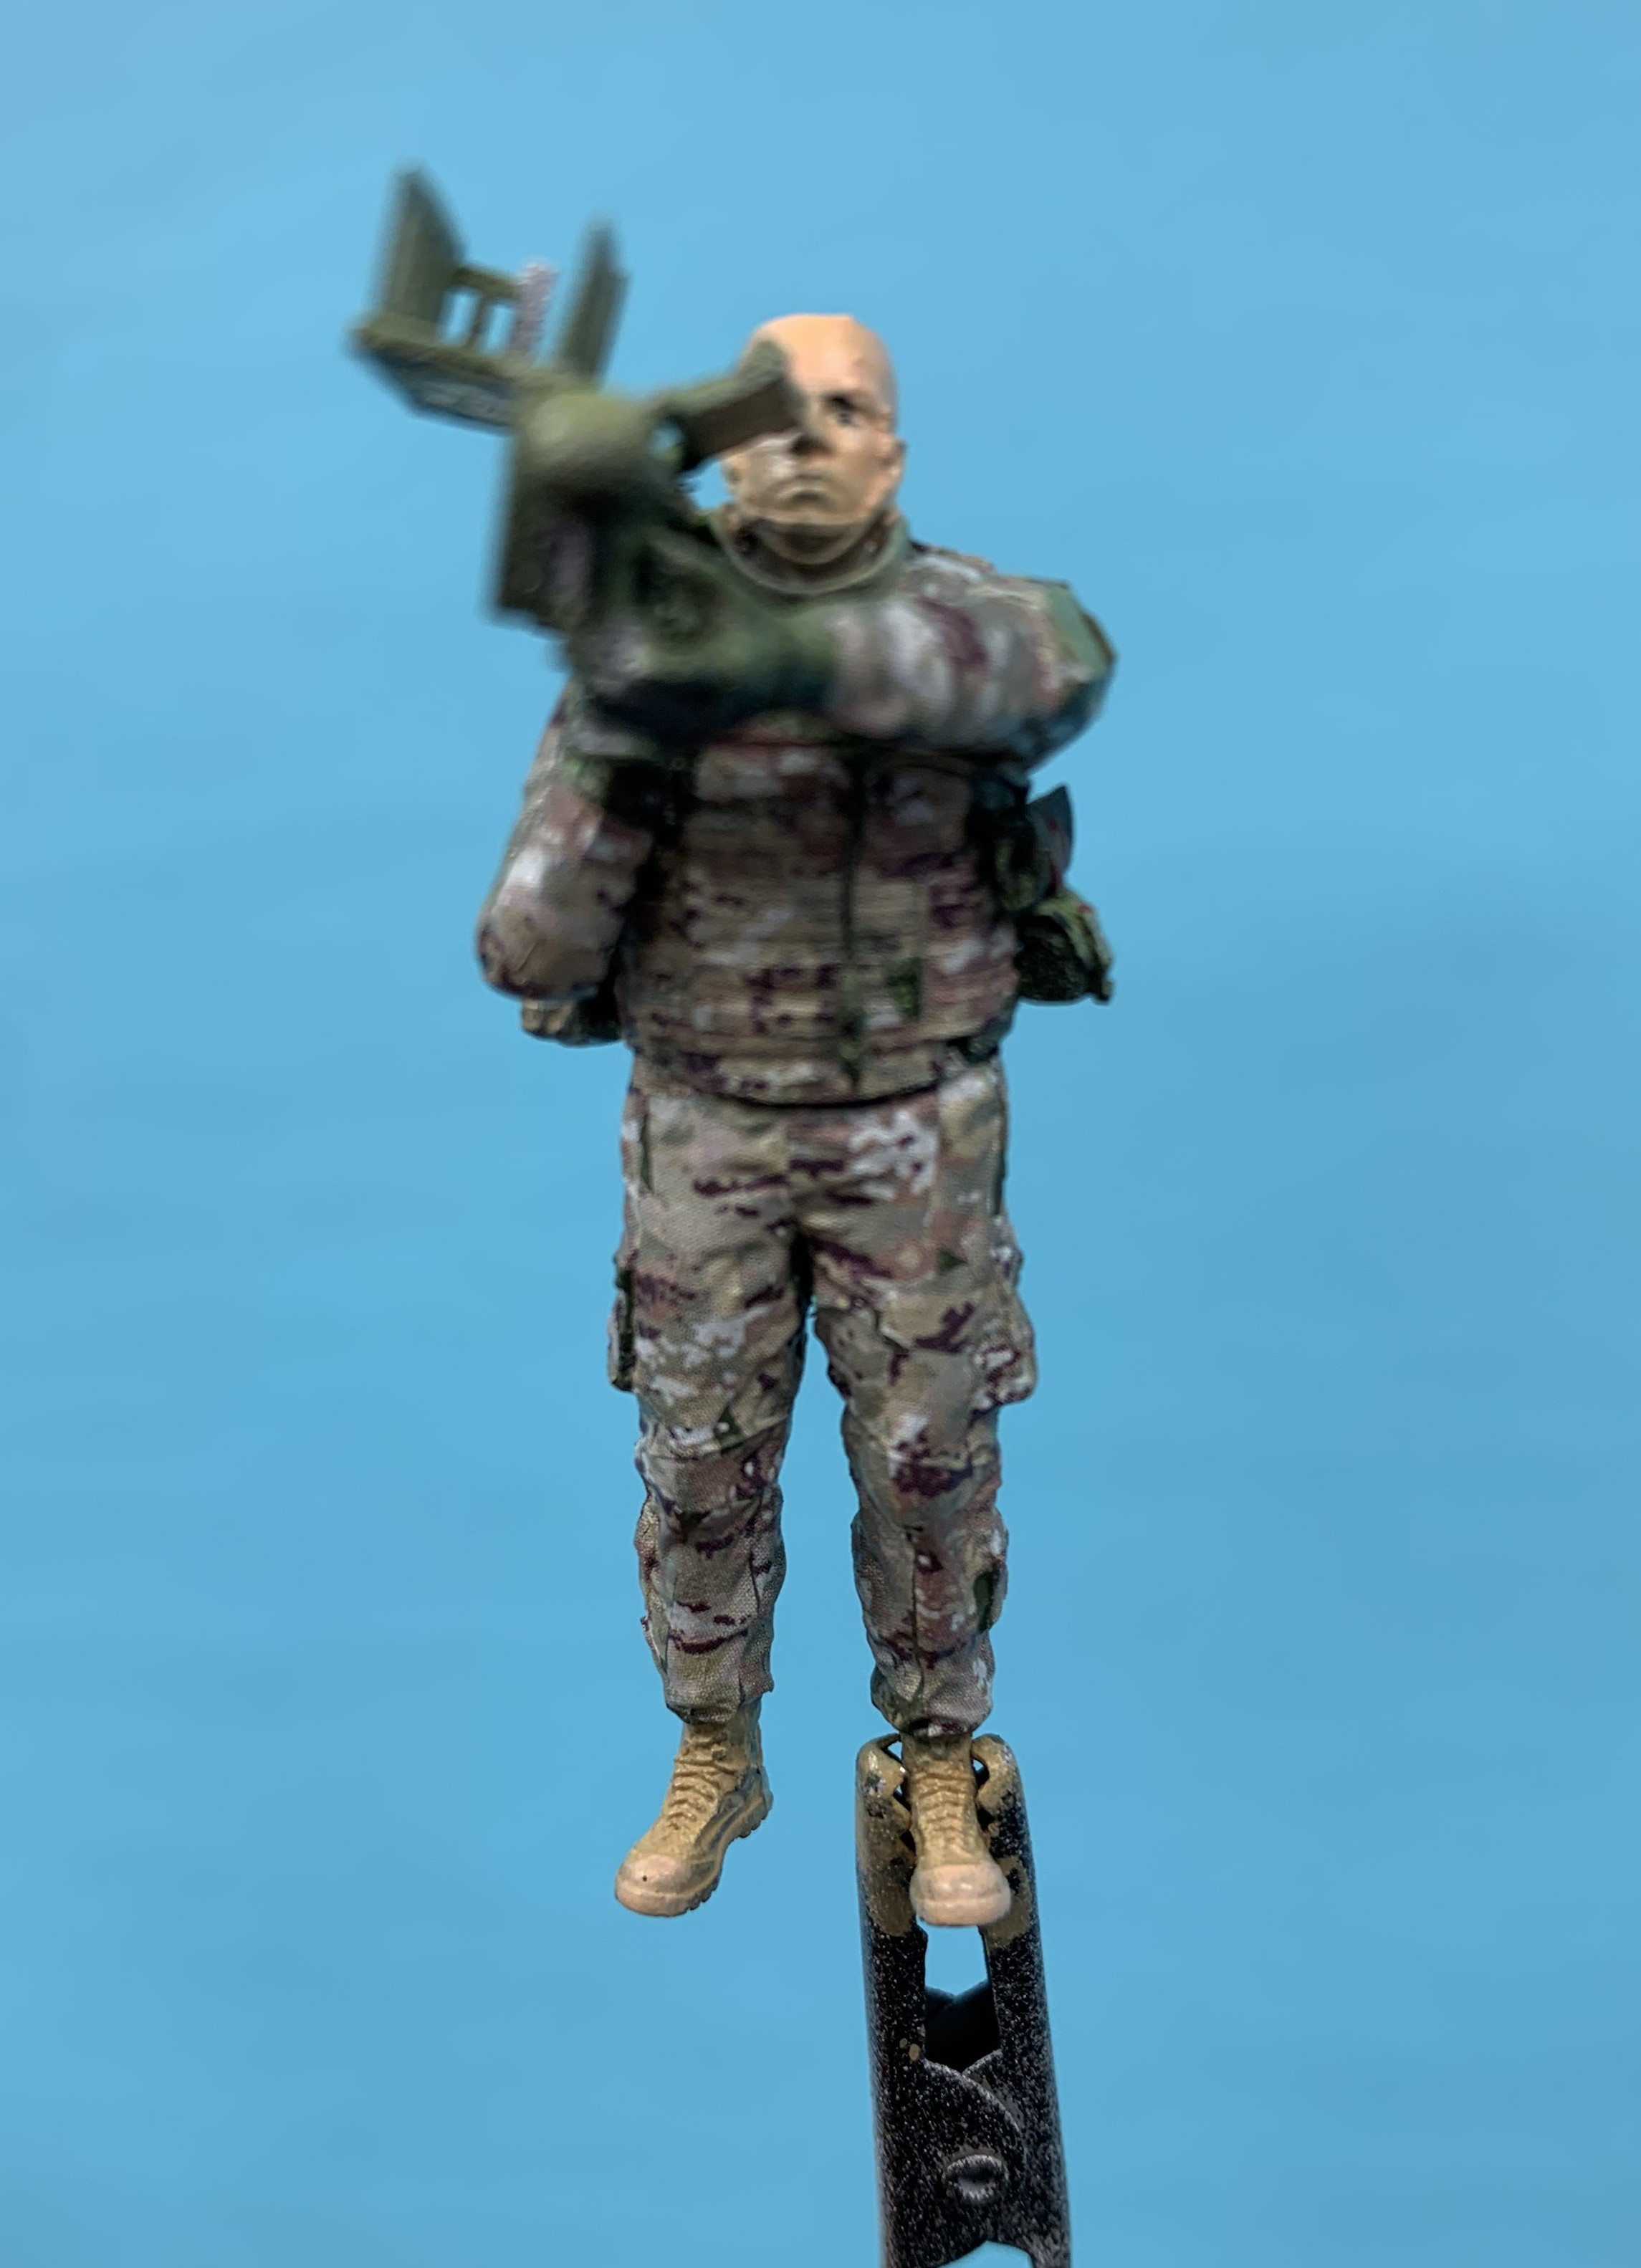
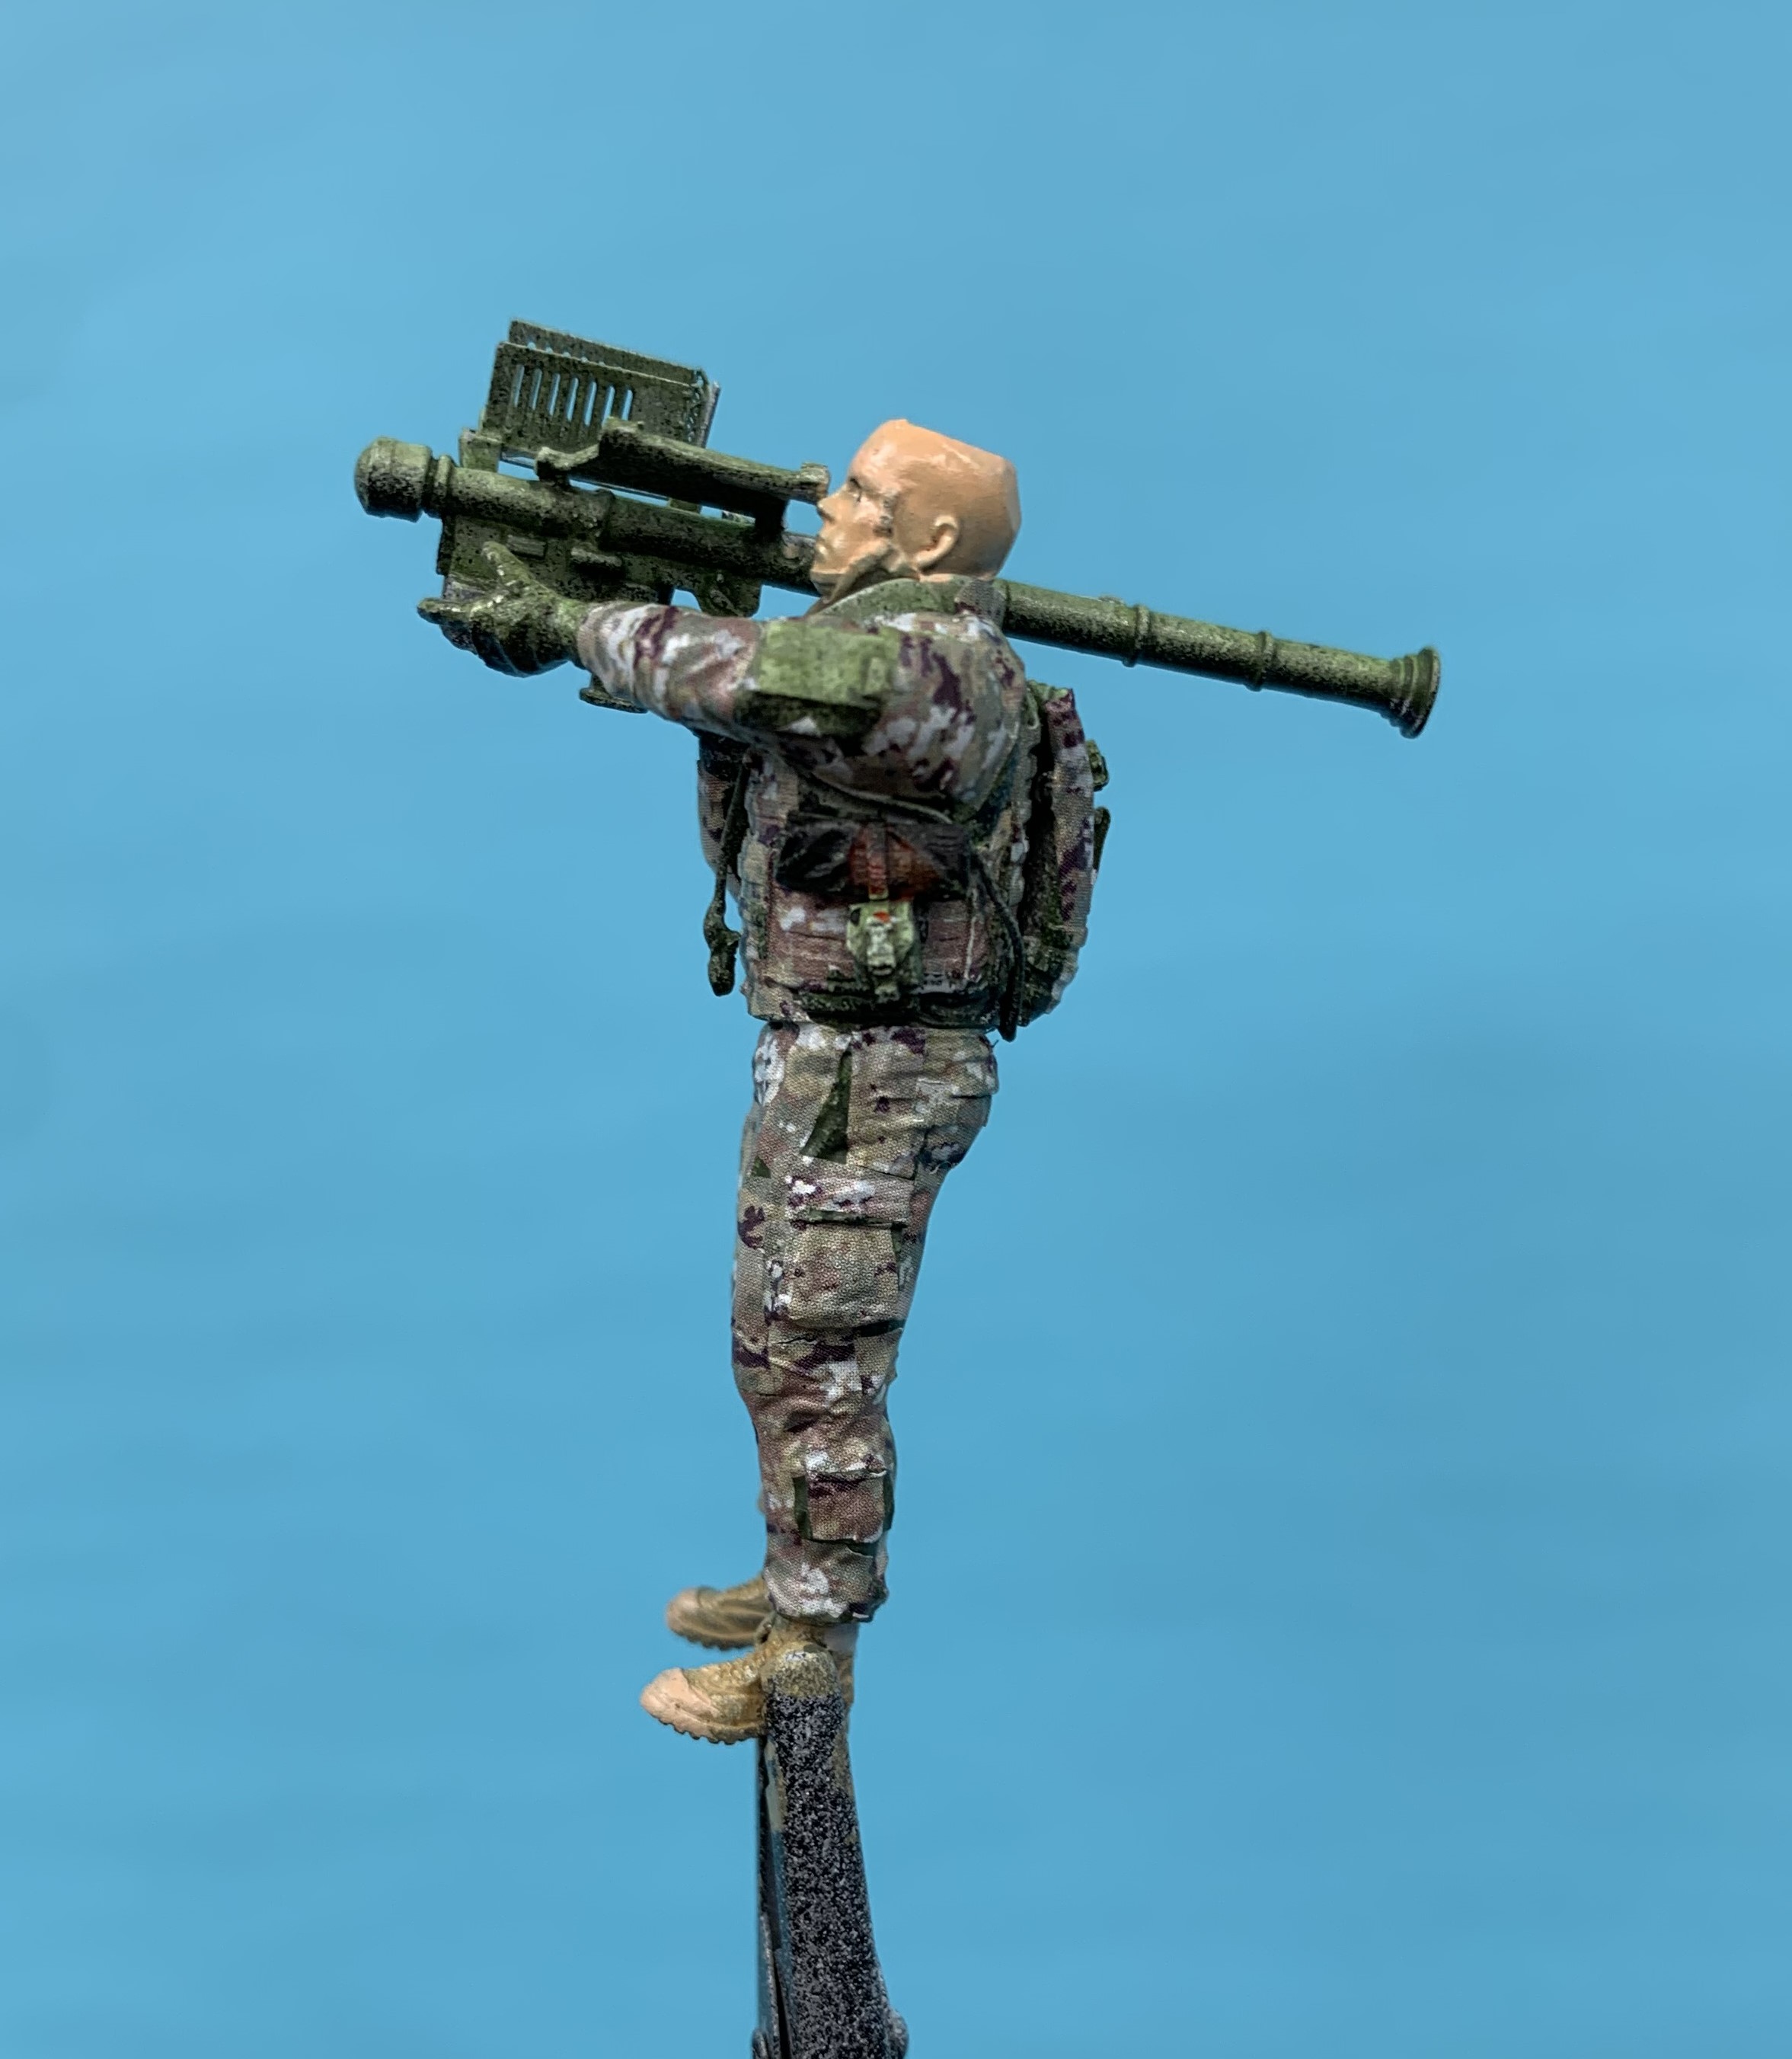
The gunner and assistant are modified Live Resin figures with the arms repositioned.
Live Resin has some great additions in order to match photo references
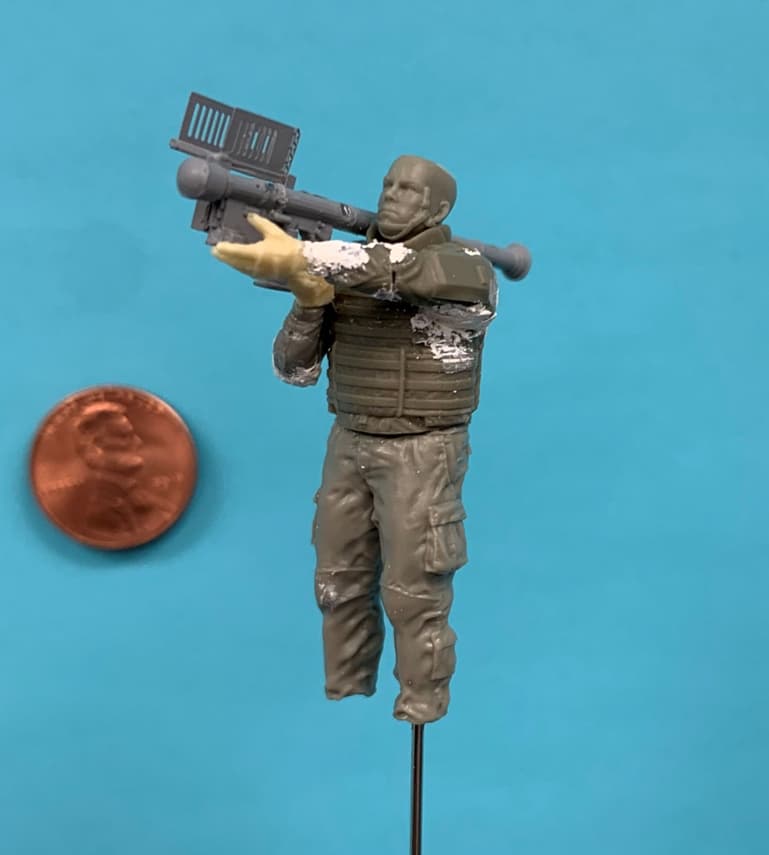
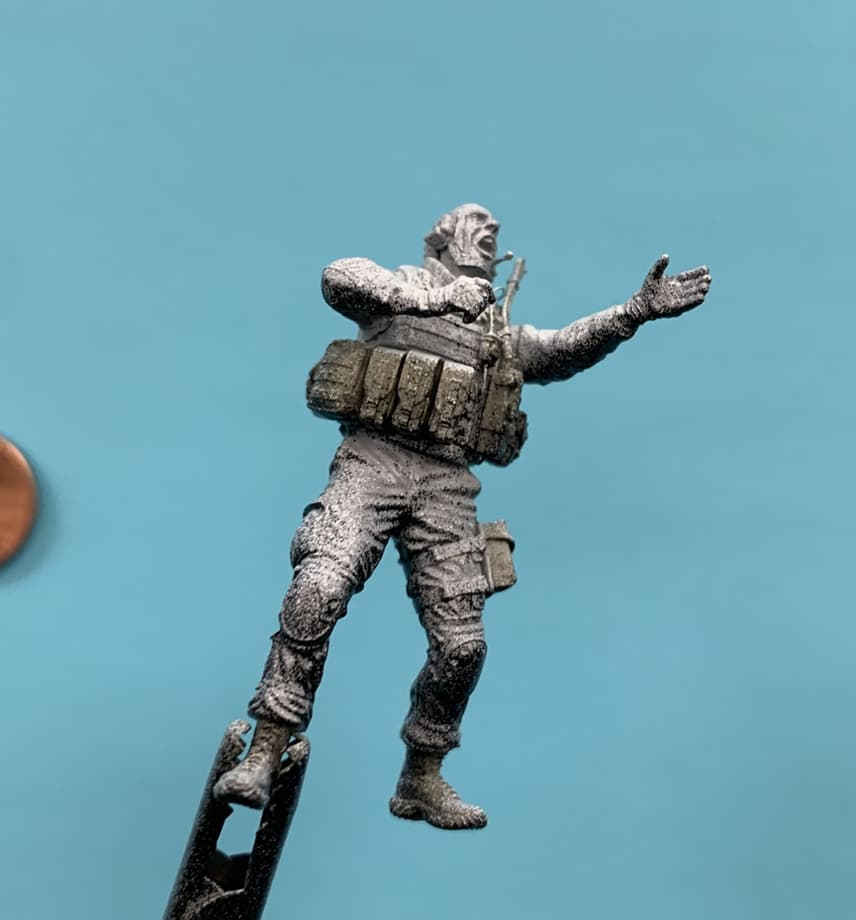
Initial focus was on the guy holding on behind the gunner.
The assistant gunner’s head came from Hornet with Live Resin Peltors and Kevlar added.
After putty and liquid surfacer, the figures were primed. Note the left shoulder pocket is relaced by the velcro patch board using carving then liquid surfacer. The initial prime with white from above and black from below was intended to give some variation. This proved unnecessary as the CrossDelta 1/35 US Multicam decals were not as transparent as expected.
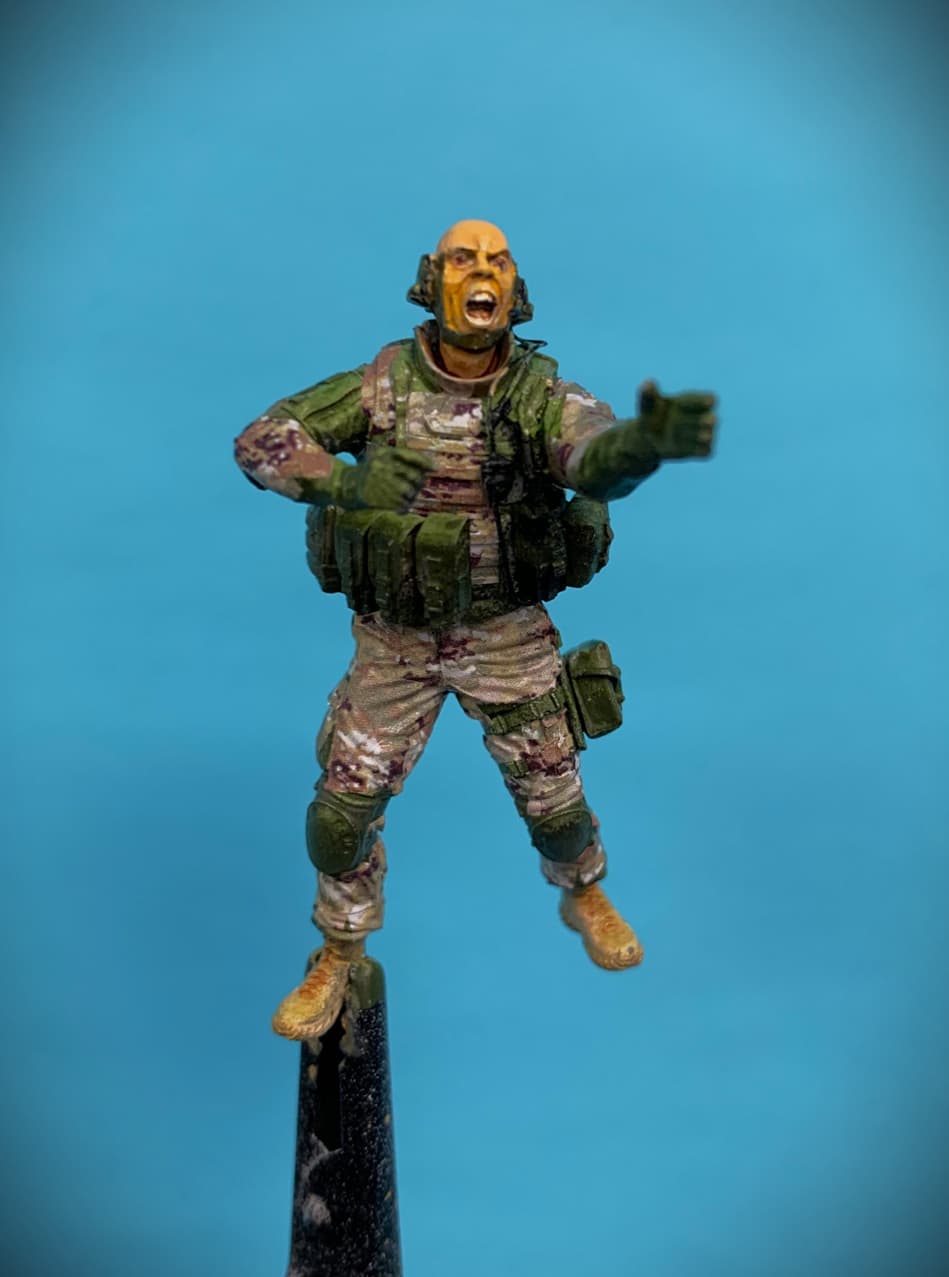
Final touch up of assistant gunner included adding M-4, kevlar, and replacing the antenna (again). Dusted up with pigments and final Dullcoat from the rattle can.
I assumed the last second yelling was for reminders like “UNCAGE!!” and “Super ELEVATE!!”
Please share comments on uniform, gear, colors, or whatever. All comments are welcome.
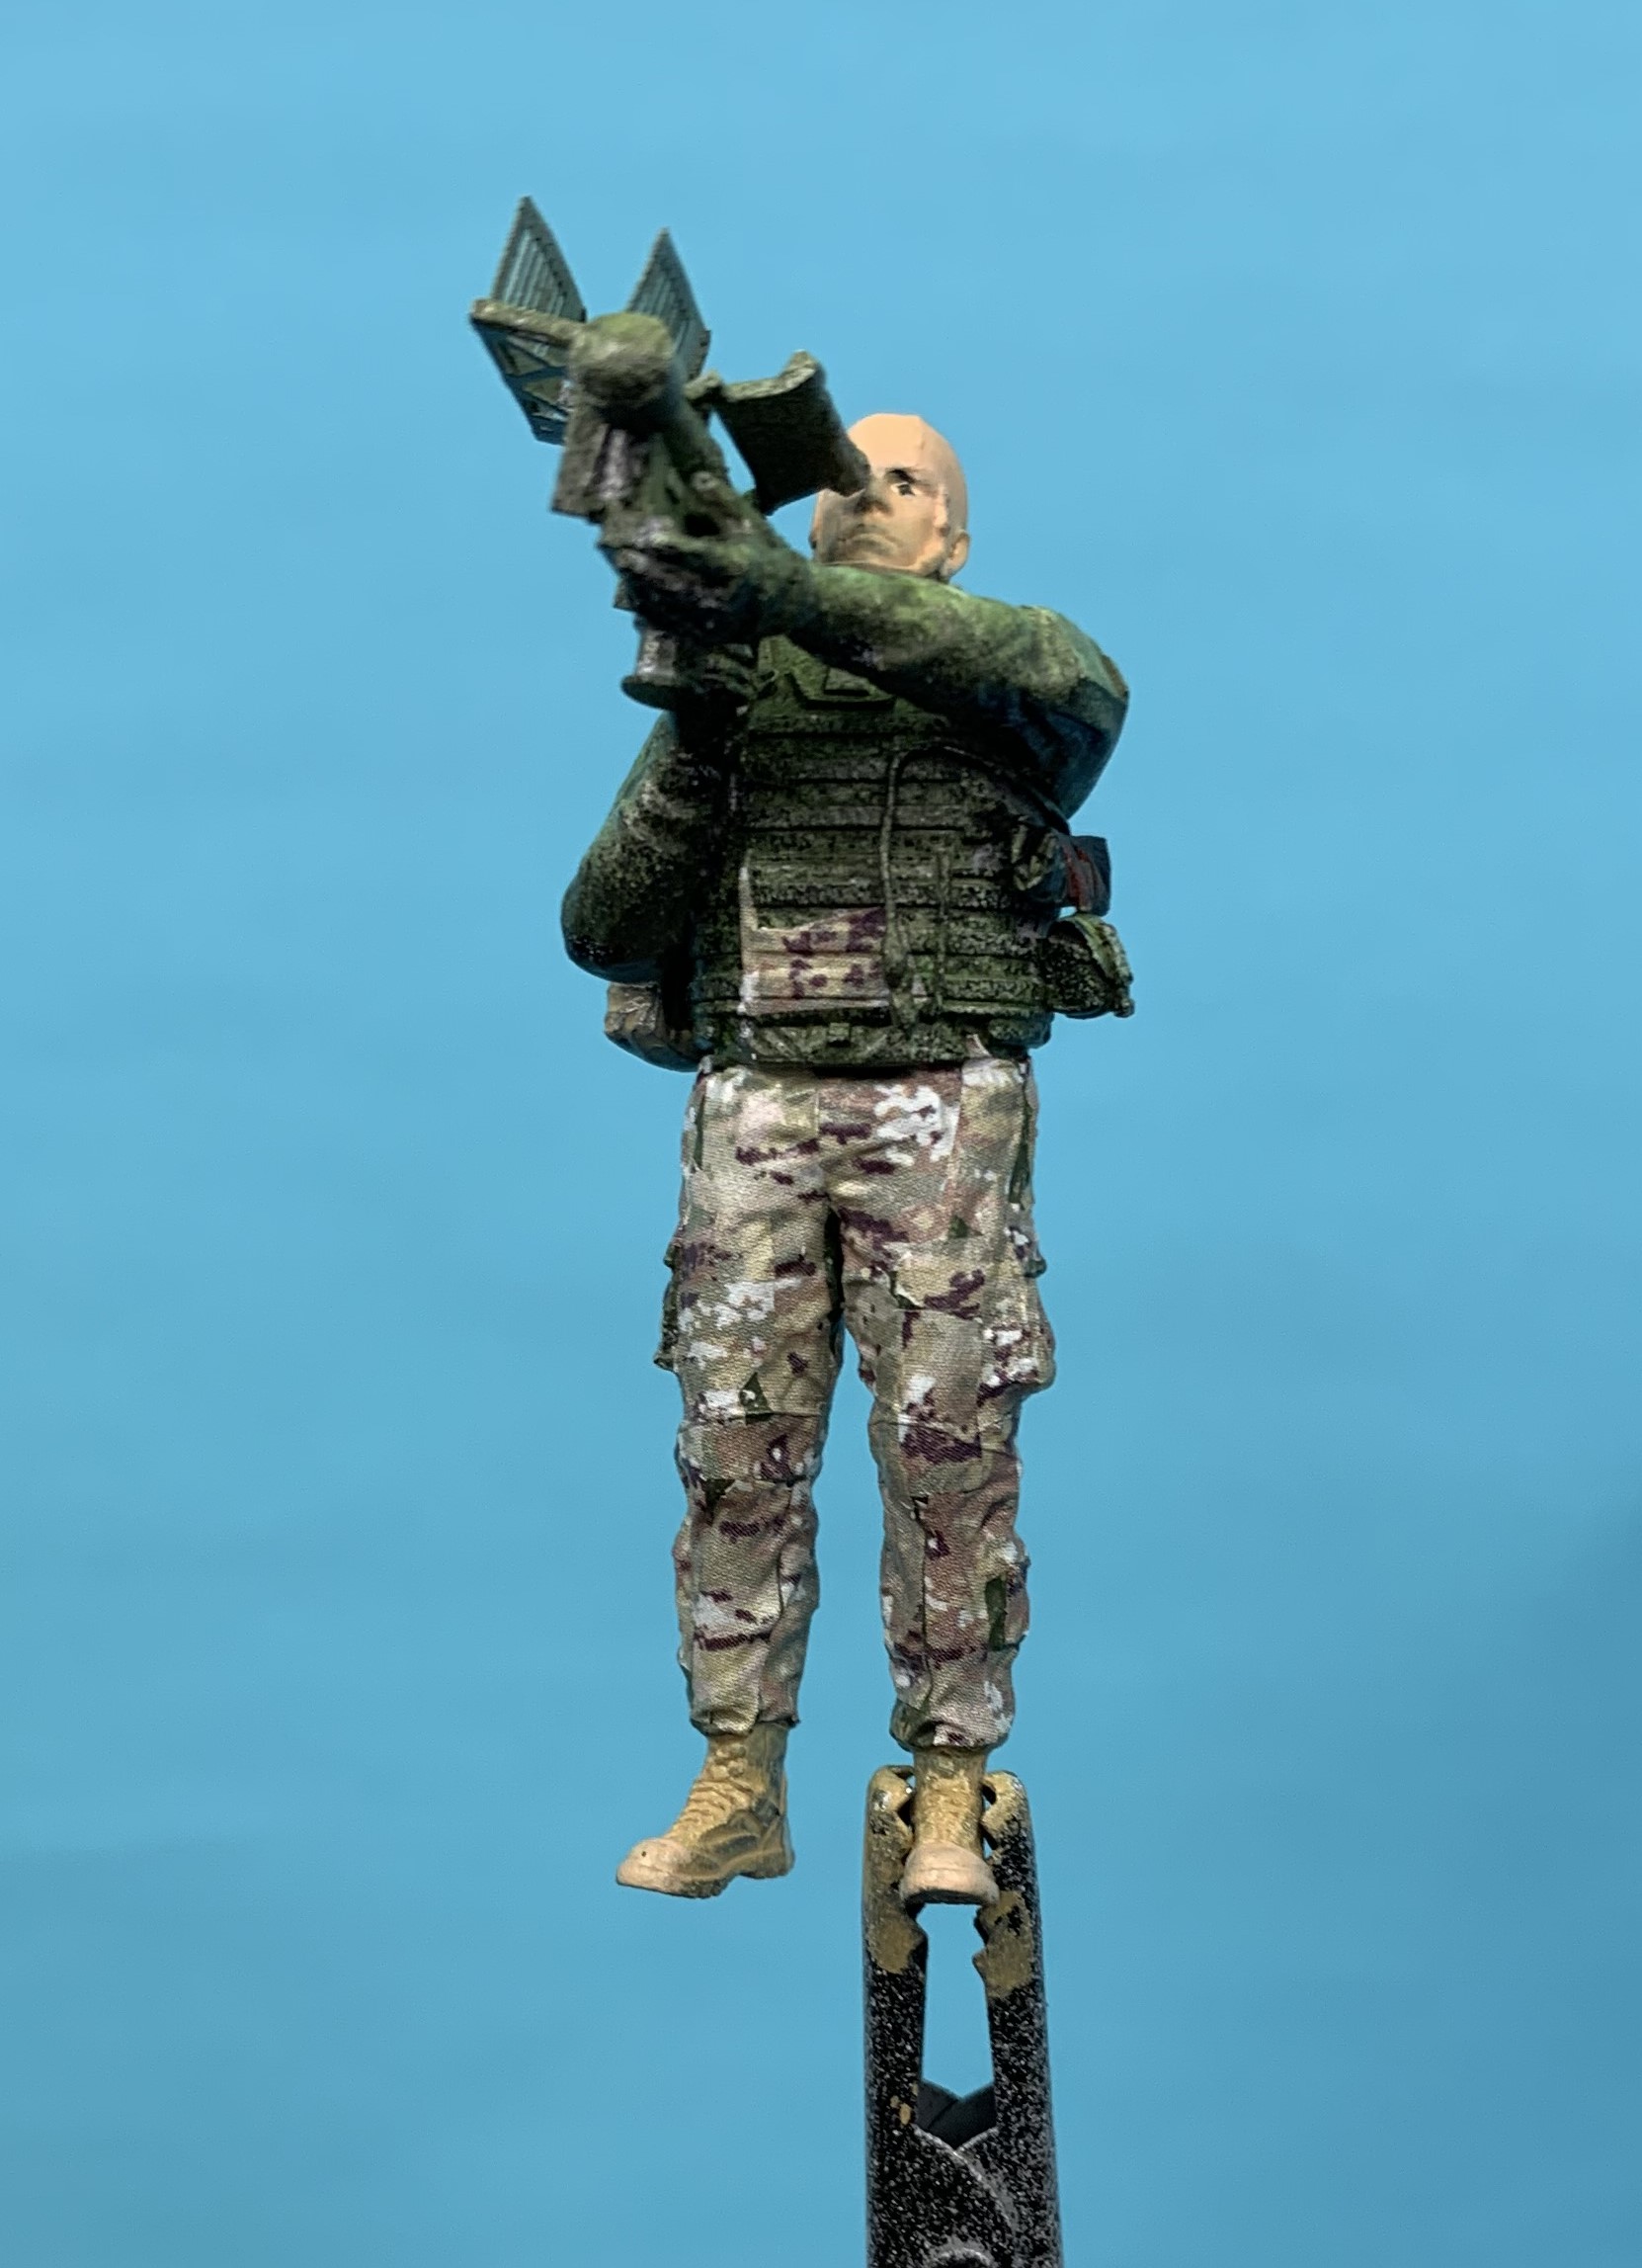
I love Live Resin products and Hornet heads!! Now on to the missile shooter.
A very fine piece you’ve done there Stuart. I think you’ve done a fine job with the face painting- really bringing the fig to life and the body positioning matches the expression too. Decals look accurate as well- just wondering how long it took you? I found decaling a figure to take a really long time compared to painting!
Thank you for your kindness Karl! Your words and encouragement mean a lot to an old guy waving a hairy paint stick at the plastic. These aftermarket Hornet heads have so much detail, that painting them is a joy.
I really enjoyed your A Step In Time- France 1916 & 1940 with your expert use of color! Amazing work!
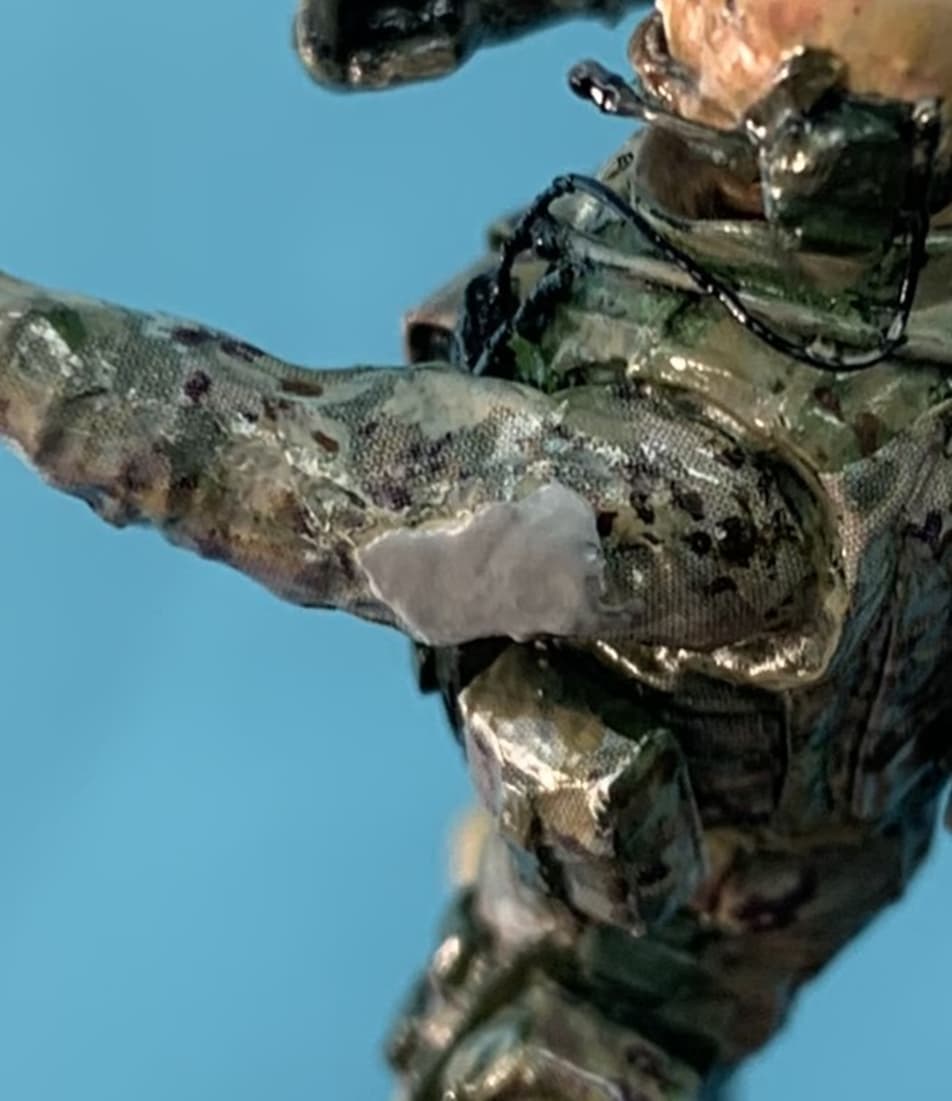
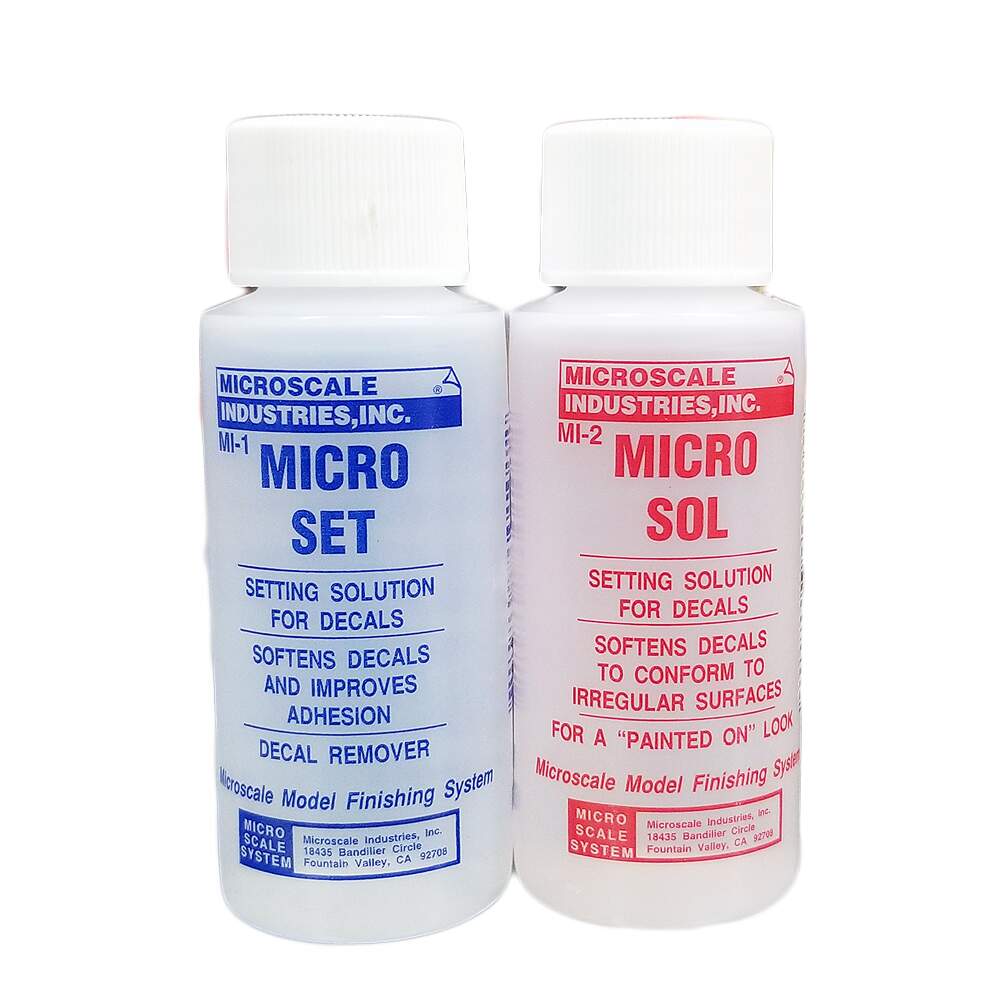
The CrossDelta 1/35 US Multicam decals went on fairly quickly over a week or so. They were applied in very very small sections with Micro Sol (red) to avoid air pockets and wrinkles. Say 1/16 inch by 1/8" decal bits roughly.
I have the advantage of being retired so got into a routine of working for 20 minutes, letting the decals set for an hour and returning for another 20 minutes. Also is a good way to give the wife a minute to herself during the day. With Decal camo patterns, I still feel the need to paint, but it adds a more consistent guide and map to the pattern on the figure. Unit patches and rank markings would be impossible in 1/35 scale without printed decals. Time spent on any model hobby effort is subject to context and interest. Always asking myself is this fun? I think something is cool until a squirrel runs by and off on to another distraction! Thanks for looking and sharing your excellent work in these forums.
Your comments about my work are very kind Stuart, thank you ![]() !
!
I think I worked in a similar way with the decals- the most difficult thing I found was working on small areas like the MOLLE straps on the vest.
You are correct about the decals on the vest MOLLE straps. After working the decal down in the corners, it must be painted to correctly represent the Multi Cam. I have seen photos of actual vests that have straps created with the camo pattern, so references are helping me. Here are some images of work in process for the Stinger shooter. Slow and steady…
Looking good ![]() !
!
Gee Wiz! I thought painting kilts and socks was bad. Excellent work, Stuart.
I was gonna ask you about the camo decal but you already covered that issue. Looks like you got it dialed in just fine. I’m gonna take a back seat to this camo decal and avoid kits with digicam. I know, I know, it sounds weak, but I personally am so used to painting uniforms that a decal seems a bit odd to me. Some day I’m going to have to address the new digicam, but I’ll see how long I can put it off, HA! Ya, I’m a big chicken.
Great work, bookmarked! Cheers, Ski.
Thank you for the nice comments Steve, but I think the kilts and socks are much more difficult. Wish I had the skill with the brush! The tough part of this multicam is finding a decal pattern that is close. Even this CrossDelta brand I think lacks black spots in the pattern from the references I can find. Wish I could explore that with others here. Always learning. Thanks again for looking in as I thrash about. Happy modeling ahead