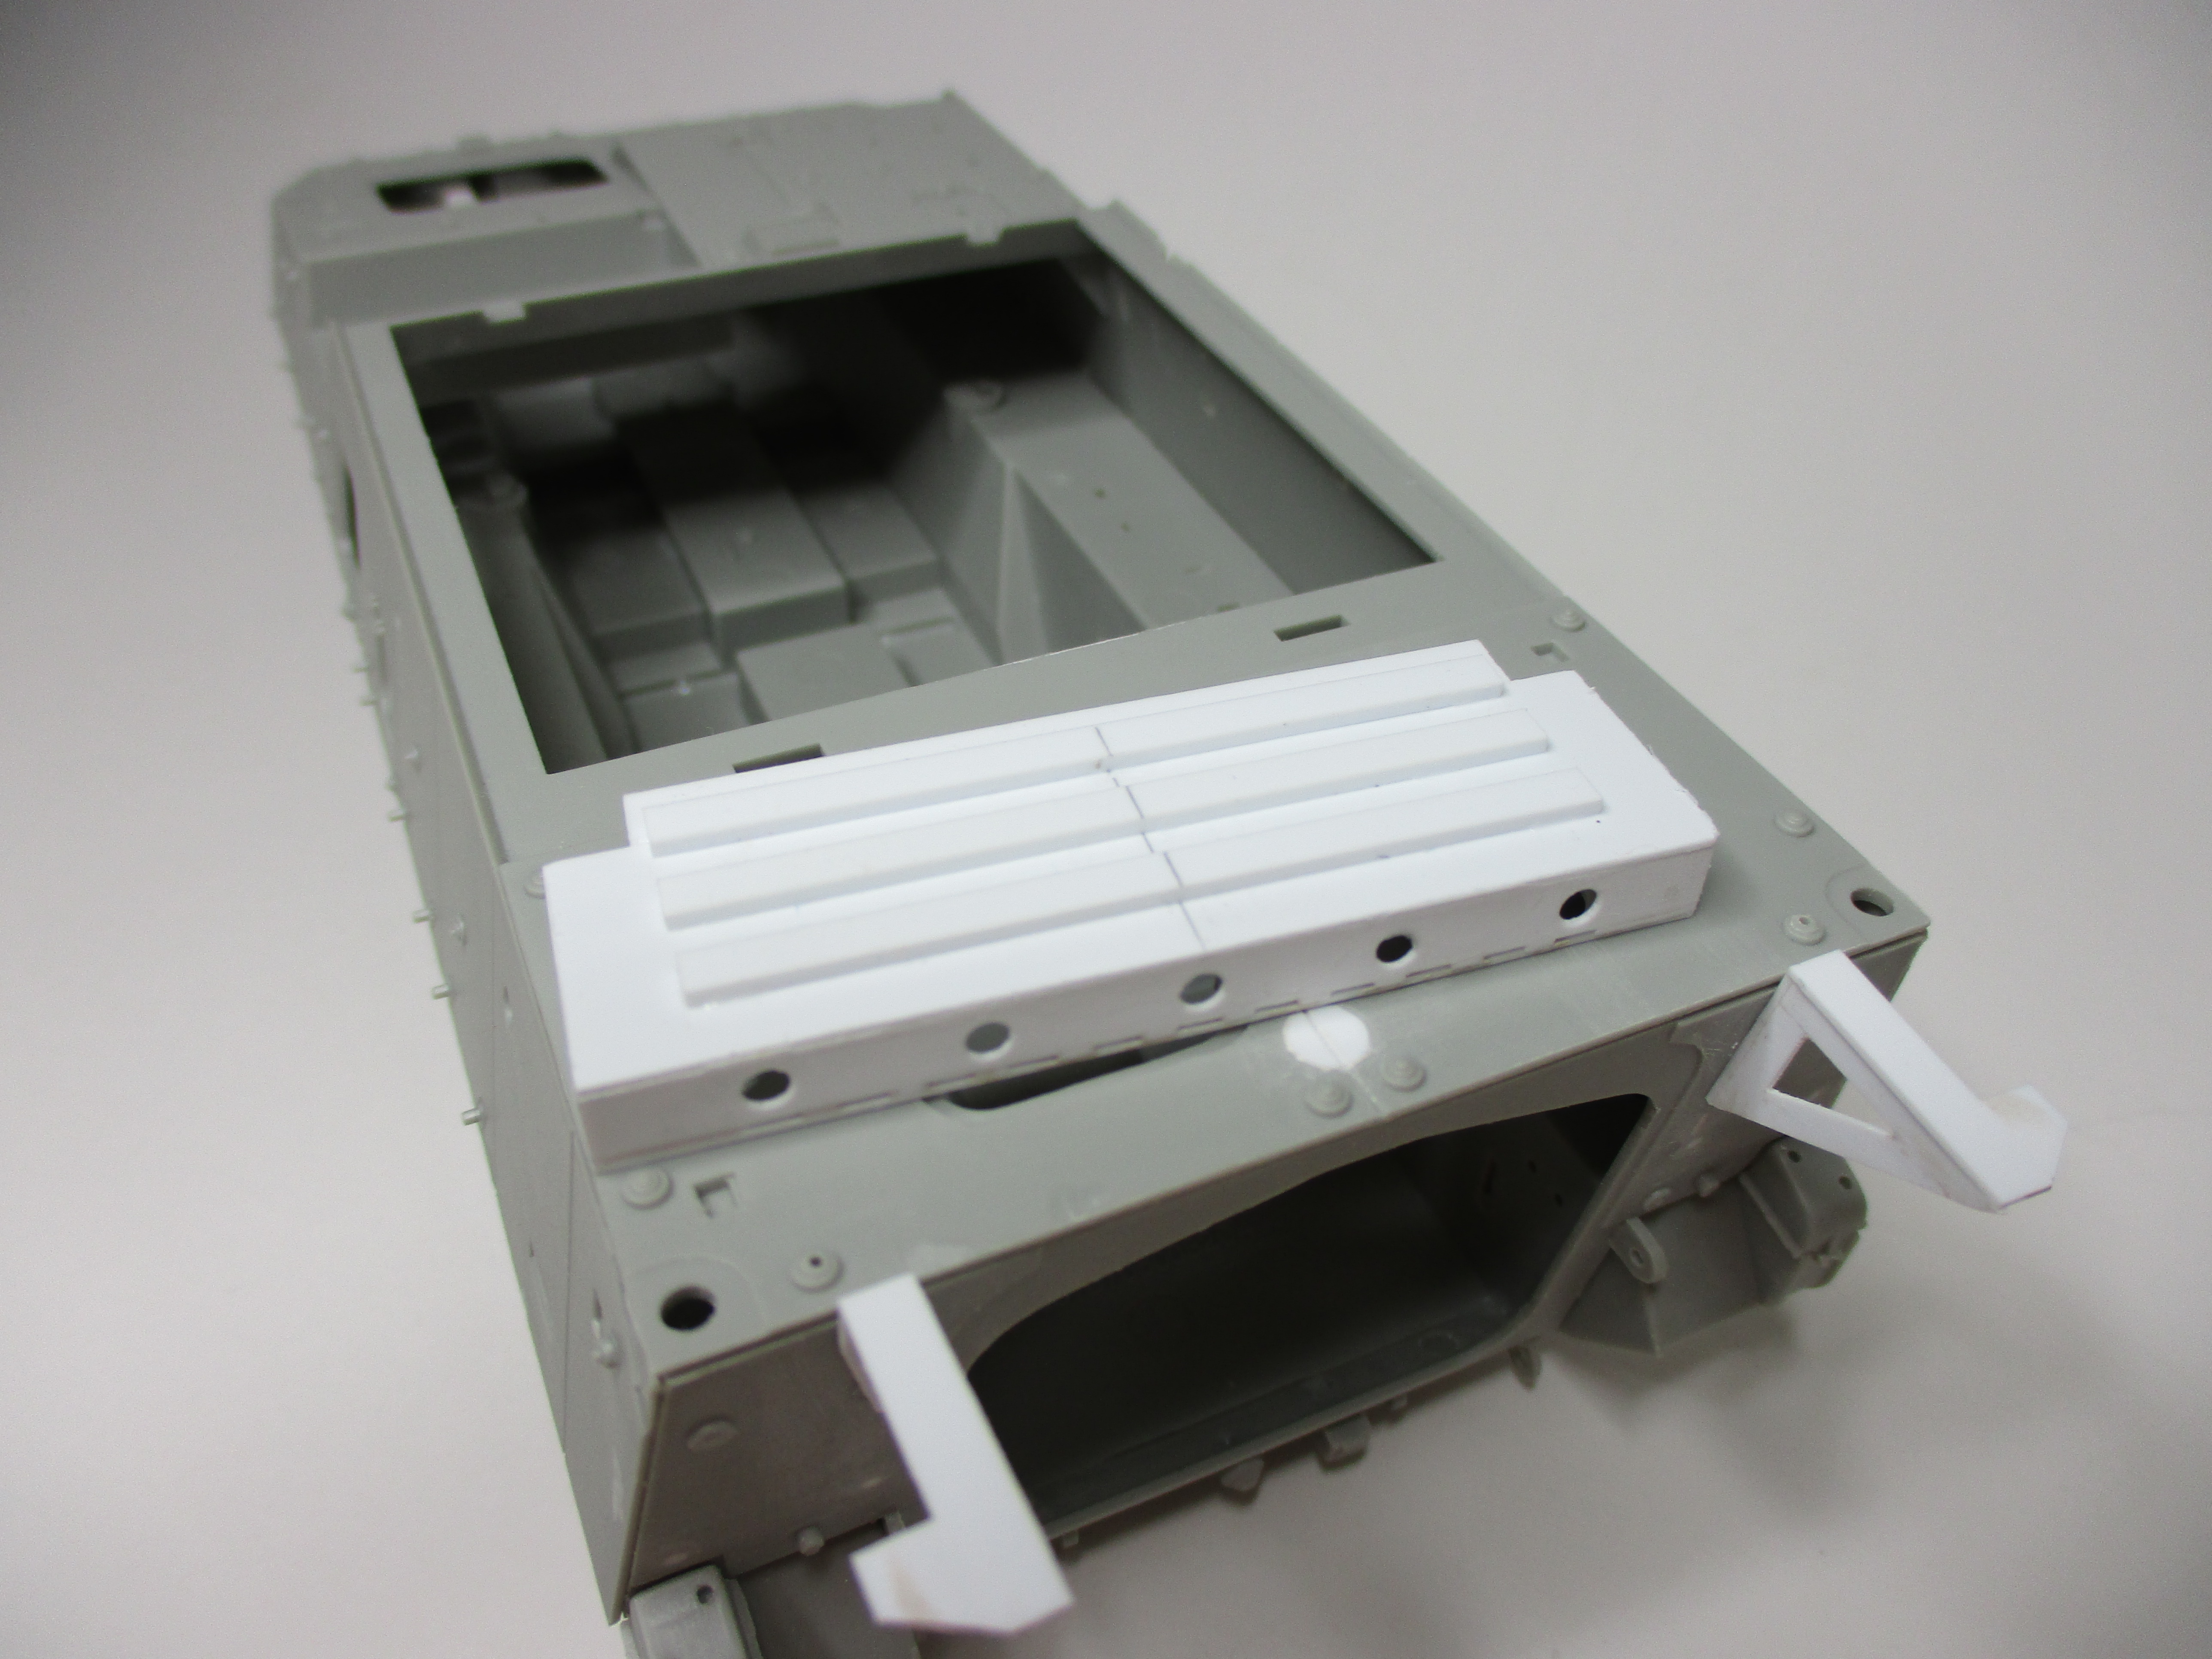
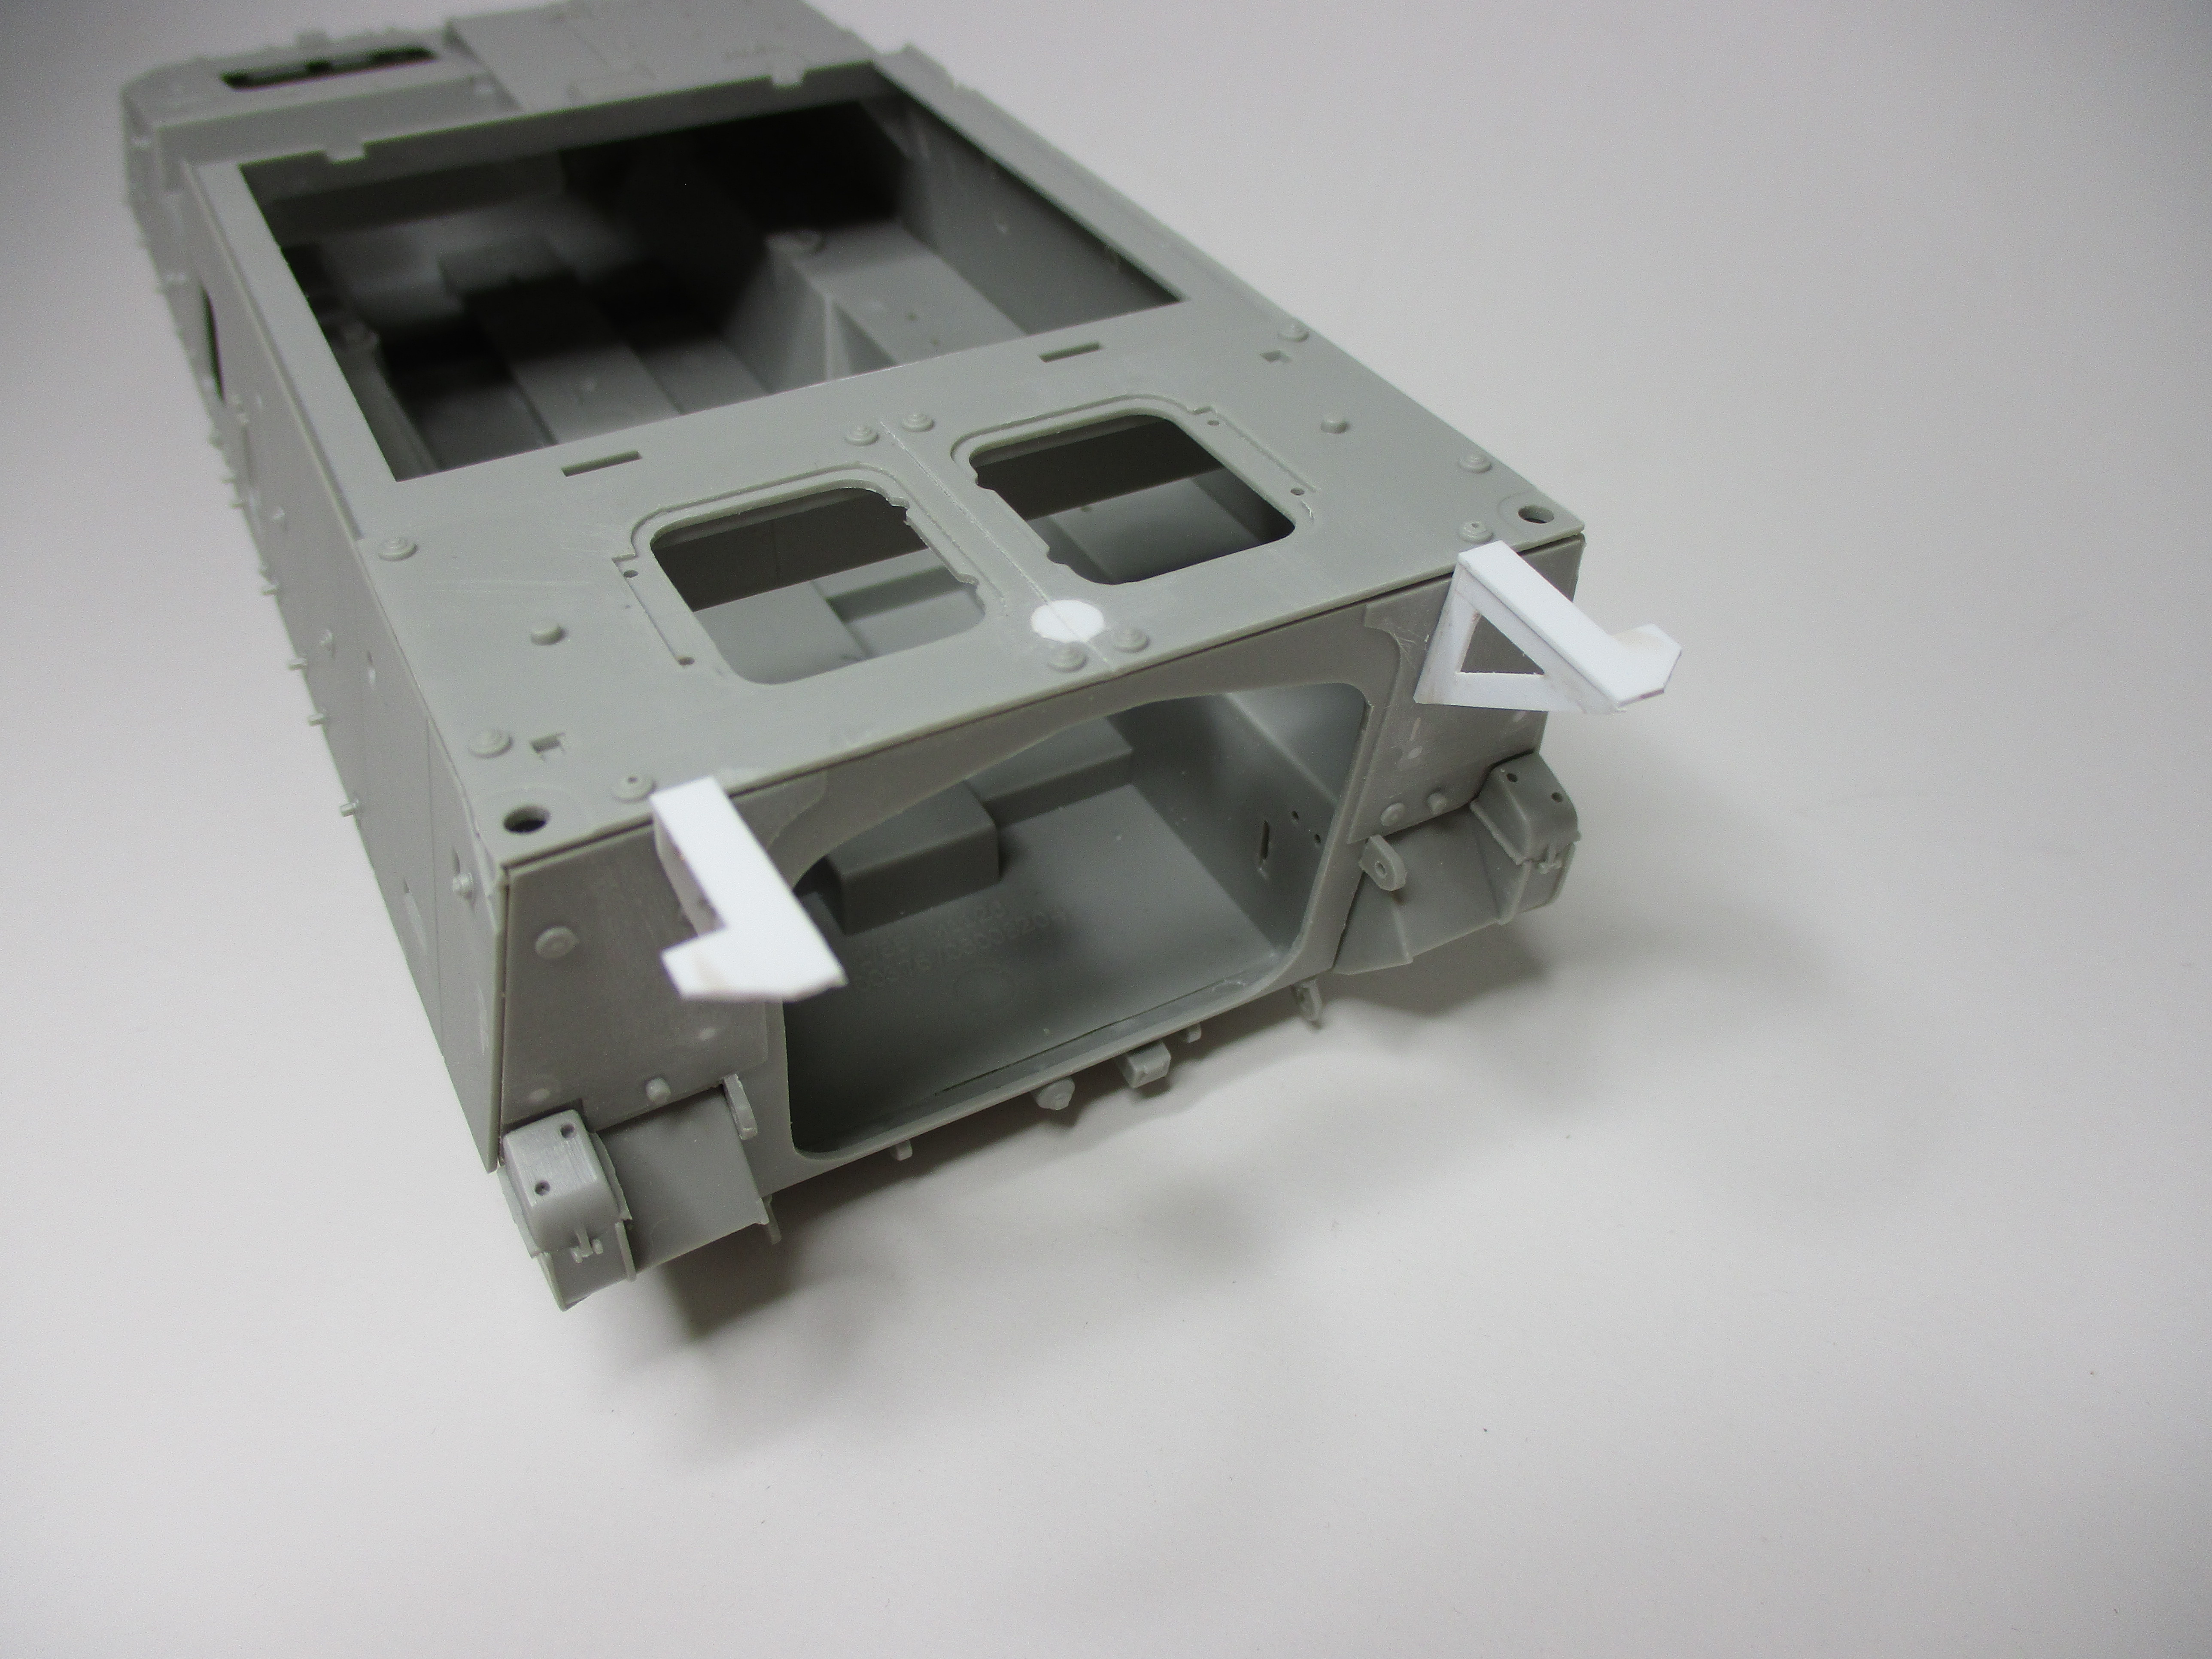
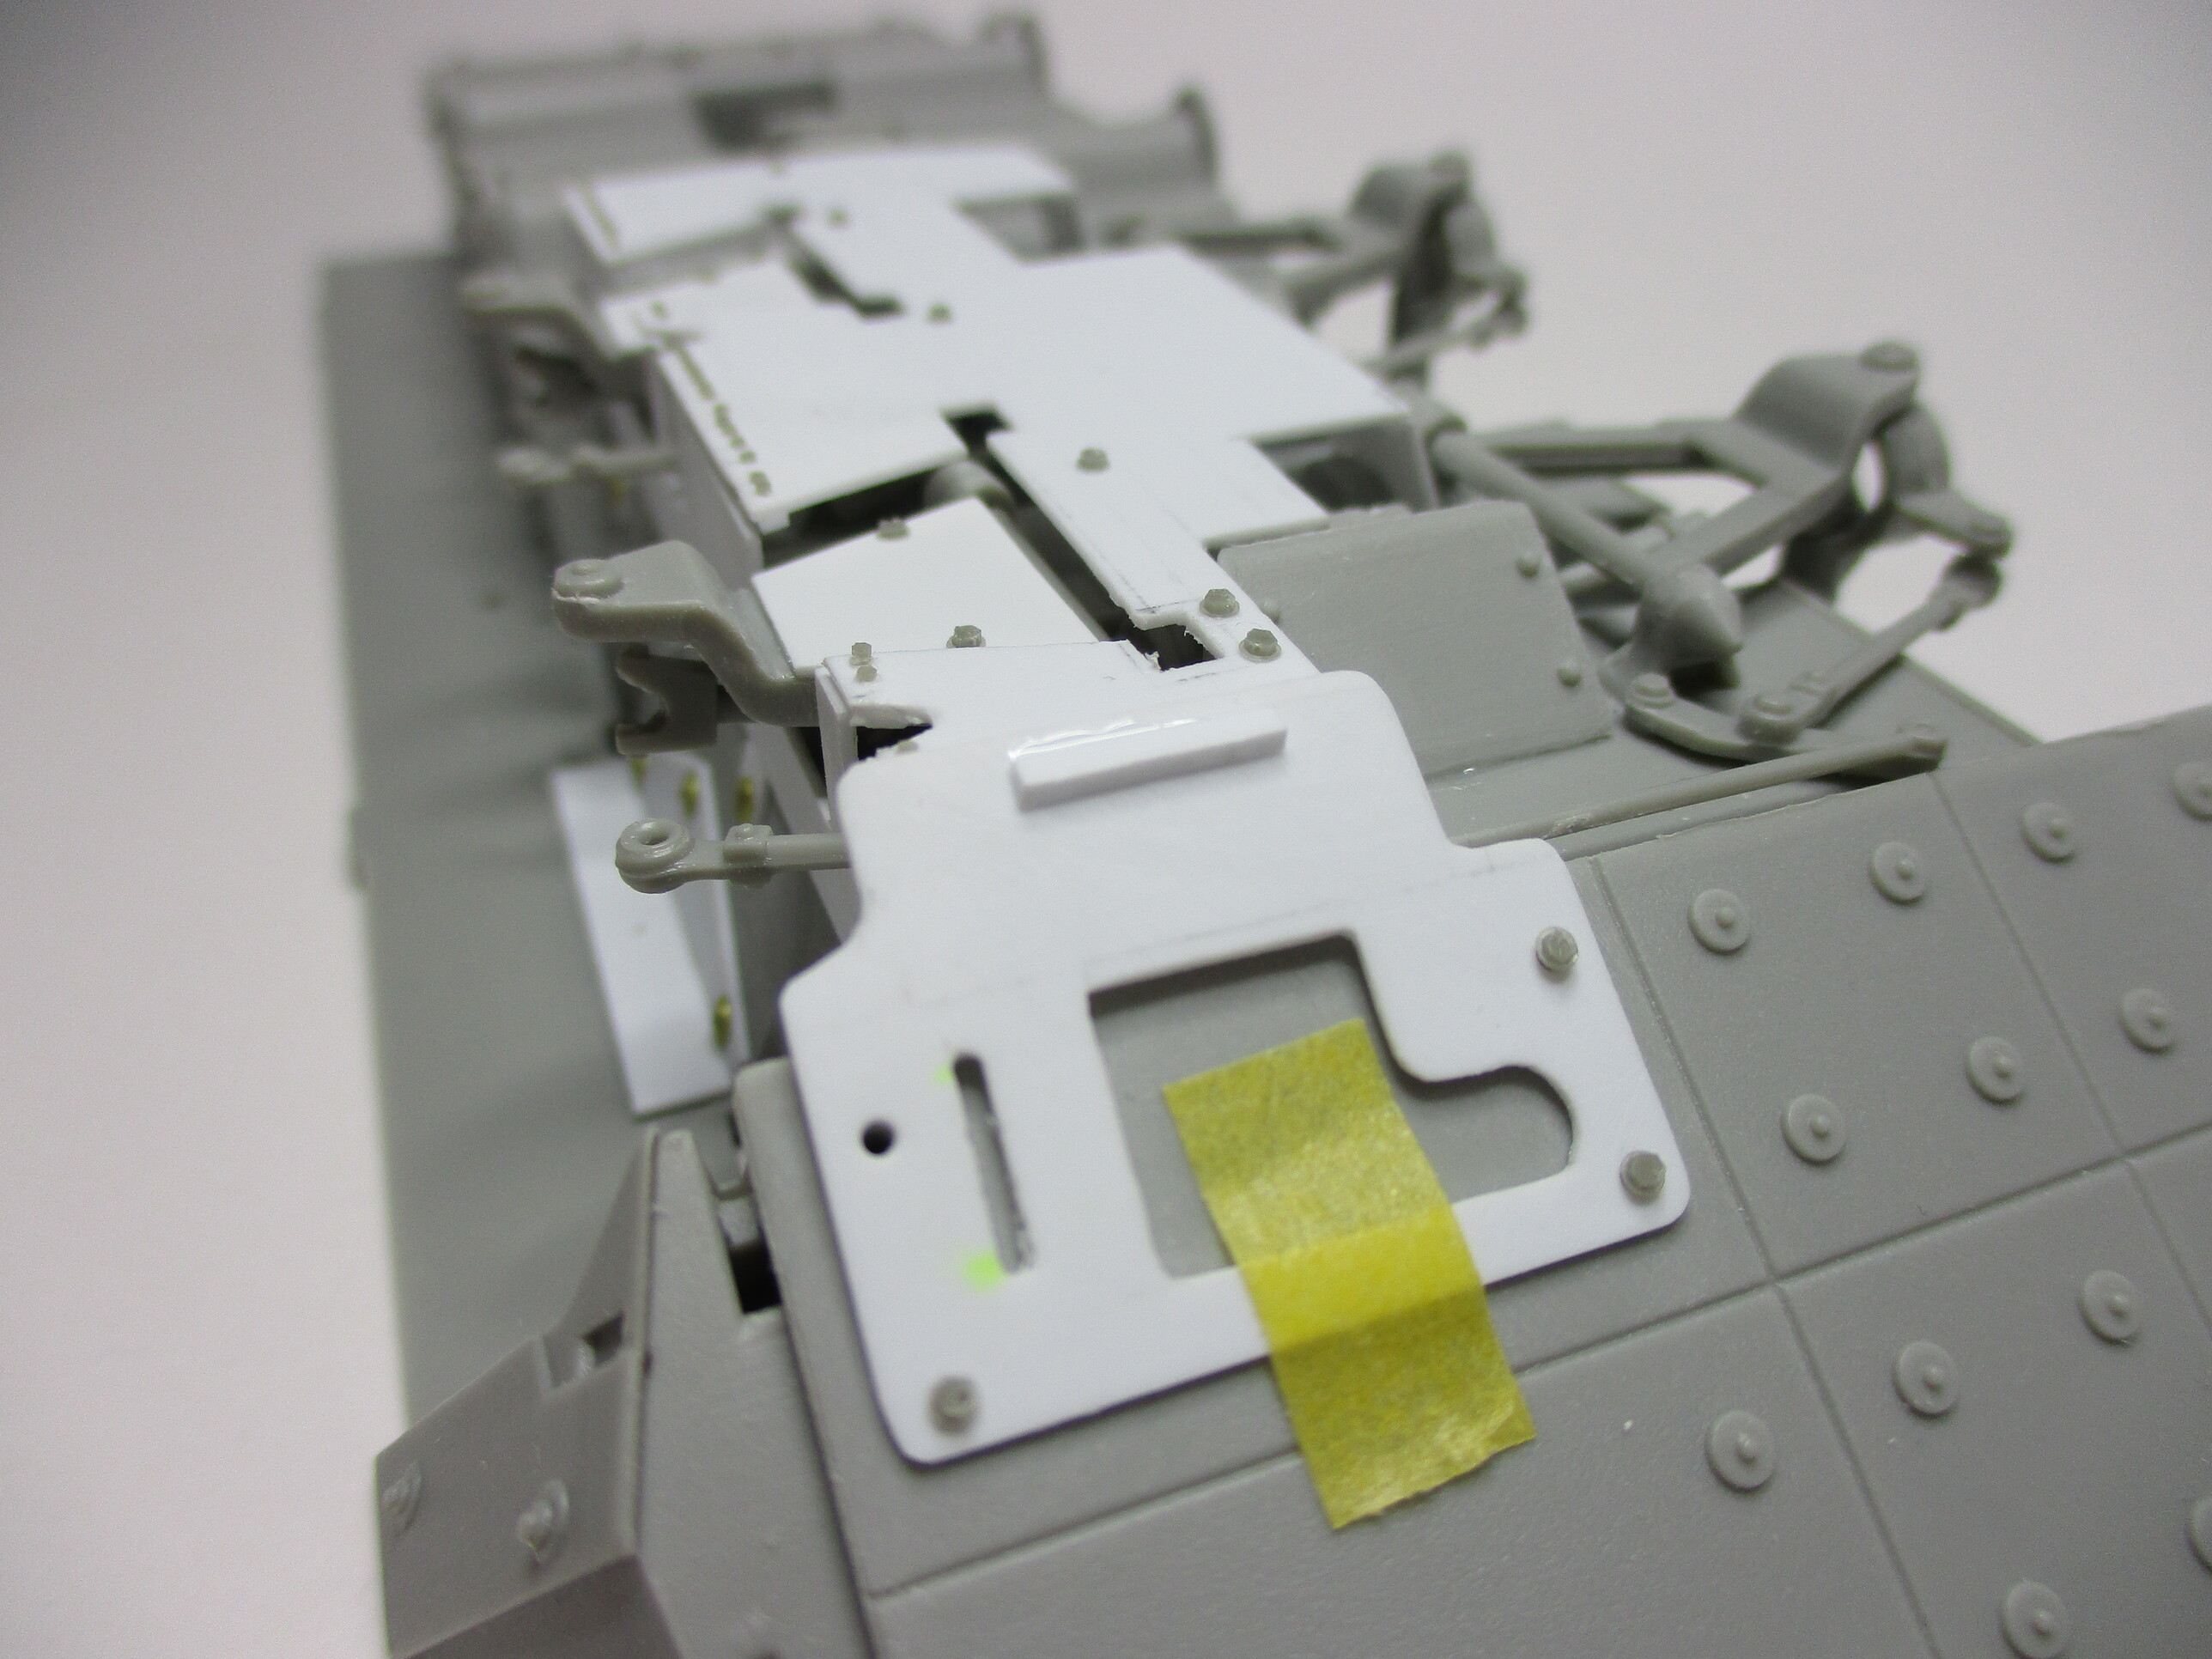
Driver enhancement kit is done!
To facilitate painting, the front and the bottom plate are not jet fixed.
Peter
Driver enhancement kit is done!
To facilitate painting, the front and the bottom plate are not jet fixed.
Peter
That’s looking very sharp Peter. Makes s big difference… Cracking job on it. Be great to see more soon I hope 
Nice work Peter. If I may ask, what measurements are you using to achieve accuracy?
Thank you for your nice comments.
Well……. first of all, I don’t think that my “interpretation” of the bottom plate is totally accurate.
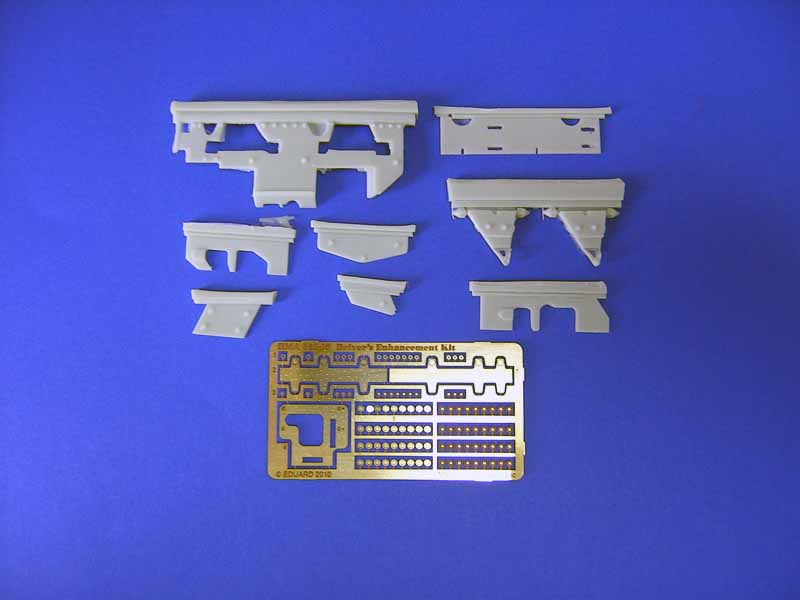
There are just few pictures that actually show parts of the DEK plates. I found some in the internet, some in Ralph Zwilling’s book “Stryker Family Upgrades in detail”. There, at page 10, is a real good picture of the bottom plate.
Finally I found “Real Model Set No. 35208 Driver’s Enhancement Kit” in the net. It is designed for the “AFV Club Stryker” and as far as I know, it is no longer in production. But there is a PDF, with a list of parts and a kind of an assembling instruction. A photo on this PDF shows all the parts that are included.
And …… this photo I used as a template!
I printed this photo in different enlargements, depending on the “real” dimensions of the Trumpeter kit.
These prints were put on the trumpeter kit and with try and error, the use of scissors and sellotape, I designed parts that look like the “real thing”.
After that, the chosen dimensions were transferred to a 0.5mm plastic sheet.
The screws you can see on the pictures are from plusmodel. The smaller ones are 0.6mm the bigger ones 1.1mm.
Peter
Looks really good, Peter!
Keep 'em coming!


Peter, thank you for your explanation. It might not be 100% accurate but from my point…it looks awesome. Your extra work is paying off very well. The end result will look a part.
Btw, is it possible you can post that PDF link? I don’t have the mentioned book but it will be nice to see something that I too might be able to copy.
Keep up the good work!
Shaping up nicely. Nice scratch work with the add on armor.
Thanks again for your nice comments!
Mike, I searched the internet to find the PDF for the Real Model RMA35208 “Drivers enhancement Kit” again, but couldn’t.
What I found, was a picture, on a German page, called: panzer-modell.de, which I put beneath. It is the same as on the PDF.
Hope I could help.
I do have a copy of the PDF on my computer. Is it possible to send you a personal email?
Peter
@PeterMax, thank you for the photo of the resin/PE parts. It gives me a clear view of what it fully suppose to look like fully. I am not familiar with panzer-modell.de. So, I will explore it soon. I will send you message myself soon. Thanks.
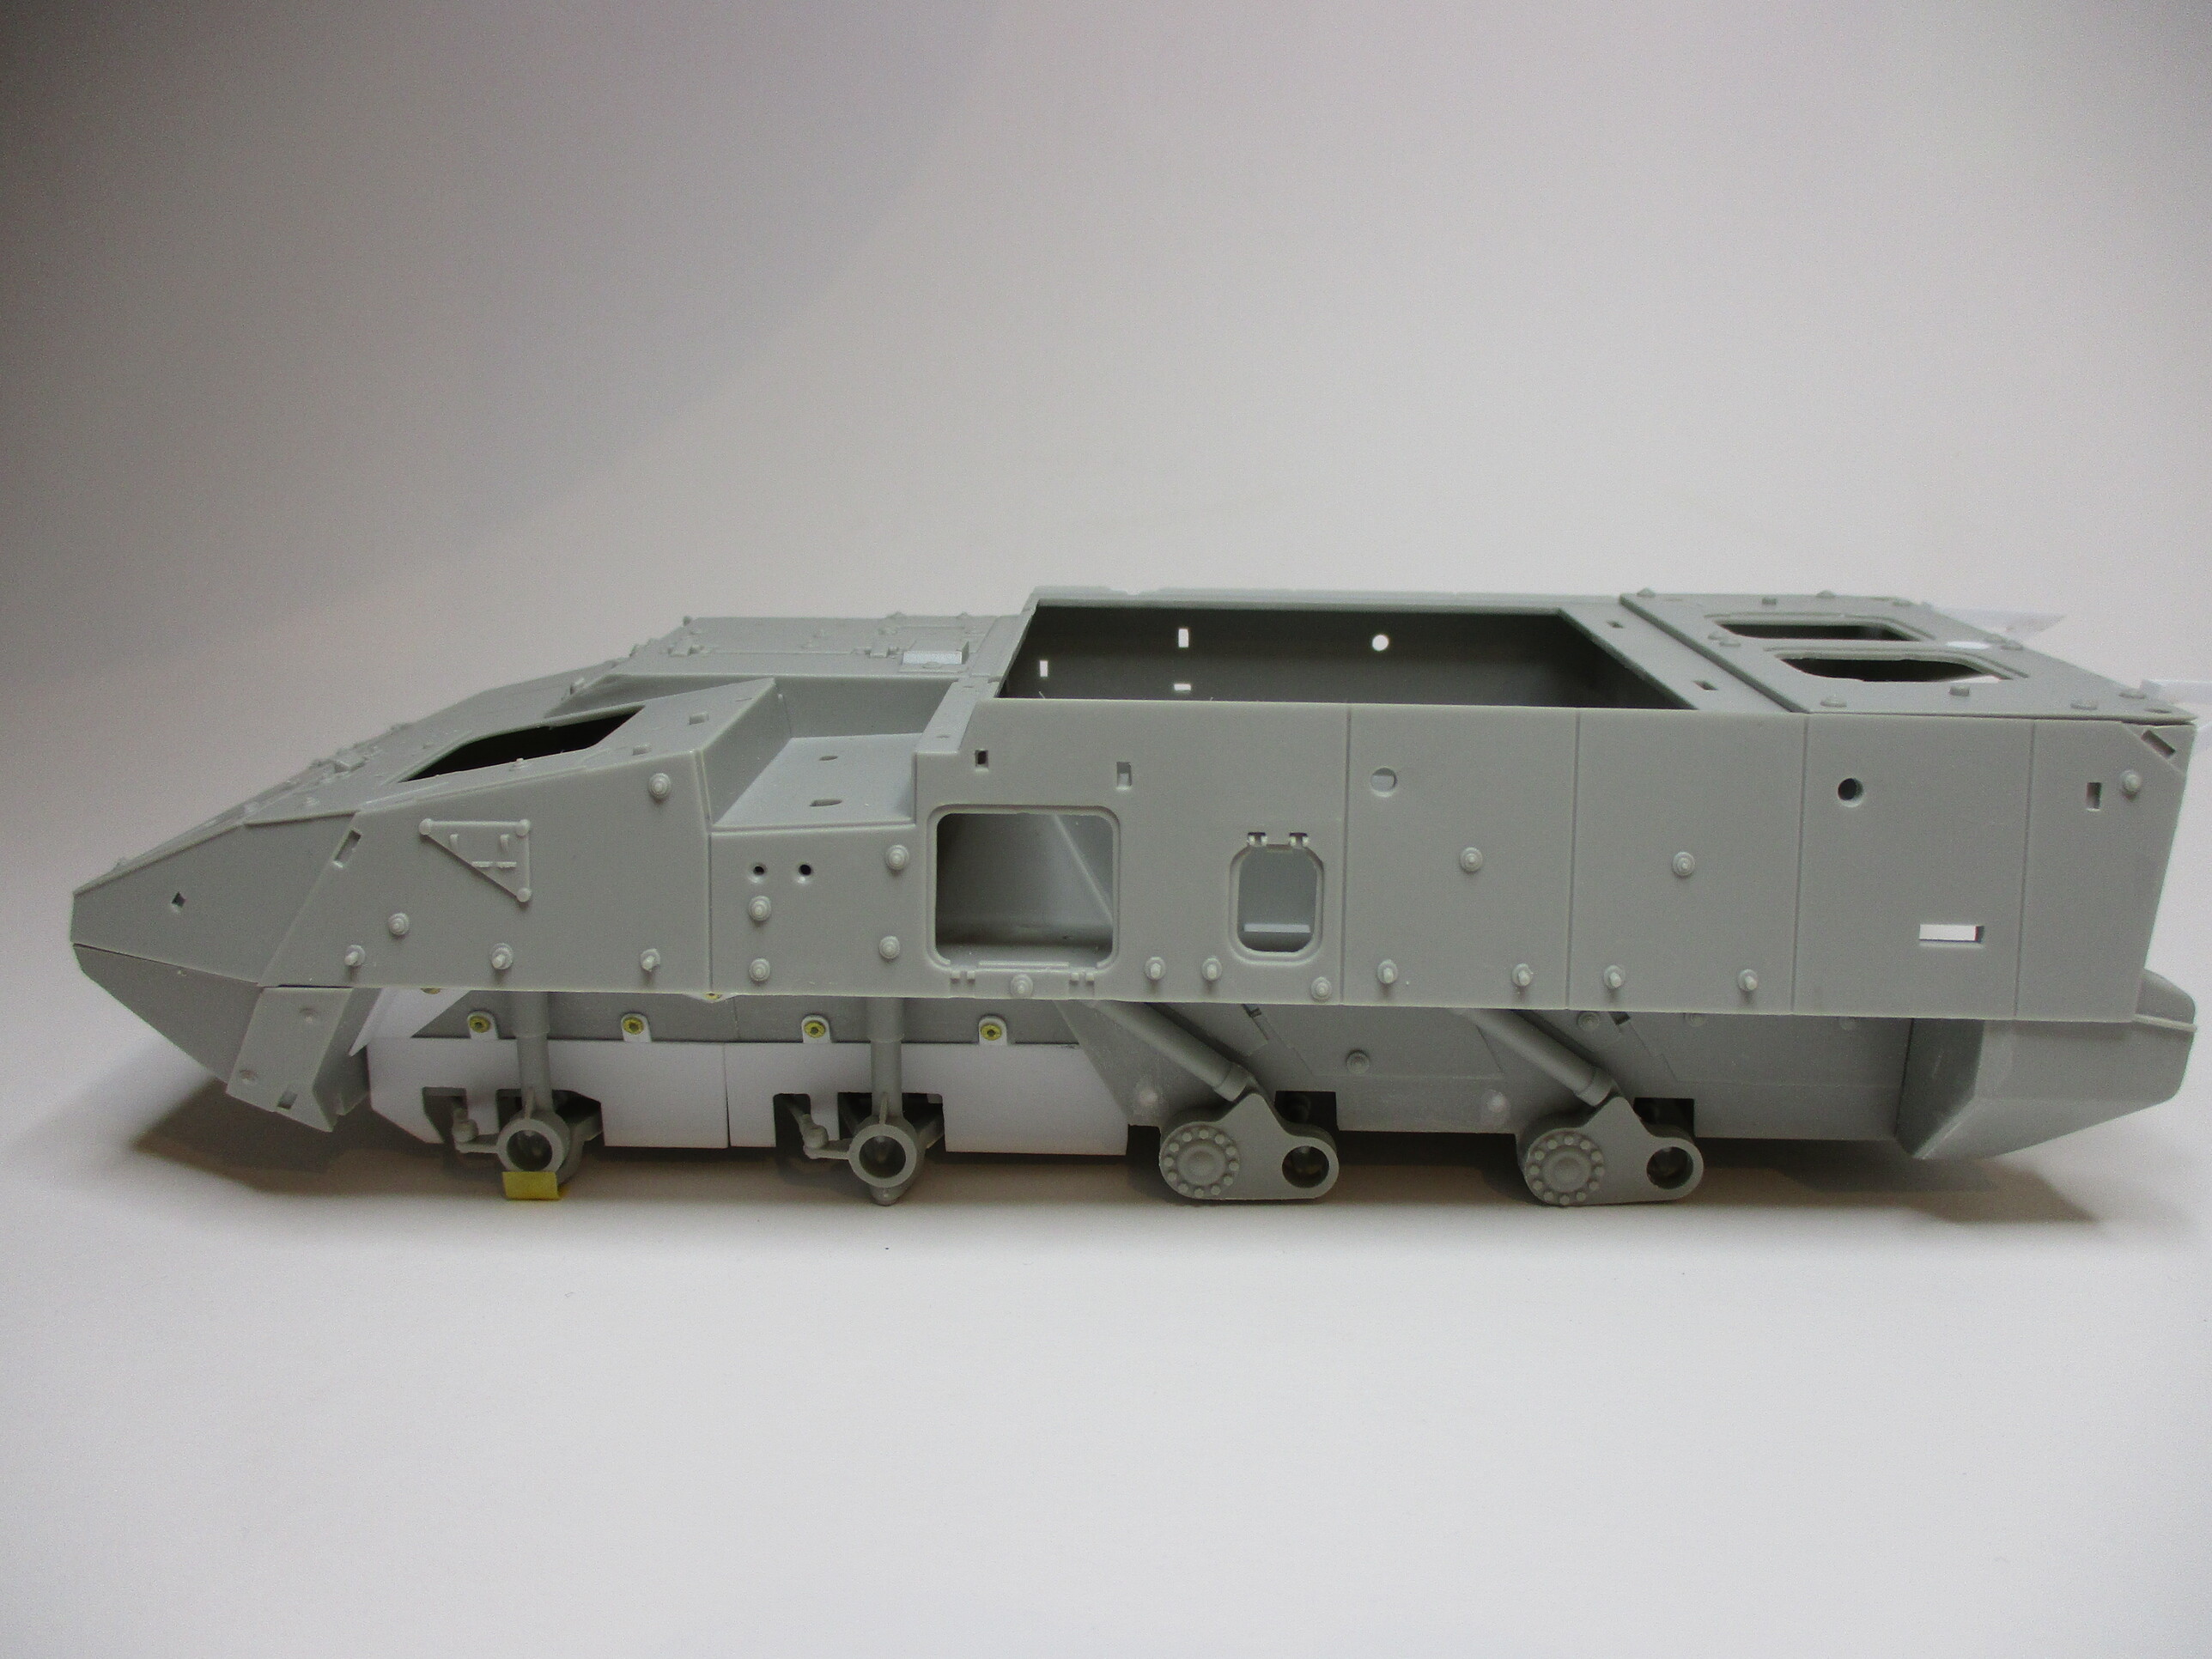
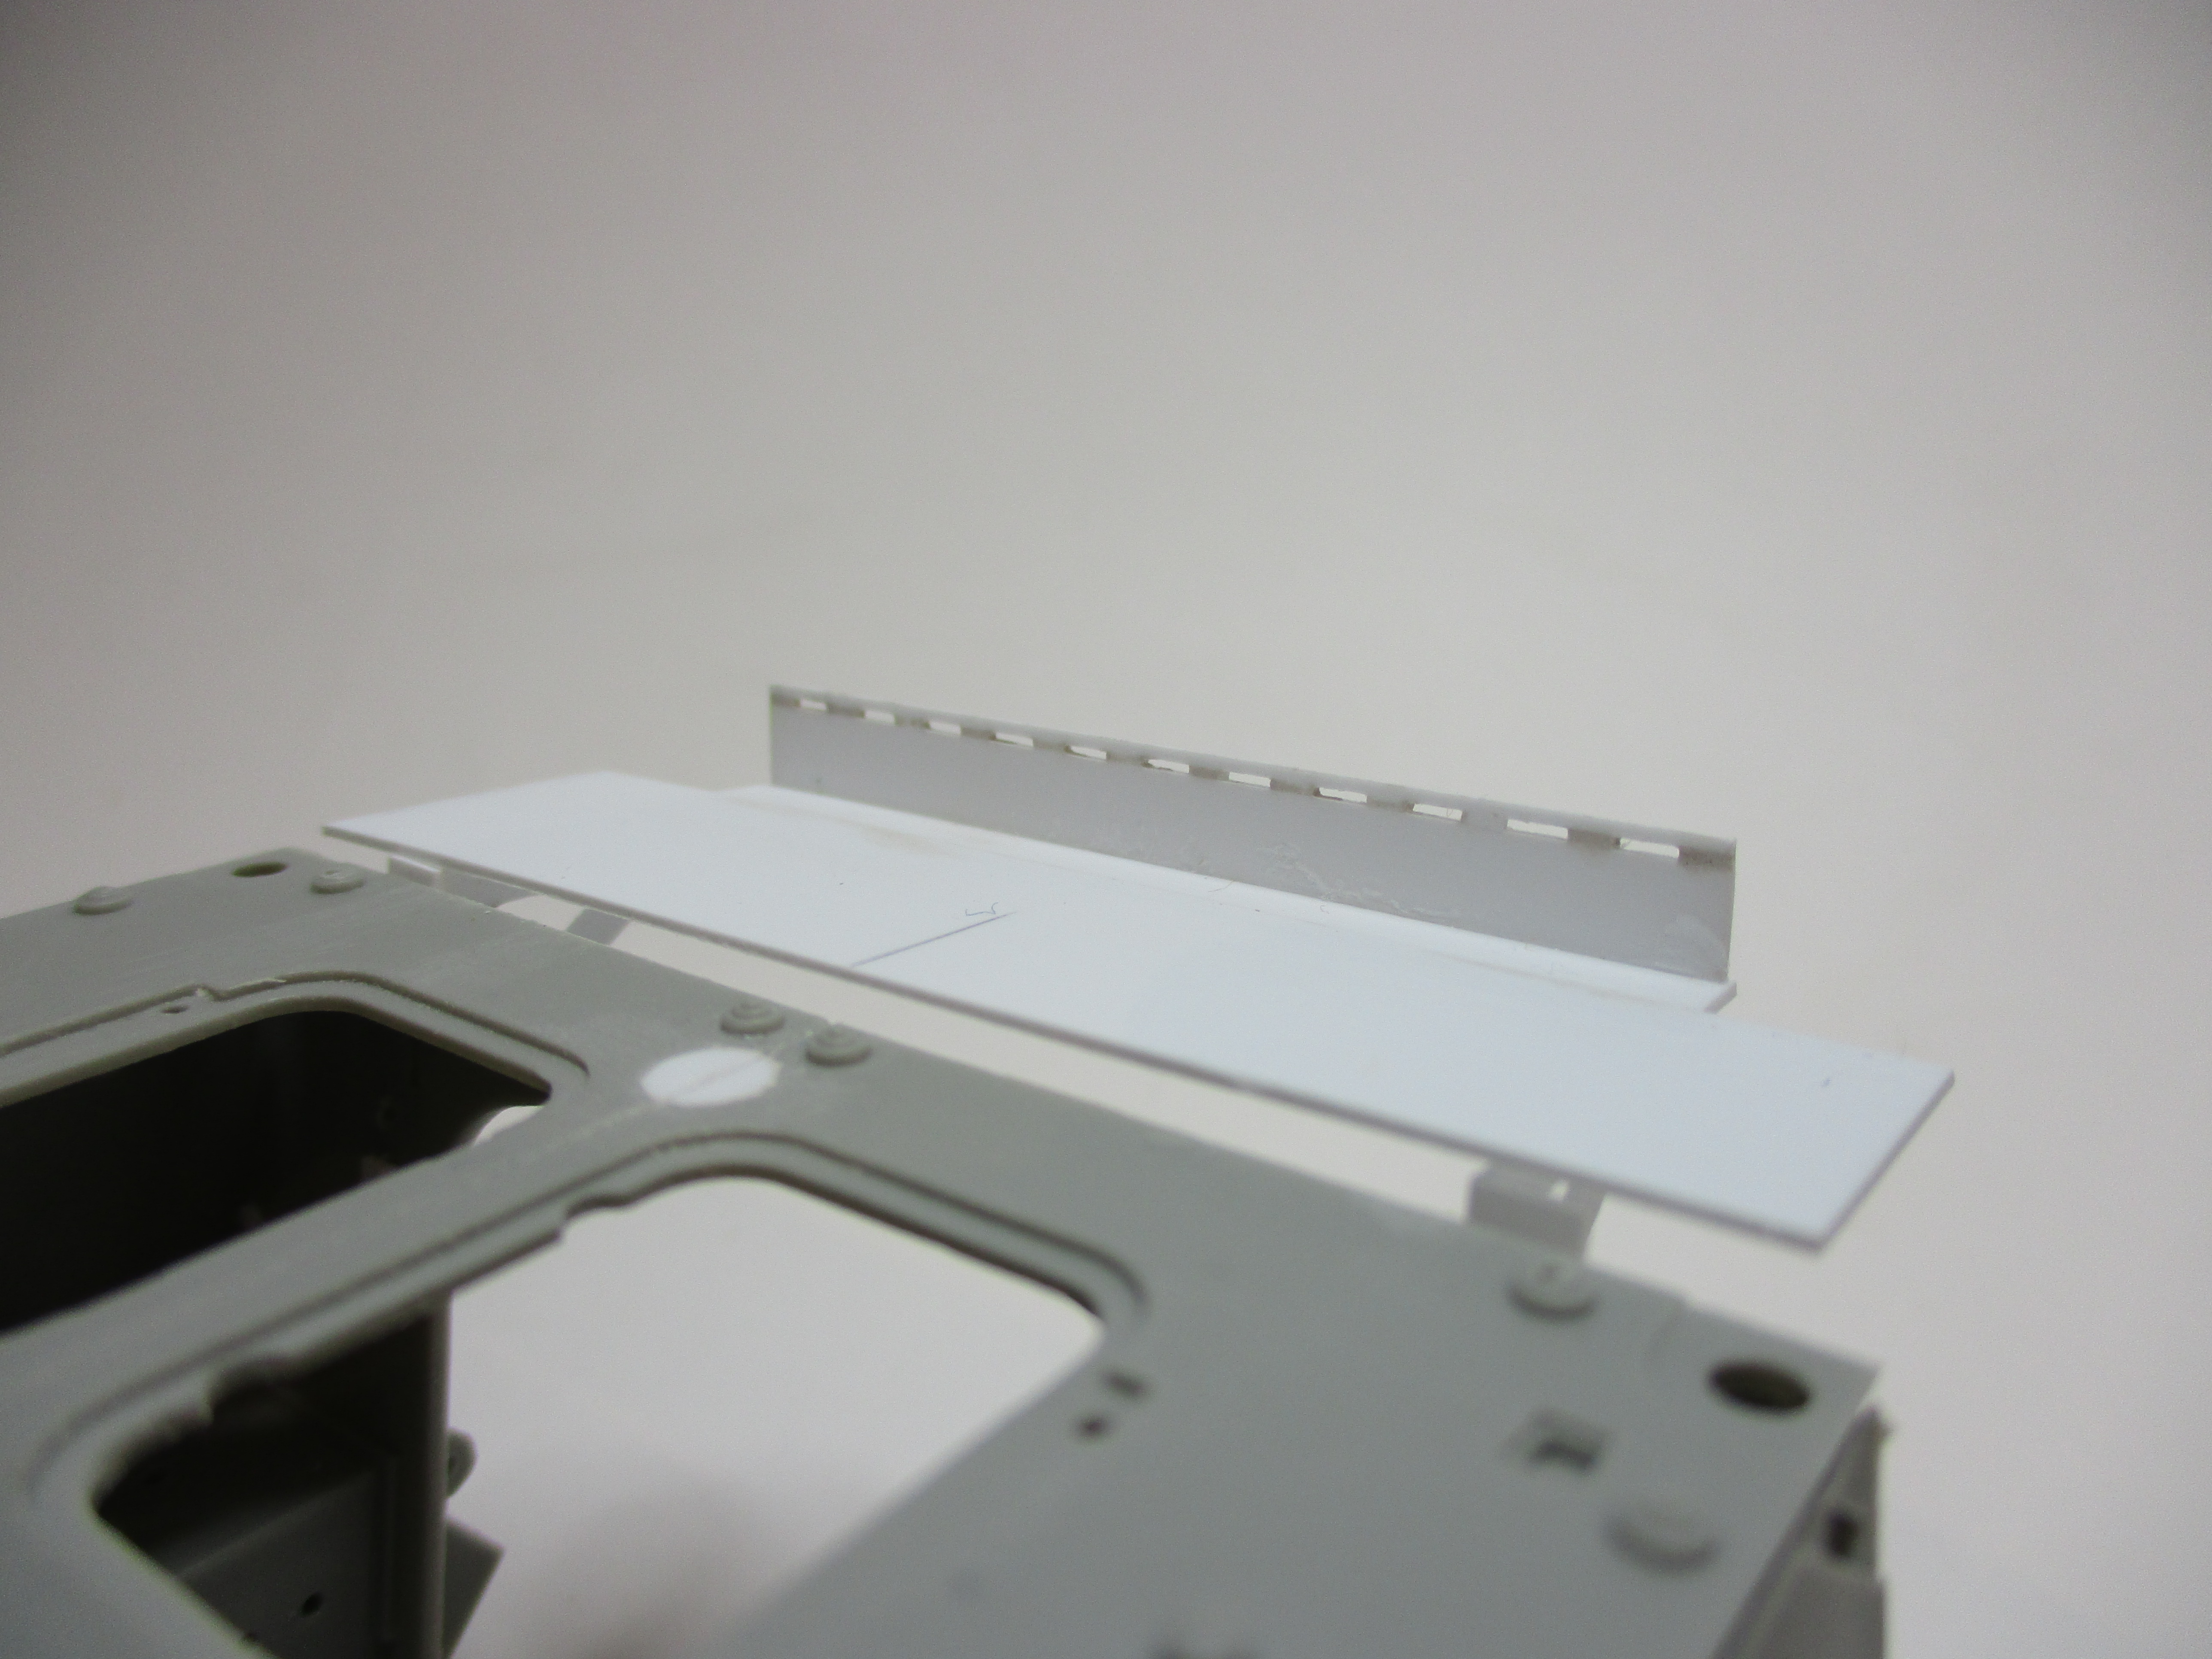
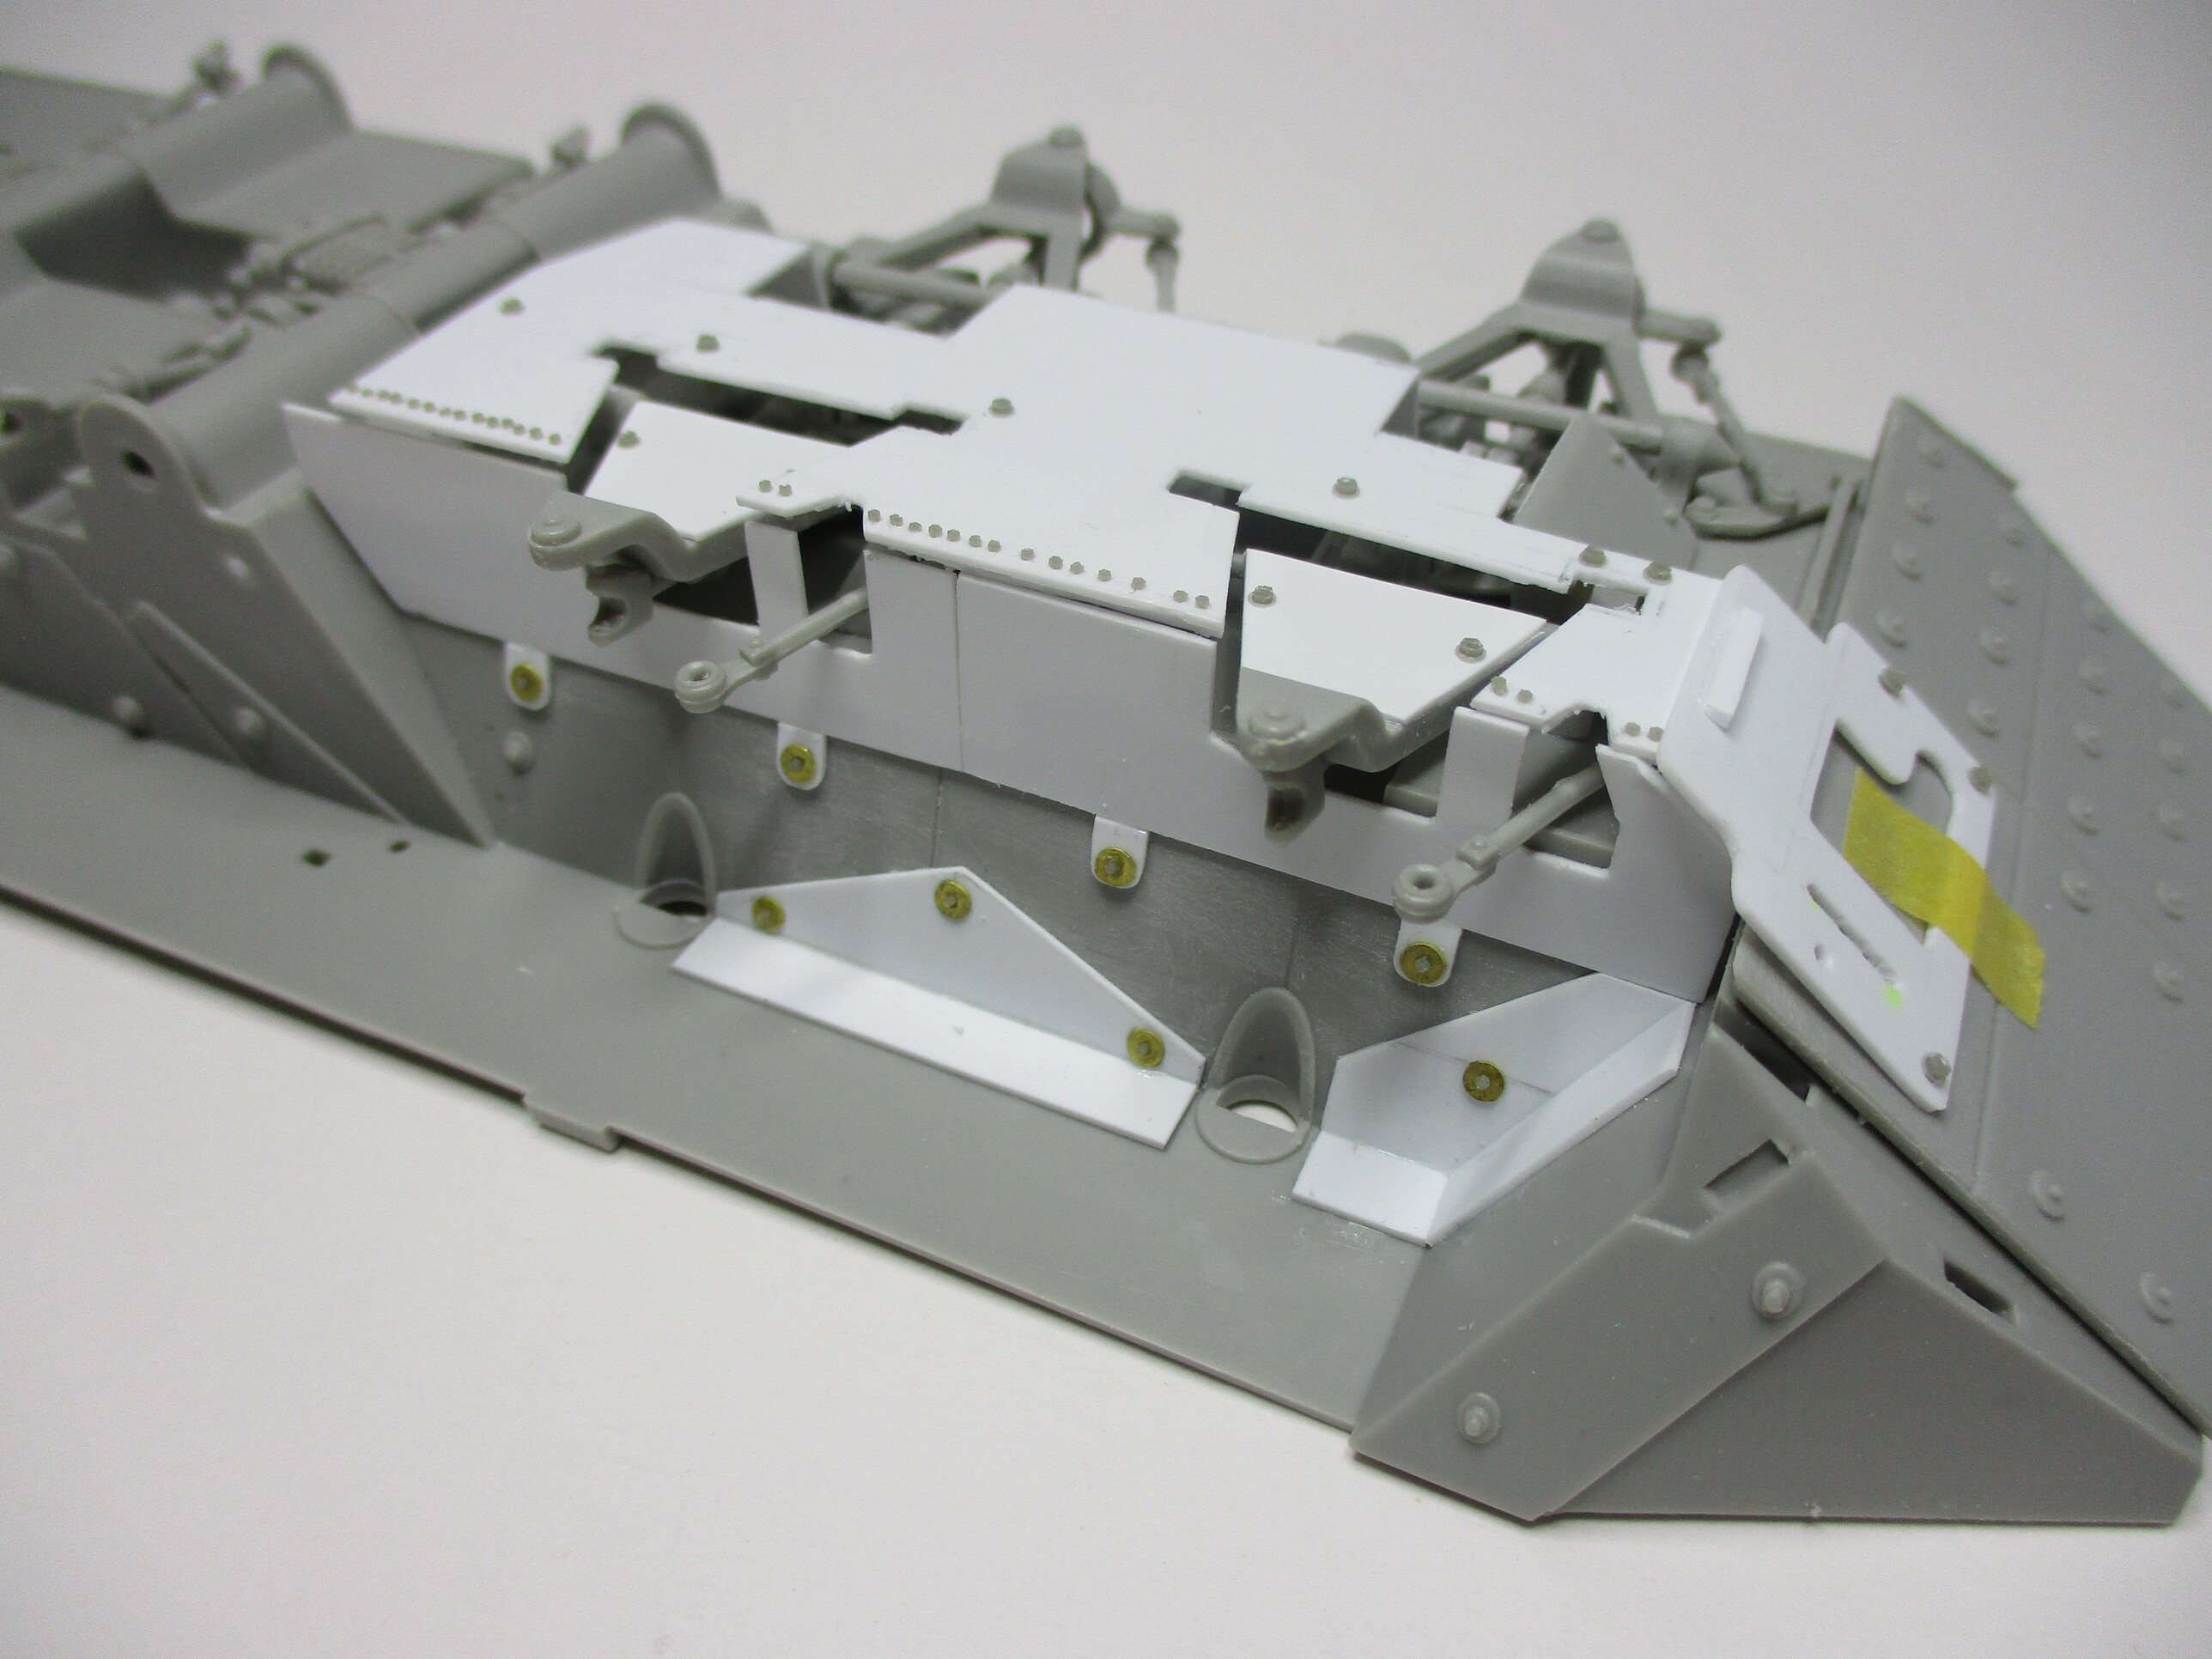
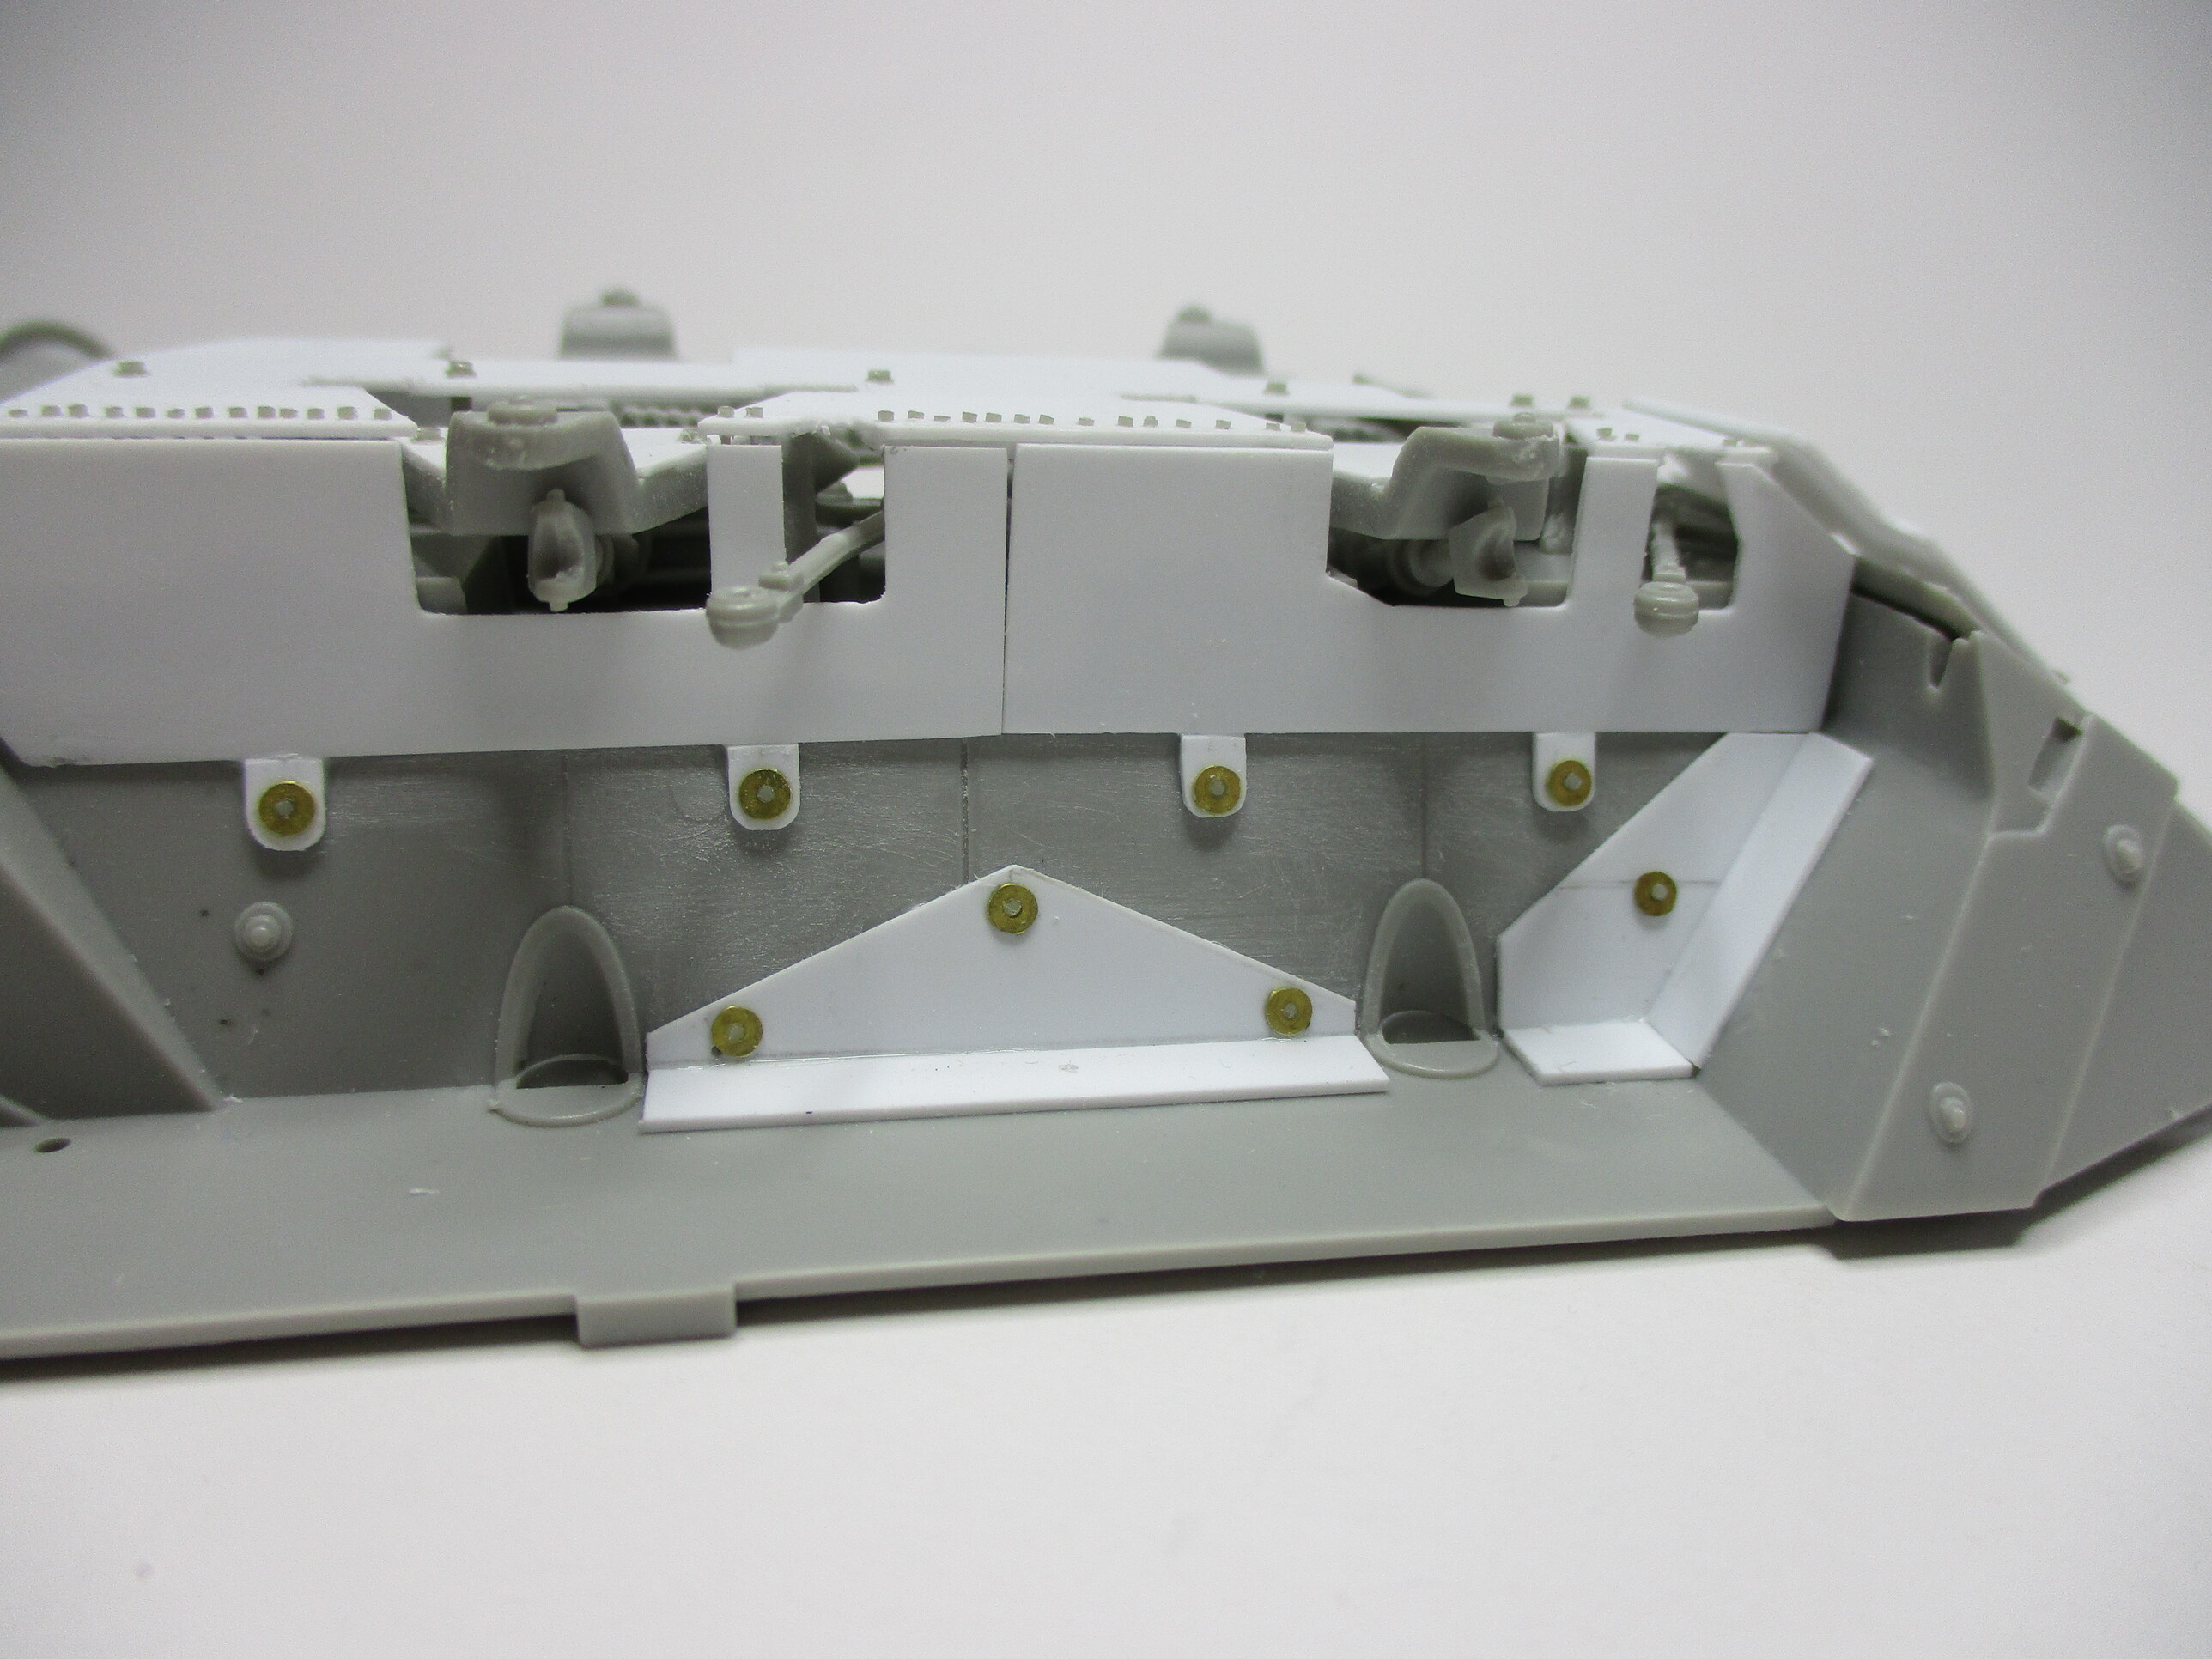
After I finished my work on the Drivers enhancement kit, I paid attention to the large storage box above the rear ramp.
This storage box is identical with the one on the M1126 Dragoon.
So again, “do it yourself is trendy”.
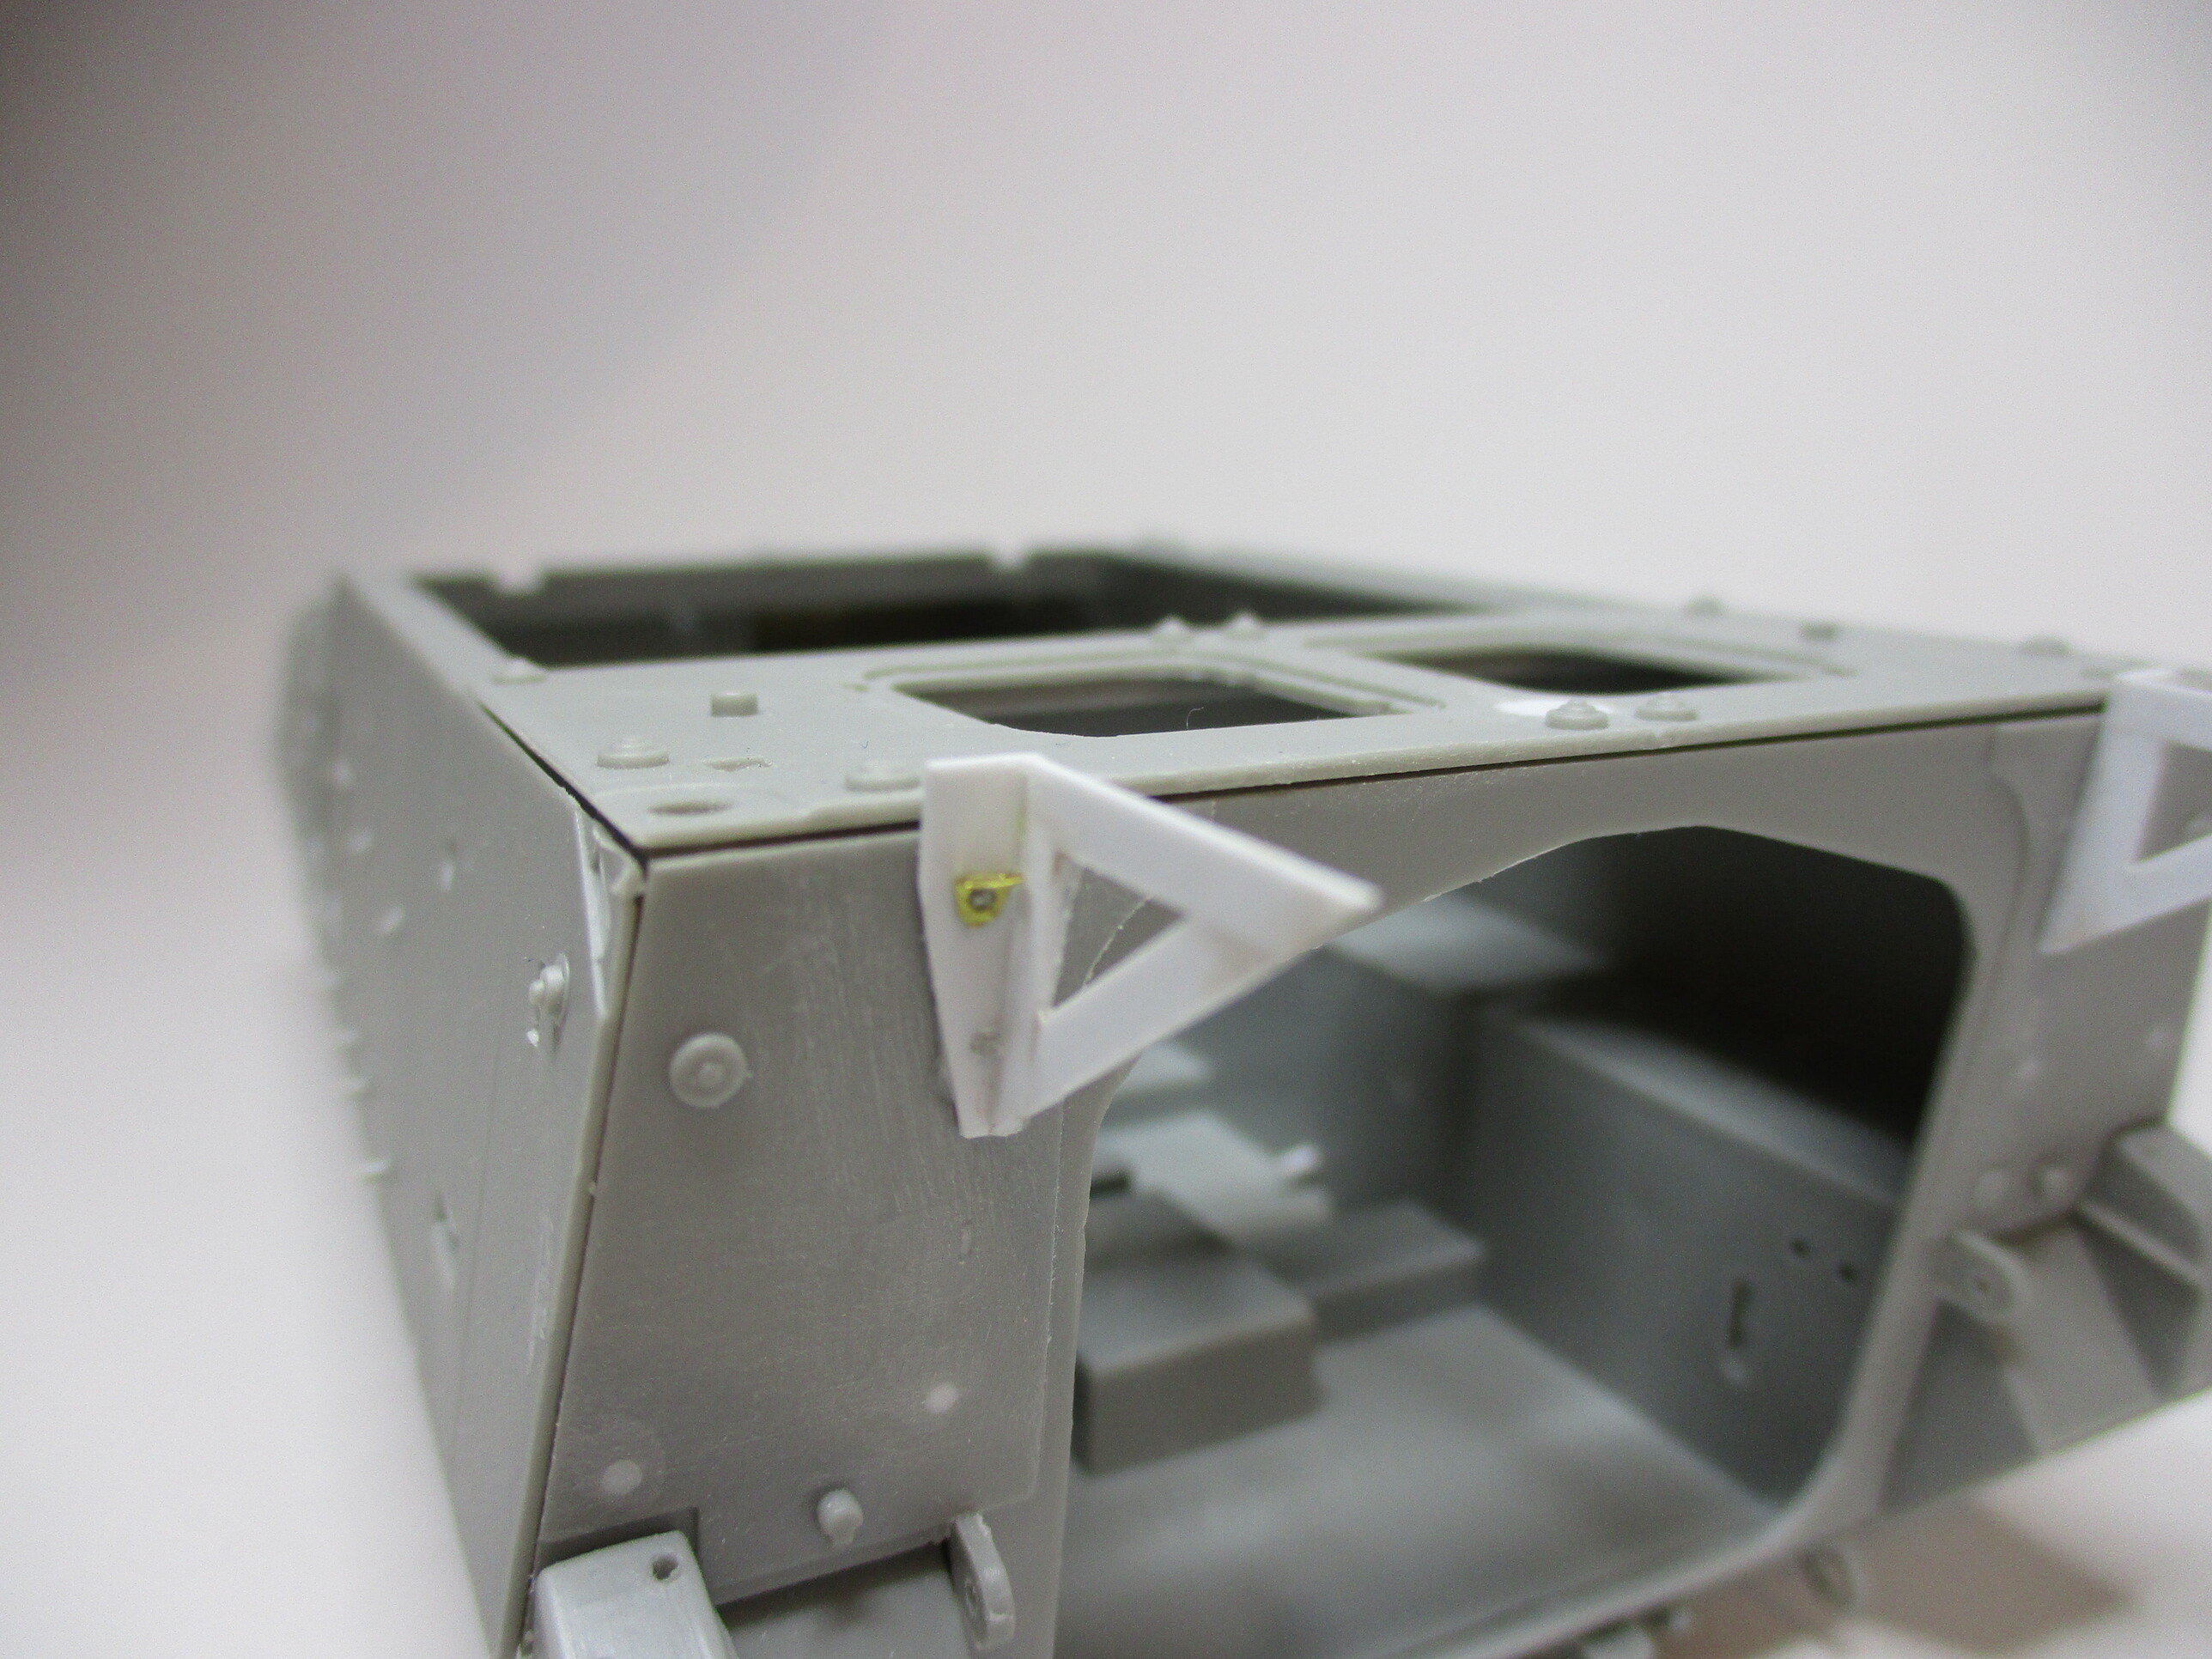
I started by assembling the major parts of the chassis. I did so, to get the accurate angel of the extensions. For the storage box should be horizontal, this is important.
I started by filling the holes below the extensions. After I figured out the accurate angel, the built was realized with evergreen strips no. 124.
After the base was finally done, I focused on the actual storage box. Again, with the use of photos and paper stencils, I figured out the needed dimensions and transferred them to 0.5mm evergreen strips.
Peter
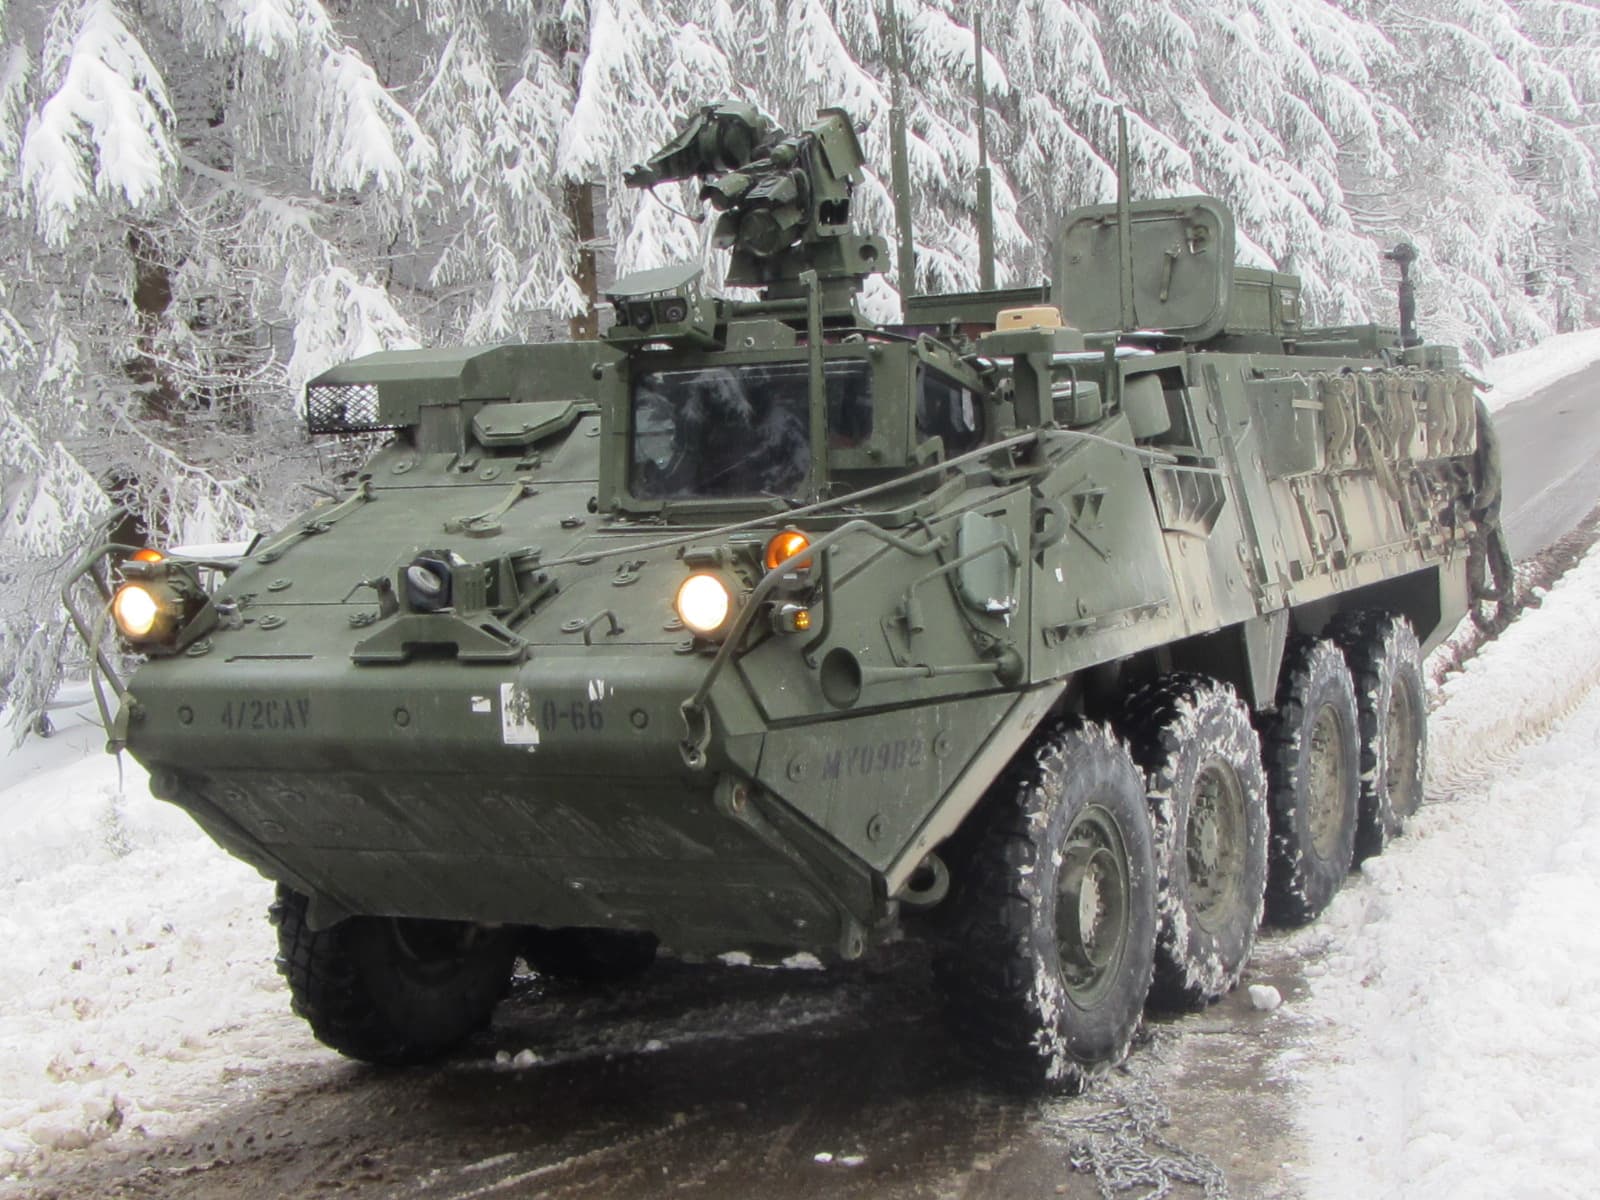
My next Stryker will be this one.
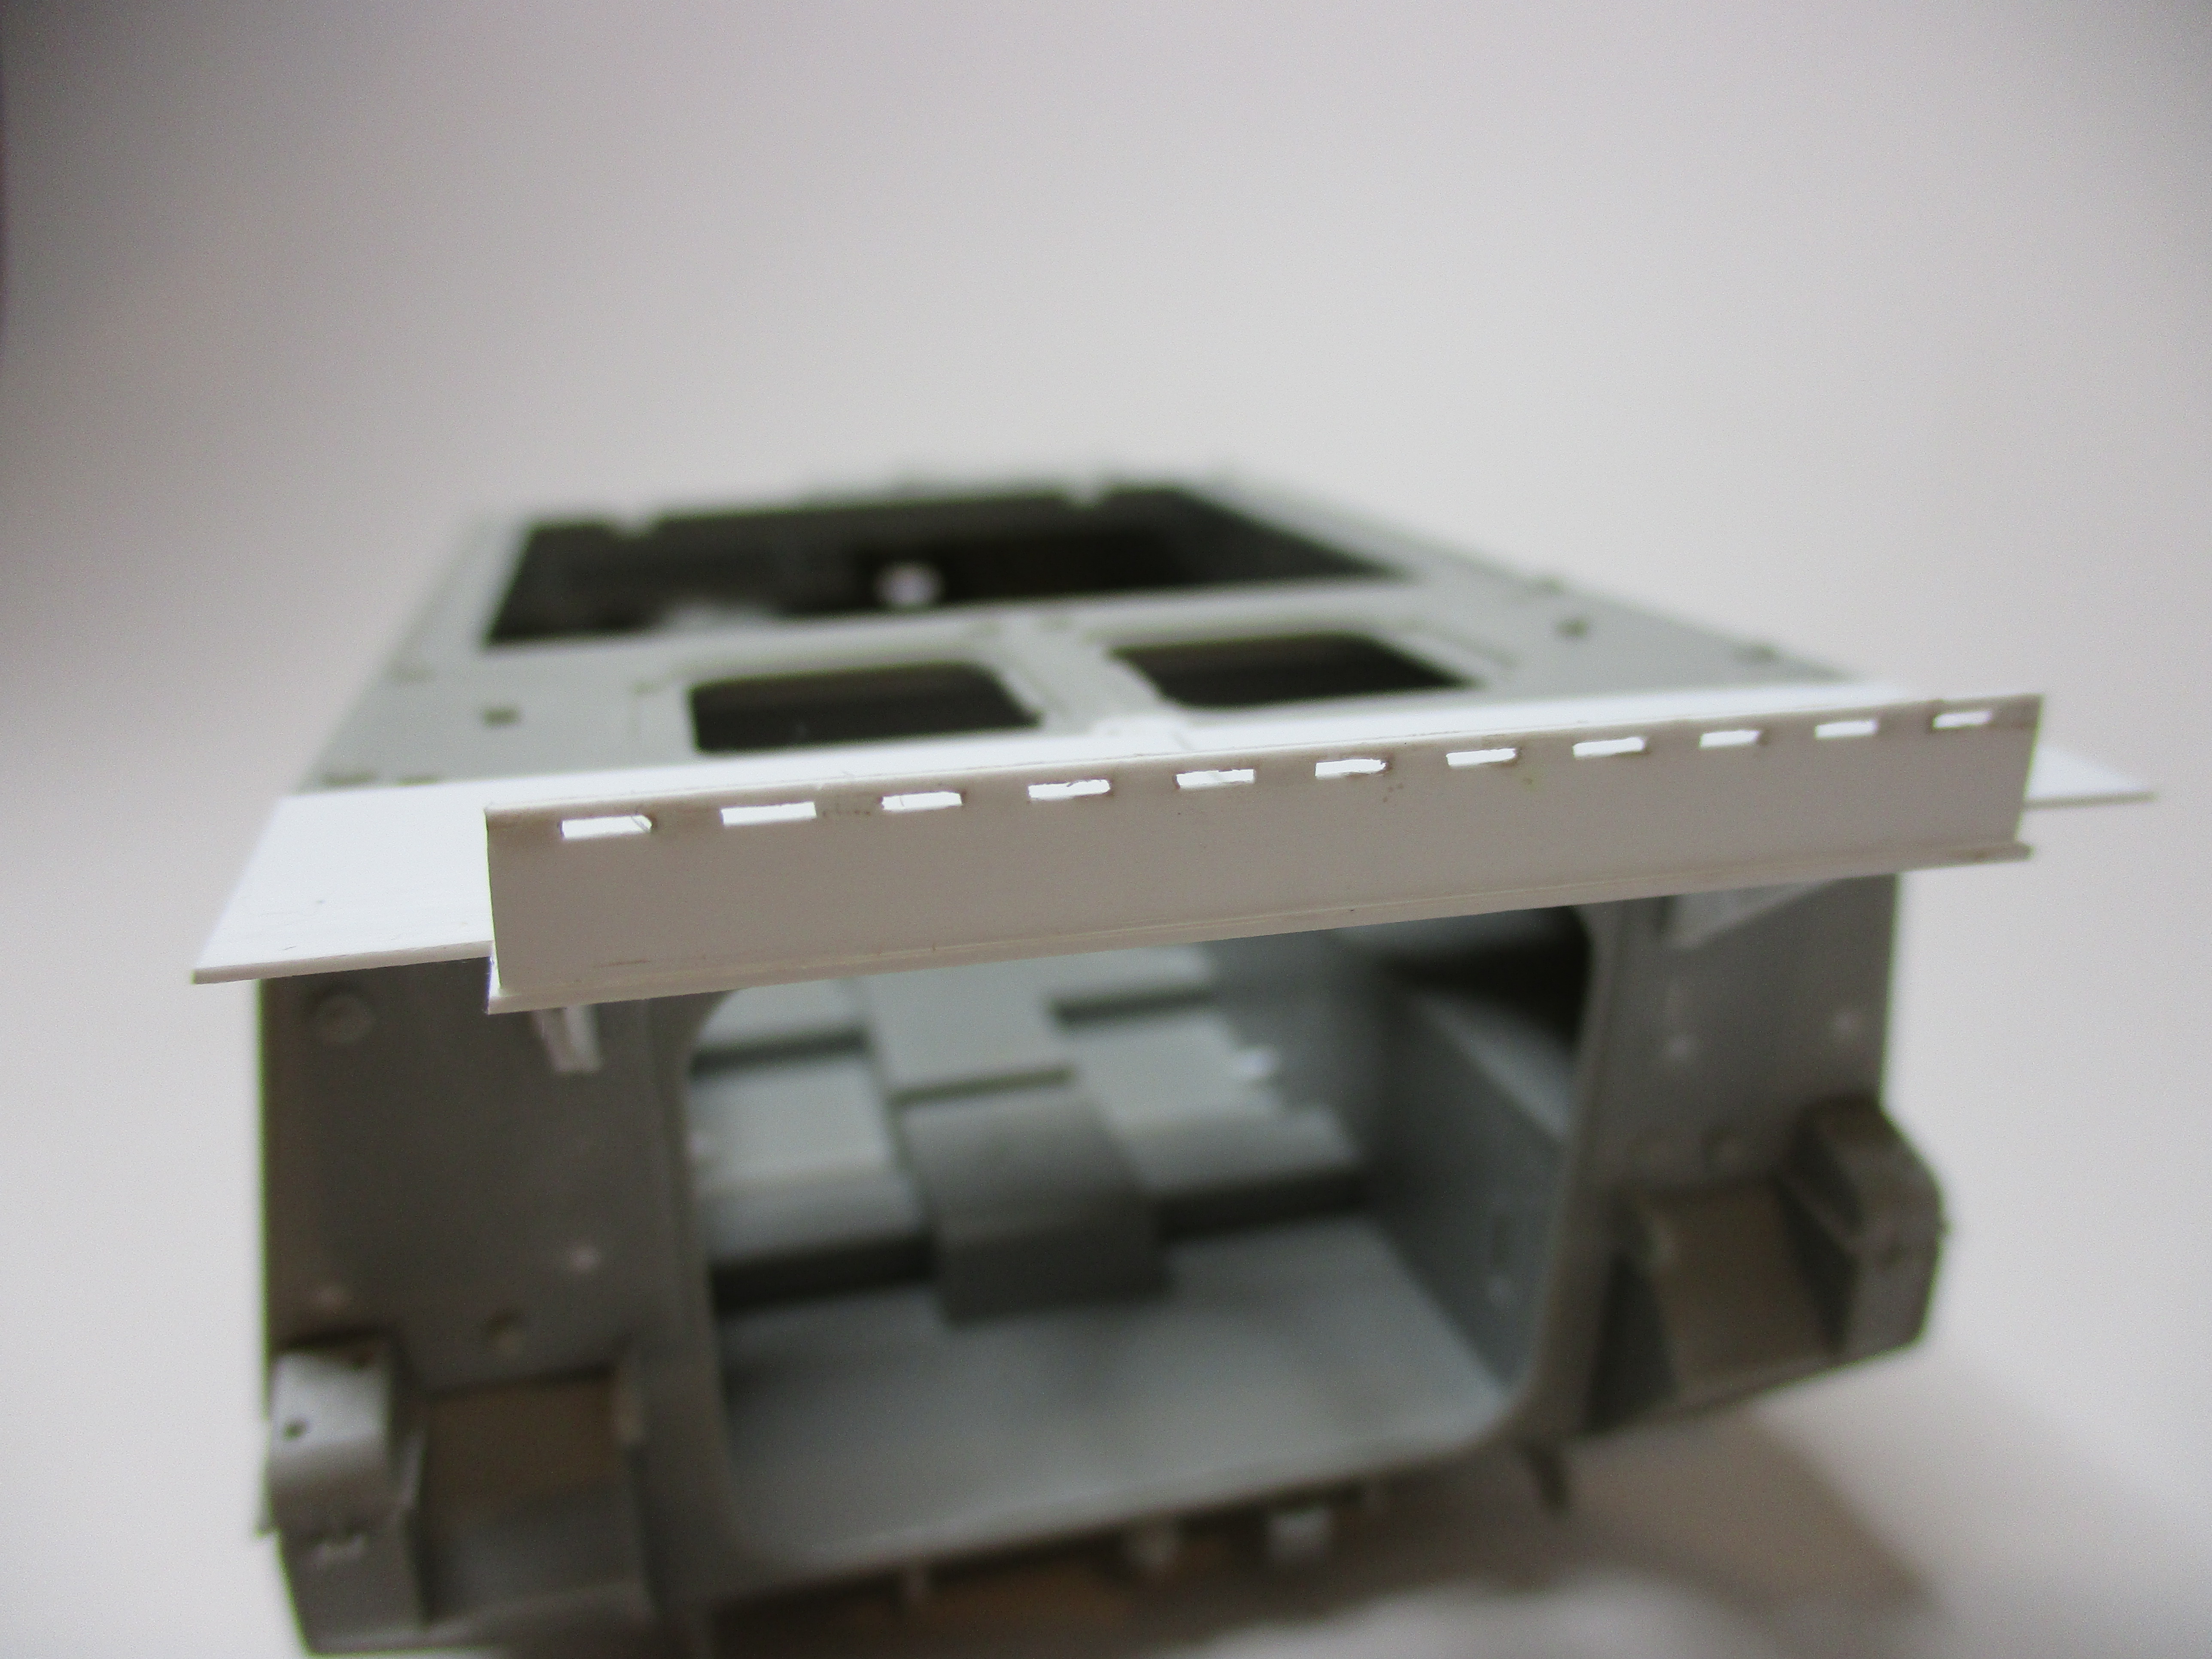
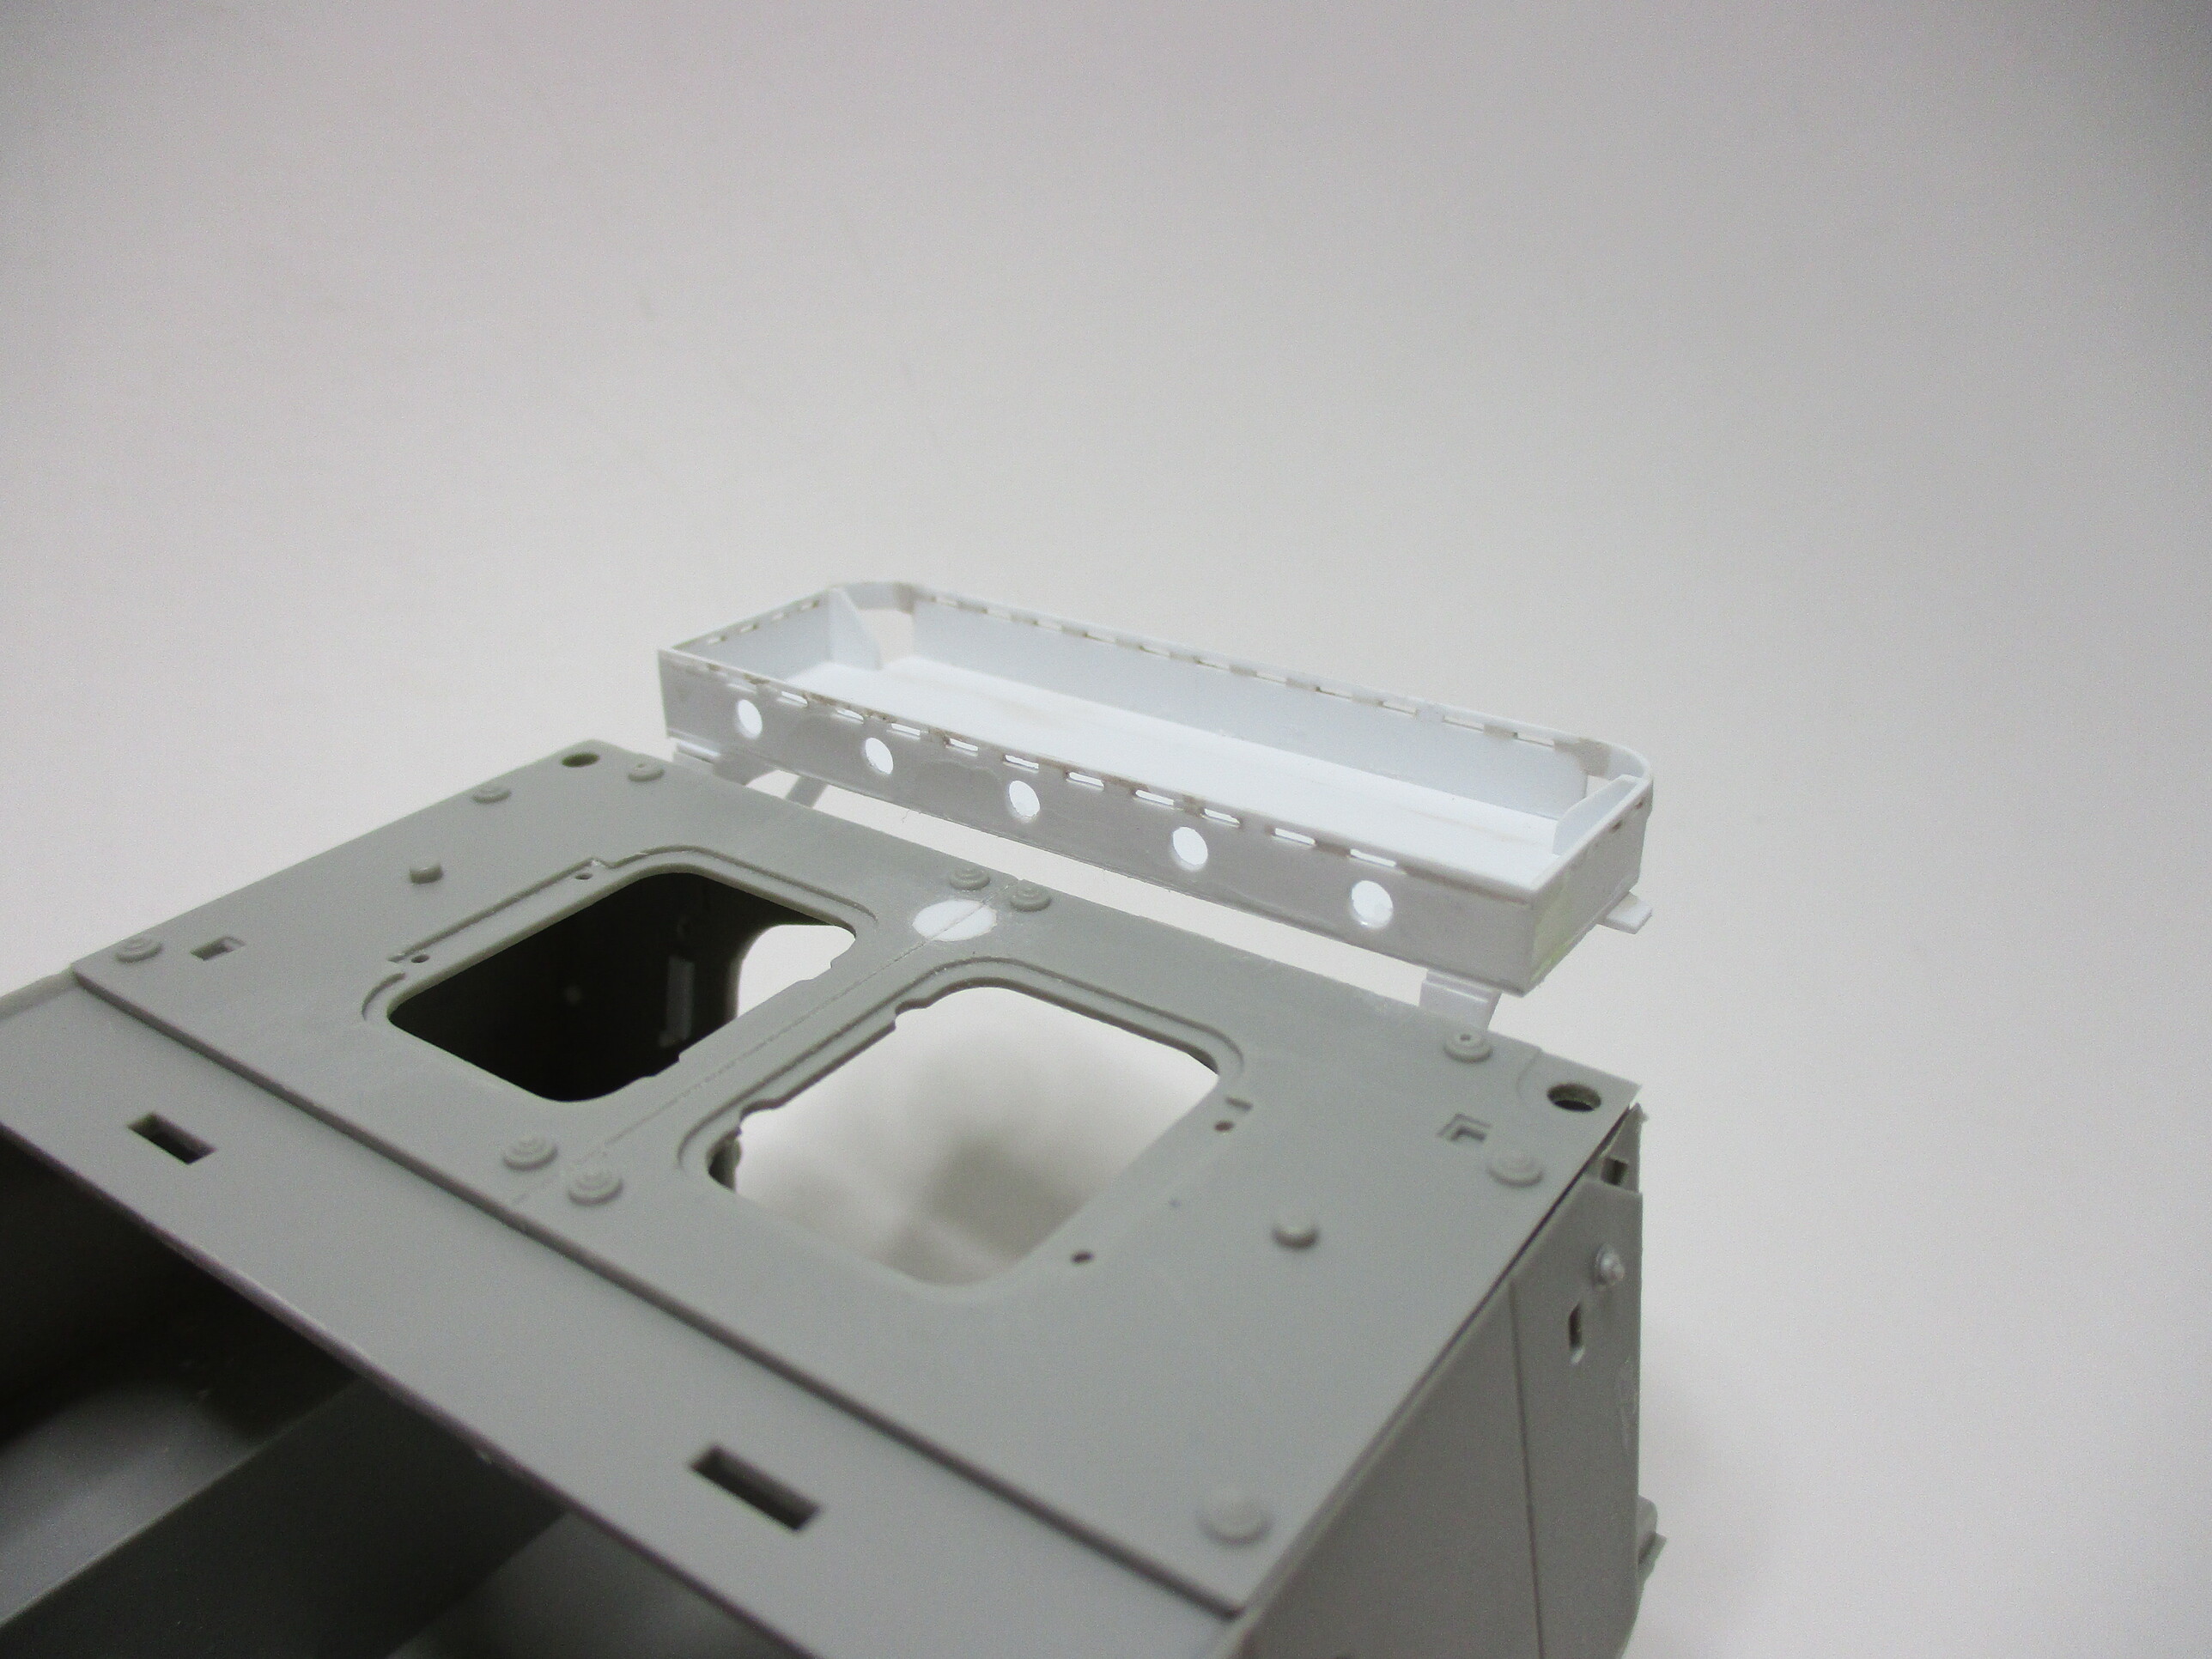
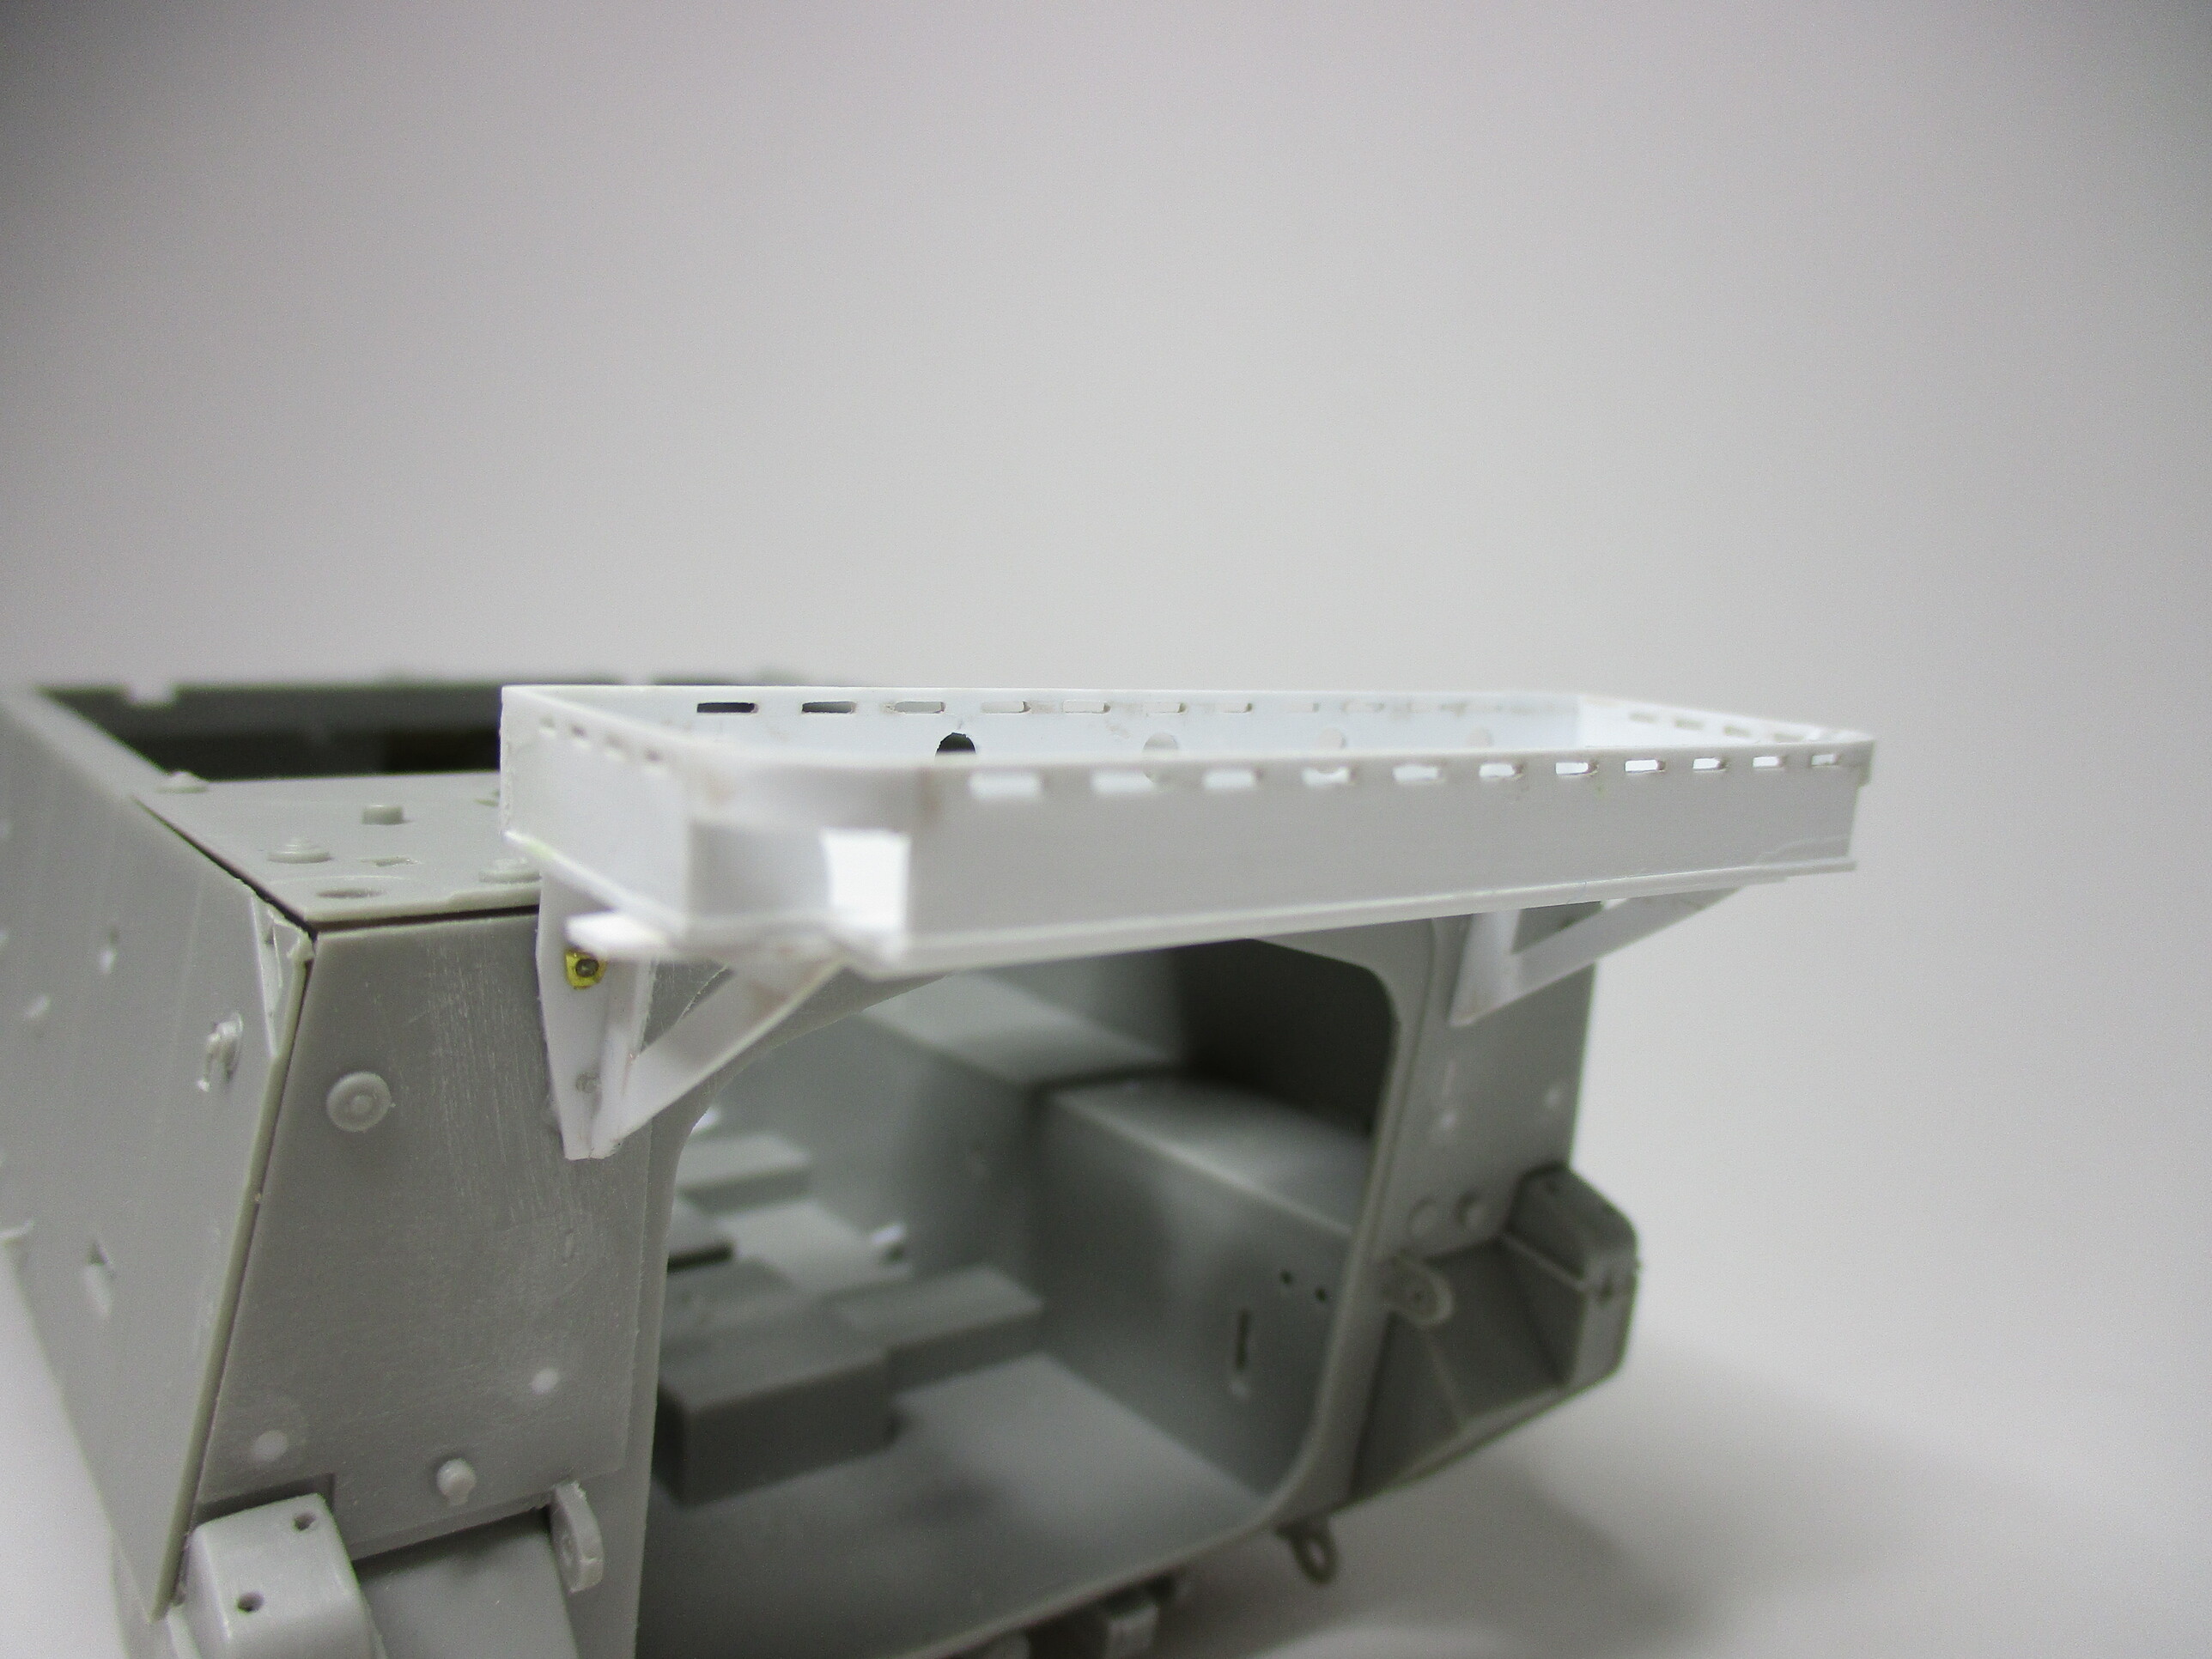
…… continued working on the storage box.
I finished the actual box, once again with the use of 0.5mm evergreen strips.
Even more the extensions were accomplished.
The storage box at its place, but not yet fixed.
To be continued …….
Peter
Peter, man that box is sharp looking. Outstanding scratchbuilding. That box is perfect.
Nicely done Peter. The scratched box makes a big difference and looks great … Well done 
Matthew, John, thank you guys for your really nice comments.
Peter
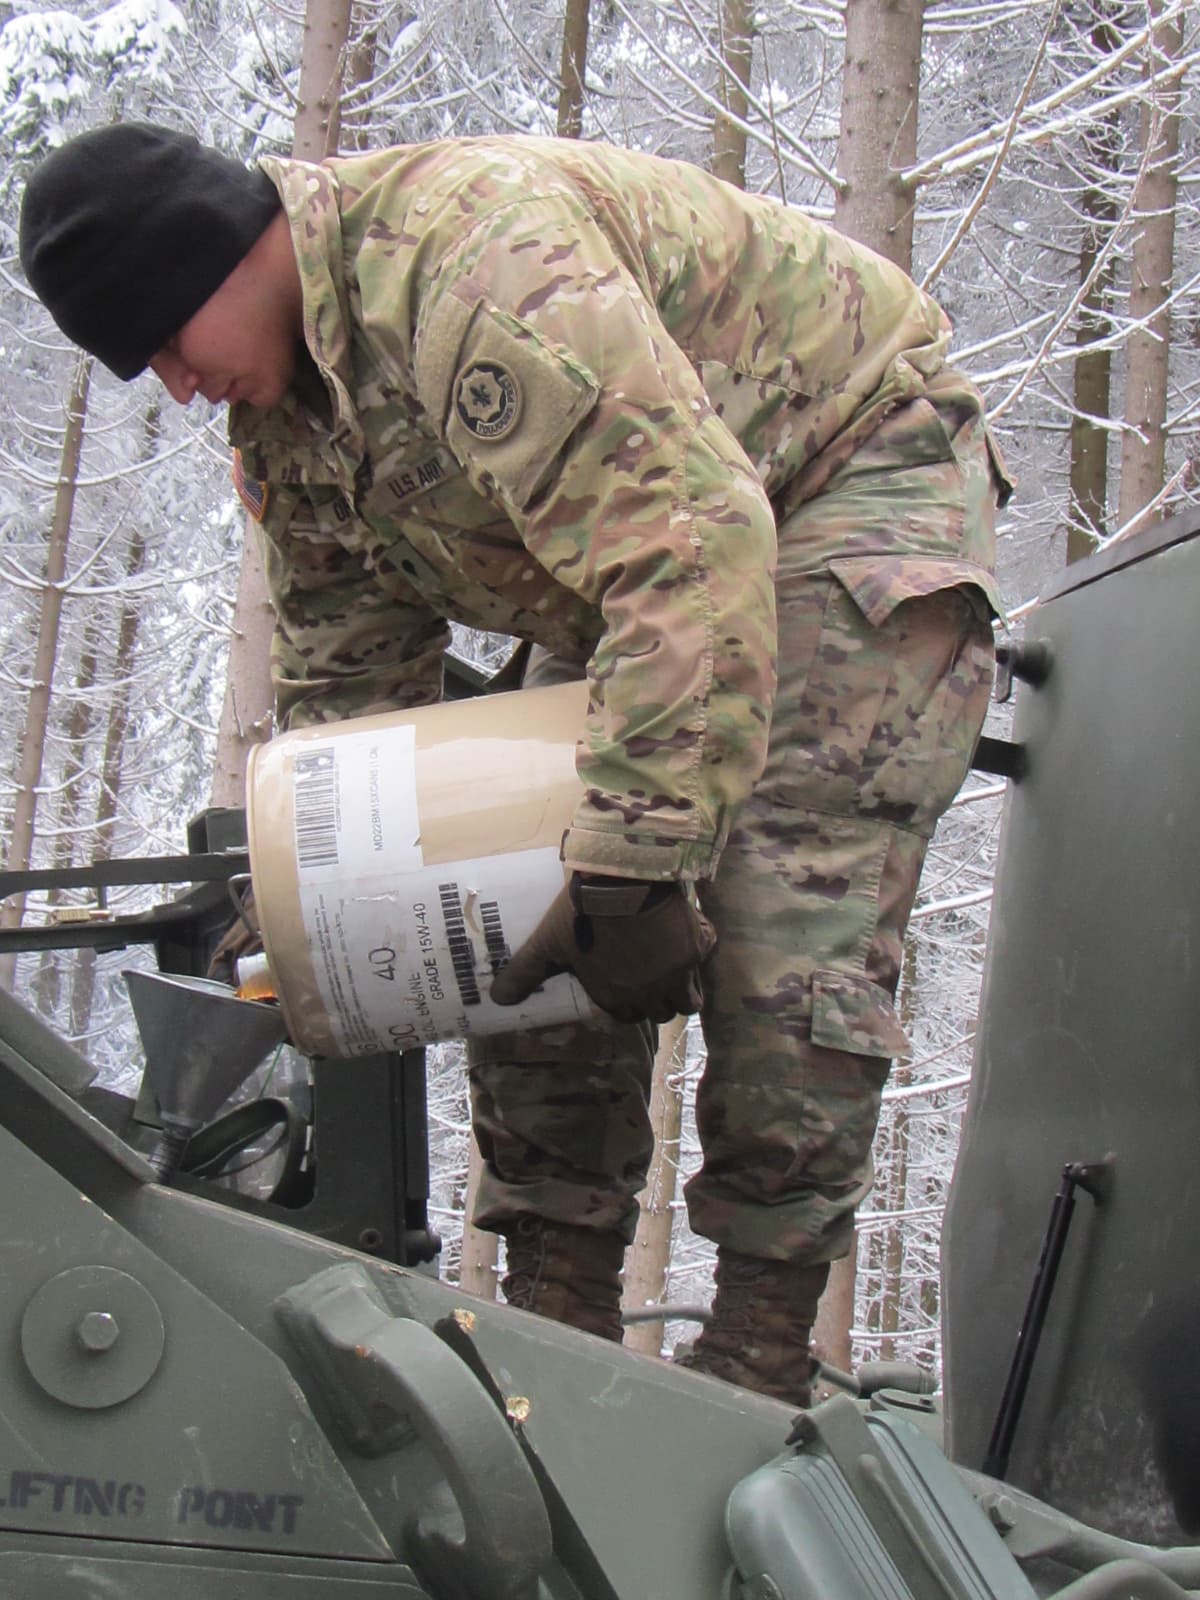
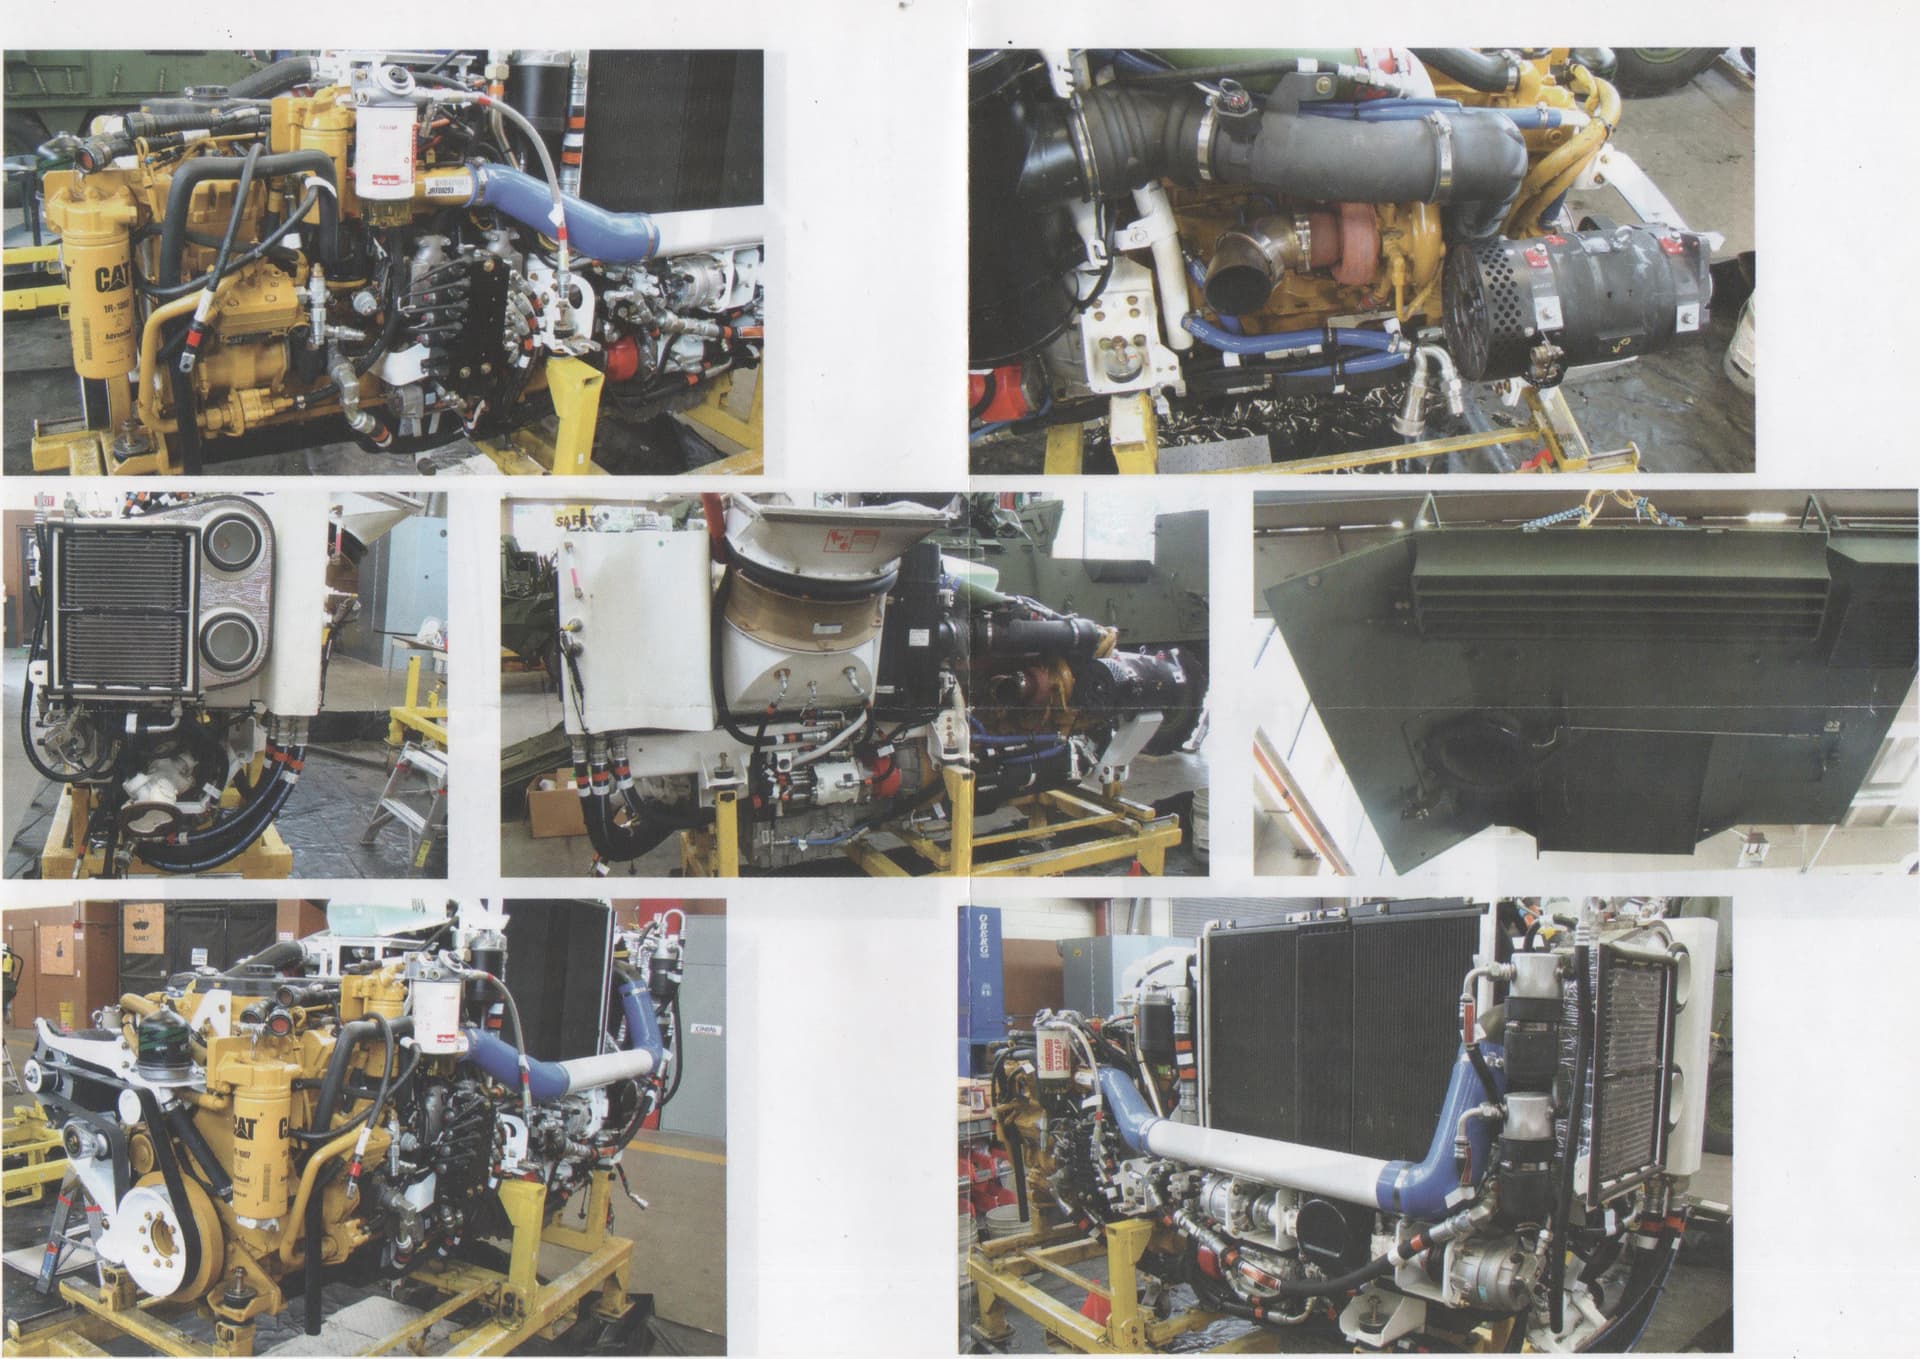
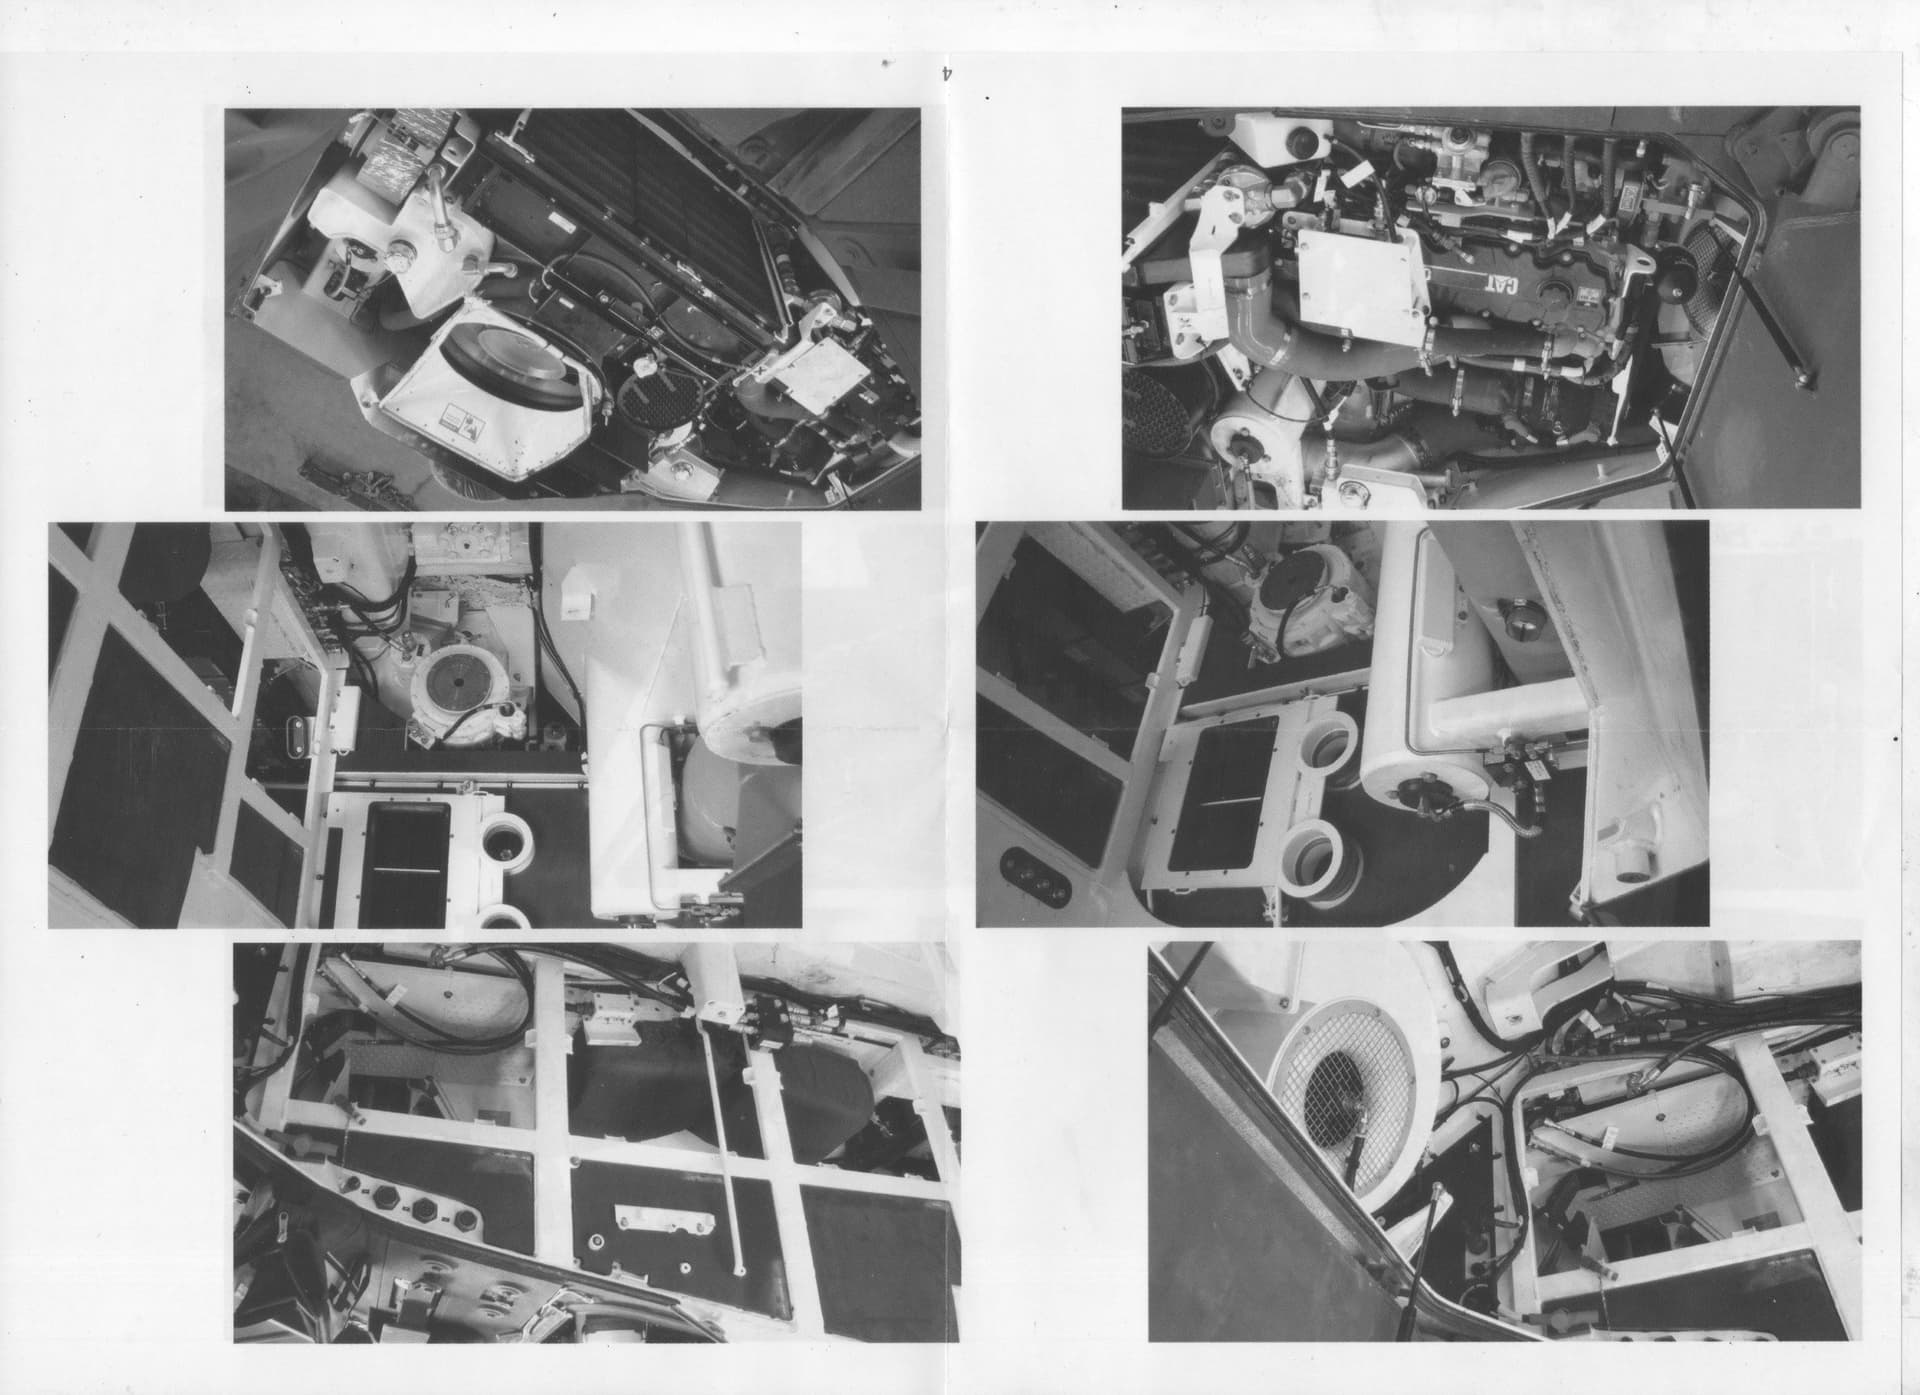
First steps done into my M1126 ICV-JC build. I will build the truck during routine maintenance, oil refill.
This will be great watching this get built up. I take it you will need to do some surgery to the upper hull @HermannB ?
Hi Johnny, I plan only to open the engine hatch.
Cool… Will be nice seeing that engine and maintenance scene…