Call Pfizer John, their little blue pill might help keep the blade up… 
2 Likes
It’ll have to be a big pill for the weight of that blade 
1 Like
Got the clear lens fitted. Painted chrome silver behind where the clear parts would go and on the side reflector’s. Then painted tamiya clear orange on turn indicators, front reflector’s and amber flashing light. Used clear red on tail lights and rear reflector’s.


Going fit the Mk19 grenade launcher next after it gets a flat black coat with some graphite rubbed in.
1 Like
Well done on the lights, they look really good.
1 Like
Cheers Sean, I got the idea from @SSGToms when he did some lights, and I thought I would follow it through with doing the side reflector’s as well… Painting the tiny dot silver beforehand then applying the clear orange gives it some depth .
1 Like
The only drawback with close up photos is seeing the areas I need to retouch with forest green lol… Damn these macro zooms
To stop me having to glue the blade in the up position, I started thinking more about what @Armorsmith said about chain, and I thought about the M1 mine plough tank I’m doing for the ODS build, which does indeed come with some chain… I wondered if there would be any spare…after working out what the M1 needed, it in theory leaves me with 35mm of spare chain… God I hope it did… As now the Stryker has it 
My plan is to have the chain painted tamiya dark iron, the chain will then go through the vehicle shackle and the shackle will go through the towing rope eyelet, and the tow rope will in turn be cut to the correct length and secured through the various points back to its housing …
1 Like
You may want to write “FREE FALL” in chalk on the blade then. The only time this is done w/the chain/winch cable is if the hydraulics are damaged/out and can not hold the blade up. “FREE FALL” is written on the blade to let anyone know that if they remove the cable, the blade will free fall to the ground and most likely injure them if they are not clear of it. The same is done if/when the rear ramp is inop (inoperative) and secured with a cable or chain or something else.
2 Likes
Thanks Gino, that is very helpful … is it written in white or black or what colour and would it be done free hand ?
Usually in white chalk, freehand.
1 Like
Great tip and thanks Gino 
Actually, according to personnel at one of the Bradley refit facilities, it’s painted on in red. It can’t be accidentally wiped off by a contractor walking by and brushing it with his coveralls, or be washed off in a heavy rain. The Army is very serious about potential hazards.

I’m guessing this isn’t limited to just Bradleys.
By the way, I have refrained from pimping my Stryker reference up until now, but I’m building another military tribute bike, and all proceeds go toward that.
The Sryker reference has ALL variants available in plastic. there are interior photos, engineering attachments, underside detail, and engine bay photos. Legend used the photos for their engine kits and as a color guide… There are over 1100 photos. If you’re interested, the whole set of walk arounds is $16.00. No tax, no postage. You almost always get them the same day digitally via wetransfer.com. PM if interested.
At a refit facility, I can see red spray paint. In the field when you don’t have any red spray paint, chalk will do.
This is one of the many aspects of this site I enjoy. Because the blade in the kit combined with the working parts are not strong enough to hold it upright, what I thought was going to be a bodge job with the chain, has now turned into a proper known issue and remedy of how its actually done at vehicle and unit level — all done with a few messages and an extra hours work for me - Brilliant and thanks to Gino & 18Bravo -
2 Likes
I can highly recommend Rob´s references. You get a lot of “bang” for the buck. 
1 Like
I concur! 


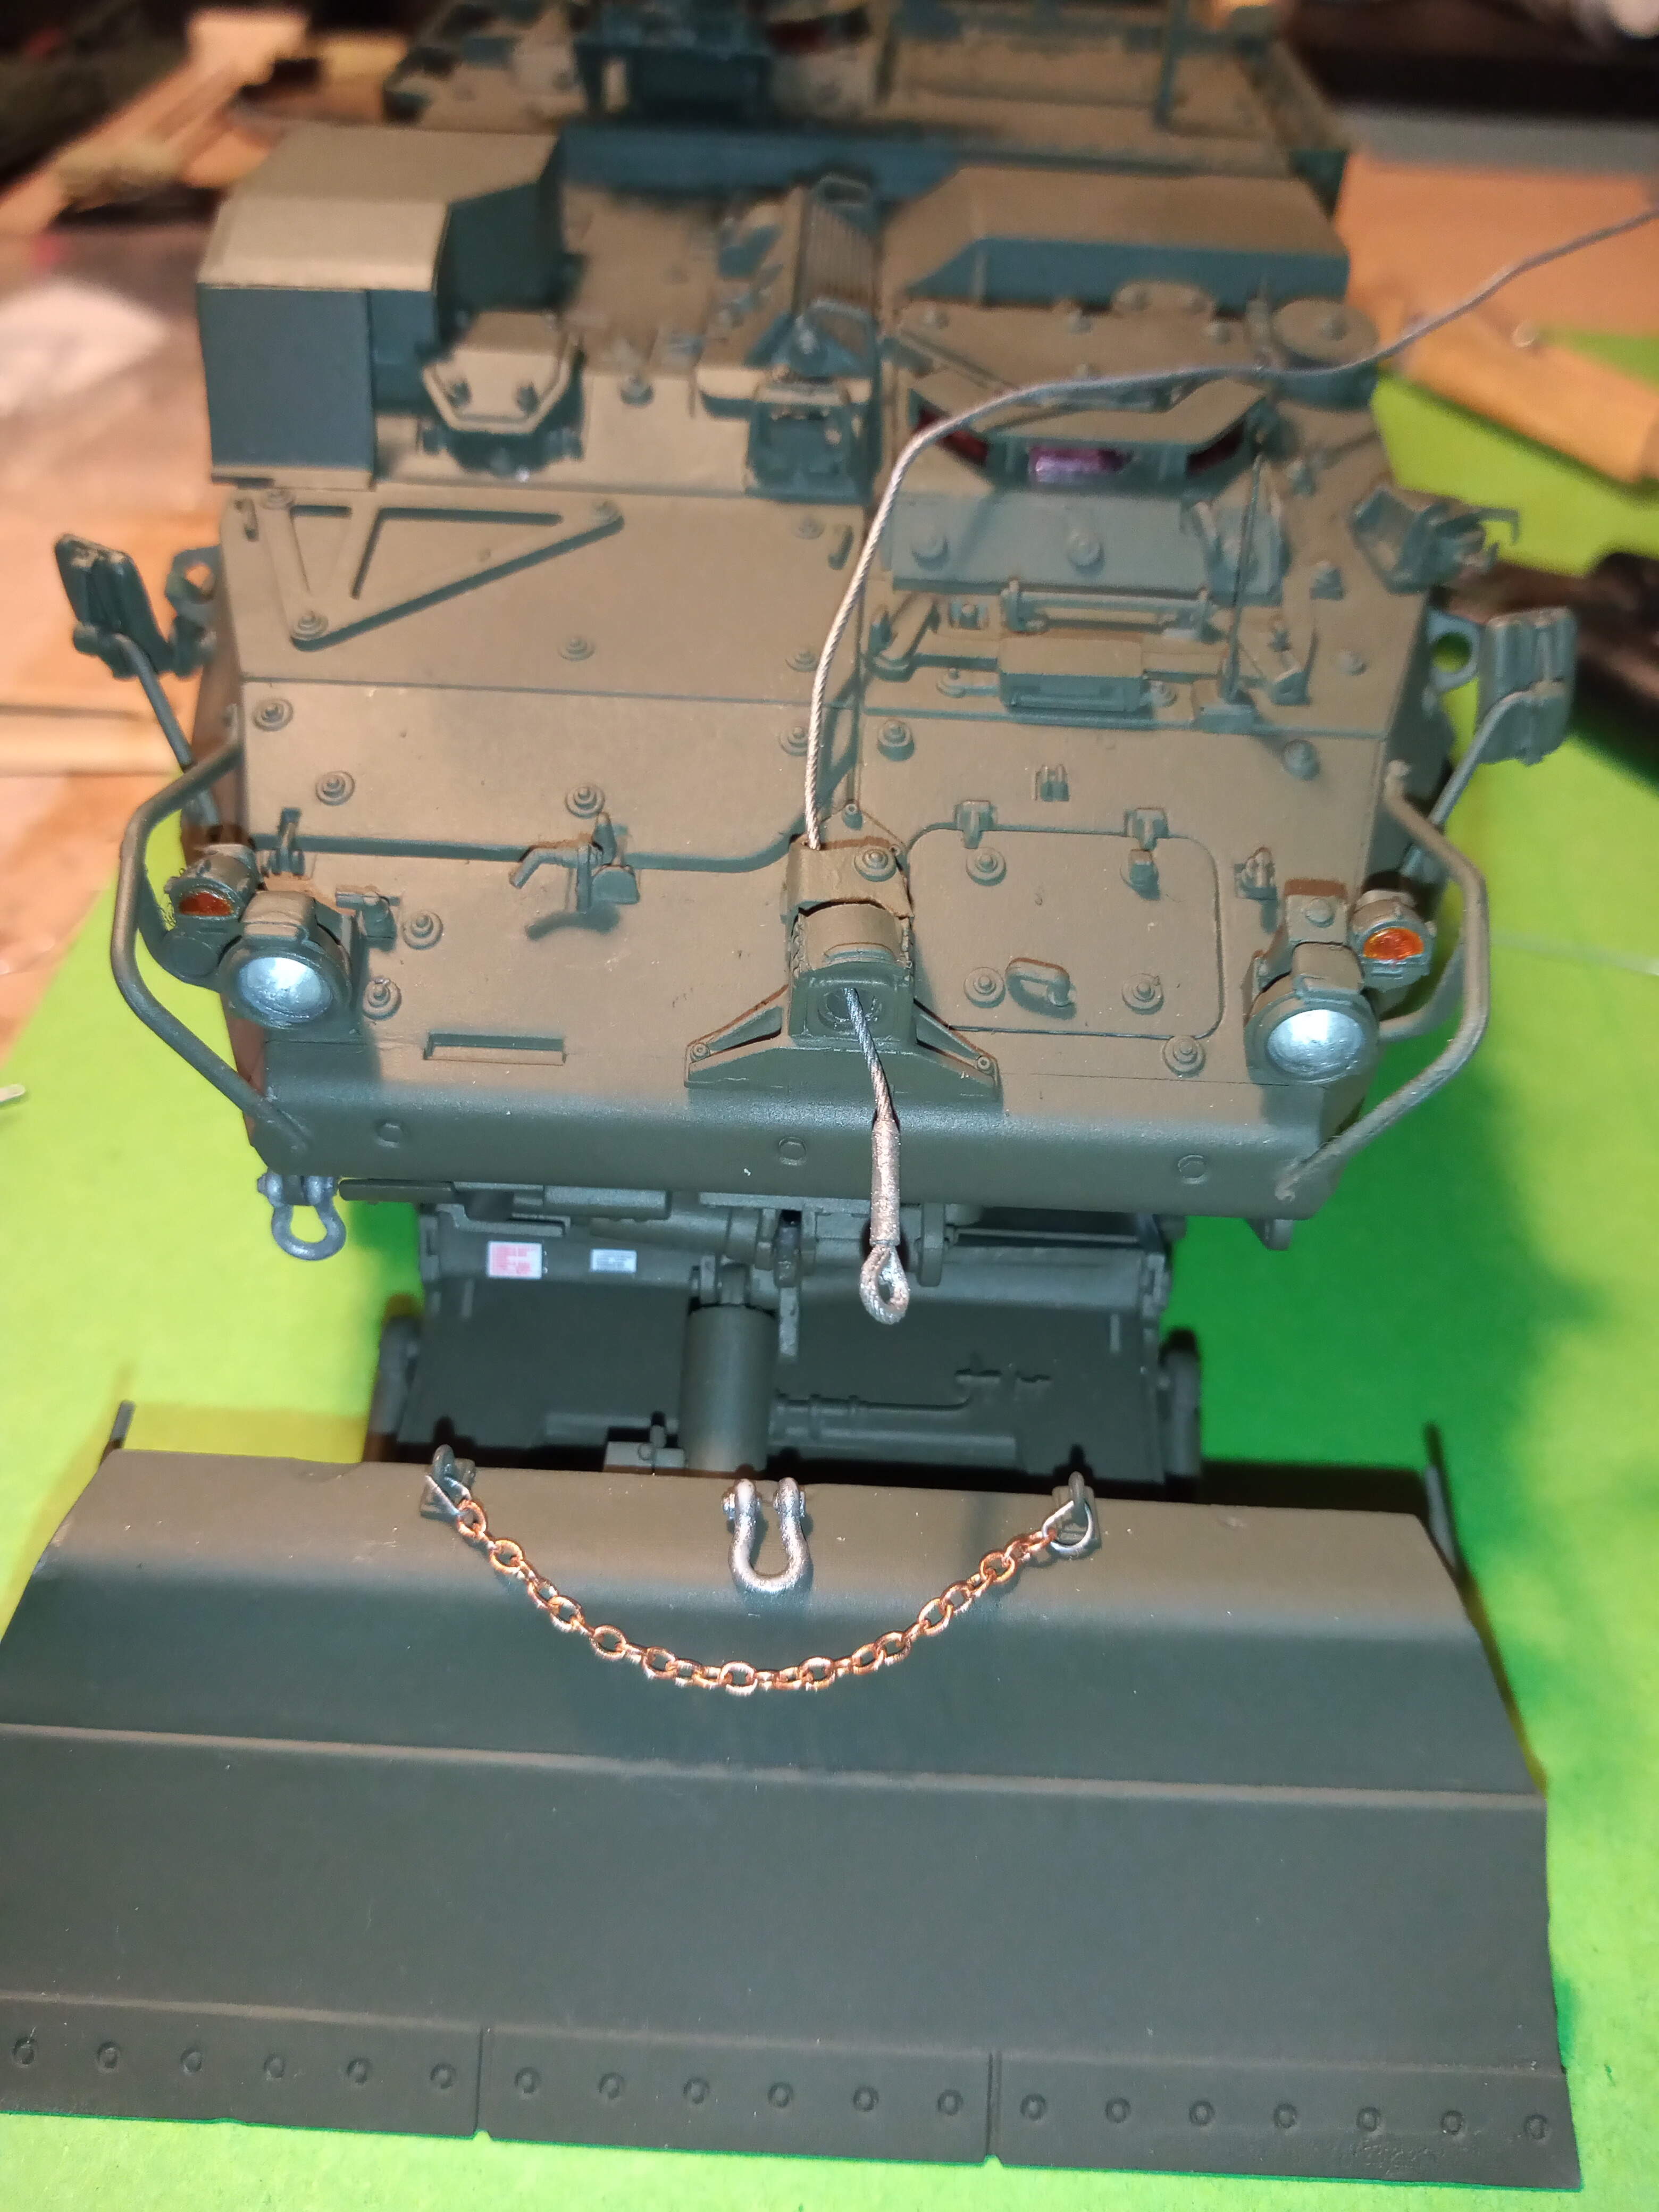
Started on adding the chain and shackle and the tow/recovery cable.
All seems to look ok … The toothpick is to keep the cable tight while glue cures.


As the recovery cable has a lot of bends to add to it, I will glue and secure it over a few days to let each section cure totally.
5 Likes
Totally looks the part John! Came out badass and I love the plow. If you choose to write “Free Fall” on it, buy a Prismacolor white colored pencil so you get it right the first time. I’ve found through trial and error that Prismacolor are THE brand to use for modeling.
2 Likes
Thanks Matt. I am pretty pleased with it as its my first modern wheeled bit of armour. I also like the fact the blade looks (or will look) like a real one that has the same issue - which I would never of known about without the great user knowledge from everyone in the site.
Looks damn good, John!
1 Like