If only the seams were that small  they were much bigger! But thanks for the tip and the photo, I had wondered why people offered photoetch kits for ‘inner road wheel rings’ for stugs and panzers, and now I know why based on your photo
  on the flipside though now I know mine are incorrect without them… theres aways next time.
2 Likes
I have done some work on the upper hull, as below. Filled in some voids around the drivers vision block, which are a bit incorrect by Tamiya, I have also added a bit of stretched sprue which will be formed into weld seam a bit later. And have fitted the Panzer Art barrel covering. I wasnt sure how the barrel cover was to be fitted in real world scenario, so drilled an inserted 4 small sections of stretched sprue to look like rivets or something along those lines.
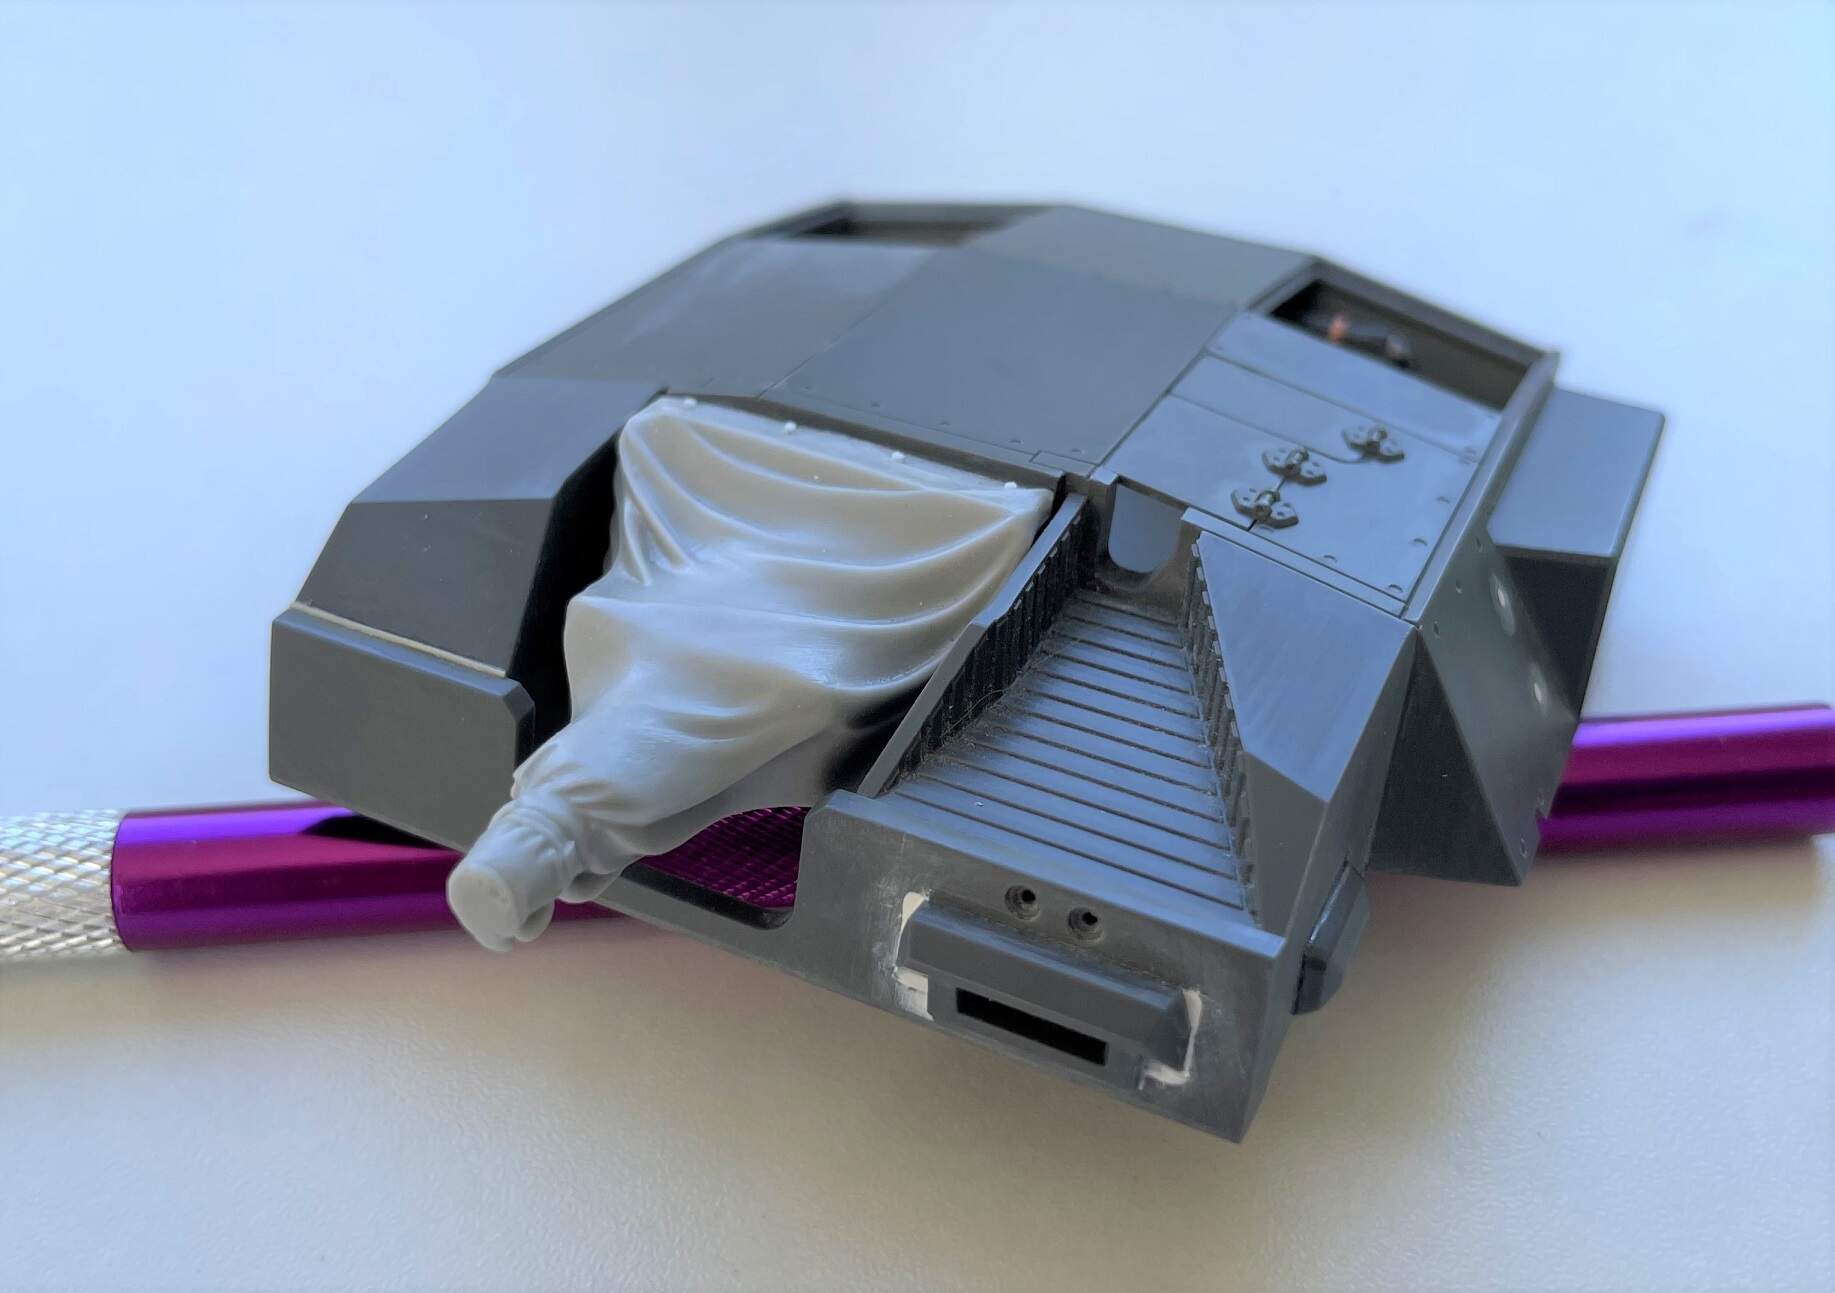
I plan on having the rear hatches both open, but the Tamiya hinges look a bit odd when placing the hatches open (fine when modeled closed though), so I have shaved them off, and will replace with Voyager PE items, it looks easier to make the actual hatches themselves from scratch rather than hacking up the kit ones, so I have ordered some 0.75mm styrene sheet to do so.
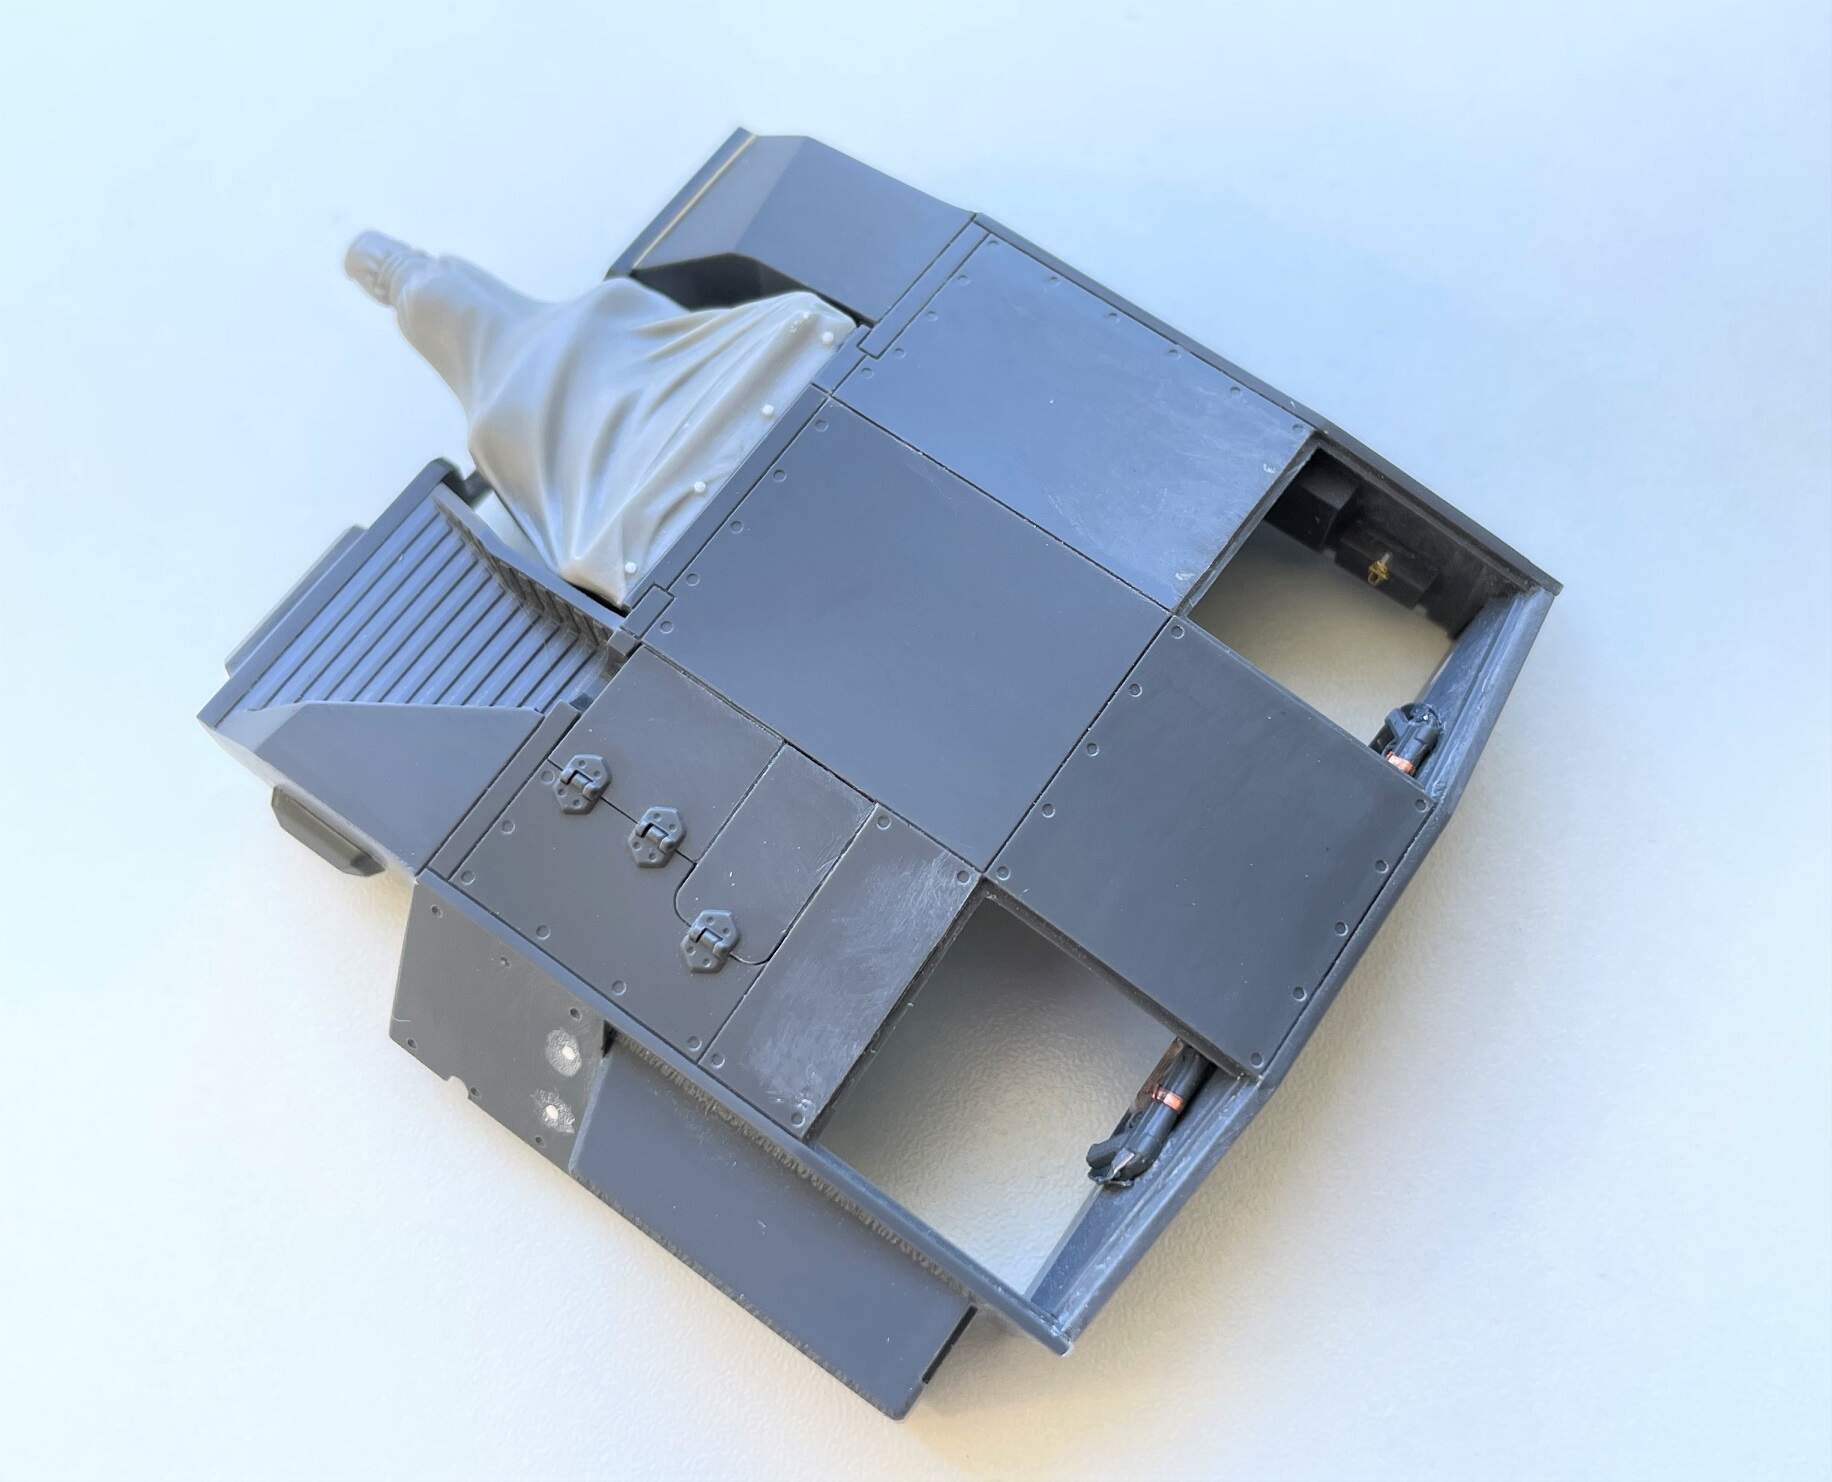
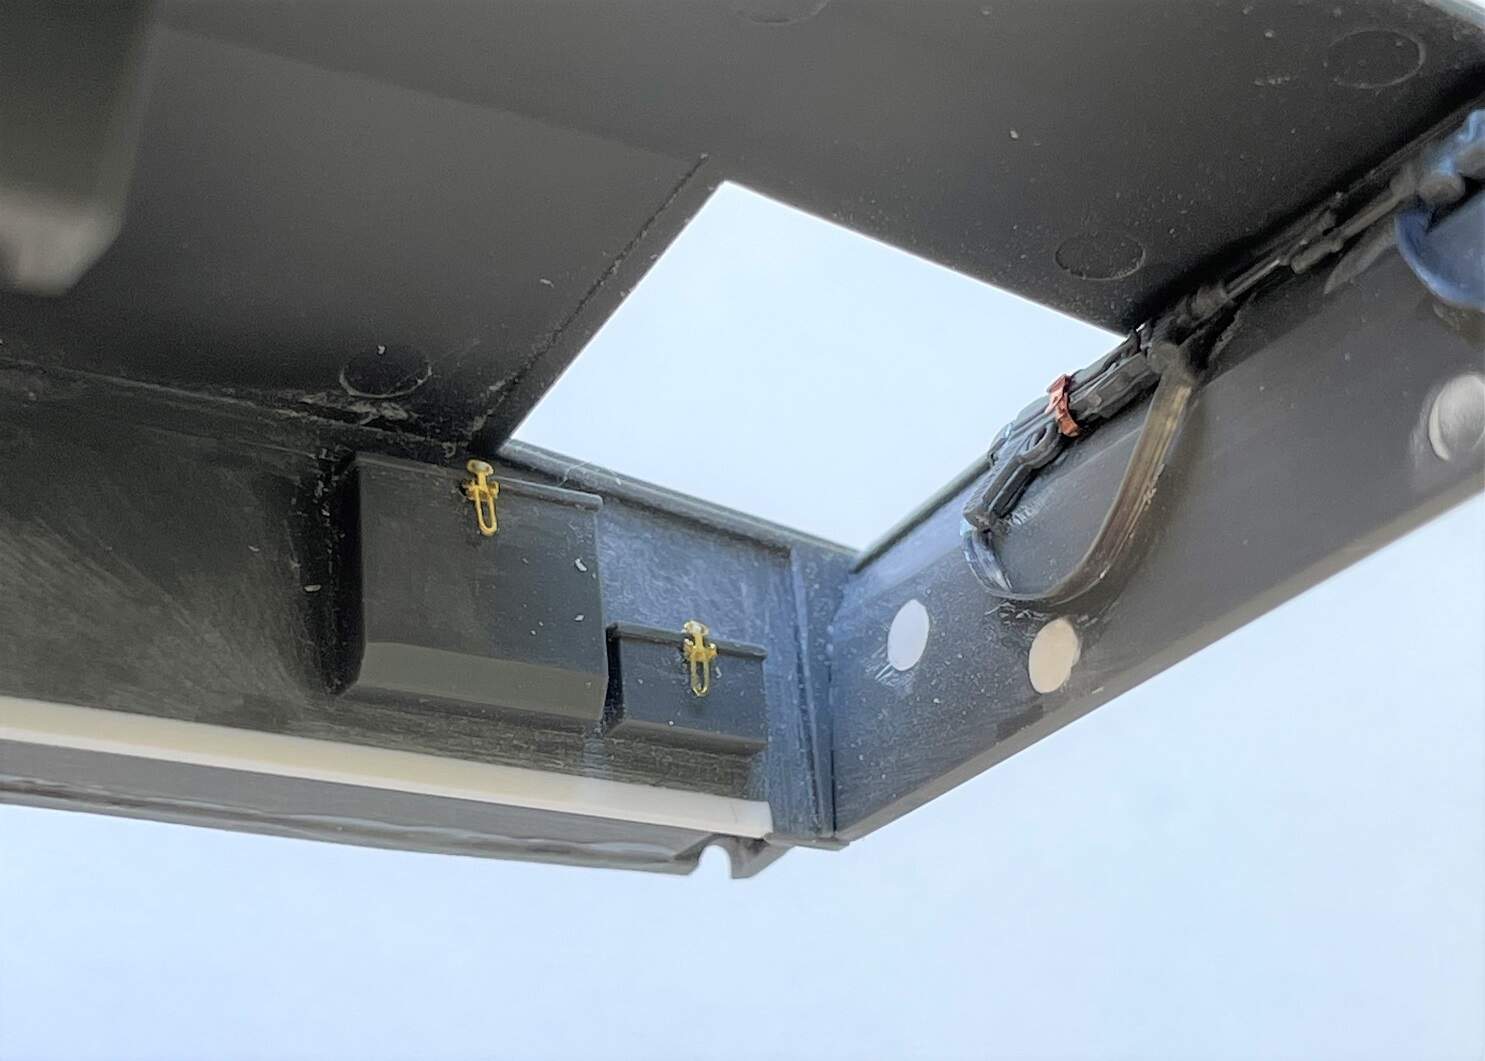
Interior detailing is finished, I have only done what might be visible from the open hatches, so jut the basics. Replaced the 3 x handles on the radio, and a bit of filling of seams:
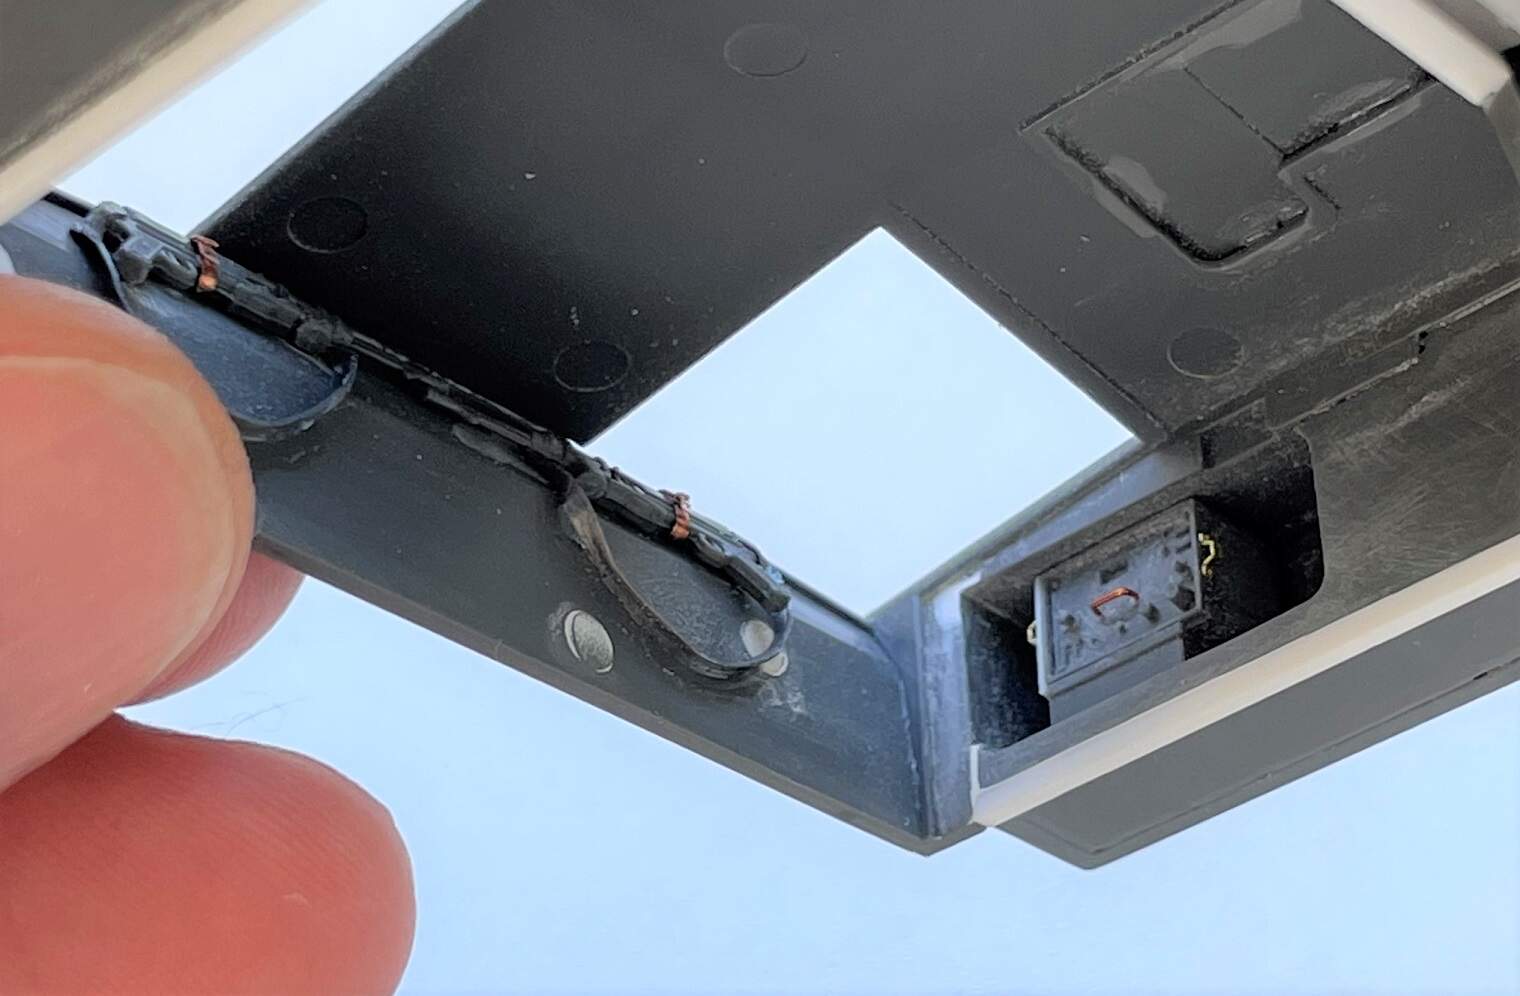
Added straps and clasps to guns and storage units:
5 Likes
Those handles on the sides of the radio are shock-absorbing rubber struts. The radio would be in a frame, and the loudspeaker beside it, and its transformer under it.
This is a repro but I believe it’s pretty accurate.
1 Like
These are to prevent the track guidehorns ripping the rubber and thereby allowing the tracks to come off under stress. Most manufacturers just represent the depth of the rubber as shallower on the inside to give the impression of these disks.
Re the radio (and other interior items) here is a great super detailed build you may find informative:
1 Like
That builder over at Britmodeller added the lifting hooks under the hatches… that’s a good idea, as they are THE most visible item.
But he puts the loudspeaker up in the corner. It was actually inside the sponson beside the radio - that’s how the size of the sponson was determined. It was moved out for the Ausf. E which had a lot more radio boxes.
David
2 Likes
I’m seeing that this will be a super detailed build, far more detailed then I probably will do for the coming years. But, congratulations with it. You are making some really high quality builds.
1 Like
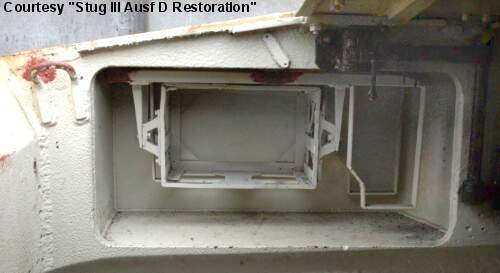
I looked through my collected photos to see if I could help, and here’s something that I had forgotten.
A reasonably well preserved Ausf.D in Axvall museum.
And a single internal photo.
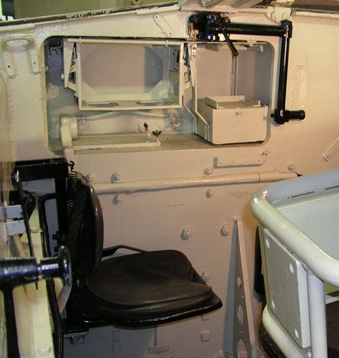
The radio receiver UkW E, the loudspeaker and the transformer would all be in the sponson.
David
2 Likes
Thanks @DByrden for the interior photos and tips - they will prove very useful. I suspect I will be doing another early/short barrel Stug III in the future, as im aware that theres quite a few things I can improve on already! Ill keep going with this one, ill call it a practise run I think.
And thanks @petbat for the link to the thread on brit modeller. I am aware of that thread, I have it saved and refer back quite regularly, its is an exceptional blog and build, very usefull as well.
Took a bit of a break from the upper hull today, and worked on the smoke discharger thingy-ma-bob at the rear. Nice to wok on something fresh. Essentially two subassemblies, the unit itself and its shroud. I put my head in the sand a bit and just pushed on without looking at any reference photos, but I will now and see how she fairs, before I fit it to the vehicle:
Same parts, different view:
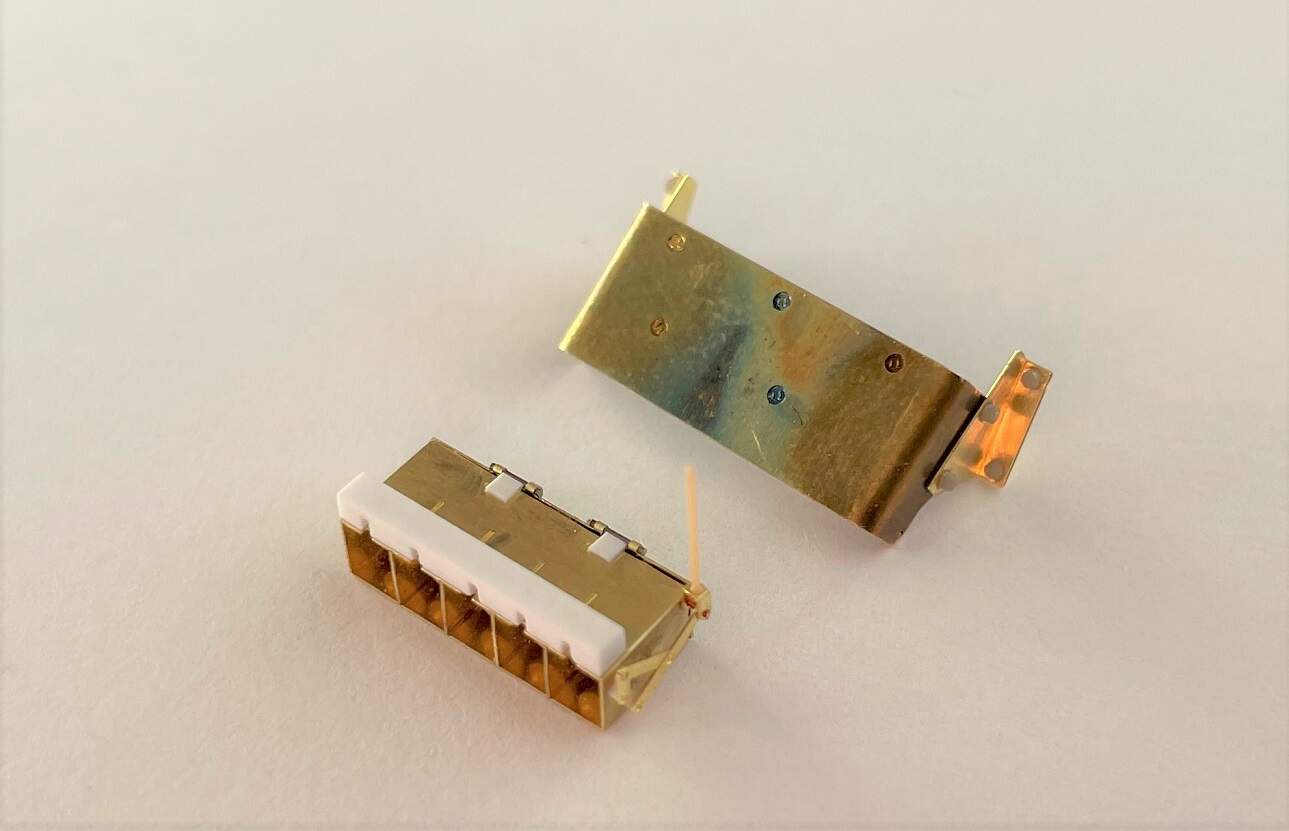
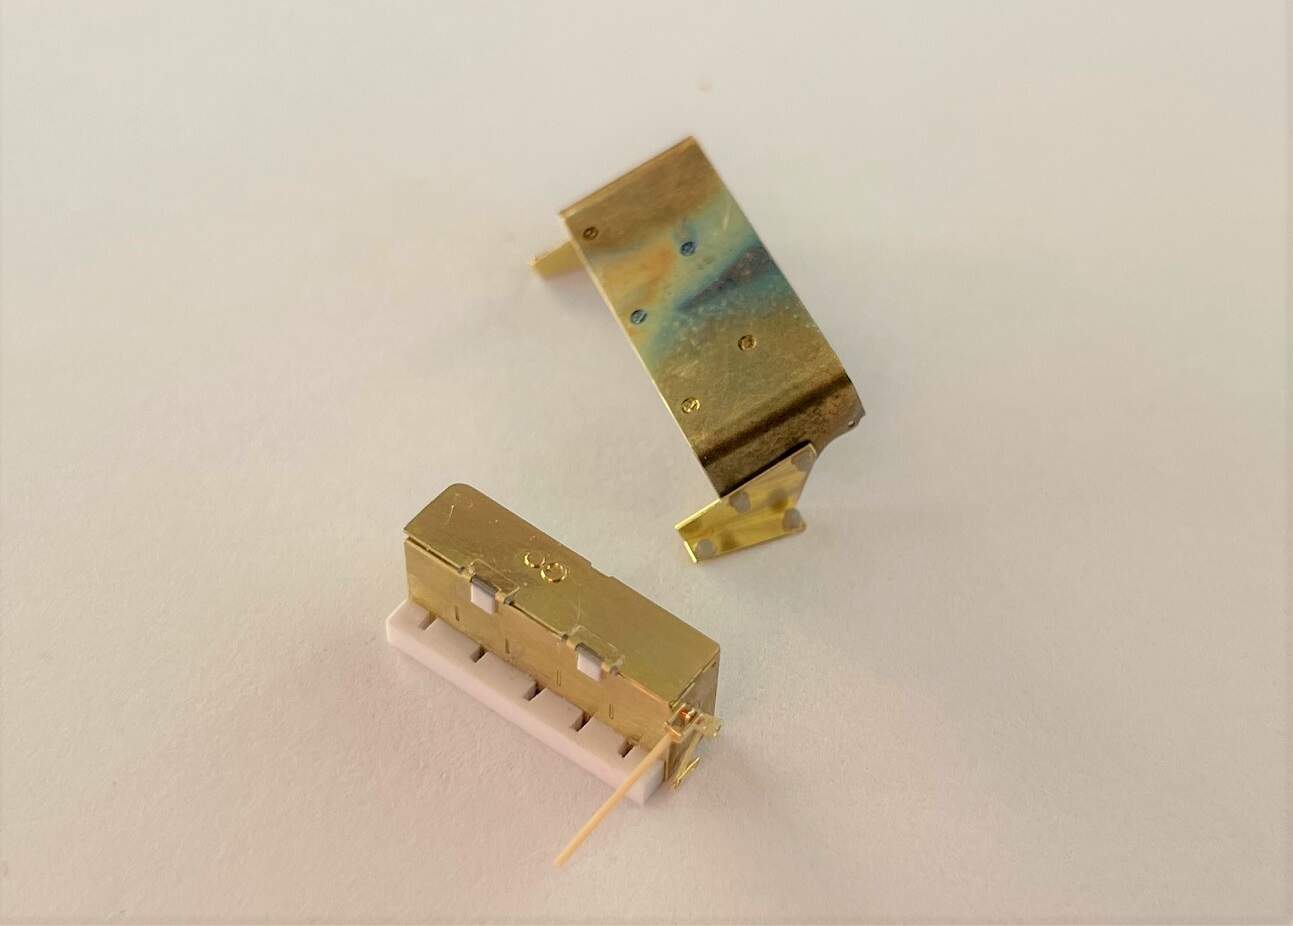
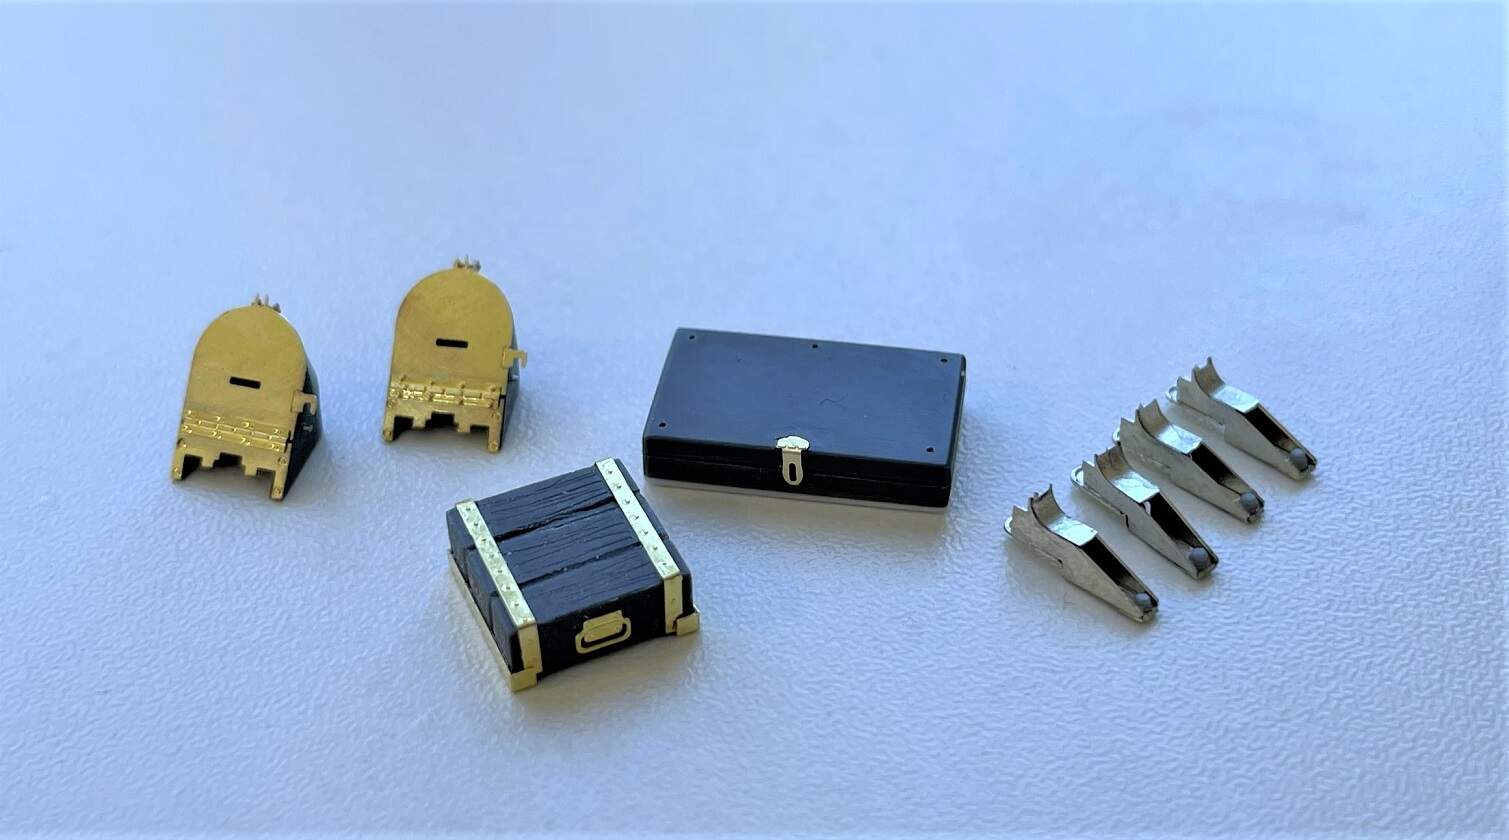
I also worked on a few other subassemblies, lights for the front, jack block, tool box (unfinished, needs some latches still), and also have started on the brackets that attach to the side of the hull for fitting the track guards. All fairly much from the instructions (although for the toolbox, Voyager asks you to make it entirely from photoetch, which I did initially, but it doesn’t look at all like the real things so I sanded down the kits plastic toolbox, scribed new lines around the perimeter to represent the top bottom halves and added a styrene underside (part was hollow) etc… all going to plan on this bits so far:
Progress is progress as they say, no matter how little or great…
4 Likes
Impressive…
1 Like
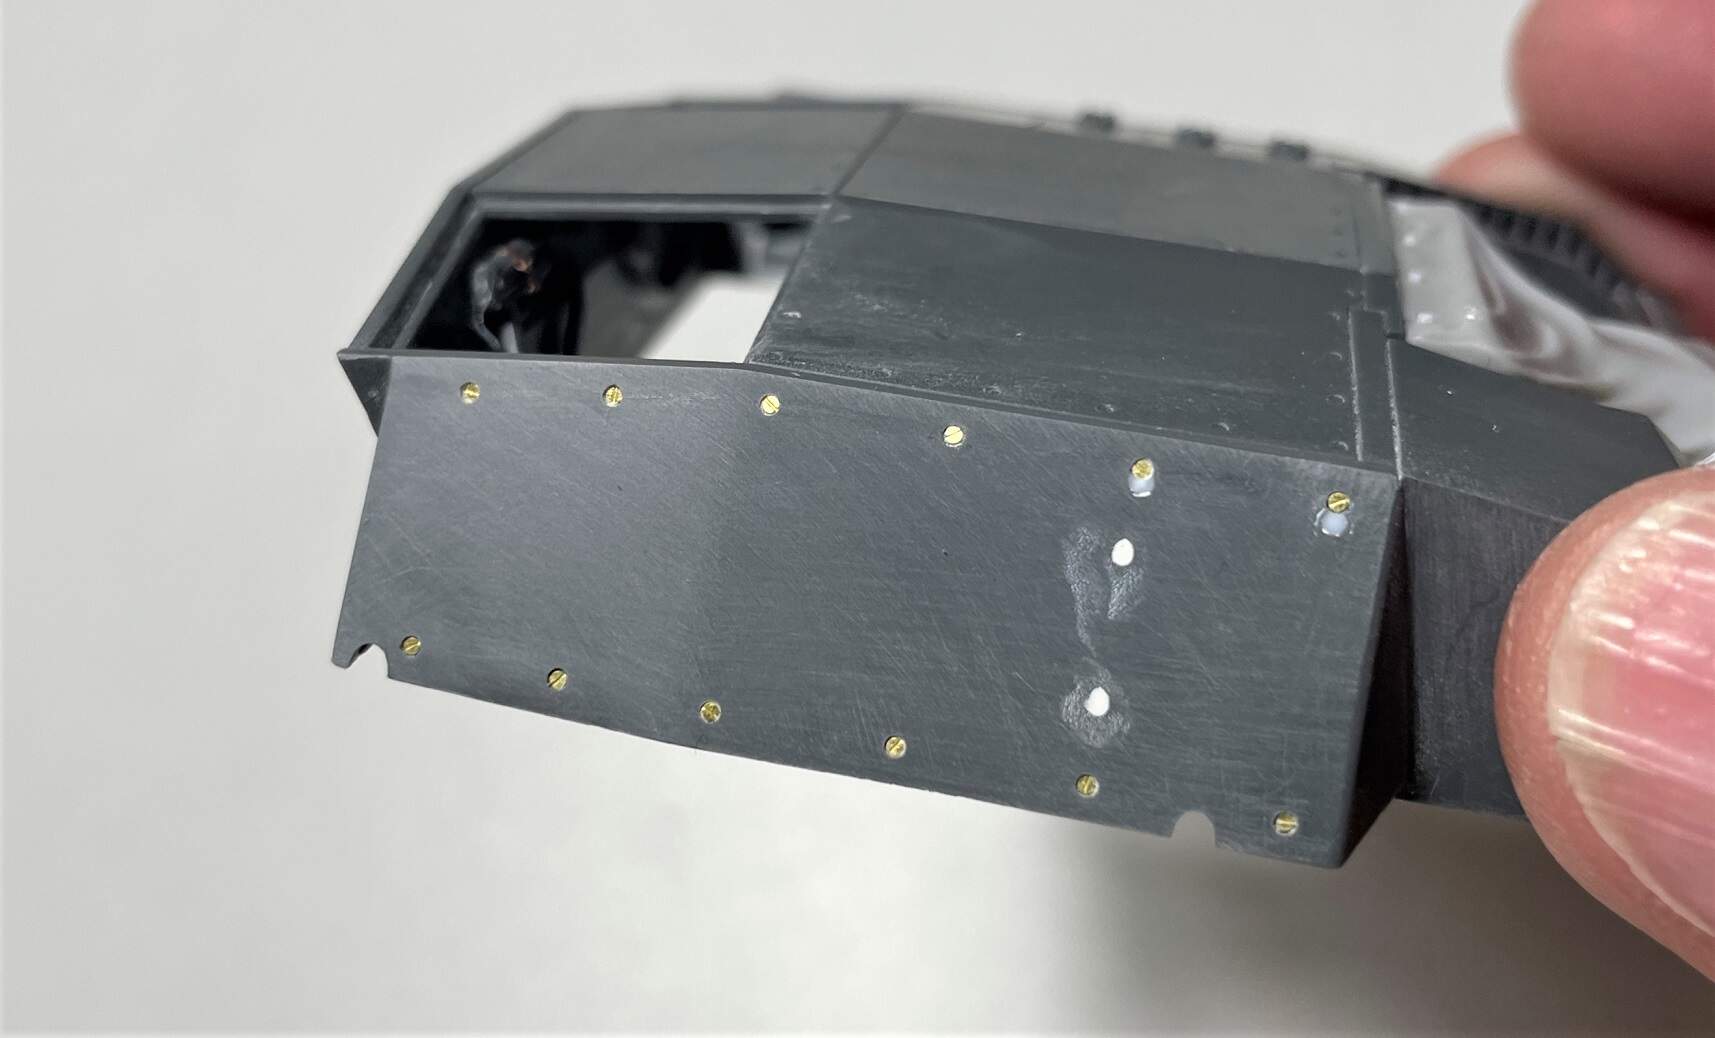
Added a bit of extra detail to the upper hull sides. Quite hard to drill the holes the right depth, so some are definitely a little deep:
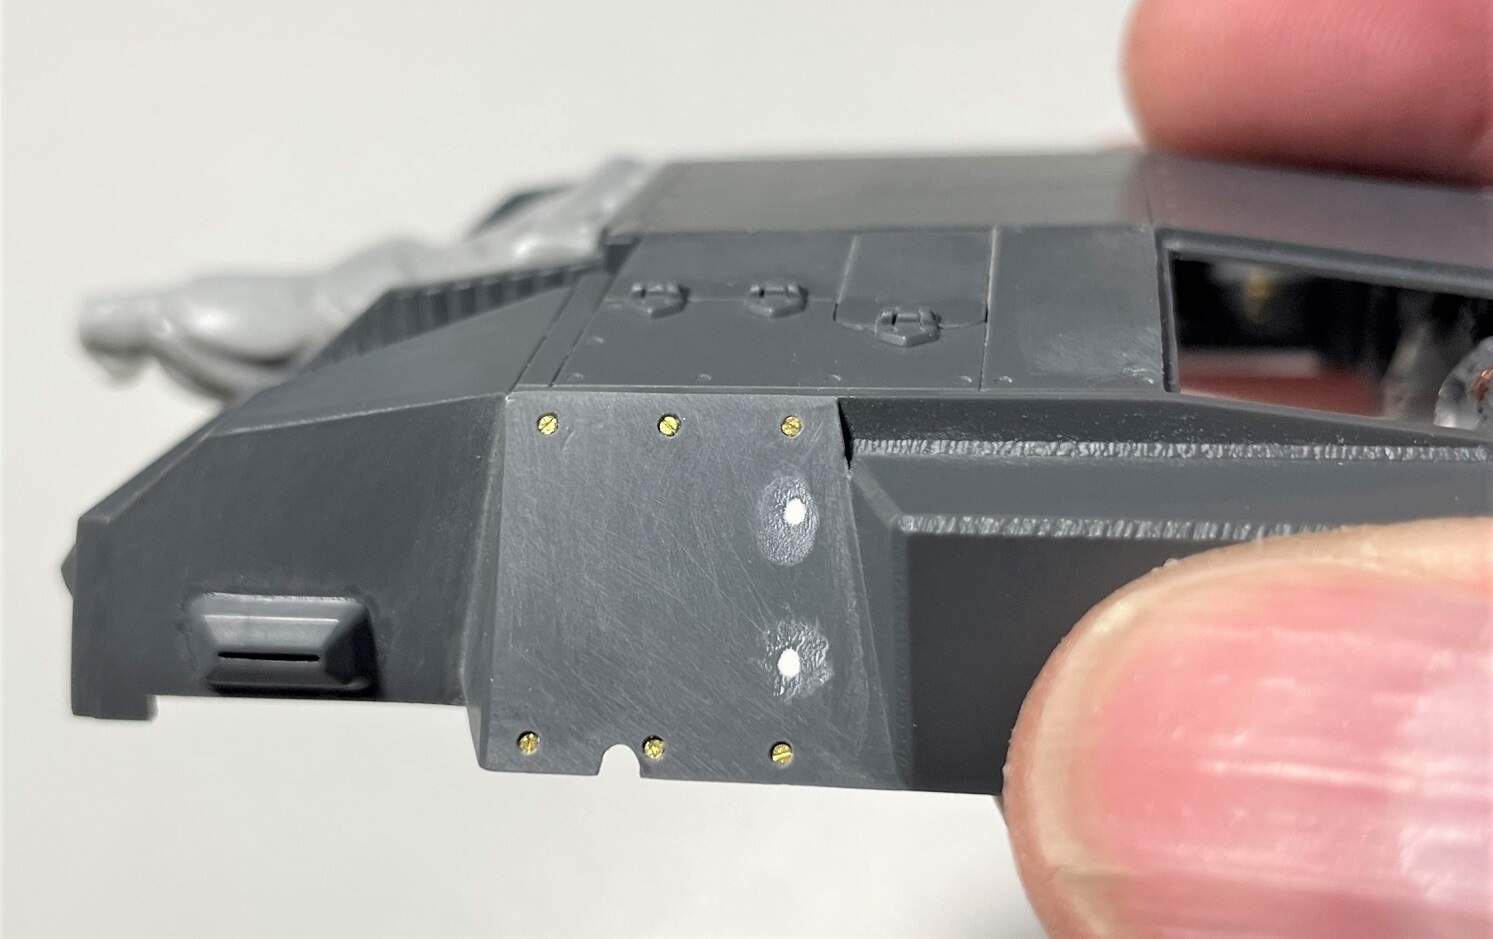
You may notice some holes had to be plugged… then re-drilled. My bad there, guess that’s what happens when you hold the drilling template backwards. What’s the saying? Measure once cut twice (or is it measure twice cut once?):
4 Likes
Great work. I envy your skills with the PE. I only use that when the plastic is too terrible. It’s actually not the metal itself; it’s the CA glue that either doesn’t hold, dries with the part in the wrong place (sometimes on the tweezers) or on my fingers. Frustrating! Any tips?
2 Likes
Hi @Bravo36 funnily enough I did glue my thumb to that smoke box somewhat feircely  took quite a while to tidy up half the skin I left on it!
Best tip I have is to use very thin CA whenever you can. I used to use medium for a long time, applied glue to parts, then joined. Now however mostly I put the pieces together in the right position unglued, then apply thin CA as close as I can to the join, then let it wick into place…… it is so much a better method!!! I also cut up little triangles of tissue paper on standby, and use those to soak up excess glue. Works really well.
By doing the placing and positioning first takes away a lot of the hassle.
You would be surprised the power of wicking!! I was gluing the lid of the smoke box, and the glue wicked all the way under the lid to where my thumb was on the other side 
I also just a couple of weeks ago got some CA debonder stuff which works well for un-gluing when you do get it wrong.
1 Like
Thanks, I appreciate the advice. What do you use to hold the PE part in place while u apply the CA? I’ve been trying to identify something I could use that the glue wouldn’t bond to? Any ideas? Anyone know?
Hi @Bravo36 , no worries on the advise happy to help. Holding wise, I normally am just holding with a pair of tweezers, or my fingers, or sometimes I might tape the parts together if big. If its a bigger part sometimes I just glue down one corner perhaps to get it semi fixed, then move my tweezers or whatever and then glue from the other end. But in short nothing special holding wise.
I dont know of anything that super glue doesnt stick to!
Turns out that fitting the spare road wheels covers over a lot of the previous detail added. Oh well good practice!
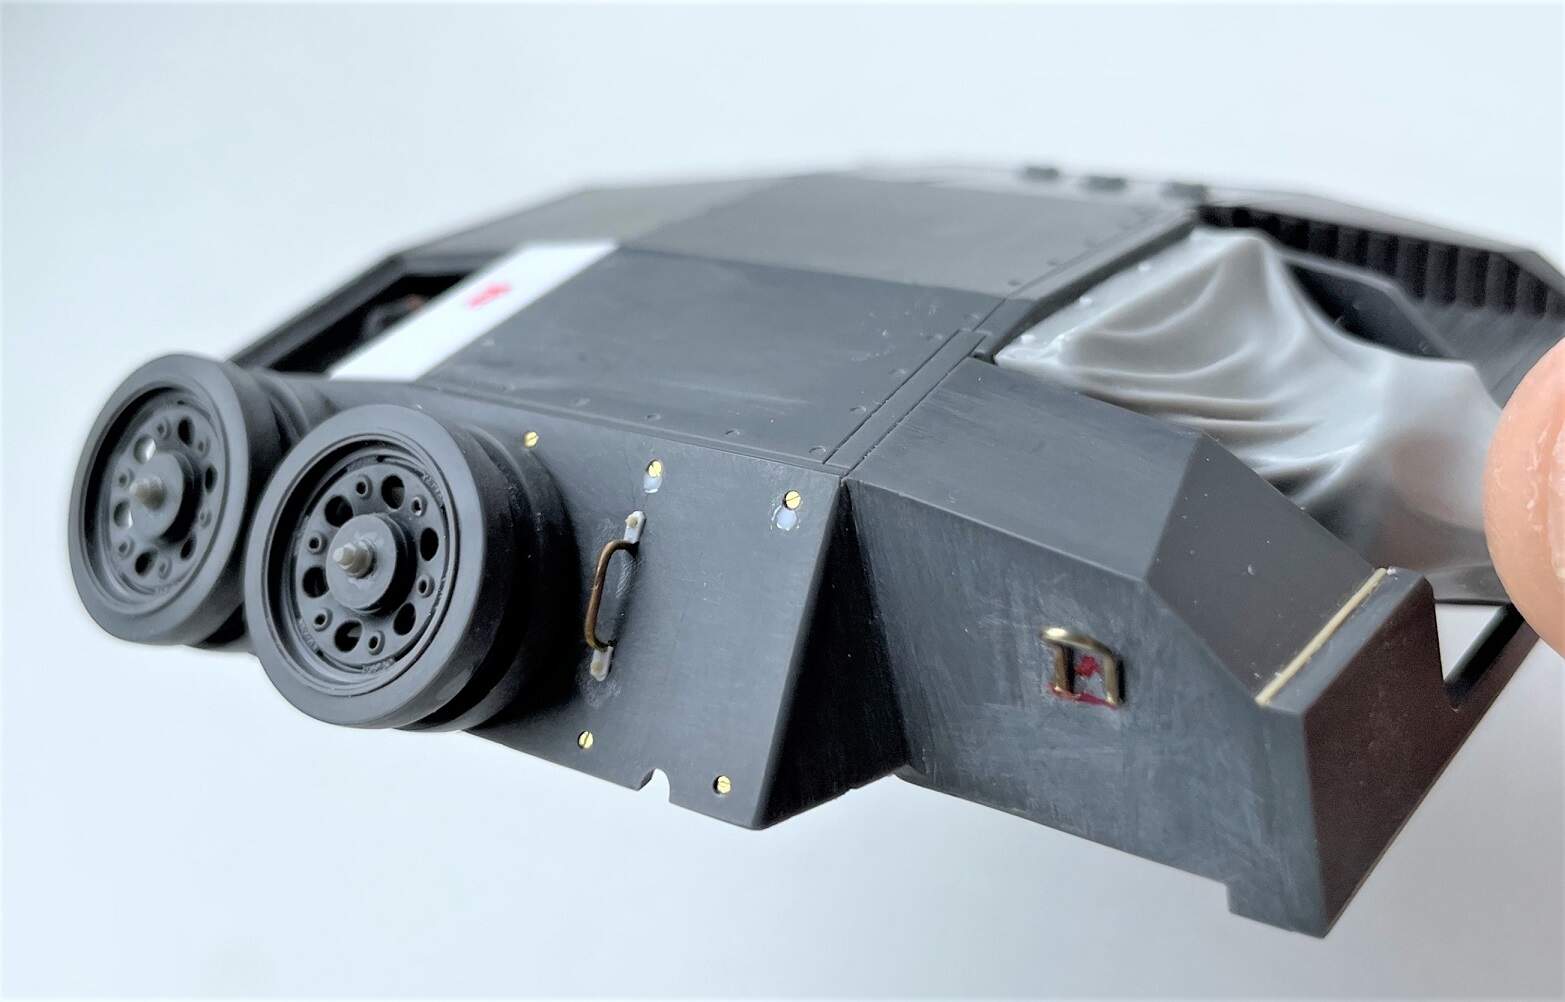
I have mounted the spare road wheels, scratched new grab handles, and scratched new D-shackle type things on each side. Styrene arrived today as well so I can make a start on replacing the upper hatches.
1 Like
I feel your pain. 
I use Ammo Ultraglue for most of my photoetch work. Although I admit it is not as strong as CA, in my opinon it is much better as it allows more time to work before it dries, and the excess can be cleaned with water (again, before it dries). Give it a try.
(Gator’s grip is also a good alternative, if you can get it)
1 Like
@SdAufKla posted this as another alternative.
HTH
Thanks, I’ll give it a try…