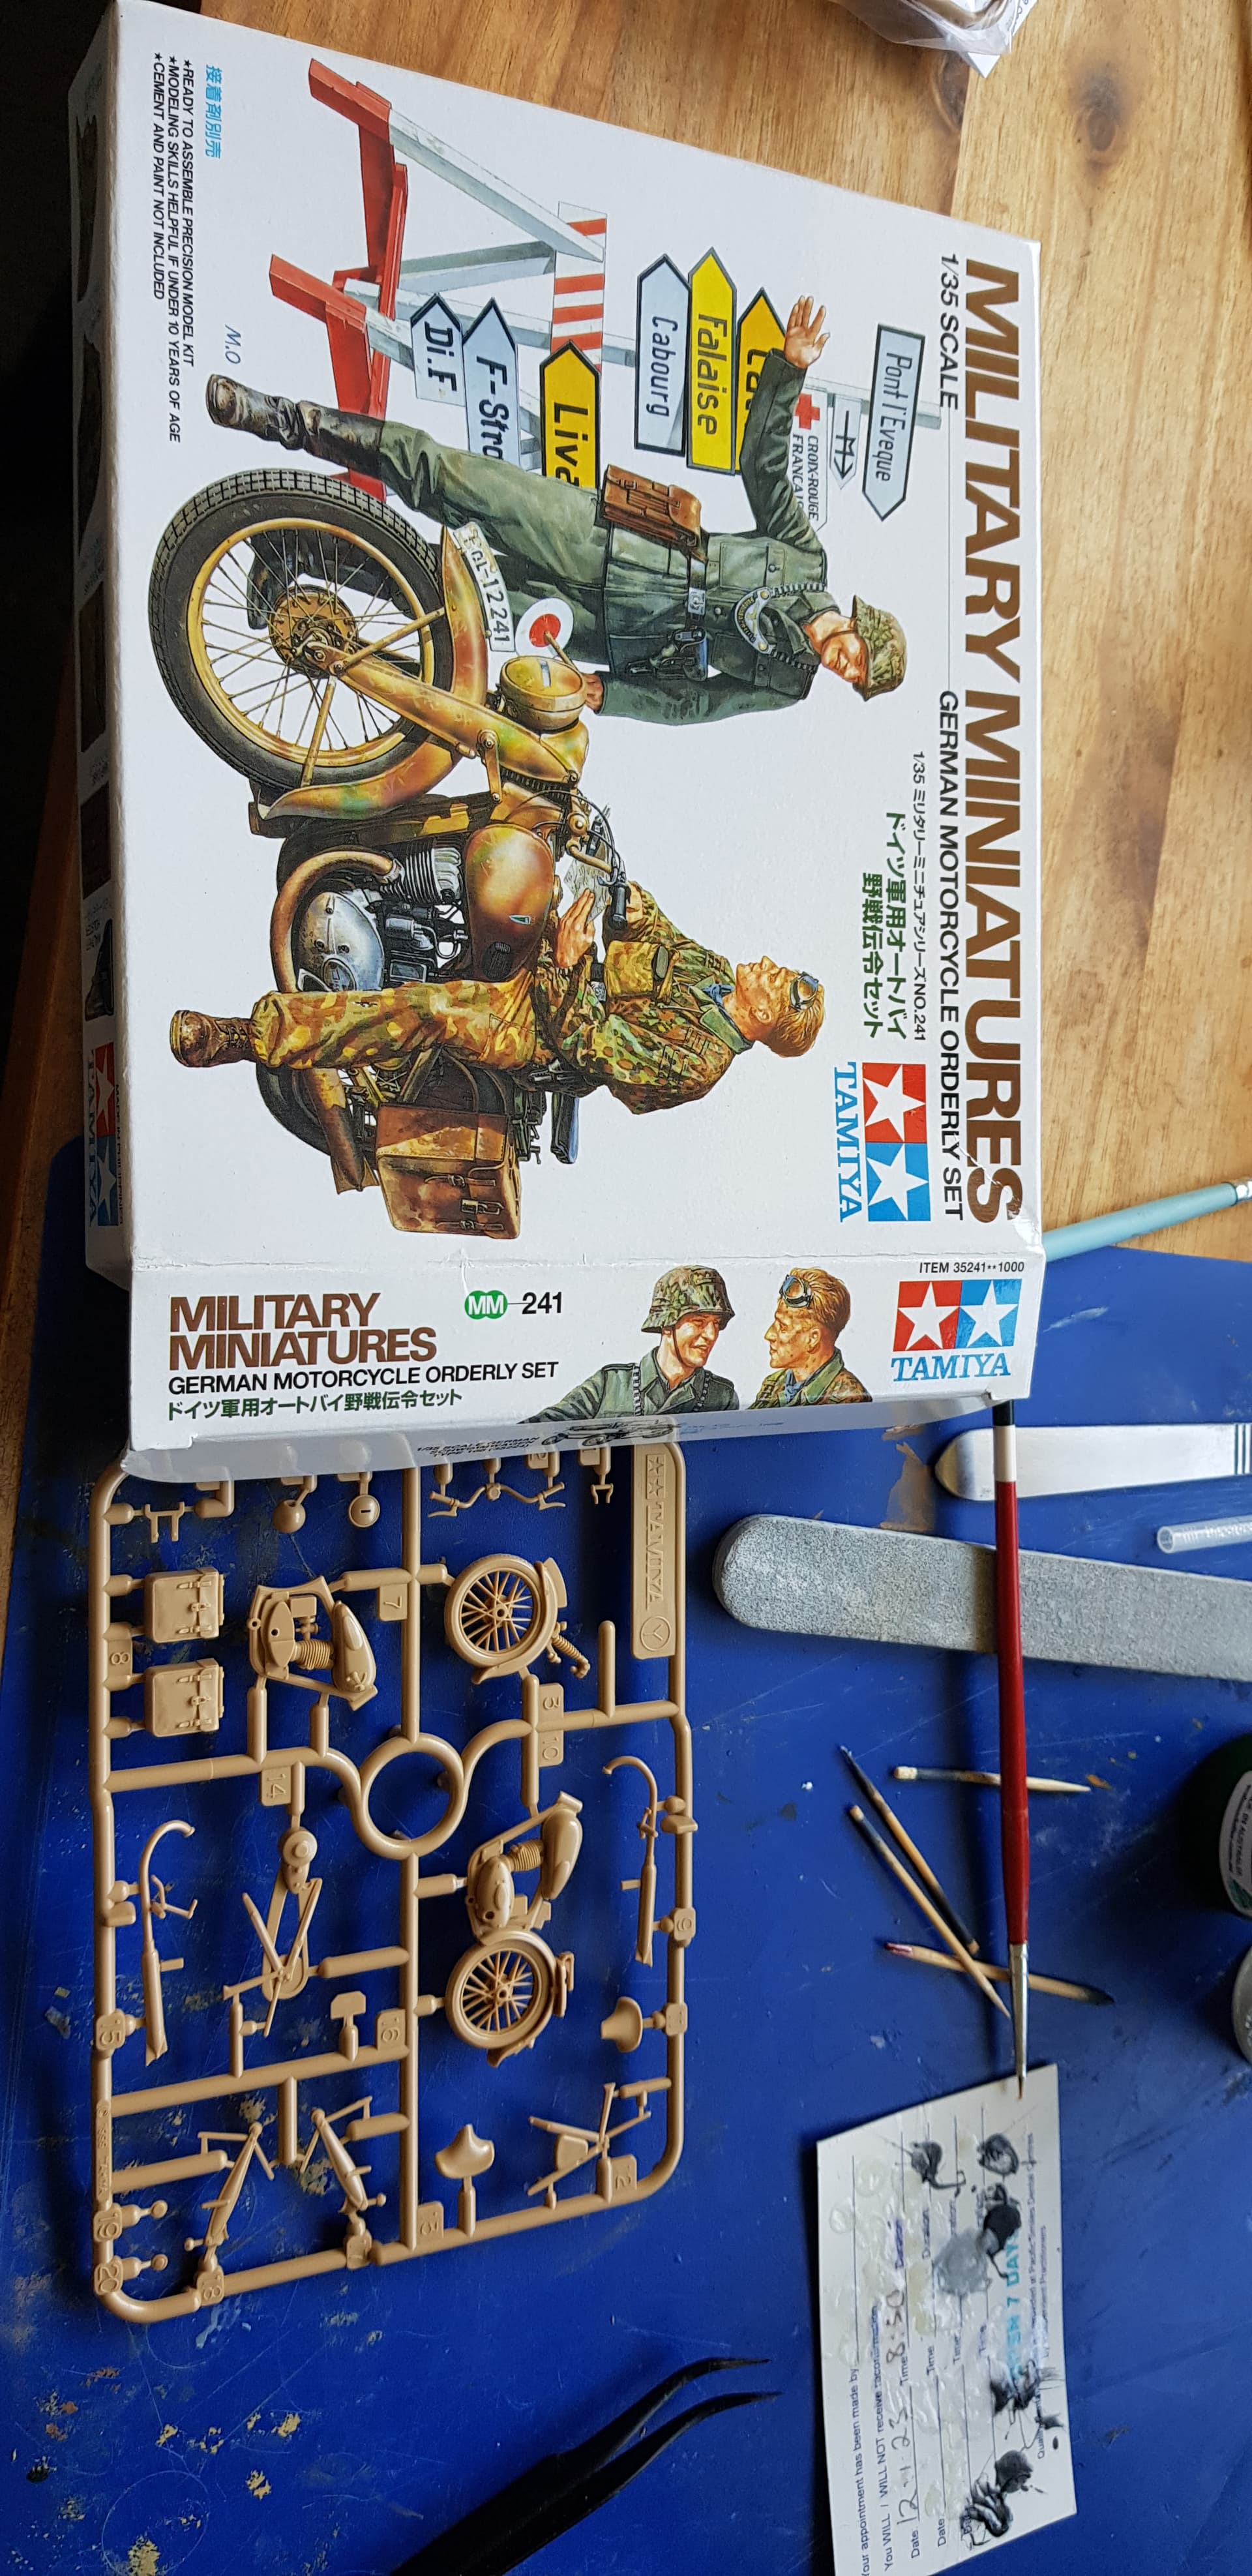
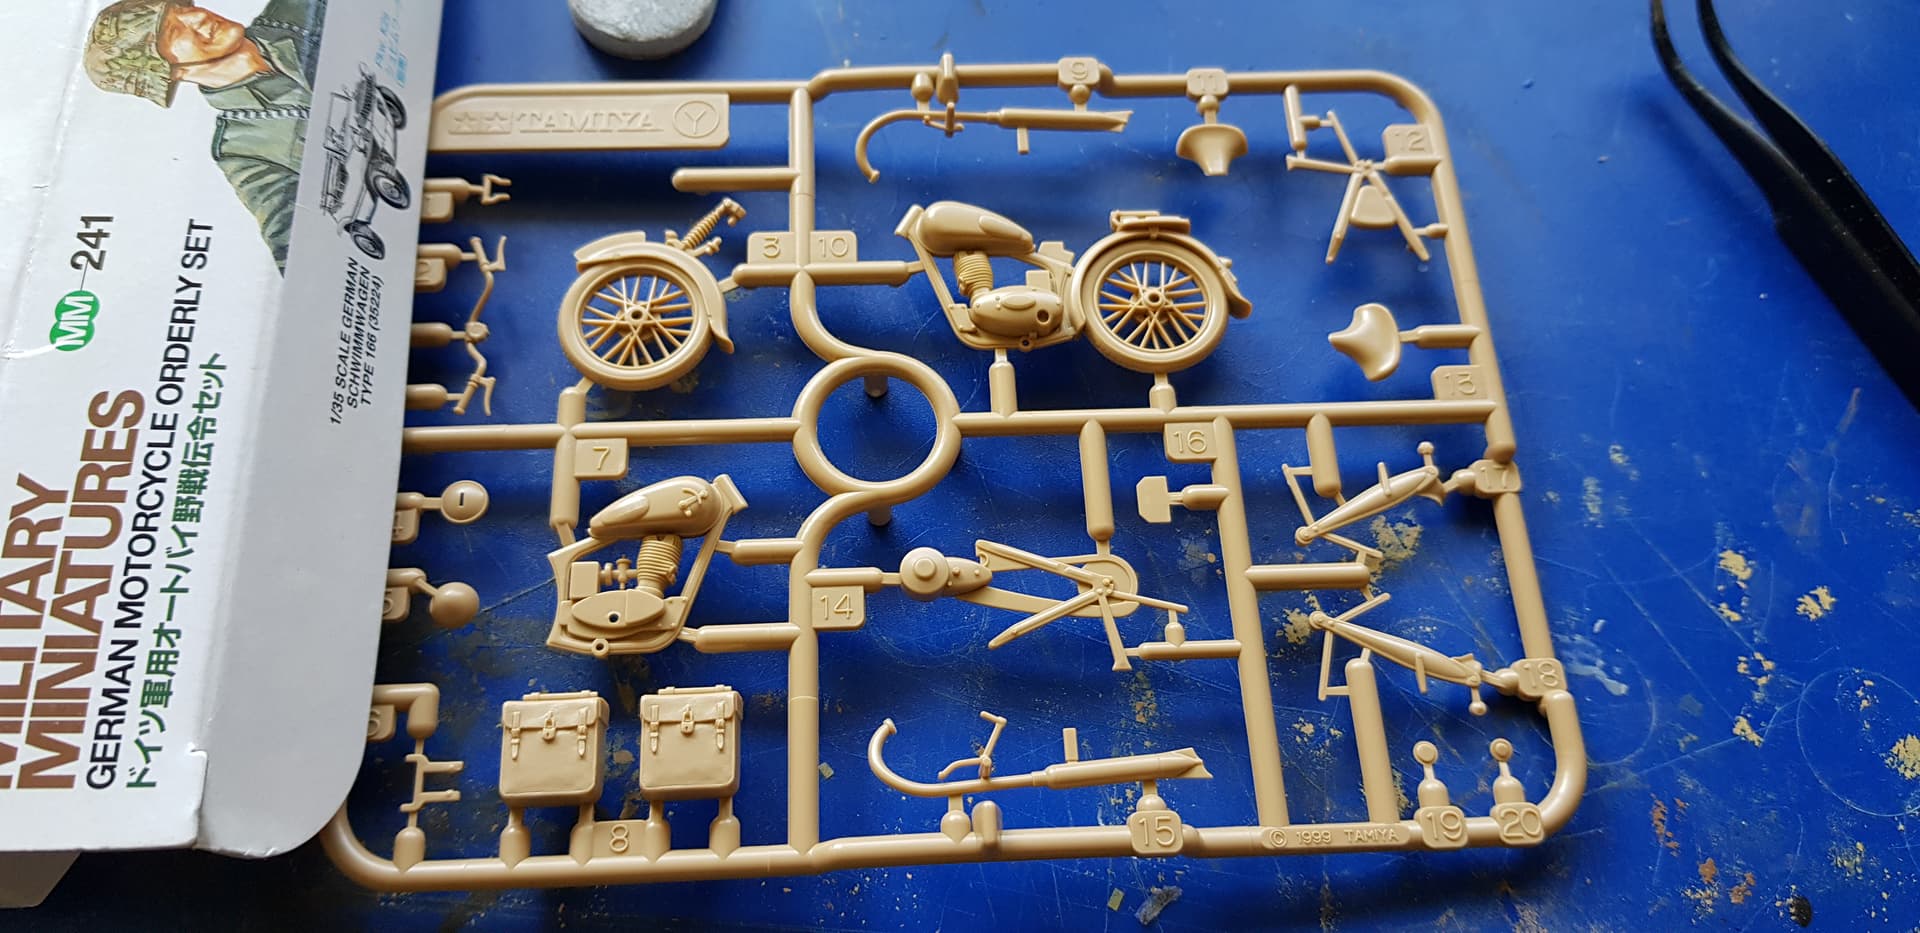
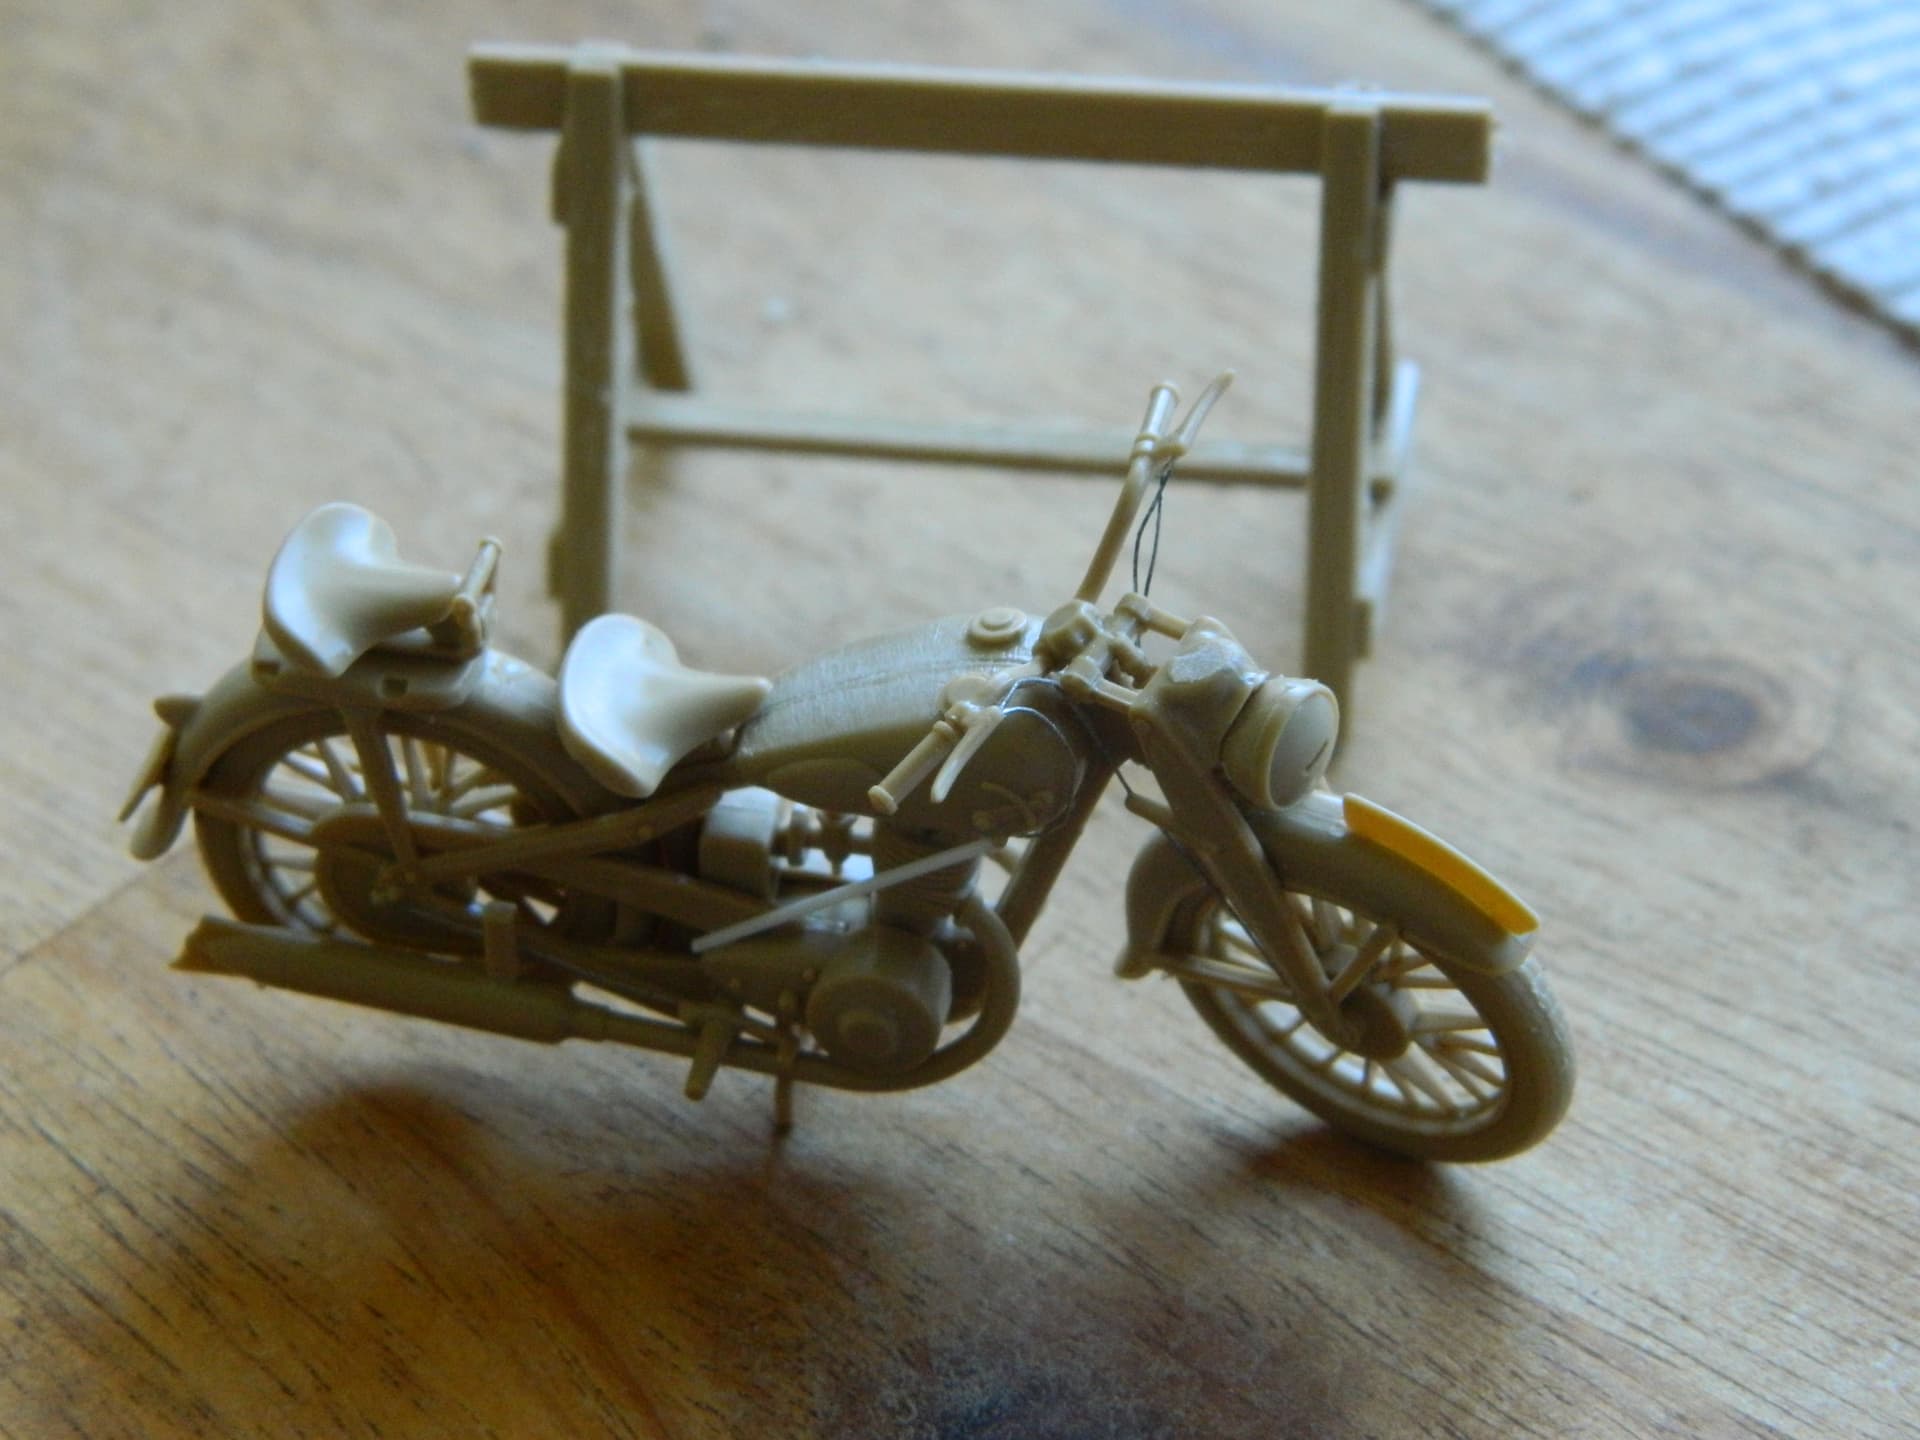
This was the only (technically) pre 2000 kit i own lol.
The box was a 2000 issue but the motorbike was 1999 so it just qualifies. This will be for a large diorama i’m slowly in the process of doing, but it’ll be good to get this done
This was the only (technically) pre 2000 kit i own lol.
The box was a 2000 issue but the motorbike was 1999 so it just qualifies. This will be for a large diorama i’m slowly in the process of doing, but it’ll be good to get this done
Wow! That knocks my “whimsy” out of the park; the surreality of what you’ve just come up with would, in fact, be superb! I mean, that would garner no small interest on the display tables that’s for sure. A helluva project the more I think about it.
it would be a bit like a family sort of visit to say, Bovington Tank Museum on a Saturday afternoon, or during the school holidays; mind you, having espied some of the human specimens doing such when I worked there (a long time ago) you’d think the aliens were already amongst us(!)
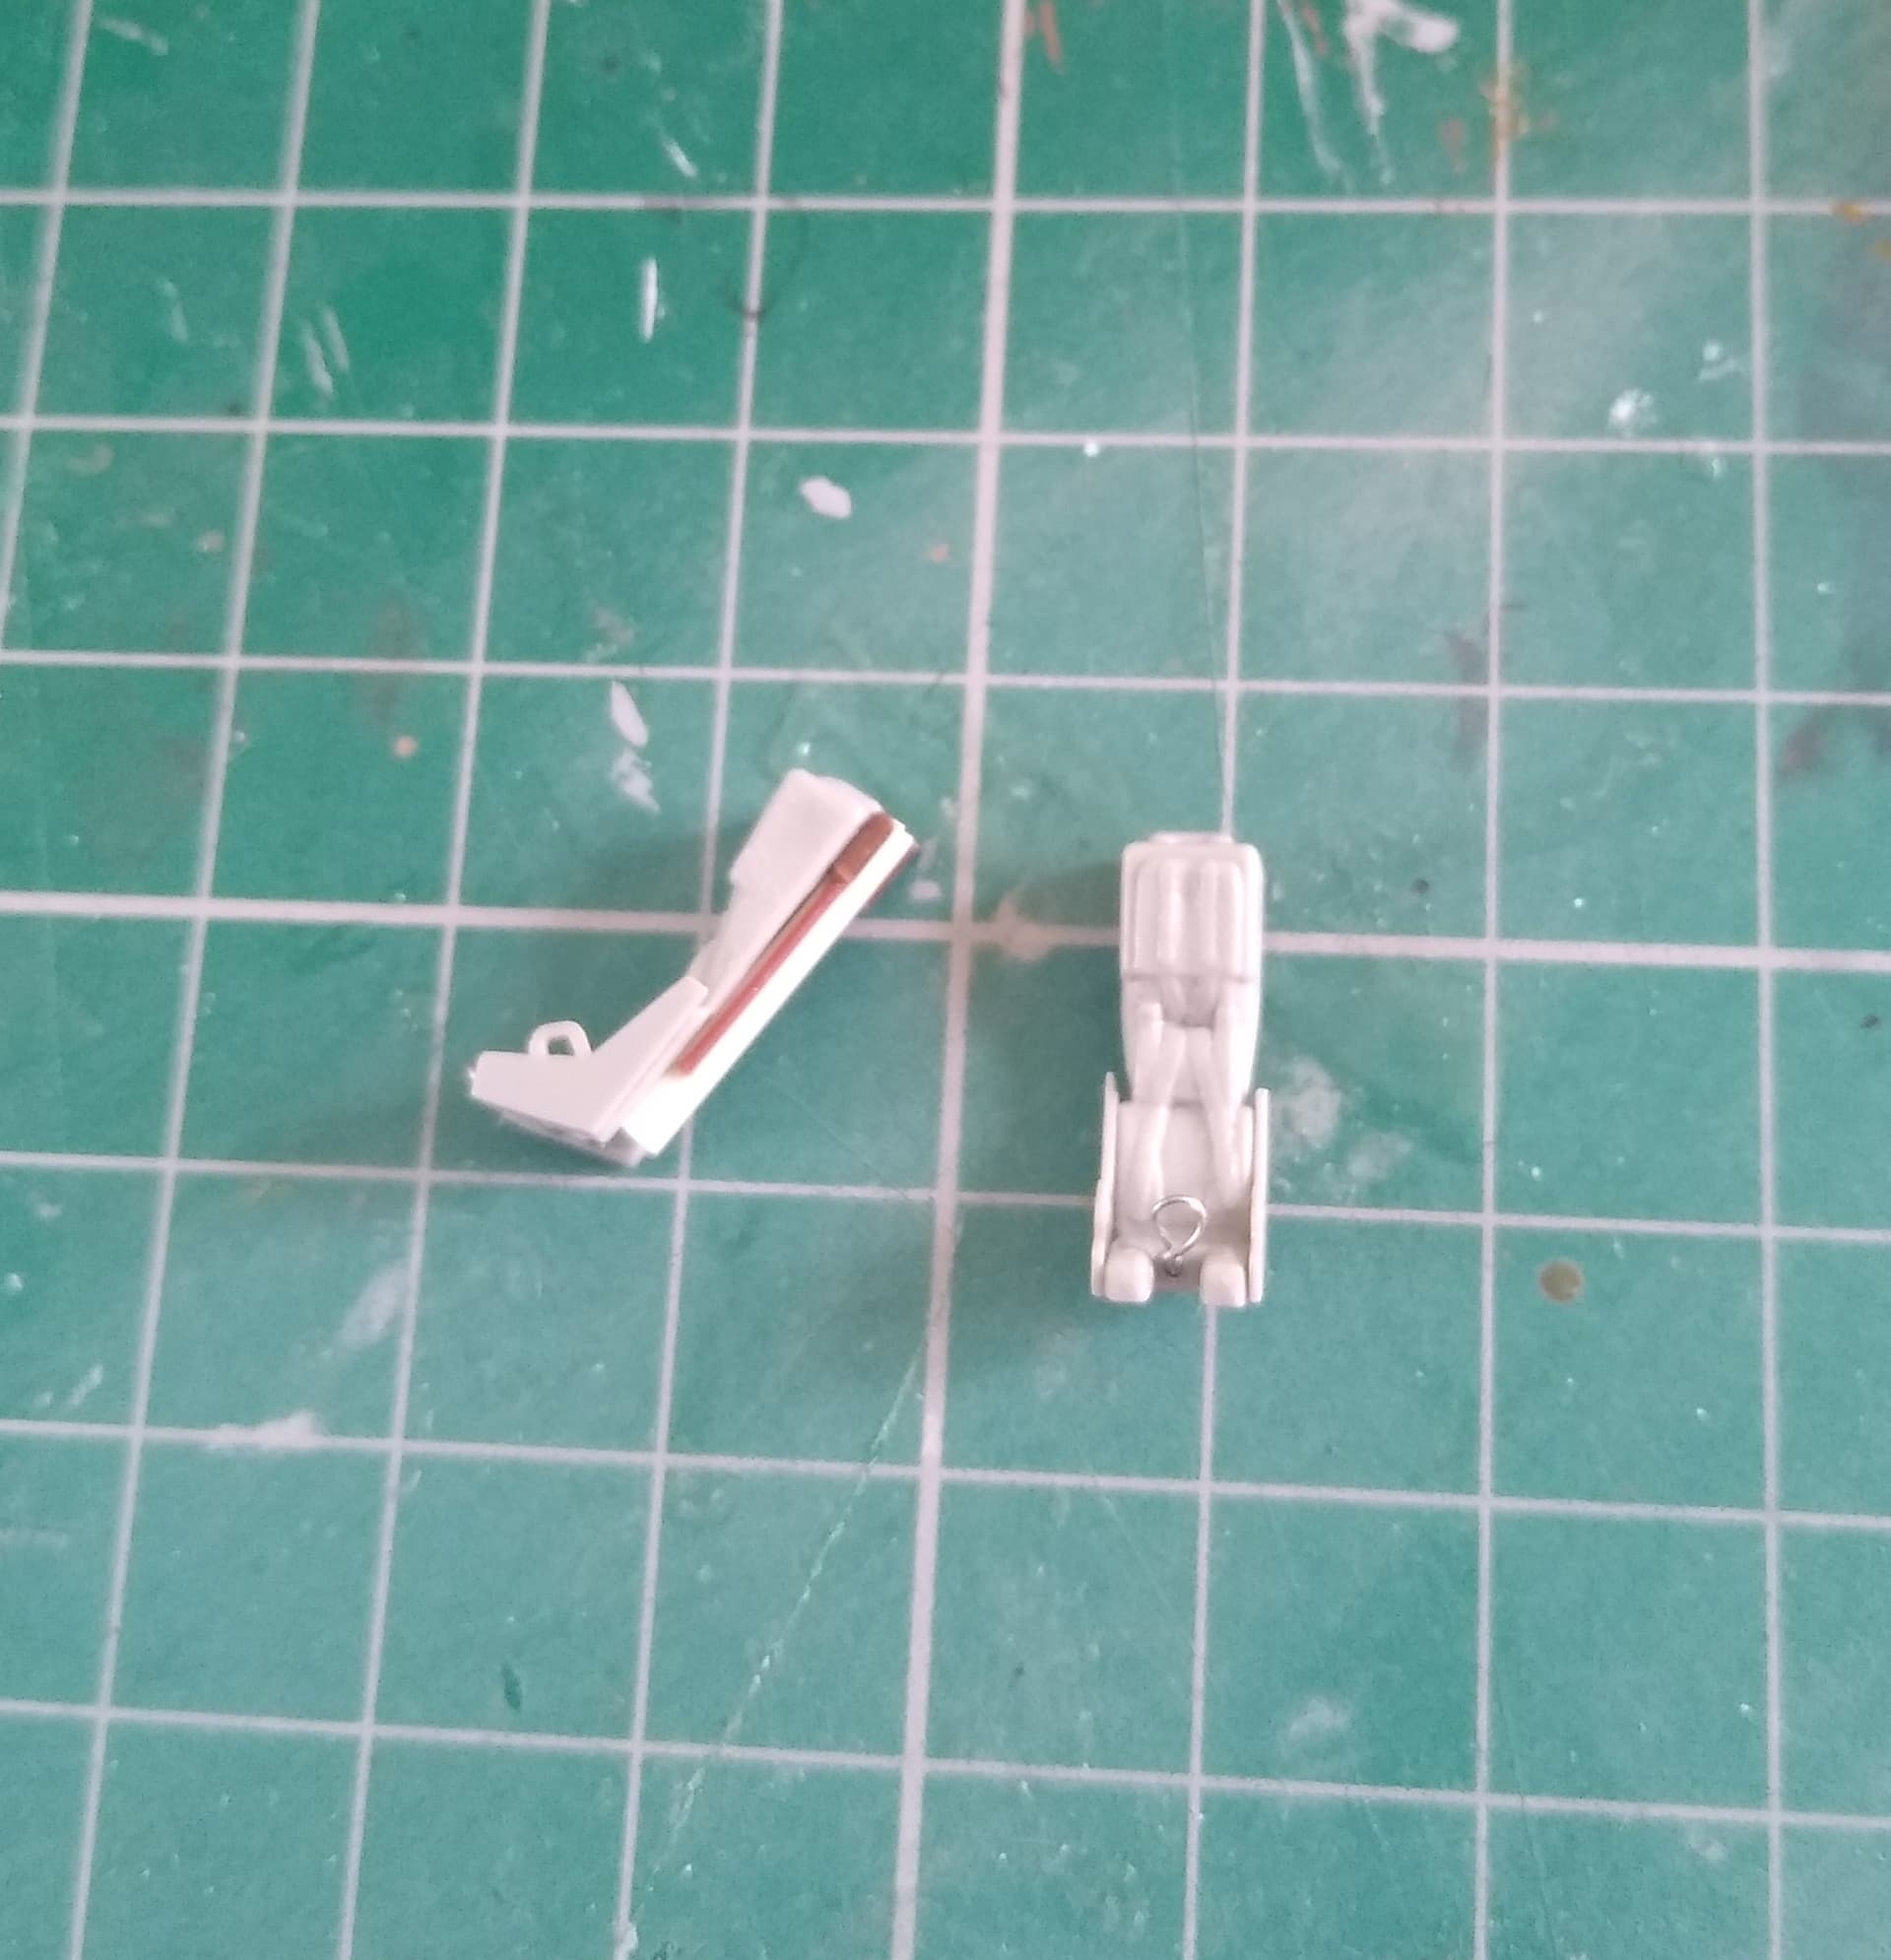
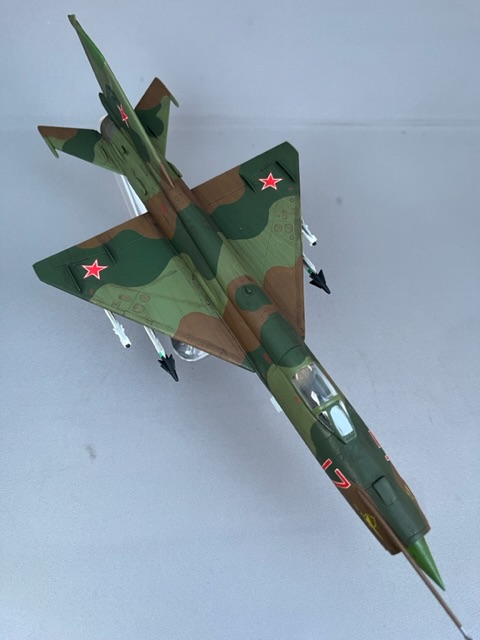
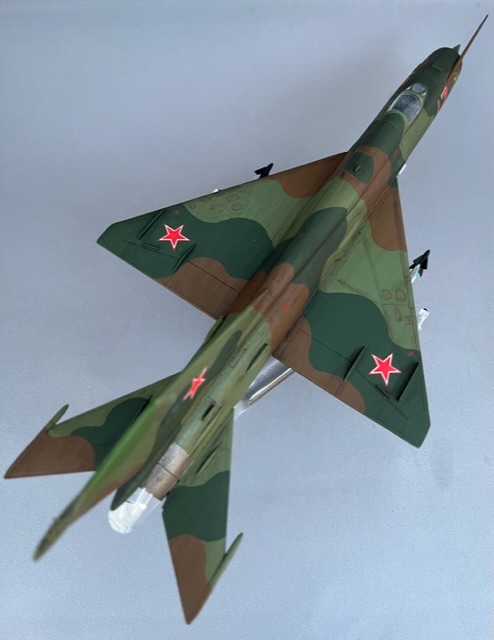
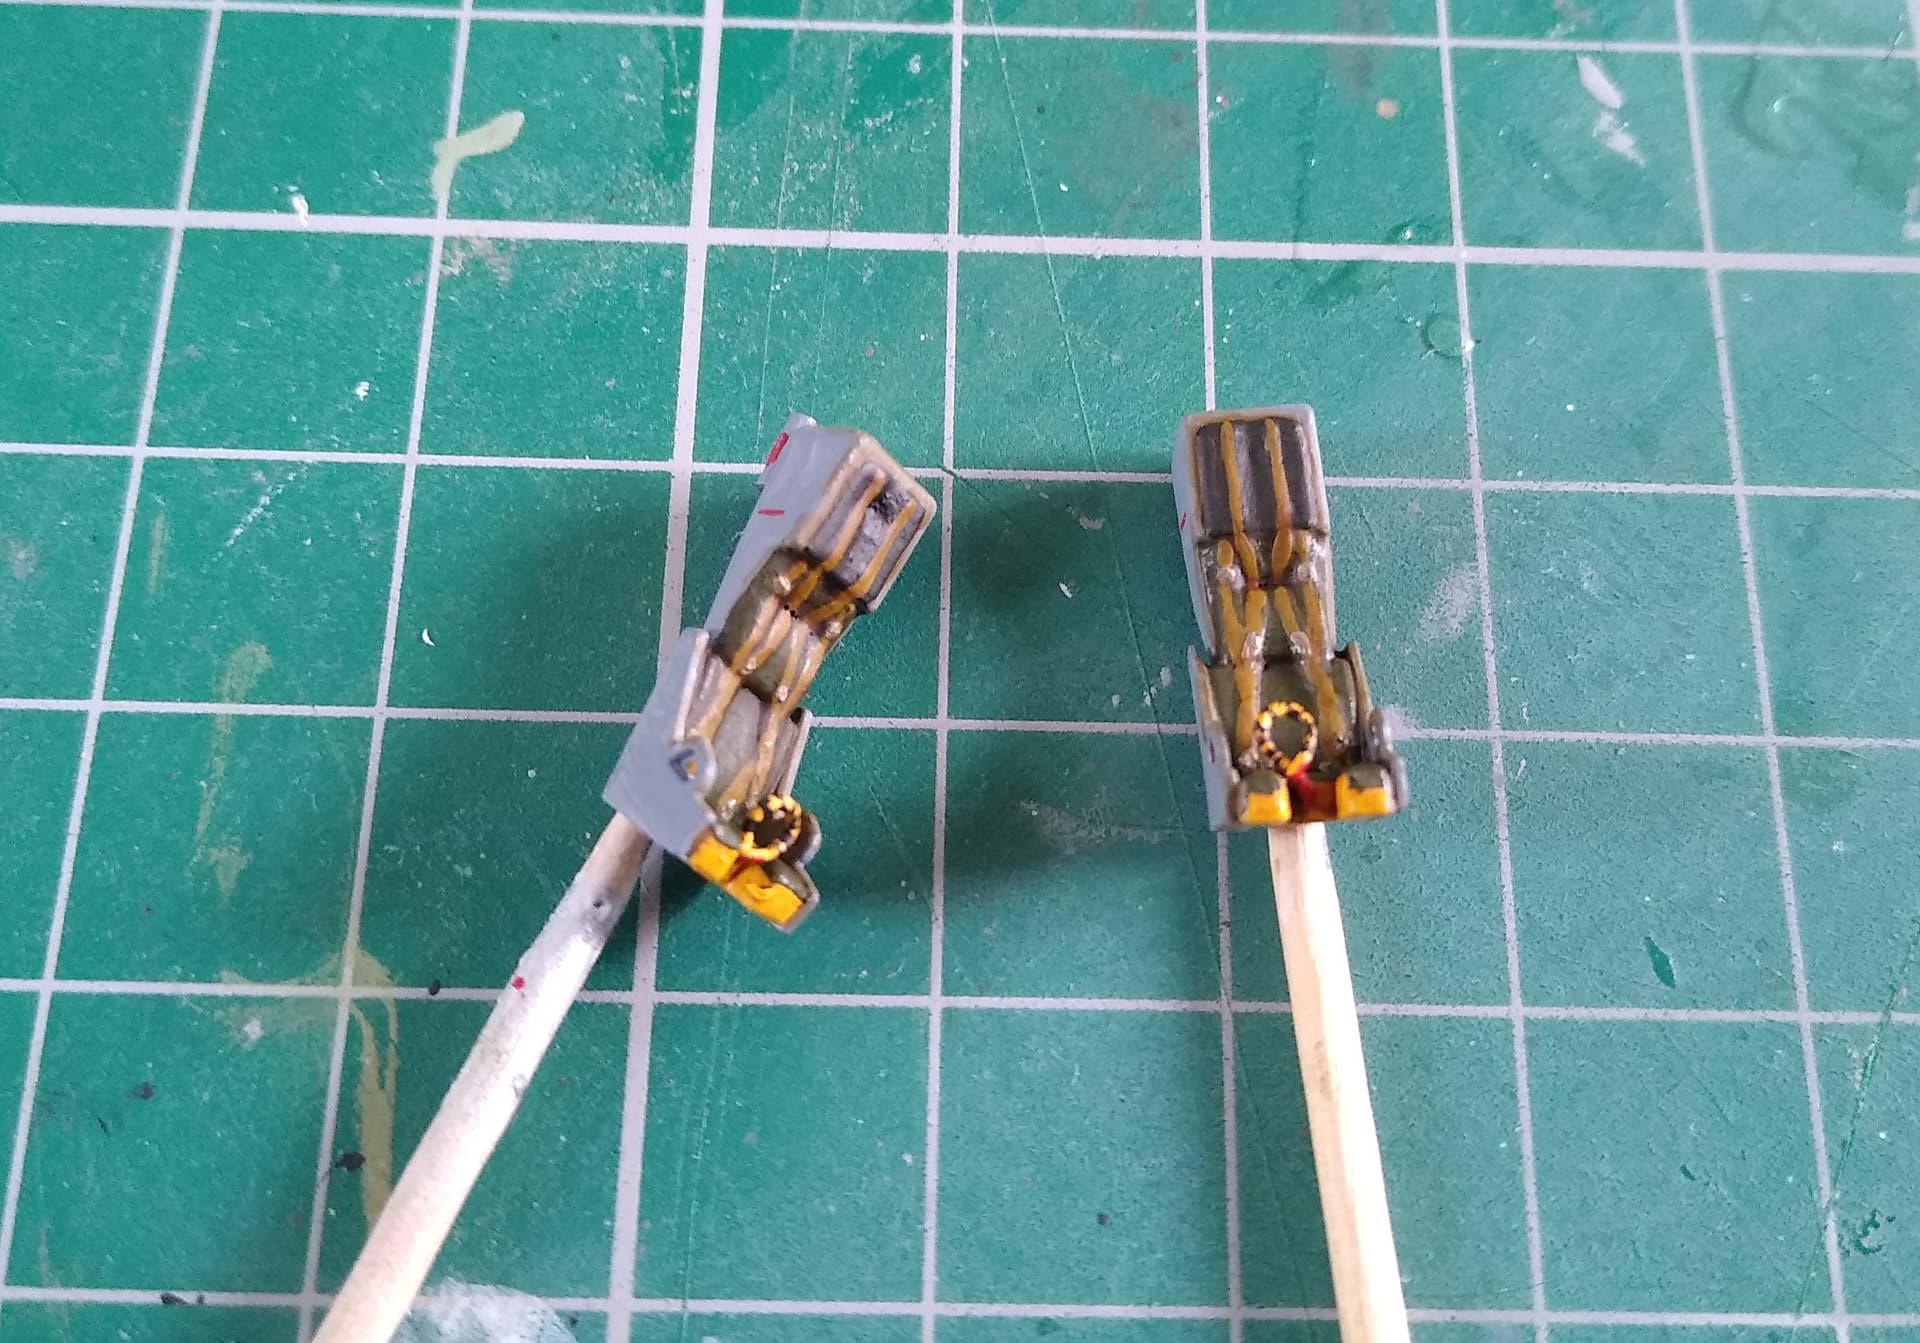
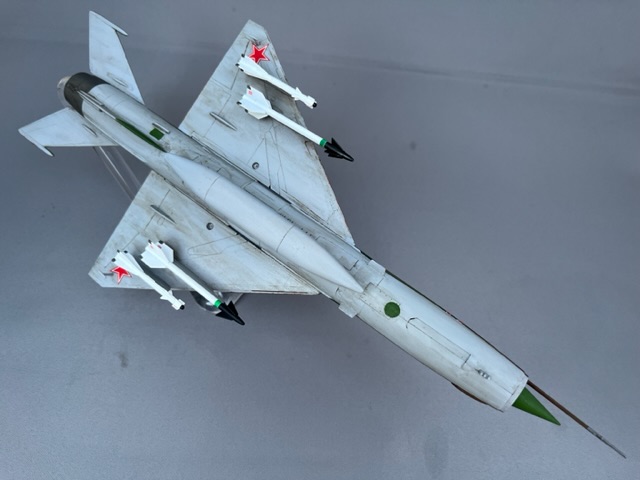
Some work to improve the ejection seats. Shape wise they’re not bad, but a little bit of extra work does improve them.
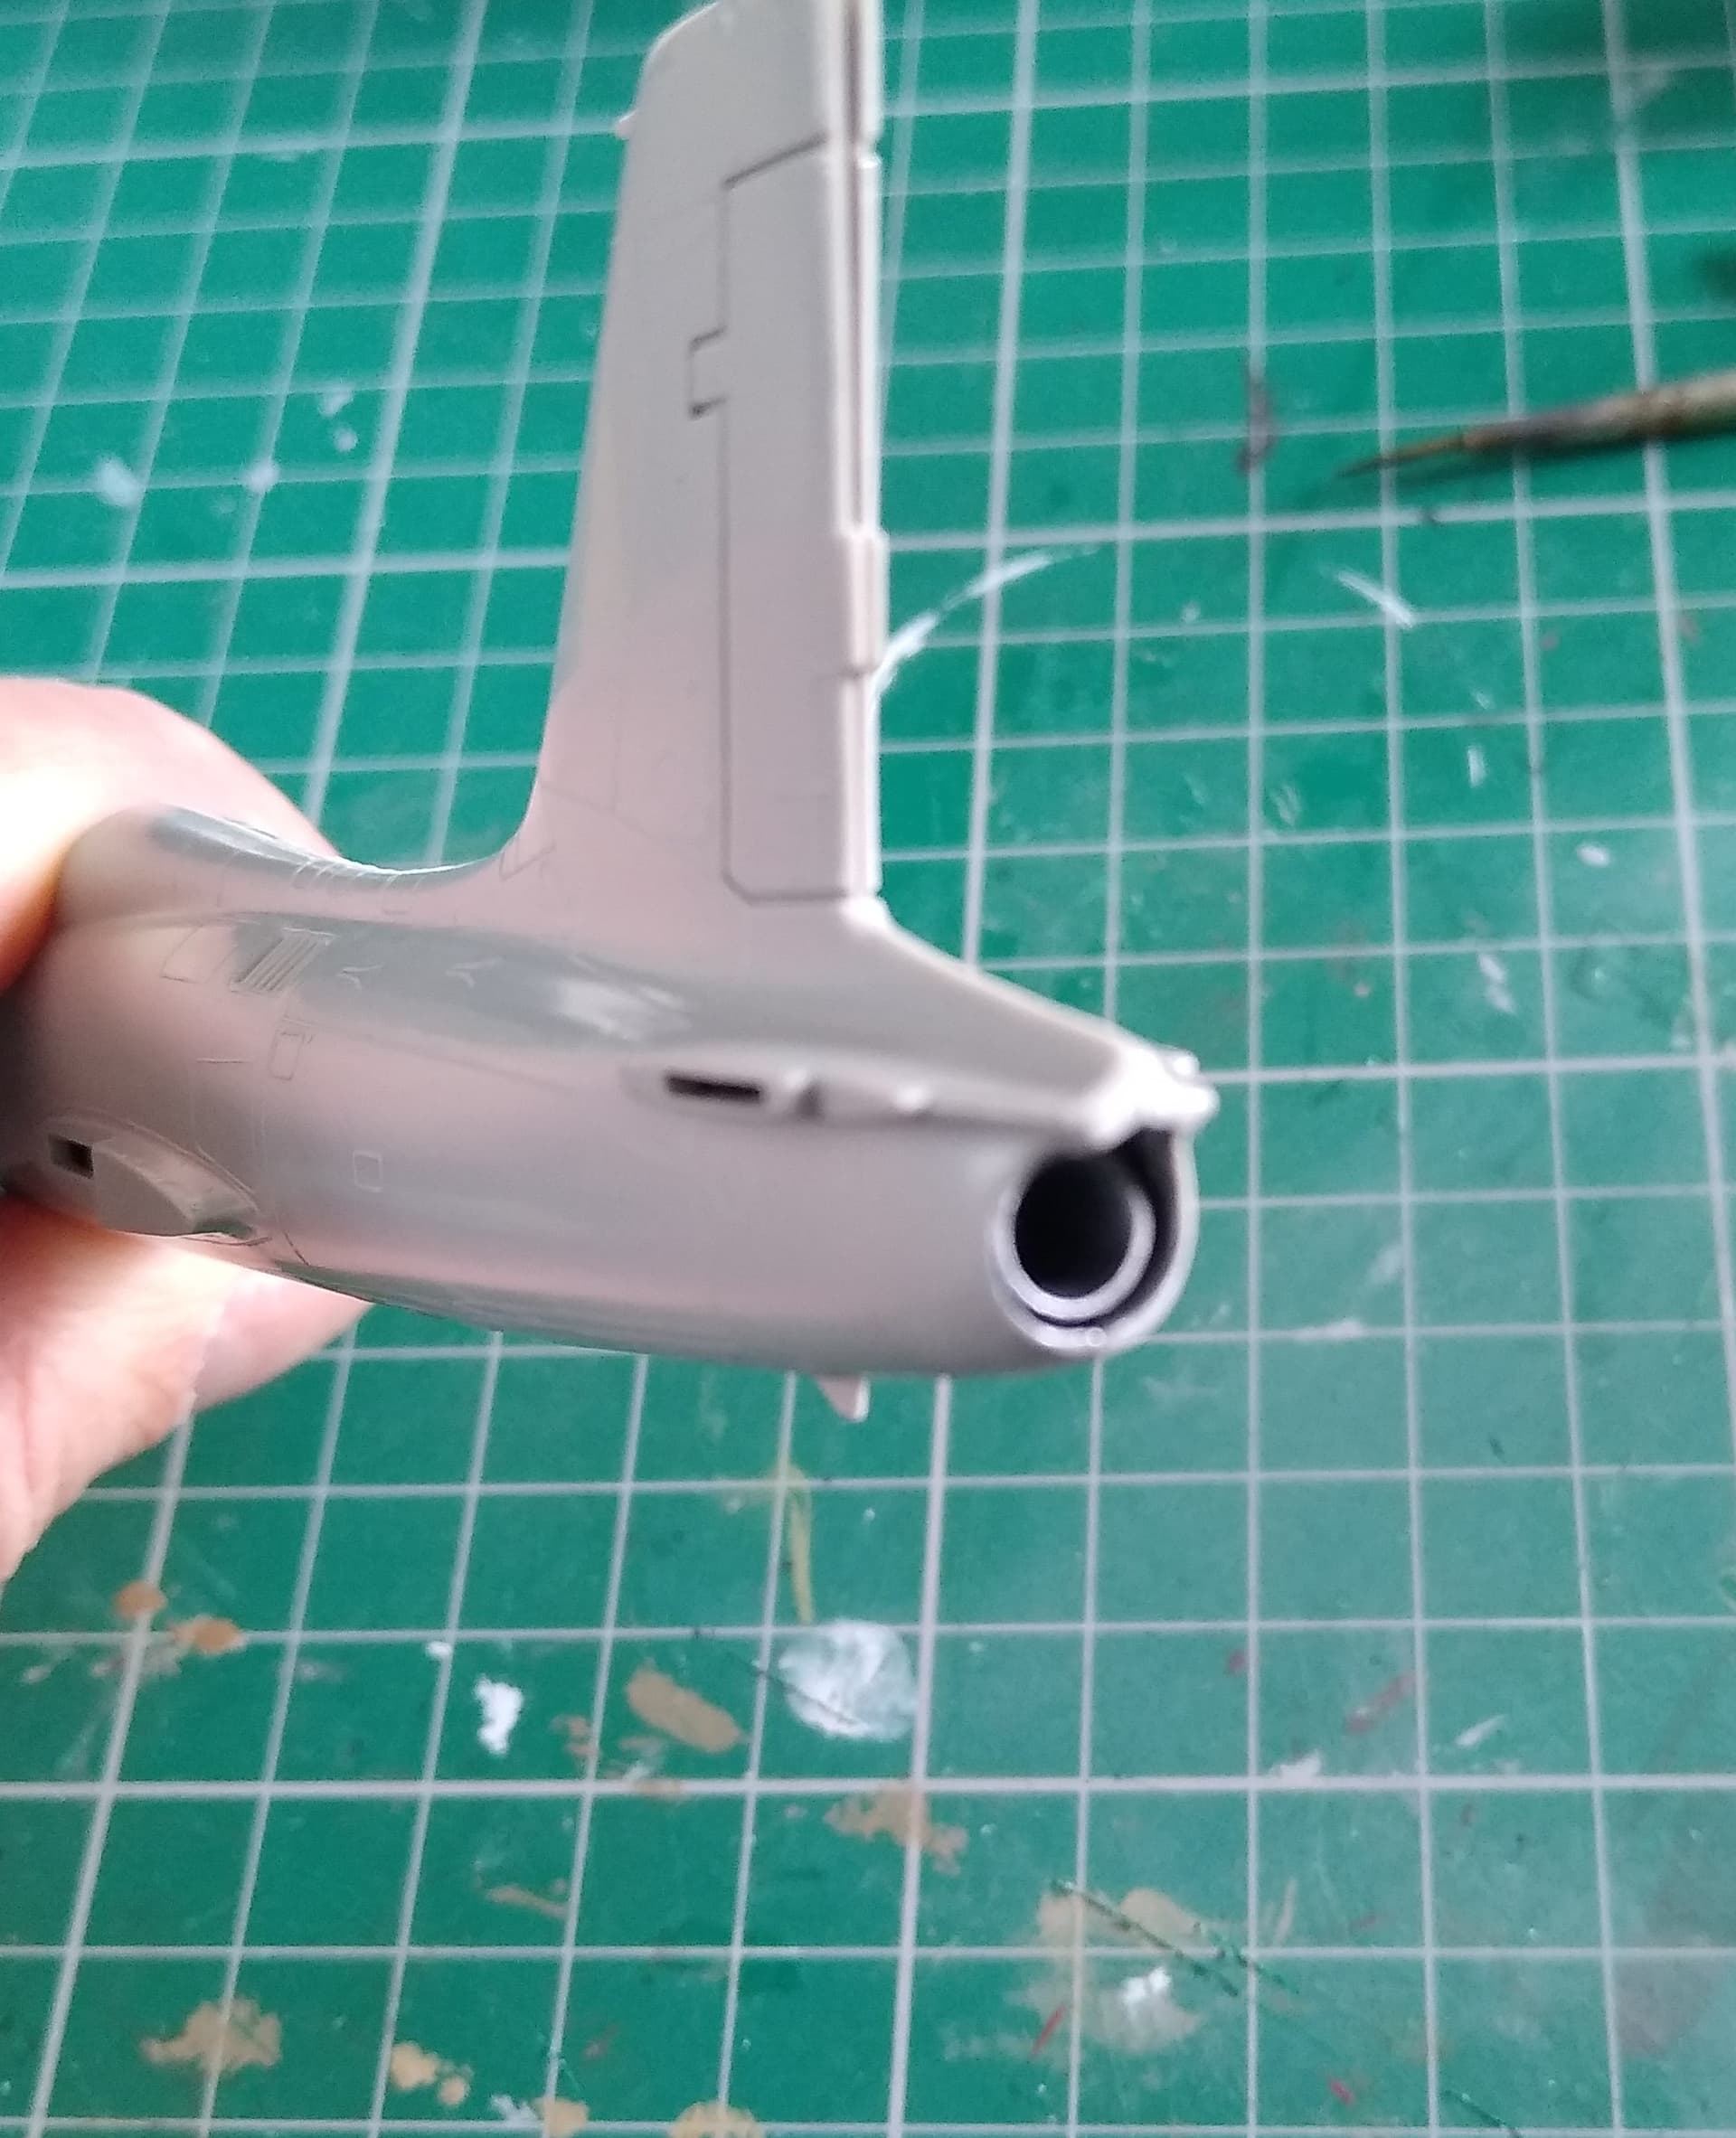
I used a bit of U-channel to make the launch rails, some rod and wire firing handle.
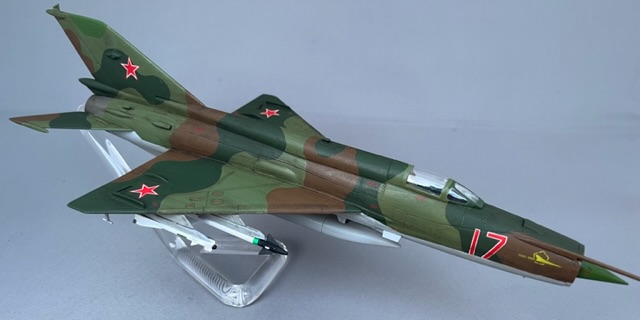
Here is my summer nostalgia entry: the (very) Old school 1/48 KP MiG-21.
I build it as a typical 1970/80ties Soviet machine. I used the kit decals.
First time I used a home made stand from an acrylic display stand.
Great idea for a campaign and I really enjoyed this old school version as a summer build. ![]()
Super to see so many entries in this campaign. Looking forward to see more great entries in this campaign. ![]()

Well done, Jesper!
Your immense campaign experience shows; fast builds and excellent finishes, no matter what subject!
Thanks for participating and inspiring others!
Thanks, Ron. Actually my builds normally take quite some time - especially since I am doing several builds at the same time to avoid builders fatigue ![]()
Really nice colours on that Jesper… and the weathering is nice and subtle … just so you know its there. Lovely work.
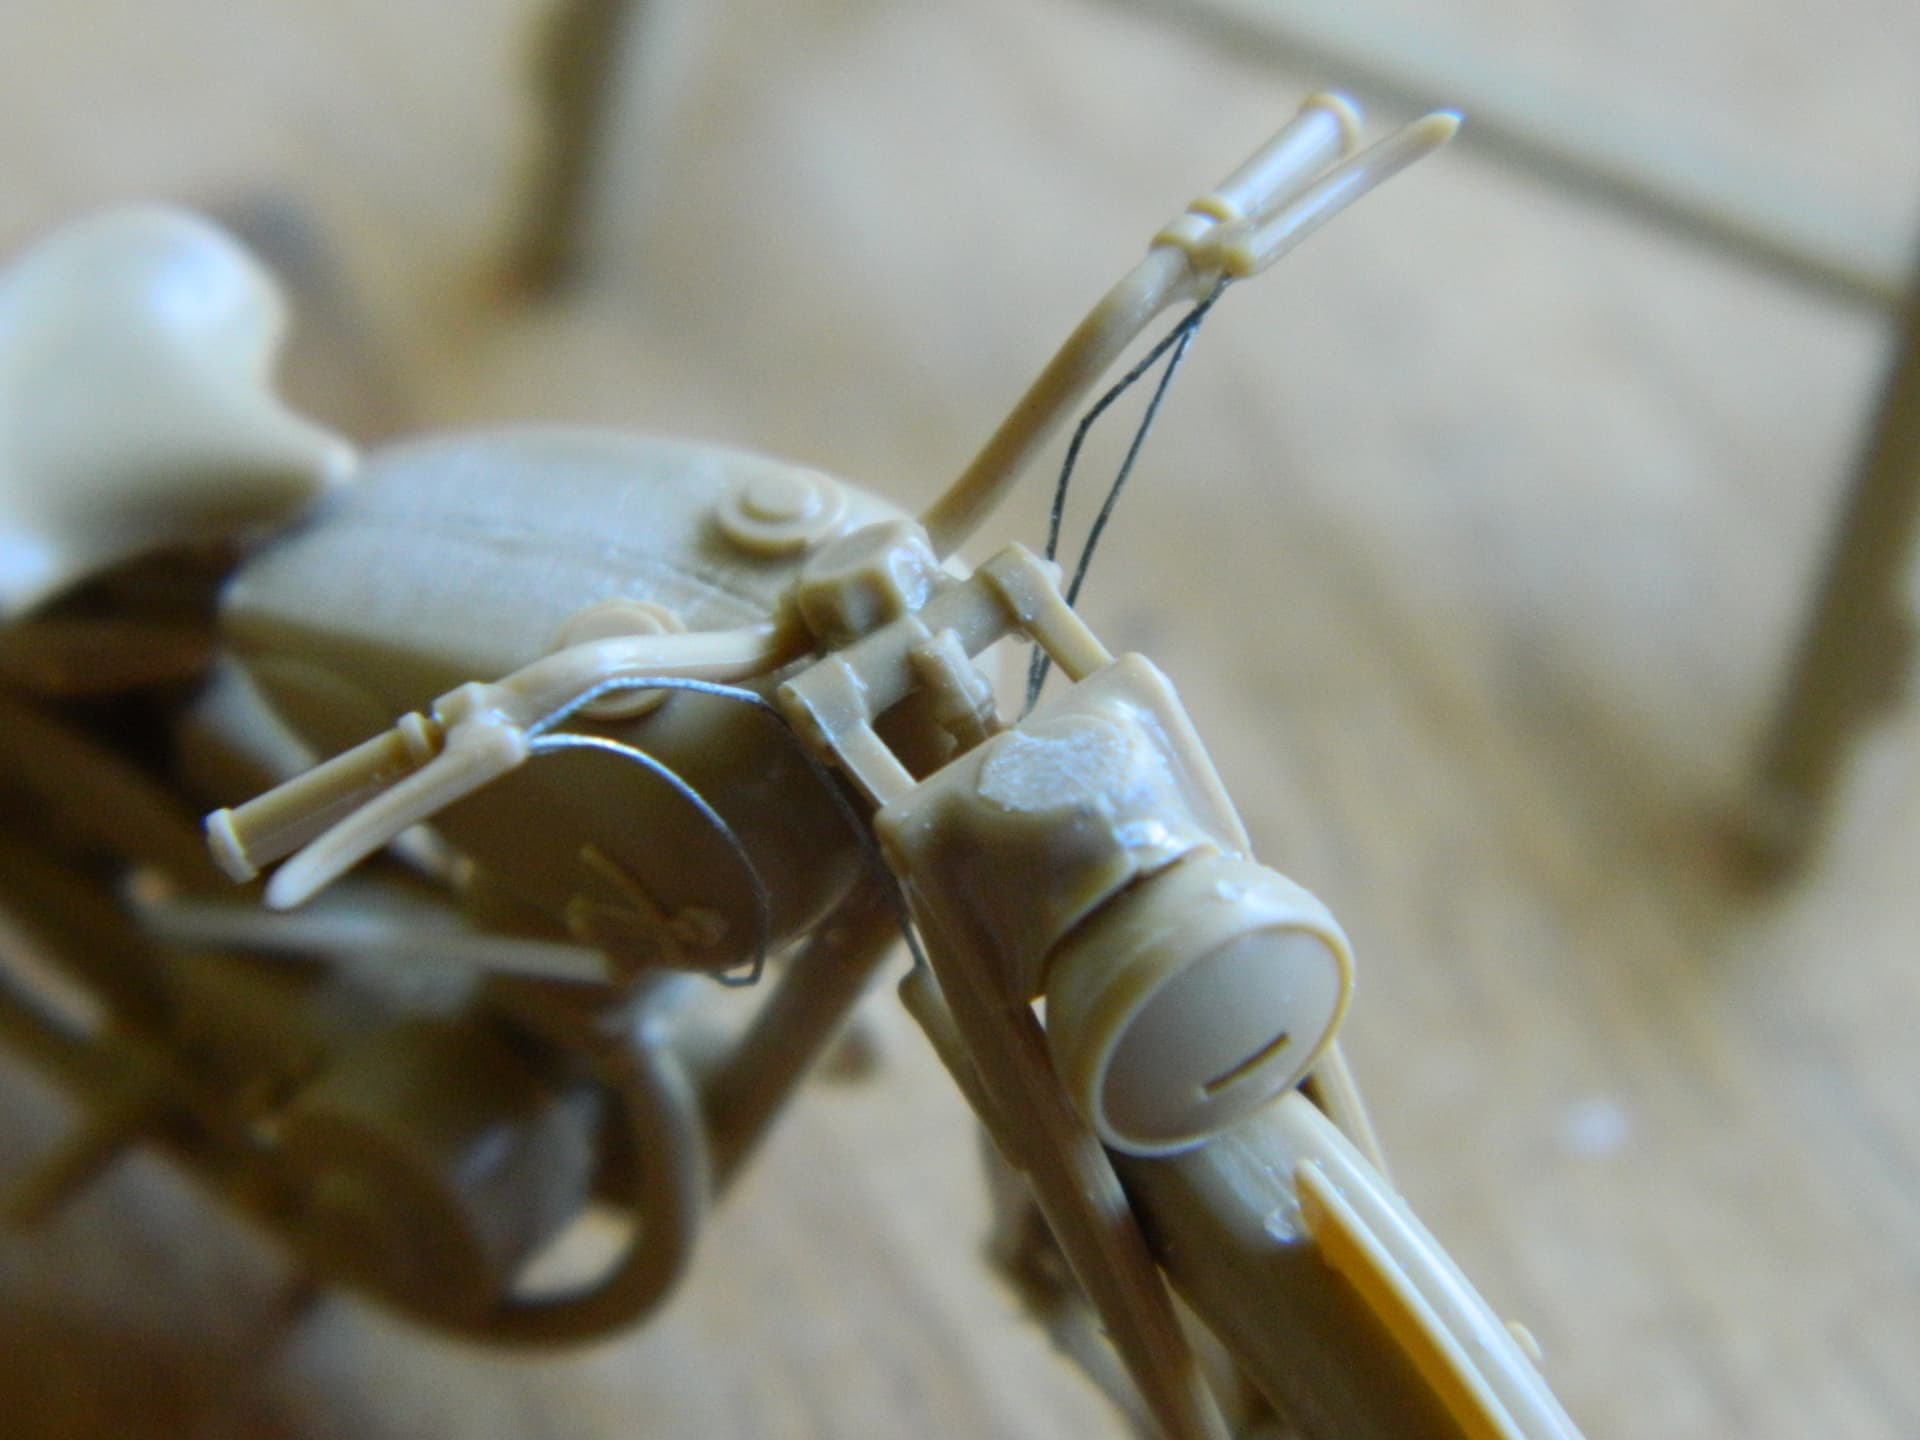
real simple build, typical Tamiya, shake the box and out it comes. Added a couple of brake and throttle lines to it. Just got to throw some paint at it now ![]()
Just something simple like adding those lines really lifts these bike kits up …and its so easy to do … totally changes their look ![]()
I agree with Johnny, the lines look great Colin. ![]()
![]()
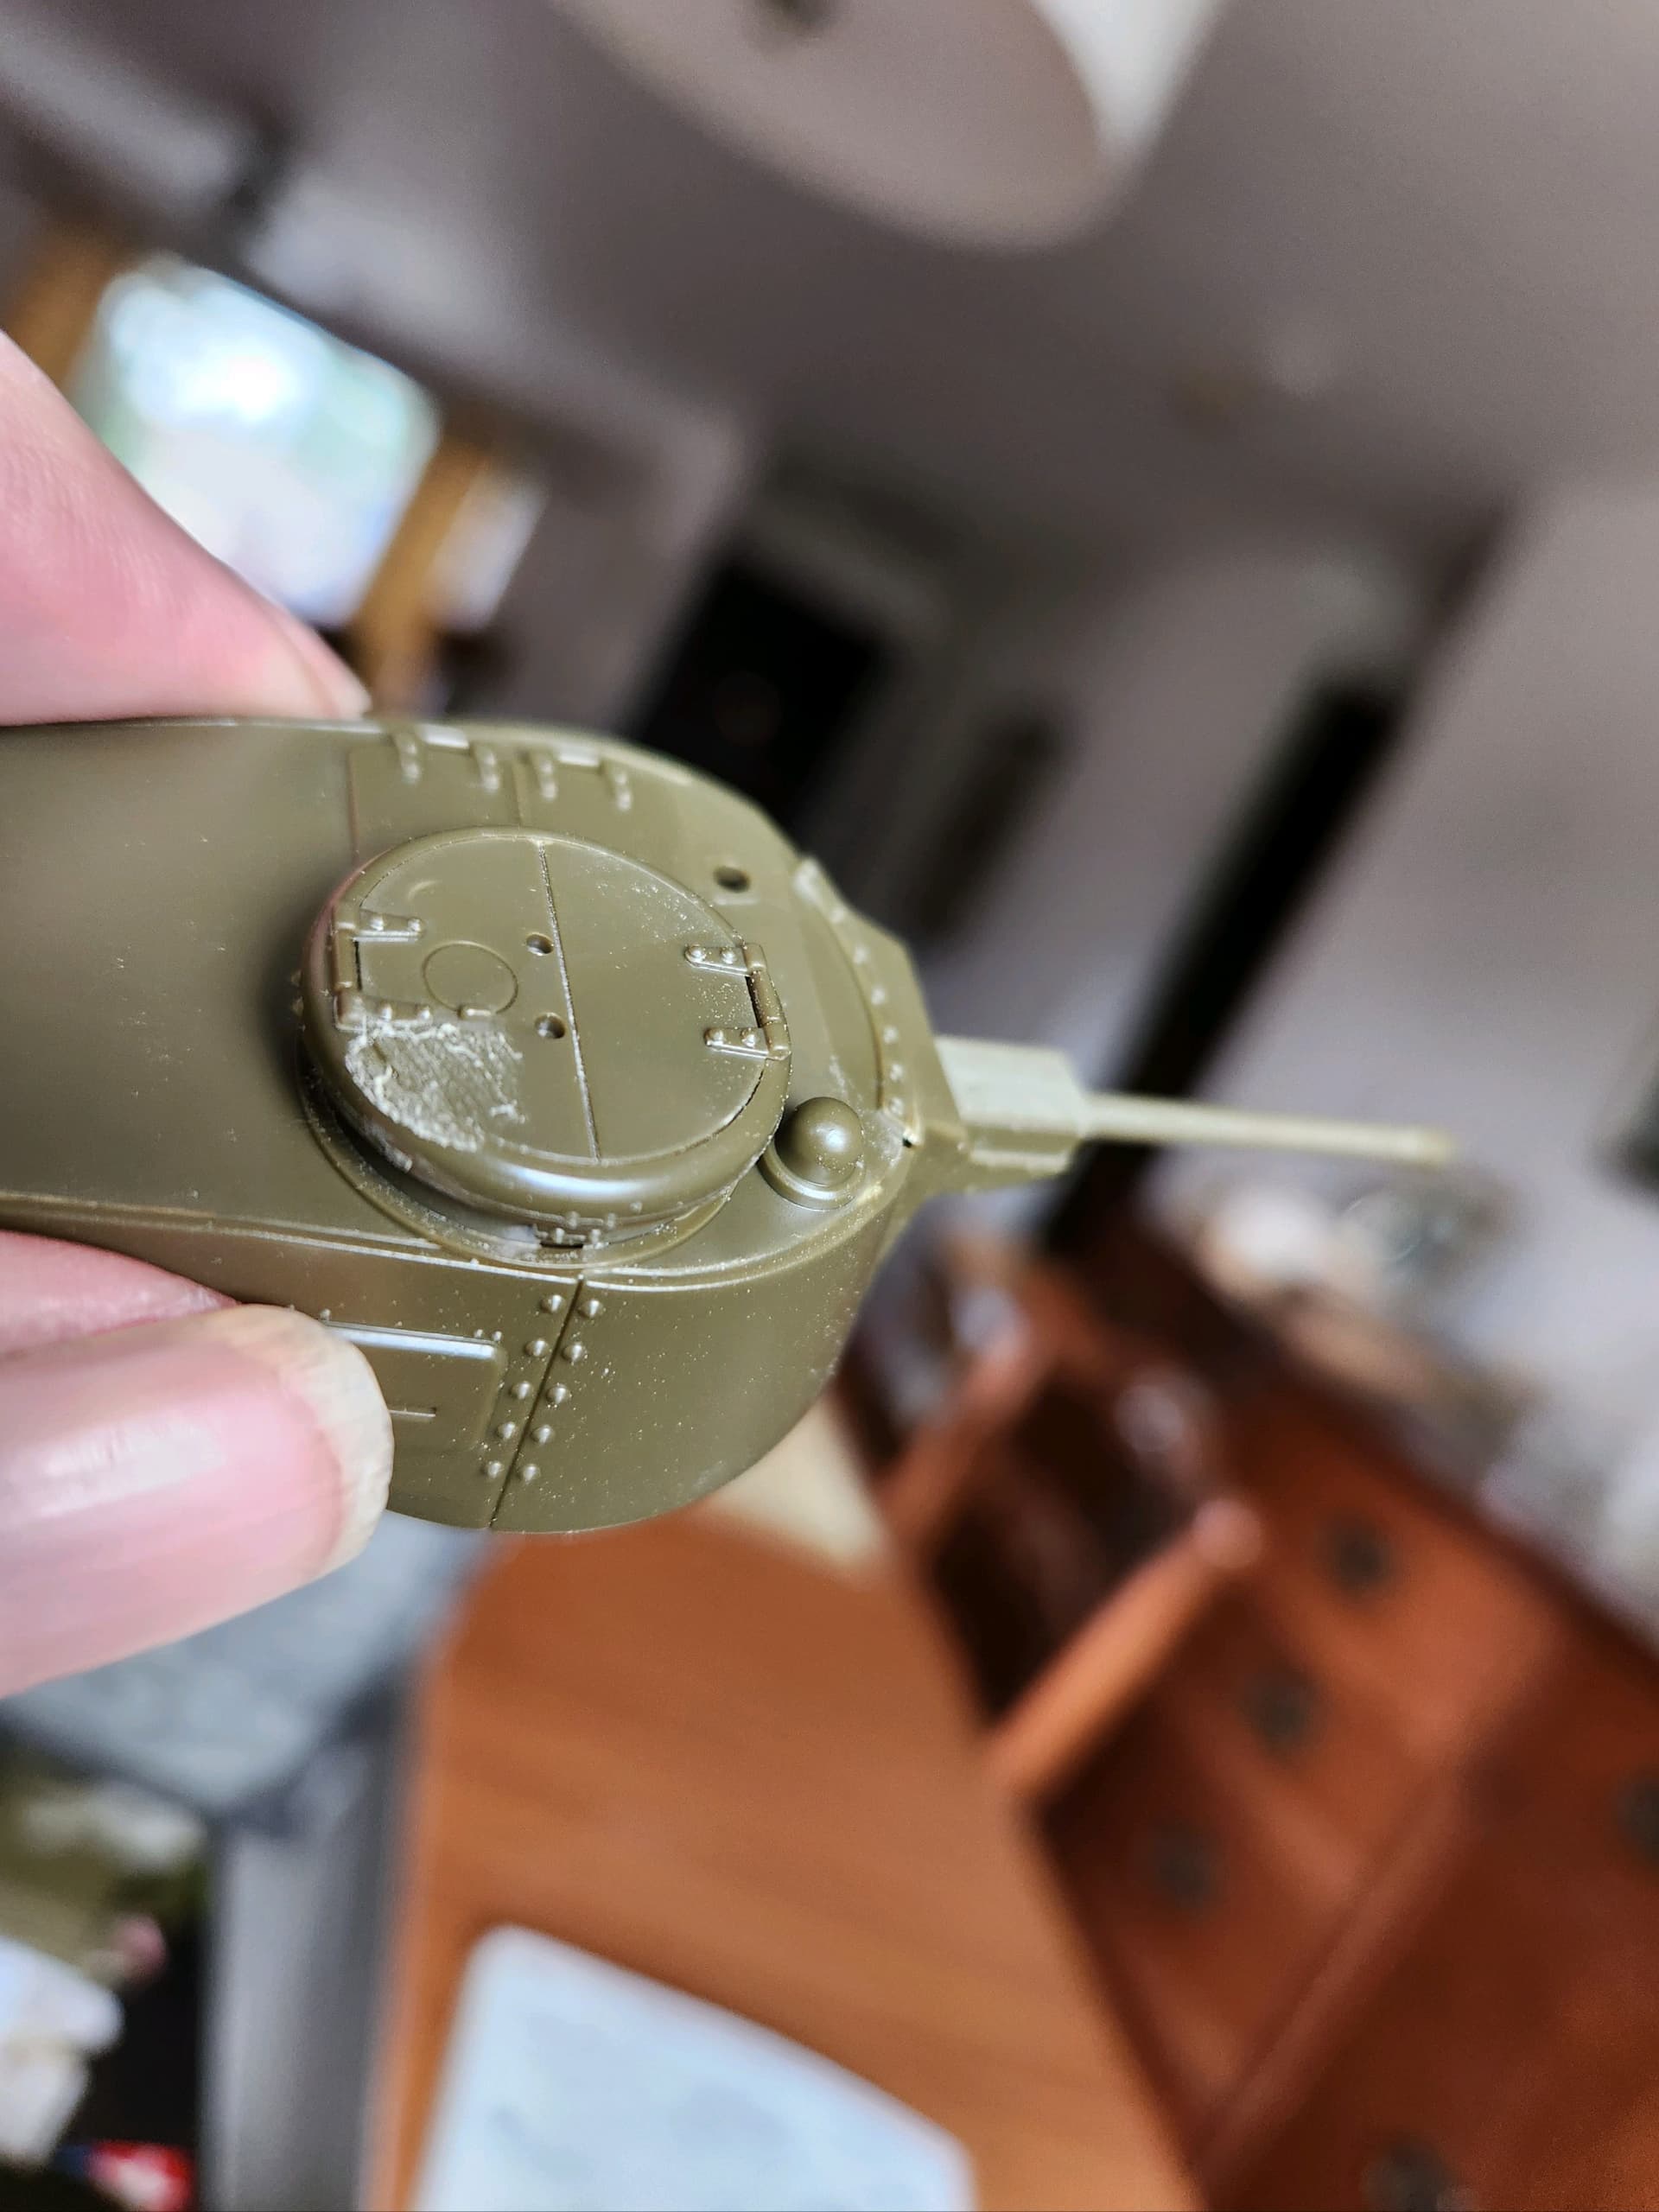
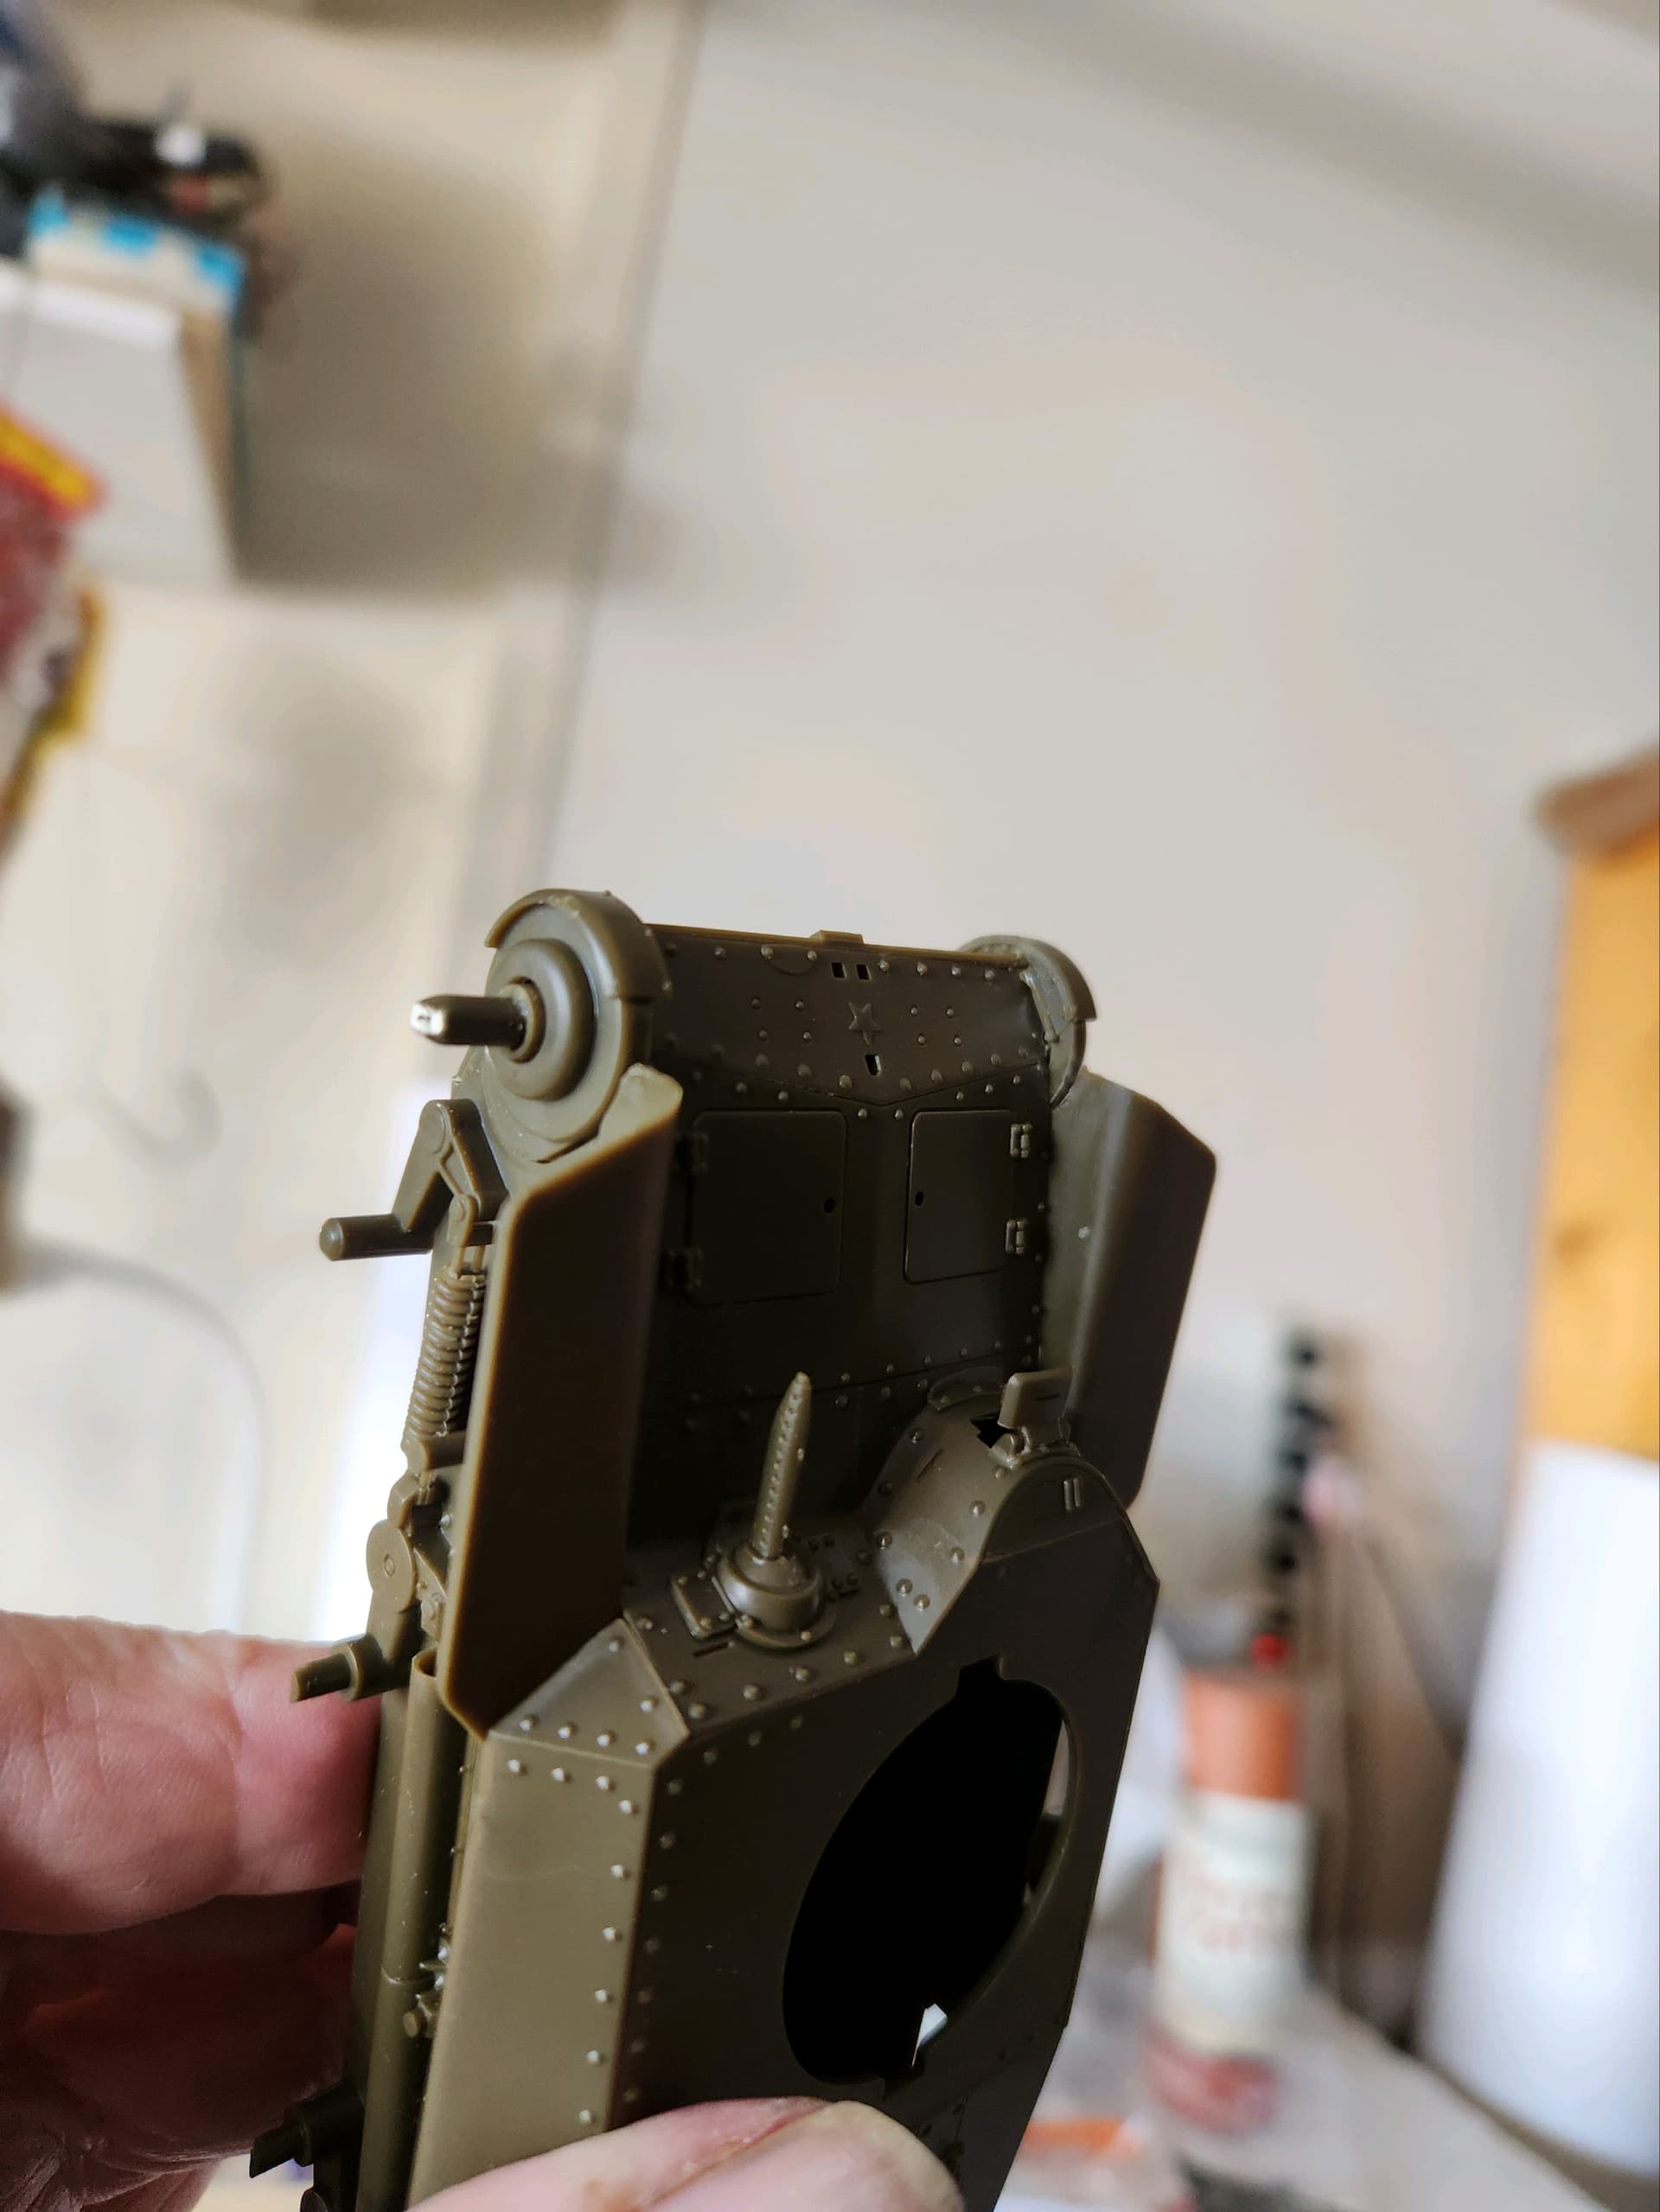
Ah, more glue to plastic time
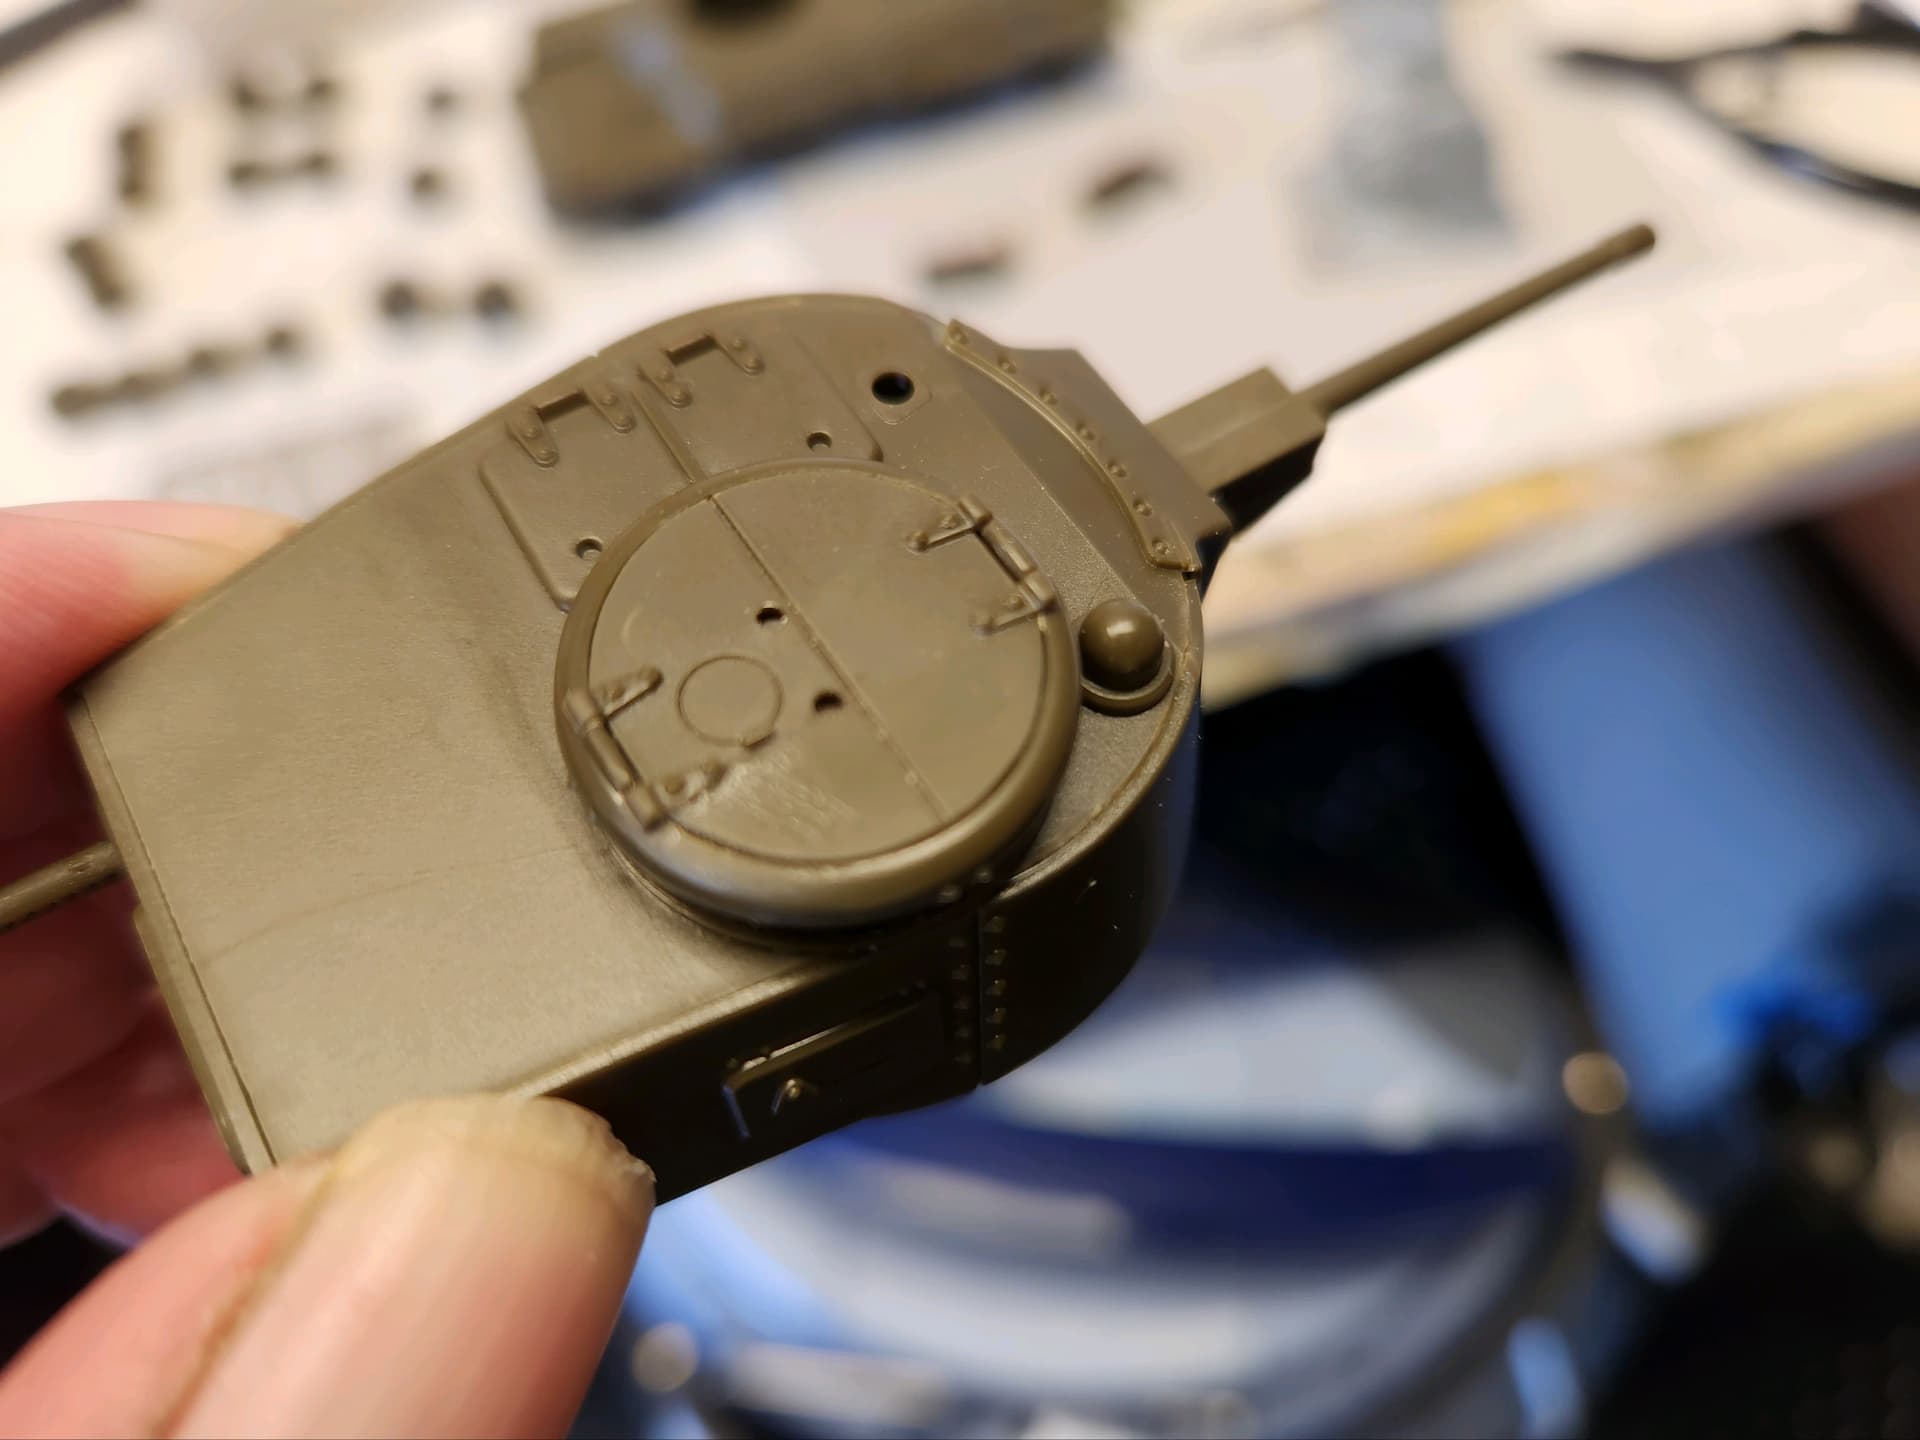
I inserted the hatches, turned the turret upside down and added some extra thin to the underside of he hatches so none would show on the topside… After holding the hatch on for half a minute, I went to remove my thumb and… Thumbprint ot the topside from the glue that leaked around the hatch.
I now understand the title “Summer Nostalgia” Makes me remember all of those glue disasters while building as a kid…
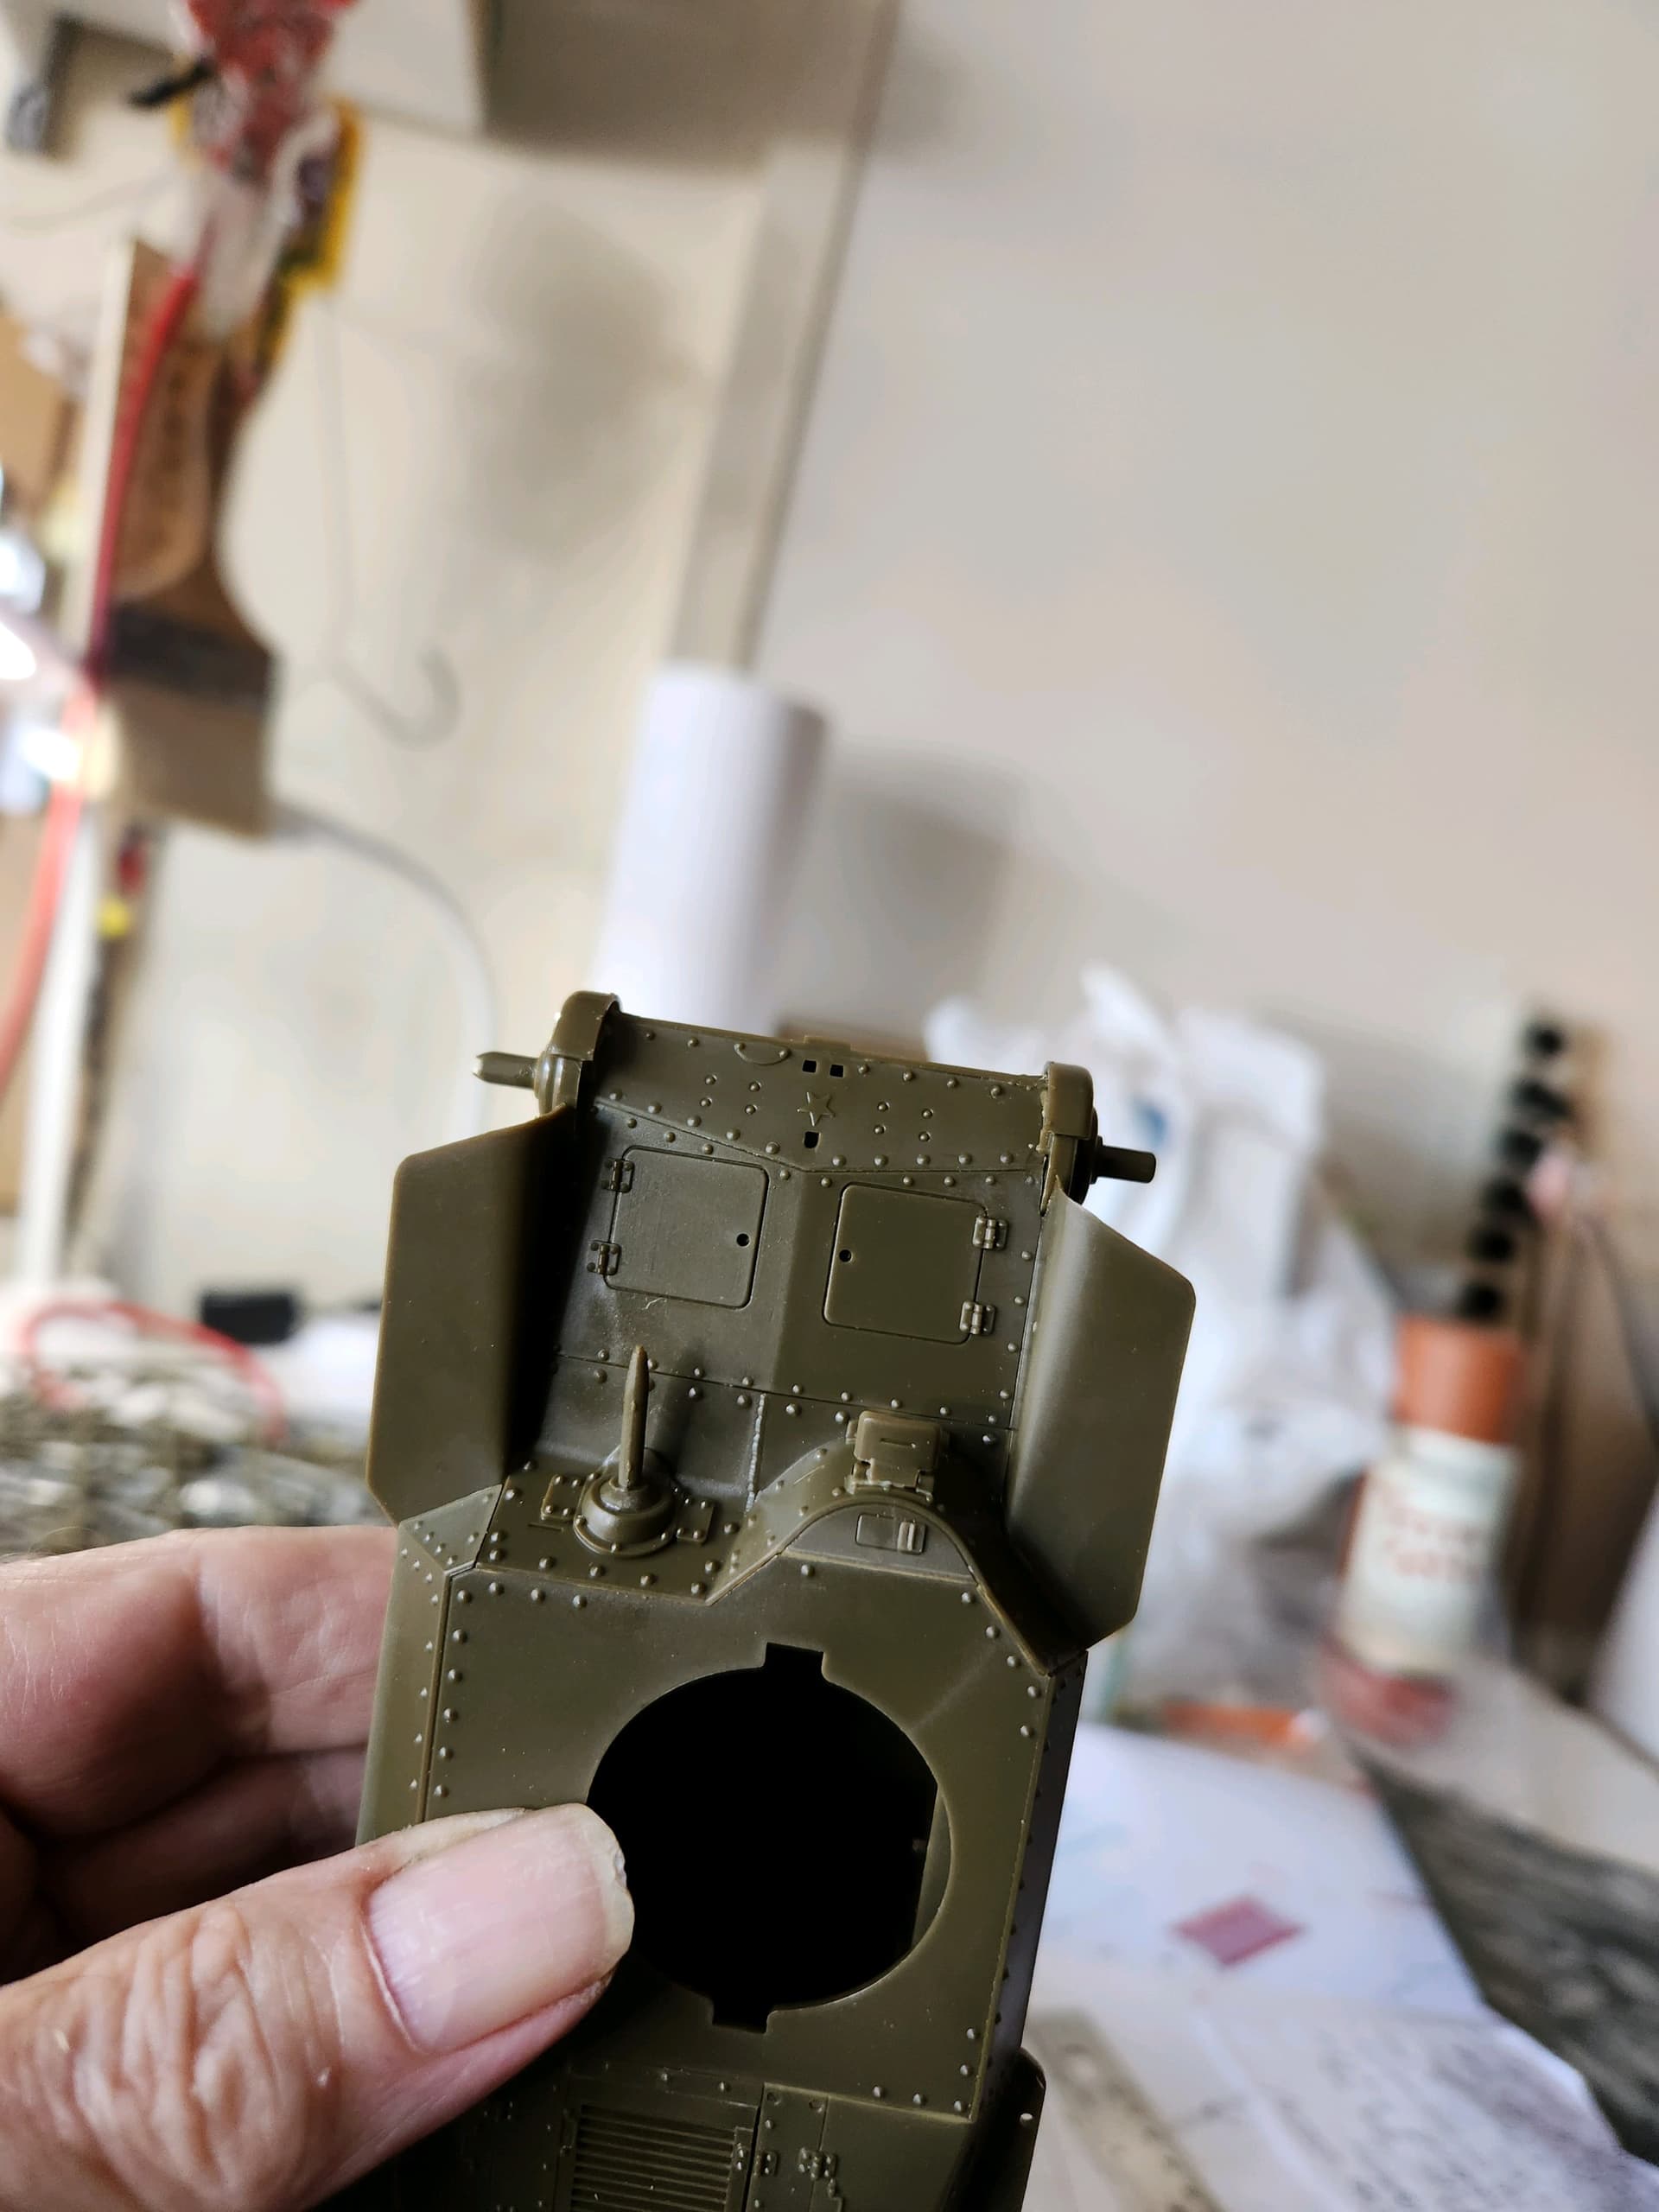
Ok, remove the hatch, let the glue dry and carefully sand and reinstall. Problem solved.
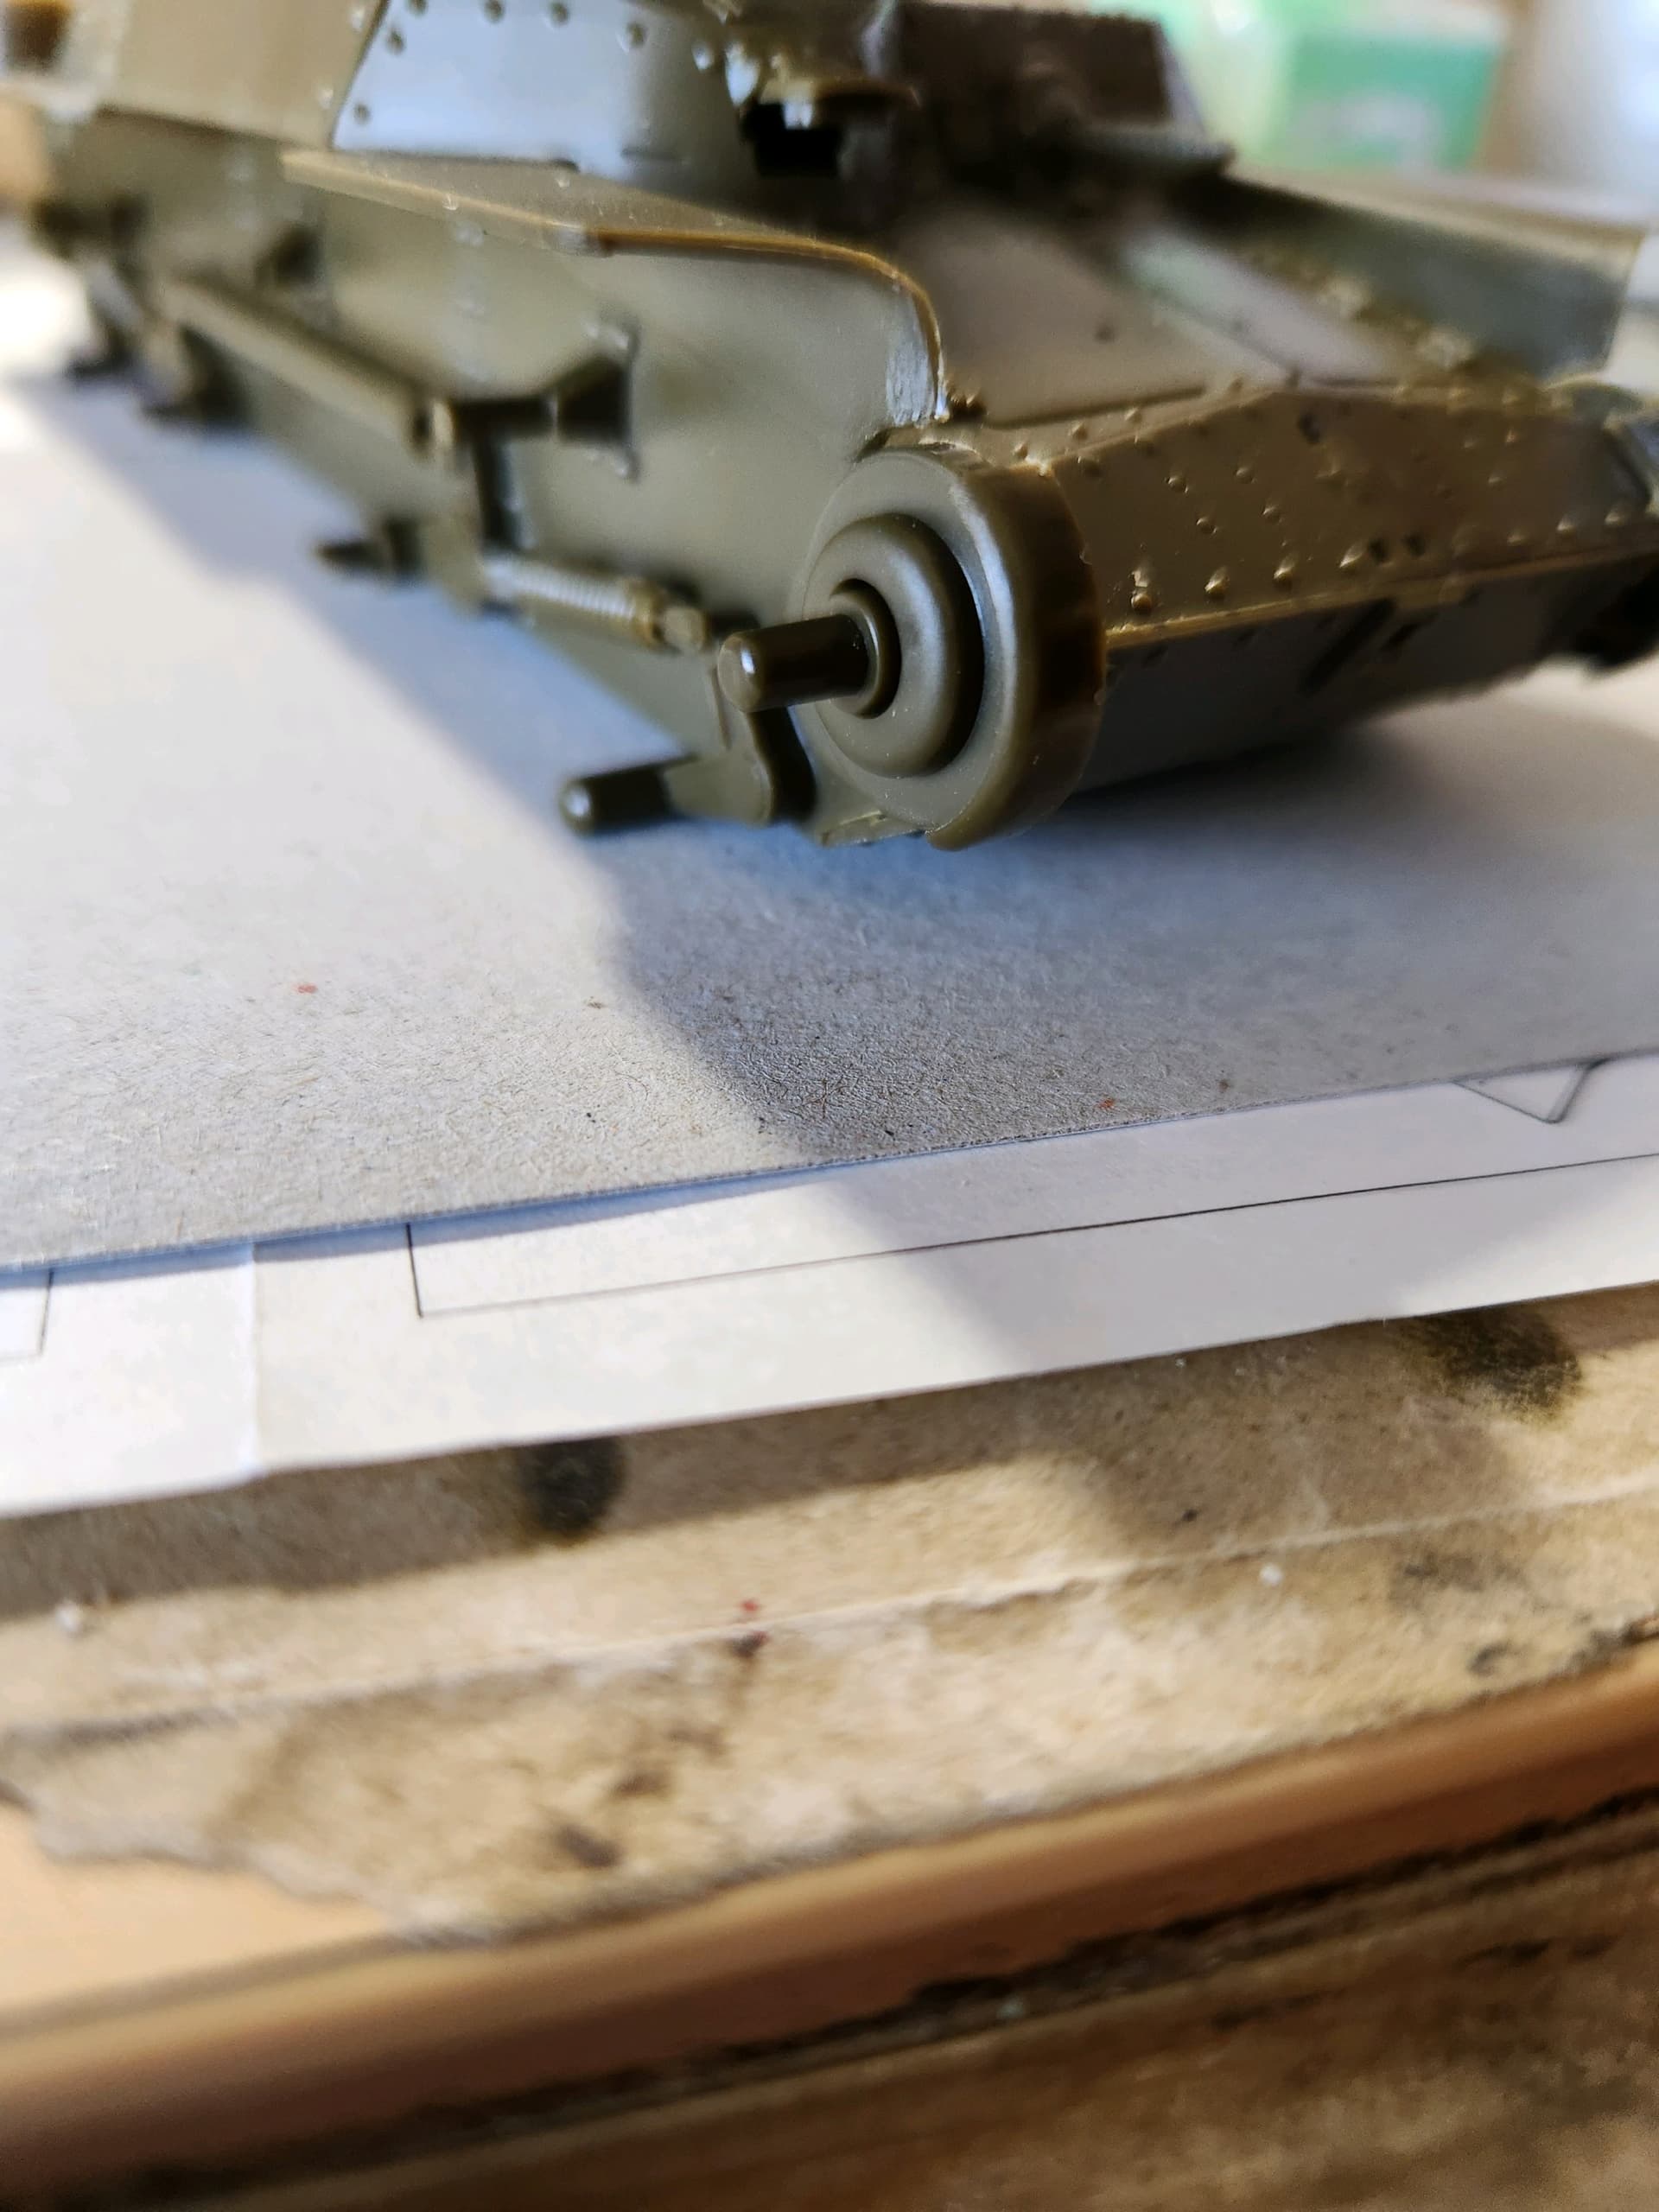
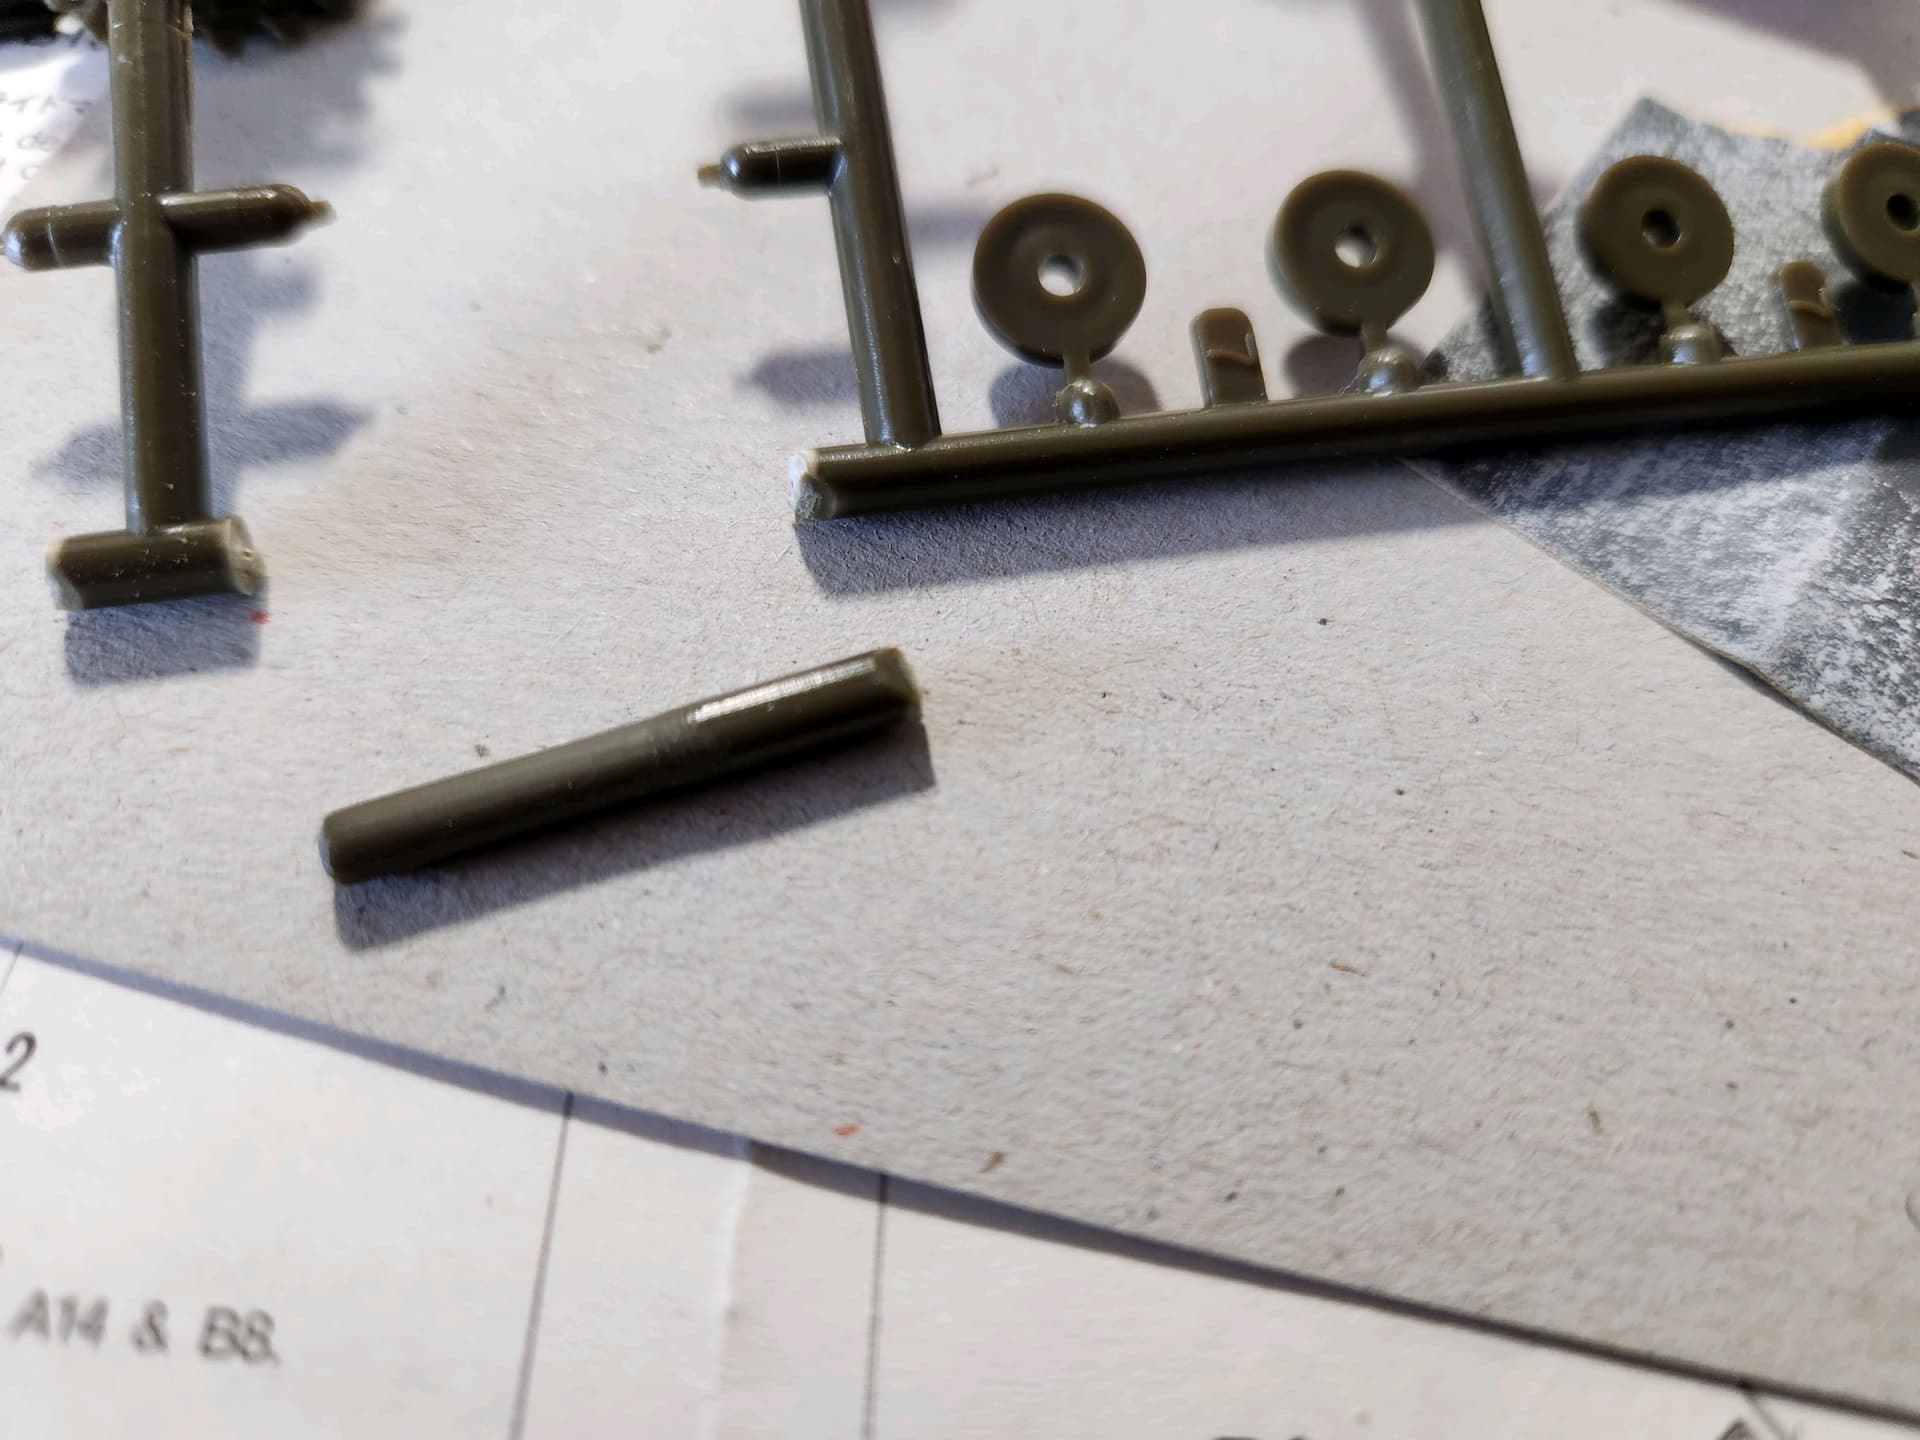
Yesterday the hull was knocked off the table.
Phew everything looks OK until I turn the hull over. The peg for the sprocket broke off, not to be found.
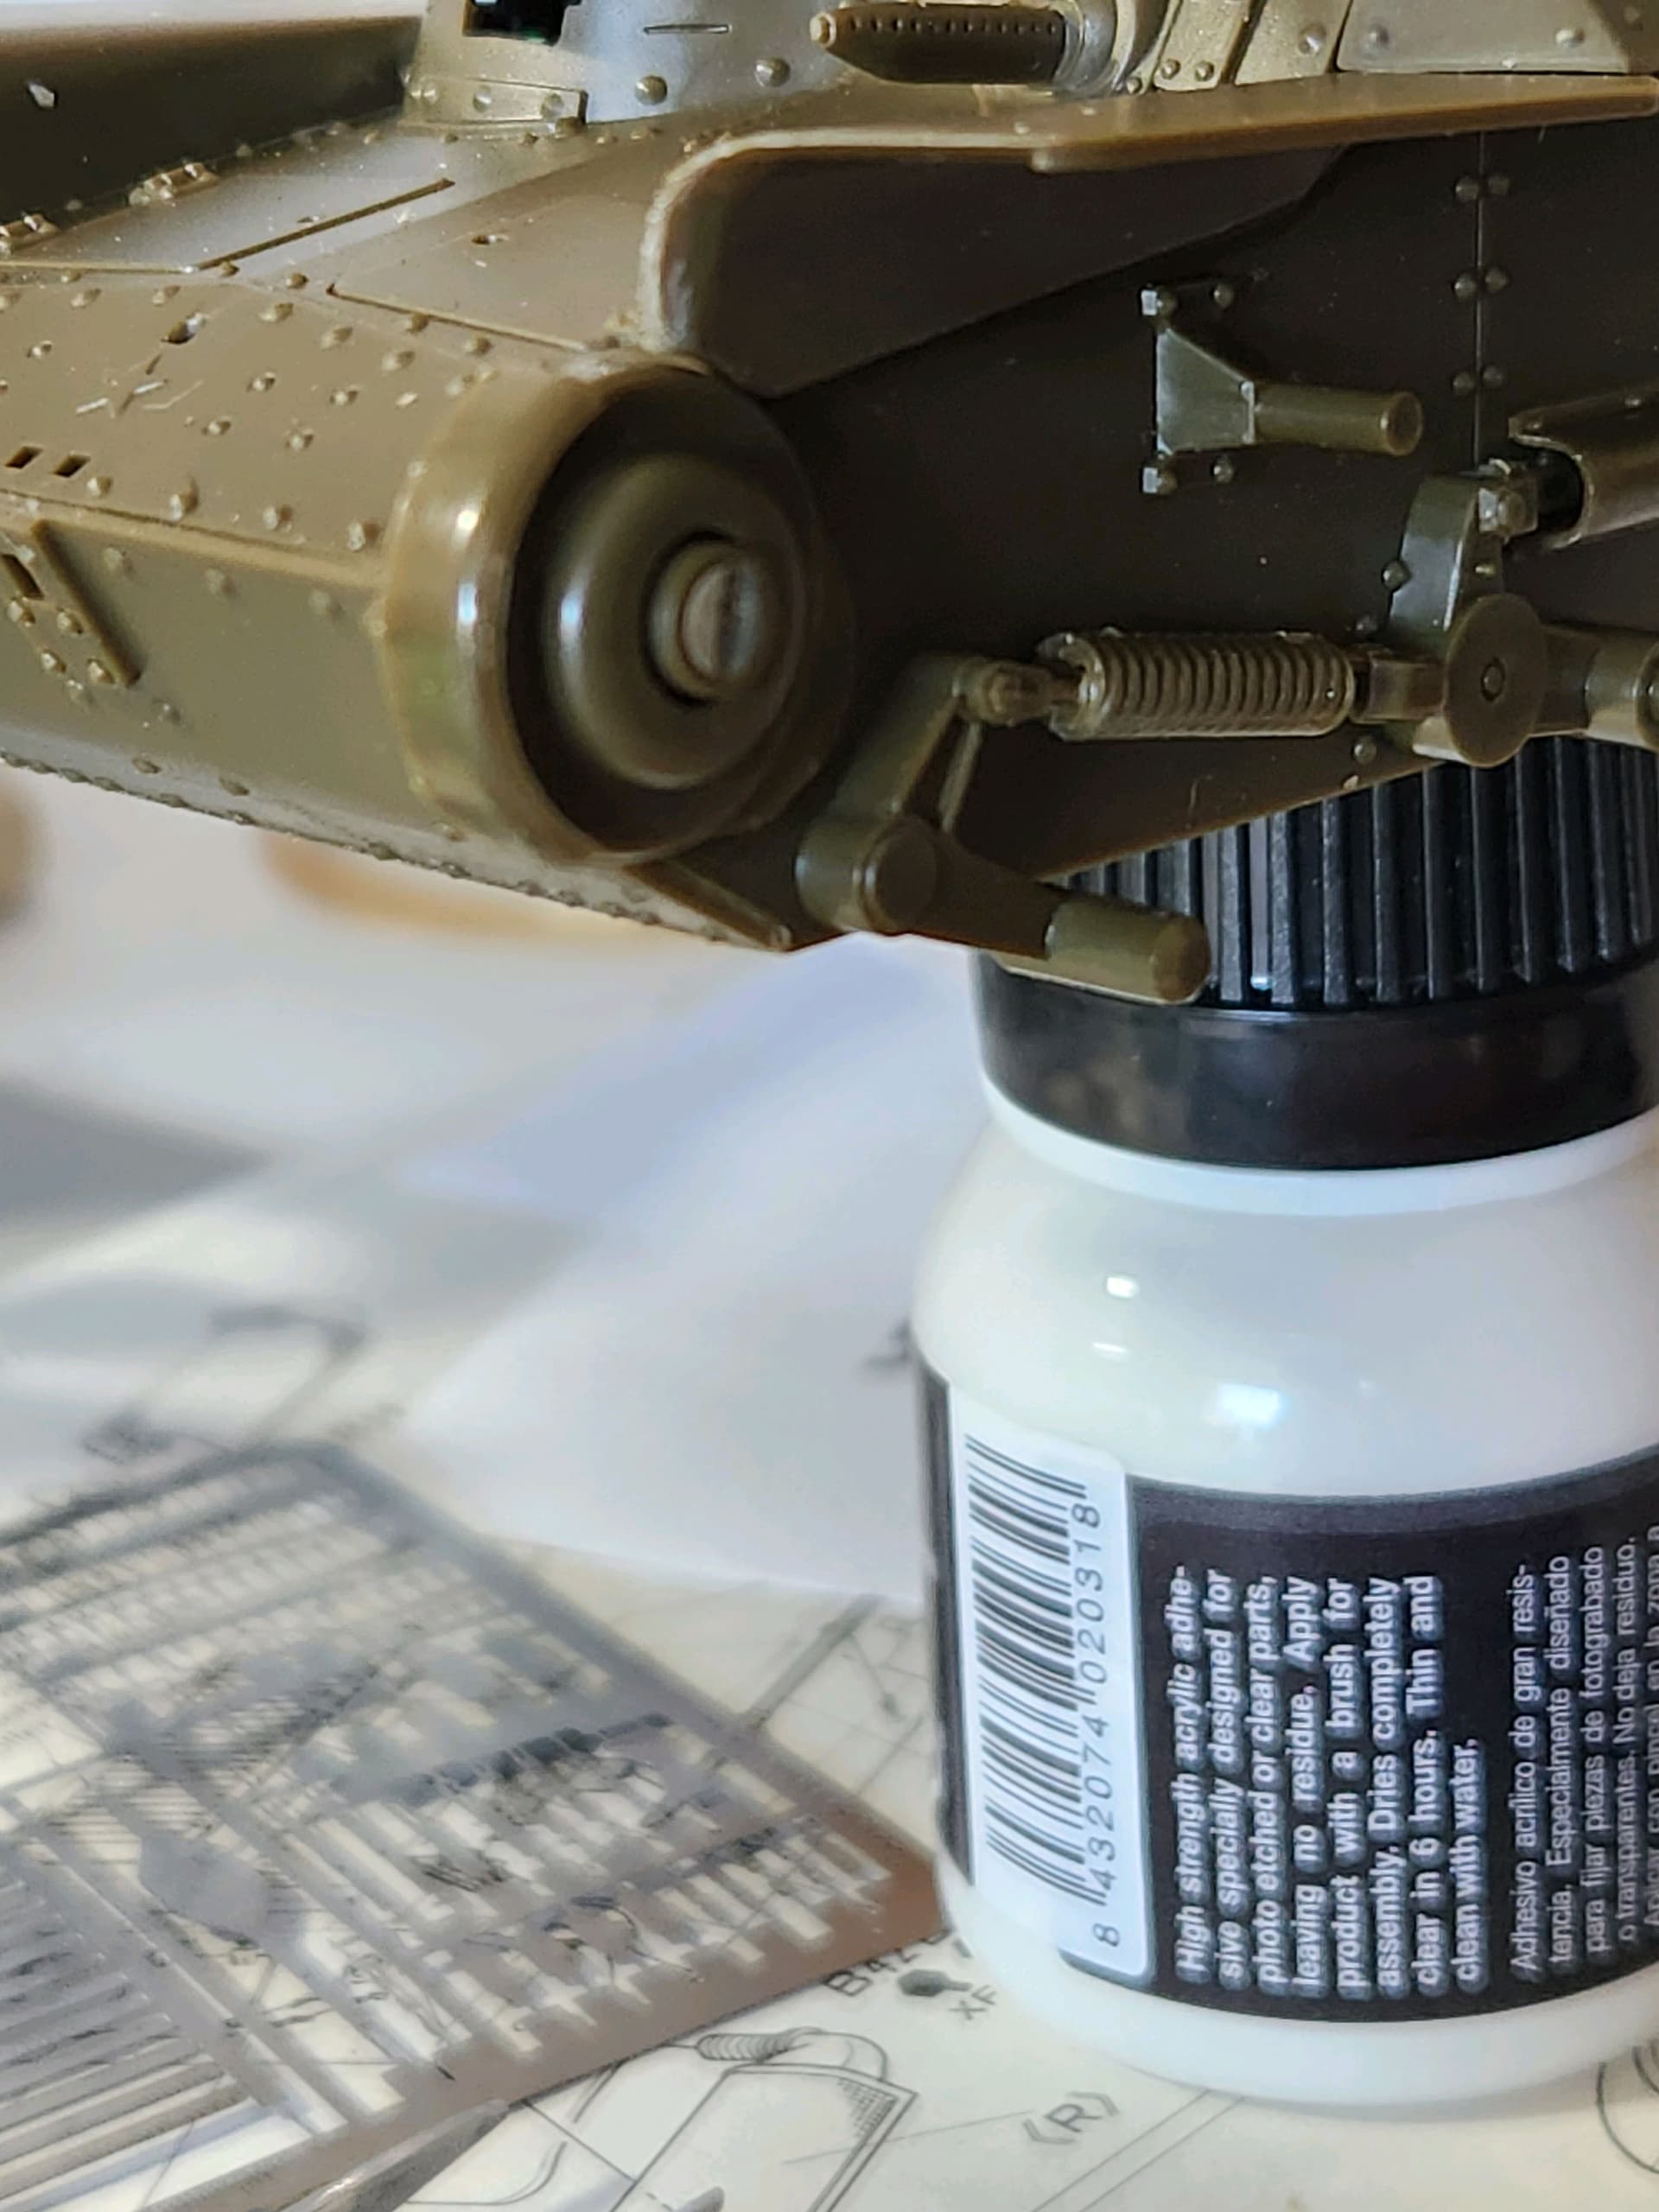
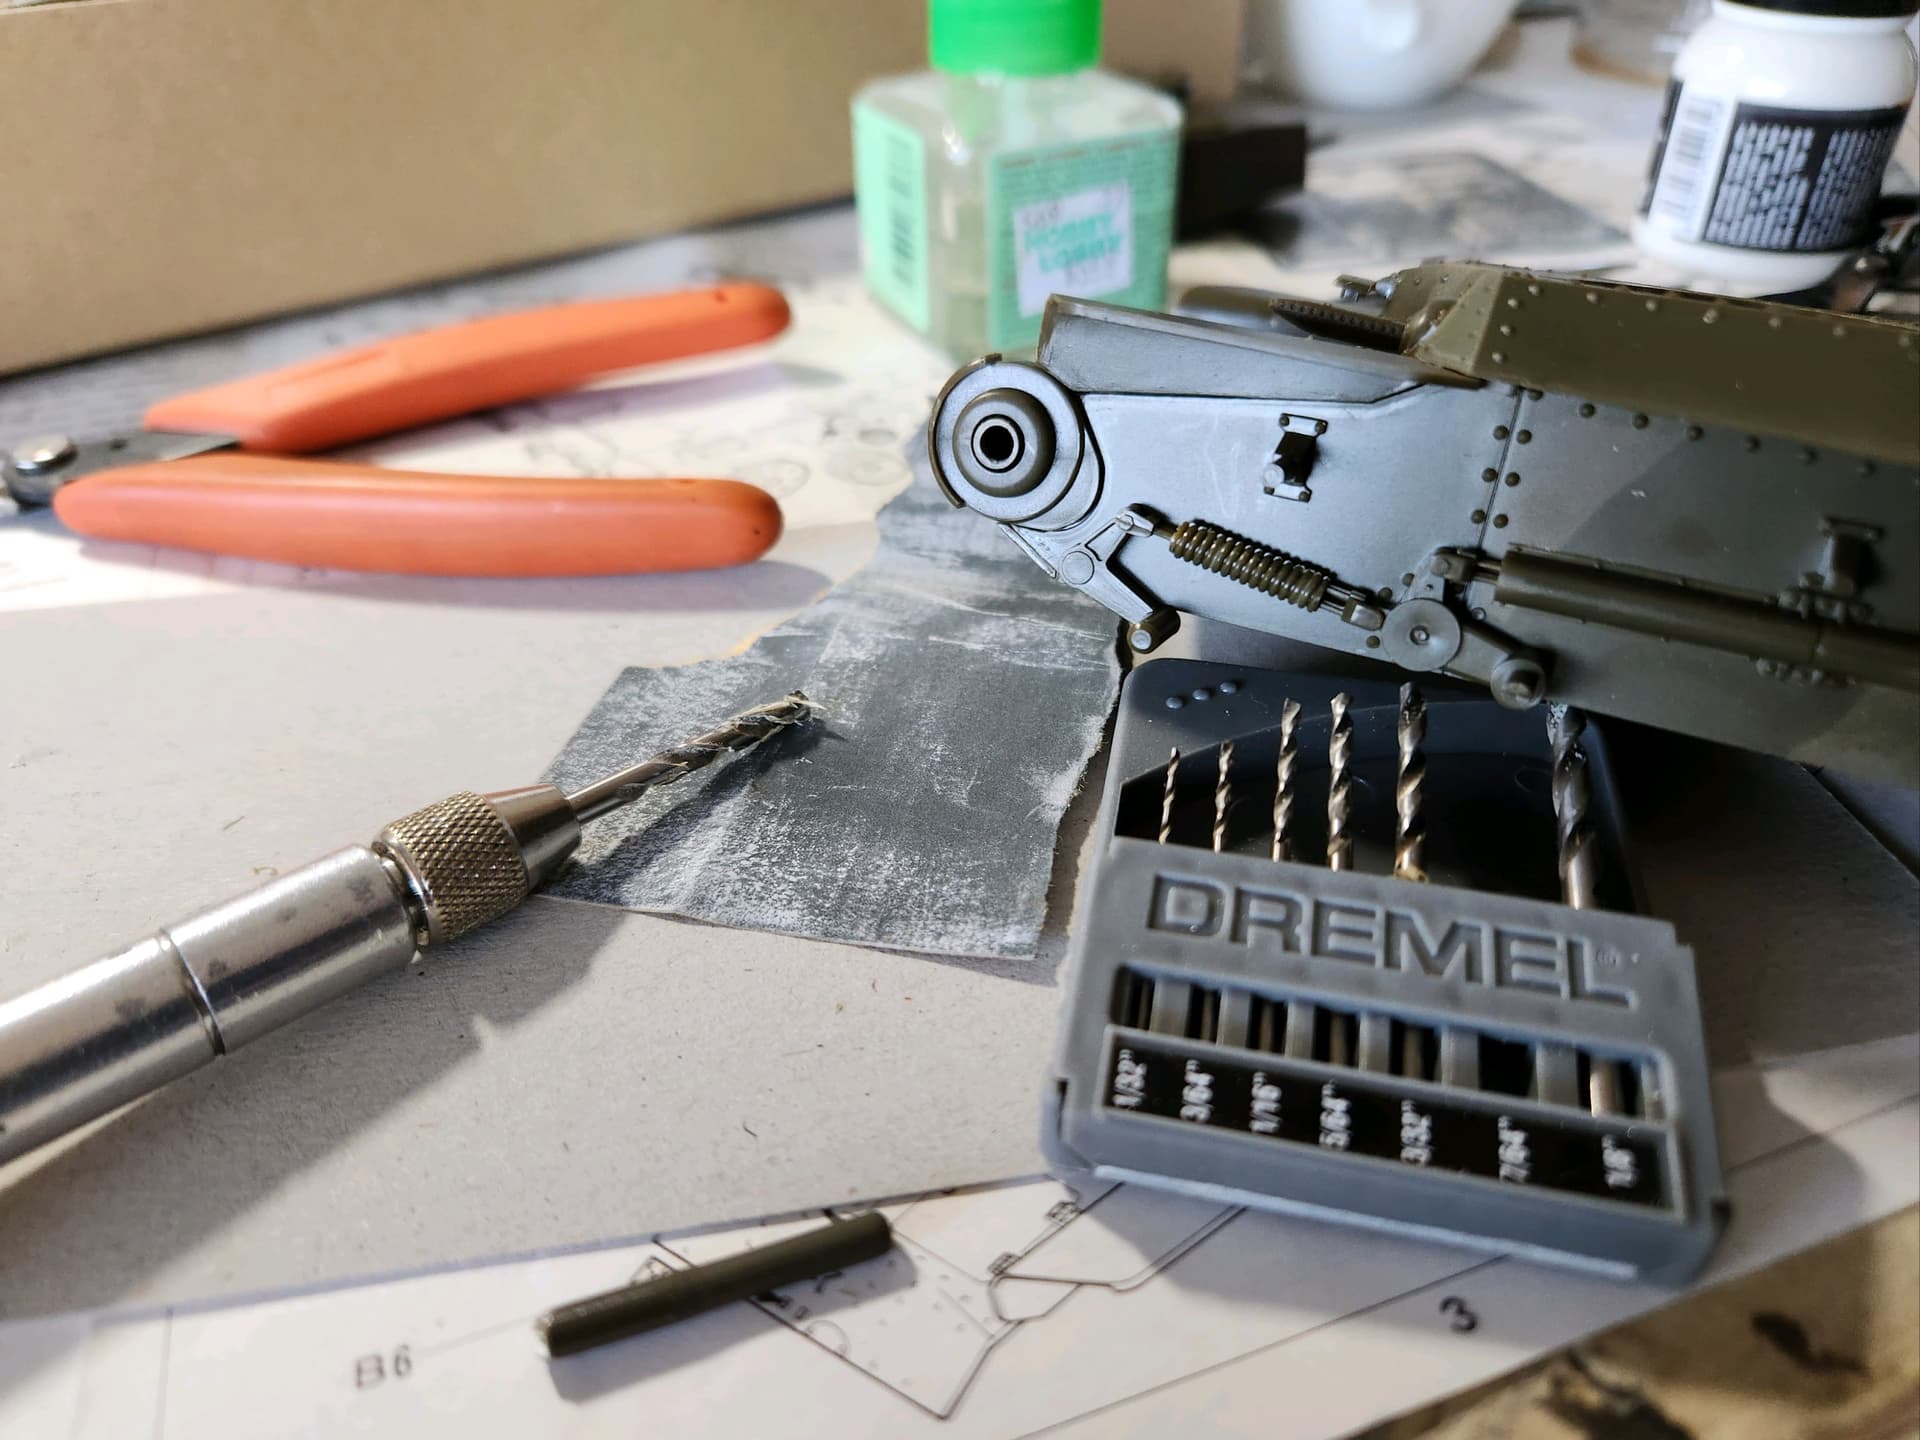
Now I have to fabricate a new one. I measure the thickness of the surviving peg and started to hunt a replacement. Thankfully the sprue tree was almost the same diameter.
I filed it down some until it fit snuggly on the sprocket. I then had to drill our the old peg.
I measured the length of the peg and inserted the replacement peg to the desired length.
Nostalgia, yep reminds me of the “good” old days learning to build kits. I am curious as to what else I am going to "do " to the kit before I am done.
Ha ha… nothing like a pessimist. ![]()
Looking good Greg.
Yup, that’s the way not to do it. But nice saves!
Great salvage work ![]()
Semper gumby modeling edition. ![]()
![]()
Really cool and well done again! ![]()
Looking good, Greg! Nice plastic kit surgery ![]()
Ejection seats finished up today.
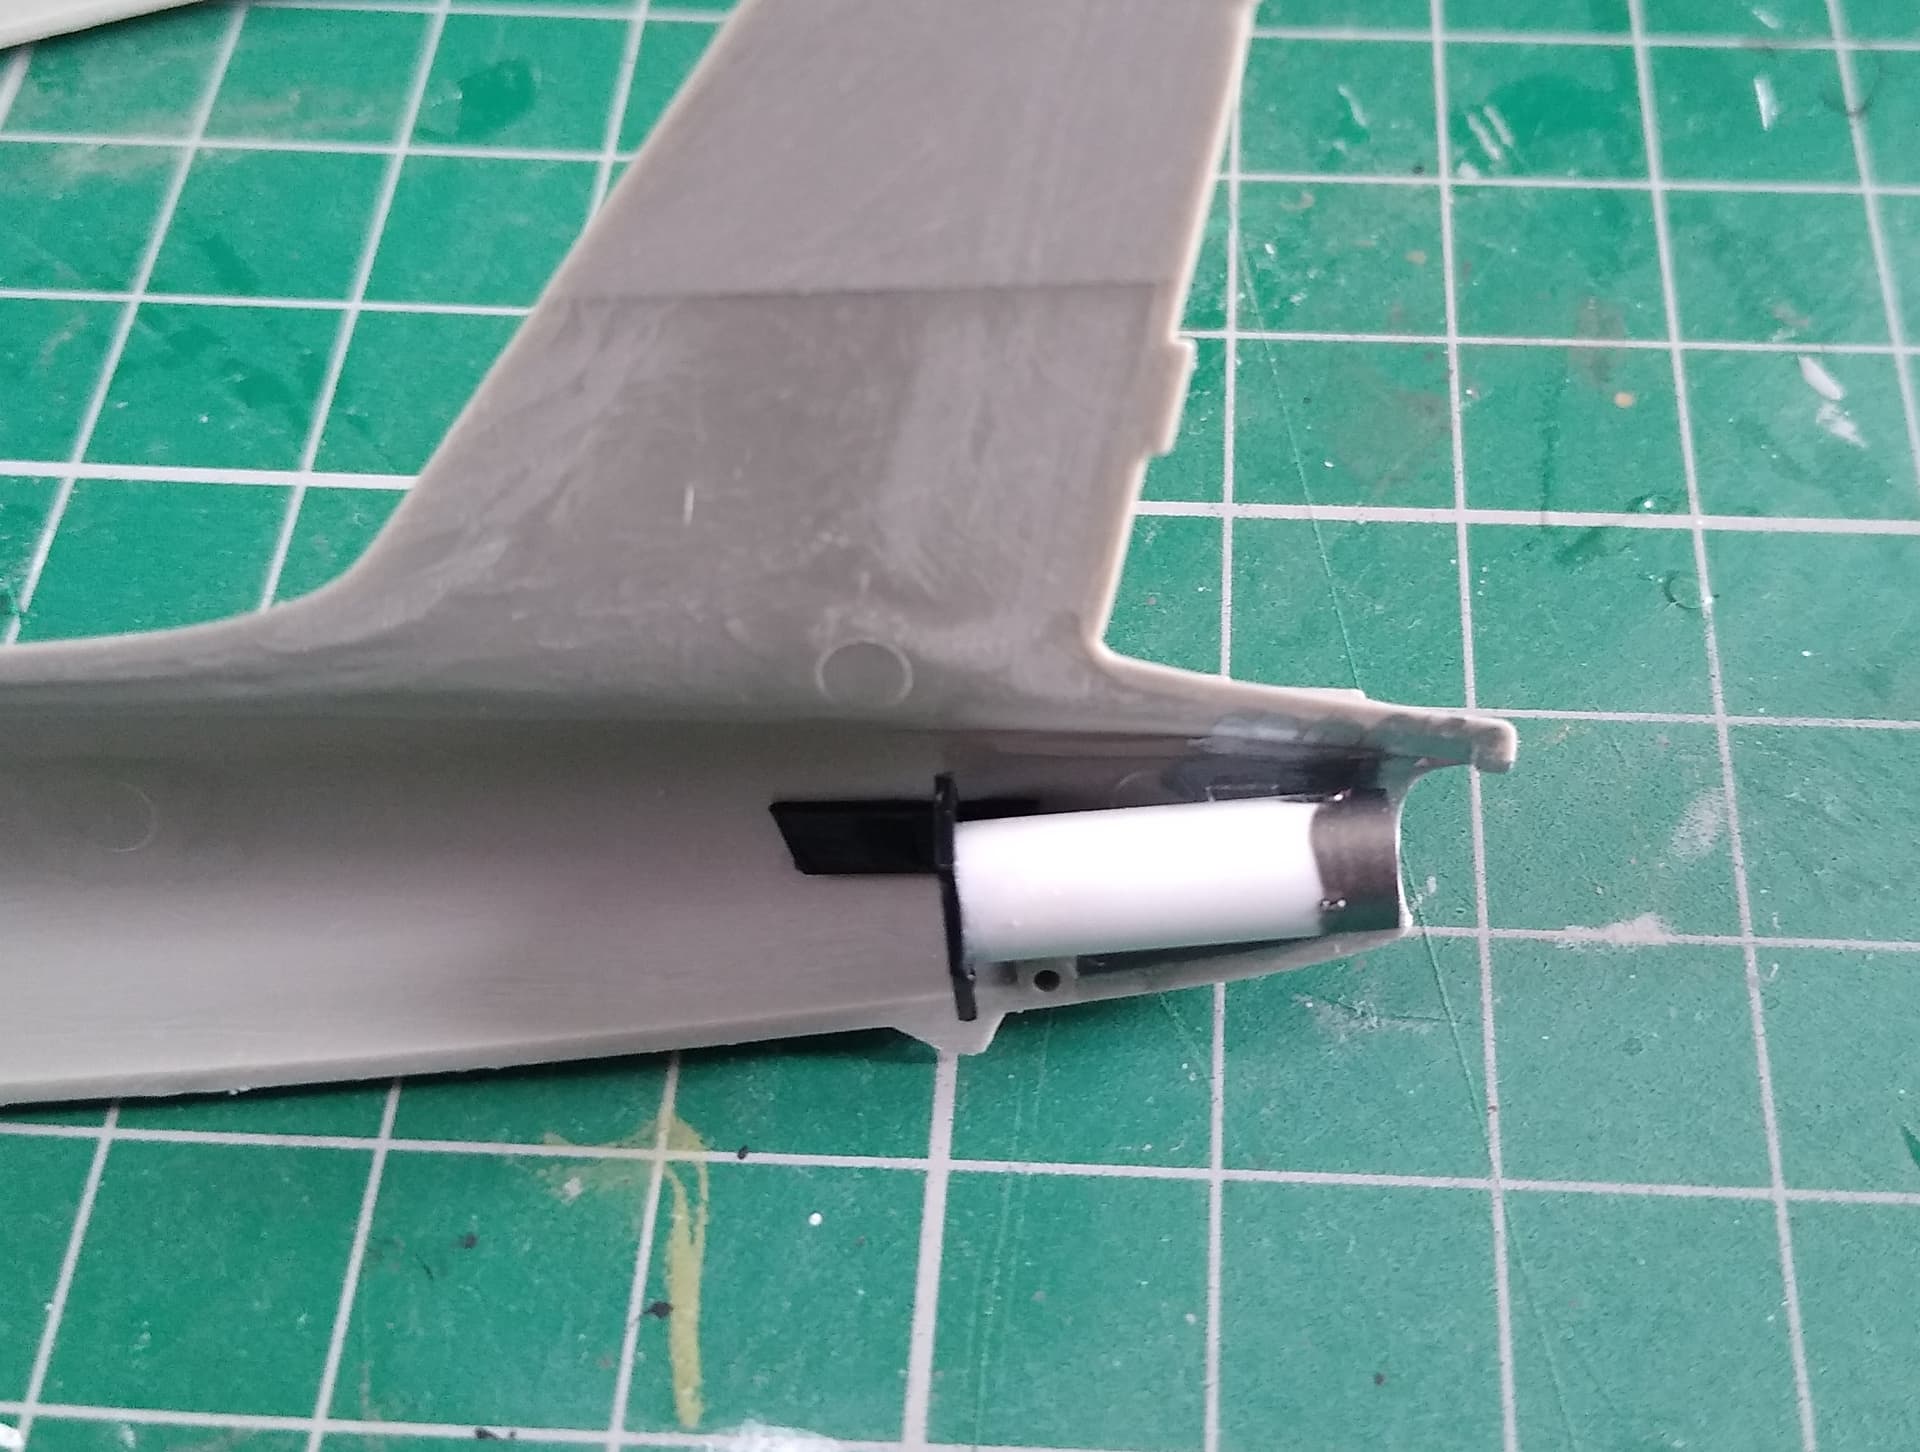
The kit also lacked a jet pipe, leaving you with a see through fuselage. So scratched one from a piece of tube. Not pretty how I glued it in the fuselage, but that’s all invisible when it’s together.
Nice fix.
Thanks. It’s old skool but works. I’ve got to do the same fix with a couple of the 326’s and an Impala in the stash. So good to know it worked here.