I seriously need to get back to my almost completed BRDM-2. I’ve been neglecting it for far too long.
3 Likes
@SableLiger yes, you should!
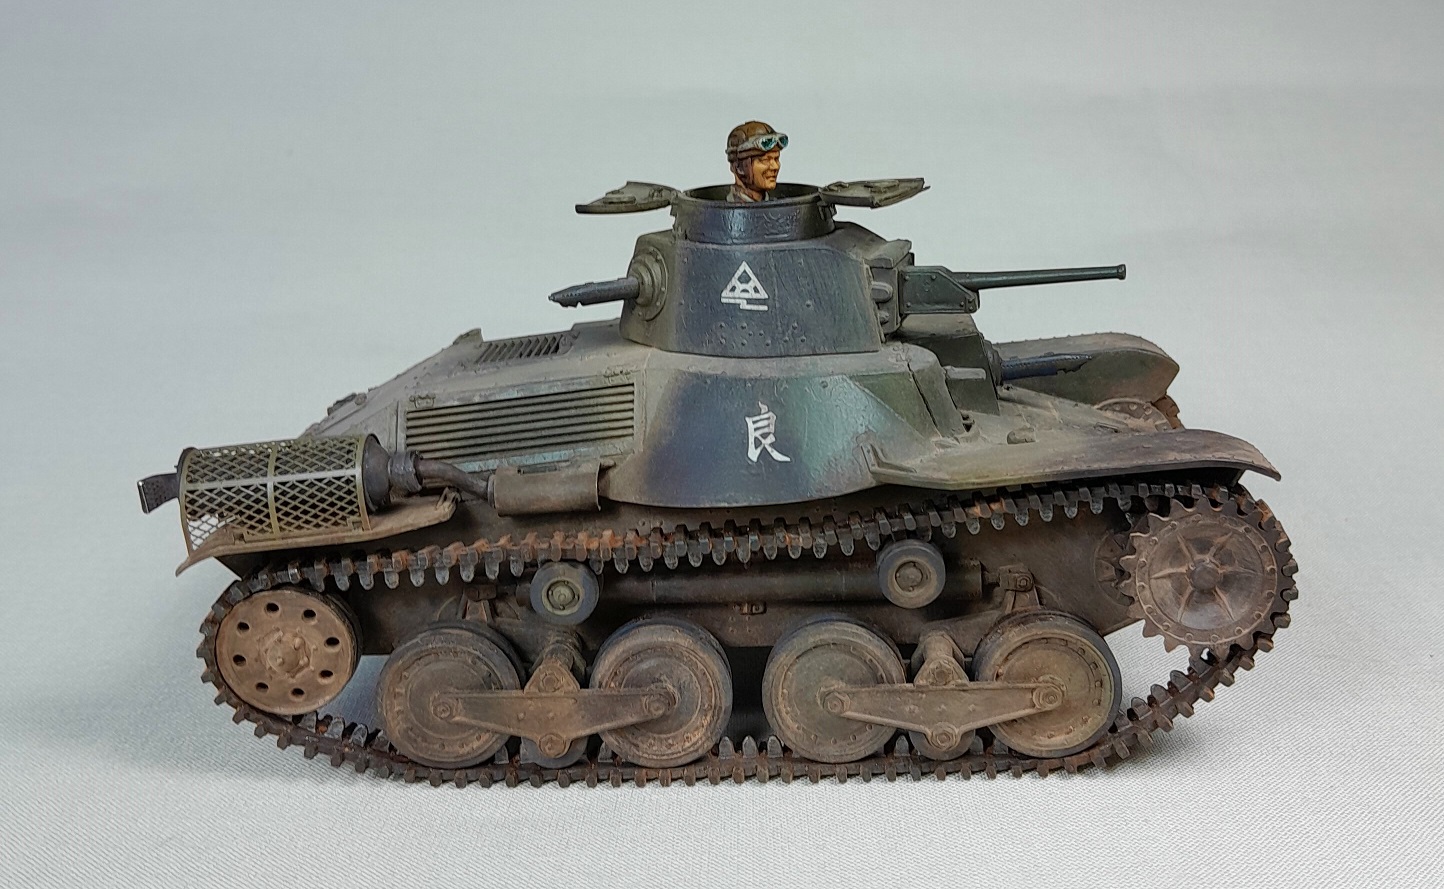
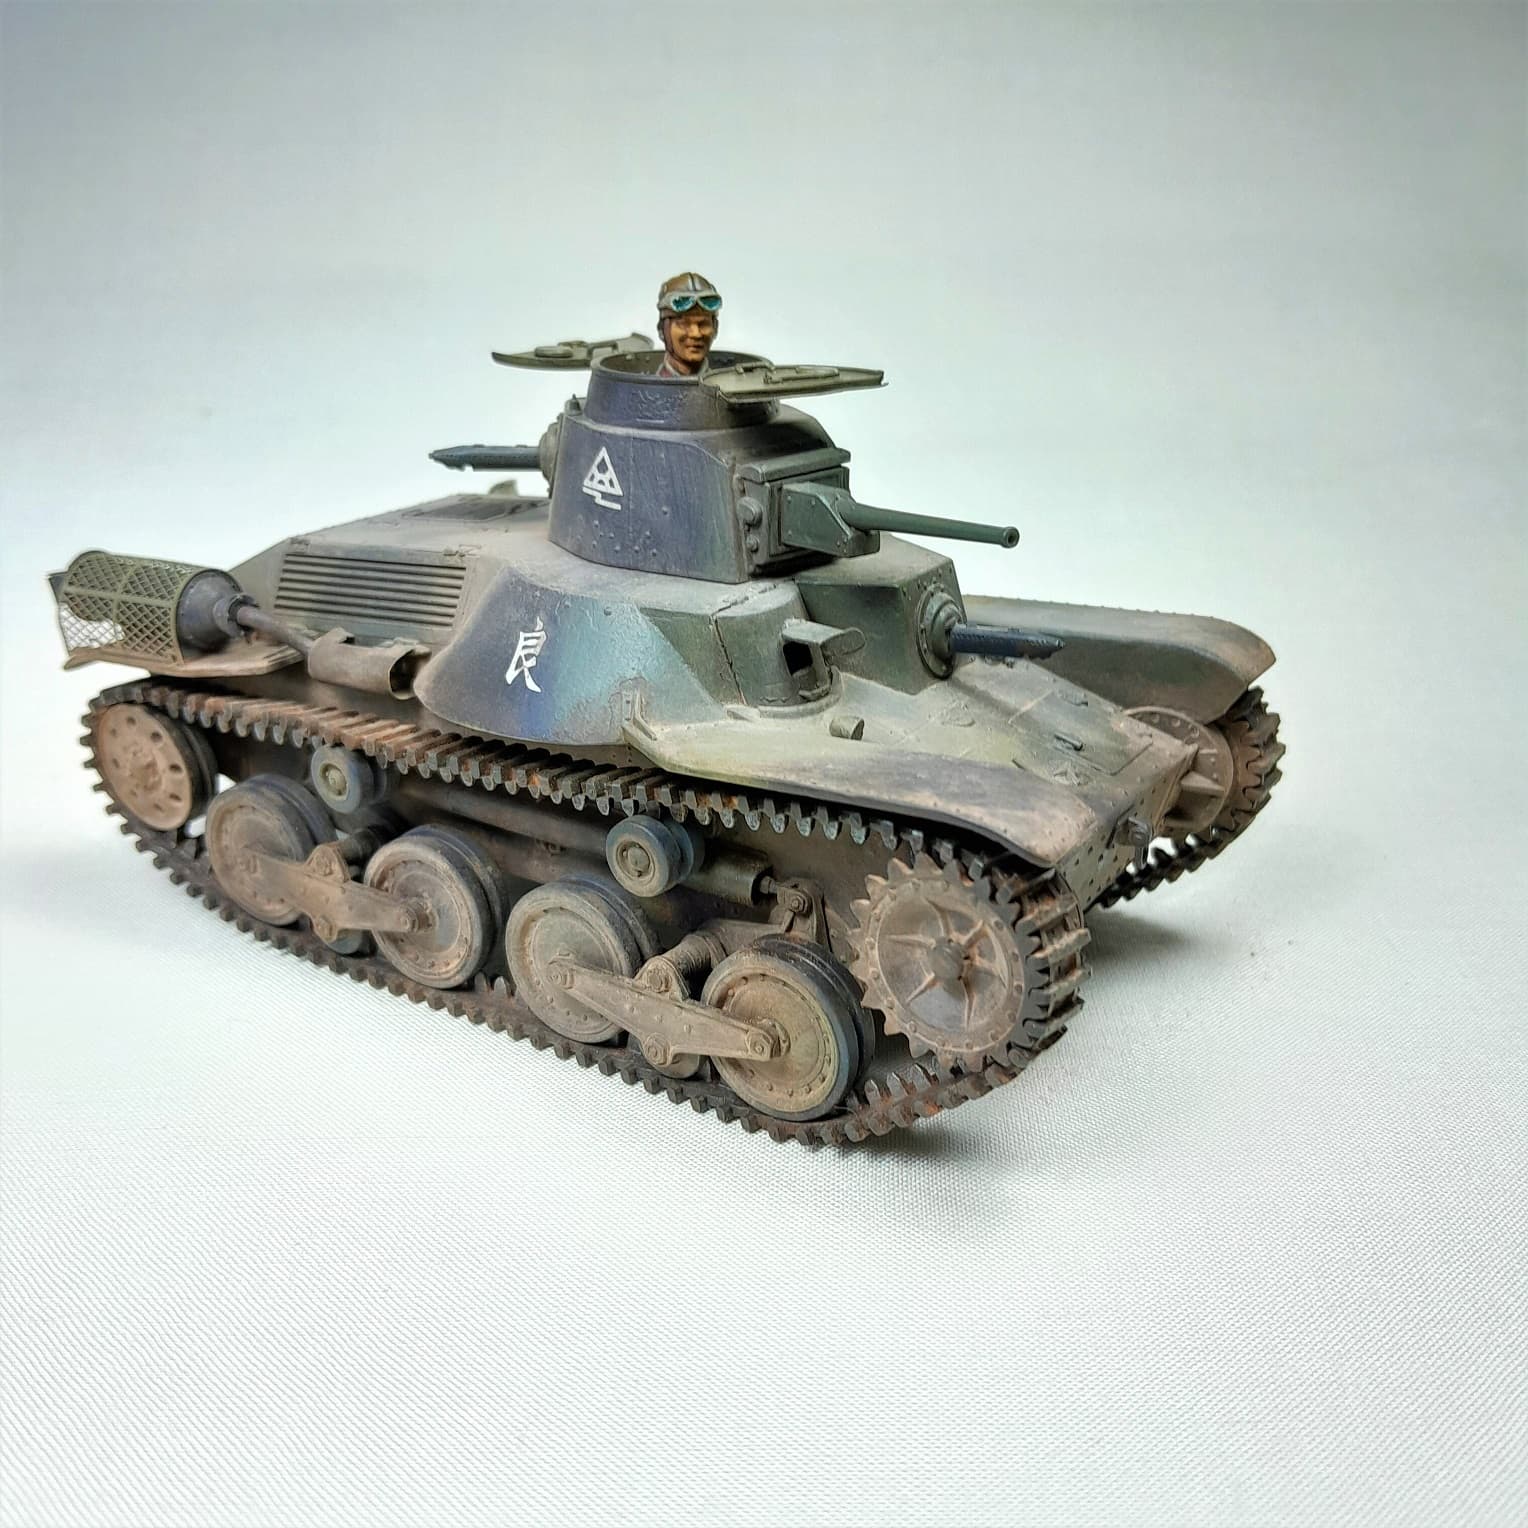
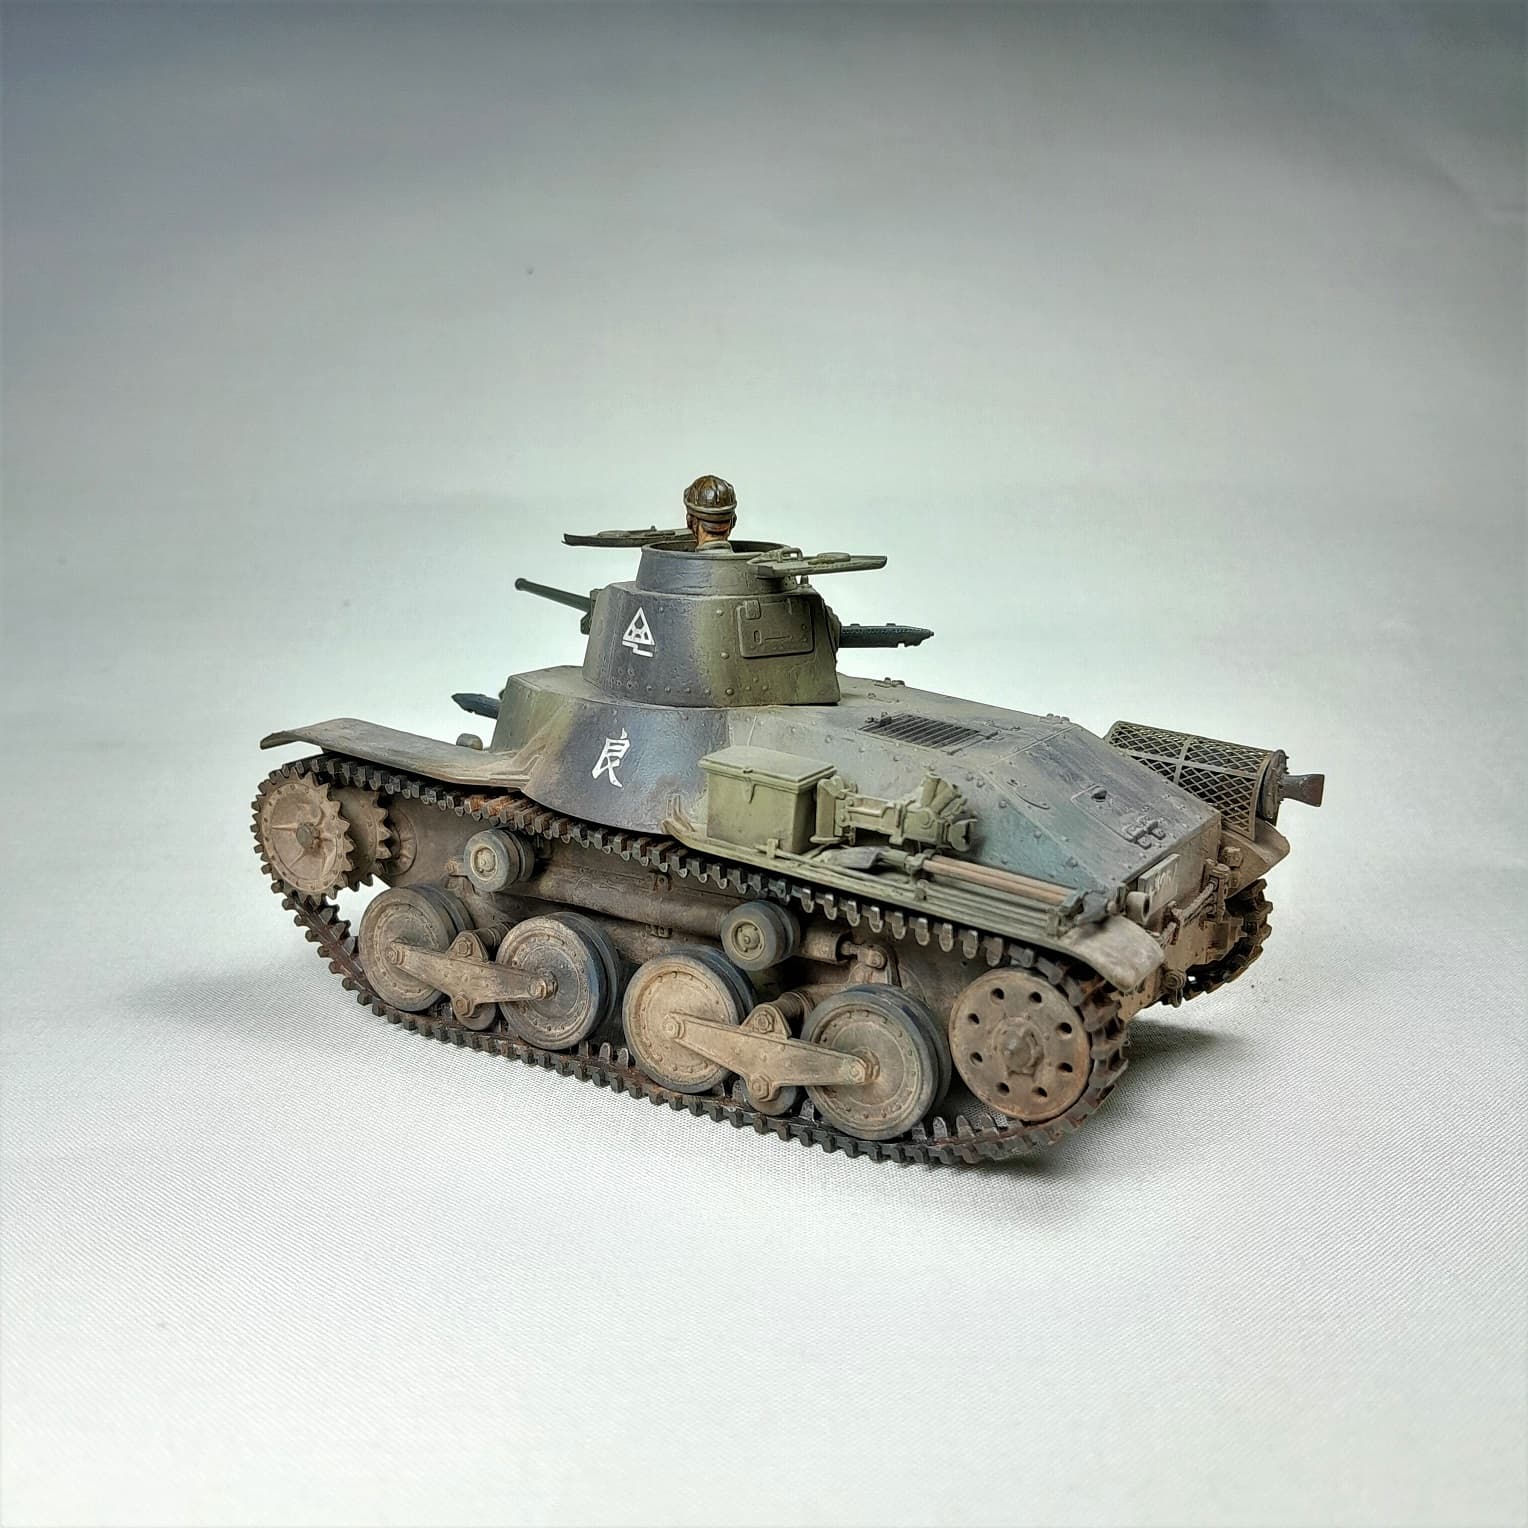
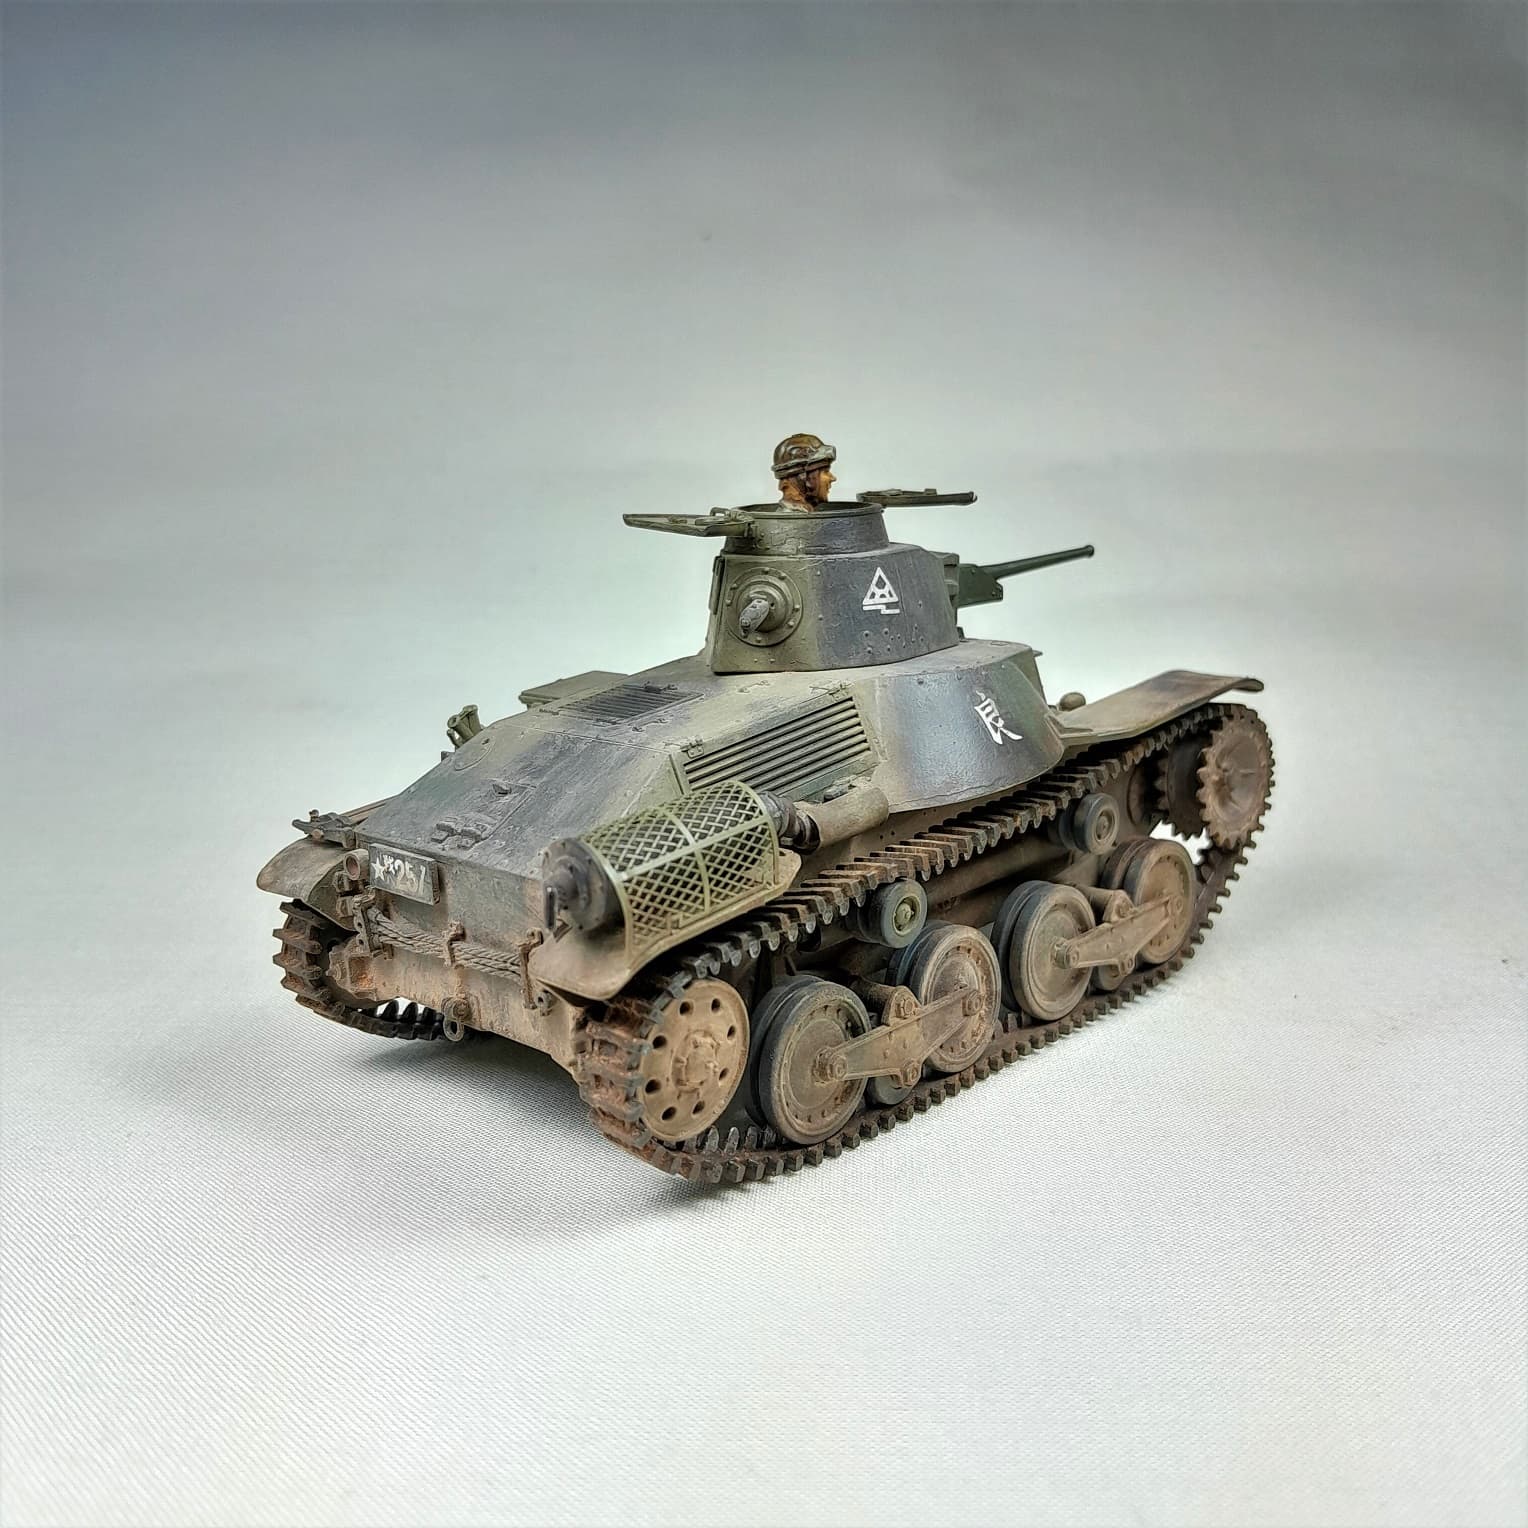
Which reminds me… My second, and unintended, summerbuild is done too!
Forgot to show it here.

12 Likes
i tlooks great. Awesome job.
3 Likes
Surely you should at least have an Old Tamiya kit. Like the Classic Pzwk Mk II in 1/35 scale.![]()
![]()
Or I can sell you one of their German Armored Cars for $12.![]()
2 Likes
Just cover the running gear of your M41 with mud. A thick coat of mud hides a multitude of sins.
2 Likes
Thank you for the suggestions. ![]() One of my overall Campaign goals is to use up my stockpile but I feel bad about this and am considering ordering something easy, cheap, and quick.
One of my overall Campaign goals is to use up my stockpile but I feel bad about this and am considering ordering something easy, cheap, and quick.
Thank you for the suggestion and offer. ![]() Last month, I purchased a cheap Tamiya Panzer II as a practice model for my brother. Unfortunately, it utilizes vinyl tracks. For some reason, replacement plastic Panzer II tracks are expensive and rare. A modern Panzer II model with link and length tracks would cost less than the old Tamiya kit and replacement tracks.
Last month, I purchased a cheap Tamiya Panzer II as a practice model for my brother. Unfortunately, it utilizes vinyl tracks. For some reason, replacement plastic Panzer II tracks are expensive and rare. A modern Panzer II model with link and length tracks would cost less than the old Tamiya kit and replacement tracks.
My closet contains a Tamiya Sd.Kfz.222 with Eduard etch but that would require scratch building an interior. I am just not prepared to undertake a difficult project like that.
Thank you for the suggestion. ![]() It would not help with the AFV Club tracks.
It would not help with the AFV Club tracks.
1 Like
To each their own but you could build with warts and have fun.
If I were to fix the sprocket/idler holes, I would cut off each layer, saving main inner section and the outer section/ring. Then add small sections of plastic around the inner part, then attach the outer section.
You can set the tank in a hull down position base which obscure/hid most of the existing issues.
3 Likes
I spent a few more hours trying to solve the M41 track pad problem. Making them one at a time by hand is possible but extremely time consuming. An accurate stencil would speed things up but making one is very difficult because the vinyl pads constantly distort, throwing everything off.
Just now I thought of a very different strategy. I could use Milliput to make a push mold of one track pad, grease it with machine oil, heat up sprue, and push it into the mold to make uniform pieces. It may be worth a try.
Milliput might also work to make an accurate stencil. That may also be worth a try.
1 Like
I’m not sure molten sprue and machine oil is a good combo… I’ve had reasonable results with pushing an item into Plasticene that has been coated with talcum powder, chilling the mould in the refrigerator, re-coating the mould with talc and then pressing soft two-part epoxy putty into the mould. The problem is the making of a new mould for every item, but there may be ways round it; I made a large flat chunk of Plasticene into which I pressed a small item repeatedly, but the impressions must be quite widely spaced. On that occasion I didn’t re-coat with talc and used resin poured into the impressions, any Plasticene stuck in the fine detail dissolved out with Turps or White Spirit, I forget which. I’m wondering if a plunge mould made in the same way with Milliput would work with being talc coated, washed with CA glue and Bicarbonate of Soda poured in, tap out the residue, more CA in any voids and repeat the Soda?
Regards,
M
Doug, I’m not suggesting you’re as lazy or even as shoddy a modeller as I often am, but have you considered the AFV Club “Rubber Band” type; no faffing around with very much at all, just secure and install. They achieve the tautness present on most US tanks of that period:

Just a thought and would save the agonizing over the separate track issues. You could then crack on with all the other stuff required, secure in the knowledge that you’d have a half-decent track.
1 Like
Try making a mould from white bathroom silicone and using Milliput as the casting medium. Test the silicone on a part first to make sure it does not stick (the white type we get here does not stick to styrene model parts) or lightly oil it. Use double sided tape or PVA glue to secure your master to a bit of styrene card and coat with the silicone. A bit of styrene added to the top will give you a flat bottom later.
When it is cured remove the silicone mould and make as many more as you want.
Then mix your Millput and press in the moulds.
1 Like
On some of my models, the vinyl tracks disintegrated or became permanently tacky. In my experience, the same thing sometimes happens with flashlight shells and tool handles.
To prevent this from happening on the M41, I purchased a set of AFV Club individual link tracks to replace the kit vinyl tracks. Unfortunately, unlike every other set of individual link tracks I have seen, AFV Club M41 tracks are half vinyl. The box does not make this clear, nor does the information provided by the seller. If I had known this in advance, I would not have purchased a Tamiya M41 and AFV Club replacement tracks.
Trumpeter makes a set of all plastic, individual link M41 tracks. They are available for $21 US but would not arrive until September or October. That is too late.
I am returning to the hobby and constantly make mistakes. ![]() On a scale of one to 10, my modeling skill level is two or three. I have almost zero experience with making dioramas and few supplies for that sort of thing . Making a mold will be a completely new experience.
On a scale of one to 10, my modeling skill level is two or three. I have almost zero experience with making dioramas and few supplies for that sort of thing . Making a mold will be a completely new experience.
When I purchased the Tamiya M41, I was hoping for a relatively cheap, relatively easy, fixer upper practice model. What I got was a surprisingly difficult, surprisingly expensive, time consuming model from hell. That is fine. I want to learn and hate to lose. However, my ability, budget, and time have limits.
Later tonight I will try my hand at making a push mold and stencil out of Milliput.
2 Likes
Doug. Sorry I did not understand the reason behind what you intended. I mistakenly thought you only need a few replacements.
The AFV Club vinyl pads are a different formula to the formula used on older more flexible tracks and definitely not like what is used for tools. It is a lot more like the vinyl Tamiya uses for the tube sections to fit their road wheels to kits.
I would use the kit ones. A friend built the AFV Club Duster when it was first released 12 or so years ago. His are still fine - I saw it a few months ago.
Prime/ paint the tracks before adding the pads. Use a nylon scourer to remove the shine from the pads, then fit them to the tracks. You do not need to paint the pads if you do this. To weather them, use acrylic paints for washes and add some pigment if you want to. The scrubbing will help the acrylic stick better to the track pads.
2 Likes
Switching to Plan C…
The M41 will live on in Damraska’s AFV Projects, pending the arrival of new tracks from China.
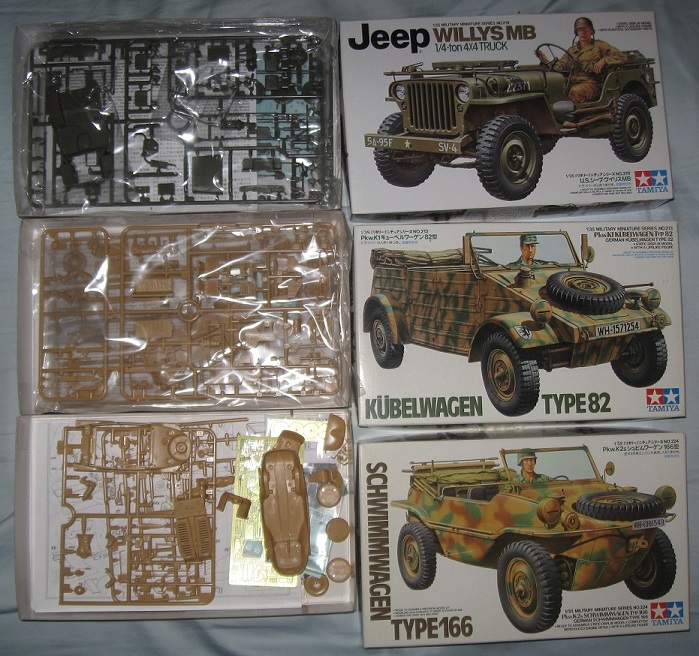
Courtesy of the office closet, Summer Nostalgia will continue with a Jeep, Kubelwagen, or Schwimmwagen. (The Schwimmwagen is started and probably does not qualify.)
The AFV Club and Tamiya tracks will go to eBay.
Edit: I left the decision to my brother and he picked the Jeep. Therefore, I am rejoining the campaign with a Tamiya Willys MB Jeep from 1997. Cutting plastic…
4 Likes
Got the instrument panel decals down this afternoon. Had wished I’d scratched the details and painted them. Although it was somewhat as a blessing in disguise as I did at least find out how difficult the decals are going to be to work with. Needed a longer than usual soak to persuade them to come off the backing and they had a nasty habit of breaking up. Might have to give the rest a coat of liquid decal film. Unfortunately I can’t find a replacement sheet. Least not with the Argentine scheme.
6 Likes
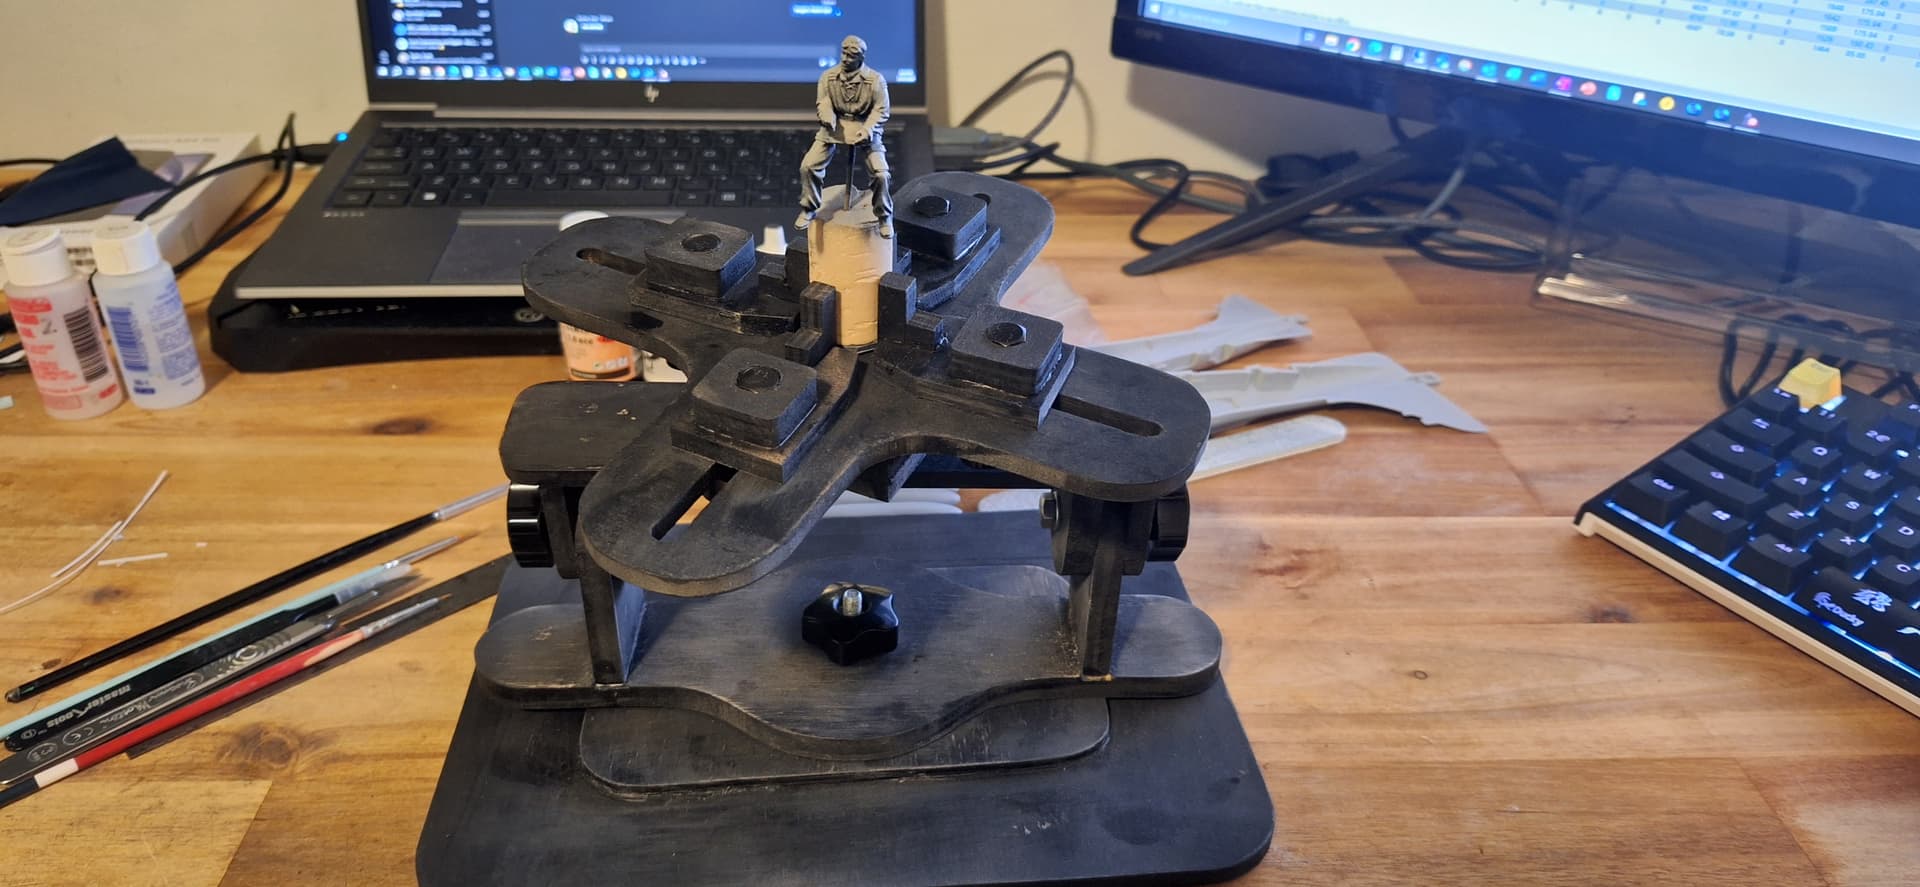
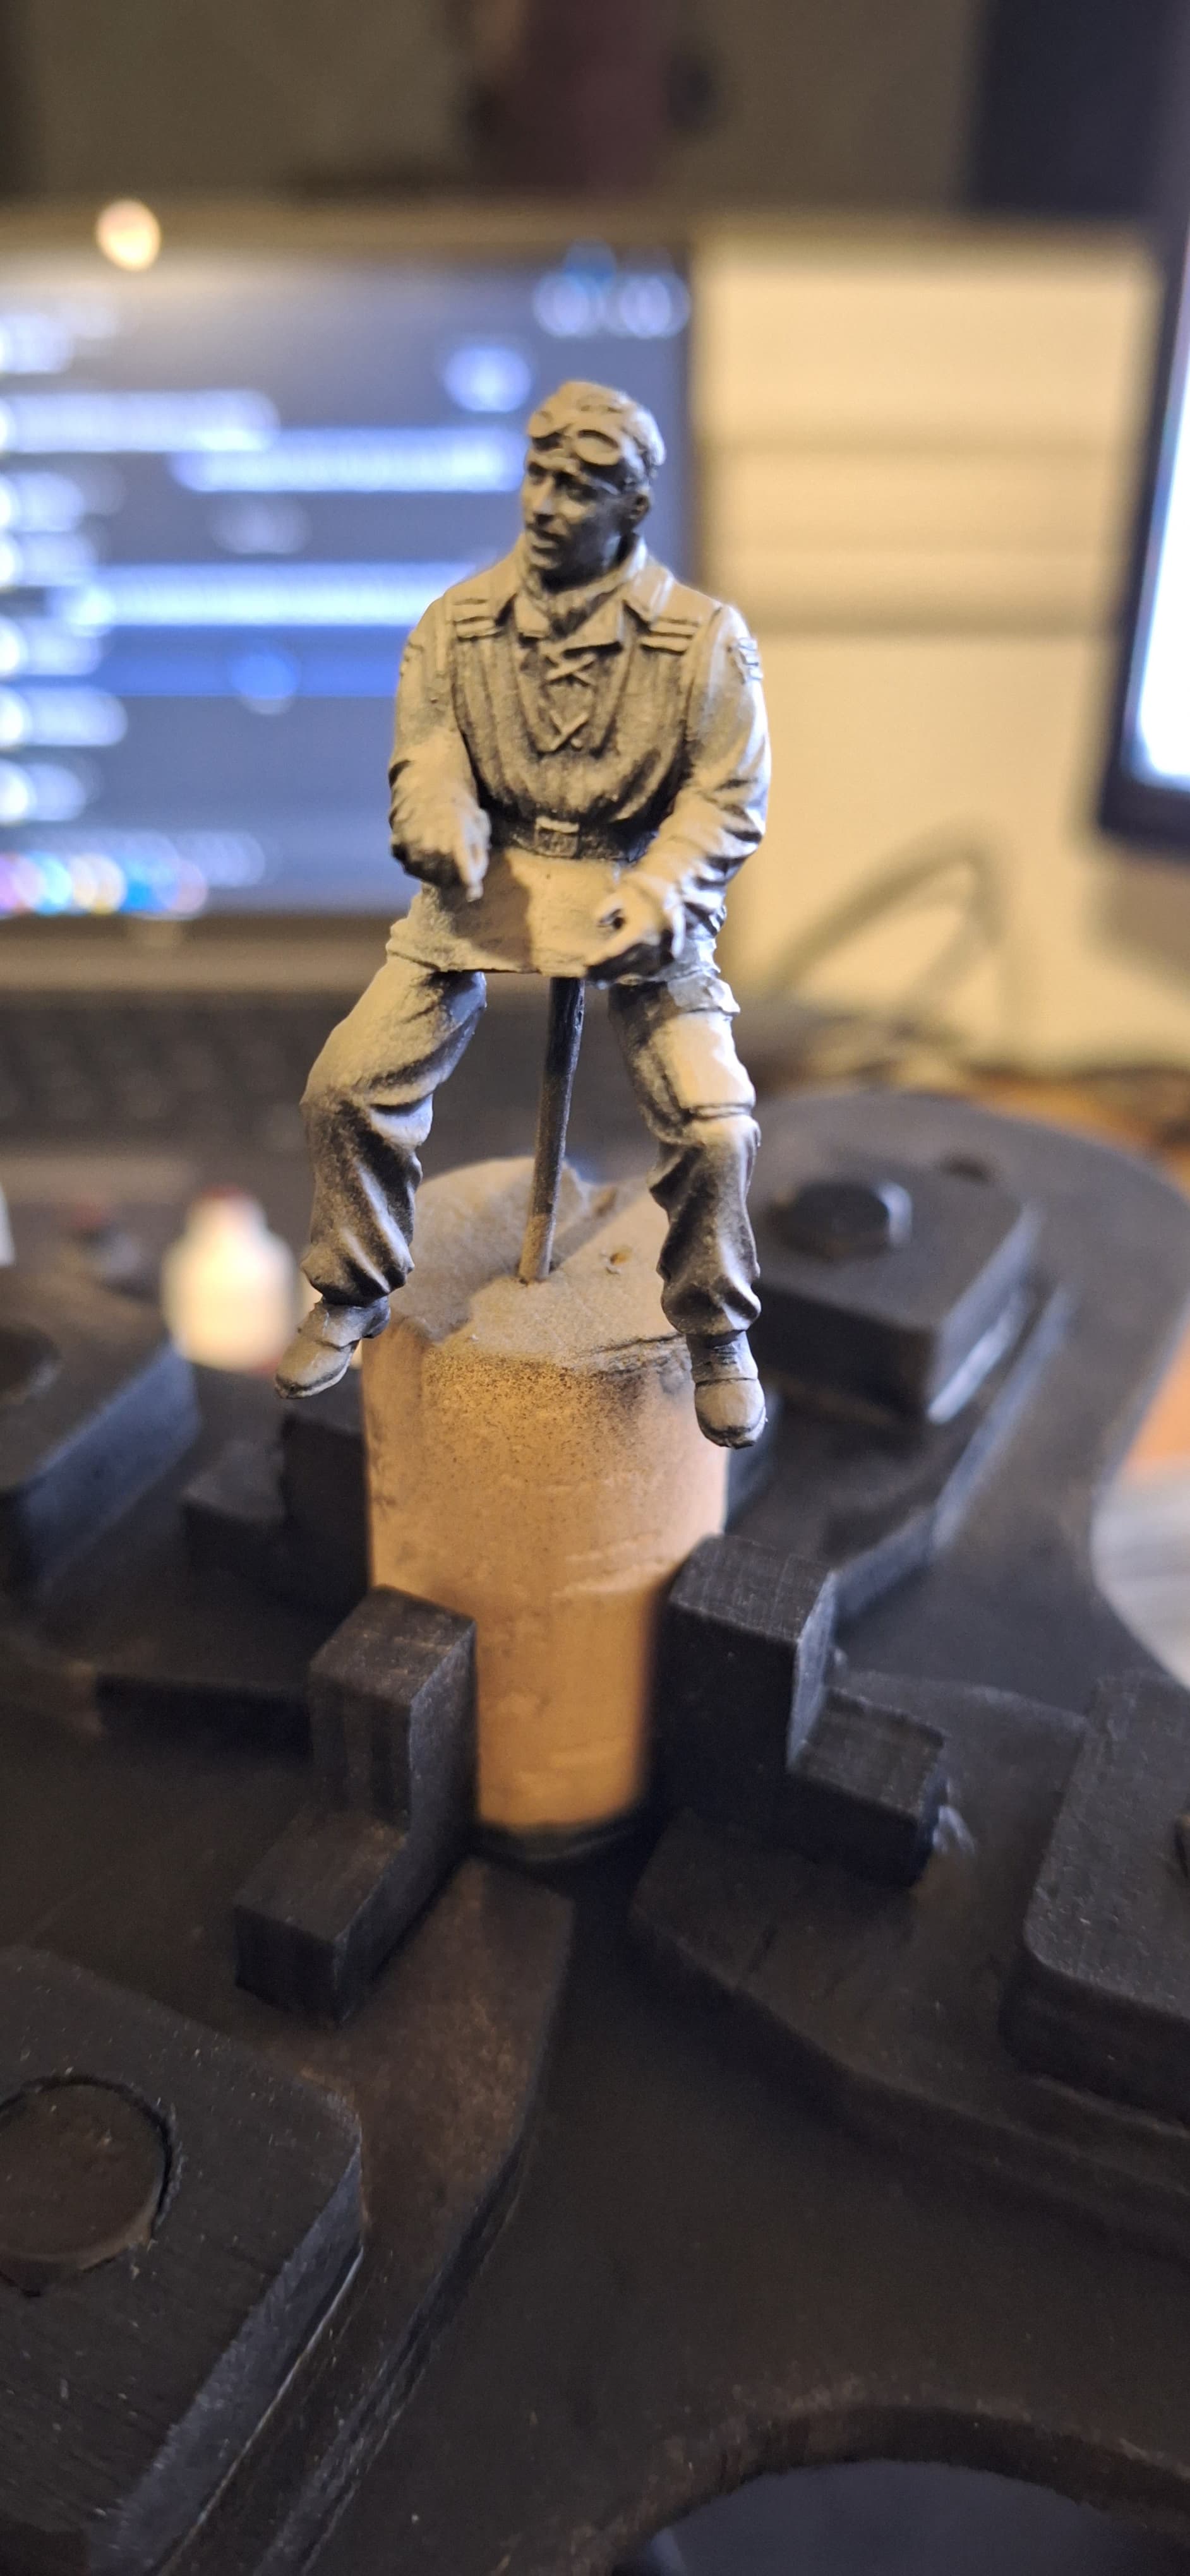
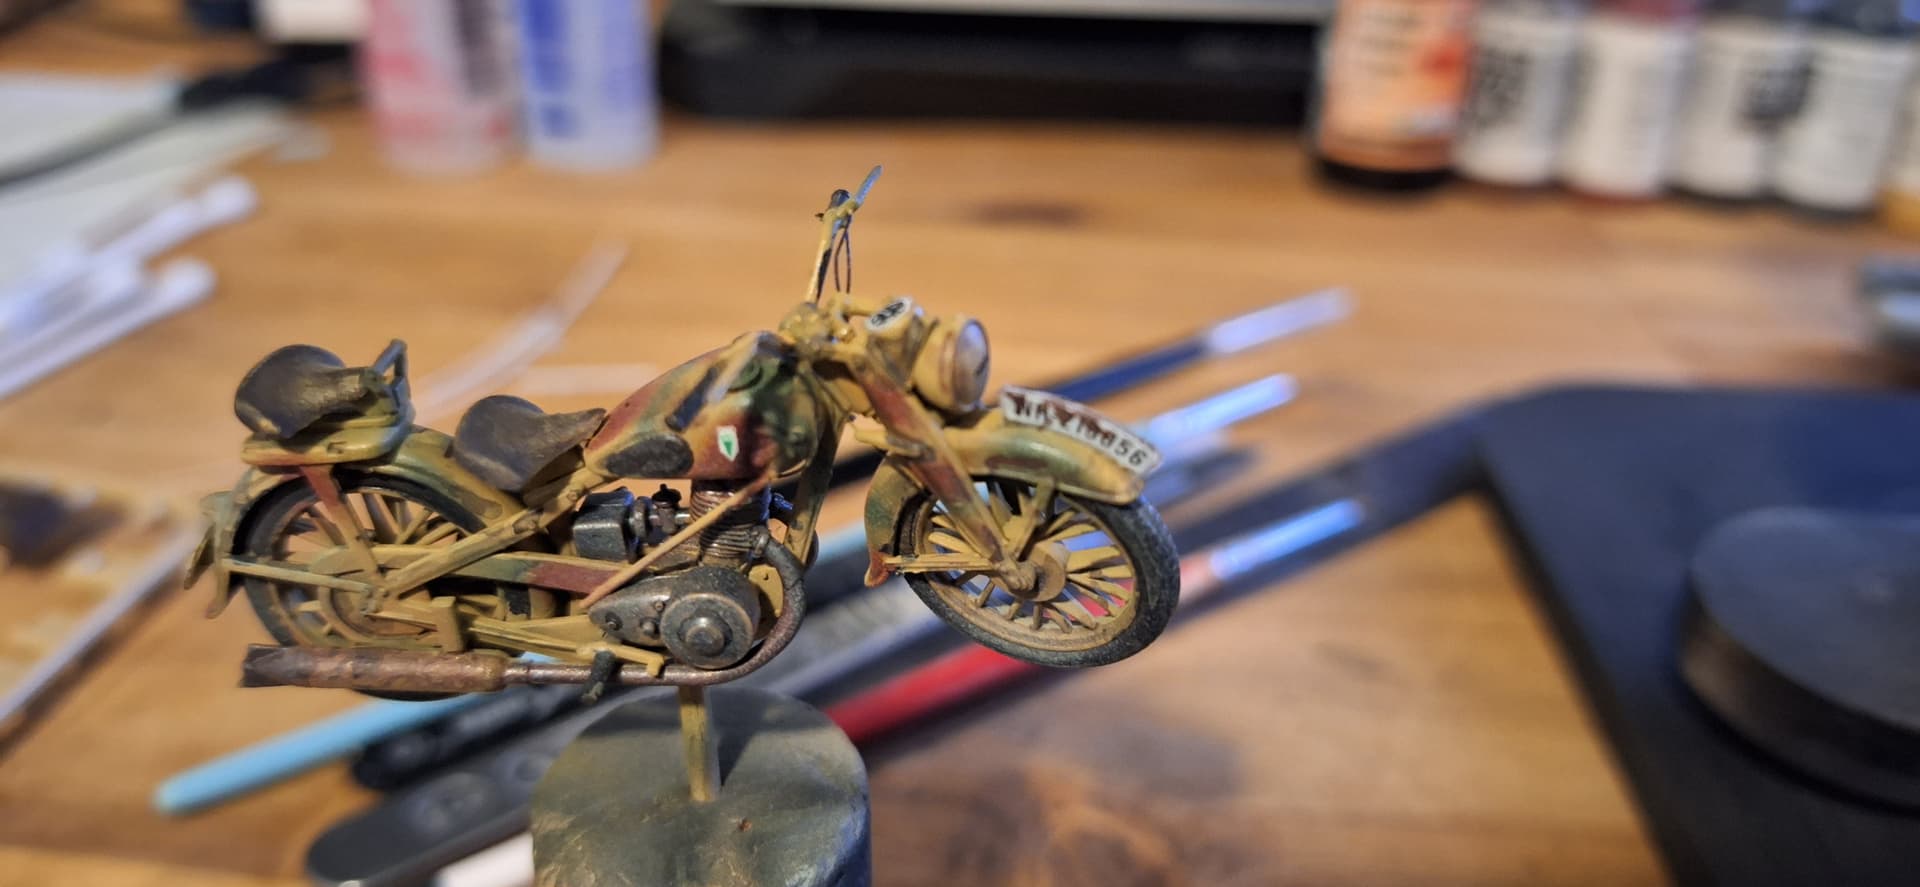
Finished the bike apart from the saddlebags. Just starting painting the figure.
And my homemade version of the octopus model holder. I couldnt justify the shipping cost which doubled the price of it for me so knocked one up out of plywood
9 Likes
It all looks good to me!

Brilliant
3 Likes
Hi Everyone,
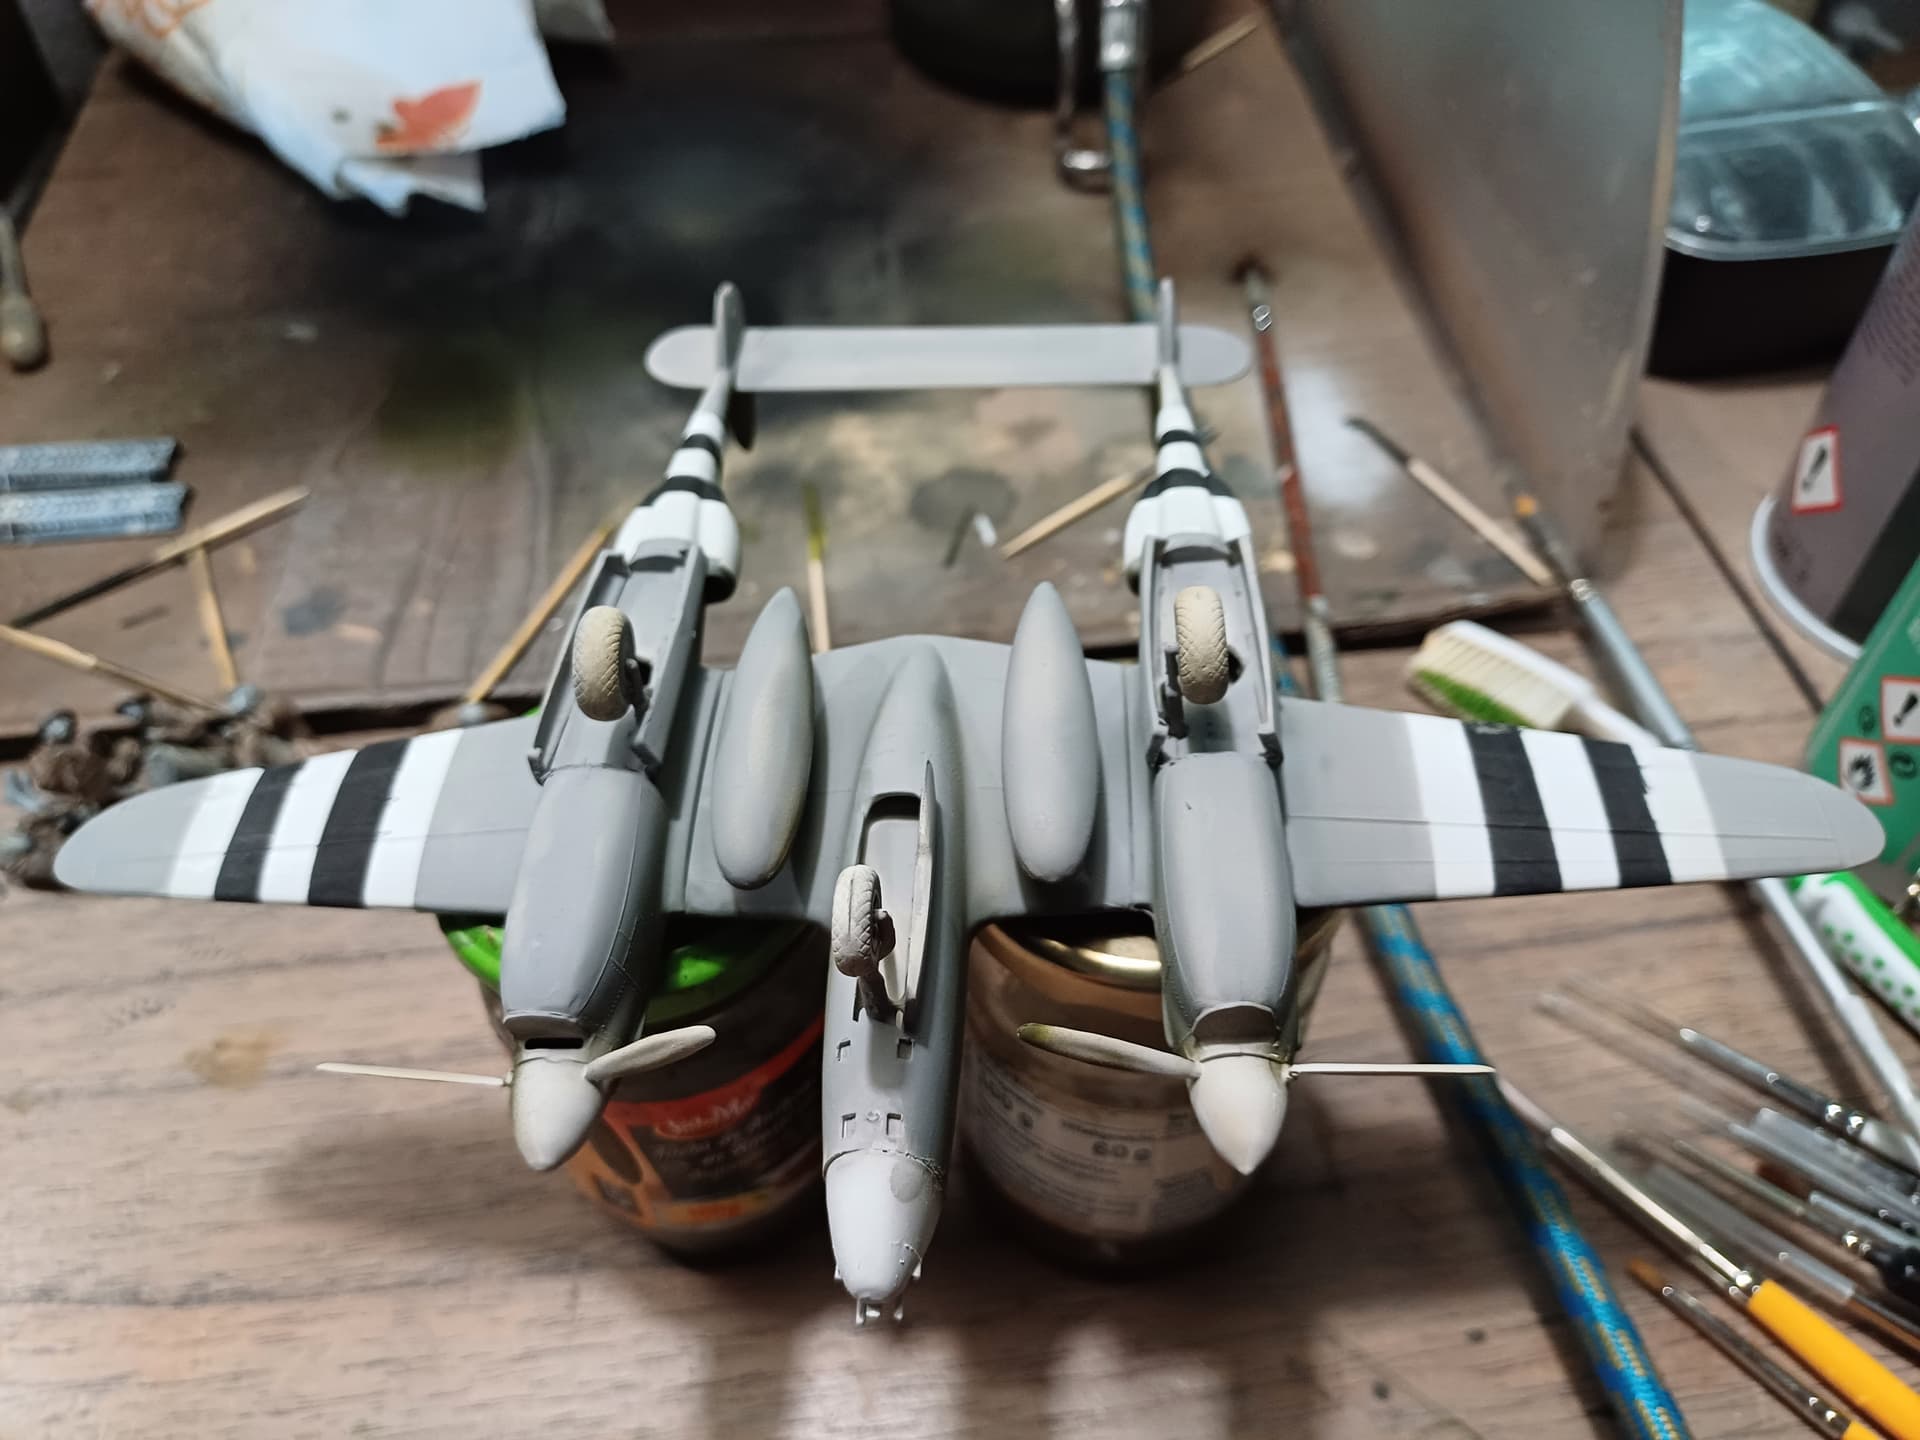
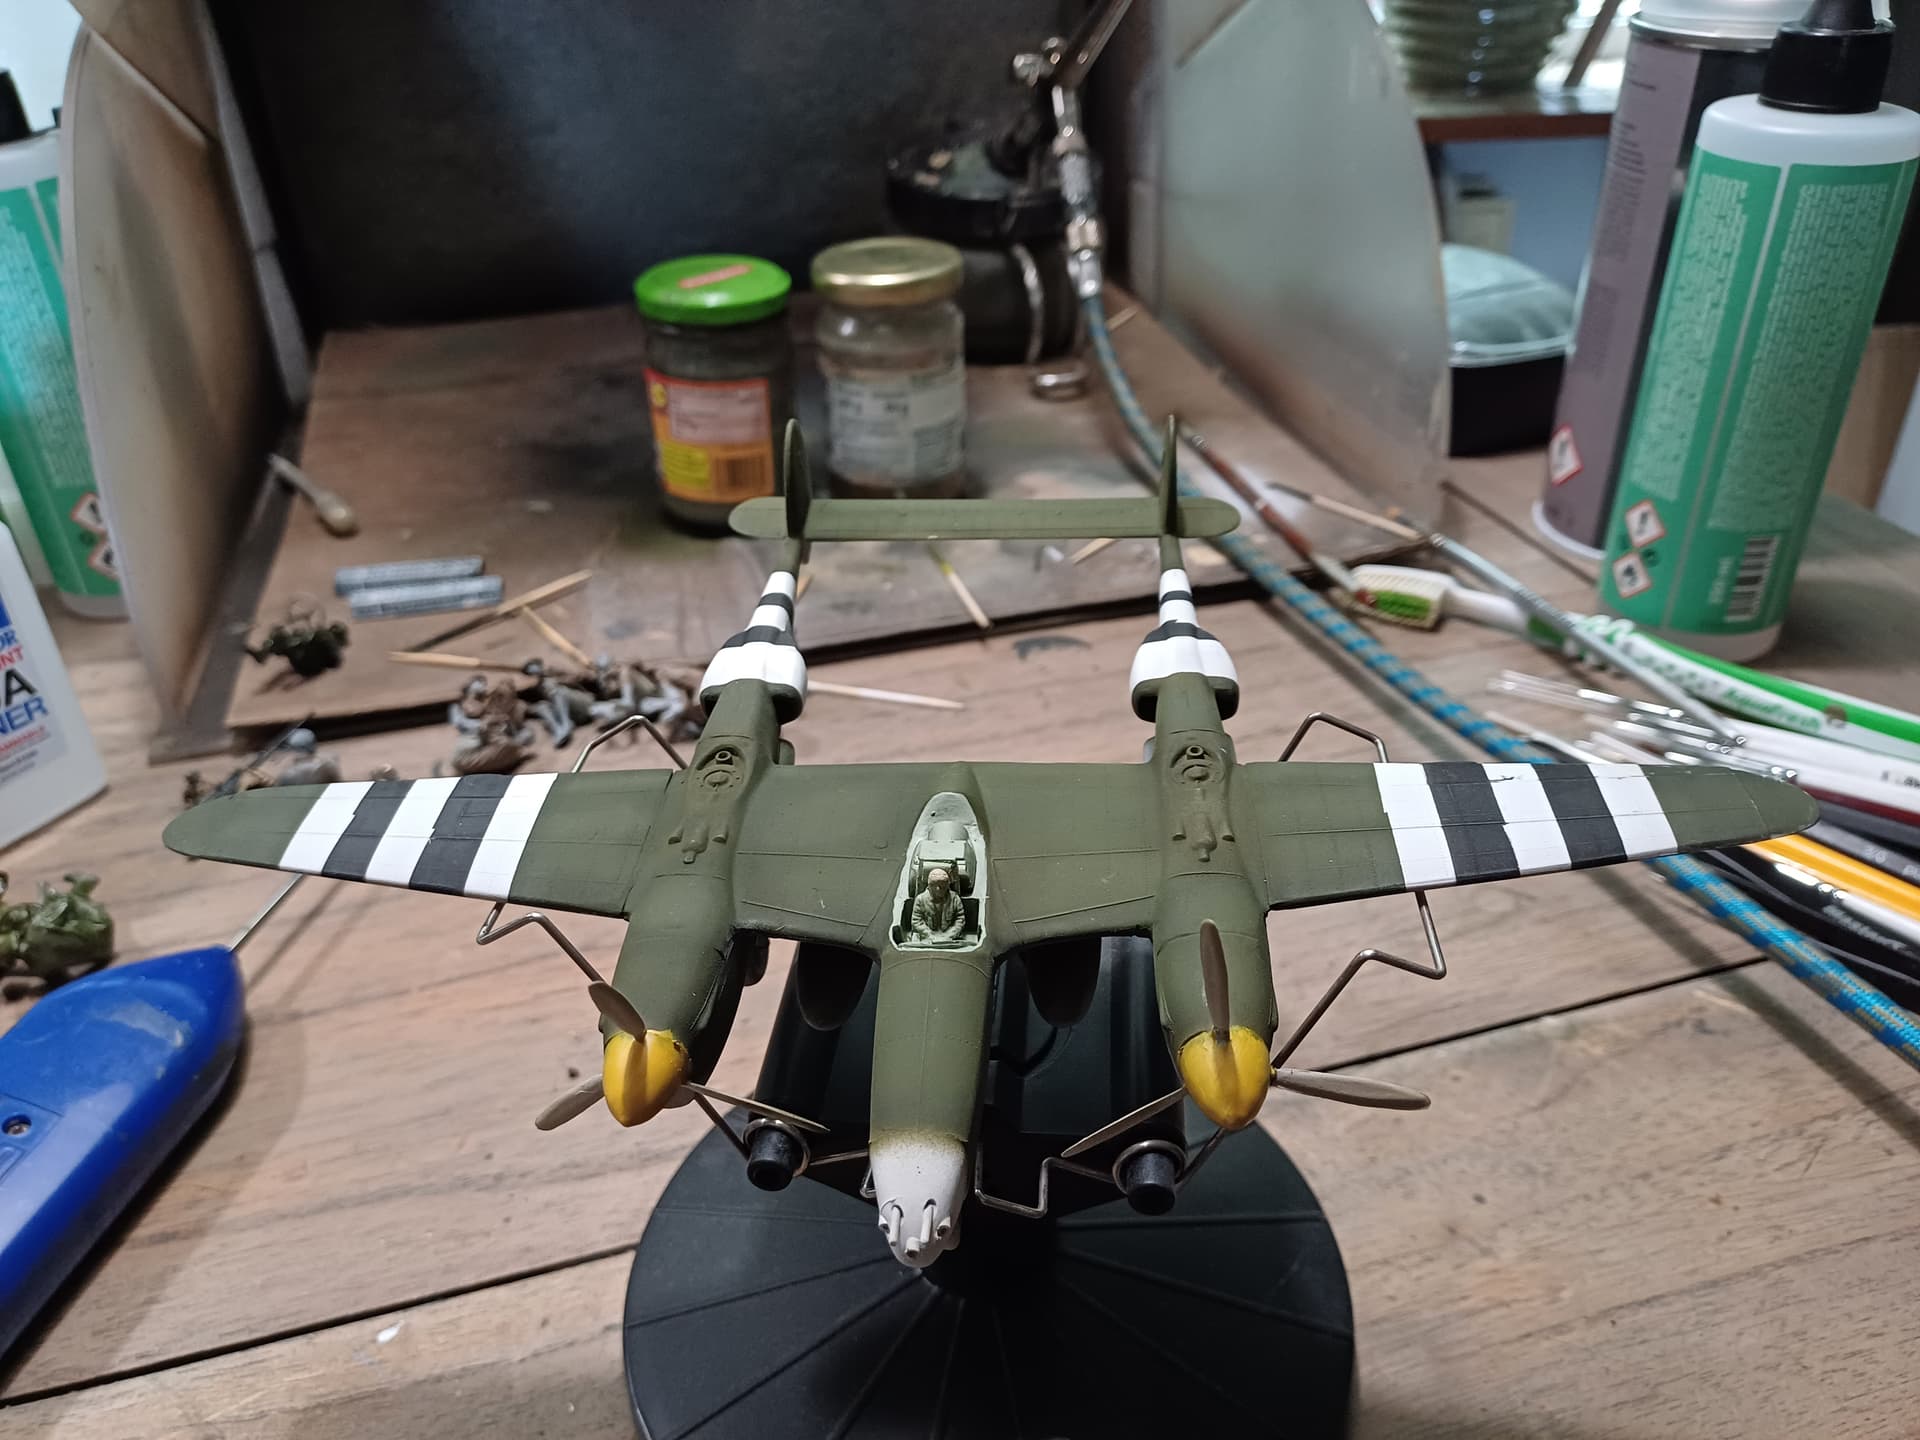
There certainly are some great builds going on, sure brings back some memories. In my last update I had given the cockpit area a base coat of interior green and cut off the main float using a razor saw. So, in trying to keep up with a new years resolution of doing updates on a timelier basis (not doing too well with that!) I’ve made some progress and should do one!
This project is actually a trial run for the “real” Kingfisher I want to do. For that one I picked up a resin engin, cowl and a main float that is of the correct width. Turns out that the molding capabilities back in the 60’s didn’t allow for wider parts to be made, who knew? Anyway, I picked up two kits over the years, this one with the PE, and another that was an earlier kit. On the old Monogram kits I’ve found that getting kits that are close to the original release date tend to have the best fit as the molds hadn’t time to get worn out. So, I’m saving the really good stuff for that build, and using this one for two reasons, one to re-familiarize myself with the kit (first built it in the mid-seventies, no paint) and second to have fun and relive a build that I enjoyed but now able to apply some skills I didn’t have back then.
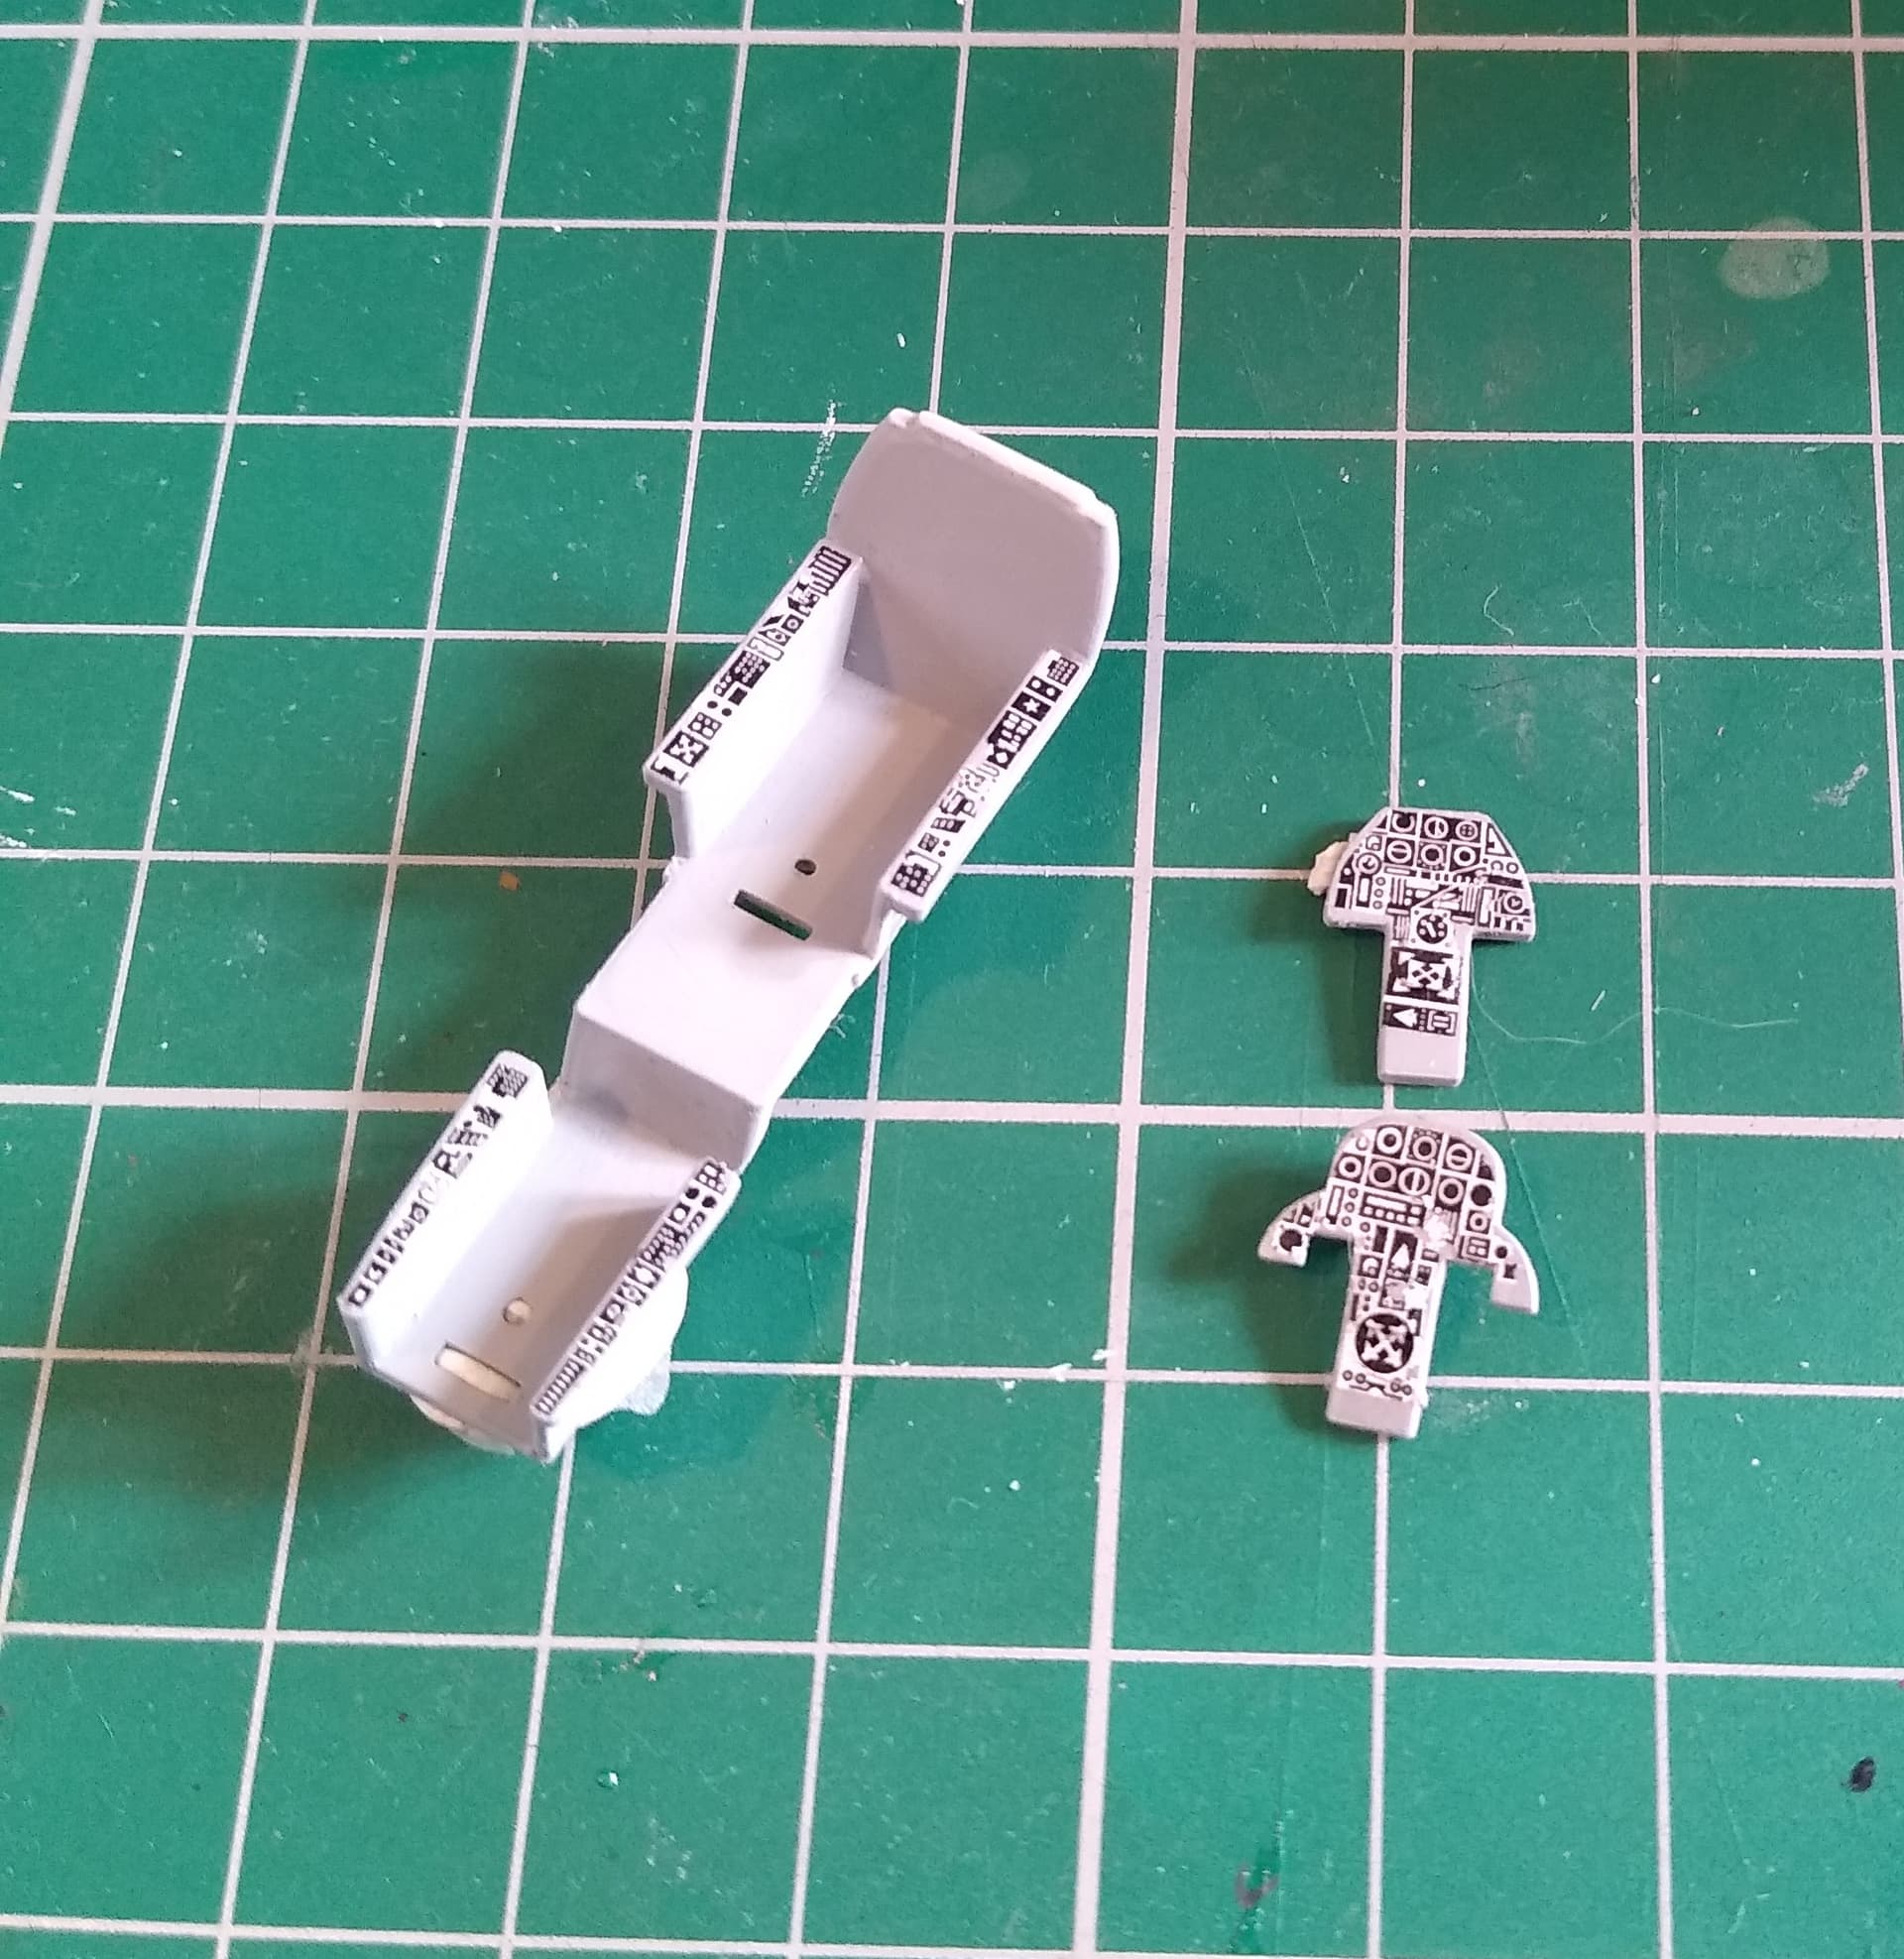
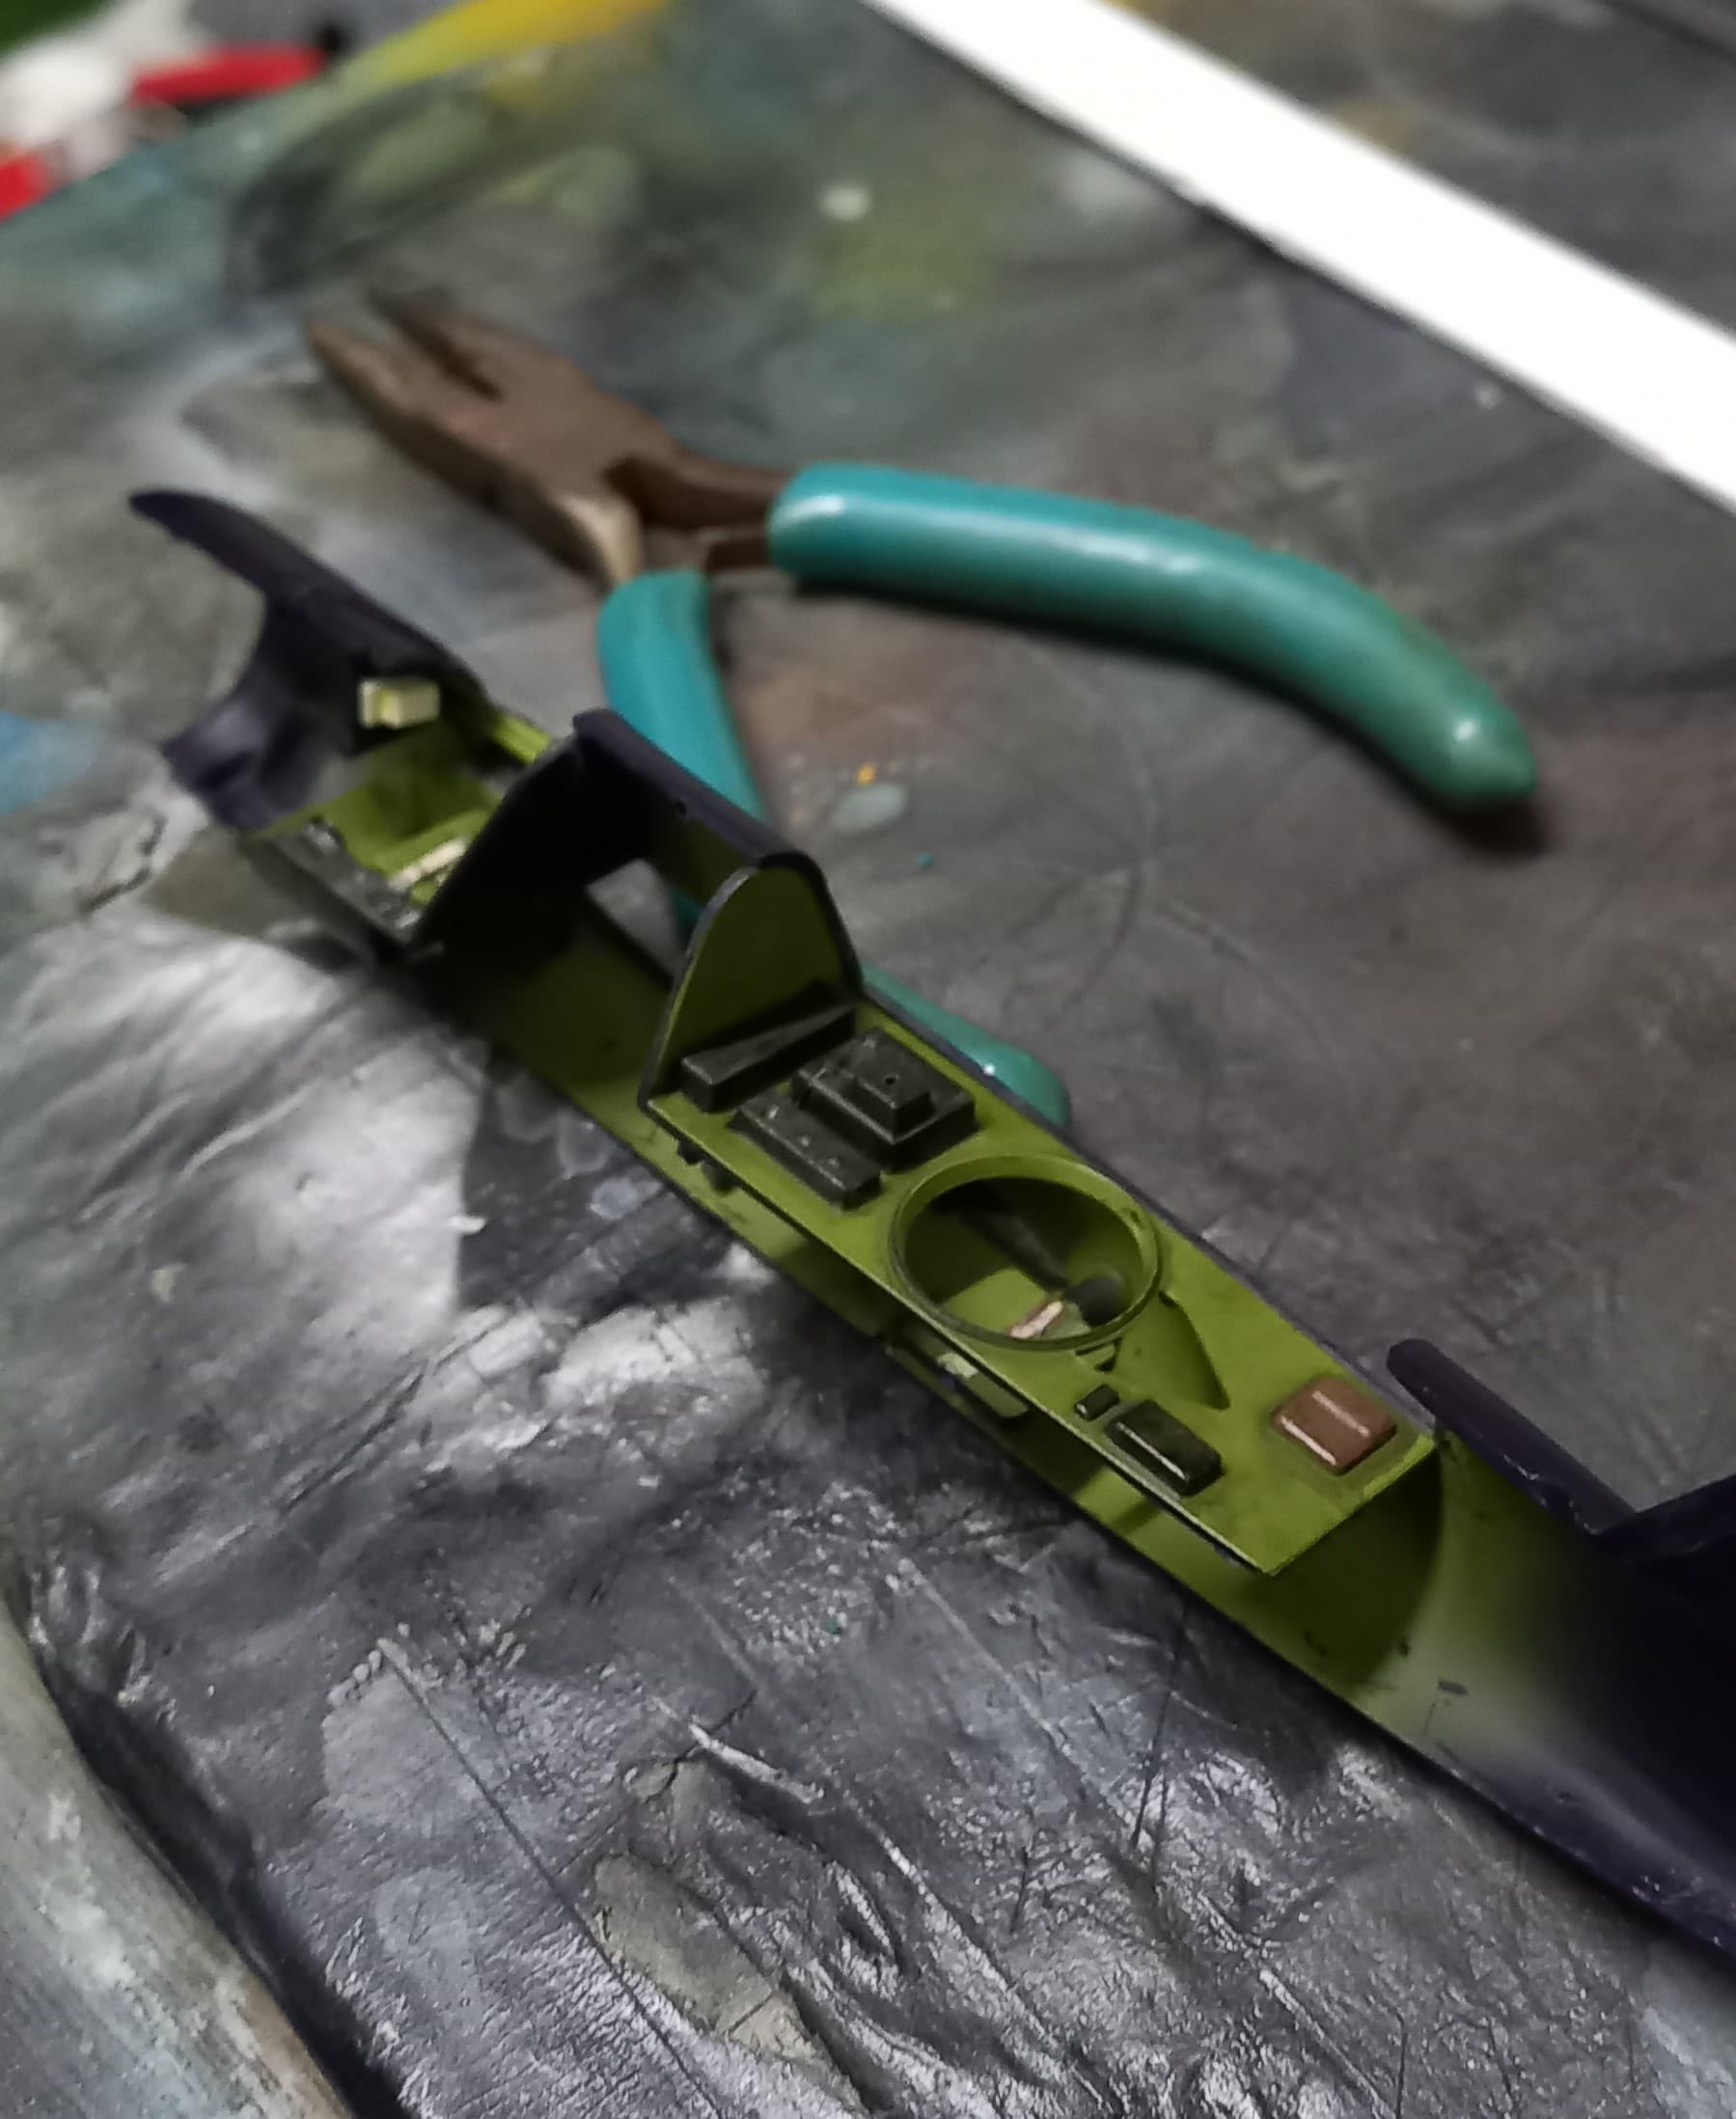
In keeping with my plan to do a little bit extra in the cockpit I addressed the instrument panel. Opting to save the PE part for the more scale build meant that I’d have to fashion a new panel from scratch. With the PE sheet this makes the process much easier. Having used this technique to replicate an instrument panel for a Rufe Zero floatplane in the past I repeated it with some minor modifications.
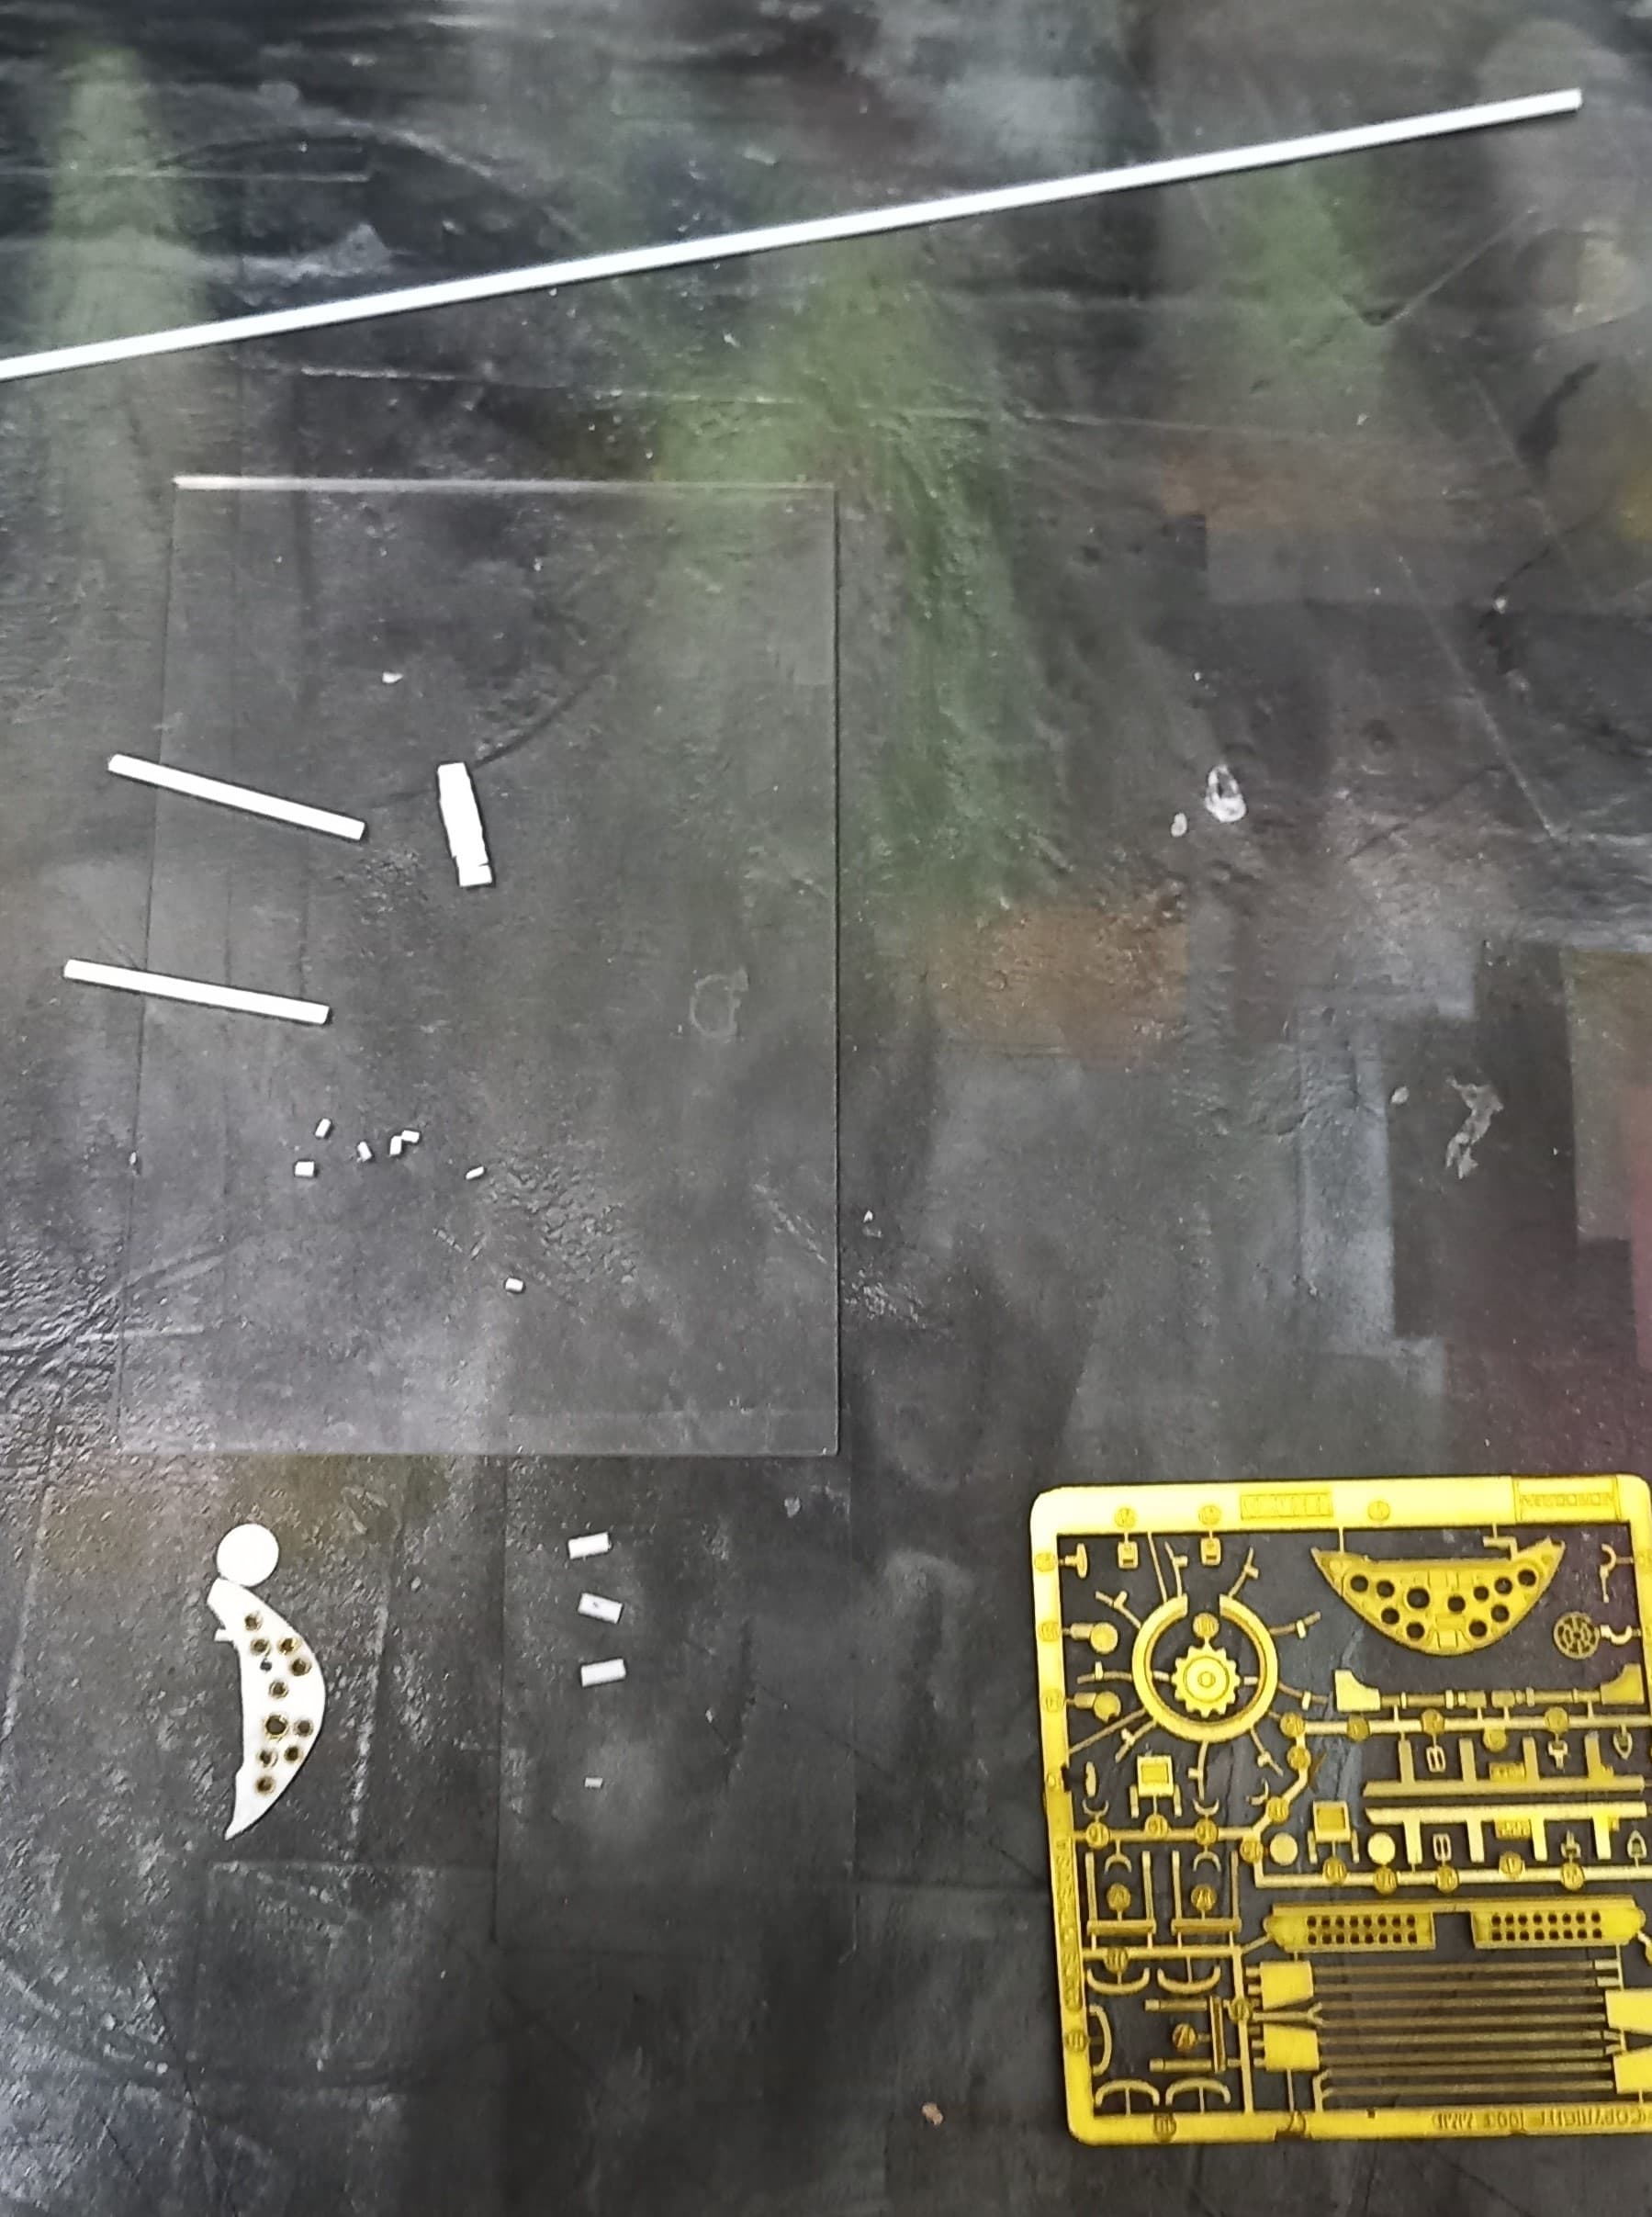
First up, I made photocopies of the PE Sheet, and the decal sheet (the kit provides instruments on the decals), and got up on it!
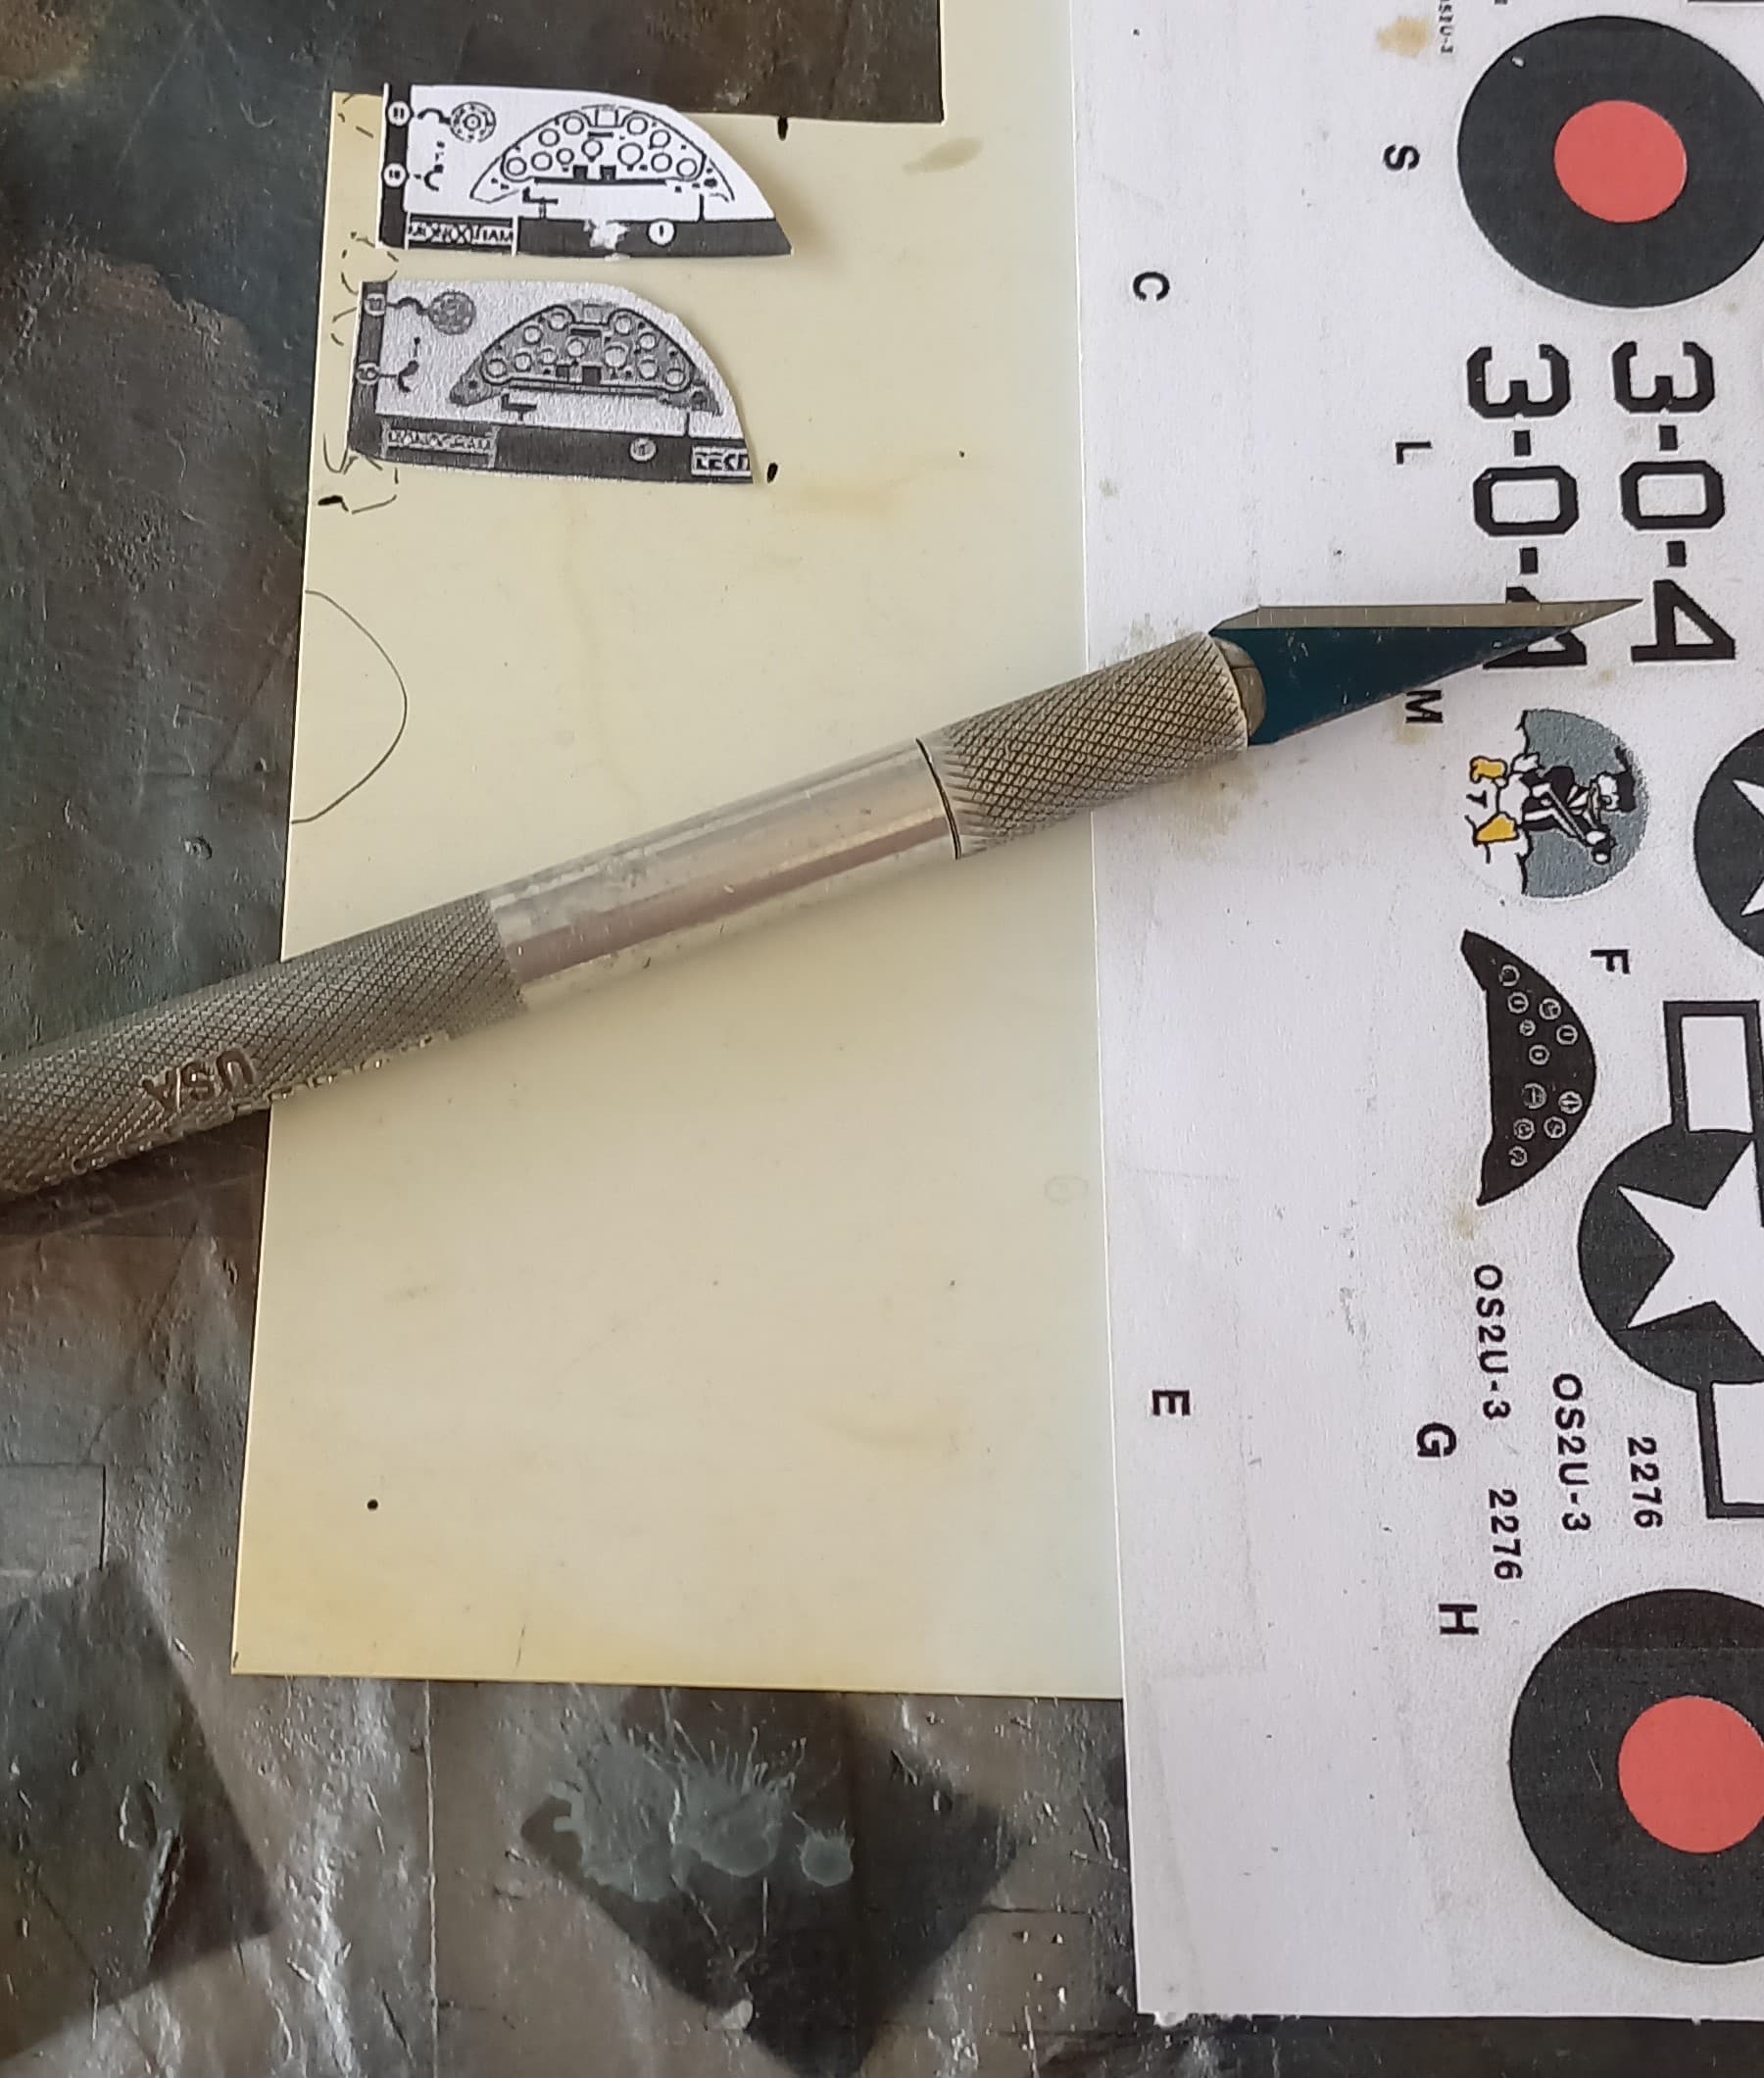
Next I took some 10K stock styrene and cut it to shape, to allow for making 2 panels.

The photocopied panels were then glued to the stock using white glue.
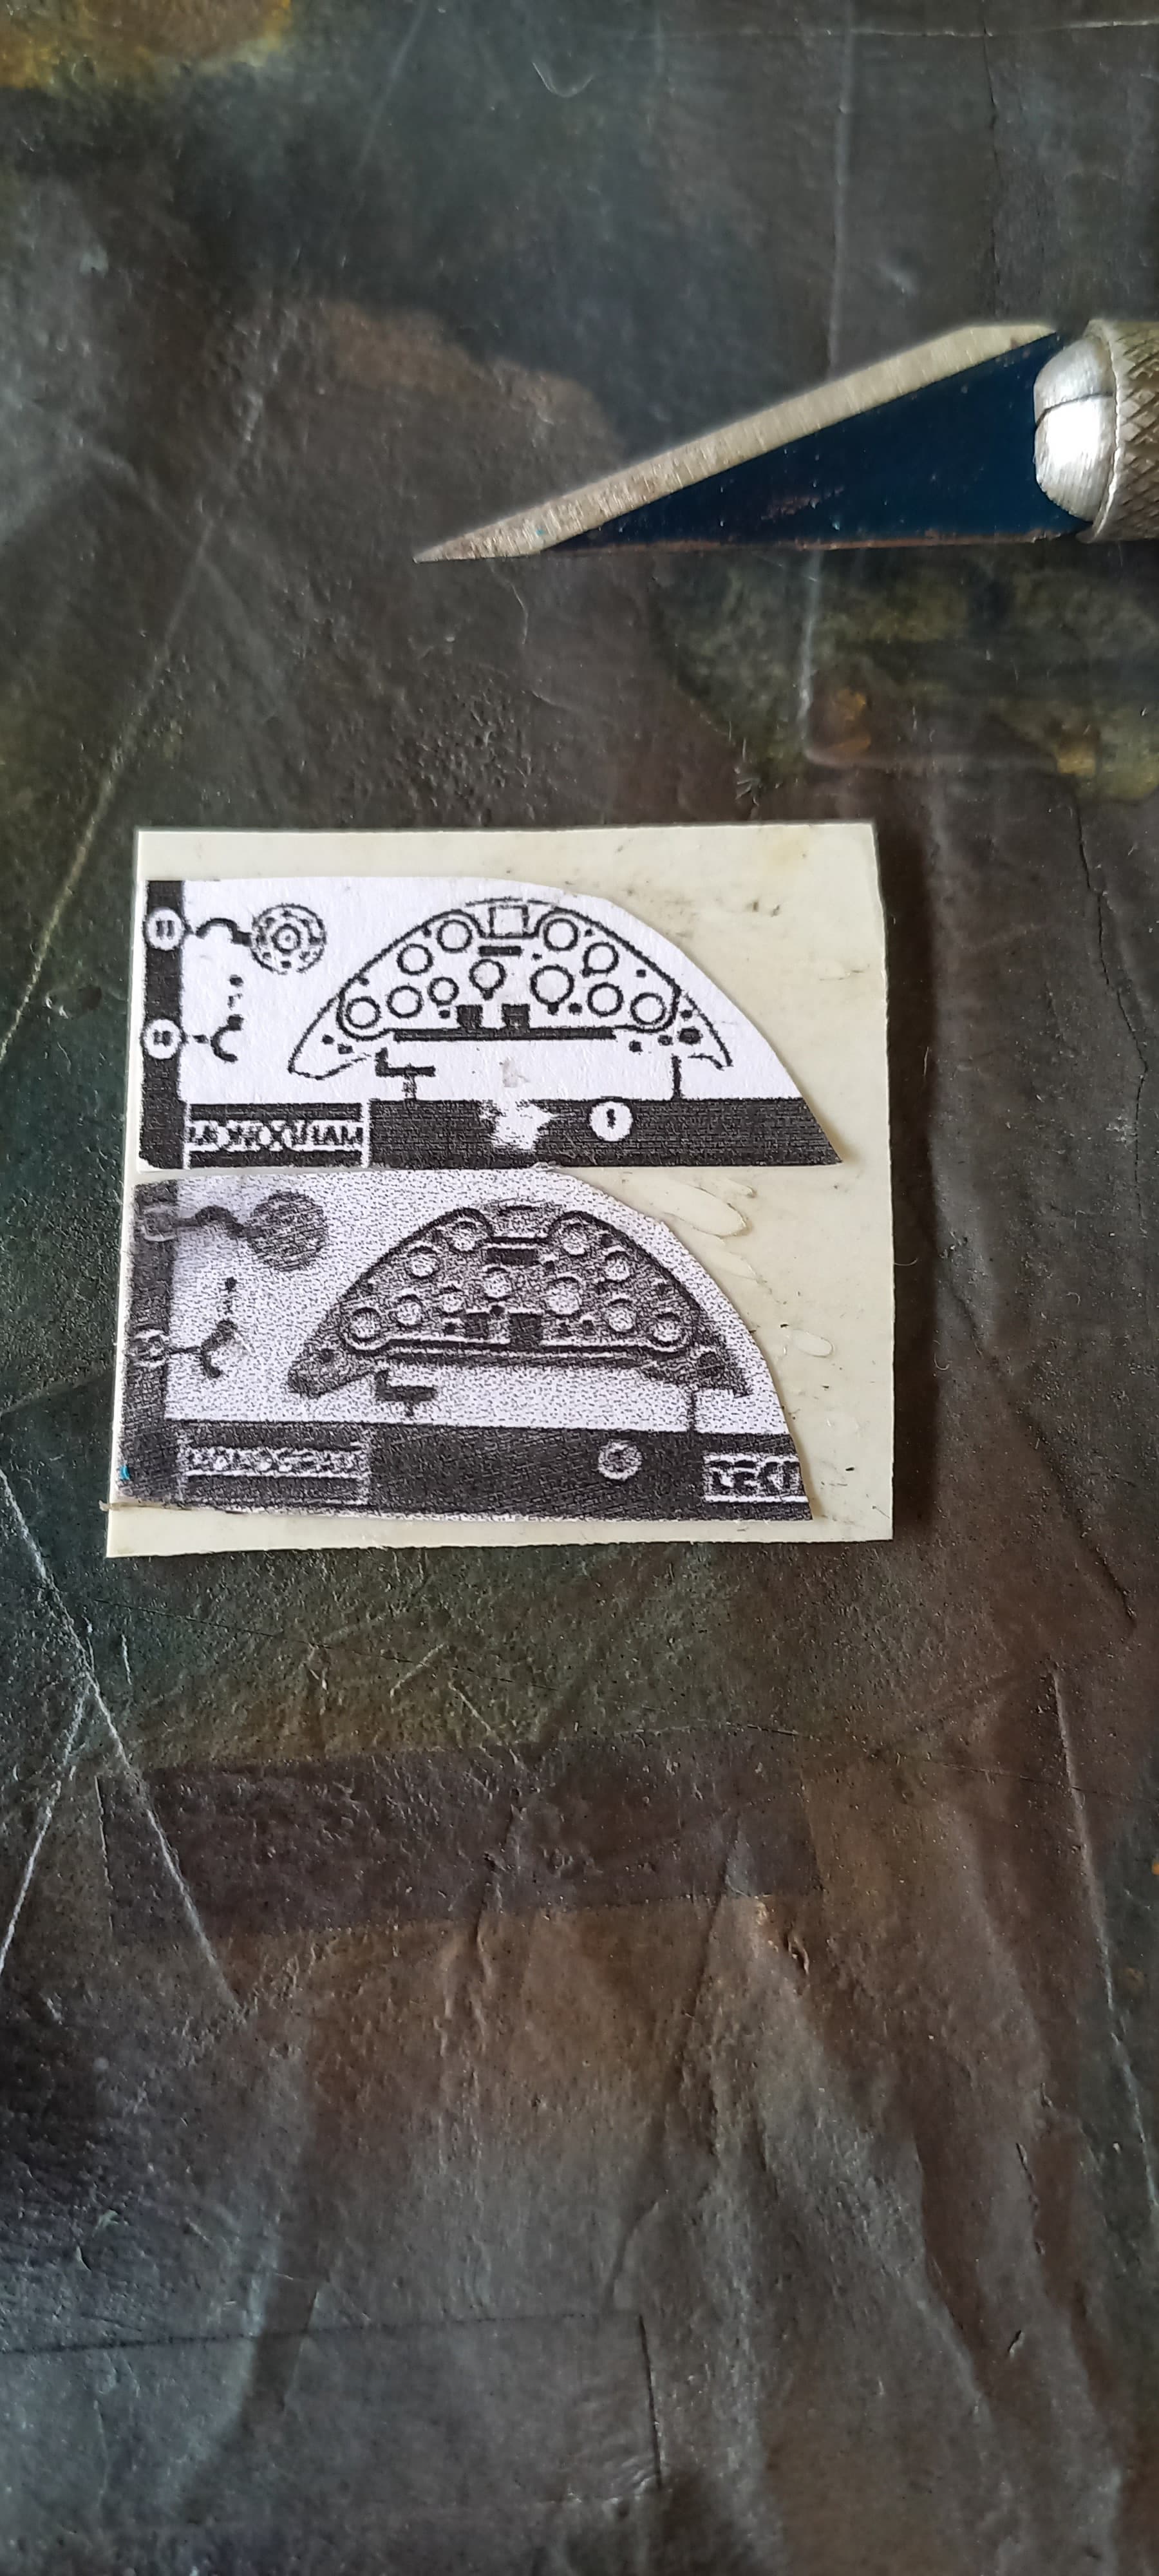
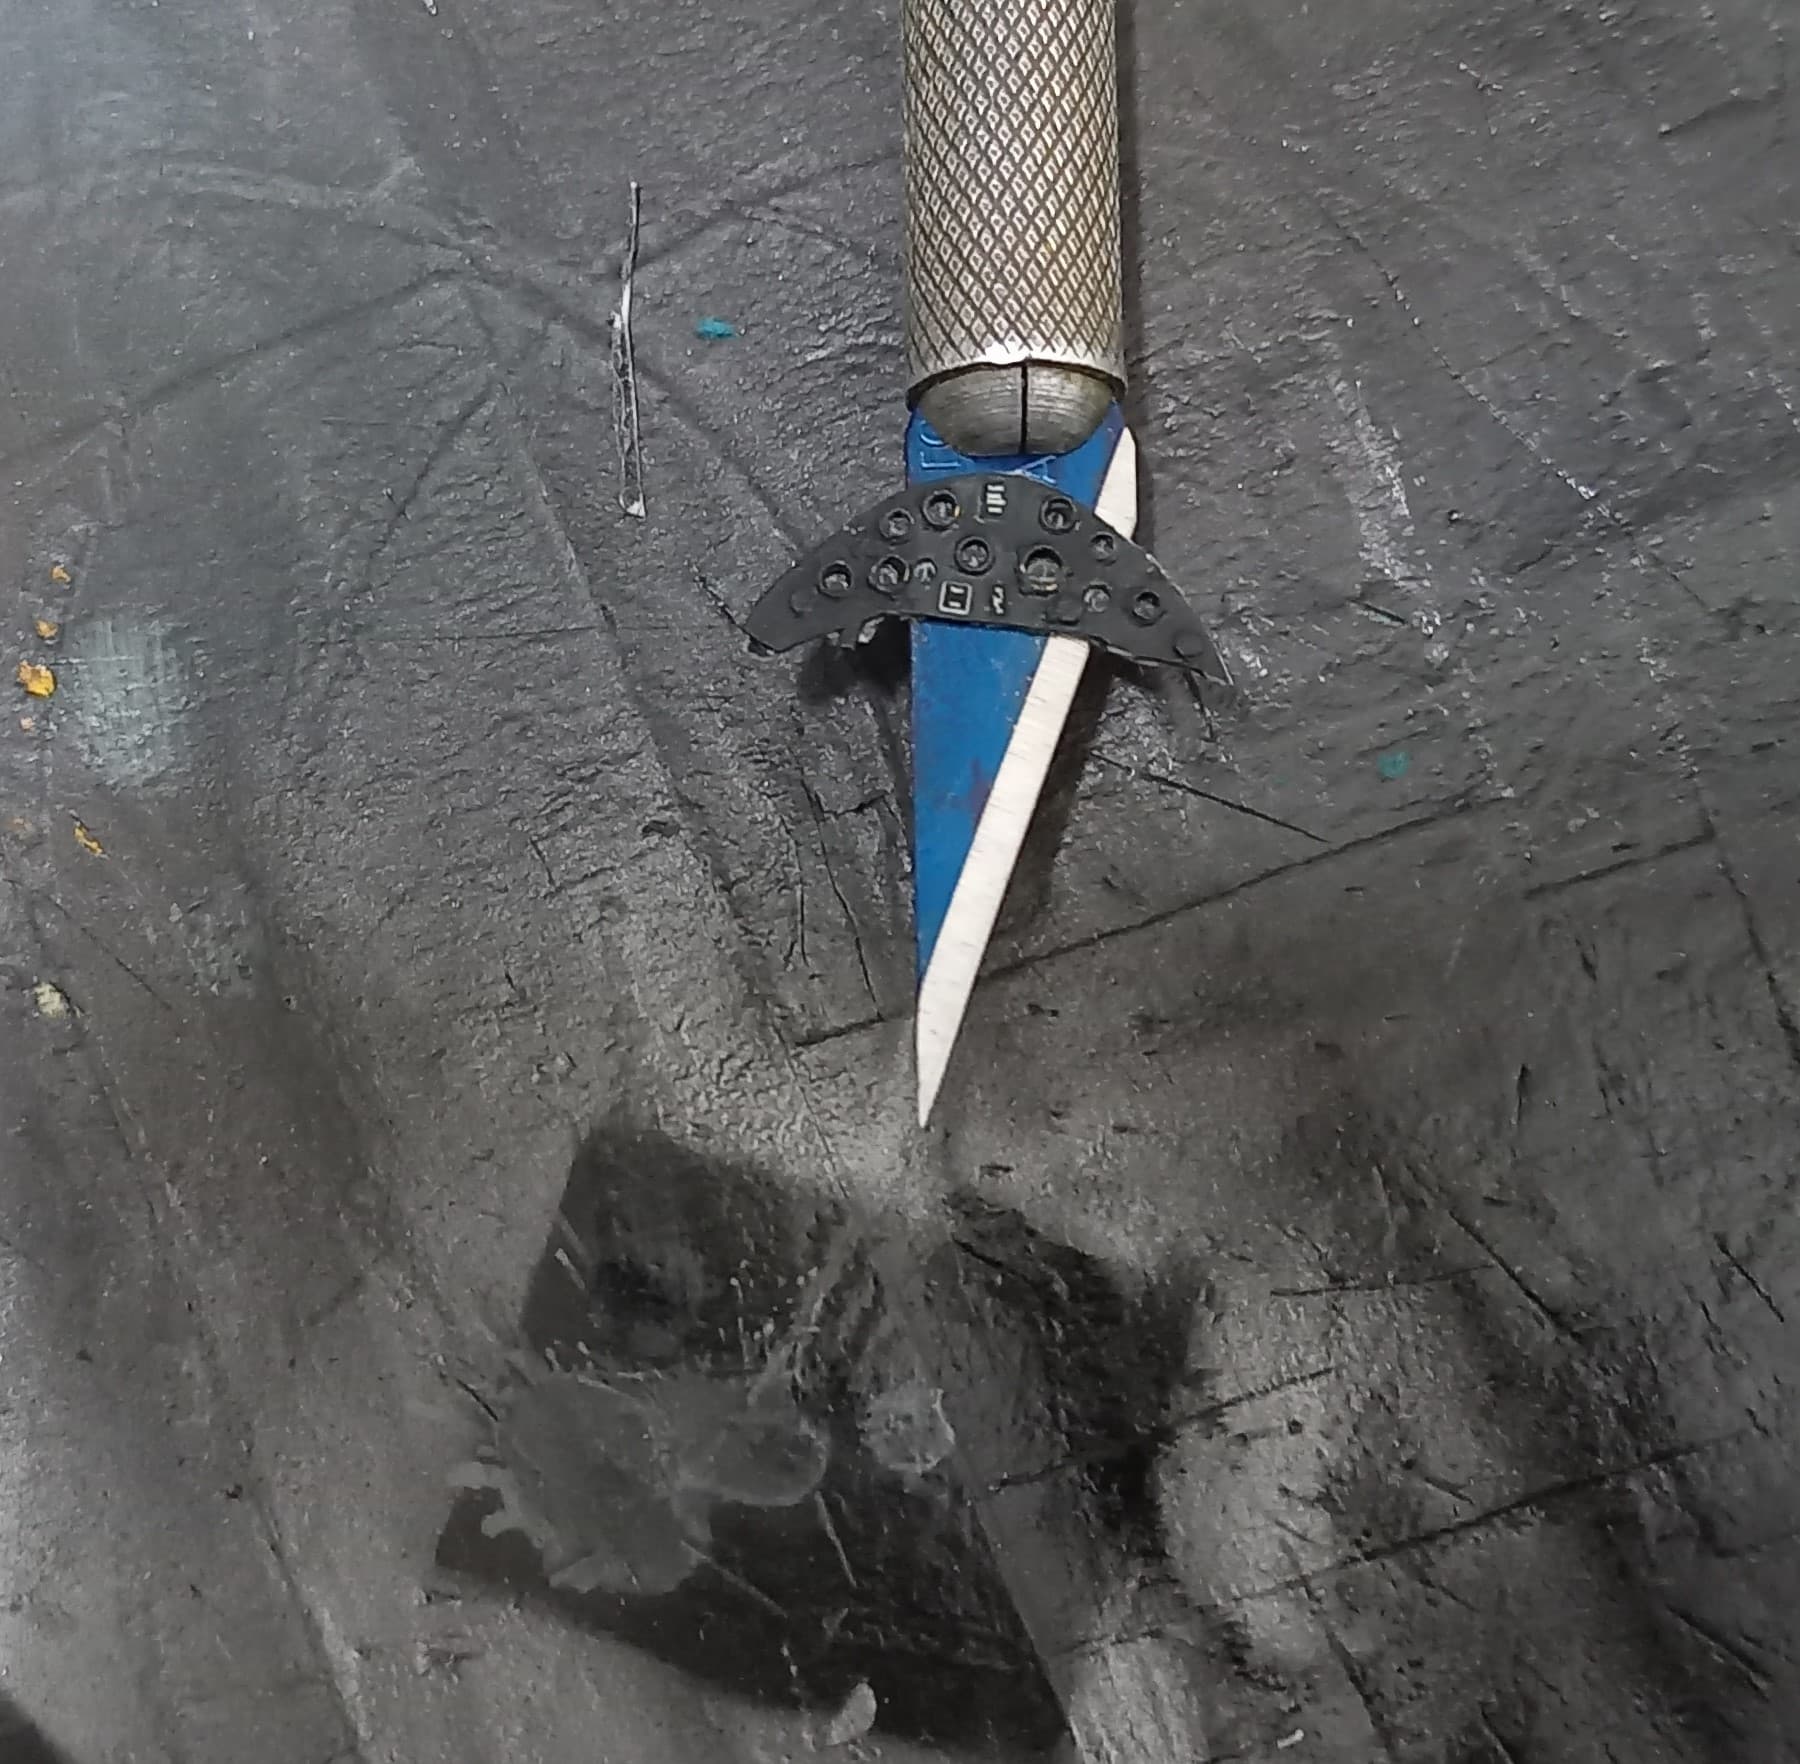
Then, using a new #11 blade I carefully cut out the outline of the panel and then using a Waldron punch set I punched out the holes where the instruments would go (note, while it looks like I didn’t get the holes lined up per the drawing it’s really just the angle of the photo, they were dead on with the drawing).
Following this adventure, it was time to give the ole eyes a break, so I assembled the wings per the kit’s instructions. This went well, despite the age of the molds, there was little flash to deal with. I also started to get the float in a better state of affairs. The fit on the float left a lot to be desired. After gluing and a rough sanding, gaps were all over the main float. Mr. Surfacer 500 jumped in to help save the day!

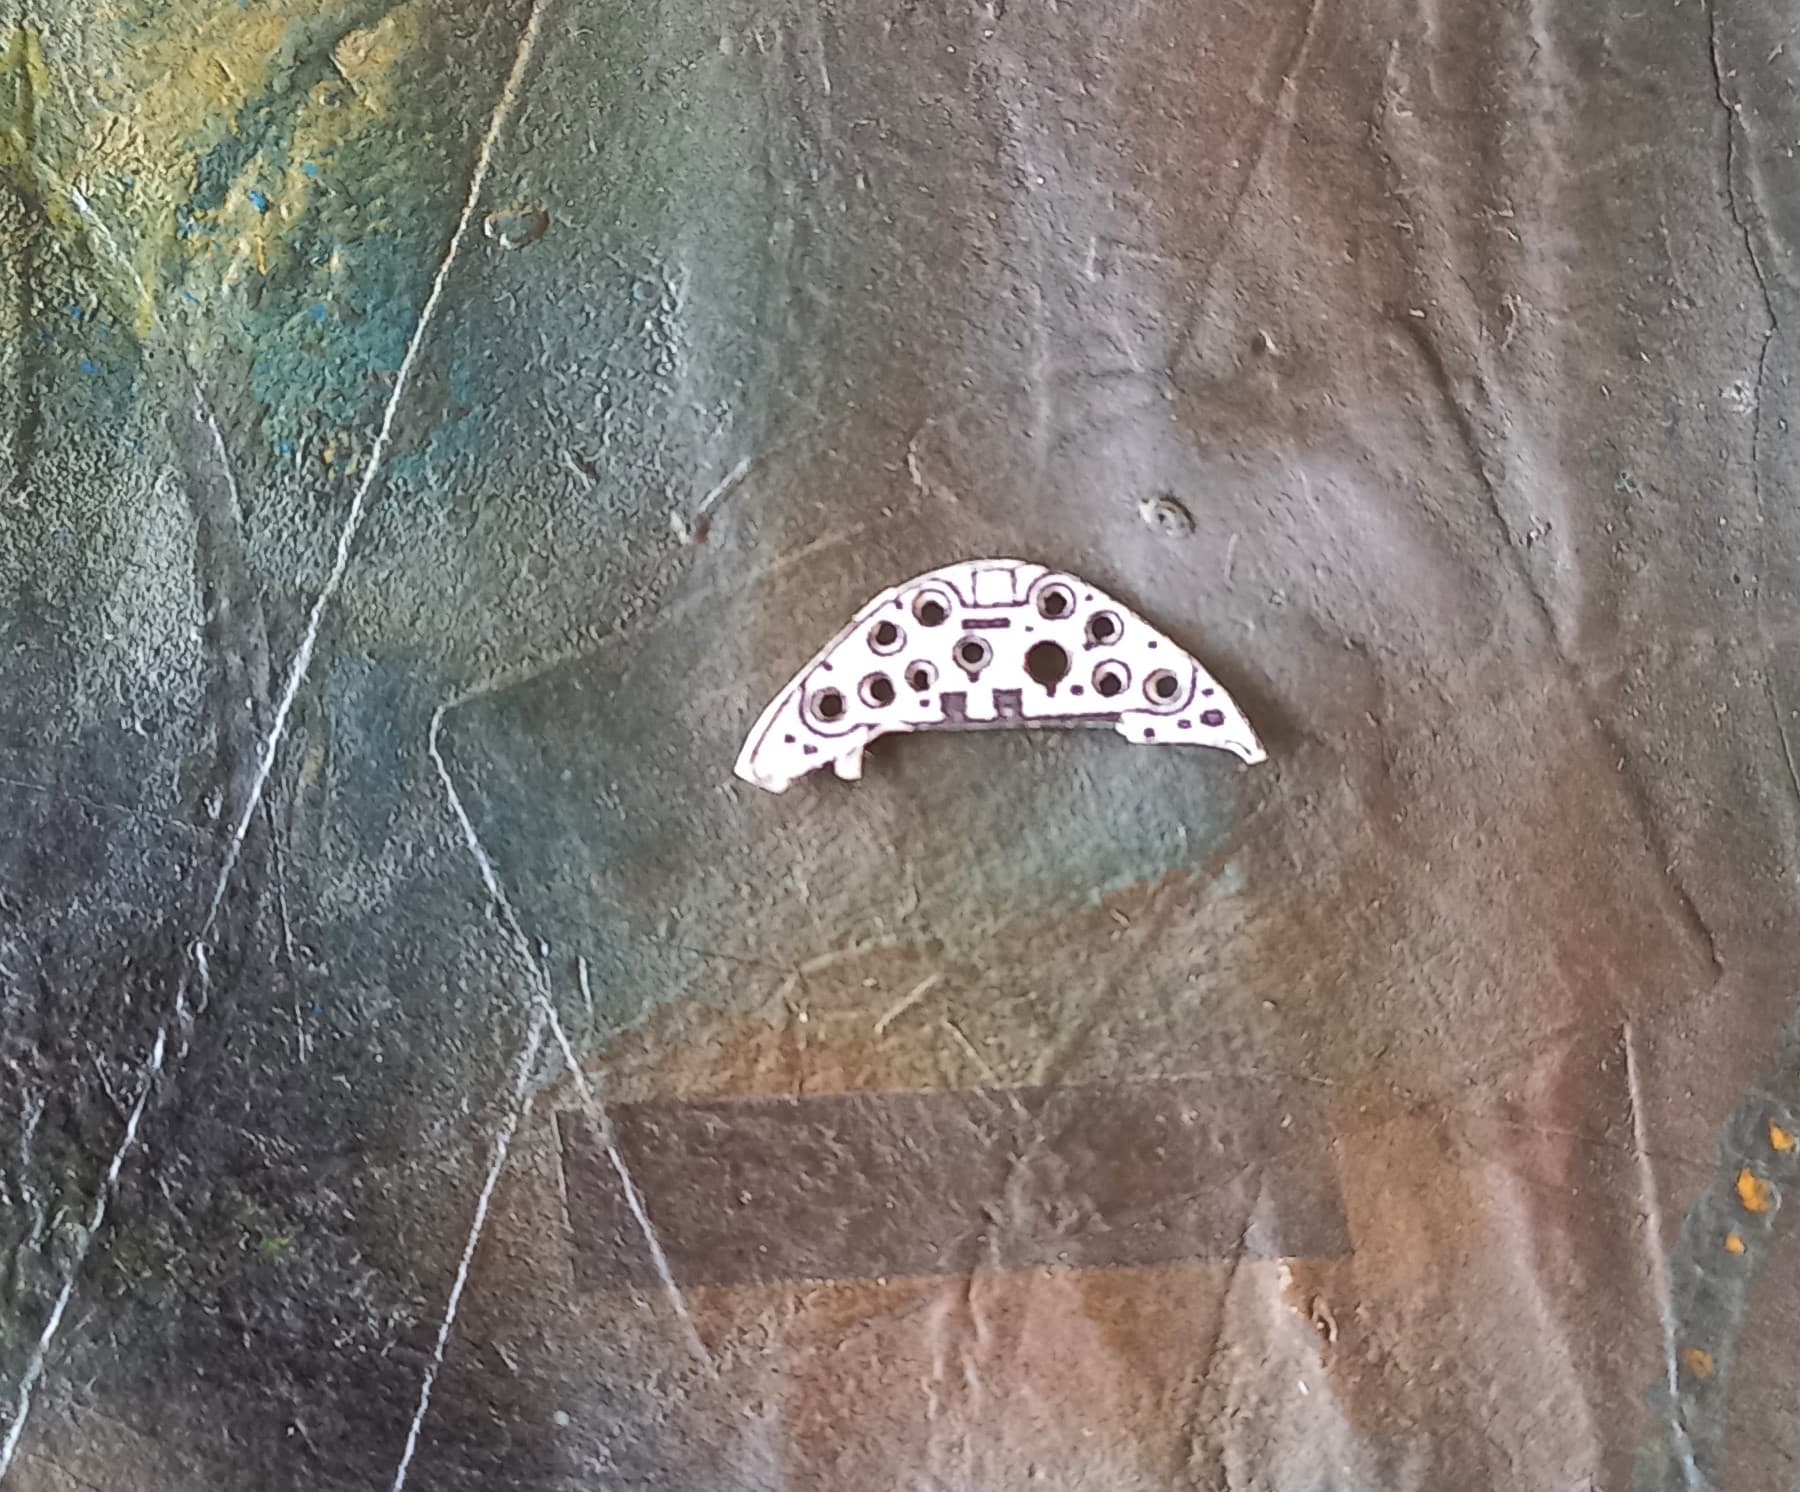
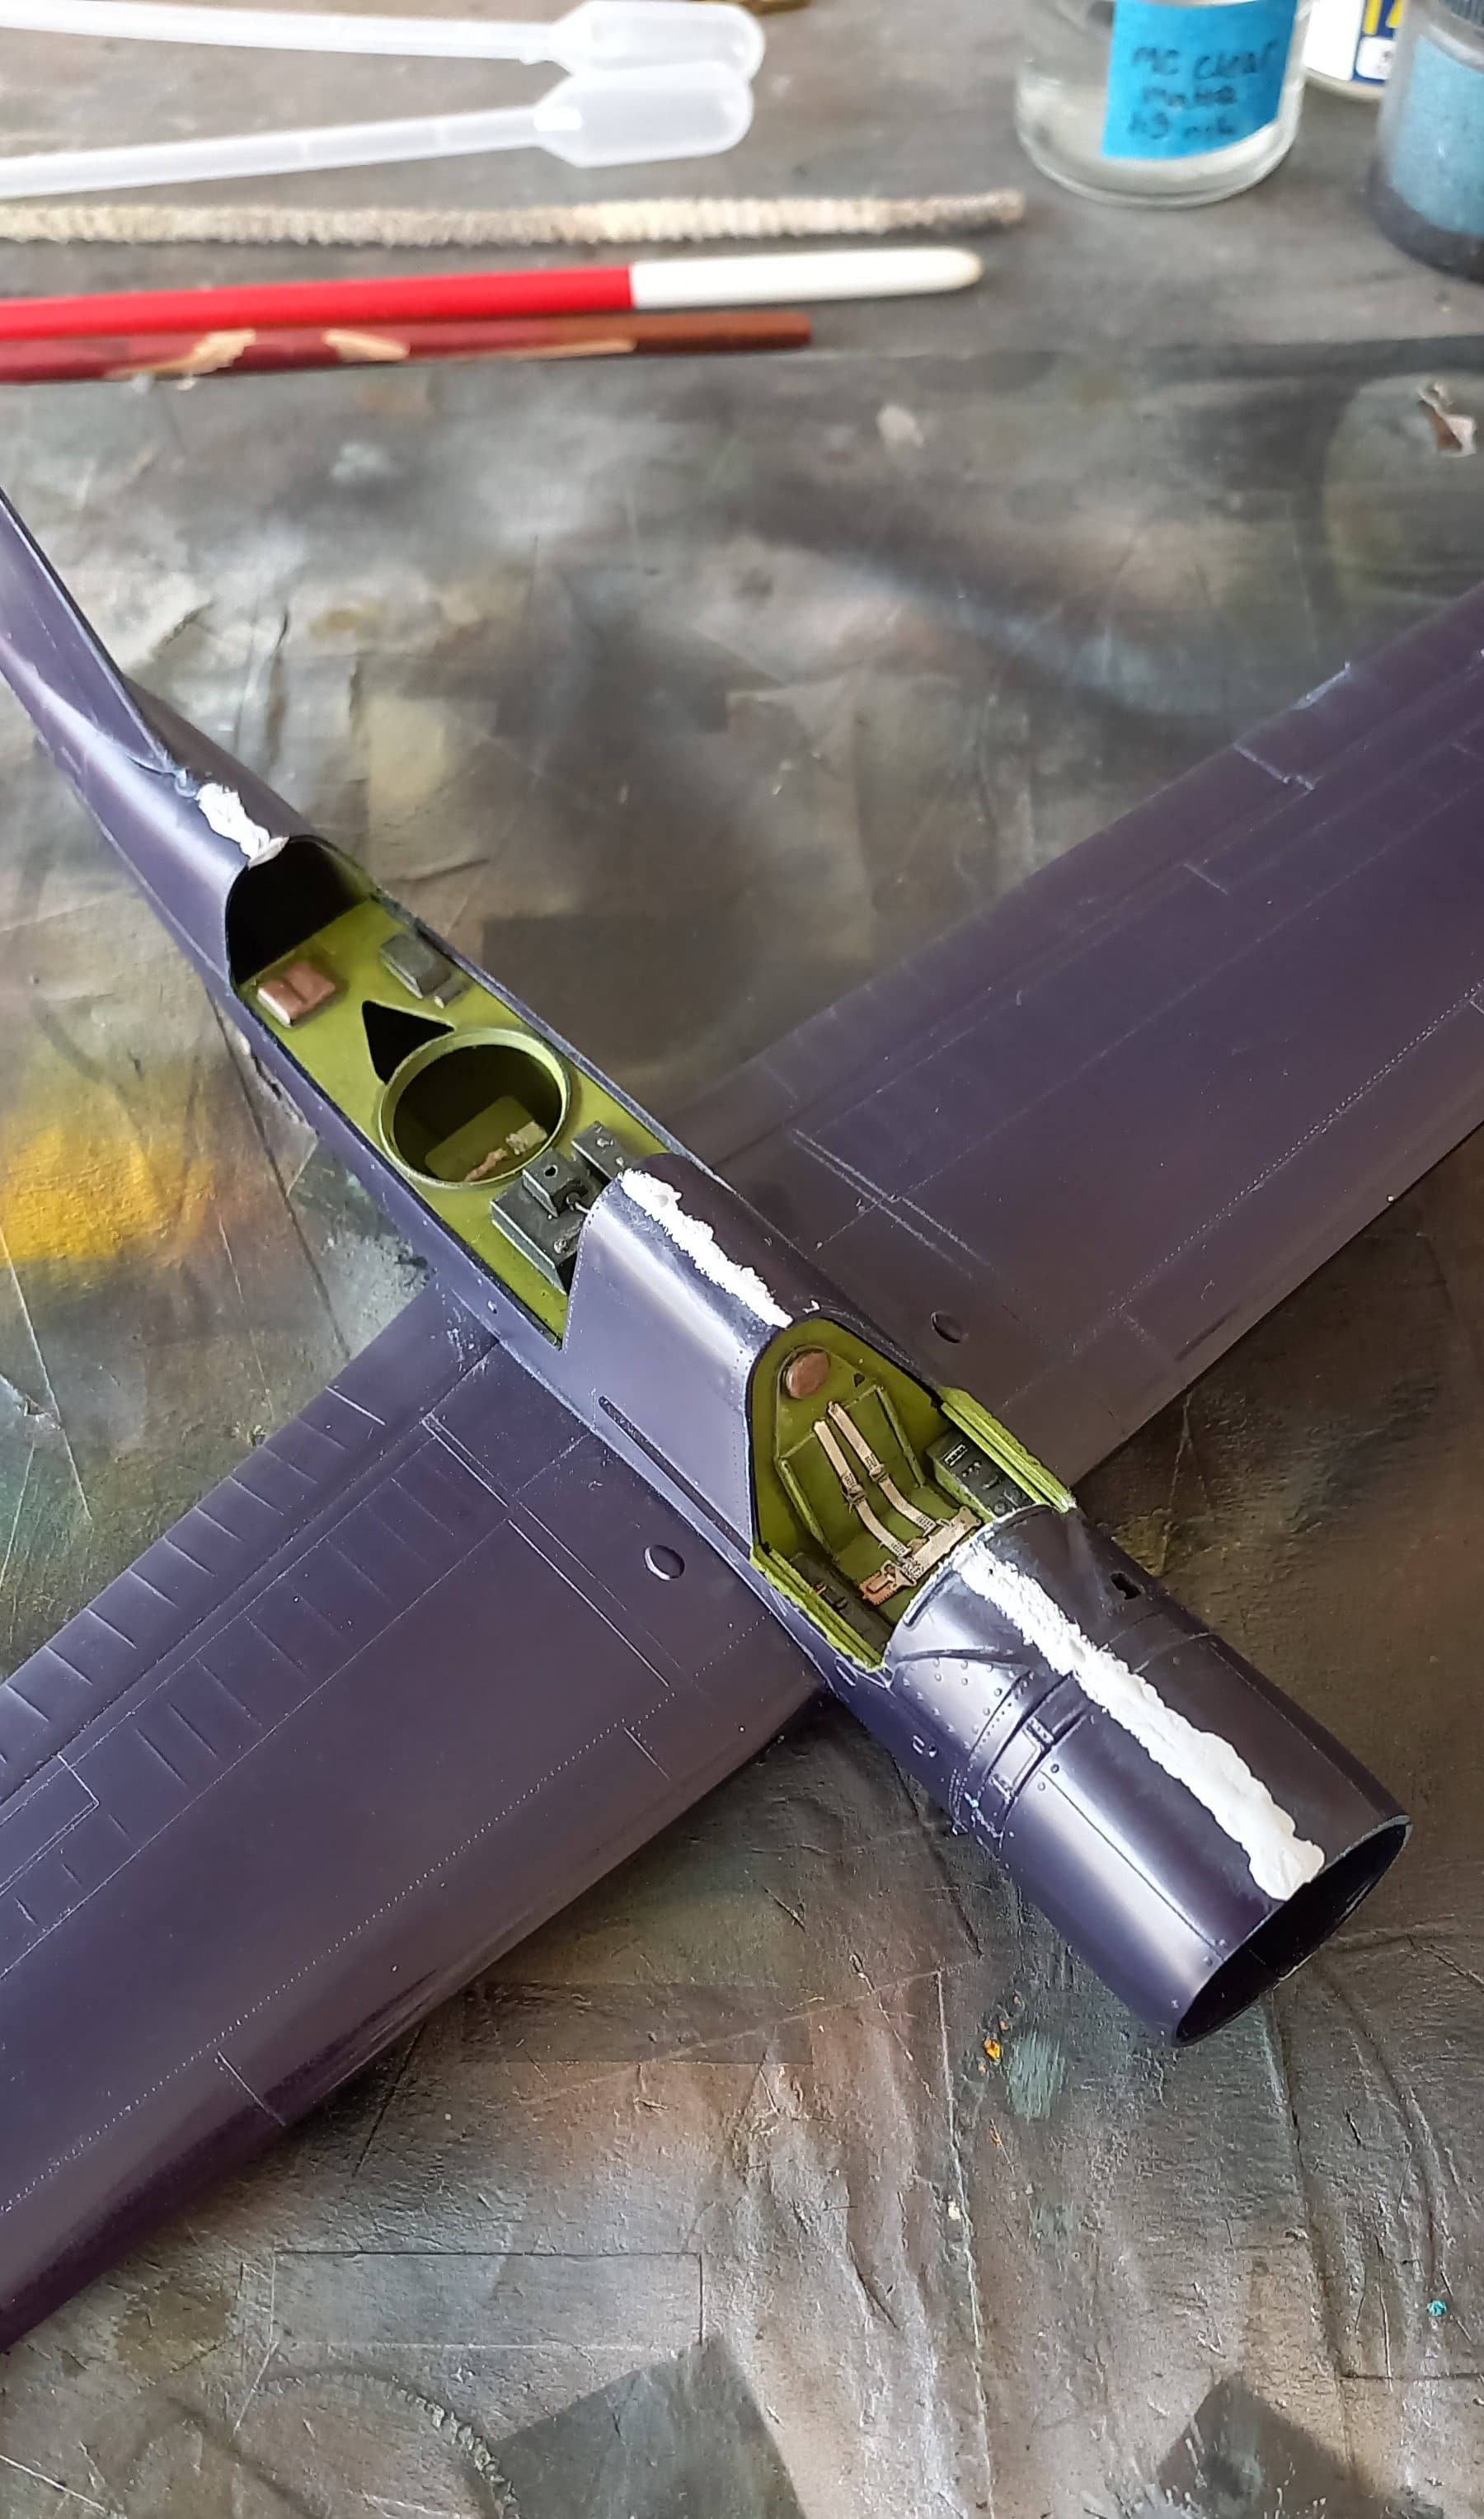
With my eyes recovered, I dove back onto the instrument panel. I checked my alignment of the holes on the scratched panel to the copy of the instrument panel decal, and found things looked pretty good!
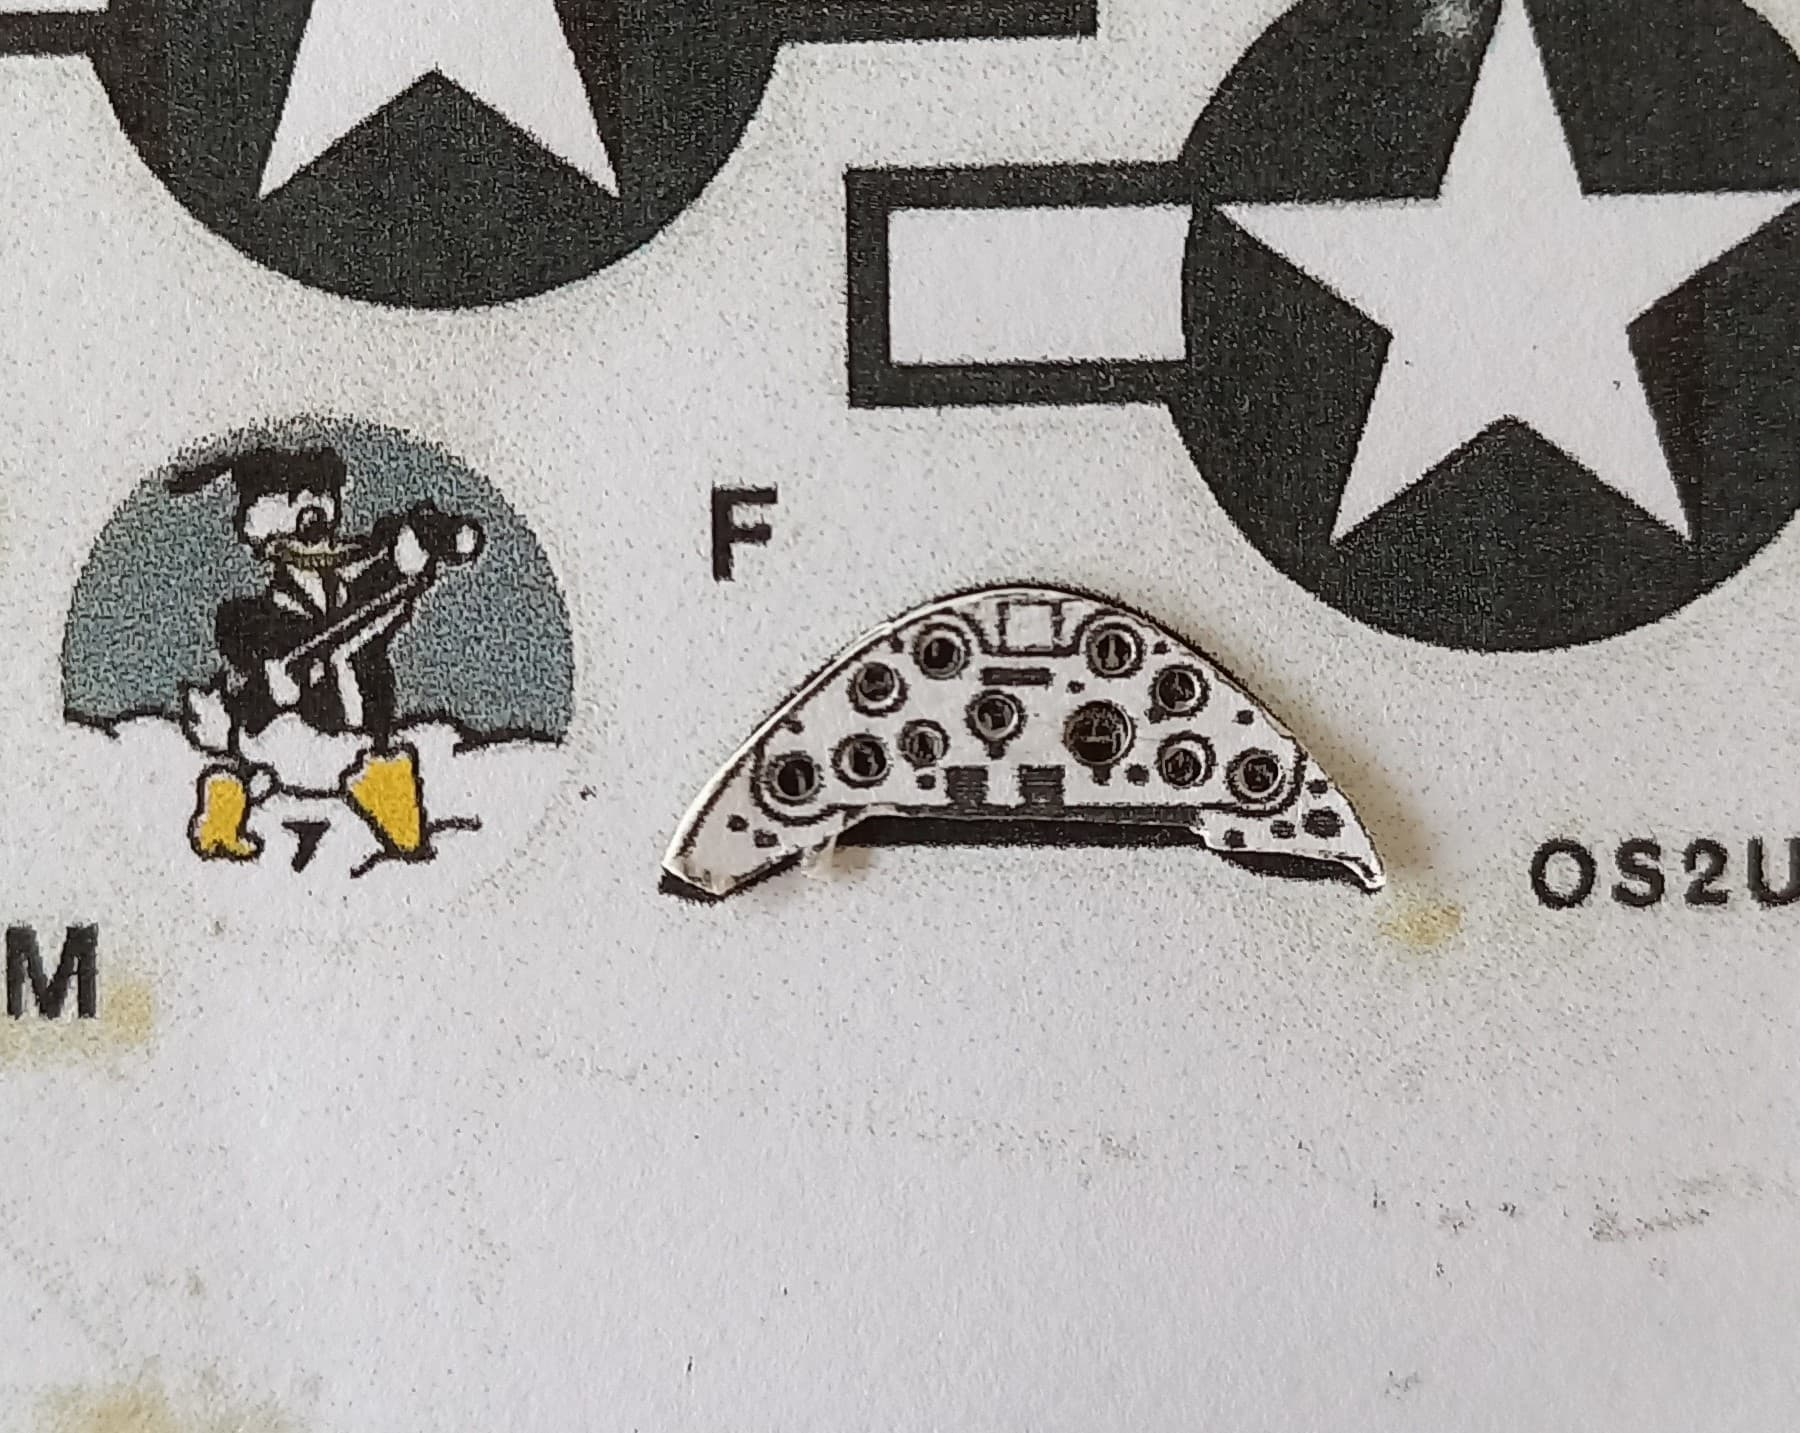
I washed off the photocopy template, and compared to the PE part, I felt that it was rather bland and could be touched up a bit. I used the smallest of blanks from punching the holes to act as buttons, and also used some bezels to give the instrument holes some depth, the bezels come from an old Airscale set.

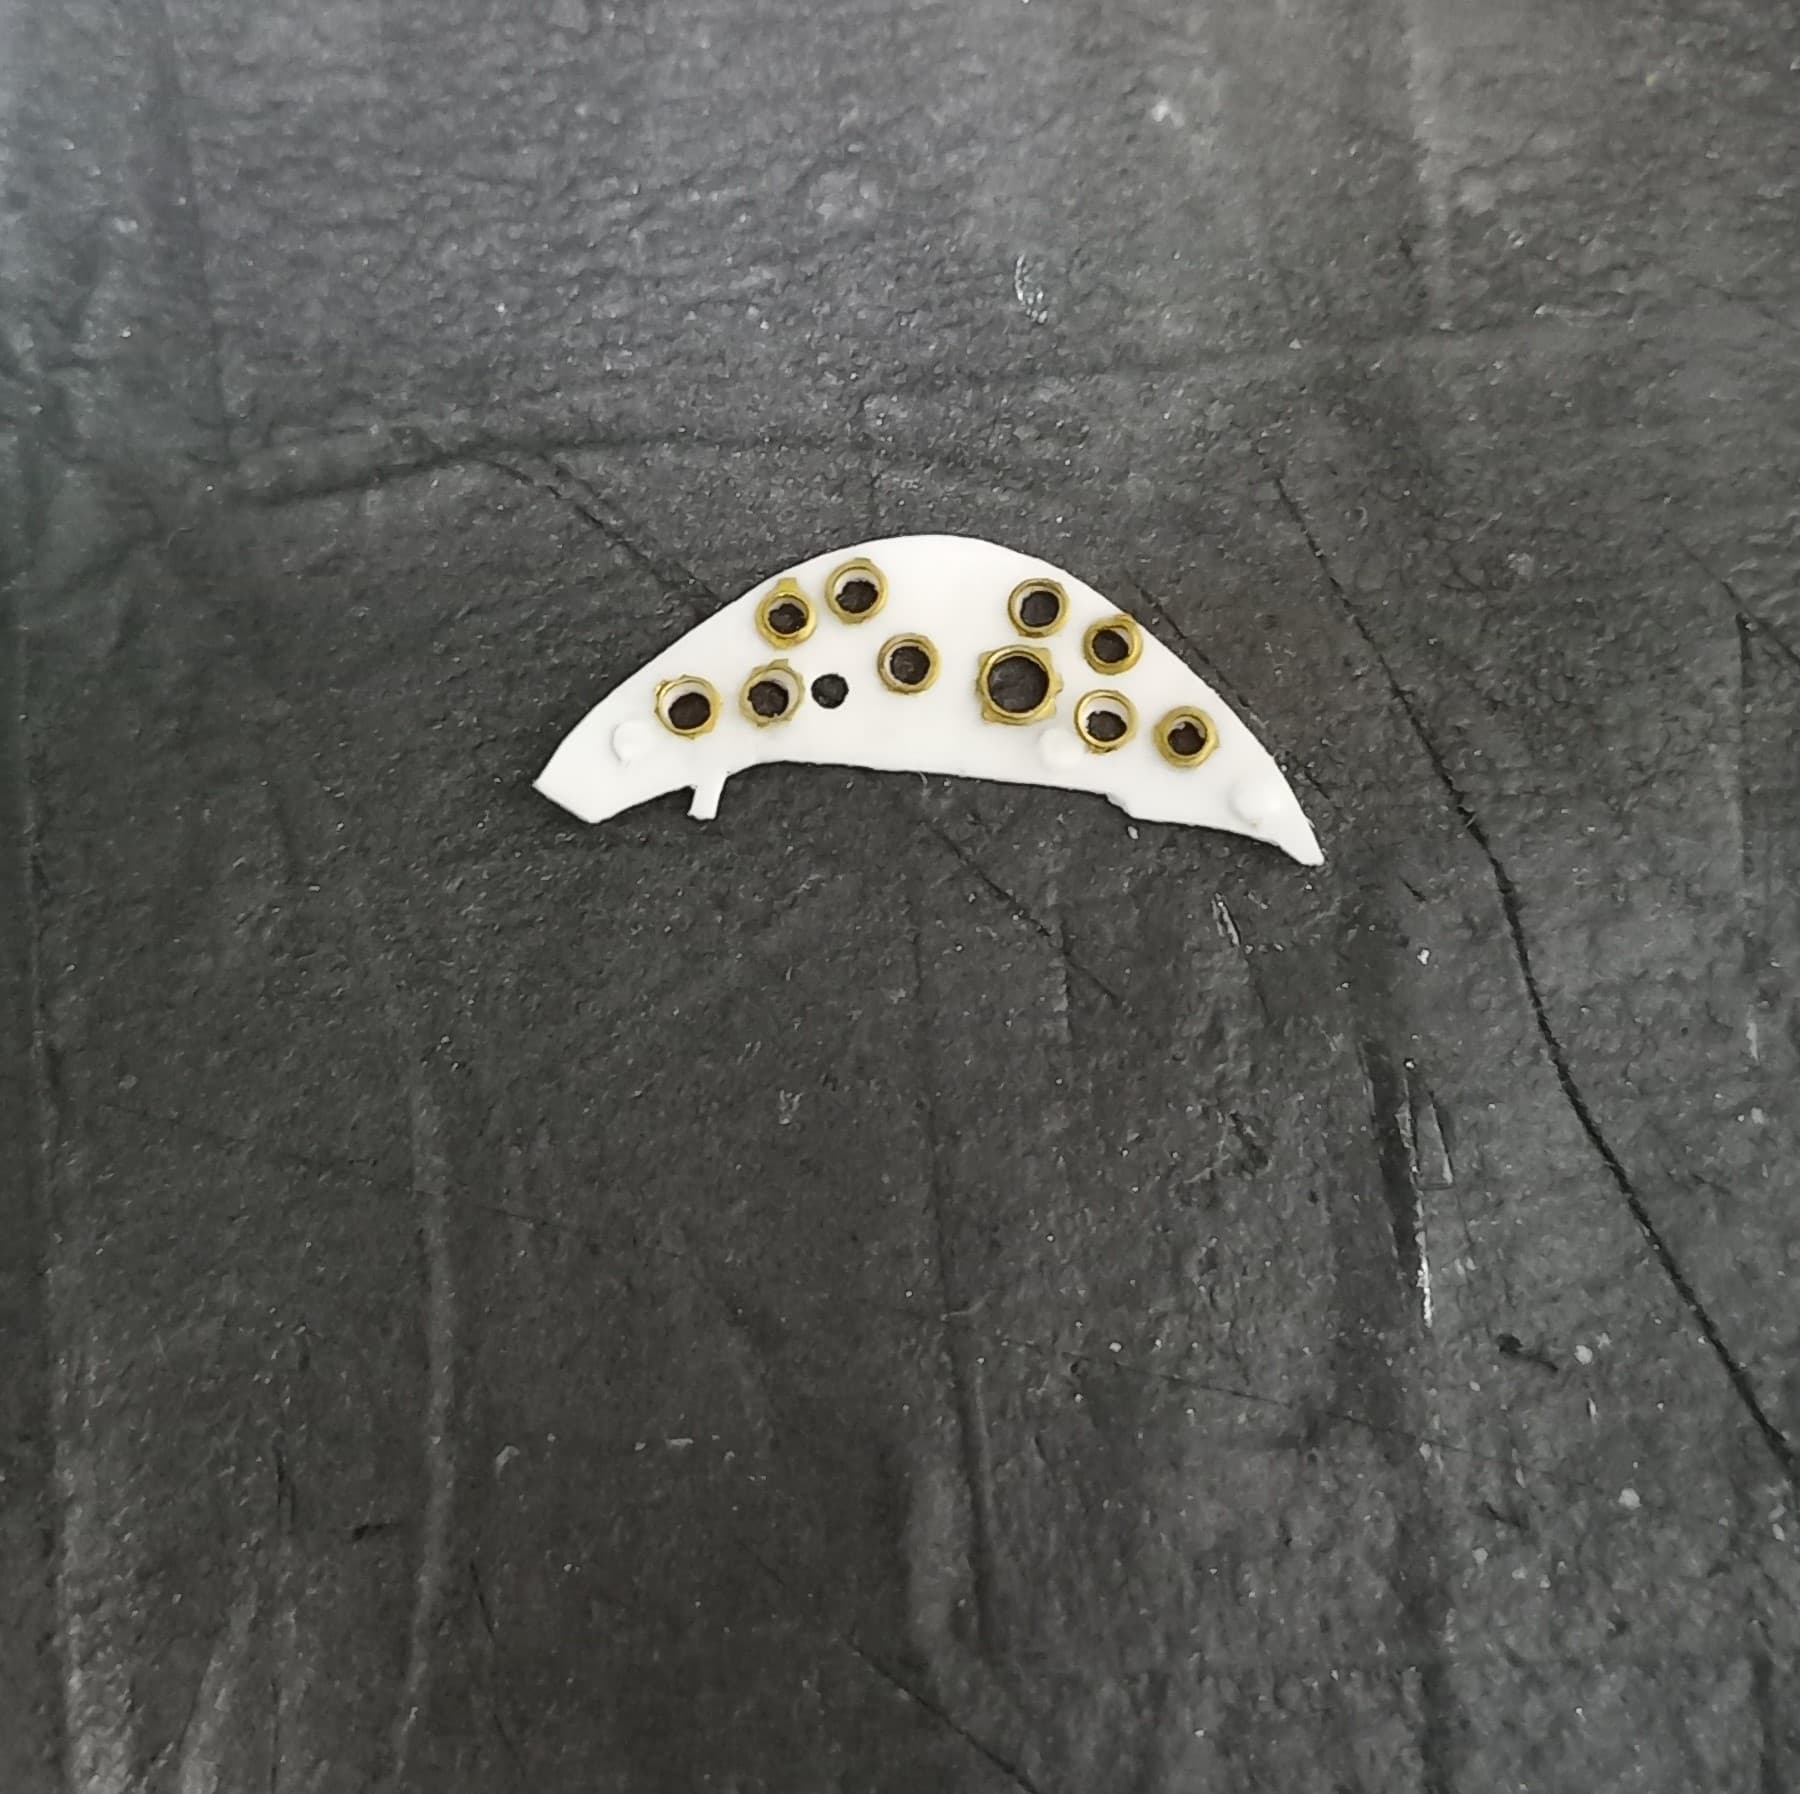
Feeling pretty good about things, it was time to paint the panel (Mr. Surfacer 1500 black diluted 1:4), the photocopy of the instrument panel received 3 coats of Future floor wax, and was cut to shape, The painted panel had a couple of placards added from the decal dungeon. Everything was then glued together, and I must admit it certainly comes close to what I envisioned.
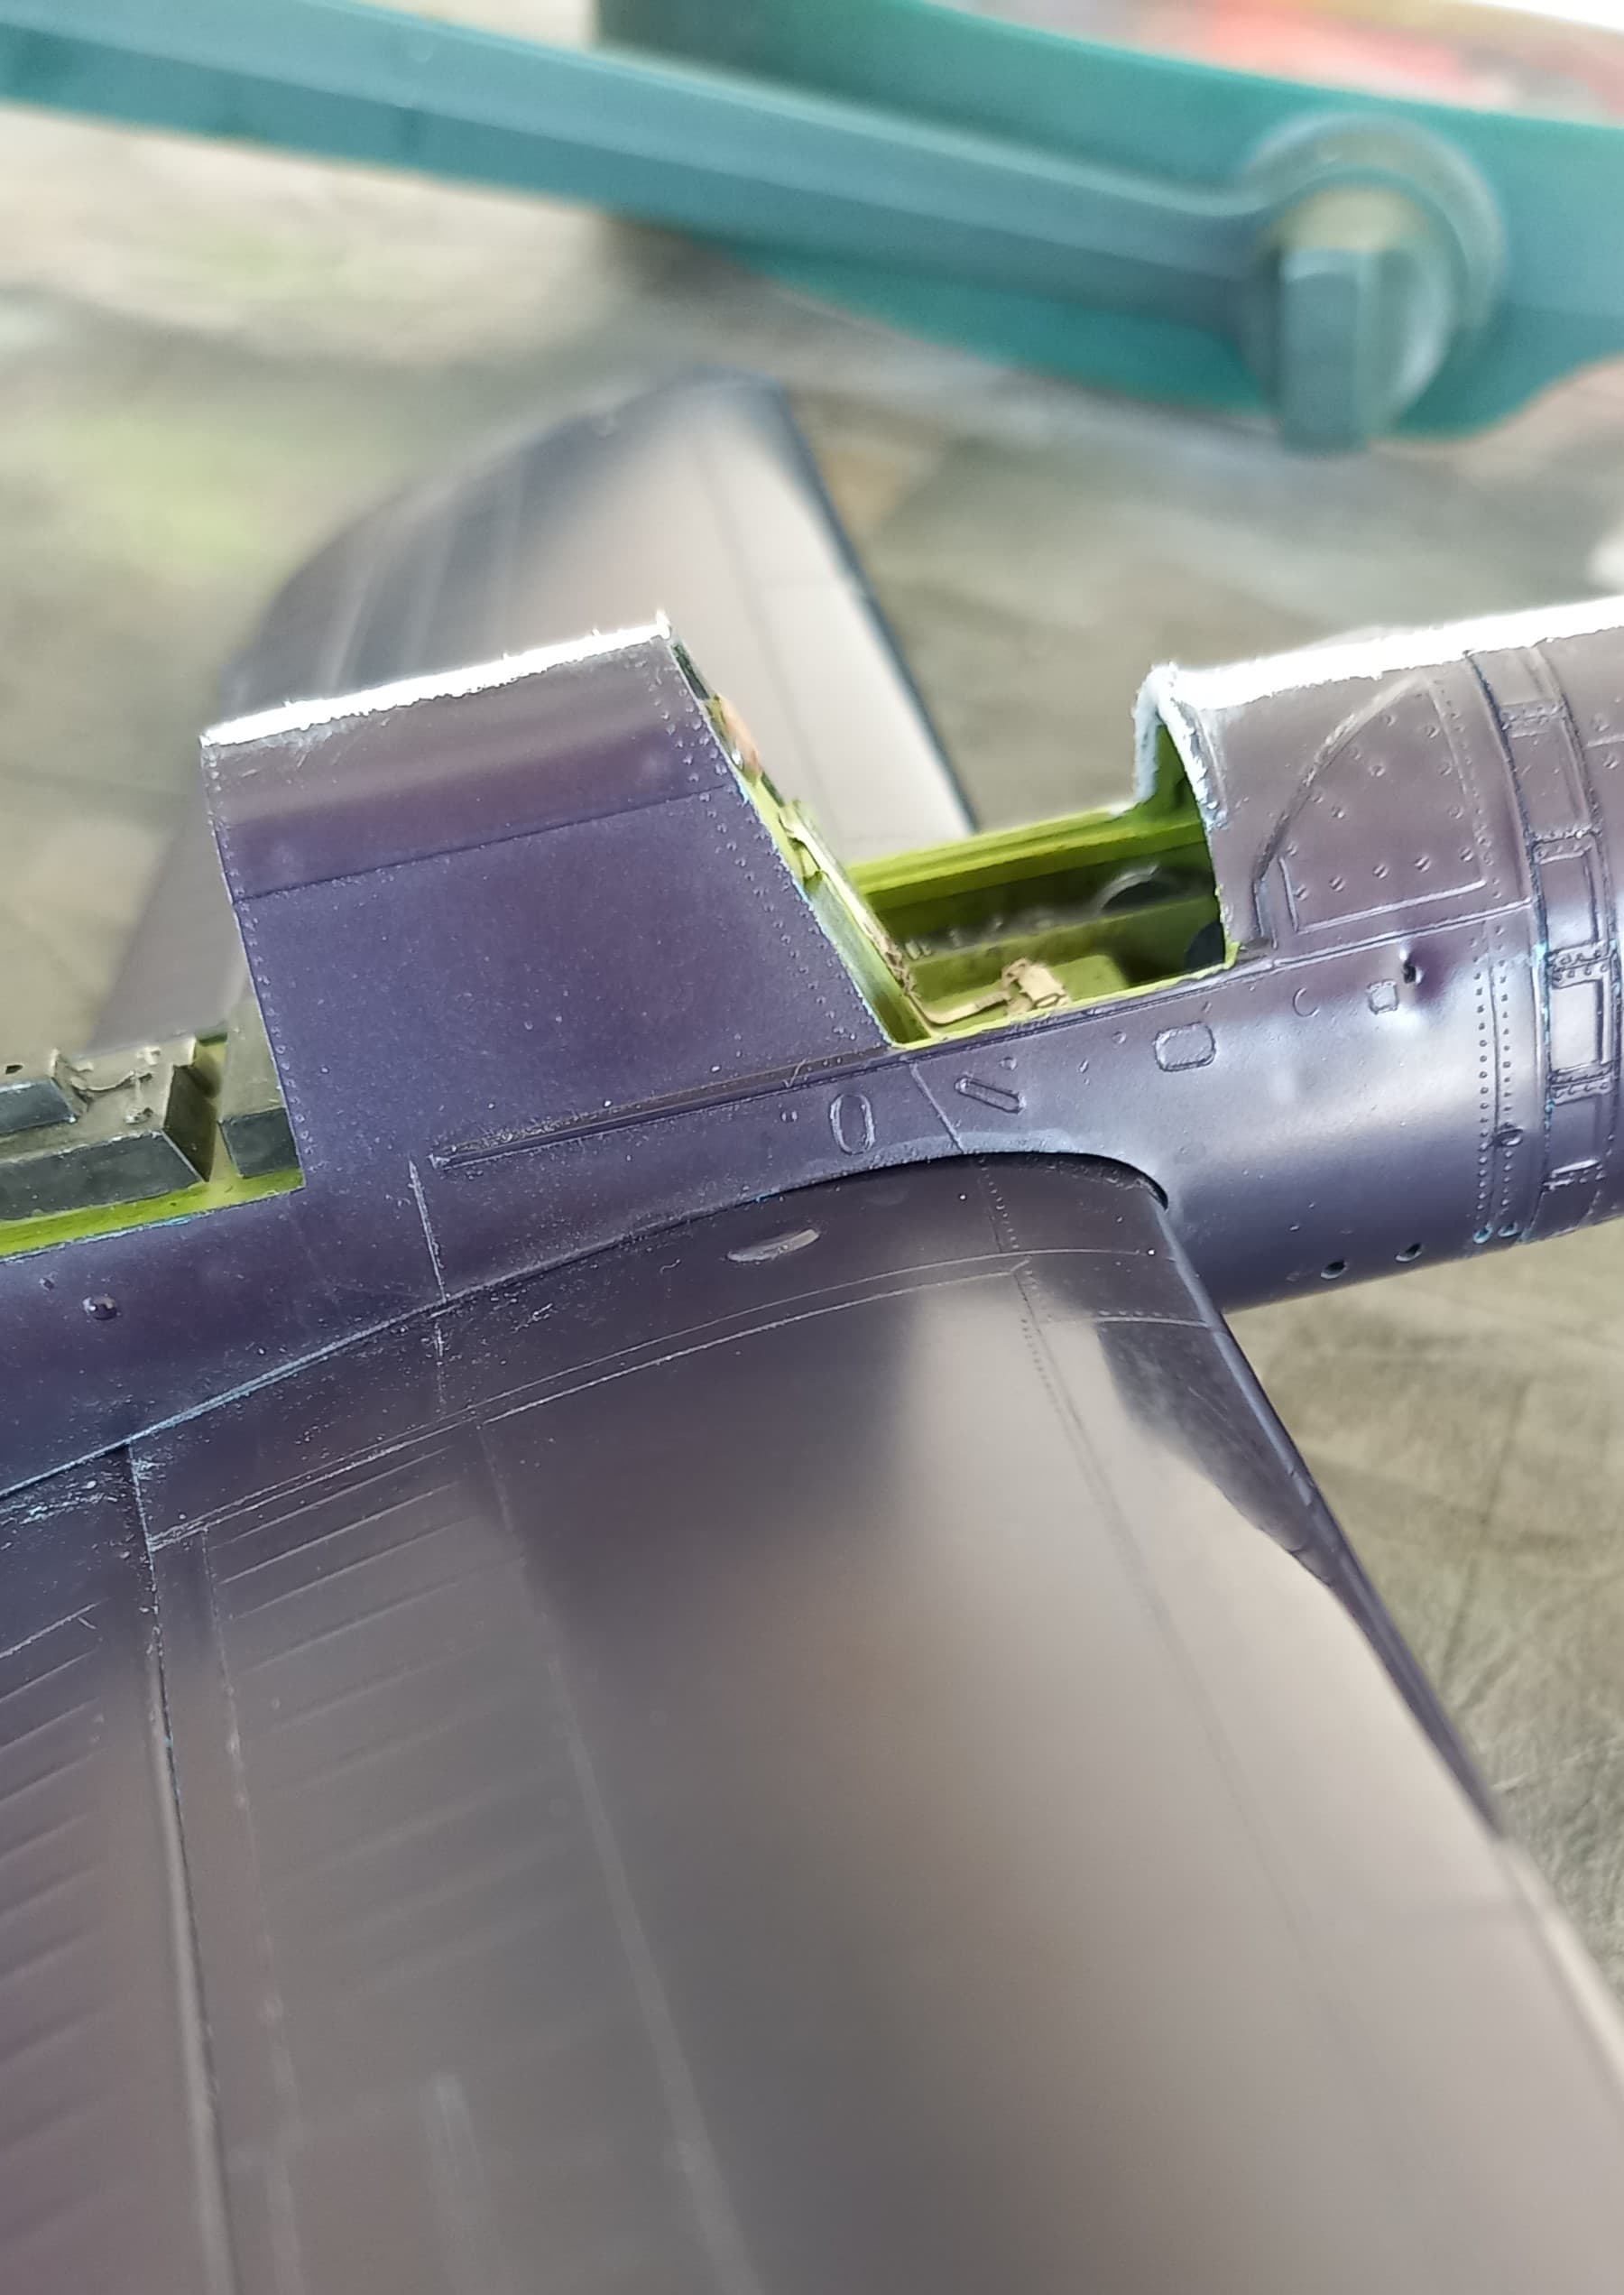
In keeping with the cockpit, I sanded off the pilot seat belts and replaced them with an old set of Eduard belts, painted the radio and assorted items in the rear, gave a drybrushing of silver and a wash of burnt umber. Satisfied, these parts were test fitted, and finally committed with glue to the right fuselage half.
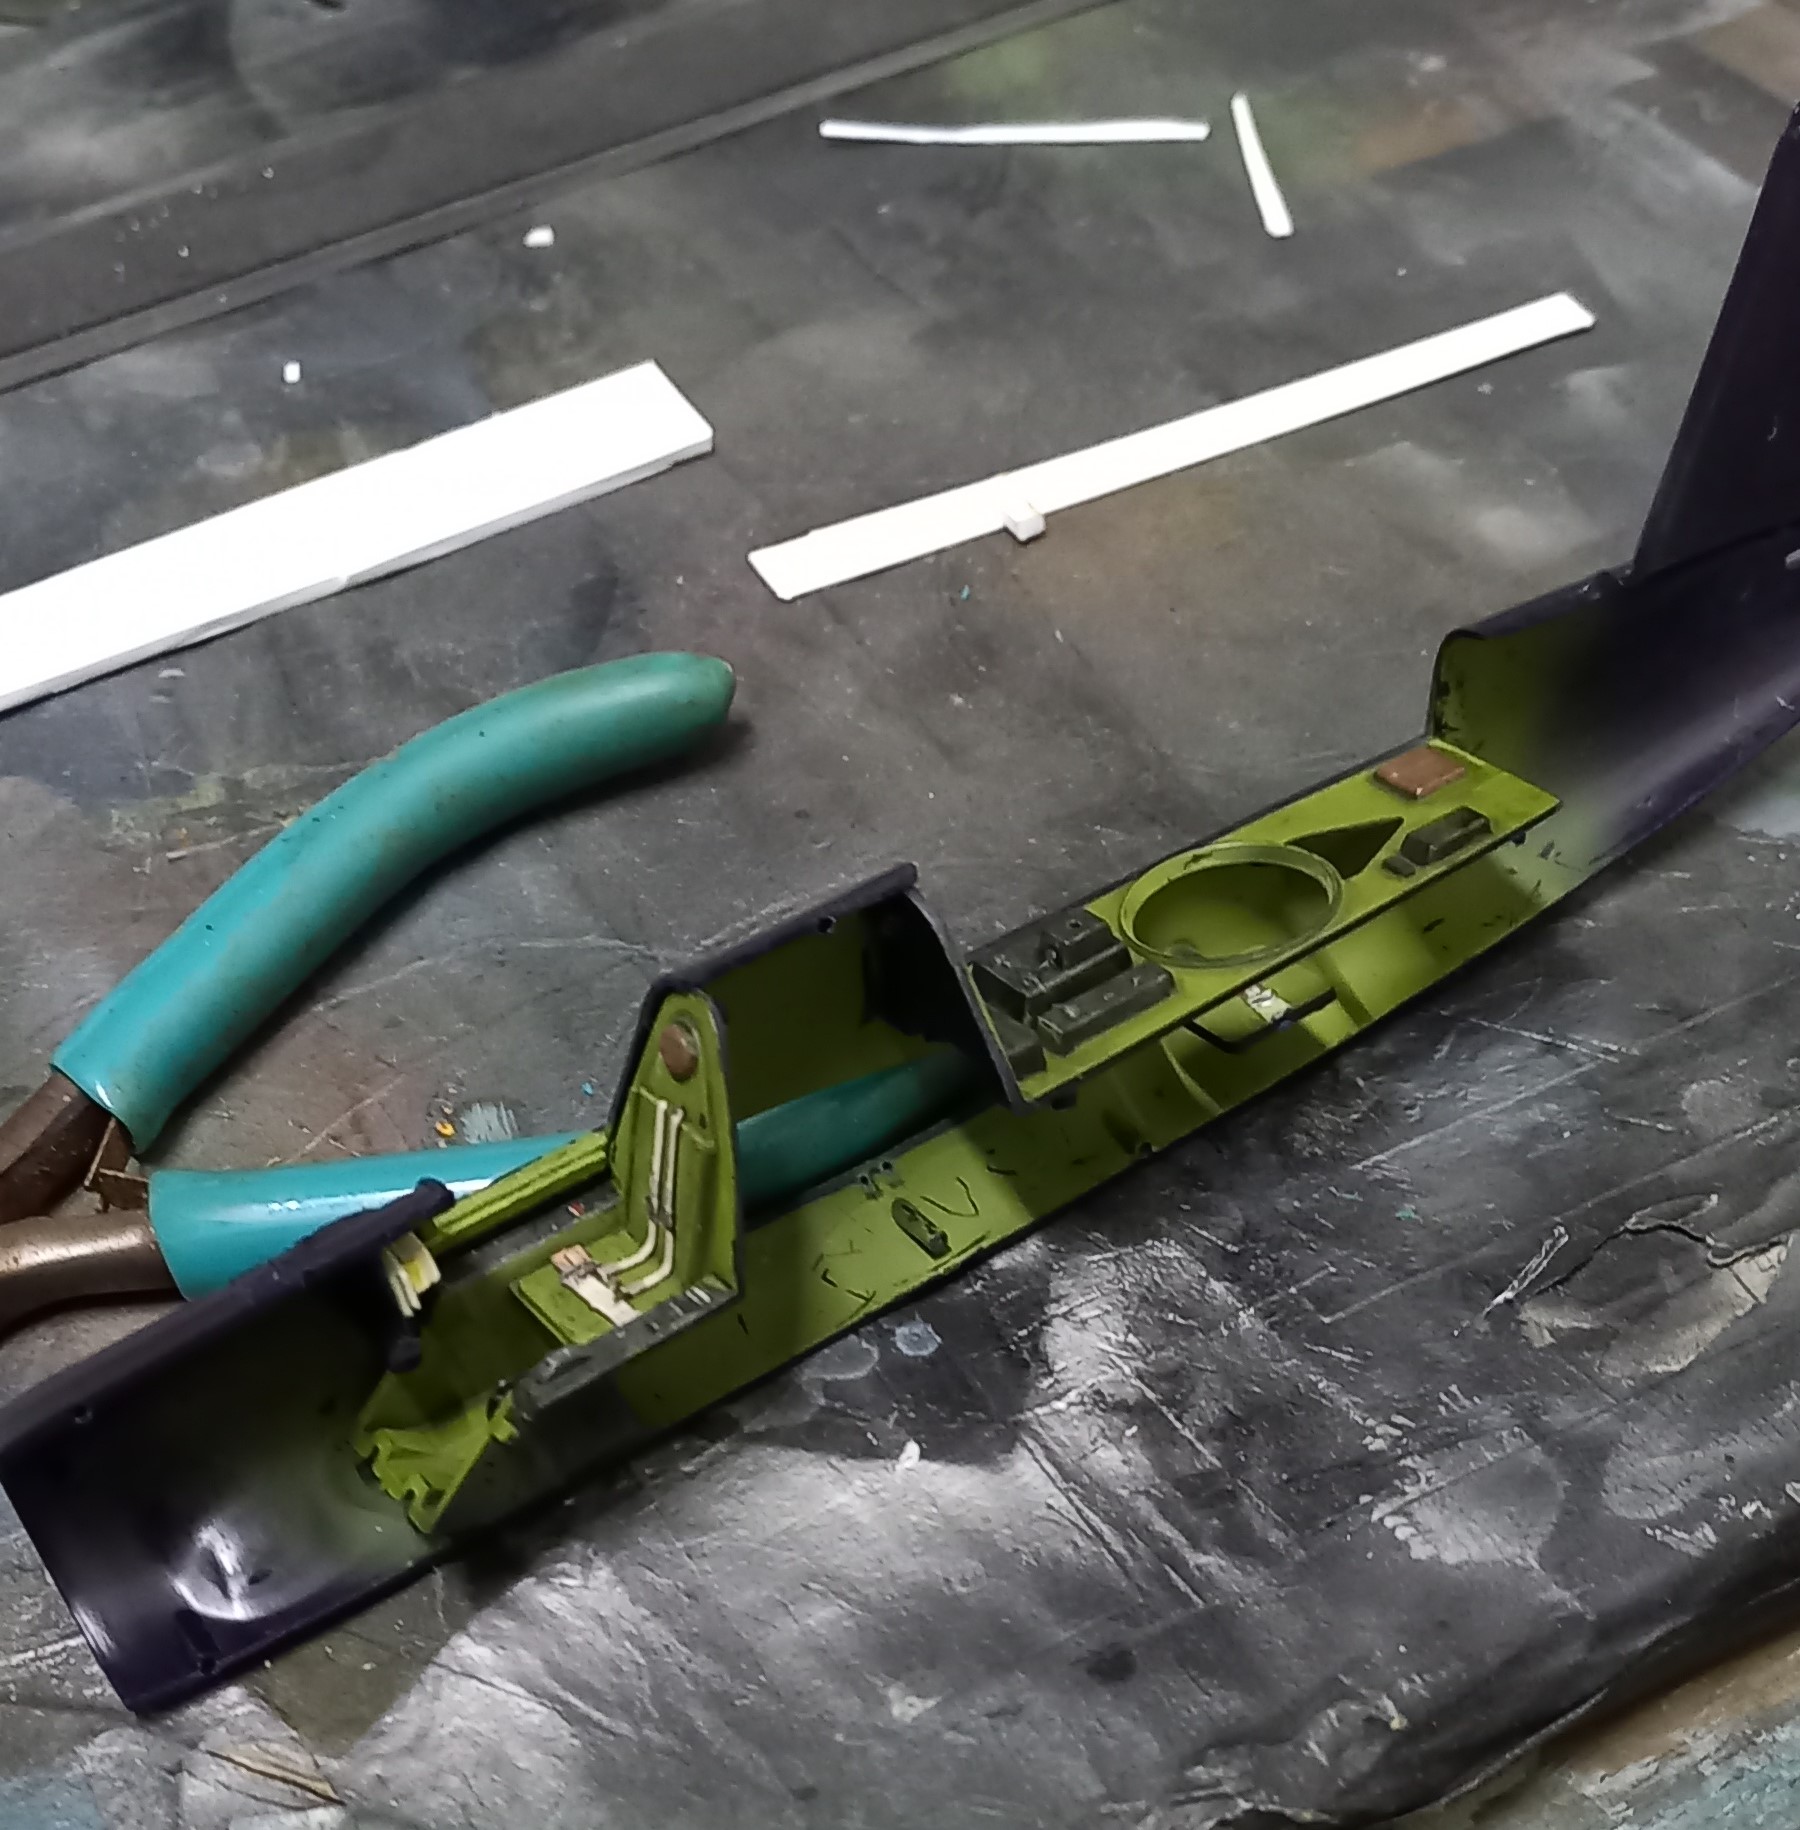
Closing the fuselage on this kit is a bit odd. The Kingfisher wings are mid-fuselage, and Monogram engineered the assembly such that the wings are inserted into the right half prior to closing the fuselage with the left half. Test fitting is key here to avoid headaches down the line. This all paid off with a pretty good fit!
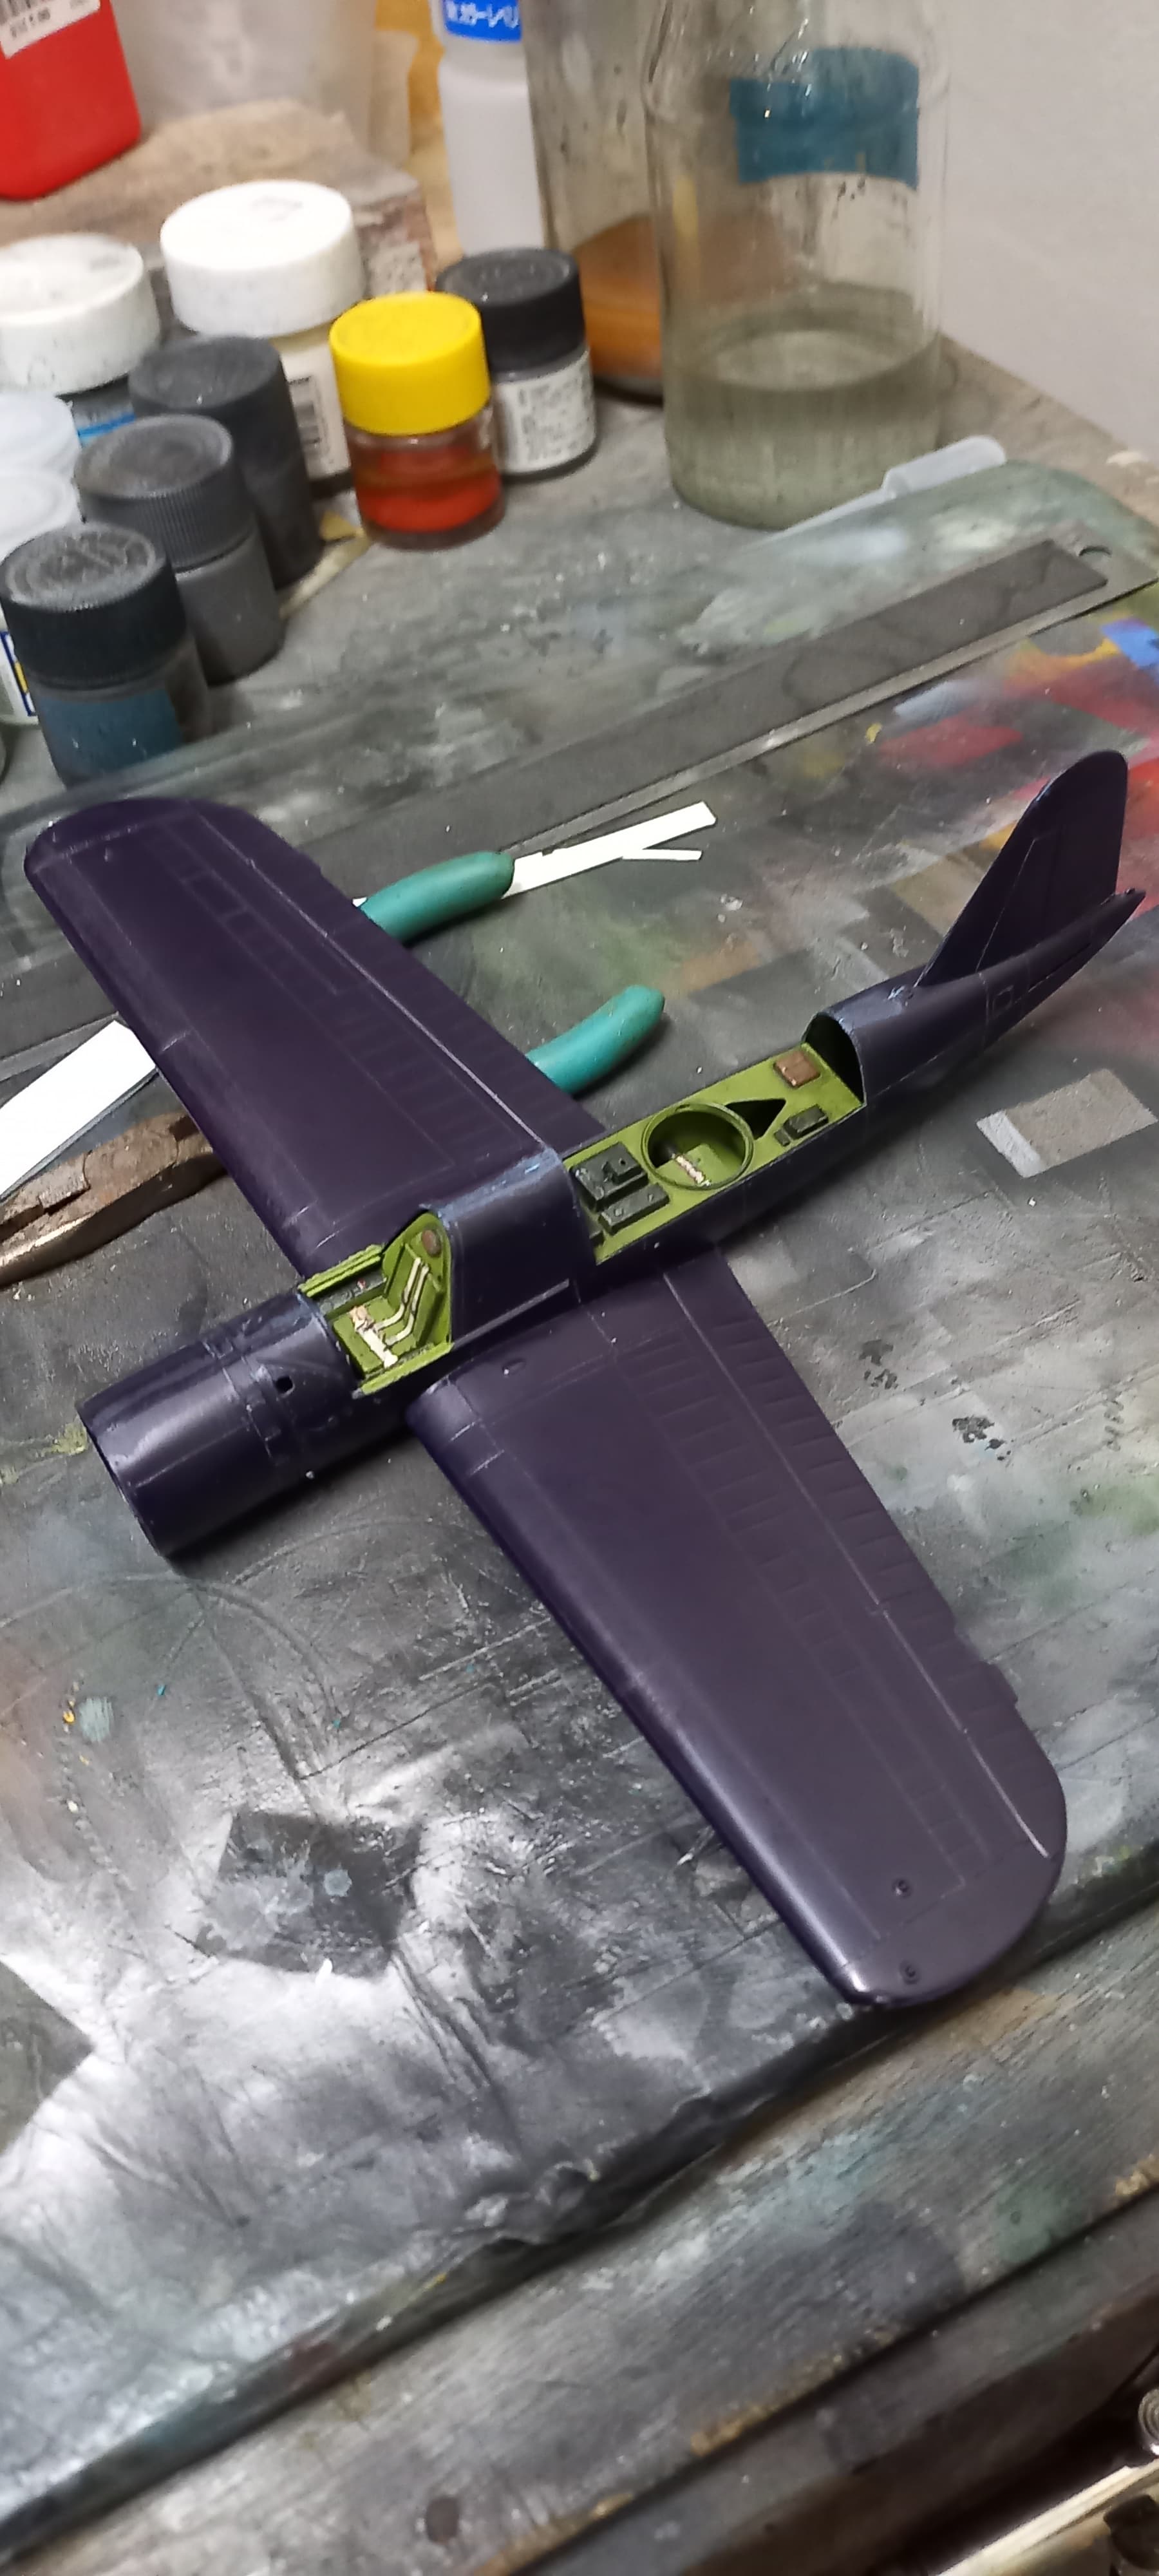
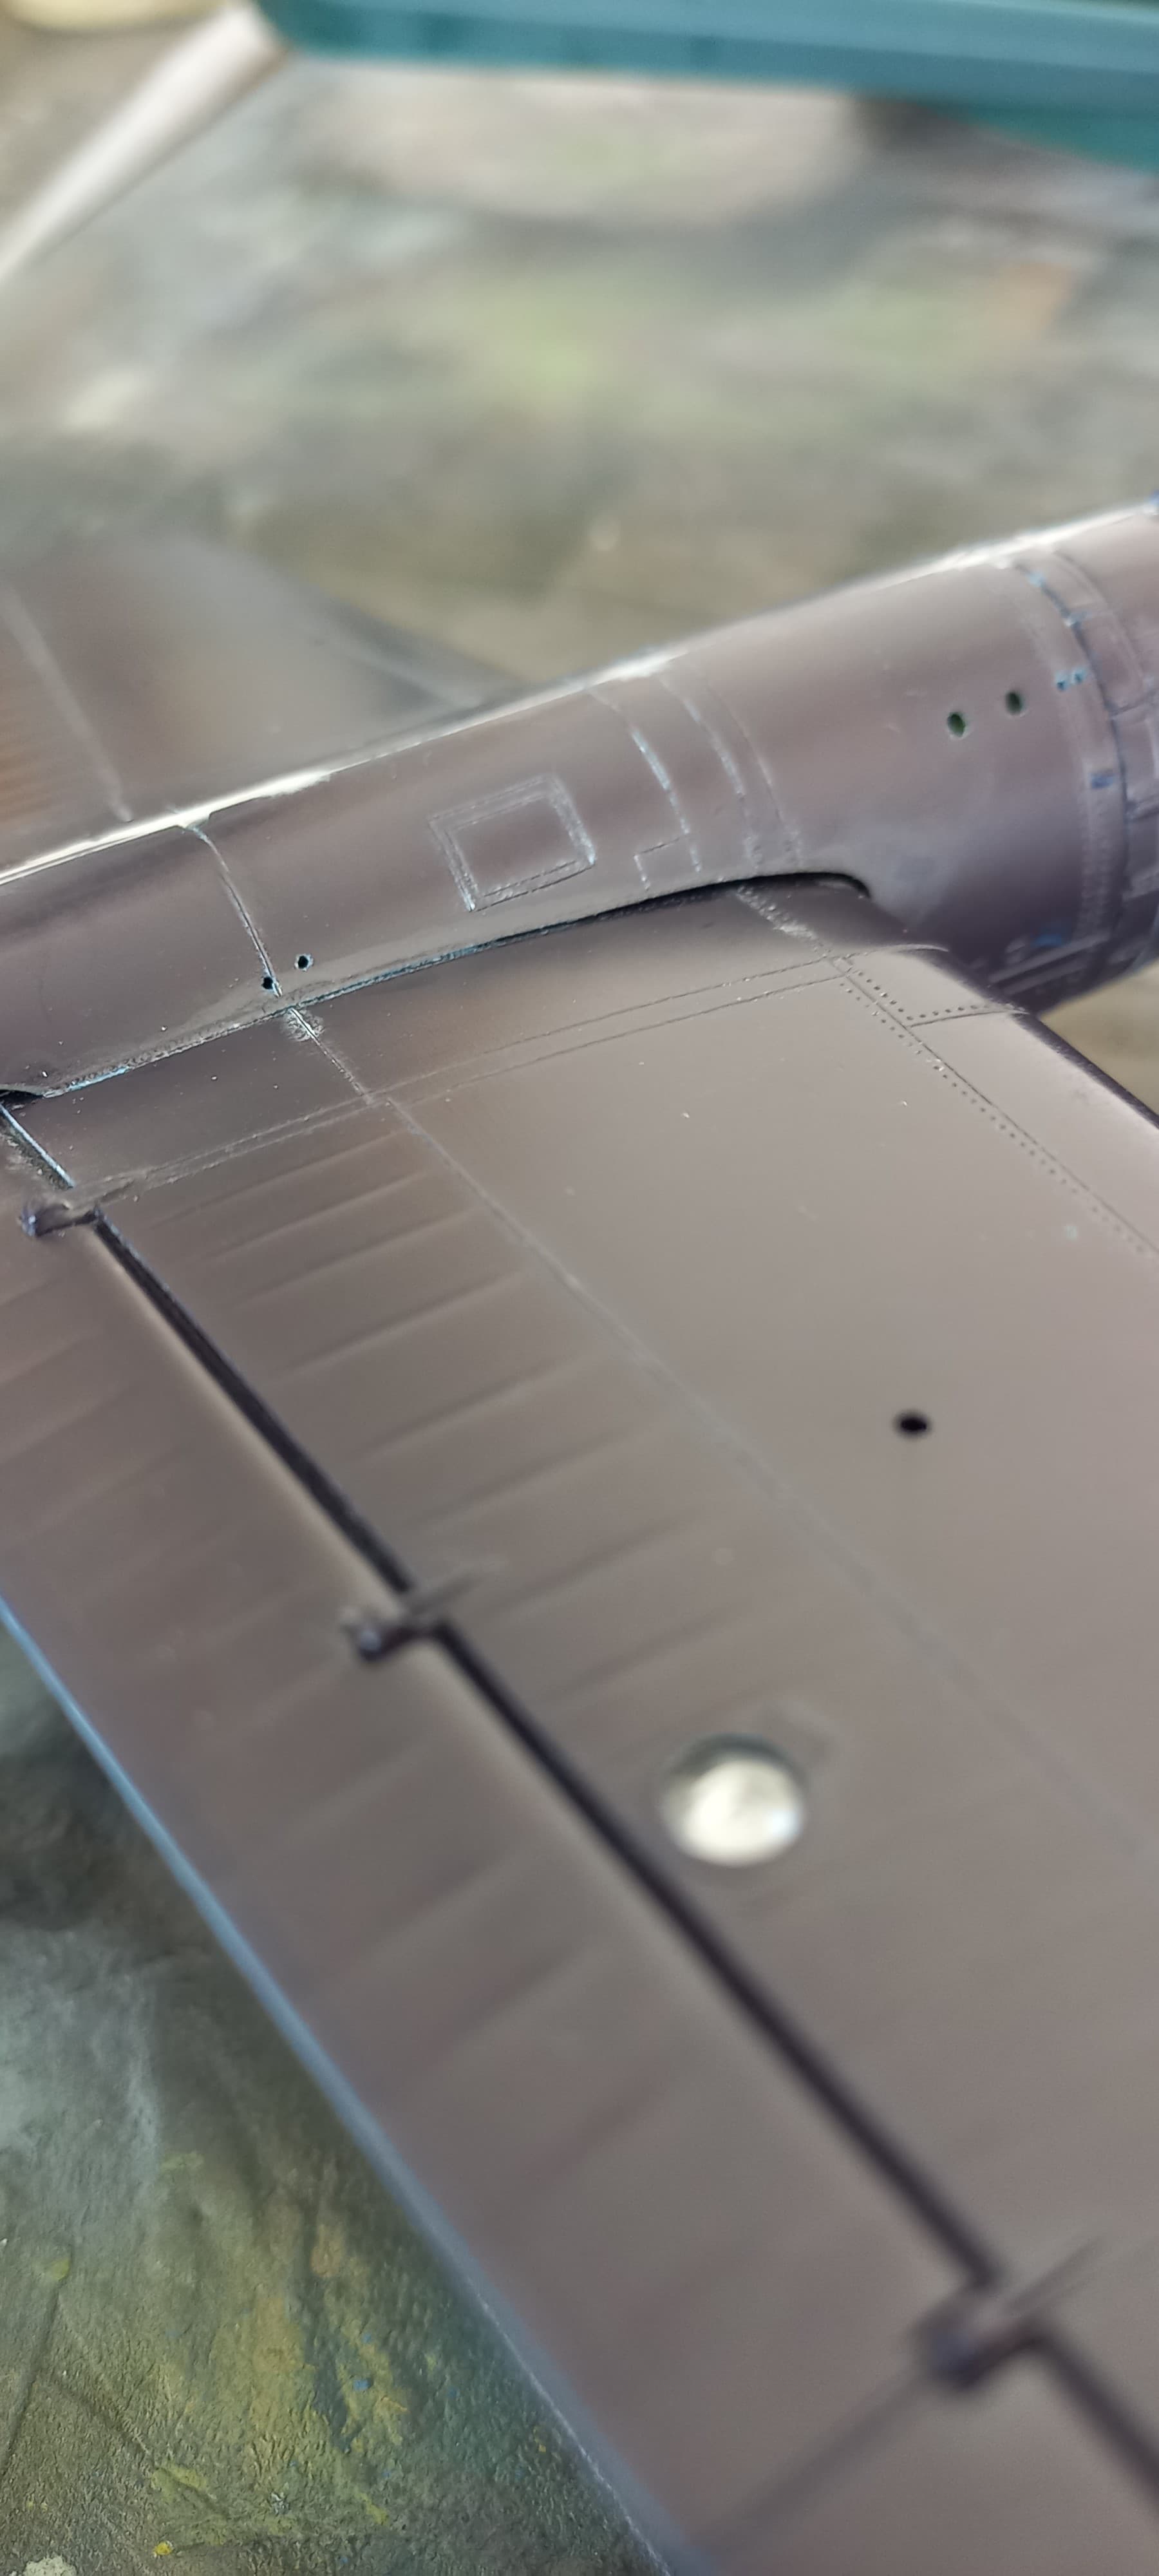
Despite being molded in 1993, these 1967 molds definitely show their wear. While the seams were a bit rough Mr. Surfacer 500 makes light work of them.
One area that needs attention is the gap between the wings and fuselage.
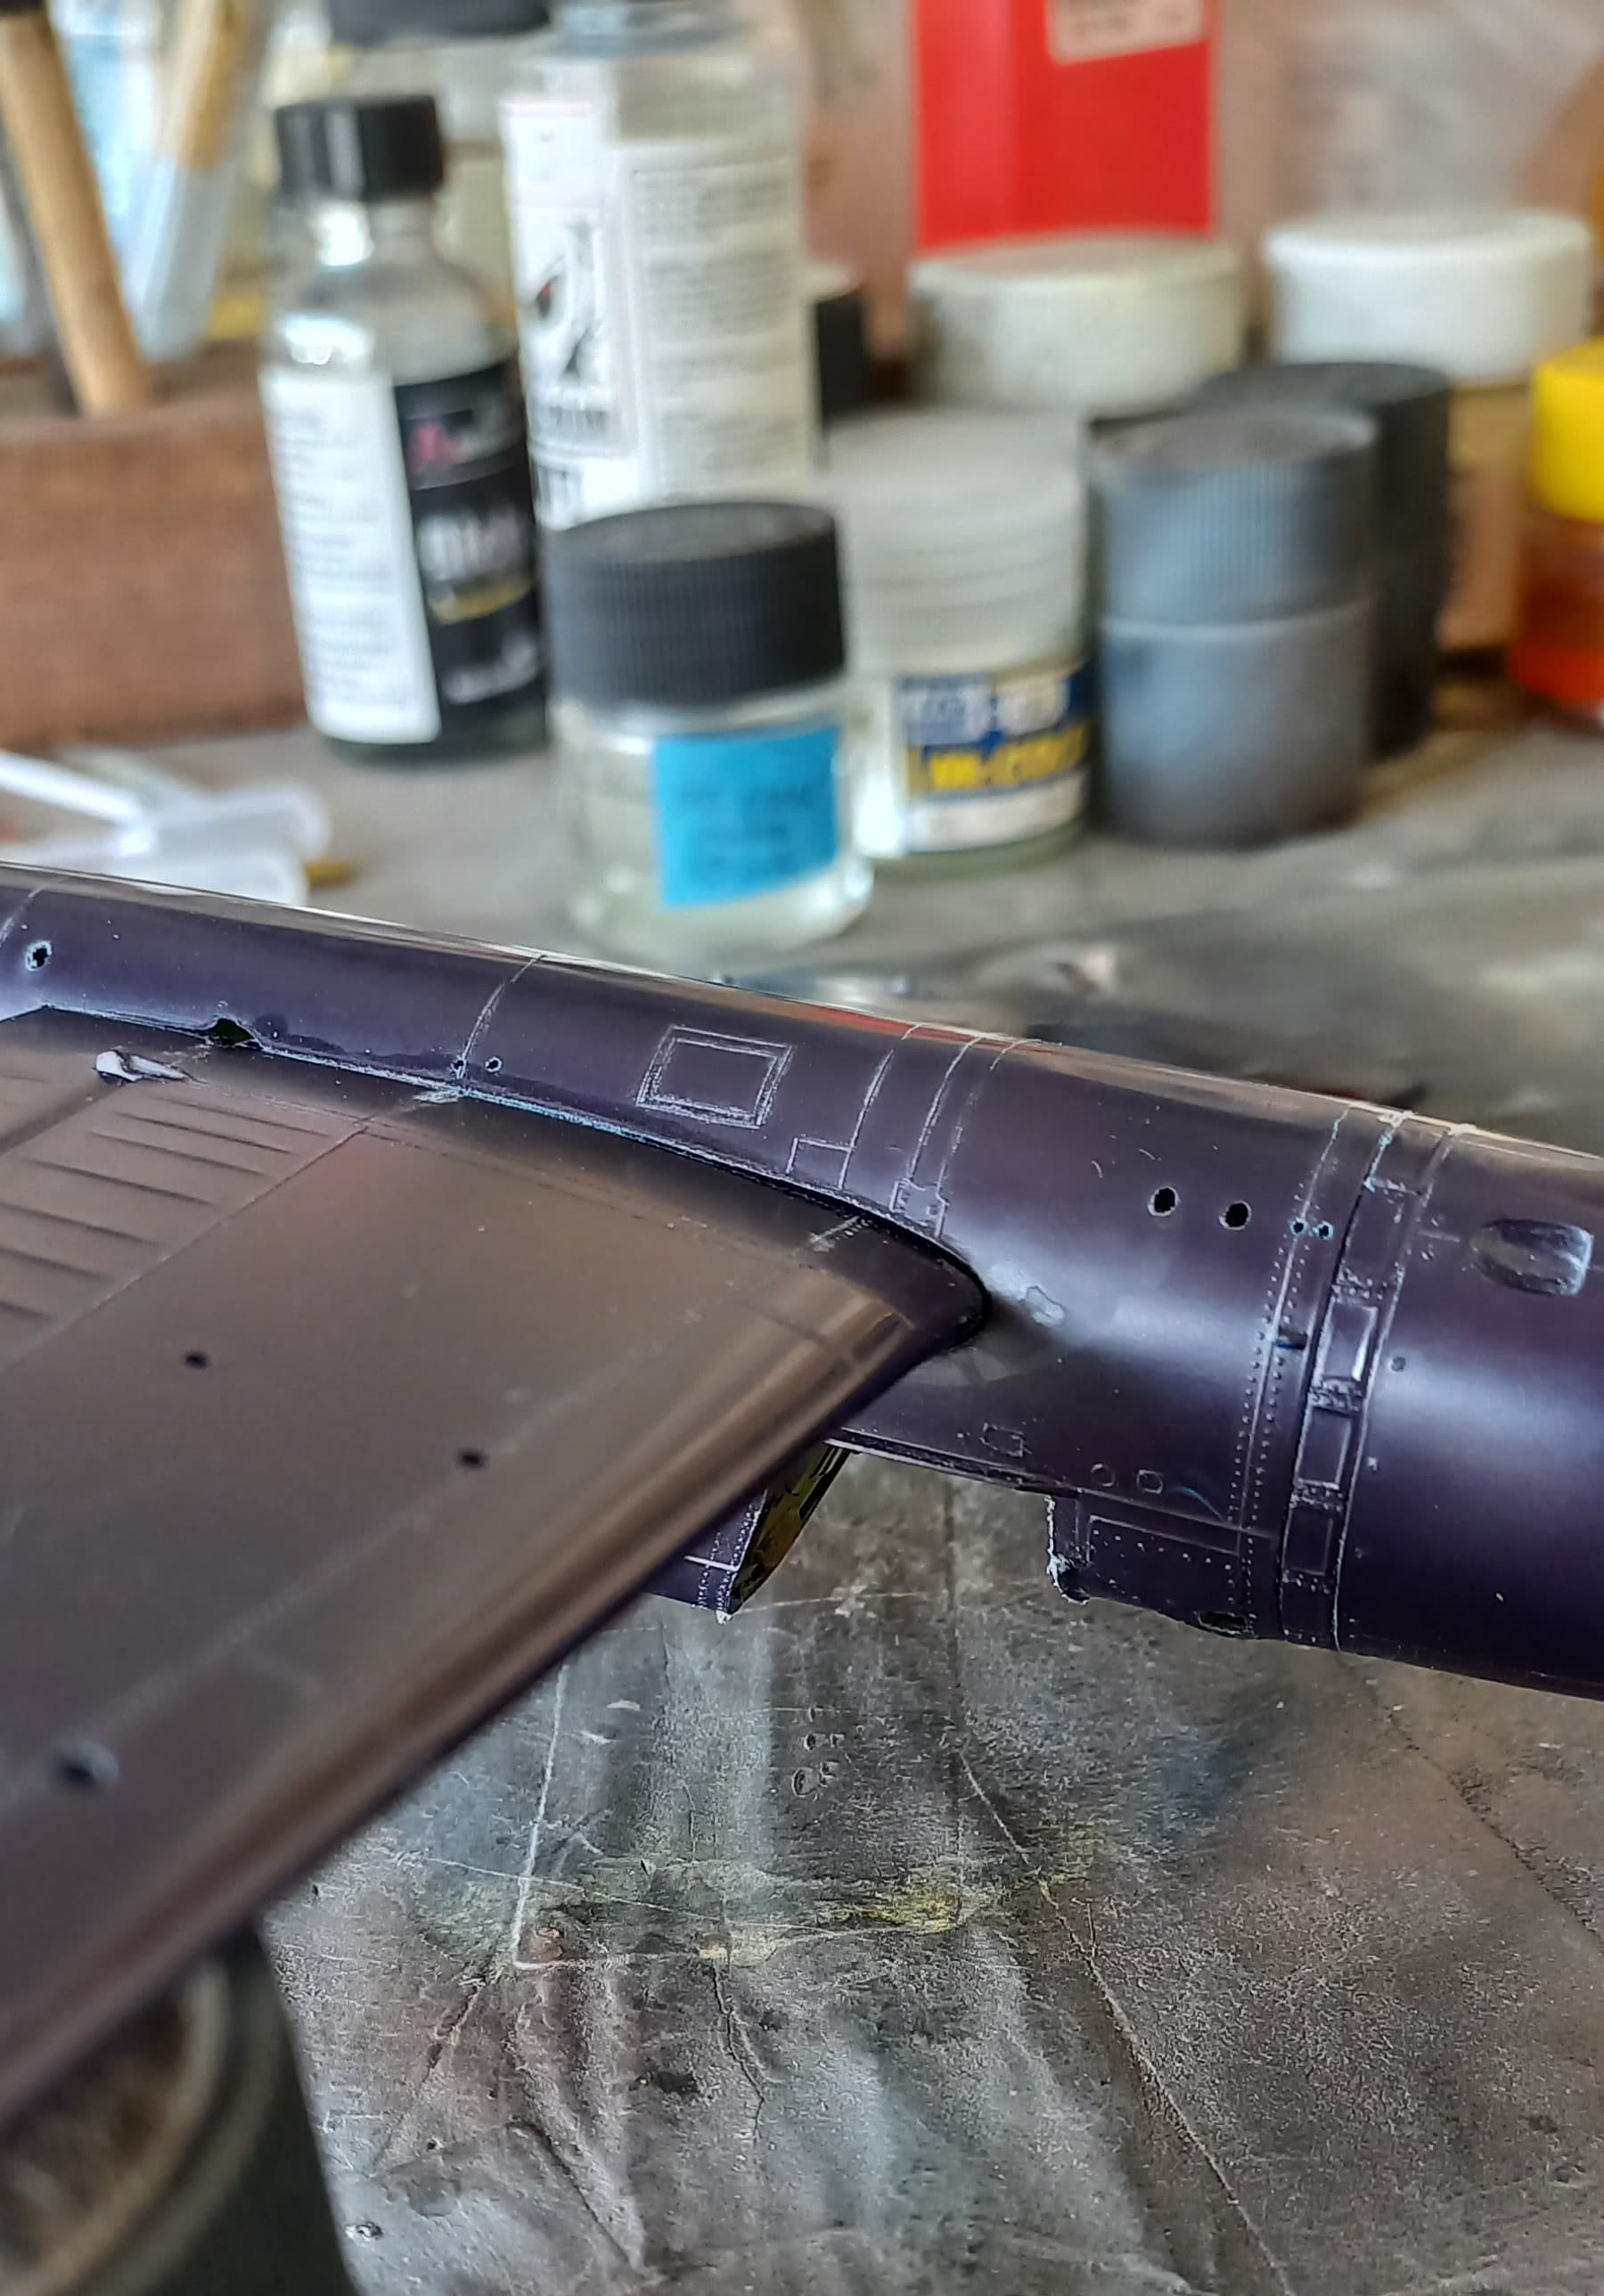
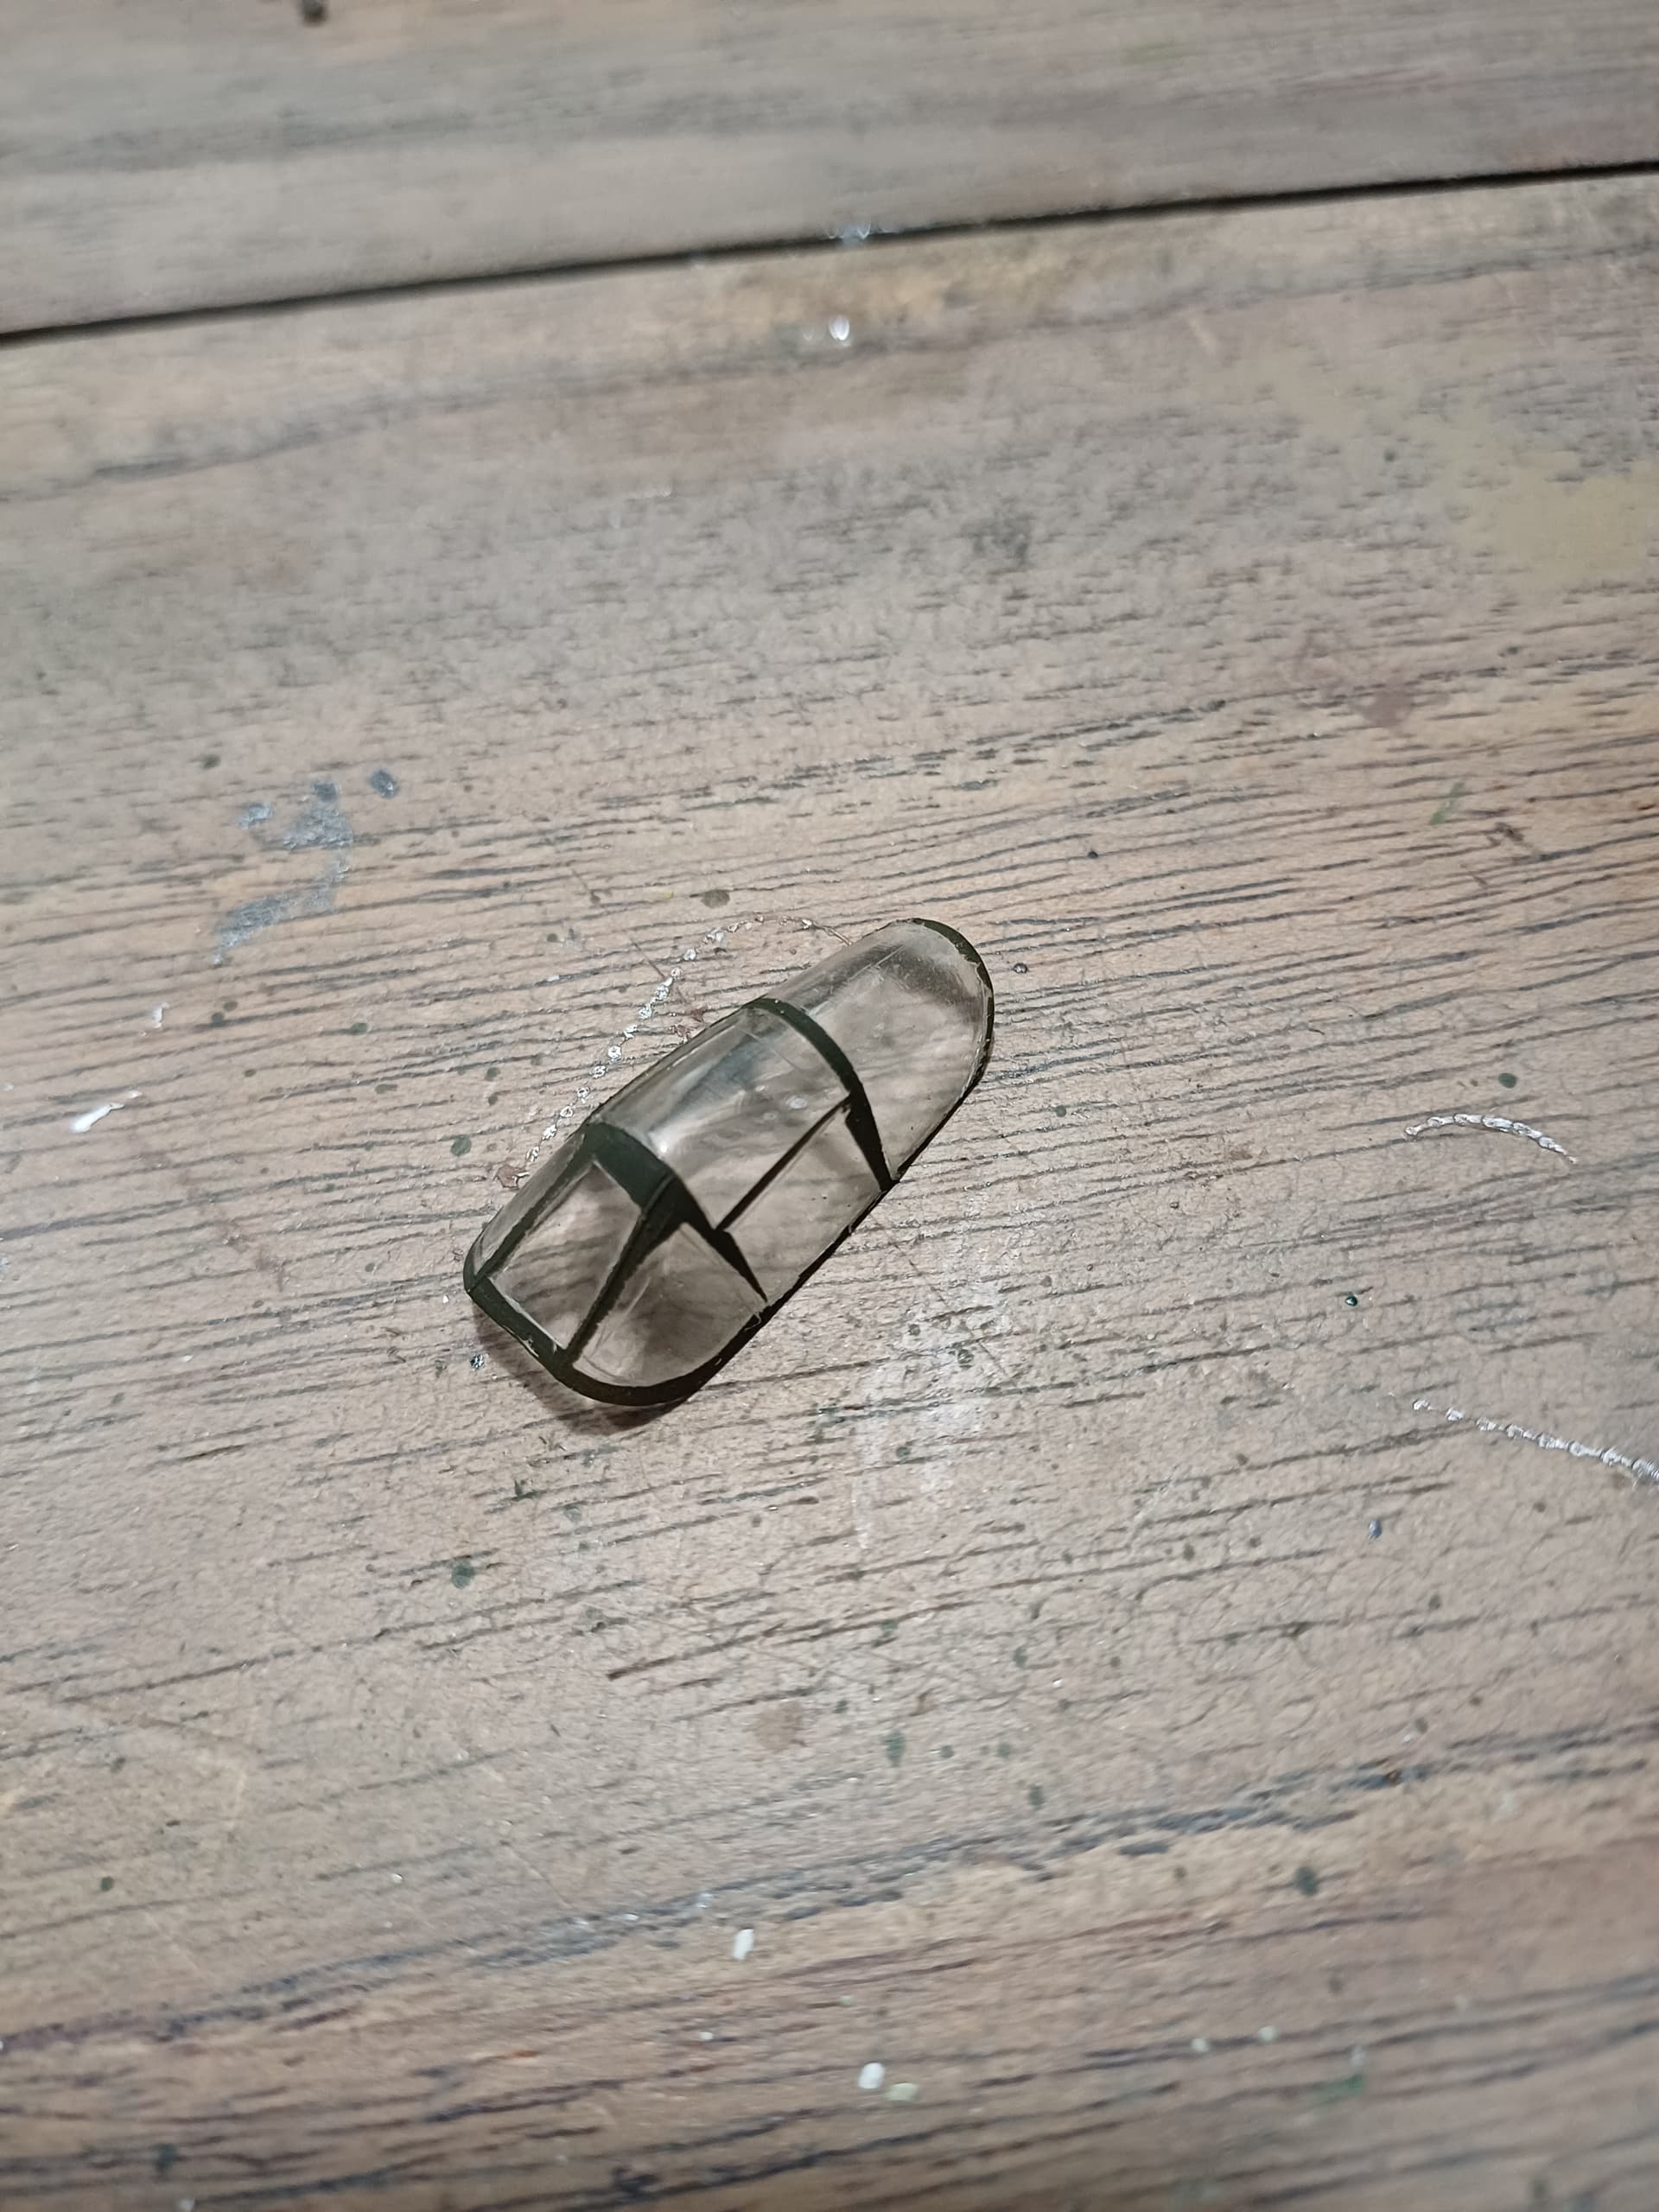
While this may seem like a lot of work, it really isn’t. Following the painting of the interior and removing the float, the kit languished in its box while I completed the Mosquito for the Twin Engine Bomber campaign. The majority of the work presented was accomplished a little over two weeks. Kind of a testament to this older kit, low parts count and fairly easy construction, a little TLC and it starting to look the part. Up next, clean up, clear parts and prep for the float reattachment. Till then be safe and have fun!
10 Likes