Hi HG! Don’t know what colour for the wheel hubs, use your best judgement, I trust you! Cheers
1 Like
That is a complete cop out !!! I say go for bright orange ![]()
1 Like
![]() maybe not that but whatever is historically accurate-ish
maybe not that but whatever is historically accurate-ish
2 Likes
Hee Hee I’ll make them AVRO ARROW CAF orange. Kidding.
1 Like
Great progress HG, always love catching up with your project updates!
Cheers, D
1 Like
Thanks Damian! I’ve got more done, yet not enough to post. Getting the correct 20 degree twist of the cowls to match the exhaust is taking a few minutes LOL.
2 Likes
Hey there Sunderlandians,
Quick update.
Any black over-spray will harm the tone of the upper surface color. It might be silly, yet masking does help preserve the light grey plastic hue and prevent an unwanted layer of paint. It just depends on what level of detail you’re after. In 1/72 little things look huge.
Note the exhaust pipe channel aligned on the 20 degree line. This has to be correct to place the intake parts. I’ve just eyeballed the parts to be centered on my cutting board and carefully added a dot on the cowl to where the back of the part should go.

Naturally, I’ll clean these intakes parts more, but what is being illustrated is the twenty degree angle of the three. Sadly, the only way for Italeri to place these bits on the sprue tree is on curve side which mates to the cowl. Sure wish they were PE. Oh well, it’s an out of box build and a gift. Off to do testing for cadmium levels in my store bought ground coffee…UGH!
Huge thanks to Sunward Hobbies https://www.sunwardhobbies.ca/ for getting my supplies over to me quickly. Thanks Everyone and God bless.
7 Likes
It’s building up into a lovely kit … Keep the coffee flowing ![]()
![]()
1 Like
Thanks @Johnnych01 John, I sure hope all the bouncing around isn’t making your head spin. Some times you have to go in different directions to get to the right place. As in life.
1 Like
I’ve said it before (perhaps a different thread) but I will say it again, watching your building process makes me realize where I still need to get to with my own building. I’ve been open to trying many new ideas and techniques, but I’ve also wanted to get more kits done (so I can try new techniques and because I like looking at the models on my shelf). However, because of this, I don’t think I am spending enough time (yet) on any individual task, so I need to think about how I am approaching this hobby and make some changes. I truly want to get better at this, but better doesn’t necessarily mean being familiar with more techniques. It means what I see in your builds, an expectation of correctness and rightness. This only comes from slowing down some and spending more time on individual tasks.
I think the trick for me will be being able to do that slowing down while avoiding the risk of burnout from projects that will by nature, take longer to complete. I will be pondering this more.
Anyway, excellent work on the Sunderland. I am sure it is going to be a real beauty when completed.
3 Likes
Thank you @mrintense56 Carl. I hear you on all accounts. What I quickly discovered, decades ago, is that advanced methods and techniques (employed by so many builders here) come as second nature. You’ll breeze through these steps. Sure it’s a slow process at the beginning few jobs, but trust me soon you’ll be getting complements like the ones you send me.
1 Like
Hi Folks,
Time for a quick update. Well quick for you, but hours for me LOL.
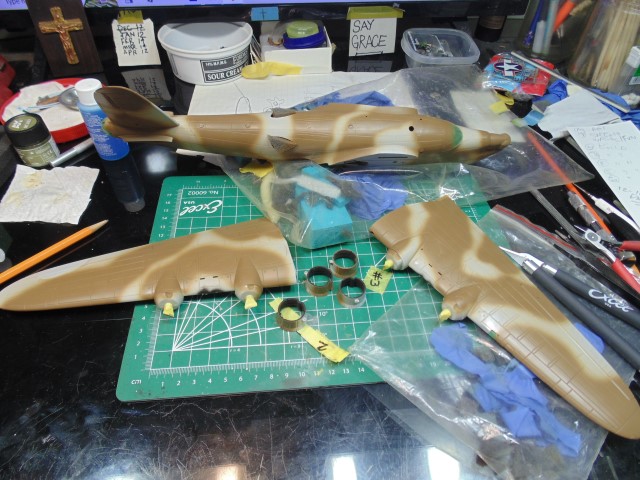
Plenty of real-estate to paint. I’m using AK Real Colors RAF Dark Earth and Green. The tape at the engine connections is so I don’t have to spend more time scraping the black off.
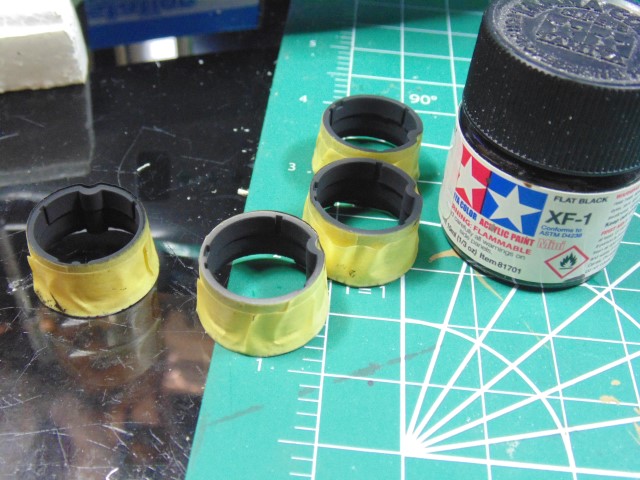
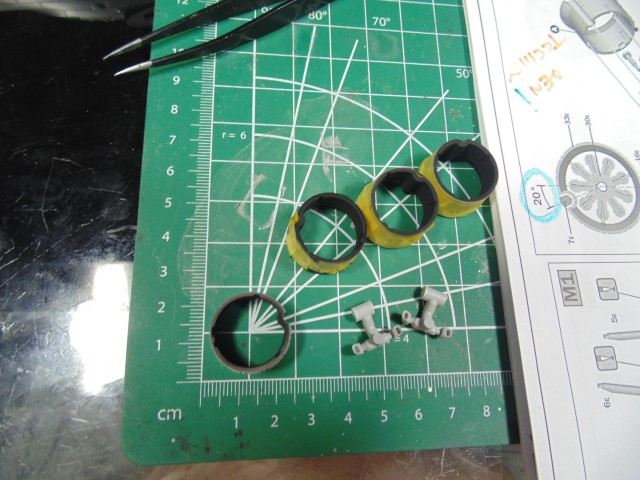
I’m tried a different technique for masking wheels.
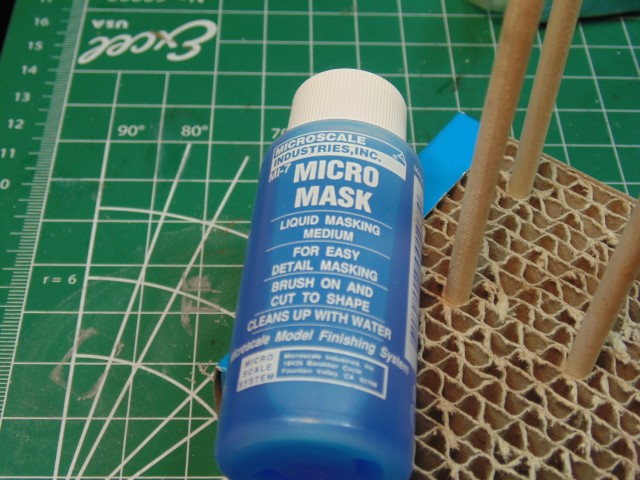
This is a great product, but has to go down on an ultra smooth surface, i.e. clear coated, polished or clear window parts. Anyway, it was a complete failure and taught me a lesson.

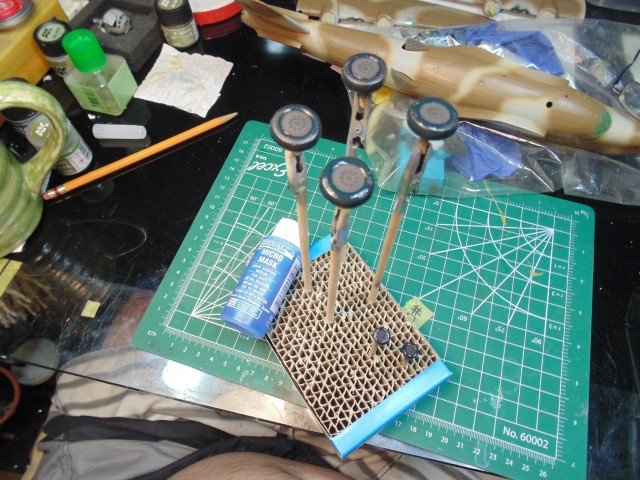
While the earth color has plenty of time to harden I’ll get everything ready for the float pod rigging. My own method I’m more than familiar and comfortable with. A 0.5mm OD (outer diameter) and 0.3. ID (inner diameter) brass tube will be threaded with EZ-Line and slipped in the holes. After the black underside is done I’ll already have the lengths of cable ready. I use my David-Union pointed bits to clean out the ends of the tiny tube parts.
More when time permits. Huge thanks to UMM-USA for always getting my replacement saw blades to me in a hurry. Thanks Everyone.
5 Likes
![]() not the only one! Beautiful progress, keep on keeping on
not the only one! Beautiful progress, keep on keeping on ![]()
![]()
2 Likes
Thanks Tim @Dioramartin glad you’re watching and following along ![]()
Great seeing that rigging going on. It is very clever how thats done. The AK RC brown looks like it went on nicely. I’m a massive fan of the AK RC range, sprays perfect and gives such a lovely even cover… and hard finish which is great for handling … Looking excellent
2 Likes
Thanks @Johnnych01 John. Wait until you see the next one.
2 Likes
I tried it not long ago on my Porsche build. It tends to shrink when drying on the headlights. I think a second coat to cover the bits would have helped in my case.
Your work looks great as usual. ![]()
![]()
2 Likes
Thanks Ryan,
I’m going to give the VMS friskers a shot as soon as I can get my hands on some. The Mr. Hobby SOL R is my usual liquid mask but it’s too thick.
1 Like
I want to wrap up the pre-rigging before setting this project aside for a few days.
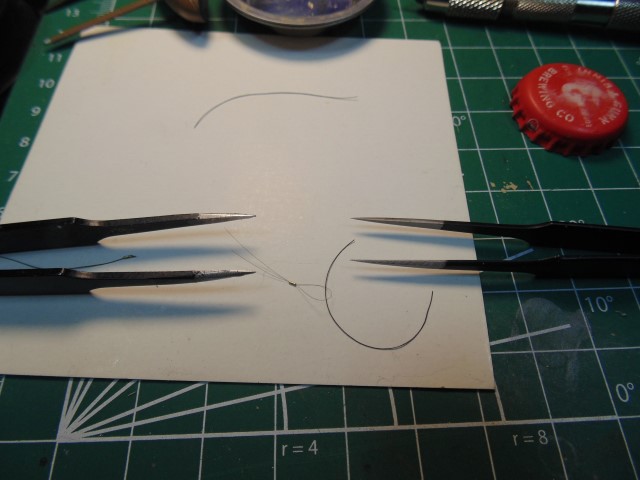
The ends of the brass are sanded 600 grit smooth then a conical drill bit cleans the very inside of the tips. Next, a looped hair follicle will pull the rubber line through easily. The tweezers on the left have notches filed in the tips to grab and hold items securely.
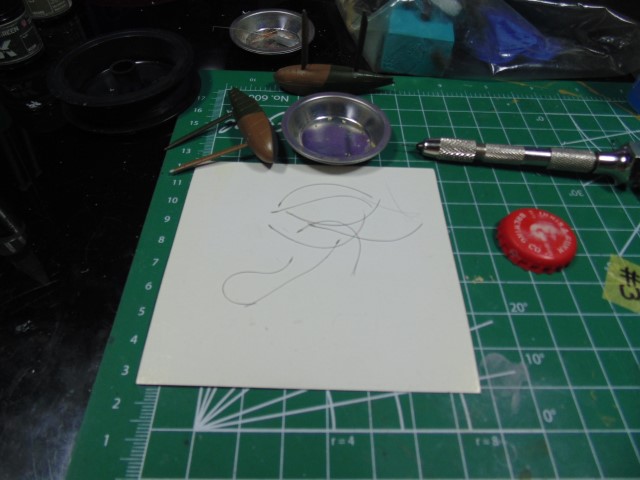
A droplet of CA at the insert end of the brass makes the bond. The holes drilled in the pod are deep enough to accommodate the tube.

I can only be so accurate at 1/72, but it looks better than a line plugged into the plastic… at least I hope @ColinEdm agrees. Obviously the paint will be touched up.
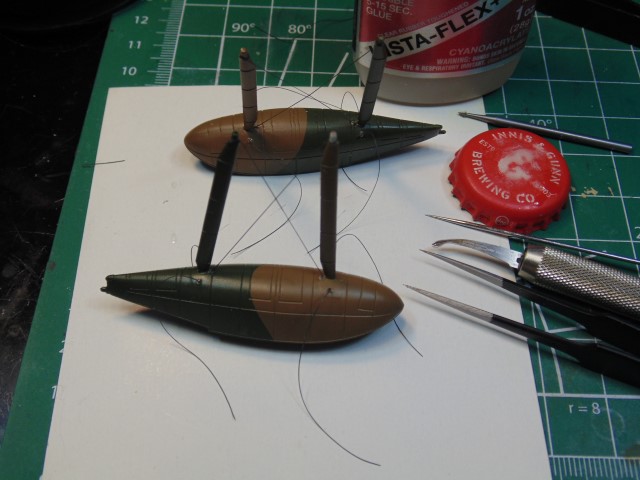
Later, I’ll thread the the other ends of the brass tubes when the black paint is laid down.
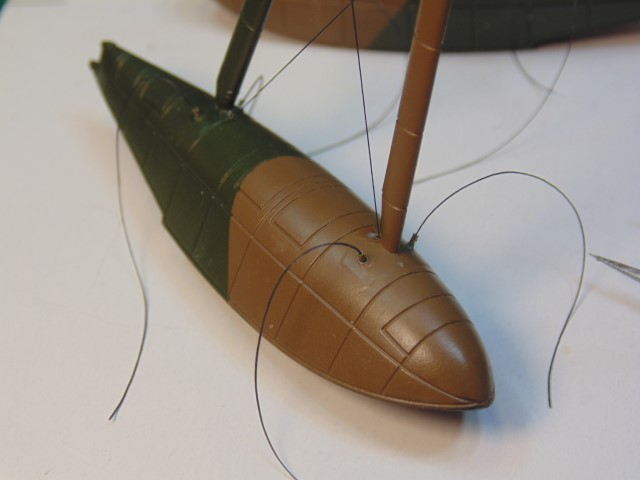
Any thoughts are welcome. Plenty more to go on this one but small steps over time equal much distance.
Thanks Everyone and God bless.
4 Likes
Beautiful. Such a delicate piece of work that just adds so much to the finish ![]()
1 Like