Thank you, Vlad!
Really any light blue should be good.
I saw!
I will choose. There’s a lot of blue.
I’m thinking in the direction of grey. But there is only one in stock - “cold gray”. I’ll take that too and experiment.
So, friends, the promised review. I have never written reviews as such. Therefore, this will not be a review, but my impressions of the model.
Well, not impressive. The box itself is normal and quite durable. But the box art could have been come up with a better idea. This is definitely not inspiring to buy.
The instructions are simple and clear. I don’t remember if there are assembly inaccuracies in it, but in the marking section, as well as in the decals themselves, there are definitely inaccuracies.
In general, the plastic is good, quite soft. But, you need to be careful when gluing parts. If there is too much glue, the plastic may “float”. On the one hand, this is good. When there are gaps when joining parts, they can be “welded” with plastic. On the other hand, there is a possibility of incorrect positioning of parts after the glue has dried. For example, when parts are glued that can fall (lean) down under their own weight (handrails, brackets, fuel tanks, etc.). Therefore, the drying process of the glue must be controlled and the parts to be glued must not be left unattended.
I also want to note one more feature. The plastic is very greasy due to the lubrication of injection molds. And the Chinese did not regret her. Before assembly, the sprues must be cleaned of grease. And don’t put them back in the bags! The bags themselves are greasy inside too!
I will also add that the parts are cast very well and clearly. Such things as bolt heads and some small elements are cast very clearly.
As far as I understand, the Chinese did some kind of 3D scanning from some real sample. What kind of sample this is and where it is located - I don’t know. But, in general, the geometric dimensions of the model look relatively normal in my opinion.
I also compared the model with models from other manufacturers, and they are all almost the same in their basic parameters.
I would also like to add that after assembly there remains a large number of unused parts that may be useful for their use in the construction of other models. In addition to the generally understandable parts such as handrails, brackets, fender liners, etc., the set contains two parts of an external intercom for communication between the landing force and the crew. They can be used to build a model of a tank of the post-war Czechoslovak modernization.
I am not an expert on the material part of the T-34. And I don’t want to be one, since this topic is simply bottomless. Sometimes it seems to me that out of the total number of “identical” types of T-34 produced, not a single one was the same. Therefore, I will leave aside the counting of the number of nuts and bolts. I will focus on the main points that caught my attention.
All welds, with the exception of the seams on the bow beam, are made in the form of “notches”, “scales”, etc. Complete nonsense. There has never been anything like this. All seams always had the shape of elongated weld beads or rounded hemispheres. And this is the “disease” of many model manufacturers. Well, where do they get this “notch” from? For the sake of simplification of production? So, it seems, it’s not the Stone Age in the yard?
Transparent details. They are NOT there! No comments.
Tracks. Not the best option either. They seemed thick to me. The upper and lower branches are cast with marks from the pushers. Moreover, on the upper branch there is blurriness at the junction of the ridge and non-ridge tracks. All ridges have sink marks. In addition, the direction of the tracks is cast incorrectly - backwards. This point cannot be corrected by rearranging the tapes from the right side to the left. In general, this is not a terrible mistake, since such options have also been encountered in real operating conditions.
Photo-etched parts. Only the end handles of the fuel tanks turned out to be more or less normal. While their fastening tapes are not entirely correct. The mesh cover of the engine compartment louvers is simply terrible. The slats of the mesh frame have a relief height only along the perimeter. Inside they merge with the mesh and go almost in the same plane. Why, in fact, do we not see the structure of the frame.
Attaching additional grousers. None available. Apparently, they were not on the museum exhibit, so they were not made on the model either. But it had to be. In real life, the grousers were fastened with leather or fabric straps.
Decals. As many as 6 options! All the proposed options were present in real life. But, according to the old Chinese tradition, it was not without mistakes. If we look at each proposed labeling option, then all of them, except the one I chose, contain inaccuracies, inconsistencies, or even complete fabrication. I was especially amused by the version with the inscription on the gun barrel - “ПобеЛа за нами” The word “побеЛа” does not exist in Russian. But it is consonant with the word «побелка» - «whitewash». Of course, everyone understands what should be - «побеДа» -“victory” . «Victory is ours».
Here, too, everything is not so clear. On the one hand, everything is assembled quite simply. On the other hand, I had to deal with various unpleasant trifles. For example, during chassis assembly. The road wheels are made up of four parts! Why make the road wheels, idlers and drive wheels movable, while offering non-working tracks?! In addition, this “mobility” only complicated the assembly and took a lot of time to refine and accurately position the suspension parts. It won’t be possible to assemble it in “a couple of minutes”! And to assemble it correctly - even more so! I didn’t succeed. As a result, the entire suspension turned out to be recessed deeper, closer to the tank’s body. But it must be flush with the fenders. This moment constantly causes me a certain dissonance.
The fit of the parts is generally good. But there are nuances. For example, road wheels. When assembling the road wheels, gaps remain between the disk and the rubber band. It was not possible to melt them with glue everywhere - there was a risk of ruining the thin edge of the disk and ruining the relief.
At the same time, work on the tank’s turret went very quickly. The swinging part of the barrel is made perfectly. All the parts are thought out and cast in such a way that even despite the slight curvature of the barrel itself, the entire subassembly is assembled simply perfectly - everything is smooth, everything is clear, and the barrel falls into place without any gaps or backlash. Overall, I was pleased with this moment.
To summarize, I will say that when assembling this model, you should not rush to glue the parts together. You must first check everything carefully, think it over, try it on, and only then glue it on.
I got this model for $30. I don’t know if this is a lot or a little. It seems to me that this is an average price for a model of this level.
RESULT.
The model is not for beginners, oddly enough.
The model is not for quick weekend assembly (as it seemed to me at first).
Some aspects of the details and the assembly itself are wonderful, some are just trash.
You might be surprised, but my subjective assessment on a 10-point scale is 6.
Friends, I hope this information was helpful to you.
And for the manufacturer, if he is reading these lines.
Hi all!
While I’m writing the next article, I continue to prepare for the photo shoot.
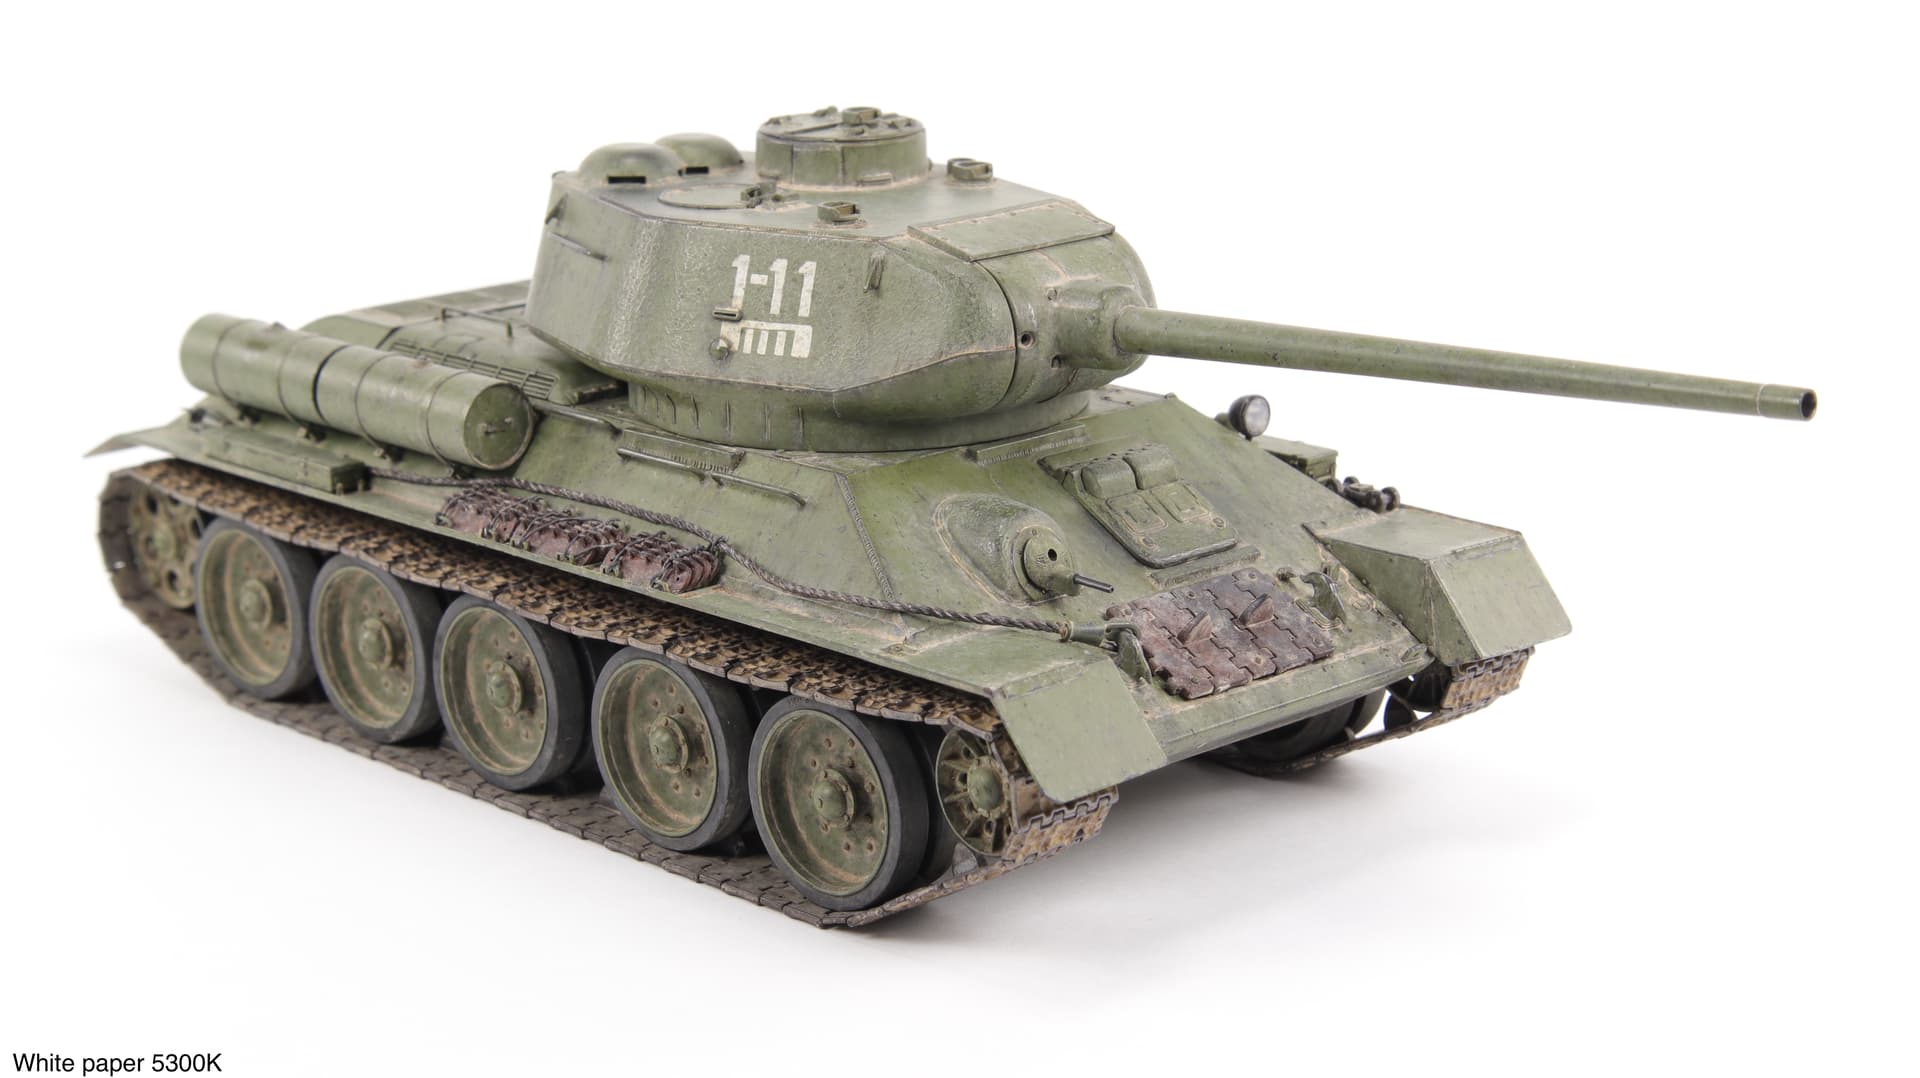
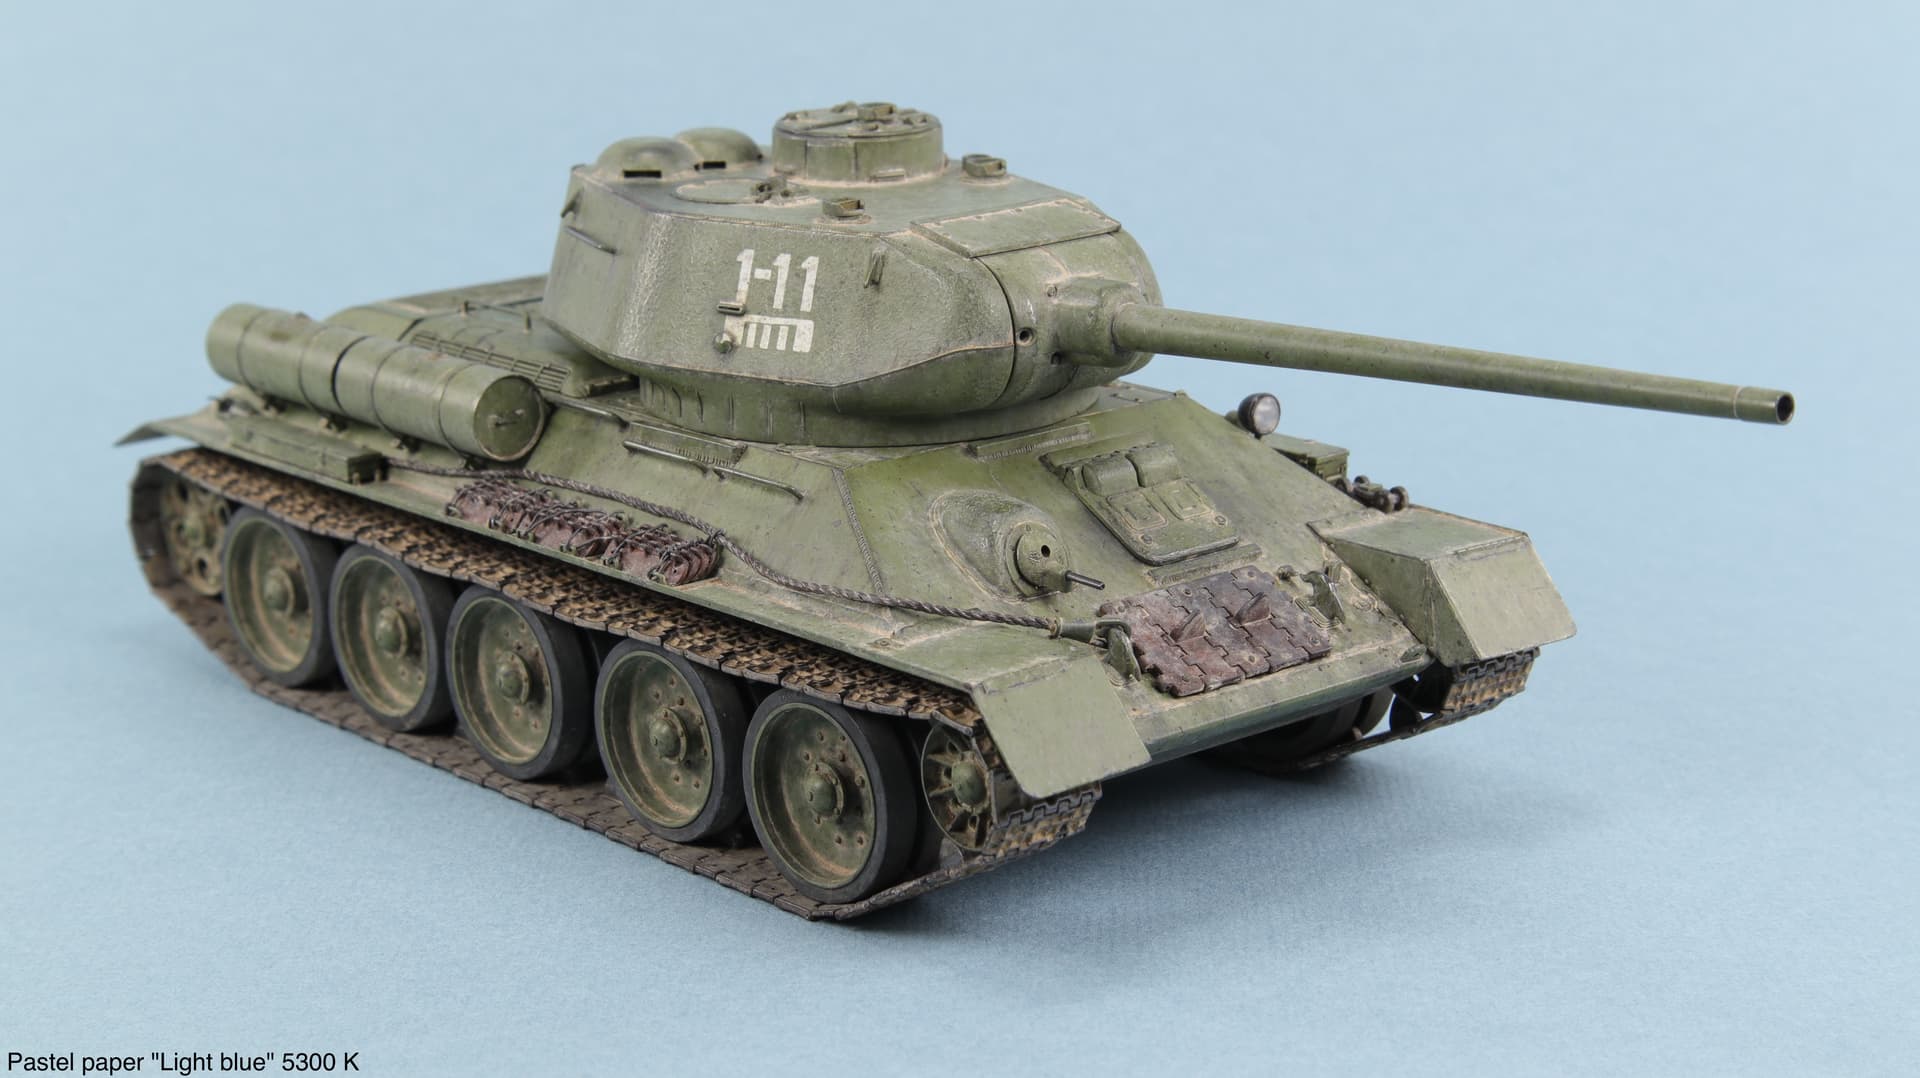
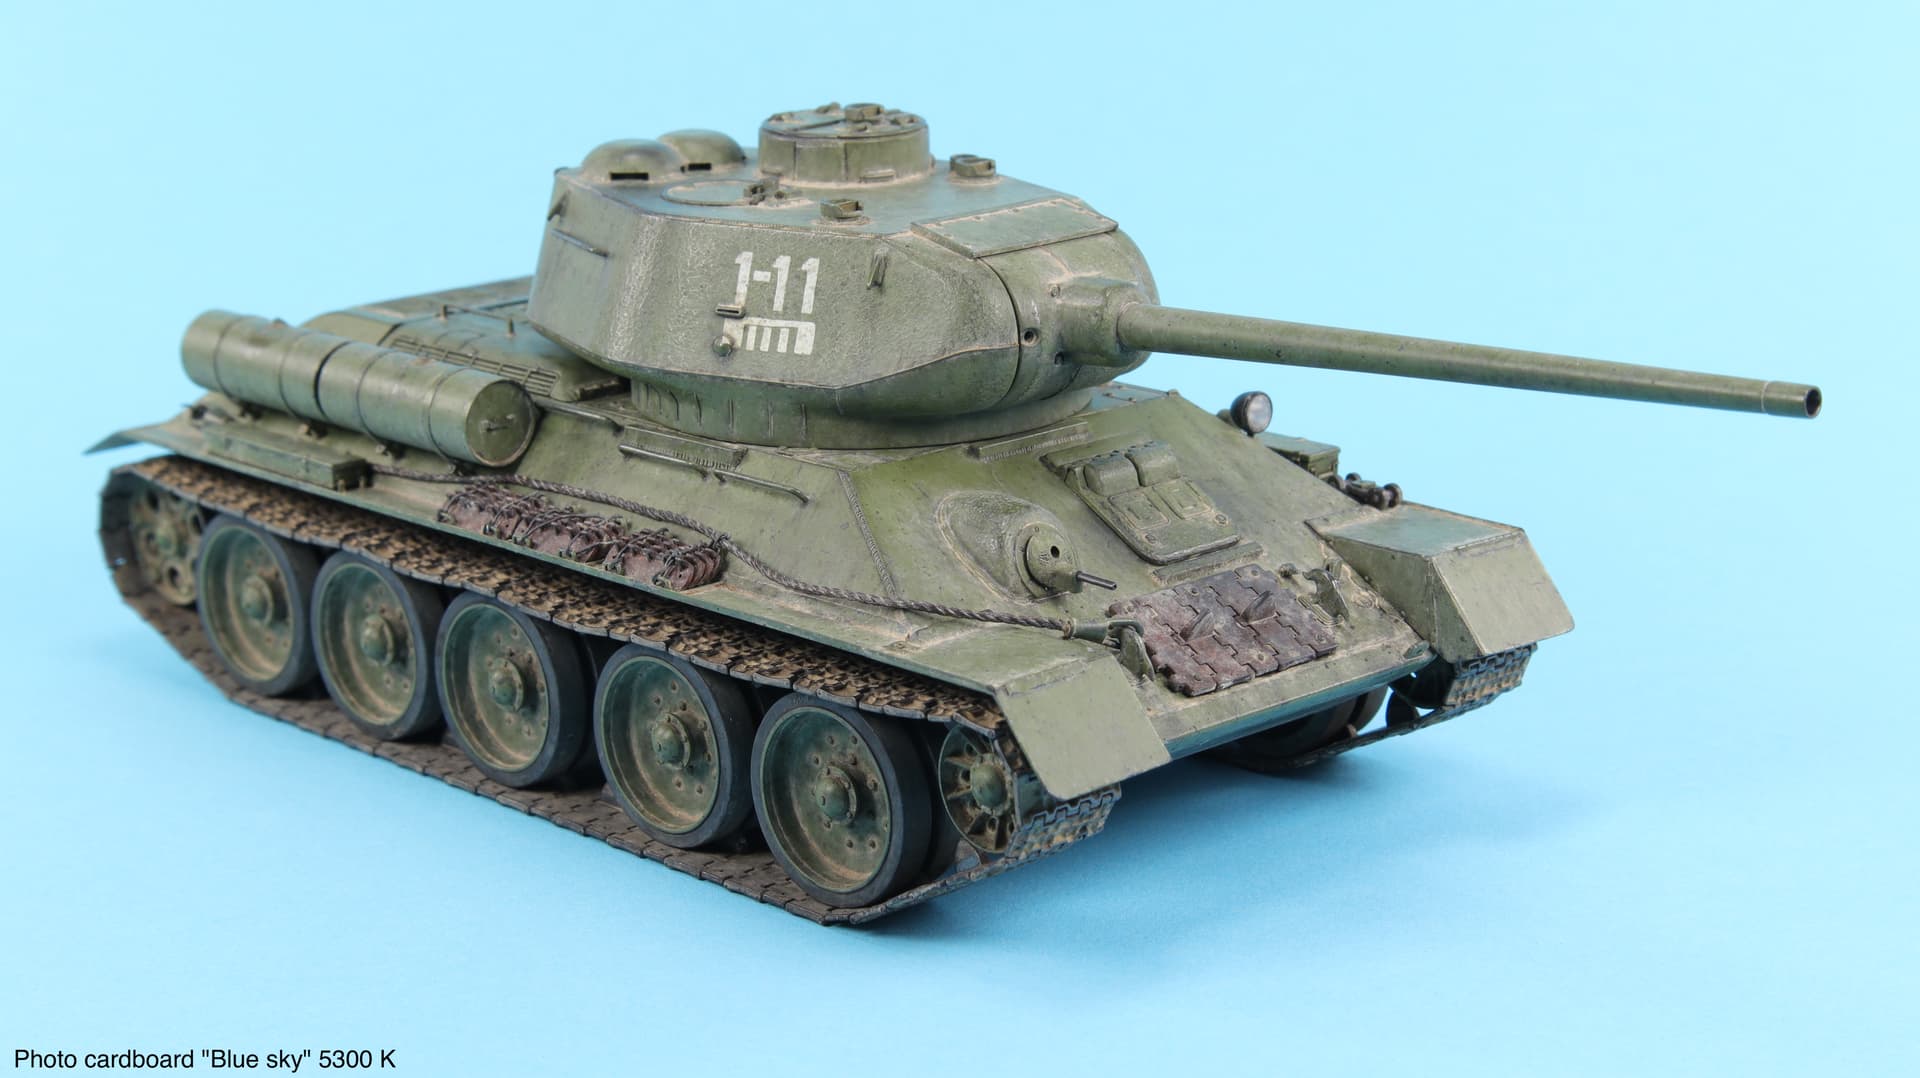
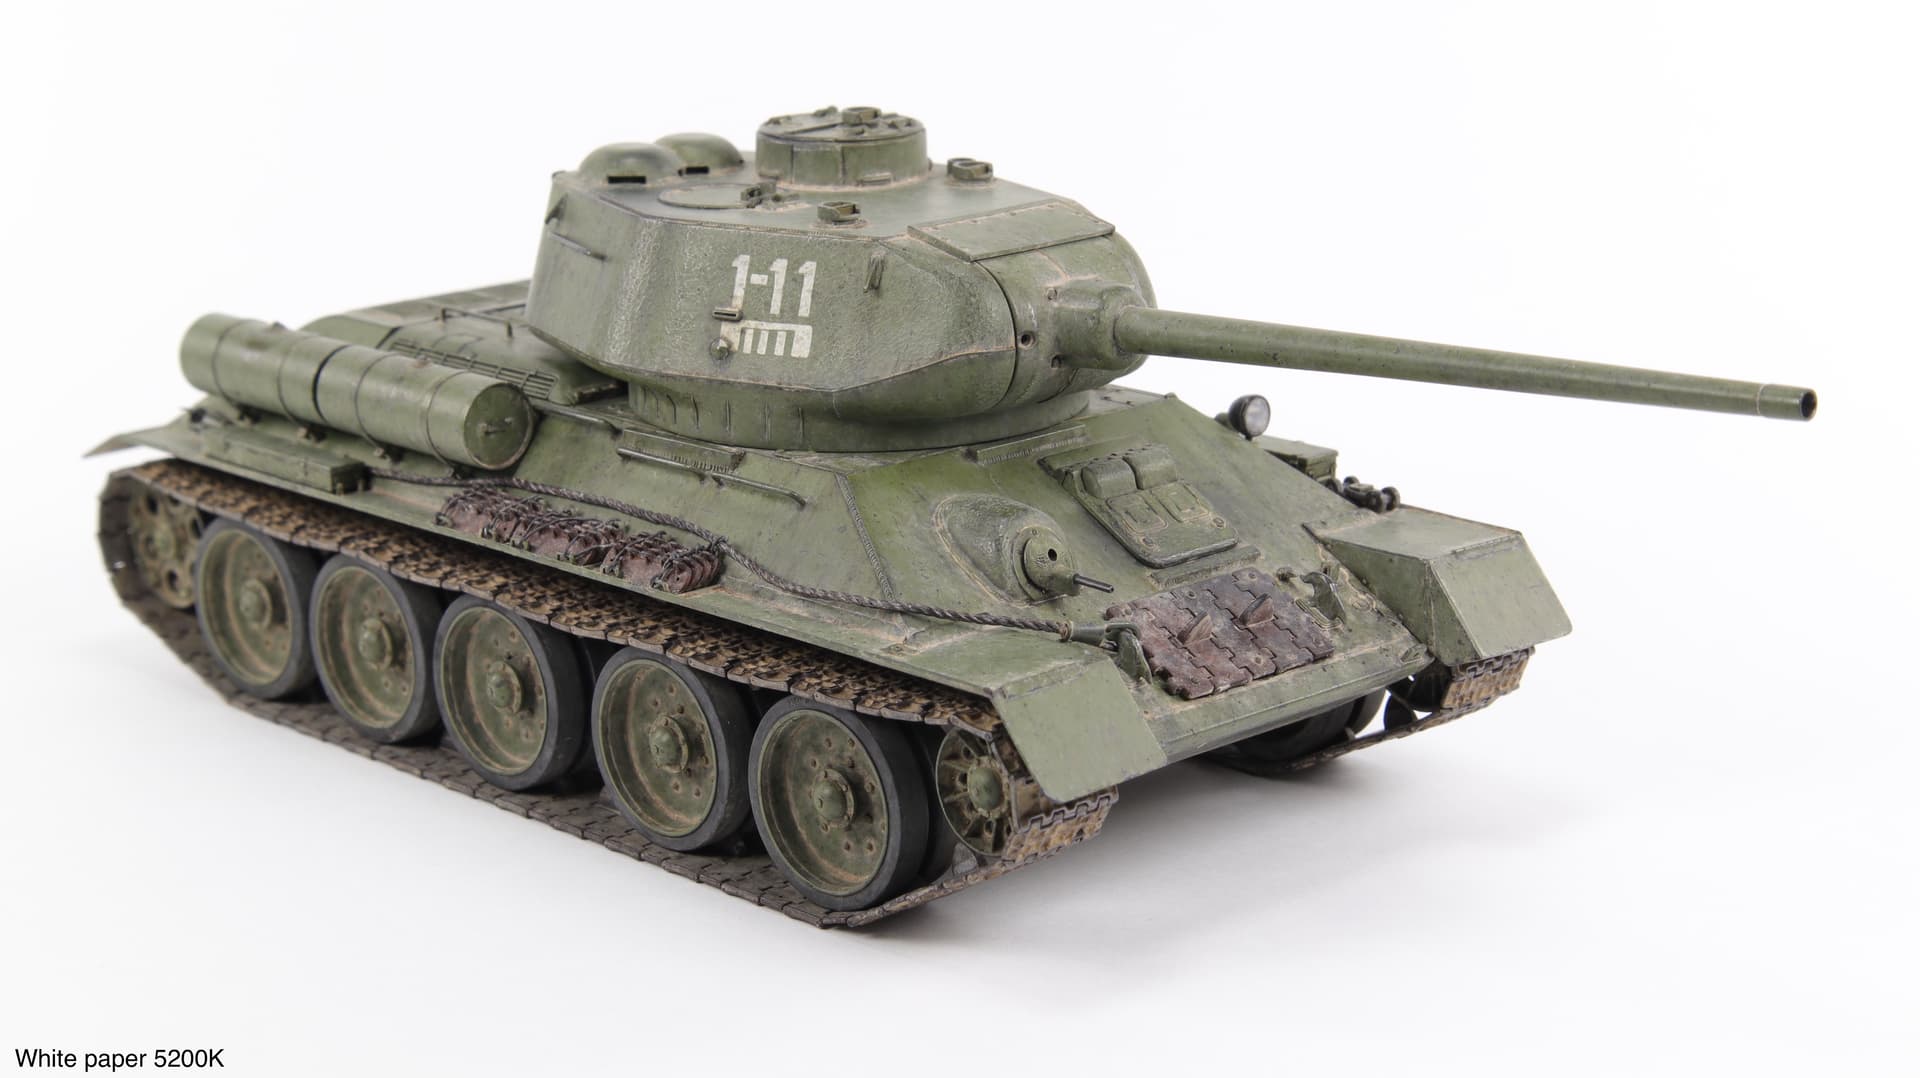
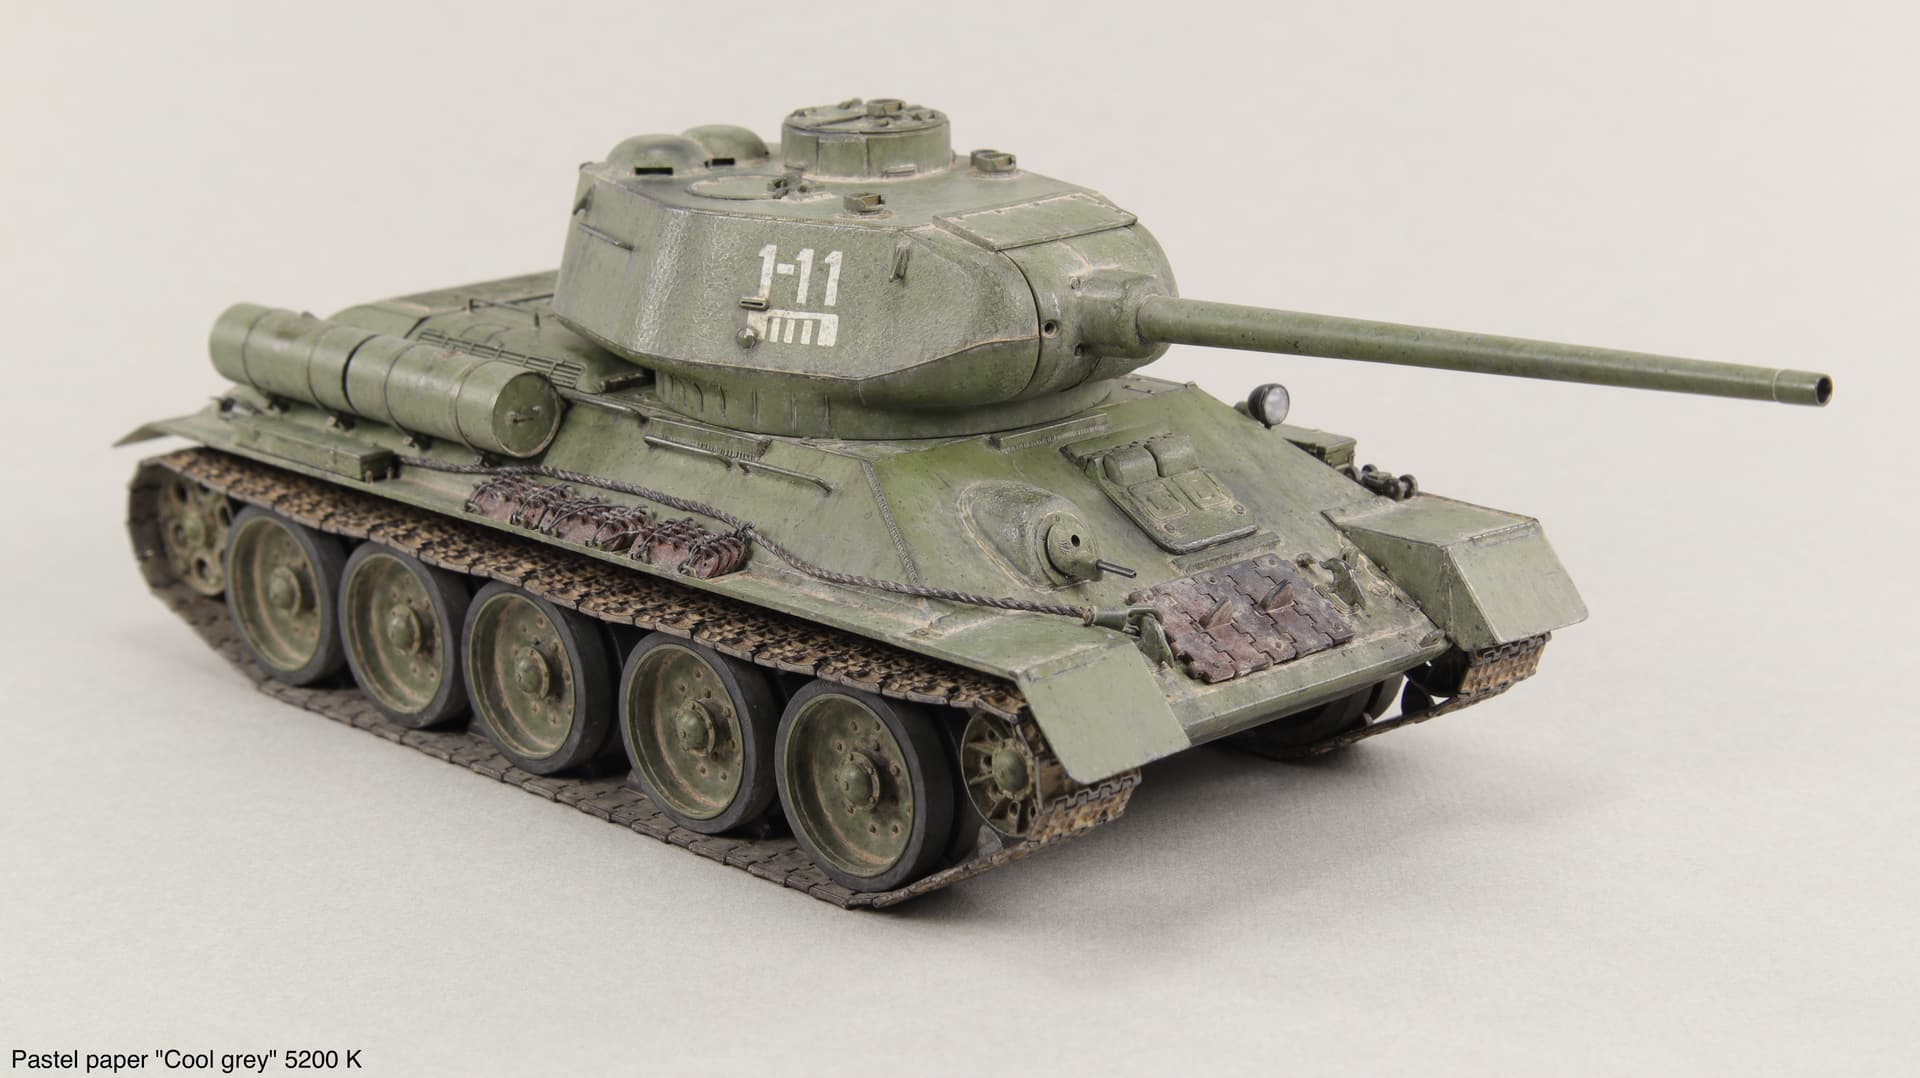
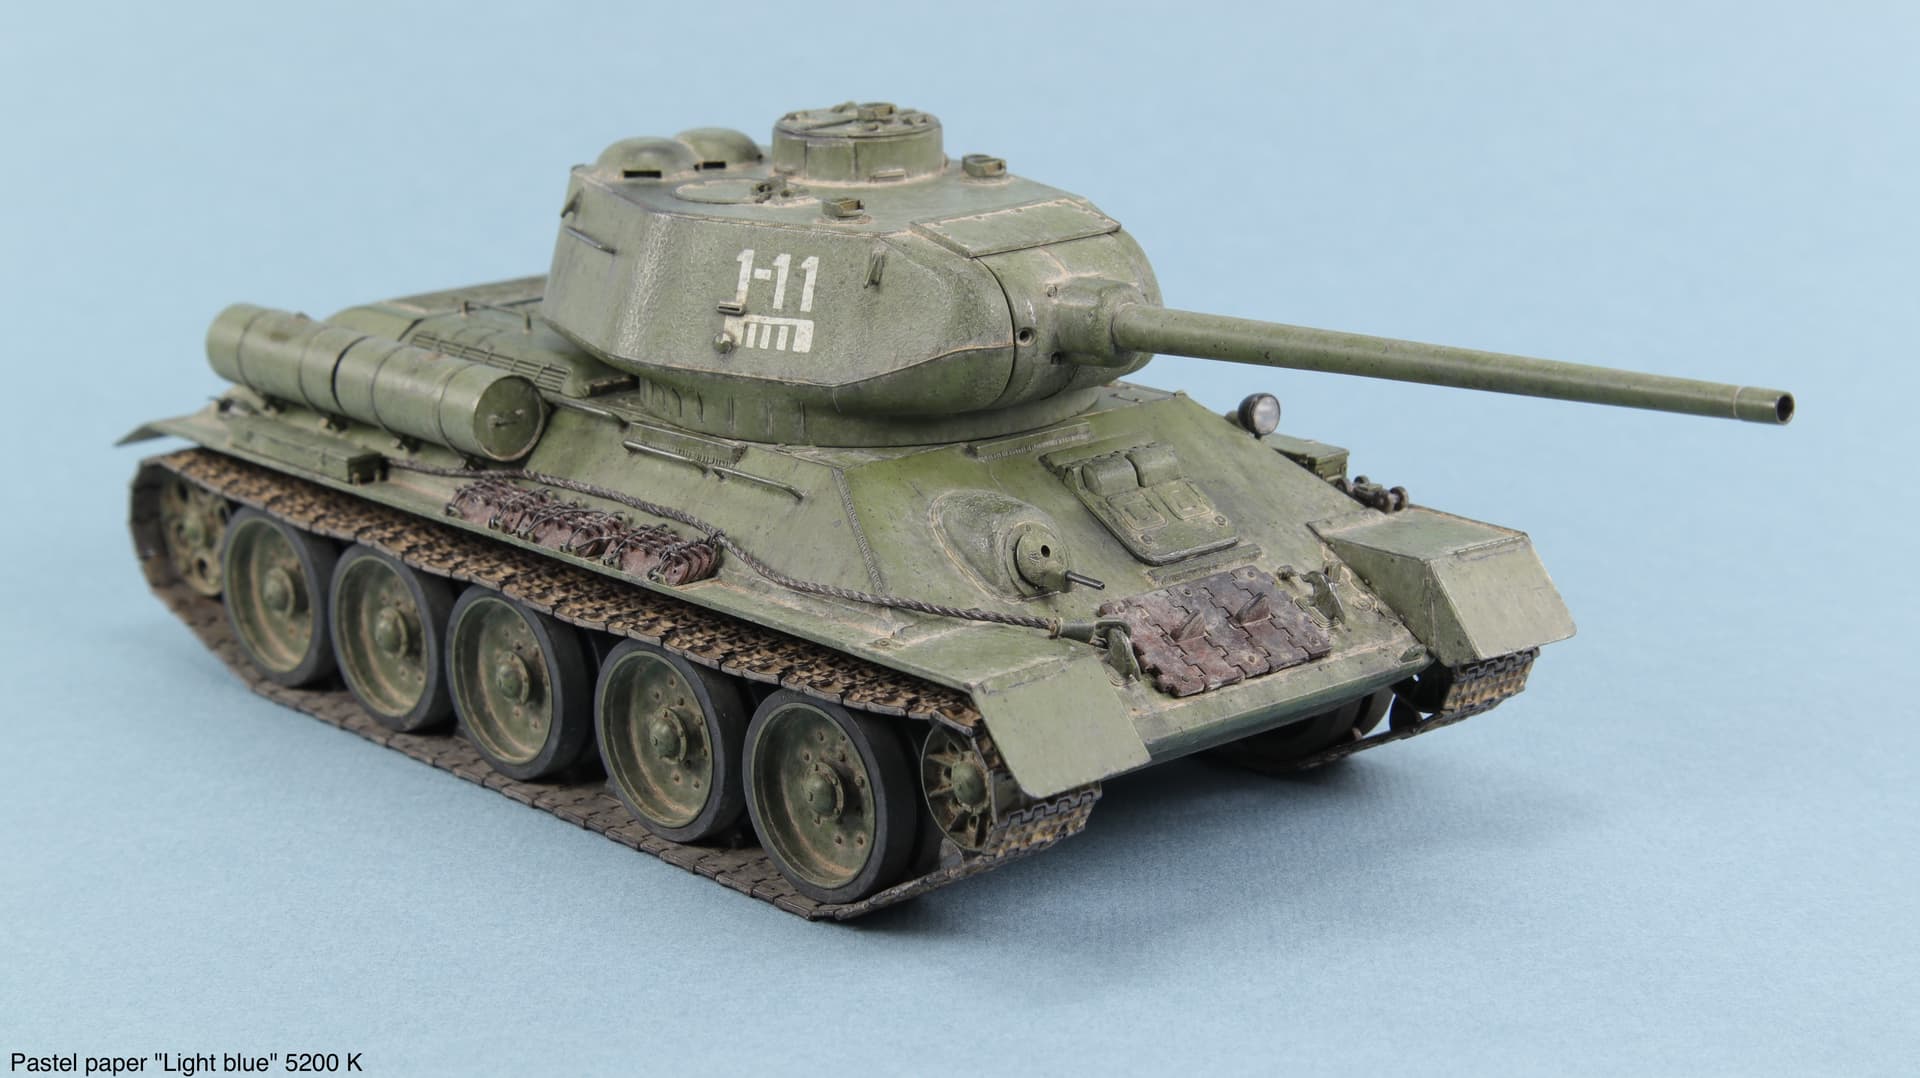
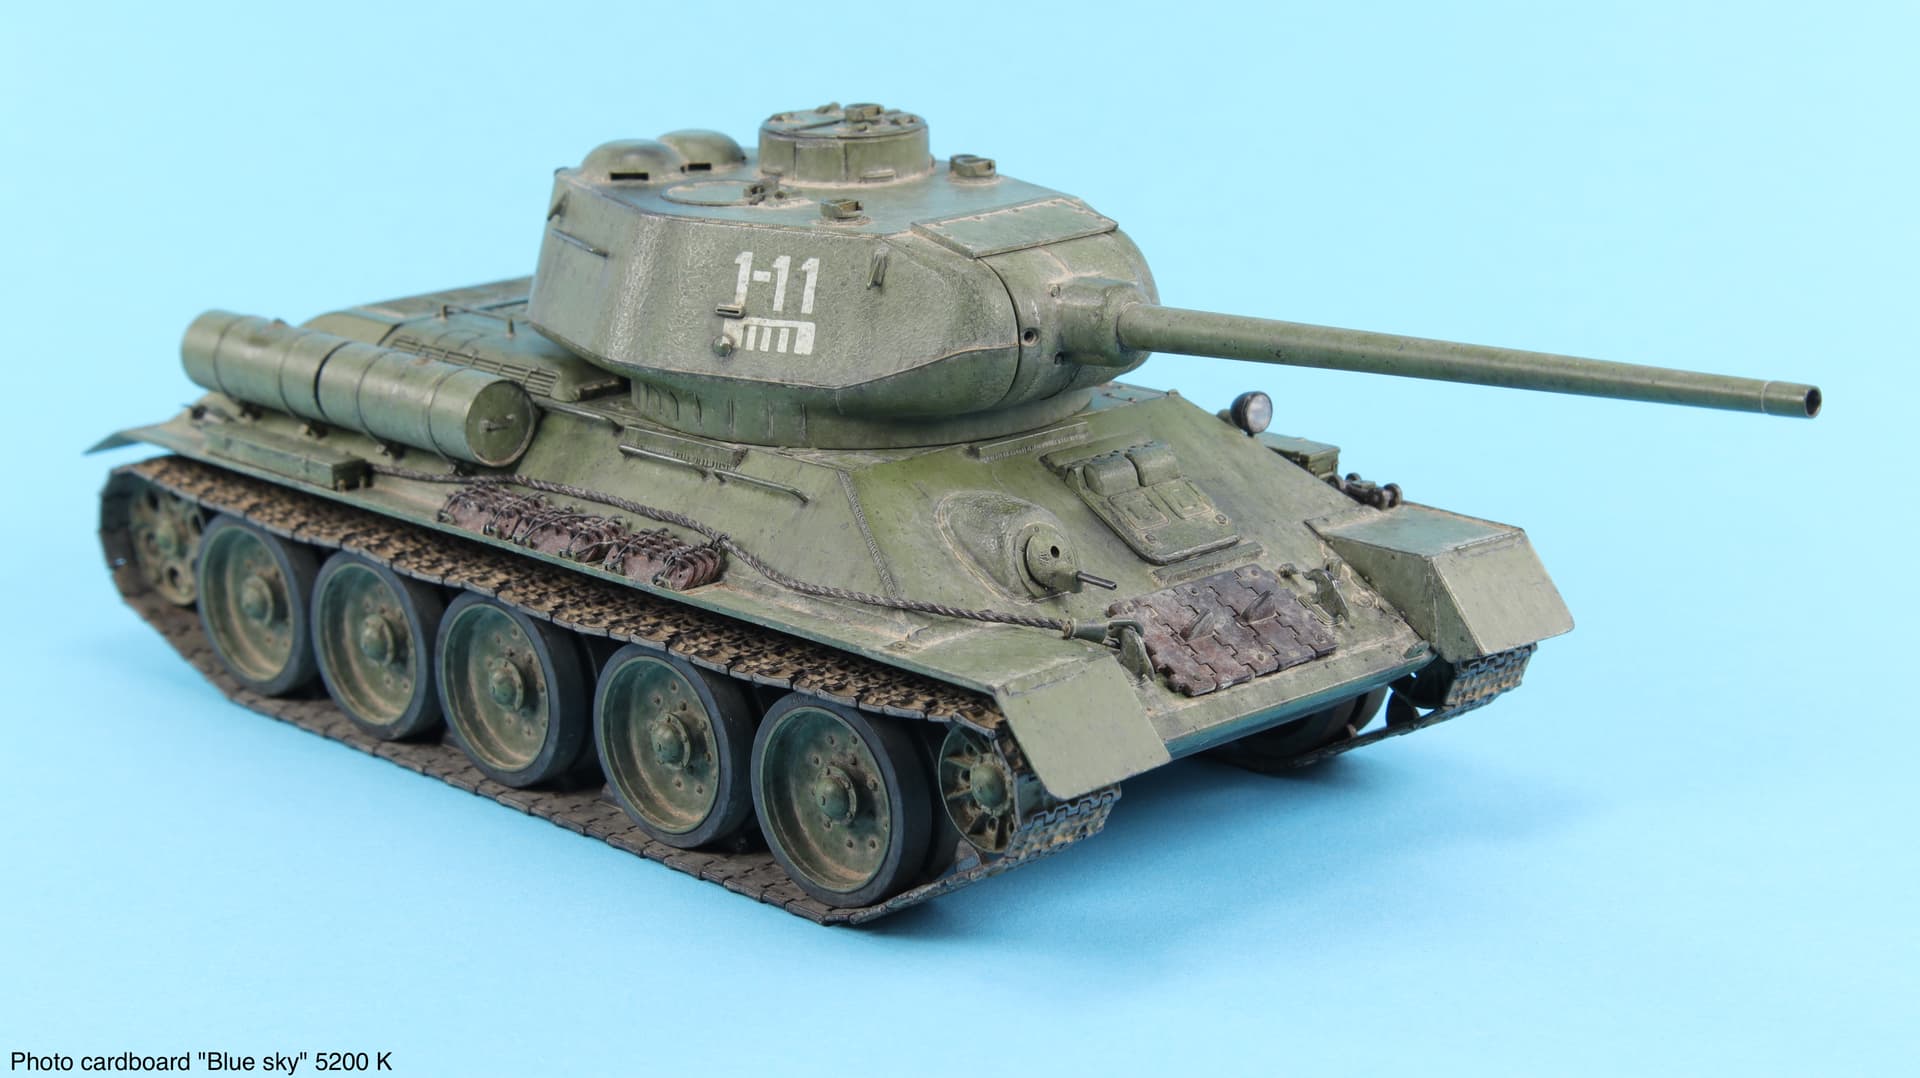
I bought a few backdrops and did a test shoot. The light and camera settings did not change. Only the backgrounds are different. I took two series of photographs with one single difference - color temperature. It is unlikely that it will tell you anything, since you do not have the opportunity to compare with the original. But you can see how the color changes with a change in white balance (in this case, a 100 Kelvin change in color temperature).
Signed each photo.
So, friends, I’m waiting for your comments on which background you liked best. Please write your opinion. It’s important for me.
First series. Color temperature 5300 K.
Second series. Color temperature 5200 K.
Nightshift would be impressed with your attention to detail I’m sure.
Fantastic job!
Watto.
5300K Blue Sky
Thank you, Nik!
OK! We decided on the background. Next, I will experiment with lighting.
So, friends! It’s time to share my thoughts regarding the assembly of the model.
Let me start by saying that I laughed for a long time when I read my first post! “Open the box, take out the sprues, and ASSEMBLE.” It turned out that this whole story is not about me. But I got an answer to the main question - how quickly can I assemble such a simple model to the stage “the model is assembled and ready for painting.” 21 days and 72 hours of work. Of which 21 hours were spent on my venture with the tracks. That is, if I assembled the tracks using glue, then the entire assembly work could have taken only 52-53 hours. And it took another 2 hours to correct the mistake - I forgot to drill holes for the handrails in advance! Overall, I think it was quite possible to assemble this model in 50 hours. And if I hadn’t been interrupted by photography, blogging, etc., then it would have been possible faster. When you start doing something and don’t slow down, it happens faster. The same idea applies to the number of days. On average, I spent 3.4 hours per day. Although, from my own experience, I can comfortably work on a model for 4 hours a day. That is, 12-13 days would be enough for me. Conclusion 1 - it is quite possible to assemble such a model in 2 weeks.
To be continued.
Experiments continue.
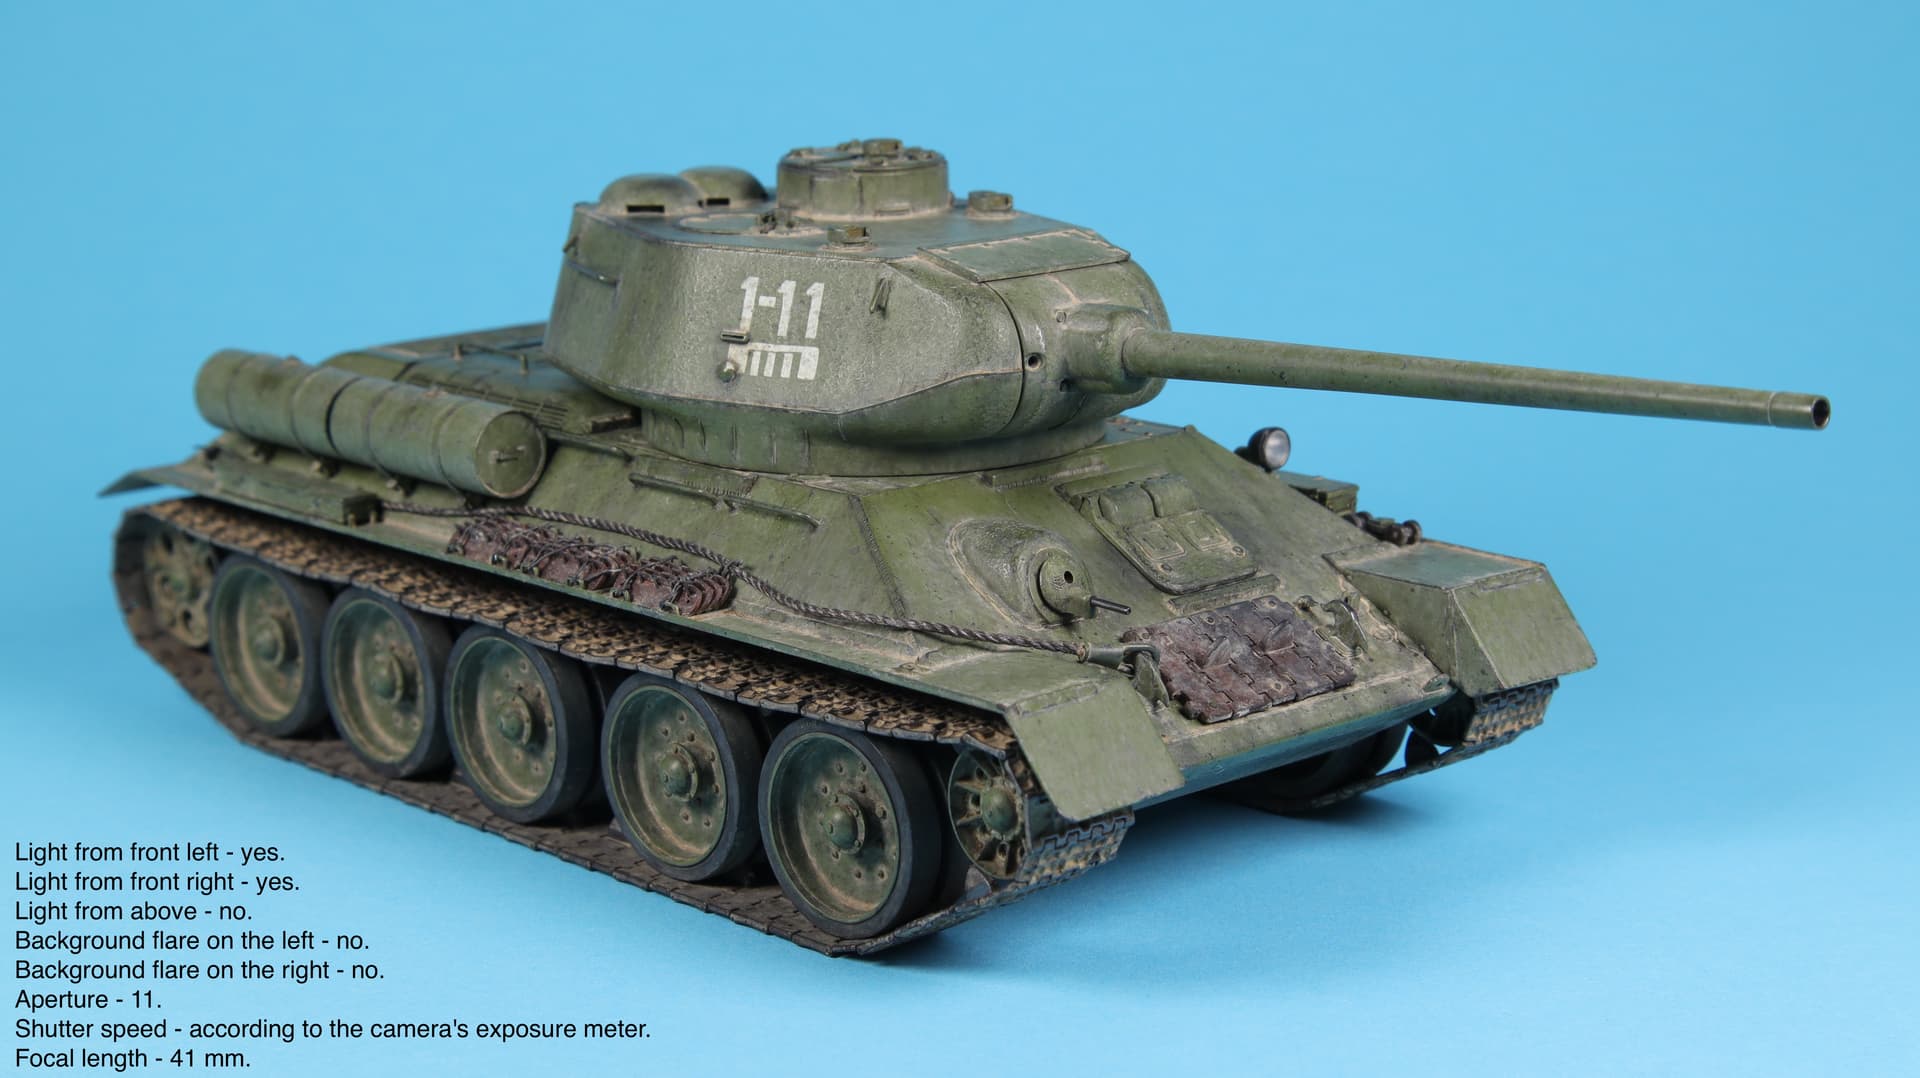
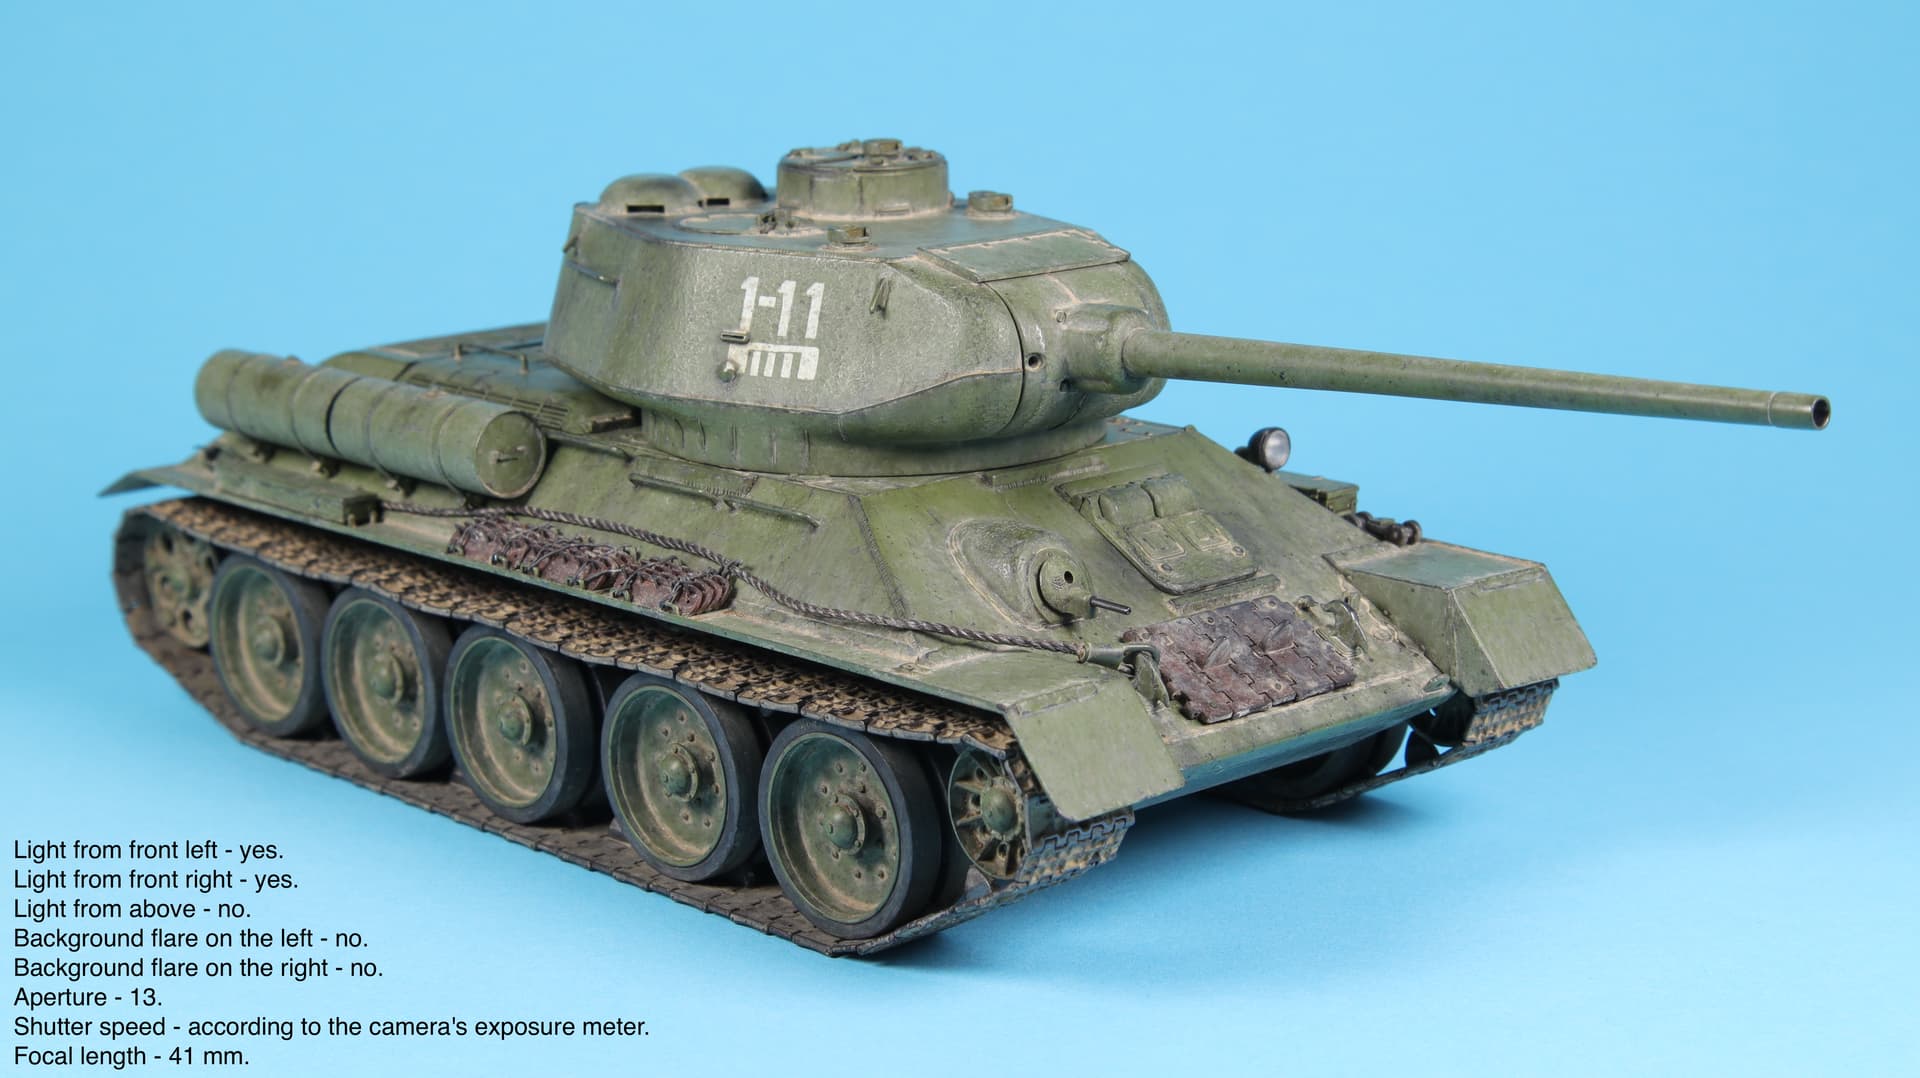
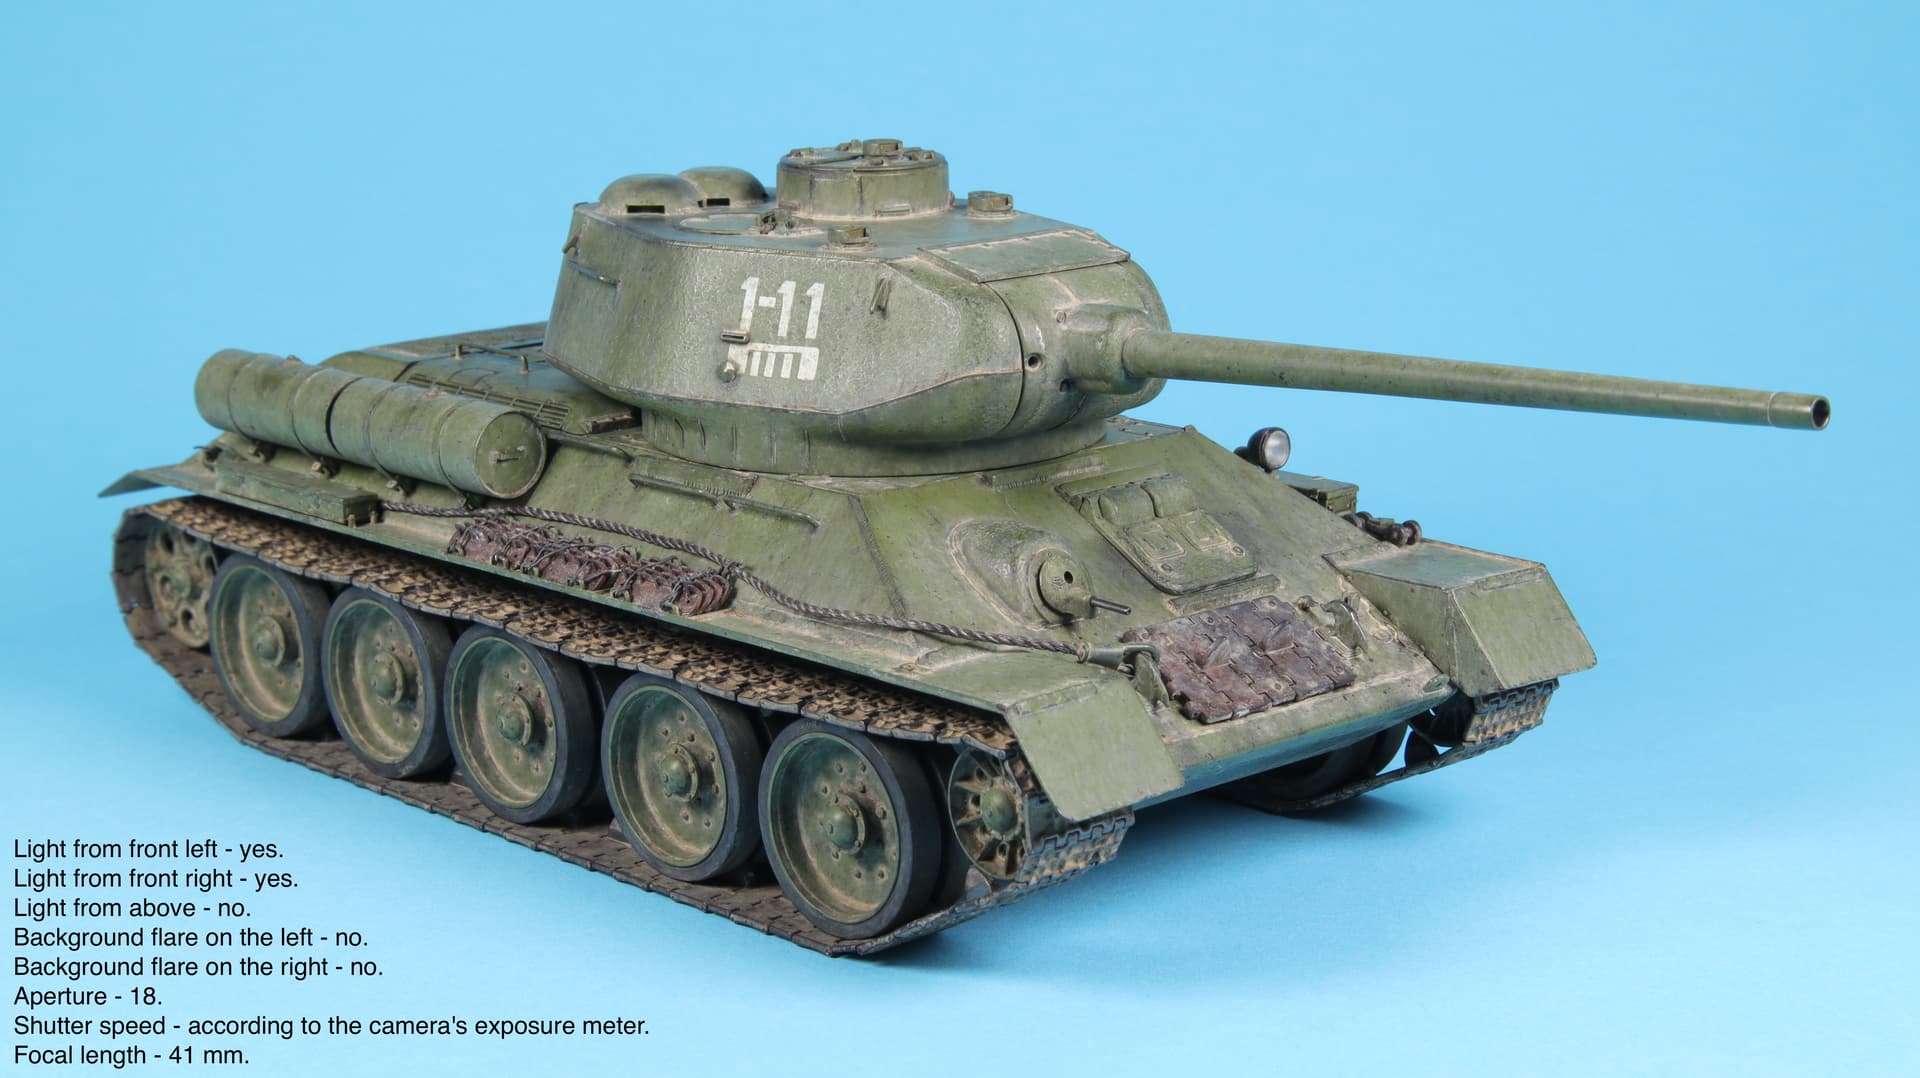
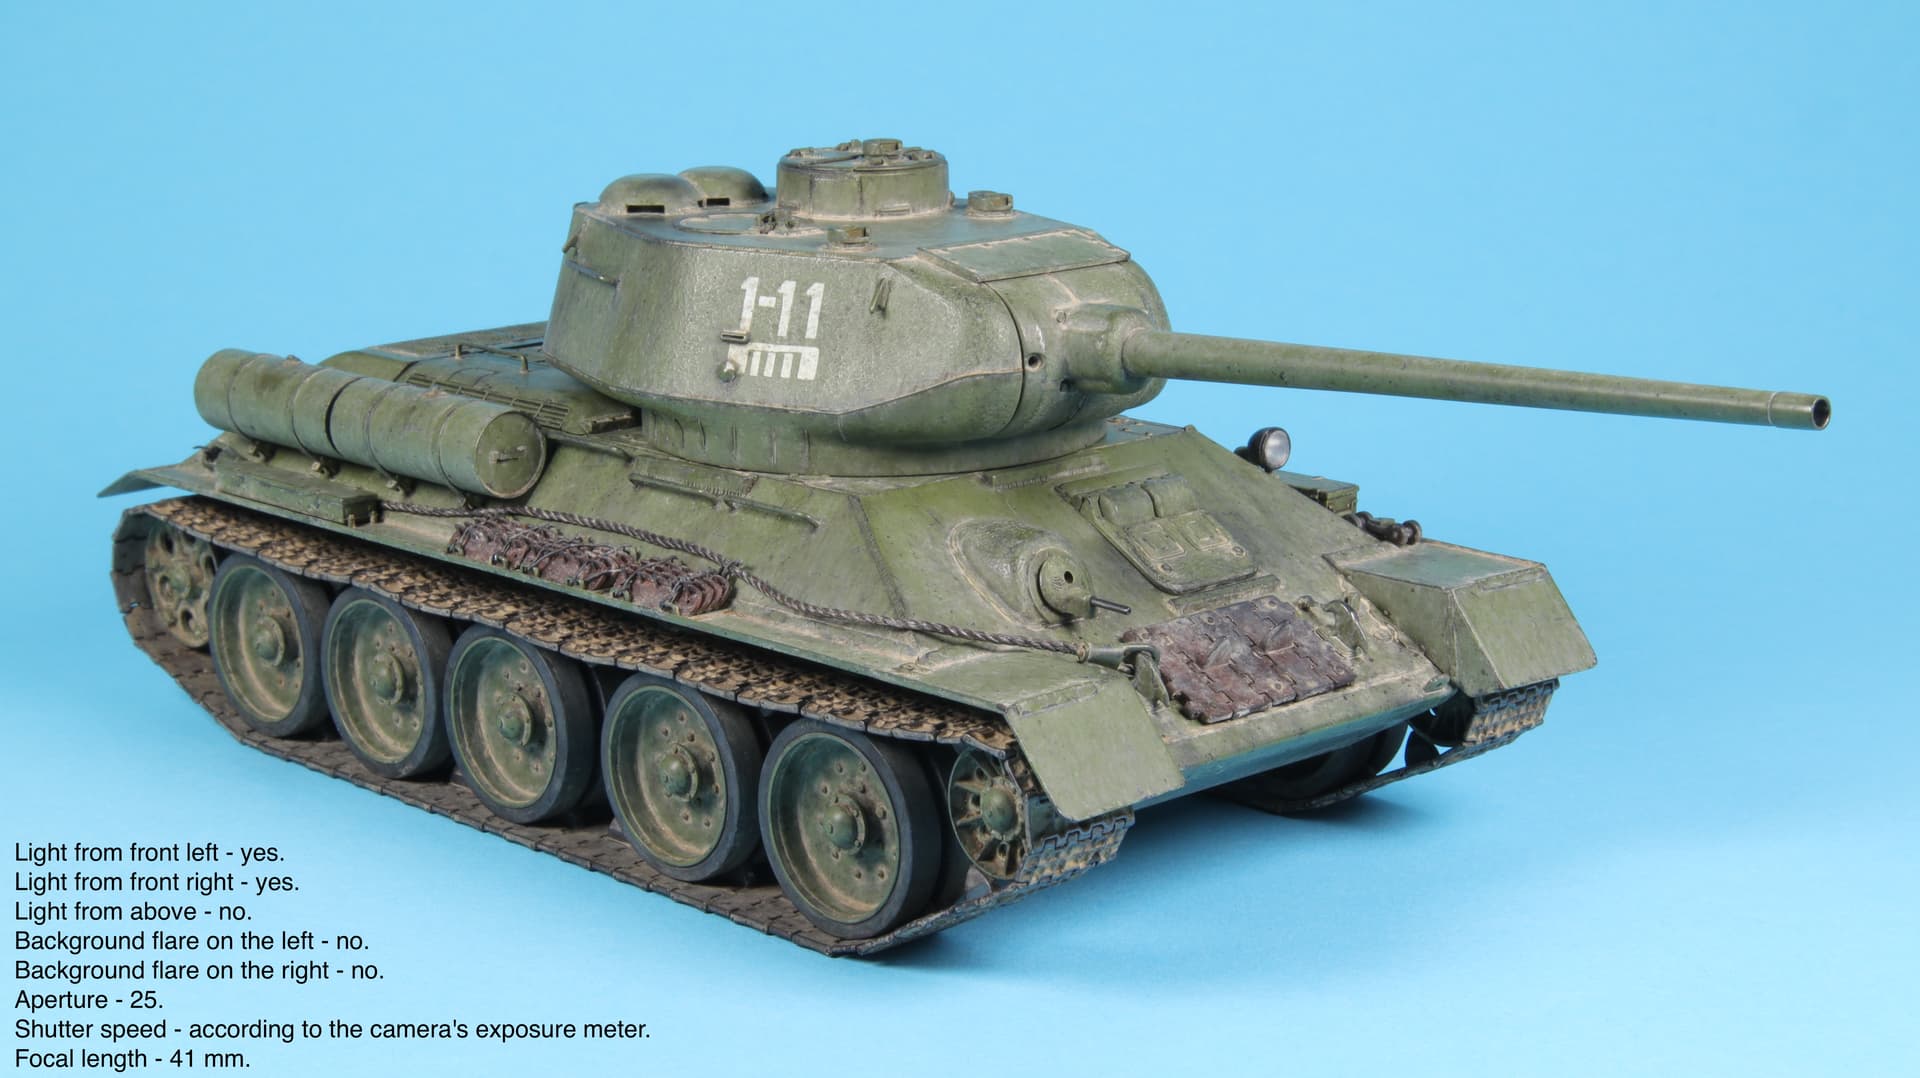
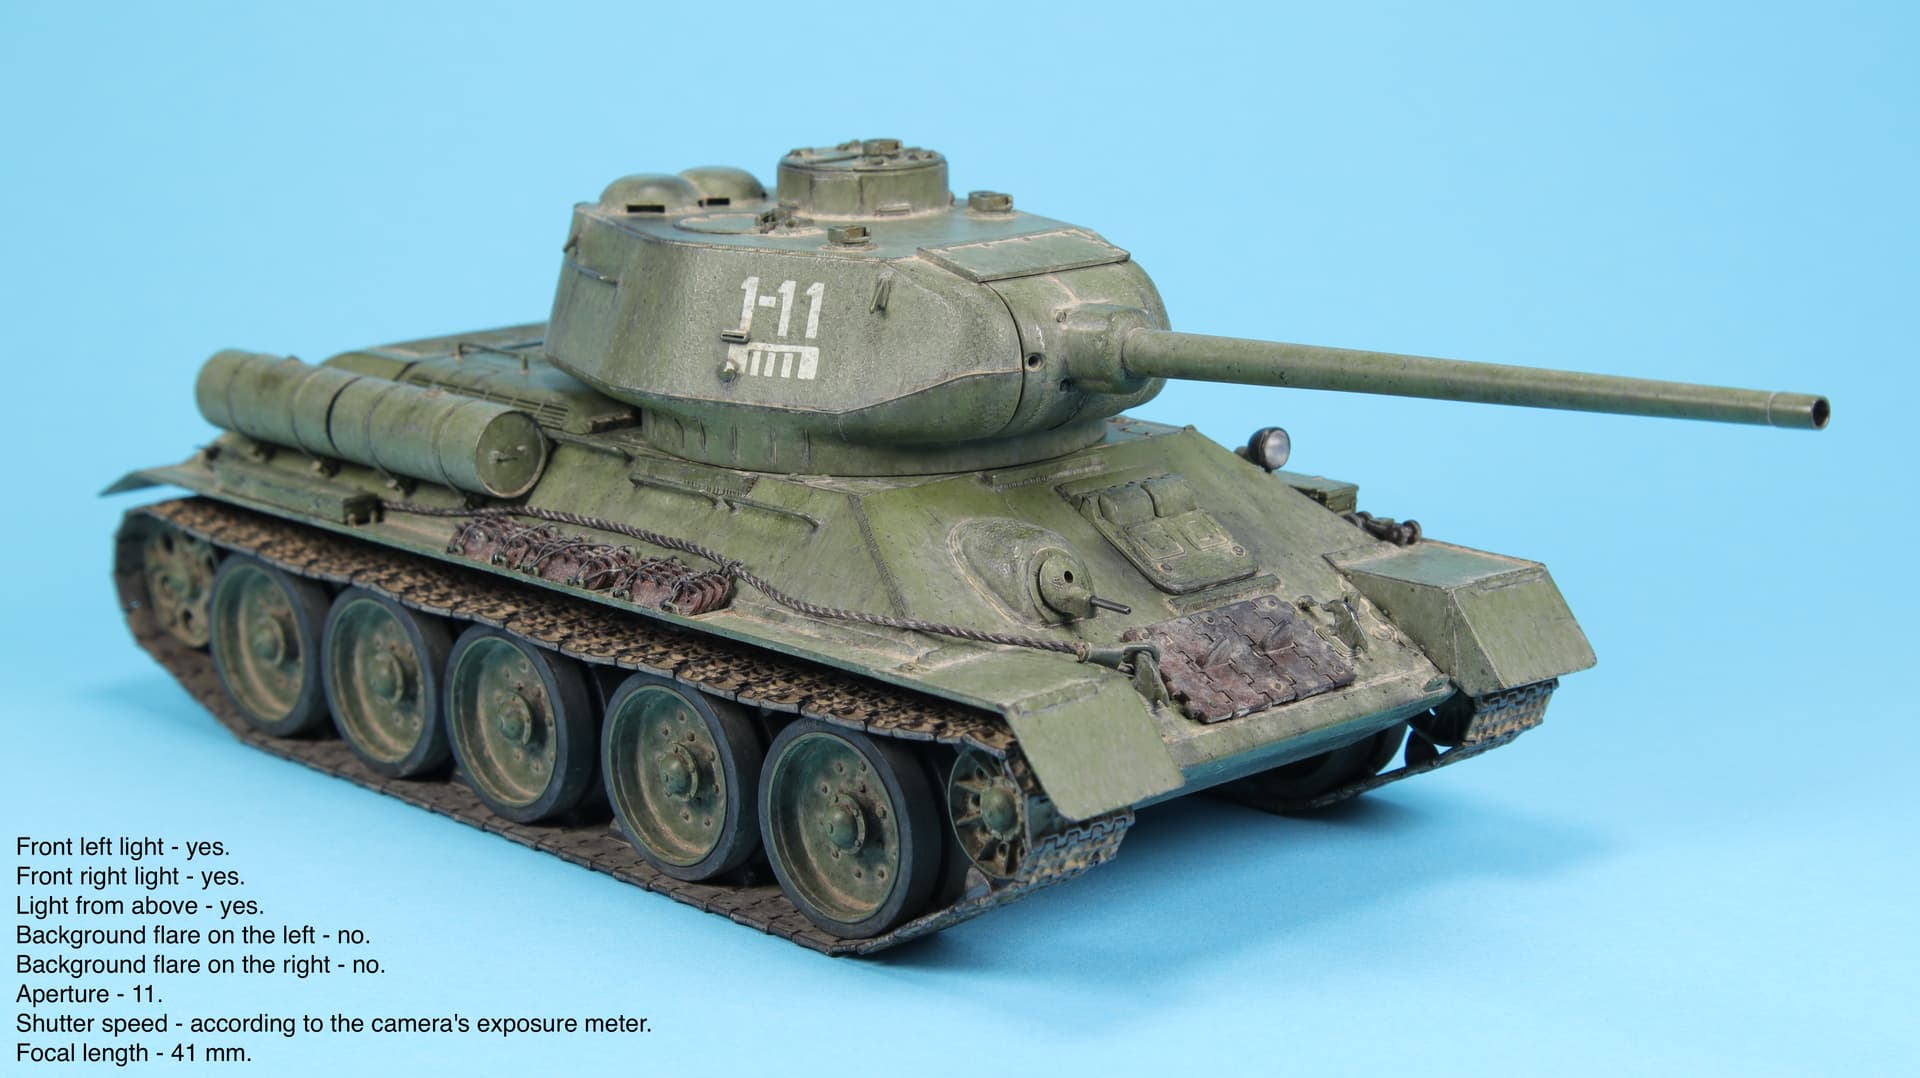
Experimented with lighting and camera settings.
In the photographs, I wrote the shooting conditions and camera settings.
And two more photos. With and without light from above.
What do you think?
f25 No light from above.
I concur, f25 No light from above. Better depth-of-field than f18.
f25, maybe with light from above?
Continuation of “thoughts”.
During the assembly process, I encountered various difficulties that were solved both easily and difficultly. This mainly concerns the running gear. I think that if the model manufacturer followed a simpler path when developing and producing transmission parts, this would only improve the assembleability of the model and save a lot of time on its assembly. It took me about 3 hours to tinker with the positioning of the road wheels, idlers, and drive wheels. In Tamiya models, for example, this takes “a matter of minutes.” Conclusion 2 - for quick assembly, you should not take a model that contains complex and incomprehensible solutions.
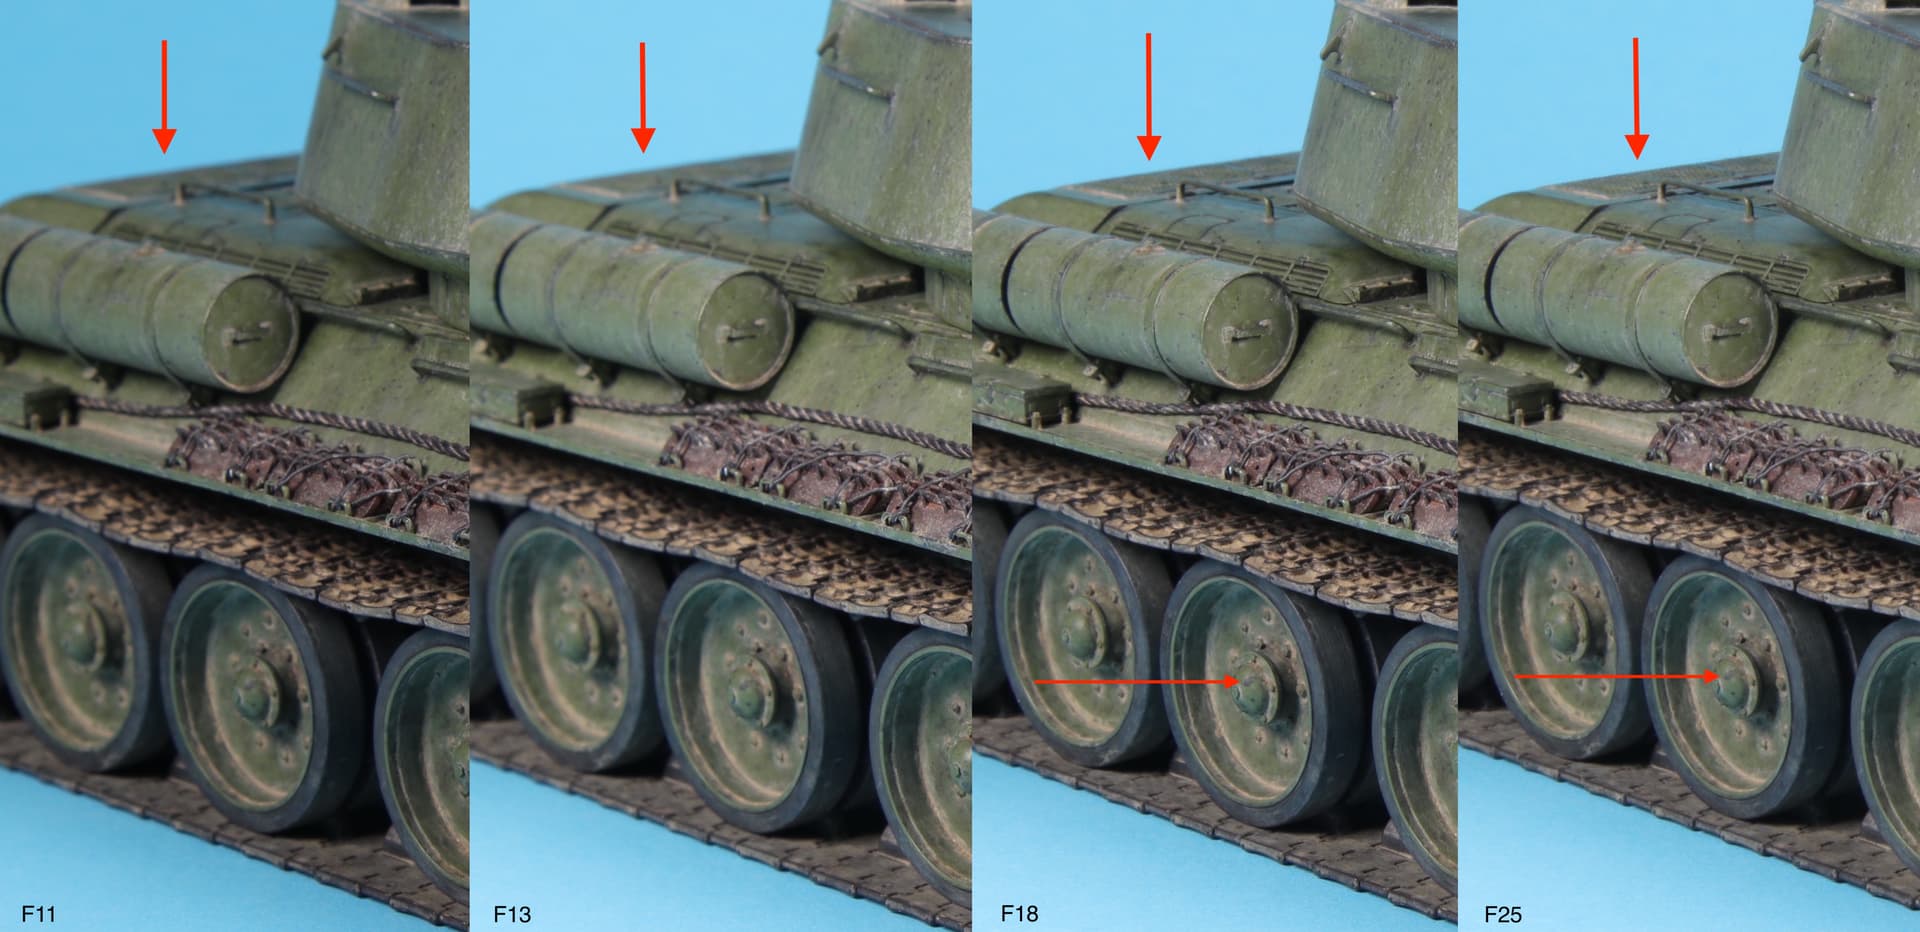
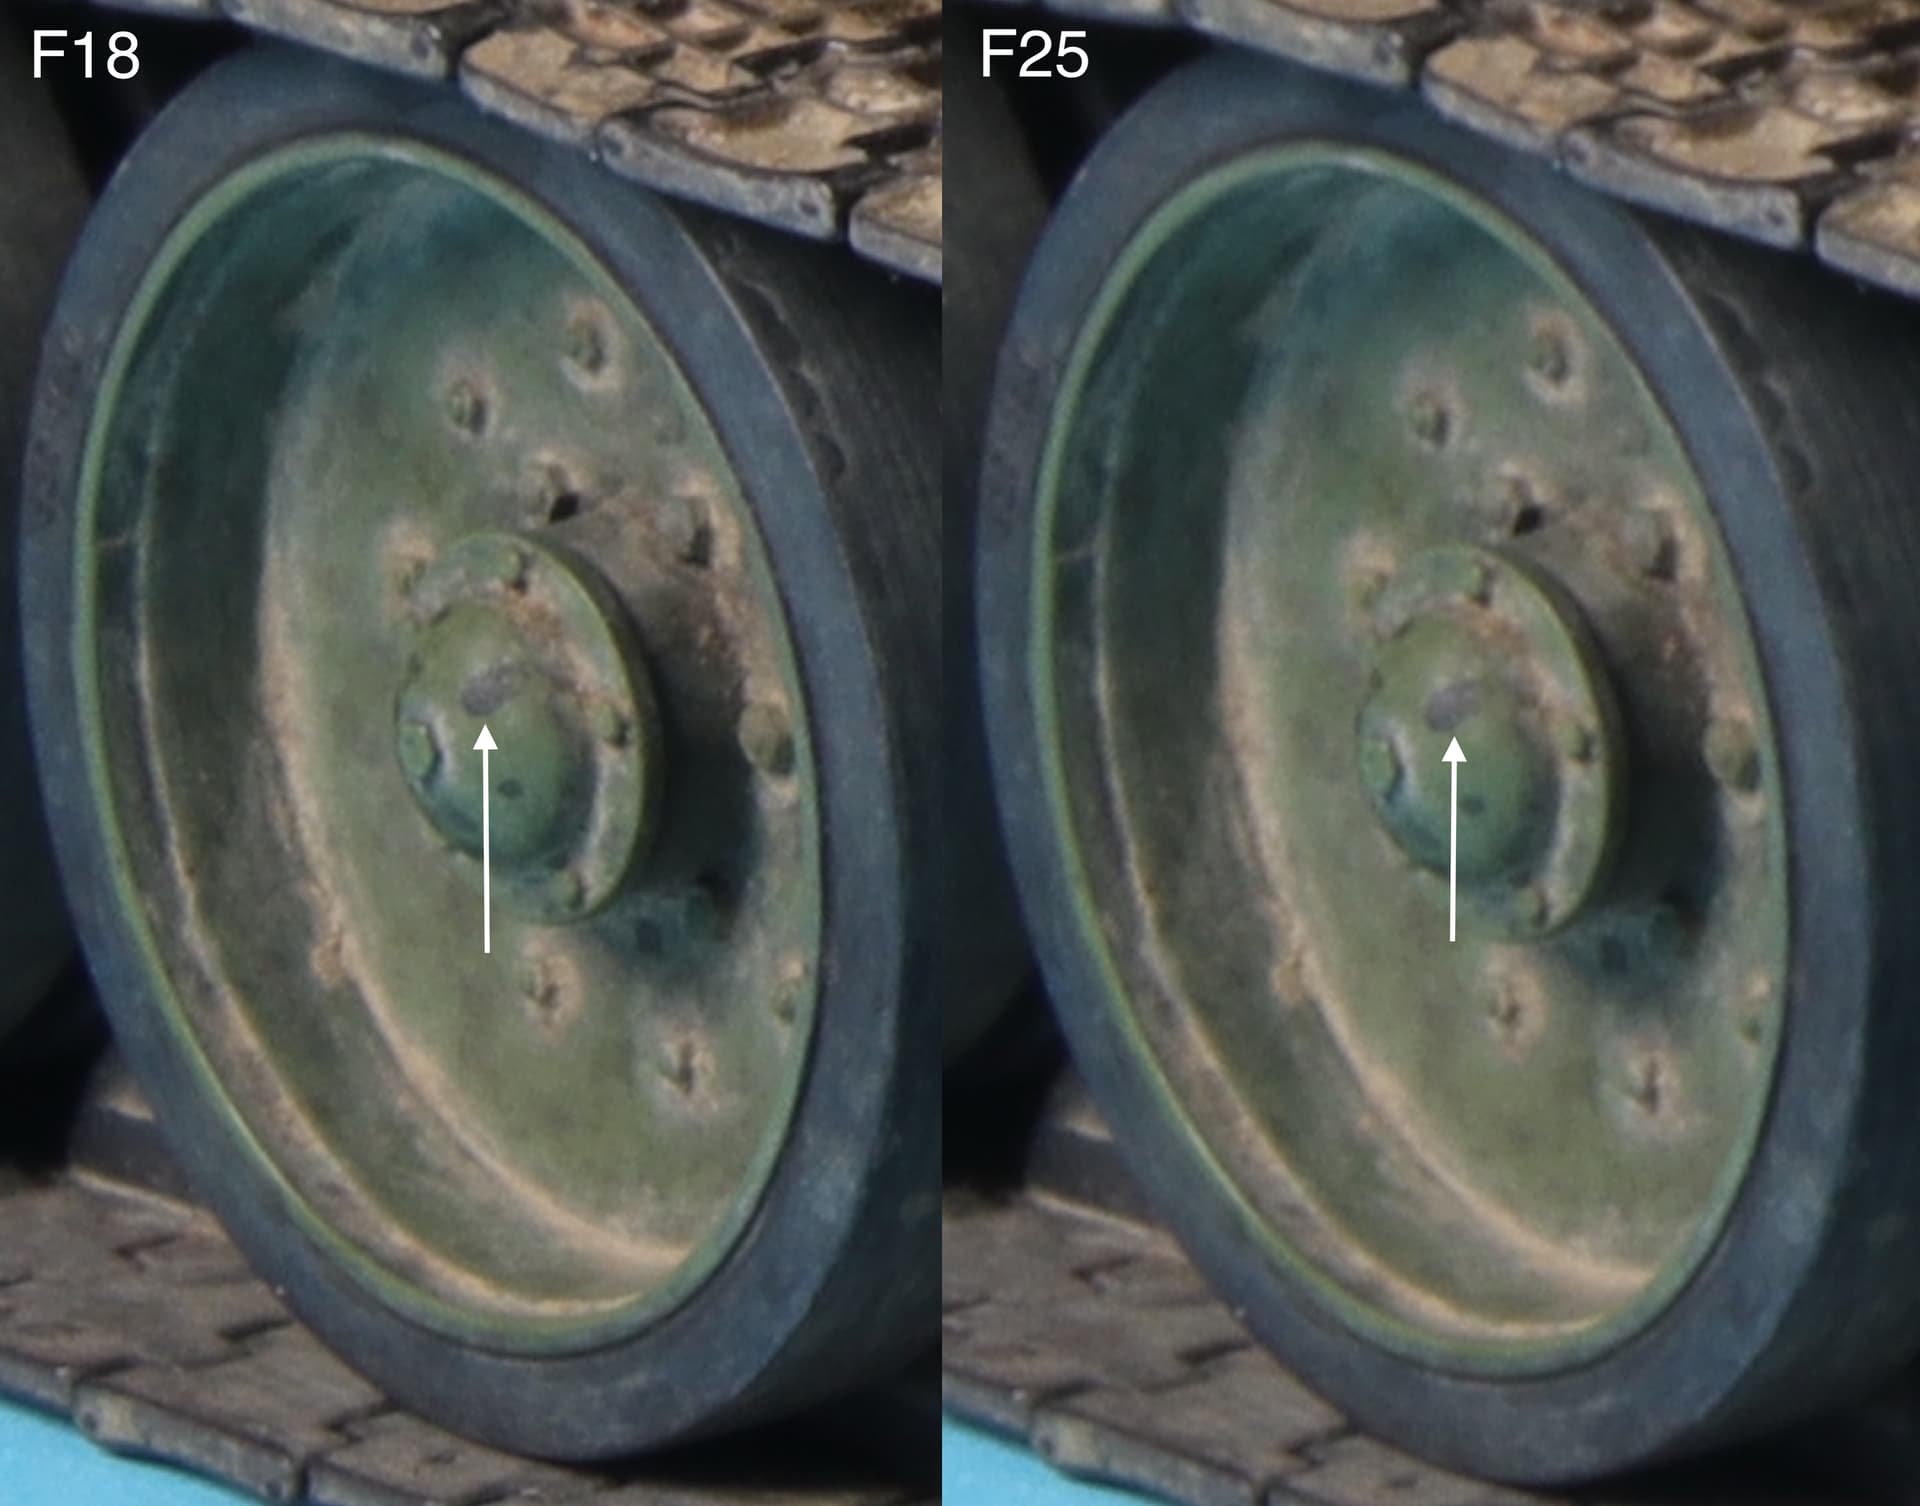
Matthew! As it turns out, there are some nuances at aperture 25.
Middle road wheel.
Even still, a so-called “quick, small scale, low parts count, easy to paint” kit can run amuck once research, accuracy, aftermarket and scratch-building are added into the equation — if so inclined it can take hundreds of additional hours. Ask me how I know.
—mike  …
…
PS: If I haven’t said it before: Your building, painting and photography go well above and beyond what most modelers would ever think to achieve — astounding! This will go into the modeling history books for certain. Brilliant!
[quote=“justsendit, post:476, topic:27719, full:true”]
Even still, a so-called “quick, small scale, low parts count, easy to paint” kit can run amuck once research, accuracy, aftermarket and scratch-building are added into the equation — if so inclined it can take hundreds of additional hours. Ask me how I know.
—mike …
I agree 1000%!
[quote=“justsendit, post:476, topic:27719, full:true”]
Mike! Thank you!
I myself am more skeptical about my modeling work. I still have a lot to learn. I just try to follow my principle - “Today I must do better than yesterday!”
By the way, this principle sometimes ruins life greatly. 
And it’s high time you were included in the team to create a “User’s Guide” for modelers!
And in general, there are a lot of members on the forum who can be included in this same team!
It largely depends on the end usage… for web design or for hard publication? The overall layout of images, text and/or facing page layout can often drive a decision. … And then there’s the question… Are you proofing from a high quality print-out or only onscreen? Lots of variables at play here. … However, from this side of my large display, your images look very professional. HTH.
—mike 
Mike! I completely agree with you.
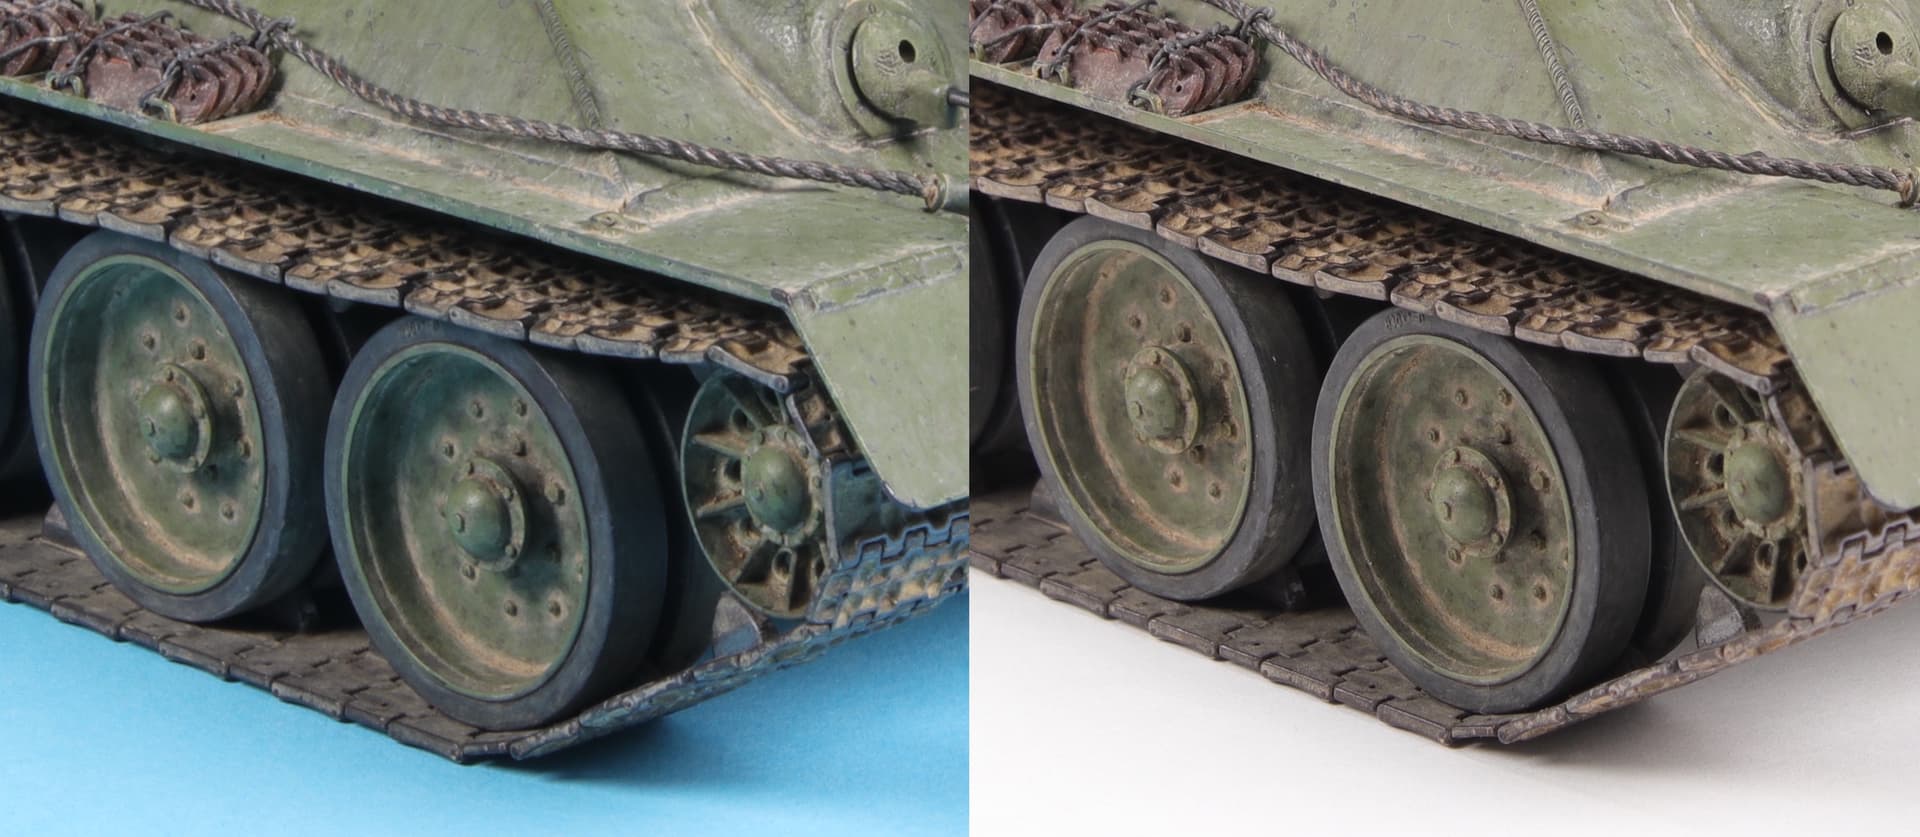
I agree that we are not a web design studio, nor, especially, a printing publishing house. And, by and large, all photographs are good in their own way. But I have a “disease” that I will probably never get rid of. It’s called perfectionism.  Therefore, I am ready to take as many more photographs to figure out which one turned out better than the others. I constantly compare the results obtained. And now, comparing the resulting photos, I noticed that the blue background reflects blue onto the model. This happens especially critically on the lower part of the model; further upward, the “influence” of blue weakens. This is very noticeable on the road wheels and their rubber bandages. They turned out “blue”. While on a white background, they look normal. Dust adhering to the rubber bandages can be seen very clearly. And on a blue background, it is almost invisible.