Continuation of thoughts.
Priming. Sometimes I wonder: is primer needed on the model? Every time I conclude that a primer is needed. In different situations, different primers, but they are necessary. In some places it is necessary to level the surface, in others, it is necessary to reveal minor imperfections. The better the base is prepared for painting, the better the result will be in the end. We must not forget about the quality of the primer. A “bad” or incorrectly prepared primer can ruin the surface. Also, when priming, do not forget about the choice and condition of the tool. Iwata with a 0.18 nozzle is clearly not suitable. A dirty and clogged airbrush can significantly ruin your life. And this means additional time spent correcting errors during priming. Conclusion 3 - it is necessary to prime. When choosing a primer and its preparation, it is necessary to be guided by current tasks.
Continuation of thoughts.
Painting. In total, the basic painting took 20 hours. And if I painted everything separately, I would only spend 6-8 hours priming and base color. In fact, all the remaining time - 12-14 hours - was spent on masks and overcoming difficulties during painting work associated with the fact that the model was completely assembled. Conclusion 4 - you should not immediately assemble the model completely. For high-quality painting and its speed, the model must be divided into separate parts and subassemblies.
Choice (selection) of color. At this stage I certainly made a mistake. The color I mixed can only be used to paint wooden fences. Complete nonsense. And although Mr. Hobby offers ready-made solutions, and they are quite acceptable, I decided to go my own way. Not the very best. I began to figure out why this crap happened. Here’s what happened. The two luminescent lamps that illuminate my workspace turned out to be a Chinese surprise. Different in their color temperature! And although both of them were initially 4000 K, over time they stopped shining with white light. One lamp began to shine with light with a red tint, the second - with a green tint! Moreover, I did not notice this right away, but quite by accident and only after a thorough cleaning of the table. The top of my desk is covered in white plastic. It was on this white one that I saw this problem. Some of the white plastic was tinged with red, and some was tinted green. And then it became clear why it was not possible to mix the desired color, why there were problems with the choice of pigments and compositions for weathering. In general, I will not go into further vicissitudes, but will immediately voice two main conclusions. Conclusion 5 - if there is a ready-made color solution, then it is better to use it. Conclusion 6 - I need to do any color selection only in daylight. Moreover, I need to make test paints and look at them from different angles, under different degrees of illumination.
I very much appreciate all the time you’ve put in to analyzing your work and sharing your conclusions with us.
Thanks, Sean!
I hope all this information is useful to someone.
And, alas, all this really takes a lot of time.
Vlad, your observations and conclusions are not only valuable to yourself, but to all who read your blog. Thank you.
Thank you so much, Matthew!
It’s just that in writing my thoughts I don’t make any discoveries. And all this, it seems to me, is a long-known truth to everyone. Therefore, it always seems to me that everything I write is just a waste of time on something that has already been known and understood for a long time. On the other hand, I like to analyze the work done, study mistakes, and, accordingly, draw certain conclusions.
In any case, I am sincerely glad that this work on analysis, in addition to work on the model itself, is of interest and brings practical benefits. 
Continuation of thoughts.
A large number of repeated weathering steps.
A very difficult question, in fact. On the one hand, I followed the path of the concept - “dirt, dust, rain/snow - dirt, dust, rain/snow - dirt, dust, rain/snow, etc.” and tried, with the help of numerous layers, to give the model the appearance of a tank that had been in service. On the other hand, most of the applied effects were either washed away by subsequent layers or painted over by them. On the one hand, it turns out that I did a lot of unnecessary work, on the other hand, the model would not be the same as it is now. Difficult question. It should not be forgotten that each subsequent stage of weathering changes the color of the base paint. In general, it all depends on what kind of end result we need. Conclusion 7 - the number of weathering stages depends on the final result I want to get. Conclusion 8 - with the help of multi-layer weathering you can adjust the base color of the model. Conclusion 9 - a large number of repeating weathering stages is not always justified.
I think that the conclusion 8 means that we can do less stressing over the exact color of paint that was originally used at the factory. It will be changed by the weathering and so searching all over for exact matches to paint chips may be overkill.
There is always new folks who don’t have the same knowledge and benefit from your sharing.
Jack! Yes, I completely agree with you. And it can save working time.
It seems to me that if you do “two-color chips,” then the light part of the chip can simply be lighter than the base color. And you don’t need a long and tedious selection of colors. The main thing is that it should not be too bright, but should contrast with the base color. And the light part of the chip will end up darker after weathering too.
Here the question is different. You won’t be able to paint chips using Mr. Hobby paints. It is not suitable for this type of work. You can paint chips with high quality only with Vallejo acrylic-vinyl paints (or other paints similar in composition). At the same time, they must be diluted with the original thinner, water must be added, and a retarder must be added. And there is not always a ready-made solution in stock. Here I had to select a color, since I don’t have that many Vallejo paints in stock.
Although, by and large, given the microscopic nature of this lightest area, it was possible to choose any ready-made color that would be lighter than the base color. I just didn’t quite like what I had. But, these are my nitpicking. All these experiments complicate the process of working on the model. But, they provide an opportunity to gain some experience.
Ryan! Agree.
So, I’ll continue this “writing”. For those taking their first steps in scale modeling, this can definitely come in handy.
Continuation of thoughts.
Variety of weathering products.
Also a debatable question. We build an abstract model or copy a real prototype. When building a copy of a real prototype, everything is clear. We use the appropriate ready-made products and make our own. But when building an abstract model, everything is much more complicated. Here, it seems to me, it is necessary to draw up a plan for upcoming weathering work. Here it is necessary to build some kind of collective image based on the photographs you have viewed, on your own observations, and on logical conclusions. At the same time, the model should look harmonious, so to speak. All elements of the model must be combined with each other. The color scheme should not be “broken”. In this regard, I made many mistakes, not all of which I managed to correct. For example, the sides of the lower part of the tank hull and the chassis. I performed weathering using different techniques and a large number of different weathering products. The result was motley sides and blurry road wheels. The sides have their own color of dust and dirt, the road wheels have their own, and the tracks have their own. Well, okay, let’s say the sides are not so visible. But I had to “align” the tracks, since I didn’t quite like their light shade and their “mosaic” appearance, when there are several earth colors on one track at once. It looks nice, but it’s not realistic. The road wheels also proved problematic. Too many weathering products at the very beginning spoiled the overall picture. It took a long, tedious and repeated time to correct everything. And this took me a huge amount of time. Not the least important role was played by the fact that the entire chassis was completely assembled. The inability to work on hard-to-reach areas, the inability to see all the rotating elements of the suspension at the same time - all this negatively affected both the construction process and the intermediate results. In order not to bore you with reading, and myself with writings about my philosophical delights on the subject of weathering, I will move on to the conclusions that I made for myself. They concern the construction of an abstract model.
Conclusion 10 - the model should not be completely assembled. All subassemblies and large elements and parts can be finally assembled only after the completion of the main weathering work. It is clear that elements such as fuel tanks, brackets, handrails - all this can be glued at once. But all elements of the chassis, hatch covers, cables, etc., must be painted and treated with weathering products only separately from the entire model.
Conclusion 11 - do not use too large and too varied a number of products. It seems to me that there must be washes and streak effects. To imitate dust and soil, in my opinion, it is enough to choose one or two products of the main color, one product to lighten the main color, and one product to darken the main color.
Conclusion 12 - pigments are best used as a filler for the main product.
Conclusion 13 - weathering products are not always suitable for solving certain problems. Somewhere you need to use paints. (For example, soot from the exhaust. It is very specific in its shape, and I was not able to do it well with pigment.).
Conclusion 14 - it’s better to do it “very thin” a hundred times than to do it “fatly” once and ruin everything. It’s better to put the model aside for a while, and then look at it again “from a different angle.”
Continuation of thoughts.
Another factor that influenced the construction process was the different time intervals in construction. Due to various circumstances, I built the model with interruptions of months. And this does not contribute to quality in any way. The pace is lost, the vision of the overall picture is lost.
Conclusion 15 - continuity of the process is needed, without long breaks.
Distractions. Internet, television, smartphones, tablets… This is just a plague of the 21st century. All this makes it difficult to think calmly and concentrate on something. At some point I realized that if I didn’t turn it all off in one fell swoop, or at least “turn down the volume,” then I would never do anything, build anything, or achieve anything. It is clear that there are so many interesting things around. I have to choose - surf the Internet or build models. Blogging is also a huge distraction. I spent 300 hours on the model, and I spent even more on blogging, taking photos, uploading photos and commenting.
Conclusion 16 - if I’m going to build a model, I disconnect as much as possible from everything around me and get involved in the building process. From start to finish. Full concentration on work.
Conclusion 17 - before starting construction, I need to decide whether I need to blog. And if yes, how and in what format. That being said, I need to be ready for the next “year” of construction.
Continuation of thoughts.
Planning. As I have learned from my own experience, this is simply necessary. A clearly drawn up action plan gives a clear understanding of everything - the timing of construction, the choice of tools, the choice of paints, and weathering products. And if you write it on paper, then it will become a great assistant in achieving your goal - to make a completely finished model. When I see how the points of the plan are being fulfilled, step by step, stage by stage, it motivates me to complete what I started. A plan will also help you save time. For example, when painting different parts the same color, you can forget about some small thing. And then, the next day, this small thing catches your eye, and you realize that it, too, should have been painted that color. And again you begin to prepare the paint, and airbrush, paint the only part, disassemble the airbrush, and wash it. And all because of one small detail! And when drawing up a plan, the probability of forgetting about this very detail is almost zero.
Conclusion 18 - before building a model, I need to draw up a detailed plan for its construction.
Continuation of thoughts.
And, perhaps, two more important conclusions that I made for myself.
Conclusion 19 - I need to learn to see the END RESULT of all the work BEFORE I START IT.
Conclusion 20 - I need to learn how to MENTALLY go through ALL STAGES of creating a model from beginning to end.
These two main conclusions are the KEYS. The keys to everything. To choosing the model itself, drawing up a construction plan, choosing tools, paints, and weathering products, minimizing all kinds of errors, etc.
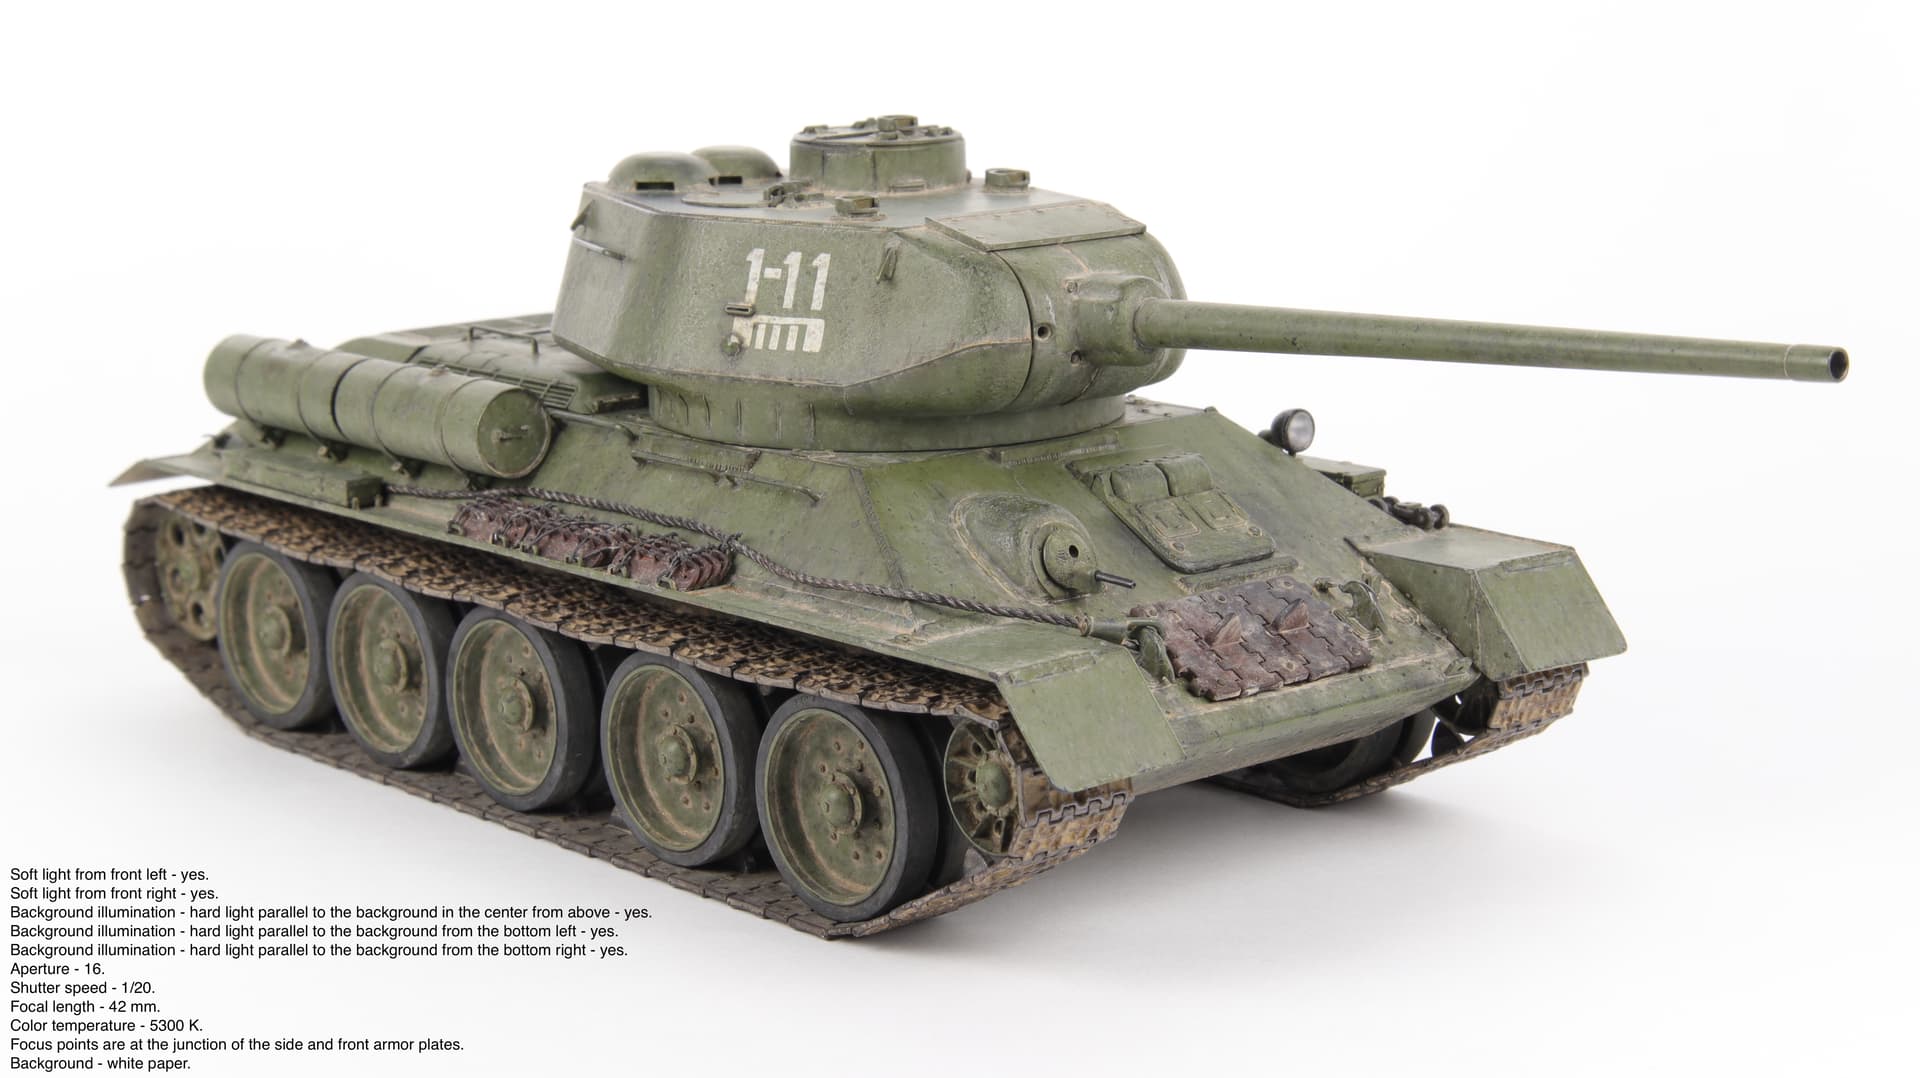
I also took this photo.
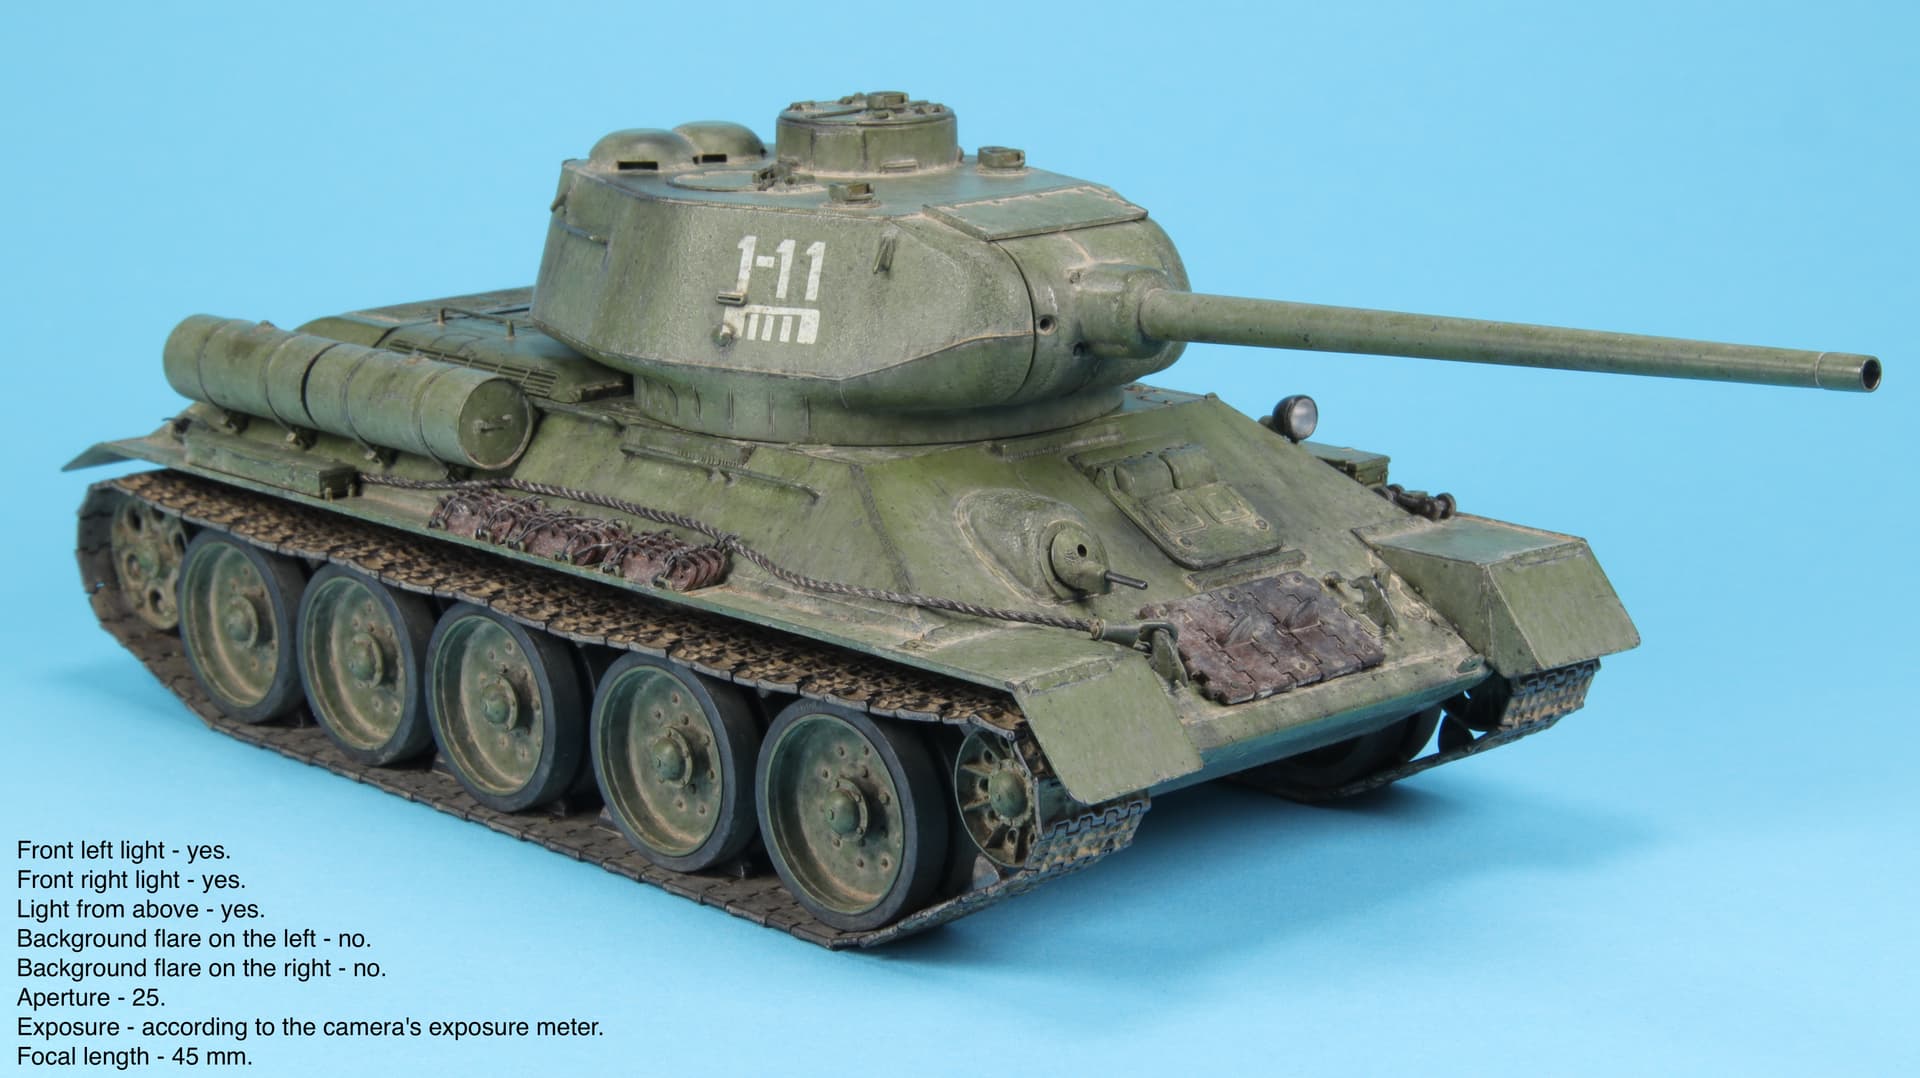
And the same on a white background.
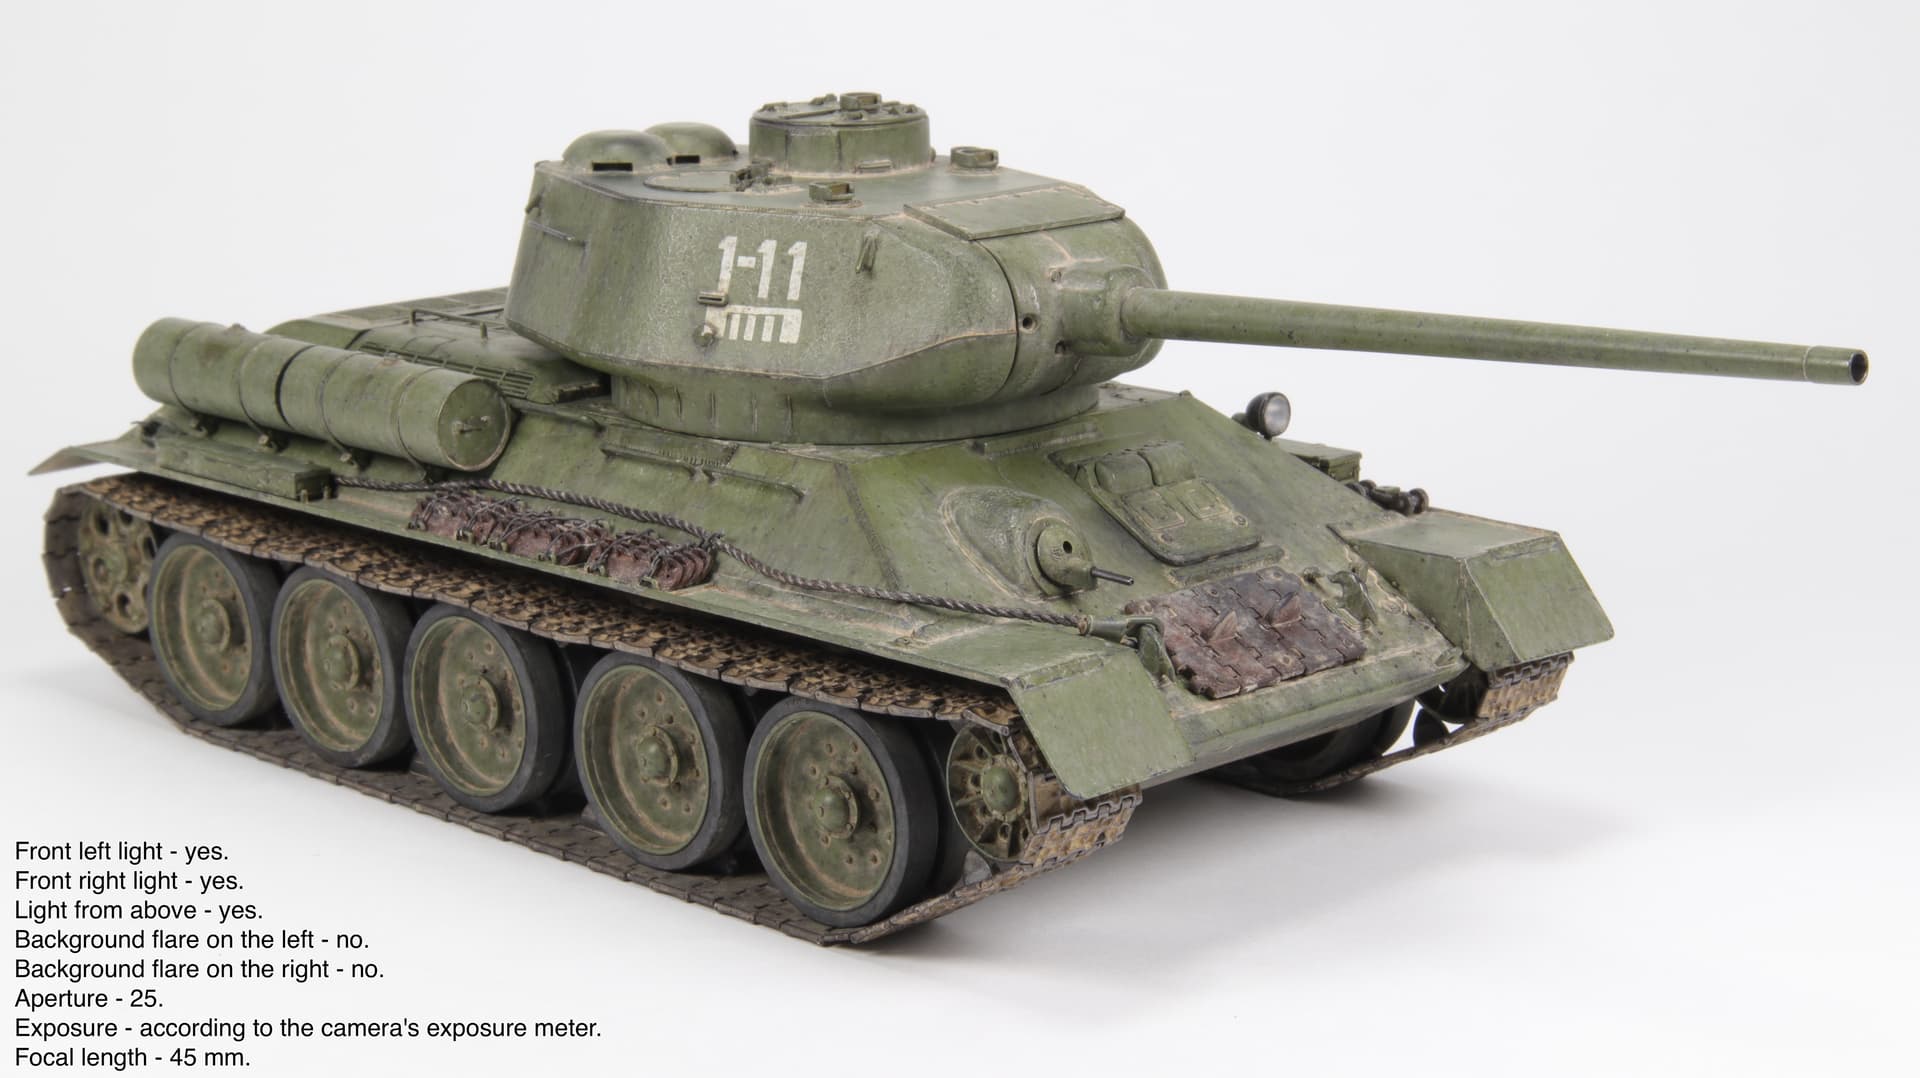
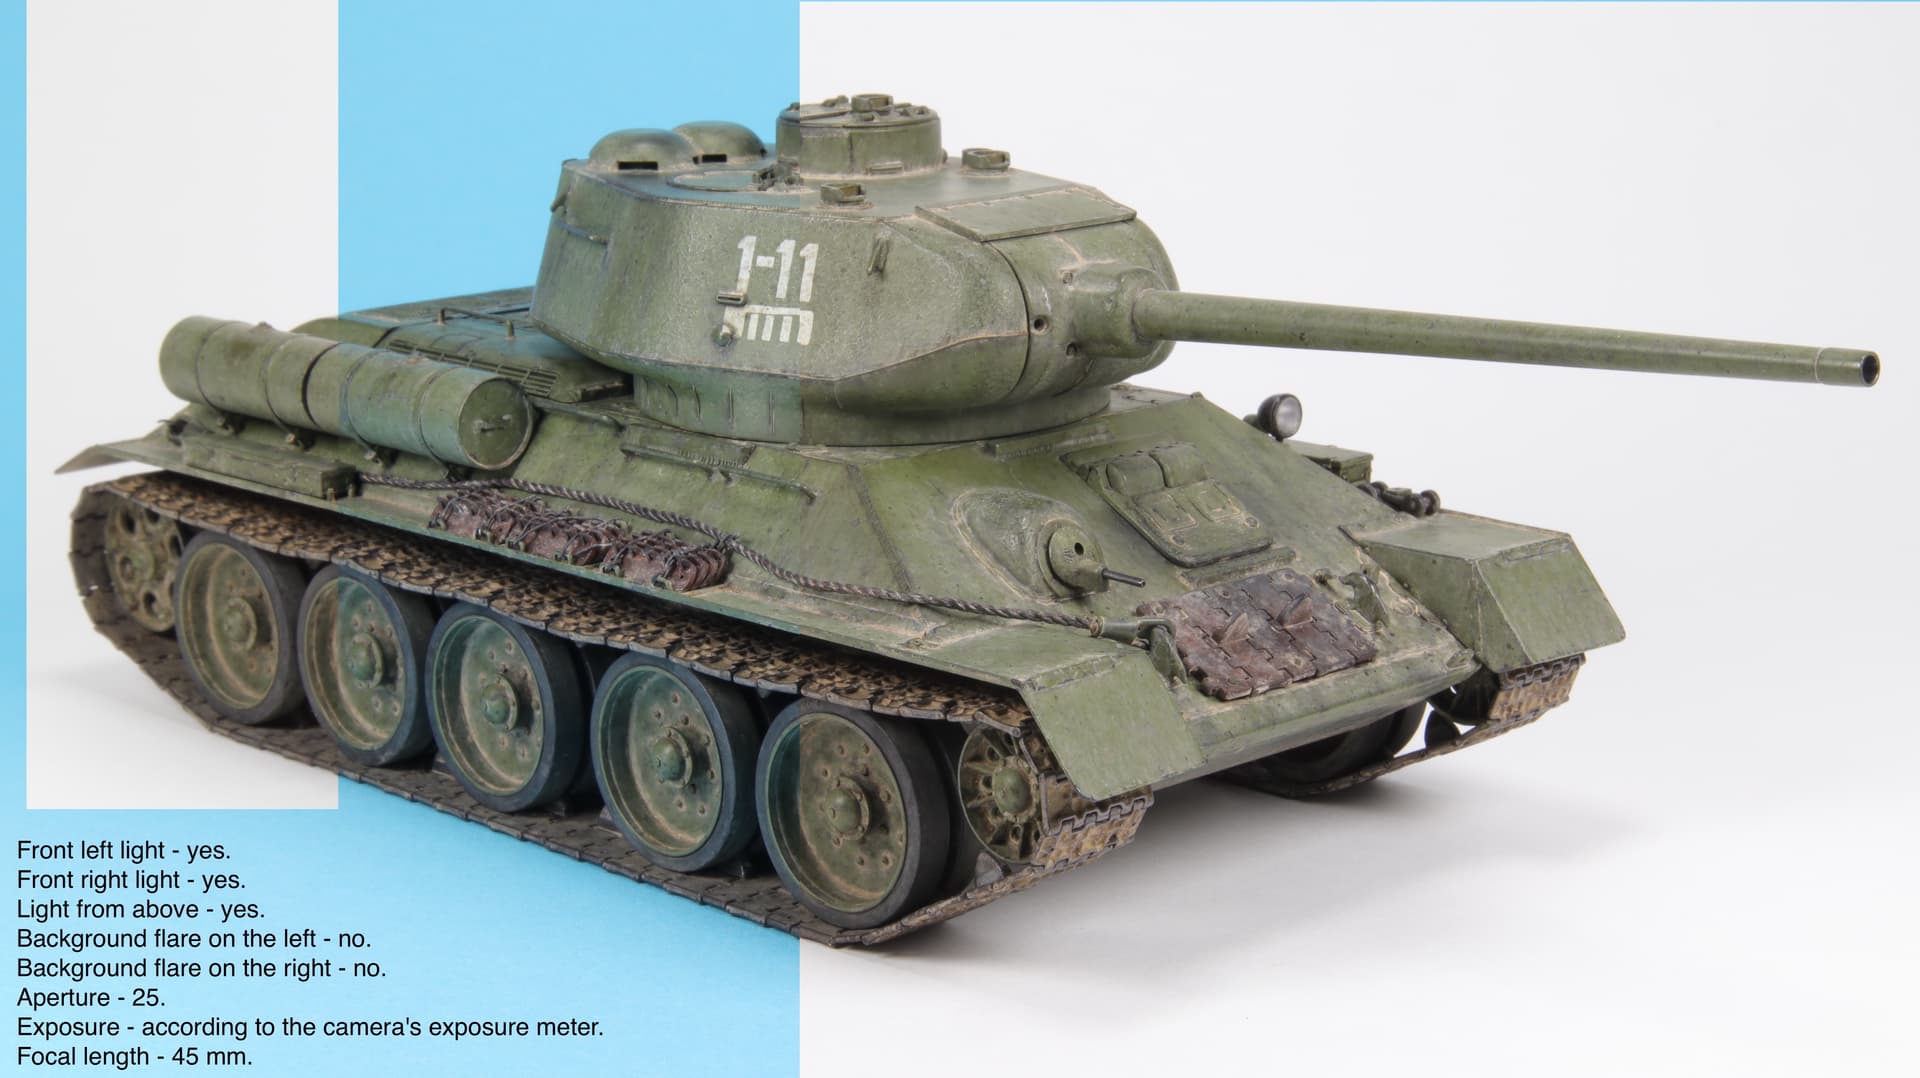
And for comparison.
Notice how the blue background affects the color of the model.
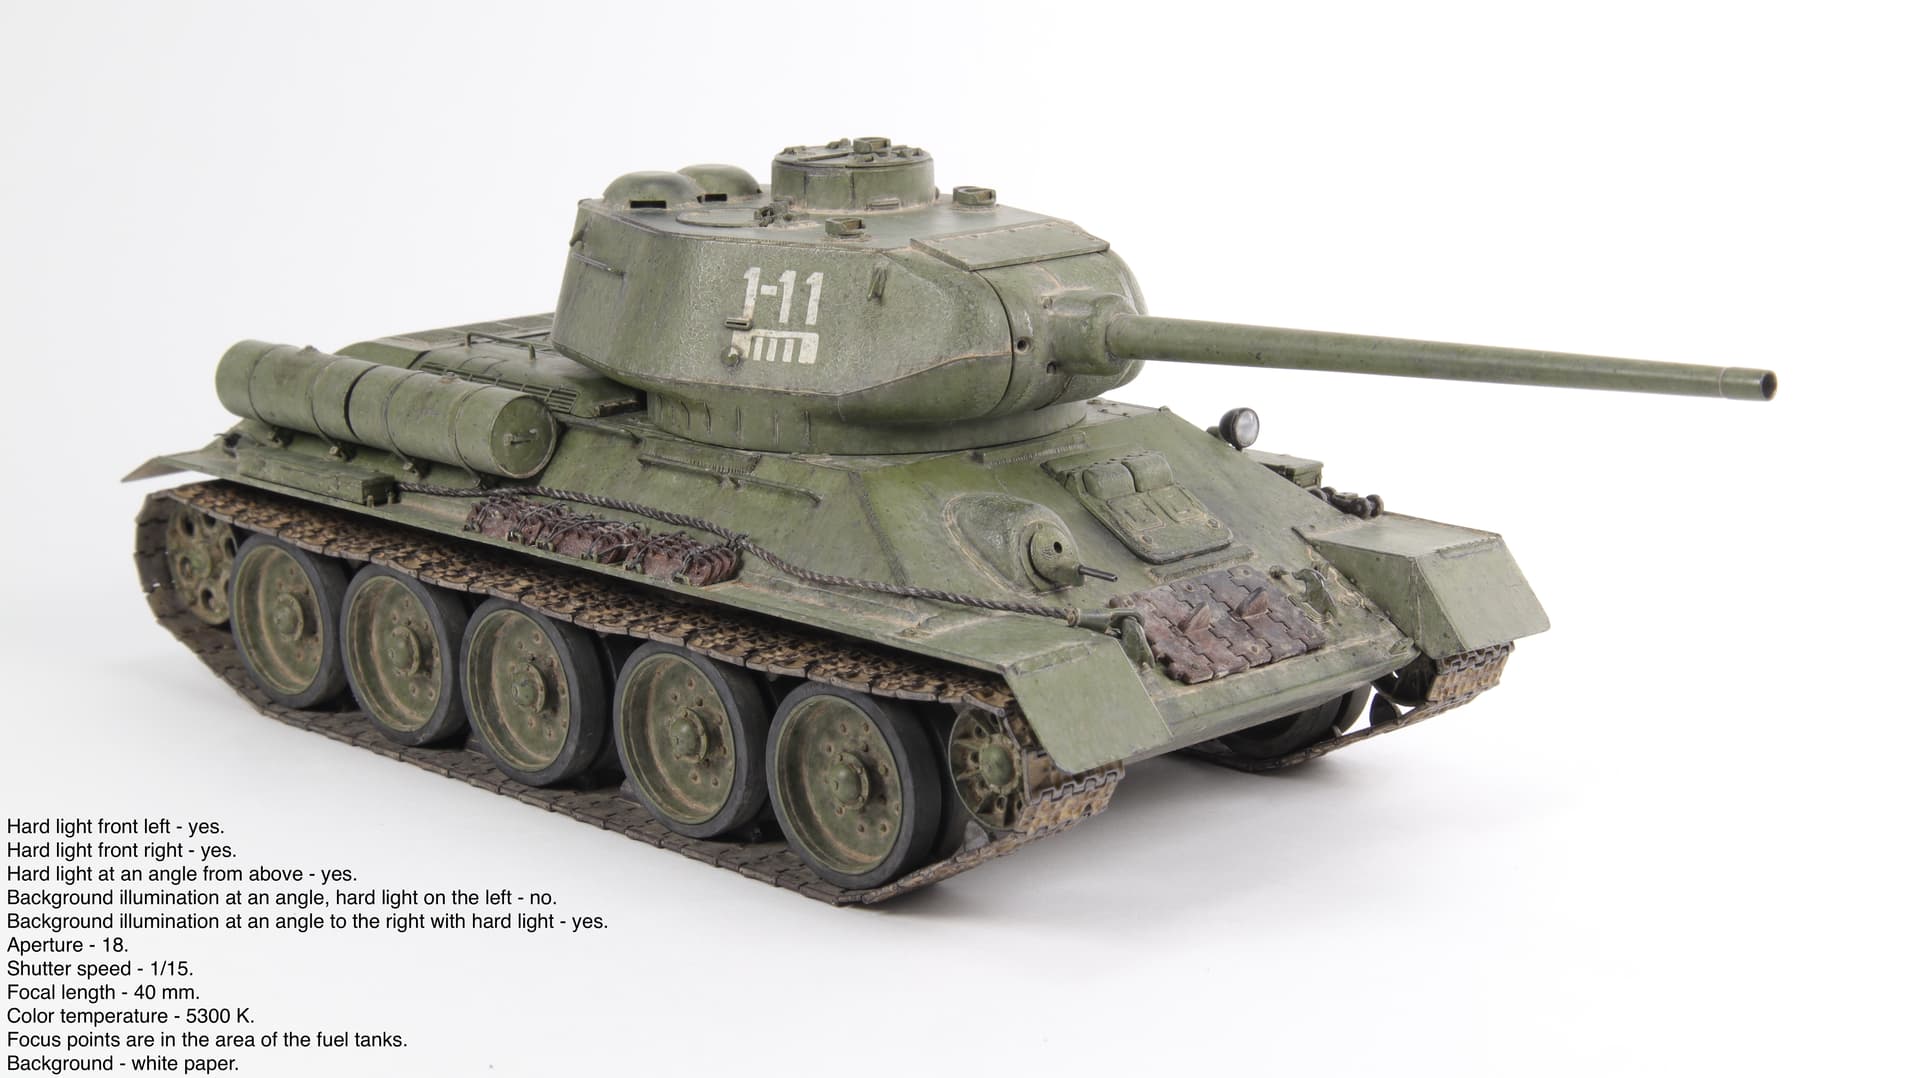

Wade! Sorry, had to delete it. Uploaded for checking.
Bravo Vlad, your magnificent obsession is completed at last. It’s a beautiful result, and your journey has been as interesting as the result. Certainly I agree that the best approach is to imagine and fix the final result in the mind before even opening the box. That forces the modeller in some circumstances to explore/practice maybe new skills to achieve the desired result, which surely is the best reason for the hobby, and the most satisfying when successful.
And if/when it becomes impossible to achieve an aspect of the original imagined result, it’s equally satisfying to adapt to that circumstance and find an alternative solution that – if lucky – actually exceeds the original idea.