smolensk,
Thanks so much for stopping by and checking out my Lotus 79 build, it’s greatly appreciated. And welcome to AutoScale as I haven’t seen you around.
joel
smolensk,
Thanks so much for stopping by and checking out my Lotus 79 build, it’s greatly appreciated. And welcome to AutoScale as I haven’t seen you around.
joel
Nice recovery.
Watching quietly from the sidelines.
Keith
Keith,
Just jump right in to the conversation whenever you want to.
So far the recovery has gone well. Today I got the cockpit body shell decaled minus the one decal I’m waiting for. The modified procedures worked like a charm.
joel
Nice recovery Joel, and quick too! I really like the green and can’t wait to see the Martini and Essex decals on it.
cheers
Michael
That green shell looks great, Joel! 
We just had another heavy rainfall here for an hour or so. Our summer 2021 is definately not a dry one …
Stay safe over there!
Torsten
Michael,
Thanks for checking the progress in my recovery from the small disaster. Paint came out perfect, actually looks better now then before. And I decaled the cockpit shell minus the decals I’m waiting for. With my new procedures I had zero issues. I now let the decal solutions do their jobs with as little fusing with them as possible.
My thinking after exchanging emails with Michael, is that his new decal paper has a thinner decal film, so it scales out better, but what we always loose track of is that race cars from the 1960s on used vinyl stickers for almost everything. Easy to replace when needed, no mess, no fuss. Only the basic shell colors were painted, and even that has changed with the advent of those insane color schemes we see today.
joel
Torsten,
Always great to get your input into one of my builds. As I said to Michael just before, everything turned out better then it was originally, I learned how to handle the new Indy Cal decals much in the same way as so many of the AM decals I do use.
Sorry to hear that you’re in the middle of another rain storm. In a sense so are we here on Long Island as Cat 1 Hurricane Henri is presently here paying us a visit. Fortunately for us it being a Cat 1 is more like a long lasting tropical storm where flooding is a major issue. I live near the center of the Island so local flooding only happens when the drainage system is full which has happened just once in more then 40 years. Actually, I worry about ground soaked so that some of my trees are blown down and hit the house which has happened also once. Took the garage out in one fall.
Stay safe and go model today.
joel
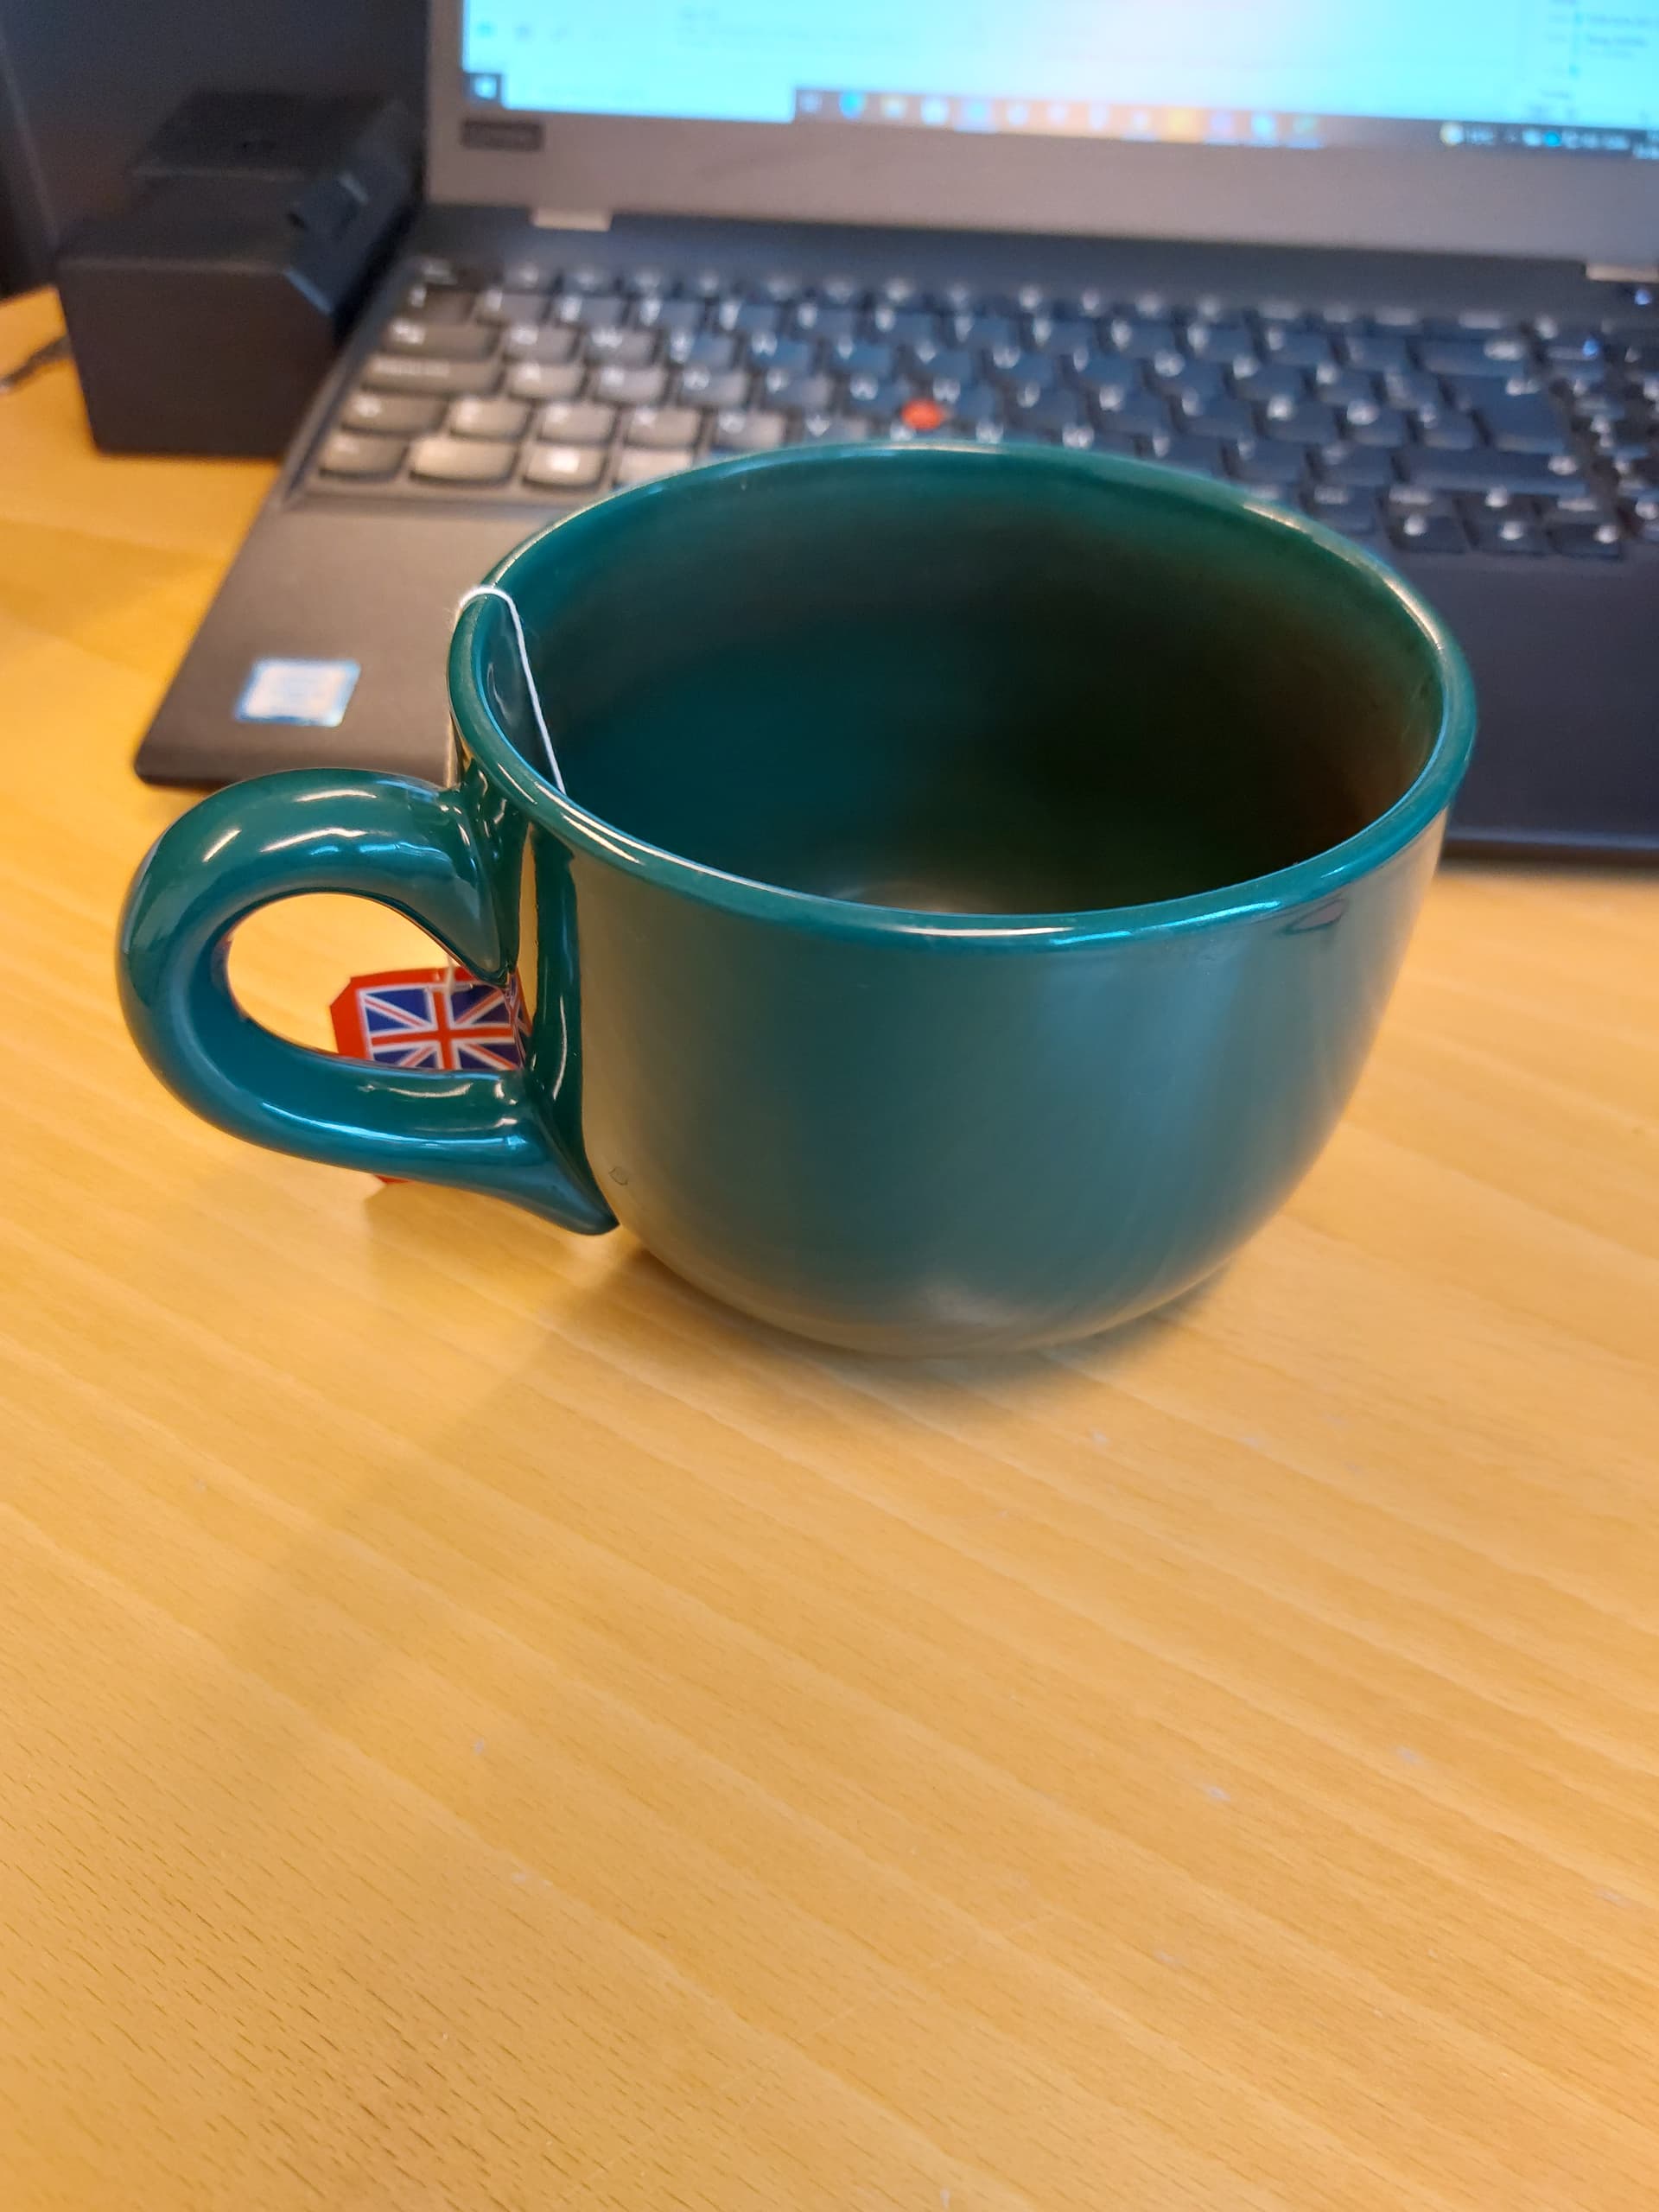
Love that green color. Not that far, from my teacup 
Looks a lot darker than the first time around; Guess it’s a question of light.
Jesper,
Love the cup, and you’re 100% right, the lighting I use for work grab shots just varies all over the place. Basically it’s a Tensor light with the small camera flash on my Nikon D7500 DSLR.
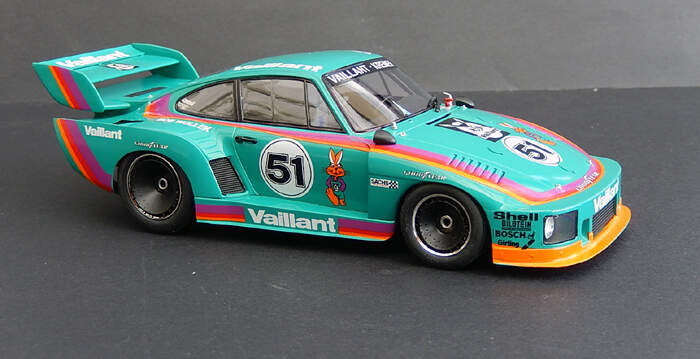
BTW, your cup color is a dead on match for the Porsche 935 K2 Kramer car.
joel
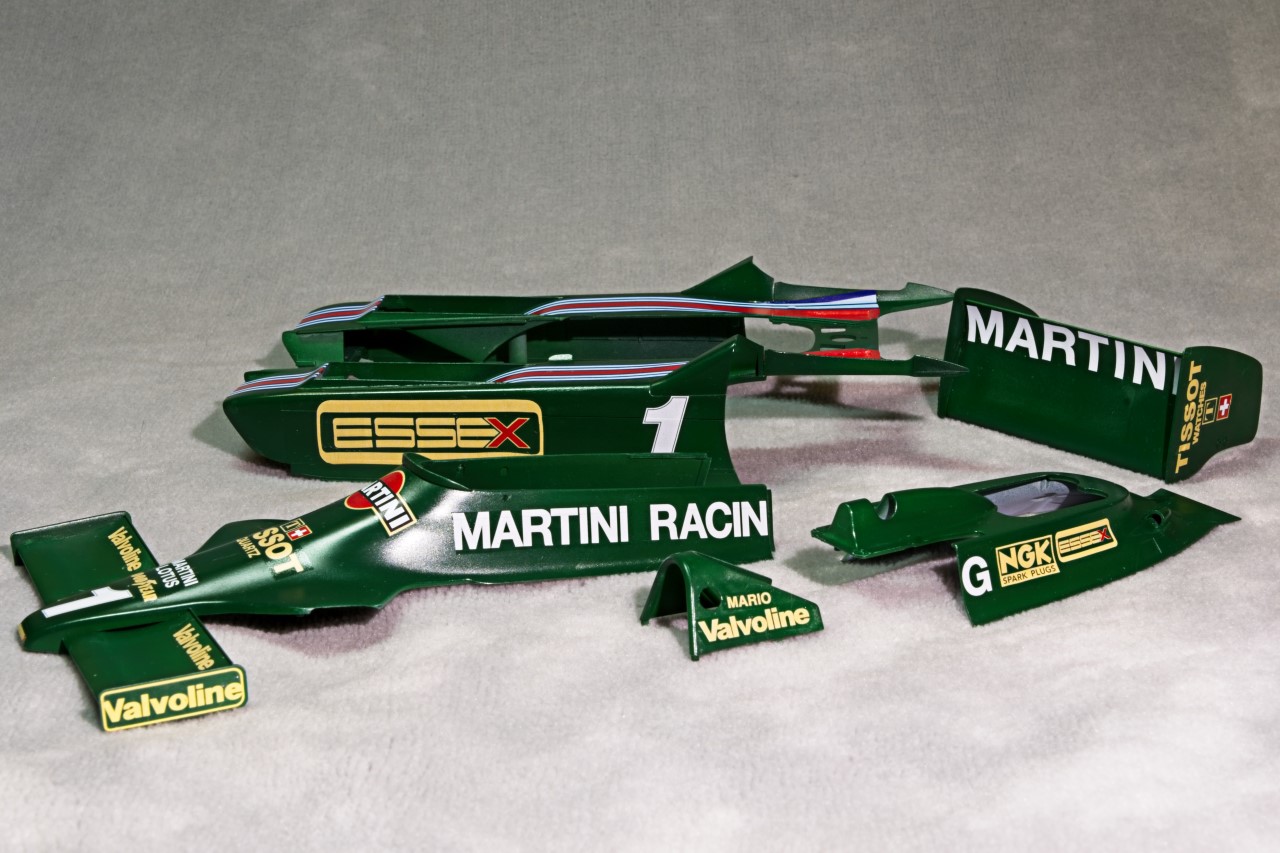
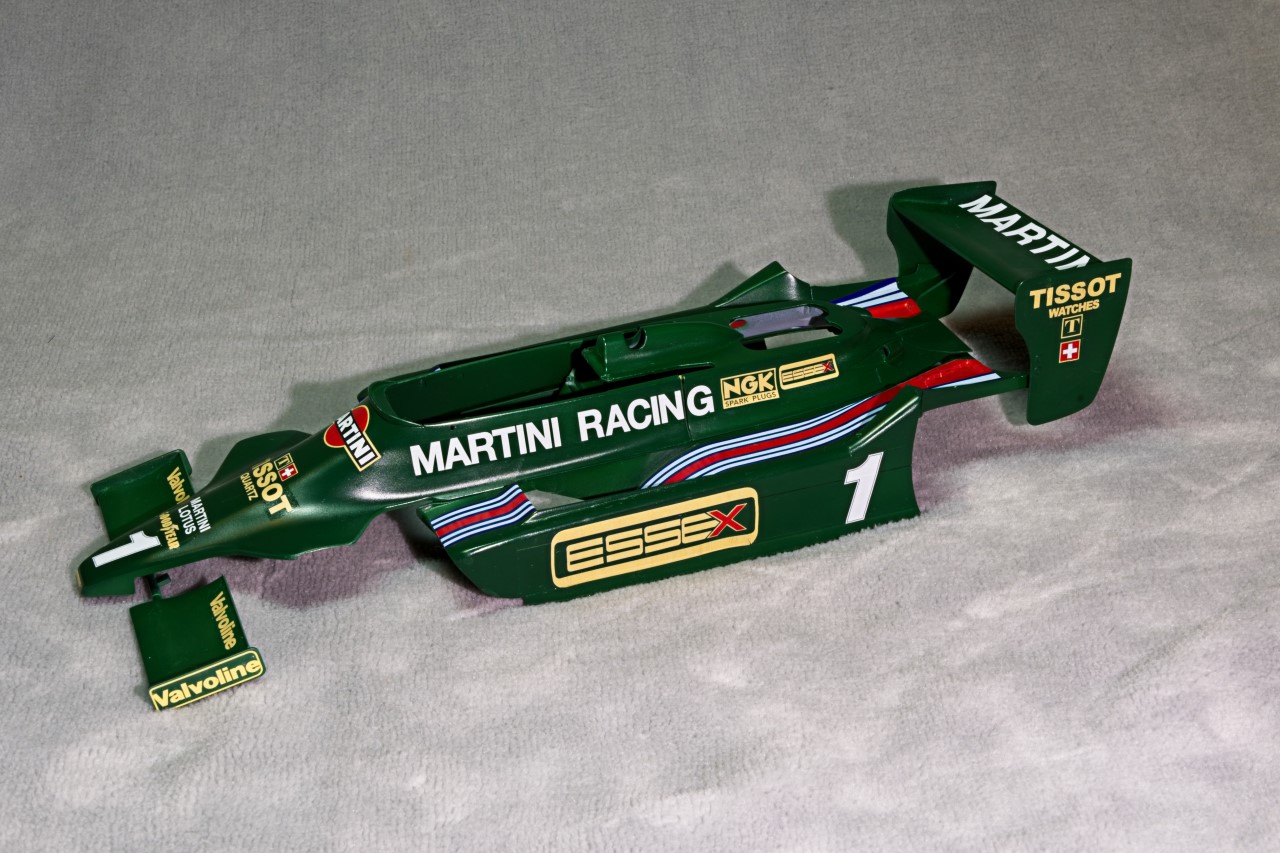
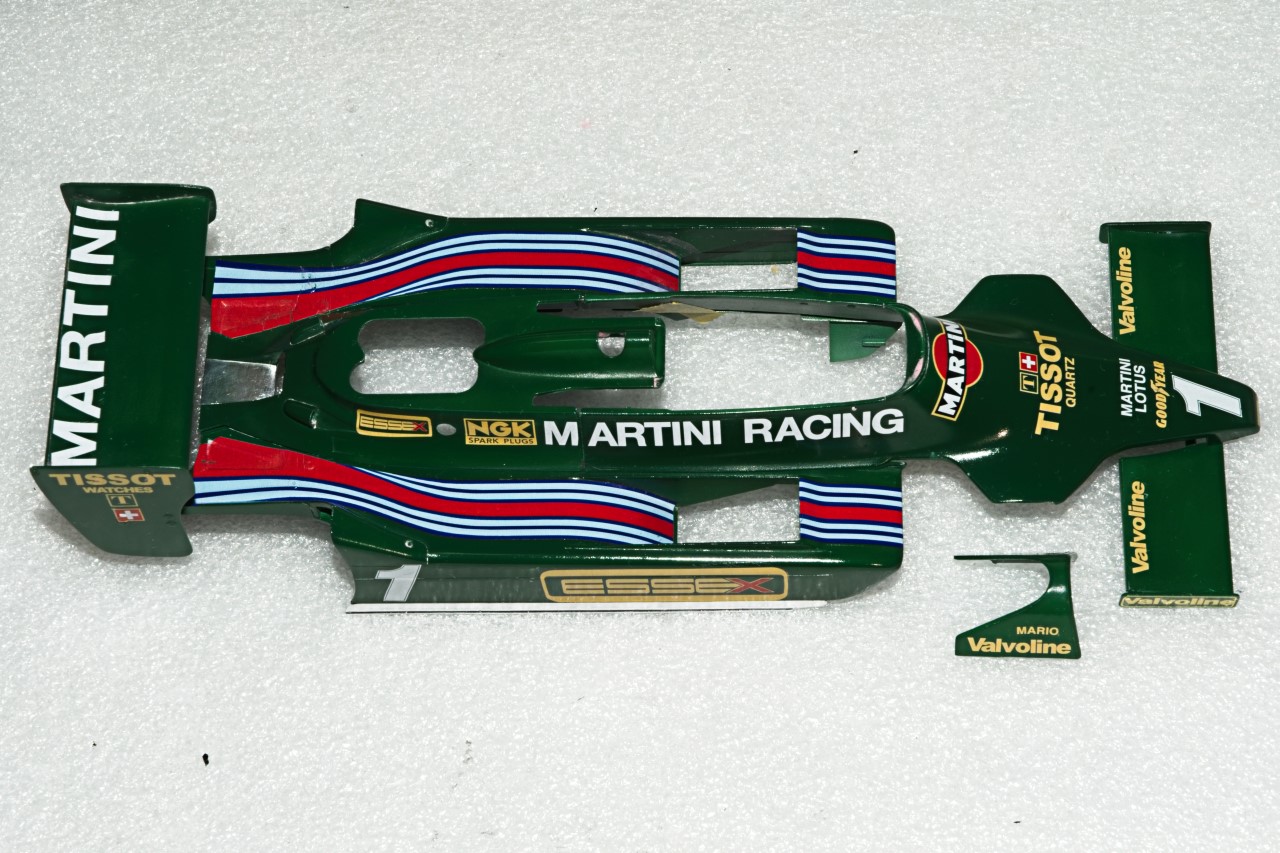
Update: Decaling
Well, the decaling stage of the build minus the tires, wheels, and calibers is done and in the books.
As I mentioned in a previous post, I had issues and problems with applying my Indy Cal decals, and managed to ruin one. Michael, the owner of Indy Cals jumped right on my problems and issues, and together along with input from my brother whose level of modeling is a few notches above mine. Anyway, Michael Oops policy is for decals purchased within one year. I bought these decals by his records more then three years ago, yet Michael not only rushed my replacement but sent me the entire decal sheet as a spare. He customer service rates a 100% A+ in my book. My revised decaling procedures worked perfectly. No stress, no issues, and no screw ups this time.
I let the decals dry in my paint curing box for 24 hours, and then out for a quick photo shoot. But this time only using two 5000k light sources and no on camera flash. Needless to say the exposures ran 2 1/2 min but came out just fine and the Martini Green is as close as I’m going to get to what the model actually looks like.
Nothing has been done post decaling as yet besides a quick wipe for dust and Cat hairs!! Here’s where the Lotus stands as of this morning. The top 6 body sections.
Top sections just dry fitted
Next up is the clear glossing, should be rather interesting as I’m once again thinking of Gravity’s 2K system.
joel
Decaling is top notch as always, Joel!
That is awesome!
Outstanding! Great work Joel, this is yet another top shelf build!
Cheers, D
Torsten, Michael, and D,
Thanks guys for your collective Thumbs up. Having you along for the ride just makes it that much more special.
joel
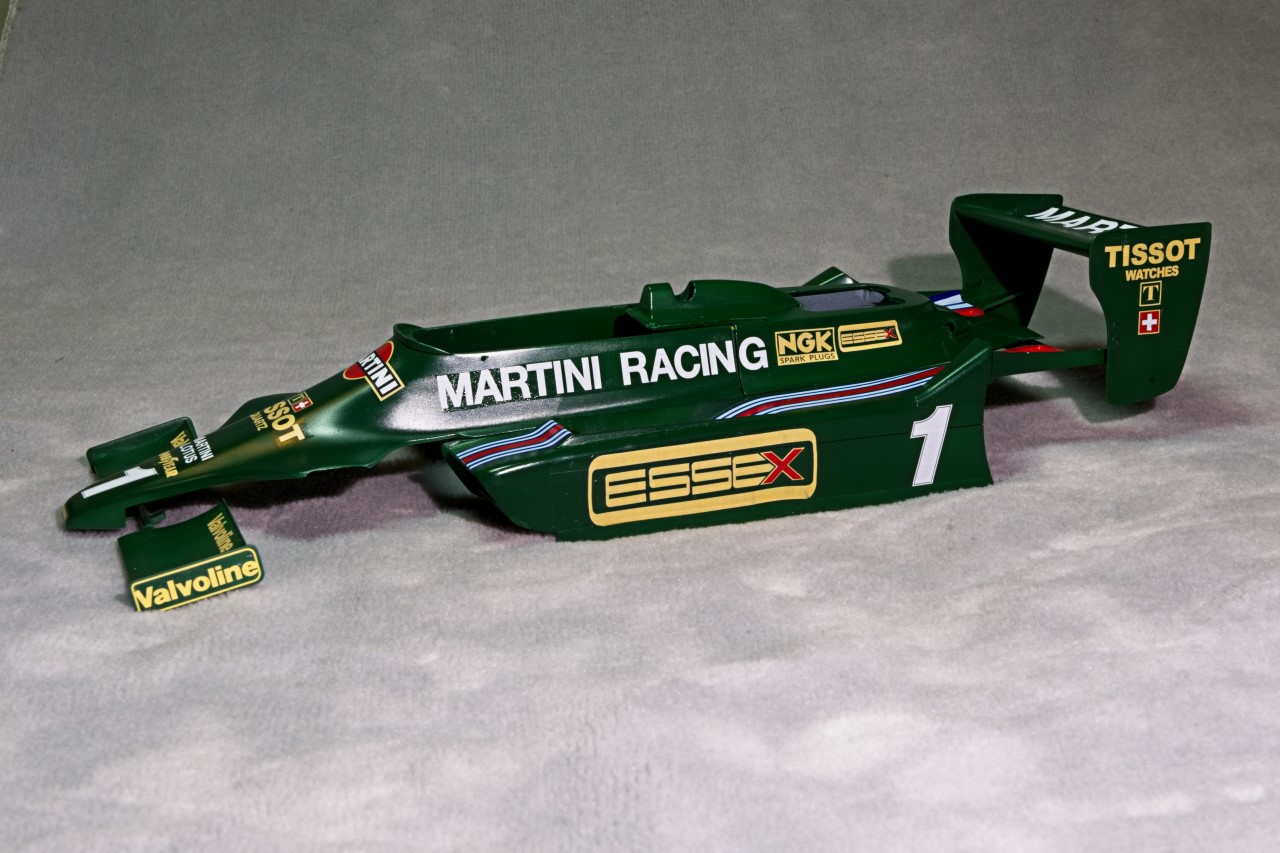
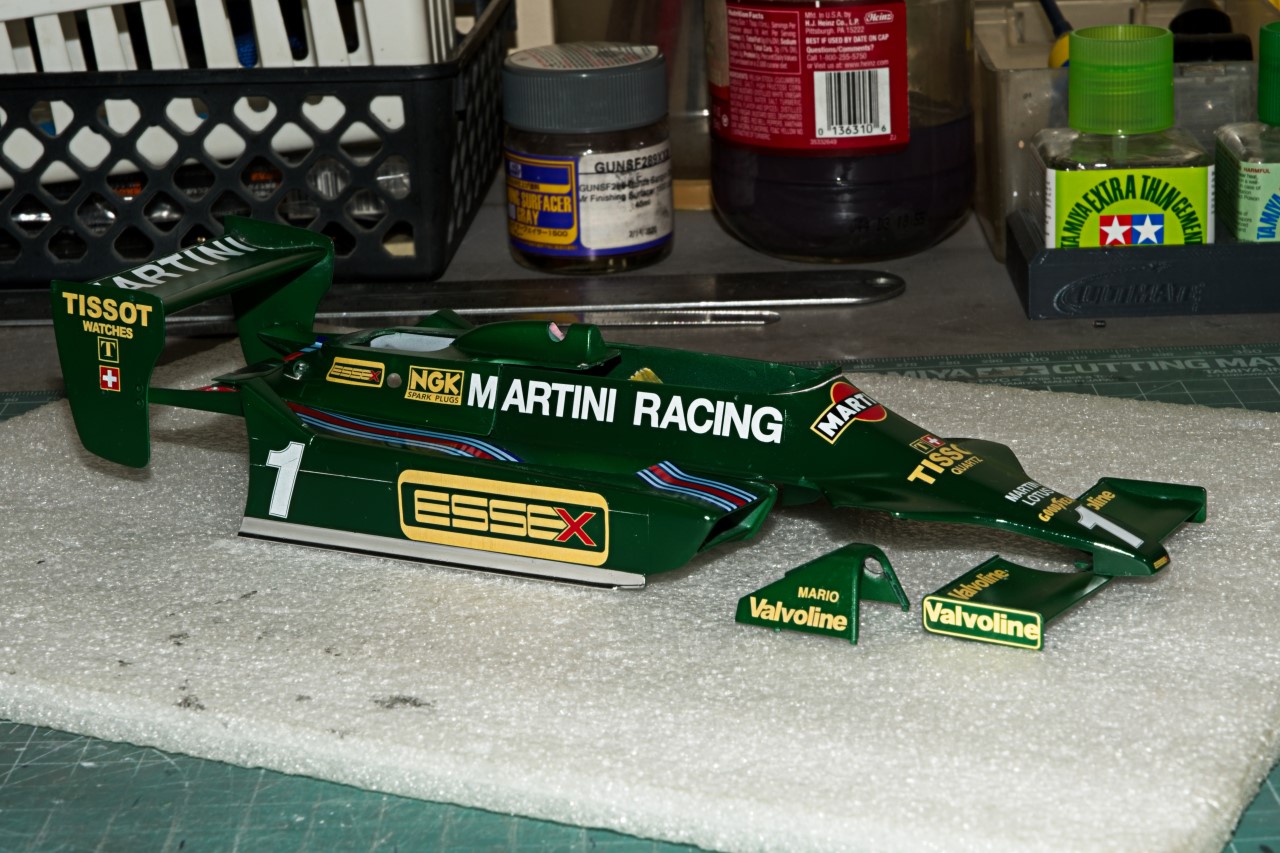
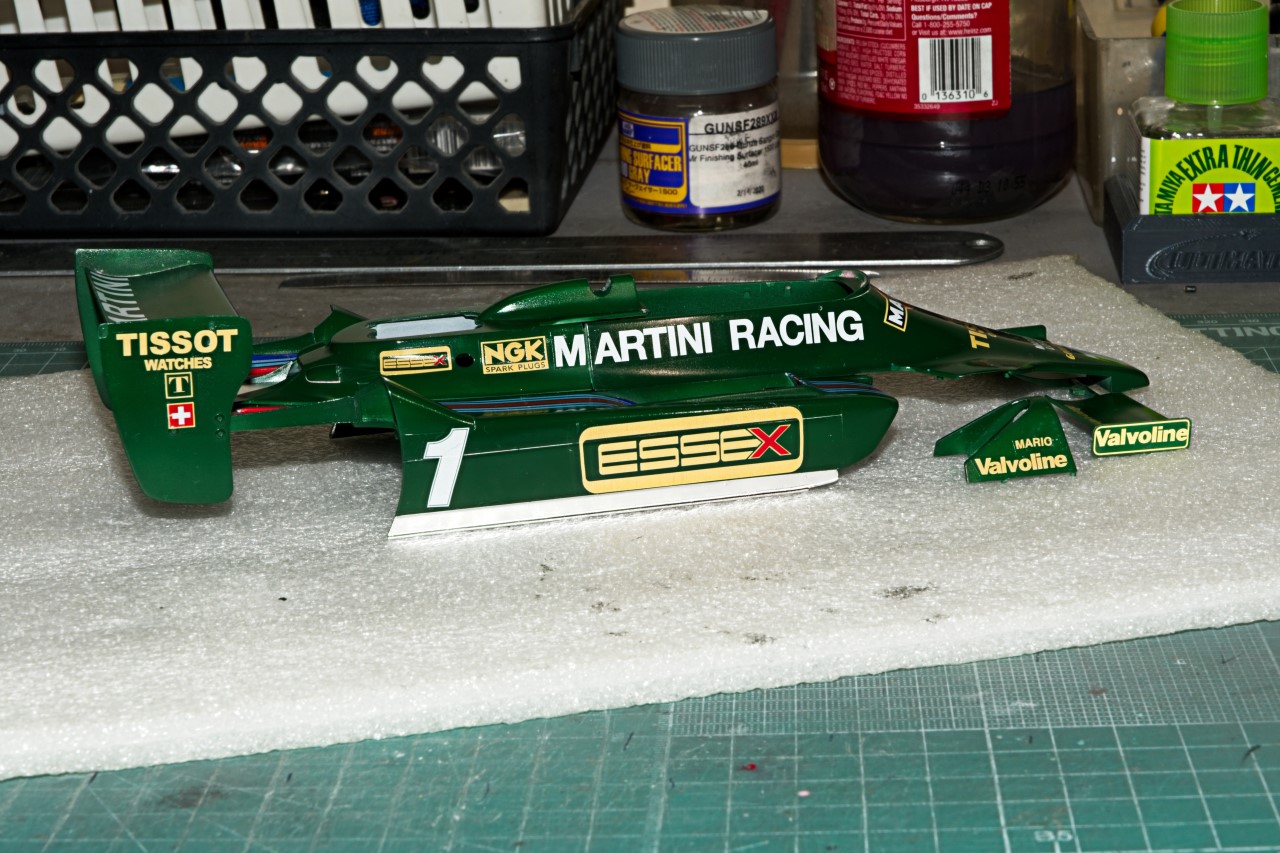
Just a quick update as I finished the Clear Gloss, followed by 8.000 then 12.000 Micro Mesh with plenty of water, and then Gravity’s 3 step polishing system,
I originally was going to use cut pieces of black decals to replicate the rubber seals on the bottom of the side pods that floated over the track to create the suction generated by the air moving through the aero tunnels. further research showed that the lower visible portion of the seal was just a removable piece of Aluminum with a rubber trim piece. So I decided to replicate the aluminum with Matt Aluminum BMF as I didn’t want to chance masking over the decals as I’ve had issues with pulling parts up back in my aircraft days. The BMF went down and smoothed out perfectly. At the same time I did the small rear section on the back of the engine cover where the exhaust existed the headers. Again, the BMF worked perfectly, and it’s more then 5 years old. And finally the 1st coat of Gravity wax.
So here’s where the body shell is at once again dry fitted.
Now it’s back to the engine/transaxle, and rear suspension.
joel
Man - you are THE guy when it comes to these auto finishes !
Joel, your body work looks great.
I like how you do the body before the drive train on your builds. I’ve always worked in the reverse, but this risks the chance of losing mojo early on, whereas you’ve got a finished body there sitting and staring at you, daring you to finish the build 
And another good thing about doing the body first is, if for whatever reason the body is ruined (yes I’ve done a few over the years), then no effort has been spent on the drive train up to that point, meaning one can quickly move onto the next project no fuss, no muss 
I might have to give it a try next time I delve into an auto build…
Looking good Joel, your tried and true methodology just keeps on coming up trumps!
@Russelle , get on board mate, you need another car on your bench!
Cheers, D
Russelle,
I always like to do the body 1st as I like painting, and decaling the best. In the case of F1 cars, the bodies are multiple pieces.
For this build I actually did the chassis, cockpit, and front suspension 1st so I could dry fit the various body sections. I should have paid closer attention as it looks like all that master cylinder detailing is going to be lost when the front section is glued into place so it fits correctly.
D, thanks my friend for always being there for one of my builds. I’ve read and reread you latest Vette build, but I’ve had so much internet connection issues of late, that I was off line more then online. The techs finally found my buried line to the main street line has corrosion issues as does the fitting on the house it connects to, and then the line in. All 3 have been changed but the buried line is still on top of my front lawn as they have a crew that just does that work. So i’ve been trying to catch up from days on my two lists. Posts pile up faster then I thought.
joel
Hey Joel! Amazing isn’t it, how much we rely on the internet these days given the circumstances of the times we’re living in… 
Good to know you’re back on line!!