Torsten,
Thanks my friend for always checking out my builds even though I left the aircraft fold. Having you along for my journeys is always reassuring for sure.
joel
Torsten,
Thanks my friend for always checking out my builds even though I left the aircraft fold. Having you along for my journeys is always reassuring for sure.
joel
Luciano,
Now there’s a very interesting paint scheme for sure. The Porsche 911 GT1 cars while successful in their brief racing career, were no where as popular as the epic 956 & 952 Proto type series, so new schemes from decal makers seem to be rather few and far between.
The Saudi Arabian Air scheme looks like a winner to me. Which reminds me that I still have my Williams FW07 F1 car with Saudi Air markings in my stash that I’ve got to get to sooner then later.
joel
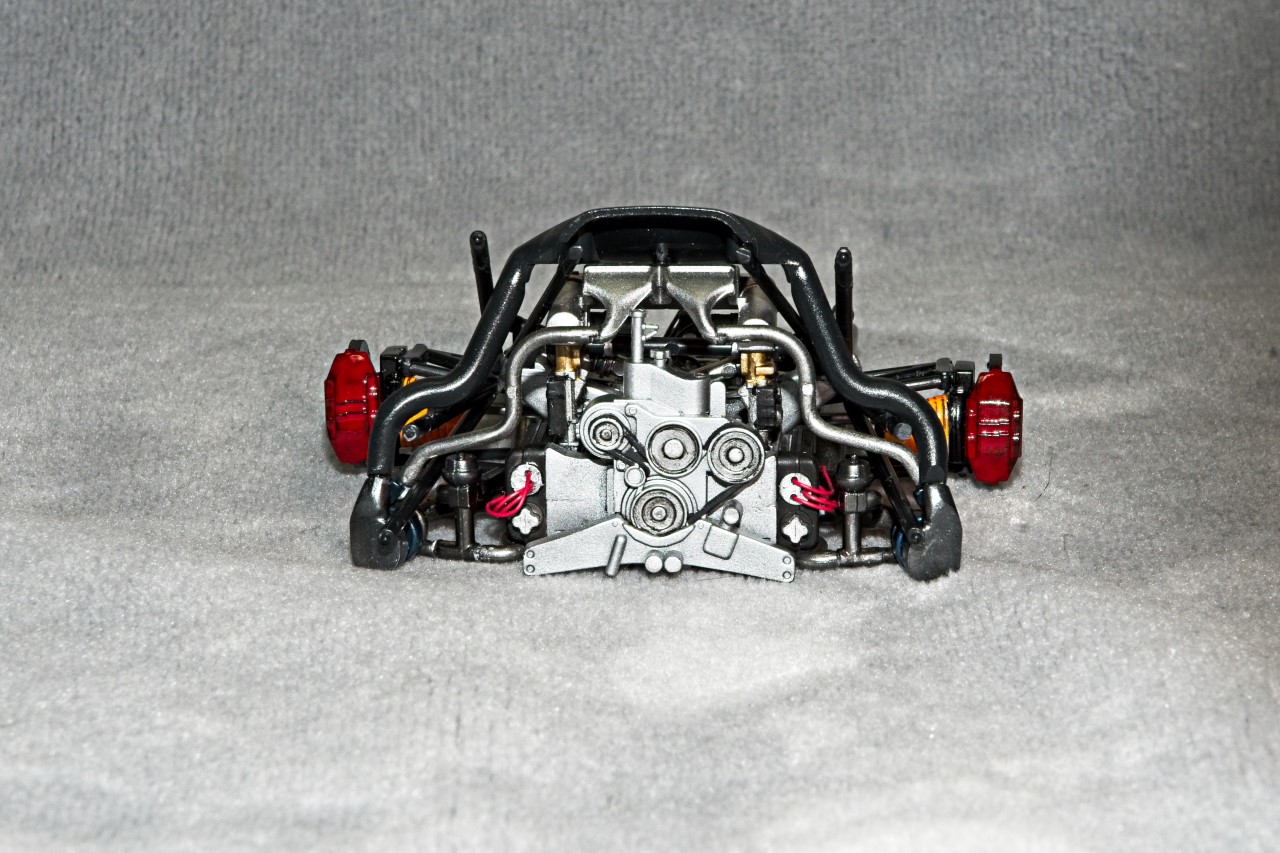
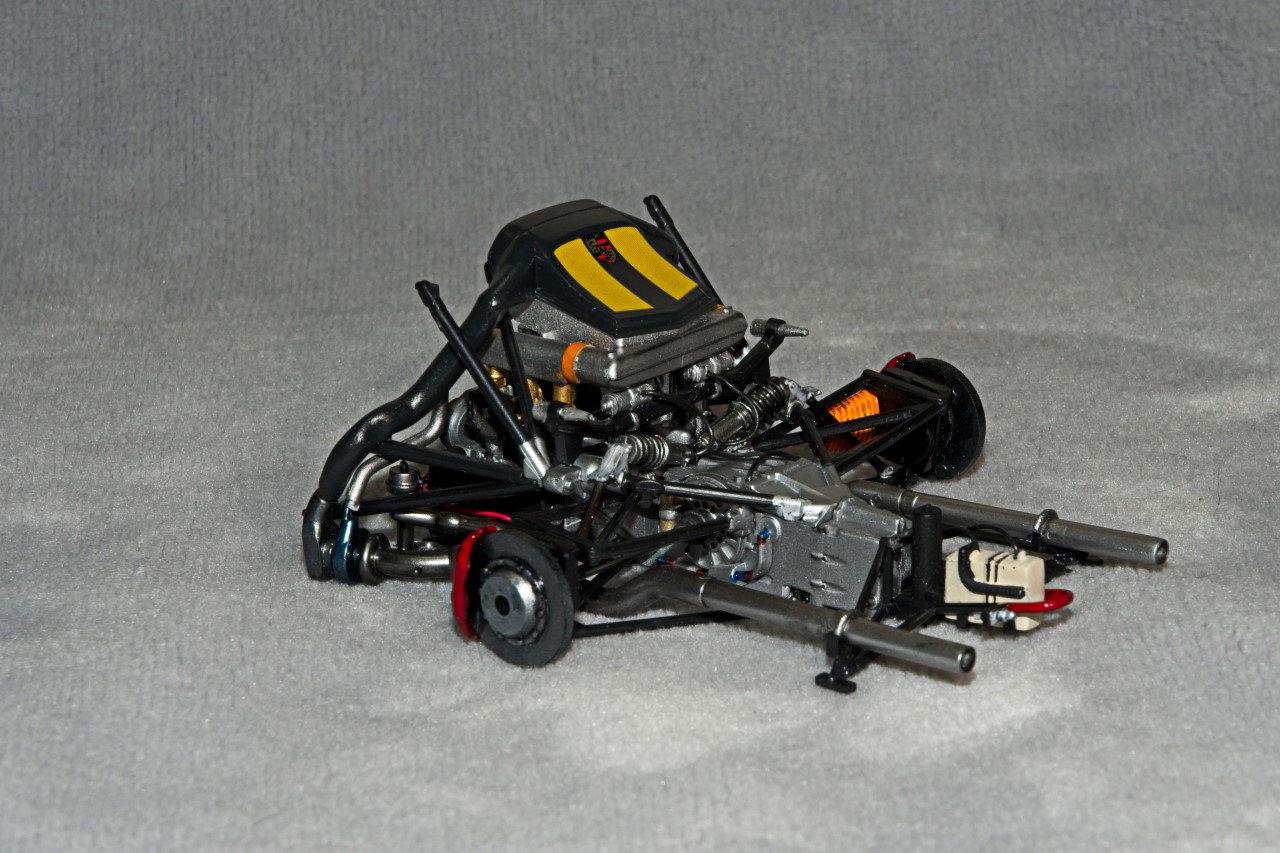
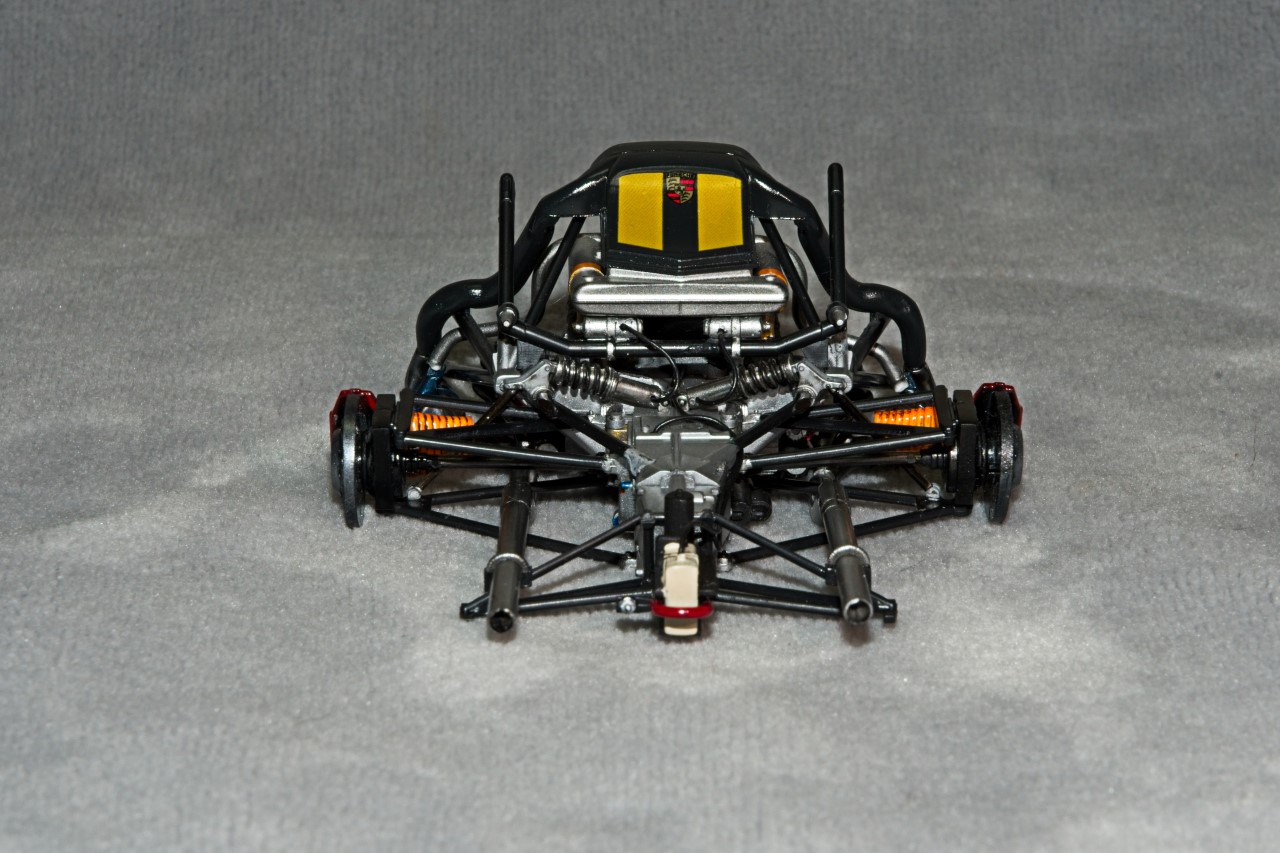
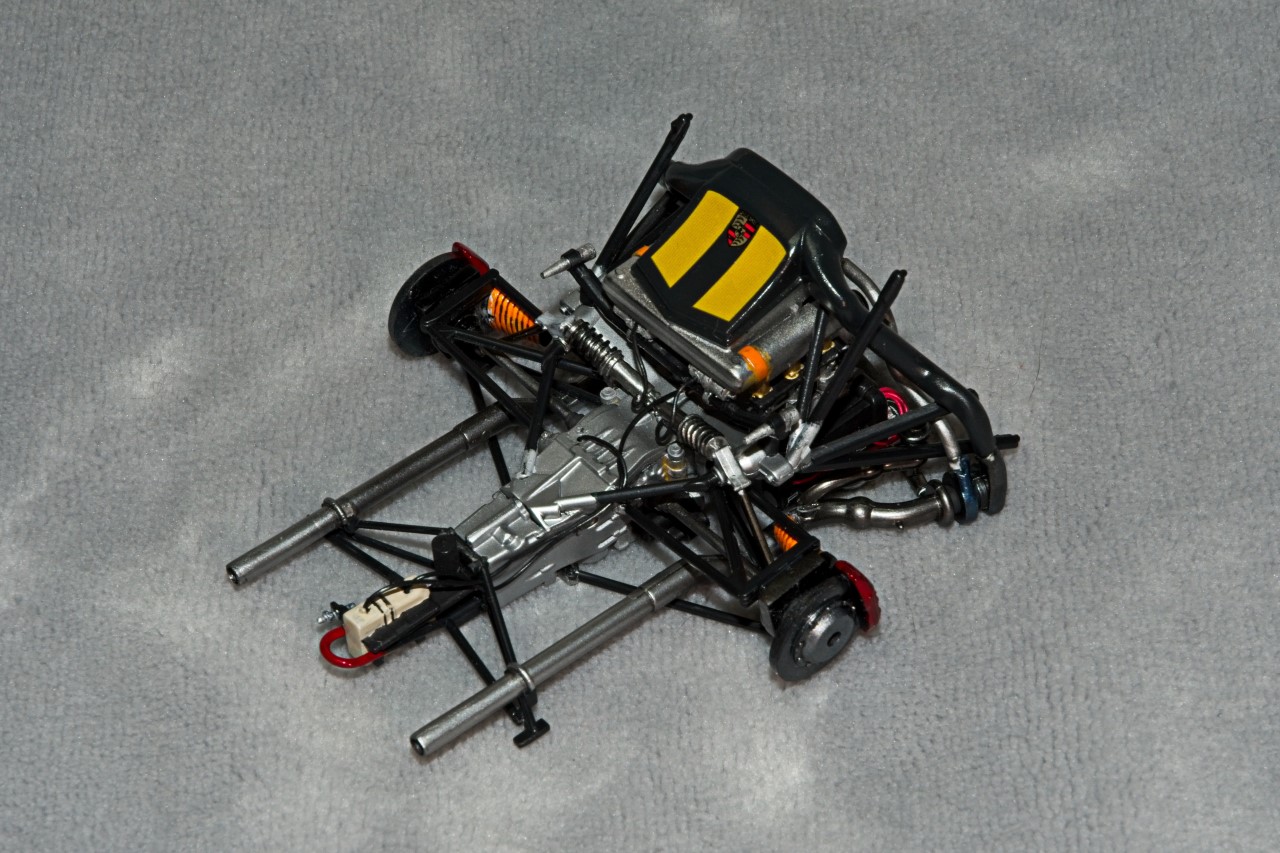
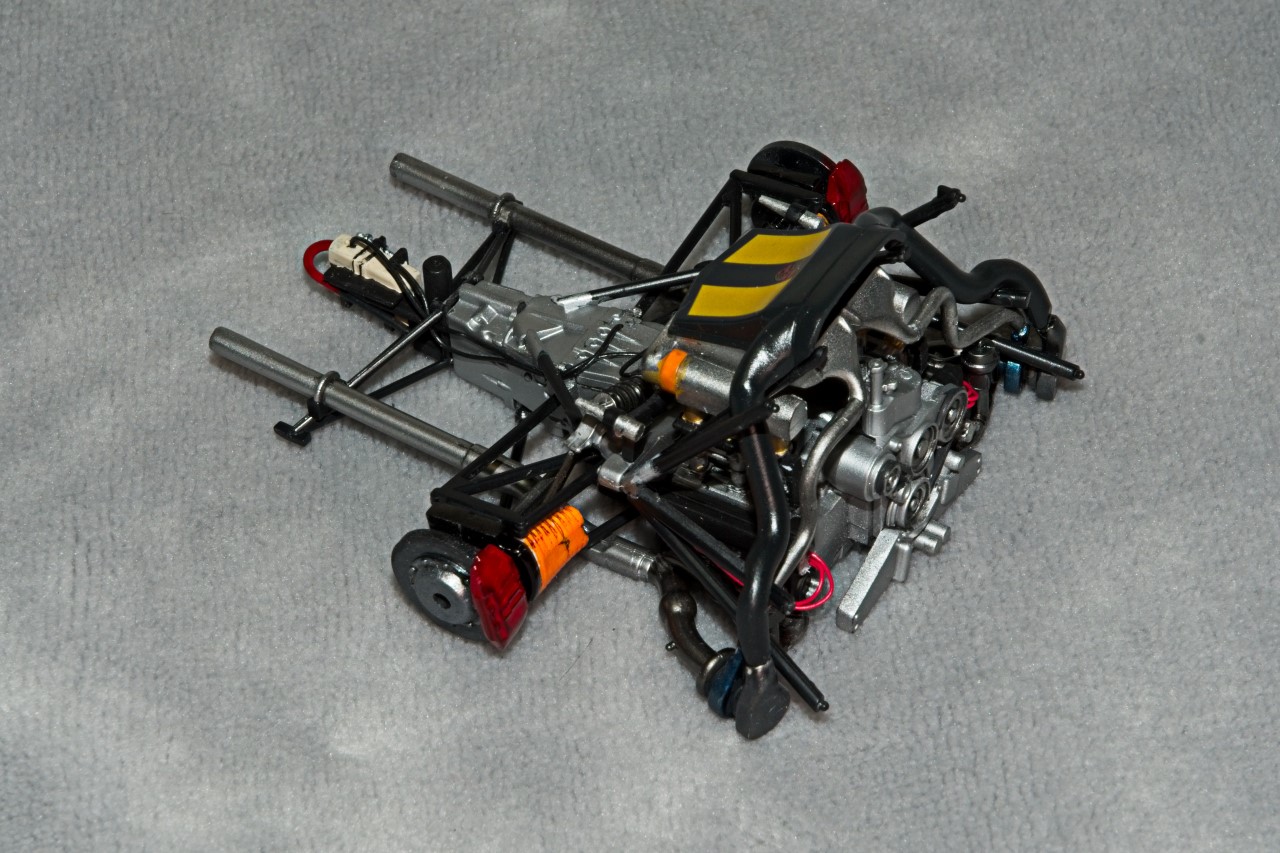
Been hard at work trying to finish the Engine/Transaxle/Rear Suspension so that I can move on to the chassis, bulkheads, and front suspension. At this point the assembly is 95% complete. Just when I think it’s done, I see way to many painting issues in the enlarged close up pics, but they really don’t show up when I view it on my workbench. Will still try to correct what I can, and then just live with those other macro issues.
Since the last update i’ve painted, weathered, and installed the twin Turbo chargers including the intake ducting from the big air intake unit. All the various secondary rods to mount the engine to the rear bulk head have been installed, as well as some secondary plumbing. I finished up the rear suspension, added the disc brake & calibur units, and just the main air brake ducting. the Tamiya designed ducting just plain doesn’t fit, and just doesn’t match any of the pictures I have. Honestly, in just about every picture those air duct lines are different and even in a few don’t even exist. So I decided to just add the main duct to the brake and leave off the rest of the ducting. There’s so much going on down in those areas that you really wouldn’t see much of them if I did actually manage to install them. I also decided to deviate from my usual painting of the brake calipers of jus a solid color and a wash that never looked as I wanted it to. So this time I hand painted the gloss Red so that the black primer showed through to represent wear and tear. Better, but still not what I really want.
Here’s a few pictures of the the engine/transaxle/rear suspension.
joel
Love it, love it, love it!
Looks amazing Joel. The mix of colours and finishes make it look like a typical Porsche Turbo engine. I am sure the team at Stuttgart would be happy to claim it as their own.
cheers
Michael
Great work Joel, the splashes of detail colour against the metal and black really bring it to life.
Cheers, D
Michael,
Thanks so much for that most enthusiastic reply, I can assure you that it’s greatly appreciated. Just the thought of any team from Porsche bothering to take a look at my build, would be a dream come true. But I’m old enough not to shall we say, hold my breath till that happens.
joel
D,
Thanks for stopping by and checking out my progress to date. Honestly, some of the colors I used aren’t exactly prototypical, but like you said, they really help to bring the engine assembly to life.
As I said in my post, I needed to take another shot at cleaning up some of those black straps on the over flow tank, and add a few more coats of Gloss Red to the calipers. I actually managed both this afternoon, and will be posting a few pics of how it turned out.
joel
Looks amazing Joel 
Russelle,
Thanks so much for your continued support, and your thumbs up.
joel
Ken,
Thanks for checking out my progress to date. It’s much appreciated,
joel
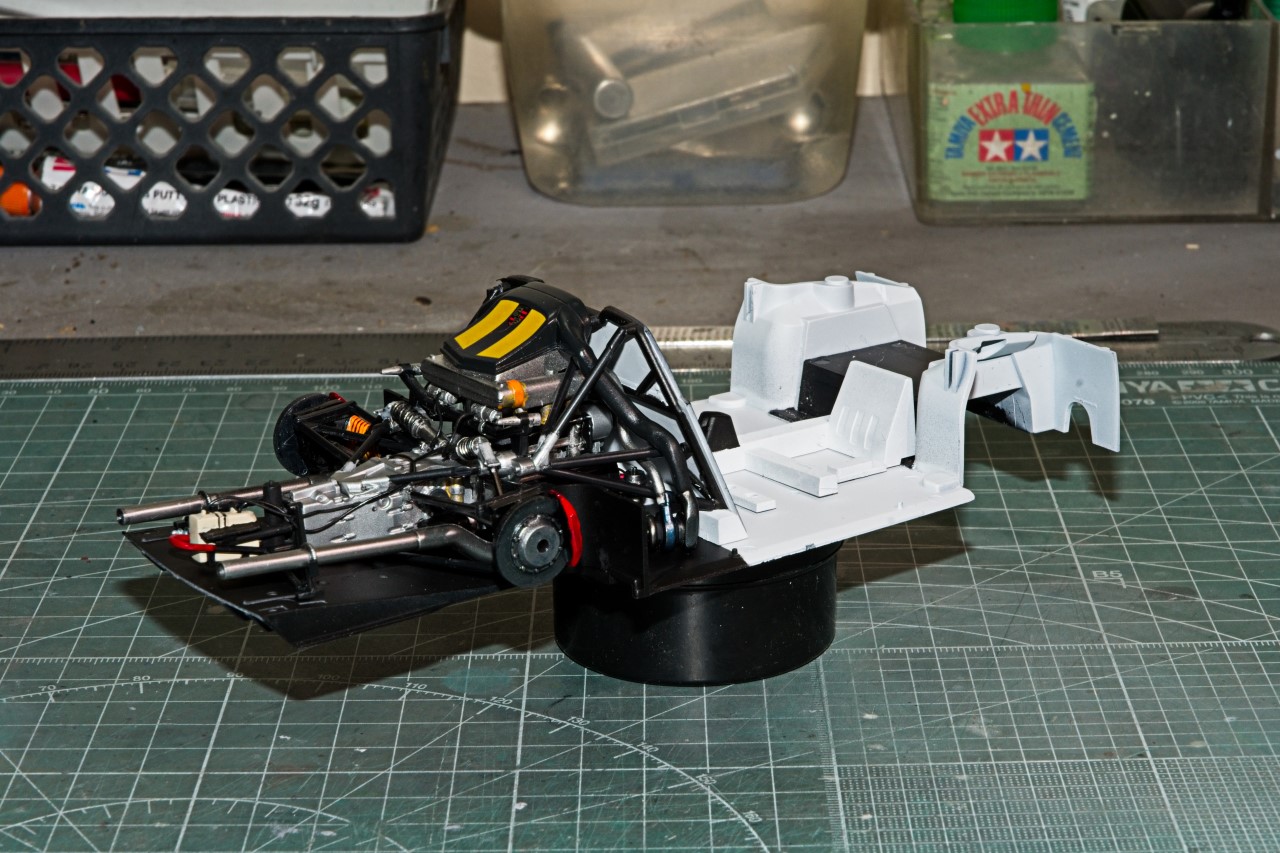
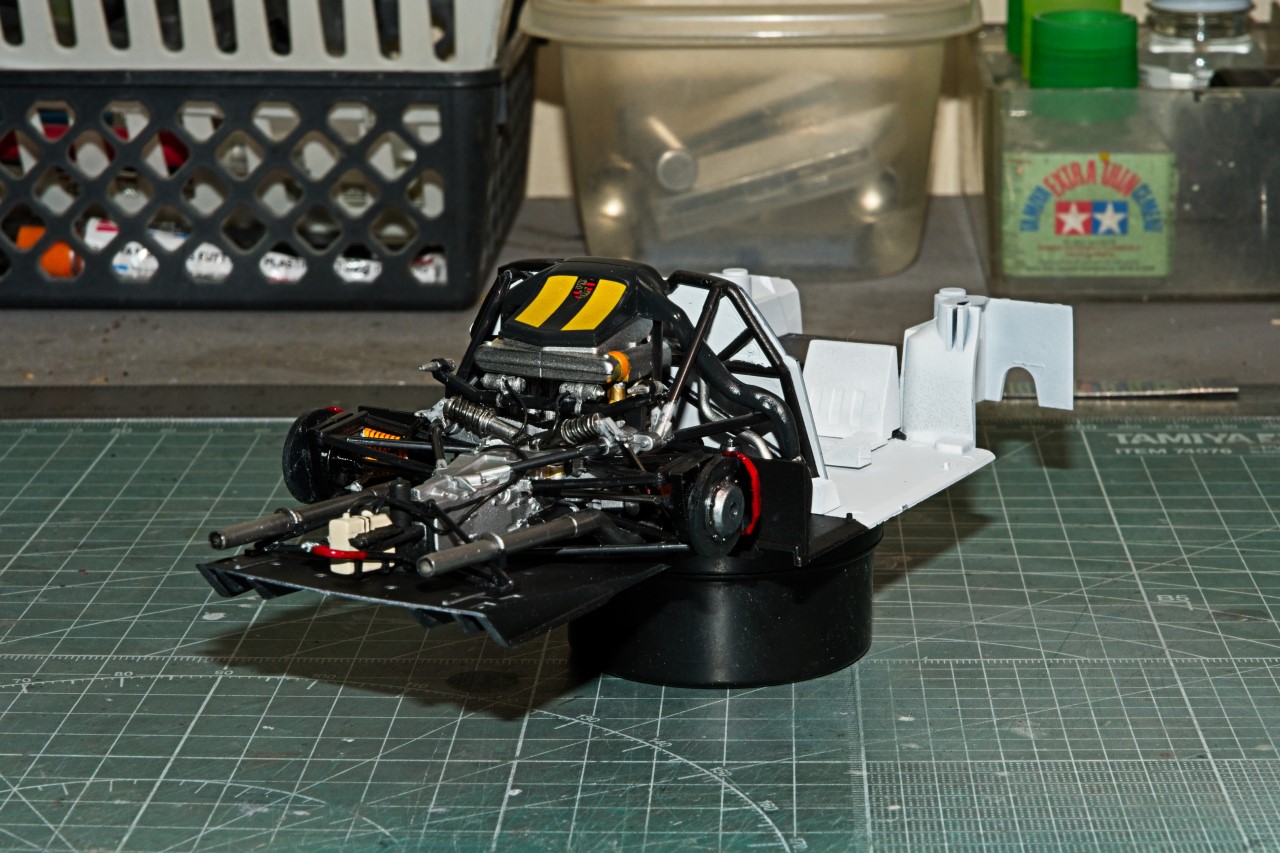
Just a quick update on my progress to date.
I decided that I’ve added as much detail to the engine/transaxle/rear suspension as I feel is needed for my enhanced type of builds. So now comes the “fun” part of getting all those engine attachment rods to correctly align with the rear cockpit bulkhead. And just to make it a little more interesting, the boys from Stuttgart decided that the bulkhead needs to be angled rearwards to help support the driver’s seat(?). Well, that’s the only theory I can come up with.
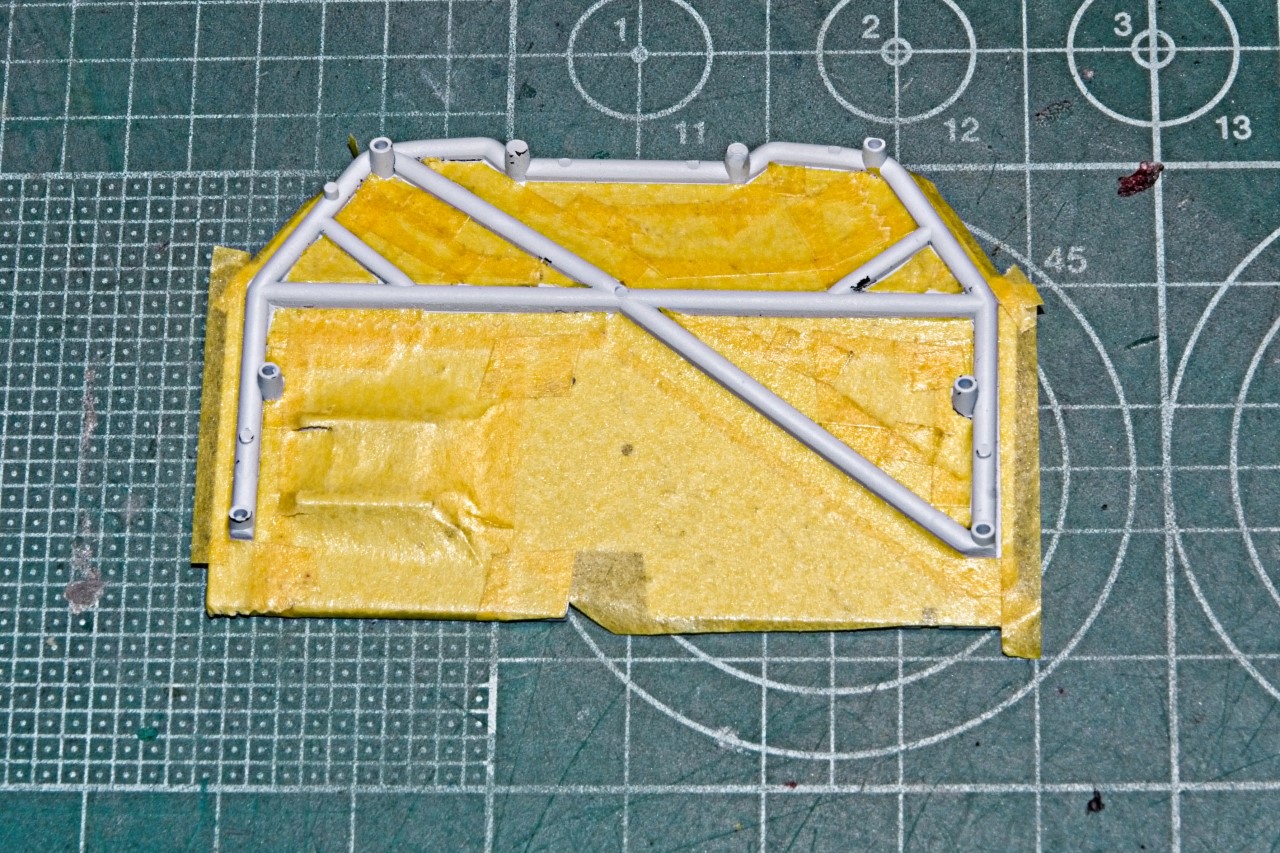
Tamiya decided to mold the chassis tubing as part of the back of the bulkhead. Of course for some unknown reason the factory cars had the back of the bulkhead painted White, while the front was kind of a semi gloss Black as the drivers cockpit was literally a two tone affair. The real challenge is that the tubing is a semi gloss black. The only way I could even contemplate painting the tubing was to 1st prime the bulkhead my own very light gray mixture of Tamiya primers. Then I air brushed on Mr. Color Flat White. Once dry I needed to mask the tubing from the bulkhead so that I could air brush the tubing Mr. Color Semi Gloss Black. Well, this turned out to me another masking job from Hell. Took more then a solid hour to get it to this:
Looks darn good, but I did get paint leakage in several spots. I was going to try and touch up as needed, but a good 75% of the back of the bulkhead can’t be seen, and the rest is in shadows. Painting took all of 10 min, and removing the tape took less then 5 min. Sure wish that applying it fit into that time range.
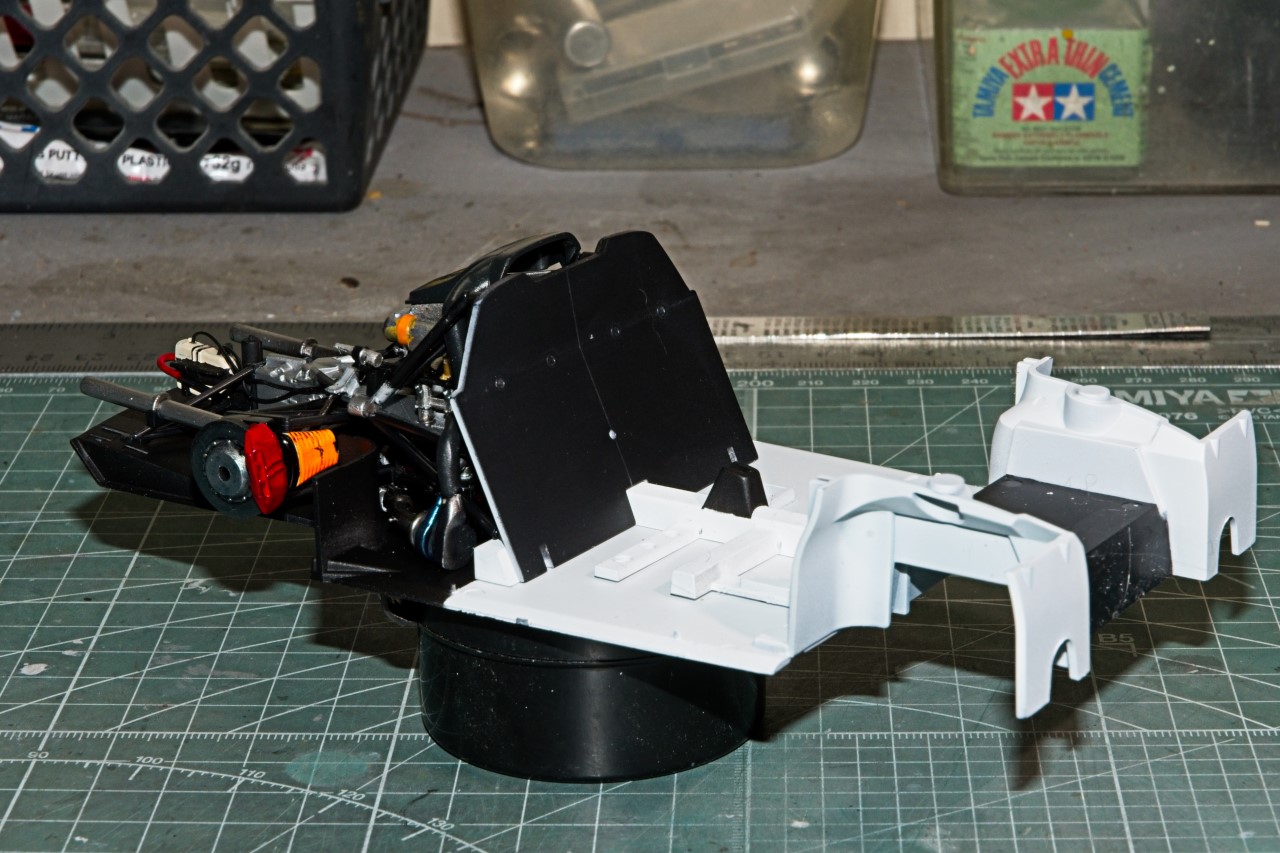
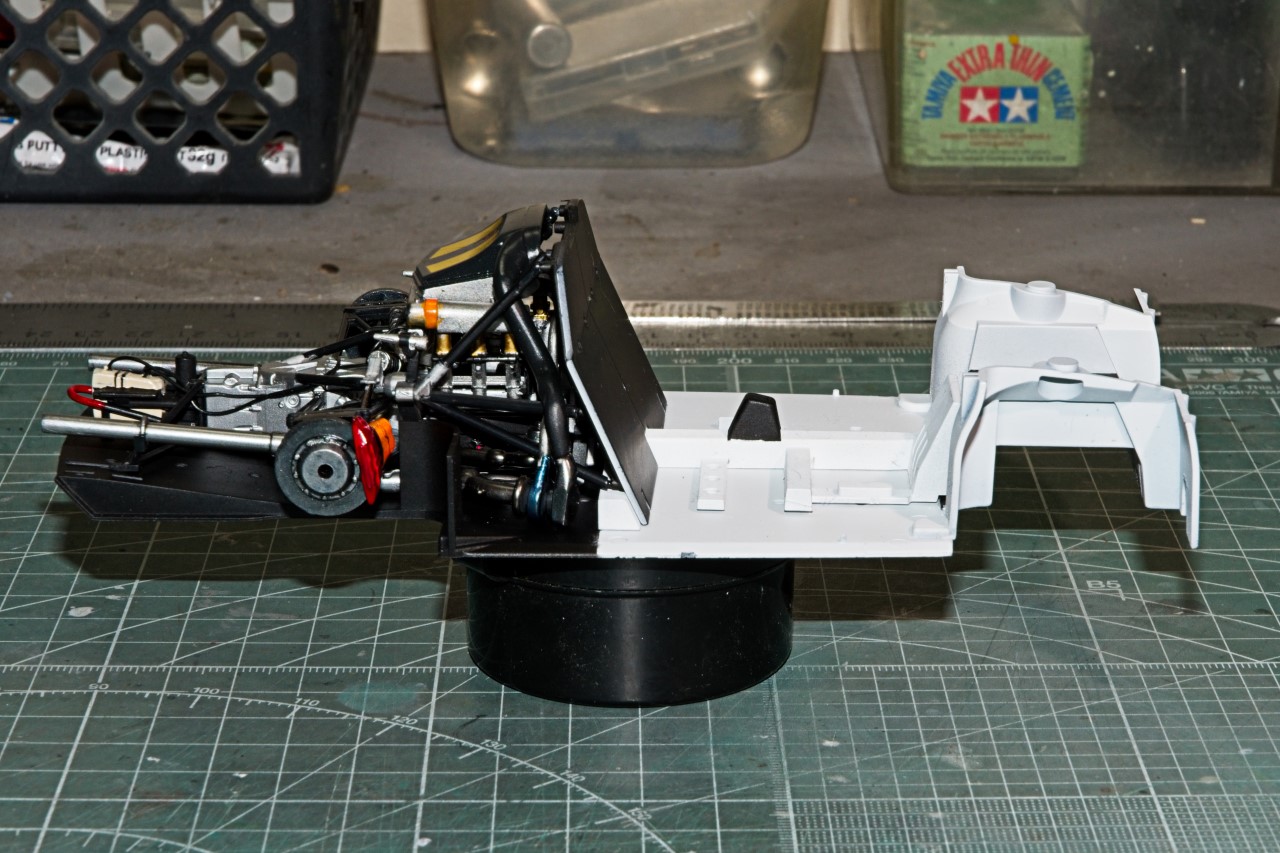
A few hours later I carefully aligned the bulkhead to the upper mounting rods and to my surprise all the others auto aligned. Never thought that would happen.
I let the glue set overnight, then dry fitted the cockpit floor channel structure, then the engine assembly. Took a few wiggles but it fits just fine. Wonders will never cease to amaze me.
joel
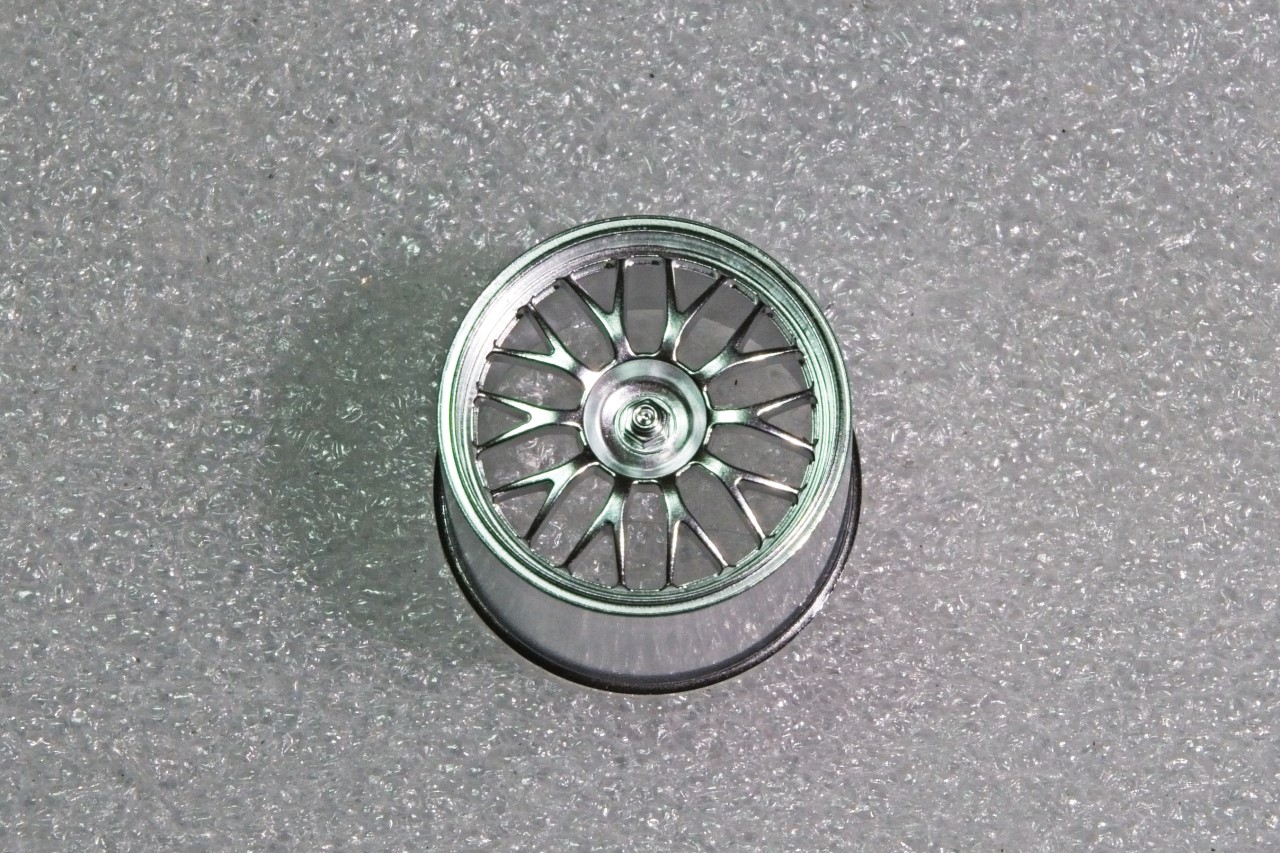
Time for another update. I’ve been working on finishing up the front suspension clip, then just decided to switch gears and tackle the wheels and tires, so that’s what this update is all about.
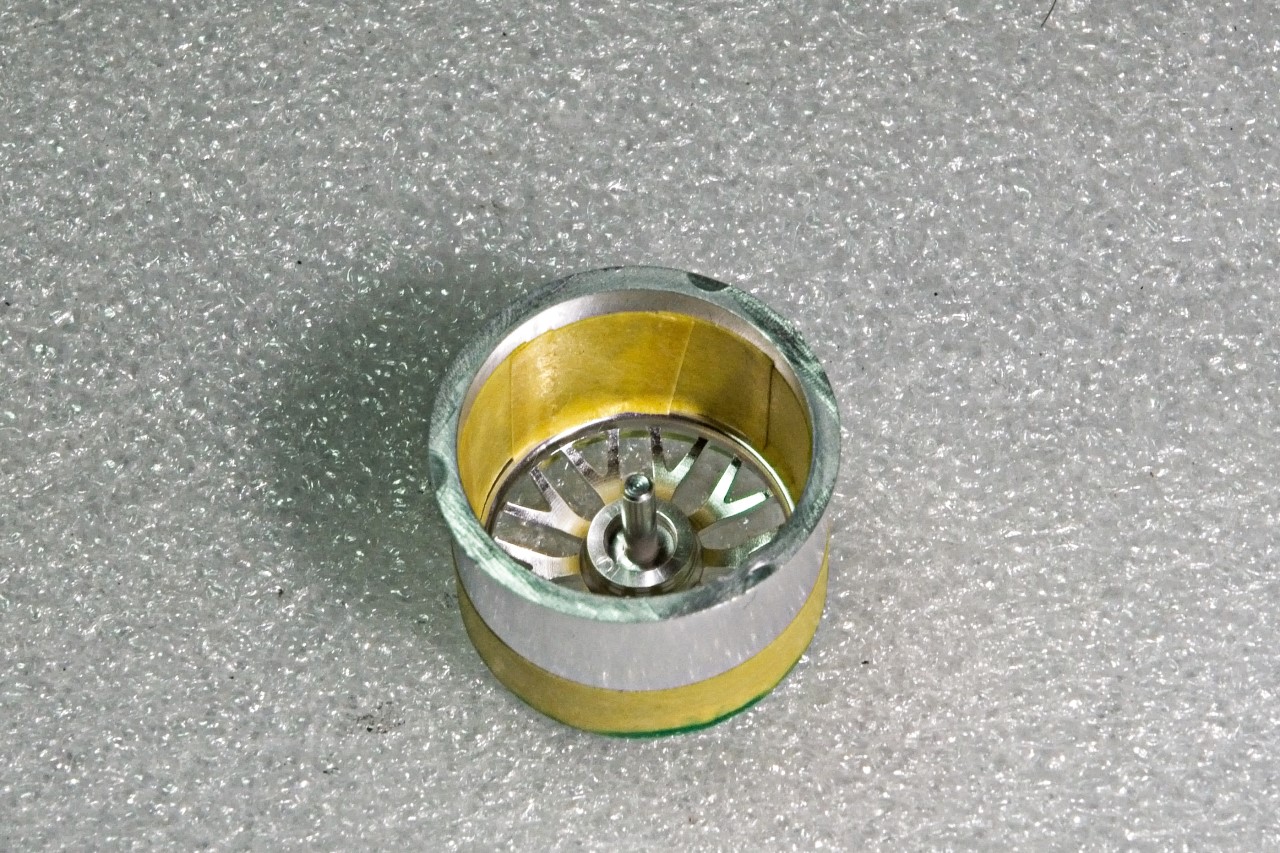
As usual, the chrome plated wheels look pretty good as to scale appearance, and the chrome plating is actually what I’d have tried to duplicate if I stripped the wheels and went with Alcad2 Chrome, so I decided to use the wheels as they are.
With that being said, the insert of the wheels are painted semi gloss gold. So the wheels needed to be masked. I used 2mm Tamiya tape to tape off the inside lip above the insert , then 10 mm Tamiya tape around the outside of the wheel as well as creating a slight channel to run a layer of Mr. Hobby masking Sol to protect the top of the Chrome wheel.
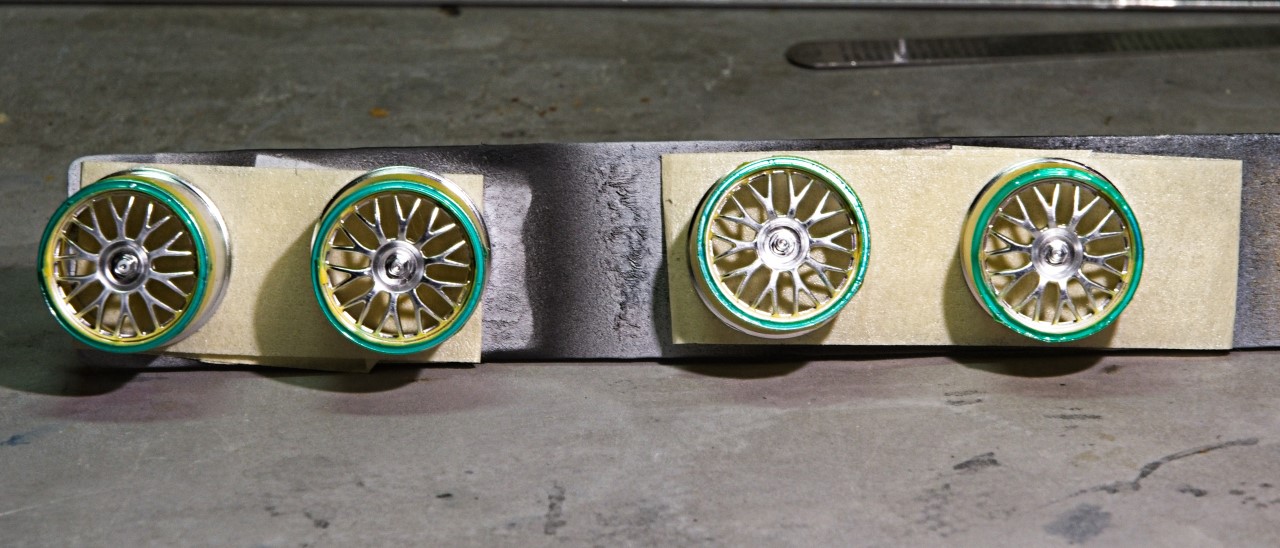
I then used pcs of tape to cover the inside of the wheel from any over spray that naturally would find a way inside.
I then repeated this process on the other 3 wheels.
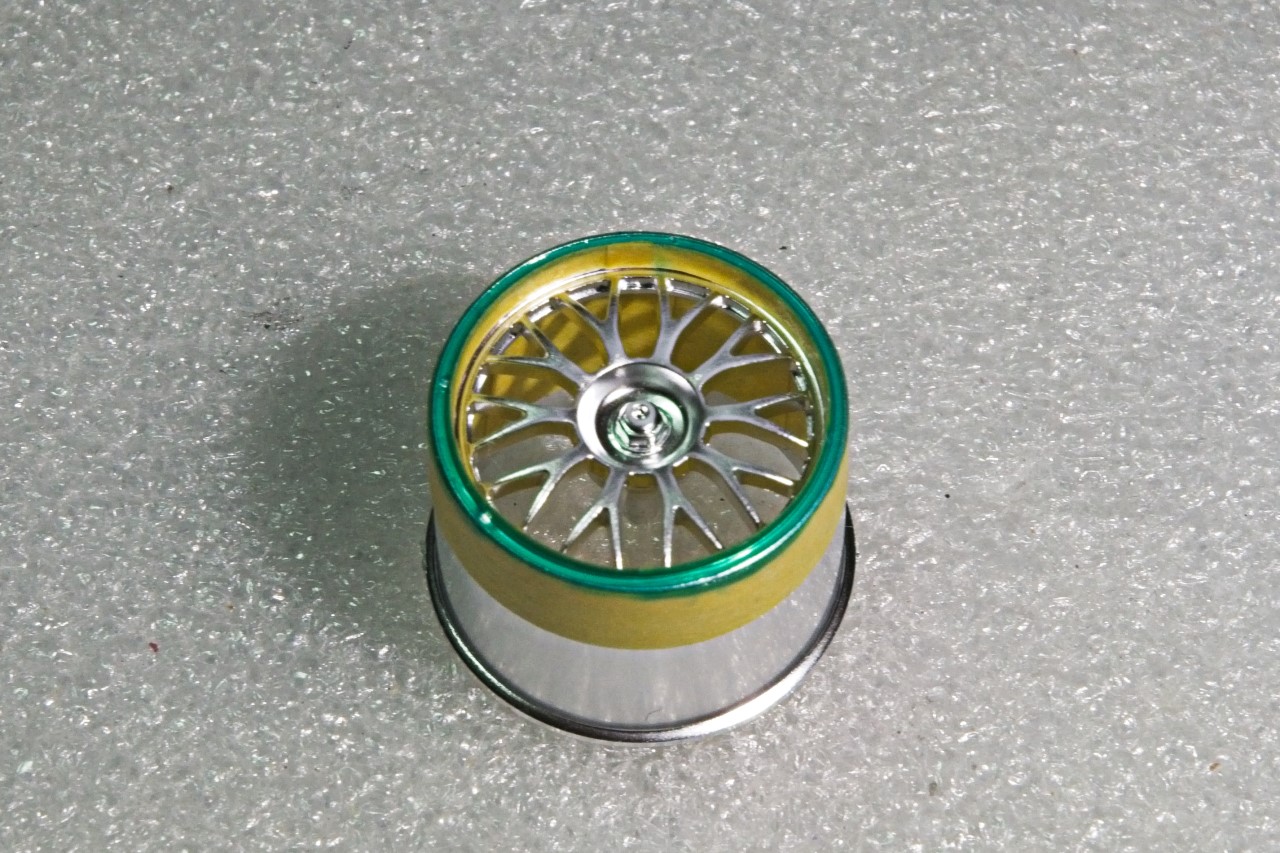
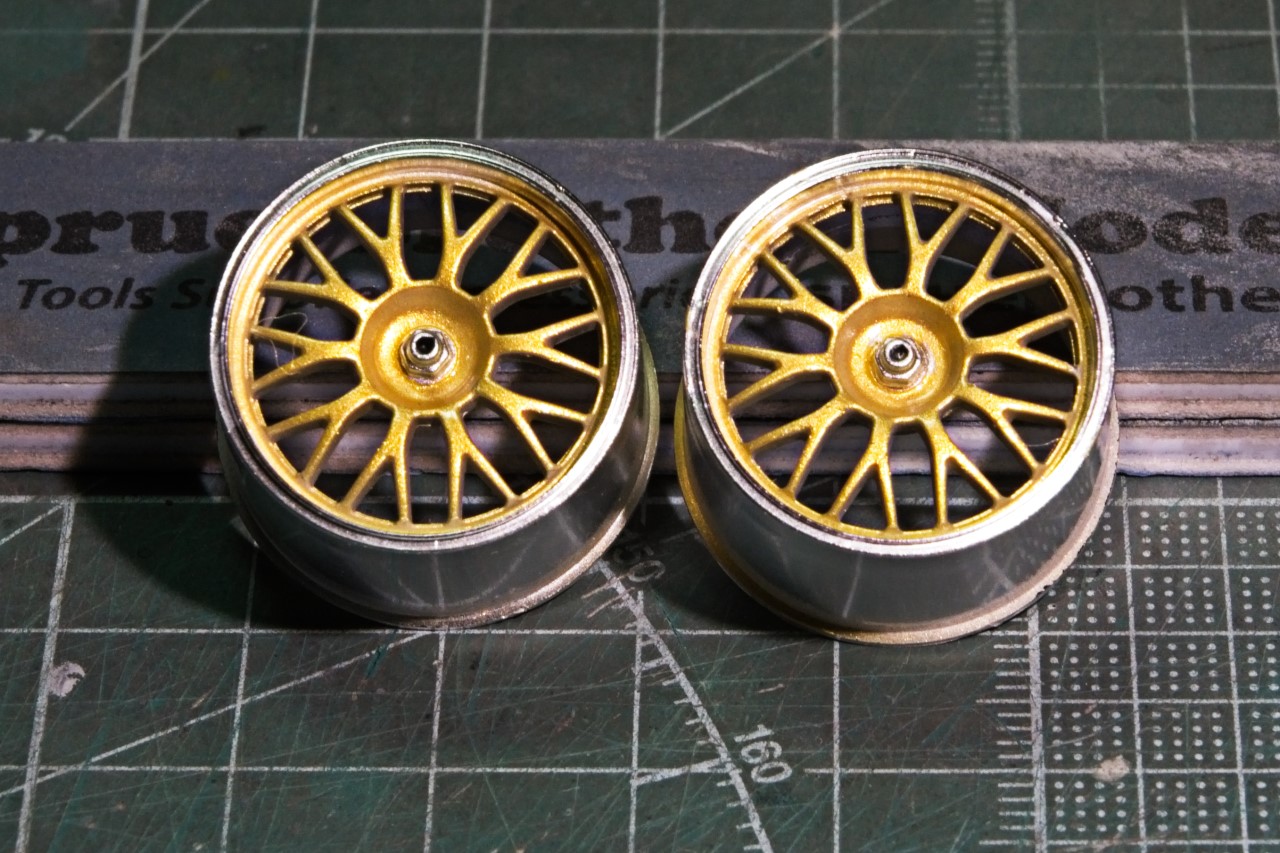
I air brushed on Mig by Ammo Acrylic Gold straight from the tube @ 18 psi and the results were perfect. No thinning necessary which did kind of surprise me.
What took a good few days of tedious masking, took all of 5 min to strip it all off the 4 wheels.
I also painted the wheel nuts steel.
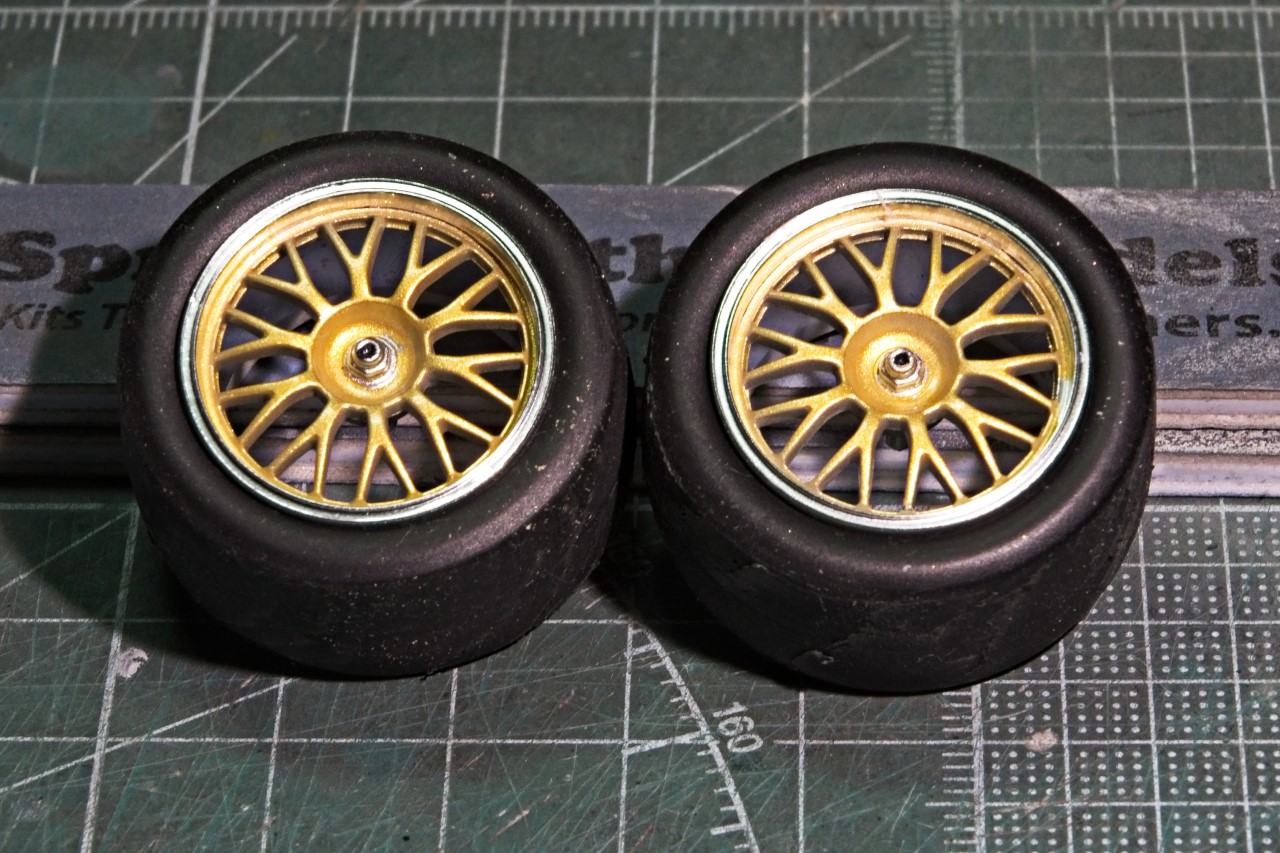
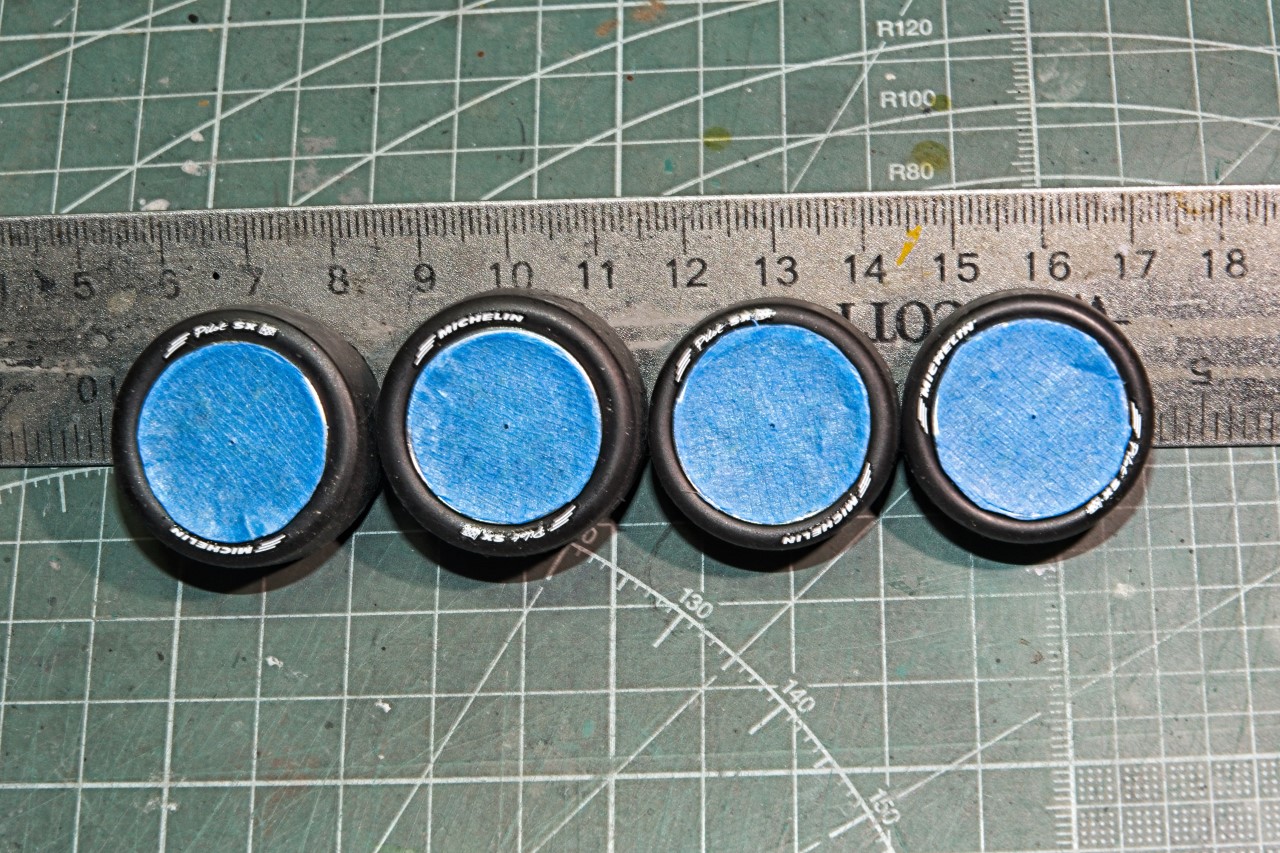
I mounted the tires after sanding the surface to remove the molding centerline.
Since I don’t have the proper tire markings from any of the AM decal companies, I decided to try the reverse wet decals that Tamiya supplies. Now I’ve never had any luck applying them, but my a friend on another site went over the entire process in a post, so I had the confidence to give it a go. To my utter surprise, they came out darn near perfect. The next day I cut out masks to mat coat the white decals and help to blend them in with Acrylic Micro Mask and one drop of Gray acrylic paint.
Masks applied but not coated:
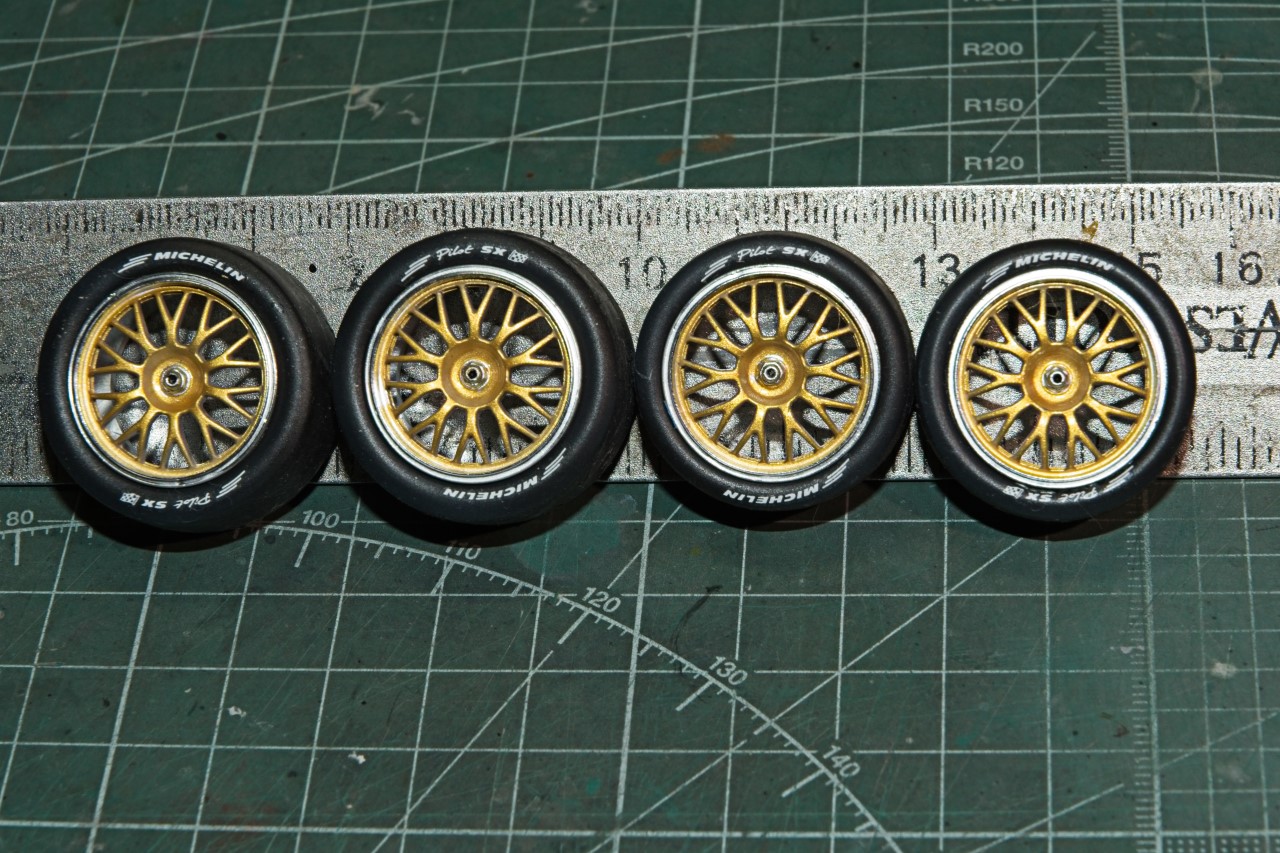
Mat coat applied and masks removed:
I’d say that the tire lettering turned out just fine.
Now it’s back to the front clip, then onto the interior.
joel
That’s a great outcome Joel! And thanks for another mini-tutorial, always learning something from your posts.
cheers
Michael
Michael,
Thanks so much for checking out my update. It’s really greatly appreciated.
joel
Beautiful work Joel, the finish on the rims and tyres looks spot on. Definitely worth the time taken to mask up for the gold inserts.
Cheers, D
Great work Joel.
D & Jesper,
Thanks guys for stopping by and your thumbs up for the current update. I’m always very appreciative of those efforts.
As for the wheels, especially chrome ones, I’ve been researching and experimenting with a few techniques to let me use the kit chromed ones if they’re the right wheels and don’t need any modifications.
The biggest issue with chrome parts is that they’re way to bright and thus look toy like. One technique I’ve tried and liked is to Mat clear coat them. The shine remains but is much softer and looks so much better. After all, to strip chrome parts only to prime and re-chrome with Alcad2 or another Metalizer doesn’t really make much sense, and is a lot of work to basically get back to where you were.
joel
Ken,
The full story of the reverse tire decals started with one post on my other site that led to numerous Google searches where the light bulb finally went on. Everyone seemed to have some issue that caused a failure at times, so I worked out my procedure that actually is comprised of all the positives and none of the negatives. I’m going to write a How To Do post on it and post it in the cars forum and maybe also as a feature if it’s worth it. I’ll have the post ready in a few days as so much is happening at home right now.
joel
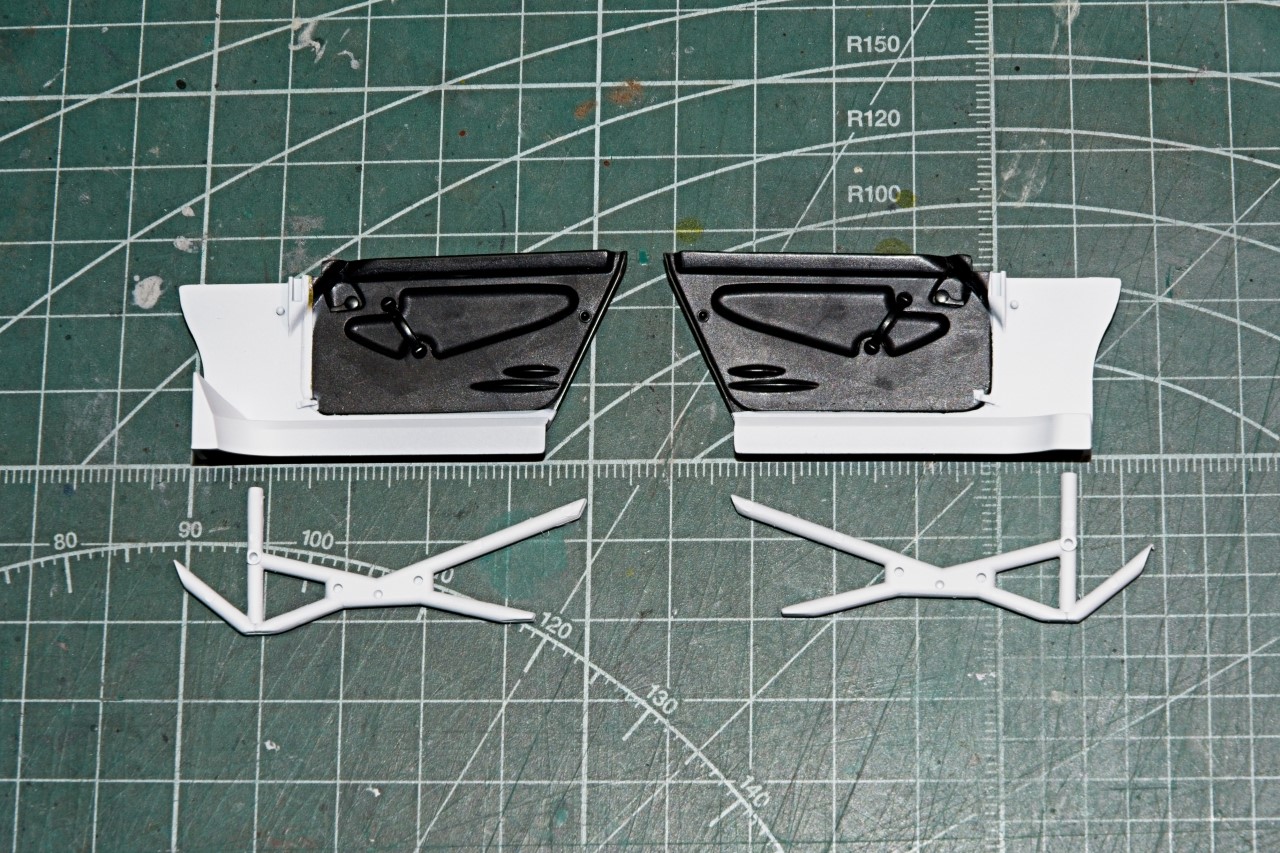
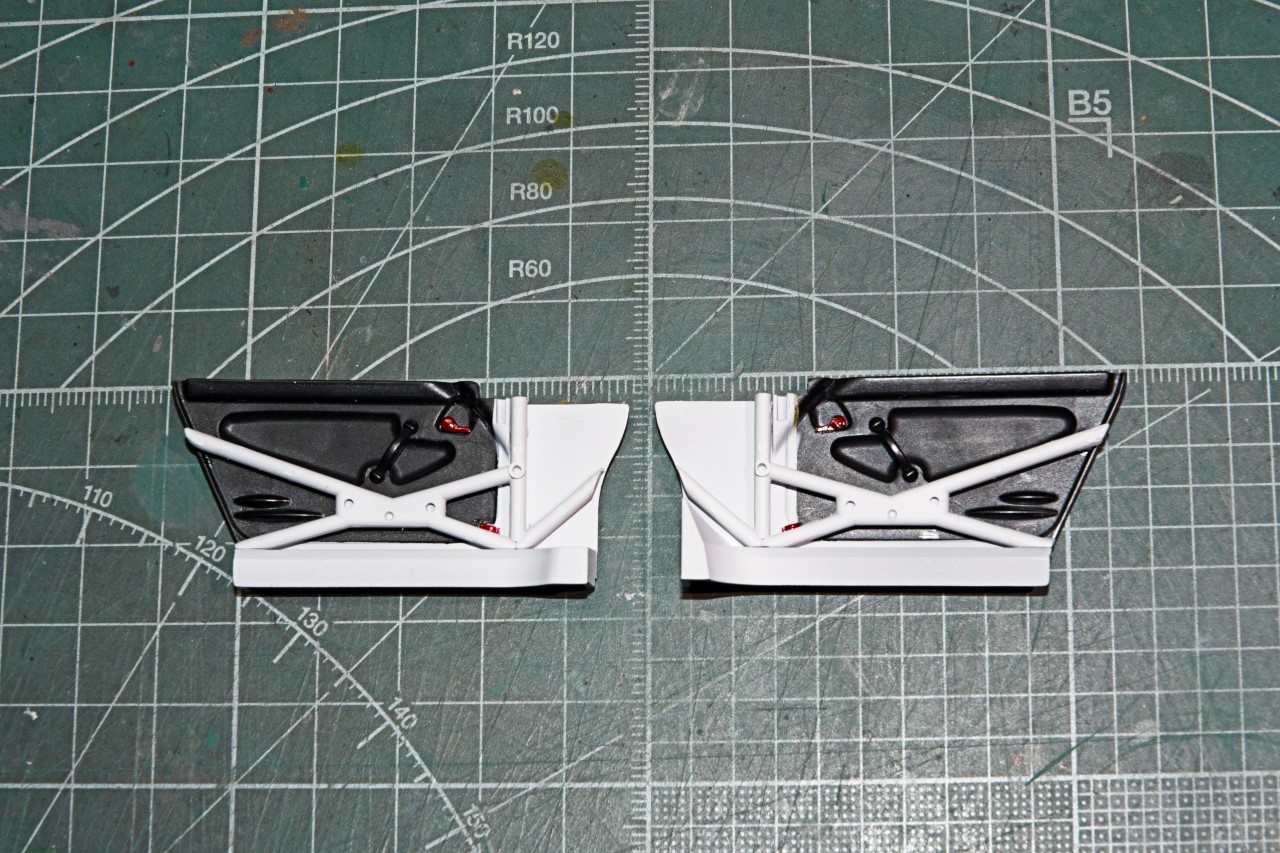
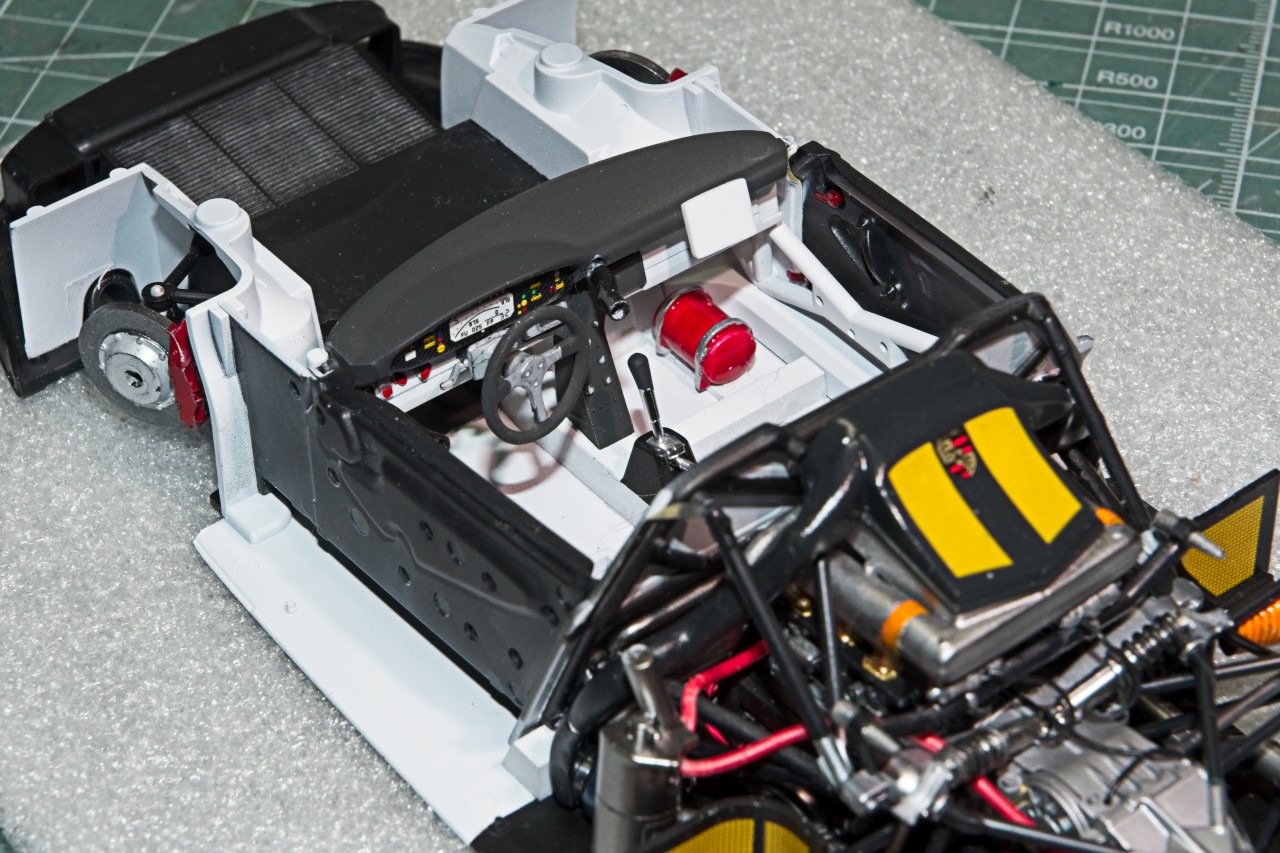
I’ve been focusing all this past week on finishing up the drivers compartment. Worked started on both the door card and attached sections of the roll cage. Just to make things a little more interesting, Porsche had painted the roll cage White like most of the interior compartment, but the actual door cards a semi gloss Black. I primed the doors and roll cage sections with my Tamiya Gray/White primer mixture. When dry I air brushed on Mr. Color Flat White, let that dry, then masked out the body shell around the doors, and air brushed the door cards Mr. Color Semi Gloss Black.
Then glued the roll cage door sections into place.
I previously painted the dash white for the lower section, and the upper section Tamiya Nato Black, then added the instrument decal, and then glued it in place. The drivers compartment minus the seat was now complete.
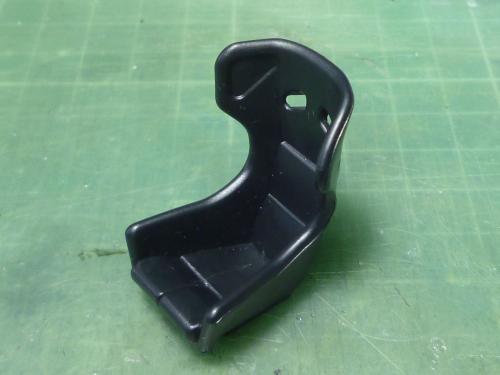
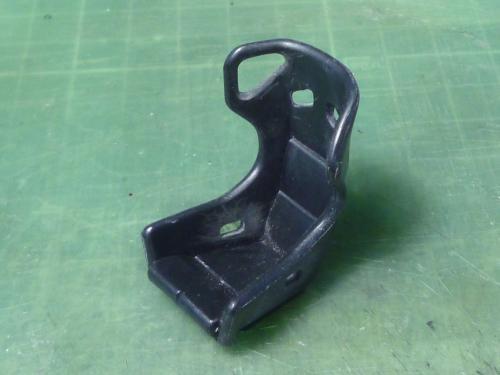
Time to work on the driver’s seat. Pictures showed that the right side of the top of the headrest had the insert cut out, while the kit seat didn’t. So I carefully opened it up.
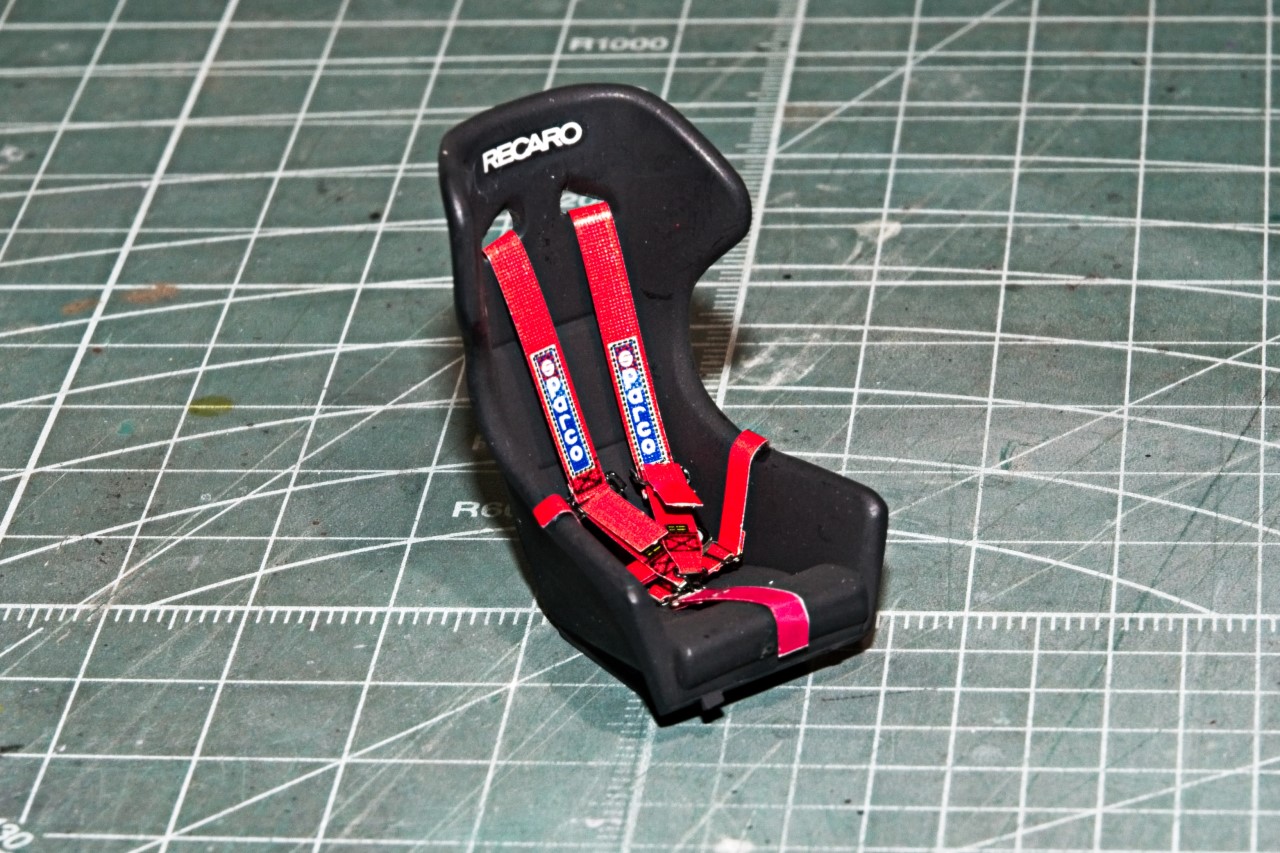
I painted the cushion and arm rests of the seat Tamiya Nato Black and the seat sides plain Jane Flat Black.
Now comes the 5 way seat harness that I was dreading. Simply put, my eyesight isn’t up to the task of working with all those little PE buckles and snaps, but since I had a Eduard pre-painted set I decided I’d give it a shot. Honestly, it was a huge struggle that took nearly 16 hrs over 3 days. At this point I’m seriously considering going to decals for Tin Tops even though it will leave a lot to be desired. So please excuse the many mistakes I made. I did the best I could.
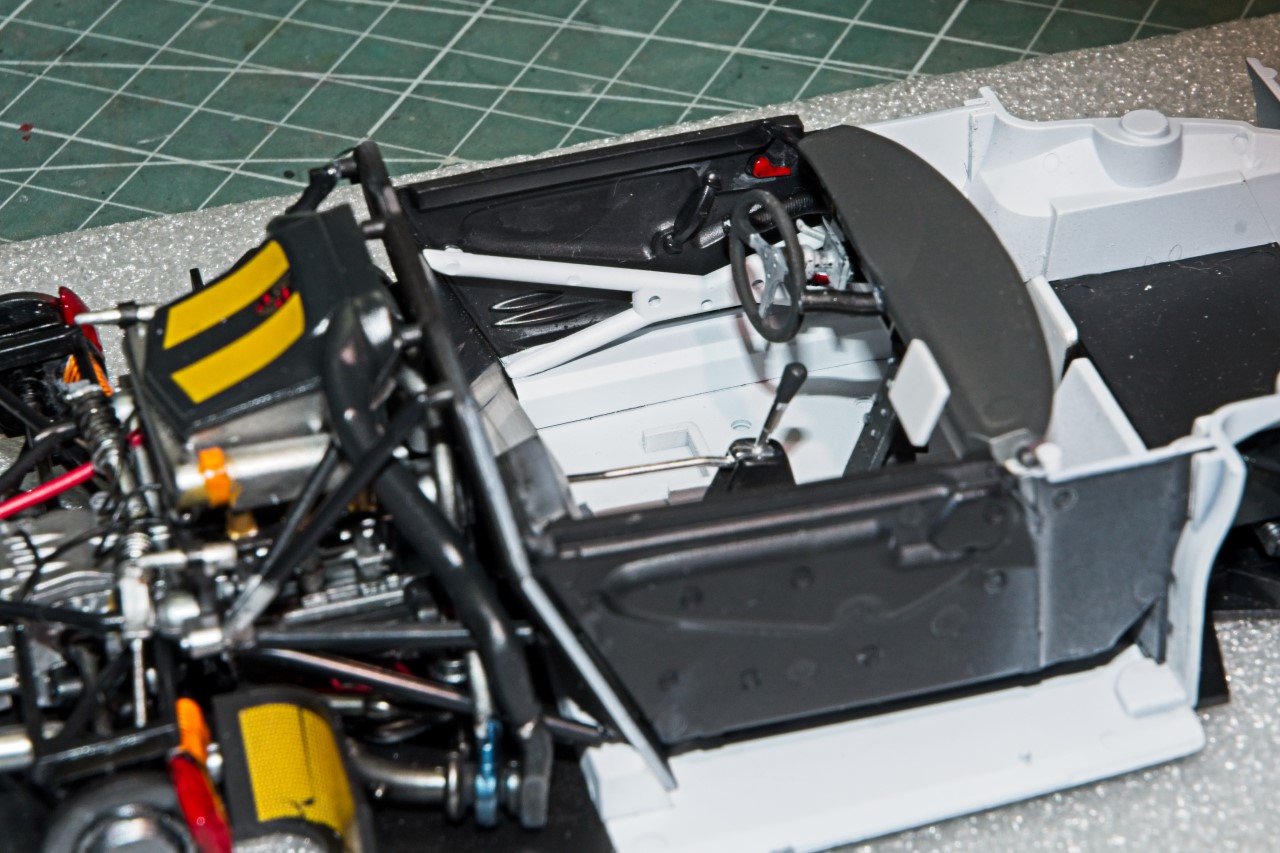
Then I glued the seat into position
And the driver’s compartment is finally done.
Now came the part of the build I’ve been waiting for, the installation of the Tires & Wheels, so she’s standing on her own legs. Always a major accomplishment in any of my builds.
All that’s left now is to finish up the body sections. Lots to do, but the finish line is finally coming into sight.
joel
Lovely detail work Joel, taking the time to do things like carve out the side of the headrest to match the references just adds so much to the build. The seat and harness came up really well and now that the tub is assembled the bigger picture looks great!
Wonderful to see the build reach the “rolling chassis with full interior” stage as well, those wheels look amazing!
Cheers, D