I can work with either one, and it may be easier to darken the OD than lighten the Rustoleum, not sure yet. And the black will be brushed on, again Vallejo acrylic, using an -off black, after I decide on the final green and shoot a very light cleat flat. I have found that light earth colored dry pigments lighten a dark green quite a bit but darken under clear. Right now I’m leaning towards proceeding as-is, that is painting the black and then lightening the whole thing, black and green, at the same time. That would enable me to lighten the horizontal surfaces more than the vertical too. I’ll ponder for a bit.
For what it’s worth - and it may be too late in the day in any case - my formulae for Brit Army stuff is Tamiya Field Grey for the “green” and a Revell enamel No 9 Anthracite for the “black”. Now, I appreciate that when CR1 was coming into service, certainly the green shade was becoming a little more “olivey”, however, I reckon the foregoing would still work.
1 Like
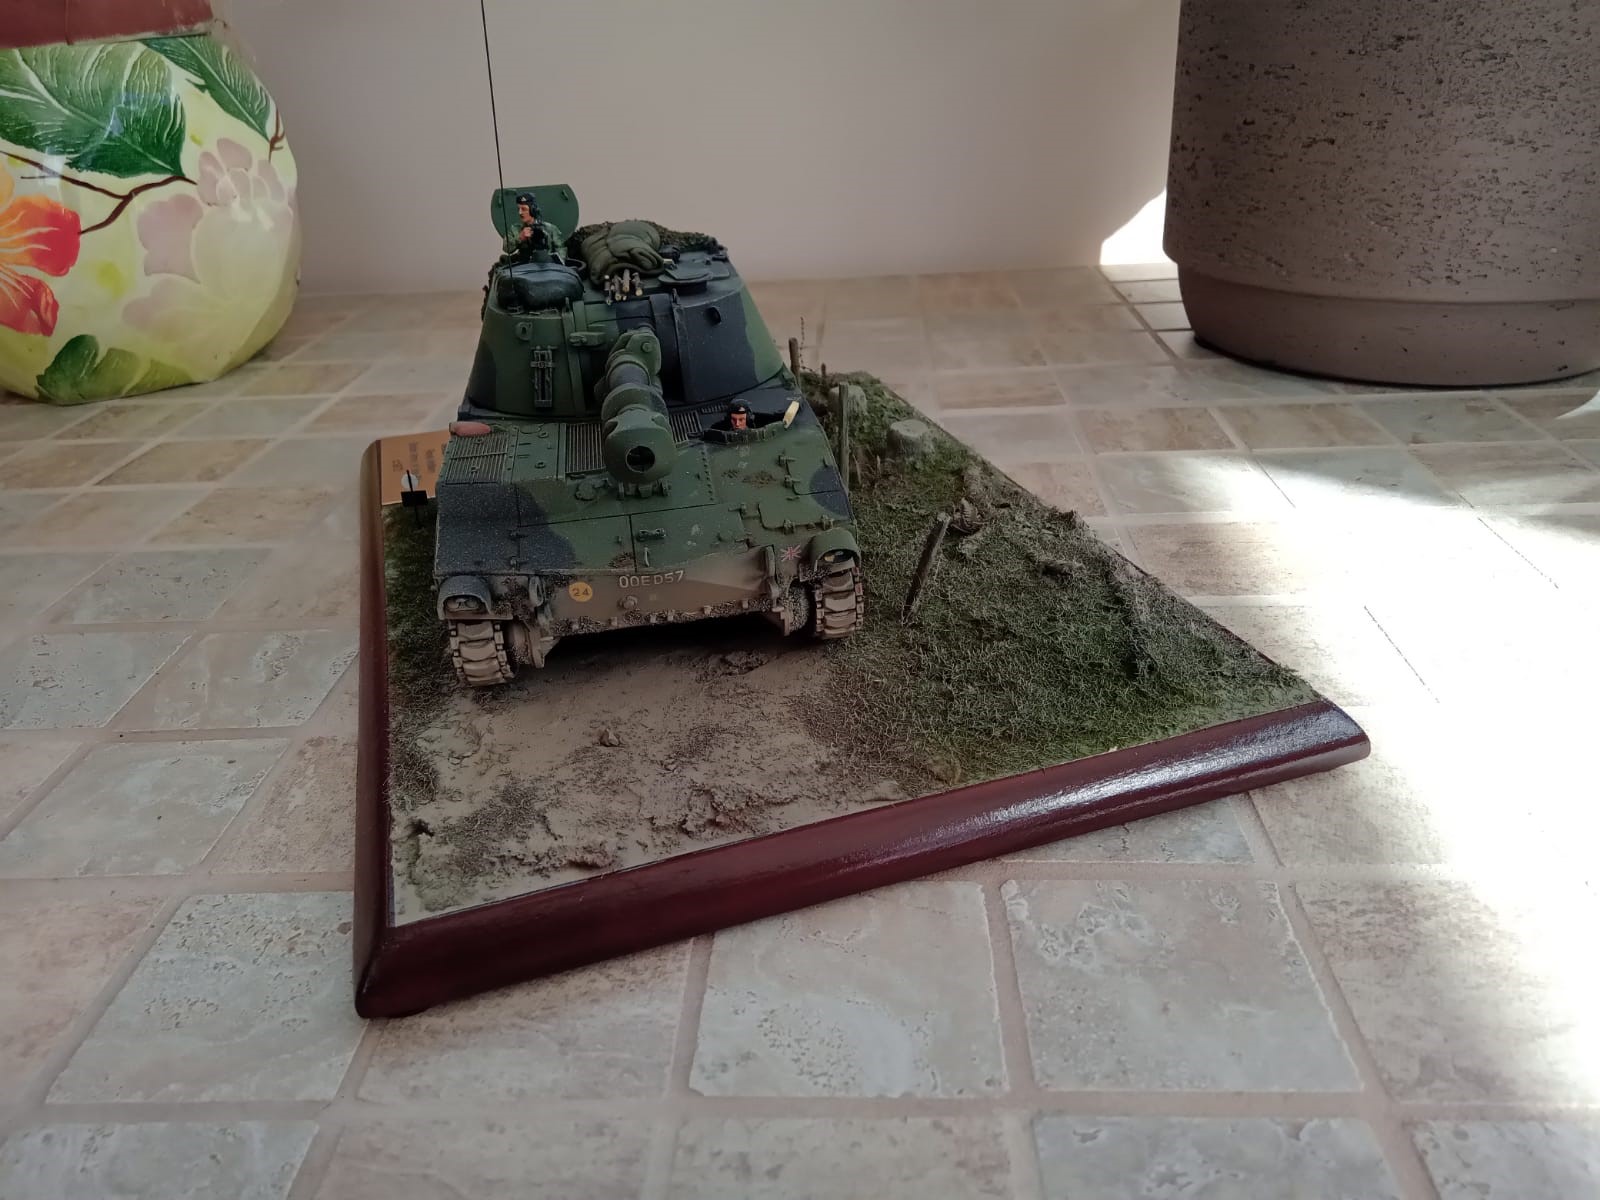
Colour perception is always somewhat subjective but just to show how the Tamiya/Revell combo works, here’s my M109 in Brit service:
Russel
Deep Bronze Green was a colour discontinued in 1973, well before the timeframe you want. The colour you actually need is IRR Nato Green (Not to be confused with Tamiya Nato Green which is too dark and too green).
NATO Green IRR
The British Olive Drab that was to contain the required IRR pigment was named as “NATO Green” in BSC 381C No. 285 in 1980. In earlier reports and reviews, from time to time, there were references to developing “a NATO Green” i.e. one that complied with the NATO STANAG. Each country was free to interpret their version of “a NATO Green” that also complied with the STANAG, these were similar but not the same shade as our NATO Green BSC 381C No. 285.
NATO standard STANAG 2338 was ratified in 1971, as usually happens what is drawn up in a STANAG is largely incorporated into a British Defence Standard (Def Stan) sometime later. The designation of our new paint as “NATO Green” was marked in Def Stan 00-23 Issue 1 in October 1980
This is a quote and below is an image I took from this website:

I show this to indicate the vast difference between DBG and IIR NG, not as a perfect replication of colour. It also indicates how the Tamiya paint is a good substitute. As Brian says Tamiya Field Grey XF-65 is a good substitute.
This may, or may not, help(!) I reckon factor in a bit of scale colour and Tamiya Field Grey gets you there:

2 Likes
The green I want looks more gray than green…
Decals arrived yesterday, so as soon as the second Challenger is ready for paint, it’s time to clear off the bench and get going again, plus I have the Leo2, AMX and M60 dozer to paint as well.
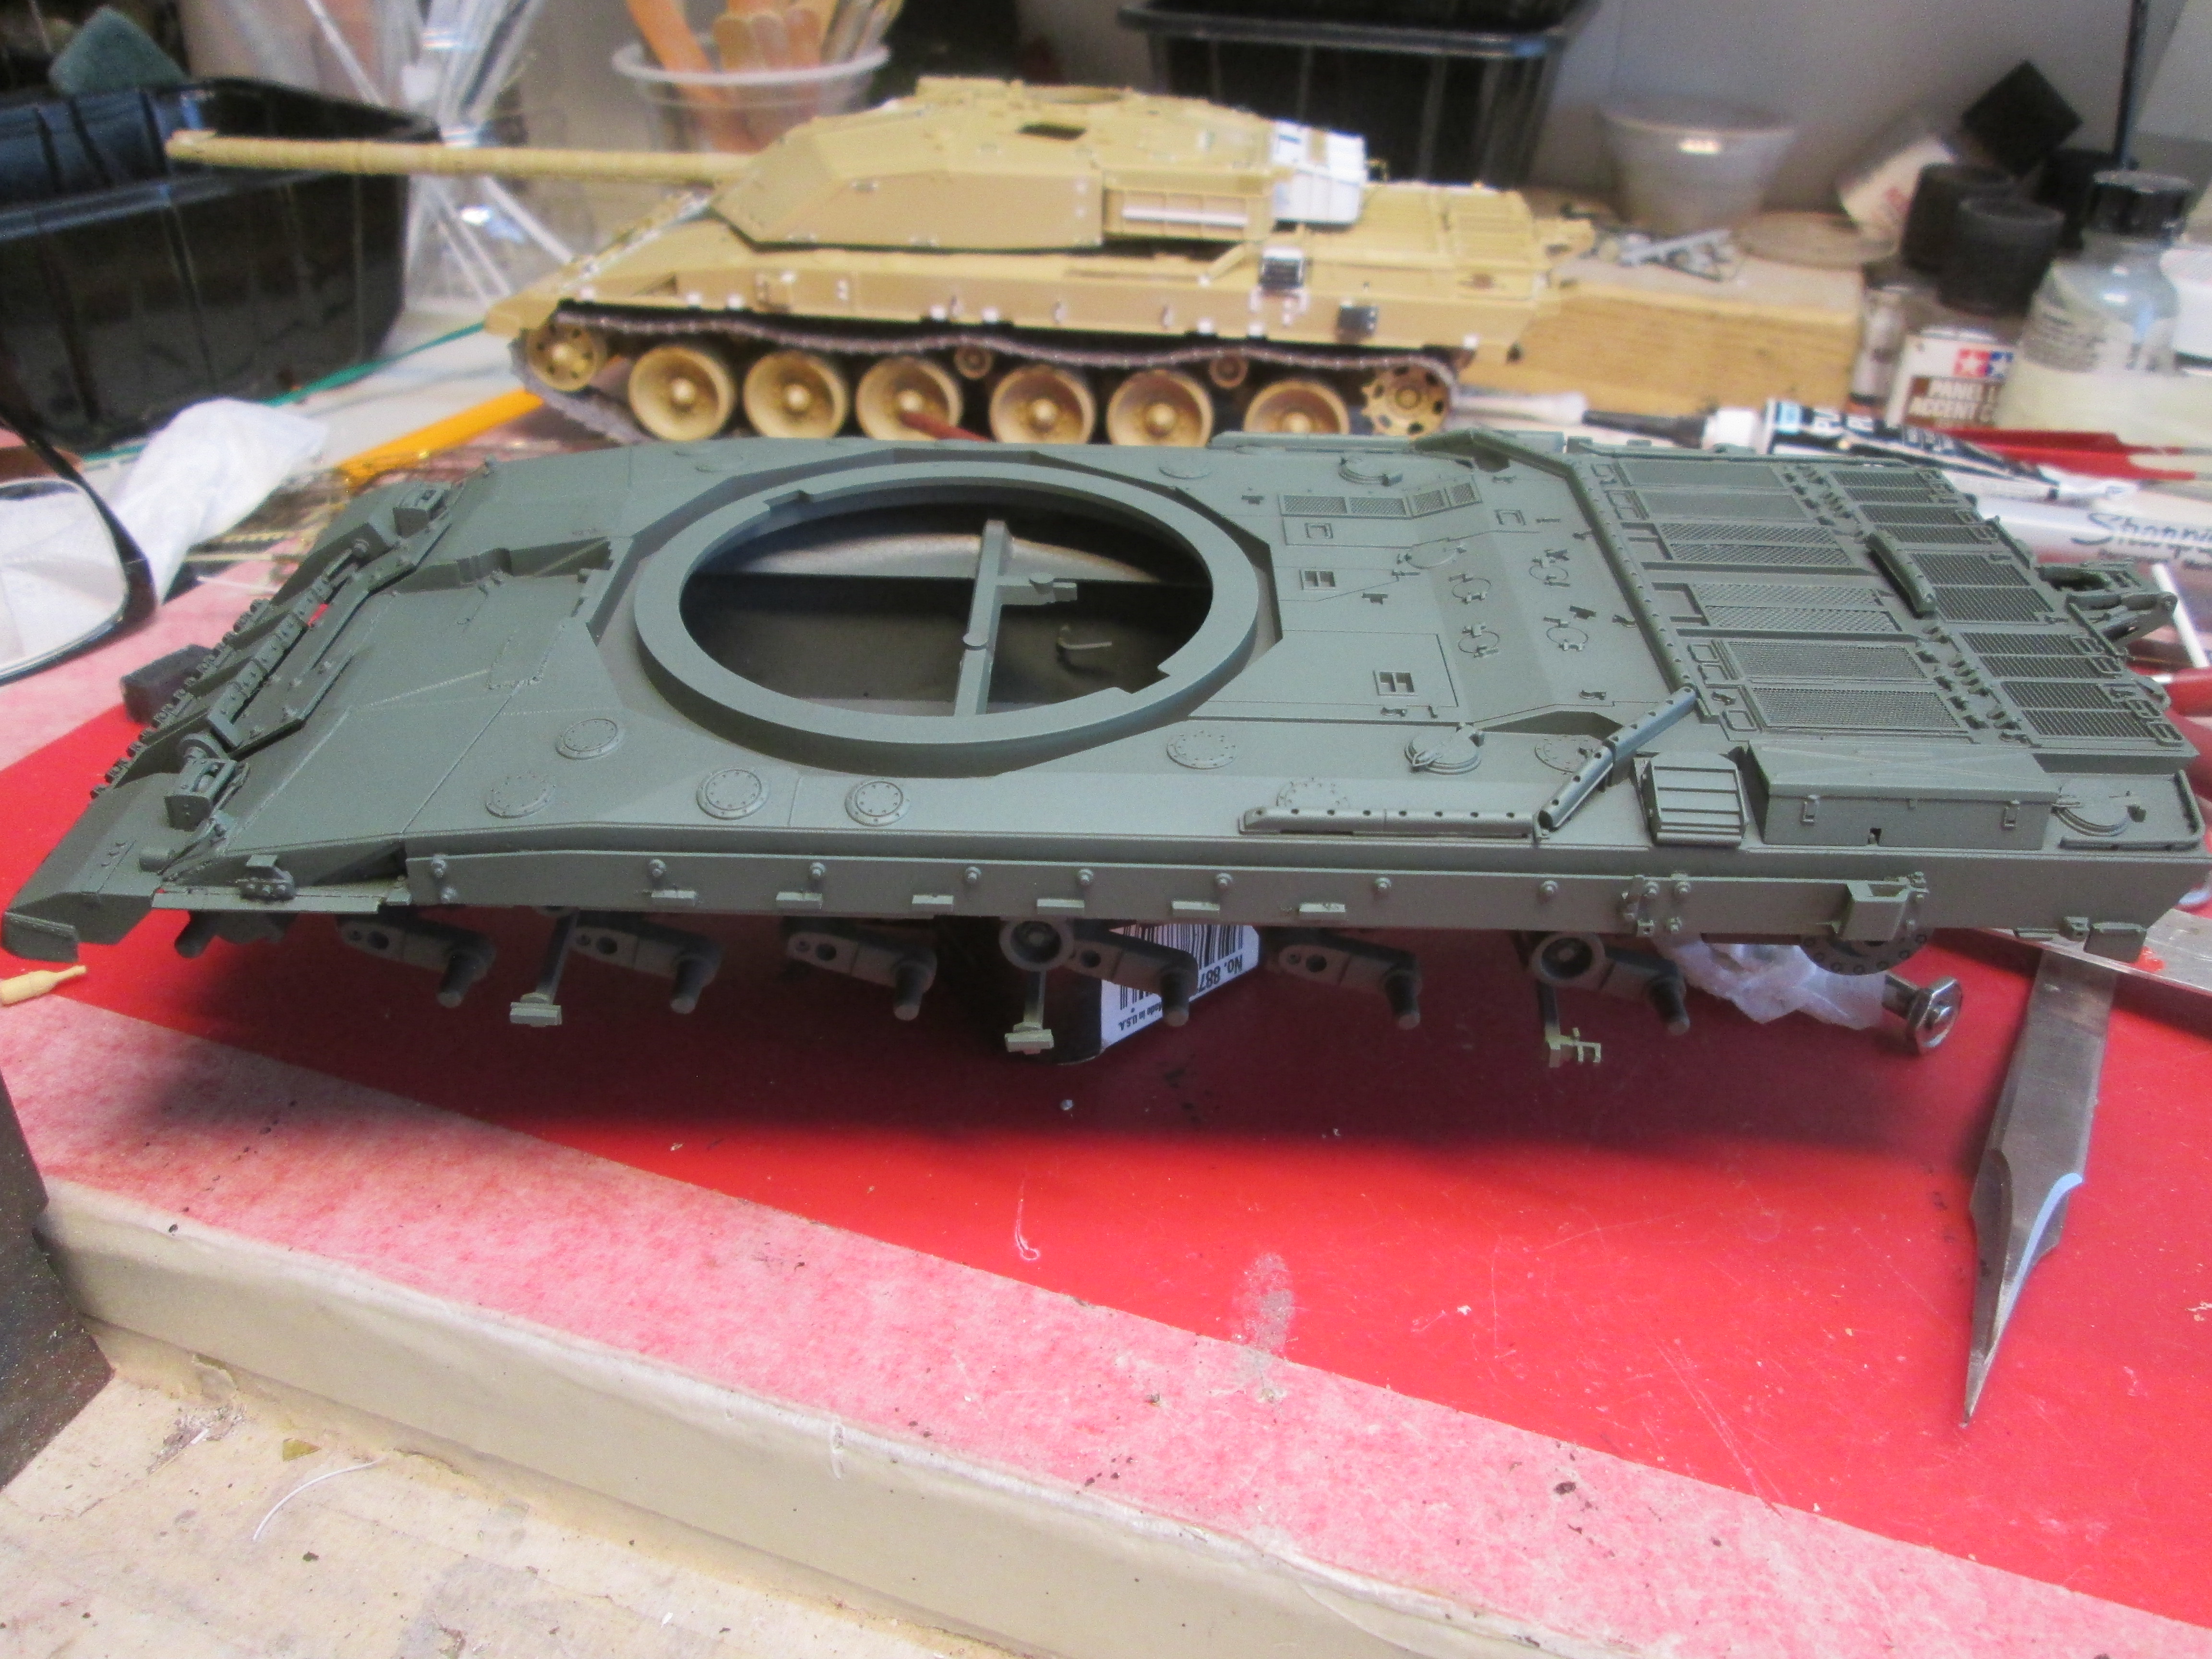
Edit: I happened to have a can of Tamiya Field Gray, but it’s TS-78… I shot a very light coat on the upper surfaces only, and I like it.
 IMG_3468 by Russel Baer, on Flickr
With the darker Rustoleum as a base coat, I actually have a “pre-shade” kind of thing going on. I think I’m gonna proceed with the off-black second color over this.
1 Like
coming along nicely Russell. ![]()
1 Like
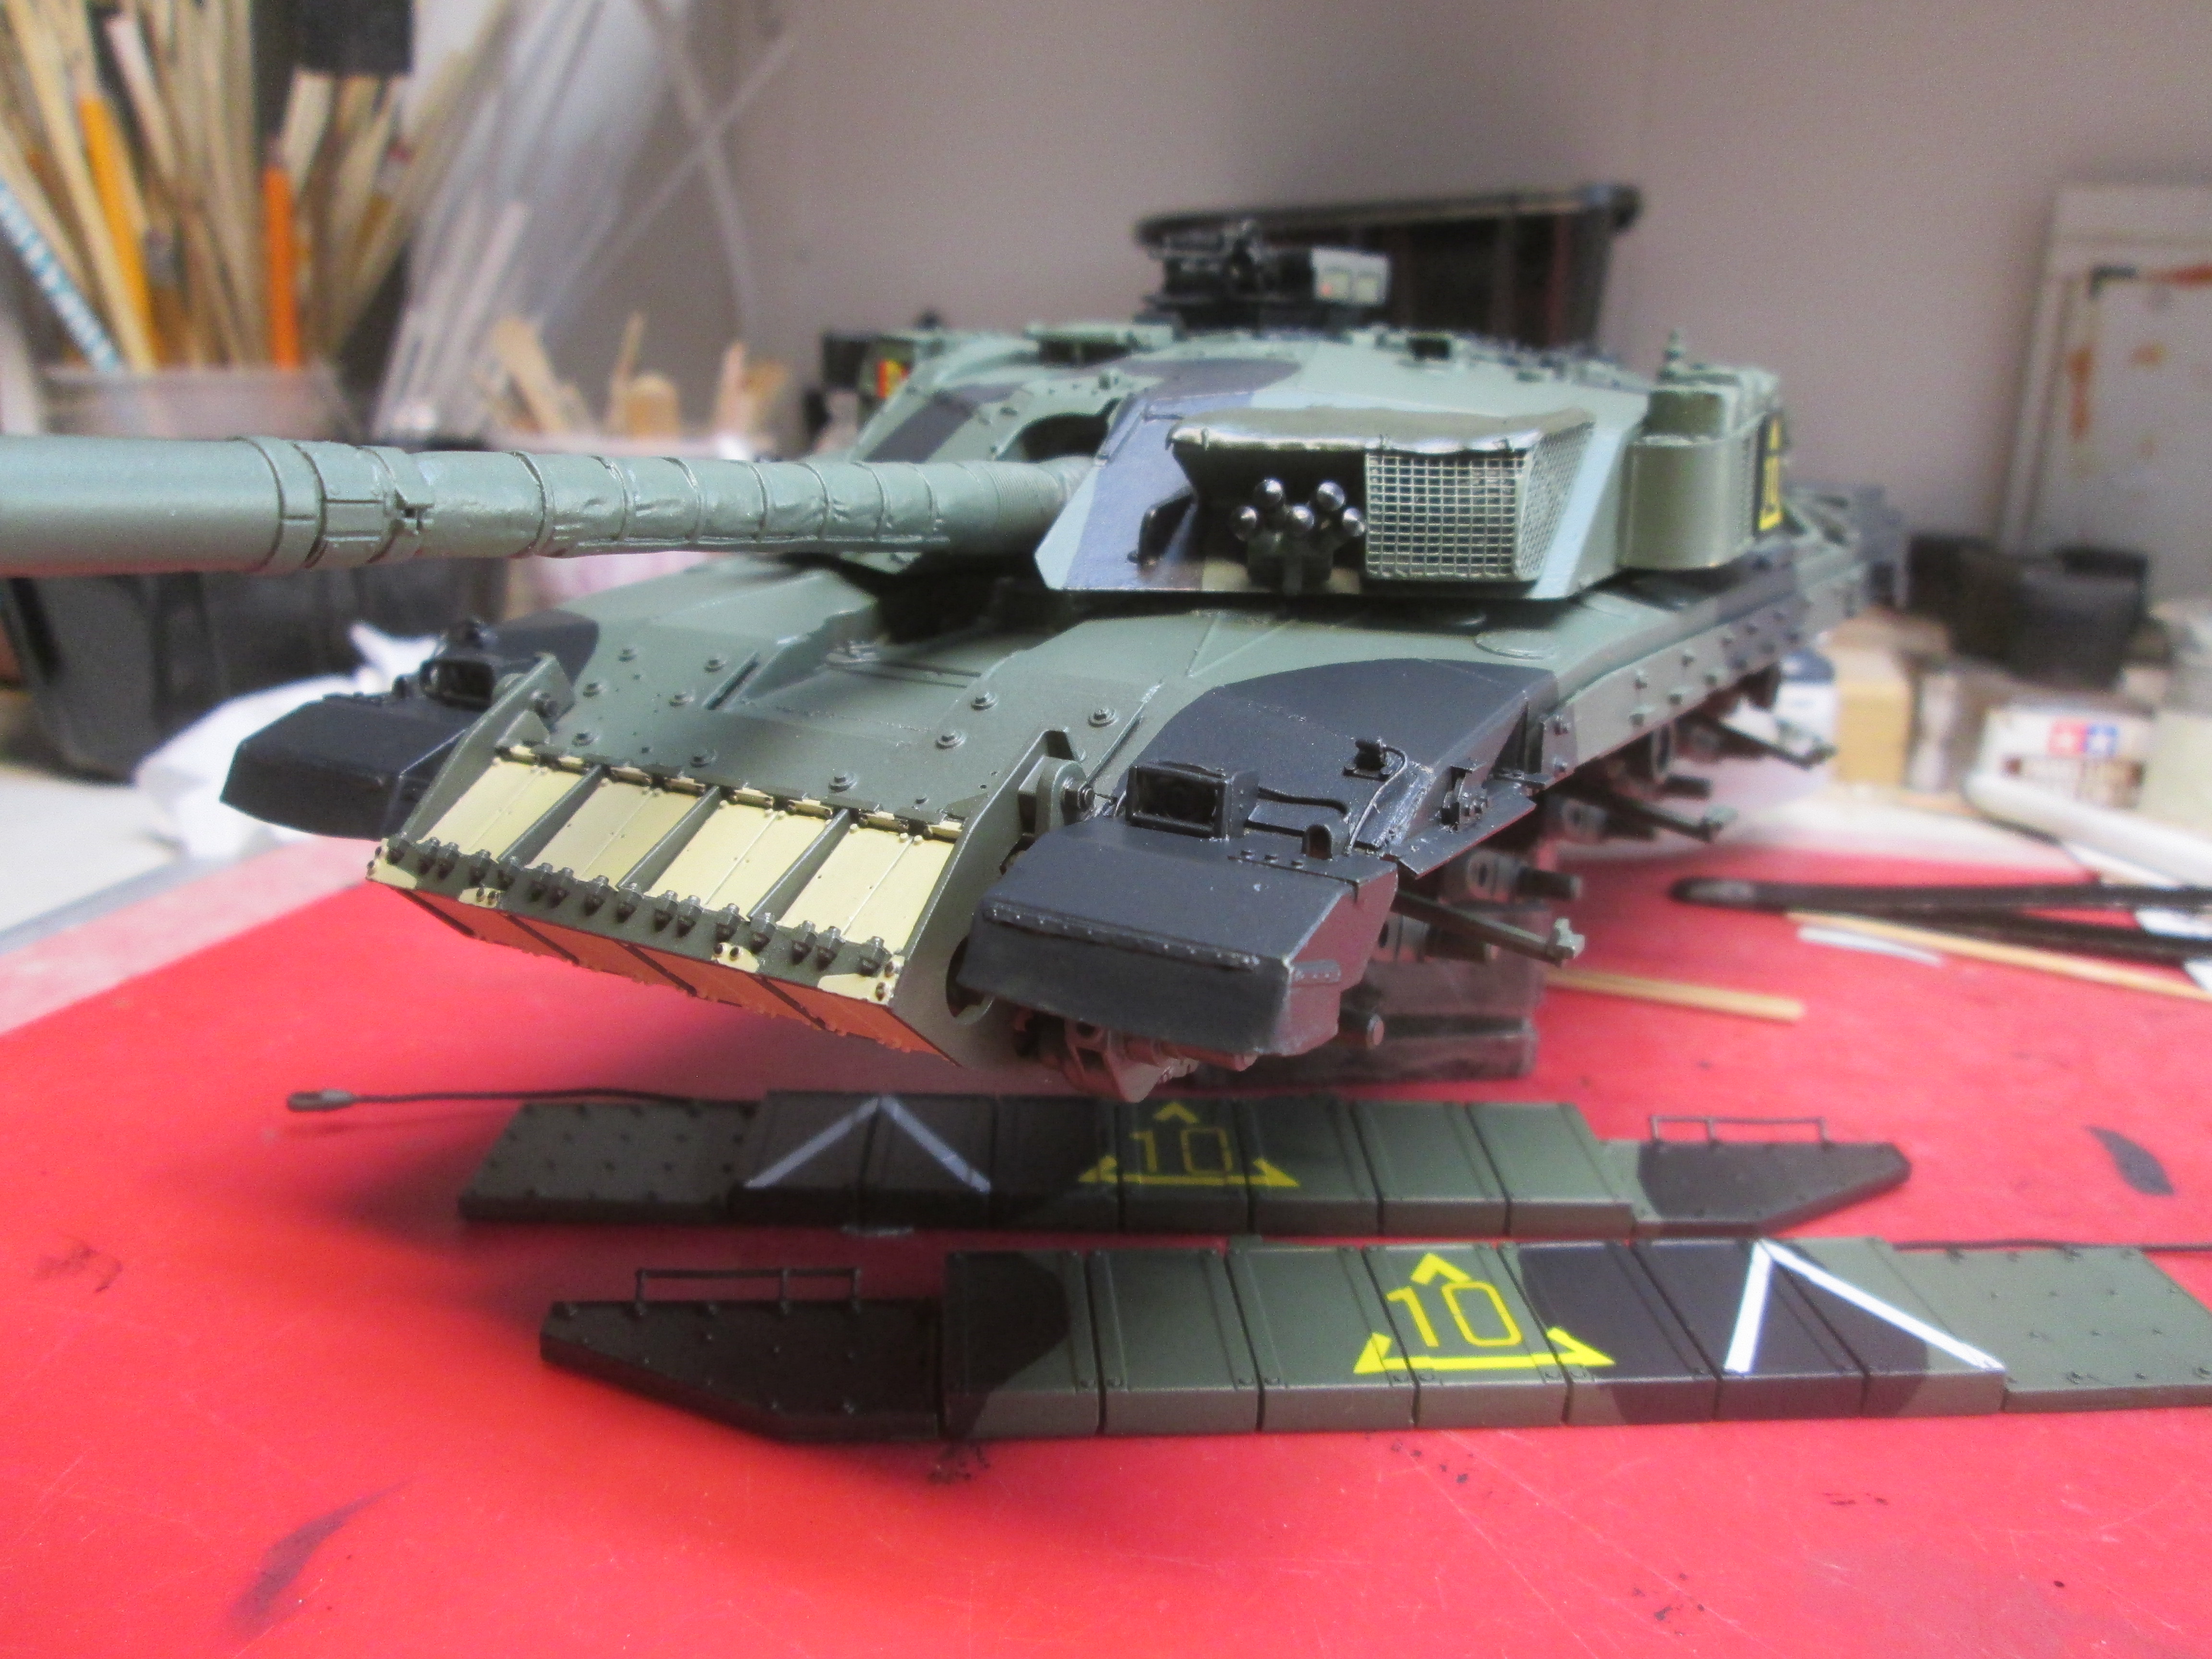
I was waiting until I could get my bench cleaned up, meaning I had to clear off all the bits and bobs I was scattering all over the place as I built the other Challenger, before I could get back on this one. Today I finally got the black on:
 IMG_3497 by Russel Baer, on Flickr
 IMG_3496 by Russel Baer, on Flickr
Plan is to do the bow armor (blocks only, frame in green) in sand tomorrow, then a clear coat and decals.
9 Likes
Good work with getting the black on. Looks nice. The devil will be in the detail painting and weathering for this. One thing I would mention Russel, and its entirely how you feel about it, but the 4 or 5 rolled up items in the LH turret basket aren’t really representative of any stowage you would see or get on a Chally 1 ?
Chally from same time frame. Images for reference and discussion only.

as a reference, you can see the 3 crew sleeping roll mats in the front basket (normally on the RHS of turret)
same tank different angle
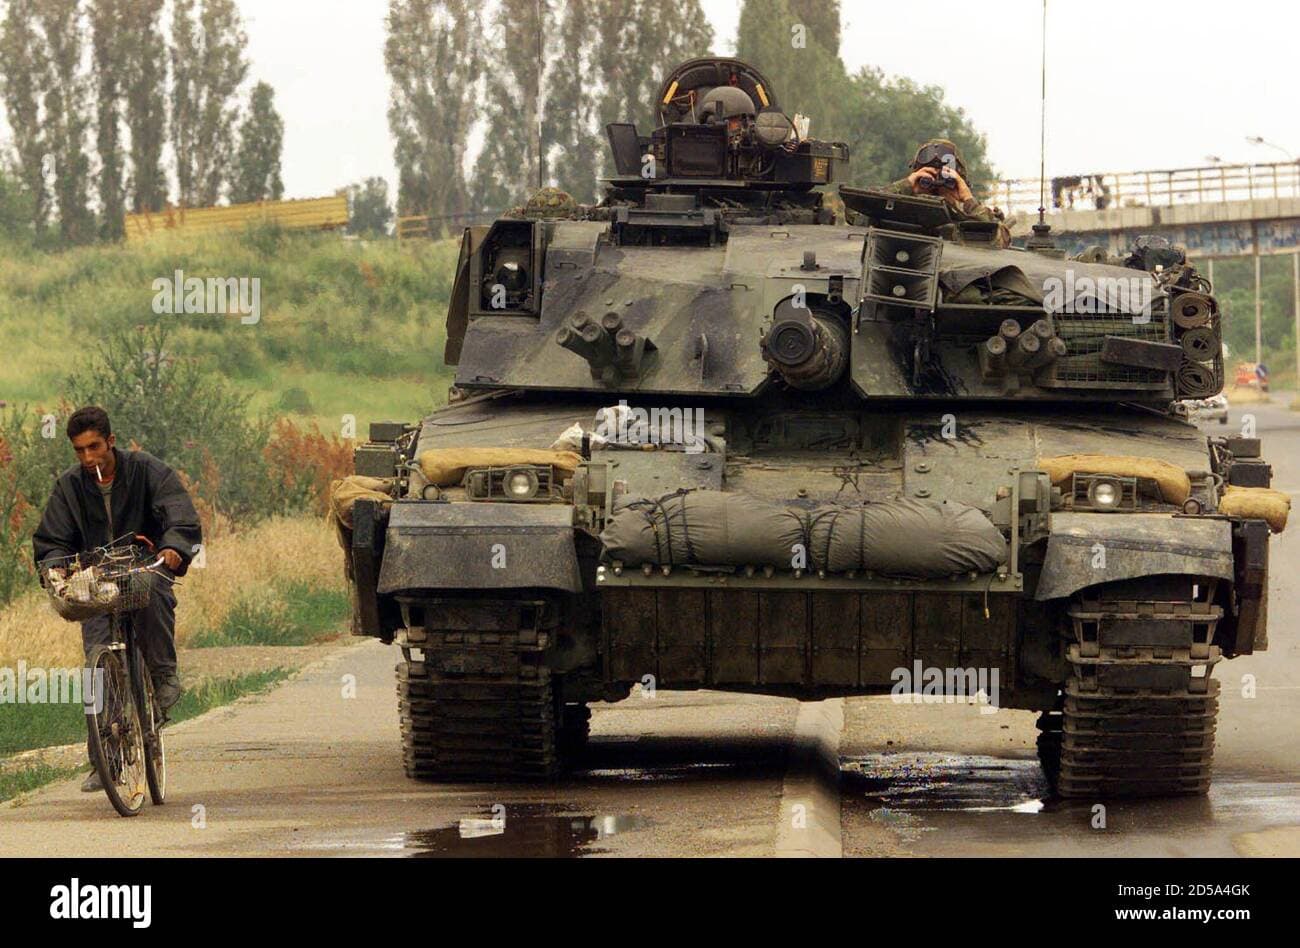
On this one and a few others I have seen from KFOR, they have the cam net rolled up in the tank sheet on top of the front armour pack - not really sure why they feel the need for the 4 sand bags … maybe a crew thing …
Anyway, just thought I’d mention it, but at the end of the day, it doesnt really distract from the great model you have done under it all
Thanks. I debated long and hard on the contents of the big basket, even considering leaving it empty, but in the end I thought the sleeping mats looked the most like something I could make from 2-part putty and fit into the semi-fragile basket. I did some for the other one too… partly because I could fit them in, partly because I’m largely ignorant of what else may have gone there. Seeing your pic of what’s in one makes me slap my forehead, but I think it’s past the point of no return there.
2 Likes
Fair one mate… like I said, it was just an observation thats all, and understand I if you have gone past the point of doing anything. Like I said, it doesn’t take anything away from the build.
In our LH long bin we had a combination of various bits of niff naff and crap chucked in there. Main gun cleaning kit, some drivers track tools and rope and we would keep some rations in there. In the bigger baskets like yours you would probably find the same, and as they have a bit more storage space, maybe extra water bottles, perhaps the loaders webbing so its close to hand, maybe smaller day sacks for the crew etc.
Why does It looks like outdoor speakers are fitted to right of barrel, attached to camnet holder,
1 Like
They are speakers, they possibly had some form of pre recorded native language Psy Ops message for broadcast or a broadcast in Russian as they were in a race to take control of the Airport and may have had a type of prerecorded message for them to ease any tensions ? I will check through the Regt journal and see if I can find anything firm out, but those are my guesses.
As dont forget, these wagons were loaded for fighting if needed.
We had a U.S Psy Ops unit attached to us in Bosnia for a while and they had a Humvee with a similar set up
Cant find anything in the journal, but that is still my best guess.
Some background ( sorry to steal the thread a bit Russel)
D Sqn KRH were the lead unit into Pristina (potentially jumping the gun with the movement forward as HCR and Para were the intended units to advance in). After a few hours, they were ordered to withdrawal and allow HCR and para to proceed in and secure it all for the arrival of 5 Airborne who landed later.
D Sqn were then ordered to another area where - Direct from KRH Journal - " and finally
settling in area centred on a town called Obilic. In this area we
became responsible for everything: the upkeep of law and order,
the maintenance of Kosovo’s electrical power and coal mining
industry, the delivery of humanitarian aid, local government and
assistance to agriculture.
So, the speakers on a wagon make sense considering the type of role they had, and at times, were dealing with mini riots and uprisings from various factions …
Had them (US Psy ops) with HQ on entrance to Basra and based at the old airfield hotel, they couldn’t understand ,why we didn’t build a fence, 6ft high with 60ft of barbwire Infront around use.
1 Like
Today was a decal-fest. I realize the tank I’m modeling was missing part of a rear mud flap and one spare track link is not there, but since I had both spare links securely mounted and I forgot to “damage” the right mud flap, my model is of the tank before it incurred that “damage”. I also suspect the call sign board on the back of the turret should have been black. Dang it. This was also the first time I’ve made up specific registration numbers using layered decals. Tee-dee-us!
Other than that, works for me.
 IMG_3500 by Russel Baer, on Flickr
I also did some detail painting while I was waiting for decals to dry. I used Walther’s Solva-Set to get them to settle down as Micro-Sol wasn’t doing much. Odd, since the decals themselves are on very thin film/
 IMG_3501 by Russel Baer, on Flickr
The big call signs on the skirt armor were made up from other bits, and I hope they look okay after some light weathering… or maybe heavy weathering.
 IMG_3499 by Russel Baer, on Flickr
Next will be a pin wash, then dust.
6 Likes
Like the color scheme. With weathering it will look terrific. ![]()
![]()
1 Like
It already looks AWESOME!
2 Likes
That’s looking absolutely terrific Russ, you have really made this build your own with the scratch building etc… Some great skills there.
Yes the turret C/S plate should really be black, but you can get away with it, and the idea of before damage occurred is equally fine … No one can say anything about it.
Don’t worry about the side plate decals. Not perfect is better. The vast majority of time and instances, all C/Ss are handballed by the crew, so they are never perfect. As an example in my troop and nearly every other one I knew just used templates cut out from large sections of cardboard, so once painted, there would be slights runs, some wouldn’t be totally level or straight… Sometimes people do them to perfect… If I notice any tiny details you have missed I will give you a heads up buddy ok ![]()
You may want to paint the turret RH basket fire extinguisher green… They are very very rarely painted … They originally started in green, then went to red…but are always removed for when the wagon is painted etc…
1 Like