Many modelers just leave them in base coat colors, others make them wooden, other green, someone else brown…
What do you think? I do have a nice clear wood color I use for tool handles which would look good on some of them.
But I’d rather stay as historical as possible.
Dragons panzer F instructions show them being in hull base or camo color depending on scheme. They appear to be metal so I would paint them what ever color the vehicle is there. I believe the only wooden part on the Panzer II is the jack block and tool handles
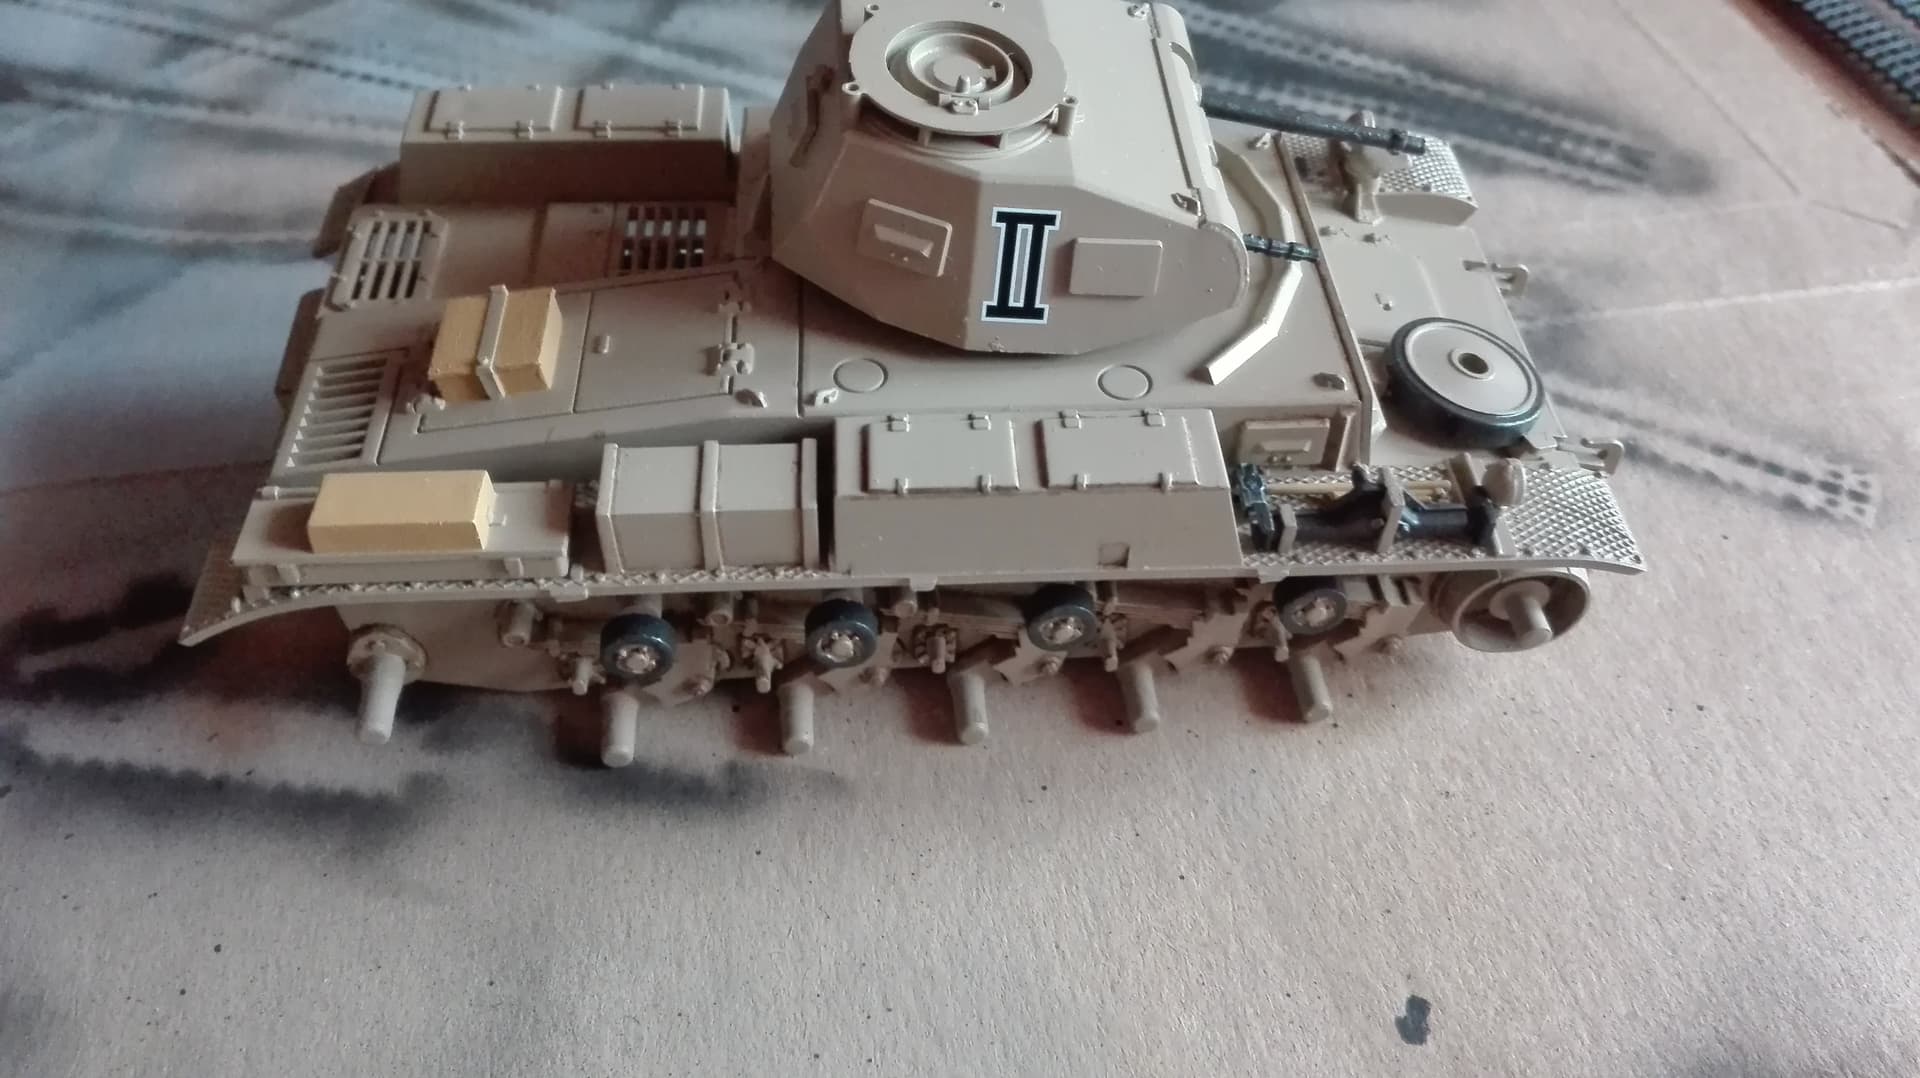
I’m no expert on the Panzer II, but I think Tamiya’s mold makers misinterpreted whatever photos or drawings they were using back then. This particular vehicle was field modified, the storage boxes and tools were rearranged and a scavenged right fender storage box added to the left rear fender. Based on what little I know I think the box on the engine deck was supposed to be the relocated Jack Block peculiar to this particular vehicle. That block was usually stowed on the left rear fender along with the Jack. And that large box on the right fender should have been the gas can rack as depicted in Academy’s newer and more accurate kit. That smaller box sitting atop the longer one would normally be located where that bogus box is
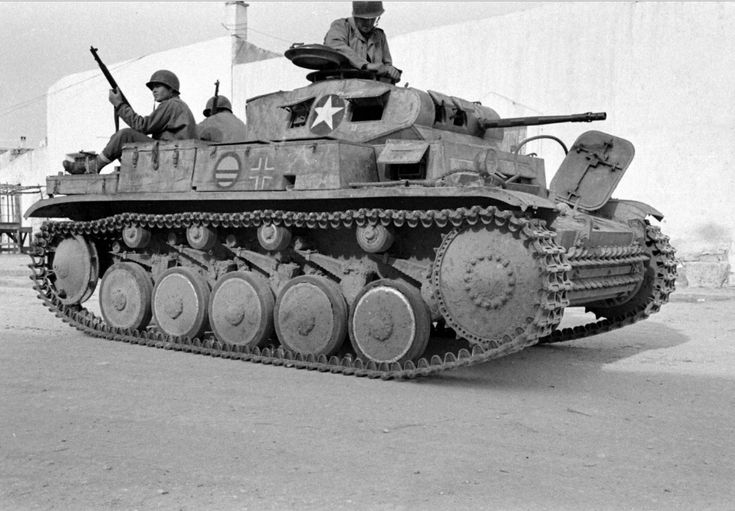
This photo of a captured Panzer II driven around by American troops has a different type of storage box there. Note the missing smaller box where the GI on the back deck has his foot resting.
The long and the short of it is that many of these vehicles seem to have been field modified by their crews. So anything goes if you’re not trying to replicate a particular vehicle. I would suggest leaving the box on the engine deck the same color as the rest of the tank. But you could get away with painting that one on the fender as a wooden crate I suppose. I’ve used a fine tooth razor saw dragged across a plastic part to suggest wood grain. Hope this helps.
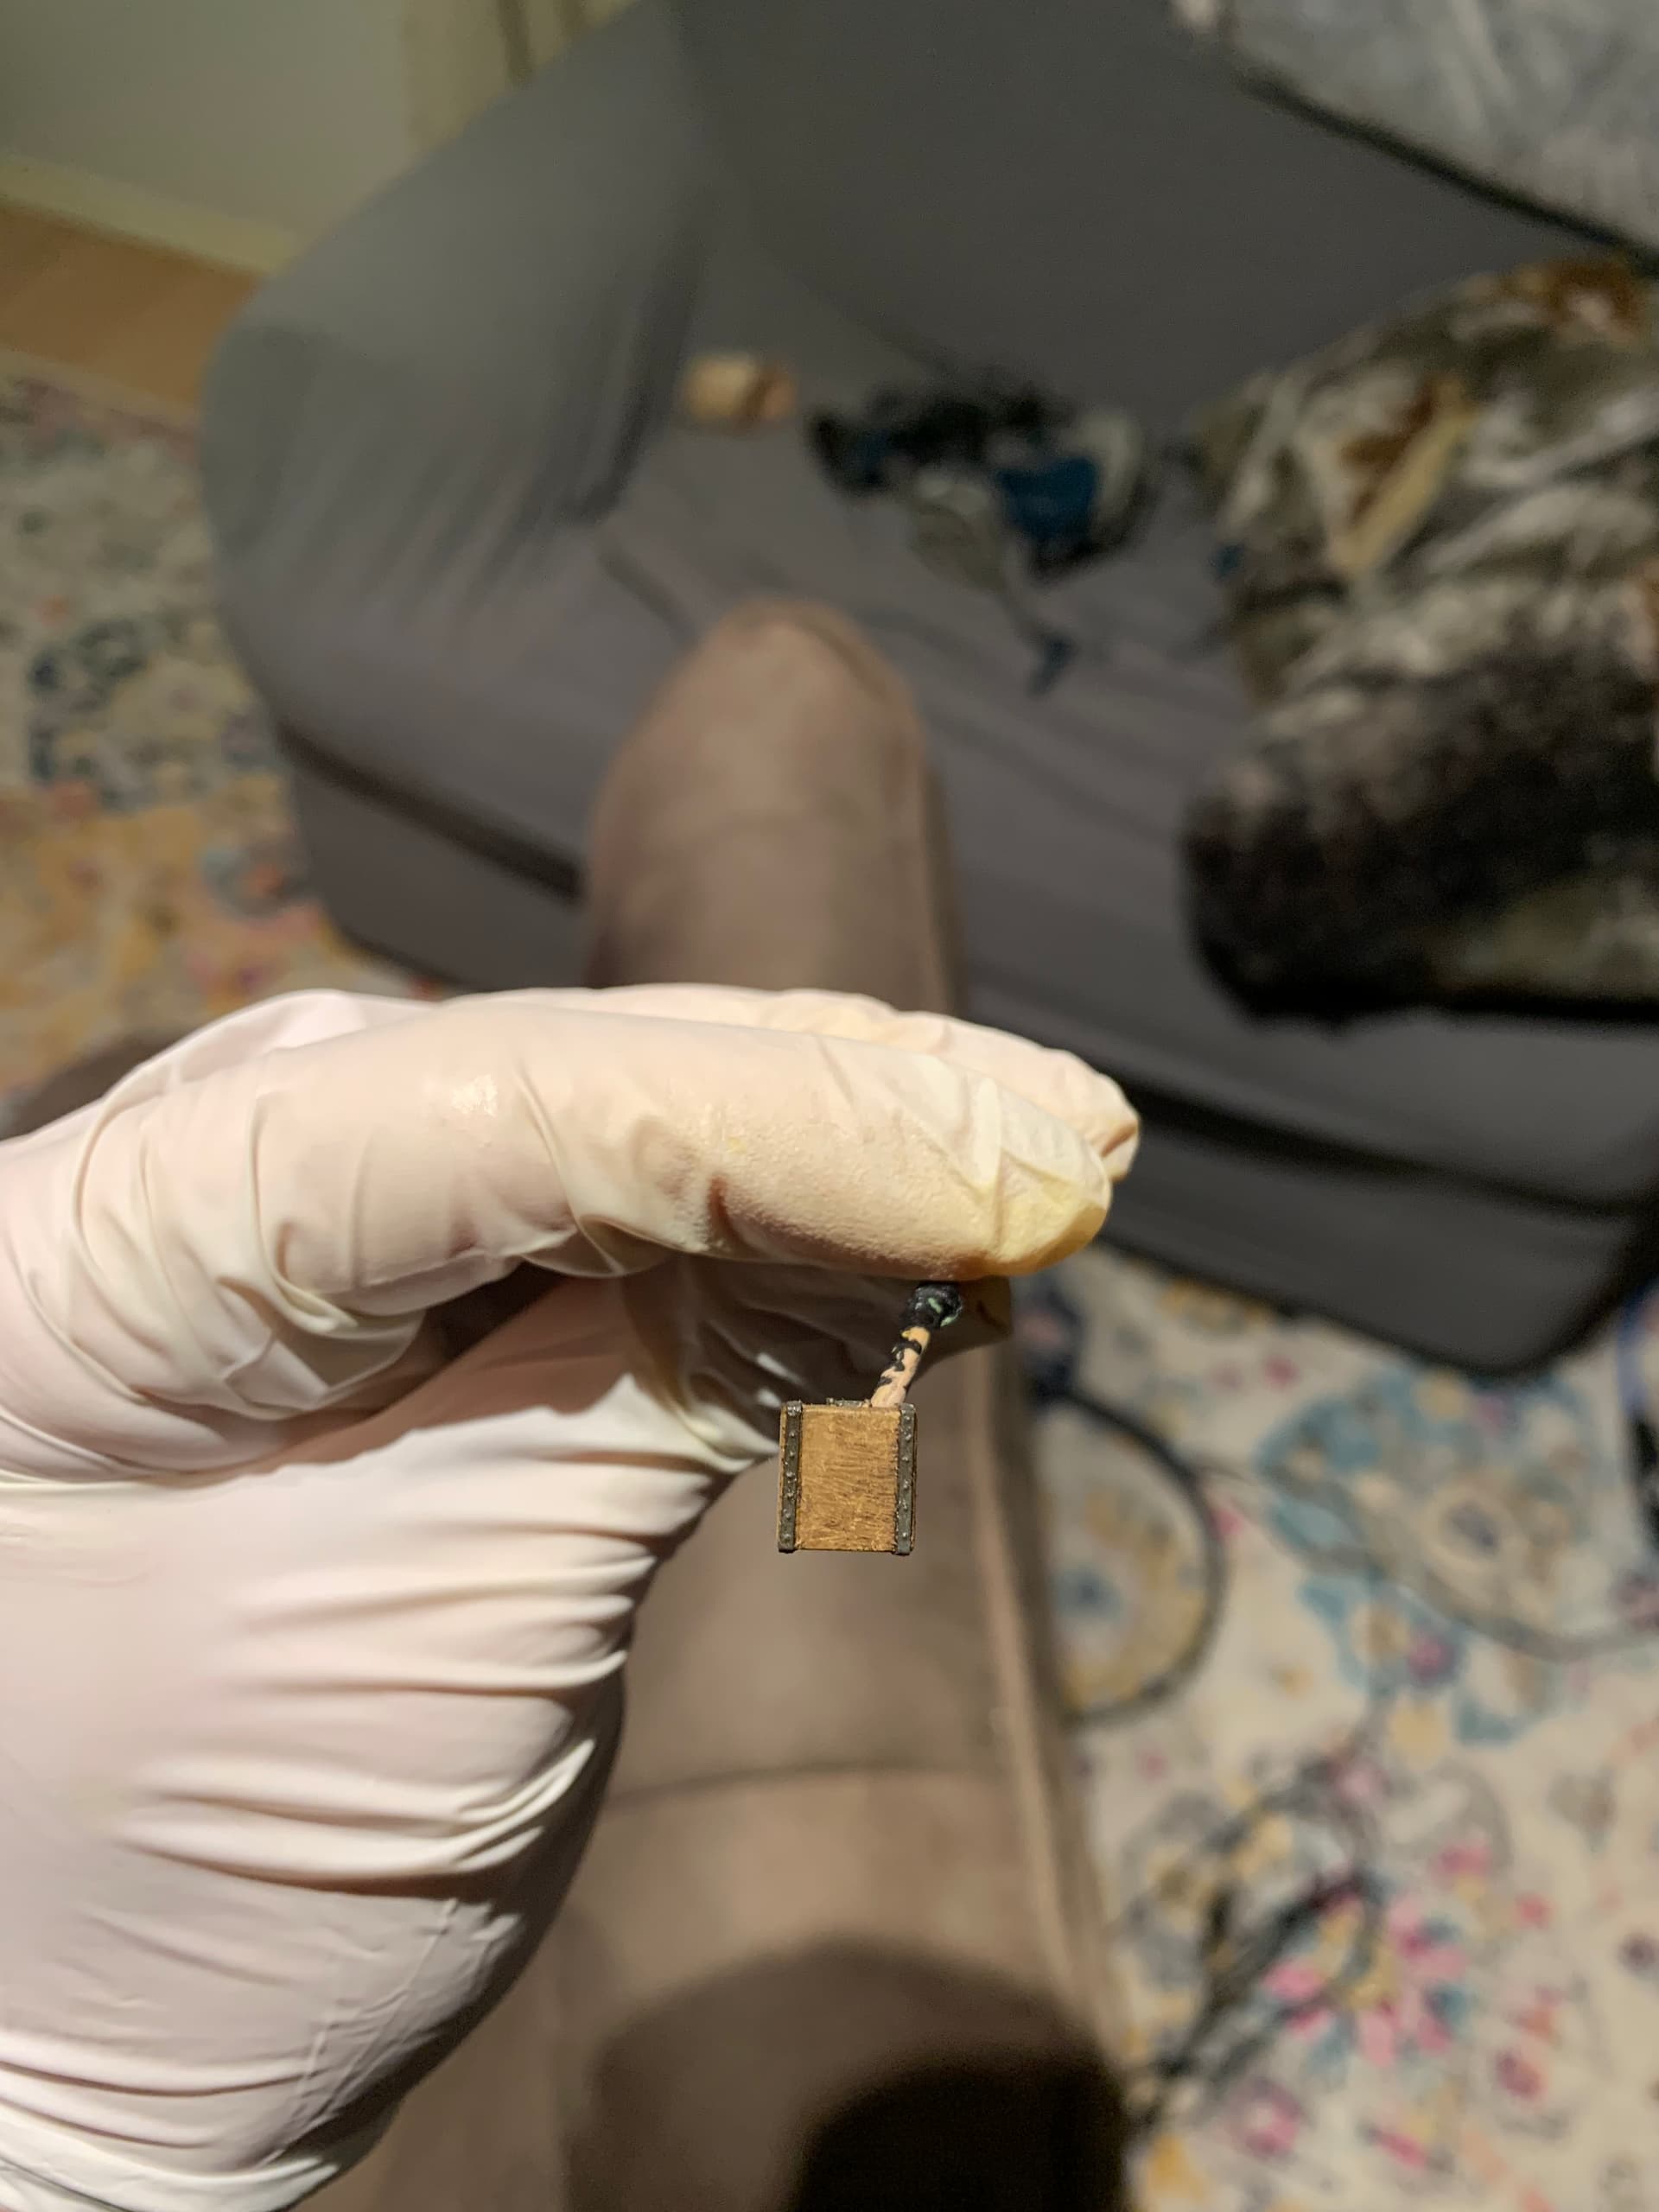
I like to simulate wood grain by painting with a light wood color like Tamiya buff. I then paint over with burnt umber oils. Once the oil dries a bit, say an hour or so I drag a stiff brush gently along the surface in the direction of grain until happy. Here is a panzer I jack block and tools I did like that
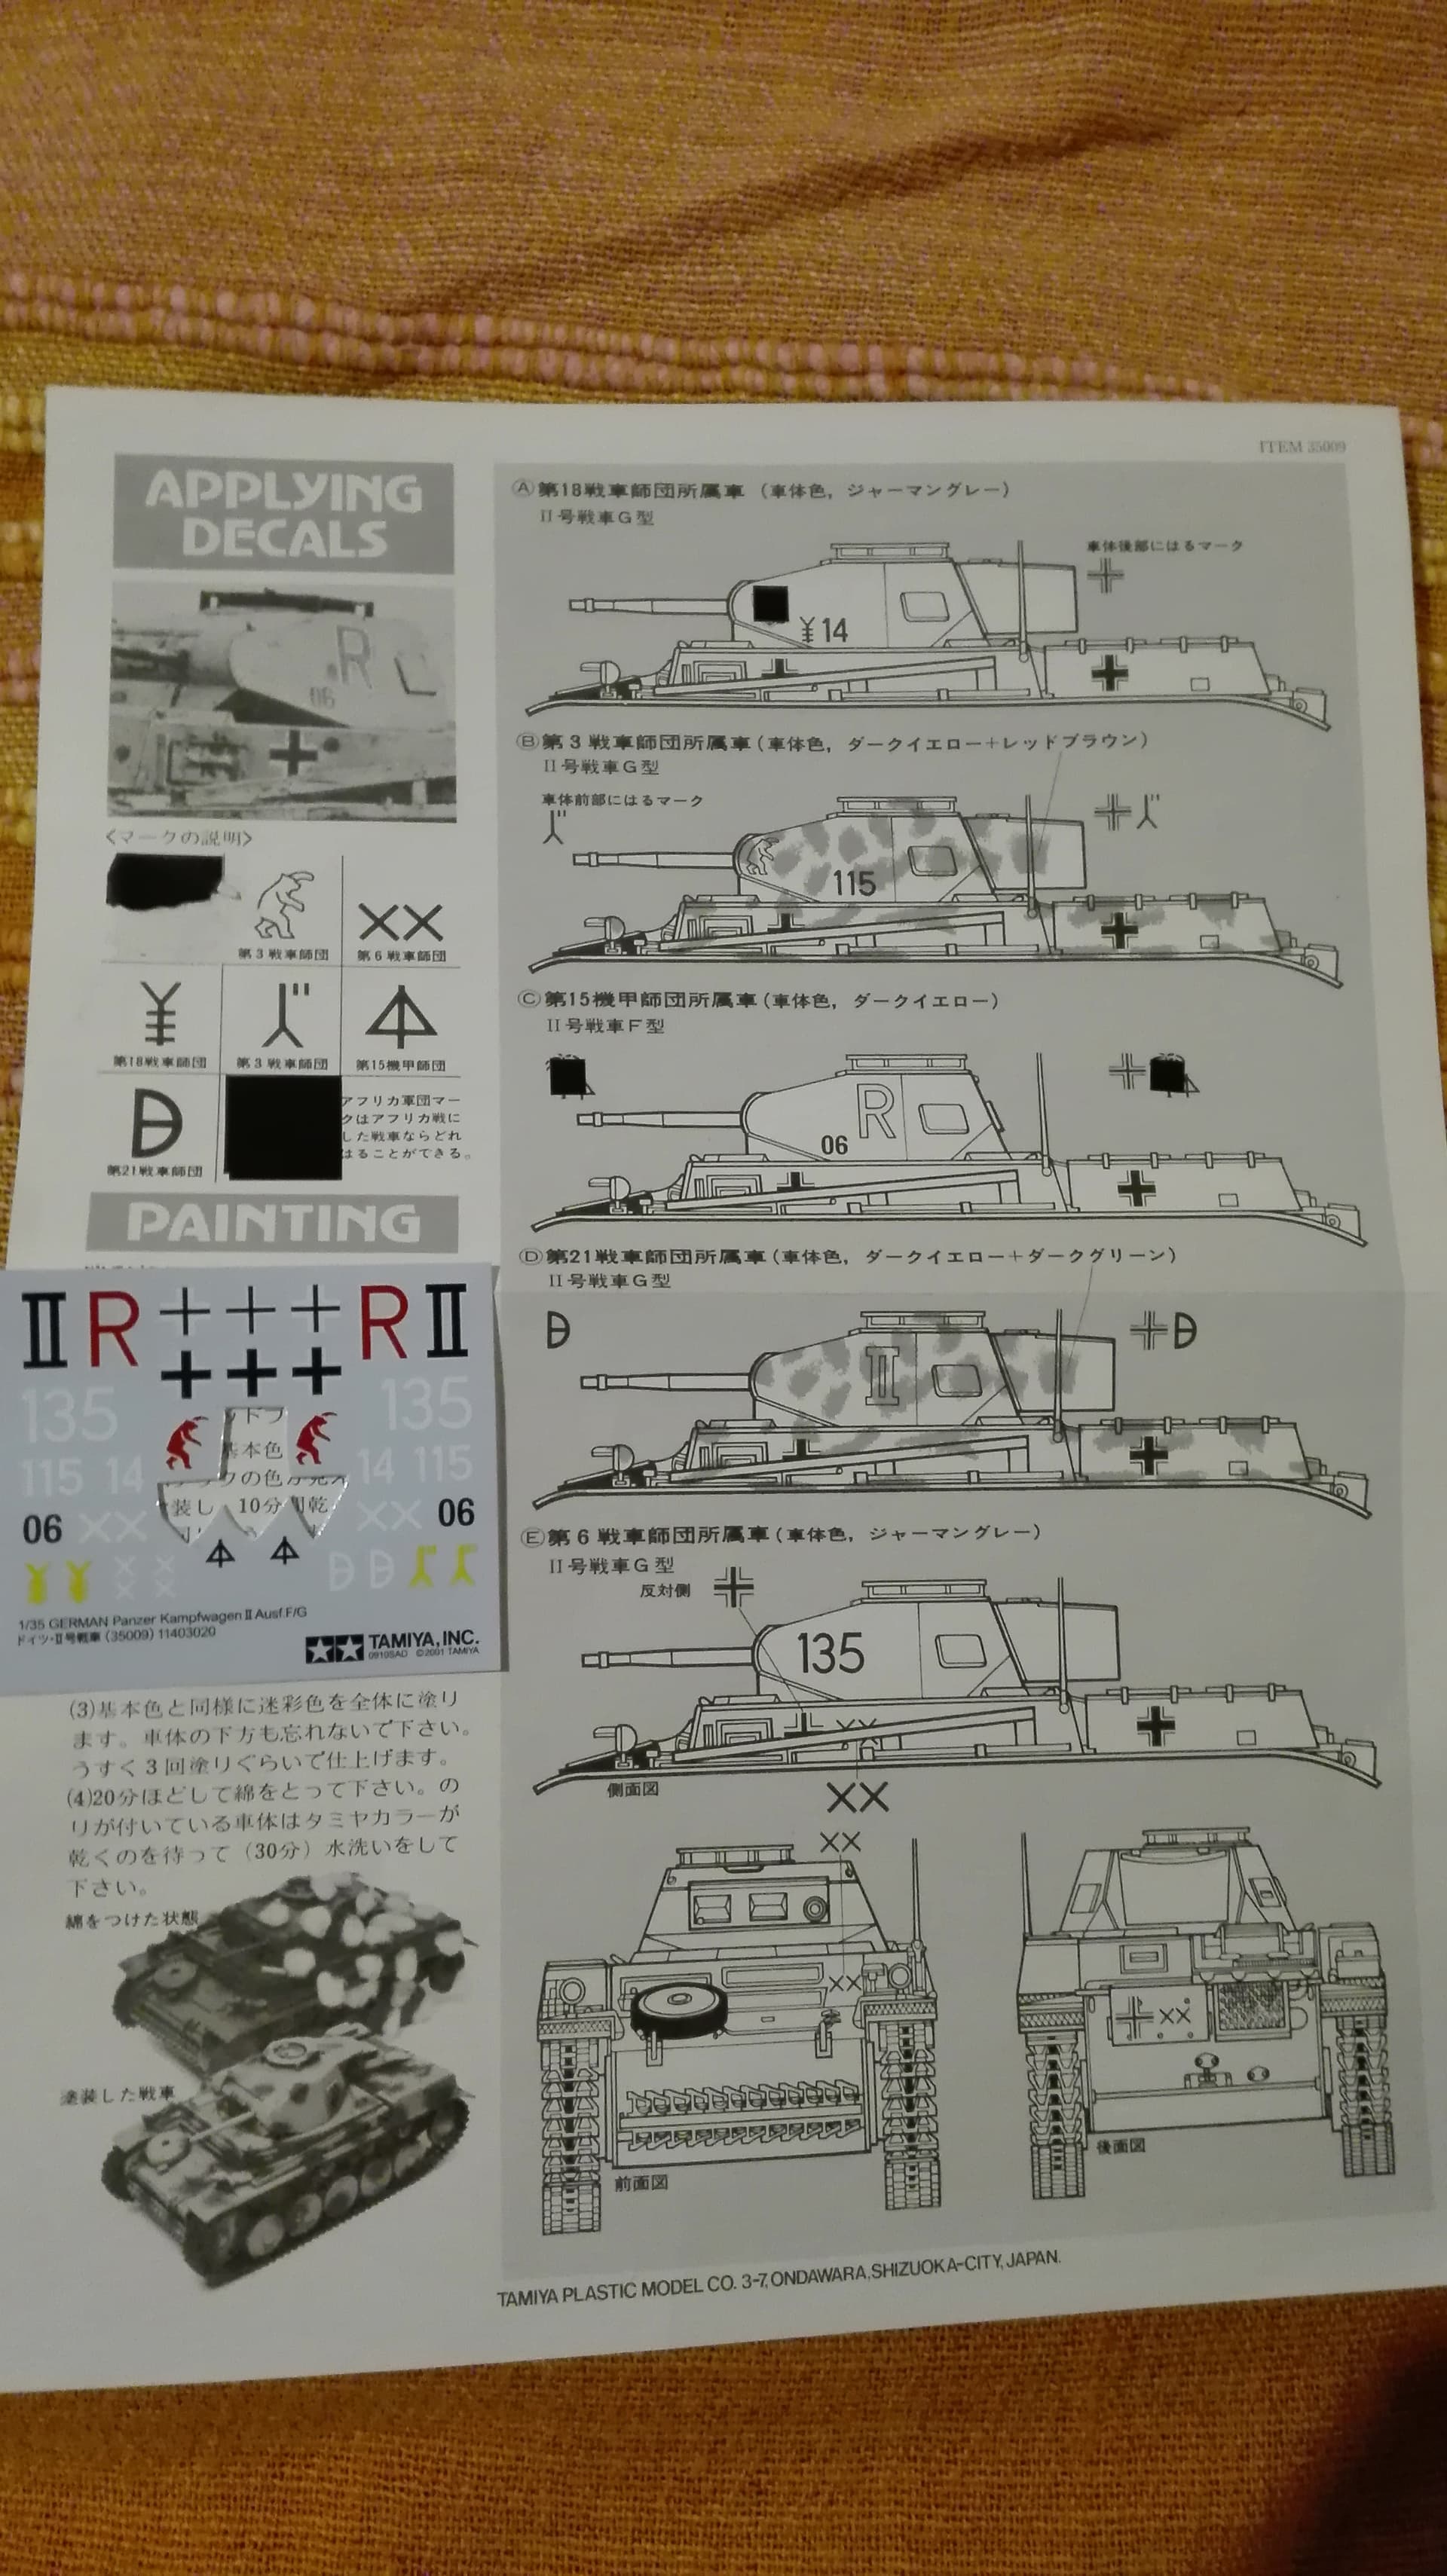
I really have no idea which ones to choose and the Tamiya instructions are in Japanese.
All I know is that my vehicle is supposed to be in North Africa.
I like the configuration with the II Roman number and the 135 one.
Also, what are those XX symbols?
And what are those symbols shown in the top right of each configuration?
And what about the front and the back, are they common for all configurations?
The XX insignia is the divisional marking for 6th Panzer Division in 1941. So the tank would be Panzer Gray with the 135 turret number.
The Roman numeral II is a tank signed to 2nd Battalion HQ of the Panzer regiment. The split D or half circle is the divisional insignia on that tank for 21st Panzer Division.
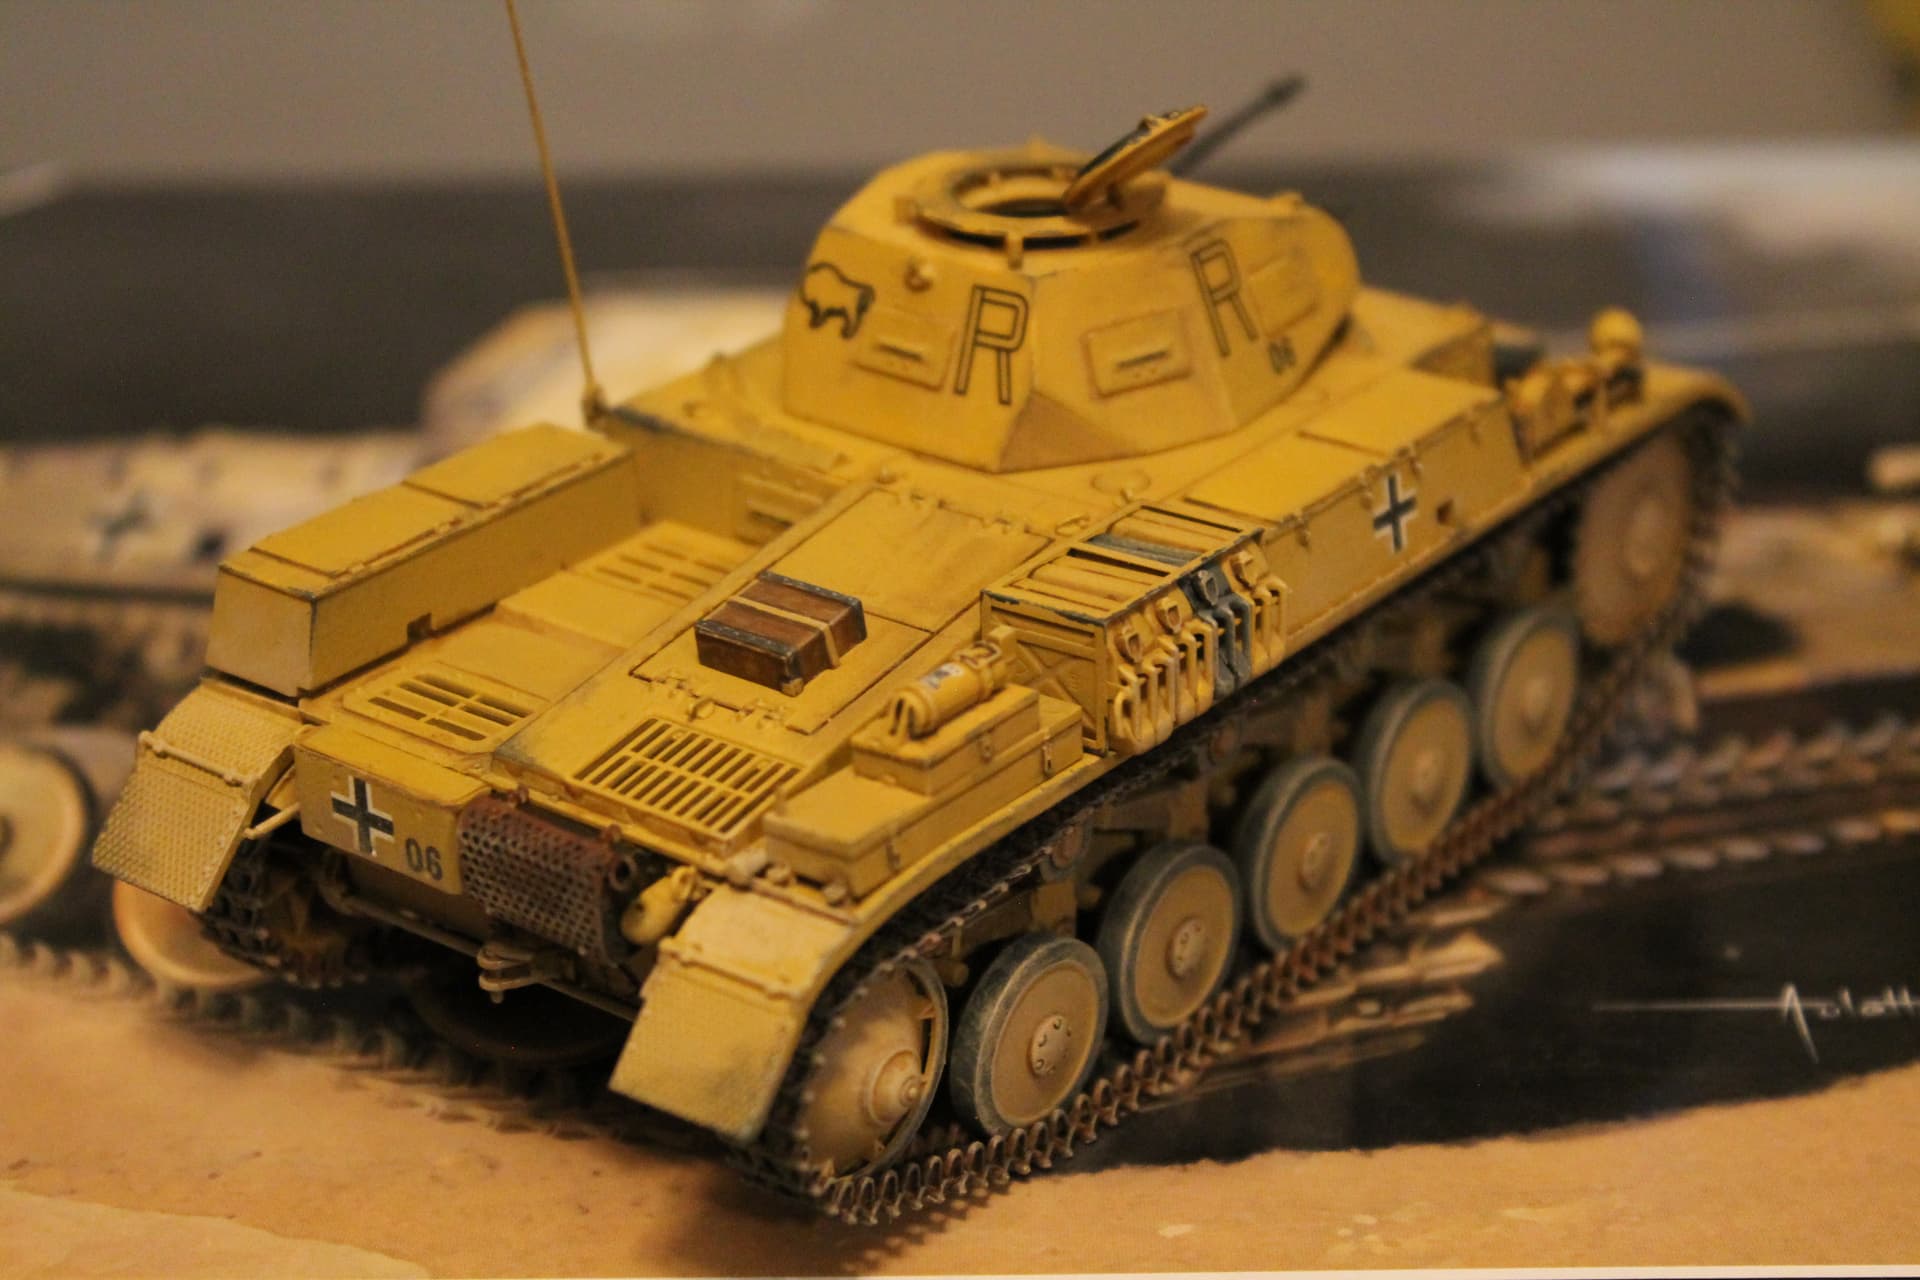
The R marking is for a tank assigned to Regimental HQ, looks to be 15th Panzer Division, but the DAK palm is wiped out on the instructions and cut away from the decal sheet.
You can also do the 15th Panzer “R” tank. Not every tank in North Africa wore the DAK palm. The little black triangle insignia for that division should probably be in red. But it was placed on the front and rear of the tank where the XX goes, or on the lower sides of the turret.
This looks to be the tank that Tamiya used for reference. No divisional insignia is visible on the front or sides, but it could be on the rear plate.