Here goes - I’ve done some model/hobby stuff before but I’m going to slate myself as a beginner so I’m treated as one and don’t miss out on any advice I may have been ignorant of in the past!
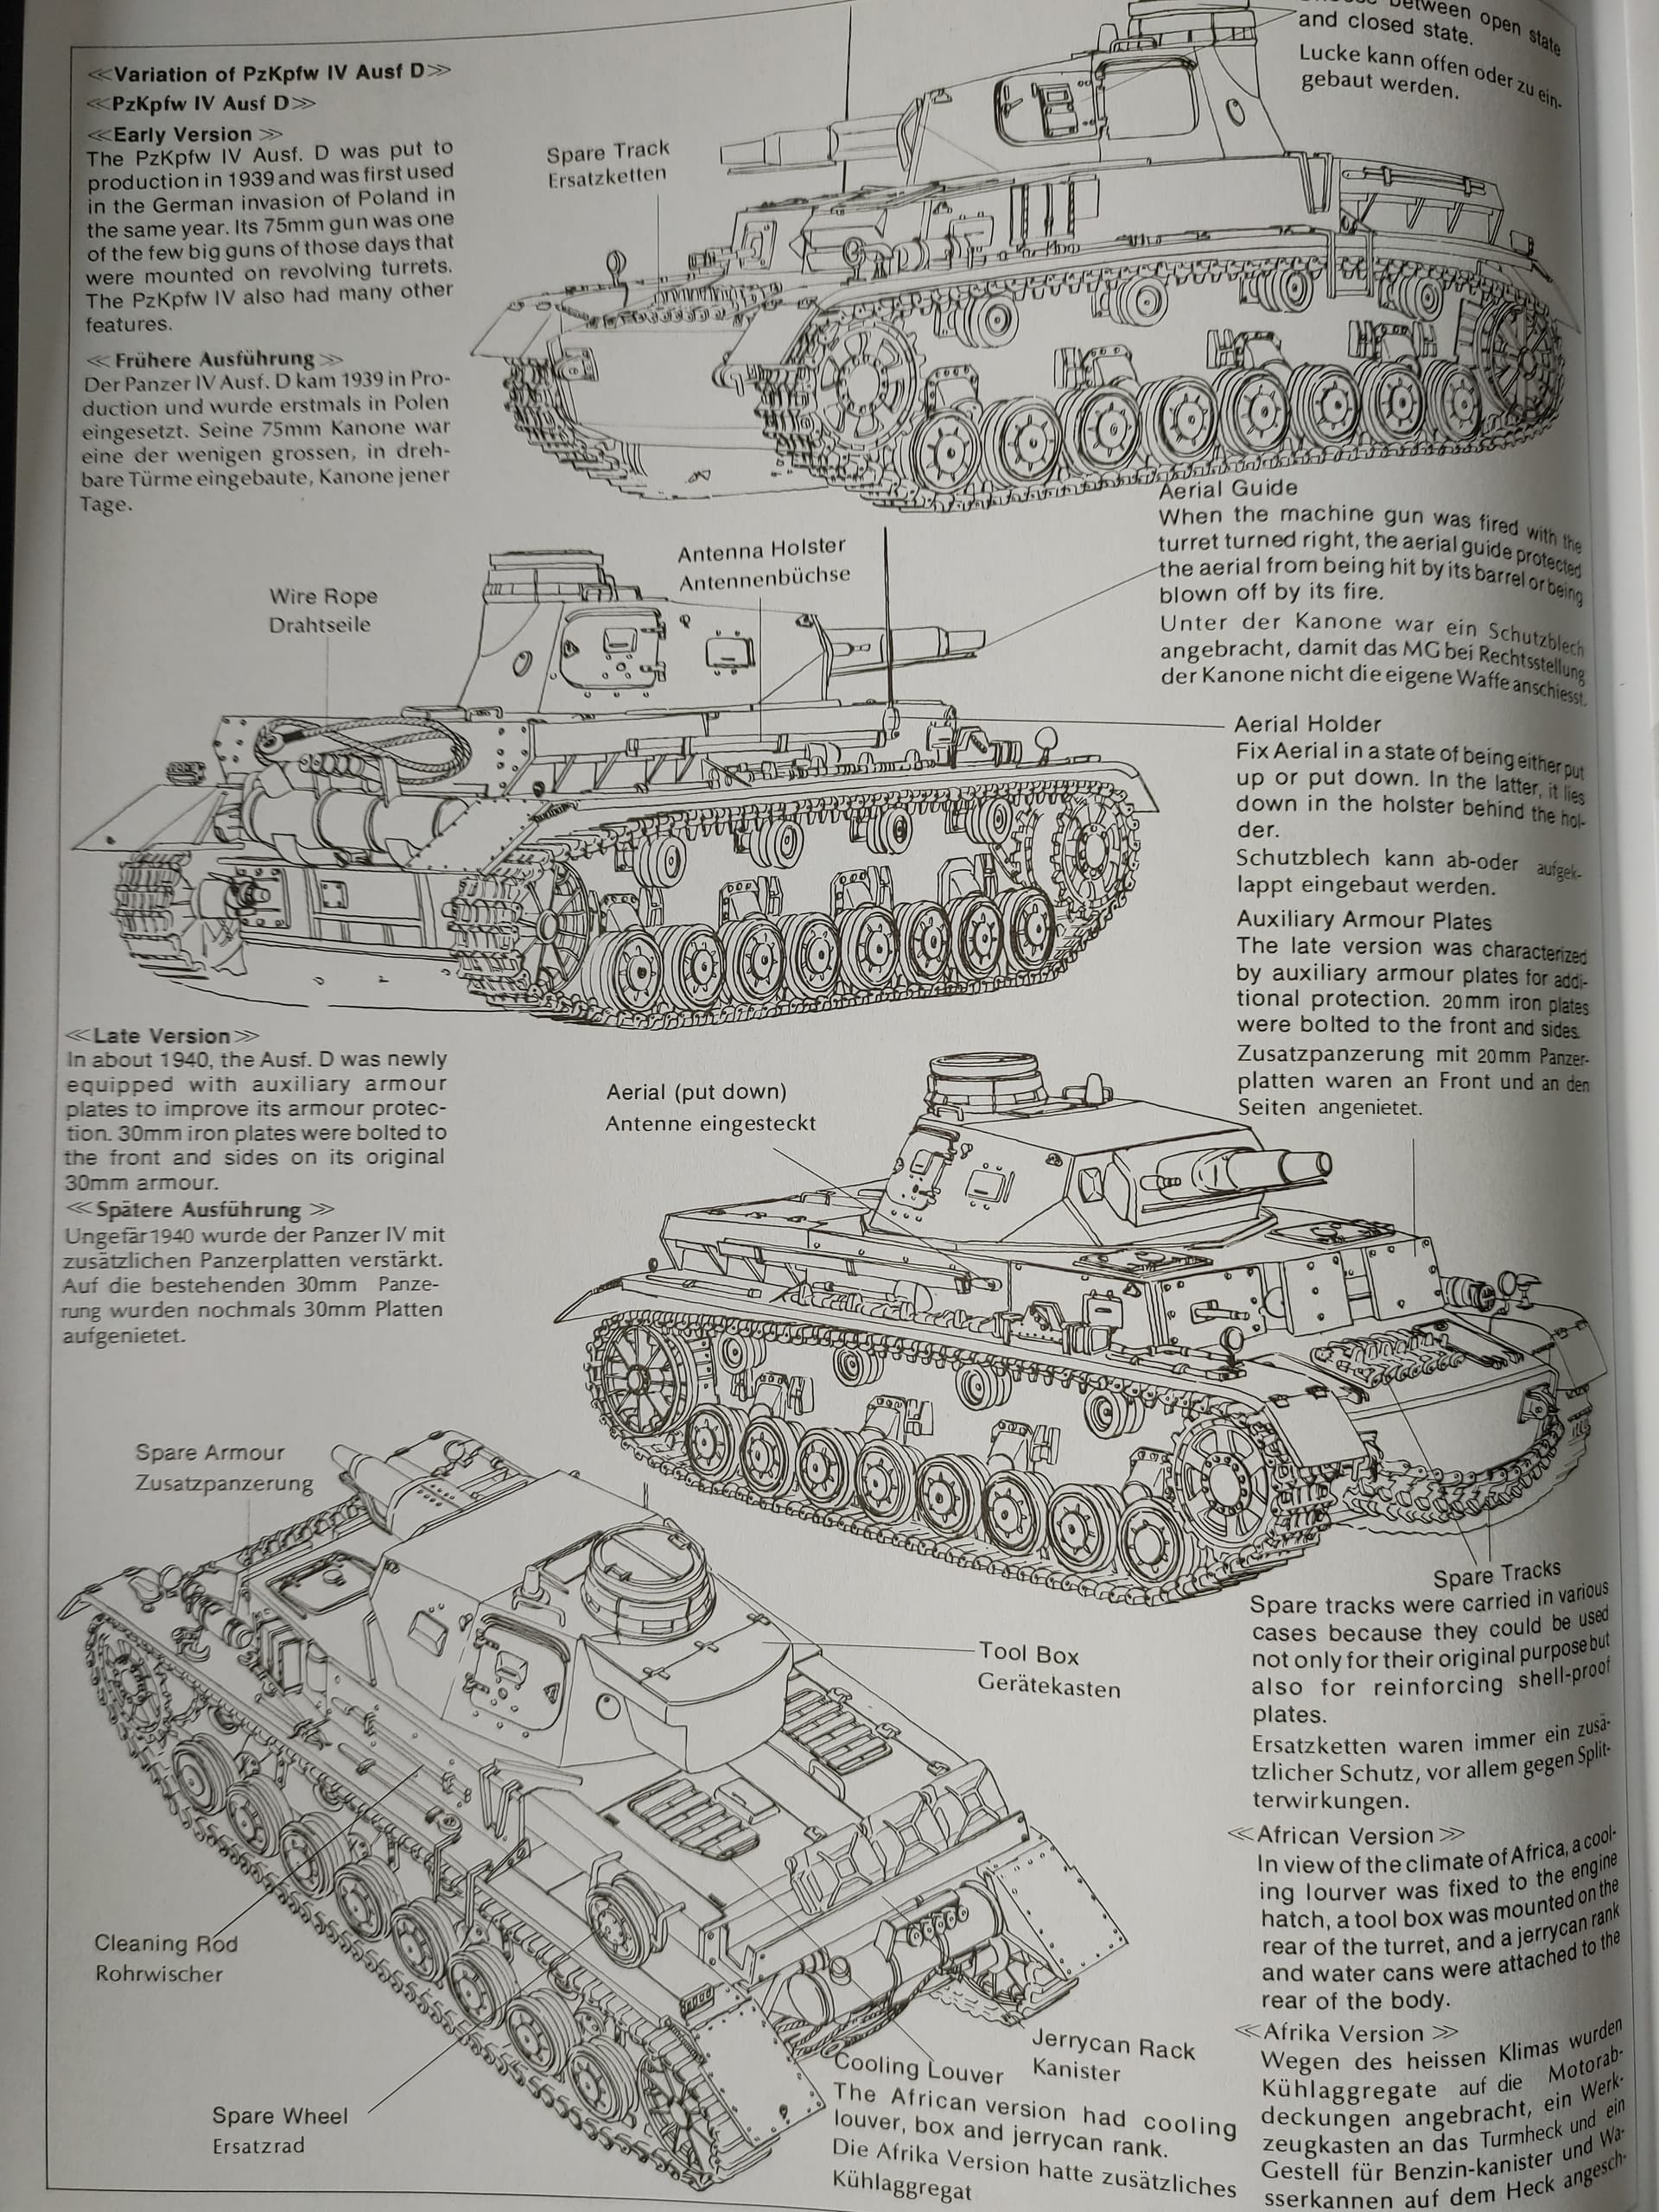
Starting with a Panzer Kampfwagen IV Ausführung D per others suggestions here.
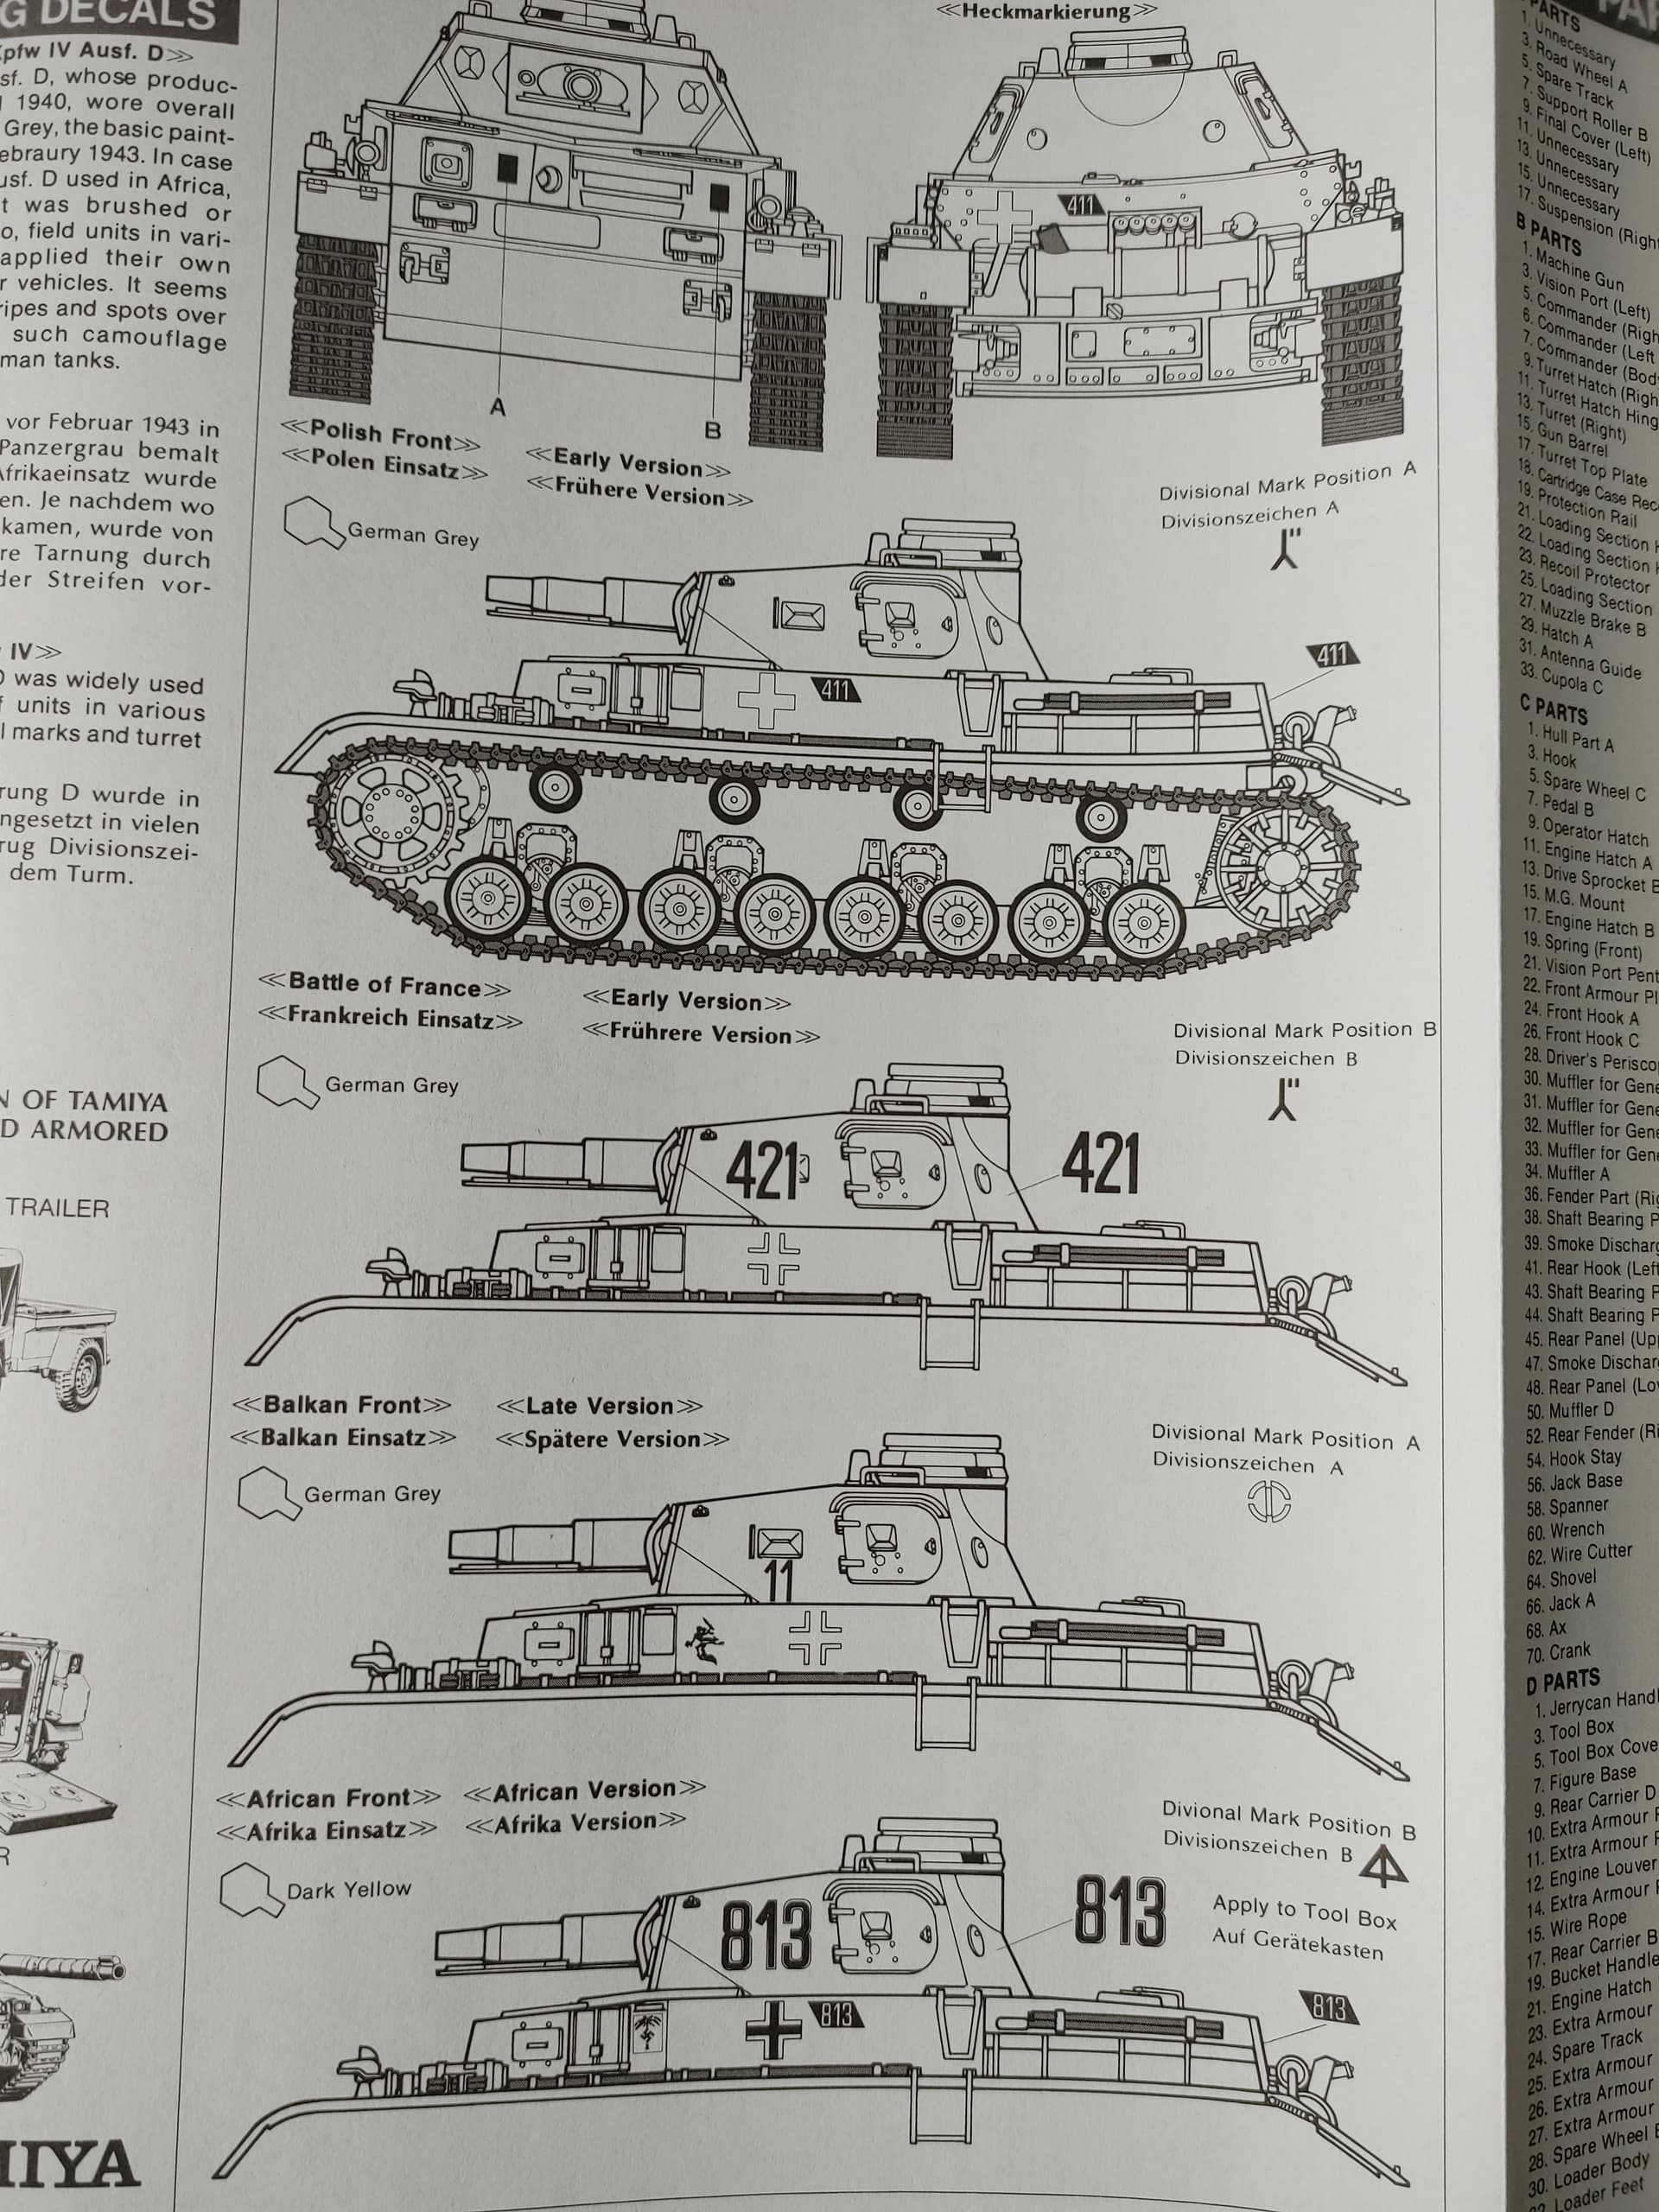
I think I’m going to go with the early/Battle of France iteration with the larger divisional numbers.
So, where do I start? Are the instructions that come with the kit the best way to go about it? Is there a better way? Cut and glue then paint? Cut, paint then glue? Thanks for your understanding, patience, and help! 

1 Like
One bit of advice is, take all the largest structural pieces (hull, roof etc.) and clean them up and make sure they fit together, before proceeding to glue things. Instruction sheets assume there will be no problems at all. We know better. And the time to find out that a panel needs trimming is BEFORE lots of fragile things are glued to it.
David
4 Likes
I like to build everything except wheels and tracks, paint base color, weather the lower hull and add wheels and tracks. Then continue with the rest of the paint and effects
2 Likes
What David says.
First the big parts where you need big “tools” to hold parts together,
or need to trim parts to make them fit.
I have had kits where the upper hull (the “lid”) was warped so I had to glue it down at one
end, wait for the joint to harden and then force it down at the other end. This would have
been devastating for small parts …
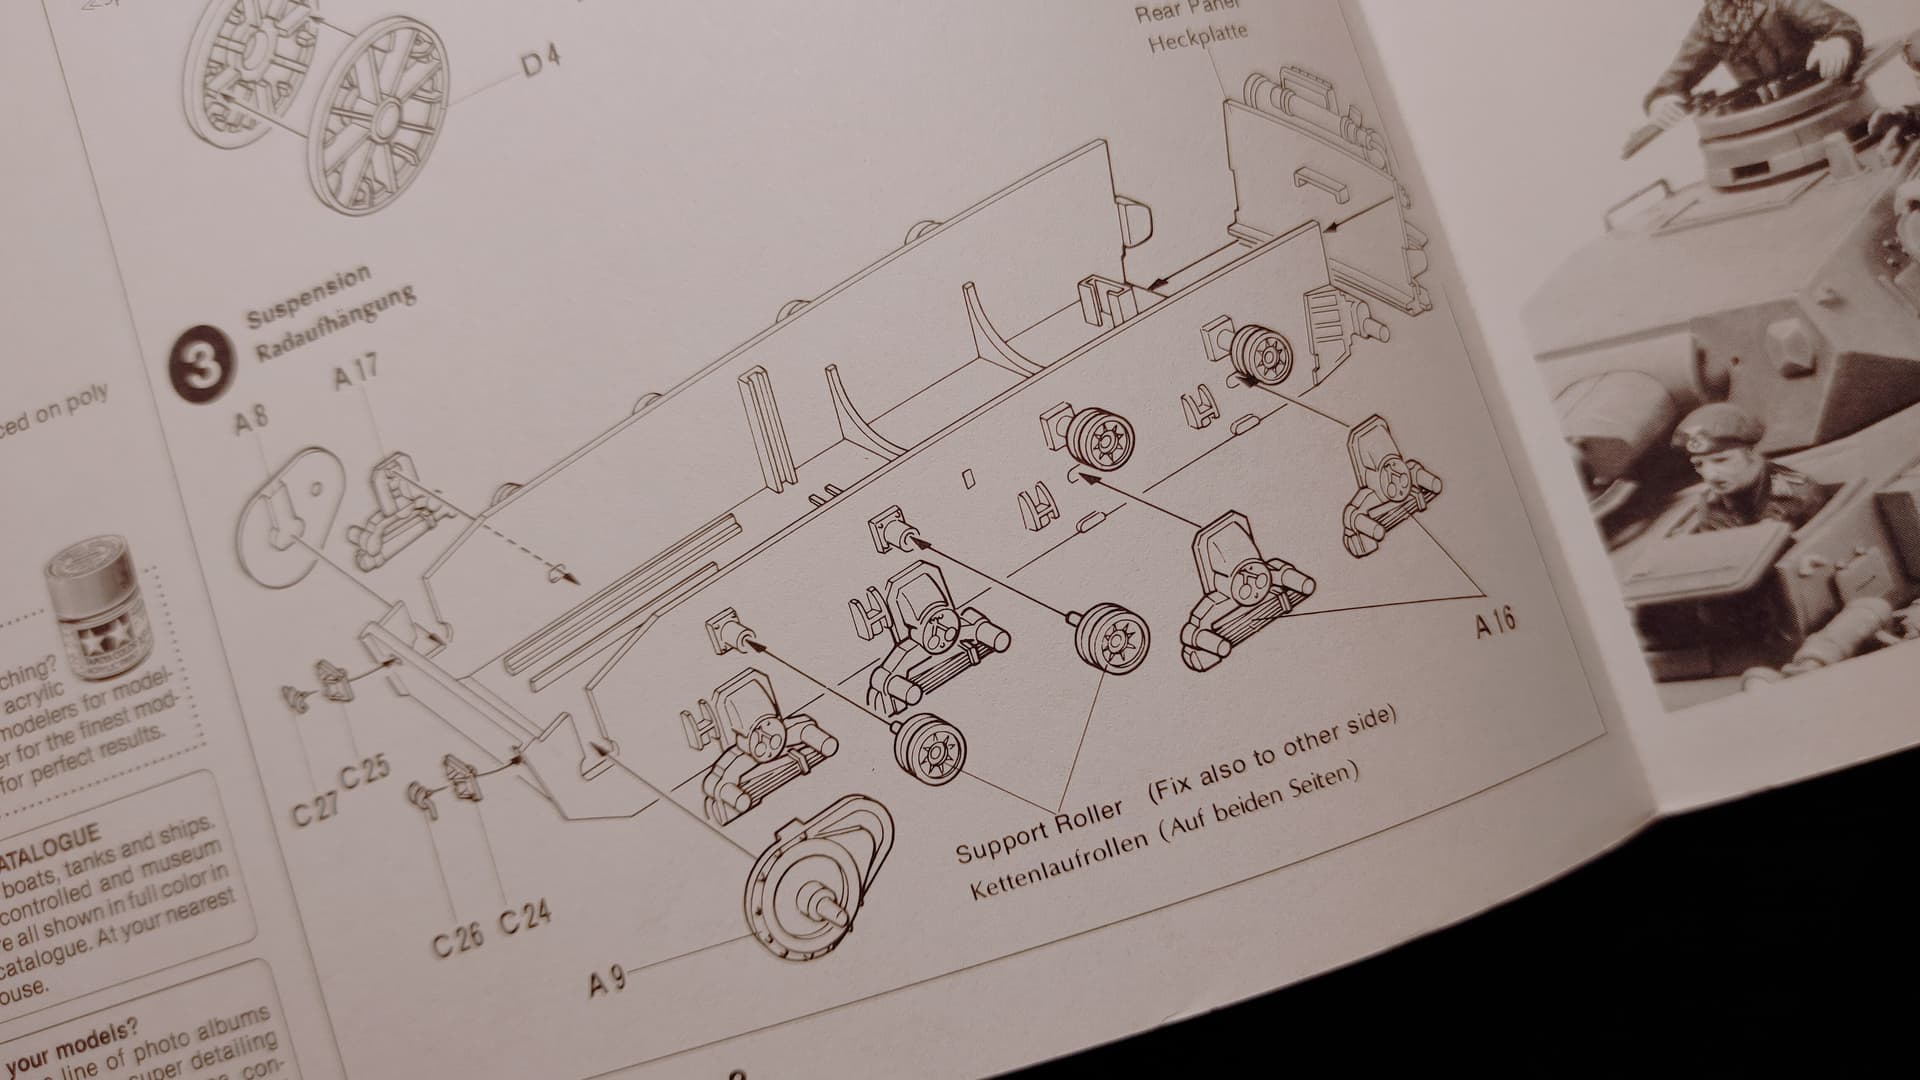
Tamiya use little vinyl (poly) caps to hold the road wheels in place. They did this to make sure the wheels could turn on the motorised models (like this kit). This means that the wheels are wobbly …
I glue the wheels to the axle stubs to make sure that they stay aligned. Unaligned road wheels on a real tank would result in thrown tracks …
Don’t hurry. Take your time to make sure everything fits, use sanding sticks or needle files to trim the edges of parts, not just around the injection gate but all the way around.
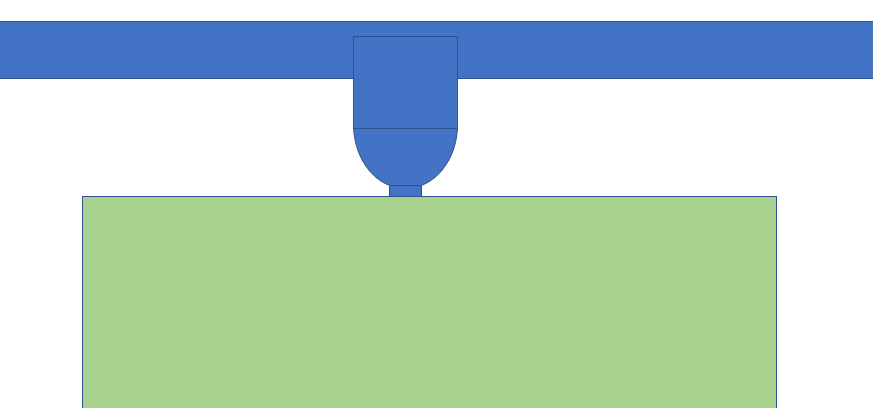
The mold (steel forms that melted plastic gets pushed into) were designed with, or developed over time due to wear and tear, flared edges. Whatever the reason the end result is that some parts do not have 90 degree corners.
Instead of the green shape they turn out similar to the blue shape (somewhat exaggerated for clarity)

These small “burrs” can affect the fit of parts and cause problems later in the build.
When designing a mold the designer MUST consider release angles, the part must be able to slide out of the mold. The end result is that a cube must be molded like a truncated pyramid.
Assume that we need a box with a lid. Design as two parts, a lid and a hollow box. The sides of the box can not be at right angles with the bottom. If the bottom has the correct length and width the top of the box will be too large. The lid also needs release angles. Getting the sides of the lid square and true results in a lid which is a fraction too small for the box. The bottom of the box could be made undersize but the leaning sides will still be there and they will be visible. Designing the box as a bottom with four sides increases the parts count (from 1 to 3 or 5 pieces), increases the build time and maybe also modelers frustration when trying to line up the parts. Tamiya has chosen simplicity or ease of assembly.
Lots of words but the message is: Get the parts square and true, it will improve the looks of the kit.
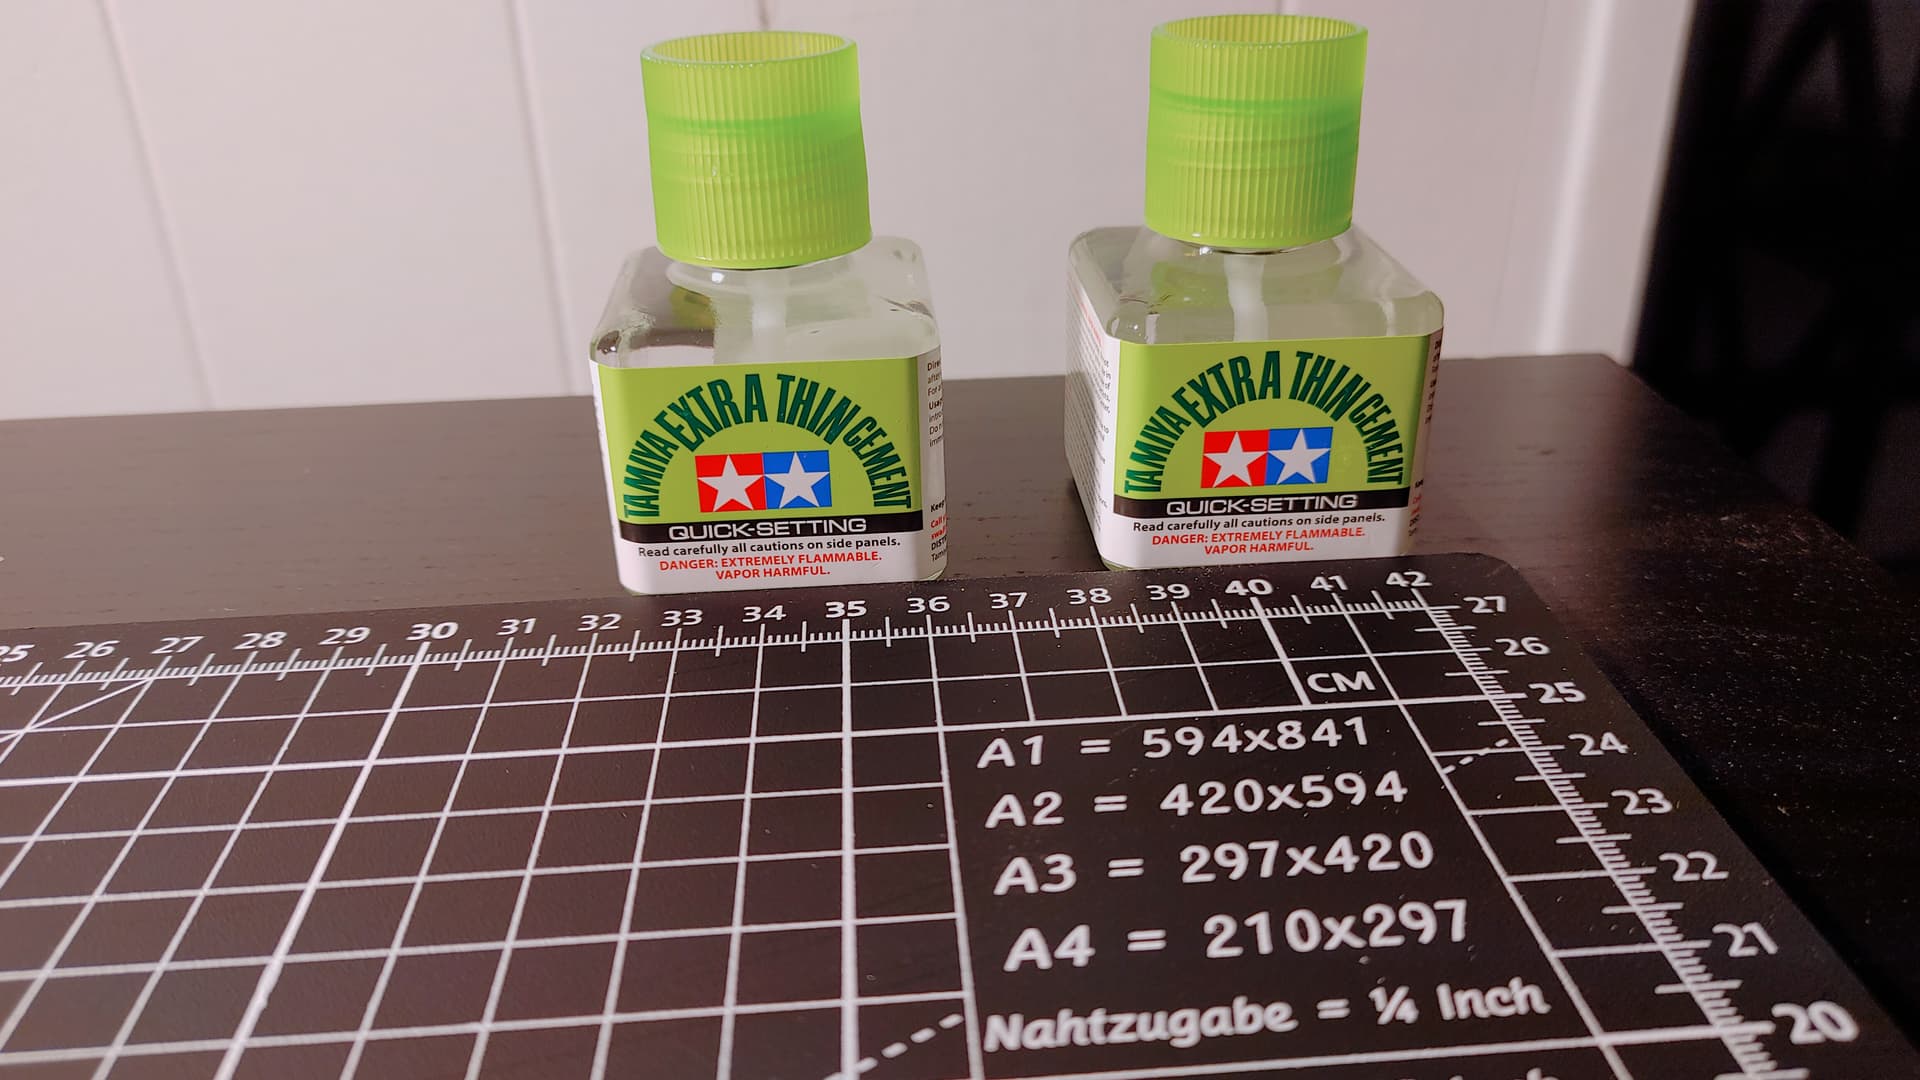
Don’t use tube glue. Use the super thin which is almost pure solvent.
It does not fill gaps so the parts must fit (see above).
Don’t mess around with putty and fillers to fill gaps between parts. Get them to fit before glueing.
Styrene (various sources, both free and paid for) can be used to fill holes. Easier to get a clean result.
This kit has motorisation holes (was designed to have an electric motor). Your choice if you want to fill these or not. The flags from the sprues can be used for this.
2 Likes
Welcome! Enjoy the process, take your time. Treat each subassembly as an individual model and work for the cleanest assembly you can manage. Clean up every sprue attachment point, mold seam, and ejector pin mark you can. It will make a big difference in your end result. Definitely use some liquid cement like Tamiya extra thin or equivalent, it is a game changer.
I generally follow the instructions but will vary time to time depending on the kit and what seems like will work for me. Many modelers build the entire thing tracks and all, then paint. I try to leave tracks off until near the end, and will sometimes paint road wheels separately before attaching. Sometimes I paint them after. Either way I generally don’t attach them to the hull until it’s ready for paint.
Watch lots of u tube videos. Ask specific questions as they come up. It’s a learning process and skill that takes practice but the internet resources available now are amazing.
1 Like
I echo all the above advice. I suggest that you look at each step in the instructions, once you understand what is happening in the individual step - locate the pieces indicated and remove them from the sprue. Then clean up the pieces and assemble (or dry fit if necessary). As said by GEdmonds:
I will generally lightly prime all the pieces while they are still on the sprue but it isn’t a necessary step at that point. You should prime the subassemblies/completed kit prior to painting. Otherwise the paint may not adhere (although there are some who paint directly onto the plastic with good results, I’ve never been that lucky)
Cheers,
C.
1 Like
Painting: I assemble as much as possible before letting paint or primer touch the plastic.
Very thin glue (usually pure solvents) can creep under the paint (happens in almost 100% of the cases), sometimes the paint settles down again, sometimes a repaint is needed. Paint on surfaces that shall be glued to another part needs to be removed.
Painting parts on the sprue makes it easy to hold them while painting
BUT
clean-up of mold seams, flash, injection gates et.c need to be done before painting.
It can obviously also be done afterwards, paint isn’t armour, BUT, doing the part cleanup after painting wrecks the paintjob which implies a repaint.
Since I am a lazy sod I assemble as much as possible. If I can reach to paint after glueing a part I will glue it. This gives me bigger objects to paint, almost no repainting or scraping off paint et.c.
Masking and/or being careful makes it possible to assemble parts that will get different colour. Glueing painted parts → solvent damage when glueing → repainting already assembled parts. I save time by painting after assembly …
2 Likes
Thank you, everyone! Fantastic info!
This is a lot to take in so bear with me, and I will take my time reading your words as well with preparing.
So far, what I’m kind of getting is this:
- Start with big parts like the body, make sure they fit.
- Paint last, except for tracks, unless you won’t be able to reach the part.
- Wait for the Tamiya extra thin cement to arrive (a couple weeks for the good deal at hobbylinc.com), instead of starting now with this
Next questions at the top of my mind…
For paint, am I airbrushing everything?
For glue/cement, do you use any type of clamps when holding pieces together, especially the bigger parts? Any tips for being neat with cement/not making a mess/getting it where you’d rather not?
Thanks again!
Oh, and how to you typically cut sprue? Flat edge of the nippers near or away from the part? I’ve tried both, just curious what’s generally preferred. Then you lightly sand the cut spot on the removed part yea?
Flat edge of the nippers nearest the part. Not hard up though, as if you cut hard up sometimes you’ll damage the part. I hold the flat edge about 0.5mm away, then cut.
Also - I always wash my hands before every session, and if it’s a long session, maybe every hour or so. Otherwise the oils and grub from your hands can stop paint sticking later down the track
1 Like
What Barleeni said!
If it is a fragile part or a thick injection gate I cut even further from the part
AND turn the flat edge towards the sprue to prevent the cutting edges from sliding
towards the the part. When the part is free from the sprue I nibble away at the
injection stub until it is gone.
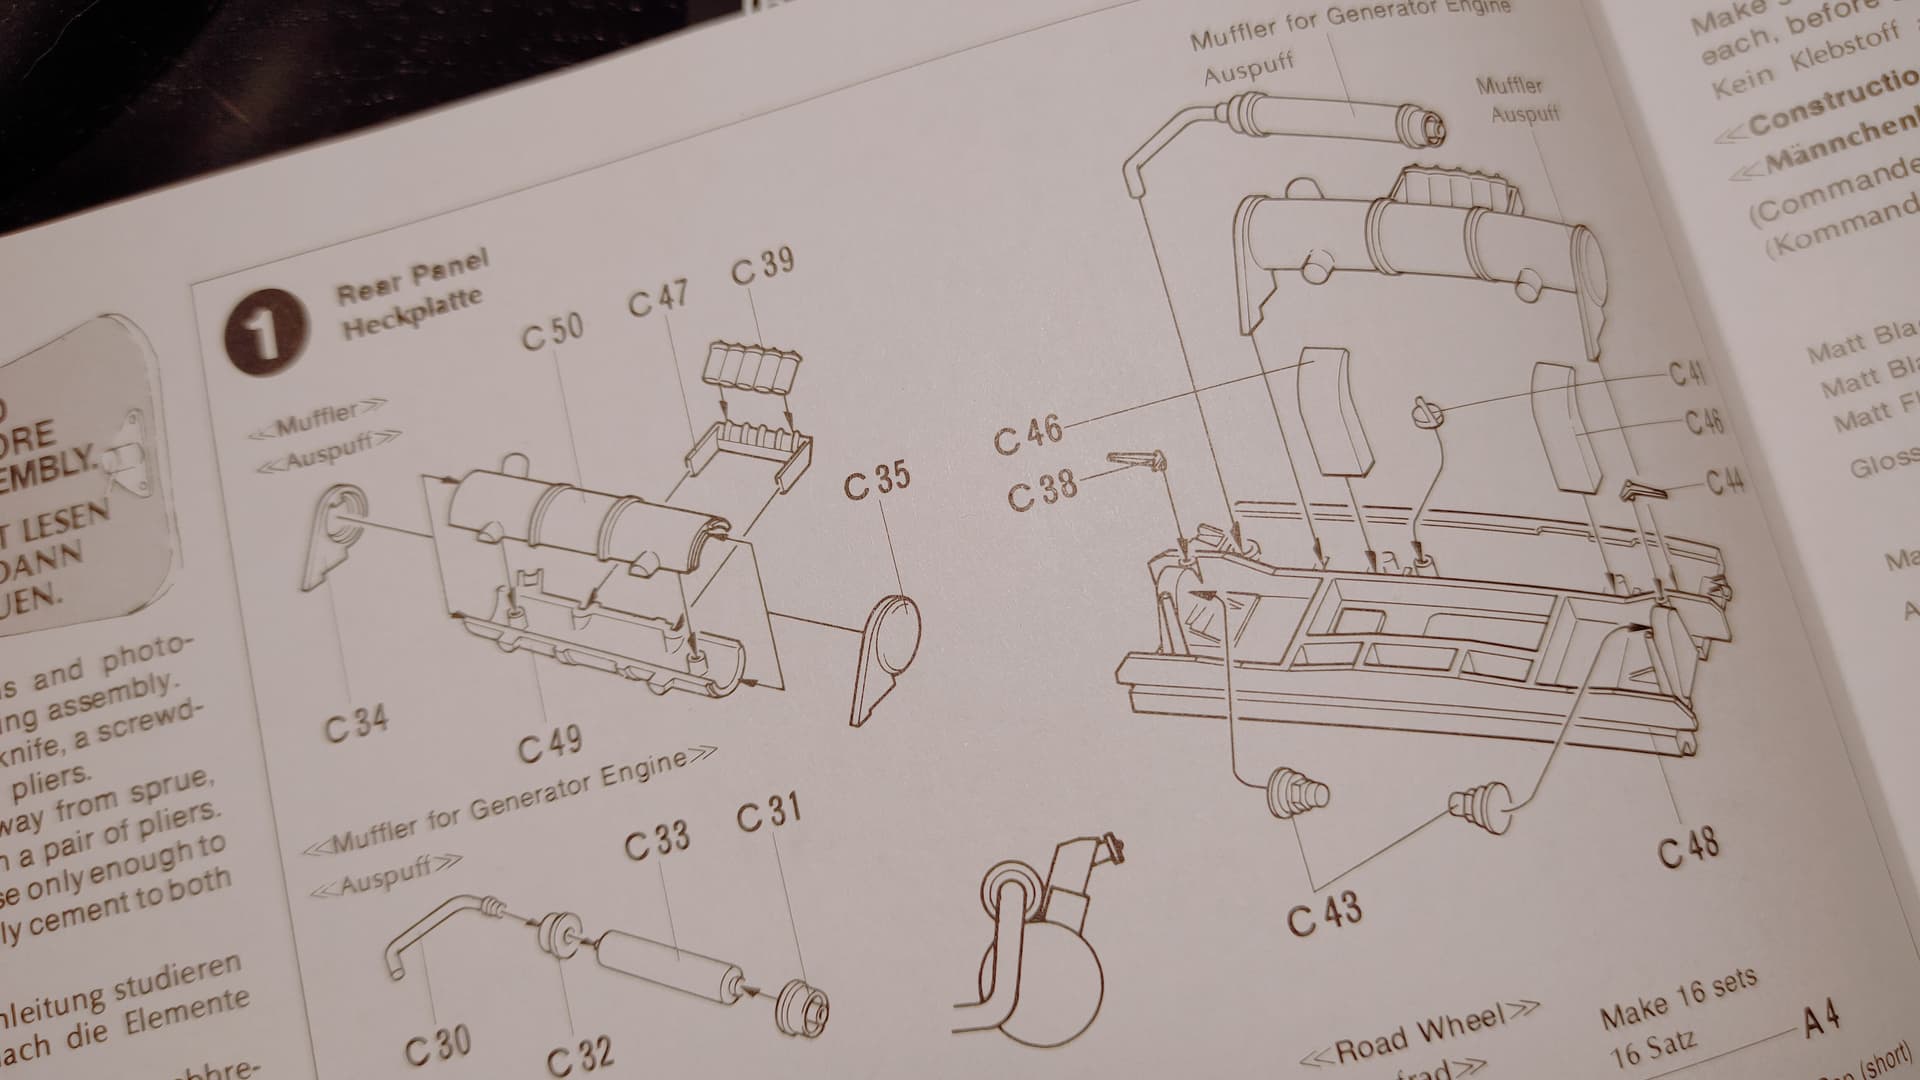
Some injection gates look something like this:
There is not enough space to cut with the flat side towards the part since the cutter will slide
downwards towards the part. In these cases I cut the injection gate flush with the sprue and then
nibble away at the rest. Sometimes it can be so tight between part and sprue that the jaws of the
cutter will not fit. In those cases I cut the sprue left and right of the injection gate and then start
nibbling away.
Glue technique.
Solvent “glue” will draw into the joint with capillary action. The ridges and grooves on your fingertips (commonly known as fingerprints) are PERFECT for capillary action so keep your fingers away from the joint. Clamps, rubber bands, tape or anything else that is too close to the joint will also act as conduits for capillary action. I apply the solvent using a small (nr 0 or 00) cheap paint brush
The procedure when using solvent “glue” is as follows:
- Dry fit and adjust parts until they fit. Warped parts will need pressure to close the joints
- Gently hold the parts together with one hand
- Dip the paint brush in the solvent
- Apply the tip of the brush to the joint, preferably in a spot which will be invisible later.
- Watch the glint/flash as the solvent is drawn into the joint.
- Repeat 3, 4 & 5 until the whole joint has been filled.
Warped parts: Press together if possible, using hand and other tools, and “glue” together as described above. Be careful with capillary action, don’t let anything come in close contact with the joint. Don’t use more force than absolutely necessary since this can cause secondary warping.
Sometimes I “glue” one end of the joint, let dry and then continue pushing the rest in position in one or more steps. If the joint edges of a warped upper hull or aircraft fuselage half doesn’t provide enough “locating force” then you may be able to get the front and rear ends in perfect position while the centers have been pushed into each other.
Dry fit first to see how the parts and joints behave. If everything fits percectly then hit it with the solvent brush.
My reason for ignoring the sorry little brushes in the commercial products is that a normal brush is a lot
easier to handle/use. It is also narrower and gives you more precision when applying solvent to the joint.
1 Like
I airbrush basic colors for most of the model, only brushing fine detail or things that are too small to airbrush. Weathering uses a variety of techniques including brushes.
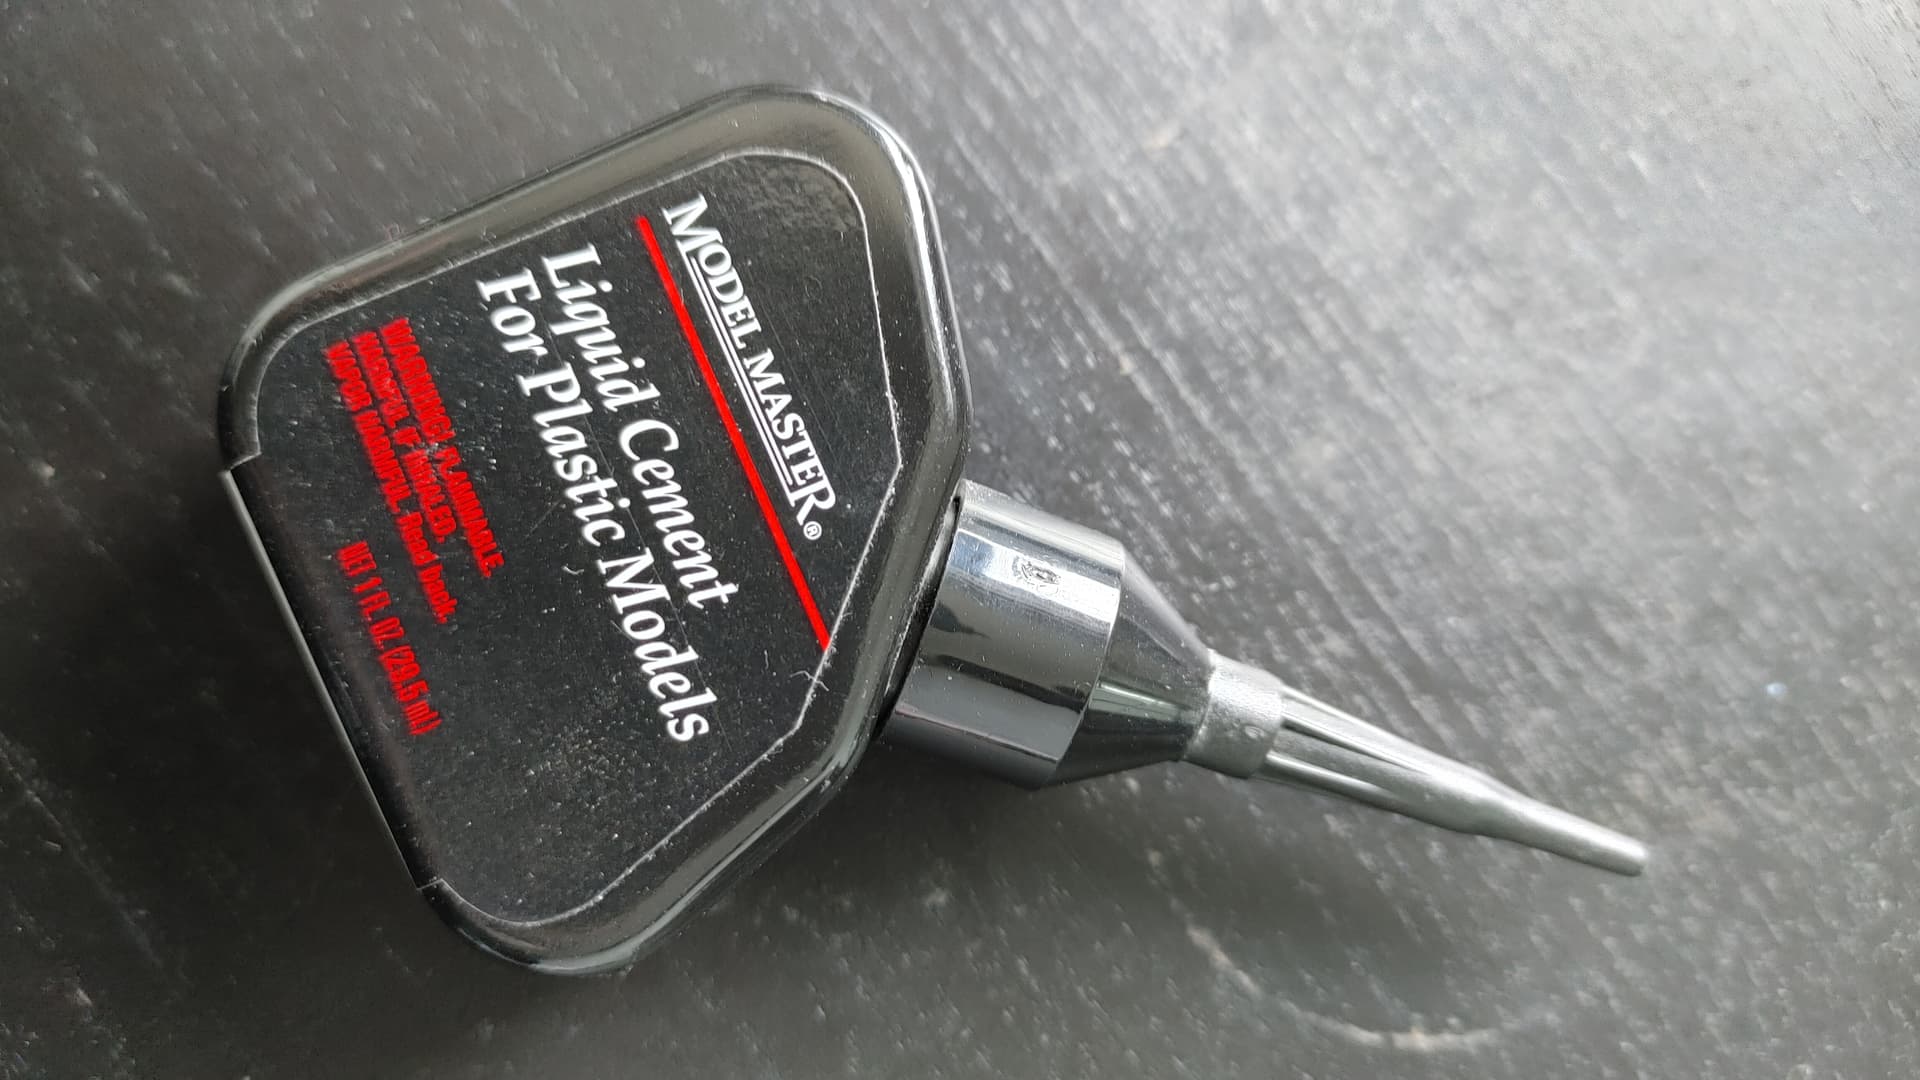
That model master cement is pretty good but will leave visible residue if you get it where it will show. I liked the ones with the fine metal tube- the all plastic bottles are too hard to control. The great thing about the extra thin is it doesn’t leave visible marks as long as you don’t get your fingerprints in it.
Oh, and I only clamp parts when absolutely necessary. Like off I have a warped hull or something. Most parts can be held by hand if you must for the minute or so it takes extra thin cement to set.
1 Like
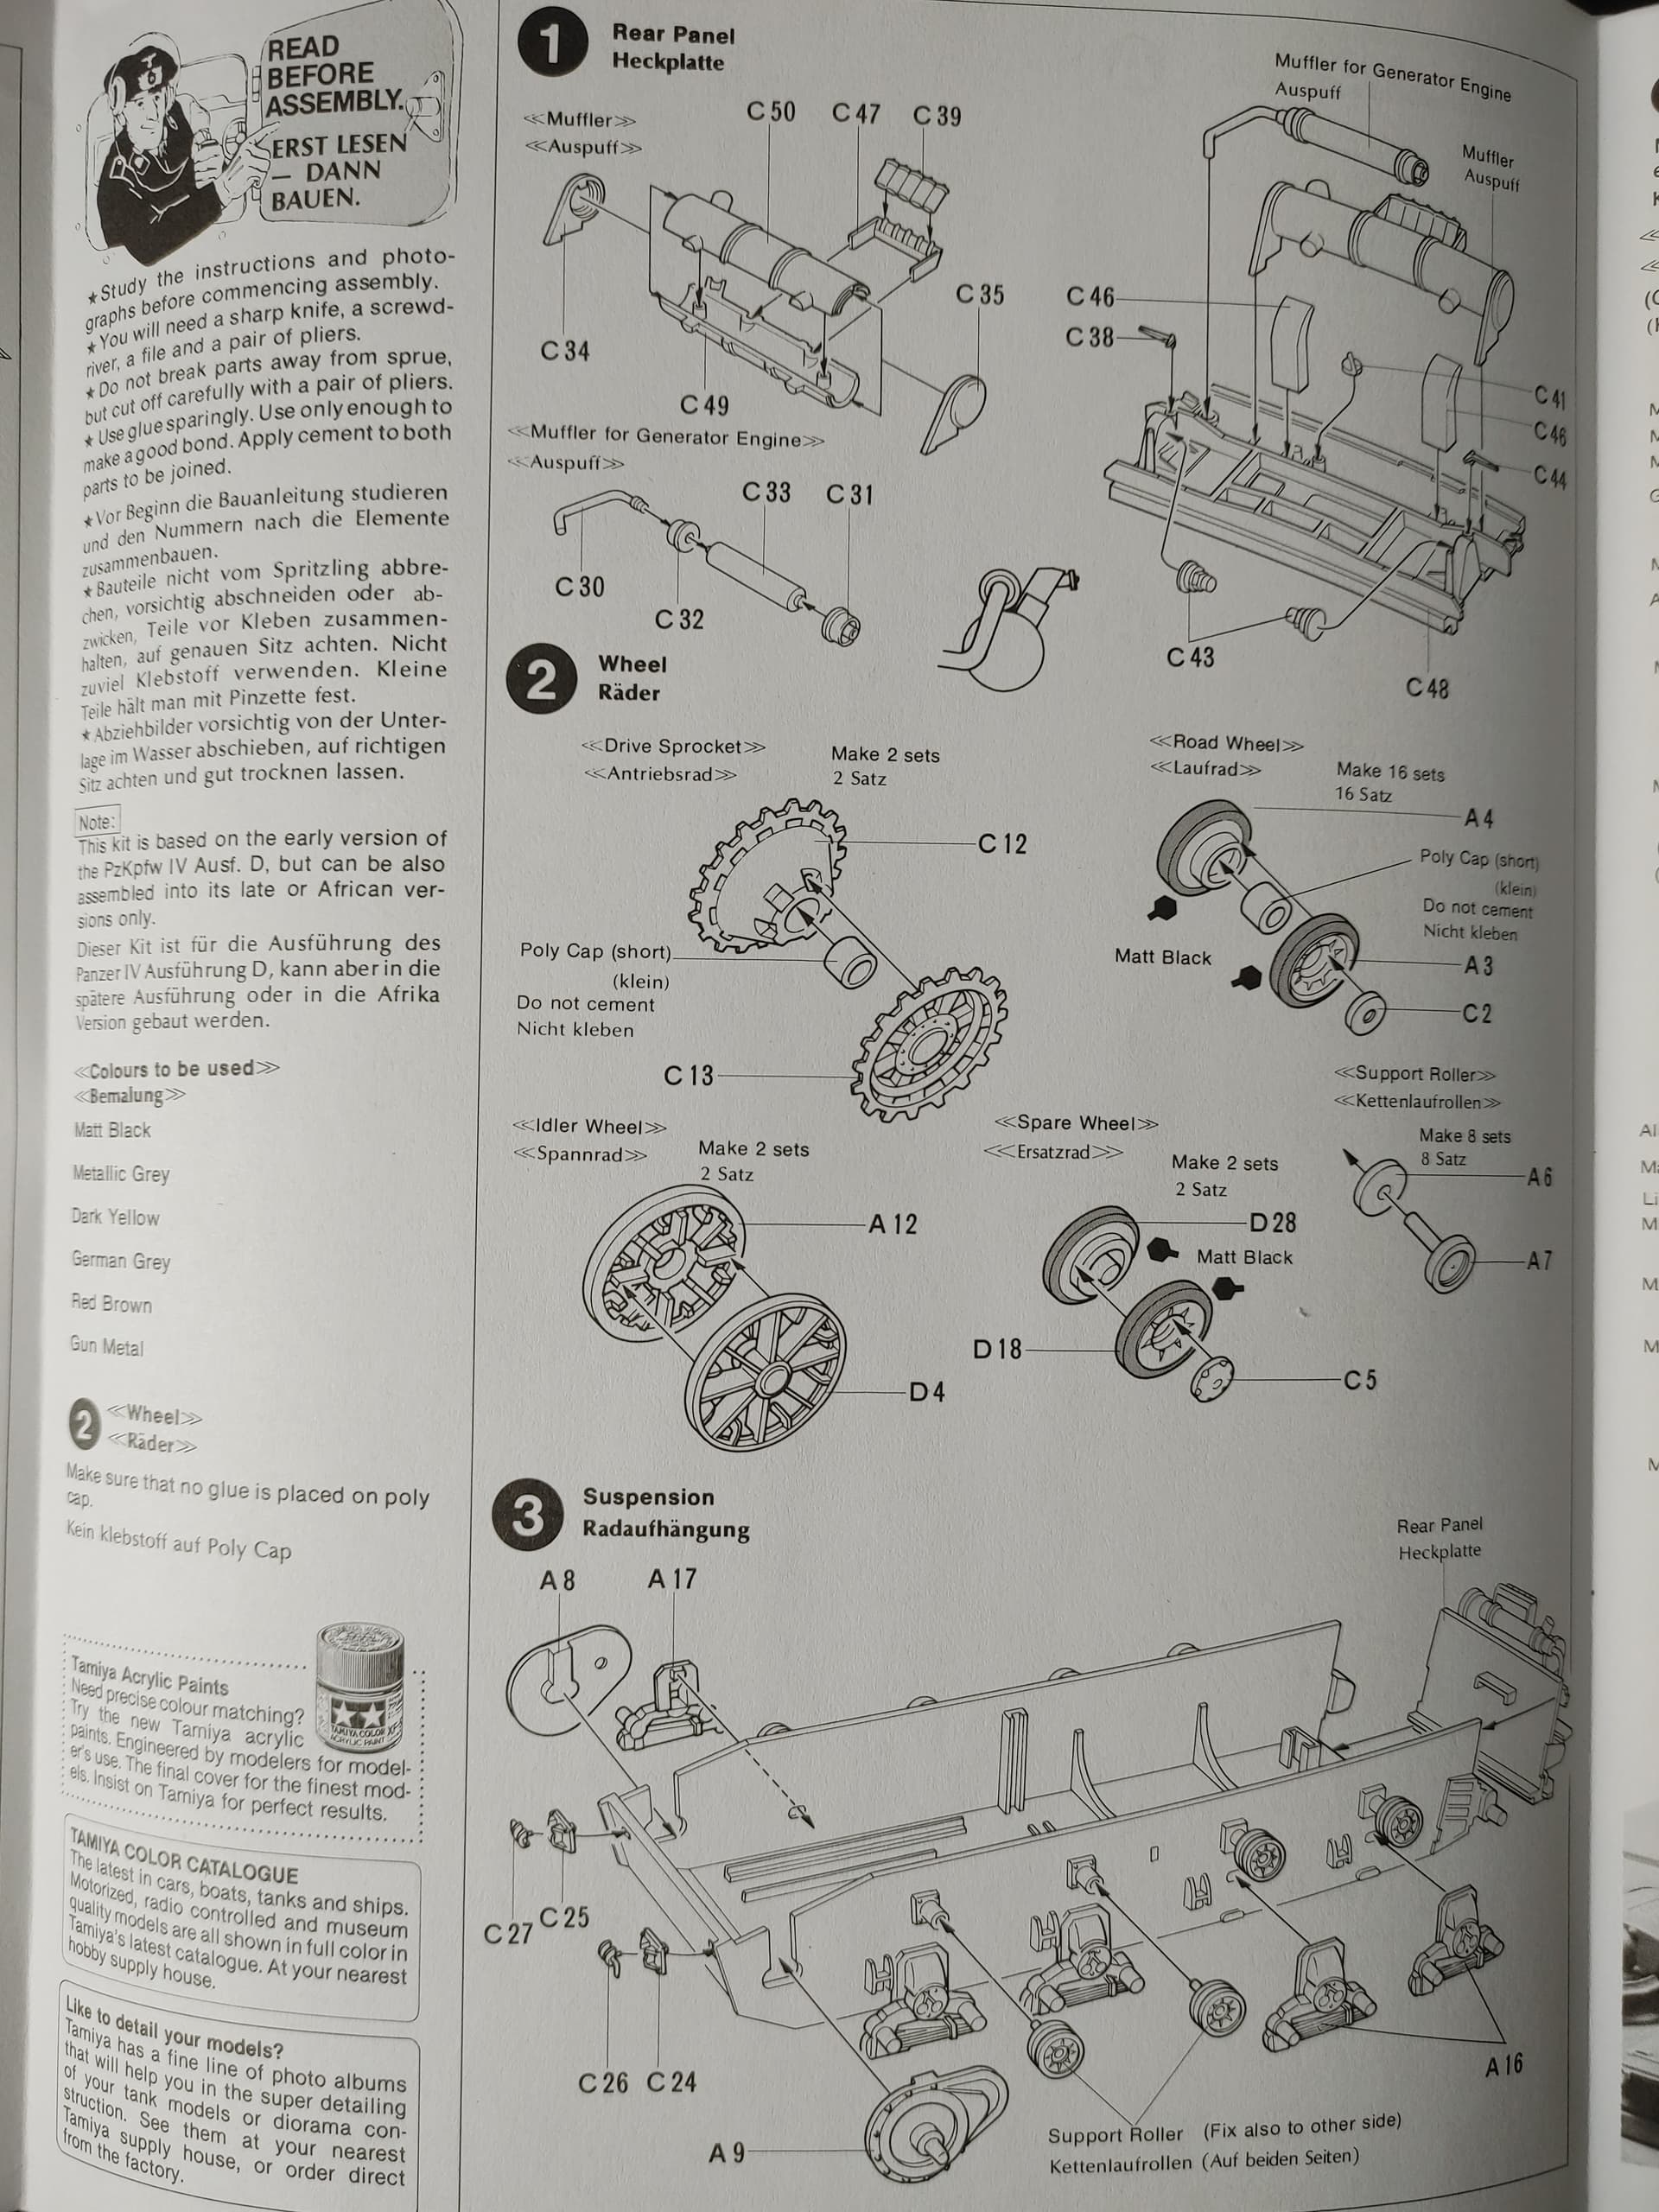
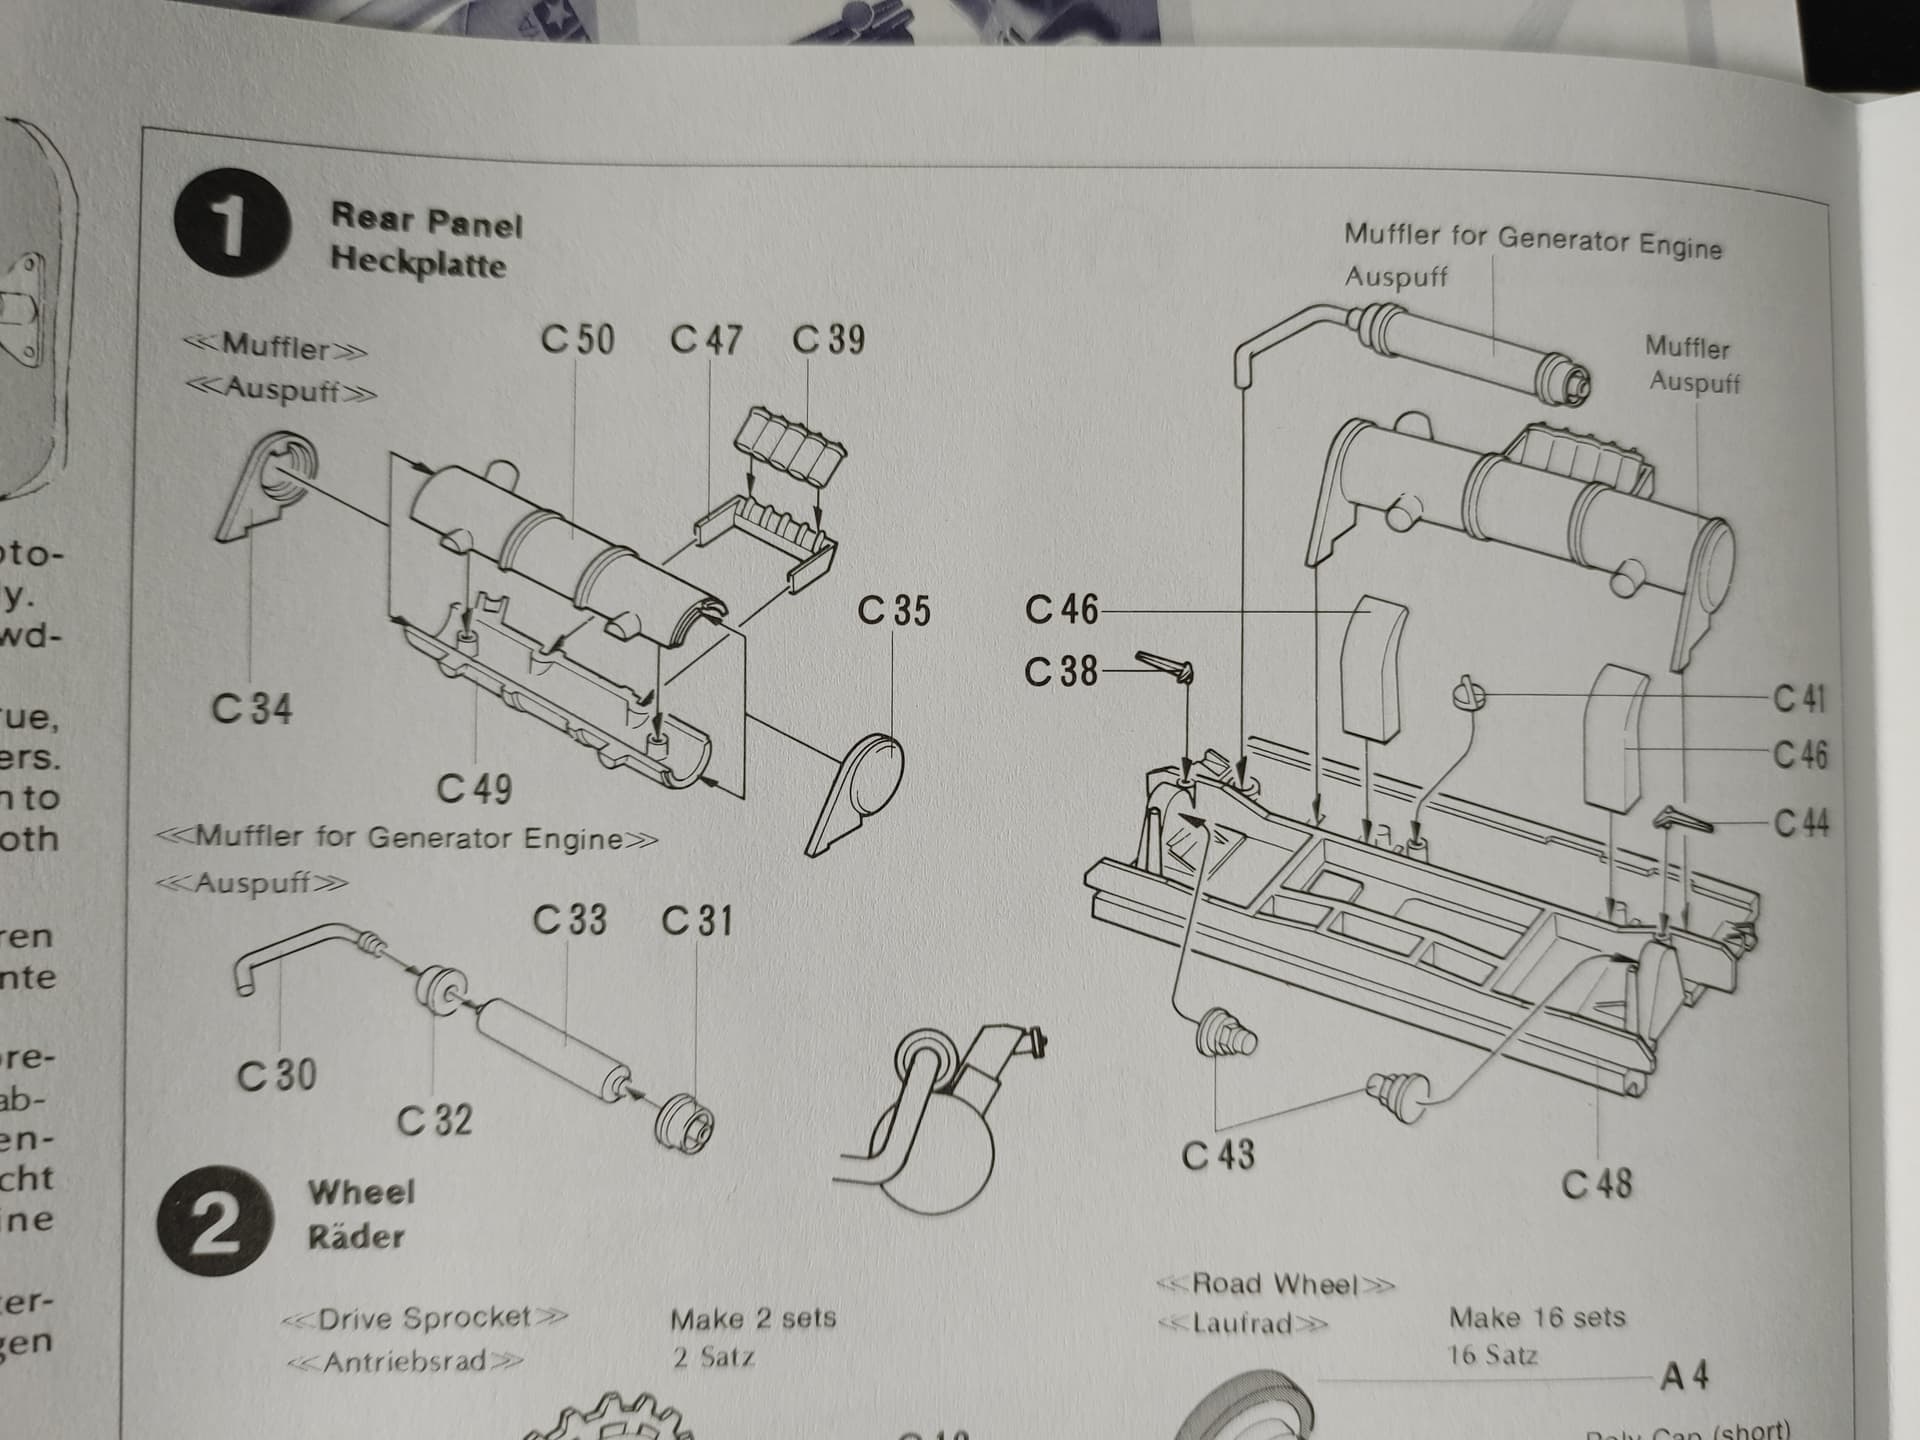
Tamiya extra thin cement arrived! Eager to get started. So should I start at Tamiya’s “step 1” or go “step 11” following the ‘put bigger stuff together first’ mantra? Or 3 and 5 first? Or, not over-complicate things and just get started? lol
1 Like
Since you are beginning, just follow the directions. Tamiya kits are pretty good and easy to build.
Ken
2 Likes
Awesome thanks
Also found this and wondered if it would be good to observe side-by-side (knowing it’s a different Ausf.):
Building the New (Tamiya 1/35 ) Panzer IV ausf F New release plastic model kit
That Tamiya extra thin cement is so good.
I buy in pairs too.
I have one open that i’m using to glue the kit parts together, and I have the other one open at the same time so I can have a good sniff of the fumes, its really quite illuminating.
2 Likes
Just follow the instructions, they’re set out in order for good reason.
There is no ‘mantra’, just experience.
2 Likes
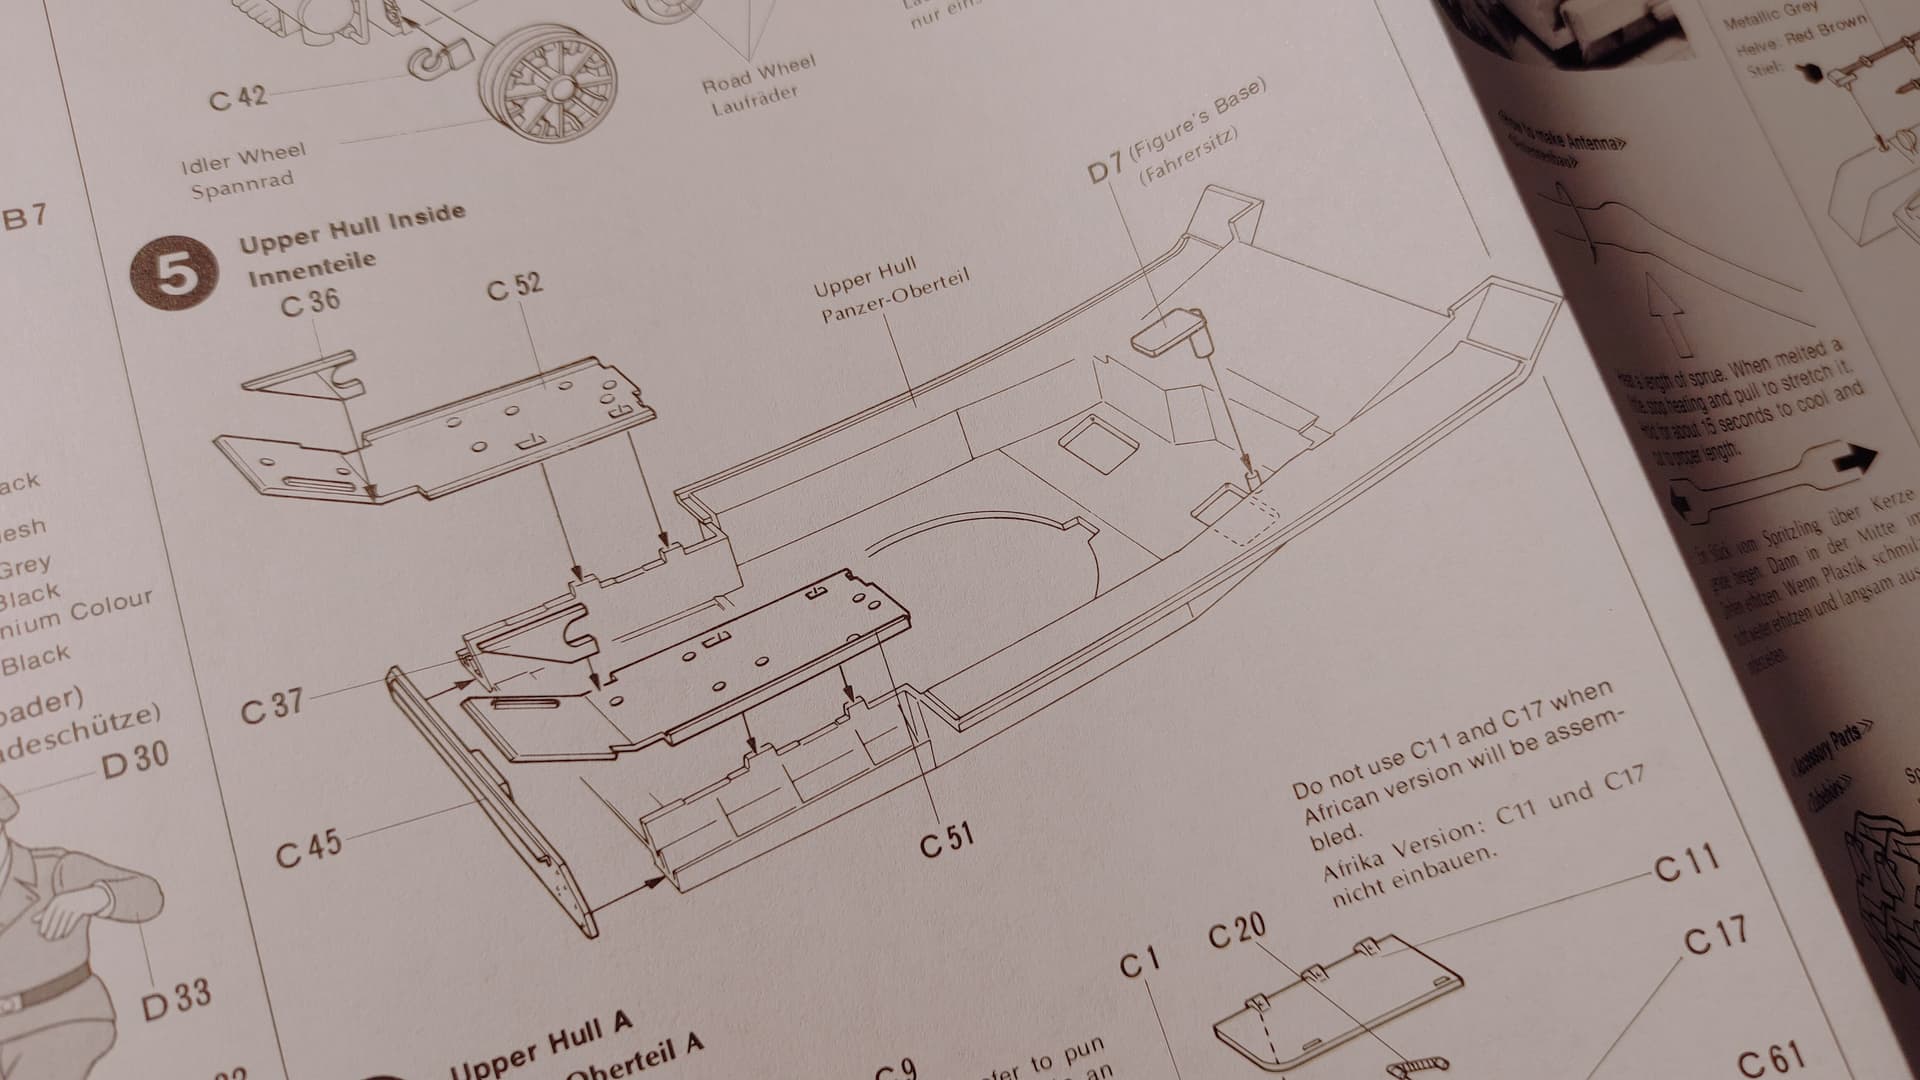
I noticed battery marks in the body… like for two C sized batteries or something. This kit didn’t come with a motor or battery pack, which made me curious if it was once sold with one…
A lot of those early Tamiya kits were released either solely as battery operated carpet crawlers, had previous variants in the line the current kit was based off of, or were released in parallel, with one carpet crawler version & one static version.
I have never seen or bought a motorized Tamiya kit, but I had seen them advertised, or know about them because of general history.
A lot of times the kits can be compromised in accuracy because of it. For example, this kit is slightly too wide (it’s more apparent if you compare it to a modern kit). Still for the time it was quite good, & the Panzer IVD from Tamiya is one of my favorite older kits. Looks pretty good as-is, but also has lots of room to do improvements on, if you have the desire to do so.
Damon.
1 Like