The white crosses are the designation for “Wasser” (water). I suggest going at it freehand. It’s not that hard and will look more realistic in the end. ![]() IMHO, of course.
IMHO, of course.
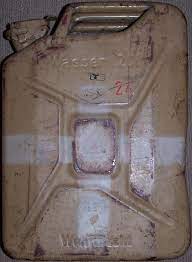
And don’t drink from the unmarked cans! ![]()
The white crosses are the designation for “Wasser” (water). I suggest going at it freehand. It’s not that hard and will look more realistic in the end. ![]() IMHO, of course.
IMHO, of course.
And don’t drink from the unmarked cans! ![]()
Interesting info about the water cans, thank you.
 ah yes, the Tamiya assembly instructions
It’s a great little kit and one that is as close to “Put a bottle of glue in the box. Close the lid. Shake. Open the lid and pour completed model out.”
Don’t stress over it. The original release of the kit there was a piece of nylon mesh that had to be cut out and glued into the anti-grenade screen frames for the turret.
Knowing Tamiya, if you cut the PE parts out of their fret while leaving the smallest attachment nubs possible, the parts will likely fit into the frames like a glove. Place the fret flat on a piece of glass and use an X-acto knife to cut close to the part. Press the knife down firmly as if chopping and don’t try to pass it across the nubs over and over as if slicing. The PE parts should cut off the fret cleanly and relatively easily.
If you are not comfortable with using CA glue, and if you were careful and didn’t bend up the PE parts, they should lay flat enough to glue in using ordinary white glue (which will have to dry overnight).
As for the rest of the kit, use your basic modeling skills, clean up the sprue attachment points and mold seams, and the parts should fit as near perfect as any kit can.
Tamiya has a well-deserved reputation for excellent parts fit and engineering, and this kit is one of its earlier ones that helped the Big-T to earn that rep.
The only parts that might need to be painted separately (basic vehicle - not external storage items) are the radio and weapons. The inside of the hull could be painted in ivory before closing it up. The radio painted and installed also before closing up. IIRC, there’s a radio operator figure (half-torso?) that could also be added before closing up the hull.
The rest of the kit could be painted Panzer Gray (bottom, suspension, inside the wheel hubs, perhaps under the fenders) and then over-painted in a desert sand color. The original vehicle would have likely been factory painted in overall Panzer Gray and then repainted in North Africa is a desert yellow / sand color (possibly from Italian paint stocks or even using a Luftwaffe sand color or simply a thin slurry of mud).
The decals could be applied on the Panzer Gray, then masked with simple tape masks to replicate a vehicle delivered in Panzer Gray and then hastily painted in theater. Alternatively, the decals could be placed over the desert yellow to replicate a more careful in theater repaint.
Since the wheels turn, painting the rubber tires is easy before or after adding the wheels. Painting the headlights first and then carefully and lightly dry-brushing the mesh rock guards should work out fairly well. Alternatively, the rock guard mesh can be carefully painted over the painted headlights.
Enjoy!
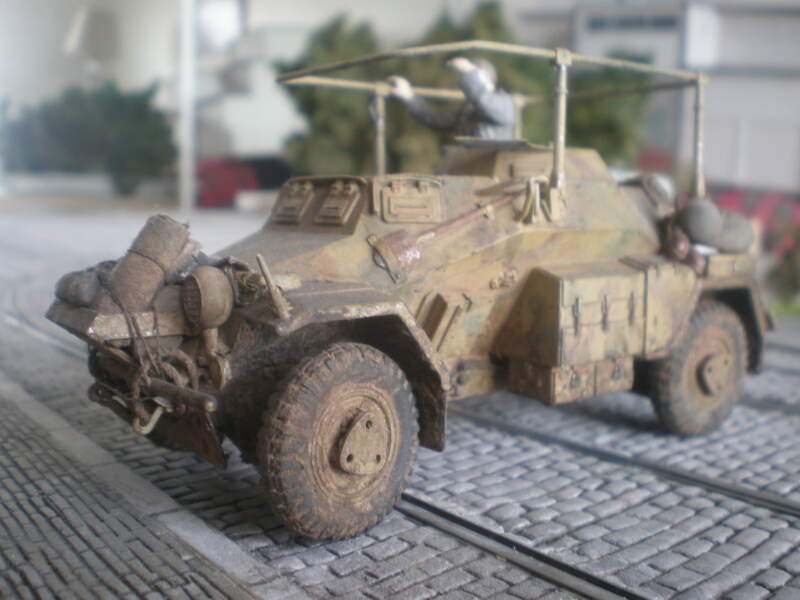
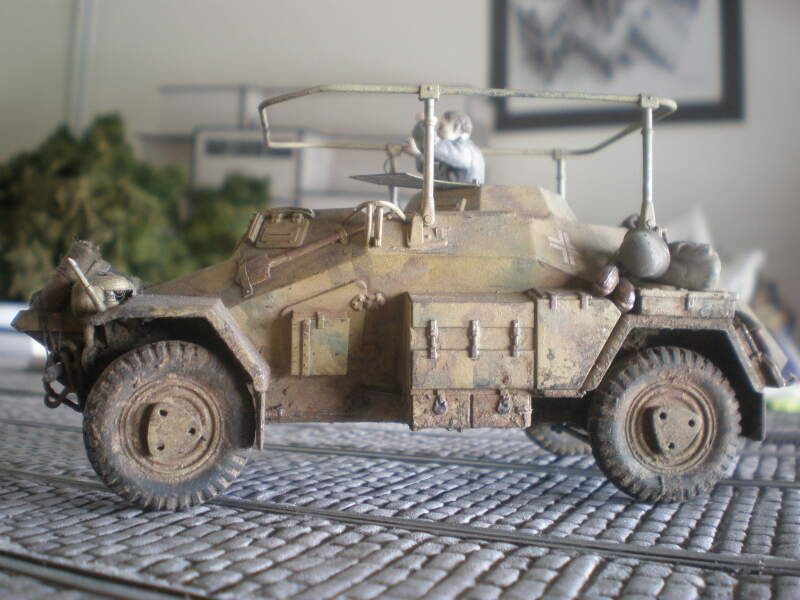
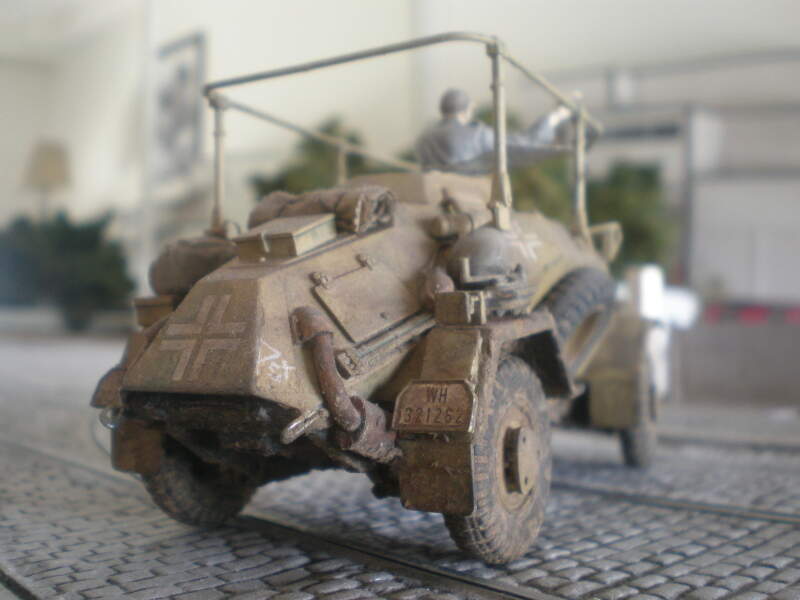
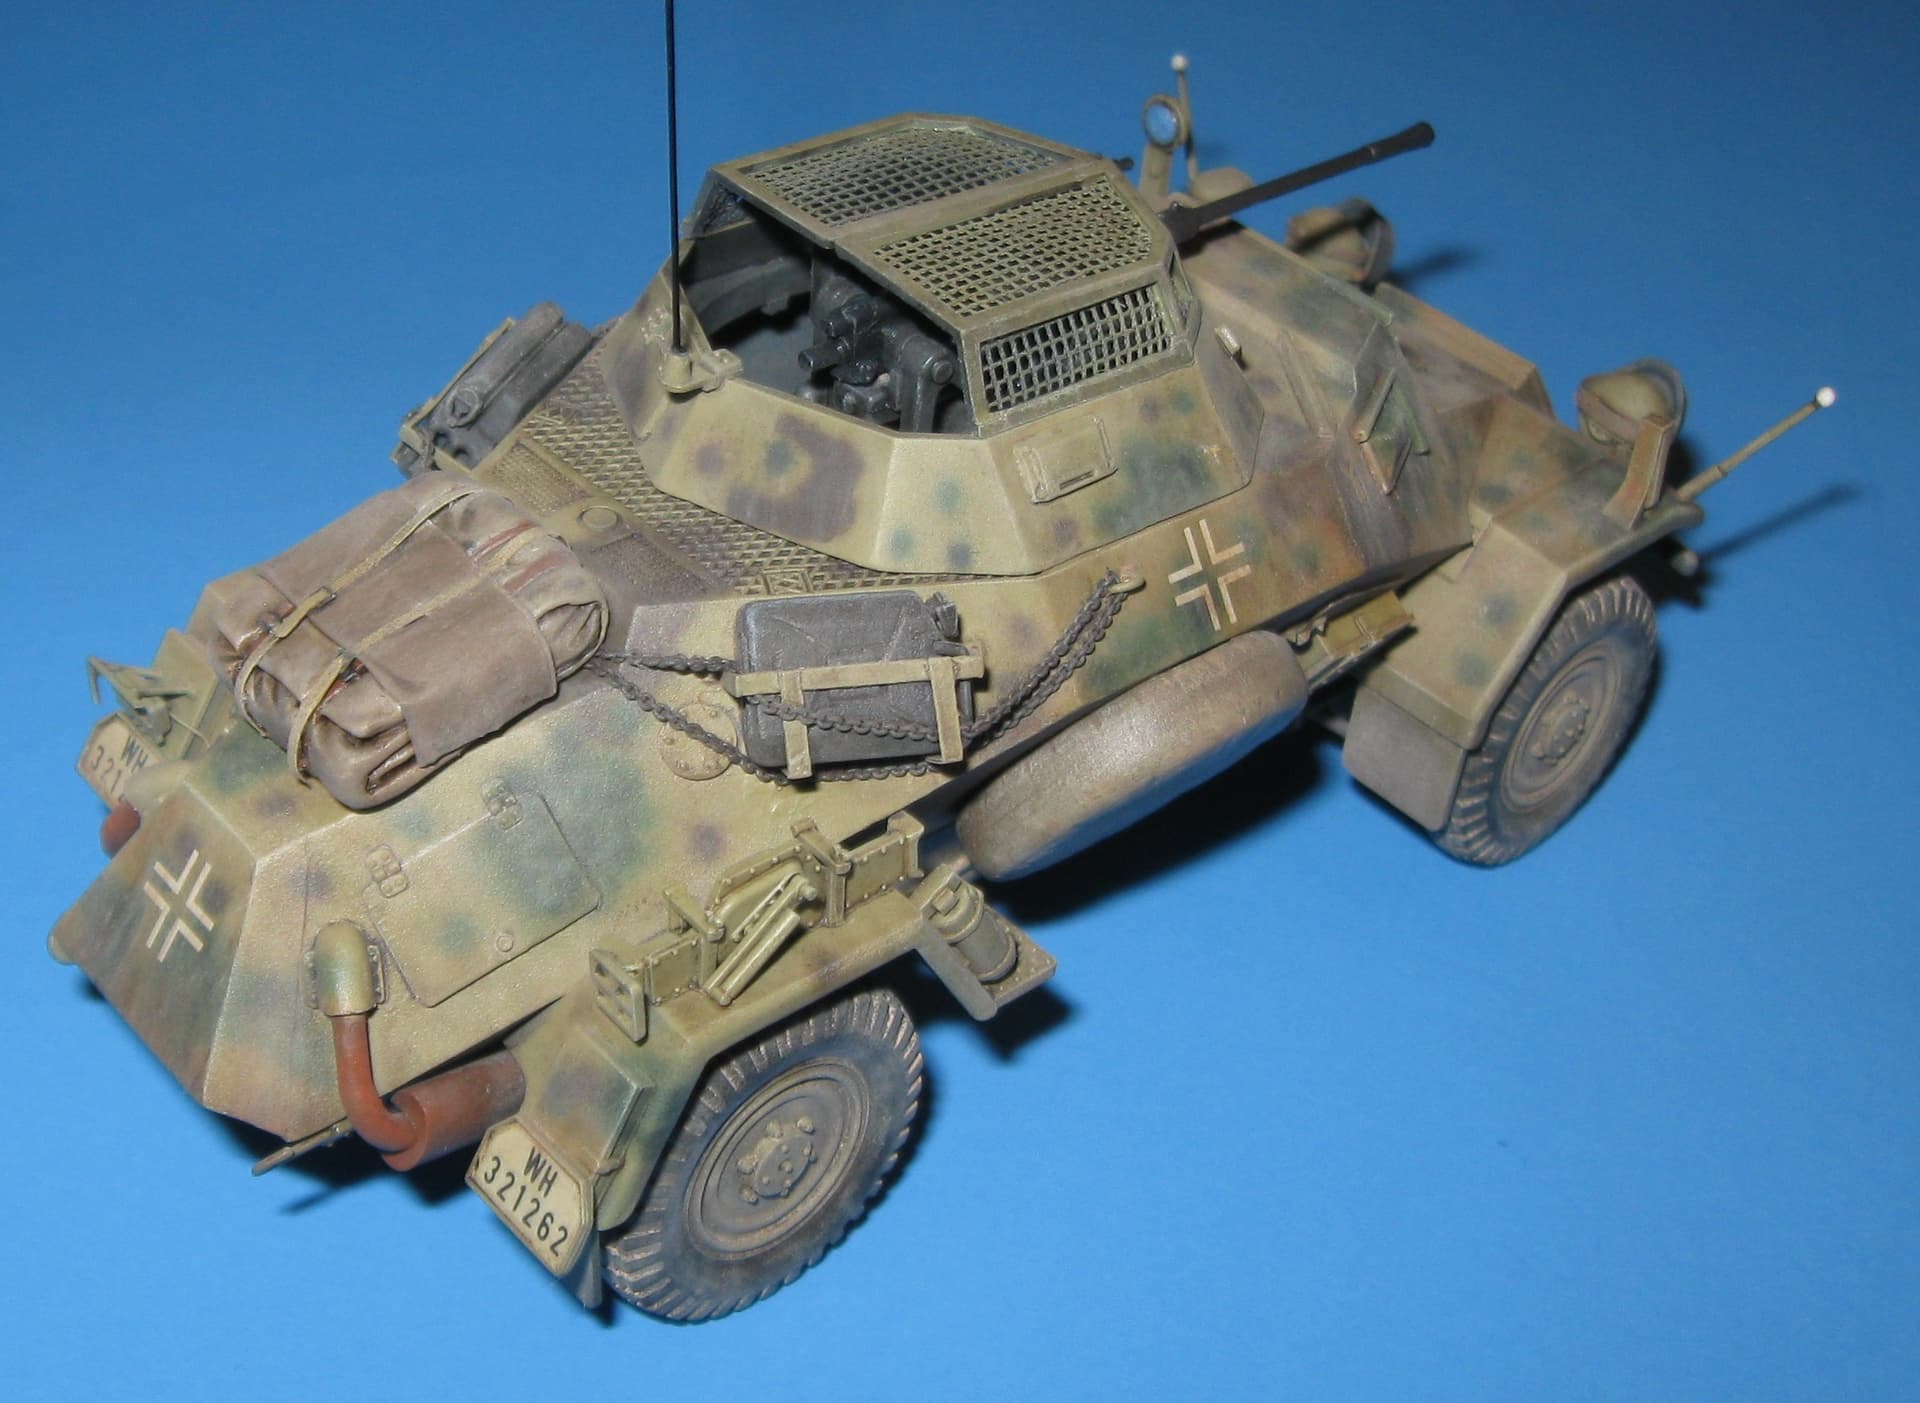
Perhaps for a little motivation, this is the original issue of the kit built out of the box.

Interestingly enough, for someone who has Tamiya’s SdKfz 222, the parts between the two kits can be swapped to build either one as a “late” or “early” production vehicle. The SdKfz 233 has the initial/early visors and the SdKfz 222 has the later, armor reinforced visors. The triangular armored wheel hub guards are also optional (depending on references). Finally, the SdKfz 233 has the external supplemental air cleaner that can be used on the 222 for a North Africa or Southern Russia version.
Thanks for the pictures and the detailed info!
By the way, I really like your headlights, they look simple but very realistic.
How did you do them? And which colors did you use?
Hmmm… I’ll have to put some thought into this.
I built this model back in the late '90s as an out-of-the-box decompression project (for me, a quick build between other long complicated projects). This is a 100% out-of-the-box build. The grenade screen mesh and tow cable are both supplied in the kit as are the figures and storage.
It was only ever intended to be just a fun and quick build to help keep my mojo up. I do remember going back and forth on replacing the kit’s two-handle Jerry cans with something better, like Italeri, but in the end I decided to just go with the kit cans. The idea was to just “perfect” each kit part the way that Tamiya designed and engineered them.
Tamiya has always specialized in “diorama in a box” models, and many of their older kits (I believe this one was released in the '70s) can be built into really nice little vignettes with just some care and patience.
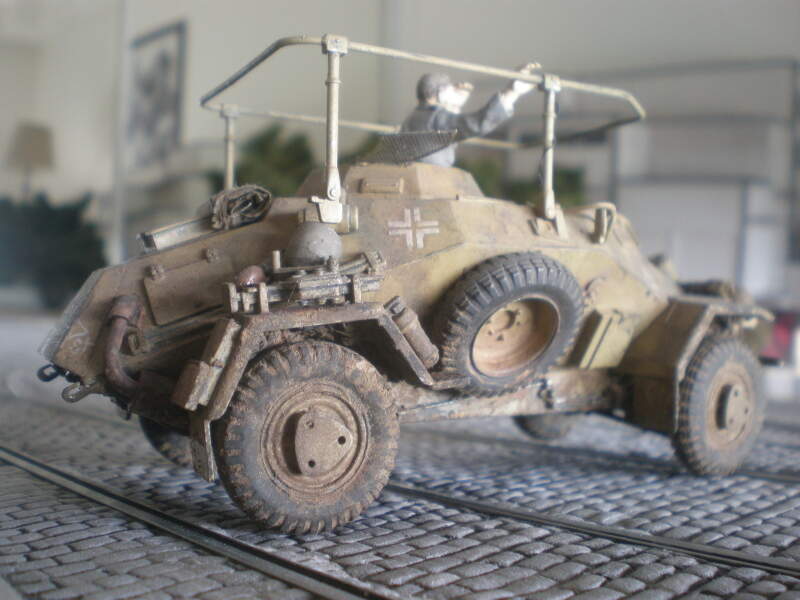
Given the time period, I’m pretty sure that I used either Model Master enamel paints or Floquil lacquers (or some combination). I didn’t switch over to Tamiya paints until around 2004. It was undercoated overall Panzer gray, though. The decals were applied and then masked off. It then got a “loose” over spray with a sand color. I deliberately left some of the dark gray showing through here and there and simply avoided spraying some areas (like the fronts of the headlights) that might have been too much trouble for careful masking in a hasty theater camo paint job.
All of the detail painting along with the figures was done with enamels.
The headlights had the clear “lens” areas picked out individually in silver which then got dots of clear gloss (probably Future floor wax). The stone guard wire mesh was then carefully touched up with Panzer gray. A little tedious, but not really as bad as it sounds.
The weathering is very simple. Ground up chalk pastels applied with a stubby paint brush and fixed with Testors Dull Coat. (Tony Greenland’s technique that I was a fan of at the time.) I did use a piece of Micro Scale silver foil for the lens in the rearview mirror, but, as I recall, the decals were all Tamiya kit decals.
So, I think that’s about it.
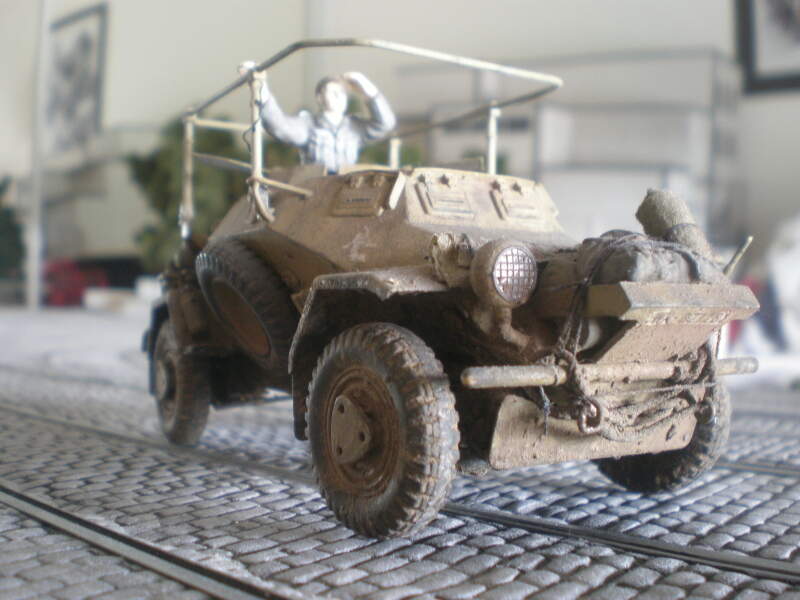
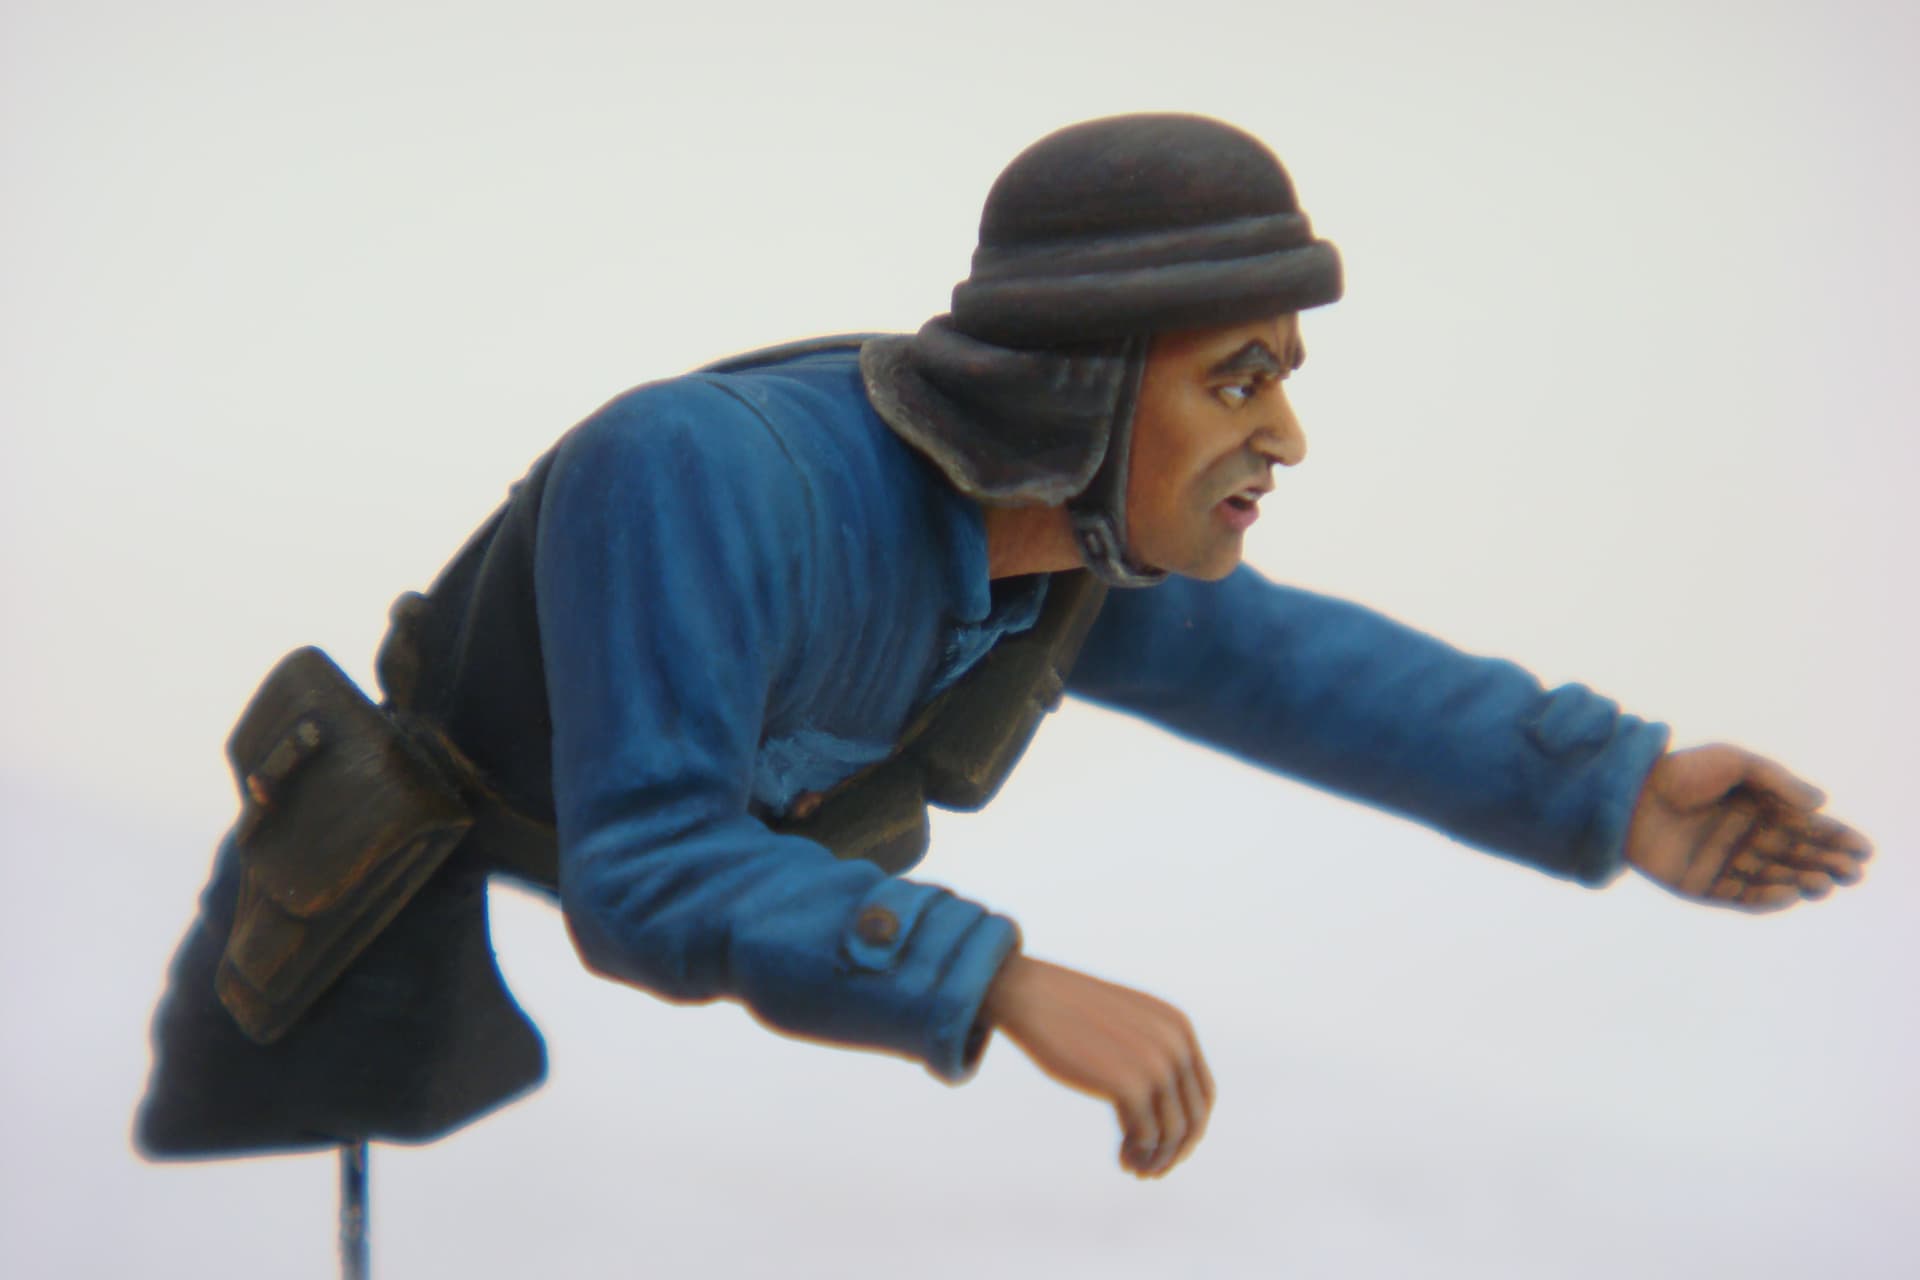
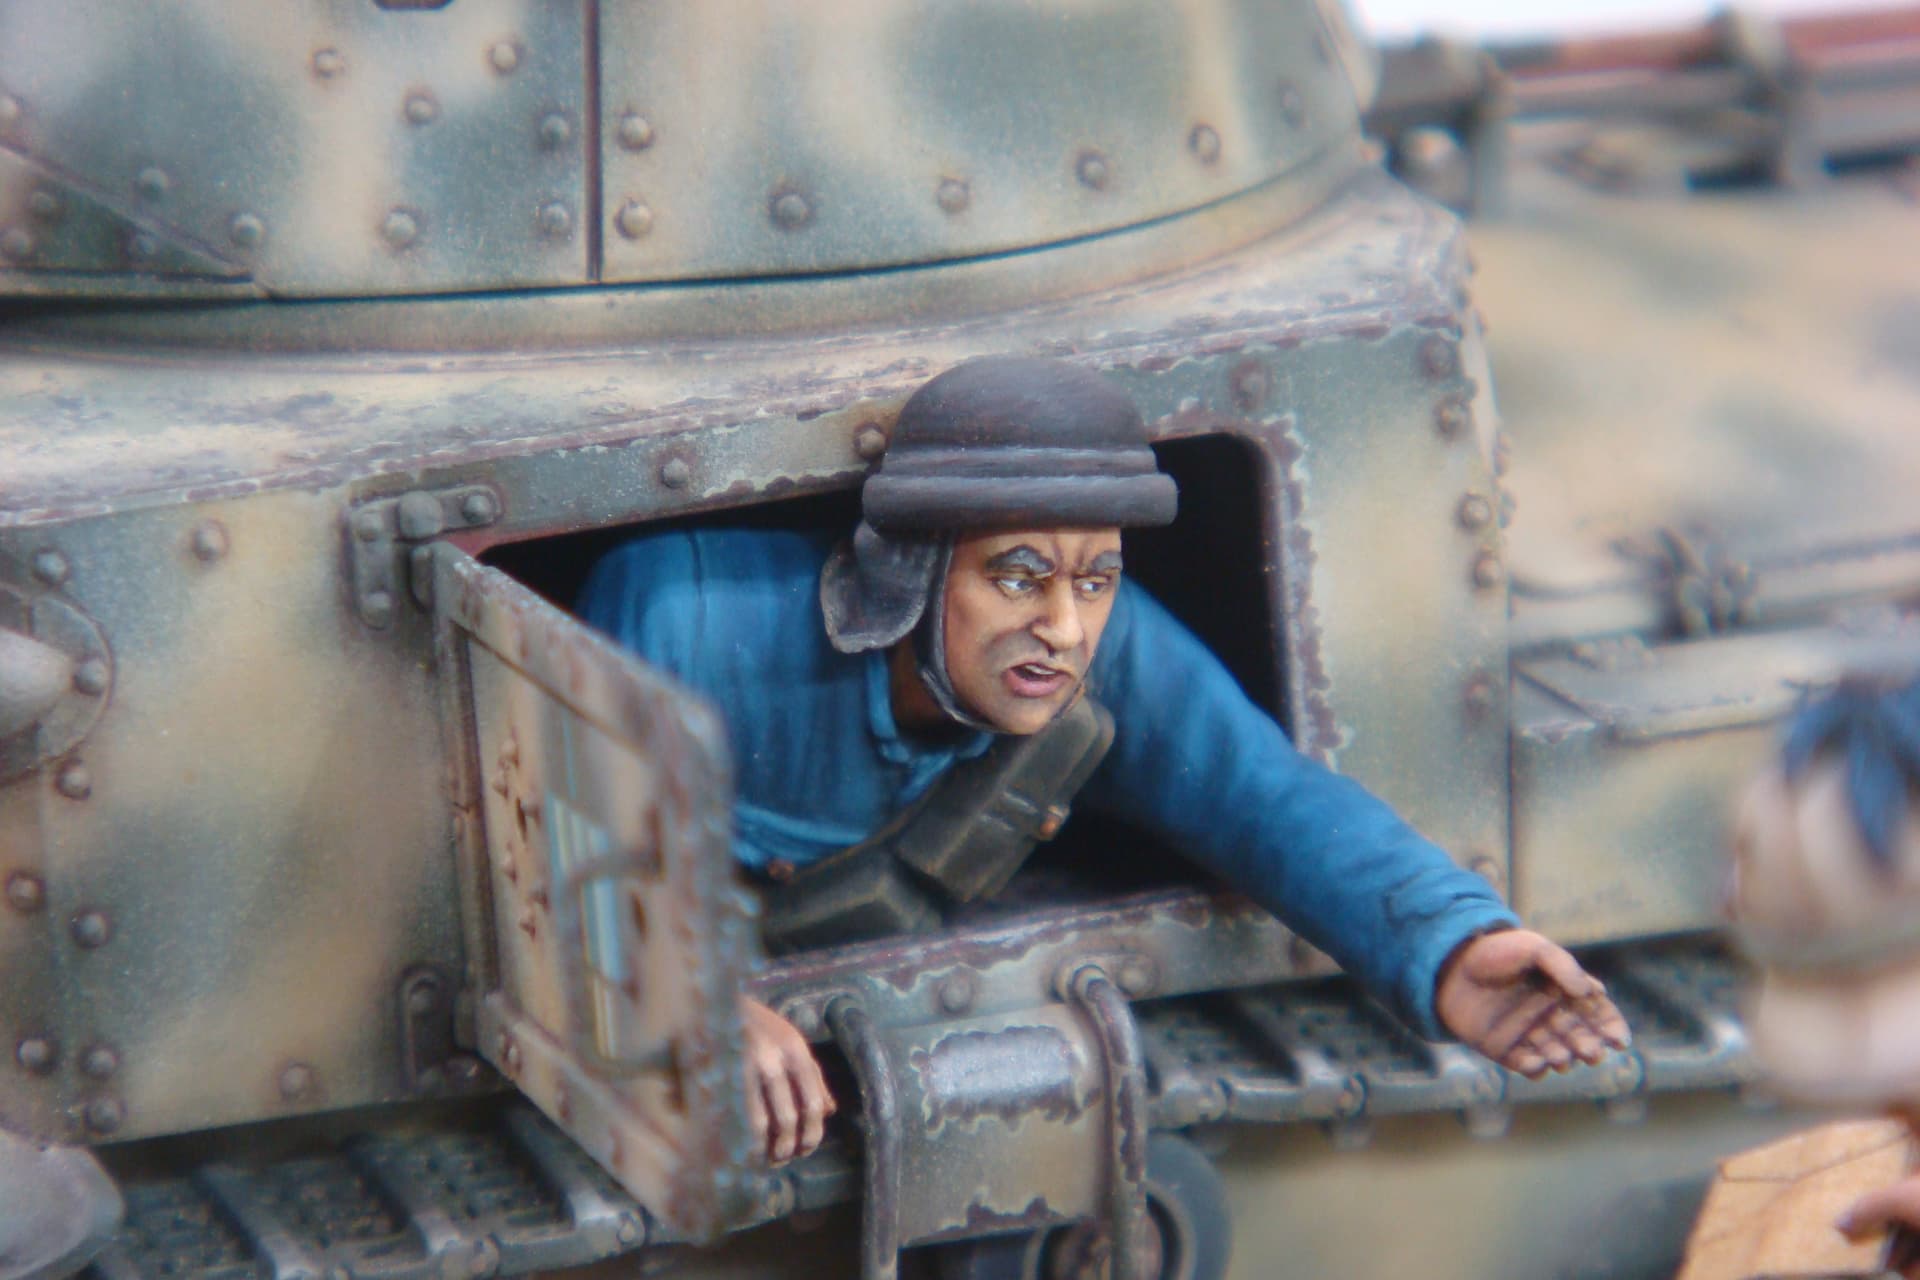
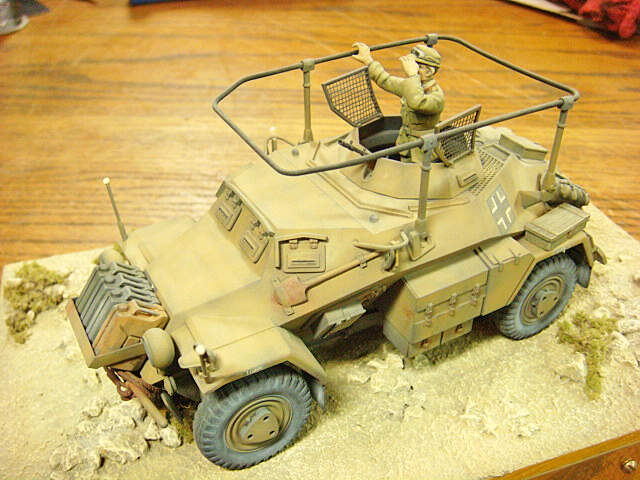
An alternative look, but very much the same approach & principles as Michael’s. I was trying for a beat-up loaded-up appearance…
![]()
Does the Tamiya kit still include those sad looking water/gas cans with only the two top handles??? (should be three)
I yes than I suggest you get some much better detailed and more realistic looking after market jerry cans.
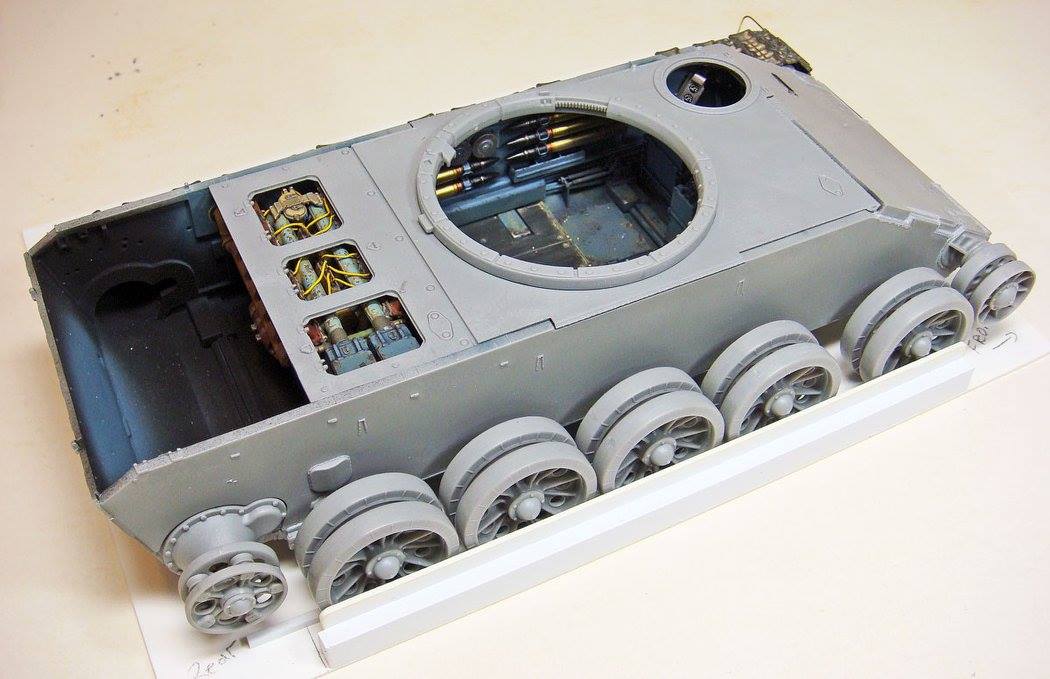
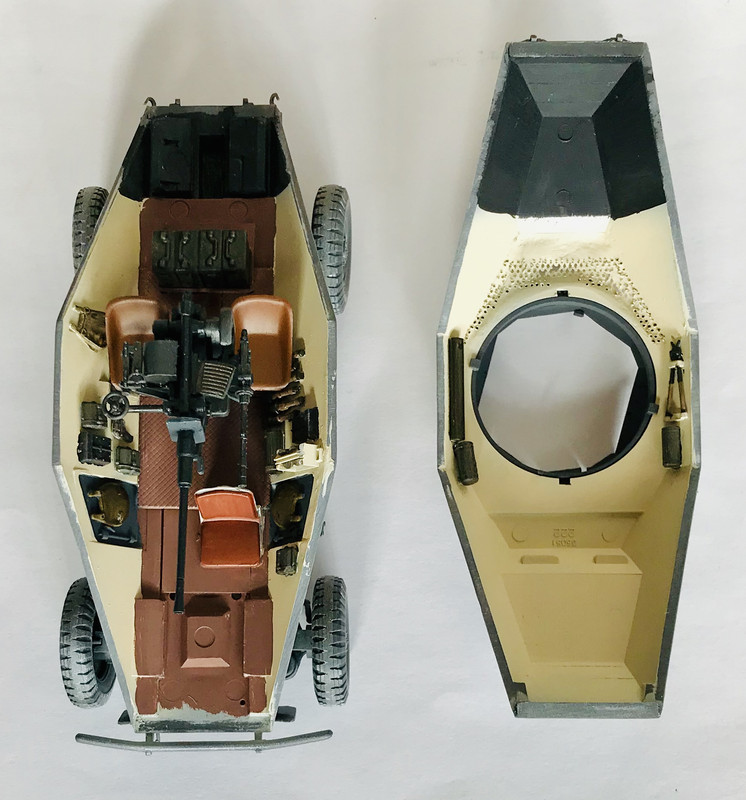
Personally, I would build all the interior, paint it, close upper and lower hull parts and finish building everything. Then paint.
Unfortunately I completey forgot about the interior, I didn’t realized that even with closed hatch it would be visible.
Luckly, the only interior piece I see is the radio and I still have to glue it.
As base color for the interior which one could I use? Could I get away with the same desert brown I will use for the exterior?
Almost certainly Panzer Grau interior - possibly elfenbein
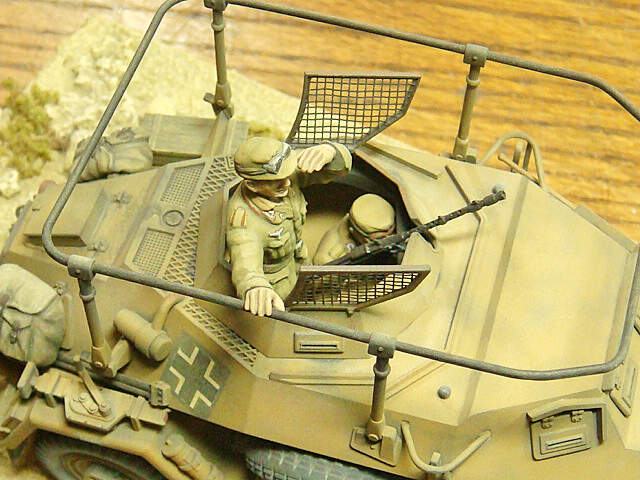
If you use the two kit figures, the standing full figure and seated interior figure along with the radio set, there is practically nothing else that can be seen down through the open turret.
The interior of the hull below the turret was very likely ivory and the interior of the turret was likely the factory exterior camouflage color (Panzer gray for an early vehicle).
A way to disguise the essentially empty interior would be to paint the entire inside flat black. The paint ivory only on the few spots that are clearly visible through the opening(s) feathering that color into the flat black. You want to essentially paint in a shadow increasing to total black from the center of the visible spot to its visible edges. You can also use the same technique on the figures and other larger interior structures, fully painting only the clearly visible areas and then fading the rest from there to total black.
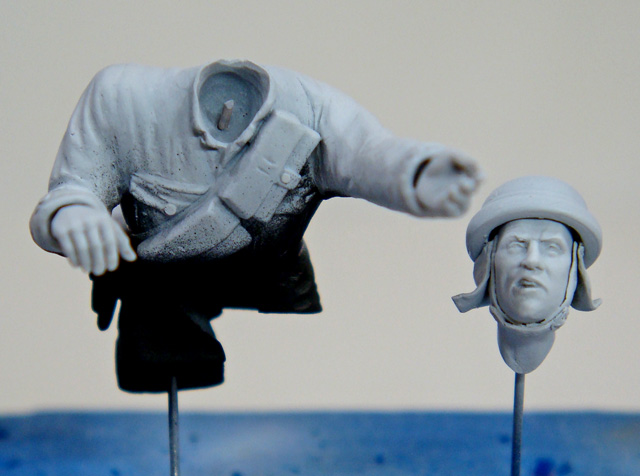
I don’t have any particularly good photos of this process of the interior of a model (I’ll keep looking), but here’s a quick sequence of a single torso figure to illustrate the idea. The visible portions are fully painted, but the rest simply fades to total black inside the black interior. The only interior areas that have any other color are the ones just inside the side hatch coaming.
So, a quick search though my happy-snaps and I found this one showing how the interior color (here a blue gray instead of ivory) has been faded into the flat black that the rest of the engine compartment has been painted in. The little bit of visible color can just be seen through the cooling air grill mesh on the finished model and the black totally disguises the rest of the empty interior in this area.
Many years ago, when I was learning how to model, I also built a Tamiya SdKfz 222.
I can tell from the finish this was done with my Aztek Airbrush (which was horrible) after discovering pigments but before learning how to use oil paints. No photo etched parts or Milliput were used but it shows signs of tentative scratch building. Curiously, the vehicle only mounts one armored plate for the hubs in a mismatched color! Kohlenklau also makes an appearance. ![]()
It appears I painted the interior of the turret Panzer Dark Gray but left the rest of the inner spaces unpainted.
If I were doing it today, I would look for a museum vehicle and copy the interior colors from that. It would be fun to make another 221/222/223 and place the two side by side as a window into changing skill and tastes.
I built the 222 a few years back and painted it this way, based off photos and info I found online.
Elfenbein sidewalls and Rot Primer on the floor areas.
Most of it was not visible in the end


Thanks for the info guys, you gave me many good ideas.
And excellent models, everyone.
Be careful doing that, museum vehicles are not always accurate when it comes to paint!
Ken
You are correct! I would go further and submit that most museums vehicles use incorrect colors. In this particular case, I have a specific museum vehicle in mind. It was the subject of an extensive restoration at the former Littlefield Tank Museum and the photographed in detail for Panzerspahwagen by Uwe Feist. If I recall correctly, Chris Hughes (Toadman’s Tank Pictures) also sold a walkaround of the vehicle. I am not sure the restorers got it correct but their work was definitely interesting and Charles Littlefield had a significant budget for research. He cared about such things.
Using museum vehicles for information is definitely a minefield. Parts get lost and replaced. Very strange paints get used. Experimental archaeology has advanced a great deal over the last 15 years so hopefully museums slowly fix those problems over time.
Edit: Stikpusher’s 222 looks about right to me.
Sometimes those armored wheel hub plates were lost in combat operations. I often leave at least one off the vehicle to simulate this and add some slight variation.
A famous incident of this (in many museums and books) is Matilda II’s blue camo seen frequently.
Including on my build shelf/////////