lol, you could use it in a museum diorama.
1 Like
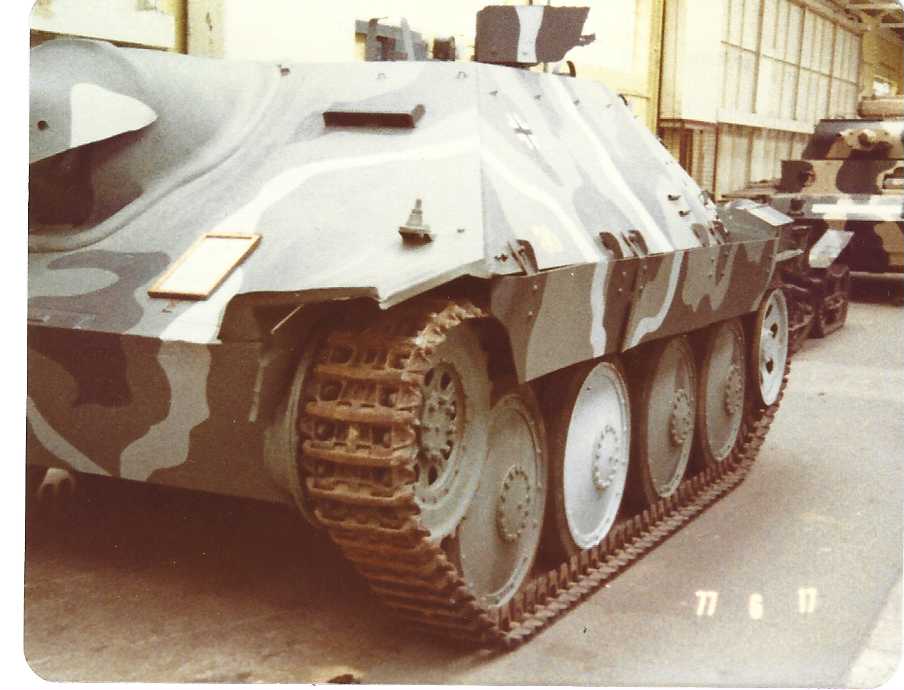
At least I didn’t recreate Bovington’s blue scheme Hetzer I saw there in the mid 70’s. It was repainted sometime later.
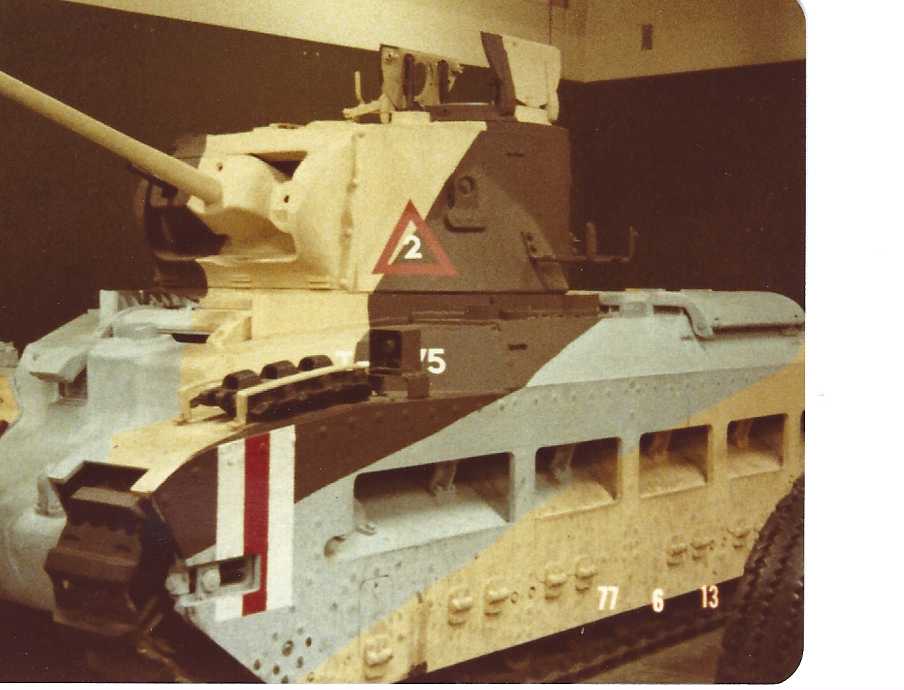
Please excuse the old faded crappy photos.
5 Likes
this image is cursed – a modern-looking hetzer
4 Likes
The photo is faded. I saw another shot taken outdoors in sunlight (maybe letting the paint dry?) and the blue was much more vibrant.
1 Like
My God I always thought it looked awful and silly.
It’s so strange that people takes more care for little plastic models than venerable old war machines.
2 Likes
When those tanks were painted, research and restorations techniques weren’t what they are today.
May documents were still classified, there were few if any reliable wartime colour photos, and those that existed tended to have inherent colour shift to them (often blue). There also wasn’t the focus on history in the sense there is now because for many it was living memory. These tanks weren’t artifacts, they were trophies.
Now we have the ability to perform things like detailed paint analysis and have access to a wider range of archive material.
It’s so strange that people takes more care for little plastic models than venerable old war machines.
As for the care being taken in museums vs models, there are drastic differences between the two. One model costs a few tens of dollars/euros. Restoring a tank costs thousands and museums are rarely flush with cash. Sometimes it’s just a matter of getting a coat of paint on to keep the rust a bay, especially in the case of armour where due to size, collections are often kept outside.
It’s changing though. Bovington just repainted 131 and their Jagdtiger to more accurate wartime colours.
2 Likes
There is a video on Sofilein’s channel on YouTube ( https://www.youtube.com/watch?v=P6APCU91zrc ) showing her and Hilary Doyle going over an SdKfz 223 at NACC; i can’t judge well because I don’t know the temperature of the lighting for the interior parts of the video, but it looks to be the same dunkelgelb as the exterior. If I had to guess for a base dunkelgrau vehicle (whether overpainted or not), I’d go the same route as the early SdKfz 251, with the driver’s area in elfebein and the fighting compartment and door interiors in dunkelgrau.
The thing of it with the Hetzer is… it has a tell-tail dent in it. I saw a photo published somewhere of the same vehicle (dent and all) parked in the same location as the blue version. Only difference is this other Hetzer photo was in unrestored condition rust and all (and same dent of course)… The paint was the typical red/brown green and sand scheme and dead flat and legitimately old. Why change it… unless somebody felt “creative”?
1 Like
Oh I wasn’t implying there aren’t instances of baffling artistic licence being taken. Or just plain apathy. The blue shift thing is actually something I learned on here a while ago and it just so happened that tank is blue. I was referring more broadly to @Nightgaunt’s comment on the care in museum vs model bench.
There are Canadian tanks, in museums on Canadian bases with access to correct records and paint that are just spraybombed with whatever was on hand in the QM that day.
The Tank Museum YouTube channel has a couple good videos on restoring the Tigers and the challenges of painting them.
I just hope the trend towards fidelity continues where it can.
1 Like
I am sure I even saw those blue Matildas in some old computer war game, I remember being baffled at how it contrasted with the desert colors.
Anyway, going back to model building, I need a simple advice: this is the glue I am using:
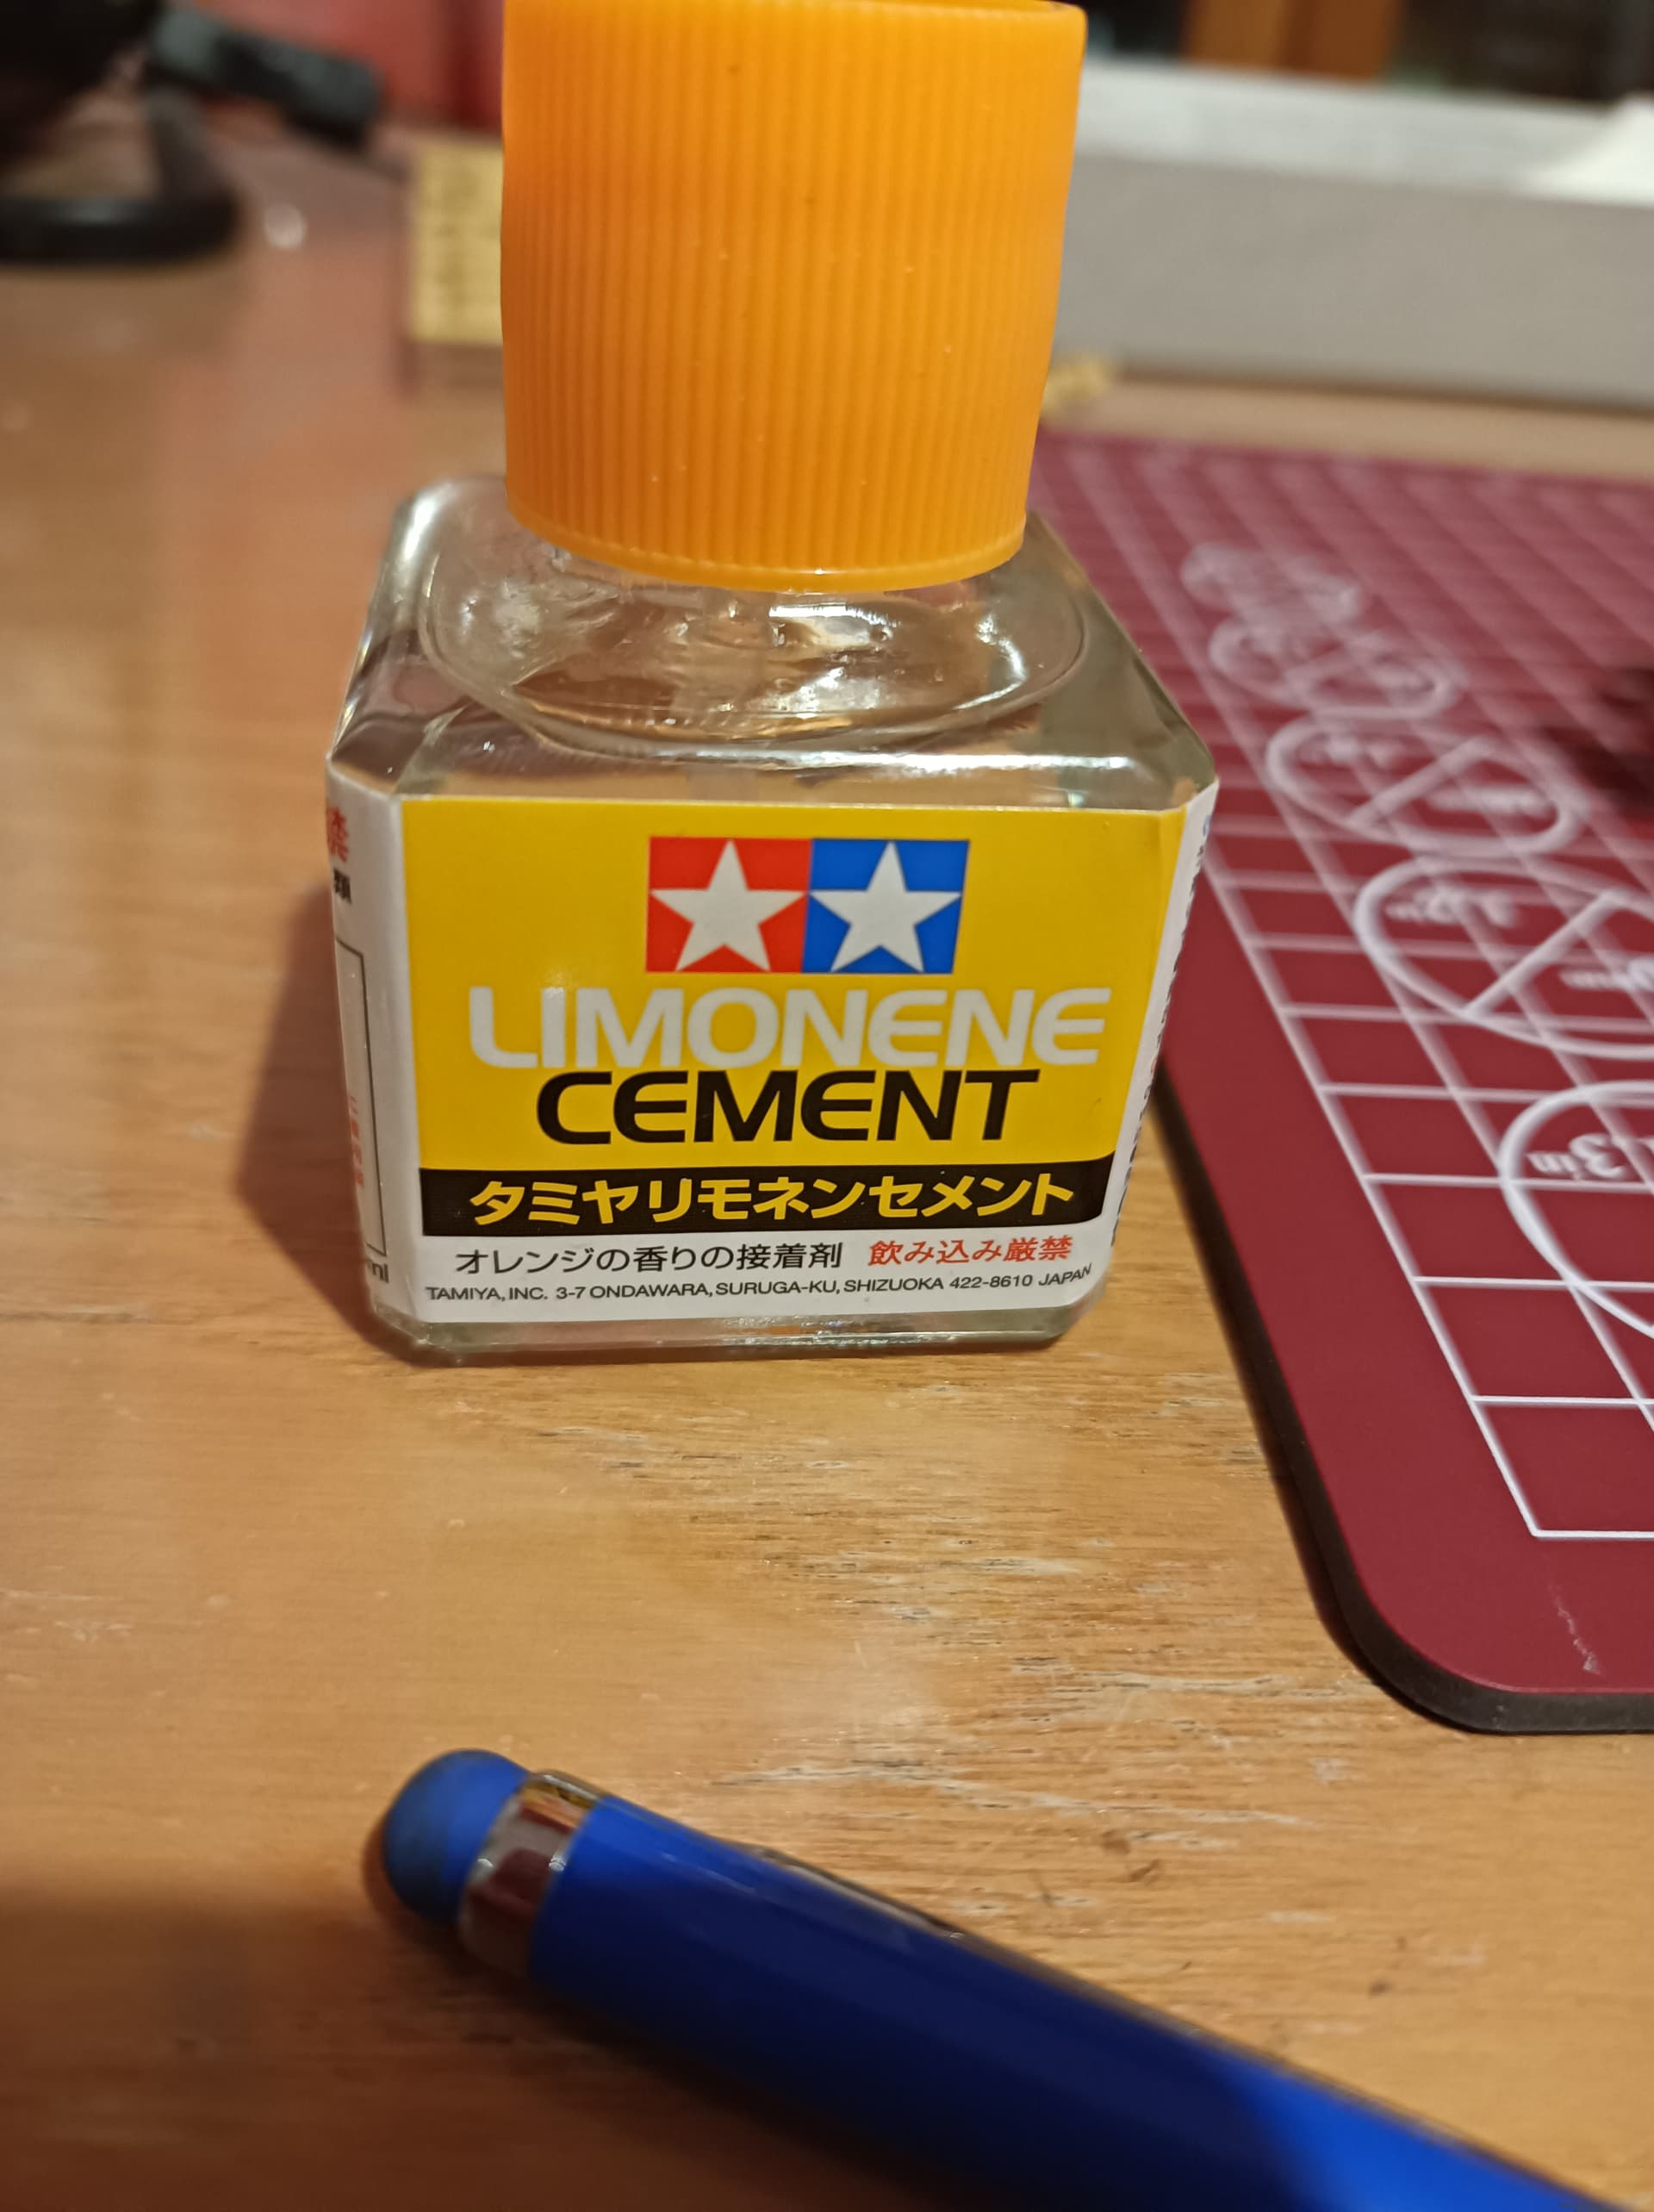
It glues fine, takes a reasonable time to cement the plastic and give ample wiggle room to fix stuff right.
Plus it also smells very good.
However, the built-in brush is simply too large for some of the details and despite being careful I always end up putting too much of it.
I wish it had the Revel contacta nozzle, unfortunately I cannot use it as it irritates my nose and throat.
So, what could I conveniently use to glue small parts?
Can I use an ordinary paint brush or will it get ruined?
4 Likes
Just trim the brush bottle.
If you don’t want to do that, an old paint brush should work, but I wouldn’t use anything you’re too fond of.
1 Like
When I want to keep the glue to a minimum I use a broken dental hand instrument. Sometimes they need to be ground to a good shape, usually a blunted point. Cheap disposable applicator (bonding) brushes can be found on ebay and Amazon. They’ll hold more than the metal tip tool but less than the brush in the cement bottle

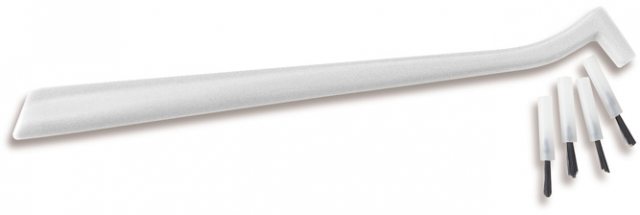
Do a search for “dycal instrument” or calcium hydroxide applicator. That’s my ideal shape for very small amounts of cement… especially CA / super glue. They last forever since you can scrape off any glue from previous uses.
I use Tamiya extra thin cement. Same sort of bottle and uses a brush applicator, but the brush is really fine and plenty okay for small detail.
If anyone is interested, here’s a pic of some of the little stuff I primed with the Vallejo polyurethane primer.
I used the middle nozzle size and sprayed at middle pressure (forgive me, I cannot remember the values) and it went rather fine, the finish is comparable to the Tamiya primer except I don’t have to use those annoying spray cans.
However, it dries to a very thick paste and I needed to clean the nozzle a couple of times during the session.
4 Likes
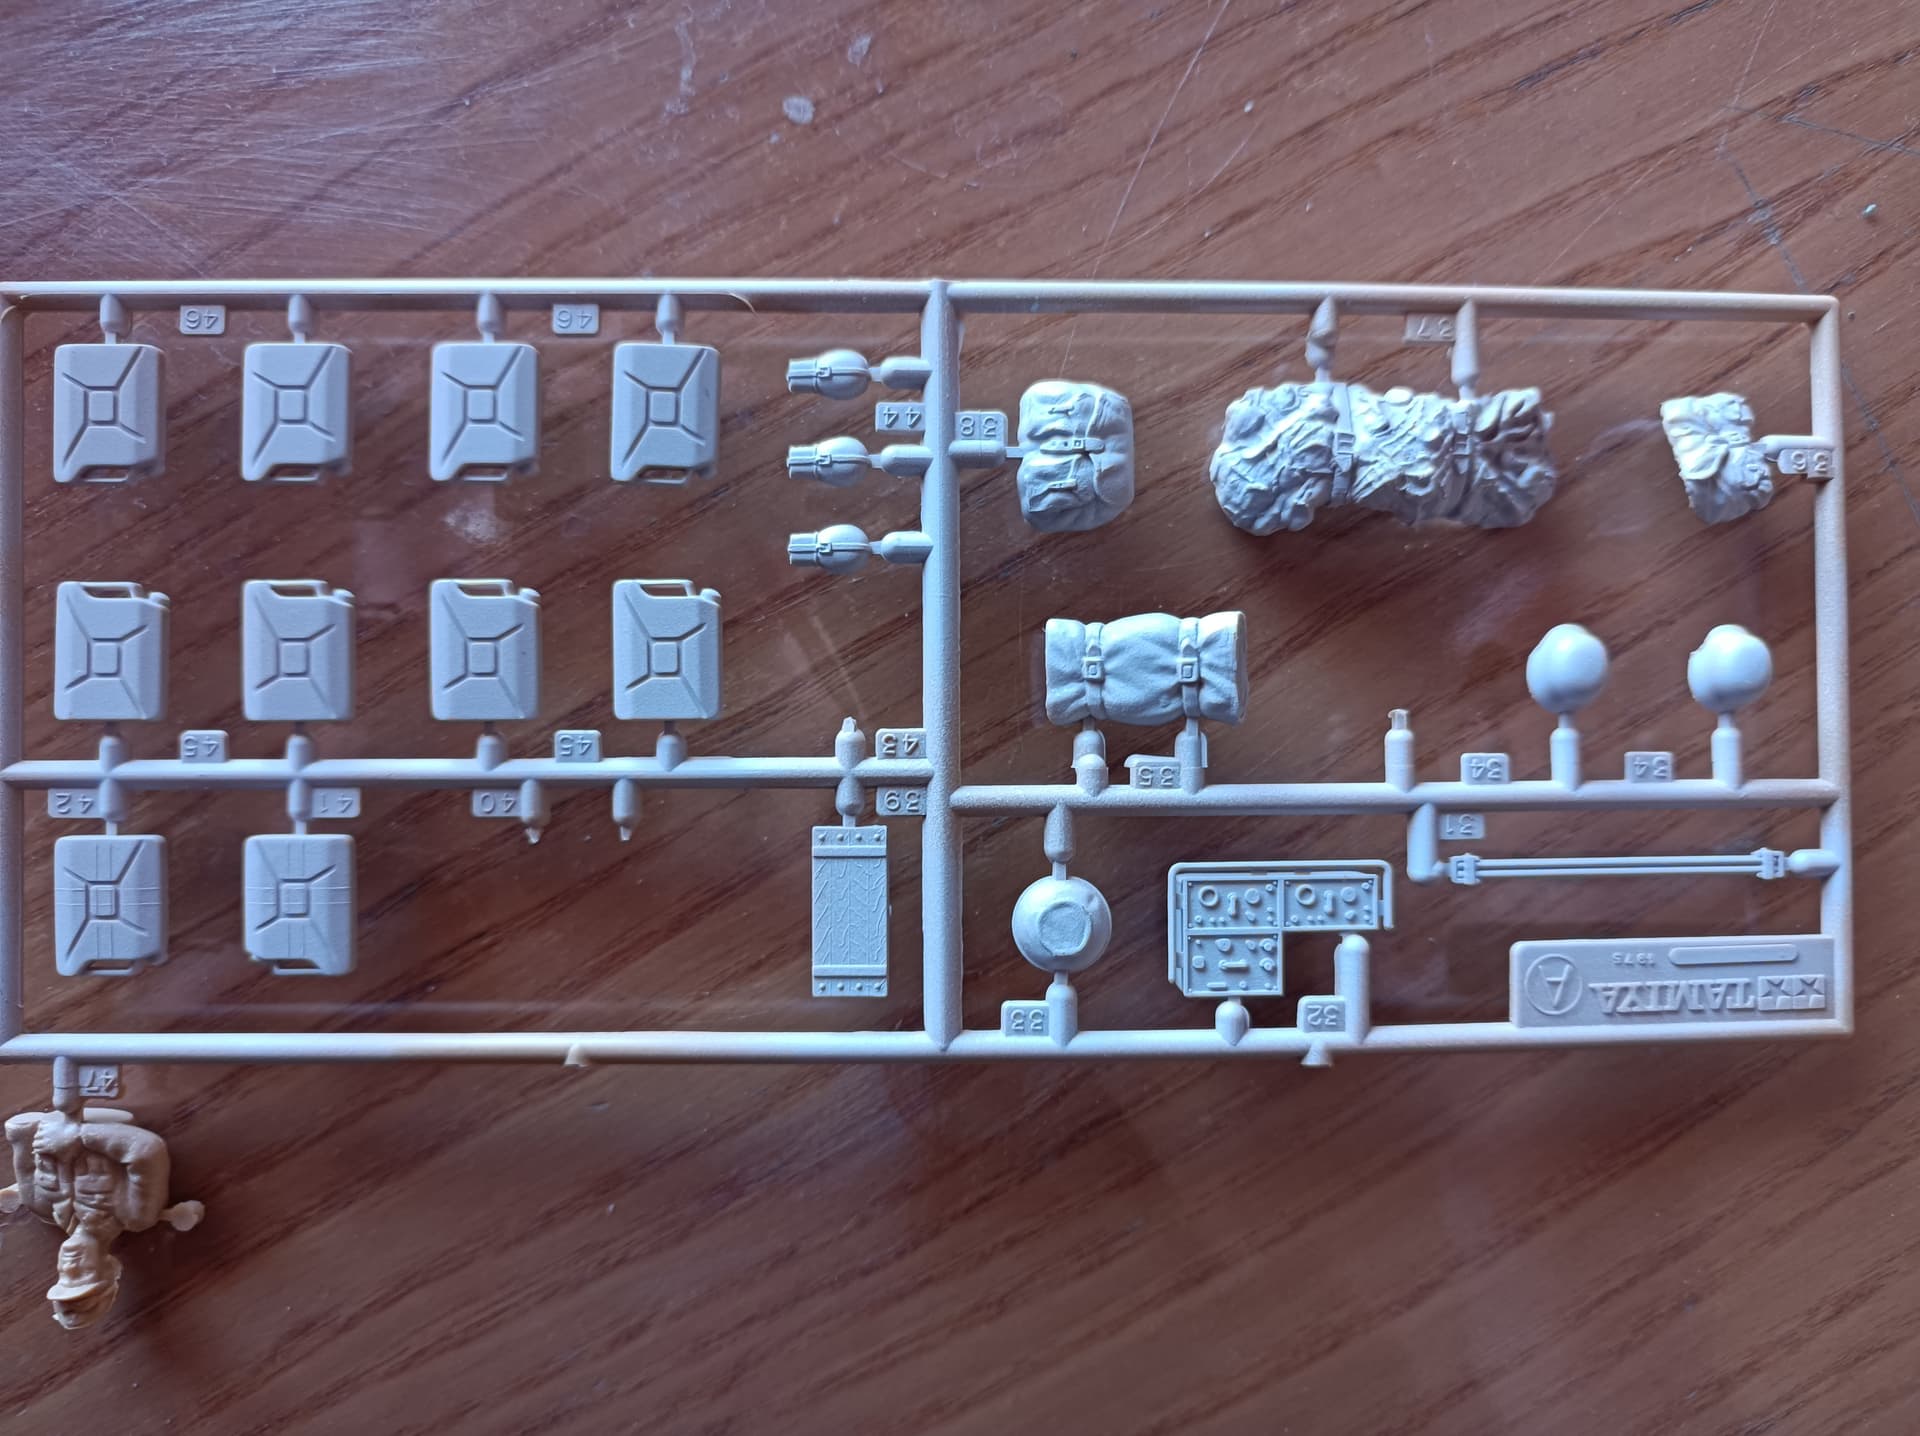
In the above picture you can see that there’s a camo net, a couple of bags and that cloth bundle next to the helmets.
What colors should I use for those?
Looking at the net on the box art it looks dark green, almost olive. The bags, I suppose brown should be fine. That bundle of cloth with the two belts, I really don’t know.
Also, I think that the Tamiya instruction want me to paint one of the boxes some kind of red, did you do the same? Didn’t saw that in your models.
It’s that kind of red I think I saw on some German camo.
EDIT:
I just noticed I got the title of the thread wrong, it’s 223, not 233 ![]()
1 Like
The net should be in a natural rope color, something like hemp or twine to best blend in with the desert environment. The bundles with the the belts are the canvas tropical rucksacks and start out in a khaki olive color. Of course the sun & dust will take a toll on that. The tongues for the buckles on the external pouches are a brown leather. The tarp can be in a solid color such as gray or khaki tan, or in the zeltbahn splinter pattern.
those jerrycans might be incorrect, the cap was on the right half, if looking at a real jerrycan from the front. It seems that these ones have the cap on the left. I’d like to add, though, that if you don’t use all of them, you can save them for a british vehicle or diorama, since they stole german jerrycans during the war. The colors probably would be varied if used in such an application, however.
I’ve used the Limonene cement on a kit without any noticeable problem, although the guy in my hobby store (on a later occasion) told me it was formulated specifically for gluing transparent parts together. Whether or not that’s true it seems to do the same job as the common variety…the only difference might be you get a high & brain damage faster without efficient ventilation, smells ultra nasty to me.
But like Khouli I’d strongly recommend you try the Extra Thin, after using the thicker stuff it can be a revelation - invisible bonding ![]()
1 Like
Missed another weekend of model working, too tired and a monumental cervical pain. Guess the full priming will have to wait.
Meanwhile, I quickly skimmed thorough this video which was posted here by @srmalloy**:

I couldn’t watch it with sound on, so i might have missed something, but I see that the interior is pretty much the same color of the exterior…was that a museum re-painting?