That pattern… it is just too much! 

Who ever came up with that, must have had kindergarden flashbacks. Makes for a great model though.
That pattern… it is just too much!
Who ever came up with that, must have had kindergarden flashbacks. Makes for a great model though.
I’m going to bookmark this for future use, thanks for the tips!
Panzer modeler . I believe it is your lighting some pictures do appear green and some yellow . Lighting can be tricky.
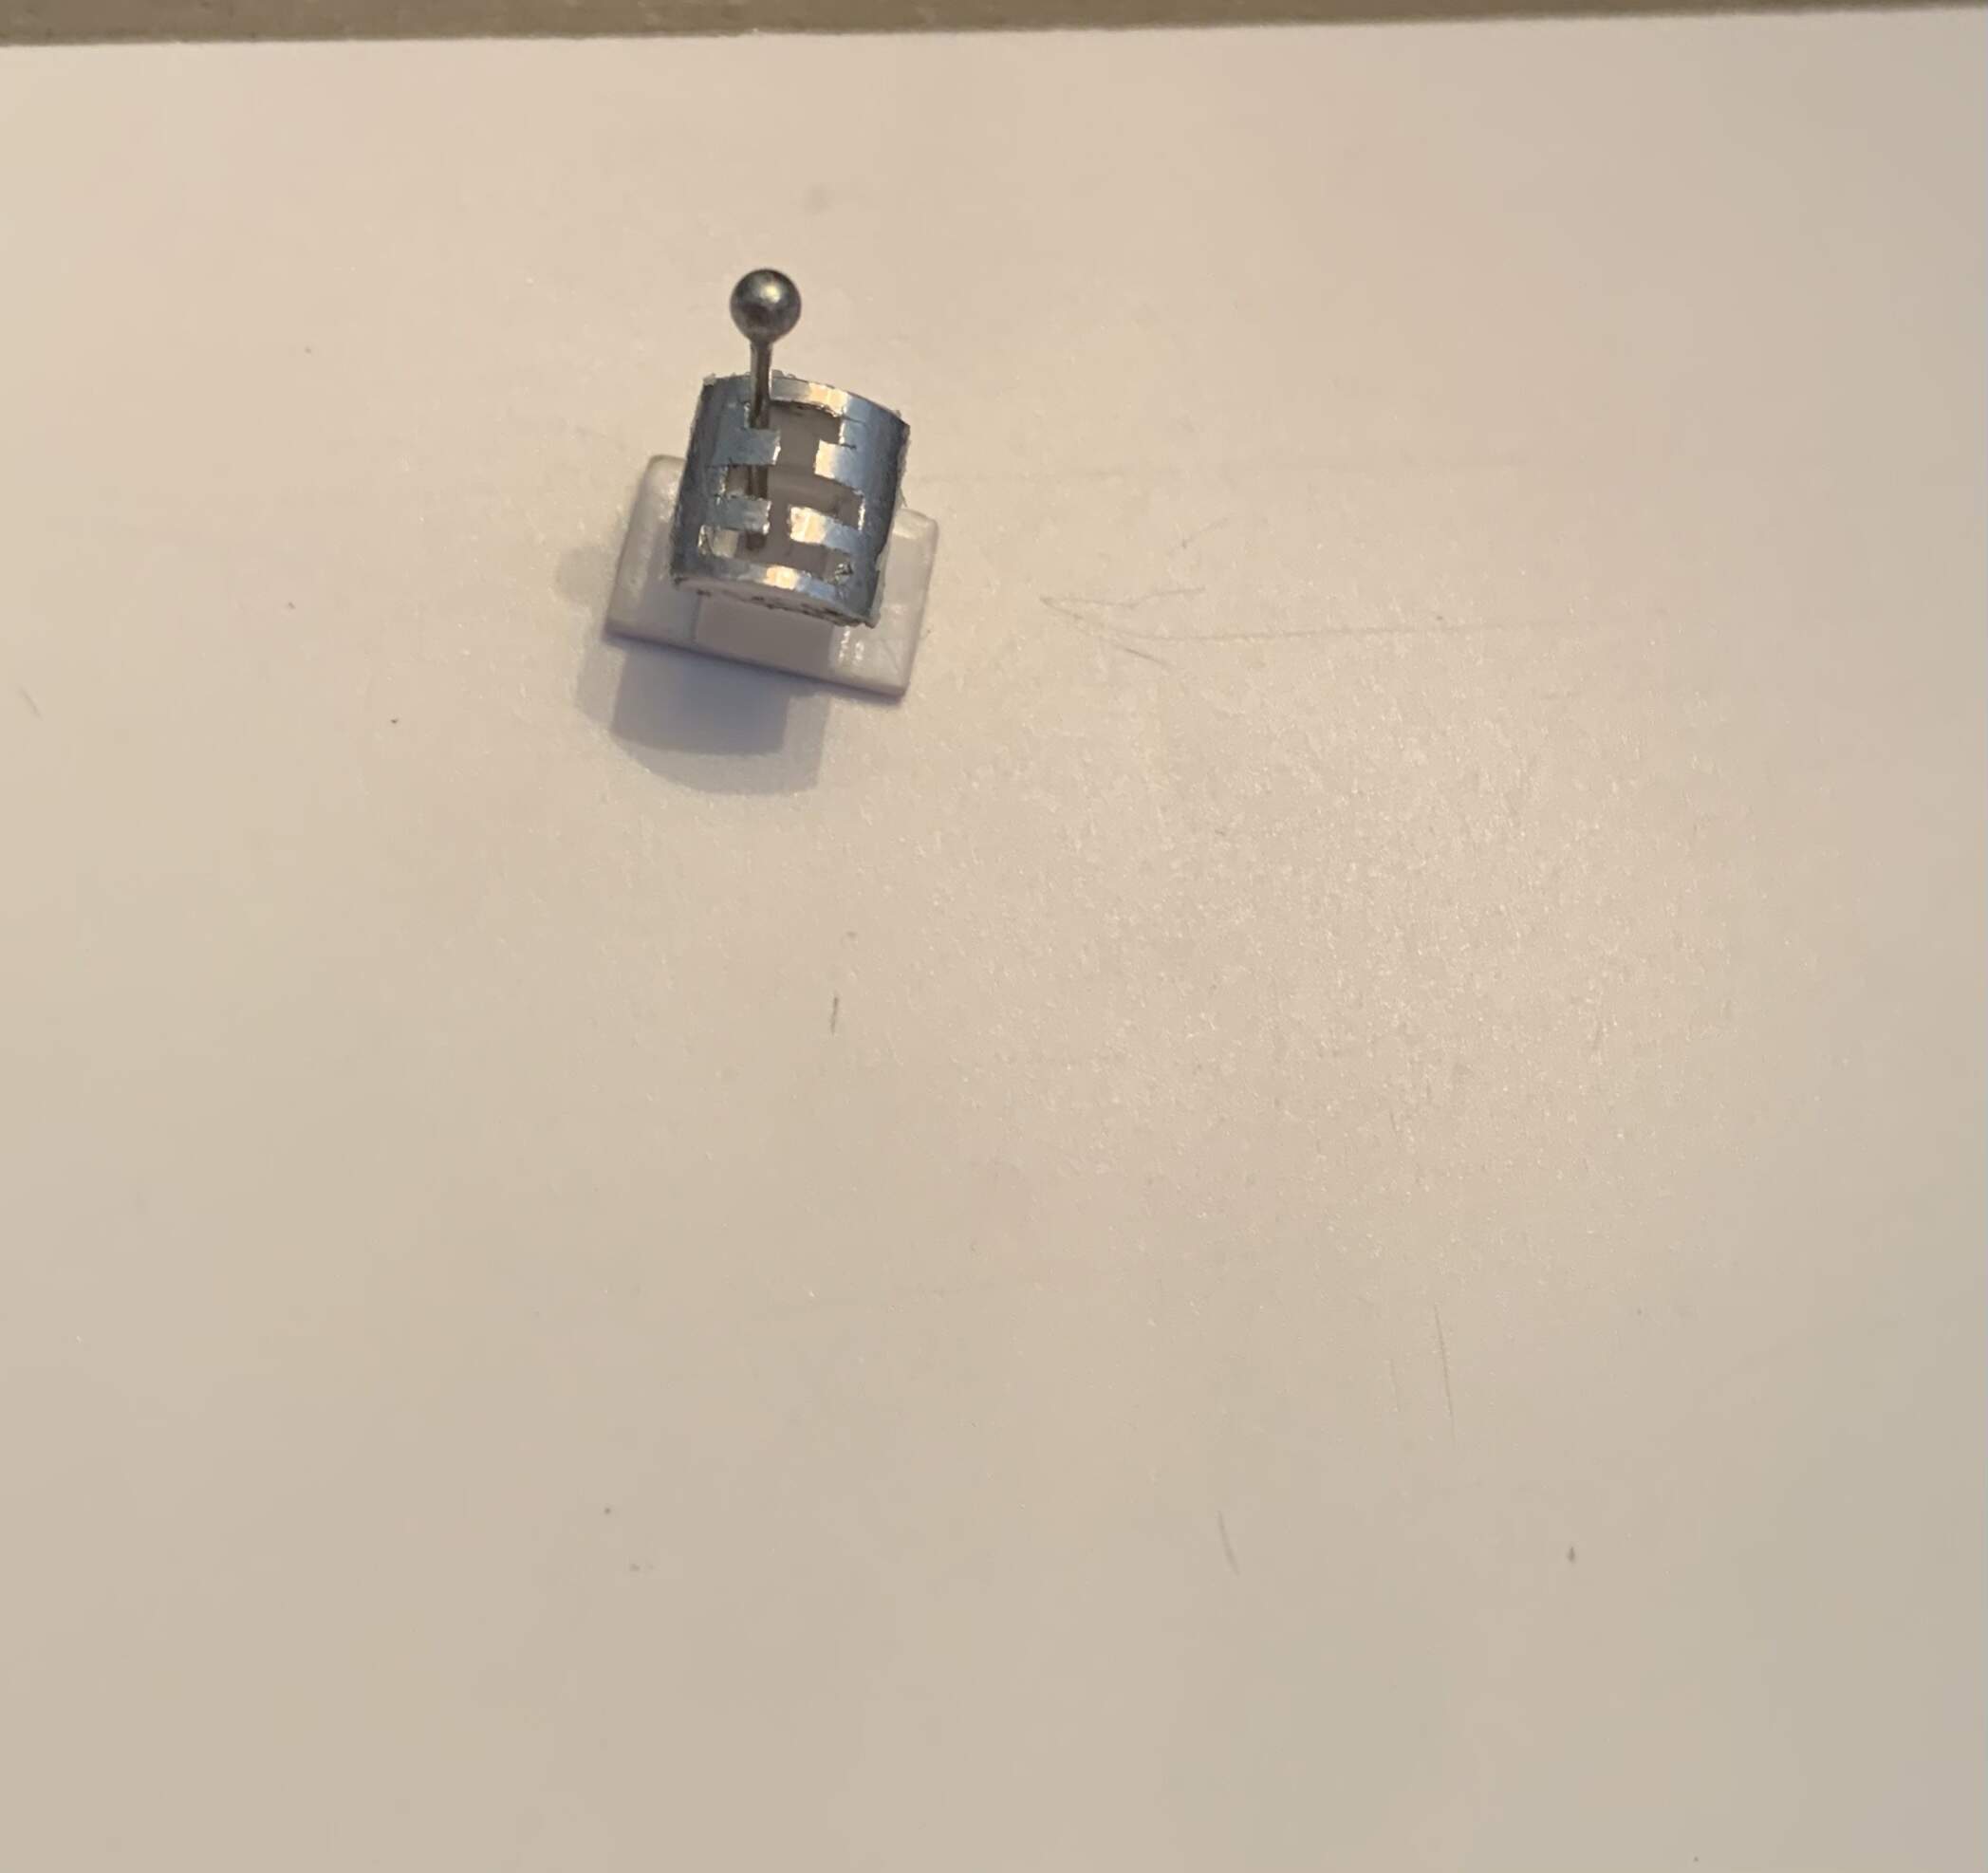
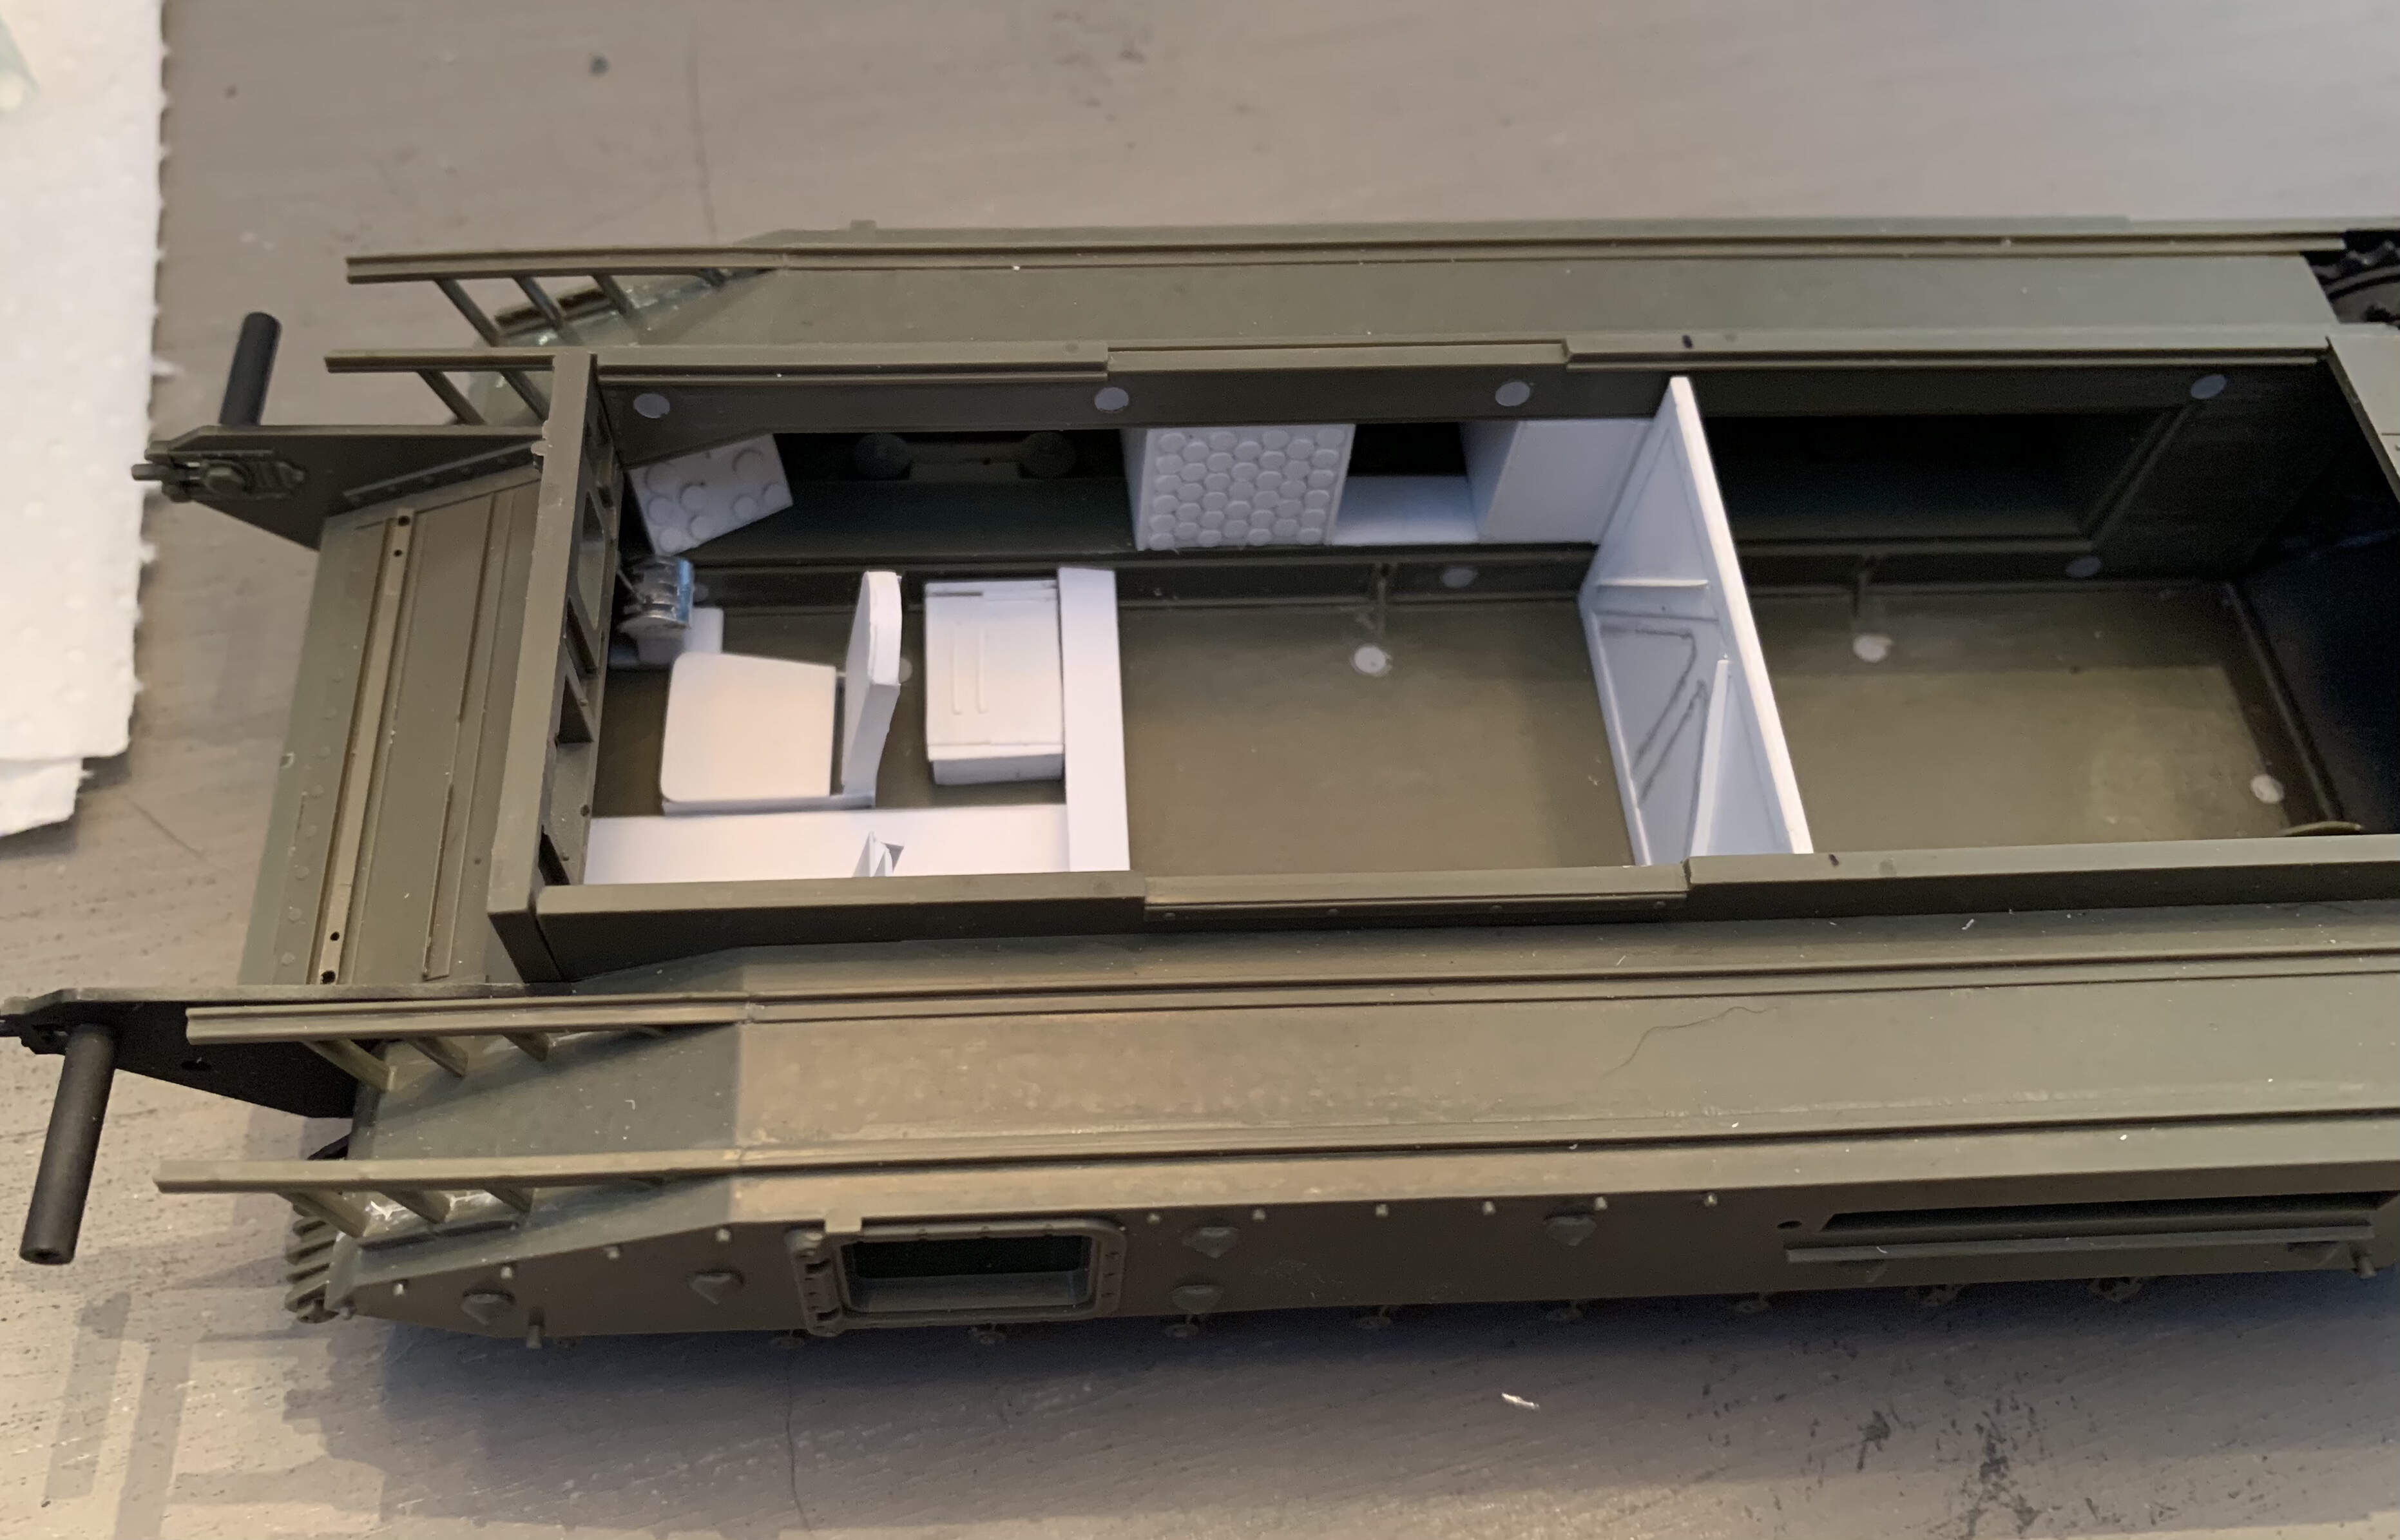
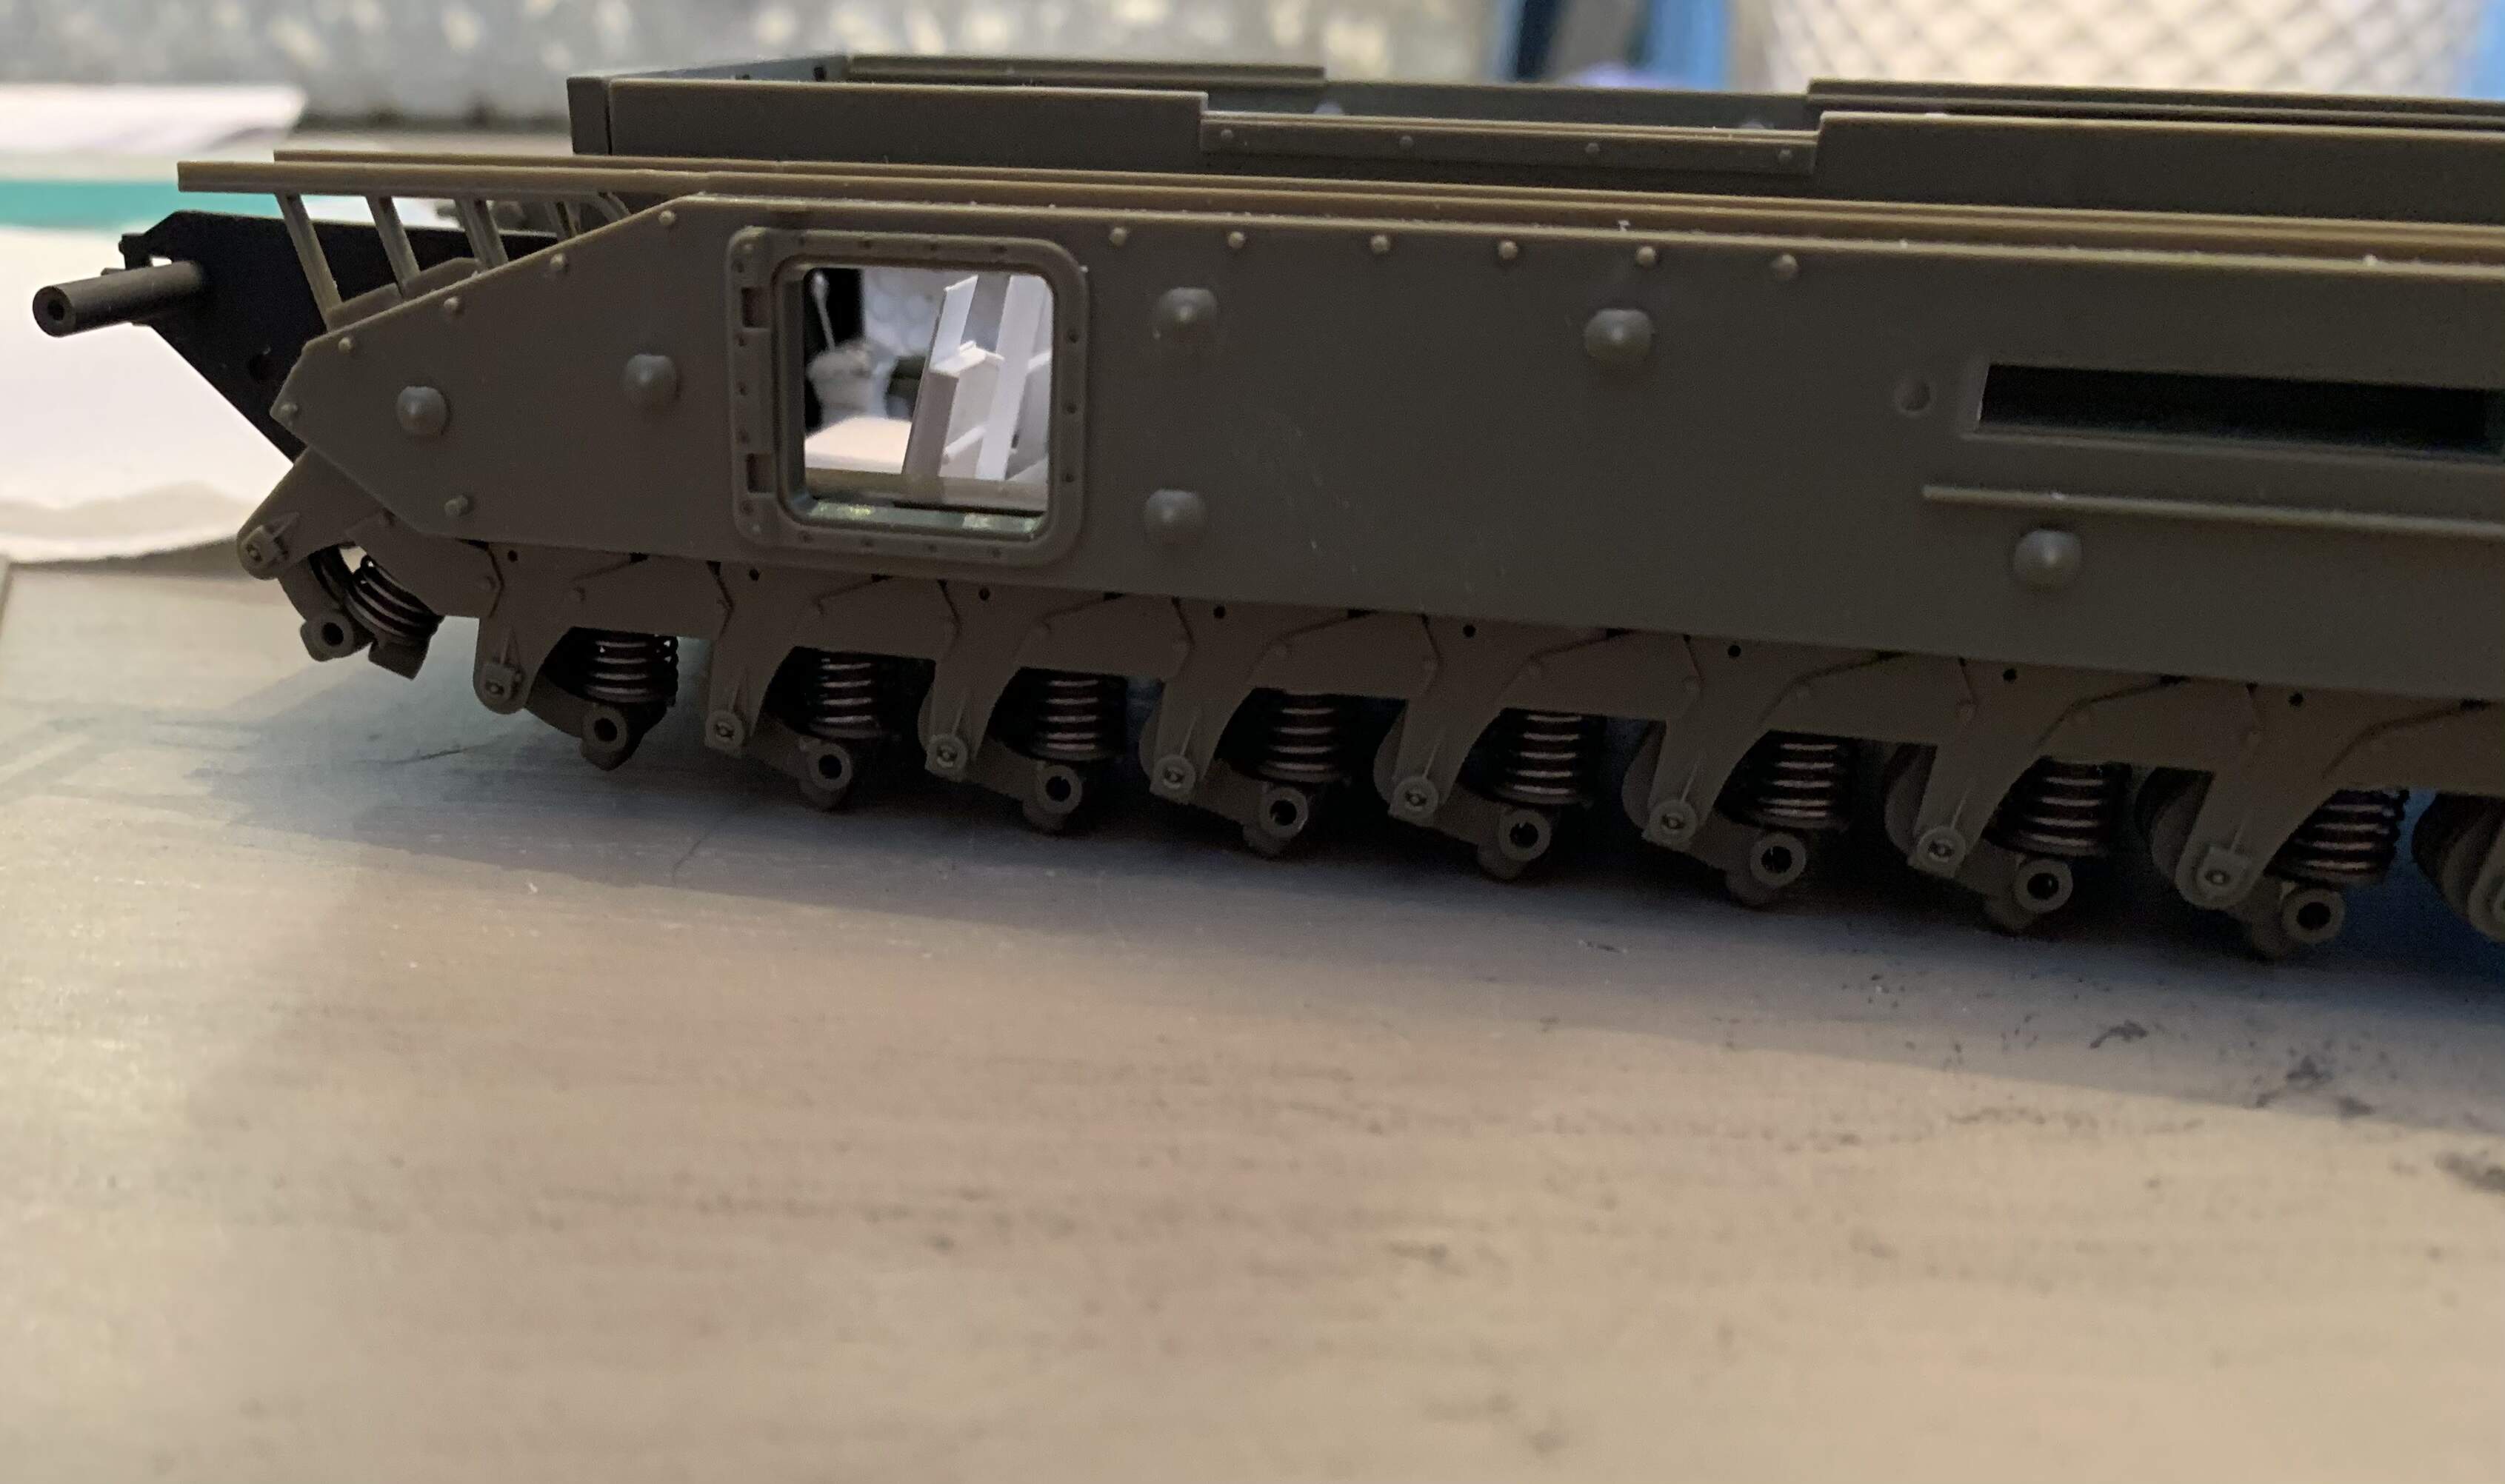
Alright, small update, chugging away on the interior. I reworked the shifter yet again…, I noticed from a picture of a different angle that it was wider than I thought and had an extra slot for what I assume is reverse gear. Finished it up and pretty happy with it. Hull interior is almost done, just a few big pieces left to add then details,
Looks amazing! Great job!
Thanks! I’m pretty happy with my first scratch building attempt. I know it ain’t perfect but I am hoping it comes to life with some paint
Hey man that shifter came out wonderful! For a first time scratchbuilder you’re really doing it up in detail and your work is amazing! Keep going! 
A lot of guys, new to scratch building, get disheartened when they have to redo something. You are taking the rework in your stride and doing it very well. Kudos to you.
Thanks! I think I have made everything in the tank more than once, the shifter four times LOL. But each time I redo it I get a new method or technique that makes building something easier, with a bit more confidence. I can definitely see myself doing this on more builds go forward. Not a full interior, but scratching up small parts to add detail!
Holy! That’s a whole new level. Very impressive
@Mead93 isn’t the only one who can scratch build.
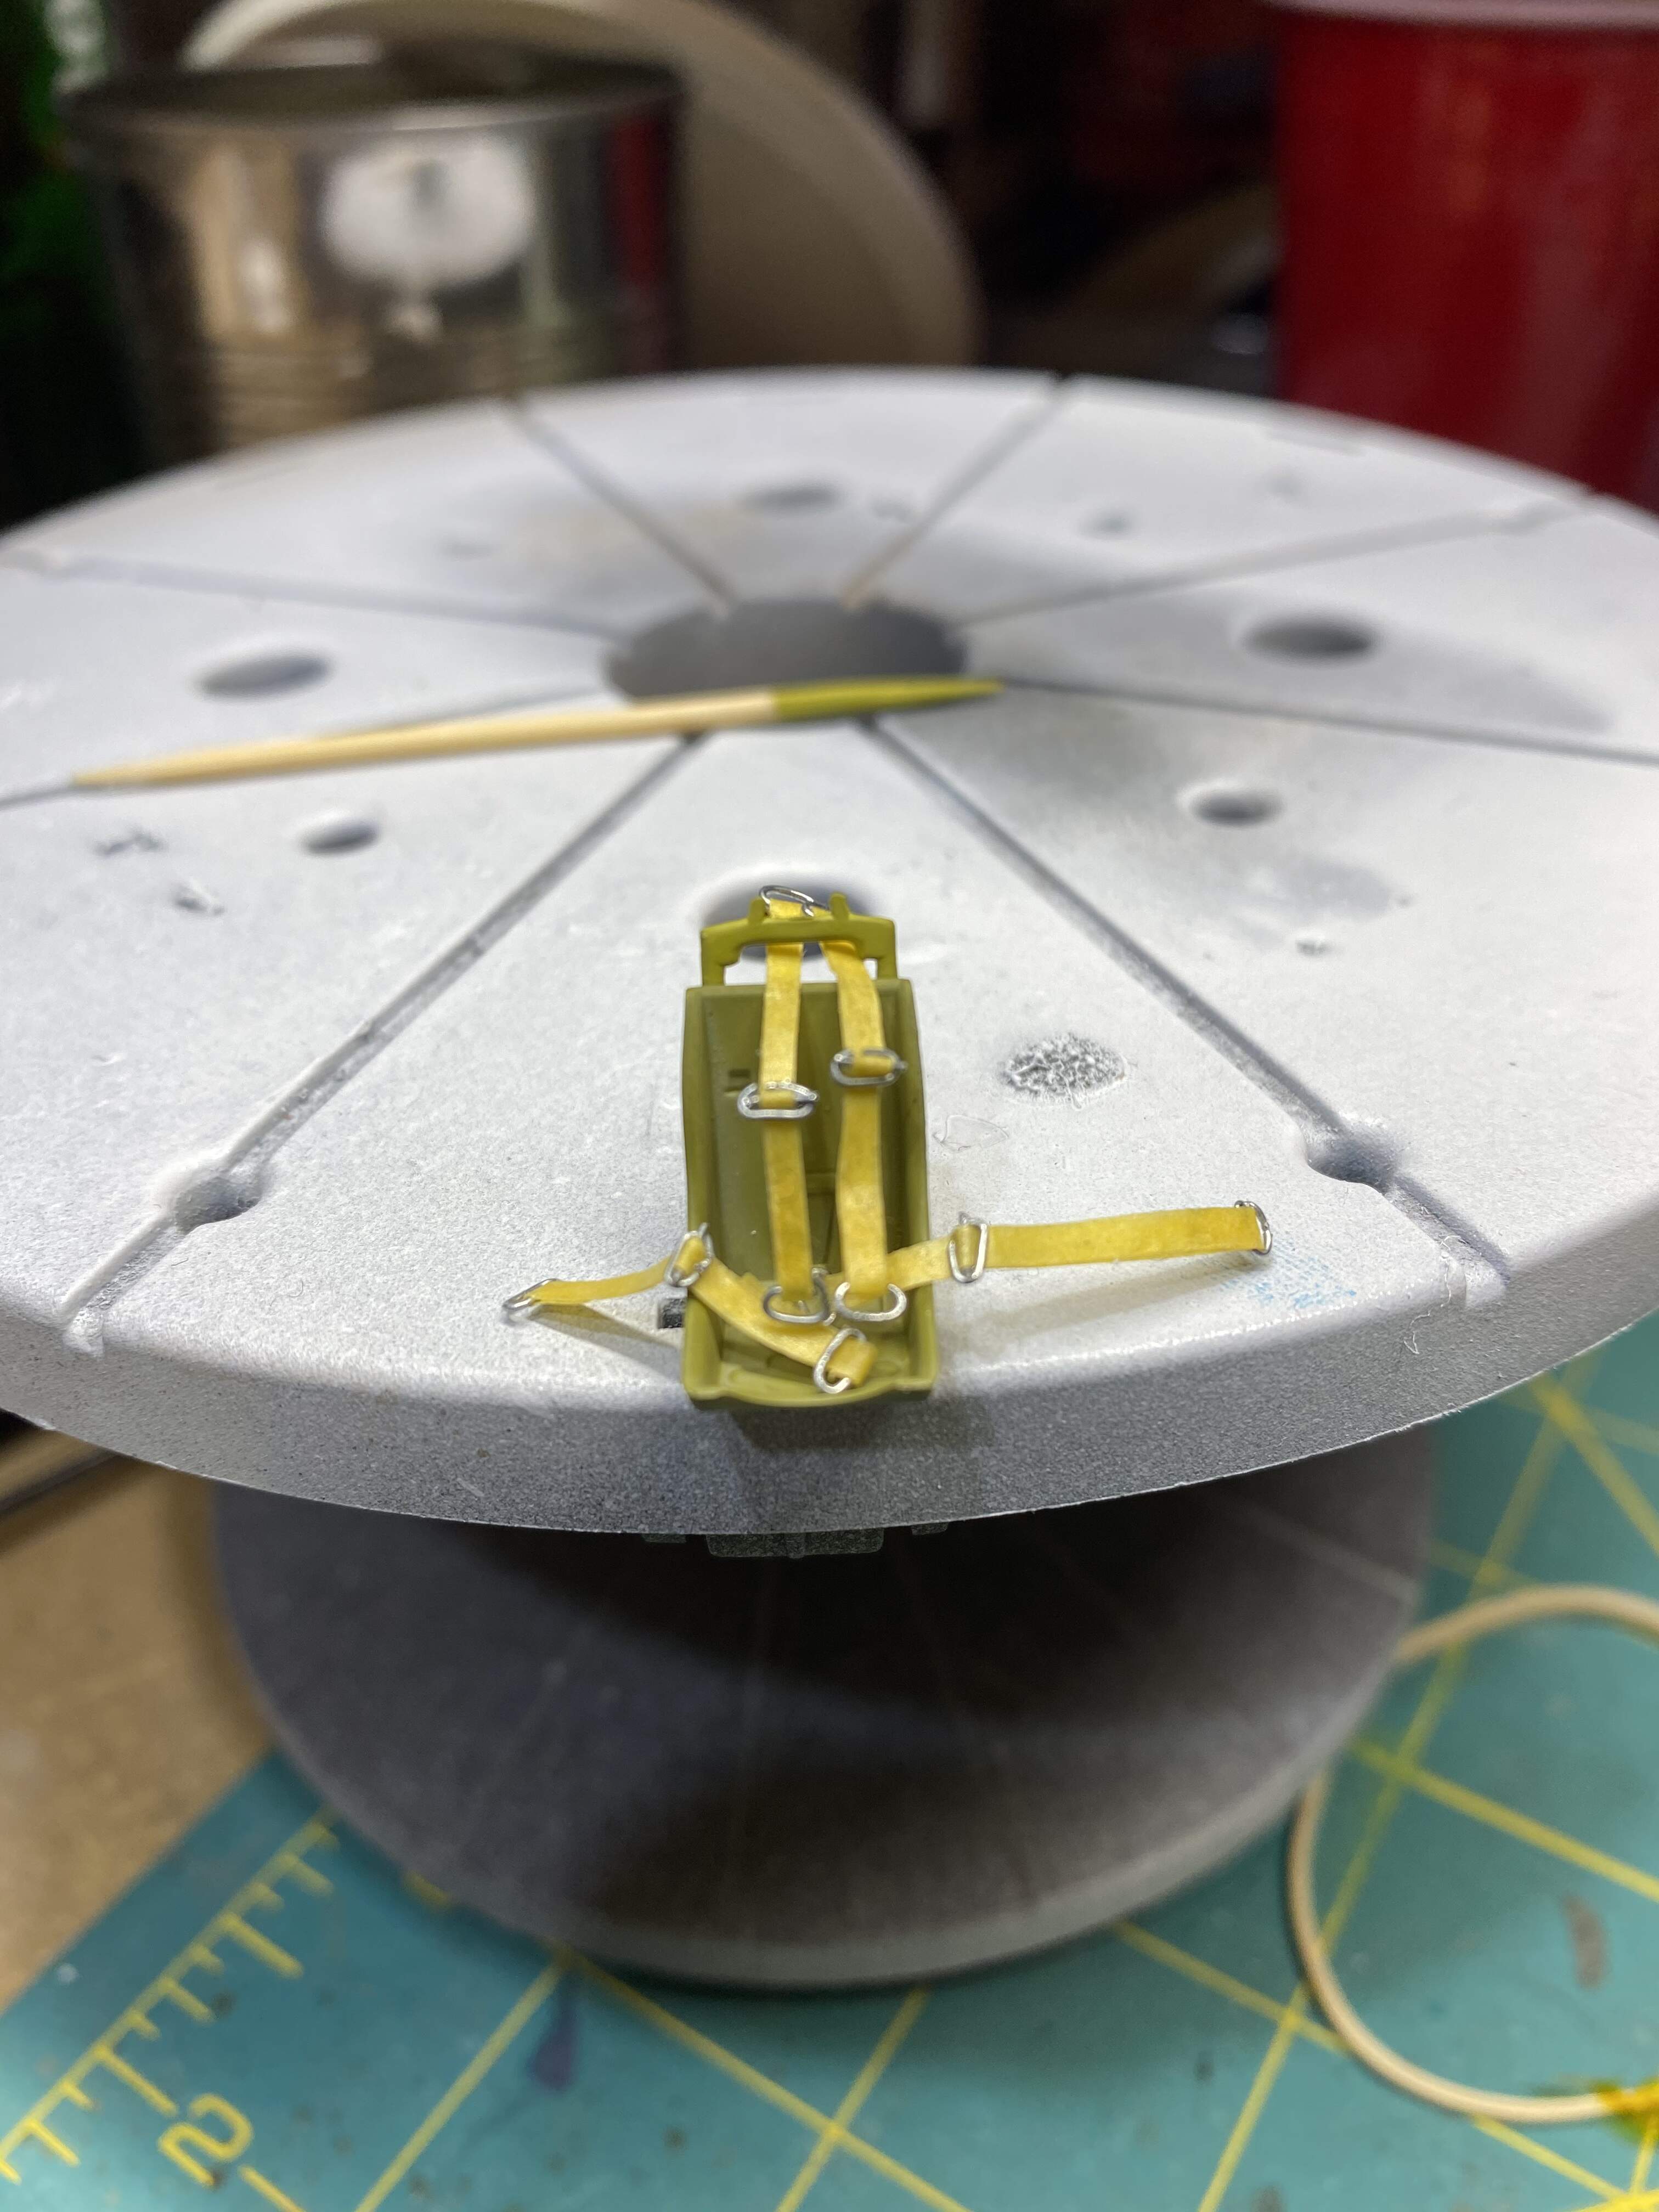
Some (slightly oversized) seatbelts for my Mustang. I don’t think my fingers will allow me to work with anything smaller.
They’re made from Tamiya tape and some 28g wire. Idea and technique courtesy Dave’s Model Workshop
Those look really nice! The wire loops look great
They’re a little fiddly but dead simple once you get the hang of it. I’ll be using this to replicate straps and tie downs for future builds too.
Dave’s production values aren’t the highest, but he’s very talented. He’s actually got a series of videos on scratch building all manner of stuff. You should take a peek.
Excellent Don. Love it when someone takes the plunge to add detail.
Yeah, that Horror Boss Dana needed a lot of work. The underside is almost as much work too… Frustrating it was so bad, but satisfying to see it come together in the end.
It looks great, the work paid off for sure
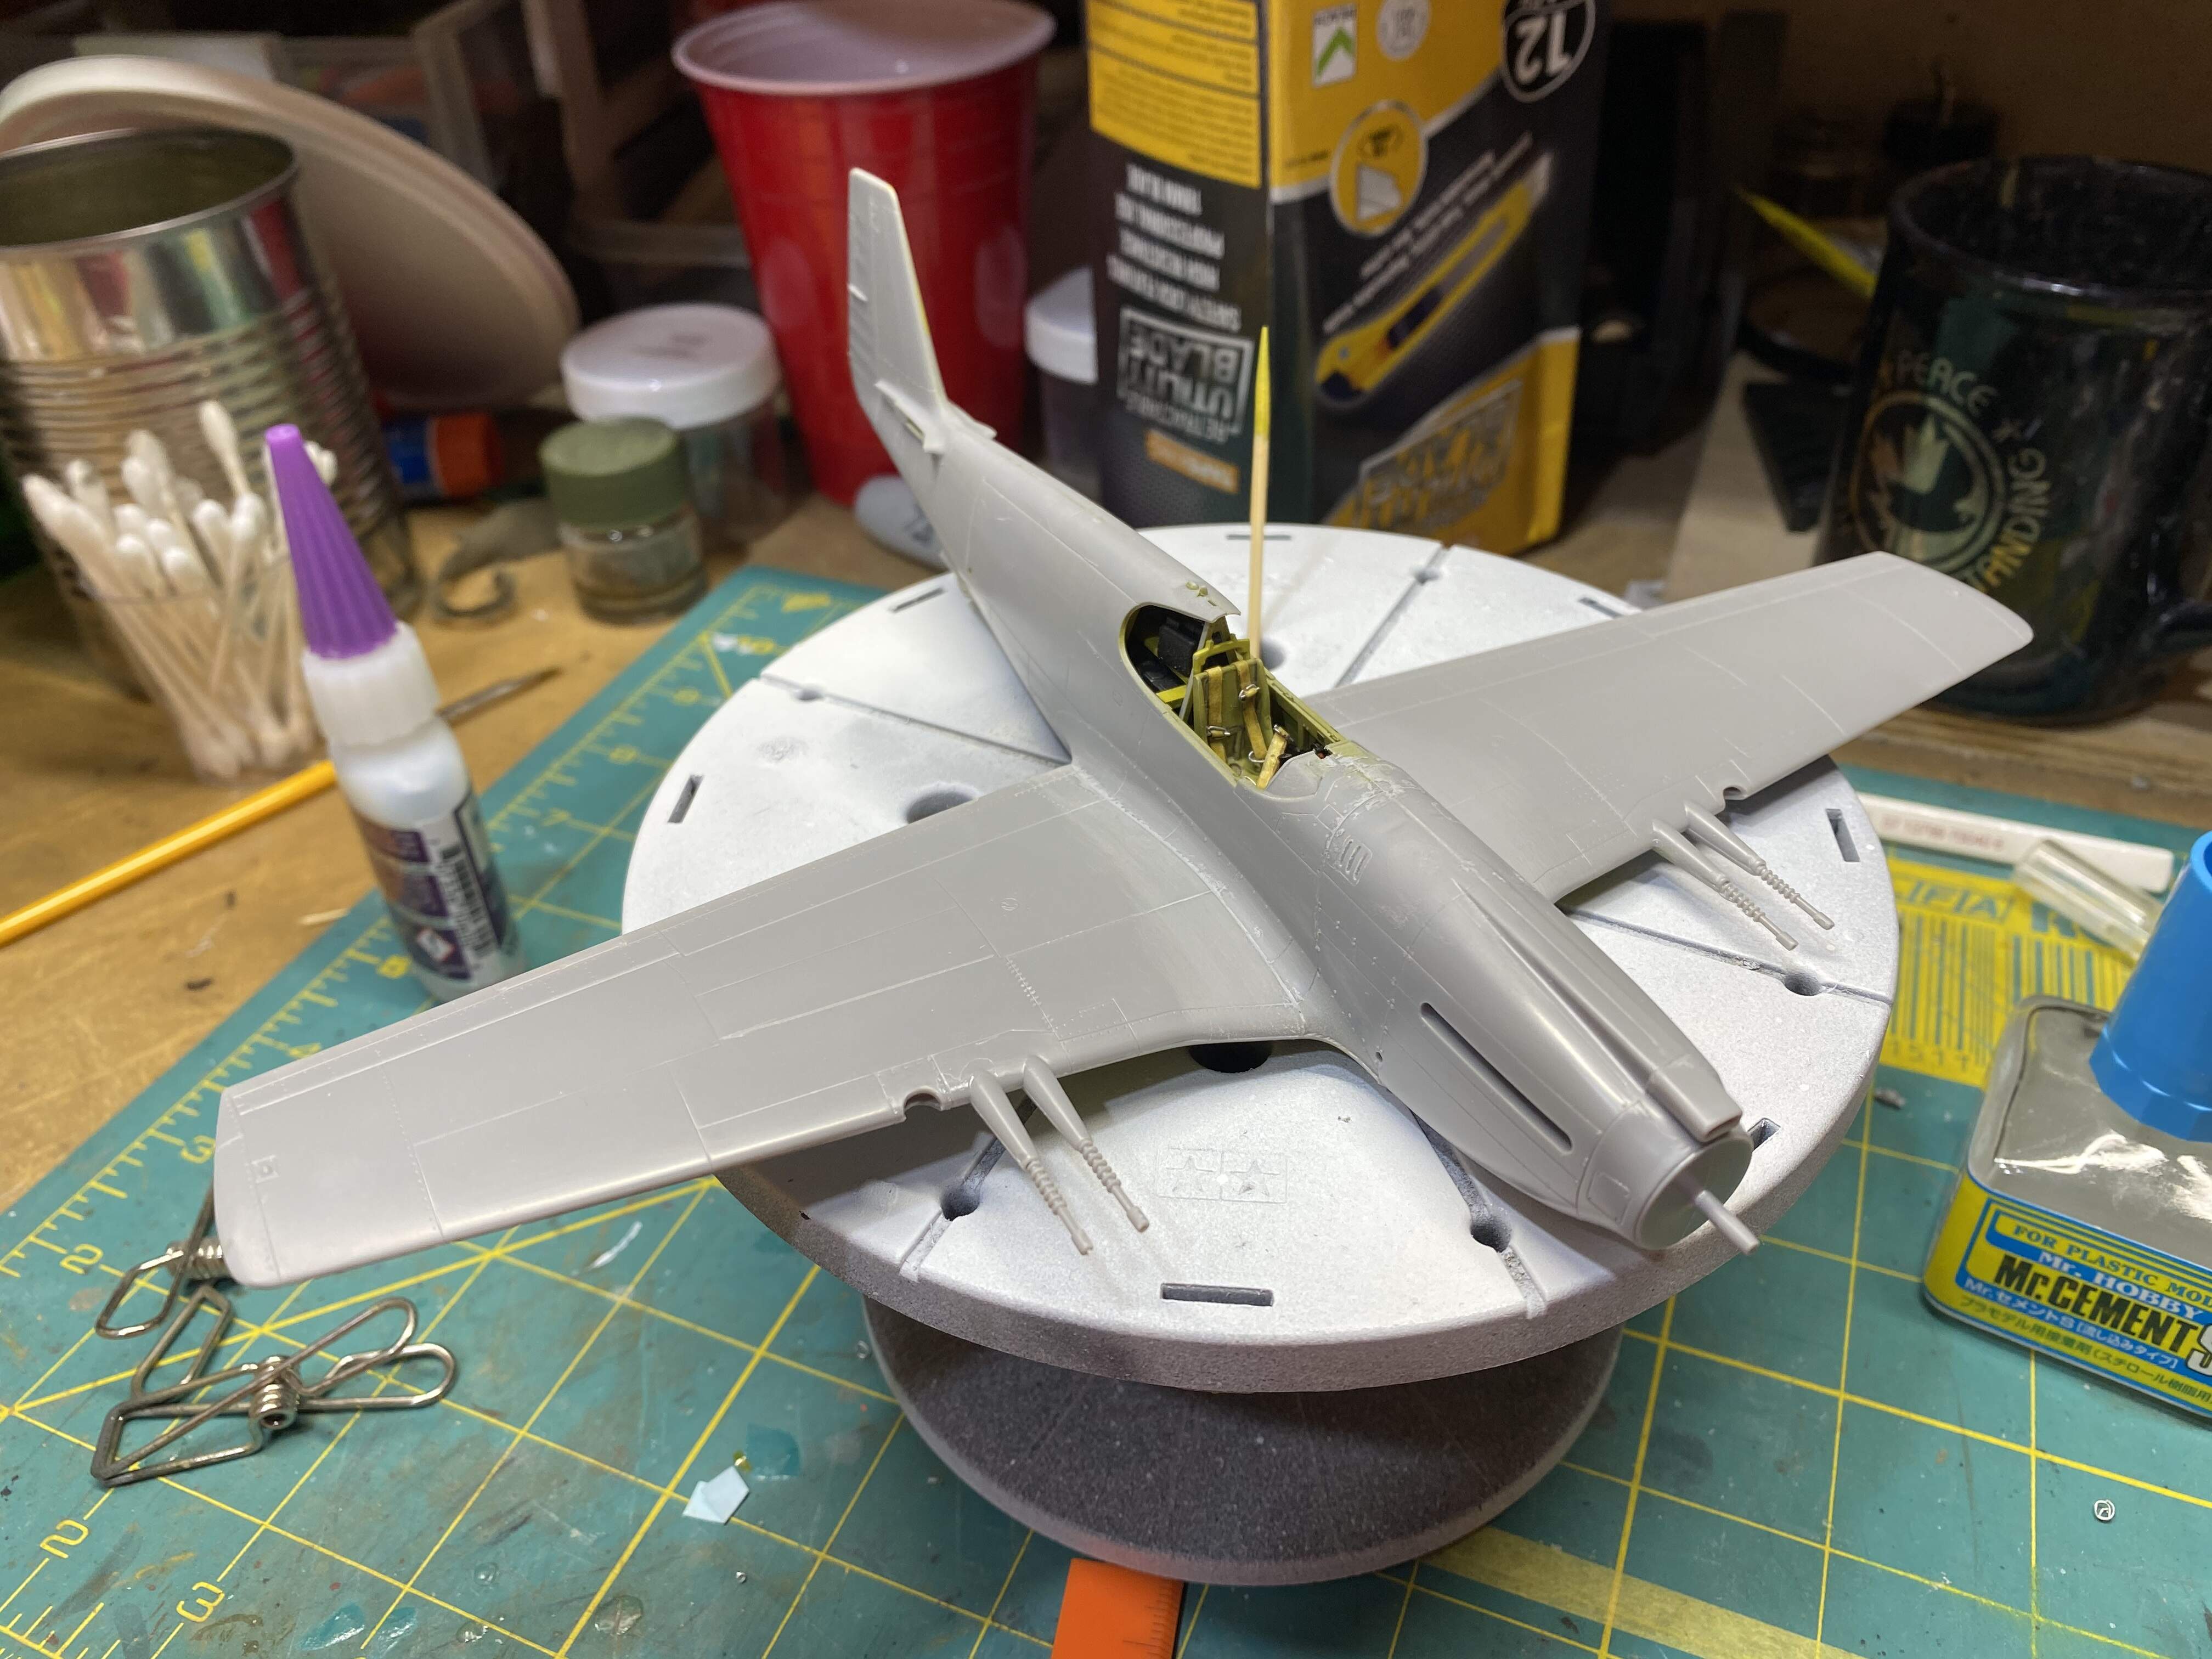
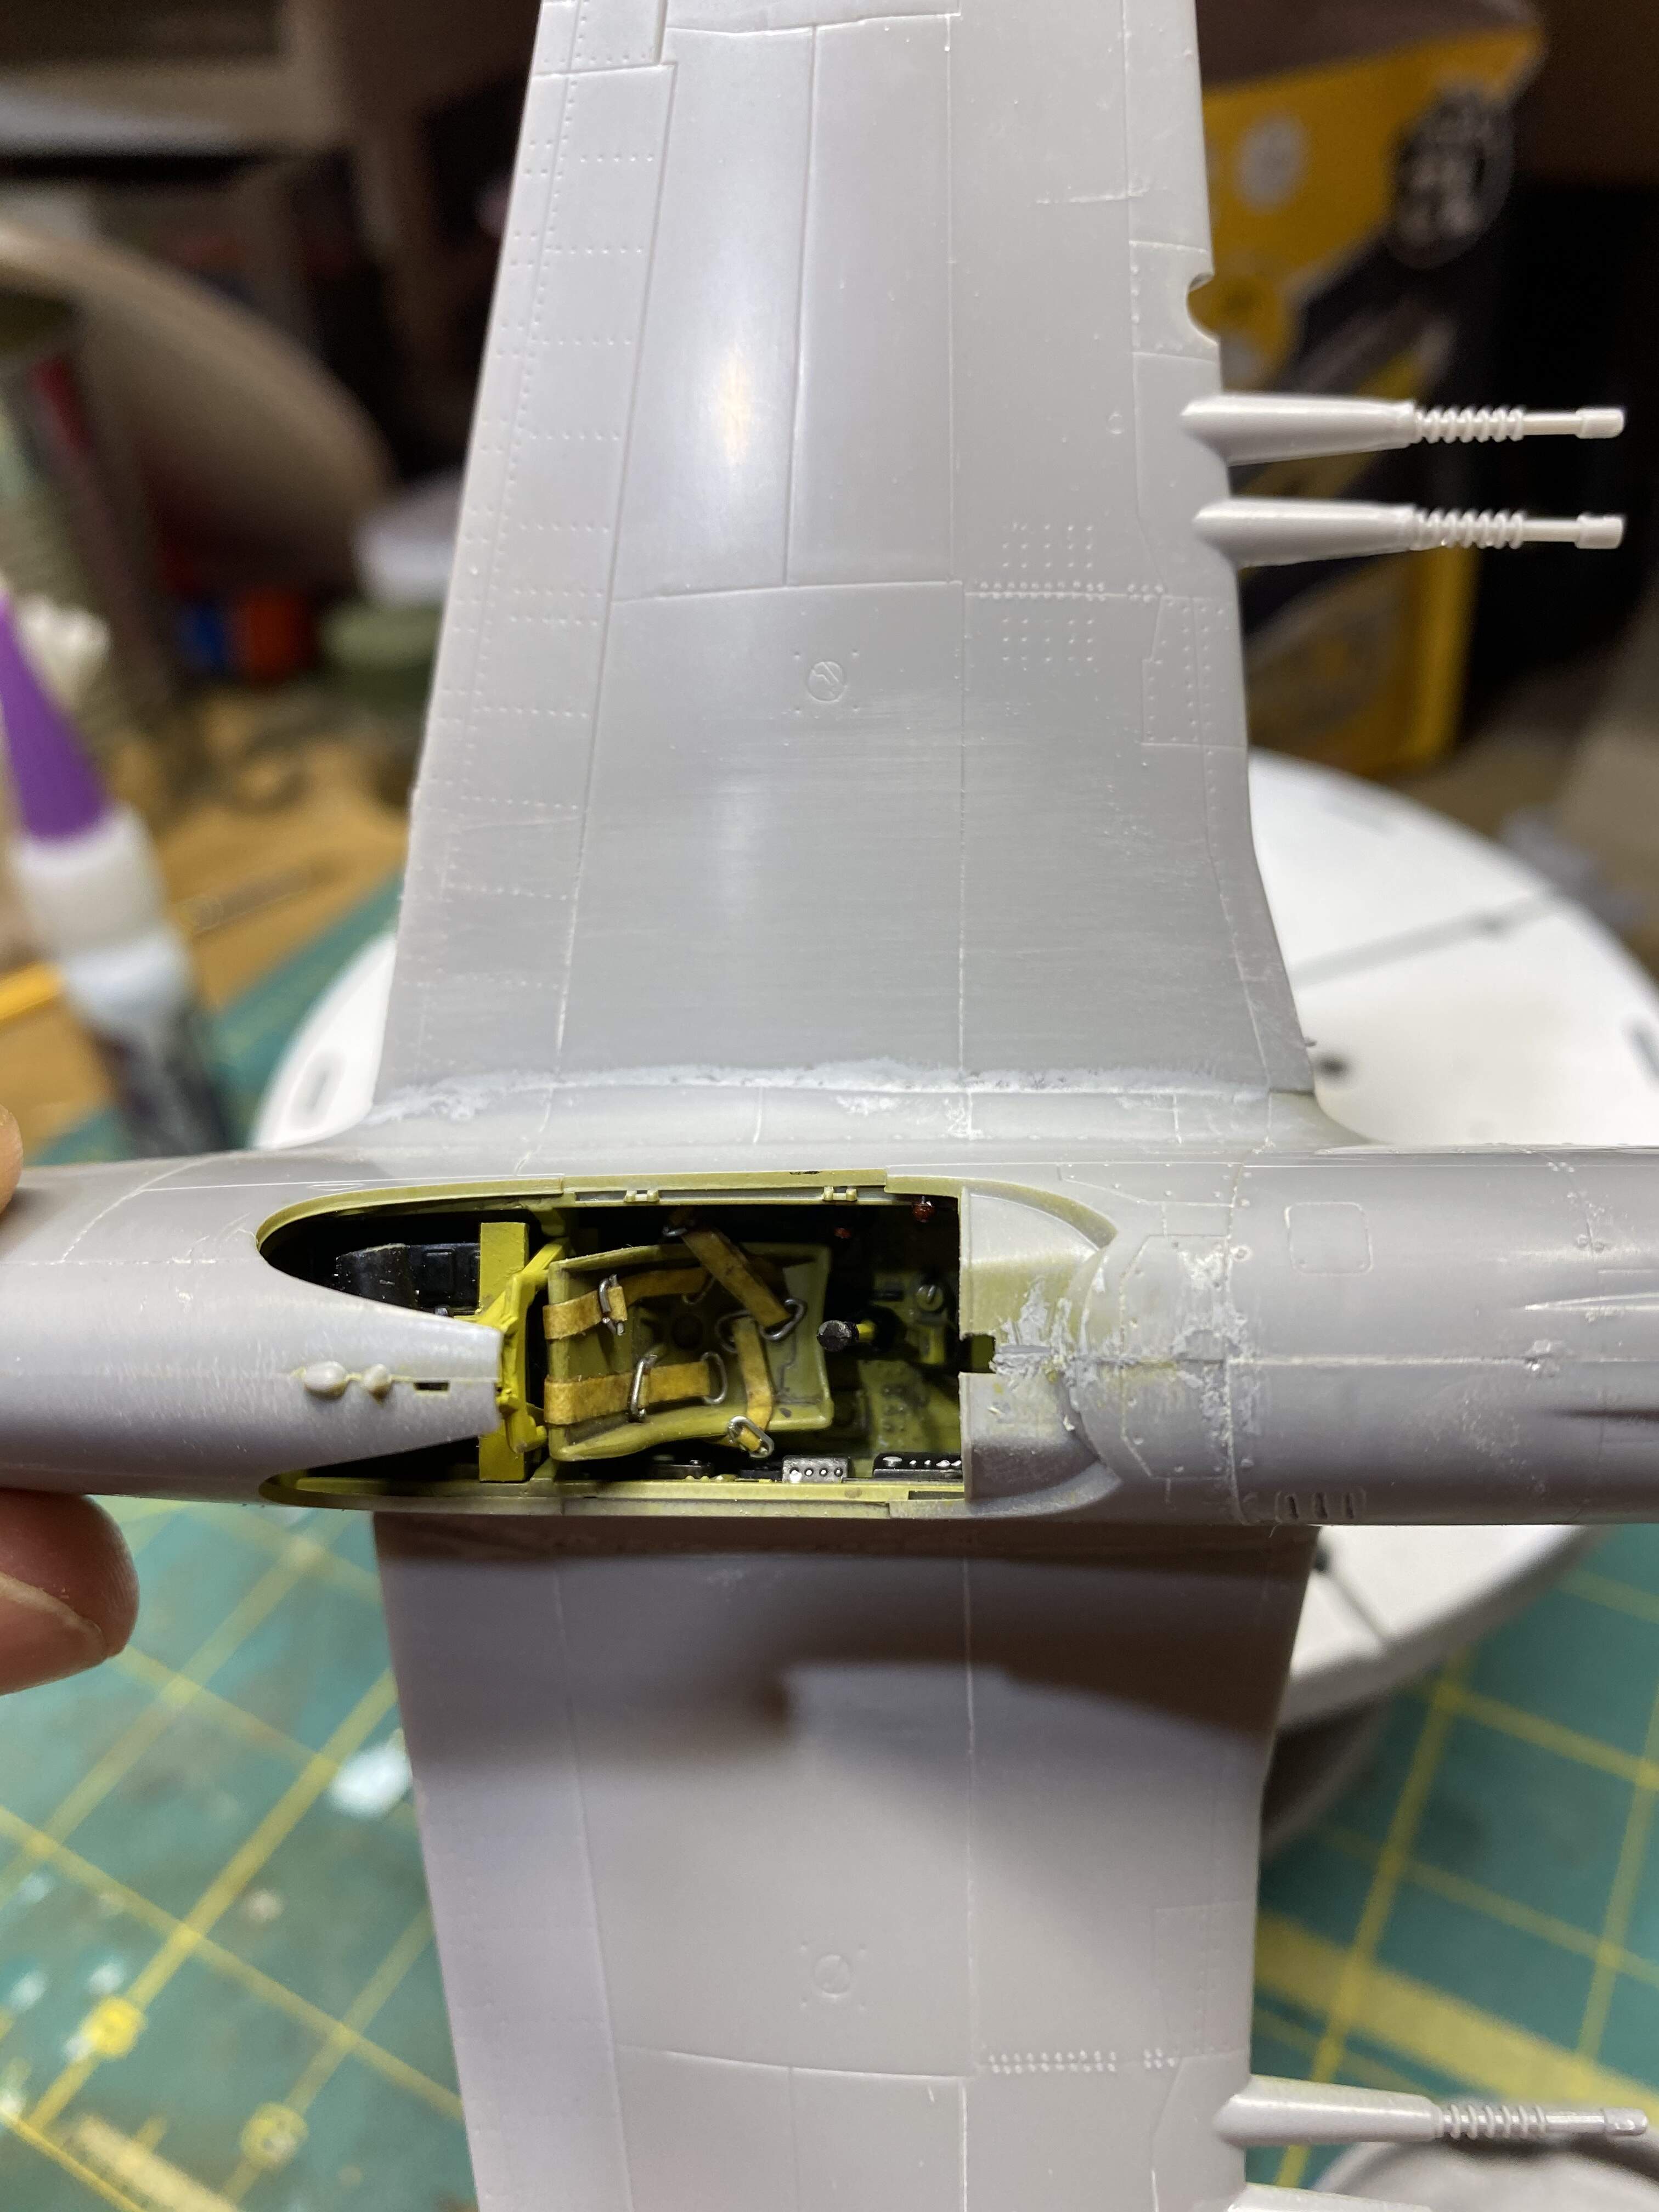
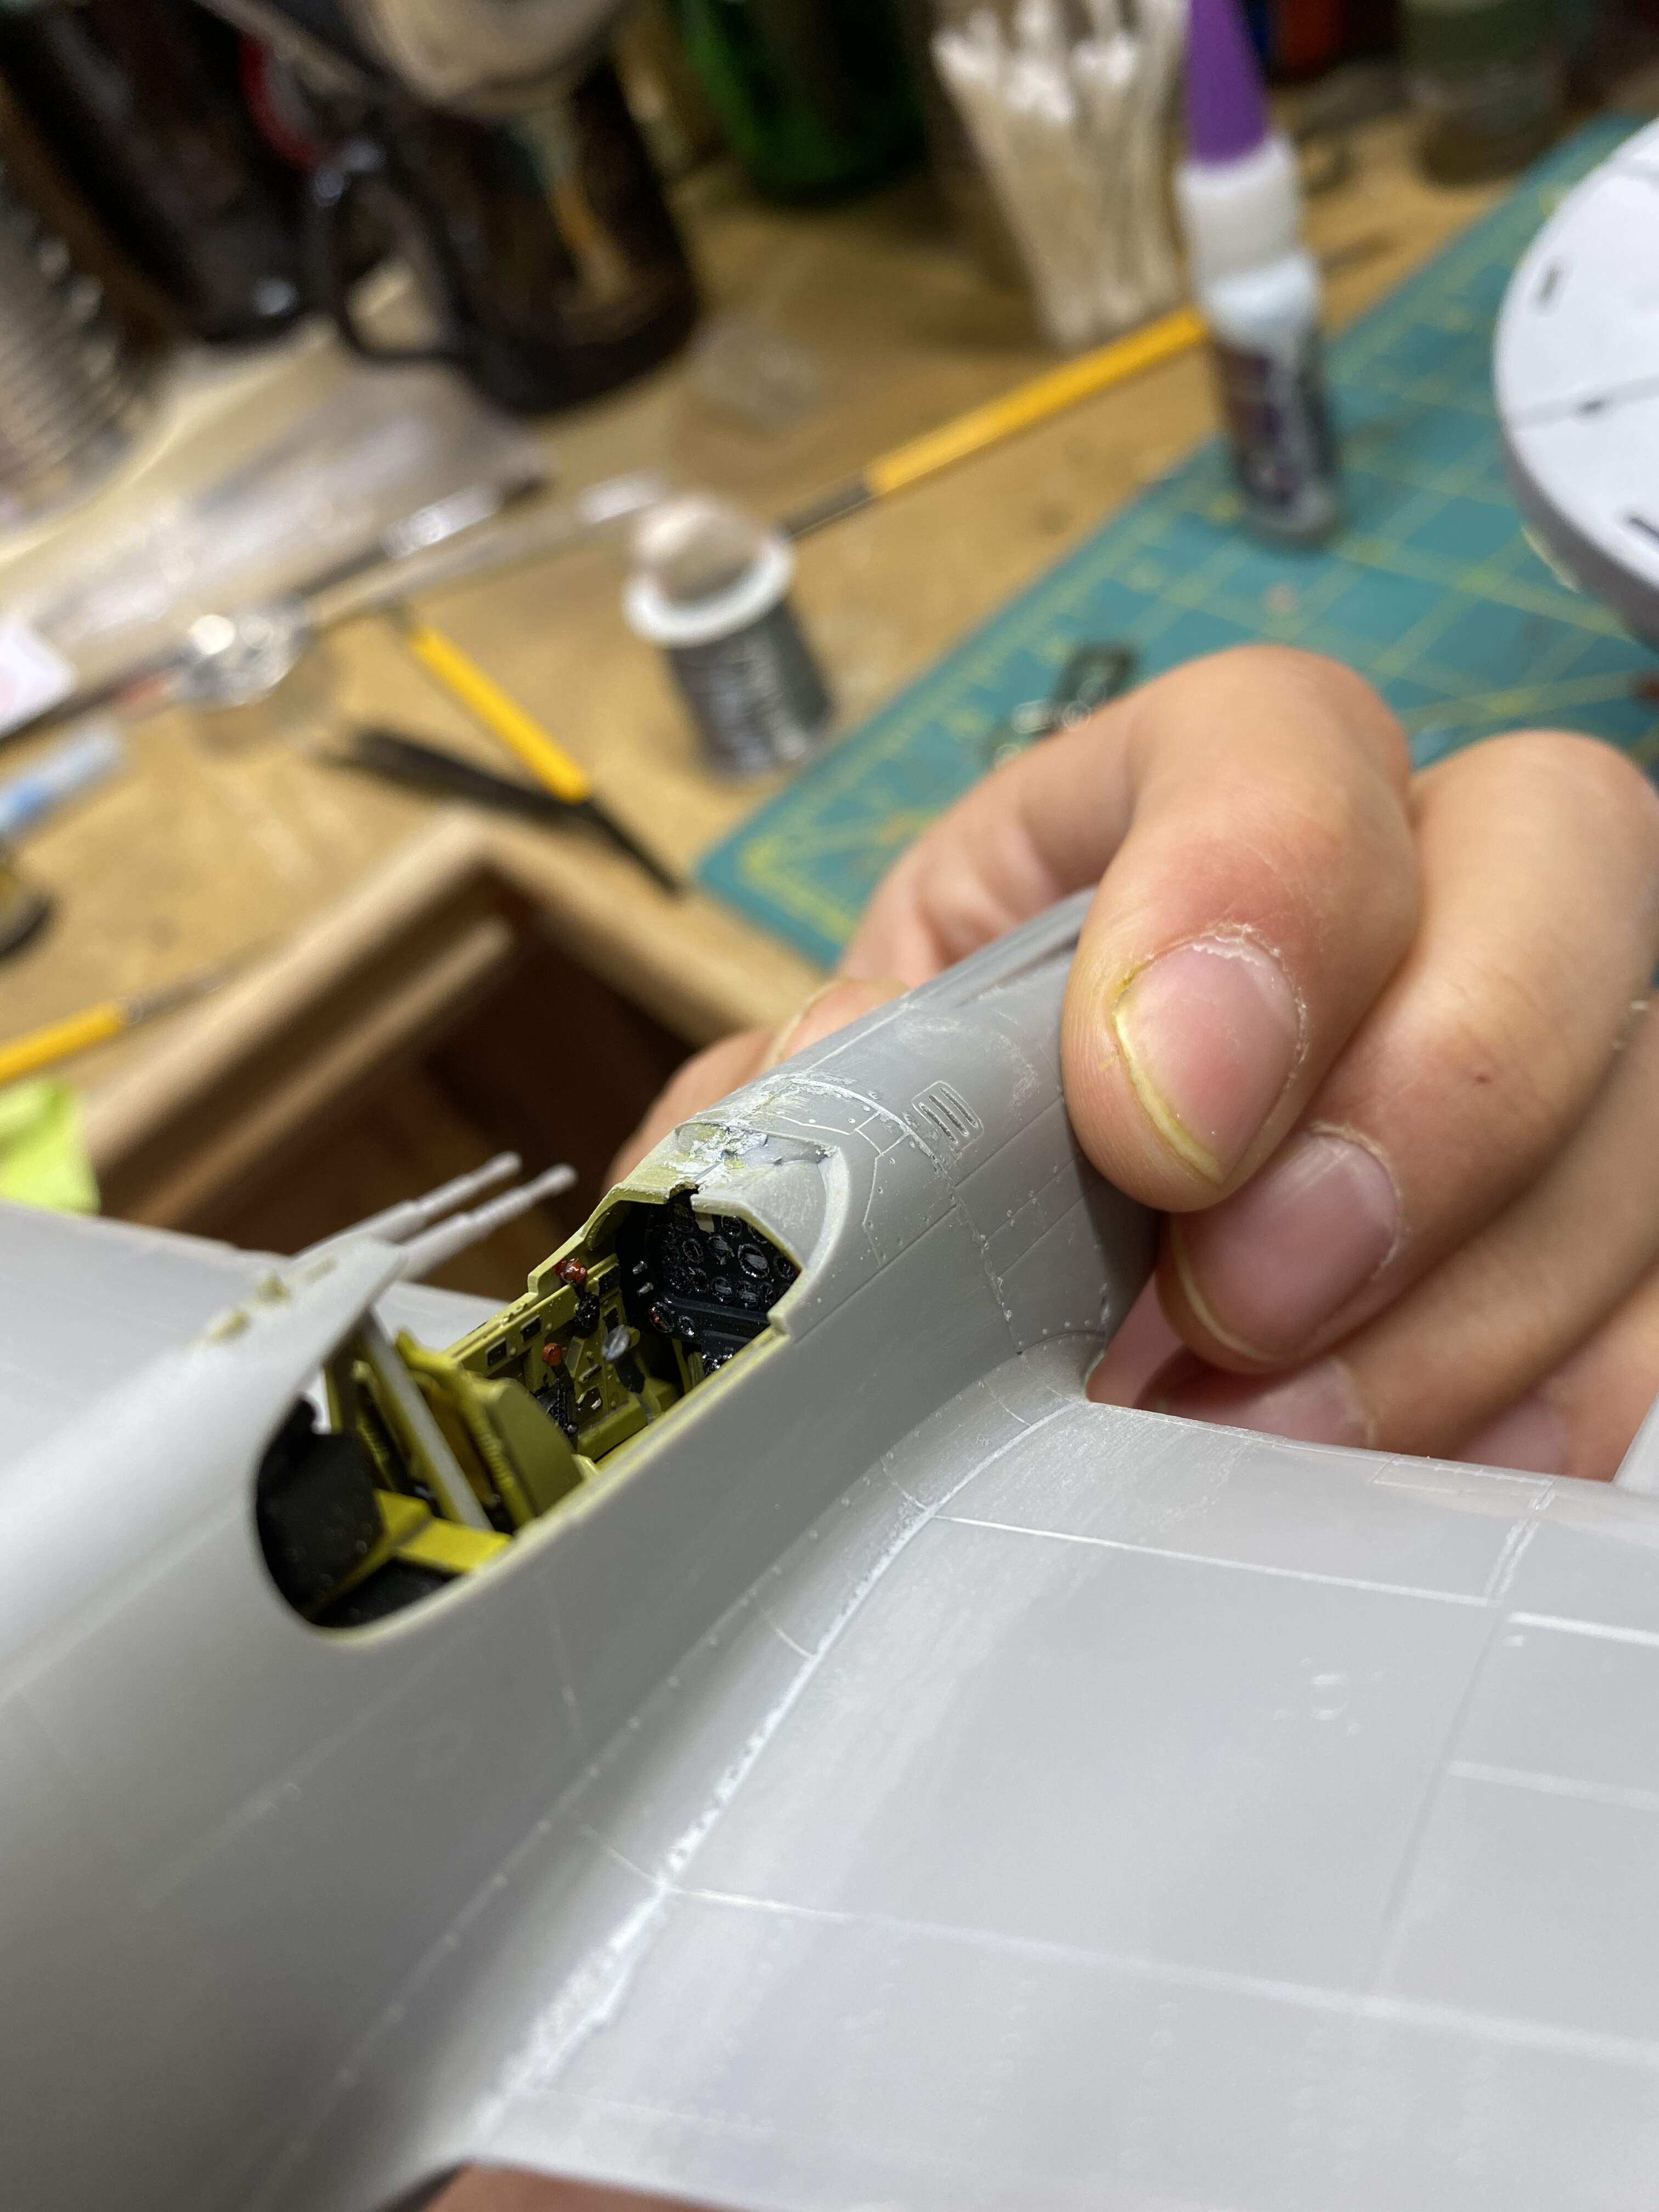
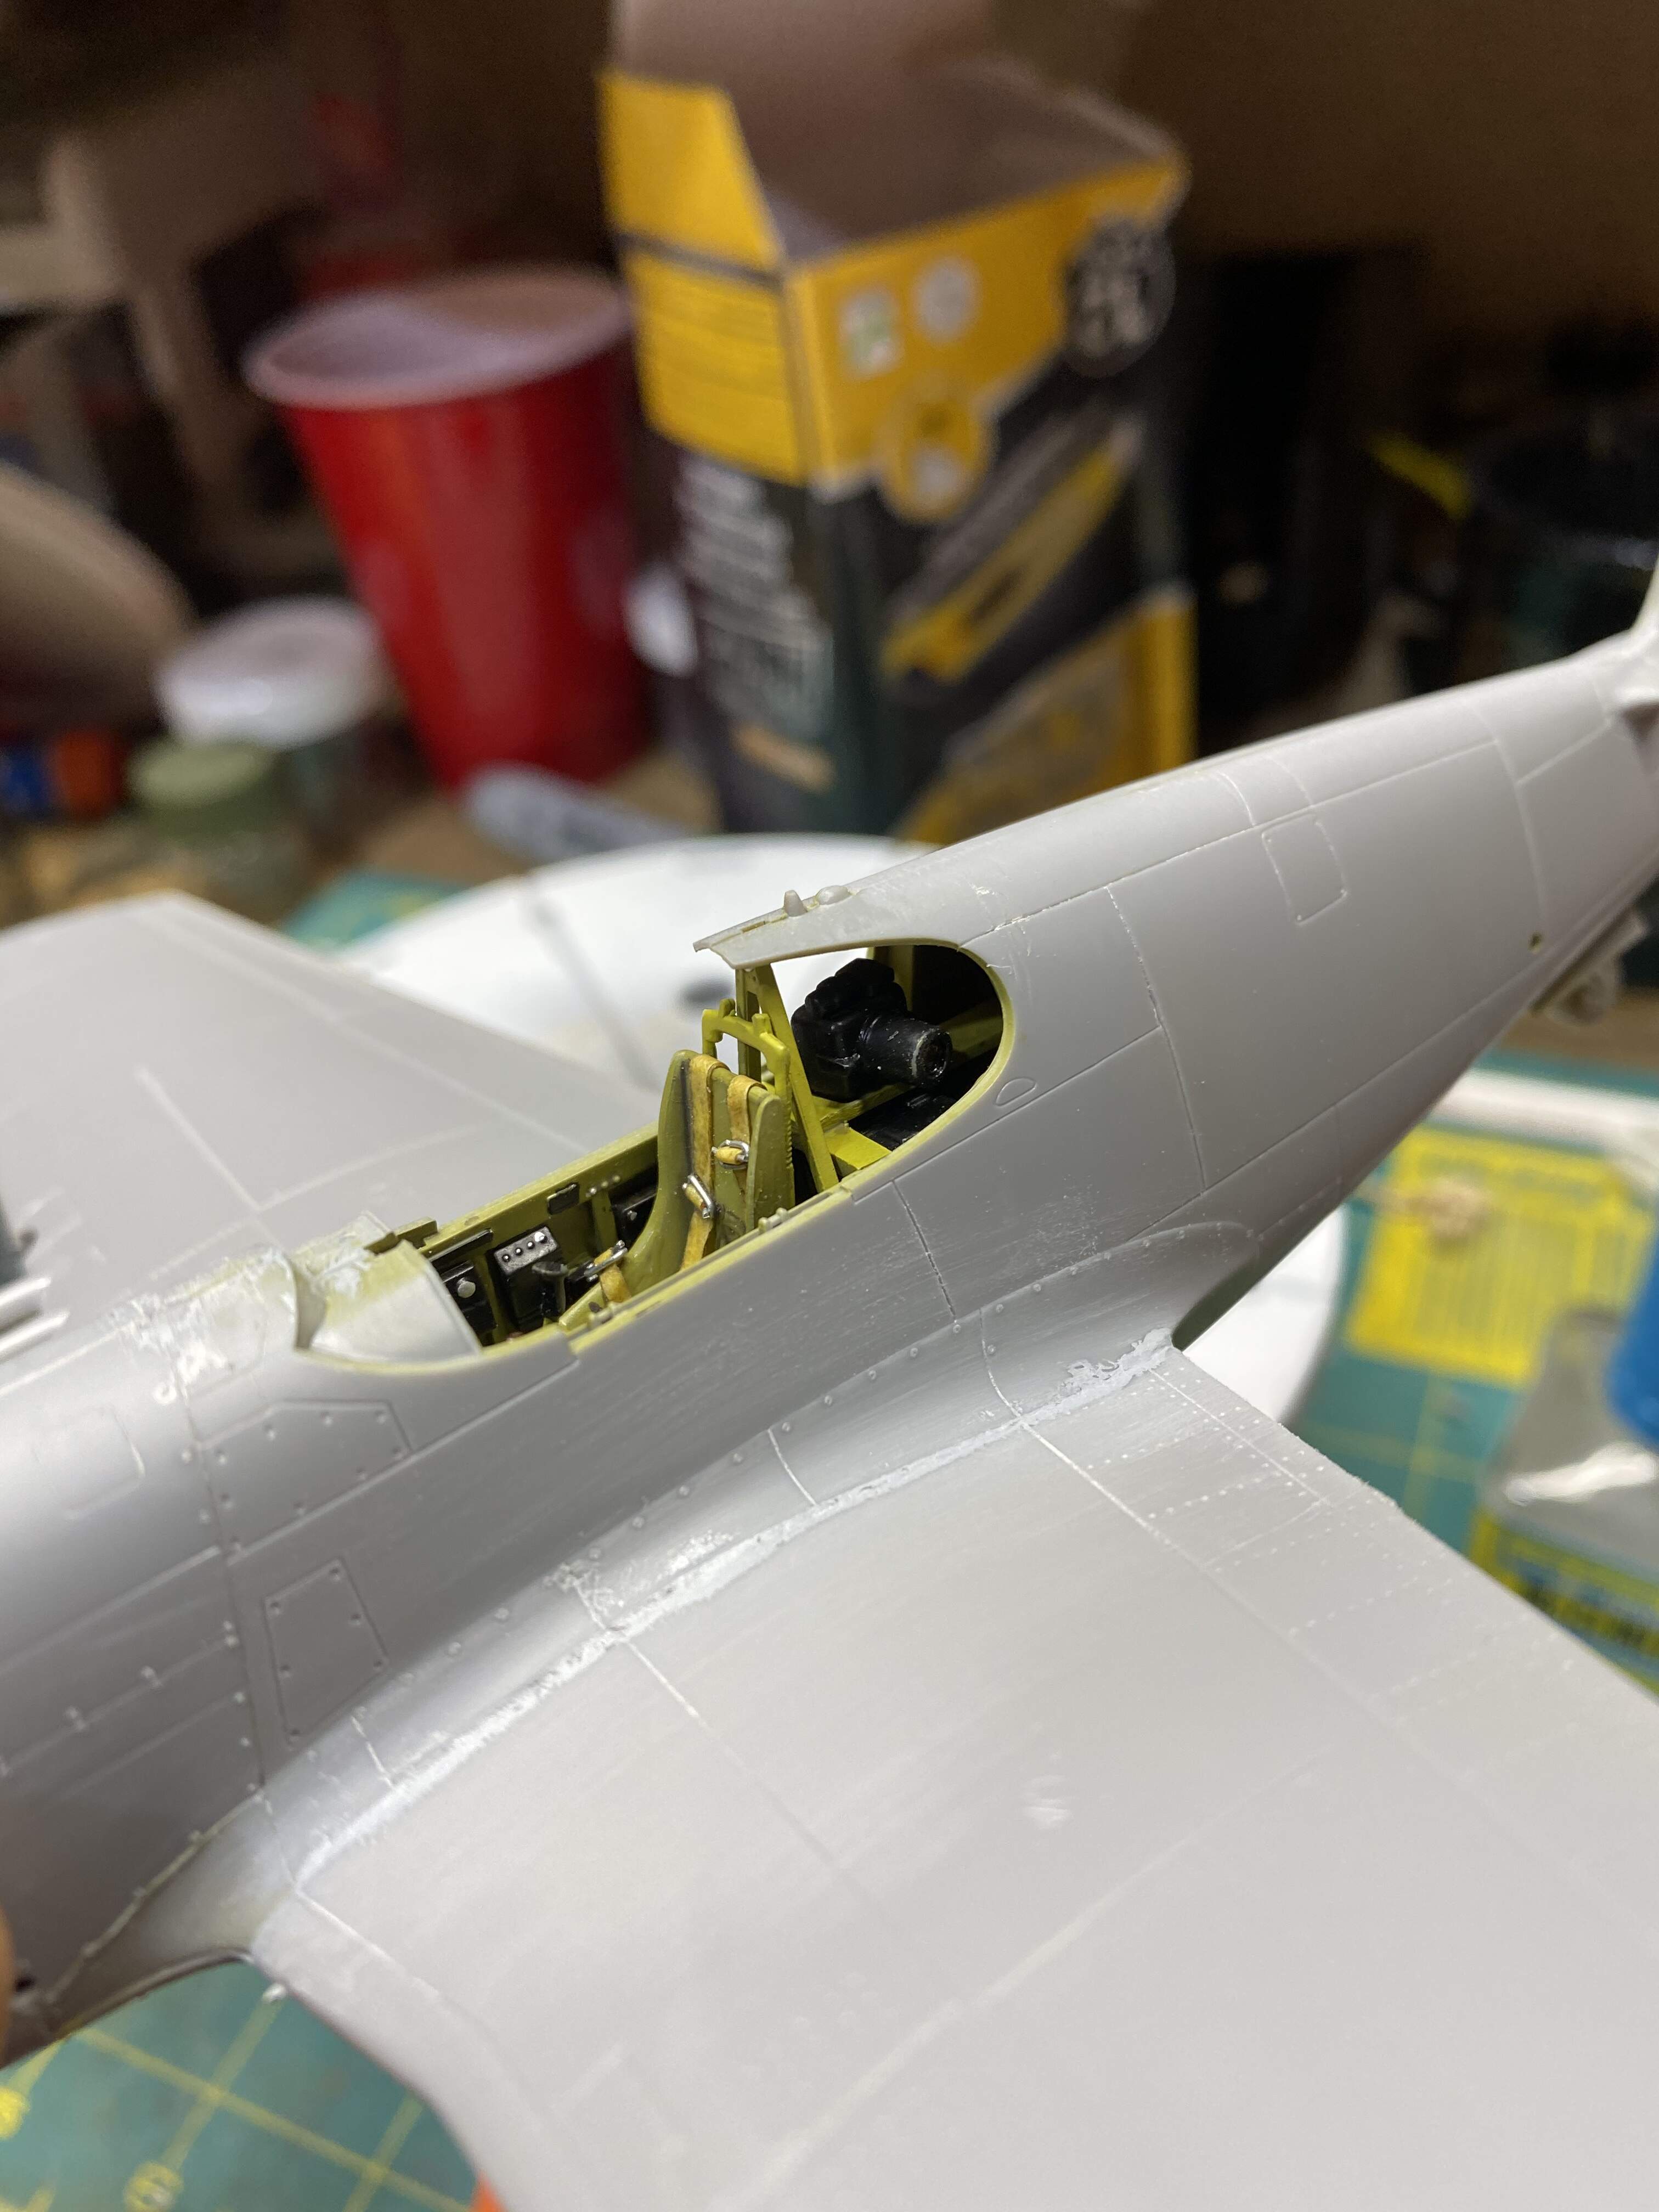
Some more work done on the Mustang this morning. Fuselage and wings have been mated. Decent fit overall. Top and bottom seems needed a little sanding and putty work.
Biggest issue was a gap on both sides where the wings meet the fuselage. They’ve been puttied and sanded as well. I’m hoping primer will help with some of the imperfections. 
Tried to take a few pics of the cockpit but my phone doesn’t really like to focus on small details like that.
@Mead93, if their SBD is anything like this kit you’re gonna have a great build on your hands.
Looking great! I think I am picking up the dauntless tomorrow! I’ll let you know how it looks!
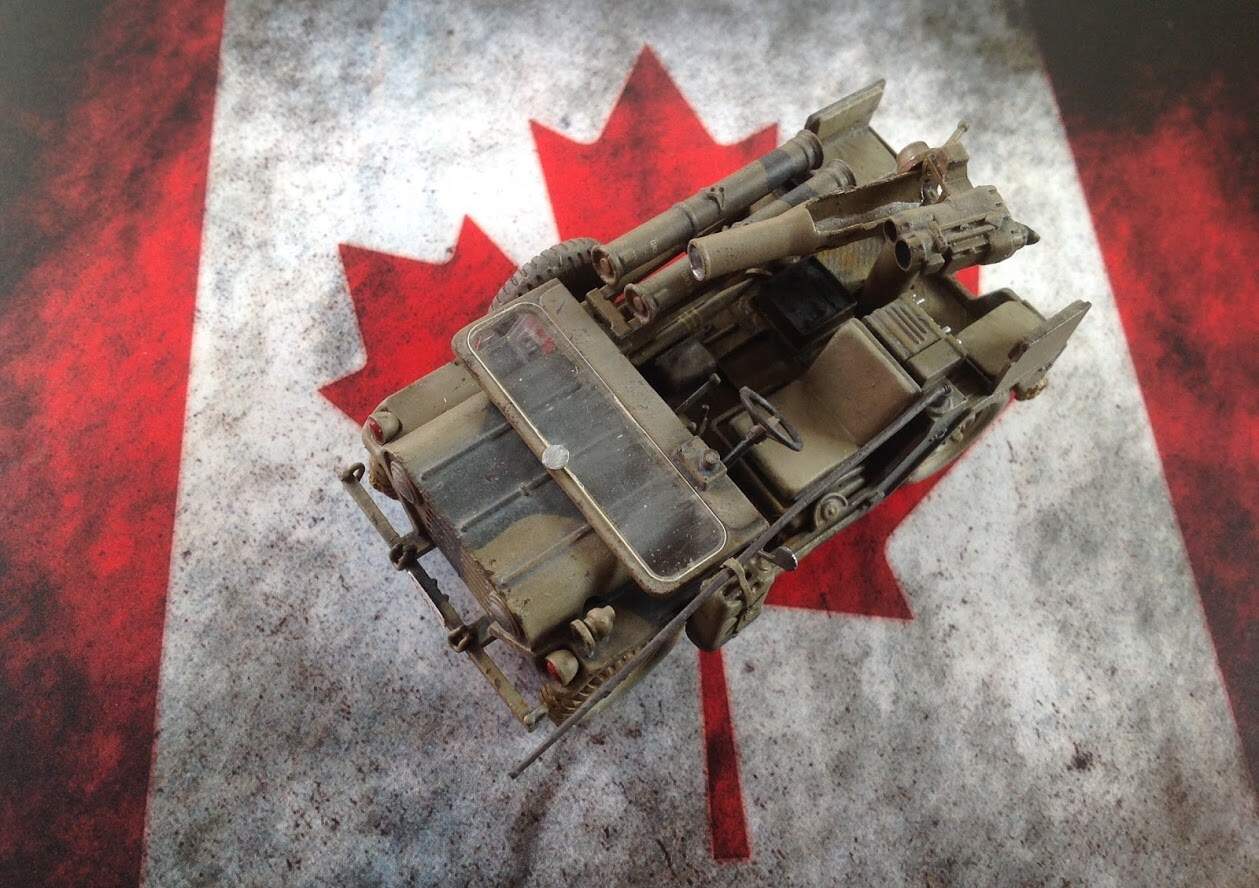
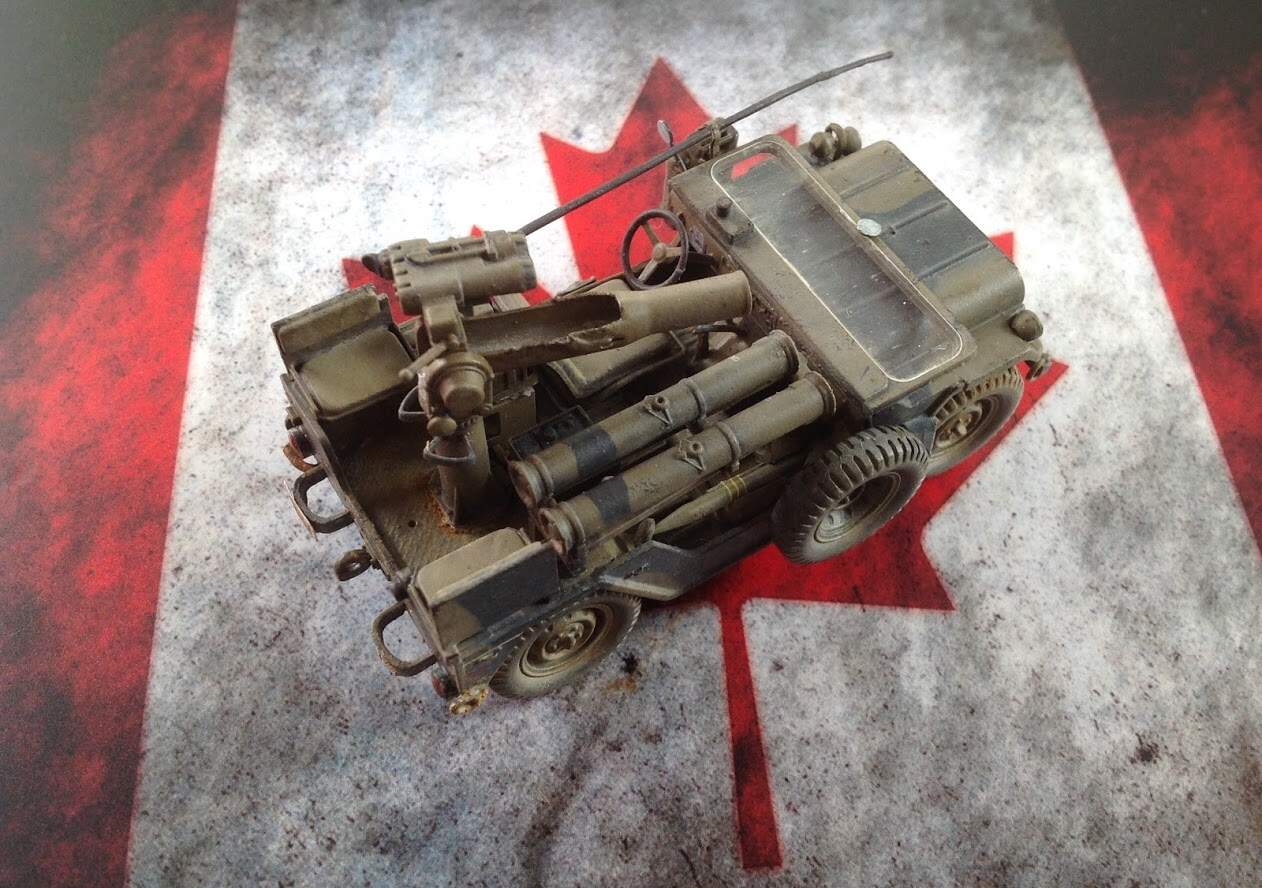
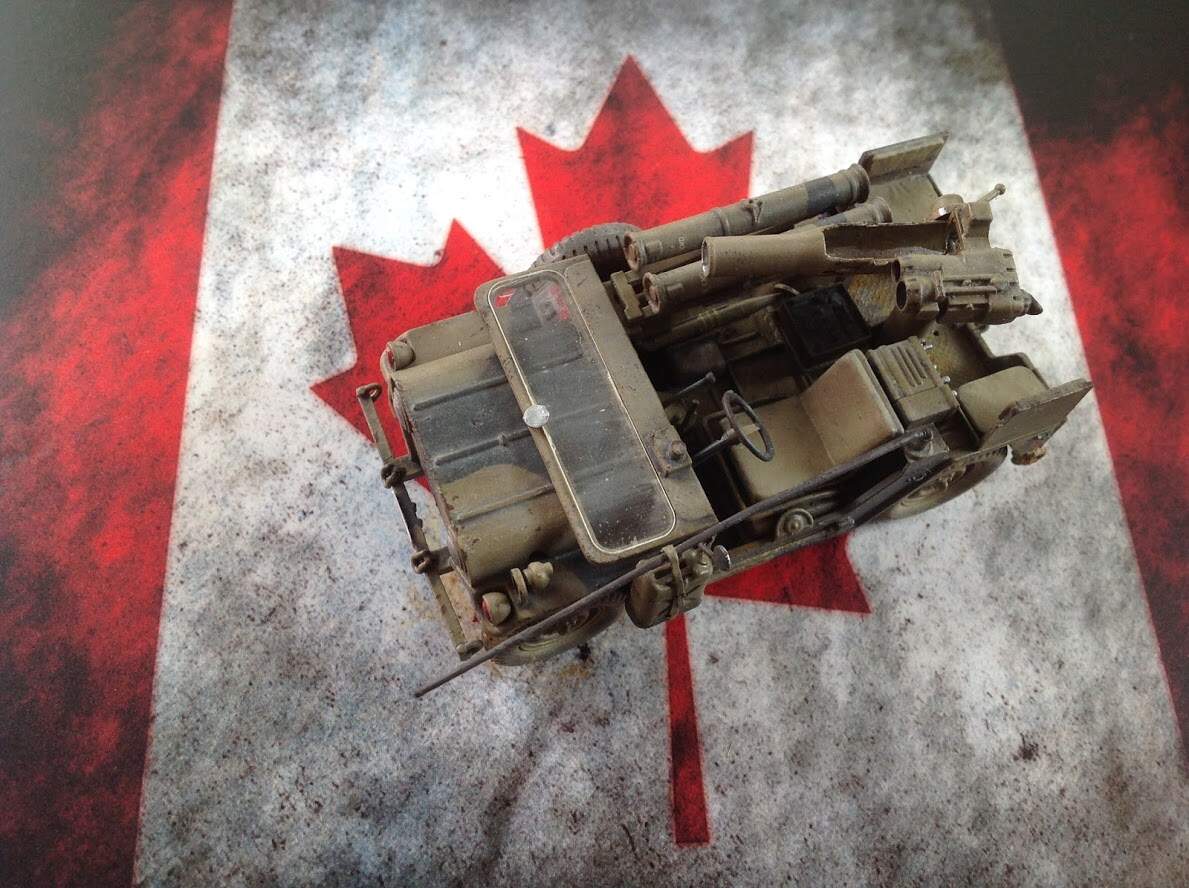
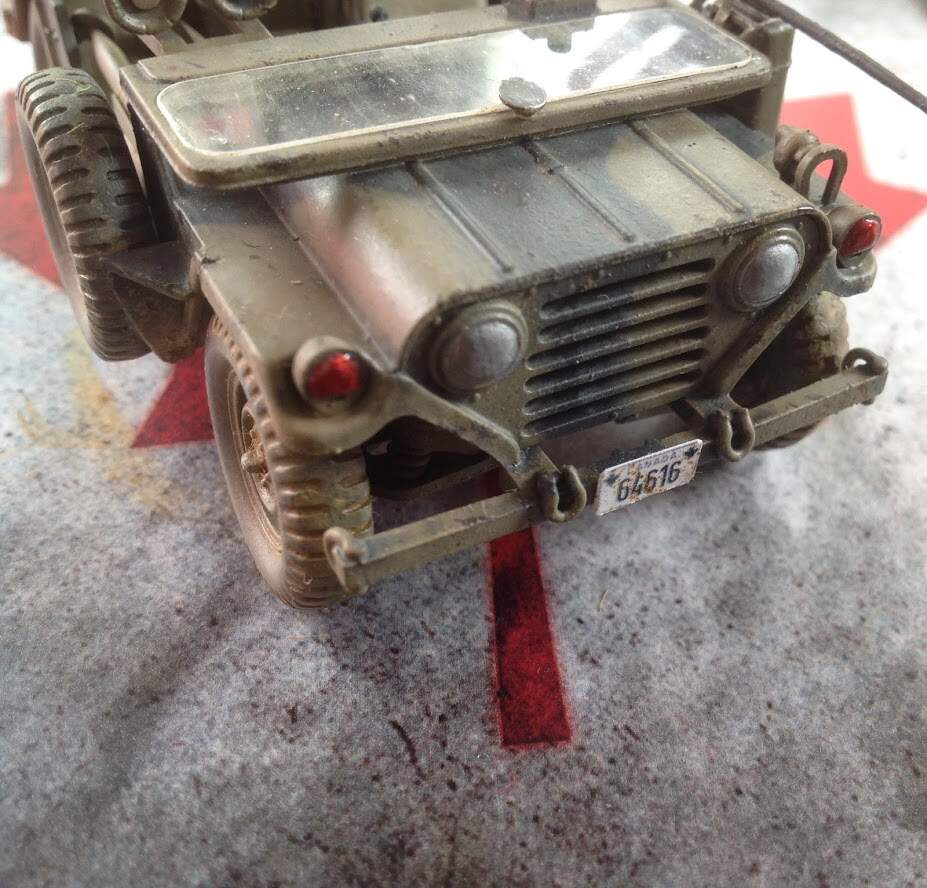
Calling my Tamiya 1/35 M151a2 TOW pretty much done. The only thing I will add in the future are instrument panel decals and maybe re work the mud effects on the wheels.
It was built pretty much OOB as a fun relaxing build with only some added tie downs and the new antenna. I had a small oopsie when the model dropped and broke the antenna so it looks a bit off center.
But anyways here are the pictures. I think it turned out pretty well for using the kit I did.
I plan to build another in a few months with full PE and DEF wheels in a green and sand camo so look out for that.