![]()
Great rendition on the HaGo Tim , very cool !!
Wath a nice building I really like all the details. Fantastic work
Thanks Rick,
Which kit? Well, ideally both! But the Dragon kit has the edge in most respects in my opinion…
Thanks G-Man. I agree, these pre-war designs do have a certain charm to them.
I also think that Japanese armour - and others such as the Italians - get a bad rep because everyone compares them to the later war designs of the Germans or Allies. For their time and place they were perfectly respectable.
Thanks md72.
Even as a Brit I knew very little about the Malayan conflict before I started this project. Mind you, we have plenty of reasons for wanting to forget it…
As for the 2-pounder, I have already all but finished the Vulcan kit and I will be dealing with this in due course…
Thanks everyone.
Now before I started this project I knew almost nothing about Japanese tanks. There’s still an awful lot that that I don’t know…
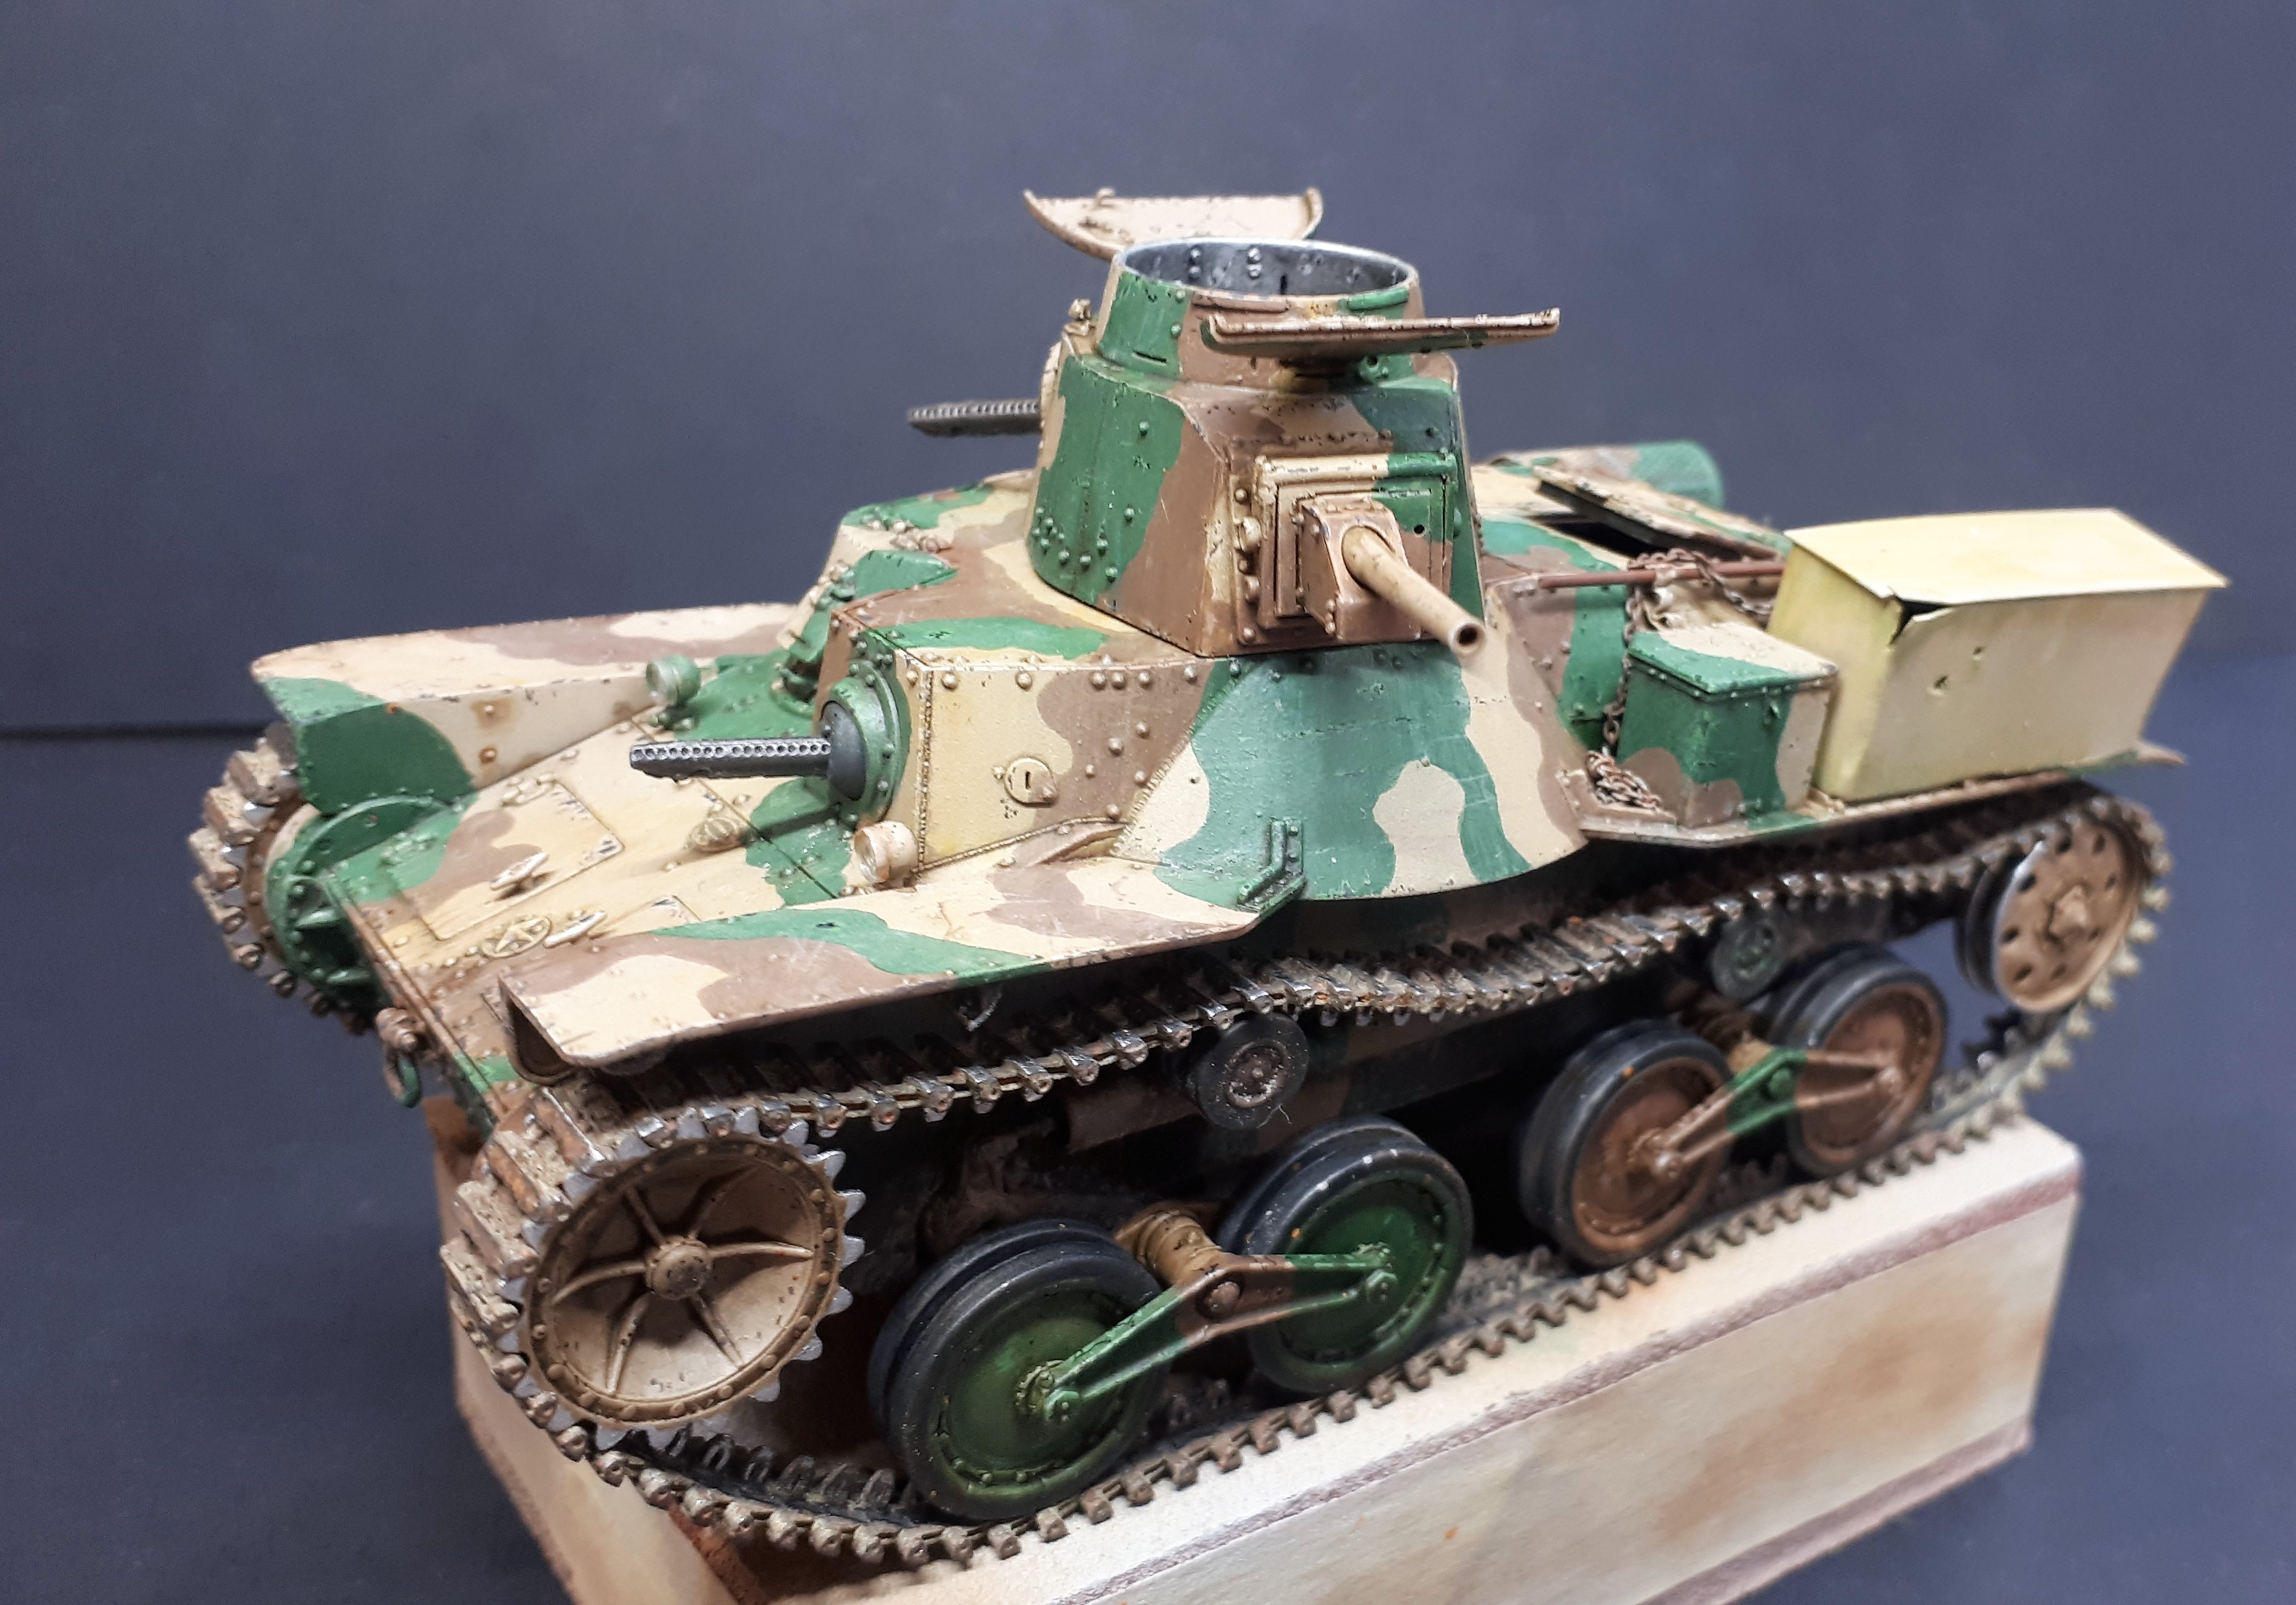
However, having looked at a lot of on-line images of the Ha-Go I noticed one aspect of the tanks used in Malaya - or at least in the Bakri action - which differs from most other Type 95s: at least some of them have a large rectangular box on the rear port trackguard which sits behind the standard metal bin. Once I started to assemble the kits (both the Fine Molds and Dragon ones are the same in this respect) this began to puzzle me, because this box is in the same position as the jack and other tools, all of which have specific mounting points which would otherwise be in the way of this box.

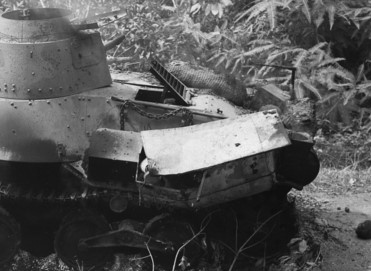
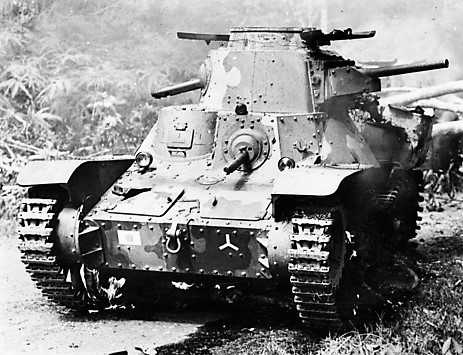
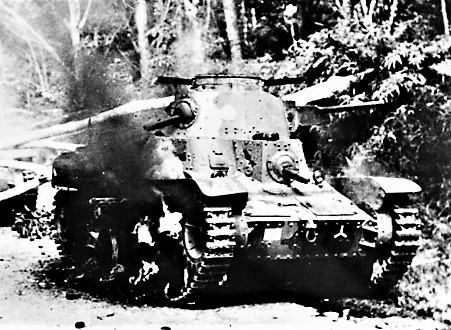
The clearest view of this box is that on the second tank (shown in the lower image and in the background of the one above). Even though it is partially destroyed, it is possible to see how it overhangs the track guards thermselves and was held on the vehicle by a length of wire or rope. As for what the box contains I have no idea. It also appears to be of fairly flimsy construction - so perhaps made of thin wood or even cardboard.
Also visible in the same image is the wrecking bar (with a length of chain wrapped around it) and mounts for the other tools which were mounted on the side of the engine compartment - and not the track guards - which would explain how the box was able to be placed in this position. What happened to the jack, I have no idea.
The only other Ha-Go I have come across which has a tool layout which is in any way similar to the Bakri tanks is the one in Bovington Tank Museum. According to the website, this Type 95 was captured in Malaya and was examined in Calcutta before being sent to Britain.
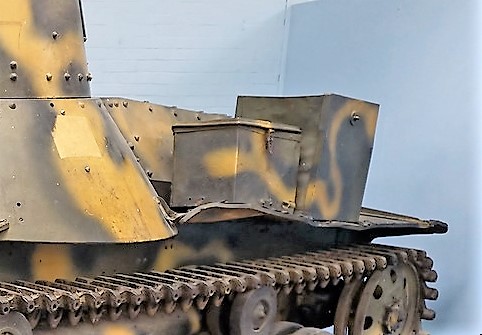
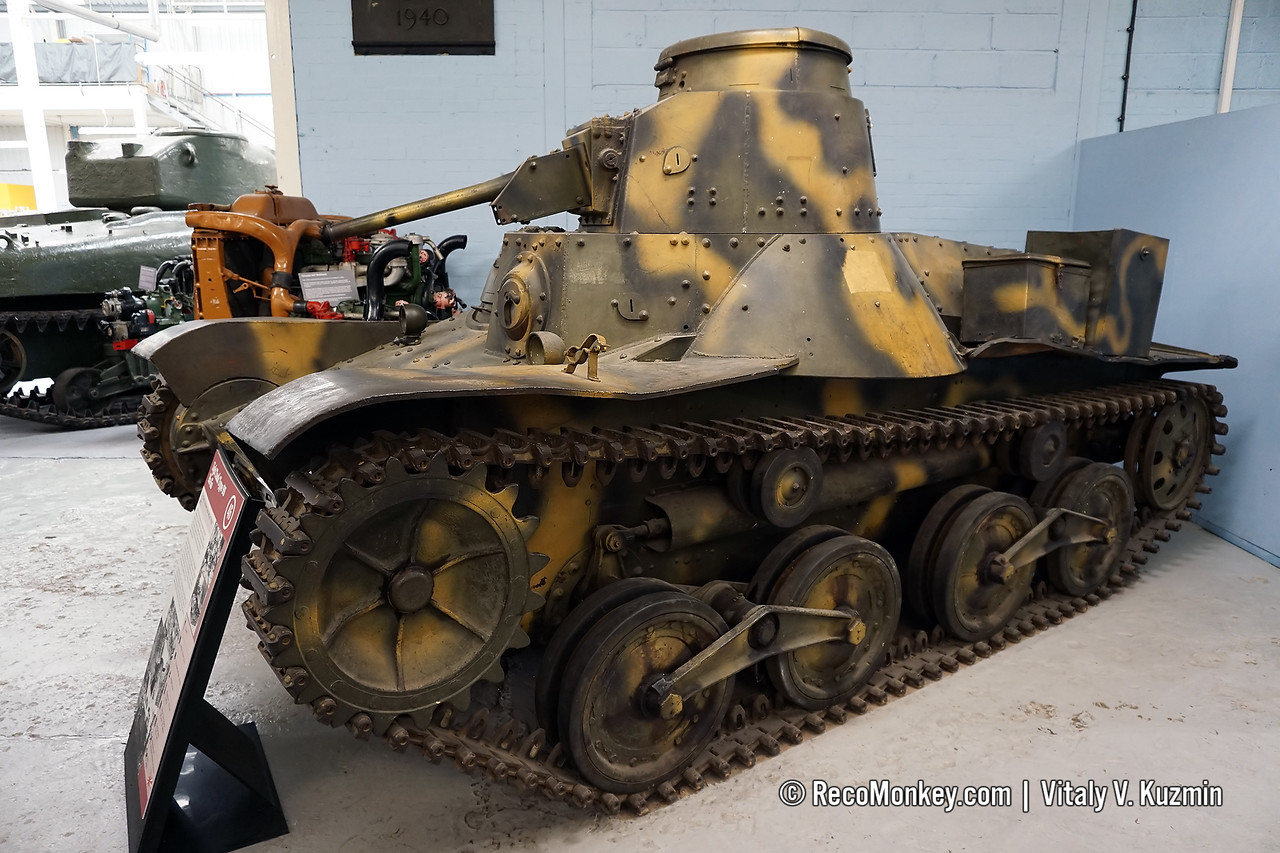
This Ha-Go, which appears to be in good condition, still has one smaller box behind the official stowage bin, although on capture it clearly had yet another as well. It also has no mounting point for the jack and you can see the clamps for the other tools (crowbar, spade and pick) on the front port trackguard - so a third variant.
By the way, there is a great walkaround of this tank from the museum’s curator David Willey at: Tank Chats #50 Ha-Go | The Tank Museum - YouTube
The tank is sealed, by the way, because of the asbestos which is still inside it and, as he helpfully explains, the camouflage scheme is completely spurious.
So I replicated the tool clamps from spare photo etch and made a crowbar from a piece of metal rod with the ends sanded to a suitable profile. You can see my attempt at scratch-building the box from thin plastic card in the images of the model below, in its finished state state prior to painting.

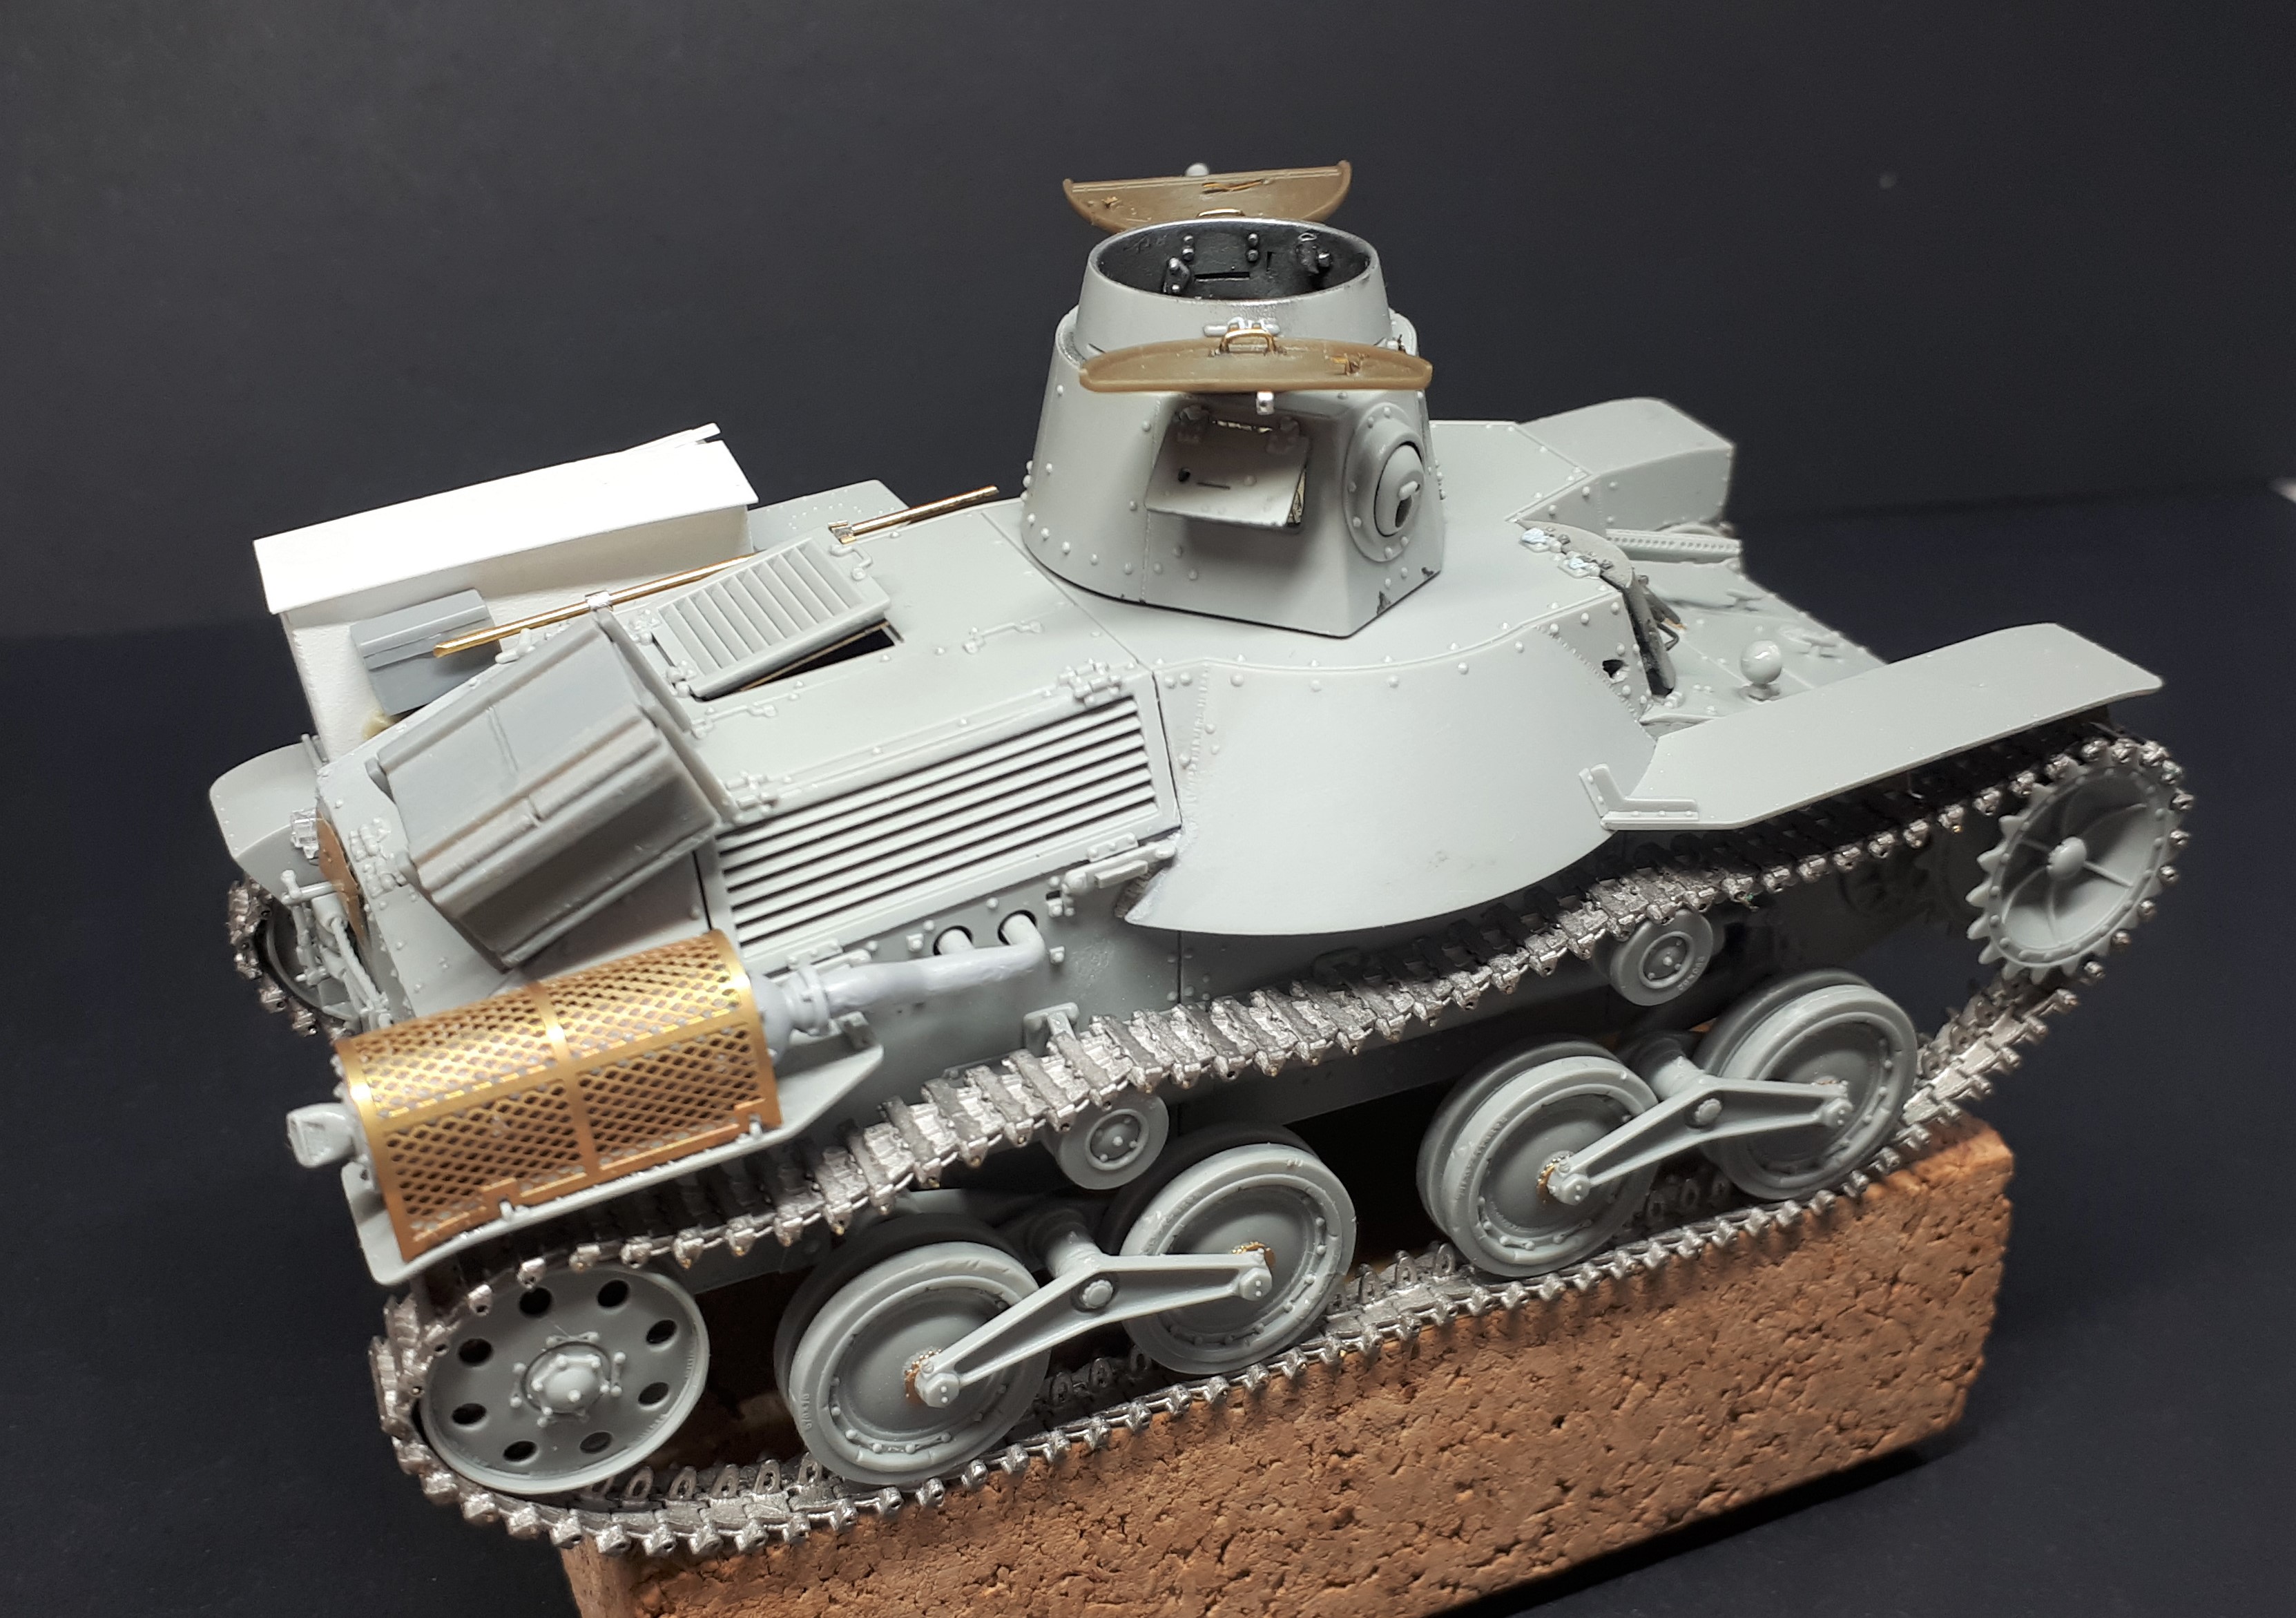
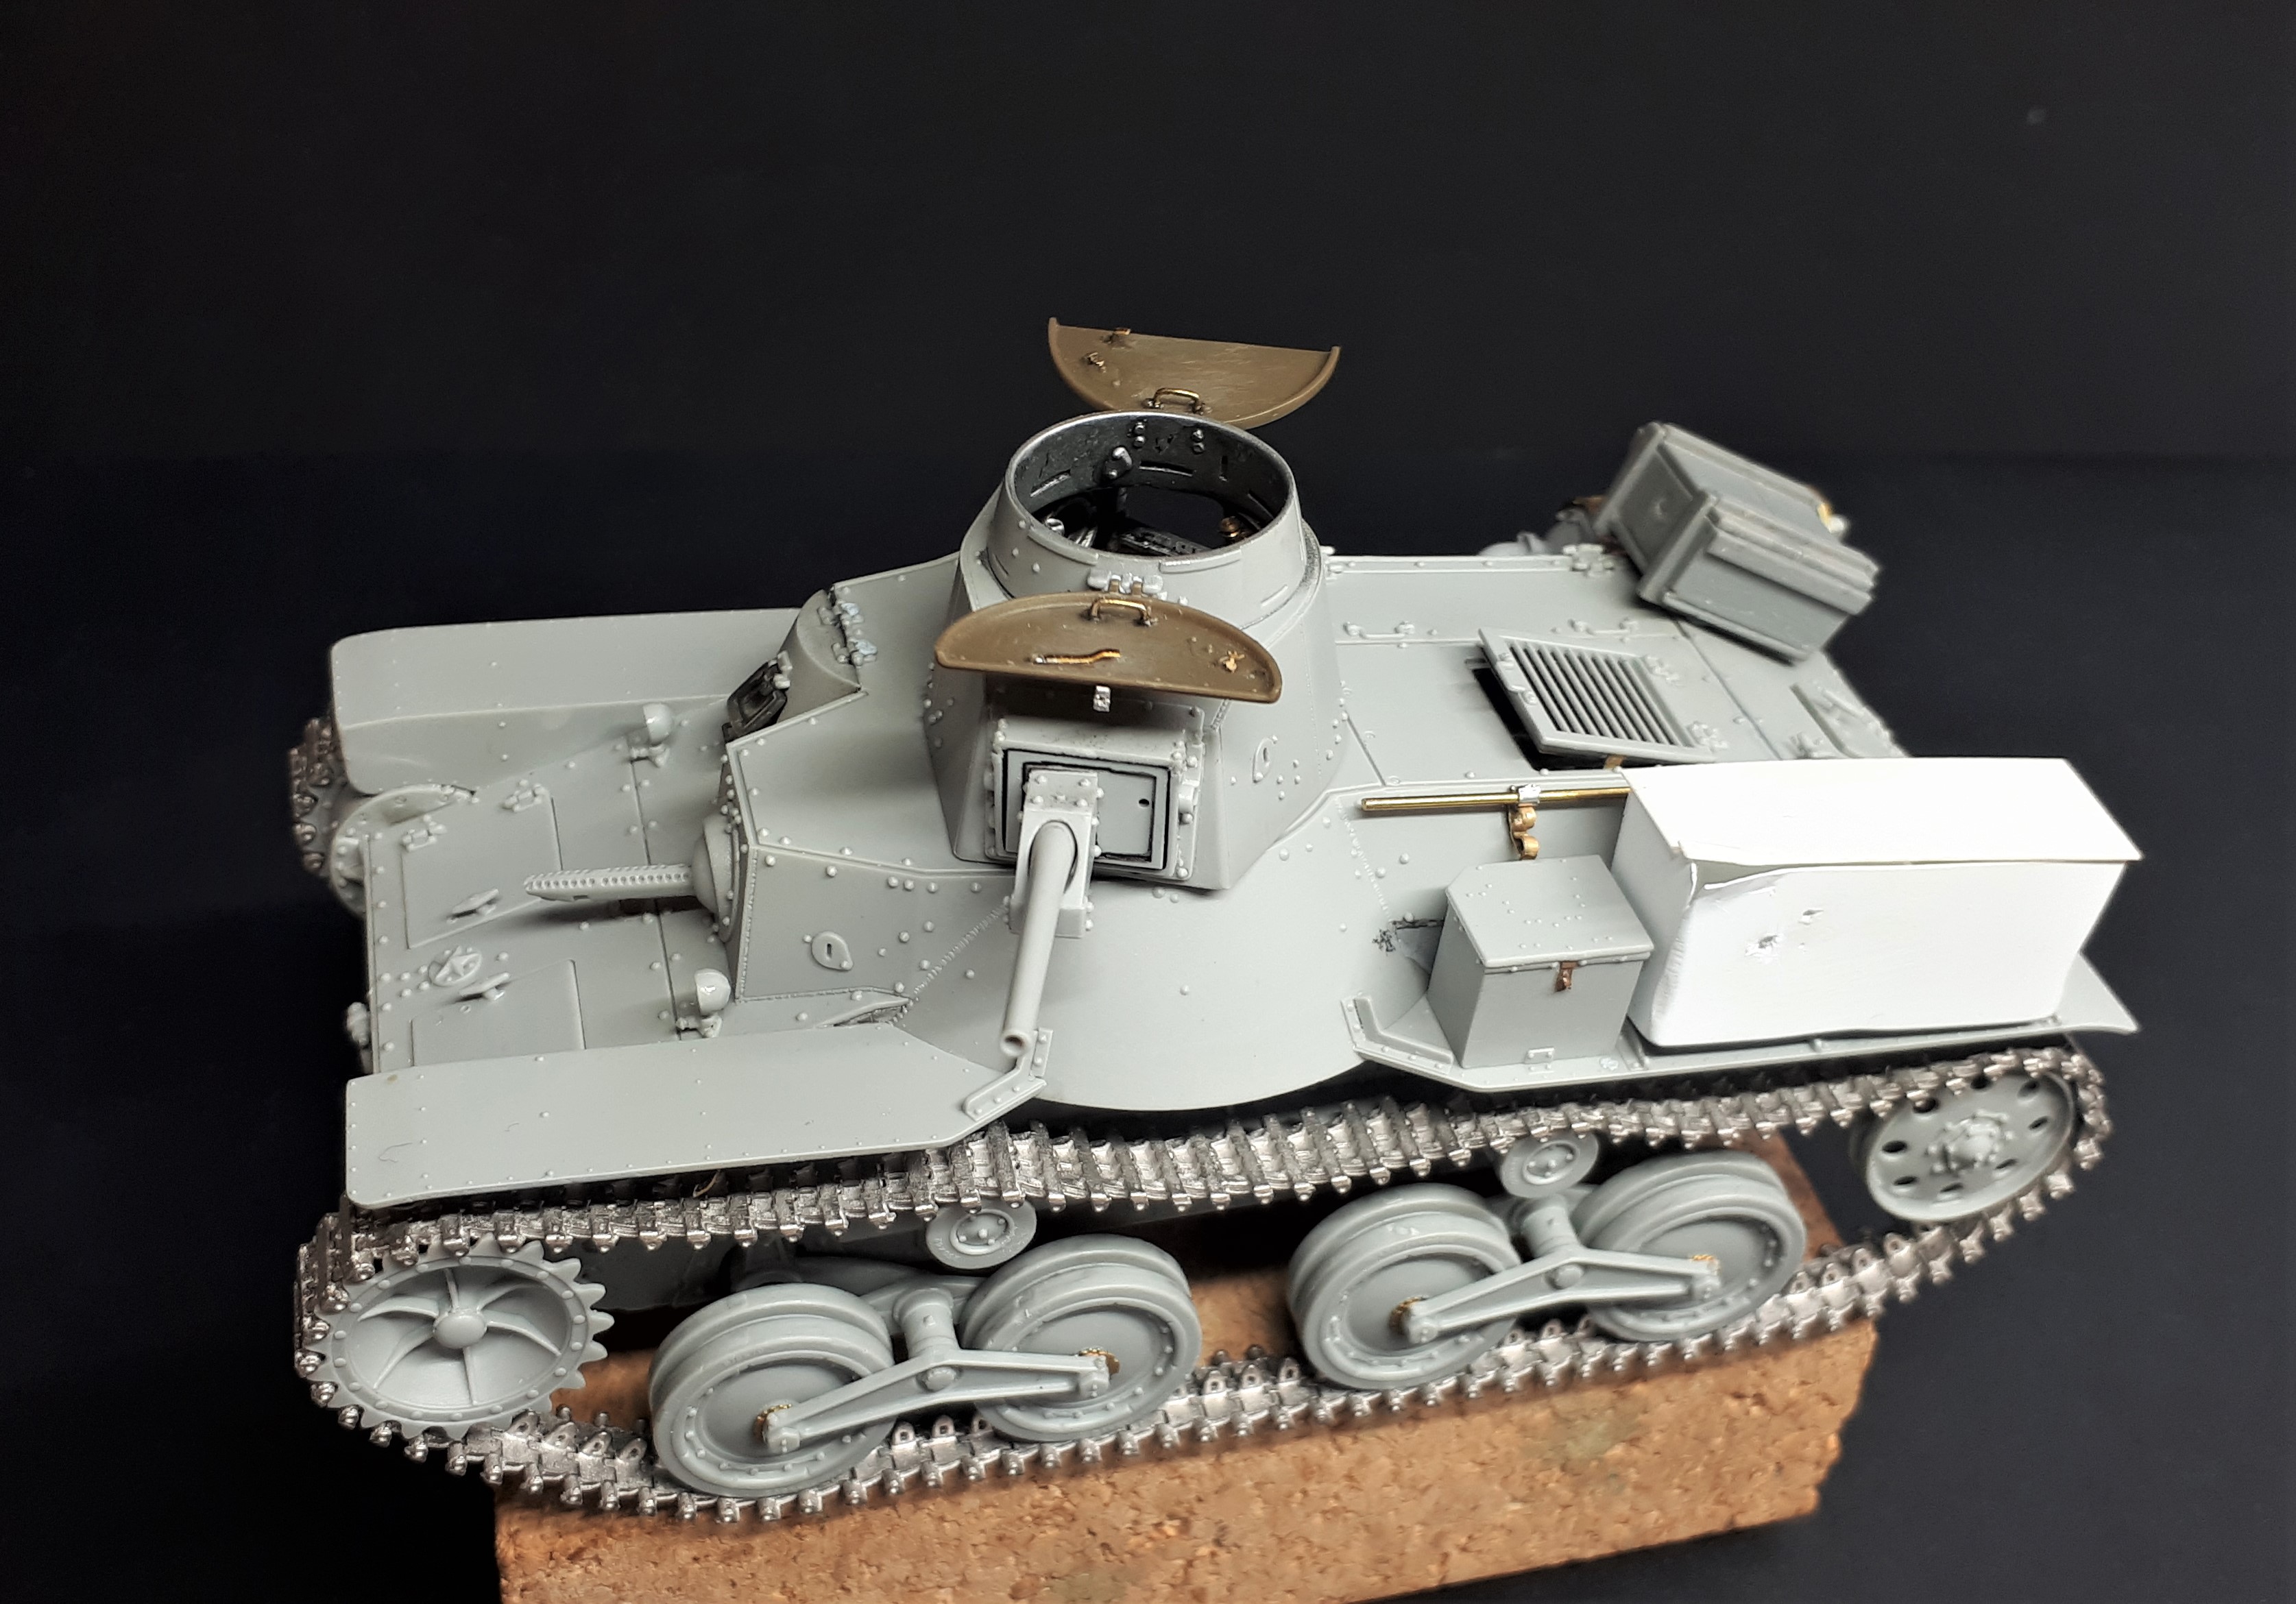

Oh yes, one last word on the tracks. The Fine Molds kit comes with the link and length variety, which are OK, but lacking in detail. The Dragon kit comes with the ‘rubber’ full-length type, which some people love and others loath. I have so say, they look very nice detail-wise and the only issue would be getting the right sag.
So I went for the Friul model option. Now I have heard from a few people that the quaility at Friul may be slipping and I have to say these ones bear that out. Not only was there quite heavy metal flash on many of the links, my box also came with two port sided pairs.
9 Likes
Tim - watching this with great interest - unusual subject and excellent workmanship - please keep it up !
1 Like
Thanks RD.
I sense that everyone is probably getting a bit bored of my Ha-Go build (believe me I am itching to get back to the diorama) - so I have started posting it as a separate item in the AFV category for anyone who wants the ‘warts and all’ approach.
So now I am going to the get on to the painting… which is a story in itself.
Now the world of Japanese tank colours is a rabbit-hole all of its own and I am not going to take you all down it with me on this post, but most of us are familiar with the fact that most IJM armour was painted in fairly elaborate camouflage schemes throughout the war.
In this regard they were far ahead of the German late war camo patterns, although it is worth remembering that all the major combatants of the Second World War experimented with disruptive schemes to some extent. The Japanese were, of course, preparing for fighting in sun-dappled jungle environments, although I cannot help thinking that they were also influenced by the French, who used particularly striking camouflage (it is a French word after all) on their early war tanks.
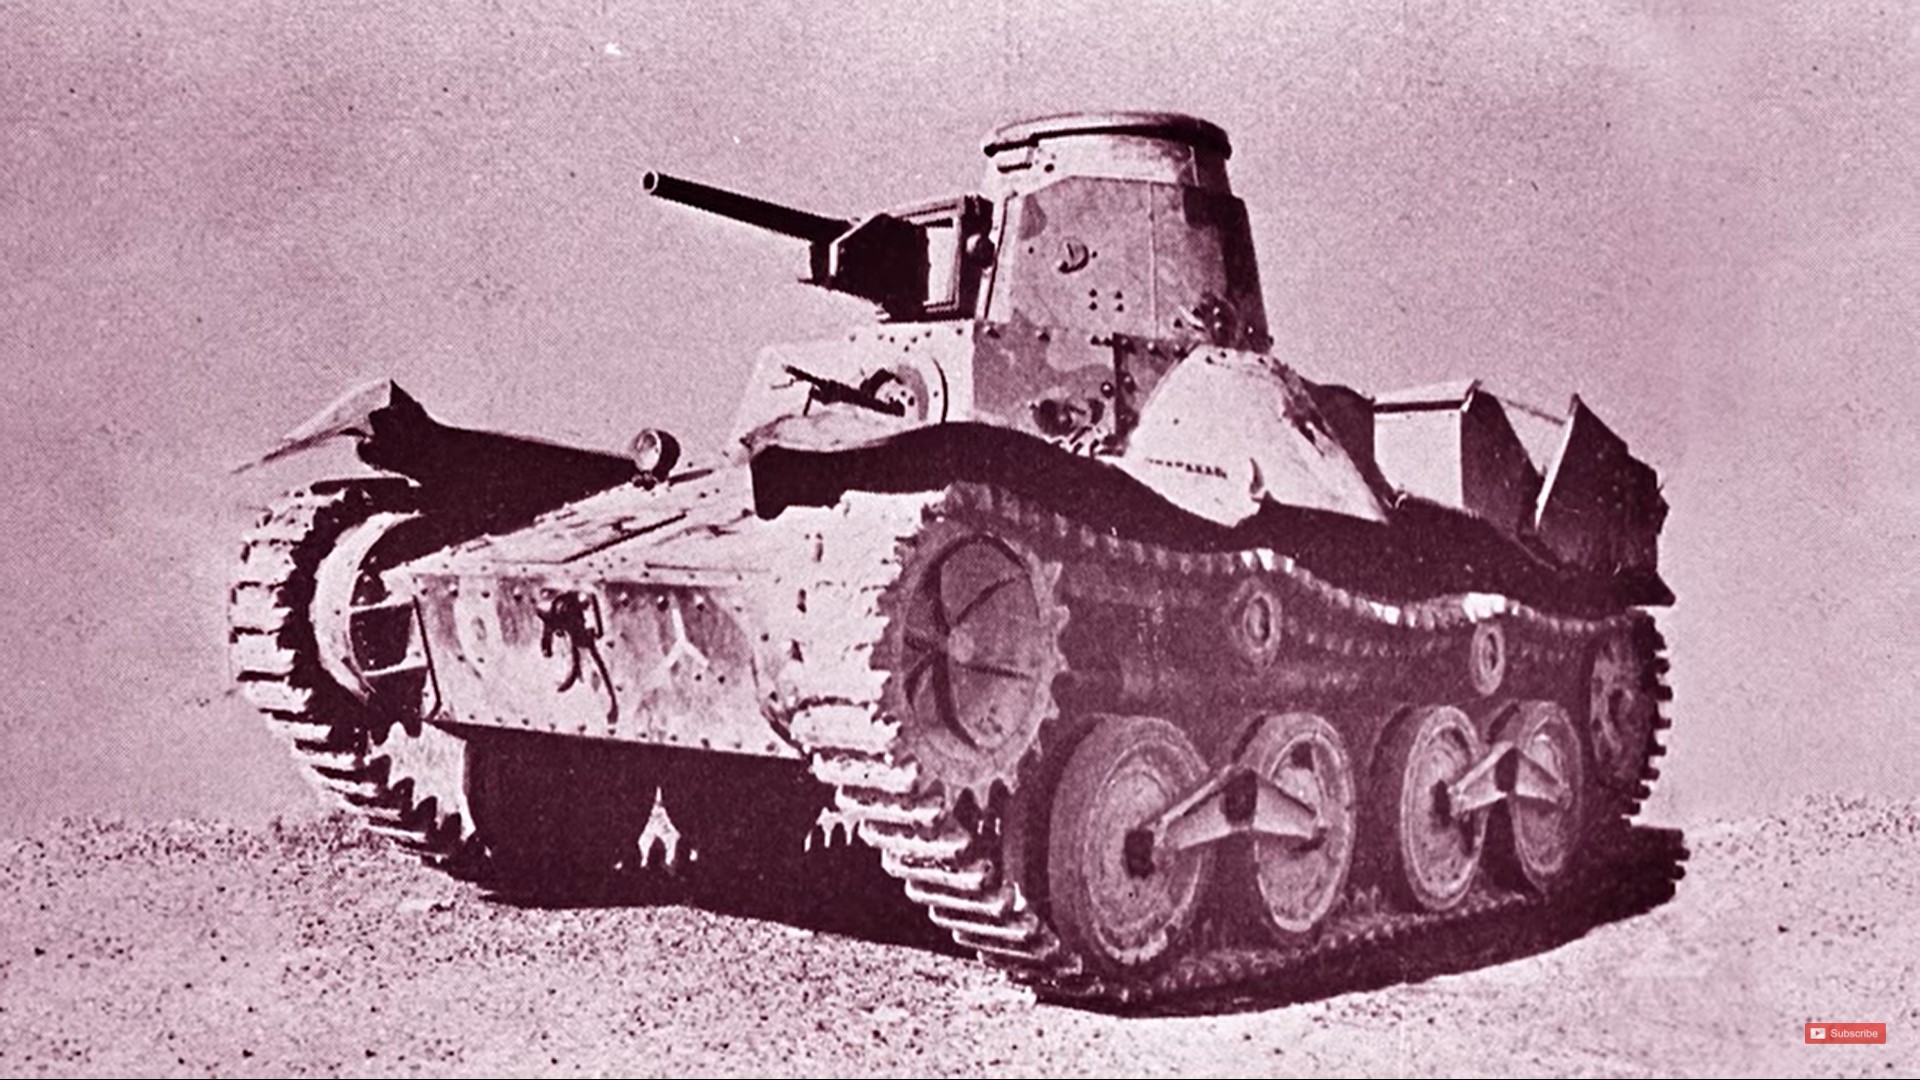
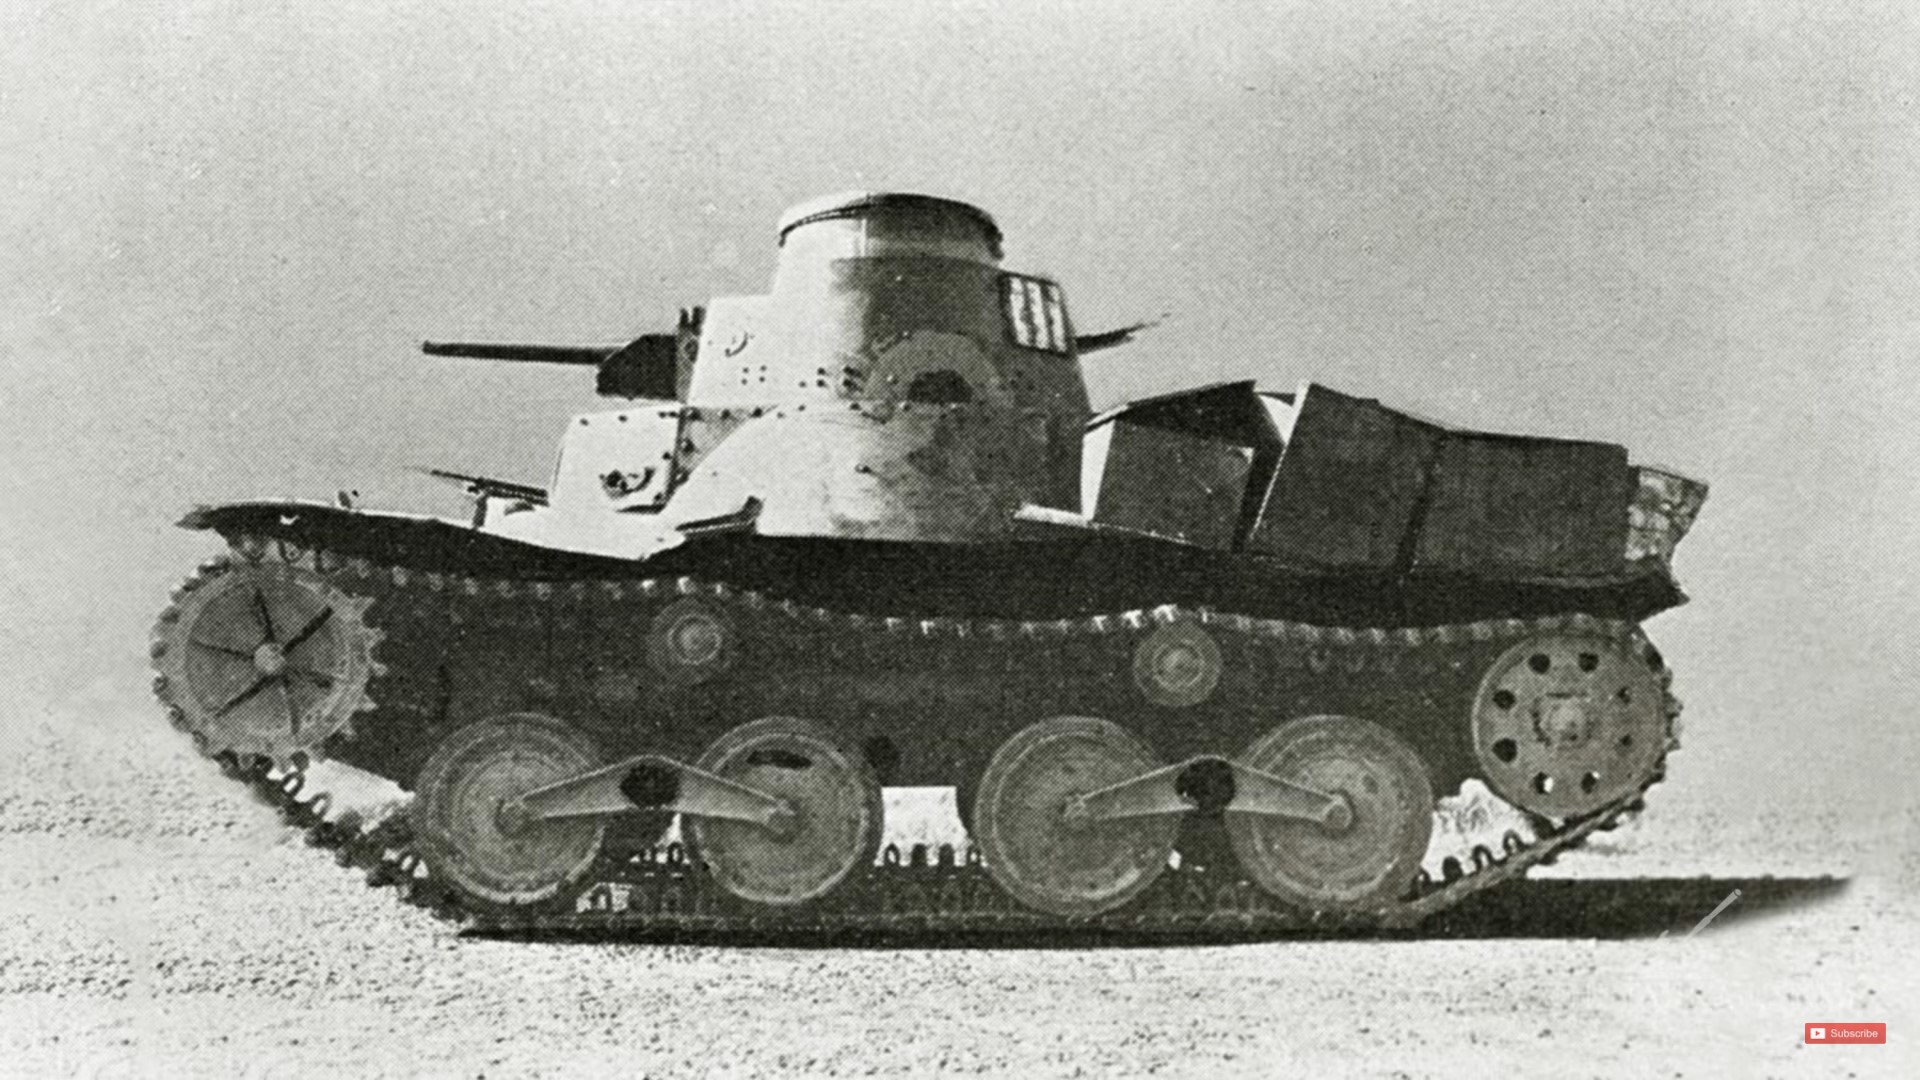
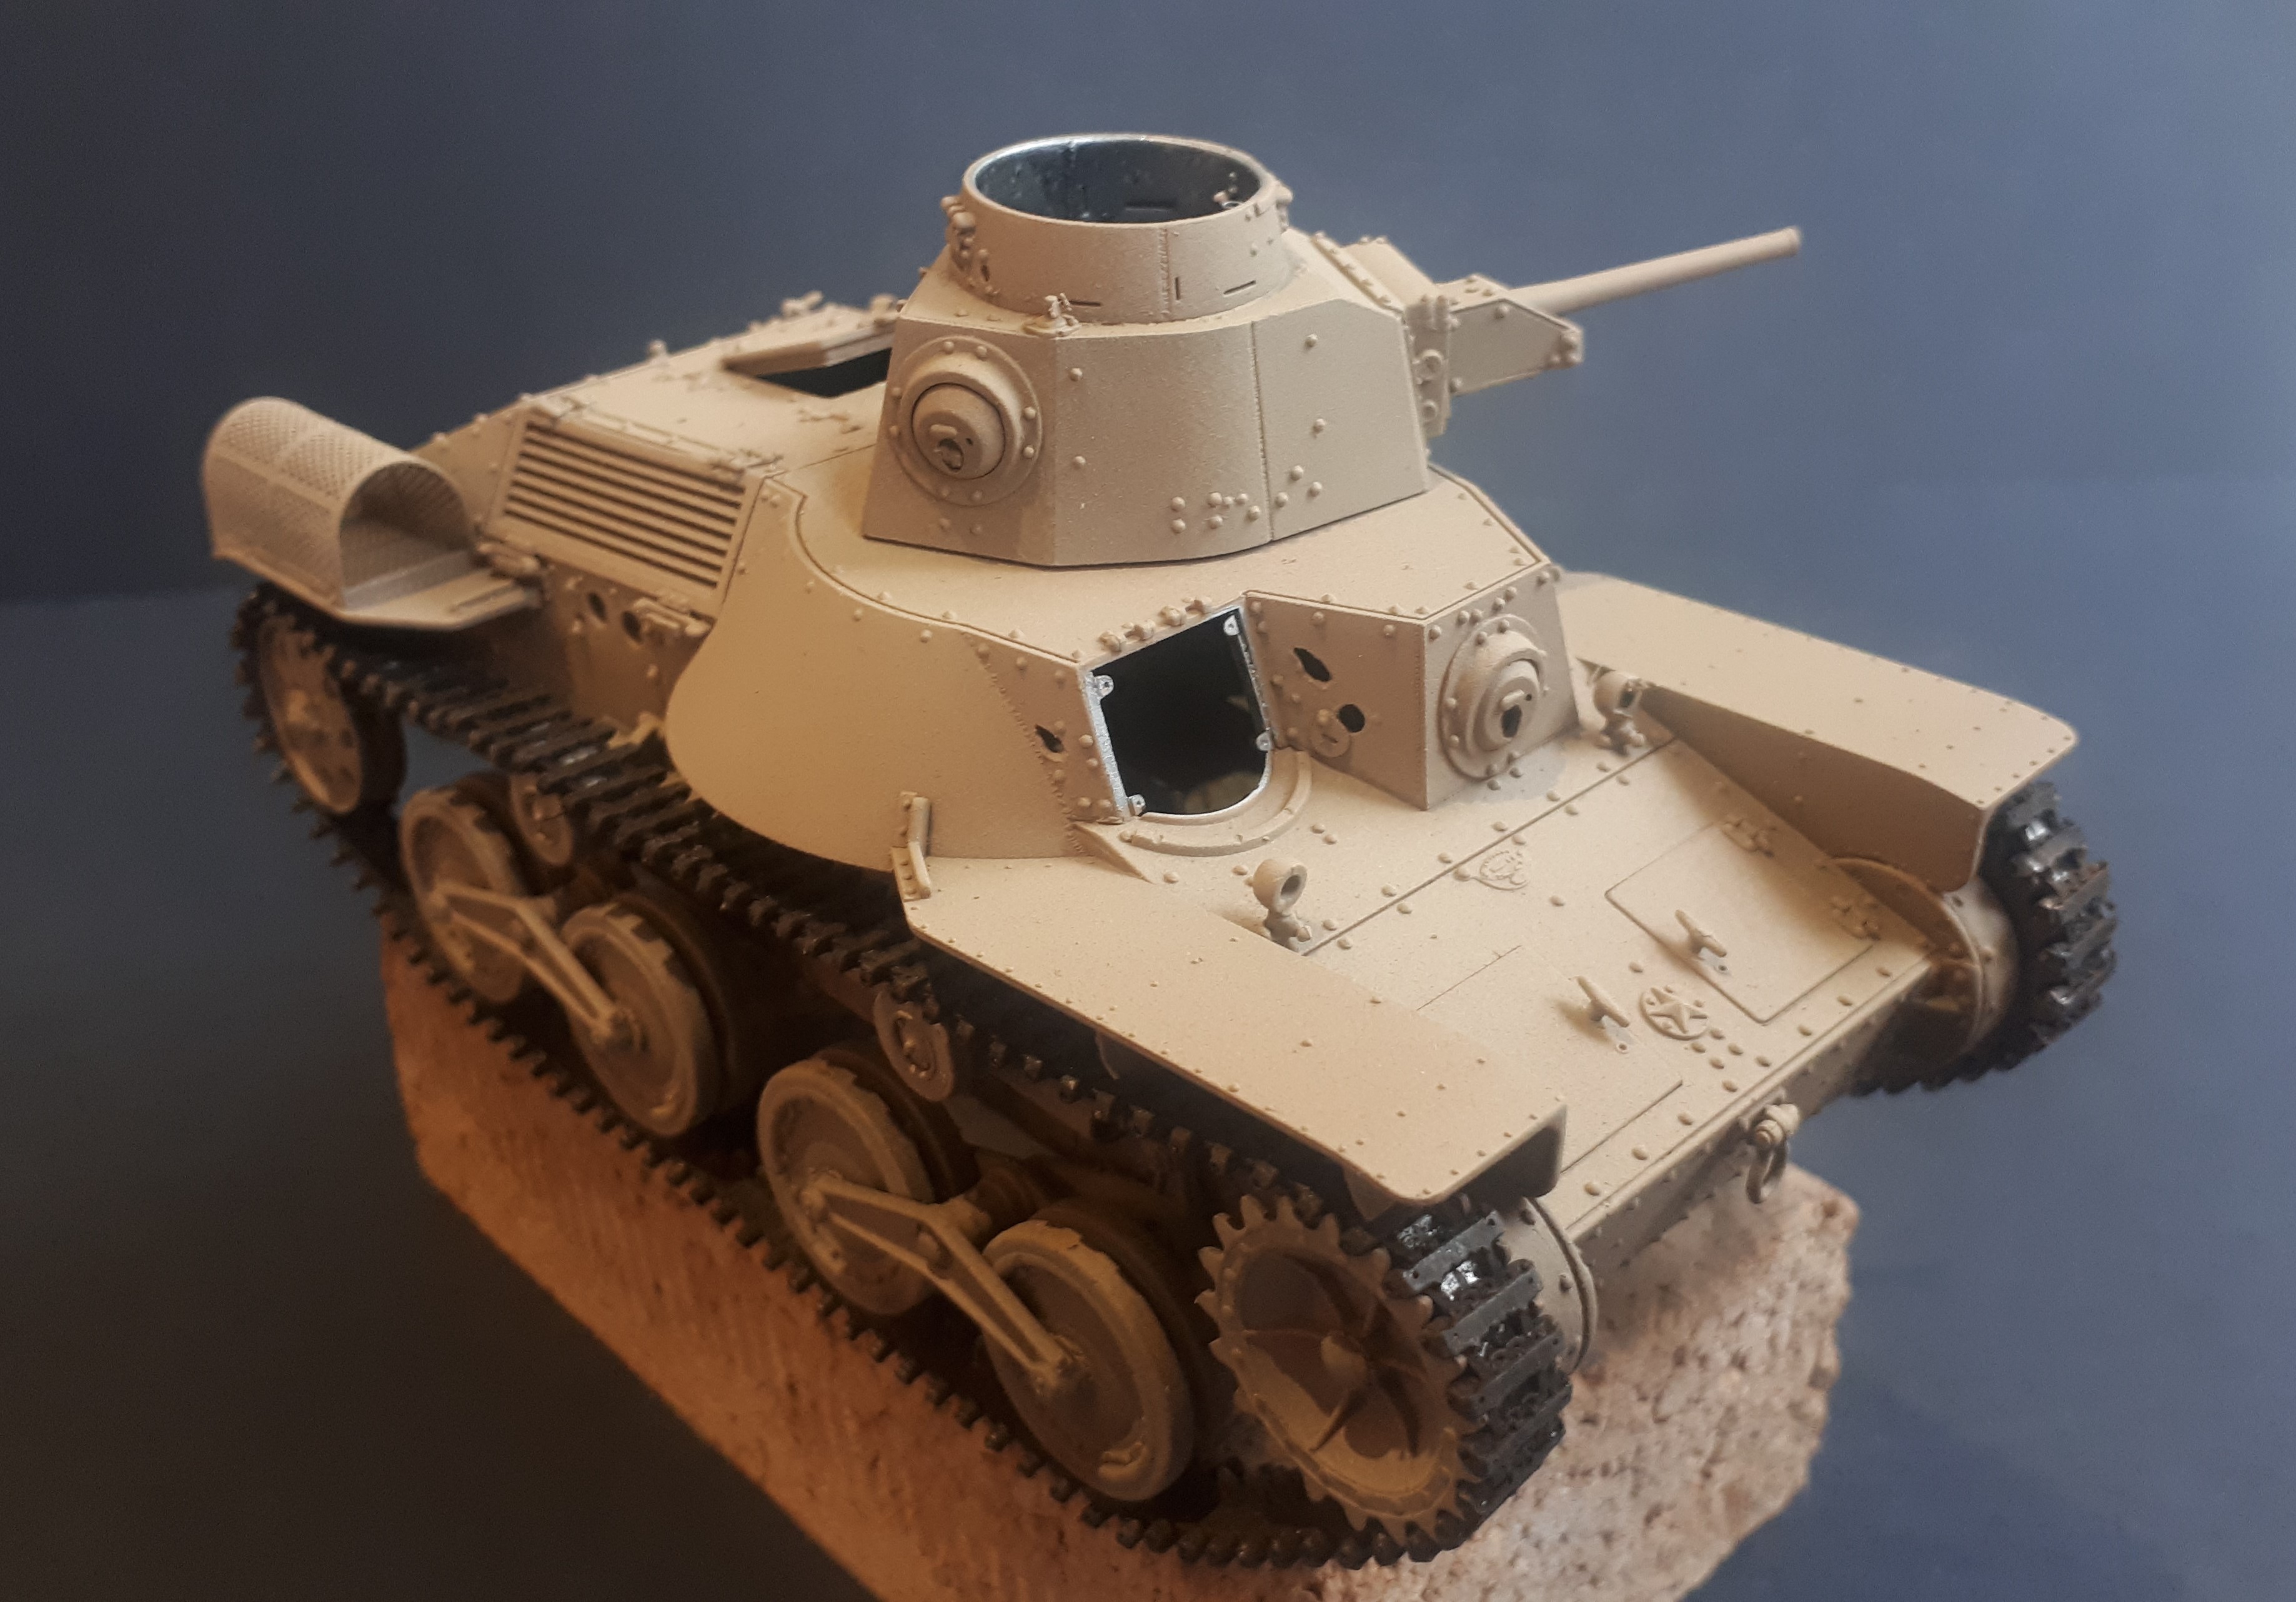
Undoubtedly the most iconic pattern is the one where the three main colours were disrupted with a fourth: yellow stripes painted in a wavy cross which subdivided the vehicle into four quarters. However, after intensive study of the photos of the Bakri Ha-Gos it became apparent that they did not have this fourth element.
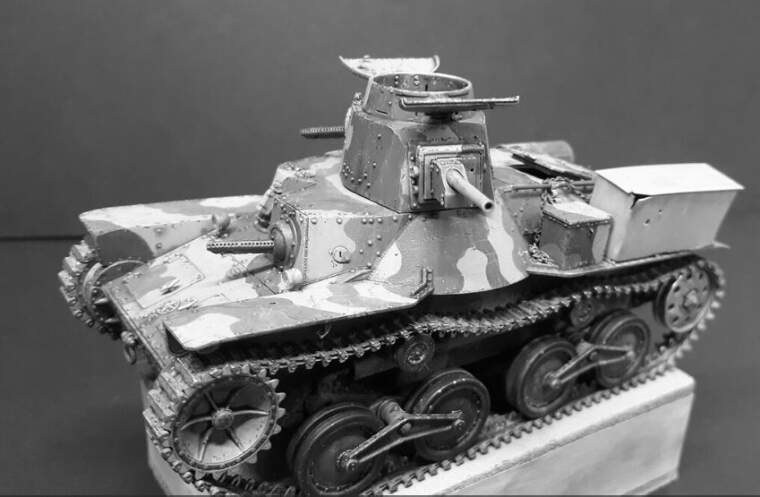
Despite the fact that the images are in black and white, you can, however, clearly see that they were painted in three colours contrasting shades. These are also hard-edged, suggesting that the tanks were hand painted. From what I have read this is consistent with early war Japanese armour. The camo was also painted in a distinctive cloud pattern - almost like jigsaw pieces. You can see this very clearly on these close ups of the leading tank which is the one my model represents…
However, when I looked for colour plates on line I was surprised that I couldn’t find any that matched this scheme - or the markings (which I will come to a little later). Since the tanks from the Bakri action are probably the most photographed Japanese tanks of the entire war I must say that I find this a bit odd… so I had to ad lib.
Some time ago I bought these Hataka paints.
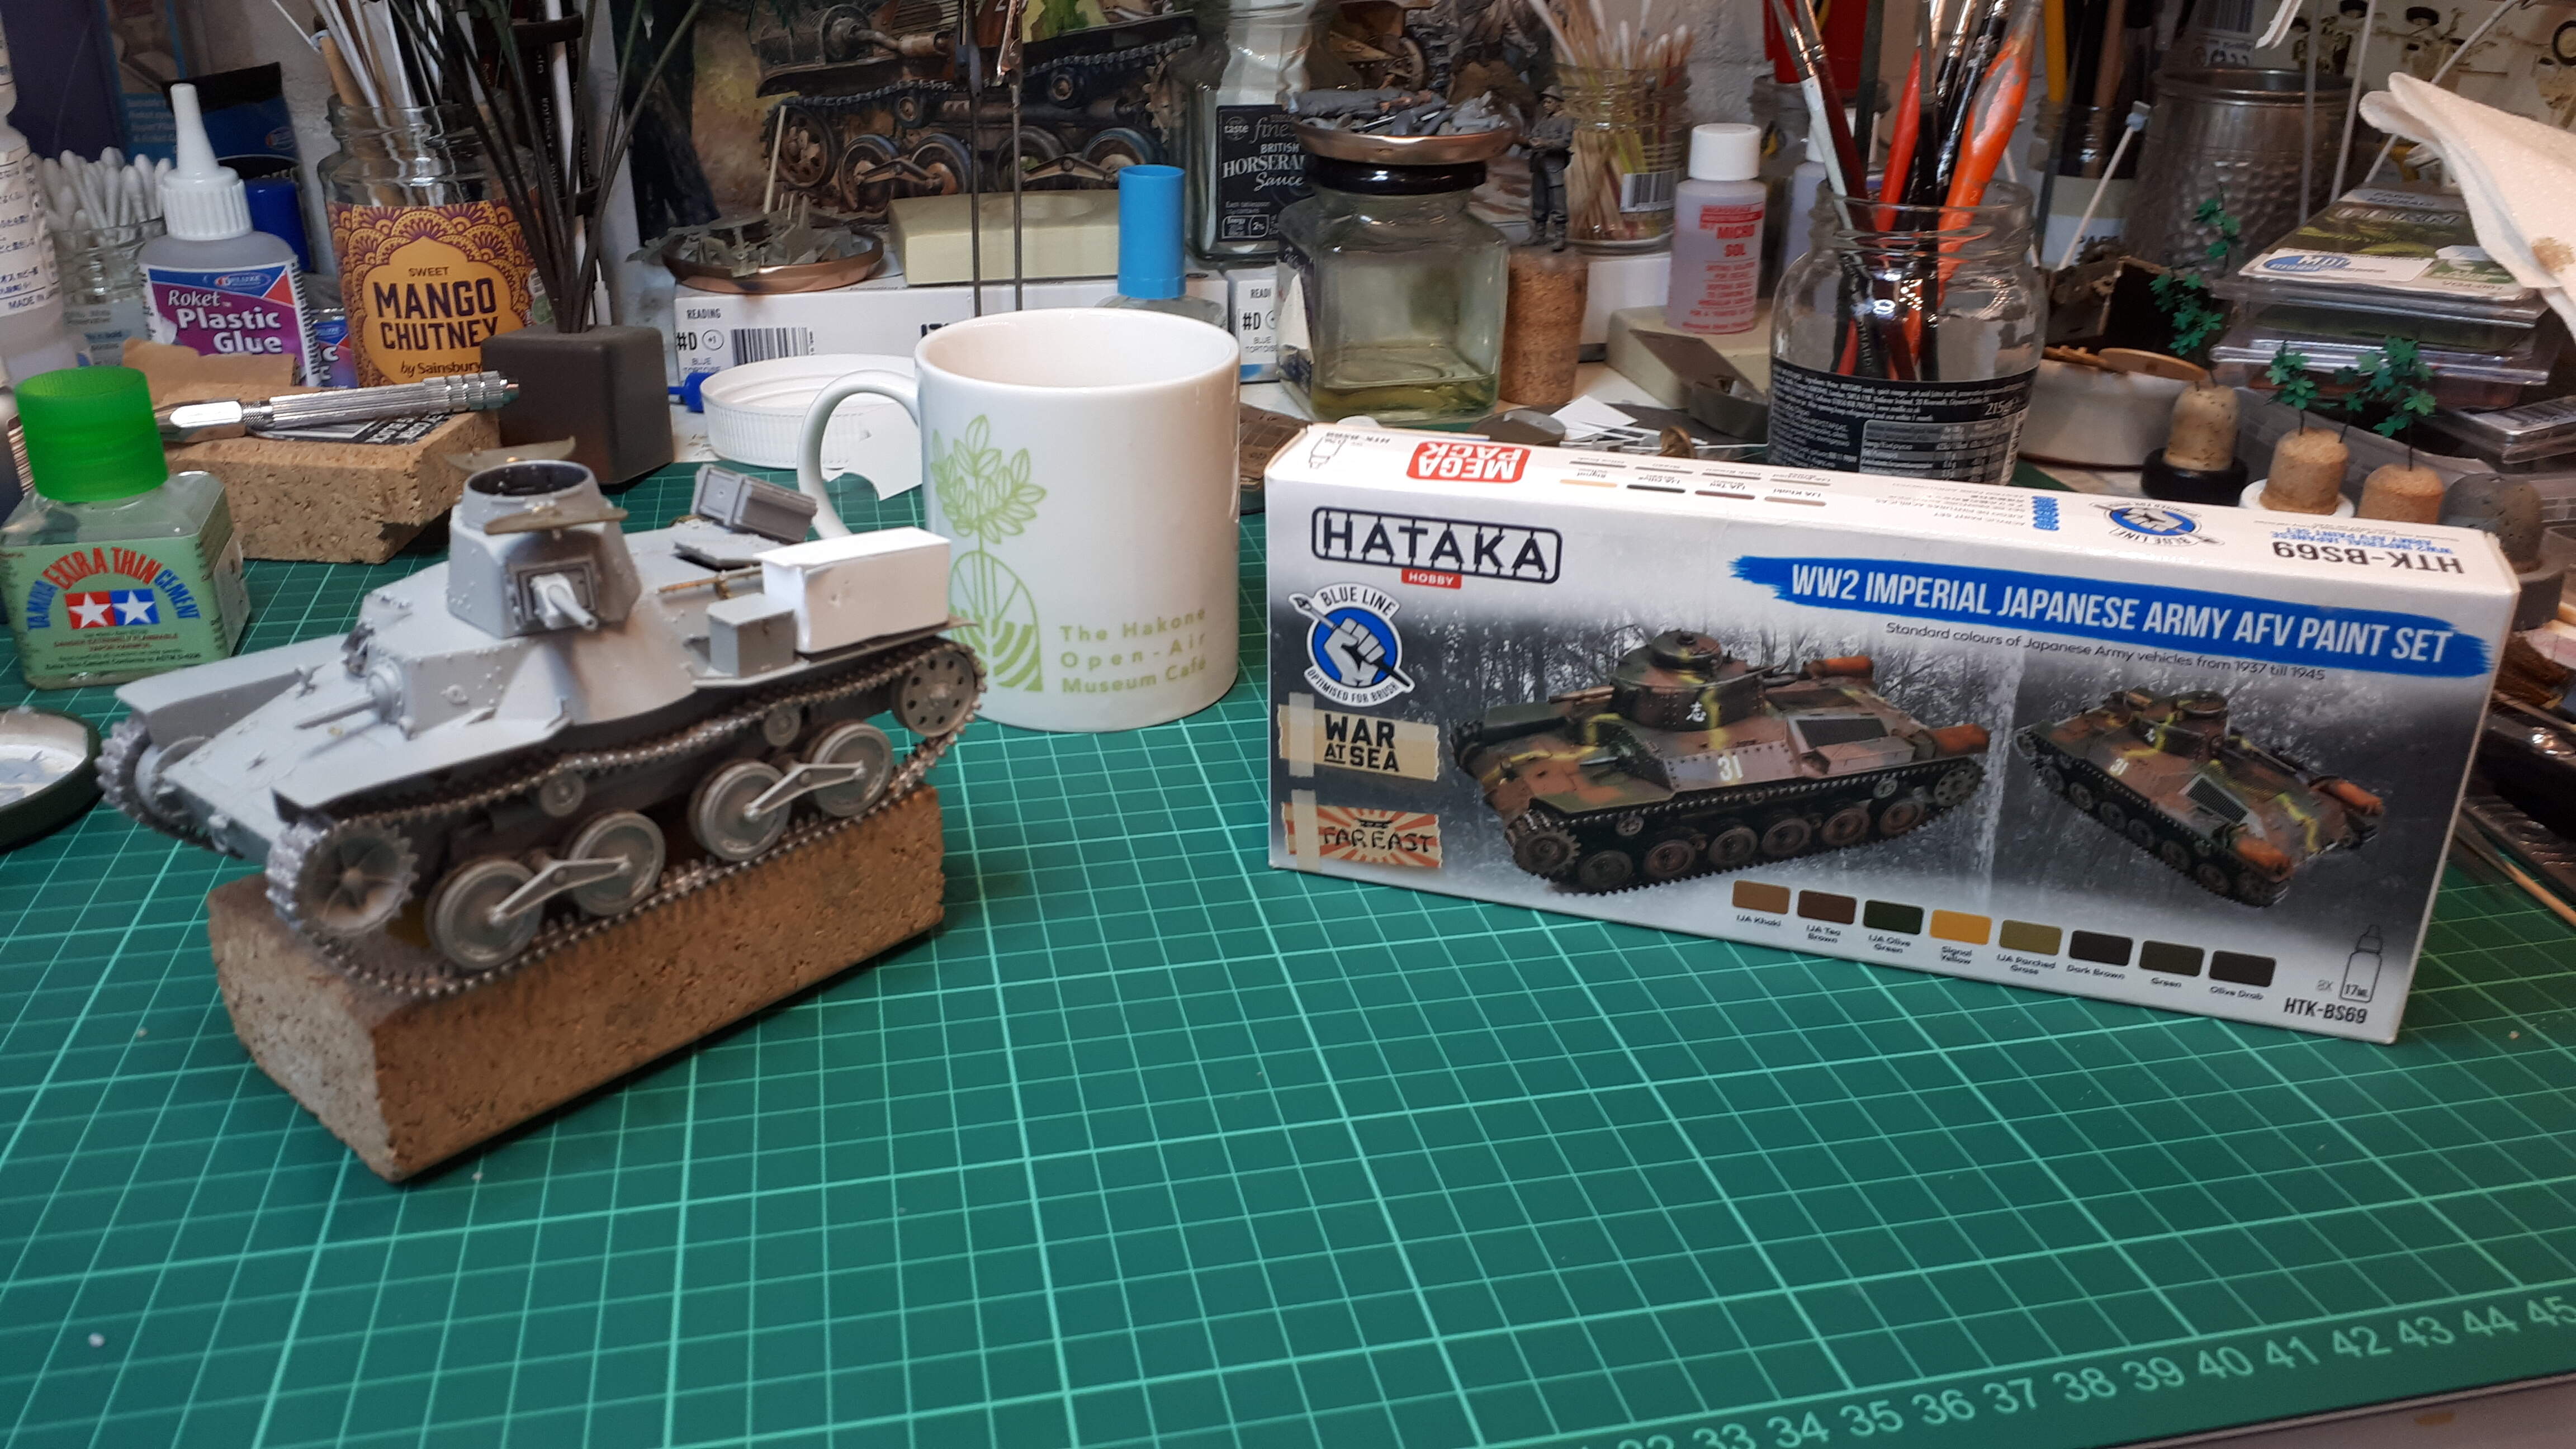
Something I didn’t notice at the time was that these sets come in at least two types: brush (blue) and airbrush (red) varieties (there are also lacquer sets for some colours). I had acquired the blue brush painting set. As things turned out this was probably a fortunate choice…
5 Likes
Hi Tim! First time i see your build. Very nice work, I like the whole idea very much. I follow this:) /Erik
I don’t envy you that camo rabbit-hole – but judging by the front plate on the two archive photos (because it’s more shadowed) the colours were very strong tonally, so I think your scheme’s excellent

4 Likes
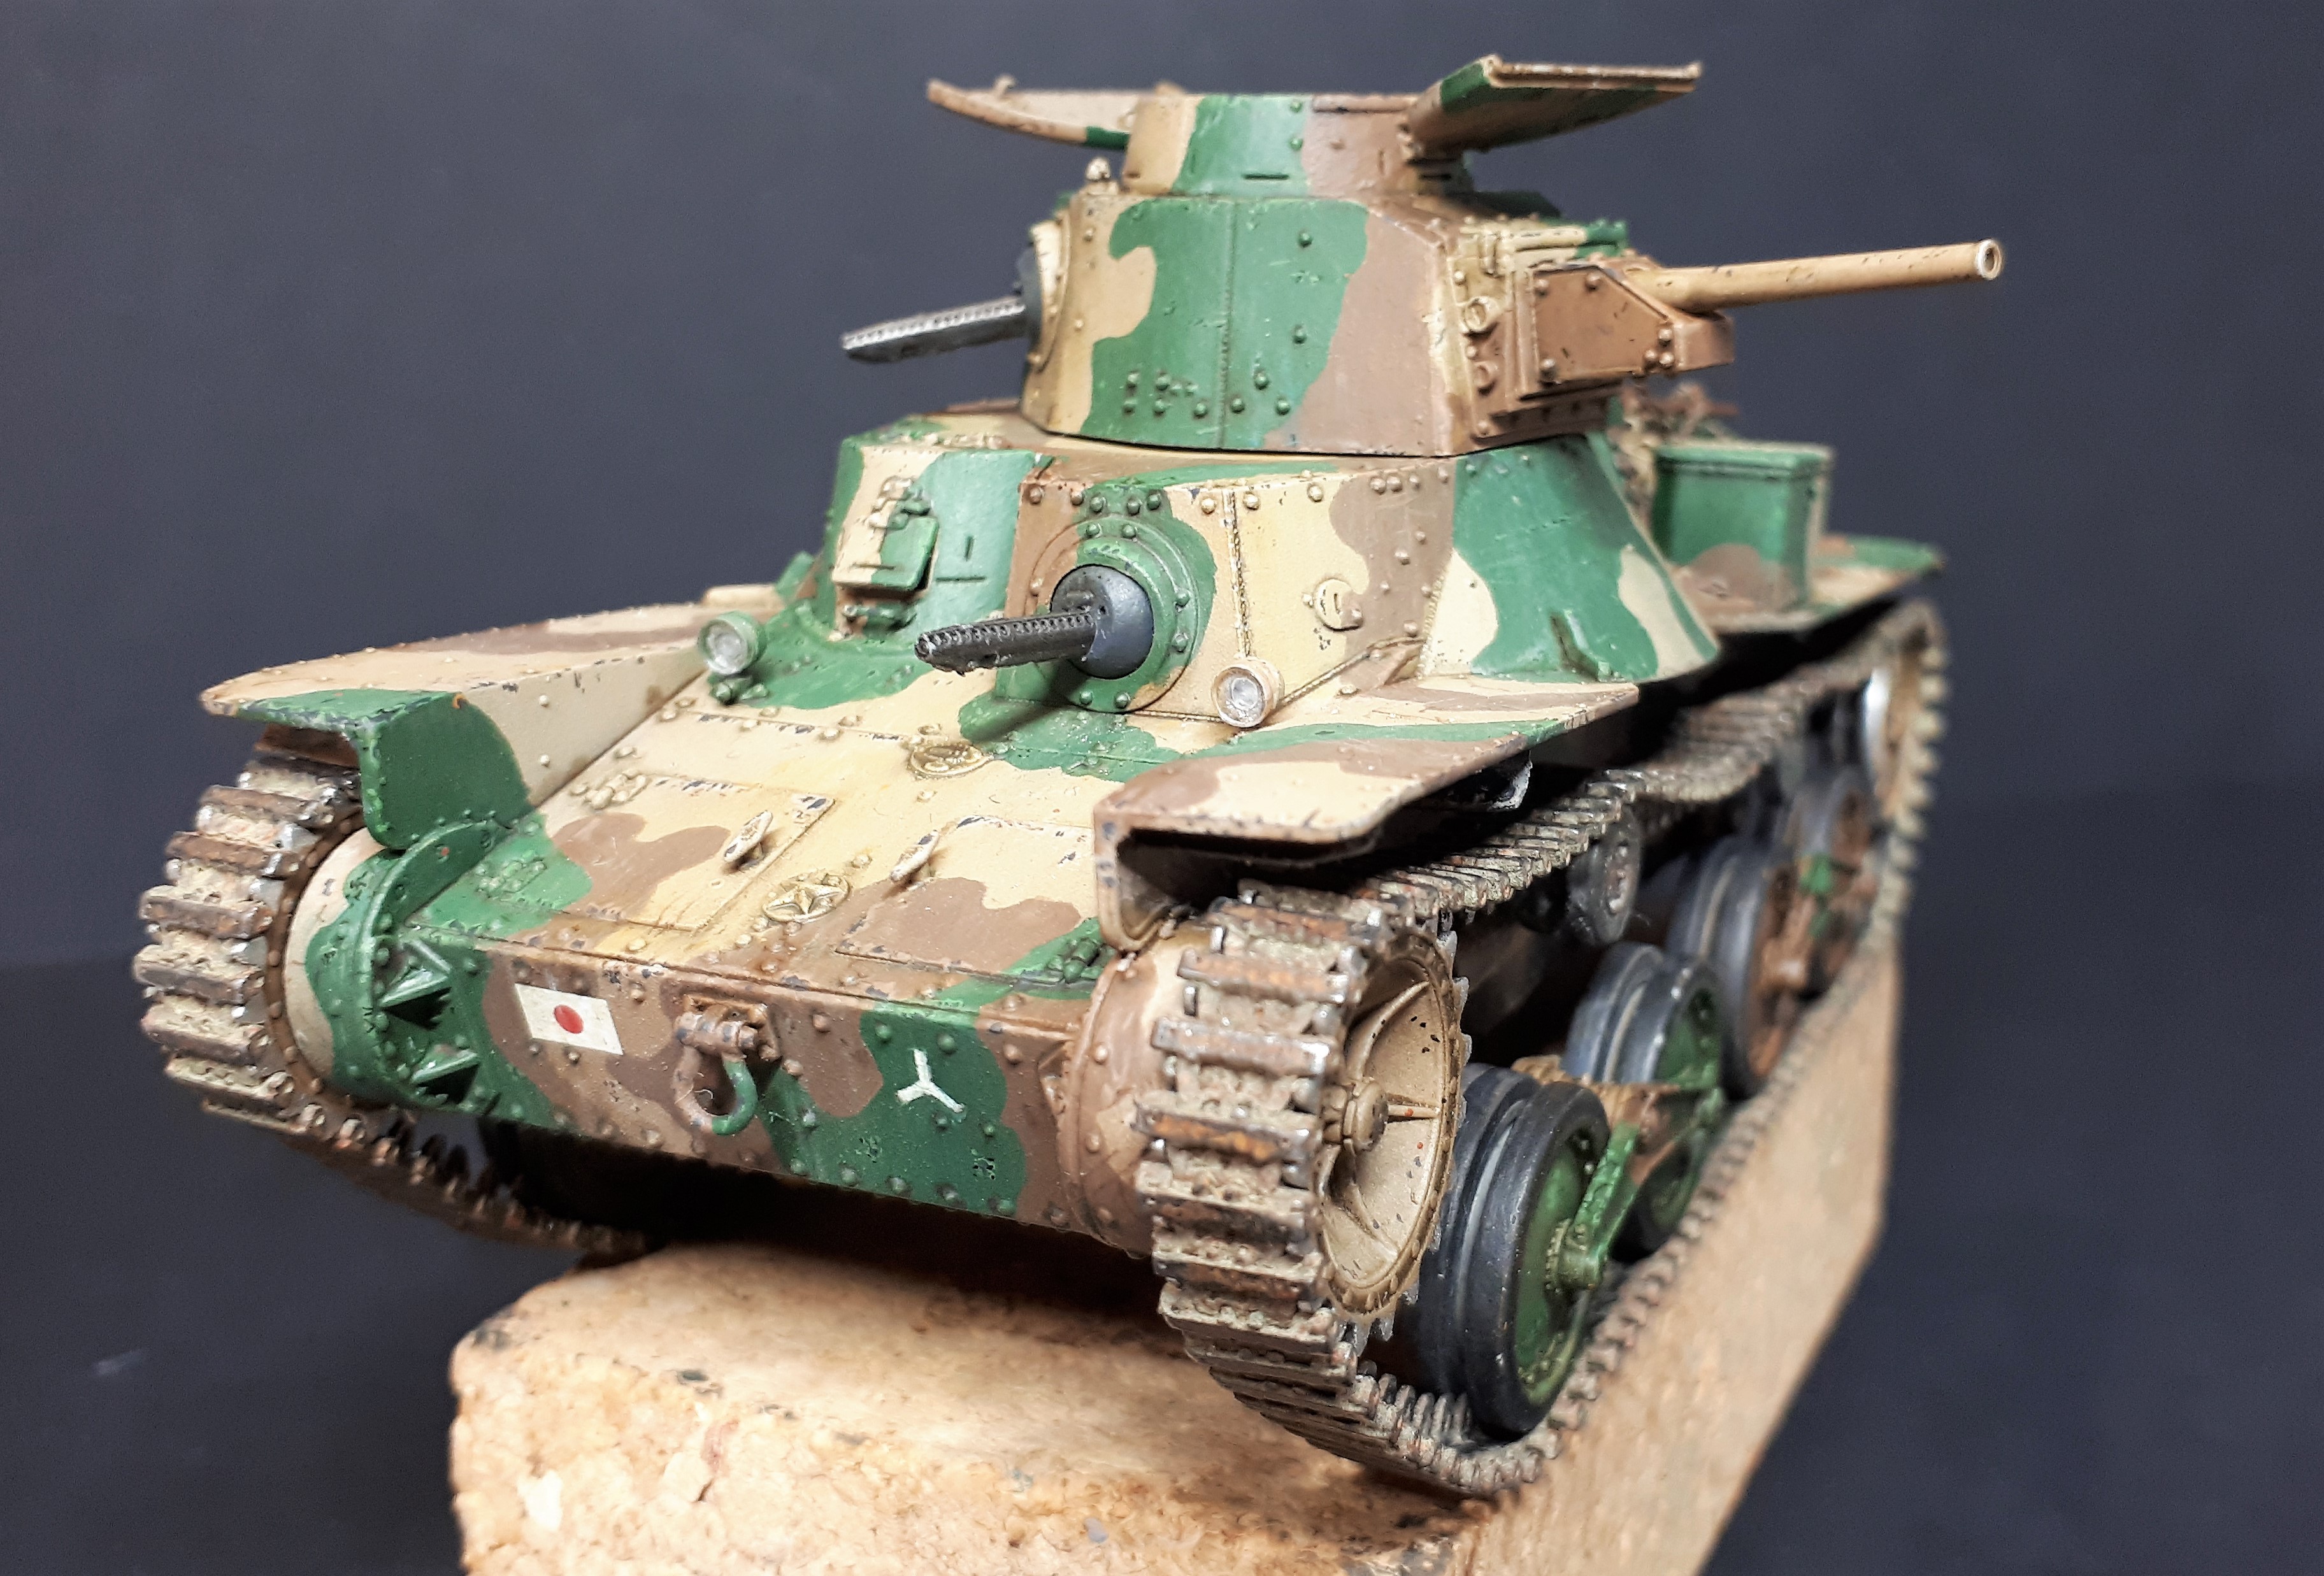
Thanks guys. This is probably a better comparison with the upper shot of the Bakri tank. I will post a few more work in progress shots in short while. This is not fully weathered yet, but I am going to leave the dust layer until I have the 2-pounder painted as well so I can make sure everything blends in with the diorama…
10 Likes

Thanks Tim and Maarten,
Yes, I am pretty pleased with the outcome.
The Hataka paints were odd compared to my usual experience with Tamiya and Vallejo. Once I realised that I had the brush painting set I assumed that they would need a decent amount of thinning for airbrushing. But even though I used their own brand of thinner, the first mix was much too ‘wet’. They also have an odd, milky sheen when diluted - although this disappears as they dry. Worst of all, they end up with a chalky feel on the model’s surface which doesn’t adhere to the layer underneath particularly well (the odd edge or corner would rub off slightly as I handled the model even after it had been left to dry for a considerable time).
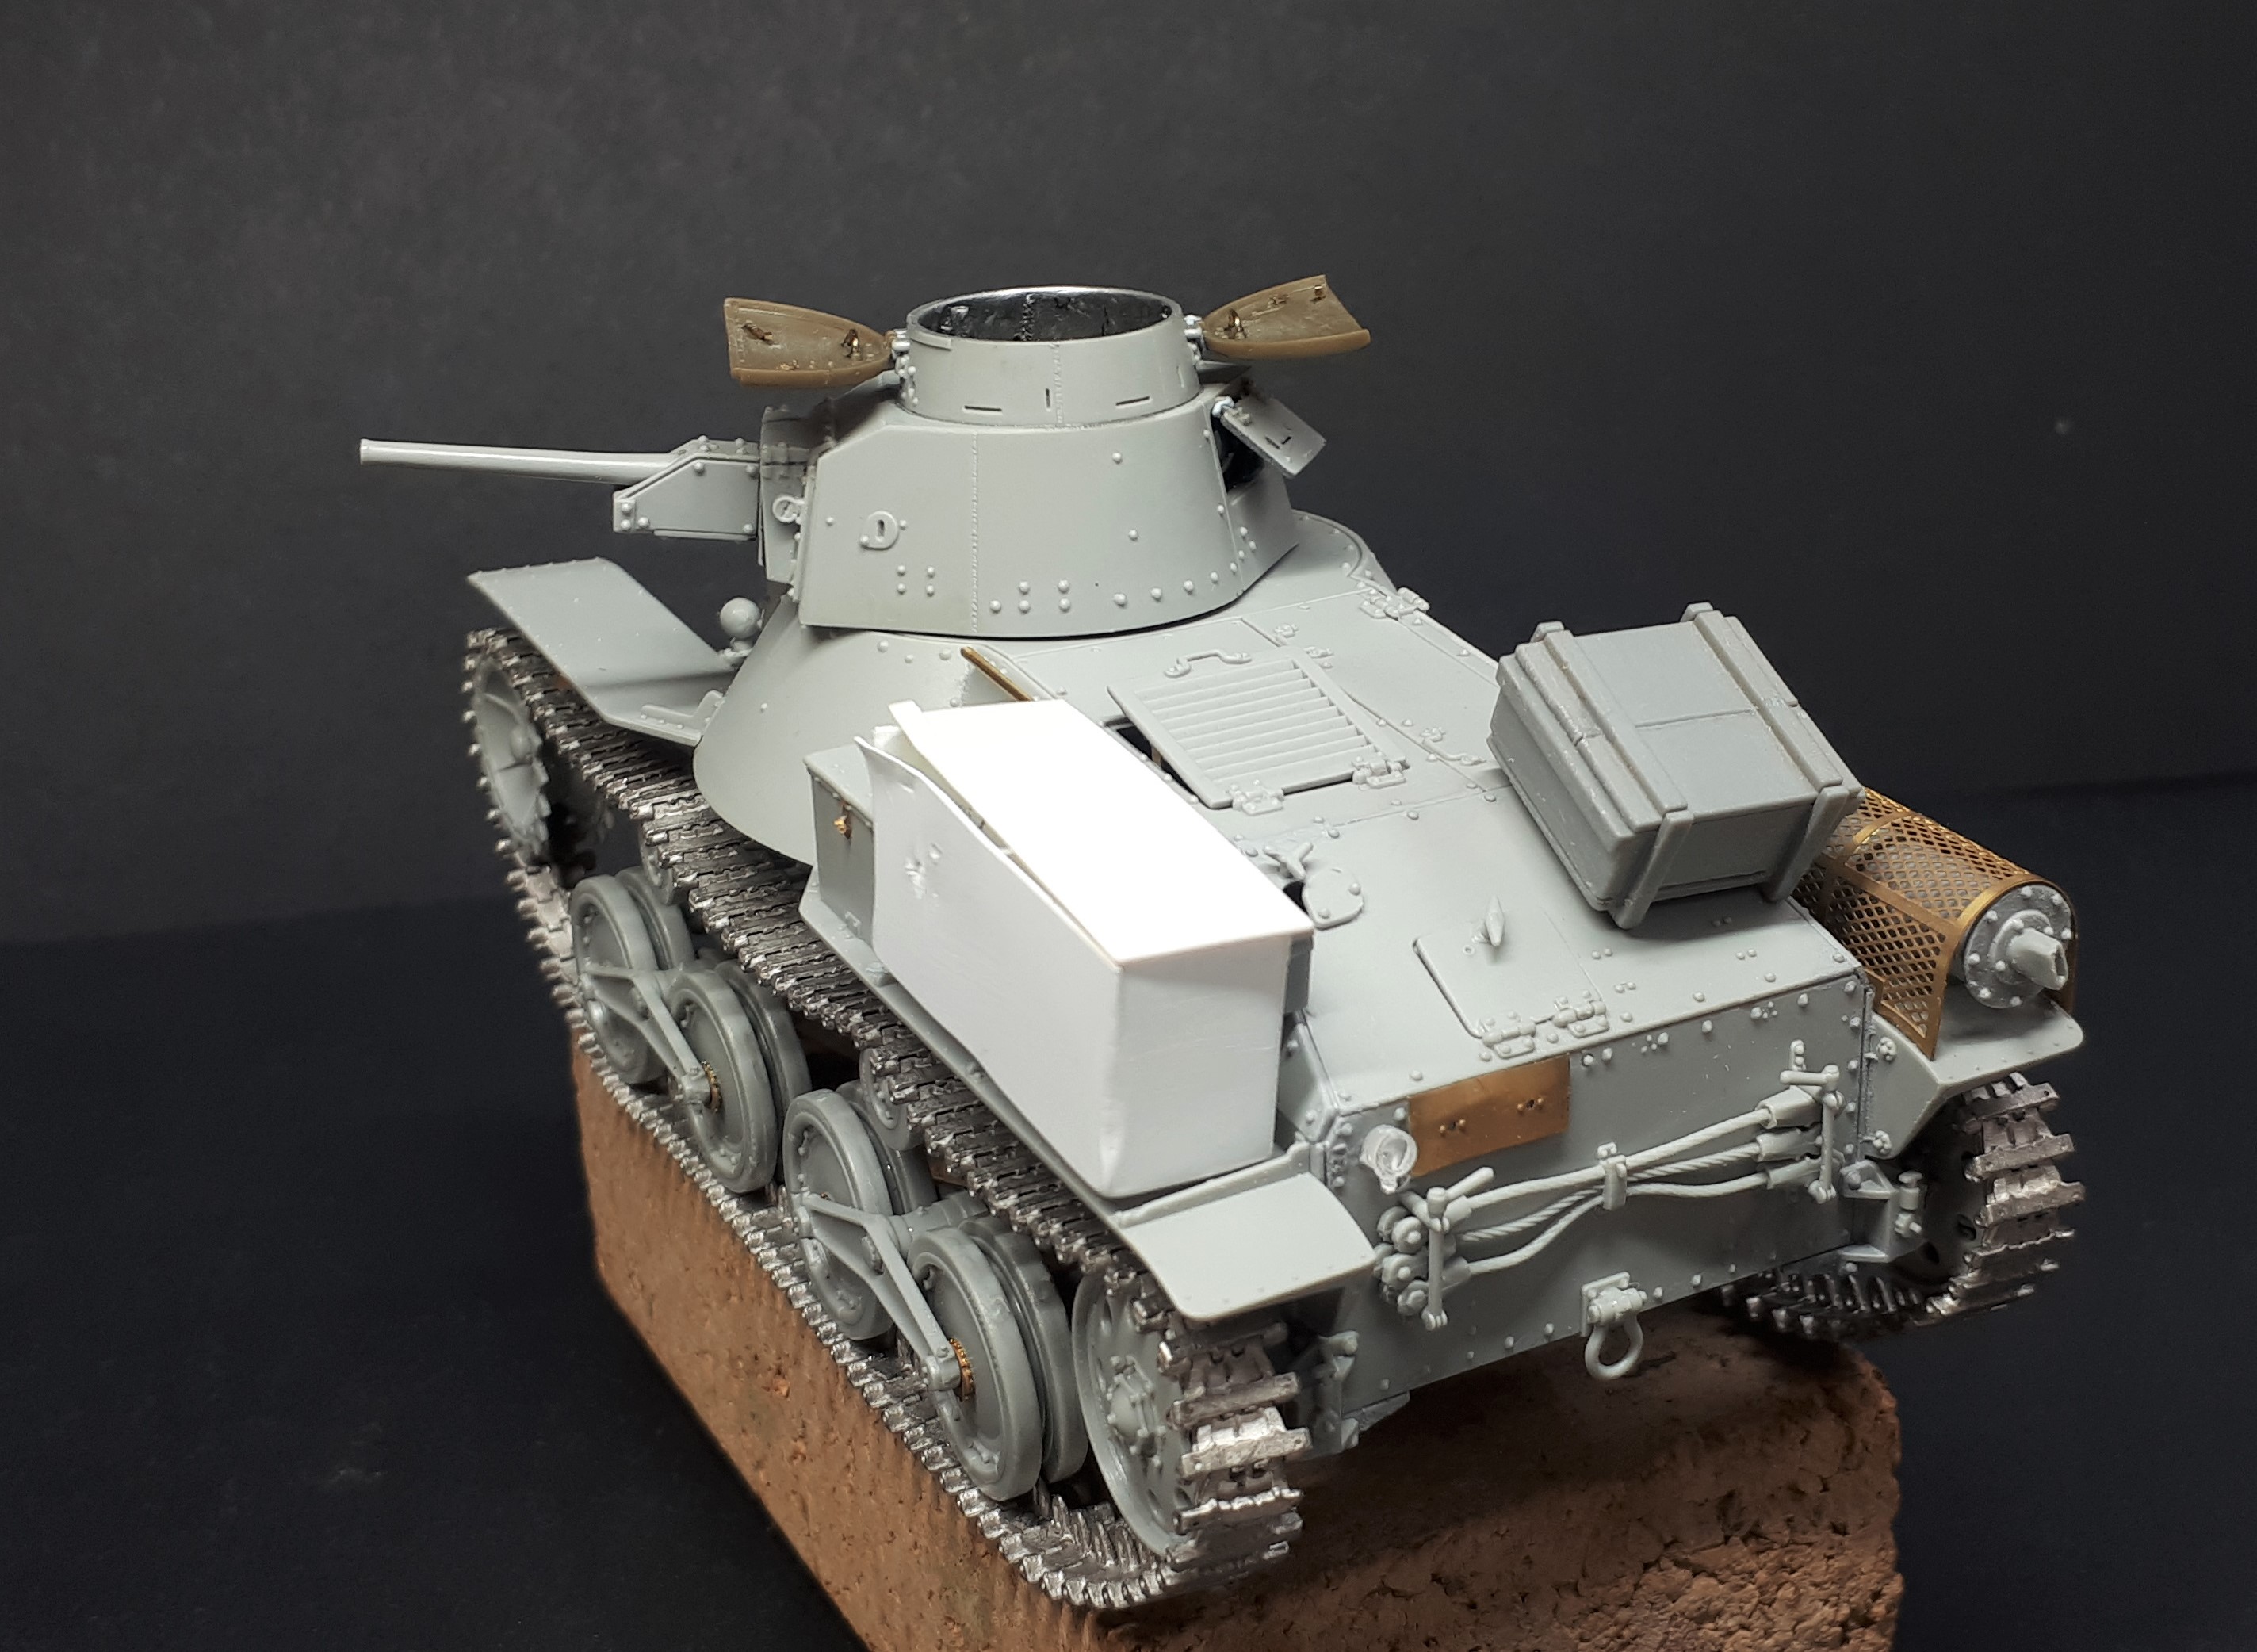
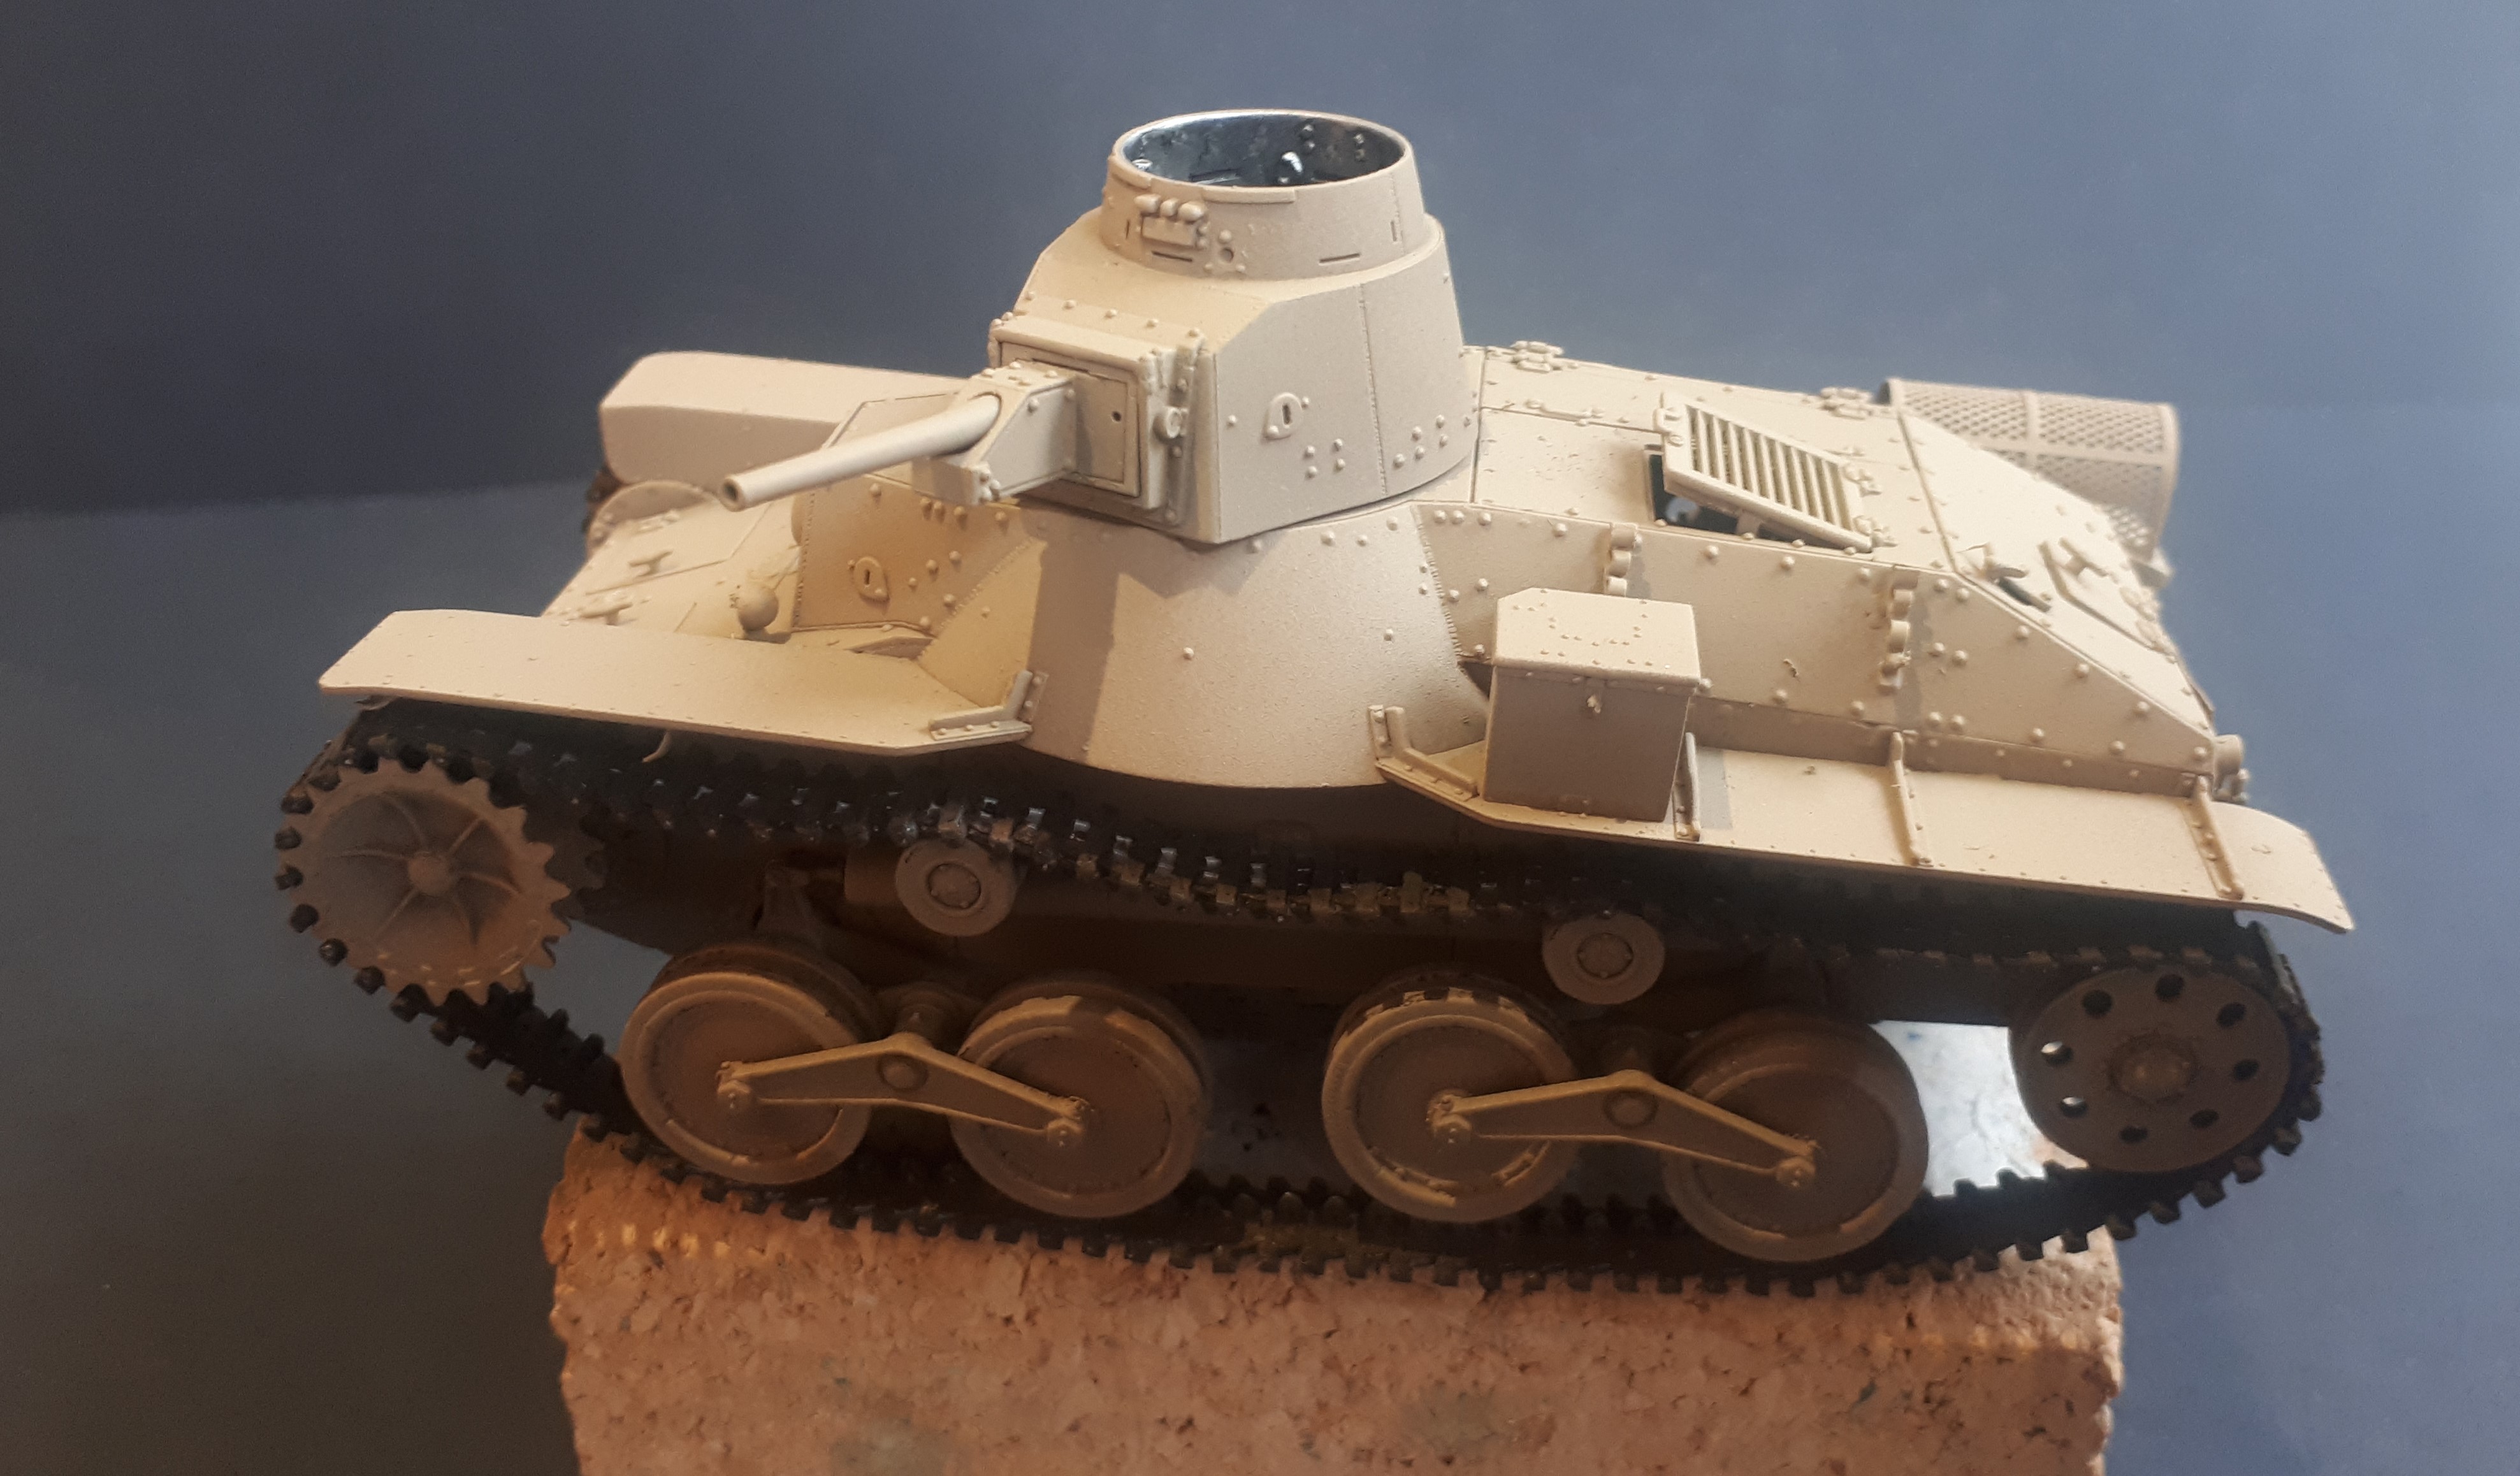
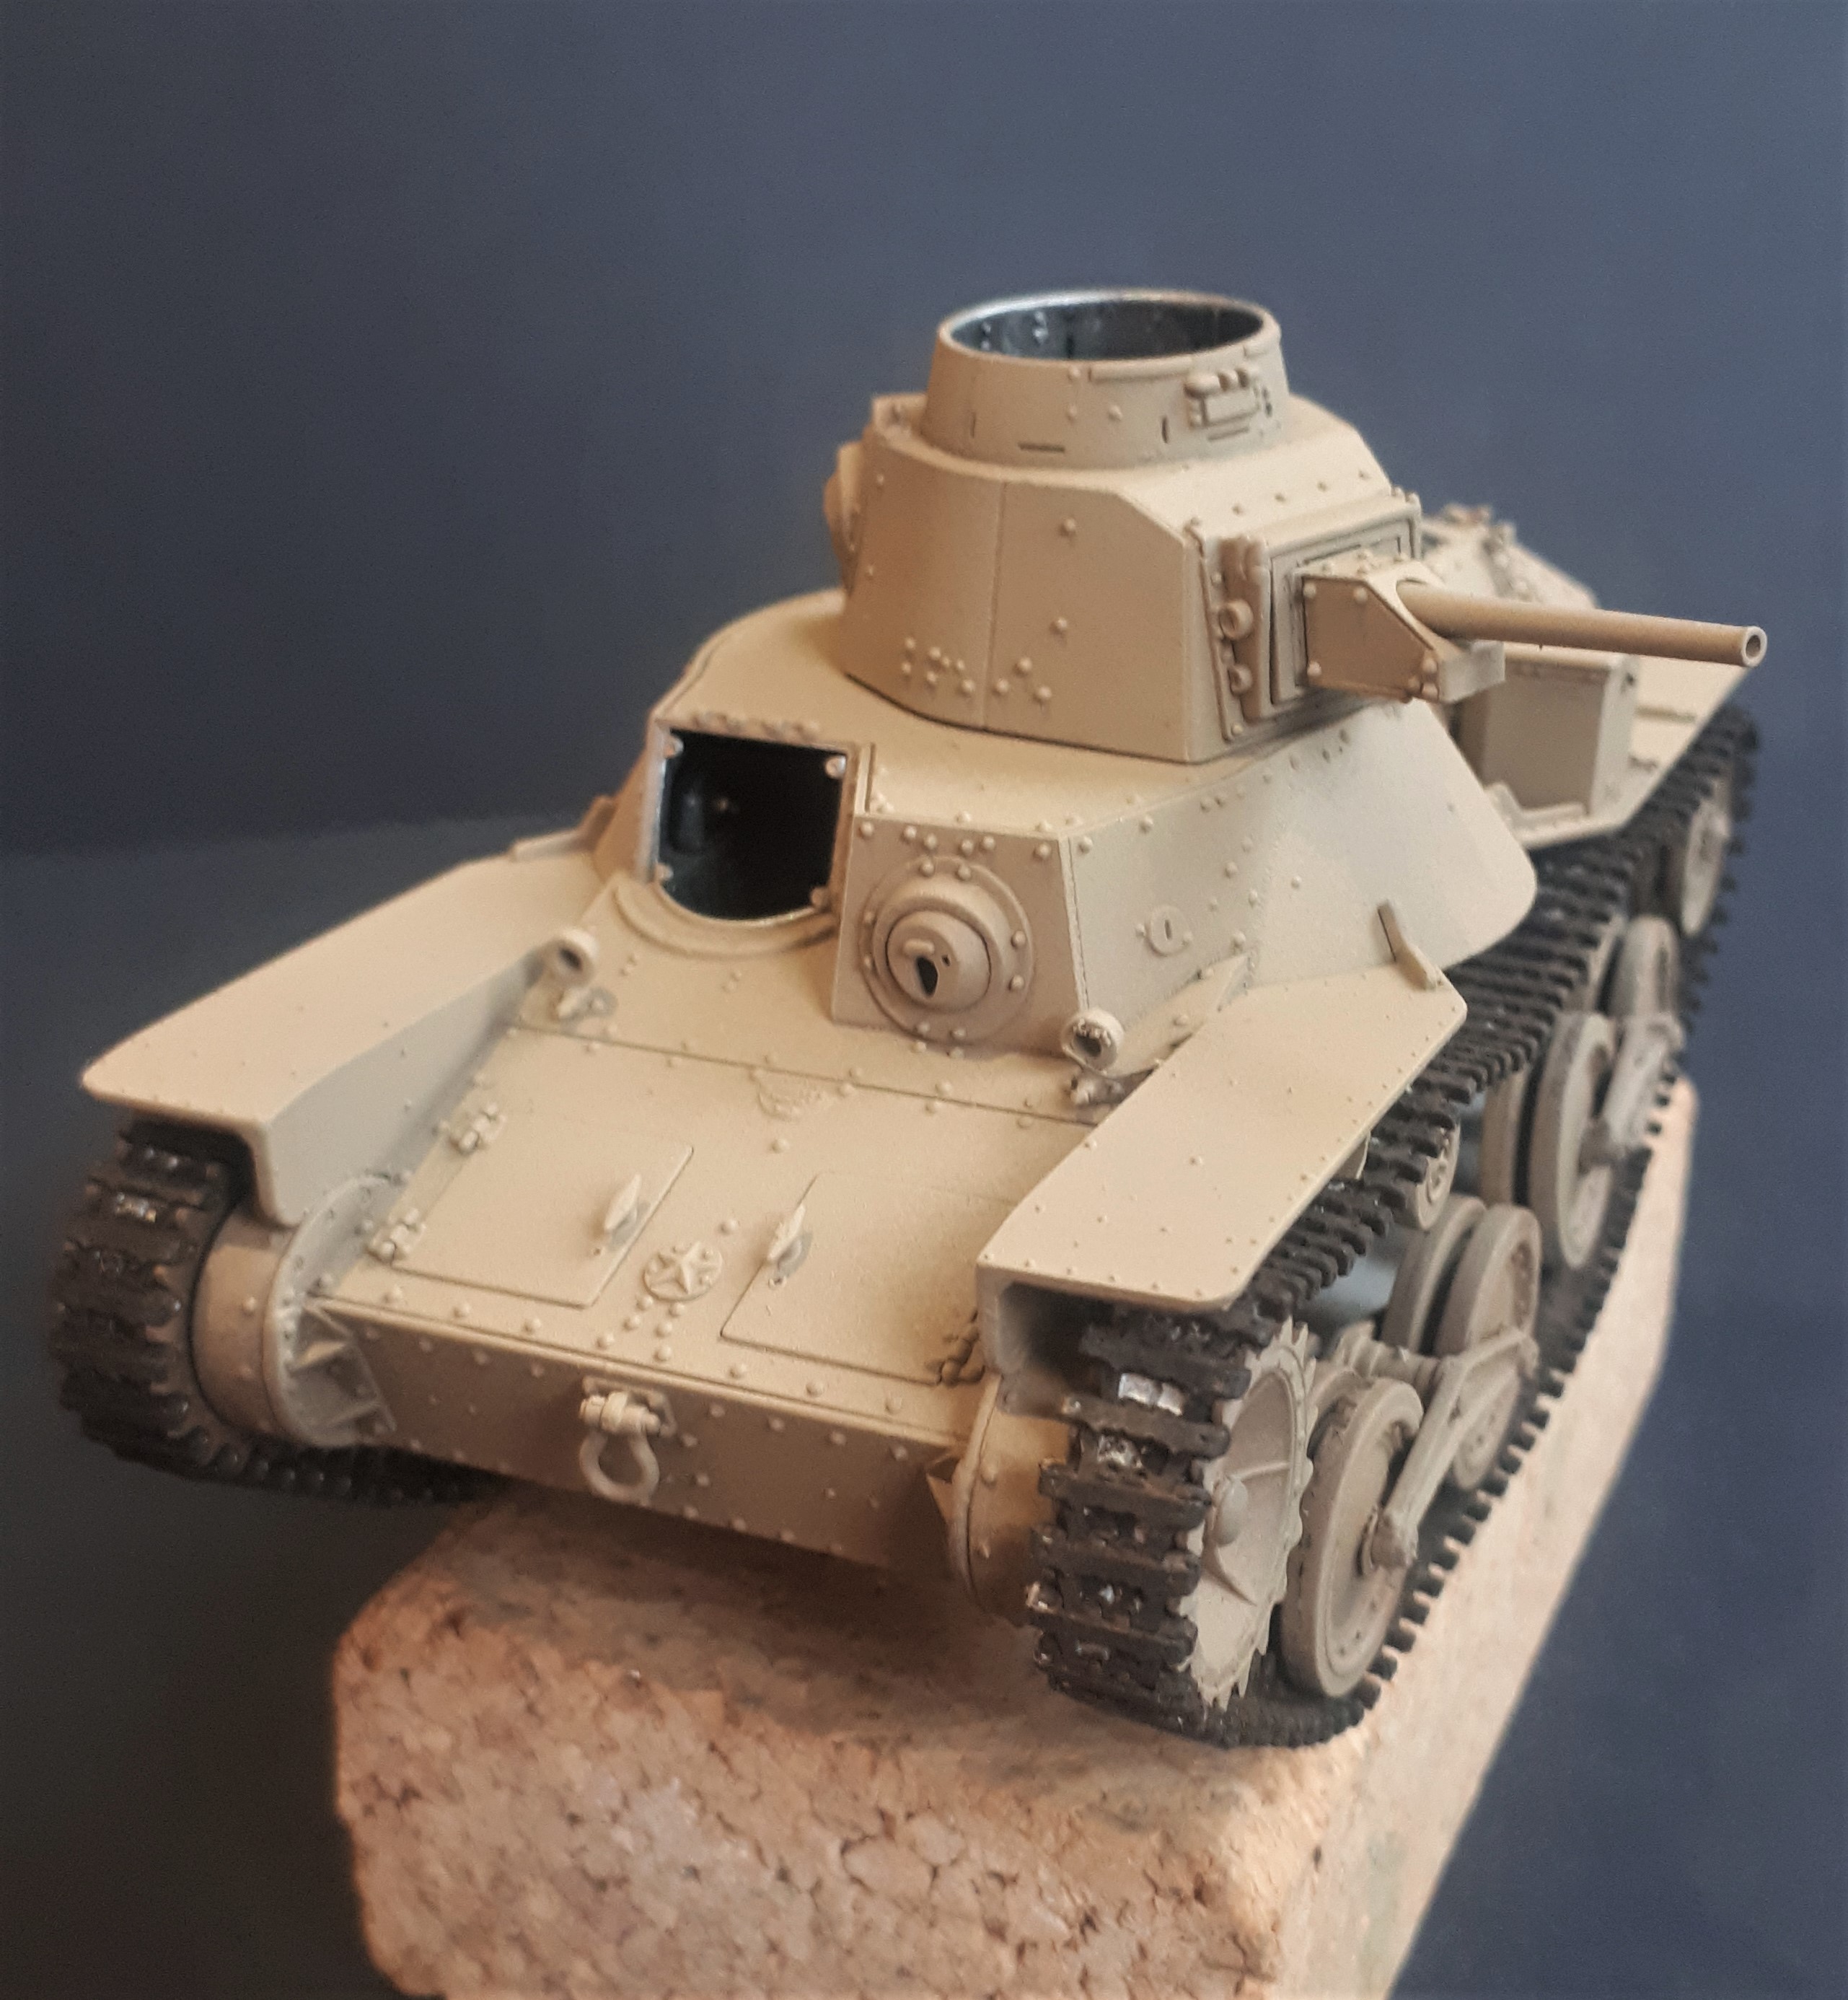
Anyway, I persevered. I began with a base coat of Khaki-Iro, which is not dissimilar the British khaki in that it is noticeably a lot more brown than green. This was then lightened with a little yellow and white for a sort of pre-shading - although it worth remembering that all colours should be lightened for true scale effect.
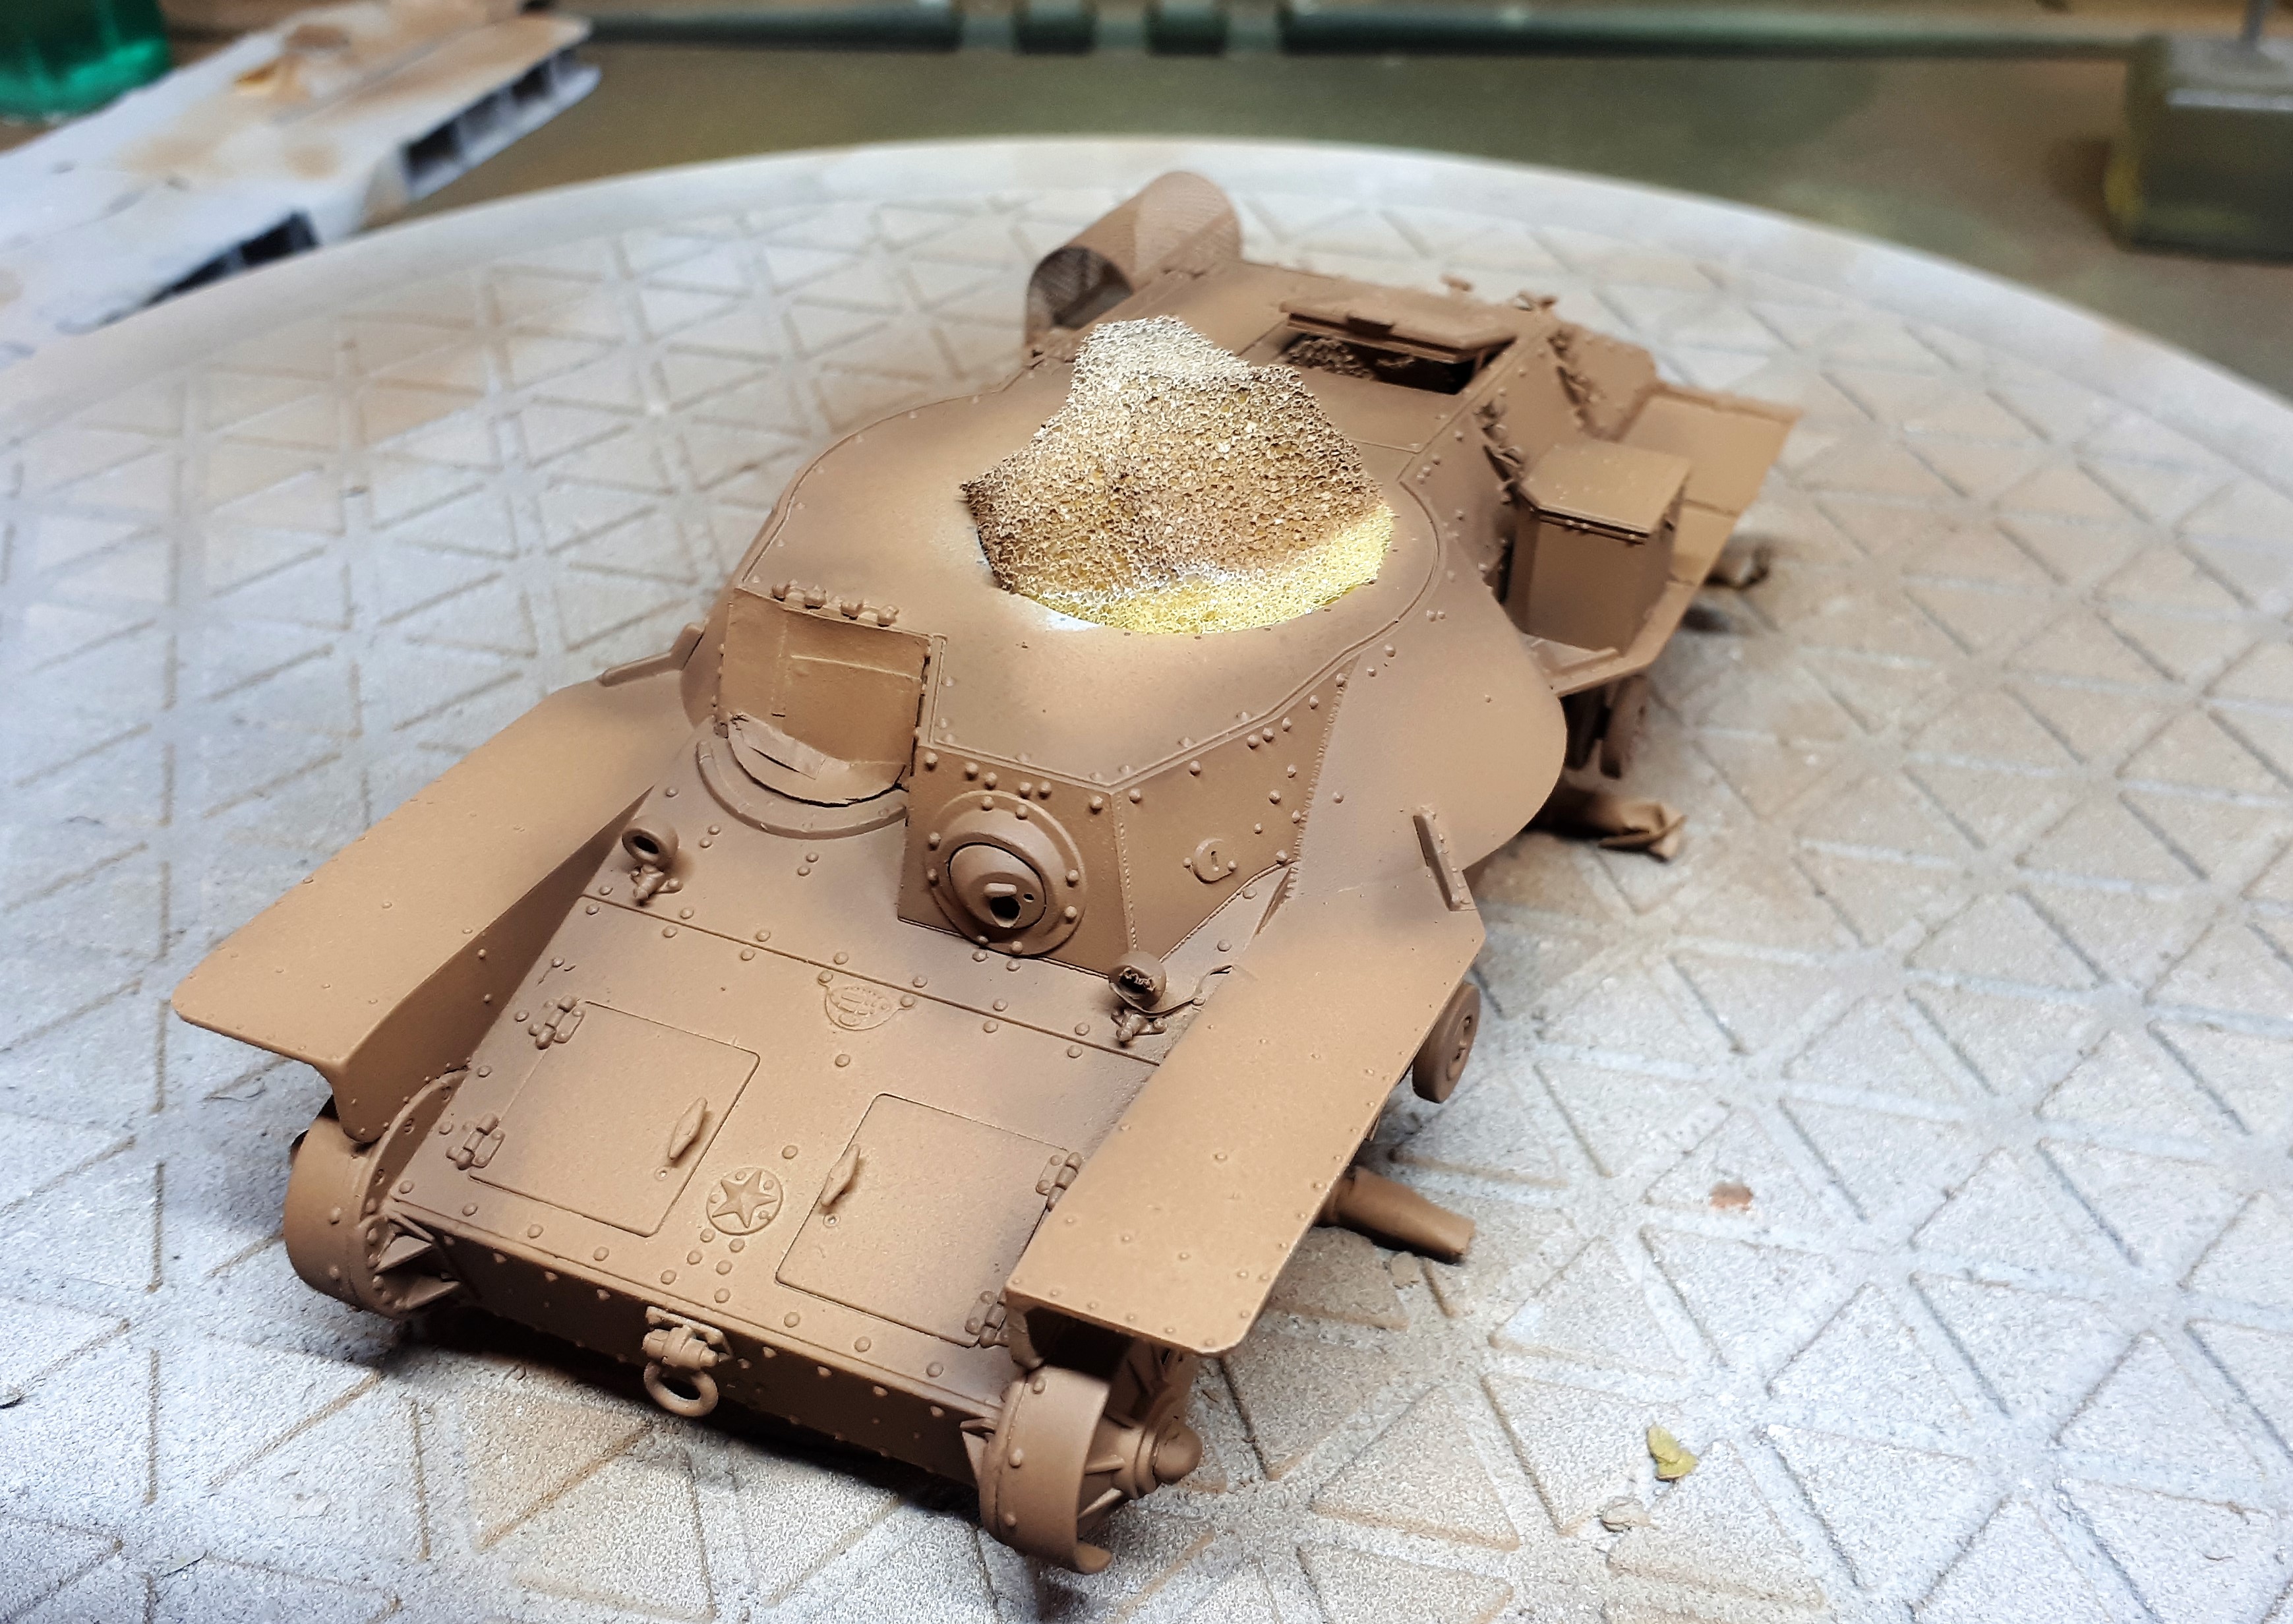
So here is the model after I had finished the base coat…
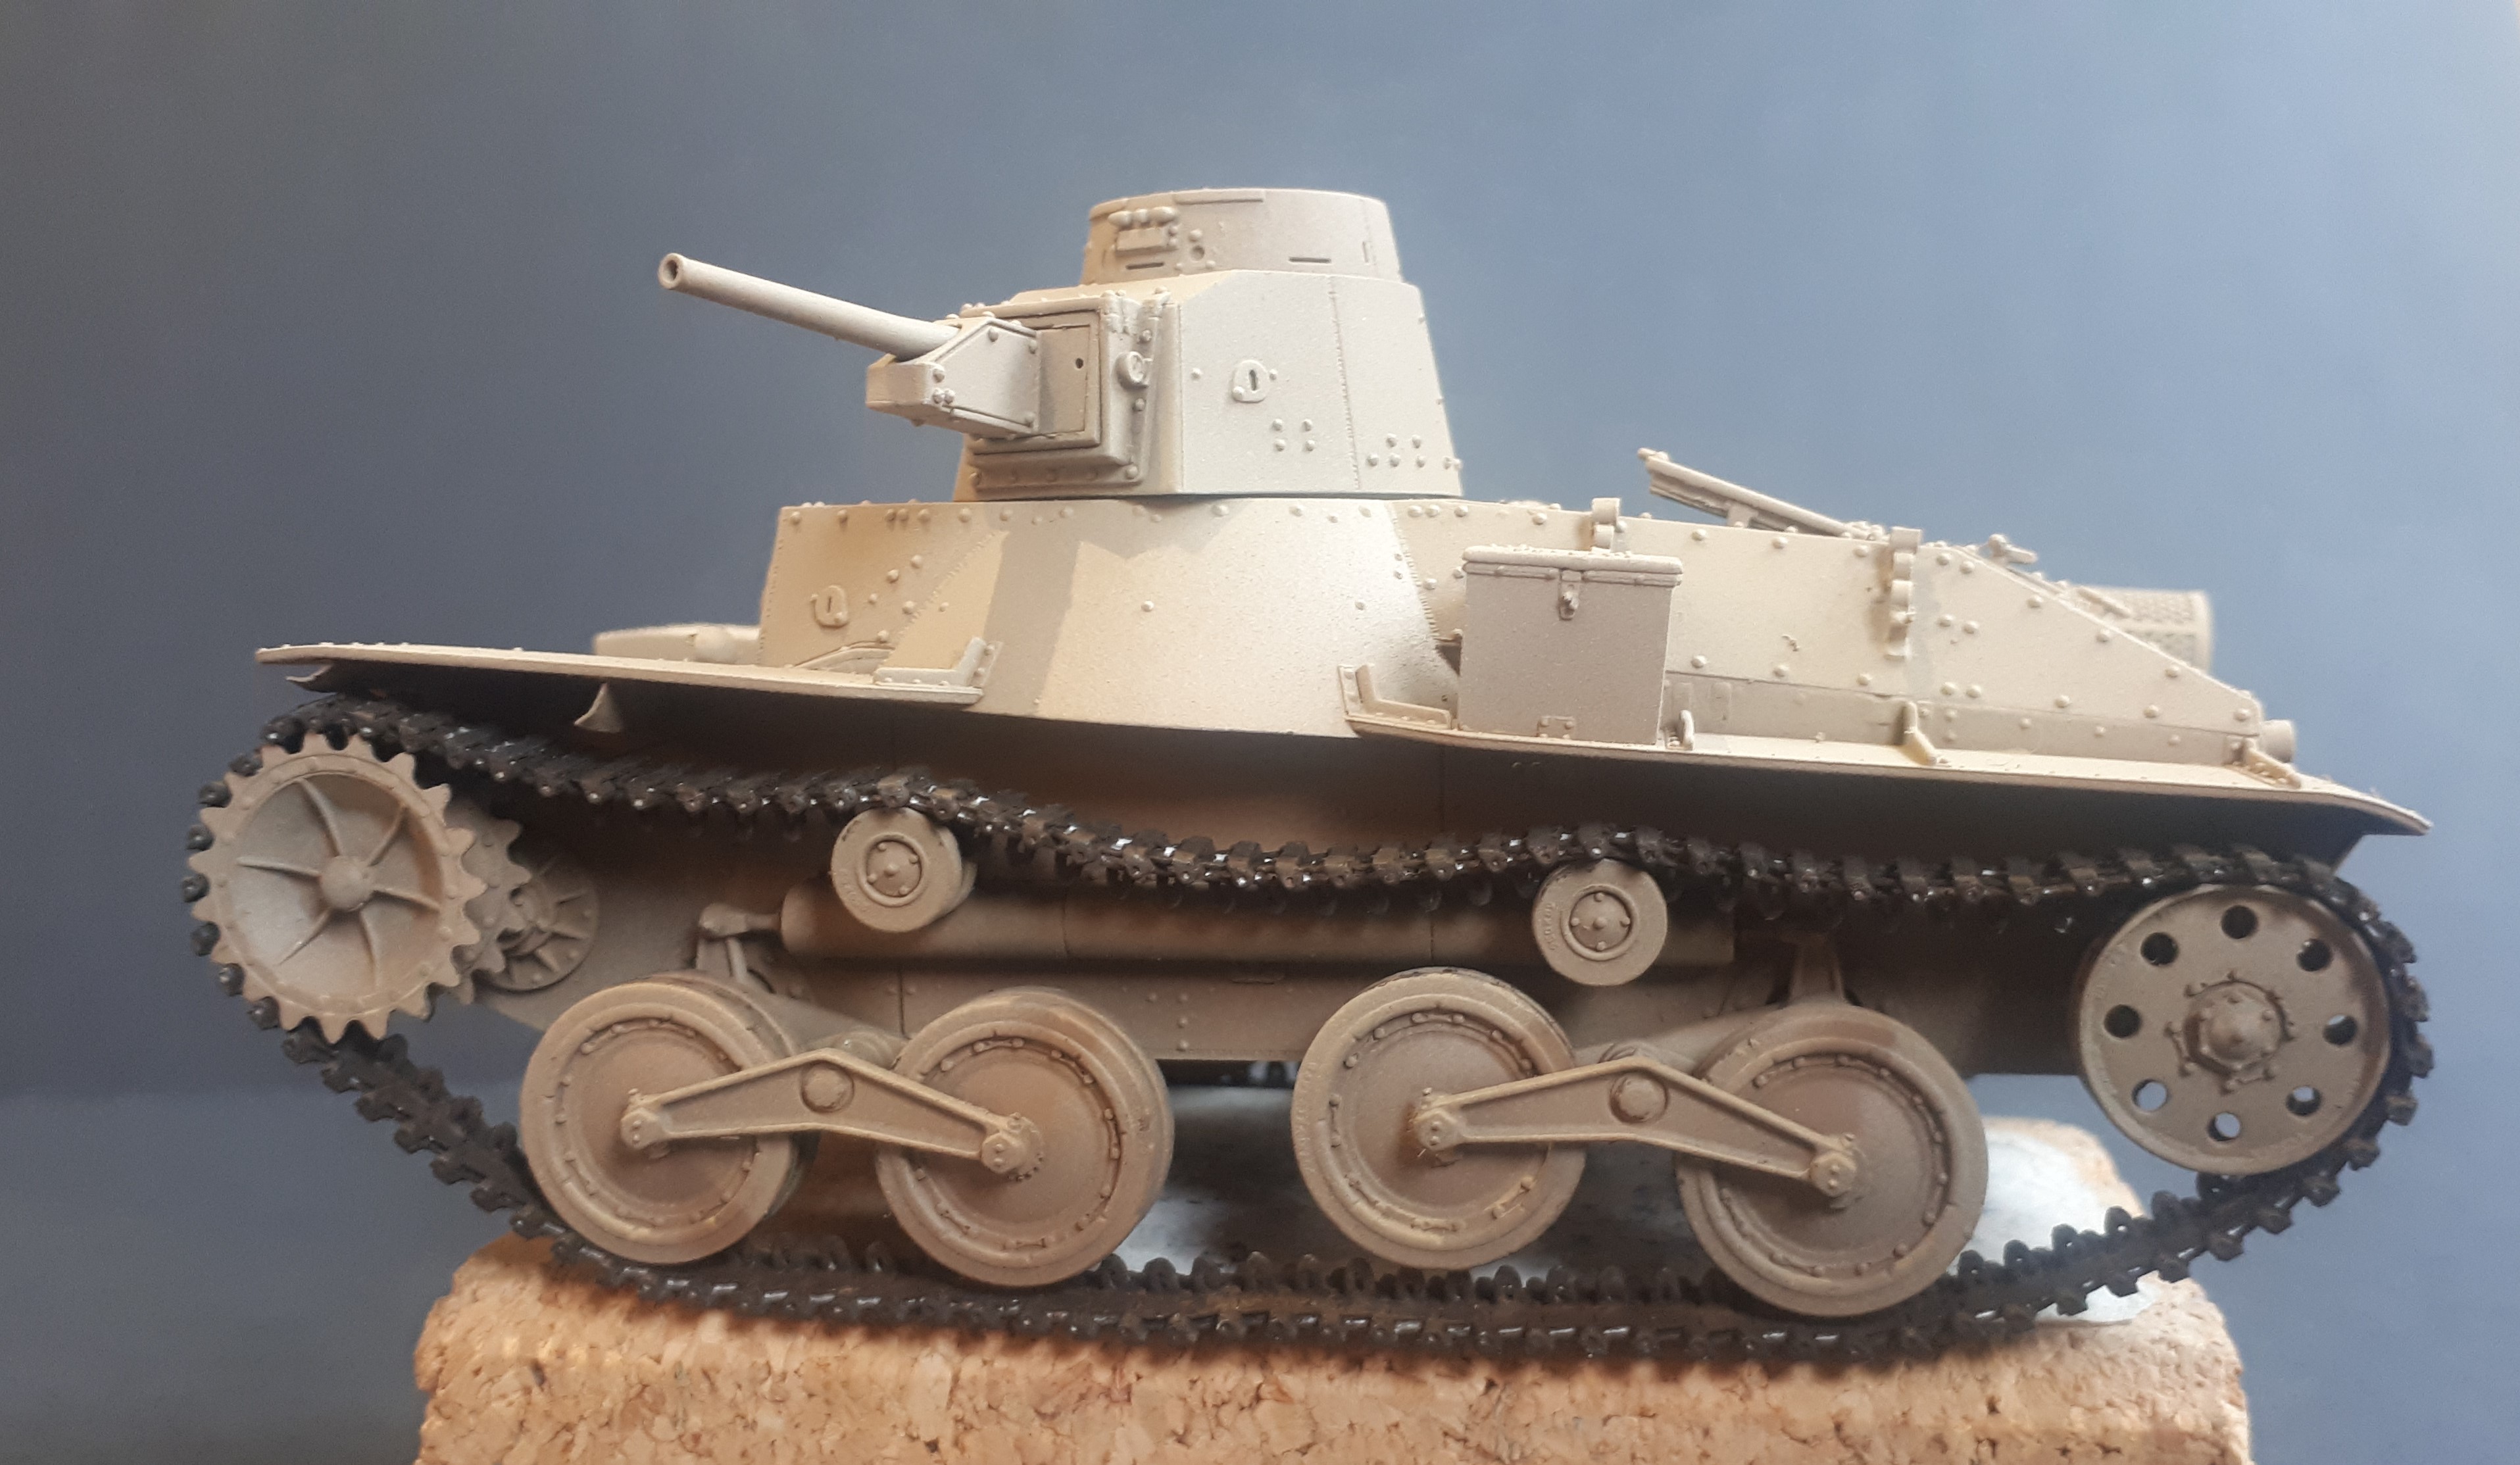

One fortunate aspect of the Dragon kit is that I was able to keep the complete exhaust assembly as a seperate assembly for painting - it just fits beneath the photoetch exhaust shroud once the latter has been fixed in place.
7 Likes
Hi Tim,
Two nice looking tanks, 
 .
.
Didn’t know that about the Hataka paints, what was your opinion of their ‘for brush’ paints?
Cheers,  ,
,
G
Tim,
Amazing work! Your trees, the interiors, the mere fact of a Malayan campaign diorama - you are right, how is that it is overlooked so often? I will be following. I’ve got to crawl out from under my rock more often - this thread started before Christmas!?
I know what you mean about the world of Japanese tank colours being a rabbit-hole. Japanese aviation researcher Nick Millman has a primer on them, ands I haven’t found anything better: Japanese Armour Colours, A Primer, 1937-1945
Tim,
Your work continues to amaze and inspire. I too am curious about the Hataka paints, so many choices now with paint; a rabbit hole of its own!!
Cheers,
Rick
Fantastic work!. /Erik
Nicely done Tim, sounds like the paint is starting to dry before hitting the model , powdery , maybe more liquid to paint ratio ?
No expert here …
The dio looks each better, I love the Japanese tanks. goes good.
Congratulations, Omar